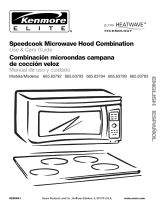
Kenmore 665.62612 El manual del propietario
- Categoría
- Microondas
- Tipo
- El manual del propietario

®
Microwave Hood Combination
Combinacibn Microondas Campana
FIII_ I Q I'+_
Models/Modelos 665.62612 665.62614 665.62619
\
.I
8184728/4619-652-61661 Sears Roebuck and Co,, Hoffman Estates, IL 60179 U.S.A. www.sears.com

TABLE OF CONTENTS
MICROWAVE HOOD COMBINATION WARRANTY .................... 3
PROTECTION AGREEMENTS ....................................................... 3
MICROWAVE OVEN SAFETY ........................................................ 4
Electrical Requirements ................................................................ 6
PARTS AND FEATURES ................................................................ 6
Turntable....................................................................................... 6
Cooking Rack ............................................................................... 7
MICROWAVE OVEN CONTROL .................................................... 7
Display .......................................................................................... 7
Start .............................................................................................. 8
Stop/Clear ..................................................................................... 8
Add Minute ................................................................................... 8
Clock ............................................................................................. 8
Kitchen Timer ................................................................................ 8
Tones ............................................................................................ 8
Child Lock ..................................................................................... 8
Exhaust Fan.................................................................................. 8
Cooktop Light ............................................................................... 8
MICROWAVE OVEN USE ............................................................... 8
Food Characteristics .................................................................... 9
Cooking Guidelines ...................................................................... 9
Cookware and Dinnerware ........................................................... 9
Aluminum Foil and Metal ........................................................... 10
Cooking Power .......................................................................... 10
Cooking ..................................................................................... 10
Popcorn ..................................................................................... 10
Beverage .................................................................................... 11
Preset Cooking .......................................................................... 11
Cooking in Stages ..................................................................... 11
Reheating ................................................................................... 12
Defrosting .................................................................................. 12
Hold Warm ................................................................................. 12
MICROWAVE OVEN CARE ......................................................... 13
General Cleaning ....................................................................... 13
Replacing Filters ........................................................................ 13
Replacing Cooktop Light........................................................... 14
Replacing Microwave Oven Light ............................................. 14
Replacement Parts .................................................................... 14
TROUBLESHOOTING .................................................................. 15
SERVICE NUMBERS ............................................... BACK COVER
2

MICROWAVE HOOD
COMBINATION
WARRANTY
FULL ONE-YEAR WARRANTY ON MICROWAVE HOOD
COMBINATION
For one year from the date of purchase, if this Kenmore Elite®
microwave hood combination fails due to a defect in material or
workmanship, Sears will repair it, free of charge.
LIMITED FIVE-YEAR WARRANTY ON THE MAGNETRON
For five years from the date of purchase, if the magnetron in this
Kenmore Elite microwave hood combination fails due to a defect
in material or workmanship, Sears will repair it free of charge.
The above warranty coverage applies only to microwave hood
combinations which are used for private household purposes.
WARRANTY SERVICE
WARRANTY SERVICE IS AVAILABLE BY CONTACTING THE
NEAREST SEARS STORE OR SERVICE CENTER IN THE UNITED
STATES. This warranty applies only while the product is in use in
the United States. This warranty gives you specific legal rights,
and you may also have other rights which vary from state to
state.
Sears, Roebuck and Co.
D/817WA, Hoffman Estates, IL 60179
Modifications not authorized by the manufacturer may void
users' authority to operate this device.
PRODUCT RECORD
In the space below, record your complete model number, serial
number, and purchase date. You can find this information on the
model and serial number label, located as shown in the Parts and
Features section of this book. Have this information available to
help you quickly obtain assistance or service when you contact
Sears concerning your appliance.
Model number 665,
Serial number
Purchase date
Save these instructions and your sales receipt for future
reference.
PROTECTION
AGREEMENTS
Master Protection Agreements
Congratulations on making a smart purchase. Your new
Kenmore®appliance is designed and manufactured for years of
dependable operation. But like all products, it may require
preventive maintenance or repair from time to time. That's when
having a Master Protection Agreement can save you money and
aggravation.
Purchase a Master Protection Agreement now and protect
yourself from unexpected hassle and expense.
The Master Protection Agreement also helps extend the life of
your new appliance. Here's what's included in the Agreement:
v' Expert service by our 12,000 professional repair specialists
v' Unlimited service and no charge for parts and labor on all
covered repairs
v' "No-lemon" guarantee - replacement of your covered
product if more than three product failures occur within twelve
months
v' Product replacement if your covered product can't be fixed
v' Annual Preventive Maintenance Check at your request - no
extra charge
v' Fast help by phone - non-technical and instructional
assistance on products repaired in your home, plus convenient
repair scheduling
v' Power surge protection against electrical damage due to
power fluctuations
v' Rental reimbursement if repair of your covered product takes
longer than promised
Once you purchase the Agreement, a simple phone call is all that
it takes for you to schedule service. You can call anytime day or
night, or schedule a service appointment online.
Sears has over 12,000 professional repair specialists, who have
access to over 4.5 million quality parts and accessories. That's
the kind of professionalism you can count on to help prolong the
life of your new purchase for years to come. Purchase your
Master Protection Agreement today!
Some limitations and exclusions apply. For prices and
information call 1-800-827-6655.
Sears Installation Service
For Sears guaranteed professional installation of home
appliances and items like garage door openers and water
heaters, in the U.S.A. call I-8OO-4-MY-ROME ®.

MICROWAVE OVEN SAFETY
Your safety and the safety of others are very important.
We have provided many important safety messages in this manual and on your appliance. Always read and obey all
safety messages.
This is the safety alert symbol.
This symbol alerts you to potential hazards that can kill or hurt you and others.
All safety messages will follow the safety alert symbol and either the word "DANGER" or
"WARNING." These words mean:
You can be killed or seriously injured if you don't
immediately follow instructions.
You can be killed or seriously injured if you don't
follow instructions.
All safety messages will tell you what the potential hazard is, tell you how to reduce the chance of injury, and tell you
what can happen if the instructions are not followed.
IMPORTANT SAFETY INSTRUCTIONS
When using electrical appliances basic safety precautions should be followed, including the following:
WARNING: To reduce the risk of burns, electric • Do not operate the microwave oven if it has a
shock, fire, injury to persons, or exposure to excessive
microwave energy:
• Read all instructions before using the microwave
oven.
• Read and follow the specific "PRECAUTIONS TO
AVOID POSSIBLE EXPOSURE TO EXCESSIVE
MICROWAVE ENERGY" found in this section.
• The microwave oven must be grounded. Connect
only to properly grounded outlet. See "GROUNDING
INSTRUCTIONS" found in this section and in the pro-
vided Installation Instructions.
• Install or locate the microwave oven only in
accordance with the provided Installation Instructions.
• Some products such as whole eggs in the shell and
sealed containers - for example, closed glass jars -
may explode and should not be heated in the
microwave oven.
• Use the microwave oven only for its intended use as
described in this manual. Do not use corrosive
chemicals or vapors in the microwave oven. This type
of oven is specifically designed to heat, cook, or dry
food. It is not designed for industrial or laboratory use.
• As with any appliance, close supervision is necessary
when used by children.
damaged cord or plug, if it is not working properly, or
if it has been damaged or dropped.
• The microwave oven should be serviced only by
qualified service personnel. Call an authorized
service company for examination, repair, or
adjustment.
• See door surface cleaning instructions in the
"Microwave Oven Care" section.
• To reduce the risk of fire in the oven cavity:
- Do not overcook food. Carefully attend the
microwave oven if paper, plastic, or other
combustible materials are placed inside the oven
to facilitate cooking.
- Remove wire twist-ties from paper or plastic bags
before placing bags in oven.
- If materials inside the oven should ignite, keep oven
door closed, turn oven off, and disconnect the
power cord, or shut off power at the fuse or circuit
breaker panel.
- Do not use the cavity for storage purposes. Do not
leave paper products, cooking utensils, or food in
the cavity when not in use.
SAVE THESE INSTRUCTIONS
4

IMPORTANT SAFETY INSTRUCTIONS
• Suitable for use above both gas and electric cooking
equipment.
• Intended to be used above ranges with maximum
width of 36 inches.
• Clean Ventilating Hoods Frequently - Grease should
not be allowed to accumulate on hood or filter.
• Oversized foods or oversized metal utensils should not
be inserted in the microwave oven as they may create
a fire or risk of electric shock.
• Do not clean with metal scouring pads. Pieces can
burn off the pad and touch electrical parts involving a
risk of electric shock.
• Do not use paper products when appliance is operat-
ed in the "PAN BROWN" mode (on models with this
feature).
• Do not store any materials, other than manufacturer's
recommended accessories, in this oven when not in
use.
• Do not store anything directly on top of the microwave
oven when the microwave oven is in operation.
• When flaming foods under the hood, turn the fan on.
• Use care when cleaning the vent-hood filter.
Corrosive cleaning agents, such as lye-based oven
cleaners, may damage the filter.
• Do not cover or block any openings on the micro-
wave oven.
• Do not store this microwave oven outdoors. Do not
use the microwave oven near water - for example,
near a kitchen sink, in a wet basement, or near a
swimming pool, and the like.
• Do not immerse cord or plug in water.
• Keep cord away from heated surfaces.
• Do not let cord hang over edge of table or counter.
• Do not mount over a sink.
• Do not cover racks or any other part of the oven with
metal foil. This will cause overheating of the oven.
SAVE THESE INSTRUCTIONS
PRECAUTIONS TO AVOID POSSIBLE EXPOSURE TO
EXCESSIVE MICROWAVE ENERGY
(a) Do not attempt to operate this oven with the door
open since open-door operation can result in
harmful exposure to microwave energy. It is
important not to defeat or tamper with the
safety interlocks.
(b) Do not place any object between the oven front
face and the door or allow soil or cleaner residue
to accumulate on sealing surfaces.
(e) Do not operate the oven if it is damaged. It is
particularly important that the oven door close
properly and that there is no damage to the:
(1) Door (bent),
(2) Hinges and latches (broken or loosened),
(3) Door seals and sealing surfaces.
(d) The oven should not be adjusted or repaired by
anyone except properly qualified service personnel.

Electrical Shock Hazard
Plug into a grounded 3 prong outlet.
Do not remove ground prong.
Do not use an adapter.
Do not use an extension cord.
Failure to follow these instructions can result in
death, fire, or electrical shock.
Observe all governing codes and ordinances. A 120 Volt, 60 Hz,
AC only, 15- or 20-amp fused electrical supply is required. (A
time-delay fuse or circuit breaker is recommended.) It is
recommended that a separate circuit serving only this appliance
be provided.
GROUNDING INSTRUCTIONS
• For all cord connected appliances:
The microwave oven must be grounded. In the event
of an electrical short circuit, grounding reduces the
risk of electric shock by providing an escape wire for
the electric current. The microwave oven is equipped
with a cord having a grounding wire with a grounding
plug. The plug must be plugged into an outlet that is
properly installed and grounded.
WARNING: Improper use of the grounding plug can
result in a risk of electric shock. Consult a qualified
electrician or serviceman if the grounding instructions
are not completely understood, or if doubt exists as to
whether the microwave oven is properly grounded.
Do not use an extension cord. If the power supply cord
is too short, have a qualified electrician or serviceman
install an outlet near the microwave oven.
• For a permanently connected appliance:
This appliance must be connected to a grounded,
metallic, permanent wiring system, or an equipment
grounding conductor should be run with the circuit
conductors and connected to the equipment
grounding terminal or lead on the appliance.
SAVE THESE INSTRUCTIONS
PARTS AND FEATURES
This manual may cover several different models. The model you
have purchased may have some or all of the features shown here.
The appearance of your particular model may differ slightly from
the illustrations in this manual.
1 2 3 4
5 6 7 8 9 10 11
!. Charcoal Filter
(behind Vent Grille)
2. Microwave Inlet Cover
3. Microwave Oven Light
4. Vent Grille
5, Metal Shielded Window
6, Model and Serial Number
Plate
7, Cooking Rack
8 Grease Filters
(shipped in oven cavity)
9. Cooking Guide Label
10. Cooktop Light
11. Control Panel
Parts and Features net shown
Turntable
1. Turntable
2. Hub
3. Support
4. Shaft
The turntable can rotate in either direction to help cook food
more evenly. Do not operate the oven without the turntable in
place. To order any of the parts, call t-8OO-4-MY-NOME e. See
"Replacement Parts" for part numbers.
6

To Install:
1. Remove tape from the hub.
2. Place the support on the oven cavity bottom.
3. Place the turntable on the support.
Fit the raised, curved lines in the center of the turntable
bottom between the 3 spokes of the hub. The rollers on the
support should fit inside the turntable bottom ridge.
To Turn Turntable Off:
The turntable can be turned off (except during an auto function).
This is helpful when cooking with plates that are larger than the
turntable, or when cooking with two 10_/_in. (26 cm) plates that
are side-by-side.
To Turn Off: Touch TURNTABLE ON/OFR
"TURNTABLE OFF" will appear in the display. The turntable will
turn back on automatically when cooking is over or STOP/CLEAR
is touched.
The cooking rack is ideal for two-level cooking. It provides extra
cavity space for cooking two or more containers at the same
time. Insert the rack securely into the rack supports on the side
walls of the oven. To reorder rack, call 1-800-4-MY-HOME e. See
"Replacement Parts" section for part number.
Rack will become hot. Always use oven mitts or pot holders
when handling.
Do not allow the rack to touch the inside cavity walls, ceiling
or floor.
• Do not use metal cookware, utensils, or a browning dish with
the rack.
• Do not let food container on rack touch the top or sides of the
oven.
• Remove rack before using Popcorn function.
• The rack is designed specifically for this oven. Do not use it in
any other oven.
• Do not cook food directly on the rack. Always use a
microwave-safe container.
• Use the rack only when cooking on two levels. Do not store it
in the oven. Damage to the oven could result if someone
accidentally turns on the oven.
MICROWAVE OVEN
CONTROL
G ® ®
® ® ®
G ® ®
®
Turr_ta_Je
Hi,h/Low/Of f OnZNight/OIf
When power is first supplied to the microwave oven, a ":" will
blink on the display. Touch STOP/CLEAR to stop the blinking.
Any other time a ":" blinks on the display, a power failure
occurred. Touch STOP/CLEAR and reset the clock if needed.
When the microwave oven is in use, the display shows cooking
power, quantities, weights and/or prompts.
If "RETRY" blinks on the display for one second, an invalid value
was entered. Retry your entry.
When the microwave oven is not in use, the display shows the
time of day or the timer countdown.

TheSTARTpadbeginsanyfunction.Ifnottouchedaftertouching
apad,"START?"willappearinthedisplay.
Ifcookingisinterrupted,touchingSTARTwillresumethepreset
cycle.
TheSTOP/CLEARpadclearsanyincorrectcommandand
cancelsanyprogramduringcooking.Itwillnoterasethetime
ofday.
Theovenwillalsoturnoffwhenthedoorisopened.Closethe
doorandtouchSTARTtoresumethecycle.
Cooktimemaybeaddedin1-minuteincrements,upto99
minutes,bytouchingtheAddMinutepad.
TouchingADDMINUTEduringacookcyclewilladd1minuteof
cooktimeatthecurrentcookpower.
TouchingADDMINUTEwhentheovenisnotinuse,oraftera
cookcyclehasended,willstarttheovenfor1minuteofcook
timeat100%cookpower.
Thisisa12-hourclockanddoesnotshowa.m.orp.m.
To Set:
The microwave oven and timer must be off.
1. Touch CLOCK.
2. Touch the number pads to set the time of day.
3. Touch CLOCK or START.
To Remove:
1. Touch CLOCK.
2. Touch O.
3. Touch CLOCK.
The time will disappear and ":" will appear on the display.
'
The Kitchen Timer can be set in minutes and seconds, up to 99
minutes, and counts down the set time. The Kitchen Timer does
not start or stop the microwave oven.
When the Kitchen Timer is in use, the microwave oven can still
operate. To see the time countdown while the oven is in use,
touch KITCHEN TIMER.
To Set: Touch KITCHEN TIMER. Touch number pads to enter
length of time. Touch KITCHEN TIMER.
To Cancel: Touch KITCHEN TIMER again, or twice if oven is
operating.
Tones are audible signals, indicating the following:
One tone
• Valid entry (short tone)
• End of timer countdown (long tone)
Two tones
• End of stage in multi-stage cooking
• Child Lock active (short tones)
• Every minute after end-of cycle tones, as reminder
Three tones
• Invalid entry
Four tones
• End-of-cycle
To Disable Valid Entry Tones: Touch and hold number pad "1"
for about 5 seconds. Two short tones will sound. Repeat to
enable tones.
To Disable All Tones (except end of timer countdown): Touch
and hold numer pad "2" for about 5 seconds. Two short tones will
sound. Repeat to enable tones.
The Child Lock shuts down the control panel pads to prevent
unintended use of the microwave oven.
When the control is locked, only the Light and Fan pads will
function. If any other pad is touched, 3 quick tones will sound
and "LOCK" will appear in the display.
To Lock/Unlock Control: The oven must be off. Touch and hold
START for 5 seconds until 2 quick tones sound and a lock icon
appears on the display. Repeat to unlock and remove the lock
icon from display.
The exhaust fan has 2 speeds: High and Low.
To protect the oven, if the temperature from the range or cooktop
below the oven gets too hot, the exhaust fan will automatically
turn on at high speed. It may stay on for up to 1 hour to cool the
oven. When this occurs, the Fan pad will not function.
The exhaust fan is also the cooling fan, and will start at low speed
when any cooking function begins. It will remain on until the
cooking function is over.
To Turn Exhaust Fan On/Off: Touch the Fan pad once for High,
twice for Low or 3 times for Off.
The cooktop light has 3 settings: On, Night and Off.
To Turn On/Night/Off: Touch Light pad repeatedly to scroll
through the settings.
MICROWAVE OVEN USE
A magnetron in the oven produces microwaves which reflect off
the metal floor, walls and ceiling and pass through the turntable
and appropriate cookware to the food. Microwaves are attracted
to and absorbed by fat, sugar and water molecules in the food,
causing them to move, producing friction and heat which cooks
the food.
• Never lean on or allow children to swing on the oven door.
• Do not operate microwave oven when it is empty.
• Heated liquids can splash out during and after heating. Use
of a wooden stir stick placed in the cup or bowl during
heating may help to avoid this.
8

• The turntable must be in place and correct side up when
oven is in use. Do not use if turntable is chipped or broken.
Call 1-800-4-MY-HOME e to reorder. See "Replacement
Parts" section for part numbers.
• Baby bottles and baby food jars should not be heated in the
oven.
• Clothes, flowers, fruit, herbs, wood, gourds, paper, including
brown paper bags and newspaper should not be dried in the
oven.
Do not use the microwave oven for canning, sterilizing or
deep frying. The oven cannot maintain appropriate
temperatures.
Paraffin wax will not melt in the oven because it does not
absorb microwaves.
• Use oven mitts or pot holders when removing containers from
oven.
Do not overcook potatoes. At the end of the recommended
cook time, potatoes should be slightly firm. Let potatoes
stand for five minutes. They will finish cooking while standing.
Do not cook or reheat eggs inside the shell. Steam buildup in
whole eggs may cause them to burst. Cover poached eggs
and allow a standing time.
When microwave cooking, the amount, size and shape, starting
temperature, composition and density of the food affect cooking
results.
Amount of Food
The more food heated at once the longer the cook time. Check
for doneness and add small increments of time if necessary.
Size and Shape
Smaller pieces of food will cook more quickly than larger pieces
and uniformly shaped foods cook more evenly than irregularly
shaped food.
Starting Temperature
Room temperature foods will heat faster than refrigerated foods
and refrigerated foods will heat faster than frozen foods.
Composition and Density
Foods high in fat and sugar will reach a higher temperature and
heat faster than other foods. Heavy, dense foods, such as meat
and potatoes, require a longer cook time than the same size of a
light, porous food, such as cake.
Covering
Covering food helps retain moisture, shorten cook time and
reduce spattering, Use the lid supplied with cookware. If a lid is
not available, wax paper, paper towels or plastic wrap approved
for microwaves may be used. Plastic wrap should be turned back
at one corner to provide an opening to vent steam.
Stirring and Turning
Stirring and turning redistributes heat evenly to avoid
overcooking the outer edges of food. Stir from outside to center.
If possible, turn food over from bottom to top.
Arranging
If heating irregularly shaped or different sized foods, the thinner
parts and smaller sizes should be arranged toward the center. If
cooking several items of the same size and shape, place them in
a ring pattern, leaving the center of the ring empty.
Piercing
Before heating, use a fork or small knife to pierce or prick foods
that have a skin or membrane, such as potatoes, egg yolks,
chicken livers, hot dogs, and sausage. Prick in several places to
allow steam to vent.
Shielding
Use small, flat pieces of aluminum foil to shield the thin pieces of
irregularly shaped foods, bones and foods such as chicken
wings, leg tips and fish tail. See "Aluminum Foil and Metal" first.
Standing Time
Food will continue to cook by the natural conduction of heat even
after the microwave cycle ends. The length of standing time
depends on the volume and density of the food.
O00/<WS/_@ 8[(:_ D_II'IIS_bI'Ws,,I;"@
Cookware and dinnerware must fit on the turntable. Always use
oven mitts or pot holders when handling because any dish may
become hot from heat transferred from the food. Do not use _¢
cookware and dinnerware with gold or silver trim. Use the
following chart as a guide, then test before using.
MATERIAL RECOMMENDATIONS
Aluminum Foil, See "Aluminum Foil and Metal" section.
Metal
Browning Dish Bottom must be at least 3/_ein. (5 mm)
above the turntable. Follow
manufacturer's recommendations.
Ceramic Glass, Acceptable for use.
Glass
China, Follow manufacturer's recommendations.
Earthenware
Melamine Follow manufacturer's recommendations.
Paper Towels, Use non-recycled and those approved by
Dinnerware, the manufacturer for microwave oven use.
Napkins
Plastic Wraps, Use those approved by the manufacturer
Bags, Covers, for microwave oven use.
Dinnerware,
Containers
Pottery and Clay Follow manufacturer's recommendations.
Styrofoam ® Do not use in oven.
Straw, Wicker, Do not use in oven.
Wooden
Containers
Wax Paper Acceptable for use.

To Test Cookware or Dinnerware for Microwave Use:
1. Put cookware or dinnerware in oven with 1 cup (250 mL) of
water beside it.
2. Cook at 100% cooking power for 1 minute.
Do not use cookware or dinnerware if it becomes hot and the
water stays cool.
Always use oven mitts or pot holders when removing dishes from
the microwave oven.
Aluminum foil and some metal can be used in the oven. If not
used properly, arcing (a blue flash of light) can occur and cause
damage to the oven.
OK for Use
Racks and bakeware supplied with the oven, aluminum foil for
shielding, and approved meat thermometers may be used with
the following guidelines:
• Never allow aluminum foil or metal to touch the inside cavity
walls, ceiling or floor.
• Always use the turntable.
• Never allow contact with another metal object during
cooking.
Do Not Use
Metal cookware and bakeware, gold, silver, pewter, non-
approved meat thermometers, skewers, twist ties, foil liners such
as sandwich wrappers, staples and objects with gold or silver
trim or a metallic glaze should not be used in the oven.
,= ,, ..... _,;;I' OW@F
Many recipes for microwave cooking specify which cooking
power to use by percent, name or number. For example,
70%=7=Medium-High.
Use the following chart as a general guide for the suggested
cooking power of specific foods.
PERCENT/ NUMBER USE
NAME
100%, High 10 Quick heating convenience
(default foods and foods with high
setting) water content, such as soups,
beverages and most
vegetables.
90%
Cooking small tender pieces of
meat, ground meat, poultry
pieces and fish fillets.
Heating cream soups.
80% 8 Heating rice, pasta or
casseroles.
Cooking and heating foods
that need a cook power lower
than high. For example, whole
fish and meat loaf.
70%, 7 Reheating a single serving of
Medium-High food.
PERCENT/ NUMBER USE
NAME
60% 6 Cooking sensitive foods such
as cheese and egg dishes,
pudding and custards.
Cooking non-stirrable
casseroles, such as lasagna.
50%, Medium 5 Cooking ham, whole poultry
and pot roasts.
Simmering stews.
40% 4 Melting chocolate.
Heating bread, rolls and
pastries.
30%, 3 Defrosting bread, fish, meats,
Medium-Low, poultry and precooked foods.
Defrost
20% 2 Softening butter, cheese, and
ice cream.
10%, Low 1 Taking chill out of fruit.
To Use:
1. Touch COOKTIME.
Touch number pads to enter cooking time.
2. Touch POWER.
Touch number pads to enter power level, if other than 100%.
3. Touch START.
The display will count down the cook time.
When the cycle ends, "END" will appear in the display, 4 end-
of-cycle tones will sound, and then reminder tones will sound
every minute.
4. Touch STOP/CLEAR or open the door to clear the display
and/or stop reminder tones.
The cook time and power may be changed after touching START
without interrupting cooking.
To Change Cook Time: Touch COOK TIME. The countdown will
freeze for a few seconds. Enter the new cook time and touch
START or wait a few seconds for the countdown to resume.
To Change Cook Power: Touch POWER repeatedly to scroll
through the cook power levels.
• Do not use regular paper bags or glassware.
• Pop only one package of popcorn at a time.
• Follow manufacturer's instructions when using a microwave
popcorn popper.
• Listen for popping to slow to 1 pop every 1or 2 seconds,
then stop the cycle. Do not repop unpopped kernels.
• Use fresh bags of popcorn for optimal results.
• Cooking results may vary by brand and fat content.
Popping time has been preset based on commercially packaged
microwave popcorn.
10

To Use POPCORN:
1. Touch POPCORN.
Display will show setting for 3.5 oz. (99 g) bag.
2. Touch POPCORN a second time for 3.0 oz. (85 g) bag, and a
third time for 1.75 oz. (50 g) bag.
The microwave oven will start 5 seconds after selecting the
appropriate size bag. The display will count down the
popping time.
When the popcorn cycle ends, "END" will appear in the
display, 4 end-of-cycle tones will sound, and then reminder
tones will sound every minute.
3. Touch STOP/CLEAR or open the door to clear the display
and/or stop reminder tones.
Beverages may be heated in the microwave oven by touching the
BEVERAGE pad. One or two 8-oz. (250 mL) cups can be heated
automatically using this function.
To Use BEVERAGE:
1. Touch BEVERAGE.
The display will show the setting for heating 1 cup.
2. Touch BEVERAGE a second time to heat 2 cups, or touch the
number pad 2.
The microwave oven will start 5seconds after the appropriate
number of cups to be heated is selected. The display will
count down the cook time.
If more or less time is required, touch POWER before the
oven starts cooking.
When the cycle ends, "END" will appear in the display, 4 end-
of-cycle tones will sound, and then reminder tones will sound
every minute.
3. Touch STOP/CLEAR or open the door to clear the display
and/or stop reminder tones.
Times and cooking power have been preset for 7 microwavable
foods. Use the following chart as a guide.
FOOD PAD QUANTITY
Rice 1 .5, 1, 1.5 or 2 cups
(125, 250, 375 or500 mL)
Fresh Vegetables 2 1-4 cups (250 mL-1 L)
Frozen Vegetables 3 1-4 cups (250 mL-1 L)
Canned Vegetables 4 1-4 cups (250 mL-1 L)
*Bacon 5 1-6 slices, average thickness
Frozen Entree 6 10 or 20 oz (283 or 567 g)
**Baked Potato 7 1-4 potatoes, 10-13 oz
(283-369 g) each
* Differences in the amount of fat, meat, thickness, and curing
process affect results. Average is 16 slices per pound.
** If cooking only 1 potato, place it between the center and the
outside edge of the turntable.
To Use Auto Cook:
1. Touch AUTO COOK.
"PAD-" appears on the display.
2. Touch AUTO COOK repeatedly to scroll through foods.
or
Touch a number pad to select type of food from chart.
If more or less time is required, touch POWER before the
oven starts cooking.
3. Touch number pads to enter quantity.
4. Touch START.
The display will count down the cook time.
When the cycle ends, "END" will appear in the display, 4 end-
of-cycle tones will sound, and then reminder tones will sound
every minute.
5. Touch STOP/CLEAR or open the door to clear the display
and/or stop reminder tones.
The oven can be set to cook at different cooking powers for
various lengths of time, up to 3 stages plus Warm Hold.
To Cook in Stages:
1. Touch COOKTIME.
Touch number pads to enter 1st stage cooking time.
2. Touch POWER.
Touch number pads to set power level, if other than 100%.
3. Touch COOK TIME to begin programming the next stage.
NOTE: If using cooking power other than 100%, COOK TIME
must be touched twice. The stage numbers will appear in the
display when the 2nd stage is ready to be programmed.
4. Repeat steps 1-3 for each additional stage.
5. Touch START.
The display will count down the cook time for each stage.
Two tones will sound between stages.
When the cycle ends, "END" will appear in the display, 4 end-
of-cycle tones will sound, and then reminder tones will sound
every minute.
HOLD WARM may be programmed as final stage.
6. Touch STOP/CLEAR or open the door to clear the display
and/or stop reminder tones.
The cook time and cooking power of the cycling stage may be
changed without interrupting cooking.
To Change Cook Time: Touch COOK TIME. The countdown will
freeze for a few seconds. Enter the new cook time and touch
START or wait a few seconds for the countdown to resume.
To Change Cook Power: Touch POWER repeatedly to scroll
through the cook power levels.
11

Times and cooking power have been preset for reheating 5
specific food types. Use the following chart as a guide.
FOOD PAD QUANTITY
Pizza Slice 1 1-3 slices
Soup/Sauce 2 1-4 cups (250 mL-1 L)
Casserole 3 1-4 cups (250 mL-1 L)
Baked Goods 4 1-6 pieces
Dinner Plate 5 1serving
To Use Auto Reheat:
1. Touch AUTO REHEAT.
2. Touch AUTO REHEAT repeatedly to scroll through foods.
or
Touch number pads to select type of food from chart.
3. Touch number pads to enter quantity.
4. Touch START.
If more or less time is required, touch POWER before the
oven starts cooking.
The display will count down the reheat time.
When the cycle ends, "END" will appear in the display, 4 end-
of-cycle tones will sound, and then reminder tones will sound
every minute.
5. Touch STOP/CLEAR or open the door to clear the display
and/or stop reminder tones.
The Auto Defrost feature's preset programs can be used or the
oven can be manually set to defrost.
The Auto Defrost system has preset times and cook powers for 3
categories: Meat, Poultry and Fish. It should not be used for food
left outside the freezer for more than 20 minutes, or for frozen
ready-made food.
• Food should be 0°F (-18°C) or colder at defrosting for optimal
results. How foods are stored can affect results.
Unwrap foods and remove lids (from fruit juice) before
defrosting,
Shallow packages will defrost more quickly than deep blocks.
Separate food pieces as soon as possible during or at the
end-of-cycle for more even defrosting,
Use small pieces of aluminum foil to shield parts of food such
as chicken wings, leg tips and fish tails. See "Aluminum Foil
and Metal" first.
To Use Auto Defrost:
1. Touch AUTO DEFROST.
"PAD-" appears in the display.
2. Touch AUTO DEFROST repeatedly to scroll through the foods
or
Touch the number pad 1 for Meat, 2 for Poultry or 3 for Fish.
"QTY" and "LBS" appear in the display.
3. Touch the number pads to enter the weight.
Weight can be set from .1 to 6.6 Ibs. for meats and poultry, or
.1 to 4.4 Ibs. for fish.
4. Touch START.
If more or less time is required, touch POWER before the
oven starts cooking.
The display will count down the defrost time.
When the cycle ends, "END" will appear in the display, 4 end-
of-cycle tones will sound, and then reminder tones will sound
every minute.
5. Touch STOP/CLEAR or open the door to clear the display
and/or stop reminder tones.
To defrost manually, use 30% cook power. Refer to a reliable
cookbook for defrosting information.
Food Poisoning Hazard
Do not let food sit in oven more than one hour
before or after cooking.
Doing so can result in food poisoning or
sickness,
Hot cooked food can be kept warm in the microwave oven. Hold
Warm can be used by itself or can be programmed to follow a
cooking cycle.
To Use:
Put hot cooked food in the oven. Cover plates of food and foods
that were cooked covered. Pastries, pies, turnovers, etc. should
remain uncovered.
1. Touch HOLD WARM.
2. Touch START.
"WARM" will appear in the display.
When the cycle ends, "END" will appear in the display, 4 end-
of-cycle tones will sound, and then reminder tones will sound
every minute.
3. Touch STOP/CLEAR or open the door to clear the display
and/or stop reminder tones.
To Set at end of cycle: Follow instructions in "Cooking in
Stages," and touch HOLD WARM during programming or during
cooking.
12

MICROWAVE OVEN
CARE
IMPORTANT: Before cleaning, make sure all controls are off and
the oven is cool. Always follow label instructions on cleaning
products.
Soap, water and a soft cloth or sponge are suggested first unless
otherwise noted.
GREASE FILTERS
Do not operate the microwave oven without the grease filters in
place.
Soak grease filters in hot water and mild detergent. Scrub and
swish to remove embedded dirt. Rinse well and shake dry.
• Do not use ammonia or oven cleaner.
• Do not place in dishwasher.
OVEN CAVITY
Do not use soap-filled scouring pads, abrasive cleaners, steel-
wool pads, gritty washcloths or some paper towels. Damage may
occur.
The area where the oven door and frame touch when closed
should be kept clean.
Average soil
• Mild, non-abrasive soaps and detergents:
Rinse with clean water and dry with soft, lint-free cloth.
Heavy soil
• Mild, non-abrasive soaps and detergents:
Heat 1 cup (250 mL) of water for 2 to 5 minutes in oven.
Steam will soften soil. Rinse with clean water and dry with
soft, lint-free cloth.
Odors
• Lemon juice or vinegar:
Heat 1 cup (250 mL) of water with 1 tablespoon (15 mL) of
either lemon juice or vinegar for 2 to 5 minutes in oven.
OVEN DOOR EXTERIOR
• Glass cleaner and paper towels or nonabrasive plastic
scrubbing pad:
Apply glass cleaner to soft cloth or sponge, not directly on
panel.
TURNTABLE
Do not operate the microwave oven without the turntable in
place.
• Mild cleanser and scouring pad
• Dishwasher
The grease filters should be removed and cleaned at least once a
month. Do not operate the microwave oven or exhaust fan
without the grease filters in place. The charcoal filters cannot be
washed and should be replaced every 6 to 12 months. See
"General Cleaning" for cleaning instructions. To order
replacements, call 1-aoo-4-M¥-HOMEt See "Replacement
Parts" section for part numbers.
To Remove and Replace Grease Filters:
1. Unplug microwave oven or disconnect power.
2. Remove each grease filter by sliding filter to the end. Pull tab
down until the filter drops out.
1, Tabs
3. Replace grease filter by inserting one end of the filter into the
outer end of the frame. Swing the other end up and slide into
position.
4. Plug in microwave oven or reconnect power.
To Remove and Replace Charcoal Filter:.
1. Unplug microwave oven or disconnect power.
2. Remove the 2 mounting screws located above the cover.
Then loosen the 2 inner screws.
3. Tilt vent grille forward and lift to remove.
4. Slide filter back slightly, lift front end, and pull filter out.
S
5. Install new charcoal filter.
6. Replace vent grille and mounting screws.
7. Plug in microwave oven or reconnect power.
13

4. Lift up the bulb cover.
The cooktop light is a candelabra base 30-watt bulb. To order
replacements, call 1-800-4-MY-HOME _. See "Replacement
Parts" section for part numbers.
To Replace:
1. Unplug microwave oven or disconnect power.
2. Remove the bulb cover mounting screw.
1.Bulb cover
5. Replace light. Close bulb cover.
6. Reattach vent grille. Replace the mounting screws.
1.Mounting screw
3. Replace light. Close bulb cover. Replace mounting screw.
4. Plug in microwave oven or reconnect power.
The microwave oven light is a candelabra base 30-watt bulb. It
will automatically come on when the door is opened and when
the microwave oven is operating. To order replacements, call
1-800-4-MY-HOME e. See "Replacement Parts" section for part
numbers.
To Replace:
1. Unplug microwave or disconnect power.
2. Remove the 2 outer vent grille mounting screws located
above the cover.
7. Plug in microwave oven or reconnect power.
Turntable
Part No. 4393799
Turntable Support and Rollers
Part No. 8184102
Turntable Hub
Part No. 8183949
Cooktop & Microwave Light Bulb
Part No. 4393681
Grease Filters
Part No. 4393790
Charcoal Filters
Part No. 8184958
Cooking Rack
Part No. 8183813
3. Tip the grille forward, then lift out to remove.
14

TROUBLESHOOTING
Try the solutions suggested here first in order to avoid the
cost of an unnecessary service call.
Nothing will operate
• Has a household fuse been blown or has the circuit
breaker been tripped? Replace the fuse or reset the circuit.
• Is the appliance wired properly? See Installation
Instructions provided with your oven.
Oven will not operate
• Is the door completely closed?
Firmly close door.
• Is the electronic oven control set correctly?
See "Microwave Oven Control" section.
Is the Child Lock set?
See "Child Lock" section.
Is the magnetron working properly?
Heat 1 cup (250 mL) of cold water for 2 minutes at 100%
cooking power. If water does not heat, contact a Sears
trained repair specialist. See back cover.
Oven makes humming noise
• This is normal and occurs when the transformer for the
magnetron cycles on.
Oven door looks wavy
• This is normal and will not affect performance.
Turntable will not operate
• Is the turntable properly in place?
Make sure turntable is correct-side up and is sitting securely
on the turntable support. See "Turntable" section.
Is the turntable support operating properly?
Remove turntable. Remove and replace turntable support.
Replace turntable. Put in 1cup (250 mL) of water, then restart
oven. If still not working, contact a Sears trained repair
specialist. See back cover. Do not operate the oven without
turntable and turntable support working properly.
Turntable rotates both directions
• This is normal and depends on motor rotation at beginning of
cycle.
Display shows messages
• Is the display showing an "Oven Status" screen, with a
letter/number code and instruction to inform Sears?
The oven has detected an internal problem. It has run a self-
checking program and displayed the error. Contact a Sears
trained repair specialist. See back cover.
Display shows time countdown, but oven is not
operating
• Is the Kitchen Timer in use?
See "Kitchen Timer" section.
Tones are not sounding
• Are tones turned off?
See "Tones" section.
Steam is coming from the vent grille
• Some steam is normal.
Fan running slower than usual
• Has the oven been stored in a cold area?
The fan will run slower until the oven warms up to normal
room temperature.
Fan running during cooking
• This is normal. Fan comes on at low speed to cool the oven.
Cooking times seem too long
• Is the cooking power set properly?
See "Cooking Power" section.
• Are large amounts of food being heated?
Larger amounts of food need longer cooking times.
• Is the incoming voltage less than specified in the
"Microwave Oven Safety" section?
Have a qualified electrician check the electrical system in the
home.
Radio or TV Interference
• Is the microwave oven plugged into the same outlet?
Try a different outlet.
• Is the radio or TV receiver near the microwave oven?
Move the receiver away from the microwave oven, or adjust
the radio or TV antenna.
• Are the microwave oven door and sealing surfaces clean?
Make sure these areas are clean.
15

f
INDICE
GARANTiA DE LA COMBINACI(_N
MICROONDAS CAMPANA ......................................................... 17
CONTRATOS DE PROTECCI(_N ................................................ 17
SEGURIDAD DEL HORNO DE MICROONDAS ......................... 18
Requisitos electricos ................................................................. 20
PIEZAS Y CARACTER|STICAS .................................................. 21
Bandeja giratoria ....................................................................... 21
Parrilla de coccion ..................................................................... 21
CONTROL DEL HORNO DE MICROONDAS ............................ 22
Pantalla ...................................................................................... 22
Inicio .......................................................................................... 22
Detener/Despejar ....................................................................... 22
Como agregar minutos .............................................................. 22
Reloj ........................................................................................... 22
Temporizador de cocina ........................................................... 22
SeSales audibles ....................................................................... 23
Bloqueo para niSos ................................................................... 23
Extractor de aire ........................................................................ 23
Luz de la superficie de cocci6n ................................................. 23
USO DEL HORNO DE MICROONDAS ....................................... 23
Caracterfsticas de los alimentos ............................................... 24
Pautas para cocinar .................................................................. 24
Utensilios de cocina y vajilla ..................................................... 24
Papel de aluminio y metal ......................................................... 25
Intensidad de cocci6n ............................................................... 25
La cocci6n ................................................................................. 25
Palomitas de maiz ..................................................................... 26
Bebidas ...................................................................................... 26
Cocci6n preestablecida ............................................................ 26
Como cocinar en etapas ........................................................... 26
Como recalentar ........................................................................ 27
Descongelaci6n ......................................................................... 27
Mantener caliente ...................................................................... 28
CUIDADO DEL HORNO DE MICROONDAS ............................. 28
Limpieza general ....................................................................... 28
Como reemplazar los filtros ...................................................... 29
Como reemplazar la luz de la superficie de coccion ................ 30
Como reemplazar la luz del homo de microondas ................... 30
Piezas de repuesto .................................................................... 30
SOLUCION DE PROBLEMAS ..................................................... 31
NUMEROS DE SERMICIO .............................. CONTRAPORTADA
16

f
GARANTIA DE LA CONTRATOS DE
f
COMBINACION
MICROONDAS
CAMPANA
GARANT|A TOTAL DE UN AI_O PARA LA COMBINACION
MICROONDAS CAMPANA
Durante un a_o a partir de la fecha de compra, siesta
combinaci6n de microondas campana Kenmore Elite® Ilegara a
fallar debido a defectos de los materiales o de la mano de obra,
Sears Io reparar& sin cargo alguno.
GARANTiA TOTAL DE CINCO AltOS PARA EL
MAGNETR(_N
Durante cinco afios a partir de la fecha de compra, si el
magnetr6n de esta combinaci6n de microondas campana
Kenmore Elite_ Ilegara a fallar debido a defectos de los
materiales o de la mano de obra, Sears Io reparara sin cargo
alguno.
La cobertura de la garantia antes mencionada se aplica s61o alas
combinaciones microondas campana que se utilicen en el
ambito dom6stico privado.
SERVIClO DE GAFIANTiA
EL SERVIClO DE GARANTIA EST,_,DISPONIBLE CON SOLO
LLAMAR A LA TIENDA O CENTRO DE SERVlCIO SEARS M,_,S
CERCANO EN LOS ESTADOS UNIDOS. Esta garantia es valida
t]nicamente mientras se emplee el producto en los Estados
Unidos. Esta garantia le otorga derechos legales especificos yes
posible que usted tenga tambien otros derechos, los cuales
varian de un estado a otro.
Sears, Roebuck and Co.
D/817WA, Hoffman Estates, IL 60179
Las modificaciones hechas sin la autorizacion del fabricante
pueden anular el derecho del usuario para operar este
dispositivo.
REGISTRO DEL PRODUCTO
En el siguiente espacio, anote por completo el n[3mero del
modelo, de la serie y la fecha de compra del electrodom6stico.
Usted podra encontrar esta informacion en la etiqueta con los
nt]meros del modelo y de la serie, ubicada segQn se ilustra en la
seccion de Partes y caracteristicas de este libro. Siempre que
Ilame a Sears respecto a su electrodom6stico, tenga esta
informacion a mano para agilizar la obtenci6n de asistencia o
servicio.
Nt_mero del modelo 665.
Nt_mero de la serie
Fecha de compra
Guarde estas instrucciones junto con su comprobante de
compra para consulta futura.
f
PROTECCION
Contratos Maestros de Proteccibn
iFelicitaciones por su inteligente adquisici6n!
Su nuevo electrodomestico Kenmore ® ha sido disefiado y
fabricado para brindarle a_os de funcionamiento confiable. Pero
al igual que todos los productos, puede necesitar mantenimiento
preventivo o reparaci6n de vez en cuando. Es alli donde el
Contrato Maestro de Proteccion puede ahorrarle dinero e
inconvenientes.
Adquiera un Contrato Maestro de Protecci6n hoy y prot_jase
contra molestias y gastos inesperados.
El Contrato Maestro de Proteccion tambien ayuda a prolongar la
vida de su nuevo artefacto. He aqui Io que se incluye en el
Contrato:
v' Servicio Experto por nuestros 12.000 especialistas en
reparacion competentes
v' Servicio ilimitado y gratuito para repuestos y mano de obra
en todas las reparaciones protegidas por el contrato
v' Garantia "sin disgustos" - reemplazo de su producto
protegido si ocurren mas de tres fallas del producto en el
transcurso de doce meses
v' Reemplazo del producto si su producto protegido no puede
ser reparado
v' Revisibn Anual de Mantenimiento Preventivo a solicitud
suya - sin costo adicional
v' Ayuda r&pida per tel6fono - asistencia no tecnica e
instructiva para productos reparados en su hogar, ademas de
un horario de reparacion conveniente
v' Proteccibn de sobrevoltaje contra dafios electricos debido a
fluctuaciones de electricidad
v' Reembolso de la renta si la reparacion de su producto
protegido tarda mb.s de Io prometido
Una vez adquirido el Contrato, tan s61otiene que Ilamar para fijar
la visita de servicio t6cnico. Usted puede Ilamar a cualquier hora,
de dia o de noche, o fijar una visita t6cnica en Internet.
Sears cuenta con un equipo de mas de 12.000 especialistas en
reparacion competentes, quienes tienen a disposici,on mas de
4,5 millones de repuestos y accesorios de calidad. Ese es el tipo
de profesionalismo con el que usted puede contar para ayudarle
a prolongar la vida de su nuevo artefacto por muchos afios mas.
iAdquiera hoy su Contrato Maestro de Protecci6n!
Se aplican algunas limitaciones y exclusiones. Para obtener
precios e informacibn adicional, Ilame al 1-888-784-6427.
Servicio de Instalacibn de Sears
Para la instalaci6n profesional garantizada de artefactos
electrodomesticos y articulos como son abridores de puertas de
garaje y calentadores de agua, en los EE.UU. Ilame al
1-800-4-MY-HOME ®.
17

SEGURIDAD DEL HORNO DE MICROONDAS
Su seguridad y la seguridad de los demds es muy importante.
Hemos incluido muchos mensajes importantes de seguridad en este manual y en su electrodom_stico.
Lea y obedezca siempre todos los mensajes de seguridad.
Este es el sfmbolo de advertencia de seguridad.
Este sfmbolo le llama la atenci6n sobre peligros potenciales que pueden ocasionar la muerte o una
lesi6n a usted y a los demAs.
Todos los mensajes de seguridad iran a continuacidn del sfmbolo de advertencia de seguridad
y de la palabra "PELIGRO" o "ADVERTENClA". Estas palabras significan:
Si no sigue las instrucciones de inmediato, usted
puede morir o sufrir una lesi6n grave.
Si no sigue las instrucciones, usted puede morir
o sufrir una lesi6n grave.
Todos los mensajes de seguridad le diran el peligro potencial, le dirAn c6mo reducir las posibilidades de sufrir
una lesi6n y Io que puede suceder si no se siguen las instrucciones.
INSTRUCCIONES IMPORTANTES DE SEGURIDAD
Cuando se usan aparatos electrodom_sticos, deben tomarse precauciones de seguridad, incluyendo las siguientes:
ADVI=RTENClA: Para reducir el incendio, riesgo • Lo mismo que con cualquier aparato electrodom6stico,
de quemaduras, choques electricos, da5os personales
o exposici6n a energ[a excesiva de microondas:
• Lea todas las instrucciones antes de usar el homo
de microondas.
• Lea y siga las "PRECAUCIONES PARA EVITAR
LA POSlBLE EXPOSlClON A ENERGJA EXCESlVA
DE MICROONDAS" especfficas que se encuentran en
esta secci6n.
• El homo de microondas debe estar conectado a tierra.
Solamente debe conectarse a un tomacorriente debida-
mente conectado a tierra. Vea "INSTRUCCIONES
PARA CONEXlON A TIERRA" en esta secci6n yen
las instrucciones de instalaci6n proporcionadas.
• Instale o ubique el homo de microondas s61ode
acuerdo alas instrucciones para instalaci6n
proporcionadas.
• Algunos productos tales como huevos enteros con
la cascara y recipientes herm_ticos - por ejemplo,
frascos de vidrio cerrados - pueden explotar y no
deben calentarse en el homo de microondas.
• Use el homo de microondas s61amente como se
describe en este manual. No use productos qufmicos
o vapores corrosivos en el homo de microondas. Este
tipo de homo esta espedficamente diseSado para
calentar, cocinar o deshidratar alimentos. Este no esta
diseSado para uso industrial o de laboratorio.
es necesario supervisar de cerca si Io usan los niSos.
• No opere el horno de microondas si el cable o el
enchufe estAn daSados, si el homo no funciona
correctamente o si se ha daSado o caido.
El homo de microondas debe ser revisado y reparado
s61opor personal t_cnico calificado. Llame una
compa_fa de servicio autorizada para el examen,
reparacidn o ajuste.
• Yea las instrucciones para la limpieza de la superficie
de la puerta en la secci6n "Cuidado del homo de
microondas".
• Para reducir el riesgo de incendio en la cavidad
del homo:
- No recocine los alimentos. Preste cuidadosa
atenci6n al homo si usa papel, plastico u otto
material combustible dentro del homo para facilitar
la cocci6n.
- Quite las ataduras de alambre de las bolsas de
papel o plAstico antes de ponerlas en el horno.
- Si alg[3n elemento se prende fuego dentro del
homo, mantenga la puerta cerrada, apague el
homo y desenchQfelo o corte la corriente con los
fusibles o el disyuntor.
- No use la cavidad para guardar cosas. No deje
productos de papel, utensilios de cocina o
alimentos en la cavidad cuando no estA en uso.
GUARDE ESTAS INSTRUCCIONES
18

INSTRUCCIONES IMPORTANTES DE SEGURIDAD
• Se adapta para el uso tanto sobre cocinas a gas
como el_ctricas.
• Destinado para usarse sobre cocinas de una
anchura maxima de 36 pulgadas (91 cm).
• Limpie con frecuencia las salidas de aire de la
campana extractora - no permita que se acumule
grasa en la campana o en el filtro.
• Cuando flamee alimentos debajo de la campana,
encienda el ventilador.
• No hay que introducir alimentos o utensilios de metal
demasiado grandes en el homo de microondas debido
a que pueden ocasionar un incendio o riesgo de
choque el_ctrico.
• No limpie con esponjas de lana de acero. Las fibras de
la esponja pueden desprenderse y tocar las piezas
el_ctricas originando un riesgo de choque el_ctrico. •
• No use articulos de papel mientras la operaci6n •
del homo esta en el modo "PAN BROWN" (Dorado •
en la sarten) (en modelos con esta caracteristica).
• No almacene ningOn material en el homo cuando no •
est6 en uso, salvo los accesorios recomendados por
el fabricante. •
• No ponga nada directamente sobre el homo de
microondas cuando 6ste esta funcionando.
• Tenga cuidado al limpiar el filtro de la campana
extractor& Los agentes de limpieza corrosivos,
tales como productos para limpieza de hornos con
lejia, pueden dadar el filtro.
No cubra o bloquee ninguna abertura en el homo
de microondas.
No guarde el horno de microondas a la intemperie.
No use el homo de microondas cerca del agua - por
ejemplo, cerca del fregadero en la cocina, en un
s6tano hOmedo o cerca de una alberca o lugares
similares.
No sumerja el cable o el enchufe en agua.
Mantenga el cable alejado de superficies calientes.
No deje que el cable cuelgue del borde de una mesa
o mostrador.
No instale el horno sobre un fregadero.
Nunca cubra las parrillas o cualquier otro accesorio
con papel met_dico. Esto puede recalentar el homo.
GUARDE ESTAS INSTRUCCIONES
PRECAUCIONES PARA EVITAR LA POSIBLE
EXPOSICION A ENERG|A EXCESIVA DE MICROONDAS
(a) No intente operar este horno con la puerta abierta
ya que esto puede resultar en exposici6n nociva a
energfa de microondas. Es importante no forzar o
impedir la operaci6n de las trabas de seguridad.
(b) No ponga ning_n objeto entre la cara frontal del
homo y la puerta y no permita que se acumule
polvo o residuos de limpiadores en las superficies
de sellado.
(c) No opere el homo si 6ste est& da5ado. Es
particularmente importante que la puerta del homo
cierre correctamente y que no haya daSo en:
(1) La puerta (torcida),
(2) Bisagras y seguros (rotos o fiojos),
(3) Sellos de la puerta y superficies de sellado.
(d) El homo no debe ser ajustado o reparado pot nadie,
excepto personal de servicio calificado.
19

Peligro de Choque Eldctrico
Conecte a un contacto de pared de conexi6n a
tierra de 3 terminales.
No quite el terminal de conexi6n a tierra.
No use un adaptador.
No use un cable eldctrico de extensi6n.
No seguir estas instrucciones puede ocasionar
la muerte, incendio o choque eldctrico.
Cumpla con todos los codigos y ordenes vigentes. Se requiere
un suministro de 120 voltios, 60 Hz, Qnicamente CA de 15- 6 20-
amperios con fusible. (Se recomienda un fusible de acci6n
retardada o un disyuntor.) Se recomienda que se use un circuito
dedicado exclusivamente para este aparato electrodomestico.
INSTRUCCIONES PARA
LA CONEXION A TIERRA
Para todos los aparatos electrodom6sticos de
conexi6n con cable:
El horno de microondas debe estar conectado a
tierra. En caso de que se produzca un corto cir-
cuito, la conexi6n a tierra reduce el riesgo de ele-
ctrocuci6n por medio de un alambre de escape
para la corriente el6ctrica. El horno de microondas
estA equipado con un cable que tiene un alambre
de conexi6n a tierra con un enchufe para conexi6n
a tierra. El enchufe debe estar conectado a un
tomacorriente que estA correctamente instalado y
conectado a tierra.
ADVERTENCIA: El uso incorrecto de la cone-
xi6n a tierra puede resultar en riesgo de electrocuci6n.
Consulte con un electricista o t6cnico calificado si las
instrucciones para conexi6n a tierra no se entienden
bien o si hay alguna duda con respecto a la correcta
conexi6n a tierra del homo de microondas.
No use un cable de extensi6n. Si el cable es muy
corto, haga que un electricista o t_cnico calificado in-
stale un tomacorriente cerca del homo de microondas.
Para aparatos electrodom_sticos de conexi6n
permanente:
Este aparato electrodom_stico debe conectarse a
un sistema de alambrado metalico permanente con
conexi6n a tierra o un conductor de conexi6n a
tierra para equipos debe instalarse junto con los
conductores del circuito y estar conectado a la
terminal o conductor de la conexi6n a tierra para
equipos en el aparato electrodom_stico.
GUARDE ESTAS
INSTRUCCIONES
2O

PIEZAS Y
f
CARACTERISTICAS
Este manual puede cubrir varios modelos diferentes. El modelo
que usted ha comprado puede tener alguna o todas las
caracteristicas que se muestran aqui. La apariencia de su
modelo puede variar ligeramente de las ilustraciones de este
manual.
1 2 3 4
5 6 7 8 9 10 11
1. Filtro de carb6n (detr#s de la
rejilta de ventitaci6n)
2. Tapa de entrada de
microondas
3. Luz del homo de microondas
4. Rejilla de ventitaci6n
5. Ventana con protecci6n
met#lica
6. Placa con el nDmero det
modelo y de la serie
7. Parritta de cocci6n
8. Fittros para ta grasa
(empacados en la cavidad
del homo)
9. Etiqueta con gufa para
cocinar
10, Luz de la superficie de
Cocci6n
11, Panel de control
Piezas y caracteristicas
que no aparecen
Bandejagiratoria
1. Bandeja giratoria
2. Eje
3. Soporte
4, Ftecha
La bandeja giratoria rota en ambas direcciones para ayudar a
cocinar los alimentos de manera mas pareja. No ponga a
funcionar el homo sin la bandeja giratoria en su lugar. Para
adquirir cualquiera de las piezas, Ilame al
1-800-4-MY-HOME _. Yea "Piezas de repuesto" para obtener los
nt]meros de piezas.
Para instalar:
1. Quite la cinta adhesiva del eje.
2. Coloque el soporte en el fondo de la cavidad del homo.
3. Coloque la bandeja giratoria en el soporte.
Encaje las curvas alzadas en el centro del fondo de la
bandeja giratoria entre los tres rayos del eje. Los rodillos del
soporte deben encajar dentro del canal ranurado que esta
debajo de la bandeja giratoria.
Para apagar la bandeja giratoria:
La bandeja giratoria puede apagarse (excepto durante una
funcion automatica). Esto resulta L]tilcuando se cocina con
platos que son mb.s grandes que la bandeja giratoria, o cuando
se cocina con dos platos de 10_/_pulg. (26 cm) que estb.n lado a
lado.
Para apagar: Toque TURNTABLE ON/OFF (Bandeja giratoria
endendida!apagada).
"TURNTABLE OFF" aparecer_, en la pantalla. La bandeja giratoria
se encender_, automaticamente una vez que la cocci6n se haya
terminado o al tocar STOP/CLEAR (Detener/Despejar).
La parrilla de coccion es ideal para cocinar en dos niveles ya que
proporciona espacio extra en el homo para cocinar en dos o mas
recipientes a la vez. Introduzca la parrilla de modo que encaje
bien en los soportes de la parrilla que estb.n en las paredes
laterales del horno. Para adquirir una nueva parrilla, Ilame al
1-800-4-MY-HOME _, Vea la seccion "Piezas de repuesto" para
obtener el n0mero de pieza.
#/#////JJ II\\\\_,\_u,Lr_
La parrilla se pondrb, muy caliente. Siempre p6ngase guantes
para hornear o porta cazuelas al manejarla.
No deje que la parrilla toque paredes interiores, el techo o el
fondo de la cavidad.
No use utensilios de cocina de metal ni platos para dorar con
la parrilla.
No deje que el recipiente de los alimentos que estb. en la
parrilla toque la parte superior o los lados del homo.
Quite la parrilla antes de usar la funci6n para cocinar
palomitas de maiz.
La parrilla ha sido diseSada especificamente para este horno.
No la use en otro tipo de homo.
No cocine los alimentos directamente sobre la parrilla. Use
siempre un recipiente apropiado para el homo de
microondas.
Use la parrilla 0nicamente cuando cocine en dos niveles. No
la guarde en el homo ya que podria dafiar el homo si alguien
Io enciende accidentalmente.
21

CONTROL DEL HORNO
DE MICROONDAS
G ® ®
® ® ®
G ® ®
®
Tttmta_Je
Hi,h/Low/Of f On/Night/Of f
Cuando se suministra energia per primera vez al homo de
microondas, destellar& ":" en la pantalla. Presione STOP/CLEAR
(Detener/Despejar) para detener el encendido y apagado.
En cualquier otro momento en que destelle en la pantalla ":" serA
porque ha ocurrido un corte de corriente. Presione STOP/CLEAR
y vuelva a fijar el reloj, si es necesario.
Cuando el homo de microondas est& en uso, la pantalla muestra
la intensidad de coccion, cantidades, pesos y/o los mensajes
correspondientes.
Si "RETRY" (Vuelva a intentar) destella en la pantalla por un
segundo, se ha ingresado un valor no vb.lido. Vuelva a intentar el
ingreso.
Cuando el homo de microondas no est& en uso, la pantalla
muestra la hora del dia o la cuenta regresiva del temporizador.
El bot6n START (Inicio) iniciar& cualquier funcion. Si no se
presiona despues de presionar un boton, aparecer& en la pantalla
"START?".
Si se interrumpe la coccion, al presionar START se reanudar& el
ciclo prefijado.
El bot6n STOP/CLEAR (Detener/Despejar) despejarA cualquier
comando incorrecto y cancelar& cualquier programa durante la
coccion. No podra borrar la hora del dia.
El homo tambi6n se apagara cuando se abra la puerta. Cierre la
puerta y presione START para reanudar el ciclo.
Puede agregarse tiempo de coccion en incrementos de 1 minuto,
hasta 99 minutos presionando el bot6n Add Minute (Agregar
minutos).
Si usted presiona ADD MINUTE durante un ciclo de cocci6n,
agregarb. 1 minuto de tiempo de cocci6n a la intensidad de
coccion actual.
Si usted presiona ADD MINUTE cuando el homo no est6 en uso
o despues de que haya terminado un ciclo de coccion, esto hara
que el homo comience por 1 minuto de tiempo de coccion al
100% de la intensidad de cocci6n.
Se trata de un reloj de 12 horas que no muestra a.m. y p.m.
Cbmo fijar la hora:
El homo de microondas y el temporizador deberb.n estar
apagados.
1. Presione CLOCK (Reloj).
2. Presione los botones num6ricos para fijar la hora del dia.
3. Presione CLOCK o START (Inicio).
C6mo quitar:
1. Presione CLOCK.
2. Presione 0.
3. Presione CLOCK.
La hora desaparecerb, y aparecerb. ":" en la pantalla.
El temporizador de cocina puede ajustarse en minutes y
segundos, hasta 99 minutos, y hace la cuenta regresiva del
tiempo fijado. El temporizador de cocina no enciende ni detiene
el horno de microondas.
Cuando el temporizador de cocina estb. en uso, el homo de
microondas todavia puede funcionar. Para ver la cuenta regresiva
mientras el homo esta en uso, presione KITCHEN TIMER
(Temporizador de cocina).
Para fijar: Presione KITCHEN TIMER. Presione los botones
numericos para ingresar el lapso de tiempo. Presione KITCHEN
TIMER.
Para cancelar: Presione nuevamente KITCHEN TIMER, o dos
veces si el horno esta funcionando.
22

Las sefiales audibles indican Io siguiente:
Una sehal audible
• Ingreso v&lido (pitido corto)
• Fin de la cuenta regresiva del temporizador (se6al audible
larga)
Dos seSales audibles
• Fin de la etapa en una coccion con mt]ltiples etapas
• Estb. activo el bloqueo para ni6os (pitidos cortos)
• Como alert& cada minuto despues de la se6al de fin de ciclo
Tres sehales audibles
• Ingreso inv&lido
Cuatro se6ales audibles
• Findelciclo
Para invalidar las se_ales audibles v_lidas de ingreso:
Presione y sostenga el boron num6rico "1" por unos 5 segundos.
Se escucharb.n dos sefiales audibles cortas. Repita el
procedimiento para habilitar las sefiales audibles.
Para invalidar todas las sehales audibles (con excepcibn de
la cuenta regresiva del final del temporizador): Presione y
sostenga el bot6n num@ico "2" por unos 5 segundos. Se
escucharAn dos se6ales audibles cortas. Repita el procedimiento
para habilitar las se6ales audibles.
El bloqueo para nifios desactiva los botones del panel de control
para impedir el uso no intencional del homo de microondas.
Cuando el control esta bloqueado, funcionaran solamente los
botones de la luz y del ventilador. Si se presiona otto boton,
sonarb.n 3 se_ales audibles rb.pidas y aparecerb. "LOCK"
(Bloqueo) en la pantalla.
Cbmo bloquear/desbloquear el control: El homo deberb, estar
apagado. Presione y sostenga START (Inicio) por 5 segundos
hasta que suenen 2 sefiales audibles rb.pidas y que aparezca el
icono del candado. Repita el procedimiento para desbloquear y
quitar el icono del candado de la pantalla.
La luz de la superficie de coccion tiene 3 ajustes: On
(Encendido), Night (Luz nocturna) y Off (Apagado).
Para encender/luz nocturna/apagar: Presione repetidamente
el boton Light (Luz) para que aparezcan los nombres de los
ajustes.
USO DEL HORNO DE
MICROONDAS
El magnetron produce las microondas en el homo, las cuales se
reflejan del piso, de las paredes y del techo de metal y pasan a
traves de la bandeja giratoria y los utensilios de cocina hasta los
alimentos. La grasa, el az{]car y las moleculas del agua que
contienen los alimentos atraen y absorben las microondas,
hacen que se muevan, produciendo friccion y calor, cuya acci6n
cocina los alimentos.
• Nunca se recueste ni deje que los ni6os se columpien en la
puer[a del homo.
• No ponga a funcionar el homo de microondas cuando este
vacio.
Los liquidos calentados pueden salpicar durante o despues
del calentamiento. El uso de una varilla de madera para
revolver en la taza o tazon durante el calentamiento puede
ayudar a evitar salpicaduras.
La bandeja giratoria debe estar en su lugar con el lado
correcto hacia arriba cuando el homo est¢ en
funcionamiento. No use la bandeja giratoria siesta
desportillada o quebrada. Llame al 1-800-4-MY-HOME e para
pedir una nueva bandeja. Vea la seccion "Piezas de
repuesto" para los n0meros de parle.
Los biberones y los tarros de comidas para bebes no se
deben calentar en el horno.
• Ropa, flores, fruta, hierbas, madera, jicaras, papel,
incluyendo bolsas de papel de estraza y peri6dico no se
deben secar en el homo.
El extractor de aire tiene dos velocidades: High (Alta) y Low
(Baja). •
Con el fin de proteger el homo de microondas, si es que la
temperatura de la estufa o de la superficie de coccion debajo del •
homo de microondas sube demasiado, el extractor de aire
arranca a velocidad alta automaticamente. Puede mantenerse
encendido hasta por 1 hora para enfriar el homo. Cuando esto
suceda, el bot6n de Fan (Ventilador) no funcionar&
El extractor de aire es ademb.s el ventilador de enfriamiento, y
comenzara a baja velocidad cuando comience cualquier funcion
de coccion. Permanecerb. encendido hasta que se haya
terminado la funci6n de coccion.
Cbmo encender o apagar el extractor de aire: Presione el
boron de Fan una vez para la velocidad alta, dos veces para la
velocidad baja o 3 veces para apagarlo.
No use el homo de microondas para hacer enlatados,
esterilizar o freir. Este homo no puede mantener las
temperaturas apropiadas.
La cera de parafina no se derretirb, en el horno porque no
absorbe las microondas.
Pongase guantes para hornear o use agarraderas al retirar
los recipientes del horno.
No recocine las papas. AI cabo del tiempo de coccion
recomendado, las papas deberan estar ligeramente firmes.
DCjelas reposar durante cinco minutos. La coccion de las
mismas terminarb, durante el reposo.
No cocine ni recaliente los huevos adentro de la c&scara. La
acumulaci6n de vapor puede causar que Cstos estallen.
Cubra los huevos escalfados y dejelos reposar por cierto
tiempo.
23

AI cocinar con microondas, la cantidad, tama_o y forma,
temperatura de inicio, composici6n y densidad de los alimentos
afectan los resultados de cocci6n.
Cantidad de alimentos
La mayor cantidad de alimentos que se caliente, mayor ser_ el
tiempo de cocci6n. Verifique el t6rmino de cocimiento y agregue
breves incrementos de tiempo si fuera necesario.
Tama6o y forma
Los trozos mas peque_os de alimentos se cocinarb.n con mayor
rapidez que los trozos grandes. Igualmente los alimentos de
forma pareja se cocinarAn con mayor uniformidad que los
alimentos de forma desigual.
La temperatura inicial
Los alimentos que estan a temperatura ambiente se calentar_n
con mayor rapidez que los alimentos refrigerados, y los
alimentos refrigerados se calentarb.n con mayor rapidez que los
congelados.
Composicibn y densidad
Los alimentos con alto contenido de grasa y de az[3car
alcanzar_n una temperatura mas alta y se calentarb.n con mayor
rapidez que otros alimentos. Los alimentos pesados y densos,
como la came y papas necesitan un tiempo de cocci6n mas
prolongado que el mismo tamaSo de alimentos con densidad
ligera y porosa como los pasteles.
Envoltorios
Los alimentos cubiertos retienen la humedad, acortan el tiempo
de cocci6n y reducen las salpicaduras. Use la tapa provista con
los utensilios de cocina. Si no la tiene, puede usar papel de cera,
toallas de papel o peliculas de plb.stico apropiados para utilizar
con microondas. Se deben doblar las peliculas de plb.stico en
una esquina a fin de proporcionar una abertura para ventilar el
vapor.
Revolver y dar vuelta los alimentos
AI revolver y dar vuelta los alimentos el calor se redistribuye
uniformemente para evitar recocinar los bordes exteriores de los
alimentos. Revuelva de afuera hacia el centro. De ser posible, de
vuelta a los alimentos desde el fondo hacia arriba.
Disposicibn de los alimentos
AI calentar alimentos de tamafio irregular o de diversos tamafios,
las pares mas delgadas y los tama_os mb.s pequeSos deben
disponerse hacia el centro. AI cocinar varios arlculos del mismo
tamafio y forma, col6quelos en circulo, dejando vacio el centro
del circulo.
Pinchar los alimentos
Antes de calentar, use un tenedor o un peque_o cuchillo para
pinchar o hacer piquetes en los alimentos que tienen cascara o
piel, como las papas, yemas de huevos, higados de polo, perros
calientes y salchichas. Pinchelos en diversos lugares para dejar
que salga el vapor.
Proteccibn de los alimentos
Use pequefios pedazos Iisos de papel de aluminio para proteger
los pedazos delgados de los alimentos de forma irregular, huesos
y alimentos como las alas de polo, puntas de las patas de polo y
colas de pescado. Vea primero la secci6n "Papel de aluminio y
metal".
Tiempo de reposo
Los alimentos se continuarb.n cocinando por la conducci6n
natural del calor at]n despues de que haya terminado el ciclo. La
duracion del tiempo de reposo depende del volumen y la
densidad de los alimentos.
Ill,<!;; I10,:: de [ y w,
Los utensilios de cocina y la vajilla deben encajar en la bandeja
giratoria. Siempre p6ngase guantes para hornear o use
agarraderas para manipular los utensilios ya que cualquier plato
puede calentarse por el calor transferido de los alimentos. No
use utensilios ni vajilas que tengan bordes dorados o plateados.
Use el cuadro siguiente a modo de pauta, luego pruebe los
utensilios antes de utilizarlos.
MATERIAL RECOMENDACIONES
Papel de Vea la secci6n "Papel de aluminio y
aluminio, metal metal".
Plato para dorar El fondo debe quedar por Io menos a 3A6
de pulg. (5 mm) de distancia de la
bandeja giratoria. Siga las
recomendaciones del fabricante.
Vidrio de Se puede usar.
cerb.mica, vidrio
Porcelana, Ioza Siga las recomendaciones del fabricante.
de barro
Melamina Siga las recomendaciones del fabricante.
Toallas de papel, Use los del tipo no reciclado y los que el
vajillas, fabricante apruebe para empleo con
servilletas microondas.
Peliculas de Use los que el fabricante apruebe para
plastico, bolsas, empleo con microondas.
envoltorios,
vajillas,
recipientes
Ceramica y Siga las recomendaciones del fabricante.
arcilla
Espuma de No Io use en el horno.
poliestireno
Styrofoam _>
Recipientes de No Io use en el horno.
popote, de
mimbre y de
madera
Papel de cera Se puede usar.
24

Para probar los utensUios de cocina o vajillas:
1. Ponga el utensilio de cocina o vajilla en el horno con una taza
(250 mL) de agua al lado.
2. Cocine a una intensidad de1100% durante un minuto.
No use el utensilio de cocina o vajilla si se pone caliente y el agua
permanece fria.
Siempre p6ngase guantes para hornear o use agarraderas al
retirar los recipientes del homo de microondas.
Papel de aluminio y algunos tipos de metal pueden usarse en el
homo. Si no se usan debidamente, pueden producir chispas
(rb.fagas azules de luz) y ocasionar daSos al homo.
Uso permitido
Las parrillas y utensilios para hornear provistos con el homo,
papel de aluminio para proteccion y term6metros para came
aprobados se pueden utilizar teniendo en cuenta las siguientes
pautas:
• Nunca deje que el papel de aluminio o metal toque las
paredes, el techo o el fondo de la cavidad interna.
• Siempre use la bandeja giratoria.
• Nunca permita el contacto con otro objeto de metal durante
la cocci6n.
No use
No se debe utilizar en el homo utensilios metAlicos de cocina y
de hornear, oro, plata, peltre, termometros para came no
aprobados, pinchos y ataduras met&licas revestidas, forros de
papel metb.lico como envoltorios de s&ndwiches, grapas y
objetos con bordes de oro o plata con glaseado metalico.
Muchas recetas culinarias para homo de microondas especifican
el nivel de intensidad de coccion que se debe utilizar en
porcentaje, nombre o nt3mero. Por ejemplo, 70%=7=Medio-Alto.
Use el cuadro siguiente como guia general de la intensidad de
coccion para alimentos espec[ficos.
PORCENTAJE/NOMBRE USO PARA
100%, Alto (ajuste prefijado) Calentar rApidamente
alimentos preparados y con
alto contenido de agua, como
sopas, bebidas y la mayoria de
verduras.
90%
Cocinar pequeSos trozos
tiernos de came, carne molida,
trozos de ave y filetes de
pescado.
Calentar sopas cremosas.
80%
Calentar arroz, pasta o
guisados.
Cocinar y calentar alimentos
que necesitan una intensidad
de cocci6n mb.s baja que la
alta. Por ejemplo, pescado
entero y rollo de came molida.
PORCENTAJE/NOMBRE USO PARA
70%, Media-Alta Recalentar una sola porci6n de
alimentos.
60% Cocinar alimentos delicados
como platos con queso y
huevos, budines y natillas.
Cocinar guisados que no
pueden revolverse, como la
lasafia.
50%, Media Cocinar jam6n, ave entera y
cazuelas.
Cocci6n lenta de estofados.
40% Derretir chocolate.
Calentar pan, bollos y pasteles.
30%, Media-Baja, Descongelar pan, pescado,
Descongelaci6n carnes, aves y alimentos
precocidos.
20% Ablandar mantequilla, queso y
helado.
10%, Baja Colocar las frutas a
temperatura ambiente.
Para usar:
1. Presione COOK TIME (Tiempo de cocci6n).
Presione los botones num6ricos para ingresar el tiempo de
cocci6n.
2.
3.
4.
Presione POWER (Intensidad).
Presione los botones num6ricos para ingresar el nivel de
intensidad, si es diferente de 100%.
Presione START (Inicio).
La pantalla harb. la cuenta regresiva del tiempo de cocci6n.
Cuando termine el ciclo, aparecerb, en la pantalla "END" (Fin),
se escuchar&n 4 seSales audibles de fin de ciclo y luego se
escuchar&n seSales audibles de alerta cada minuto.
Presione STOP/CLEAR (Detener/Despejar) o abra la puerta
del homo para despejar la pantalla y/o detener las seSales
audibles de alerta.
El tiempo y la intensidad de coccion pueden cambiarse despues
de presionar START sin interrumpir la cocci6n.
Para cambiar el tiempo de coccibn: Presione COOK TIME. La
cuenta regresiva se detendr& por unos pocos segundos. Ingrese
el nuevo tiempo de cocci6n y presione START o espere unos
pocos segundos para reanudar la cuenta regresiva.
Para cambiar la inteneidad de ooocibn: Presione
repetidamente POWER para ver los niveles de las intensidades
de cocci6n.
25

• No utilice bolsas de papel comunes o cristaleria.
• Solamente haga estallar 1 paquete de palomitas de maiz a la
vez.
Siga las instrucciones del fabricante si es que utiliza un
"popper" de palomitas de maiz para el homo de microondas.
Espere hasta que se produzca un estallido cada 1 6 2
segundos, luego apagar el ciclo. Nunca haga estallar de
nuevo los granos que no estallaron.
Para obtener los mejores resultados utilice bolsas de
palomitas de maiz frescas.
Los resultados de la cocci6n estan sujetos a cambios segQn
la marca y el contenido de grasa.
El tiempo de estallido para las palomitas de maiz ha sido
preestablecido basado en las palomitas de maiz empacadas
comercialmente y aptas para el homo de microondas.
Cbmo utilizar POPCORN:
1. Presione POPCORN (Palomitas de maiz).
La pantalla mostrara el ajuste para una bolsa de 3,5 onzas
(99 g).
2. Presione POPCORN por segunda vez para una bolsa de 3
onzas (85 g), y por tercera vez para una bolsa de 1,75 onzas
(50 g).
El homo de microondas comenzarb. 5 segundos despues de
haber seleccionado el tamafio adecuado de bolsa. La
pantalla hara la cuenta regresiva del tiempo de estallido de
las palomitas de maiz.
Cuando termine el ciclo de preparaci6n de las palomitas de
maiz, aparecerb, en la pantalla "END" (Fin), sonar&n 4 sefiales
audibles de fin de ciclo y luego sonarb.n se_ales audibles de
alerta cada minuto.
3. Presione STOP/CLEAR (Detener/Despejar) o abra la puerta
del homo para despejar la pantalla y/o detener las se_ales
audibles de alerta.
Las bebidas pueden calentarse en el homo de microondas
tocando el bot6n de BEVERAGE (Bebidas). Puede calentar
automaticamente una o dos tazas de 8 onzas (250 mL) usando
esta funcion.
Para usar BEVERAGE:
1. Toque BEVERAGE.
La pantalla mostrarb, el ajuste para calentar 1taza.
2. Toque BEVERAGE por segunda vez para calentar 2 tazas o
toque el bot6n num6rico 2.
El microondas comenzara 5 segundos despues de que se
haya seleccionado el nt]mero apropiado de tazas que desea
calentar. La pantalla harb. la cuenta regresiva del tiempo de
coccion.
Si requiere mas o menos tiempo, toque POWER (Intensidad)
antes de que el homo comience a funcionar.
Cuando termine el ciclo, aparecera "END" (Fin) en la pantalla,
sonarb.n 4 seSales audibles de fin de ciclo y luego sonarAn
sefiales audibles de alerta cada minuto.
3. Toque STOP/CLEAR (Detener/Despejar) o abra la puerta para
despejar la pantalla y/o detener las sefiales audibles de
alerta.
Se han preestablecido tiempos y potencias de coecion para
muchos alimentos comunes aptos pare el homo de microondas.
Utilice el cuadro siguiente como guia.
ALIMENTO BOTON CANTIDAD
Arroz 1 0,5, 1, 1,5 6 2 tazas
(125, 250, 375 6 500 mL)
Vegetales frescos 2 1-4 tazas (250 mL-1 L)
Vegetales congelados 3 1-4 tazas (250 mL-1 L)
Vegetales enlatados 4 1-4 tazas (250 mL-1 L)
*Tocino 5 1-6 rebanadas de espesor
mediano
Plato principal 6 10 6 20 onzas (283 6 567 g)
congelado
**Papas horneadas 7 1-4 papas de 10-13 onzas
(283-369 g) cada una
* Los resultados se verb.n afectados pot las diferencias en la
cantidad de grasa, came, espesor y el proceso de curado. Lo
comt]n es 16 rebanadas por libra.
** Si cocina solamente una papa, coloquela entre el centro y el
borde exterior de la bandeja giratoria.
C6mo usar la coccibn autom&tica:
1. Presione AUTO COOK (Coccion automatica).
Aparecerb. en la pantalla "PAD-" (Bot6n).
2. Presione repetidamente AUTO COOK para que aparezcan los
nombres de los alimentos.
o
Presione un bot6n numerico para seleccionar el tipo de
alimento del cuadro,
Si se requiere mas o menos tiempo, presione POWER
(Intensidad) antes de que el homo comience la coccion.
3. Presione los botones num6ricos para ingresar la cantidad.
4. Presione START (Inicio).
La pantalla harb. la cuenta regresiva del tiempo de cocci6n.
51
Cuando termine el ciclo, aparecerb, en la pantalla "END" (Fin),
se escucharan 4 sefiales audibles de fin de ciclo y luego se
escucharan sefiales audibles de alerta cada minuto.
Presione STOP/CLEAR (Detener/Despejar) o abra la puerta
del homo para despejar la pantalla y/o detener las seSales
audibles de alerta.
_,,,u4'/sO ............. @#_@_SD;/S
Se puede ajustar el homo de mieroondas pare que cocine a
distintas intensidades de cocci6n durante lapsos de tiempo
diferentes y hasta en 3 etapas mas Warm Hold (Mantener
caliente).
Cbmo cocinar en etapas:
1. Presione COOK TIME (Tiempo de cocci6n).
Presione los botones num_ricos para ingresar el tiempo de
coccion de la primera etapa.
2. Presione POWER (Intensidad).
Presione los botones num_ricos para fijar el nivel de
intensidad, si es diferente de 100%.
26

3.
Presione COOK TIME para comenzar a programar la pr6xima
etapa.
NOTA: Siesta usando una intensidad diferente de 100%,
debe presionar dos veces COOK TIME. Los nt3meros de
etapa apareceran en la pantalla cuando la segunda etapa
este lista para ser programada.
4.
5.
Repita los pasos 1 al 3 para cada etapa adicional.
Presione START (Inicio).
La pantalla harb. la cuenta regresiva del tiempo de cocci6n
para cada etapa. Se escucharAn dos sefiales audibles entre
las etapas.
Cuando termine el ciclo, aparecera "END" (Fin) en la pantalla,
sonarb.n 4 seSales audibles de fin de ciclo y y luego sonarb.n
sefiales audibles de alerta cada minuto.
Si Io desea, puede programar HOLD WARM (Mantener
caliente) como la etapa final.
6. Presione STOP/CLEAR (Detener/Despejar) o abra la puerta
para despejar la pantalla y/o para detener las seSales
audibles de alerta.
El tiempo y la intensidad de cocci6n de la etapa que este
activada pueden cambiarse sin interrumpir la cocci6n.
Cbmo cambiar el tiempo de coccibn: Presione COOK TIME. La
cuenta regresiva se detendra por unos pocos segundos. Ingrese
el nuevo tiempo de cocci6n y toque START o espere unos pocos
segundos para que reanude la cuenta regresiva.
Cbmo cambiar la intensidad de coccibn: Presione
repetidamente POWER para que aparezcan los niveles de la
intensidad de cocci6n.
5. Presione STOP/CLEAR (Detener/Despejar) o abra la puerta
para despejar la pantalla y/o detener las sefiales audibles de
alerta.
Puede usar los programas prefijados de la caracteristica Auto
Defrost (Descongelacion automatica) o puede fijar manualmente
su homo en la posici6n de descongelacion.
El sistema de descongelacion automatica tiene tiempos e
intensidades de cocci6n prefijados para 3 categorias: Meat
(Came), Poultry (Aves) y Fish (Pescado). No deberb, usarse para
alimentos que se hayan dejado fuera del congelador por mb.s de
20 minutos, o para alimentos listos para comer que esten
congelados.
• Los alimentos deberb.n estar a 0°F (-18°C) o mas frios para
Iograr los resultados 6ptimos al descongelarlos. Los
resultados pueden verse afectados segQn como se
almacenen los alimentos.
Antes de descongelarlos, desenvuelva los alimentos y quite
las tapas (de los jugos de frutas).
Se han preestablecido tiempos e intensidades de cocci6n para
recalentar 5 tipos de alimentos en particular. Use el siguiente
cuadro como guia.
_SHHH//Y'__ 2.
ALIMENTO BOT(_N CANTIDAD
Rebanada de pizza 1 1-3 rebanadas
Sopa/Salsa 2 1-4 tazas (250 mL-1
Estofado 3 1-4 tazas _50 mL-1
Alimentos 4 1-6 porciones
horneados
Plato principal 5 1 plato
C6mo usar el recalentado autom_tico:
1. Presione AUTO REHEAT (Recalentado automatico).
2. Presione repetidamente AUTO REHEAT para que aparezcan
los nombres de los alimentos.
o
Presione los botones num6ricos para seleccionar el tipo de
alimento del cuadro,
3.
4.
Presione los botones num6ricos para ingresar la cantidad.
Presione START (Inicio).
Si se requiere mas o menos tiempo, toque POWER
(Intensidad) antes de que el homo comience la coccion.
La pantalla mostrar& la cuenta regresiva del tiempo de
cocci6n.
Los paquetes llanos se deshielan con mb.s rapidez que los
bloques profundos.
Para Iograr una descongelaci6n mas uniforme, separe todas
las piezas de los alimentos tan pronto como le sea posible o
al final del ciclo.
Para proteger algunas piezas de los alimentos como sedan
las puntas de las alas y patas de polio, y colas de pescado
utilice unos pedacitos de papel de aluminio. Consulte
primero la secci6n "Papel de aluminio y metal".
Cuando termine el ciclo, aparecerb. "END" (Fin) en la pantalla,
se escucharAn 4 sefiales audibles de fin de ciclo y luego se
escucharAn las seSales audibles de alerta cada minuto.
Cbmo usar la descongelacibn autombtica:
1. PresioneAUTO DEFROST.
Aparecerb. en la pantalla "PAD-" (Bot6n).
Presione repetidamente AUTO DEFROST para que
aparezcan los nombres de los alimentos
o
Presione el boton numerico 1 para came, 2 para aves o 3
para pescado.
Aparecer&n en la pantalla "QTY" (Cantidad) y "LBS" (Libras).
3. Presione los botones num6ricos para ingresar el peso.
El peso puede fijarse desde 0,1 hasta 6,6 Ibs. para came y
ayes, o desde 0,1 hasta 4,4 Ibs. para pescado.
4. Presione START (Inicio).
Si se requiere mas o menos tiempo, toque POWER
(Intensidad) antes de que el homo comience a cocinar.
La pantalla hath. la cuenta regresiva del tiempo de
descongelaci6n.
Cuando termine el ciclo, aparecera en la pantalla "END" (Fin),
sonarb.n 4 seSales audibles de fin de ciclo y luego sonarb.n
sefiales audibles de alerta cada minuto.
5. Presione STOP/CLEAR (Detener/Despejar) o abra la puerta
del homo para despejar la pantalla y/o detener las seSales
audibles de alerta.
Para la descongelaci6n manual, use el 30% de la intensidad de
coccion. Consulte un libro de cocina confiable para obtener
informaci6n sobre c6mo descongelar.
27

Peligro de Intoxicaci6n Alimentaria
No deje sus alimentos en el horno por mds de
una hora antes o despu_s de su coccibn.
No seguir esta instrucci6n puede ocasionar
intoxicacibn alimentaria o enfermedad.
La comida cocida caliente puede mantenerse caliente en el
horno de microondas. La funci6n de Hold Warm (Mantener
caliente) puede usarse sola o programarse para que siga a un
ciclo de cocci6n.
Cbmo usar:
Ponga la comida cocida caliente en el horno. Cubra los platos de
comida y los alimentos que se han cocinado cubiertos. Los
articulos de pasteleria, los pays y las empanadas deberb.n
permanecer sin cubrirse.
1. Presione HOLD WARM (Mantener caliente).
2. Presione START (Inicio).
Aparecerb. en la pantalla "WARM" (Caliente).
Cuando el ciclo termine, aparecera en la pantalla "End" (Fin),
se escucharan 4 setiales audibles de fin de ciclo y luego se
escucharAn setiales audibles de alerta cada minuto.
3. Presione STOP/CLEAR (Detener/Despejar) o abra la puerta
del horno para despejar la pantalla y/o para detener las
setiales audibles de alerta.
Para fijar al final del ciclo: Siga las instrucciones en "Coccion
por etapas" y presione HOLD WARM durante la programaci6n o
durante la cocci6n.
CUIDADO DEL HORNO
DE MICROONDAS
IMPORTANTE: Antes de la Iimpieza, asegOrese de que todos los
controles esten apagados y que el horno este frio. Siempre siga
las instrucciones que vienen en las etiquetas de los productos de
limpieza.
En primer lugar se sugiere el empleo de jab6n, agua y una
esponja o patio suave, a menos que se indique Io contrario.
FILTROS PARA LA GRASA
No ponga a funcionar el homo de microondas sin los filtros para
la grasa en su lugar.
Remoje los filtros para la grasa en agua caliente y detergente
suave. Fr6telos y agitelos para quitar la suciedad acumulada.
Enjub.guelos bien y sact_dalos para secarlos.
• No use amoniaco ni productos comerciales para limpiar
hornos.
• No los lave en la lavavajillas.
CAVIDAD DEL HORNO
No use estropajos que vienen con jab6n, productos de limpieza
abrasivos, estropajos de metal, patios b.speros o ciertos tipos de
papel. Datios pueden ocurrir.
Se debe mantener limpia la zona donde la puerta del homo entra
en oontacto con el marco cuando estb. cerrada.
Sueiedad promedio
• Jabones y detergentes suaves, no abrasivos:
Enjuague con agua limpia y seque con un patio suave sin
pelusas.
Sueiedad profunda
• Jabones y detergentes suaves, no abrasivos:
Caliente una taza (250 mL) de agua durante 2 a 5 minutos en
el homo. El vapor ablandarA la suciedad. Enjuague con agua
limpia y seque con un patio suave sin pelusas.
Olores
• Jugo de limon o vinagre:
Caliente en el homo una taza (250 mL) de agua con una
cucharada (15 mL) de jugo de lim6n o vinagre durante 2 a 5
minutos.
28

EXTERIOR DE LA PUERTA DEL HORNO
• Producto para limpiar vidrios y toallas de papel o estropajo
de plb.stico no abrasivo:
Aplique el producto para limpiar vidrios al patio suave o
esponja, no Io haga directamente sobre el tablero.
BANDEJA GIRATORIA
No ponga a funcionar el homo de microondas si no tiene la
bandeja giratoria en su lugar.
• Producto de limpieza suave y estropajo
• Lavavajillas
Cuando menos una vez al rues deben extraerse y limpiarse los
filtros de grasa. No deje que su horno de microondas o el
extractor de aire funcionen sin que los filtros est6n en su sitio.
Los filtros de carb6n no pueden lavarse y deberan reemplazarse
cada 6 a 12 meses. Vea "Limpieza general" para obtener
instrucciones sobre la limpieza. Para ordenar piezas de
reemplazo, Ilame al 1-800-4-MY-HOME _, Para obtener el
nt]mero de pieza consulte la secci6n "Piezas de repuesto".
Cbmo extraer y reemplazar los filtros de grasa:
1o Desenchufe el homo de microondas o desconecte el
suministro de energia.
2. Quite cada filtro de grasa deslizandolo hacia el extremo. Jale
la lengL)eta hacia abajo hasta que el filtro caiga hacia afuera.
Cbmo extraer y reemplazar el filtro de carbbn:
1. Desenchufe el homo de microondas o desconecte el
suministro de energia.
2. Quite los 2 tornillos de montaje ubicados sobre la cubierta.
Luego afloje los 2 tornillos interiores.
3. Incline la rejilla de ventilaci6n hacia adelante y levb.ntela para
quitarla.
4. Deslice el filtro ligeramente hacia atras, levante el extremo
delantero y jale el filtro hacia afuera.
S
5. Instale el nuevo filtro de carb6n.
6. Vuelva a colocar la rejilla de ventilaci6n y los tornillos de
montaje.
7. Enchufe el homo de microondas o reestablezca el suministro
de energia.
l. Leng_e_s
3. Vuelva a colocar el filtro de grasa insertando un extremo del
mismo dentro del extremo exterior del marco. Haga girar el
otro lado hacia arriba y deslicelo en su sitio.
4. Enchufe el homo de microondas o reestablezca el suministro
de energia.
29

3. Incline la rejilia hacia adelante y luego levb.ntela para quitarla.
La luz de la superficie de coccion es un foco de base de
candelabro de 30 vatios. Si desea hacer un pedido de piezas de
repuesto, Ilame al 1-800-4-MY-HOME ®,Para obtener el nt]mero
de parle consulte la secci6n "Piezas de repuesto'.
Cbmo reemplazarlo:
1. Desenchufe el homo de microondas o desconecte el
suministro de energia.
2. Quite el tornillo de montaje de la cubierta del foco.
4. Levante la cubierta del foco.
1. Tornitlo de montaje
3. Reemplace la luz y cierre la cubierta del foco. Vuelva a
colocar el tornillo de montaje.
4. Enchufe el homo de microondas o restablezca el suministro
de energia.
1.Cubierta del foco
5. Reemplace la luz y cierre la cubierta del foco.
6. Vuelva a sujetar la rejilla de ventilaci6n y vuelva a colocar los
tornillos de montaje.
La luz del homo de microondas es un foco de base de
candelabro de 30 vatios. Se encendera automaticamente al abrir
la puerta y cuando el homo este funcionando. Si desea hacer un
pedido de piezas de repuesto, lame al 1-8OO-4-MY-HOME_L
Para obtener el nt]mero de pieza consulte la secci6n "Piezas de
repuesto'.
Cbmo reemplazarlo:
1. Desenchufe el homo de microondas o desconecte el
suministro de energia.
2. Quite los 2 tornillos de montaje de la rejilla de ventilaci6n
exterior ubicados sobre la cubier[a.
7. Enchufe el homo de microondas o restablezca el suministro
de energia.
Bandeja giratoria Filtros de grasa
Pieza No. 4393799 Pieza No. 4393790
Soporte y rodillos de la Filtros de carb6n
bandeja giratoria Pieza No. 8184958
Pieza No. 8184102
Eje de ia bandeja giratoria Parrilla de cocci6n
Pieza No. 8183949 Pieza No. 8183813
Foco de luz de la superficie
de coccion y del homo de
microondas
Pieza No. 4393681
30

f
SOLUCION DE
PROBLEMAS
Pruebe primero las soluciones aqui sugeridas para evitar el
costo de una visita de servicio t_cnico innecesaria.
Nada funciona
• &Se ha quemado el fusible de la casa o se ha disparado el
disyuntor?
Reemplace el fusible o reajuste el circuito.
• &Se ha cableado debidamente el electrodom_stico?
Vea las instrucciones de instalaci6n provistas con su horno
de microondas.
El homo no funciona
• &Se ha cerrado bien la puerta?
Cierre la puerta con firmeza.
• &Se ha fijado debidamente el control electrbnico del
homo?
Vea la seccion "Control del homo de microondas".
• &Se ha activado el Seguro para niSos?
Vea la seccion "Seguro para ni_os".
• &Est& funcionando debidamente el magnetrbn?
Caliente una taza (250 mL) de agua fria durante 2 minutos a
una intensidad de coccion de1100%. Si el agua no se
calienta, pongase en contacto con un especialista de
reparacion competente de Sears. Vea la contraportada.
El homo emite zumbidos
• Esto es normal y ocurre cuando el transformador del
magnetr6n cambia de marcha.
La puerta del homo parece ondulada
• Esto es normal y no afecta el funcionamiento.
La bandeja giratoda no funciona
• &Se ha colocado la bandeja giratoria debidamente en su
lugar?
Cerci6rese de que la bandeja giratoria tenga el lado correcto
hacia arriba y que este debidamente sentada en su soporte.
Vea la seccion "Bandeja giratoria".
• &Est& funcionando debidamente el soporte de la bandeja
giratoria?
Quite la bandeja giratoria. Quite y vuelva a colocar el soporte
de la bandeja giratoria. Vuelva a colocar la bandeja giratoria.
Ponga una taza (250 mL) de agua, luego reanude la marcha
del horno. Si todavia no funciona, p6ngase en contacto con
un especialista de reparaci6n competente de Sears. Vea la
contraportada. No ponga afuncionar el homo si la bandeja
giratoria y su soporte no estan funcionando bien.
La bandeja giratoda rota en ambas direcciones
• Esto es normal y depende de la rotacion del motor al
comienzo del ciclo.
La pantalla muestra mensajes
• &Est& mostrando la pantalla un "Oven Status" (Estado del
horno) con un cbdigo de letra/nt_mero e instruccibn de
informar a Sears?
El homo ha detectado un problema interno. Ha realizado un
programa de autoverificaci6n y ha mostrado el error en la
pantalla. Pongase en contacto con un especialista de
reparacion competente de Sears. Vea la contraportada.
La pantalla muestra la cuenta regresiva pero el homo no
estb funcionando
• &Estb en uso el temporizador de cocina?
Vea la seccion "Temporizador de cocina".
Las se6ales audibles no suenan
• &Se han apagado las seSales audibles?
Vea la seccion "Sefiales audibles".
El vapor est_ saliendo de la rejilla de ventilacibn
• Cierta cantidad de vapor es normal.
El ventilador est_ funcionando a menos velocidad de Io
acostumbrado
• &Se ha guardado el homo en una zona frfa?
El ventilador va a funcionar a menos velocidad hasta que el
homo alcance la temperatura ambiente normal.
El ventilador funciona durante la coccibn
• Esto es normal. El ventilador se enciende a una velocidad
baja para enfriar el horno. _,J/_,_
Los tiempos de coccibn parecen demasiado , _
prolongados
• &Se ha fijado la intensidad de coccibn adecuadamente?
Vea la seccion "lntensidad de cocci6n".
• &Se estb calentando una gran cantidad de alimentos?
Las cantidades mb.s grandes de alimentos necesitan tiempos
de cocci6n mas prolongados.
• & Estb el voltaje de entrada mbs bajo que el especificado
en la seccibn "Seguridad del horno de microondas"?
Contrate a un electricista competente para que revise el
sistema el¢ctrico de la casa.
Interferencia de la radio o la TV
• &Se ha enchufado del homo de microondas en el mismo
contacto?
Pruebe un contacto distinto.
• &Est& el receptor de la radio o la TV cerca del homo de
microondas?
Aleje el receptor del homo de microondas o regule la antena
de la radio o de la TV.
• &Est&n limpias las superficies sellantes y la puerta del
horno de microondas?
Cerci6rese de que estas zonas est_n Iimpias.
31

Your Home
8184728/4619-652-61661
© Sears, Roebuck and Co.
® Registered Trademark / TMTrademark / SMservice Mark of Sears, Roebuck and Co.
© Marca RegJstrada / TMMarca de FAbrica / SMMarca de Servicio de Sears, Roebuck and Co.
@ Styrofoam is a Registered Trademark of The Dow Chemical Company.
@Styrofoam es una marca registrada de The Dow Chemical Company.
11/02
Printed in China
Impreso en China
-
 1
1
-
 2
2
-
 3
3
-
 4
4
-
 5
5
-
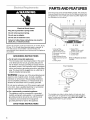 6
6
-
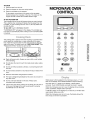 7
7
-
 8
8
-
 9
9
-
 10
10
-
 11
11
-
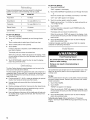 12
12
-
 13
13
-
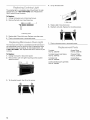 14
14
-
 15
15
-
 16
16
-
 17
17
-
 18
18
-
 19
19
-
 20
20
-
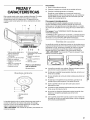 21
21
-
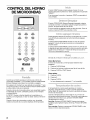 22
22
-
 23
23
-
 24
24
-
 25
25
-
 26
26
-
 27
27
-
 28
28
-
 29
29
-
 30
30
-
 31
31
-
 32
32


Kenmore 665.62612 El manual del propietario
- Categoría
- Microondas
- Tipo
- El manual del propietario
en otros idiomas
- English: Kenmore 665.62612 Owner's manual
Artículos relacionados
-
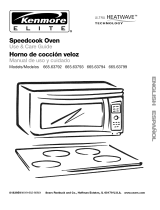 Kenmore Elite 665.63794 El manual del propietario
-
Kenmore 66561632100 El manual del propietario
-
-
-
-
-
-
Kenmore 66569649992 El manual del propietario
-