Brother MW-120 Software User's Guide

Tipo
Software User's Guide

El Brother MW-120 es una impresora móvil que te permite imprimir datos desde un ordenador con Windows o un PDA con Pocket PC. Es compatible con varios sistemas operativos, incluyendo Windows 98SE, Me, NT 4.0, 2000 Professional y XP, así como Pocket PC 2002 y 2003. La impresora viene con software Spotsnap para editar datos importados, así como Snapper para imprimir con la impresora. También puedes imprimir directamente desde otras aplicaciones, como procesadores de texto u hojas de cálculo.

El Brother MW-120 es una impresora móvil que te permite imprimir datos desde un ordenador con Windows o un PDA con Pocket PC. Es compatible con varios sistemas operativos, incluyendo Windows 98SE, Me, NT 4.0, 2000 Professional y XP, así como Pocket PC 2002 y 2003. La impresora viene con software Spotsnap para editar datos importados, así como Snapper para imprimir con la impresora. También puedes imprimir directamente desde otras aplicaciones, como procesadores de texto u hojas de cálculo.

z
Before using this printer, be sure to read this User's Guide.
z
We suggest that you keep this manual in a handy place for future
reference.
Software Guide
Guía del software
MW-120
Mobile Printer
Impresora móvil
z
Antes de usar esta impresora, asegúrese de leer esta “Guía del usuario”.
z
Aconsejamos mantener este manual a mano para futuras consultas.
{
Microsoft
®
, Windows
®
, Windows NT
®
and Windows Mobile
are either registered trademarks or trademarks of Microsoft
Corporation in the United States and other countries.
{
Adobe
®
, Acrobat
®
, Reader
®
are either registered trademarks
or trademarks of Adobe Systems Incorporated in the United
States and/or other countries.
{ Portion of graphics filter software are based in part on the
work of Group 42,Inc.
{ Portion of graphics filter software are based in part on the
work of the Independent JPEG group.
{ VS-FlexGrid Pro Copyright(C) 1999 VideoSoft Corporation.
{
All other software and product names mentioned are trade-
marks or registered trademarks of their respective companies.
CONTENTS
1
1 Operating Environment .................................. 2
2 Printing Data From a Computer Running
Windows .......................................................... 4
Installing the software ............................................... 4
Printing .................................................................... 10
Printing from other applications .............................. 11
Uninstalling the software ......................................... 12
3 Printing Data From a Pocket PC .................. 14
Installing the software ............................................. 15
Printing .................................................................... 18
Printing procedures ................................................. 19
Uninstalling the software ......................................... 35
CONTENTS
2
This mobile printer can print data from a computer running
Windows
®
or a PDA running Pocket PC.
Computer running Windows
®
In order to use this printer, make sure that your system con-
figuration meets the following requirements.
PC operating environment
*1 Connecting with the PC running Microsoft
®
Windows
®
OS, USB and Serial interfaces are available.
*2 Connecting by Serial interface, optional serial cable is
necessary.
*3 For use with Microsoft
®
Windows NT
®
4.0 SP6, Check
our web site and download the driver.
1 Operating Environment
Processor
Pentium 266 MHz or higher recom-
mended
Operating
system*
1
Serial interface (RS-232C)*
2
Microsoft
®
Windows
®
98SE, Me,
NT4.0*
3
, 2000 Professional or XP
Compliant with USB Ver.1.1
Microsoft
®
Windows
®
98SE, Me,
2000 Professional or XP
Available Memory 64 MB or larger recommended
Hard disk free
space
Minimum 20 MB
To print data from a computer running Windows
®
Refer to page 4.
Operating Environment
3
Pocket PC (PDA running Pocket PC)
In order to use this printer, make sure that your Pocket PC
meets the following requirements.
Pocket PC operating environment
When installing the software, a computer running Win-
dows
®
that can connect to the Pocket PC will be
needed.
*1 “Microsoft
®
Pocket PC 2003” is “Windows Mobile™”
Software 2003 for Pocket PC.
Processor
ARM or MIPS
(Not compatible with SH)
Operating system
Microsoft
®
Pocket PC
Microsoft
®
Pocket PC 2002
Microsoft
®
Pocket PC 2003
*1
Interface Infrared port compliant with IrDA 1.2
For information on Pocket PCs whose opera-
tion has already been verified, check our Web
site at http://www.brother.com.
To print data from a Pocket PC Refer to page 14.
4
In order to use this printer to print data from a computer run-
ning Windows
®
, the software must be installed on the com-
puter.
Installing the software
1
Insert the enclosed CD-ROM into the CD-ROM
drive of the computer running Windows
®
.
The installer automatically starts up and the Brother
Mobile Printing Software dialog box appears.
If the installer does not automatically start up, dou-
ble-click “My Computer”, and then choose the “CD
drive” and double-click the “setup.exe” file.
2
Select the lan-
guage, and then
click the OK button.
The Brother Mobile
Software screen
appears.
2 Printing Data From a Computer
Running Windows
y Do not connect this printer to the computer
until you are instructed to do so.
Printing Data From a Computer Running Windows
5
3
Click the top button
(Windows).
A dialog box
appears, allowing
you to select what
to install.
4
Click the button for
the software that you
wish to install.
Here, click the button for
the Spotsnap software.
The Driver Setup
dialog box appears.
Software packages that are installed
Software Description
Spotsnap
Software
Spotsnap
Operator
Software for editing imported data
Snapper
Software for grabbing images, text or
copied data from the PC screen into
Spotsnap Operator
Templates Samples of pre-formatted layouts
Help On-screen operating guide
Printer
Driver
MPrint
MW-120
Software for printing with this printer
Windows button
Spotsnap software
6
5
Follow the instruc-
tions that appear to
finish the installa-
tion.
Next, the printer
driver is installed.
Select USB Cable,
and then click the
OK button.
The installation proce-
dure for the printer
driver differs depending
on the operating sys-
tem being used.
For Windows
®
98SE,
2000 or Me with USB
Continue with the procedure on
the next page.
For Windows
®
XP with USB
Go directly to the procedure on page 8.
Printing Data From a Computer Running Windows
7
For Windows
®
98 SE, 2000 Professional, or Me
(USB connection)
6
When the message
“Connect Brother
MW-120, and then
turn it on.” appears,
use the enclosed
USB cable to con-
nect this printer to
the computer run-
ning Windows
®
, and
then turn on the
printer.
The printer driver is installed.
Enclosed USB cable
Continue with “Printing” on page 10.
8
For Windows
®
XP (USB connection)
6
When the message
“Connect Brother
MW-120, and then
turn it on.” appears,
use the enclosed
USB cable to con-
nect this printer to
the computer run-
ning Windows, and then turn on the printer.
The Found New Hardware Wizard dialog box
appears.
If a dialog box allowing you to select a model
appears, make sure that MW-120 is selected,
and then click the Next button.
Enclosed USB cable
Printing Data From a Computer Running Windows
9
7
Select Install the
software automati-
cally (Recom-
mended), and then
click the Next button
A dialog box
appears, warning
that the software
has not passed
Windows Logo
testing to verify its
compatibility with
Windows.
8
Click the Continue
Anyway button.
Follow the instructions that appear to finish the installa-
tion.
Since this driver has been tested thoroughly by
Brother, no problem should be found during
normal operation.
10
Printing
This printer can be used to print in two different ways.
Printing from Spotsnap
Operator
Take a snapshot
Import text or an image
Copy text or an image
(Snapper)
Check the text or
image, and then edit it.
(Spotsnap Operator)
Print
Refer to the PDF manual
on the CD-ROM.
Printing from other applications, such as
word-processing or spreadsheet appli-
cations
Create the data in the
application
Select the MW-120 as
the printer
Print
Refer to page 11.
Printing begins
DIRECTLY FROM PC SCREEN DIRECTLY FROM WINDOWS
SOFTWARE PACKAGES
Printing Data From a Computer Running Windows
11
Printing from other applications
If this printer is selected for printing, it can be used to print
data from other applications, such as word-processing or
spreadsheet applications.
Selecting the MW-120 as the printer and printing
The procedure for Excel 2000 will be described as an
example.
1
Create the required data with Excel 2000.
2
On the File menu, click Print.
3
From the Printer list,
select Brother MW-
120.
4
Click the OK button.
The data is sent to
the printer and
printed.
This printer is not compatible with some appli-
cations. For details on compatible applications
and for information on the newest printer
driver, check our Web site at
http://www.brother.com.
The data that is to be printed should be
adjusted to the size of the paper. For example,
if the paper size is changed from A4 to A7, the
data must be adjusted to fit in the A7-size
page.
12
Uninstalling the software
If this printer will no longer be used on the computer, the
Spotsnap software and the printer driver can be uninstalled.
Uninstalling (removing) the Spotsnap software
The procedure for Windows
®
98 will be described as an
example.
1
Click the Start button, select Settings, click
Control Panel, and then double-click in
Control Panel.
The Add/Remove Programs Properties dialog box
appears.
2
Select Spotsnap
Software, and then
click the
Add/Remove button.
Follow the instructions
that appear to finish the
uninstallation.
Printing Data From a Computer Running Windows
13
Uninstalling (removing) the printer driver
1
Click the Start button, select Settings, and
then click Printers.
The Printers dialog box appears.
2
Right-click .
A pop-up menu
appears.
3
Select Delete.
The printer driver is
deleted.
In order to use this printer from a computer,
the software must be installed again.
14
In order to use this printer to print data from a Pocket PC
(PDA running Pocket PC), a computer running Windows
®
must be used to install the software onto the Pocket PC.
For details on ActiveSync
®
and on connecting the Pocket
PC to a computer running Windows
®
, refer to the instruc-
tion manual for the Pocket PC.
Installing the software onto a Pocket PC
Printing
3 Printing Data From a Pocket PC
Enclosed CD-ROM
Pocket PC
Computer running
Windows
®
MW-120 (this printer)
Pocket PC
Printing Data From a Pocket PC
15
Installing the software
1
Insert the enclosed CD-ROM into the CD-ROM
drive of the computer running Windows
®
.
The installer automatically starts up and the Brother
Mobile Printing Software dialog box appears.
If the installer does not automatically start up, dou-
ble-click “My Computer”, and then choose the “CD
drive” and double-click the “setup.exe” file.
2
Select the lan-
guage, and then
click the OK button.
The Brother Mobile
Software screen
appears.
3
Click the second
button (Pocket PC).
A dialog box
appears, allowing
you to select either
“Pocket PC” or
“Pocket PC 2002”,
“Pocket PC 2003”.
Pocket PC button
16
4
Click the button for
the operating sys-
tem that you are
using.
The InstallShield
Wizard starts.
5
Click either the Yes
or No button.
Follow the instructions
that appear to finish the
installation.
Next button
Printing Data From a Pocket PC
17
Software packages that are installed
* For information on future updates, check our Web site at
http://www.brother.com.
* Installing to Pocket PC 2003, only “standard” for Set up
Method is available.
Software Description
Setup Method
Standard Compact
Common
modules
(The “Mprin-
tUtility” will be
installed at the
same time.)
Basic components of the
software (The settings for
this printer can be
changed.)
{ {
Note Print
Prints memos saved with
Notes
{
Schedule Print
Prints schedules saved
with Schedule
{
Task Print
Prints tasks and appoint-
ments saved with Tasks
{
Contact Print
Prints names, addresses
and telephone numbers
saved with Contact
{ {
Clipboard Print
Prints images and text
moved to the Clipboard
{
Screen
Capture Print
Prints the currently dis-
played screen of the
Pocket PC
{ {
Image File
Print
Prints saved image files
{
E-mail Print Prints saved e-mails
{
Help files
Operating guide that can
be viewed on the screen of
the Pocket PC
{ {
18
Printing
This printer has eight different printing functions.
1
Tap on the Program screen.
The Brother MPrint screen appears.
2
Check that ,
, ,
, ,
,
and appear
in the screen.
Refer to the pages indicated below for more details on
the corresponding printing function.
Note Print page 19
Schedule Printpage 25
Ta s k P r i n t page 28
Contact Printpage 29
Clipboard Printpage 30
Screen Capture Printpage 31
Image File Printpage 33
E-mail Printpage 34
Printing Data From a Pocket PC
19
Printing procedures
First, we will describe the procedure for using the Note Print.
This procedure contains the basic steps for printing.
Note Print
Memos saved with Notes can be printed.
1
Tap on the Brother MPrint screen.
A list of memos appears in the Note Print screen.
2
Tap the memo that
you wish to print.
Only one memo can be
selected.
The selected
memo is high-
lighted.
3
Tap Preview in the
Printer menu.
The Print preview
screen appears.
To display the memos in each previously cate-
gorized folder, tap the folder list.
If Print was tapped, printing will begin without
the Print preview screen being displayed.
Folder list
20
4
Position this printer
and the Pocket PC
so that their IrDA
infrared ports are
facing each other
and within 20 cm
apart.
5
Tap the Print button.
After the Pocket PC
detects this printer,
printing begins.
Make sure that this printer is turned on.
Within 20
cm apart
Printing Data From a Pocket PC
21
The printed layout may differ depending on the
size of paper selected with Printer setting.
The Print preview screen allows you to view an
image of the data as it will be printed. Text may
be difficult to read.
22
Advanced settings
Precise print settings can be specified.
Printer settings
1
Tap Printer setting in the Print preview
screen.
The Printer setting screen appears.
2
The following set-
tings can be speci-
fied.
Printer:
MW-120 (this printer)
Port:
IrDA (infrared port)/
FILE/USB
Paper size:
A7/Cut labels (4
Labels)/Cut labels (2
Labels)
The setting is
adjusted according
to the paper cassette that is loaded into the printer.
Printing orientation: Portrait/Landscape
Print mode: Normal/Global
Number of copies: 1 through 50/Collate
3
Tap .
The printer settings are applied.
ok button
Printing Data From a Pocket PC
23
Graphics-processing settings
1
Tap Graphics in the Print preview screen.
The Graphics processing screen appears.
2
The following set-
tings can be speci-
fied.
Half-tone:
Dithering/Error Diffu-
sion/None
Image processing:
Full-size printing/Fit
to paper
3
Tap .
The graphics-pro-
cessing settings are applied.
ok button
24
Text format settings
The font and size of the printed text can be changed.
1
Tap Font in the Set-
tings menu of the
Note Print screen.
The Font setting
screen appears.
2
The following text
settings can be
specified.
Font name:
Tahoma/Courier
New/Frutiger Lino-
type/Bookdings
Size:
Largest/Larger/Stan-
dard/Smaller/Smallest
Effects:
Bold/Underline/Italic/
Strikethrough
3
Tap .
The text format settings are applied.
ok button
Printing Data From a Pocket PC
25
Schedule Print
Schedules saved with Schedule can be printed.
1
Tap on the Brother MPrint screen.
A list of schedules appears in the Schedule Print
screen.
2
Tap the box to the
left of the schedule
that you wish to
print.
More than one schedule
can be selected.
A check mark
appears.
3
Tap Preview in the Printer menu.
The procedure continues in the same way as with the
Note Print ( page 19).
The period of time to be printed can be speci-
fied.
(“Printing a specified date” on page 27)
To display the schedules in each previously
specified category, tap the category list.
Category list
26
Template setting
The layout in which data is printed can be specified.
1
Tap Template in the
Settings menu of the
Schedule Print
screen.
The Template
screen appears.
2
Select the template
that you wish to use.
3
Tap .
The selected tem-
plate is applied.
Examples of templates
Two down Four down A7 portrait
ok button
Template menu
Printing Data From a Pocket PC
27
Printing a specified date
The period of time to be printed can be specified.
1
Tap Date in the Set-
tings menu of the
Schedule Print
screen.
The Date screen
appears.
2
Change the date
setting.
Start date/End date/
Inprogress
Date
3
Tap .
The schedules
included in the
specified time
period are dis-
played in the
Schedule Print
screen.
ok button
28
Task Print
Tasks and appointments saved with Tasks can be printed.
1
Tap on the Brother MPrint screen.
A list of tasks appears in the Task Print screen.
2
Tap the box to the
left of the task that
you wish to print.
More than one task can
be selected.
A check mark
appears.
The procedure continues in the same way as with the
Note Print ( page 19).
The period of time to be printed can be speci-
fied.
( “Printing a specified date” on page 27)
The layout in which data is printed can be
specified.
( “Template setting” on page 26)
Printing Data From a Pocket PC
29
Contact Print
Names, address and telephone numbers saved with
Contacts can be printed.
1
Tap on the Brother MPrint screen.
A list of contacts appears in the Contact Print
screen.
2
Tap the box to the
left of the contact
that you wish to
print.
More than one name
can be selected.
A check mark appears.
The procedure continues in the same way as with the
Note Print ( page 19).
y The layout in which data is printed can be
specified.
( “Template setting” on page 26)
30
Clipboard Print
The images and text moved to the Clipboard can be printed.
1
Tap on the Brother MPrint screen.
The contents of the Clipboard appear in the Clip-
board Print screen.
The procedure continues in the same way as with the
Note Print ( page 19).
The Clipboard is the name of the location
where data that was cut or copied is stored.
Printing Data From a Pocket PC
31
Screen Capture Print
The currently displayed screen of the Pocket PC can be
printed.
1
Tap on the Brother MPrint screen.
A toolbar appears
in the upper-right
corner of the
screen.
2
Display the screen
that you wish to
print.
3
Tap on the tool-
bar.
The captured
screen appears in
the Print preview
screen.
The procedure continues in the same way as with the
Note Print ( page 19).
Toolbar
32
Screen capture settings
The time until the data is imported and the size of the cap-
tured area can be specified.
1
Tap on the tool-
bar.
The Screen capture print
settings screen appears.
2
The following text set-
tings can be speci-
fied.
Capture delay time:
0 to 10 seconds
Specifies the length of
time until the image is
imported after is
tapped.
Capture range:
Selection range (Use
the stylus to select the
desired area.)/Client
(Area indicated by
in the illustration at the
right)/Desktop (Entire
screen)
3
Tap .
The screen capture settings are applied.
ok button
Printing Data From a Pocket PC
33
Image File Print
Saved image files (in BMP, JPEG or PNG format) can be printed.
1
Tap on the Brother MPrint screen.
The Image File Print screen appears.
2
Select the file format of the image data to be
searched for.
Select from the five available file formats.
Image file (BMP, JPG or PNG)
Bitmap file
Jpeg file (JPG or JPEG)
Png file
All files
3
Tap the image file
that you wish to print.
Only one file can be
selected.
The selected file is
highlighted.
4
Tap .
The Print preview
screen appears.
The procedure continues in the same way as with the
Note Print (page 19).
ok button
34
E-mail Print
Saved e-mails can be printed.
1
Tap on the Brother MPrint screen.
A list of e-mails appears in the Email Print screen.
2
Tap the e-mail that
you wish to print.
Only one e-mail can be
selected.
The selected
e-mail is high-
lighted.
The procedure continues in the same way as with the
Note Print (page 19).
The layout in which data is printed can be
specified.
(“Template setting” on page 26)
Printing Data From a Pocket PC
35
Uninstalling the software
Uninstall (remove) the software using the Pocket PC func-
tions. For details on uninstalling the software, refer to the
instruction manual for the Pocket PC.
Guía del software
{ Microsoft
®
, Windows
®
, Windows NT
®
y Windows Mobile™
son marcas comerciales registradas o marcas comerciales
de Microsoft Corporation en Estados Unidos y otros países.
{ Adobe
®
, Acrobat
®
, Reader
®
son marcas comerciales
registradas o marcas comerciales de Adobe Systems
Incorporated en los Estados Unidos y/o en otros países.
{ Parte del software de filtrado de gráficos se basa
parcialmente en el trabajo de Group 42, Inc.
{ Parte del software de filtrado de gráficos se basa
parcialmente en el trabajo de The Independent JPEG
Group.
{ VS-FlexGrid Pro Copyright(C) 1999 VideoSoft Corporation.
{
Los nombres de productos y aplicaciones de software
restantes mencionados en este documento son marcas
comerciales o marcas registradas de sus respectivas
compañías.
CONTENIDO
1
1 Entorno operativo .......................................... 2
2 Impresión de datos desde un equipo con
Windows ......................................................... 4
Instalación del software ............................................ 4
Impresión ................................................................ 10
Impresión desde otras aplicaciones ....................... 11
Desinstalación del software .................................... 12
3 Impresión de datos desde un PC de
bolsillo ........................................................... 14
Instalación del software .......................................... 15
Impresión ................................................................ 18
Procedimientos de impresión ................................. 19
Desinstalación del software .................................... 35
CONTENIDO
2
Esta impresora móvil puede imprimir datos desde un equipo
con Windows
®
o un PDA con Pocket PC.
Equipo con Windows
®
Para utilizar esta impresora, asegúrese de que la
configuración de su sistema cumple los siguientes requisitos.
Entorno operativo del PC
*1 Si se establece conexión con un equipo en el que se
ejecuta un sistema operativo Microsoft
®
Windows
®
, las
interfaces USB y serie están disponibles.
*2 Si se conecta a través de una interfaz serie, es
necesario un cable serie opcional.
*3 Si utiliza Microsoft
®
Windows NT
®
4.0 SP6, visite
nuestro sitio Web y descargue el controlador.
1 Entorno operativo
Procesador
Se recomienda un procesador Pentium
de 266 MHz o superior
Sistema
operativo*
1
Interfaz serie (RS-232C)*
2
Microsoft
®
Windows
®
98SE, Me,
NT4.0*
3
, 2000 Professional o XP
Compatible con USB versión 1.1
Microsoft
®
Windows
®
98SE, Me,
2000 Professional o XP
Memoria
disponible
Se recomiendan 64 MB o mayor
Espacio libre en
el disco duro
Mínimo, 20 MB
Para imprimir datos desde un PC con Windows
®
Consulte la página 4.
Entorno operativo
3
PC de bolsillo (PDA con Pocket PC)
Para utilizar esta impresora, asegúrese de que su PC de
bolsillo cumple los siguientes requisitos.
Entorno operativo del PC de bolsillo
Para instalar el software, será necesario disponer de un
equipo con Windows
®
que se pueda conectar al PC de
bolsillo.
*1 “Microsoft
®
Pocket PC 2003” es el software “Windows
Mobile™” de 2003 para Pocket PC.
Procesador
ARM o MIPS
(No compatible con SH)
Sistema operativo
Microsoft
®
Pocket PC
Microsoft
®
Pocket PC 2002
Microsoft
®
Pocket PC 2003
*1
Interfaz
Puerto de infrarrojos compatible con IrDA
1.2
Para obtener información sobre los PCs de
bolsillo cuyo funcionamiento ya se ha
comprobado, visite nuestro sitio Web en
http://www.brother.com.
Para imprimir datos desde un PC de bolsillo Consulte la página 14.
4
Para poder imprimir datos con esta impresora desde un
equipo con Windows
®
, el software debe estar instalado en el
equipo.
Instalación del software
1
Inserte el CD-ROM adjunto en la unidad de
CD-ROM del equipo con Windows
®
.
El instalador se inicia automáticamente y aparece el
cuadro de diálogo Software de impresión móvil
Brother.
Si el instalador no se inicia automáticamente, haga
doble clic en “Mi PC”, y después elija la “unidad CD”
y haga doble clic en el archivo “setup.exe”.
2
Seleccione el idioma
y haga clic en el
botón Aceptar.
Aparece la pantalla
Software de
impresión móvil
Brother.
2 Impresión de datos desde un
equipo con Windows
y No conecte la impresora al equipo hasta que
se le indique.
Impresión de datos desde un equipo con Windows
5
3
Haga clic en el
botón superior
(Windows).
Aparece un cuadro
de diálogo en el que
puede seleccionar
los componentes
que desea instalar.
4
Haga clic en el botón
correspondiente al
software que desee
instalar.
Aquí, haga clic en el
botón del Software
Spotsnap.
Aparece el cuadro
de diálogo
Instalación del controlador.
Paquetes de software instalados
Software Descripción
Software
Spotsnap
Operador
Spotsnap
Software para la edición de datos
importados
Snapper
Software para la captura de
imágenes, texto o datos copiados
desde la pantalla del equipo en el
Operador Spotsnap
Plantillas
Muestras de diseños con formato
predefinido
Ayuda Guía de funcionamiento en pantalla
Controlador
de la
impresora
MPrint
MW-120
Software para imprimir con esta
impresora
Botón de Windows
Software Spotsnap
6
5
Siga las
instrucciones que
aparecen en la
pantalla para
completar la
instalación.
A continuación, se
instala el
controlador de la
impresora.
Seleccione Cable
USB y haga clic en
el botón Aceptar.
El procedimiento de
instalación del controlador de la impresora varía según
el sistema operativo que se está usando.
Para Windows
®
98SE,
2000 o Me con USB
Continúe con el procedimiento
descrito en la página siguiente.
Para Windows
®
XP con
USB
Vaya directamente al
procedimiento descrito en la
página 8.
Impresión de datos desde un equipo con Windows
7
Para Windows
®
98 SE, 2000 Professional o Me
(conexión USB)
6
Cuando aparezca el
mensaje “Conecte la
unidad Brother
MW-120 y, a
continuación,
enciéndala”, utilice el
cable USB adjunto
para conectar la impresora al equipo con
Windows
®
y, a continuación, encienda la
impresora.
Se instala el controlador de la impresora.
Cable USB adjunto
Continúe en la sección “Impresión”, en la página 10.
8
Para Windows
®
XP (conexión USB)
6
Cuando aparezca el
mensaje “Conecte el
Brother MW-120, y a
continuación,
enciéndalo”, utilice el
cable USB adjunto
para conectar la
impresora al equipo
con Windows y, a continuación, encienda la
impresora.
Aparece el cuadro de diálogo Asistente para
hardware nuevo encontrado.
Si aparece un cuadro de diálogo en el que se
puede elegir un modelo, compruebe que se ha
seleccionado MW-120 y haga clic en el botón
Siguiente.
Cable USB adjunto
Impresión de datos desde un equipo con Windows
9
7
Seleccione Instalar
automáticamente
el software
(recomendado) y
haga clic en el botón
Siguiente.
Aparece un cuadro
de diálogo de
advertencia en el
que se indica que
el software no ha
pasado la prueba
del logotipo de
Windows para
verificar su
compatibilidad con
Windows.
8
Haga clic en el
botón Continuar.
Siga las instrucciones que aparecen en la pantalla
para completar la instalación.
Dado que Brother ha sometido este
controlador a pruebas exhaustivas, no debería
surgir ningún problema durante el
funcionamiento normal.
10
Impresión
Esta impresora se puede utilizar para imprimir de dos
maneras distintas.
Impresión desde el Operador
Spotsnap
Tome una fotografía.
Importe texto o una imagen.
Copie texto o una
imagen.
(Snapper)
Cree el texto o la imagen y,
a continuación, edítelos.
(Operador Spotsnap)
Imprima.
Consulte el manual PDF
suministrado en el
CD-ROM.
Impresión desde otras aplicaciones,
como procesadores de texto u hojas de
cálculo
Cree los datos en la
aplicación.
Seleccione el modelo
MW-120 como impresora
Imprima.
Consulte la página 11.
La impresión comienza.
DIRECTAMENTE DESDE LA
PANTALLA DEL EQUIPO
DIRECTAMENTE DESDE
PAQUETES DE SOFTWARE
DE WINDOWS
Impresión de datos desde un equipo con Windows
11
Impresión desde otras aplicaciones
Si se ha seleccionado, esta impresora se puede utilizar para
imprimir datos desde otras aplicaciones, como procesadores
de texto u hojas de cálculo.
Selección del modelo MW-120 como impresora e
impresión de documentos
Como ejemplo, se describirá el procedimiento
correspondiente a Excel 2000.
1
Cree los datos requeridos en Excel 2000.
2
En el menú Archivo, haga clic en Imprimir.
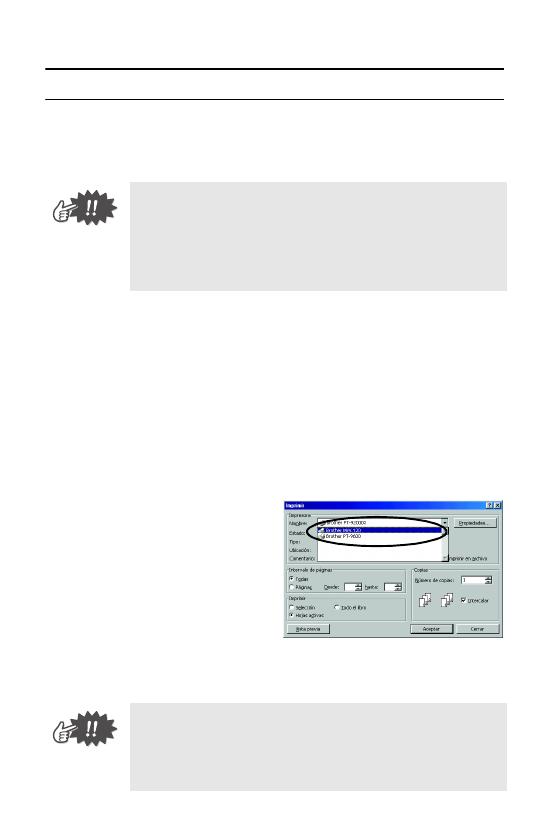
3
En la lista Impresora,
seleccione
Brother
MW-120
.
4
Haga clic en el
botón Aceptar.
Los datos se envían a
la impresora y se
imprimen.
Esta impresora no es compatible con algunas
aplicaciones. Para obtener detalles acerca de las
aplicaciones compatibles e información sobre el
controlador de impresora más reciente, visite
nuestro sitio Web en http://www.brother.com.
Los datos que se van a imprimir deben ajustarse al
tamaño del papel. Por ejemplo, si el tamaño del papel
se cambia de A4 a A7, los datos deben ajustarse para
que quepan en la página de tamaño A7.
12
Desinstalación del software
Si la impresora ya no se va a utilizar con el equipo, el
software Spotsnap y el controlador de la impresora se
pueden desinstalar.
Desinstalación (eliminación) del software
Spotsnap
Como ejemplo, se describirá el procedimiento
correspondiente a Windows
®
98.
1
Haga clic en el botón Inicio, seleccione
Configuración, haga clic en Panel de control
y, a continuación, haga doble clic en en
el Panel de control.
Aparece el cuadro de diálogo de propiedades de
Agregar o quitar programas.
2
Seleccione
Software
Spotsnap
y, a
continuación, haga
clic en el botón
Agregar o quitar.
Siga las instrucciones
que aparecen en la
pantalla para completar
la desinstalación.
Impresión de datos desde un equipo con Windows
13
Desinstalación (eliminación) del controlador de
la impresora
1
Haga clic en el botón Inicio, seleccione
Configuración y, a continuación, haga clic en
Impresoras.
Aparece el cuadro de diálogo Impresoras.
2
Haga clic con el botón derecho del ratón en .
Aparece un menú
emergente.
3
Seleccione
Eliminar
.
Se elimina el
controlador de la
impresora.
Para utilizar la impresora desde un equipo, el
software debe instalarse de nuevo.
14
Para imprimir datos con esta impresora desde un PC de
bolsillo (PDA con Pocket PC), se debe utilizar un equipo con
Windows
®
para instalar el software en el PC de bolsillo.
Para obtener información detallada acerca de ActiveSync
®
y de la conexión del PC de bolsillo a un equipo con
Windows
®
, consulte el manual de instrucciones del PC de
bolsillo.
Instalación del software en un PC de bolsillo
Impresión
3 Impresión de datos desde un
PC de bolsillo
CD-ROM adjunto
PC de bolsillo
Equipo con
Windows
®
MW-120 (esta impresora)
PC de bolsillo
Impresión de datos desde un PC de bolsillo
15
Instalación del software
1
Inserte el CD-ROM adjunto en la unidad de
CD-ROM del equipo con Windows
®
.
El instalador se inicia automáticamente y aparece el
cuadro de diálogo Software de impresión móvil
Brother.
Si el instalador no se inicia automáticamente, haga
doble clic en “Mi PC”, y después elija la “unidad CD”
y haga doble clic en el archivo “setup.exe”.
2
Seleccione el idioma
y haga clic en el
botón Aceptar.
Aparece la pantalla
Software de
impresión móvil
Brother.
3
Haga clic en el
segundo botón
(Pocket PC).
Aparece un cuadro
de diálogo que
permite seleccionar
“Pocket PC” o
“Pocket PC 2002”,
“Pocket PC 2003”.
Botón de Pocket PC
16
4
Haga clic en el botón
correspondiente al
sistema operativo
que está usando.
Se inicia el
Asistente
InstallShield.
5
Haga clic en Sí o en
No.
Siga las instrucciones
que aparecen en la
pantalla para completar
la instalacn.
Botón Siguiente
Impresión de datos desde un PC de bolsillo
17
Paquetes de software instalados
* Para obtener información sobre futuras actualizaciones,
visite nuestro sitio Web en http://www.brother.com.
* Para la instalación en Pocket PC 2003, sólo está
disponible el método de configuración “estándar”.
Software Descripción
Método de instalación
Estándar Compacto
Módulos
comunes
(El software
“Utilidad MPrint”
se instalará
simultáneamente.)
Componentes básicos
del software (la
configuración de esta
impresora se puede
modificar)
{ {
Imprimir notas
Imprime memos
guardados en Notas
{
Imprimir
calendario
Imprime calendarios
guardados en
Calendario
{
Imprimir tareas
Imprime tareas y citas
guardadas en Tareas
{
Imprimir
contactos
Imprime nombres,
direcciones y números
de teléfono guardados
en Contactos
{ {
Imprimir
Portapapeles
Imprime imágenes y
textos movidos al
Portapapeles
{
Imprimir
captura de
pantalla
Imprime la pantalla
mostrada en el PC de
bolsillo
{ {
Imprimir archivo
de imagen
Imprime archivos de
imagen guardados
{
Imprimir correo
electrónico
Imprime correos
electrónicos guardados
{
Archivos de
ayuda
Guía de funcionamiento
que se puede visualizar
en la pantalla del PC de
bolsillo
{ {
18
Impresión
Esta impresora cuenta con ocho funciones de impresión
diferentes.
1
Haga clic en en la pantalla Programa.
Aparece la pantalla Brother MPrint.
2
Compruebe que
, ,
, ,
, ,
y
aparecen en la
pantalla.
Consulte las páginas que se indican a continuación
para obtener más detalles acerca de la función de
impresión correspondiente.
Imprimir Notas página 19
Imprimir Calendariopágina 25
Imprimir Tareaspágina 28
Imprimir Contactospágina 29
Imprimir Portapapelespágina 30
Imprimir Pantallapágina 31
Imprimir Imágenespágina 33
Imprimir E-mailpágina 34
Impresión de datos desde un PC de bolsillo
19
Procedimientos de impresión
En primer lugar, describiremos el procedimiento para usar
Imprimir notas. Este procedimiento contiene los pasos
básicos para llevar a cabo la impresión.
Imprimir Notas
Los memos guardados en Notas se pueden imprimir.
1
Haga clic en en la pantalla Brother
MPrint.
Aparece una lista de memos en la pantalla Imprimir
notas.
2
Haga clic en el
memo que desee
imprimir.
Sólo se puede
seleccionar un memo.
El memo
seleccionado
aparece resaltado.
Para visualizar los memos incluidos en cada
una de las categorías de carpetas definidas
previamente, haga clic en la lista de carpetas.
Lista de carpetas
20
3
Haga clic en Vista
previa... en el menú
Impresora.
Aparece la pantalla
Vista previa.
4
Coloque la
impresora y el PC
de bolsillo de
manera que sus
puertos de
infrarrojos IrDA
estén uno frente al
otro a menos de 20 cm.
Si se hace clic en Imprimir, da comienzo la
impresión sin que se muestre la pantalla Vista
previa.
Asegúrese de que la impresora está
encendida.
A menos de
20 cm
Impresión de datos desde un PC de bolsillo
21
5
Haga clic en el
botón Imprimir.
Una vez que el PC
de bolsillo detecta
la impresora, da
comienzo la
impresión.
El diseño impreso puede variar en función del
tamaño de papel seleccionado en
Configuración de impresora.
La pantalla Vista previa permite ver una
imagen de los datos tal y como se imprimirán.
Puede que el texto sea difícil de leer.
22
Configuración avanzada
Se pueden especificar opciones de configuración de
impresión precisas.
Configuración de impresora
1
Haga clic en Configuración de impresora en
la pantalla Vista previa.
Aparece la pantalla Configuración de impresora.
2
Se pueden
especificar las
siguientes opciones
de configuración.
Impresora:
MW-120 (esta
impresora)
Puerto:
IrDA (puerto de
infrarrojos)/FILE/USB
Tamaño del papel:
A7/Etiquetas cortadas
(4 etiquetas)/Etiquetas
cortadas (2 etiquetas)
La configuración se ajusta en función del paquete
de papel que está cargado en la impresora.
Orientación: Vertical/Horizontal
Modo de impresión: Normal/Global
Número de copias: de 1 a 50/Intercalar
3
Haga clic en .
Se aplican los ajustes de configuración de la impresora.
Botón Aceptar
Impresión de datos desde un PC de bolsillo
23
Ajustes para el procesamiento de gráficos
1
Haga clic en Gráficos en la pantalla Vista
previa.
Aparece la pantalla Procesamiento de gráficos.
2
Se pueden
especificar las
siguientes opciones
de configuración.
Semitonos:
Entramado/Difusión
de errores/Ninguno
Procesamiento de
imágenes:
Impresión de tamaño
completo/Adaptar al
papel
3
Haga clic en .
Se aplican los ajustes de configuración de
procesamiento de gráficos.
Botón Aceptar
24
Configuración de formato de texto
La fuente y el tamaño del texto impreso se pueden
modificar.
1
Haga clic en Fuente
en el menú
Configuración de la
pantalla Imprimir
notas.
Aparece la pantalla
Configuración de fuentes.
2
Se pueden
especificar las
siguientes opciones
de configuración de
texto.
Fuente:
Tahoma/Courier
New/Frutiger
Linotype/Bookdings
Tamaño:
Más grande/Grande/
Estándar/Pequeño/
Más pequeño
Efectos:
Negrita/Subrayado/Cursiva/Tachado
3
Haga clic en .
Se aplican los ajustes de configuración de formato
de texto.
Botón Aceptar
Impresión de datos desde un PC de bolsillo
25
Imprimir Calendario
Los calendarios guardados en Calendario se pueden
imprimir.
1
Haga clic en en la pantalla Brother
MPrint.
Aparece una lista de calendarios en la pantalla
Imprimir calendario.
2
Haga clic en la
casilla situada a la
izquierda del
calendario que
desee imprimir.
Se puede seleccionar
más de un calendario.
Aparece una
marca de verificación.
3
Haga clic en
Vista previa
en el menú Impresora.
El procedimiento continúa de la misma manera que en
Imprimir notas ( página 19).
Se puede especificar el periodo de tiempo que
se desea imprimir.
(“Impresión de una fecha especificada” en la
página 27)
Para visualizar los calendarios incluidos en cada
una de las categorías anteriormente
especificadas, haga clic en la lista de categorías.
Lista de categorías
26
Configuración de plantillas
Se puede especificar el diseño utilizado para imprimir los datos.
1
Haga clic en
Plantilla en el me
Configuración de la
pantalla Imprimir
calendario.
Aparece la pantalla
Plantilla.
2
Seleccione la
plantilla que desee
utilizar.
3
Haga clic en .
Se aplica la plantilla
seleccionada.
Ejemplos de plantillas
Dos en vertical Cuatro en vertical A7 vertical
Botón Aceptar
Menú de plantillas
Impresión de datos desde un PC de bolsillo
27
Impresión de una fecha especificada
Se puede especificar el periodo de tiempo que se desea
imprimir.
1
Haga clic en Fecha
en el menú
Configuración de la
pantalla Imprimir
calendario.
Aparece la pantalla
Fecha.
2
Cambie la
configuración de la
fecha.
Fecha inicial/Fecha
final/En progreso
Fecha
3
Haga clic en .
Los calendarios
incluidos en el
periodo de tiempo
especificado se
muestran en la
pantalla Imprimir
calendario.
Botón Aceptar
28
Imprimir Tareas
Las tareas y citas guardadas en Tareas se pueden imprimir.
1
Haga clic en en la pantalla Brother
MPrint.
Aparece una lista de tareas en la pantalla Imprimir
tareas.
2
Haga clic en la
casilla situada a la
izquierda de la tarea
que desee imprimir.
Se puede seleccionar
más de una tarea.
Aparece una
marca de verificación.
El procedimiento continúa de la misma manera que en
Imprimir notas ( página 19).
Se puede especificar el periodo de tiempo que
se desea imprimir.
(
“Impresión de una fecha especificada” en la
página 27)
Se puede especificar el diseño utilizado para
imprimir los datos.
(
“Configuración de plantillas” en la página 26)
Impresión de datos desde un PC de bolsillo
29
Imprimir Contactos
Los nombres, direcciones y números de teléfono guardados
con Contactos se pueden imprimir.
1
Haga clic en en la pantalla Brother
MPrint.
Aparece una lista de contactos en la pantalla
Imprimir contactos.
2
Haga clic en la
casilla situada a la
izquierda del
contacto que desee
imprimir.
Se puede seleccionar
más de un nombre.
Aparece una marca de verificación.
El procedimiento continúa de la misma manera que en
Imprimir notas ( página 19).
y
Se puede especificar el diseño utilizado para
imprimir los datos.
(
“Configuración de plantillas” en la página 26)
30
Imprimir Portapapeles
Las imágenes y los textos movidos al Portapapeles se
pueden imprimir.
1
Haga clic en en la pantalla Brother
MPrint.
El contenido del Portapapeles aparece en la
pantalla Imprimir Portapapeles.
El procedimiento continúa de la misma manera que en
Imprimir notas ( página 19).
El Portapapeles es el lugar en el que se
guardan los datos que se han cortado o
copiado.
Impresión de datos desde un PC de bolsillo
31
Imprimir Pantalla
La pantalla mostrada en el PC de bolsillo se puede imprimir.
1
Haga clic en en la pantalla Brother
MPrint.
En la esquina
superior derecha
de la pantalla
aparece una barra
de herramientas.
2
Visualice la pantalla
que desee imprimir.
3
Haga clic en en
la barra de
herramientas.
La pantalla
capturada aparece
en la pantalla Vista previa.
El procedimiento continúa de la misma manera que en
Imprimir notas ( página 19).
Barra de herramientas
32
Configuración de captura de pantalla
Se puede especificar el tiempo transcurrido hasta que se
importan los datos y el tamaño del área capturada.
1
Haga clic en en la
barra de herramientas.
Aparece la pantalla Configuración de impresión
de captura de pantalla.
2
Se pueden especificar las
siguientes opciones de
configuración de texto.
Tiempo de retardo de
captura:
de 0 a 10 segundos
Especifica el intervalo de
tiempo que transcurre
hasta que la imagen se
importa después de
hacer clic en .
Rango de captura:
Rango de selección
(utilice el lápiz para
seleccionar el área que
desee.)/Cliente (área
indicada por
en la
figura de la derecha)/
Escritorio (pantalla entera)
3
Haga clic en .
Se aplican los ajustes de configuración de captura
de pantalla.
Botón Aceptar
Impresión de datos desde un PC de bolsillo
33
Imprimir Imágenes
Los archivos de imagen guardados (en formato BMP, JPEG o
PNG) se pueden imprimir.
1
Haga clic en en la pantalla Brother
MPrint.
Aparece la pantalla Imprimir archivo de imagen.
2
Seleccione el formato de archivo de los datos
de imagen que desee buscar.
Seleccione uno de los cinco formatos de archivo
disponibles.
Archivo de imagen (BMP, JPG o PNG)
Archivo de mapa de bits
Archivo JPEG (JPG o JPEG)
Archivo PNG
Todos los archivos
3
Haga clic en el
archivo de imagen
que desee imprimir.
Sólo se puede
seleccionar un archivo.
El archivo
seleccionado
aparece resaltado.
4
Haga clic en .
Aparece la pantalla Vista previa.
El procedimiento continúa de la misma manera que en
Imprimir notas (página 19).
Bot
ó
n Aceptar
34
Imprimir E-mail
Los correos electrónicos guardados se pueden imprimir.
1
Haga clic en en la pantalla Brother
MPrint.
Aparece una lista de correos electrónicos en la
pantalla Imprimir correo electrónico.
2
Haga clic en el
mensaje de correo
electrónico que
desee imprimir.
Sólo se puede
seleccionar un mensaje
de correo electrónico.
El correo electrónico seleccionado se resalta.
El procedimiento continúa de la misma manera que en
Imprimir notas (página 19).
Se puede especificar el diseño utilizado para
imprimir los datos.
(
“Configuración de plantillas” en la página 26)
Impresión de datos desde un PC de bolsillo
35
Desinstalación del software
Desinstale (elimine) el software utilizando las funciones de
Pocket PC. Para obtener información detallada acerca de la
desinstalación del software, consulte el manual de
instrucciones del PC de bolsillo.
z
Before using this printer, be sure to read this User's Guide.
z
We suggest that you keep this manual in a handy place for future
reference.
Software Guide
Guía del software
MW-120
Mobile Printer
Impresora móvil
z
Antes de usar esta impresora, asegúrese de leer esta “Guía del usuario”.
z
Aconsejamos mantener este manual a mano para futuras consultas.
  • Page 1 1
  • Page 2 2
  • Page 3 3
  • Page 4 4
  • Page 5 5
  • Page 6 6
  • Page 7 7
  • Page 8 8
  • Page 9 9
  • Page 10 10
  • Page 11 11
  • Page 12 12
  • Page 13 13
  • Page 14 14
  • Page 15 15
  • Page 16 16
  • Page 17 17
  • Page 18 18
  • Page 19 19
  • Page 20 20
  • Page 21 21
  • Page 22 22
  • Page 23 23
  • Page 24 24
  • Page 25 25
  • Page 26 26
  • Page 27 27
  • Page 28 28
  • Page 29 29
  • Page 30 30
  • Page 31 31
  • Page 32 32
  • Page 33 33
  • Page 34 34
  • Page 35 35
  • Page 36 36
  • Page 37 37
  • Page 38 38
  • Page 39 39
  • Page 40 40
  • Page 41 41
  • Page 42 42
  • Page 43 43
  • Page 44 44
  • Page 45 45
  • Page 46 46
  • Page 47 47
  • Page 48 48
  • Page 49 49
  • Page 50 50
  • Page 51 51
  • Page 52 52
  • Page 53 53
  • Page 54 54
  • Page 55 55
  • Page 56 56
  • Page 57 57
  • Page 58 58
  • Page 59 59
  • Page 60 60
  • Page 61 61
  • Page 62 62
  • Page 63 63
  • Page 64 64
  • Page 65 65
  • Page 66 66
  • Page 67 67
  • Page 68 68
  • Page 69 69
  • Page 70 70
  • Page 71 71
  • Page 72 72
  • Page 73 73
  • Page 74 74
  • Page 75 75

Brother MW-120 Software User's Guide

Tipo
Software User's Guide

El Brother MW-120 es una impresora móvil que te permite imprimir datos desde un ordenador con Windows o un PDA con Pocket PC. Es compatible con varios sistemas operativos, incluyendo Windows 98SE, Me, NT 4.0, 2000 Professional y XP, así como Pocket PC 2002 y 2003. La impresora viene con software Spotsnap para editar datos importados, así como Snapper para imprimir con la impresora. También puedes imprimir directamente desde otras aplicaciones, como procesadores de texto u hojas de cálculo.

En otros idiomas