Silvercrest 344173 El manual del propietario
- Tipo
- El manual del propietario

LIDL US LLC.
ARLINGTON
VA 22202
Made in /Hecho en: China
Last Information Update · Estado de las informaciones:
02 / 2020 · Ident.-No.: SWWS240C1-012020-2
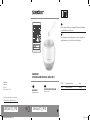
WAXING KIT
KIT DE DEPILACIÓN CON CERA SWWS 240 C1
IAN 344173_1910 IAN 344173_1910
US - EN Operating instructions Page 1
US - ES Instrucciones de uso Página 27
Before reading, unfold the page containing the illustrations and familiarize
yourself with all functions of the device.
Antes de empezar a leer abra la página que contiene las imágenes y, en
seguida, familiarícese con todas las funciones del dispositivo.
WAXING KIT
Operating instructions
KIT DE DEPILACIÓN CON CERA
Instrucciones de uso
9
CV_344173_SWWS240C1_LB9.indd 1-3CV_344173_SWWS240C1_LB9.indd 1-3 14.02.20 12:3914.02.20 12:39

B
A
CV_344173_SWWS240C1_LB9.indd 4-6CV_344173_SWWS240C1_LB9.indd 4-6 14.02.20 12:3914.02.20 12:39

LIDL US LLC.
ARLINGTON
VA 22202
Made in /Hecho en: China
Last Information Update · Estado de las informaciones:
02 / 2020 · Ident.-No.: SWWS240C1-012020-2
WAXING KIT
KIT DE DEPILACIÓN CON CERA SWWS 240 C1
IAN 344173_1910 IAN 344173_1910
US - EN Operating instructions Page 1
US - ES Instrucciones de uso Página 27
Before reading, unfold the page containing the illustrations and familiarize
yourself with all functions of the device.
Antes de empezar a leer abra la página que contiene las imágenes y, en
seguida, familiarícese con todas las funciones del dispositivo.
WAXING KIT
Operating instructions
KIT DE DEPILACIÓN CON CERA
Instrucciones de uso
9
CV_344173_SWWS240C1_LB9.indd 1-3CV_344173_SWWS240C1_LB9.indd 1-3 14.02.20 12:3914.02.20 12:39

US-EN │ 1 ■
SWWS 240 C1
Contents
Introduction ......................... 2
Intended use ......................... 2
Warning types ....................... 3
Safety instructions .................... 4
Important cord information ............ 8
Check package contents ............... 9
Appliance description ................ 10
Automatic shut-off ................... 10
Before first use ...................... 11
Preparing the appliance .............. 11
Epilation ........................... 13
Legs ......................................
14
Armpits ...................................
15
Bikini zone .................................
16
After epilation ..............................17
Cleaning ........................... 18
Storage ............................ 20
Disposal ........................... 21
Appendix .......................... 22
Technical specifications .......................22
FCC Compliance Statement ...................
22
3 year limited warranty .......................24
Distributor .................................
26
IB_344173_SWWS240C1_LB9.indb 1IB_344173_SWWS240C1_LB9.indb 1 14.02.20 12:3314.02.20 12:33

■ 2 │ US-EN
SWWS 240 C1
Introduction
Congratulations on the purchase of your new appliance.
You have selected a high-quality product.
The operating instructions are part of this product.
They contain important information about safety,
usage, and disposal. Before using the product, please
familiarize yourself with all operating and safety instruc-
tions.
Use the product only as described and for the specified
range of applications. Please also pass these operating
instructions on to any future owner.
Intended use
This appliance has been designed exclusively for epila-
tion of legs, armpits and the bikini zone on the human
body. This appliance is intended solely for use in private
households. Do not use it for commercial purposes.
Any use other than the intended use is considered to be
improper. The manufacturer accepts no responsibility
for damage caused by improper use. The risk is borne
solely by the user.
IB_344173_SWWS240C1_LB9.indb 2IB_344173_SWWS240C1_LB9.indb 2 14.02.20 12:3314.02.20 12:33

US-EN │ 3 ■
SWWS 240 C1
Warning types
The following warning types are used in these operating
instructions:
This is the safety alert symbol. It is used to
alert you to potential injury hazards. Obey
all safety messages that follow this symbol to
avoid possible injury or death.
► WARNING indicates a hazardous situation that, if
not avoided, could result in death or serious injury.
► CAUTION indicates a hazardous situation that, if not
avoided, could result in minor or moderate injury.
► NOTICE indicates information considered important,
but not hazard-related (e.g. messages related to
property damage).
►A TIP provides additional information that will assist
you in using the appliance.
IB_344173_SWWS240C1_LB9.indb 3IB_344173_SWWS240C1_LB9.indb 3 14.02.20 12:3314.02.20 12:33

■ 4 │ US-EN
SWWS 240 C1
Safety instructions
This section contains important safety instructions for using
the appliance. This appliance complies with statutory
safety regulations. Improper use may result in personal
injury and property damage.
IMPORTANT SAFETY
INSTRUCTIONS
When using electrical appliances, especially when
children are present, basic safety precautions should
always be followed, including the following:
READ ALL INSTRUCTIONS BEFORE USE!
KEEP AWAY FROM WATER!
DANGER – To reduce the risk of electrocution:
1. Always unplug the appliance immediately
after use.
2. Do not use the appliance while bathing or
showering.
3. Do not place or store the appliance where
it can fall or be pulled into a tub or sink.
4. Do not immerse the appliance, cord or plug
in water or other liquids.
IB_344173_SWWS240C1_LB9.indb 4IB_344173_SWWS240C1_LB9.indb 4 14.02.20 12:3314.02.20 12:33

US-EN │ 5 ■
SWWS 240 C1
5. Do not reach for an appliance that has
fallen into water. Unplug it immediately.
6. Never touch the appliance, power cord
or power plug with wet hands.
7. Do not use the appliance outdoors; use in
dry indoor rooms only.
8. Do not allow any liquid to run over the
appliance’s plug connections.
WARNING ‒ To reduce the risk of burns,
electrocution, fire, or injury to persons:
1. An appliance should never be left unattended
when plugged in.
2. Close supervision is necessary when this
appliance is used by, on, or near children
or individuals with certain disabilities.
3. This product is not intended for use by
persons (including children) with reduced
physical, sensory or mental capabilities or
lack of experience and knowledge, unless
they are supervised by a person who is
responsible for their safety or receive
instructions from this person on how to use
the product. Children should be supervised
to ensure they do not play with the product.
IB_344173_SWWS240C1_LB9.indb 5IB_344173_SWWS240C1_LB9.indb 5 14.02.20 12:3314.02.20 12:33

■ 6 │ US-EN
SWWS 240 C1
4. Cleaning and user maintenance should not
be performed by children, unless they are
being supervised.
5.
Use this appliance only for its intended
use as described in this manual. Use only
accessories/attachments recommended by
the manufacturer.
6. Never operate this appliance if it has a
damaged cord or plug, if it is not working
properly, or if it has been dropped, dam-
aged, or dropped into water. Return the
appliance to a service center for examina-
tion and repair. Under no circumstances
should you open the appliance yourself.
Repairs that are not carried out by a specialist
workshop could lead to physical injuries
and will also invalidate any warranty claims.
7. Keep the cord away from heated surfaces.
8. Never cover the appliance or place it on
soft surfaces, such as a bed or couch.
9. Never use while sleeping.
10. Never drop or insert any object into any
opening or tube.
IB_344173_SWWS240C1_LB9.indb 6IB_344173_SWWS240C1_LB9.indb 6 14.02.20 12:3314.02.20 12:33

US-EN │ 7 ■
SWWS 240 C1
11. Do not use outdoors or operate where
aerosol (spray) products are being used or
where oxygen is being administered.
12. Do not use an extension cord with this
appliance.
13. Provide a stable location for the appliance.
14. Do not apply hot wax near eyes or other
heat-sensitive areas, to any skin injury,
rashes, or surface growth.
15. Fill the appliance with wax only. Do not add
any aggressive substances or substances
containing solvents!
16. Do not let the cord hang over the edge
of the table or the counter where it could
be pulled on by children or tripped over
unintentionally.
17. Unplug from outlet when not in use, in case of
operating malfunctions, and before cleaning.
18. After use, the surfaces of the heating elements
will still have some residual heat.
19. Allow to cool before handling, cleaning, or
storing the appliance.
20. The physiological effects of this appliance
have not been investigated by Intertek.
IB_344173_SWWS240C1_LB9.indb 7IB_344173_SWWS240C1_LB9.indb 7 14.02.20 12:3314.02.20 12:33

■ 8 │ US-EN
SWWS 240 C1
21. Do not touch hot surfaces. Use handles or
knobs.
22. Test hot wax on a small area of the skin
for proper temperature and possible skin
reactions before using it. If you are suscep-
tible to allergic reactions or if you have
circulatory problems, it is recommended
that you consult a physician before using
this appliance.
23. There is a risk of injury if the appliance
is misused. Use the appliance only as
described in the instructions!
FOR HOUSEHOLD USE ONLY!
SAVE THESE INSTRUCTIONS!
Important cord information
This appliance has a polarized plug. To reduce the
risk of electric shock, this plug only fits into a polarized
outlet in one way. If the plug does not completely fit into
the outlet, reverse the plug. If it still does not fit, contact
a qualified electrician. Do not attempt to modify the
plug in any way.
IB_344173_SWWS240C1_LB9.indb 8IB_344173_SWWS240C1_LB9.indb 8 14.02.20 12:3314.02.20 12:33

US-EN │ 9 ■
SWWS 240 C1
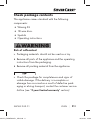
Check package contents
This appliance comes standard with the following
components:
▯ Waxing Kit
▯ 18 wax discs
▯ Spatula
▯ Operating instructions
Risk of suffocation!
► Packaging materials should not be used as a toy.
♦ Remove all parts of the appliance and the operating
instructions from the packaging.
♦ Remove all packing material from the appliance.
► Check the package for completeness and signs of
visible damage. If the delivery is incomplete or
damage has occurred as a result of defective pack-
aging or during transport, contact the customer service
hotline (see "3 year limited warranty" section).
IB_344173_SWWS240C1_LB9.indb 9IB_344173_SWWS240C1_LB9.indb 9 14.02.20 12:3314.02.20 12:33

■ 10 │ US-EN
SWWS 240 C1
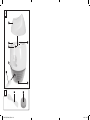
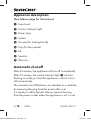
Appliance description
(See fold-out page for illustrations)
1 Inner bowl
2 Control indicator light
3 Power plug
4 Socket
5
Groove (for locking the lid)
6 Tray (for the spatula)
7 Lid
8 Spatula
9 Wax disc
Automatic shut-off
After 60 minutes, the appliance will turn off auto matically.
After 55 minutes, the control indicator light 2 will start
flashing to notify you that the appliance is about to turn
off automatically.
The automatic shut-off feature is not intended as a substitute
for removing the plug from the power after use!
It is merely a safety feature! Always remove the plug
from the power socket when the appliance is not in use!
IB_344173_SWWS240C1_LB9.indb 10IB_344173_SWWS240C1_LB9.indb 10 14.02.20 12:3314.02.20 12:33

US-EN │ 11 ■
SWWS 240 C1
Before first use
♦ Wipe the appliance with a damp cloth inside and
outside to remove any residual dust left over from
transport. Dry it well so that there is no moisture
left in the appliance.
♦ Place the appliance on a level and heat-resistant
surface. Also keep in mind that wax splashes may
drip onto the surface. The surface should therefore
be easy to clean.
Preparing the appliance
PROPERTY DAMAGE!
► Never operate this appliance when it is empty
(without wax).
► Fill the appliance with wax only. Do not add any
aggressive substances or substances containing
solvents!
► Never heat the wax in the plastic packaging.
► Never heat the wax in a microwave oven, over an
open flame, or on a stove.
► Never use pointed or sharp objects to remove
solidified wax from the appliance.
IB_344173_SWWS240C1_LB9.indb 11IB_344173_SWWS240C1_LB9.indb 11 14.02.20 12:3314.02.20 12:33

■ 12 │ US-EN
SWWS 240 C1
Once the appliance is set up on a suitable surface:
♦ Remove the wax discs 9 from its packaging.
♦ Add the required number of wax discs 9 to the inner
bowl 1. Use the following standard values as an
orientation guide. The values may vary.
Body region Number of wax
discs 9
Lower leg approx. 2 pcs. per
lower leg
Armpits 1 pc.
Bikini zone 1 pc.
Entire body (lower leg,
armpits, bikini zone) 6 pcs.
♦ Put the lid 7 on the appliance by placing the plastic
tab in the groove 5 and then turning the lid 7
slightly clockwise (see fold-out page):
♦ Insert the plug 3 of the power cord into the socket 4
on the appliance.
♦ Insert the plug into a power socket. The control
indicator light 2 in the base of the appliance turns
on and the appliance heats up.
♦ Stir the wax occasionally while it is melting.
As soon as the wax discs 9 have melted (it takes about
25–30 minutes for 6 discs), you can start epilating.
IB_344173_SWWS240C1_LB9.indb 12IB_344173_SWWS240C1_LB9.indb 12 14.02.20 12:3314.02.20 12:33

US-EN │ 13 ■
SWWS 240 C1
► If you realize that you need more wax than you
have melted, you can add additional wax discs 9
to the inner bowl 1. Wait until the wax has melted
before you start epilating.
► Never melt more than 6 wax discs 9 at a time.
Epilation
The skin regions you want to epilate should be dry,
clean, and free of skincare products, oils, or fats.
► Before first use, perform a skin test to find out whether
your skin reacts to the treatment. Apply a small amount
of melted wax to an inconspicuous area of the skin.
After removing the wax, check to see whether the
skin reacts in any way over the course of the next
24 hours. If you notice any skin reactions, stop using
this appliance. If in any doubt, seek medical advice.
► If you have a tendency toward ingrown hairs, carry
out peelings frequently. They can prevent the hairs
from growing inward.
► Always pull off the wax strips as close as possible
to the skin surface.
► Make sure that you do not get any wax on your
clothes. Wax residue can be very difficult to remove
and may discolor clothing.
IB_344173_SWWS240C1_LB9.indb 13IB_344173_SWWS240C1_LB9.indb 13 14.02.20 12:3314.02.20 12:33

■ 14 │ US-EN
SWWS 240 C1
Legs
Once the wax discs 9 are completely melted:
♦ Open the lid 7 by turning it slightly counterclockwise
and lifting it upward.
♦ Pick up a little wax using the flattened edge of the
spatula 8. You can wipe off excess wax on the rim
of the appliance.
♦ Apply the wax to the skin in the direction of hair
growth (from the knee toward the heel). The wax
strips should have the approximate thickness of an
orange peel and the area of two spatulas 8 laid
side by side. You may have to add wax. Try to make
sure that one end of the applied wax strip (the end
closer to your heel) is a little thicker as you will need
to be able to grip this end for removal.
♦ After application, you can place the spatula 8 into
the tray 6 on the edge of the appliance so that the
spatula 8 projects over the inner bowl 1.
♦ Wait about 30 - 60 seconds until the wax is dry.
♦ Pull the skin tight with one hand. Grip the wax strip
by the thicker end and pull it off with a rapid movement
against the direction of hair growth (from your ankle
toward your knee).
IB_344173_SWWS240C1_LB9.indb 14IB_344173_SWWS240C1_LB9.indb 14 14.02.20 12:3314.02.20 12:33

US-EN │ 15 ■
SWWS 240 C1
Repeat the process for the remaining areas of skin.
♦ When you are finished with the treatment, pull the
plug from the power socket to turn off the appliance.
The control indicator light 2 turns off.
Armpits
Once the wax disc 9 is completely melted:
♦ Open the lid 7 by turning it slightly counterclockwise
and lifting it upward.
► As armpit hairs tend to grow in different directions,
they need to be removed in at least two steps.
♦ Raise your elbow upward and hold it out behind you.
This tightens the skin in the armpit.
♦ Pick up a little wax using the flattened edge of the
spatula 8. You can wipe off excess wax on the rim
of the appliance.
♦ Apply it immediately from the middle of the armpit
upward in the direction of the elbow. The wax strips
should be roughly the thickness of an orange peel.
Try to make sure that one end of the applied wax
strip (the end closer to your elbow) is a little thicker as
you will need to be able to grip this end for removal.
♦ After application, you can place the spatula 8 into
the tray 6 on the edge of the appliance so that the
spatula 8 projects over the inner bowl 1.
IB_344173_SWWS240C1_LB9.indb 15IB_344173_SWWS240C1_LB9.indb 15 14.02.20 12:3314.02.20 12:33

■ 16 │ US-EN
SWWS 240 C1
♦ Wait about 30–60 seconds until the wax is dry.
♦ Grip the wax strip by the thicker end (the end closer
to your elbow) and pull it off downward with a rapid
movement against the direction of hair growth.
♦ To epilate the lower part of the armpit, apply the wax
from the middle of the armpit toward the bottom.
♦ Wait about 30–60 seconds until the wax is dry.
♦ Grip the wax strip at the lower end and pull it off
upward with a rapid movement against the direction
of hair growth.
♦ When you are finished with the treatment, pull the
plug from the power socket to turn off the appliance.
The control indicator light 2 turns off.
Bikini zone
Once the wax disc 9 is completely melted:
♦ Open the lid 7 by turning it slightly counterclockwise
and lifting it upward.
♦ Pick up a little wax using the flattened edge of the
spatula 8. You can wipe off excess wax on the rim
of the appliance.
♦ After application, you can place the spatula 8 into
the tray 6 on the edge of the appliance so that the
spatula 8 projects over the inner bowl 1.
IB_344173_SWWS240C1_LB9.indb 16IB_344173_SWWS240C1_LB9.indb 16 14.02.20 12:3314.02.20 12:33

US-EN │ 17 ■
SWWS 240 C1
► When epilating the bikini zone, treat only small
areas at a time. The skin is very sensitive.
♦ Tighten the skin with one hand and apply the wax in
the direction of hair growth (toward your inner thigh).
♦ Wait about 30–60 seconds until the wax is dry.
♦ Grip the wax strip by the thicker end (the end closer
to your inner thigh) and pull it off downward with a
rapid movement against the direction of hair growth.
♦ Repeat the process for the remaining areas of skin.
♦ When you are finished with the treatment, pull the
plug from the power socket to turn off the appliance.
The control indicator light 2 turns off.
After epilation
■ Clean the spatula 8 (see section "Cleaning").
■ You can remove small quantities of residual wax from
your skin using baby oil. If you do not have any baby
oil, you can also use olive oil or some other edible
oil.
■ You skin may be slightly reddened after epilation.
This is normal. Run cold water over affected areas to
soothe the skin. If your skin does not recover and/
or you experience a burning sensation, contact a
physician.
IB_344173_SWWS240C1_LB9.indb 17IB_344173_SWWS240C1_LB9.indb 17 14.02.20 12:3314.02.20 12:33

■ 18 │ US-EN
SWWS 240 C1
Cleaning
Risk of electric shock!
► Before cleaning the appliance, disconnect it from the
power supply.
► Never immerse the appliance in water or other
liquids!
Risk of injury!
► Allow the appliance to cool down before cleaning it.
PROPERTY DAMAGE!
► Never use pointed or sharp objects to remove solidi-
fied wax from the appliance!
► Do not use any chemical, abrasive, or aggressive
cleaning agents to clean the appliance!
► You do not need to clean the inner bowl 1 and
remove the wax residues after every use. The wax
remaining in the appliance can be melted and
reused for the next application!
IB_344173_SWWS240C1_LB9.indb 18IB_344173_SWWS240C1_LB9.indb 18 14.02.20 12:3314.02.20 12:33

US-EN │ 19 ■
SWWS 240 C1
♦ Scrape the surplus wax off the spatula 8 on the inside
of the rim of the appliance immediately after use.
♦ Wipe the spatula 8 as well as the rim of the appliance
immediately after use with a cloth moistened with
some baby oil. This will allow you to remove any re-
maining soft wax residue. Preferably use an old cloth
as wax residue is extremely difficult to remove from
textiles. If you do not have any baby oil in the house,
you can also use olive oil or some other edible oil
for cleaning. Make sure that no wax residue remains
in the grooves 5 for locking the lid 7! Wipe the
spatula 8 and the rim afterward with a paper cloth
to remove any remaining oil.
♦ If there is any wax left on the outside of the
appliance, proceed as follows:
–Ensure that the appliance is unplugged but still warm.
–Wipe the surface with a cloth moistened with some
oil.
–Make sure that no wax residue remains in the
grooves 5 for locking the lid 7!
–Remove any oil residue with a clean paper towel.
IB_344173_SWWS240C1_LB9.indb 19IB_344173_SWWS240C1_LB9.indb 19 14.02.20 12:3314.02.20 12:33

■ 20 │ US-EN
SWWS 240 C1
Storage
♦ Once the appliance and the spatula 8 have been
cleaned as described in the "Cleaning" section:
–Lay the spatula 8 in the tray 6 on the edge of
the appliance so that the spatula 8 protrudes
over the inner bowl 1.
–Put the lid 7 on.
–Store the cooled-down appliance in a clean, dry
location.
► If you are unable to remove/turn the lid 7 when you
remove it from storage, there is probably solidified
wax between the lid 7 and the appliance. In this
case, heat up the appliance for about 10 minutes
(depending on the amount of wax) with the lid 7
closed. The wax will soften and the lid 7 can now
be removed.
IB_344173_SWWS240C1_LB9.indb 20IB_344173_SWWS240C1_LB9.indb 20 14.02.20 12:3314.02.20 12:33

US-EN │ 21 ■
SWWS 240 C1
Disposal
Disposal of the appliance
Electrical appliances may not be thrown away as part
of normal household trash. If you can no longer use
your electrical appliance, dispose of it in accordance
with the legal provisions applicable in your state.
This will ensure that old electric appliances are recycled
and environmental pollution is kept to a minimum.
Further information about disposal is available on the
internet at www.epa.gov.
Disposal of the packaging
The packaging protects the appliance from damage
during transport. The packaging materials have been
selected for their environmental friendliness and ease
of disposal, and are therefore recyclable.
Returning the packaging to the material cycle
conserves raw materials and reduces the
amount of waste that is generated. Dispose
of packaging materials that are no longer
needed in accordance with applicable local
regulations.
IB_344173_SWWS240C1_LB9.indb 21IB_344173_SWWS240C1_LB9.indb 21 14.02.20 12:3314.02.20 12:33

■ 22 │ US-EN
SWWS 240 C1
Dispose of the packaging in an environmentally
friendly manner. Note the marking on the
different packaging materials and separate
them accordingly. The packaging materials are
marked with abbreviations (a) and numbers (b)
with the following meanings: 1–7: Plastics,
20–22: Paper and cardboard, 80–98:
Composites.
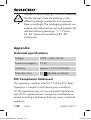
Appendix
Technical specifications
Voltage 120V ~ (AC), 60 Hz
Power consumption 75 W
Capacity approx. 17.9 oz (530ml)
Protection class II / (double insulation)
FCC Compliance Statement
This appliance complies with Part 15 of the FCC Rules.
Operation is subject to the following two conditions:
(1) This appliance may not cause harmful interference,
and (2) this appliance must accept any interference re-
ceived, including interference that may cause undesired
operation.
IB_344173_SWWS240C1_LB9.indb 22IB_344173_SWWS240C1_LB9.indb 22 14.02.20 12:3314.02.20 12:33

US-EN │ 23 ■
SWWS 240 C1
CAUTION: Changes or modifications not expressly
approved by the party responsible for compliance could
void the user’s authority to operate the equipment.
NOTE: This equipment has been tested and found to
comply with the limits for Class B digital devices, pursuant
to part 15 of the FCC rules. These limits are designed to
provide reasonable protection against harmful interfer-
ence in a residential installation. This equipment gener-
ates, uses and can radiate radio frequency energy and,
if not installed and used in accordance with the instruc-
tions, may cause harmful interference to radio communi-
cations. However, there is no guarantee that interference
will not occur in a particular installation.
If this equipment does cause harmful interference to
radio or television reception, which can be determined
by turning the equipment off and on, the user is encour-
aged to try to correct the interference by one or more of
the following measures:
–Reorient or relocate the receiving antenna.
–Increase the separation between the equipment and
the receiver.
–Connect the equipment to an outlet on a circuit differ-
ent from the one to which the receiver is connected.
–Consult the dealer or an experienced radio/TV
technician for help.
IB_344173_SWWS240C1_LB9.indb 23IB_344173_SWWS240C1_LB9.indb 23 14.02.20 12:3314.02.20 12:33

■ 24 │ US-EN
SWWS 240 C1
3 year limited warranty
What does this warranty cover?
The warranty covers:
▯ Damage, breakage or inoperability due to defect.
▯ Damage not caused by normal wear and tear
or failure to follow the safety and maintenance
instructions provided in the user manual.
What is not covered by the warranty?
The warranty does not cover damage caused by:
▯ Normal wear and tear of the product, including
fragile parts (such as switches, glass, etc.);
▯ Improper use or transport;
▯ Disregarding safety and maintenance instructions;
▯ Accidents or acts of nature (e.g. lightning, fire, water,
etc.);
▯ Tampering with the product (such as removing cover,
unscrewing screws etc.)
Consequential and incidental damages are also not
covered under this warranty. However, some states do
not allow the exclusion or limitation of incidental or
consequential damages, so this limitation or exclusion
may not apply to you.
IB_344173_SWWS240C1_LB9.indb 24IB_344173_SWWS240C1_LB9.indb 24 14.02.20 12:3314.02.20 12:33

US-EN │ 25 ■
SWWS 240 C1
What is the period of coverage and warranty
resolution?
The warranty is for 3 years from the date of purchase.
At our discretion, product will either be refunded or
replaced.
What will we not do?
We will not:
▯ Start a new warranty period upon product
exchange;
▯ Repair product.
How to process the warranty?
To initiate, please:
▯ Call customer service at 1 (844) 543-5872
▯ Visit the Website Customer Service Platform at
www.lidl.com/contact-us
or
▯ Visit a LIDL store for further assistance
To ensure the quickest warranty return process, please
have the following available:
▯ The original sales receipt that includes the date
purchased;
▯ The product and manual in the original package;
▯ A statement of the problem.
IB_344173_SWWS240C1_LB9.indb 25IB_344173_SWWS240C1_LB9.indb 25 14.02.20 12:3314.02.20 12:33

■ 26 │ US-EN
SWWS 240 C1
What must you do to keep the warranty in
effect?
▯ Retain the original receipt;
▯ Follow all product instructions;
▯ Do not repair or modify the product.
How does state law relate to this warranty?
This warranty gives you specific legal rights, and you may
also have other rights which vary from state to state. All
implied warranties are limited by the duration and terms
of this warranty. Some states do not allow limitations
on how long an implied warranty lasts, so the above
limitation may not apply to you.
Distributor
LIDL US LLC.
ARLINGTON
VA 22202
IB_344173_SWWS240C1_LB9.indb 26IB_344173_SWWS240C1_LB9.indb 26 14.02.20 12:3314.02.20 12:33

US-ES │ 27 ■
SWWS 240 C1
Contenido
Introducción ........................ 28
Uso previsto ........................ 28
Tipos de advertencias ................ 29
Instrucciones de seguridad ............ 30
Información importante sobre el cable .. 35
Revisión del contenido del paquete ..... 36
Descripción del dispositivo ............ 37
Apagado automático ................. 37
Antes del primer uso ................. 38
Preparación del dispositivo ........... 38
Depilación .......................... 40
Piernas ....................................
41
Axilas. . . . . . . . . . . . . . . . . . . . . . . . . . . . . . . . . . . . .43
Zona del bikini .............................
44
Después de depilar ..........................
46
Limpieza ........................... 46
Almacenamiento .................... 48
Eliminación ......................... 49
Apéndice ........................... 50
Especificaciones técnicas .....................
50
Declaración de conformidad de la FCC ..........
51
Garantía limitada de 3 años ...................
52
Importador ................................
55
IB_344173_SWWS240C1_LB9.indb 27IB_344173_SWWS240C1_LB9.indb 27 14.02.20 12:3314.02.20 12:33

■ 28 │ US-ES
SWWS 240 C1
Introducción
Felicidades por la compra de su nuevo dispositivo.
Ha seleccionado un producto de alta calidad.
El instructivo de uso es parte de este producto.
Contiene información importante sobre seguridad,
uso y eliminación. Antes de usar el producto, familiarícese
con todas las instrucciones de operación y seguridad.
Use el producto solamente como se describe y para la
variedad de aplicaciones especificada. También entregue
este instructivo de operación a cualquier propietario
futuro.
Uso previsto
Este dispositivo está diseñado exclusivamente para la
depilación en las piernas, las axilas y la zona del bikini
en el cuerpo humano. Este dispositivo está diseñado
exclusivamente para usarse en el hogar. No lo use para
fines comerciales.
Cualquier otro uso que no sea el previsto se considera
inadecuado. El fabricante no acepta ninguna responsa-
bilidad por daño causado por el uso inadecuado.
El usuario asume completamente el riesgo.
IB_344173_SWWS240C1_LB9.indb 28IB_344173_SWWS240C1_LB9.indb 28 14.02.20 12:3314.02.20 12:33

US-ES │ 29 ■
SWWS 240 C1
Tipos de advertencias
Los siguientes tipos de advertencias se usan en este
instructivo de operación:
Este es el símbolo de alerta de seguridad. Se
usa para alertarle sobre peligros de lesiones
potenciales. Obedezca todos los mensajes
de seguridad a continuación de este símbolo
para evitar posibles lesiones y la muerte.
► ADVERTENCIA indica una situación peligrosa que, si no
se evita, podría provocar la muerte o lesiones graves.
► PRECAUCIÓN indica una situación peligrosa que,
si no se evita, podría provocar lesiones menores o
moderadas.
► AVISO indica información que se considera importante,
pero no está relacionada con peligro (por ejemplo,
mensajes relacionados con daños materiales).
►Una CONSEJO contiene información adicional que
le ayudará a usar el dispositivo.
IB_344173_SWWS240C1_LB9.indb 29IB_344173_SWWS240C1_LB9.indb 29 14.02.20 12:3314.02.20 12:33

■ 30 │ US-ES
SWWS 240 C1
Instrucciones de seguridad
Esta sección contiene instrucciones de seguridad
importantes para el uso del dispositivo. Este dispositivo
cumple con las normas de seguridad legales. El uso
inadecuado puede provocar lesiones personales y
daños materiales.
INSTRUCCIONES DE
SEGURIDAD IMPORTANTES
Siempre que use dispositivos eléctricos, especialmente
cuando haya niños presentes, debe observar precauciones
básicas de seguridad, como las siguientes:
¡LEA TODAS LAS INSTRUCCIONES ANTES
DEL USO!
¡MANTÉNGASE LEJOS DEL AGUA!
PELIGRO–Para reducir el riesgo de electrocución:
1. Desenchufe siempre el dispositivo inmedia-
tamente después de usarlo.
2. No use el dispositivo mientras se baña en
una tina o regadera.
3. No coloque ni guarde el dispositivo donde
pueda caerse o jalarse hacia una tina o un
lavabo.
IB_344173_SWWS240C1_LB9.indb 30IB_344173_SWWS240C1_LB9.indb 30 14.02.20 12:3314.02.20 12:33

US-ES │ 31 ■
SWWS 240 C1
4. No sumerja el dispositivo, el cable o la
clavija en agua u otros líquidos.
5. No saque un dispositivo que se haya caído
en el agua. Desconéctelo inmediatamente.
6. Nunca toque el dispositivo, el cable de
alimentación ni la clavija con las manos
mojadas.
7.
No use el dispositivo en el exterior; úselo
solamente en habitaciones en el interior.
8. No permita que ningún líquido entre en
contacto con las conexiones de enchufe del
dispositivo.
ADVERTENCIA–Para reducir el riesgo de
quemaduras, electrocución, fuego o lesiones a
personas:
1. Nunca debe dejarse un dispositivo desaten-
dido cuando está conectado.
2. Es necesario supervisar de cerca cuando
este dispositivo sea utilizado por niños, en
ellos o cerca de ellos o por personas con
ciertas discapacidades.
3. Este producto no ha sido fabricado para uso
por parte de personas (incluyendo niños) con
capacidades físicas, sensoriales o mentales
IB_344173_SWWS240C1_LB9.indb 31IB_344173_SWWS240C1_LB9.indb 31 14.02.20 12:3314.02.20 12:33

■ 32 │ US-ES
SWWS 240 C1
limitadas, o falta de experiencia y conoci-
miento, a menos que sean supervisadas por
una persona responsable de su seguridad o
que hayan recibido instrucción de dicha per-
sona con respecto al uso del producto. Los
niños deben ser supervisados para asegurar
que no jueguen con el producto.
4.
Los niños no deben realizar la limpieza y
el mantenimiento del usuario, a menos que
sean supervisados.
5.
Use este dispositivo solamente para el uso
previsto como se describe en este manual.
Use solamente los accesorios que reco-
mienda el fabricante.
6. Nunca opere este dispositivo si el cable
o la clavija están dañados, si no funciona
correctamente, si se ha dejado caer, si está
dañado o si se ha caído en el agua. Envíe
el dispositivo a un centro de servicio para
inspección y reparación. Bajo ninguna
circunstancia abra el dispositivo por su
cuenta. Las reparaciones que no se llevan
a cabo en un taller especializado podrían
resultar en lesiones y también invalidar
cualquier reclamación de garantía.
IB_344173_SWWS240C1_LB9.indb 32IB_344173_SWWS240C1_LB9.indb 32 14.02.20 12:3314.02.20 12:33

US-ES │ 33 ■
SWWS 240 C1
7. Mantenga el cable lejos de superficies
calientes.
8. Nunca cubra el dispositivo ni lo coloque
sobre superficies blandas, tal como en una
cama o sofá.
9. Nunca lo use mientras duerme.
10. Nunca lo deje caer ni introduzca ningún
objeto en ninguna de las aberturas o en el
tubo.
11. No lo use en exteriores ni en lugares donde
se estén usando productos en aerosol, ni
donde se esté administrando oxígeno.
12. No use cables de extensión con este dispo-
sitivo.
13. Coloque el dispositivo en un lugar estable.
14. No aplique cera caliente cerca de los ojos
o de otras áreas sensibles, ni en ninguna
lesión, erupción o crecimiento de la super-
ficie de la piel.
15. Llene el dispositivo solamente con cera.
¡No agregue sustancias agresivas o
sustancias que contengan solventes!
IB_344173_SWWS240C1_LB9.indb 33IB_344173_SWWS240C1_LB9.indb 33 14.02.20 12:3314.02.20 12:33

■ 34 │ US-ES
SWWS 240 C1
16. No permita que el cable cuelgue sobre el
borde de una mesa o barra de cocina, ya
que podría ser jalado por niños o podría
tropezarse con él accidentalmente.
17. Desconéctelo de la toma de corriente si no
lo está usando, en caso de falla de funcio-
namiento o antes de limpiarlo.
18. Después del uso, las superficies de los
elementos de calentamiento aún tendrán
cierto calor residual.
19. Permita que se enfríe antes de manejarlo,
limpiarlo o guardarlo.
20. Intertek no ha estudiado los efectos fisioló-
gicos de este dispositivo.
21. No toque las superficies calientes. Use las
asas o perillas.
22. Pruebe la cera caliente en un área de la
piel para asegurarse de la temperatura
adecuada y ver las posibles reacciones
de la piel antes de usarlo. Si usted es sus-
ceptible a reacciones alérgicas o si tiene
problemas circulatorios, se recomienda
que consulte a un médico antes de usar
este dispositivo.
IB_344173_SWWS240C1_LB9.indb 34IB_344173_SWWS240C1_LB9.indb 34 14.02.20 12:3314.02.20 12:33

US-ES │ 35 ■
SWWS 240 C1
23. Existe el riesgo de lesiones si se usa el
dispositivo de manera indebida. Use el
dispositivo exclusivamente como se des-
cribe en las instrucciones.
¡EXCLUSIVO PARA USO
DOMÉSTICO!
¡CONSERVE ESTE
INSTRUCTIVO!
Información importante sobre el cable
Este dispositivo tiene un enchufe polarizado. Para
reducir el riesgo de descargas eléctricas, este enchufe
se introduce en un contacto polarizado sólo de una
manera. Si el enchufe no se introduce por completo
en el contacto, inviértalo. Si aun así no se introduce,
póngase en contacto con un electricista calificado.
No intente modificar el enchufe de ningún modo.
IB_344173_SWWS240C1_LB9.indb 35IB_344173_SWWS240C1_LB9.indb 35 14.02.20 12:3314.02.20 12:33

■ 36 │ US-ES
SWWS 240 C1
Revisión del contenido del paquete
Este dispositivo se entrega de manera estándar con
los siguientes componentes:
▯ Kit de depilación con cera
▯ 18 discos de cera
▯ Espátula
▯ Instructivo de operación
¡Riesgo de asfixia!
► Los materiales de empaque no deben usarse como
un juguete.
♦ Retire todas las partes del dispositivo y el instructivo
de operación de la caja.
♦ Retire todo el material de empaque del dispositivo.
► Verifique que el paquete esté completo y no muestre
signos visibles de daño. Si la entrega está incom-
pleta o dañada debido al empaque defectuoso
o durante el transporte, póngase en contacto con
la línea directa de Servicio al Cliente (consulte la
sección "Garantía limitada de 3 años").
IB_344173_SWWS240C1_LB9.indb 36IB_344173_SWWS240C1_LB9.indb 36 14.02.20 12:3314.02.20 12:33

US-ES │ 37 ■
SWWS 240 C1
Descripción del dispositivo
(Vea las imágenes en la página desplegable)
1 Recipiente interno
2
Luz indicadora de control
3 Clavija de alimentación
4 Contacto
5 Ranura (para asegurar la tapa)
6
Bandeja (para la espátula)
7 Tapa
8 Espátula
9 Disco de cera
Apagado automático
Después de 60 minutos, el dispositivo se apagará
automáticamente. Después de 55 minutos, la lámpara
indicadora de control 2 comenzará a parpadear para
avisarle que el dispositivo está a punto de apagarse
automáticamente.
¡La función de apagado automático no tiene el propósito
de sustituir la desconexión de la clavija de la toma
de corriente! ¡Es simplemente una característica de
seguridad! Siempre desconecte la clavija de la toma
de corriente cuando no se use el dispositivo.
IB_344173_SWWS240C1_LB9.indb 37IB_344173_SWWS240C1_LB9.indb 37 14.02.20 12:3314.02.20 12:33

■ 38 │ US-ES
SWWS 240 C1
Antes del primer uso
♦ Limpie el dispositivo con una tela humedecida, tanto
por dentro como por fuera, para retirar cualquier
polvo residual que haya quedado debido al
transporte. Séquelo bien, de manera que no quede
humedad en el dispositivo.
♦ Coloque el dispositivo sobre una superficie nivelada
y resistente al calor. Tenga en cuenta también que
las salpicaduras de cera pueden gotear sobre la
superficie. Por lo tanto, la superficie deberá ser fácil
de limpiar.
Preparación del dispositivo
¡DAÑOS MATERIALES!
► Nunca opere este dispositivo cuando esté vacío
(sin cera).
► Llene el dispositivo solamente con cera. ¡No agregue
sustancias agresivas o sustancias que contengan
solventes!
► Nunca caliente la cera en el empaque de plástico.
► Nunca caliente la cera en un horno de microondas,
sobre una flama abierta o en una estufa.
► Nunca use objetos punzantes o afilados para
remover cera solidificada del dispositivo.
IB_344173_SWWS240C1_LB9.indb 38IB_344173_SWWS240C1_LB9.indb 38 14.02.20 12:3314.02.20 12:33

US-ES │ 39 ■
SWWS 240 C1
Una vez que el dispositivo esté colocado sobre una
superficie adecuada:
♦ Retire los discos de cera 9 del empaque.
♦ Agregue la cantidad de discos de cera 9 requerida
al recipiente interno 1. Use los siguientes valores
estándar como guía para orientarse. Los valores
pueden variar.
Región corporal Cantidad de
discos de cera 9
Pantorrilla aprox. 2 piezas por
pantorrilla
Axilas 1 pza.
Zona del bikini 1 pza.
Cuerpo entero
(pantorrilla, axilas y
zona del bikini)
6 piezas
♦ Coloque la tapa 7 en el dispositivo al colocar la
pestaña de plástico en la ranura 5 y luego gire la
tapa 7 ligeramente en sentido de las manecillas
del reloj (consulte la página desplegable):
♦ Inserte la clavija 3 del cable de alimentación en el
contacto 4 en el dispositivo.
IB_344173_SWWS240C1_LB9.indb 39IB_344173_SWWS240C1_LB9.indb 39 14.02.20 12:3314.02.20 12:33

■ 40 │ US-ES
SWWS 240 C1
♦ Inserte la clavija en una toma de corriente. La
lámpara indicadora de control 2 en la base del
dispositivo se enciende y el dispositivo se calienta.
♦ Agite la cera ocasionalmente mientras se derrite.
Una vez que los discos de cera 9 estén derretidos
(esto tarda aproximadamente de 25 a 30 minutos para
6 discos), puede empezar el proceso de depilación.
► Si nota que necesita más cera de la que derritió, puede
agregar discos de cera 9 al recipiente interno 1.
Espere hasta que la cera se derrita para poder
empezar a depilar.
► Nunca derrita más de 6 discos de cera 9 al mismo
tiempo.
Depilación
Las áreas de la piel que desea depilar deberán estar
secas, limpias y libres de productos para el cuidado de
la piel, aceites o grasas.
IB_344173_SWWS240C1_LB9.indb 40IB_344173_SWWS240C1_LB9.indb 40 14.02.20 12:3314.02.20 12:33

US-ES │ 41 ■
SWWS 240 C1
► Antes del primer uso, haga una prueba en la piel
para saber si la piel reacciona al tratamiento.
Aplique una pequeña cantidad de cera derretida en
un área poco visible de la piel. Después de remover
la cera, revise si la piel reacciona de alguna forma
durante las próximas 24 horas. Si nota reacciones
en la piel, deje de usar este dispositivo. En caso de
duda, solicite asesoría médica.
► Si tiene tendencia a vellos que crecen hacia
adentro, lleve a cabo depilaciones frecuentemente.
Esto puede prevenir que el vello crezca hacia
adentro.
► Desprenda siempre las tiras de cera lo más cerca
posible a la superficie de la piel.
► Asegúrese de que la ropa no se impregne de cera.
El residuo de cera puede ser muy difícil de remover
y puede decolorar la ropa.
Piernas
Una vez que los discos de cera 9 estén completamente
derretidos:
♦ Abra la tapa 7 girándola ligeramente en sentido
contrario a las manecillas del reloj y levantándola.
♦ Tome un poco de cera con el borde plano de la
espátula 8. Puede limpiar el exceso de cera en el
borde del dispositivo.
IB_344173_SWWS240C1_LB9.indb 41IB_344173_SWWS240C1_LB9.indb 41 14.02.20 12:3314.02.20 12:33

■ 42 │ US-ES
SWWS 240 C1
♦ Aplique la cera a la piel en dirección del crecimiento
del vello (desde la rodilla hasta el talón). Las tiras
de cera deberán tener el grosor aproximado de una
cáscara de naranja y el área de dos espátulas 8
colocadas una junto a otra. Es posible que tenga
que agregar cera. Trate de asegurar que un extremo
de la tira de cera aplicada (el extremo más cerca al
talón) sea un poco más grueso, ya que necesitará
tomar este extremo para retirarla.
♦ Después de la aplicación, puede colocar la espátula
8 en la bandeja 6 sobre el borde el dispositivo,
de modo que la espátula 8 se proyecte sobre el
recipiente interno 1.
♦ Espere alrededor de 30 a 60 segundos hasta que la
cera se seque.
♦ Presione la piel con firmeza con una mano.
Tome la tira de cera por el extremo más grueso y
despréndala con un movimiento rápido en contra de
la dirección del crecimiento del vello (desde el tobillo
hacia la rodilla).
Repita el proceso en las áreas restantes de la piel.
♦ Cuando termine con el tratamiento, desenchufe
la clavija de la toma de corriente para apagar
el dispositivo. La luz indicadora de control 2 se
apaga.
IB_344173_SWWS240C1_LB9.indb 42IB_344173_SWWS240C1_LB9.indb 42 14.02.20 12:3314.02.20 12:33

US-ES │ 43 ■
SWWS 240 C1
Axilas
Una vez que el disco de cera 9 esté completamente
derretido:
♦ Abra la tapa 7 girándola ligeramente en sentido
contrario a las manecillas del reloj y levantándola.
► Puesto que el vello de las axilas tiende a crecer en
diferentes direcciones, necesita depilarse al menos
en dos pasos.
♦ Levante el codo y sosténgalo detrás del cuerpo.
Esto tensa la piel de la axila.
♦ Tome un poco de cera con el borde plano de la
espátula 8. Puede limpiar el exceso de cera en el
borde del dispositivo.
♦ Aplíquela inmediatamente desde el centro de la
axila hacia arriba en dirección del codo. Las tiras
de cera deberán tener aproximadamente el grosor
de una cáscara de naranja. Trate de asegurar que
un extremo de la tira de cera aplicada (el extremo
más cerca al codo) sea un poco más grueso, ya que
necesitará tomar este extremo para retirarla.
♦ Después de la aplicación, puede colocar la espátula
8 en la bandeja 6 sobre el borde el dispositivo,
de modo que la espátula 8 se proyecte sobre el
recipiente interno 1.
IB_344173_SWWS240C1_LB9.indb 43IB_344173_SWWS240C1_LB9.indb 43 14.02.20 12:3314.02.20 12:33

■ 44 │ US-ES
SWWS 240 C1
♦ Espere alrededor de 30 a 60 segundos hasta que la
cera se seque.
♦ Tome la tira de cera por el extremo más grueso (el
extremo más cerca del codo) y despréndala hacia
abajo con un movimiento rápido en contra de la
dirección del crecimiento del vello.
♦ Para depilar la parte inferior de la axila, aplique
la cera desde el centro de la axila hacia la parte
inferior.
♦ Espere alrededor de 30 a 60 segundos hasta que la
cera se seque.
♦ Tome la tira de cera por el extremo inferior y
despréndala hacia arriba con un movimiento rápido
en contra de la dirección del crecimiento del vello.
♦ Cuando termine con el tratamiento, desenchufe
la clavija de la toma de corriente para apagar
el dispositivo. La luz indicadora de control 2 se
apaga.
Zona del bikini
Una vez que el disco de cera 9 esté completamente
derretido:
♦ Abra la tapa 7 girándola ligeramente en sentido
contrario a las manecillas del reloj y levantándola.
IB_344173_SWWS240C1_LB9.indb 44IB_344173_SWWS240C1_LB9.indb 44 14.02.20 12:3314.02.20 12:33

US-ES │ 45 ■
SWWS 240 C1
♦ Tome un poco de cera con el borde plano de la
espátula 8. Puede limpiar el exceso de cera en el
borde del dispositivo.
♦ Después de la aplicación, puede colocar la espátula
8 en la bandeja 6 sobre el borde el dispositivo,
de modo que la espátula 8 se proyecte sobre el
recipiente interno 1.
► Durante la depilación en la zona del bikini, trate
solamente áreas pequeñas cada vez. La piel es
muy sensible.
♦ Tense la piel con una mano y aplique la cera en
dirección del crecimiento del vello (hacia la parte
interna del muslo).
♦ Espere alrededor de 30 a 60 segundos hasta que
la cera se seque.
♦ Tome la tira de cera por el extremo más grueso (el
extremo más cerca de la parte interna del muslo) y
despréndala hacia abajo con un movimiento rápido
en contra de la dirección del crecimiento del vello.
♦ Repita el proceso en las áreas restantes de la piel.
♦ Cuando termine con el tratamiento, desenchufe
la clavija de la toma de corriente para apagar
el dispositivo. La luz indicadora de control 2 se
apaga.
IB_344173_SWWS240C1_LB9.indb 45IB_344173_SWWS240C1_LB9.indb 45 14.02.20 12:3314.02.20 12:33

■ 46 │ US-ES
SWWS 240 C1
Después de depilar
■ Limpie la espátula 8 (vea la sección "Limpieza").
■ Puede remover pequeñas cantidades de cera
residual de la piel con aceite para bebé. Si no tiene
aceite para bebé, puede usar aceite de oliva o algún
otro aceite comestible.
■ Su piel puede enrojecerse ligeramente después de la
depilación. Esto es normal. Aplique agua fría en las
zonas afectadas para aliviar la piel. Si la piel no se
recupera o si experimenta sensación de ardor, acuda
a un médico.
Limpieza
¡Riesgo de descarga eléctrica!
► Antes de limpiar el dispositivo, desconéctelo de la
fuente de alimentación.
► ¡Nunca sumerja el dispositivo en agua u otro líquido!
¡Riesgo de lesiones!
► Permita que el dispositivo se enfríe antes de limpiarlo.
IB_344173_SWWS240C1_LB9.indb 46IB_344173_SWWS240C1_LB9.indb 46 14.02.20 12:3314.02.20 12:33

US-ES │ 47 ■
SWWS 240 C1
¡DAÑOS MATERIALES!
► ¡Nunca use objetos punzantes o afilados para
remover cera solidificada del dispositivo!
► ¡No use ningún agente de limpieza químico, abrasivo
o agresivo para limpiar el dispositivo!
► No necesita limpiar el recipiente interno 1 y remover
los residuos de cera después de cada uso. ¡La cera
que queda en el dispositivo puede derretirse y
volver a usarse en la siguiente aplicación!
♦ Raspe la cera excedente de la espátula 8 en el lado
interno del borde del dispositivo inmediatamente
después del uso.
♦ Limpie la espátula 8 así como el borde del dispositivo
inmediatamente después de cada uso con una tela
humedecida en aceite para bebé. Esto le permitirá
remover cualquier residuo de cera que aún esté
blando. De preferencia, use una tela usada, ya que
el residuo de cera es sumamente difícil de remover
de los textiles. Si no tiene aceite para bebé en la
casa, puede usar aceite de oliva o algún otro aceite
comestible para limpiar.
IB_344173_SWWS240C1_LB9.indb 47IB_344173_SWWS240C1_LB9.indb 47 14.02.20 12:3314.02.20 12:33

■ 48 │ US-ES
SWWS 240 C1
¡Asegúrese de que no queden residuos de cera en
las ranuras 5 para cerrar la tapa 7! Limpie la
espátula 8 y el borde posteriormente con una tela
de papel para eliminar el aceite que quede.
♦ Si queda cera en la parte externa del dispositivo,
proceda de la forma siguiente:
–Asegúrese de que el dispositivo esté desconectado
pero aún caliente.
–Limpie la superficie con una tela humedecida en
un poco de aceite.
–¡Asegúrese de que no queden residuos de cera en
las ranuras 5 para cerrar la tapa 7!
–Remueva cualquier residuo de aceite con una
toalla de papel limpia.
Almacenamiento
♦ Una vez que el dispositivo y la espátula 8 estén
limpios como se describe en la sección "Limpieza":
–Coloque la espátula 8 en la bandeja 6 sobre el
borde del dispositivo de modo que la espátula 8
sobresalga sobre el recipiente interno 1.
–Coloque la tapa 7.
–Guarde el dispositivo enfriado en un lugar limpio
y seco.
IB_344173_SWWS240C1_LB9.indb 48IB_344173_SWWS240C1_LB9.indb 48 14.02.20 12:3314.02.20 12:33

US-ES │ 49 ■
SWWS 240 C1
► Si no puede quitar o girar la tapa 7 después de
haber estado guardado el dispositivo, probablemente
haya cera solidificada entre la tapa 7 y el dispositivo.
En este caso, caliente el dispositivo durante alrededor
de 10 minutos (dependiendo de la cantidad de cera)
con la tapa 7 cerrada. La cera se ablandará y
ahora la tapa 7 puede quitarse.
Eliminación
Eliminación del dispositivo
Los dispositivos eléctricos no deben ser desechados
como parte de la basura doméstica normal. Si ya no
puede usar su dispositivo, elimínelo de conformidad
con las disposiciones legales aplicables en su estado.
Esto asegura que los dispositivos eléctricos usados sean
reciclados y la contaminación ambiental se mantenga
a un nivel mínimo. Puede encontrar más información
sobre la eliminación de desechos en Internet en
www.epa.gov.
Eliminación del empaque
El empaque protege al dispositivo contra daños
durante el transporte. Los materiales de empaque han
sido seleccionados por su compatibilidad ambiental y
facilidad de eliminación y, por lo tanto, son reciclables.
IB_344173_SWWS240C1_LB9.indb 49IB_344173_SWWS240C1_LB9.indb 49 14.02.20 12:3314.02.20 12:33

■ 50 │ US-ES
SWWS 240 C1
Devolver el empaque al ciclo de materiales
conserva las materias primas y reduce la
cantidad de desechos que se generan.
Elimine los materiales de empaque que ya
no se necesitan de conformidad con las
normas locales aplicables.
Deseche todos los materiales de empaque
de una manera compatible con el medio
ambiente. Observe las marcas en los diferentes
materiales de empaque y sepárelos según sea
conveniente. Los materiales de empaque están
marcados con abreviaturas (a) y números (b)
con los siguientes significados: 1–7: Plásticos:
20–22: Papel y cartón, 80–98: Materiales
compuestos.
Apéndice
Especificaciones técnicas
Voltaje 120 V ~ (CA), 60 Hz
Consumo de
energía 75W
Capacidad aprox. 530 ml (17.9 oz)
Clase de
protección II / (doble aislamiento)
IB_344173_SWWS240C1_LB9.indb 50IB_344173_SWWS240C1_LB9.indb 50 14.02.20 12:3314.02.20 12:33

US-ES │ 51 ■
SWWS 240 C1
Declaración de conformidad de la FCC
Este dispositivo cumple con la Parte 15 del Reglamento
de la FCC. La operación está sujeta a las dos siguientes
condiciones:
(1) Este dispositivo no puede causar interferencia
dañina y (2) este dispositivo debe aceptar cualquier
interferencia recibida, incluyendo interferencia que
pueda causar operación no deseable.
PRECAUCIÓN: Los cambios o modificaciones no
aprobados expresamente por la parte responsable del
cumplimiento normativo podrían invalidar la autoridad
del usuario de operar este equipo.
NOTA: Este equipo se ha probado y se ha determinado
que cumple con los límites de los dispositivos digitales
Clase B, de conformidad con la parte 15 del reglamento
de la FCC. Estos límites están diseñados para propor-
cionar protección razonable contra interferencia dañina
en una instalación residencial. Este equipo genera, usa
y puede emitir energía de radiofrecuencia y, si no se
instala y usa de acuerdo con las instrucciones, puede
causar interferencia dañina a las comunicaciones de
radio. Sin embargo, no hay garantía de que no ocurrirá
interferencia en una instalación en particular.
Si este equipo causa interferencia dañina a la recepción
de radio o televisión, lo cual puede determinarse al
apagar y encender el equipo, se aconseja al usuario
intentar corregir la interferencia mediante una o más de
las siguientes medidas:
IB_344173_SWWS240C1_LB9.indb 51IB_344173_SWWS240C1_LB9.indb 51 14.02.20 12:3314.02.20 12:33

■ 52 │ US-ES
SWWS 240 C1
–Reoriente o reubique la antena receptora.
–Incremente la distancia entre el equipo y el receptor.
–Conecte el equipo en una toma de un circuito eléctrico
diferente a la que está conectado el receptor.
–Consulte al distribuidor o a un técnico experimentado
en radio o televisión para solicitar ayuda.
Garantía limitada de 3 años
¿Lo que cubre la presente garantía?
La garantía incluye:
▯ Daños, quebraduras o incapacidad para funcionar
debido a defectos.
▯ Daños que no hayan sido causados por el desgaste
propio del uso o por no seguir las instrucciones de
seguridad y mantención incluidas en el manual para
el usuario.
¿Lo que no cubre esta garantía?
La garantía no cubre daños causados por:
▯ El desgaste propio del uso del producto, incluidas
las partes frágiles (como interruptores, piezas de
vidrio, etc.).
▯ Uso o transporte no indicado del producto.
▯ Desatención a las instrucciones de seguridad y
mantención.
IB_344173_SWWS240C1_LB9.indb 52IB_344173_SWWS240C1_LB9.indb 52 14.02.20 12:3314.02.20 12:33

US-ES │ 53 ■
SWWS 240 C1
▯ Accidentes o causas de fuerza mayor (e.g. relámpa-
gos, incendio, inundación, etc.).
▯ Manipulación mal intencionada del producto (retirar
la cubierta, tornillos, etc.).
La presente garantía tampoco cubre daños indirectos
o emergentes. Sin embargo algunos estados no
permiten la exclusión o limitación de daños indirectos
o emergentes, por lo que dicha exclusión o limitación
pudiera no aplicarse en su caso.
¿Período de cobertura y resolución de la
garantía?
La garantía es válida por 3 años a partir de la fecha
de compra. La empresa, según lo estime conveniente,
devolverá el dinero o repondrá el producto.
¿La empresa no?
▯ Dará inicio a un nuevo período de garantía al hacerse
el cambio del producto.
▯ Reparará el producto.
¿Cómo se tramita la garantía?
Recomendamos que primero usted:
▯ Llame al Servicio de atención al cliente al 1 (844)
543-5872.
▯ Visite el Portal de atención al cliente en
www.lidl.com/contact-us
IB_344173_SWWS240C1_LB9.indb 53IB_344173_SWWS240C1_LB9.indb 53 14.02.20 12:3314.02.20 12:33

■ 54 │ US-ES
SWWS 240 C1
o
▯ Visite una de nuestras tiendas LIDL en caso de cualquier
inquietud.
A fin de acelerar el trámite de la garantía, tenga a bien
contar con lo siguiente:
▯ Recibo de venta original que incluya la fecha de compra.
▯ Producto y manual en su empaque original.
▯ Descripción del problema.
¿Qué debe hacer usted para mantener la
garantía vigente?
▯ Guardar el recibo original.
▯ Seguir todas las instrucciones para el uso del producto.
▯ No realizar ninguna reparación ni alteración al
producto.
¿De qué manera influyen las leyes estatales
con esta garantía?
La presente garantía le otorga derechos legales
específicos, y pudiera usted contar con otros derechos
los cuales varían de un estado a otro. Todas las
garantías implícitas se encuentran limitadas
a la duración y términos de la presente garantía.
Algunos estados no permiten limitaciones al período de
tiempo y términos de la garantía implícita, por lo que
dichas limitaciones pudieran no aplicarse en su caso.
IB_344173_SWWS240C1_LB9.indb 54IB_344173_SWWS240C1_LB9.indb 54 14.02.20 12:3314.02.20 12:33

US-ES │ 55 ■
SWWS 240 C1
Importador
LIDL US LLC.
ARLINGTON
VA 22202
IB_344173_SWWS240C1_LB9.indb 55IB_344173_SWWS240C1_LB9.indb 55 14.02.20 12:3314.02.20 12:33

■ 56 │ US-ES
SWWS 240 C1
IB_344173_SWWS240C1_LB9.indb 56IB_344173_SWWS240C1_LB9.indb 56 14.02.20 12:3314.02.20 12:33

LIDL US LLC.
ARLINGTON
VA 22202
Made in /Hecho en: China
Last Information Update · Estado de las informaciones:
02 / 2020 · Ident.-No.: SWWS240C1-012020-2
WAXING KIT
KIT DE DEPILACIÓN CON CERA SWWS 240 C1
IAN 344173_1910 IAN 344173_1910
US - EN Operating instructions Page 1
US - ES Instrucciones de uso Página 27
Before reading, unfold the page containing the illustrations and familiarize
yourself with all functions of the device.
Antes de empezar a leer abra la página que contiene las imágenes y, en
seguida, familiarícese con todas las funciones del dispositivo.
WAXING KIT
Operating instructions
KIT DE DEPILACIÓN CON CERA
Instrucciones de uso
9
CV_344173_SWWS240C1_LB9.indd 1-3CV_344173_SWWS240C1_LB9.indd 1-3 14.02.20 12:3914.02.20 12:39
-
 1
1
-
 2
2
-
 3
3
-
 4
4
-
 5
5
-
 6
6
-
 7
7
-
 8
8
-
 9
9
-
 10
10
-
 11
11
-
 12
12
-
 13
13
-
 14
14
-
 15
15
-
 16
16
-
 17
17
-
 18
18
-
 19
19
-
 20
20
-
 21
21
-
 22
22
-
 23
23
-
 24
24
-
 25
25
-
 26
26
-
 27
27
-
 28
28
-
 29
29
-
 30
30
-
 31
31
-
 32
32
-
 33
33
-
 34
34
-
 35
35
-
 36
36
-
 37
37
-
 38
38
-
 39
39
-
 40
40
-
 41
41
-
 42
42
-
 43
43
-
 44
44
-
 45
45
-
 46
46
-
 47
47
-
 48
48
-
 49
49
-
 50
50
-
 51
51
-
 52
52
-
 53
53
-
 54
54
-
 55
55
-
 56
56
-
 57
57
-
 58
58
-
 59
59
-
 60
60


Silvercrest 344173 El manual del propietario
- Tipo
- El manual del propietario
en otros idiomas
- English: Silvercrest 344173 Owner's manual
Artículos relacionados
Otros documentos
-
Solac d212 El manual del propietario
-
Solac DEPIL CENTER DC7500 El manual del propietario
-
Samsung ME21F707MJT User Manual (ver.1.0) Nov 5, 2013 ENGLISH, SPANISH 0.0 pdf
-
Samsung ME21F707MJT/AA-01 El manual del propietario
-
 Kenmore Elite 40188529900 El manual del propietario
-
Kenmore 40185053010 El manual del propietario
