La página se está cargando...

8 a.m. - 7 p.m., EST, Monday - Friday, 9 a.m. - 6 p.m., EST, Saturday
1-877-527-0313
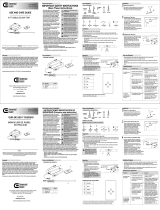
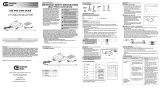
USE AND CARE GUIDE
24 FT FLEXIBLE LED LIGHT STRIP
Installation
Installation
Operation
Operating the remote
BUTTON DESCRIPTIONS
Part Description
LED light strip
LED driver
B
A
C
Remote
Troubleshooting
The power supply wire is not
securely connected to the light
strip.
The driver does not have power.
Problem
Possible Cause
Solution
The light strip does
not turn on.
An additional
connected section
of light strip does
not turn on.
The remote does not have a
direct line of sight to the IR eye
on the driver or is too far away.
The connections are not secure,
or the polarity is incorrect.
Check the connections and make sure
the connector plug is securely
connected to the copper connections
of both light strips. Make sure the
polarities match ( + to +, etc).
Plug the driver into a live 120V
receptacle.
Check the connection and make sure
the power supply wire is securely
connected to the copper connections
of the light strip.
Hardware not shown to actual size.
HARDWARE INCLUDED
A
B
C
3
Installing the LED driver
Clean the location in which the light strip (A) is
to be mounted to make sure it is free from dirt,
dust, and oil, or anything that will inhibit
the adhesive from making solid contact to the
mounting surface.
Install the LED driver (B) in the desired location
using the mounting screws (CC) and mounting
holes provided on the LED driver (B).
Connect the female plug end of the LED
light strip (A) to the male plug of the LED
driver (B).
Questions, problems, missing parts? Before returning to store,
HOMEDEPOT.COM
Safety Information
Contact the Customer Service Team at 1-877-527-0313 or visit www.homedepot.com.
THANK YOU
Warranty
PACKAGE CONTENTS
Aim the remote directly at the eye attached to
the driver (B), and press the ON button and
additional control buttons on the remote (C).
Pull out the plastic battery barrier sheet from
the battery compartment located on the
bottom of the remote (C).
Peel off the adhesive backing on the light strip (A),
and secure the light strip (A) to the desired location
Place the retaining clip (DD) on to the light strip and
secure with the mounting screw (CC).
Care and Cleaning
Check to make sure the plastic battery
barrier sheet has been removed. Check
to make sure the polarity of the
batteries is correct. Check to make sure
the batteries are not dead.
Check the line of sight and move the IR
eye on the driver accordingly. Make
sure that the distance between the
remote control and the IR eye on the
driver is within 22 ft. (7 m).
Pre-Installation
Batteries in the remote are
dead, not installed correctly, or
the plastic barrier sheet has
not been removed.
call Commerial Electric Customer Service
Pre-Installation
A
DD
CC
C
eye
B
A
BB
AA
CC
B
Quantity
1
1
1
D
Coupler
1
Preparing the light strip (optional)
2
Installing the light strip
NOTE:
D
Retain this manual for future use.
We strive to continually create quality products designed to enhance your home. Visit us online to see our full line of
products available for your home improvement needs. Thank you for choosing Commercial Electric!
□
□
□
□
□
□
□
□
□
□
□
□
□
□
□
□
□
□
□
□
□
□
□
□
□
□
□
□
□
□
□
Observe proper polarity when changing batteries.
The lamp may not light if the batteries are
inserted incorrectly.
Reorient or relocate the receiving antenna.
Increase the separation between the equipment and receiver.
Connect the equipment into an outlet on a circuit different from that to which the receiver is
connected.
Consult the dealer or an experienced radio/TV technician for help.
When not using this product for extended periods,
remove the batteries to prevent product damage
due to battery leakage.
OFF
OFF
Brighten
Dim
ON
ON
Before attempting to clean the light strip, unplug the driver box from the power outlet.
To clean the light strip, use a clean, dry or slightly damp cloth.
Allow the light strip and components to dry thoroughly before plugging the driver unit back into the
outlet.
Do not use any cleaners with chemicals, solvents, or harsh abrasives, as damage to the light strip
may occur.
Item #1001798987
Model #DC9521WH-A
IMPORTANT SAFETY INSTRUCTIONS
(Save These Instructions)
This portable luminaire has a polarized plug (one
blade is wider than the other) as a feature to
r
only one way into a polarized outlet. If the plug
does not insert fully into the outlet, reverse the
electrician for assistance. Never use this product
with an extension cord unless the plug can be
fully inserted. Do not alter the plug in any way,
as serious injury or damage may result.
CAUTION:
To avoid electrical shock or
product failure, suitable for wet locations.
CAUTION:
damage, or early lamp failure, this lamp should
not be used in heat-producing appliances.
WARNING: D
o not connect another strip to
this single adapter.
WARNING: Risk of Electric Shock. Install only
to a covered Class A GFCI receptacle that has an
enclosure that is weatherproof with the
attachment plug cap inserted or removed.
WARNING:
unit not expressly approved by the party
responsible for compliance could void the
user’s authority to operate the equipment.
AA
Wire clip A
x 3
BB
Wire clip B
x 3
DD
Retaining clip
x 12
CC
Mounting screw
x 26
NOTE: The maximum operating distance, with new
batteries, between the remote (C) and the eye on the
driver (B) is approximately 7 m (22 ft.) with a
direct line of sight between the two.
CAUTION:
Risk of Fire - Do not operate the
unit while coiled.
To operate the Brighten and Dim controls, hold the button down
until you reach the desired light output.
OFF
ON
1-877-527-0313
GUÍA DE USO Y CUIDADO
BARRA DE LUCES LED, FLEXIBLE,
DE 24 PIES (7,31 M)
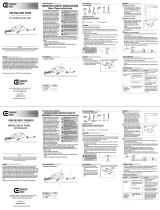
Instalación
Operation
Cómo operar el control remoto
DESCRIPCIÓN DE LOS BOTONES
Pieza
Descripción
Barra de luces LED
Controlador LED
B
A
C
Control remoto
Resolución de problemas
El cable de suministro no está
conectado de forma segura a la
barra de luces.
El controlador no tiene energía.
Problema
Cause posible
Solución
Las barra de luces
no enciende.
No enciende una
sección adicional
conectada de la
barra de luces.
El control remoto no tiene una
línea directa al receptor de
infrarrojos del controlador o
está muy alejado.
Las conexiones no están
seguras o la polaridad no es la
correcta.
que el enchufe conector esté
conectado de forma segura a las
conexiones de cobre de ambas barras
de luces. Asegúrate de que las
polaridades coincidan (+ con +, etc.).
Enchufa el controlador en un
receptáculo de 120 V.
el cable de suministro esté conectado
de forma segura a las conexiones de
cobre de la barra de luces.
HERRAJE INCLUIDO
3
Cómo instalar el controlador LED
Limpia el lugar donde montarás la barra de
luces (A) para asegurarte de que no tenga
polvo, suciedad, aceite o cualquier sustancia
que pueda evitar que el adhesivo haga
Instala el controlador LED (B) en la ubicación
deseada usando los tornillos de montaje (CC)
de LED (B).
Conecta el extremo del enchufe hembra de
la barra de luces LED (A) en el enchufe macho
del controlador LED (B).
HOMEDEPOT.COM
Información sobre la seguridad
Comuníquese con el equipo de Atención al Cliente al 1-877-527-0313 o visite www.homedepot.com.
GRACIAS
Garantía
CONTENIDO DEL PAQUETE
Apunta el control remoto directamente al
receptor del controlador (B) y oprime el botón
de ENCENDIDO, y los demás botones del
control remoto (C).
Quita la tapa de plástico del compartimiento
de la batería localizado en la base del control
remoto (C).
Retira el reverso del adhesivo de la barra de
luces (A) y fíjala en la ubicación deseada
Cuidado y limpieza
seguridad de las baterías fue quitada.
Asegúrate de que la polaridad de las
baterías sea la correcta. Asegúrate de
que las baterías no estén agotadas.
receptor de infrarrojos del controlador
según corresponda. Asegúrate de que
la distancia entre el control remoto y el
receptor de infrarrojos del controlador
sea 22 pies o 7 metros, o menor.
Previo a la instalación
Las baterías del control remoto
están agotadas, no están
instaladas correctamente, o no
se ha quitado la tapa de
plástico.
Previo a la instalación
receptor
Cantidad
1
1
1
D
Acoplador
1
Cómo instalar la barra de luces
Asegura el cable de suministro y el cable del
ojo adjunto en la ubicación deseada con los
sujetadores de cables A (AA) incluidos.
NOTA: Los herrajes no se muestran en su tamaño real.
Conserva este manual para uso en el futuro.
□
□
□
□
□
□
□
□
□
□
□
□
□
□
□
□
□
□
□
□
□
□
□
□
Observa la polaridad correcta cuando cambies las
baterías. La lámpara no se prenderá si las baterías
están puestas incorrectamente.
Cuando no estés usando este producto en períodos
de largo tiempo, quite las baterías para prevenir
la batería.
OFF
ON
OFF
APAGADO
Atenuar
ON
ENCENDIDO
Antes de intentar limpiar la barra de luces, desenchufa la caja del controlador del tomacorriente.
Para limpiar la barra de luces, usa un paño limpio y seco o ligeramente humedecido.
Espera a que la barra de luces y sus componentes se sequen completamente antes de volver a
conectar la unidad del controlador en el tomacorriente.
No uses ningún limpiador con químicos, solventes o productos abrasivos, ya que podrían dañar la
barra de luces.
Artículo #1001798987
Modelo #DC9521WH-A
INSTRUCCIONES IMPORTANTES DE
SEGURIDAD (Conserve este instructivo)
PRECAUCIÓN:
Para evitar choque eléctrico
PRECAUCIÓN:
Para evitar fuego, daños del
producto, o fallos tempranos de la lámpara,
esta no bebe usarse en electrodomésticos que
produzcan calor.
ADVERTENCIA: No conectar otra barra a
este adaptador simple.
ADVERTENCIA: Los cambios o
expresamente aprobados por la parte
responsable de su cumplimiento con las
regulaciones podrían anular la autoridad del
usuario para usar este equipo.
NOTA: La distancia máxima de
funcionamiento, con baterías nuevas,
entre el control remoto (C) y el receptor
del controlador (B) es de aproximadamente
7 metros (22 pies) con una línea directa
entre ambos.
PRECAUCIÓN: Riesgo de incendio. No opere
la unidad mientras en espiral.
o daño del producto, apto para lugares
mojados.
AA
Grapa para cable A
x 3
BB
Grapapara cable B
x 3
DD
Gancho sujetador
x 12
CC
Tornillo de montaje
x 26
2
Coloca el gancho sujetador (DD) en la barra de luz
y asegúralo con el tornillo de montaje (CC).
□
Secure the power supply wire to the desired
location using the wire clips A (AA) provided.
Secure the attached eye wire to the desired
location using the wire clips B (BB) provided.
□
□
Asegura el cable de suministro en la ubicación
deseada con los sujetadores de cables (AA) incluidos.
Asegura el terminal ojo adjunto en la ubicación
deseada con los sujetadores de cables B (BB) incluidos.
C
B
Para operar los controles Brighten (aumentar la intensidad) y Dim (reducir la intensidad),
mantén presionado el botón hacia abajo hasta alcanzar la intensidad de luz deseada
esforzamos continuamente para crear productos de calidad diseñados para mejorar tu hogar. Visítanos en línea
para ver nuestra línea completa de productos disponibles para tus necesidades de mejoramiento del hogar.
¡Gracias por elegir a Commercial Electric!
□
Esta luminaria portátil cuenta con un enchufe
polarizado (una clavija es más ancha que la otra)
eléctrica. Este enchufe encajará sólo de una forma
en un tomacorriente polarizado. Si el enchufe no
se inserta completamente en el tomacorriente,
voltéalo. Si aun así no encaja bien, comunícate
con un electricista autorizado para pedirle
asistencia. Nunca la utilices con una extensión, a
menos que el enchufe pueda insertarse
completamente. No alteres el enchufe ya que esto
puede provocar lesiones o daños graves.
□
□
□
□
Reorienta o reubiqua la antena receptora.
Aumenta la separación entre el equipo y el receptor.
Conecta el equipo a un tomacorriente de un circuito diferente al circuito al que está conectado el
receptor.
Pide ayuda a un concesionario o técnico de radio/TV experimentado.
This equipment has been tested and found to
comply with the limits for a Class B digital device,
pursuant to Part 15 of the FCC Rules. These limits
are designed to provide reasonable protection
against harmful interference in a residential
installation. This equipment generates, uses and
can radiate radio frequency energy and, if not
installed and used in accordance with the instructions,
may cause harmful interference to radio communications. However, there is no guarantee that
interference will not occur in a particular installation. If this equipment does cause harmful interference
to radio ortelevision reception, which can be determined by turning the equipment off and on, the user
is encouraged to try to correct the interference by one or more of the following measures:
Este equipo ha sido probado y se ha determinado
que cumple con los límites para los equipos digitales
de Clase B, en consonancia con la Parte 15 de las
Regulaciones de la FCC. Estos límites están
diseñados para brindar una protección razonable
contra la interferencia dañina en las instalaciones
residenciales. Este equipo genera, usa y puede
irradiar energía de radiofrecuencia y, de no instalarse y usarse según las instrucciones, pudiera
ocasionar interferencia dañina a las comunicaciones radiales. Sin embargo,no existe garantía de que
no se producirá interferencia en una instalación particular. Si este equipo ocasionara interferencia
dañina a la recepción radial o televisiva, lo que se puede determinar apagando y encendiendo el equipo,
se le exhorta al usuario a eliminar la interferencia mediante una o varias de las siguientes medidas:
ADVERTENCIA: Riesgo de descarga
eléctrica. Instale solamente a un enchufe de
clase A GFCI cubierto que cuenta con un recinto
que es resistente a la intemperie con la tapa de
enchufe insertado o eliminado.
TOOLS REQUIRED
Safety goggles
Scissors
Phillips
screwdriver
Drill
Hammer
HERRAMIENTAS REQUERIDAS
Lentes protectores
Tijeras
Destornillador Phillips
Taladro
Martillo
3-YEARS LIMITED WARRANTY
of three years from the date of purchase. If within this period the product is found to be defective in
material or workmanship, the product must be returned, with a copy of the bill of sale as proof of purchase,
to the original place of purchase. The manufacturer will, at its option, repair, replace, or refund the
becoming damaged due to misuse, accidental damage, improper handling and/or installation, and
exclusions or limitations on an implied warranty, so the above exclusions and limitations may not apply.
GARANTÍA LIMITADA DE 3 AÑOS
El fabricante garantiza que esta lámpara estará libre de defectos en materiales y mano de obra por un
periodo de tres años a partir de la fecha de su compra. Si durante este lapso, el producto resulta
defectuoso en cuanto a material omano de obra, deberá devolverlo al lugar de la compra original, junto con
una copia de la factura de venta comocomprobante de la compra. El fabricante, según su criterio, reparará,
sustituirá o reembolsará el precio de la compra alcomprador o consumidor original. Esta garantía no cubre
los focos ni que la luminaria resulte dañado debido a un maluso, daño accidental, manejo o instalación
o emergentes. Puesto que algunos estados no permiten las exclusiones o limitacionesen una garantía
implícita, es posible que las exclusiones y limitaciones anteriores no se apliquen. Esta garantía le brinda
A
B
C
D
1
□
□
□
□
The LED light strip (A) can be cut to a desired length; however, it can only be cut where marked with
scissors, approximately every 6 inches. Do not cut the silver color solder marks. Only cut in the center of
the copper pads as shown.
To adjust the length, use the following steps:
Locate the cutable locations on the strip light (A), starting from the end that has the power supply
wire attached.
Choose the location to be cut that best suits the length of strip light needed to illuminate the
desired area.
Using sharp scissors, cut directly through the center of the cut line. Be sure to leave enough room
on either side of the strip to attach the coupler (C) if needed.
□
CAUTION:
To avoid damage to the light strip, do not twist the light stripor bend the light strip 90 degrees.
Cut the excess plastic off approximately 1/4 in. with scissors.
Do not cut the silver solder markings, only the copper colored pads.
A
+
+
24V
24V
-
-
Instalación
1
Cómo preparar la barra de luces (opcional)
□
□
Puedes cortar la barra de luces LED (A) al largo que desees; sin embargo, solamente puedes cortarla donde
se marcó con tijeras, aproximadamente cada 6 pulgadas (15.2 cm). No cortes las marcas soldadas de color
plateado. Corta sólo el centro de las láminas de cobre como se muestra.
Sigue los pasos a continuación para ajustar el largo:
Localiza las partes que pueden cortarse en la barra de luces (A), comenzando por el extremo que
tiene el cable de suministro adjunto.
Elige el lugar a cortar que se adapte mejor al largo de la barra de luces necesaria para iluminar el
área deseada.
□
PRECAUCIÓN:
Para evitar daños a la barra de luces, no la tuerza ni doble en ángulo recto. No cortes las
□
o.
Corta aproximadamente 1/4 plg (6 mm) el plástico excedente con un tijeras.
marcas de soldadura plateadas, sólo las láminas de color cobre.
+
+
-
-
□
□
□
4
Installing the coupler (optional)
A
A
Insert both ends of the light strip (A) into the coupler (D) until it is stops and make sure the contacts
are secure , and snap the cover closed.
A coupler (D) is provided for extending the light strip into other areas or for turning corners (90
degree installations) and connecting the two pre-cut light strips togother.
Open the cover on the coupler (D). Align the two sections of the light strip (A), making sure that the
use the opposite end for proper + 24V alignment.
□
□
□
4
Cómo instalar el acoplador (opcional)
Se proporciona el acoplador (D) para extender la cinta de luces hacia otras áreas o para girar en
esquinas (instalaciones a 90 grados) y conectar las dos barras de luces precortadas juntas.
Inserta ambos extremos de la barra de luces (A) en el acoplador (D) hasta que se detenga y
la cubierta.
A
DD
CC
D
Abre la cubierta del acoplador (D). Alinea las 2 secciones de la barra de luces (A), asegurándote de
que las polaridades sean las mismas (+ con +, y así sucesivamente). Si no se alinean las marcas de
+ 24 V, voltea la cinta de luces y usa el extremo opuesto para obtener una alineación apropiada de
+ 24 V.
D
A
-
+
24V
A
BB
AA
CC
B
Antes de regresar a la tienda, llama al servicio al cliente de
Commercial Electricentre
,
de lunes a viernes de 8 a.m. a 7 p.m., hora estándar del Este, y sábados de 9 a.m. a 6 p.m.,
hora estándar del Este
CAUTION:
31.2 Watt rated power supply can
operate up to a maximum of two, 24 foot
Commercial Electric DC series 24V LED tape
lights.
PRECAUCIÓN:
La fuente de corriente de 31.2
Watt puede hacer funcionar un máximo de dos
cintas LED de 24 V y 7.32 m de la serie CC de
Commercial Electric.
+
-
A
+
+
24V
24V
-
-
+
+
-
-
24V
A
A
D
D
A
-
+
24V
+
-
24V
1/1