ProfiCook PC-FR 1269 H Instrucciones de operación
- Tipo
- Instrucciones de operación

PC-FR1269H_IM 29.08.23
Bedienungsanleitung
Instruction Manual • Gebruiksaanwijzing • Mode d’emploi • Manual de instrucciones
Istruzioni per l’uso • Instrukcja obsługi / Gwarancja • Használati utasítás
Руководство по эксплуатации •
Heißluft-Fritteuse PC-FR 1269 H
Hot Air Fryer • Hete lucht friteuse • Friteuse à air chaud
Freidora por aire caliente • Friggitrice ad aria calda • Frytkownica na gorące powietrze
Forró levegős olajsütő • Фритюрницас горячим воздухом •

PC-FR1269H_IM 29.08.23
Bedienungsanleitung ....................................................................................Seite 4
Instruction Manual ........................................................................................ Page 9
Gebruiksaanwijzing ................................................................................... Pagina 14
Mode d’emploi............................................................................................... Page 19
Manual de instrucciones .......................................................................... Página 24
Istruzioni per l’uso .....................................................................................Pagina 29
Instrukcja obsługi .......................................................................................Strona 34
Használati utasítás .......................................................................................Oldal 40
Руководство по эксплуатации .................................................................. стр. 45
53 ....................................................................................................................
2

PC-FR1269H_IM 29.08.23
3
Übersicht der Bedienelemente
Overview of the Components • Overzicht van de bedieningselementen
Liste des différents éléments de commande • Indicación de los elementos de manejo
Elementi di comando • Przegląd elementów obsługi • A kezelőelemek áttekintése
Обзор деталей прибора •

4
PC-FR1269H_IM 29.08.23
WICHTIG:
Lesen Sie unbedingt zuerst die separat beiliegenden Sicherheits-
hinweise.
Bedienungsanleitung
Vielen Dank, dass Sie sich für unser Produkt entschieden
haben. Wir wünschen Ihnen viel Freude mit dem Gerät.
Lesen Sie vor Inbetriebnahme dieses Gerätes die Be-
dienungsanleitung und die separat beiliegenden Sicher-
heitshinweise sehr sorgfältig durch. Bewahren Sie diese
Unterlagen inkl. Garantieschein, Kassenbon und nach
Möglichkeit den Karton mit Innenverpackung gut auf. Falls
Sie das Gerät an Dritte weitergeben, geben Sie auch immer
alle dazugehörigen Unterlagen mit.
Symbole in dieser Bedienungsanleitung
Wichtige Hinweise für Ihre Sicherheit sind besonders ge-
kennzeichnet. Beachten Sie diese Hinweise unbedingt, um
Unfälle und Schäden am Gerät zu vermeiden:
WARNUNG:
Warnt vor Gefahren für Ihre Gesundheit und zeigt mög-
liche Verletzungsrisiken auf.
ACHTUNG:
Weist auf mögliche Gefährdungen für das Gerät oder
andere Gegenstände hin.
Inhalt
Übersicht der Bedienelemente ..........................................3
Auspacken des Gerätes ..................................................... 4
Übersicht der Bedienelemente / Lieferumfang ................4
Warnhinweise für die Benutzung des Gerätes ................ 5
Anwendungshinweise ........................................................ 5
Standort ............................................................................5
Elektrischer Anschluss ..................................................... 5
Standby (Bereitschaftszustand) .......................................5
Gerät ein- / ausschalten ....................................................5
Vor der ersten Benutzung ................................................5
Hinweise für die Benutzung .............................................5
Funktionstasten ..................................................................6
Einstellen der Temperatur und der Garzeit ......................6
Bedienung............................................................................6
Automatikprogramme.......................................................6
Betrieb unterbrechen .......................................................7
Betrieb beenden ...............................................................7
Reinigung .............................................................................7
Aufbewahrung .....................................................................7
Störungsbehebung .............................................................8
Technische Daten ...............................................................8
Entsorgung .......................................................................... 8
Bedeutung des Symbols „Mülltonne“ ...............................8
Auspacken des Gerätes
1. Nehmen Sie das Gerät aus seiner Verpackung.
2. Entfernen Sie sämtliches Verpackungsmaterial, wie Fo-
lien, Füllmaterial, Kabelbinder und Kartonverpackung.
3. Prüfen Sie den Lieferumfang auf Vollständigkeit.
4. Sollte der Verpackungsinhalt unvollständig oder Beschä-
digungen feststellbar sein, nehmen Sie das Gerät nicht in
Betrieb. Bringen Sie es umgehend zum Händler zurück.
Übersicht der Bedienelemente /
Lieferumfang
Gerät
1 Lufteinlassöffnungen
2 Luftauslassöffnungen
3 Bedienfeld
4 Griff des Frittierbehälters
5 Frittierbehälter
6 Griffmulde
7 Silikonnoppen
8 Siebeinsatz
Bedienfeld
9 Kontrollleuchten für die Automatikprogramme:
Pommes
Rippchen
Garnelen
Hähnchenkeulen
Steak
Kuchen
Fisch
10 Display
11 Taste (Garzeit erhöhen)
12 Taste (Garzeit verringern)
13 Taste
(Automatikprogramm: Warmhalten / Auftauen)
14 Taste (Betriebsbereitschaft / Standby)
15 Taste (Garvorgang starten / stoppen)
16 Taste (Automatikprogramm auswählen)
17 Taste (Temperatur verringern)
18 Taste (Temperatur erhöhen)
19 Betriebs-Anzeige

5
PC-FR1269H_IM 29.08.23
Warnhinweise für die
Benutzung des Gerätes
WARNUNG: Verbrennungsgefahr!
• Fassen Sie den Frittierbehälter nur am Griff an. Ver-
wenden Sie gegebenenfalls Topfhandschuhe.
• Während des Betriebes kann heißer Dampf aus
der Luftaustrittsöffnung austreten. Halten Sie genug
Abstand.
ACHTUNG:
• Die Lufteinlass- und Luftaustrittsöffnungen dürfen nicht
abgedeckt werden, um eine ausreichende Luftzirkula-
tion zu gewährleisten.
• Halten Sie einen ausreichenden Sicherheitsabstand
(30 cm) zu leicht entzündlichen Gegenständen wie
Möbel, Vorhänge, etc.!
• Betreiben Sie das Gerät, wegen der aufsteigenden
Hitze und der Dämpfe, nicht unter Hängeschränken.
• Manipulieren Sie nicht den Sicherheitsschalter.
• Überlastung! Verwenden Sie keine Mehrfachsteck-
dose, da dieses Gerät zu leistungsstark ist.
Anwendungshinweise
Standort
• Stellen Sie das Gerät auf eine rutschfeste, ebene und
hitzebeständige Fläche.
• Das Gerät nicht mit der Rückseite direkt an eine Wand
stellen.
• Achten Sie darauf, dass das Gerät und das Netzkabel
nie auf heißen Oberächen oder in der Nähe von Wär-
mequellen platziert werden (z. B. Herd, Kochfeld).
Elektrischer Anschluss
Bevor Sie den Netzstecker in die Steckdose stecken, ver-
gewissern Sie sich, dass die Netzspannung mit der des
Gerätes übereinstimmt. Die Angaben dazu nden Sie auf
dem Typenschild.
Standby (Bereitschaftszustand)
Das Gerät bendet sich im Bereitschaftszustand, wenn
ausschließlich die Taste leuchtet. Das Gerät wechselt in
folgenden Situationen in den Bereitschaftszustand:
• Wenn der Netzstecker eingesteckt wird.
• Wenn ca. 60 Sekunden lang keine Taste gedrückt wird.
• Wenn die eingestellte Garzeit abgelaufen ist. Zuvor
erscheint kurz die Anzeige im Display. Es ertönen
5 Signaltöne.
Gerät ein- / ausschalten
Mit der Taste schalten Sie das Gerät ein und aus.
• Sobald Sie das Gerät einschalten, wird die Betriebs-
bereitschaft-Anzeige sichtbar.
• Nach Ablauf der Zeit erscheint die Anzeige im
Display. Der Ventilator läuft kurz nach, um das Gerät
abzukühlen. Anschließend ertönen 5 Signaltöne und das
Gerät schaltet in Standby.
Vor der ersten Benutzung
• Am Heizelement bendet sich eine Schutzschicht. Um
diese zu entfernen, betreiben Sie das Gerät ca. 15 Mi-
nuten lang ohne Inhalt. Leichte Rauch- und Geruchsent-
wicklung ist bei diesem Vorgang normal. Sorgen Sie für
ausreichende Belüftung.
• WARNUNG:
Lassen Sie das Gerät abkühlen, bevor Sie es reinigen!
- Ziehen Sie den Netzstecker aus der Steckdose.
- Wischen Sie den Frittierbehälter, den Siebeinsatz und
den Innenraum des Gerätes vor der Benutzung aus.
Hinweise für die Benutzung
• Dieses Gerät dient zur Zubereitung von festen Nah-
rungsmitteln. Bereiten Sie keine Suppen oder andere
üssige Nahrungsmittel darin zu.
• Ein Sicherheitsschalter verhindert die Benutzung des
Gerätes ohne Frittierbehälter.
• Um ein optimales Ergebnis zu erzielen, füllen Sie den
Frittierbehälter maximal bis zur Markierung MAX. Über-
füllen Sie den Frittierbehälter nie, damit die Nahrungsmit-
tel nicht mit dem Heizelement in Berührung kommen.
• Füllen Sie auf keinen Fall Öl oder eine andere Flüssig-
keit in den Frittierbehälter. Um ein knuspriges Ergebnis
zu erzielen, können die Lebensmittel mit etwas Öl be-
strichen werden.
• Keine stark fetthaltigen Speisen (z. B. Würstchen) mit
dem Gerät zubereiten.
• Im Gerät können alle Speisen zubereitet werden, die
auch für den Backofen geeignet sind.
• Der Siebeinsatz sorgt dafür, dass sich das angesam-
melte Fett am Boden des Frittierbehälters absetzt.
Dadurch werden die Nahrungsmittel knuspriger.
• Beim Backen von Kuchen, Brot usw. ist zu beachten,
dass sich der Teig ausdehnt. Der Teig darf nicht mit dem
Heizelement in Berührung kommen.
• Zum Backen von Brot o. Ä. kann der Siebeinsatz heraus-
genommen werden.
• Lebensmittel, die beim Garen übereinander liegen,
sollten nach der Hälfte der Garzeit geschüttelt werden.
Dadurch wird das Garergebnis optimiert und ein un-
gleichmäßiges Garen verhindert.
• Hausgemachte Kartoffelprodukte nach dem Schneiden
mindestens 30 Minuten wässern, um die Kartoffelstärke

6
PC-FR1269H_IM 29.08.23
zu reduzieren. Anschließend die Kartoffelstücke mit
Küchenpapier gut abtrocknen.
• Die Garzeit hängt von verschiedenen Faktoren ab:
Größe, Beschaffenheit, Menge der Lebensmittel und
eingestellte Temperatur.
• Wenn Sie die Heißluftfritteuse nicht vorheizen, addieren
Sie 3 Minuten zur Garzeit hinzu.
• Braten Sie Steaks und größere Fleischmengen vor dem
Garen in der Heißluftfritteuse in einer Pfanne an. Zeit
und Temperatur sind abhängig von der gewünschten
Garstufe.
• Mit dem Gerät können Sie auch Nahrungsmittel aufwär-
men. Wählen Sie das Automatikprogramm „Warmhal-
ten / Auftauen“ mit der Taste aus. Die voreingestellte
Temperatur und Zeit kann individuell angepasst werden.
Funktionstasten
• Bei den Tasten am Gerät handelt es sich um Touch-Tas-
ten. Berühren Sie die Tasten leicht mit einem Finger, um
die Funktion auszuführen. Jeder Tastendruck wird mit
einem Signalton bestätigt.
• Wenn Sie die Taste oder gedrückt halten, startet
ein Schnelllauf.
Einstellen der Temperatur und der Garzeit
Die Tasten und sind jeweils zweimal auf dem Be-
dienfeld vorhanden.
• Mit der Taste oder über und unter dem Symbol
stellen Sie die Temperatur (80 – 200 °C) ein.
• Mit der Taste oder über und unter dem Symbol
stellen Sie die Garzeit (1 – 60 Minuten) ein.
• Temperatur und Garzeit werden abwechselnd auf dem
Display angezeigt.
Bedienung
1. Vergewissern Sie sich, dass das Gerät vom Stromnetz
getrennt ist.
2. Ziehen Sie den Frittierbehälter am Griff aus dem Gerät.
3. Setzen Sie gegebenenfalls den Siebeinsatz mit den
Silikonnoppen in das Gerät. Drücken Sie den Siebein-
satz bis ganz unten.
4. Schieben Sie den Frittierbehälter zurück in das Gerät. Er
muss hörbar einrasten.
5. Schließen Sie das Gerät an eine vorschriftsmäßig
installierte Schutzkontakt-Steckdose an. Es ertönt ein
Signalton und alle Symbole leuchten kurz auf. Danach
leuchtet nur noch die Taste .
6. Drücken Sie die Taste , um das Gerät in die Betriebs-
bereitschaft zu schalten. Das Gerät ist werkseitig auf
eine Temperatur von 180 °C und 15 Minuten eingestellt.
7. Wir empfehlen, das Gerät für ca. 3 Minuten ohne Gargut
vorzuheizen. Stellen Sie die benötigte Temperatur und
die Garzeit auf 3 Minuten ein.
8. Drücken Sie die Taste , um den Garvorgang zu
starten.
9. Nach Ablauf der Zeit erscheint die Anzeige im
Display. Der Ventilator läuft kurz nach, um das Gerät
abzukühlen. Anschließend ertönen 5 Signaltöne und das
Gerät schaltet in Standby.
10. Ziehen Sie den Frittierbehälter am Griff aus dem Gerät.
11. Stellen Sie den Frittierbehälter auf eine hitzebeständige
Fläche.
12. Befüllen Sie den Frittierbehälter mit den gewünschten
Lebensmitteln.
13. Schieben Sie den Frittierbehälter zurück in das Gerät. Er
muss hörbar einrasten.
14. Drücken Sie die Taste , um das Gerät wieder in die
Betriebsbereitschaft zu schalten.
15. Stellen Sie die gewünschte Temperatur und die Garzeit
ein. Alternativ kann auch ein Automatikprogramm ge-
wählt werden (siehe nächster Abschnitt).
16. Drücken Sie die Taste , um den Garvorgang zu
starten.
17. Schütteln Sie gegebenenfalls nach der Hälfte der
Garzeit die Lebensmittel. Ziehen Sie dazu den Frittierbe-
hälter am Griff heraus. Schieben Sie den Frittierbehälter
anschließend wieder zurück in das Gerät. Das Gerät
setzt den Betrieb an der unterbrochenen Stelle fort.
Automatikprogramme
• Die Automatikprogramme wählen Sie durch wiederholtes
Drücken der Taste .
• Das Automatikprogramm „Warmhalten / Auftauen“ wäh-
len Sie mit der Taste .
• Die nachfolgende Tabelle zeigt die ab Werk vorein-
gestellten Temperaturen in Grad Celsius (°C) und die
Minuten (min). Die Voreinstellungen sind nur Richtwerte.
Je nach Größe und Gewicht der Lebensmittel müssen
Temperatur und Zeit eventuell individuell angepasst
werden.
• Die voreingestellte Temperatur ( ) und die Garzeit ( )
können mit den entsprechenden Tasten und
angepasst werden.
• Beachten Sie auch die Angaben auf der Lebensmittel-
verpackung.
Modus °C min
Pommes 200 20
Rippchen 180 15
Garnelen 160 20
Hähnchenkeulen 160 40
Steak 180 25
Kuchen 160 20

7
PC-FR1269H_IM 29.08.23
Modus °C min
Fisch 180 20
Warmhalten /
Auftauen 115 12
Betrieb unterbrechen
• Durch Herausziehen des Frittierbehälters wird der
Betrieb unterbrochen. Setzen Sie den Frittierbehälter
wieder ein, um den Betrieb fortzusetzen.
• Der Betrieb kann auch durch Ziehen des Netzsteckers
unterbrochen werden. Stecken Sie den Netzstecker
wieder in die Steckdose, um den Betrieb fortzusetzen.
• Das Gerät setzt den Betrieb an der unterbrochenen
Stelle fort. Dies gilt auch bei Stromausfall.
Betrieb beenden
1. Nach Ablauf der Zeit erscheint die Anzeige im
Display. Der Ventilator läuft kurz nach, um das Gerät
abzukühlen. Anschließend ertönen 5 Signaltöne und das
Gerät schaltet in Standby.
2. Sie können den Betrieb auch vorzeitig beenden, indem
Sie die Taste drücken.
3. Ziehen Sie den Frittierbehälter am Griff heraus.
4. Geben Sie die Nahrungsmittel in eine hitzebeständige
Schüssel.
5. Schieben Sie den Frittierbehälter zurück in das Gerät.
6. Ziehen Sie den Netzstecker aus der Steckdose.
Reinigung
WARNUNG:
• Schalten Sie das Gerät vor der Reinigung immer aus und zie-
hen Sie den Netzstecker aus der Steckdose. Warten Sie, bis
das Gerät abgekühlt ist.
• Lassen Sie den Siebeinsatz erst abkühlen, bevor Sie diesen
aus dem Frittierbehälter entnehmen!
• Tauchen Sie das Gerät nicht in Wasser! Es könnte zu einem
elektrischen Schlag oder Brand führen.
ACHTUNG: Antihaftbeschichtung
• Benutzen Sie keine Drahtbürste oder andere scheu-
ernde Gegenstände.
• Benutzen Sie keine scharfen oder scheuernden
Reinigungsmittel.
• Den Siebeinsatz können Sie im warmen Spülwasser mit
etwas Handspülmittel reinigen.
• Reinigen Sie das Gerät und den Frittierbehälter von
innen und außen mit einem leicht feuchten, nicht nassen
Tuch.
• Entfernen Sie auch eventuelle Speise- / Fettrückstände
auf und neben dem Heizelement mit einem leicht feuch-
ten Tuch. Schalten Sie das Gerät erst wieder ein, wenn
das Heizelement vollständig trocken ist!
Aufbewahrung
• Reinigen Sie das Gerät wie beschrieben. Lassen Sie das
Zubehör vollständig trocknen.
• Wir empfehlen, das Gerät in der Original-Verpackung
aufzubewahren, wenn Sie es über einen längeren Zeit-
raum nicht benutzen möchten.
• Lagern Sie das Gerät immer außerhalb der Reichweite
von Kindern an einem gut belüfteten und trockenen Ort.

8
PC-FR1269H_IM 29.08.23
Störungsbehebung
Problem Mögliche Ursache Abhilfe
Das Gerät ist ohne
Funktion.
Das Gerät hat keine Stromversorgung. Überprüfen Sie die Steckdose mit einem
anderen Gerät.
Setzen Sie den Netzstecker richtig ein.
Kontrollieren Sie die Haussicherung.
Der Frittierbehälter ist nicht richtig eingesetzt. Ein
Sicherheitsschalter verhindert den Betrieb mit
einem nicht korrekt eingesetzten Frittierbehälter.
Setzen Sie den Frittierbehälter richtig ein.
Er muss hörbar einrasten.
Das Gerät ist defekt. Wenden Sie sich an unseren Service oder
an einen Fachmann.
Die Lebensmittel sind
noch nicht fertig gegart.
Der Frittierbehälter ist überfüllt. Reduzieren Sie die Menge der Lebensmit-
tel. Kleinere Mengen garen gleichmäßiger.
Die Temperatur ist zu niedrig eingestellt. Stellen Sie eine höhere Temperatur ein.
Die Garzeit ist zu kurz eingestellt. Stellen Sie eine längere Garzeit ein.
Die Lebensmittel sind
ungleichmäßig gegart.
Die Lebensmittel liegen übereinander. Dadurch ist
keine ausreichende Luftzirkulation gewährleistet.
Schütteln Sie die Nahrungsmittel nach der
Hälfte der Garzeit.
Die Nahrungsmittel sind
nicht knusprig.
Es wurden Lebensmittel verwendet, die nur für
eine herkömmliche Fritteuse geeignet sind.
Verwenden Sie für den Backofen ge-
eignete Lebensmittel oder bestreichen Sie
sie mit ein wenig Öl.
Aus dem Gerät tritt
Rauch aus.
Sie bereiten sehr fetthaltige Lebensmittel zu. Durch Fettspritzer im Inneren des Gerätes
kann es zur Rauchentwicklung kommen.
Sorgen Sie für ausreichende Belüftung.
Der Frittierbehälter ist überfüllt. Die Lebensmittel
berühren das Heizelement.
Reduzieren Sie die Menge der Lebens-
mittel.
Im Frittierbehälter oder auf dem Heizelement
benden sich noch Speise- / Fettrückstände vom
vorherigen Gebrauch.
Reinigen Sie das Gerät nach jedem
Gebrauch wie im Kapitel „Reinigung“
beschrieben.
Technische Daten
Modell: .............................................................PC-FR 1269 H
Spannungsversorgung: ......................220 – 240 V~, 50 – 60 Hz
Leistungsaufnahme:....................................................1800 W
Schutzklasse: .........................................................................
Nettogewicht: ..............................................................ca. 6 kg
Technische und gestalterische Änderungen im Zuge stetiger
Produktentwicklungen vorbehalten.
Dieses Gerät wurde nach allen zutreffenden, aktuellen
CE-Richtlinien geprüft und nach den neuesten sicherheits-
technischen Vorschriften gebaut.
Entsorgung
Bedeutung des Symbols „Mülltonne“
Schonen Sie unsere Umwelt, Elektrogeräte ge-
hören nicht in den Hausmüll.
Nutzen Sie die für die Entsorgung von Elektro-
geräten vorgesehenen Sammelstellen und
geben dort Ihre Elektrogeräte ab, die Sie nicht
mehr benutzen werden.
Sie helfen damit die potenziellen Auswirkungen, durch
falsche Entsorgung, auf die Umwelt und die menschliche
Gesundheit zu vermeiden.
Sie leisten damit Ihren Beitrag zur Wiederverwertung, zum
Recycling und zu anderen Formen der Verwertung von
Elektro- und Elektronik-Altgeräten.
Informationen, wo die Geräte zu entsorgen sind, erhalten
Sie über Ihre Kommunen oder die Gemeindeverwaltungen.
Ihr Händler und Vertragspartner ist ebenfalls zur kosten-
freien Rücknahme des Altgerätes verpichtet.

PC-FR1269H_IM 29.08.23
9
IMPORTANT:
Be sure to read the separately enclosed safety instructions rst.
Instruction Manual
Thank you for choosing our product. We hope you will enjoy
using the appliance.
Read the instruction manual and the separately enclosed
safety instructions very carefully before using this appliance.
Keep these documents, including the warranty certicate,
receipt and, if possible, the box with the inner packaging in
a safe place. If you pass the appliance on to a third party,
always include all the relevant documents.
Symbols in this Instruction Manual
Important information for your safety is specially marked.
It is essential to comply with these instructions in order to
avoid accidents and prevent damage to the appliance:
WARNING:
This warns you of dangers to your health and indicates
possible injury risks.
CAUTION:
This refers to possible hazards to the appliance or other
objects.
Content
Overview of the Components ............................................3
Unpacking the Appliance ...................................................9
Overview of the Components / Scope of Delivery ........... 9
Warnings for the Use of the Appliance ..........................10
Notes for Use .....................................................................10
Location .......................................................................... 10
Electrical Connection .....................................................10
Standby (Ready State) ...................................................10
Switching the Appliance On / Off ....................................10
Before First Use .............................................................10
Notes on Use .................................................................10
Function Buttons .............................................................. 11
Setting the temperature and cooking time ..................... 11
Operation ........................................................................... 11
Automatic programmes .................................................. 11
Interrupting Operation .................................................... 11
Ending Operation ........................................................... 11
Cleaning ............................................................................. 12
Storage ............................................................................... 12
Troubleshooting ................................................................12
Technical Data ................................................................... 13
Disposal .............................................................................13
Meaning of the “Dustbin” Symbol ..................................13
Unpacking the Appliance
1. Remove the appliance from its packaging.
2. Remove all packaging material, such as foils, lling
material, cable ties and cardboard packaging.
3. Check the scope of delivery for completeness.
4. If the contents of the packaging are incomplete or if
damage can be detected, do not operate the appliance.
Return it to the dealer immediately.
Overview of the Components /
Scope of Delivery
Appliance
1 Air inlet openings
2 Air outlet openings
3 Control panel
4 Deep-frying container handle
5 Deep-frying container
6 Recessed handle
7 Silicone knobs
8 Sieve insert
Control Panel
9 Indicator lights for the automatic programmes:
French fries
Ribs
Prawns
Chicken legs
Steak
Cake
Fish
10 Display
11 Button (increase cooking time)
12 Button (reduce cooking time)
13 Button
(automatic programme: Keep warm / Defrost)
14 Button (ready for operation / standby)
15 Button (start / stop cooking)
16 Button (select automatic programme)
17 Button (reduce temperature)
18 Button (increase temperature)
19 Operating display

PC-FR1269H_IM 29.08.23
10
Warnings for the Use of the Appliance
WARNING: Risk of Burns!
• Only touch the deep-frying container by the handle.
Use oven gloves if necessary.
• Hot steam may escape from the air outlet during oper-
ation. Keep enough distance.
CAUTION:
• The air inlet and air outlet openings should not be
covered to ensure sufcient air circulation.
• Keep a sufcient safety distance (30 cm) from easily
inammable objects such as furniture, curtains, etc.!
• Do not operate the appliance under wall cabinets
because of the rising heat and vapours.
• Do not manipulate the safety switch.
• Overload! Do not use a multiple socket, as this appli-
ance is too powerful.
Notes for Use
Location
• Place the appliance on a non-slip, level and heat-resist-
ant surface.
• Do not place the appliance with the back directly against
a wall.
• Never place the appliance or the power cord on hot
surfaces or near heat sources (e. g. cooker, hob).
Electrical Connection
Before inserting the mains plug into the socket, make sure
that the mains voltage matches that of the appliance. You
will nd the information on the type plate.
Standby (Ready State)
The appliance is in standby mode when only the button
is lit. The appliance switches to standby mode in the
following situations:
• When the mains plug is plugged in.
• If no button is pressed for about 60 seconds.
• When the set cooking time has elapsed. Previously,
appears briey on the display. 5 signal tones sound.
Switching the Appliance On / Off
Use the button to switch the appliance on and off.
• As soon as you switch on the appliance, the ready-to-
use display appears.
• After the time has elapsed, appears in the display.
The fan runs briey to cool down the appliance. Then
5 signal tones sound and the appliance switches to
standby.
Before First Use
• There is a protective layer on the heating element. To
remove this, operate the appliance for approx. 15 min-
utes without contents. Slight smoke and odours are
normal during this process. Ensure that there is sufcient
ventilation.
• WARNING:
Let the appliance cool down before cleaning it!
- Unplug the appliance from the mains.
- Wipe out the deep-frying container, the sieve insert
and the interior of the appliance before use.
Notes on Use
• This appliance is intended for the preparation of solid
food. Do not prepare soups or other liquid foods in it.
• A safety switch prevents the appliance from being used
without a deep-frying container.
• For best results, do not ll the deep-frying container
more than the MAX mark. Never overll the deep-frying
container so that the food does not come into contact
with the heating element.
• Never add oil or any other liquid to the deep-frying con-
tainer. To achieve a crispy result, the food can be spread
with a little oil.
• Do not prepare foods with a high fat content (e. g. sau-
sages) with the appliance.
• All foods that are also suitable for the oven can be pre-
pared in the appliance.
• The sieve insert ensures that the accumulated fat settles
to the bottom of the deep-frying container. This makes
the food crispier.
• When baking cakes, bread, etc., note that the dough
expands. The dough must not come into contact with the
heating element.
• The sieve insert can be removed for baking bread or
similar.
• Food that lies on top of each other during cooking should
be shaken halfway through the cooking time. This opti-
mises the cooking result and prevents uneven cooking.
• Soak homemade potato products for at least 30 minutes
after cutting to reduce potato starch. Then dry the potato
pieces well with kitchen paper.
• The cooking time depends on various factors: Size,
texture, amount of food and set temperature.
• If you do not preheat the hot air fryer, add 3 minutes to
the cooking time.
• Fry steaks and larger quantities of meat in a pan before
cooking in the hot air fryer. Time and temperature de-
pend on the desired cooking level.
• You can also reheat food with the appliance. Select
the automatic programme “Keep warm / Defrost” with
the button . The preset temperature and time can be
adjusted individually.

PC-FR1269H_IM 29.08.23
11
Function Buttons
• The buttons on the appliance are touch buttons. Touch
the buttons lightly with a nger to perform the function.
Each key press is conrmed with a beep.
• If you keep the button or pressed, a quick run
starts.
Setting the Temperature and Cooking Time
The buttons and are each present twice on the
control panel.
• With the button or above and below the symbol
to set the temperature (80 – 200 °C).
• With the button or above and below the symbol
to you set the cooking time (1 – 60 minutes).
• Temperature and cooking time are displayed alternately
on the display.
Operation
1. Make sure that the appliance is disconnected from the
mains.
2. Pull the deep-frying container out of the appliance by
the handle.
3. If necessary, place the sieve insert with the silicone
knobs in the appliance. Push the sieve insert all the way
down.
4. Push the deep-frying container back into the appliance.
It must audibly click into place.
5. Connect the appliance to a properly installed safety
socket. A beep sounds and all the symbols light up
briey. Then only the button lights up.
6. Press the button to switch the appliance to standby.
The appliance is factory-set to a temperature of 180 °C
and 15 minutes.
7. We recommend preheating the appliance for about
3 minutes without cooking food. Set the required tem-
perature and cooking time to 3 minutes.
8. Press the button to start the cooking process.
9. When the time has elapsed, appears in the display.
The fan runs briey to cool down the appliance. Then
5 beeps sound and the appliance switches to standby.
10. Pull the deep-frying container out of the appliance by
the handle.
11. Place the deep-frying container on a heat-resistant
surface.
12. Fill the deep-frying container with the desired food.
13. Push the deep-frying container back into the appliance.
It must audibly click into place.
14. Press the button to switch the appliance back to
operating mode.
15. Set the desired temperature and cooking time. Alter-
natively, select an automatic programme (see next
chapter).
16. Press the button to start the cooking process.
17. If necessary, shake the food halfway through the cook-
ing time. To do this, pull out the deep-frying container by
the handle. Then push the deep-frying container back
into the appliance. The appliance continues operation at
the interrupted point.
Automatic Programmes
• Select the automatic programmes by repeatedly press-
ing the button .
• The automatic programme “Keep warm / Defrost” is
selected with the button .
• The following table shows the factory preset tempera-
tures in degrees Celsius (°C) and the minutes (min). The
pre-settings are only guide values. Depending on the
size and weight of the food, the temperature and time
may have to be adjusted individually.
• The preset temperature ( ) and cooking time ( ) can
be adjusted with the corresponding buttons and .
• Also observe the information on the food packaging.
Mode °C min
French fries 200 20
Ribs 180 15
Prawns 160 20
Chicken legs 160 40
Steak 180 25
Cake 160 20
Fish 180 20
Keep warm /
Defrost 115 12
Interrupting Operation
• Pull out the deep-frying container to interrupt operation.
Replace the deep-frying container to resume operation.
• Operation can also be interrupted by pulling out the
mains plug. Reconnect the mains plug to the socket to
continue operation.
• The appliance resumes operation at the interrupted
point. This also applies in the event of a power failure.
Ending Operation
1. When the time has elapsed, appears in the display.
The fan runs briey to cool down the appliance. Then
5 signal tones sound and the appliance switches to
standby.
2. You can also end operation prematurely by pressing the
button .
3. Pull out the deep-frying container by the handle.
4. Put the food in a heat-resistant bowl.
5. Push the deep-frying container back into the appliance.
6. Unplug the appliance from the mains.

PC-FR1269H_IM 29.08.23
12
Cleaning
WARNING:
• Always switch off the appliance and disconnect the mains plug
from the socket before cleaning. Wait until the appliance has
cooled down.
• Allow the sieve insert to cool down before removing it from the
deep-frying container!
• Do not immerse the appliance in water! It could cause an elec-
tric shock or re.
CAUTION: Non-stick coating
• Do not use a wire brush or other abrasive objects.
• Do not use harsh or abrasive cleaners.
• You can clean the sieve insert in warm rinse water with a
little hand dishwashing liquid.
• Clean the inside and outside of the appliance and the
deep-frying container with a slightly damp, not wet cloth.
• Also remove any food / grease residues on and next to
the heating element with a slightly damp cloth. Do not
switch the appliance on again until the heating element
is completely dry!
Storage
• Clean the appliance as described. Allow the accessories
to dry completely.
• We recommend storing the appliance in its original
packaging if you do not intend to use it for a longer
period of time.
• Always store the appliance out of the reach of children in
a well-ventilated and dry place.
Troubleshooting
Problem Possible Cause Remedy
The appliance has no function. The appliance has no power supply. Check the power socket with another
appliance.
Insert the mains plug correctly.
Check the house fuse.
The deep-frying container is not inserted
correctly. A safety switch prevents
operation with an incorrectly inserted
deep-frying container.
Insert the deep-frying container correctly.
It must audibly click into place.
The appliance is defective. Contact our service or a specialist.
The food is not fully cooked. The deep-frying container is overlled. Reduce the amount of food. Smaller
quantities cook more evenly.
The temperature is set too low. Set a higher temperature.
The cooking time is set too short. Set a longer cooking time.
The food is cooked unevenly. The food is on top of each other. This
does not ensure sufcient air circulation.
Shake the food halfway through the
cooking time.
The food is not crispy. You have used food that is only suitable
for a conventional deep fryer.
Use foods suitable for the oven or spread
them with a little oil.

PC-FR1269H_IM 29.08.23
13
Problem Possible Cause Remedy
Smoke is coming out of the
appliance.
You are preparing very fatty food. Smoke may develop due to splashes of fat
inside the appliance. Make sure there is
sufcient ventilation.
The deep-frying container is overlled.
The food is touching the heating element.
Reduce the amount of food.
There is still food / fat residue in the
deep-frying container or on the heating
element from previous use.
Clean the appliance after each use as
described in the chapter “Cleaning”.
Technical Data
Model:..............................................................PC-FR 1269 H
Power supply:.....................................220 – 240 V~, 50 – 60 Hz
Power consumption: ...................................................1800 W
Protection class: .....................................................................
Net weight: .......................................................... approx. 6 kg
The right to make technical and design modications in
the course of continuous product development remains
reserved.
This appliance has been tested according to all applicable,
current CE directives and built according to the latest safety
regulations.
Disposal
Meaning of the “Dustbin” Symbol
Protect our environment: do not dispose of elec-
trical equipment in the domestic waste.
Please return any electrical equipment that
you will no longer use to the collection points
provided for their disposal.
This helps avoid the potential effects of incorrect disposal
on the environment and human health.
This will contribute to the recycling and other forms of
re-utilisation of electrical and electronic equipment.
Information concerning where the equipment can be
disposed of can be obtained from your local authority. Your
dealer and contractual partner is also obliged to take back
the old appliance free of charge.

PC-FR1269H_IM 29.08.23
14
BELANGRIJK:
Lees eerst de apart bijgevoegde veiligheidsinstructies.
Gebruiksaanwijzing
Dank u voor het kiezen van ons product. Wij hopen dat u
het gebruik van het apparaat zult genieten.
Lees de gebruiksaanwijzing en de apart bijgevoegde
veiligheidsinstructies zorgvuldig door voordat u dit apparaat
in gebruik neemt. Bewaar deze documenten, inclusief het
garantiebewijs, de kassabon en, indien mogelijk, de doos
met de binnenverpakking op een veilige plaats. Als u het
apparaat aan een derde doorgeeft, voeg dan altijd alle
relevante documenten bij.
Symbolen in deze gebruiksaanwijzing
Belangrijke aanwijzingen voor uw veiligheid zijn speciaal
gekenmerkt. Neem deze aanwijzingen strikt in acht om
ongevallen en schade aan het apparaat te vermijden:
WAARSCHUWING:
Waarschuwt voor gevaren voor uw gezondheid en toont
mogelijk letsel risico’s.
LET OP:
Wijst op mogelijke gevaren voor het apparaat of andere
voorwerpen.
Inhoud
Overzicht van de bedieningselementen ...........................3
Het apparaat uitpakken ....................................................14
Overzicht van de bedieningselementen /
Omvang van de levering ..................................................14
Waarschuwingen voor het gebruik van het apparaat...15
Opmerkingen voor het gebruik .......................................15
Locatie ............................................................................ 15
Elektrische aansluiting ...................................................15
Stand-by (gereed) ..........................................................15
Apparaat in- / uitschakelen .............................................15
Voor het eerste gebruik .................................................. 15
Opmerkingen over het gebruik ......................................15
Functietoetsen ..................................................................16
Temperatuur en kooktijd instellen .................................. 16
Bediening ...........................................................................16
Automatische programma’s ...........................................16
Bediening onderbreken ..................................................16
Beëindiging van de werking ........................................... 17
Reiniging ............................................................................ 17
Bewaren .............................................................................17
Problemen oplossen ........................................................17
Technische gegevens .......................................................18
Verwijdering .......................................................................18
Betekenis van het symbool “vuilnisemmer” ................... 18
Het apparaat uitpakken
1. Neem het apparaat uit de verpakking.
2. Verwijder al het verpakkingsmateriaal, zoals folies, vul-
materiaal, kabelbinders en kartonnen verpakkingen.
3. Controleer de inhoud van de verpakking op volledigheid.
4. Als de inhoud van de verpakking onvolledig is of als er
beschadigingen kunnen worden vastgesteld, mag u het
apparaat niet in gebruik nemen. Breng het onmiddellijk
terug naar de dealer.
Overzicht van de bedieningselementen /
Omvang van de levering
Apparaat
1 Luchtinlaatopeningen
2 Luchtuitlaatopeningen
3 Bedieningspaneel
4 Handgreep frituurbak
5 Frituurbak container
6 Verzonken handgreep
7 Siliconen knoppen
8 Zeenzet
Bedieningspaneel
9 Controlelampjes voor de automatische programma’s:
Friet
Ribbetjes
Gamba's
Kippenpoten
Biefstuk
Cake
Vis
10 Display
11 Toets (kooktijd verlengen)
12 Toets (kooktijd verkorten)
13 Toets (automatisch programma: Warmhouden /
Ontdooien)
14 Toets (stand-by)
15 Toets (koken starten / stoppen)
16 Toets (automatisch programma selecteren)
17 Toets (temperatuur verlagen)
18 Toets (temperatuur verhogen)
19 Bedieningsdisplay

PC-FR1269H_IM 29.08.23
15
Waarschuwingen voor het
gebruik van het apparaat
WAARSCHUWING: Verbrandingsgevaar!
• Raak de frituurcontainer alleen bij het handvat aan.
Gebruik indien nodig ovenwanten.
• Tijdens de bediening kan hete stoom uit de luchtuitlaat
ontsnappen. Houd voldoende afstand.
LET OP:
• De luchtinlaat- en luchtuitlaatopeningen mogen niet
worden afgedekt om voldoende luchtcirculatie te
garanderen.
• Houd voldoende veiligheidsafstand (30 cm) tot licht
ontvlambare voorwerpen zoals meubels, gordijnen,
enz.
• Gebruik het apparaat niet onder wandkasten vanwege
de opstijgende hitte en dampen.
• De veiligheidsschakelaar niet manipuleren.
• Overbelasting! Gebruik geen stekkerdozen, want dit
apparaat is te krachtig.
Opmerkingen voor het gebruik
Locatie
• Plaats het apparaat op een antislip, vlak en hittebesten-
dig oppervlak.
• Plaats het apparaat niet met de achterkant tegen een
muur.
• Plaats het apparaat of het netsnoer nooit op hete opper-
vlakken of in de buurt van warmtebronnen (bijv. fornuis,
kookplaat).
Elektrische aansluiting
Controleer voordat u de stekker in het stopcontact steekt of
de netspanning overeenkomt met die van het apparaat. U
vindt de informatie op het typeplaatje.
Stand-by (gereed)
Het apparaat staat in stand-by als alleen de toets brandt.
In de volgende situaties schakelt het apparaat over naar de
stand-by modus:
• Als de stekker in het stopcontact zit.
• Als er gedurende ongeveer 60 seconden geen toets
wordt ingedrukt.
• Als de ingestelde kooktijd verstreken is. Daarvoor ver-
schijnt kort op het display. Er klinken 5 signaaltonen.
Apparaat in- / uitschakelen
Met de toets schakelt u het apparaat in en uit.
• Zodra u het apparaat inschakelt, verschijnt het gebruiks-
klare display.
• Na aoop van de tijd verschijnt op het display.
De ventilator draait kort om het apparaat af te koelen.
Daarna klinken 5 signaaltonen en schakelt het apparaat
over op stand-by.
Voor het eerste gebruik
• Op het verwarmingselement zit een beschermlaag. Laat
het apparaat ong. 15 minuten zonder inhoud werken om
deze te verwijderen. Lichte rook en geuren zijn normaal
tijdens dit proces. Zorg voor voldoende ventilatie.
• WAARSCHUWING:
Laat het apparaat afkoelen voordat u het reinigt!
- Haal de stekker uit het stopcontact.
- Veeg voor gebruik de frituurcontainer, het zeenzet-
stuk en de binnenkant van het apparaat schoon.
Opmerkingen over het gebruik
• Dit apparaat is bedoeld voor de bereiding van vast
voedsel. Bereid er geen soepen of andere vloeibare
voedingsmiddelen in.
• Een veiligheidsschakelaar voorkomt dat het apparaat
gebruikt kan worden zonder een frituurcontainer.
• Vul voor de beste resultaten de frituurcontainer niet
verder dan de MAX-markering. Vul de frituurcontainer
nooit te vol, zodat het voedsel niet in contact komt met
het verwarmingselement.
• Voeg nooit olie of een andere vloeistof toe aan de frituur-
container. Voor een knapperig resultaat kan het voedsel
worden ingesmeerd met een beetje olie.
• Bereid geen voedsel met een hoog vetgehalte (bijv.
worstjes) met het apparaat.
• Alle voedingsmiddelen die ook geschikt zijn voor de oven
kunnen in het apparaat worden bereid.
• De zeenzet zorgt ervoor dat het opgehoopte vet naar
de bodem van de frituurcontainer zakt. Hierdoor wordt
het voedsel knapperiger.
• Houd er bij het bakken van cake, brood enz. rekening
mee dat het deeg uitzet. Het deeg mag niet in contact
komen met het verwarmingselement.
• De zeenzet kan worden verwijderd voor het bakken van
brood en dergelijke.
• Voedsel dat tijdens het koken op elkaar ligt, moet halver-
wege de kooktijd worden geschud. Dit optimaliseert het
kookresultaat en voorkomt ongelijkmatig koken.
• Week zelfgemaakte aardappelproducten minstens
30 minuten na het snijden om het aardappelzetmeel te
reduceren. Droog de aardappelstukjes vervolgens goed
af met keukenpapier.
• De kooktijd is afhankelijk van verschillende factoren:
Grootte, textuur, hoeveelheid voedsel en ingestelde
temperatuur.
• Als je de heteluchtfriteuse niet voorverwarmt, voeg dan
3 minuten toe aan de kooktijd.
• Bak steaks en grotere hoeveelheden vlees in een pan
voordat je ze in de heteluchtfriteuse bakt. Tijd en tempe-
ratuur zijn afhankelijk van het gewenste kookniveau.

PC-FR1269H_IM 29.08.23
16
• U kunt ook voedsel opnieuw opwarmen met het apparaat.
Selecteer het automatische programma “Warm hou-
den / Ontdooien” met de toets . De vooraf ingestelde
temperatuur en tijd kunnen individueel worden aangepast.
Functietoetsen
• De toetsen op het apparaat zijn tiptoetsen. Raak de
toetsen lichtjes met een vinger aan om de functie uit te
voeren. Elke druk op de toets wordt bevestigd met een
pieptoon.
• Als u de toets of ingedrukt houdt, start een
snelloop.
Temperatuur en kooktijd instellen
De toetsen en zijn elk twee keer aanwezig op het
bedieningspaneel.
• Met de of toets boven en onder het symbool
stel je de temperatuur in (80 – 200 °C).
• Met de of toets boven en onder het symbool
stel je de kooktijd in (1 – 60 minuten).
• Temperatuur en kooktijd worden afwisselend op het
display weergegeven.
Bediening
1. Zorg ervoor dat het apparaat is losgekoppeld van het
stroomnet.
2. Trek de frituurcontainer aan de handgreep uit het
apparaat.
3. Plaats indien nodig het zeenzetstuk met de siliconen
noppen in het apparaat. Duw het zeenzetstuk helemaal
naar beneden.
4. Duw de frituurcontainer terug in het apparaat. Hij moet
hoorbaar vastklikken.
5. Sluit het apparaat aan op een correct geïnstalleerd stop-
contact. Er klinkt een pieptoon en alle symbolen lichten
kort op. Alleen de toets licht op.
6. Druk op de toets om het apparaat in stand-by te
zetten. Het apparaat is in de fabriek ingesteld op een
temperatuur van 180 °C en 15 minuten.
7. Wij raden aan het apparaat ongeveer 3 minuten voor te
verwarmen zonder voedsel te koken. Stel de gewenste
temperatuur en kooktijd in op 3 minuten.
8. Druk op de toets om het kookproces te starten.
9. Wanneer de tijd verstreken is, verschijnt op het
display. De ventilator draait kort om het apparaat af te
koelen. Daarna klinken 5 pieptonen en schakelt het
apparaat over op stand-by.
10. Trek de frituurcontainer aan de handgreep uit het
apparaat.
11. Plaats de frituurcontainer op een hittebestendige
ondergrond.
12. Vul de frituurcontainer met het gewenste voedsel.
13. Duw de frituurcontainer terug in het apparaat. Hij moet
hoorbaar vastklikken.
14. Druk op de toets om het apparaat weer in de bedrijfs-
modus te zetten.
15. Stel de gewenste temperatuur en kooktijd in. U kunt
ook een automatisch programma kiezen (zie volgende
paragraaf).
16. Druk op de toets om het kookproces te starten.
17. Schud indien nodig het voedsel halverwege de kooktijd.
Trek hiervoor de frituurcontainer aan het handvat naar
buiten. Duw vervolgens de frituurcontainer terug in het
apparaat. Het apparaat gaat verder op het onderbroken
punt.
Automatische programma’s
• Selecteer de automatische programma’s door herhaal-
delijk op de toets te drukken.
• Het automatische programma “Warmhouden / Ont-
dooien” wordt geselecteerd met de toets .
• De volgende tabel toont de in de fabriek ingestelde tem-
peraturen in graden Celsius (°C) en de minuten (min).
De voorinstellingen zijn slechts richtwaarden. Afhankelijk
van de grootte en het gewicht van het voedsel moeten
de temperatuur en de tijd mogelijk afzonderlijk worden
aangepast.
• De vooraf ingestelde temperatuur ( ) en kooktijd ( )
kunnen worden aangepast met de bijbehorende toetsen
en .
• Let ook op de informatie op de verpakking van het
voedsel.
Modus °C min
Franse frietjes 200 20
Ribbetjes 180 15
Garnalen 160 20
Kippenpoten 160 40
Biefstuk 180 25
Cake 160 20
Vis 180 20
Warmhouden /
Ontdooien 115 12
Bediening onderbreken
• Trek de frituurcontainer naar buiten om de bediening
te onderbreken. Plaats de frituurcontainer terug om de
bediening te hervatten.
• De bediening kan ook worden onderbroken door de stek-
ker uit het stopcontact te trekken. Steek de stekker weer
in het stopcontact om de bediening voort te zetten.
• Het apparaat hervat de bediening op het onderbroken
punt. Dit geldt ook bij stroomuitval.

PC-FR1269H_IM 29.08.23
17
Beëindiging van de werking
1. Na aoop van de tijd verschijnt op het display.
De ventilator draait kort om het apparaat af te koelen.
Daarna klinken 5 signaaltonen en schakelt het apparaat
over op stand-by.
2. U kunt de werking ook voortijdig beëindigen door op de
toets te drukken.
3. Trek de frituurcontainer aan het handvat naar buiten.
4. Doe het voedsel in een hittebestendige kom.
5. Duw de frituurcontainer terug in het apparaat.
6. Haal de stekker uit het stopcontact.
Reiniging
WAARSCHUWING:
• Schakel het apparaat altijd uit en trek de stekker uit het stop-
contact voordat u het apparaat schoonmaakt. Wacht tot het
apparaat is afgekoeld.
• Laat het zeenzetstuk afkoelen voordat u het uit de frituurcontai-
ner haalt!
• Dompel het apparaat niet onder in water! Dit kan een elektri-
sche schok of brand veroorzaken.
LET OP: Anti-aanbaklaag
• Gebruik geen staalborstel of andere schurende
voorwerpen.
• Gebruik geen scherpe of schurende reinigingsmid-
delen.
• U kunt het zeenzetstuk schoonmaken in warm spoelwa-
ter met een beetje handafwasmiddel.
• Reinig de binnen- en buitenkant van het apparaat en de
frituurcontainer met een licht vochtige, niet natte doek.
• Verwijder ook eventuele voedsel- / vetresten op en naast
het verwarmingselement met een licht vochtige doek.
Schakel het apparaat pas weer in als het verwarmings-
element volledig droog is!
Bewaren
• Reinig het apparaat zoals beschreven. Laat de accessoi-
res volledig drogen.
• Wij raden aan het apparaat in de originele verpakking op
te bergen als u het langere tijd niet gebruikt.
• Bewaar het apparaat altijd buiten het bereik van kinderen
op een goed geventileerde en droge plaats.
Problemen oplossen
Probleem Mogelijke oorzaak Remedie
Het apparaat werkt niet. Het apparaat heeft geen stroomvoorziening. Controleer het stopcontact met een ander
apparaat.
Steek de netstekker er goed in.
Controleer de huiszekering.
De frituurcontainer is niet correct geplaatst. Een
veiligheidsschakelaar voorkomt bediening met
een verkeerd geplaatste frituurcontainer.
Plaats de frituurcontainer op de juiste ma-
nier. Hij moet hoorbaar vastklikken.
Het apparaat is defect. Neem contact op met onze service of een
specialist.

PC-FR1269H_IM 29.08.23
18
Probleem Mogelijke oorzaak Remedie
Het voedsel is niet volle-
dig gaar.
De frituurcontainer is te vol. Verminder de hoeveelheid voedsel. Klei-
nere hoeveelheden worden gelijkmatiger
gaar.
De temperatuur is te laag ingesteld. Stel een hogere temperatuur in.
De kooktijd is te kort ingesteld. Stel een langere bereidingstijd in.
Het voedsel is ongelijk-
matig gaar.
Het voedsel ligt op elkaar. Dit zorgt niet voor
voldoende luchtcirculatie.
Schud het voedsel halverwege de berei-
dingstijd.
Het voedsel is niet
knapperig.
Je hebt voedsel gebruikt dat alleen geschikt is
voor een conventionele friteuse.
Gebruik voedsel dat geschikt is voor de
oven of bestrijk het met een beetje olie.
Er komt rook uit het
apparaat.
U bereidt zeer vet voedsel. Er kan rook ontstaan door vetspatten in het
apparaat. Zorg voor voldoende ventilatie.
De frituurcontainer is te vol. Het voedsel raakt
het verwarmingselement.
Verminder de hoeveelheid voedsel.
Er zitten nog etensresten / vetresten in de
frituurcontainer of op het verwarmingselement
van eerder gebruik.
Reinig het apparaat na elk gebruik zoals
beschreven in het hoofdstuk “Reiniging”.
Technische gegevens
Model:..............................................................PC-FR 1269 H
Stroomvoorziening: ............................220 – 240 V~, 50 – 60 Hz
Stroomverbruik: ........................................................... 1800 W
Beschermingsklasse: .............................................................
Nettogewicht: ........................................................... ong. 6 kg
Het recht om technische en ontwerpaanpassingen te ma-
ken in de loop van voortdurende productontwikkeling blijft
voorbehouden.
Dit apparaat is getest volgens alle van toepassing zijnde,
huidige CE-richtlijnen en gebouwd volgens de meest
recente veiligheidsvoorschriften.
Verwijdering
Betekenis van het symbool “vuilnisemmer”
Bescherm ons milieu, elektrische apparaten ho-
ren niet in het huisafval.
Maak voor het afvoeren van elektrische appara-
ten gebruik van de voorgeschreven verzamel-
punten en geef daar de elektrische apparaten af
die u niet meer gebruikt.
Daardoor helpt u de potentiële effecten te voorkomen
die een verkeerde afvoer op het milieu en de menselijke
gezondheid kunnen hebben.
Op deze wijze levert u uw bijdrage aan het hergebruik, de
recycling en andere verwerkingsvormen voor oude elektro-
nische en elektrische apparaten.
Voor informatie over verzamelpunten voor uw apparaten
kunt u contact opnemen met uw gemeente of gemeen-
teadministratie. Uw dealer en contractpartner is bovendien
verplicht het oude apparaat gratis terug te nemen.

PC-FR1269H_IM 29.08.23
19
IMPORTANT :
Veillez à lire d’abord les instructions de sécurité jointes séparé-
ment.
Mode d’emploi
Merci d’avoir choisi notre produit. Nous espérons que vous
saurez proter votre appareil.
Lisez très attentivement le mode d’emploi et les consignes
de sécurité jointes séparément avant d’utiliser cet appareil.
Conservez ces documents, y compris le certicat de garan-
tie, le reçu et, si possible, la boîte avec l’emballage intérieur
dans un endroit sûr. Si vous transmettez l’appareil à un
tiers, joignez toujours tous les documents pertinents.
Symboles de ce mode d’emploi
Les informations importantes pour votre sécurité sont
particulièrement indiquées. Veillez à bien respecter ces
indications an d’éviter tout risque d’accident ou d’endom-
magement de l’appareil :
AVERTISSEMENT :
Prévient des risques pour votre santé et des risques
éventuels de blessure.
ATTENTION :
Indique les risques pour l’appareil ou tout autre appareil.
Sommaire
Liste des différents éléments de commande ..................3
Déballage de l’appareil ..................................................... 19
Liste des différents éléments de commande /
Contenu de la livraison ....................................................19
Avertissements pour l’utilisation de l’appareil..............20
Notes d’utilisation ............................................................. 20
Emplacement .................................................................20
Branchement électrique ................................................. 20
Veille (état prêt) ..............................................................20
Allumer / éteindre l’appareil ............................................20
Avant la première utilisation ........................................... 20
Notes sur l’utilisation ......................................................20
Boutons de fonction ......................................................... 21
Réglage de la température et du temps de cuisson ......21
Utilisation ........................................................................... 21
Programmes automatiques ............................................21
Interruption de l’utilisation ..............................................22
Fin de l’utilisation ............................................................22
Nettoyage ...........................................................................22
Stockage ............................................................................22
Dépannage .........................................................................22
Données techniques .........................................................23
Élimination .........................................................................23
Signication du symbole « Poubelle » ........................... 23
Déballage de l’appareil
1. Sortez l’appareil de son emballage.
2. Retirez tous les matériaux d’emballage, tels que les
feuilles, les matériaux de remplissage, les attaches de
câbles et les emballages en carton.
3. Vériez que le contenu de la livraison est complet.
4. Si le contenu de l’emballage est incomplet ou si des dom-
mages peuvent être détectés, n’utilisez pas l’appareil.
Retournez-le immédiatement au revendeur.
Liste des différents éléments de
commande / Contenu de la livraison
Appareil
1 Ouvertures d’entrée d’air
2 Ouvertures de sortie d’air
3 Panneau de contrôle
4 Poignée du récipient de friture
5 Récipient de friture
6 Poignée encastrée
7 Boutons en silicone
8 Insert de tamisage
Panneau de contrôle
9 Témoins lumineux pour les programmes automatiques :
Frites
Côtes
Crevettes
Cuisses de poulet
Steak
Gâteau
Poisson
10 Afcheur
11 Bouton (augmentation du temps de cuisson)
12 Bouton (réduction du temps de cuisson)
13 Bouton (programme automatique : Maintien au
chaud / Décongélation)
14 Bouton (veille)
15 Bouton (démarrage / arrêt de la cuisson)
16 Bouton (sélection du programme automatique)
17 Bouton (réduction de la température)
18 Bouton (augmentation de la température)
19 Afchage de l’utilisation

PC-FR1269H_IM 29.08.23
20
Avertissements pour
l’utilisation de l’appareil
AVERTISSEMENT : Risque de brûlures !
• Ne touchez le récipient de friture que par la poignée.
Utilisez des gants de cuisine si nécessaire.
• De la vapeur chaude peut s’échapper de la sortie d’air
pendant l’utilisation. Gardez une distance sufsante.
ATTENTION :
• Les ouvertures d’entrée et de sortie d’air ne doivent
pas être couvertes an de garantir une circulation d’air
sufsante.
• Maintenez une distance de sécurité sufsante (30 cm)
par rapport aux objets facilement inammables tels
que les meubles, les rideaux, etc.
• N’utilisez pas l’appareil sous des armoires murales en
raison de la chaleur et des vapeurs qui s’en dégagent.
• Ne pas manipuler l’interrupteur de sécurité.
• Surcharge ! N’utilisez pas de multiprise, car cet appa-
reil est trop puissant.
Notes d’utilisation
Emplacement
• Placez l’appareil sur une surface antidérapante, plane et
résistante à la chaleur.
• Ne placez pas l’appareil avec l’arrière directement contre
un mur.
• Ne placez jamais l’appareil ou le cordon d’alimentation
sur des surfaces chaudes ou à proximité de sources de
chaleur (par exemple, cuisinière, plaque de cuisson).
Branchement électrique
Avant d’insérer la che dans la prise, vériez que la tension
du réseau correspond à celle de l’appareil. Vous trouverez
ces informations sur la plaque signalétique.
Veille (état prêt)
L’appareil est en mode veille lorsque seul le bouton est
allumé. L’appareil passe en mode veille dans les situations
suivantes :
• Lorsque la che secteur est branchée.
• Si aucun bouton n’est actionné pendant environ 60 se-
condes.
• Lorsque le temps de cuisson programmé est écoulé. Au-
paravant, apparaît brièvement sur l’écran. 5 signaux
sonores retentissent.
Allumer / éteindre l’appareil
Le bouton permet d’allumer et d’éteindre l’appareil.
• Dès que vous mettez l’appareil en marche, l’écran prêt à
l’emploi s’afche.
• Une fois le temps écoulé, l’écran afche . Le ven-
tilateur fonctionne brièvement pour refroidir l’appareil.
Ensuite, 5 signaux sonores retentissent et l’appareil se
met en veille.
Avant la première utilisation
• L’élément chauffant est recouvert d’une couche protec-
trice. Pour l’enlever, faites fonctionner l’appareil pendant
environ 15 minutes sans contenu. Un léger dégagement
de fumée et d’odeurs est normal pendant ce processus.
Veillez à ce que l’appareil soit sufsamment ventilé.
• AVERTISSEMENT :
Laissez l’appareil refroidir avant de le nettoyer !
- Débranchez l’appareil du réseau électrique.
- Essuyez le récipient de friture, le tamis et l’intérieur de
l’appareil avant de l’utiliser.
Notes sur l’utilisation
• Cet appareil est destiné à la préparation d’aliments so-
lides. N’y préparez pas de soupes ou d’autres aliments
liquides.
• Un interrupteur de sécurité empêche l’utilisation de
l’appareil sans récipient de friture.
• Pour de meilleurs résultats, ne remplissez pas le réci-
pient de friture au-delà du repère MAX. Ne remplissez
jamais trop le récipient de friture an que les aliments
n’entrent pas en contact avec l’élément chauffant.
• N’ajoutez jamais d’huile ou tout autre liquide dans le
récipient de friture. Pour obtenir un résultat croustillant,
les aliments peuvent être tartinés d’un peu d’huile.
• Ne préparez pas d’aliments à forte teneur en matières
grasses (par exemple, des saucisses) avec l’appareil.
• Tous les aliments qui conviennent également au four
peuvent être préparés dans l’appareil.
• Le tamis permet à la graisse accumulée de se déposer
au fond du récipient de friture. Les aliments deviennent
ainsi plus croustillants.
• Lors de la cuisson de gâteaux, de pain, etc., notez que la
pâte se dilate. La pâte ne doit pas entrer en contact avec
l’élément chauffant.
• Le tamis peut être retiré pour la cuisson du pain ou
d’autres aliments similaires.
• Les aliments superposés pendant la cuisson doivent être
secoués à la moitié du temps de cuisson. Cela permet
d’optimiser le résultat de la cuisson et d’éviter une
cuisson inégale.
• Faites tremper les produits de pommes de terre faits
maison pendant au moins 30 minutes après les avoir
coupés an de réduire la fécule de pomme de terre.
Ensuite, séchez bien les morceaux de pommes de terre
avec du papier absorbant.
• Le temps de cuisson dépend de plusieurs facteurs : La
taille, la texture, la quantité d’aliments et la température
réglée.

PC-FR1269H_IM 29.08.23
21
• Si vous ne préchauffez pas la friteuse à air chaud, ajou-
tez 3 minutes au temps de cuisson.
• Faites frire les steaks et les grandes quantités de viande
dans une poêle avant de les cuire dans la friteuse à air
chaud. La durée et la température dépendent du niveau
de cuisson souhaité.
• Vous pouvez également réchauffer des aliments avec
l’appareil. Sélectionnez le programme automatique
« Maintien au chaud / Décongélation » à l’aide du bou-
ton . La température et la durée préréglées peuvent
être réglées individuellement.
Boutons de fonction
• Les boutons de l’appareil sont des boutons tactiles.
Touchez légèrement les boutons avec un doigt pour
exécuter la fonction. Chaque pression sur une touche est
conrmée par un signal sonore.
• Si vous maintenez le bouton ou enfoncé, une
course rapide démarre.
Réglage de la température et du temps de cuisson
Les boutons et sont présents chacun deux fois sur
le panneau de contrôle.
• Avec le bouton ou au-dessus et en dessous du
symbole pour régler la température (80 – 200 °C).
• Avec le bouton ou au-dessus et au-dessous du
symbole vous permet de régler le temps de cuisson
(1 – 60 minutes).
• La température et le temps de cuisson sont afchés
alternativement sur l’écran.
Utilisation
1. Assurez-vous que l’appareil est débranché du réseau
électrique.
2. Retirez le récipient à friture de l’appareil en le tenant par
la poignée.
3. Si nécessaire, placez le tamis avec les boutons en
silicone dans l’appareil. Poussez l’insert du tamis
jusqu’en bas.
4. Remettez le récipient à frire dans l’appareil. Un déclic
doit se faire entendre.
5. Branchez l’appareil sur une prise de courant de sécurité
correctement installée. Un signal sonore retentit et tous
les symboles s’allument brièvement. Ensuite, seul le
bouton s’allume.
6. Appuyez sur le bouton pour mettre l’appareil en
veille. L’appareil est réglé en usine sur une température
de 180 °C et 15 minutes.
7. Nous recommandons de préchauffer l’appareil pendant
environ 3 minutes sans cuire d’aliments. Réglez la tem-
pérature et le temps de cuisson sur 3 minutes.
8. Appuyez sur le bouton pour lancer le processus de
cuisson.
9. Une fois le temps écoulé, l’écran afche . Le ven-
tilateur fonctionne brièvement pour refroidir l’appareil.
Ensuite, 5 bips retentissent et l’appareil se met en veille.
10. Retirez le récipient à friture de l’appareil en le tenant par
la poignée.
11. Placez le récipient à friture sur une surface résistante à
la chaleur.
12. Remplissez le récipient avec les aliments souhaités.
13. Remettez le récipient à frire dans l’appareil. Un déclic
doit se faire entendre.
14. Appuyez sur le bouton pour remettre l’appareil en
mode utilisation.
15. Réglez la température et le temps de cuisson souhaités.
Vous pouvez également sélectionner un programme
automatique (voir section suivante).
16. Appuyez sur le bouton pour lancer la cuisson.
17. Si nécessaire, secouez les aliments à mi-cuisson. Pour
ce faire, tirez le récipient à friture par la poignée. Remet-
tez ensuite le récipient dans l’appareil. L’utilisation de
l’appareil se poursuit au point d’interruption.
Programmes automatiques
• Sélectionnez les programmes automatiques en appuyant
plusieurs fois sur le bouton .
• Le programme automatique « Maintien au chaud / Dé-
congélation » est sélectionné à l’aide du bouton .
• Le tableau suivant indique les températures préréglées
en usine en degrés Celsius (°C) et en minutes (min).
Les préréglages ne sont que des valeurs indicatives. En
fonction de la taille et du poids des aliments, la tempéra-
ture et la durée doivent être ajustées individuellement.
• La température préréglée ( ) et le temps de cuisson
( ) peuvent être ajustés à l’aide des boutons et
correspondants.
• Respectez également les informations gurant sur l’em-
ballage des aliments.
Mode °C min
Frites 200 20
Côtes 180 15
Crevettes 160 20
Cuisses de poulet 160 40
Steak 180 25
Gâteau 160 20
Poisson 180 20
Maintien au
chaud / Décongé-
lation
115 12

PC-FR1269H_IM 29.08.23
22
Interruption de l’utilisation
• Retirez le récipient de friture pour interrompre l’utilisation.
Remettez le récipient en place pour reprendre l’utilisa-
tion.
• L’utilisation peut également être interrompue en débran-
chant la che secteur. Rebranchez la che d’alimentation
à la prise de courant pour poursuivre l’utilisation.
• L’appareil reprend son utilisation à l’endroit où elle a
été interrompue. Il en va de même en cas de panne de
courant.
Fin de l’utilisation
1. Une fois le temps écoulé, l’écran afche . Le ven-
tilateur fonctionne brièvement pour refroidir l’appareil.
Ensuite, 5 signaux sonores retentissent et l’appareil se
met en veille.
2. Vous pouvez également mettre n prématurément à
l’utilisation de l’appareil en appuyant sur le bouton .
3. Retirez le récipient de friture par la poignée.
4. Placez les aliments dans un récipient résistant à la
chaleur.
5. Remettez le récipient à friture dans l’appareil.
6. Débranchez l’appareil.
Nettoyage
AVERTISSEMENT :
• Éteignez toujours l’appareil et débranchez la che de la prise de
courant avant de le nettoyer. Attendez que l’appareil ait refroidi.
• Laissez refroidir le tamis avant de le retirer du récipient de friture !
• Ne plongez pas l’appareil dans l’eau ! Cela pourrait provoquer
un choc électrique ou un incendie.
ATTENTION : Revêtement antiadhésif
• N’utilisez pas de brosse métallique ou d’autres objets
abrasifs.
• N’utilisez pas de nettoyants agressifs ou abrasifs.
• Vous pouvez nettoyer le tamis dans de l’eau de rinçage
tiède additionnée d’un peu de liquide vaisselle.
• Nettoyez l’intérieur et l’extérieur de l’appareil ainsi que le
récipient de friture avec un chiffon légèrement humide et
non mouillé.
• Éliminez également les éventuels résidus d’aliments ou
de graisse sur et à côté de l’élément chauffant à l’aide
d’un chiffon légèrement détachable. Ne remettez pas
l’appareil en marche tant que l’élément chauffant n’est
pas complètement sec !
Stockage
• Nettoyez l’appareil comme indiqué. Laissez les acces-
soires sécher complètement.
• Nous vous recommandons de ranger l’appareil dans
son emballage d’origine si vous n’avez pas l’intention de
l’utiliser pendant une période prolongée.
• Rangez toujours l’appareil hors de portée des enfants,
dans un endroit sec et bien ventilé.
Dépannage
Problème Cause possible Remède
L’appareil ne fonctionne
pas.
L’appareil n’est pas alimenté en courant. Vériez la prise de courant avec un autre appareil.
Insérez la che secteur correctement.
Vériez le fusible de la maison.
Le récipient de friture n’est pas inséré
correctement. Un interrupteur de
sécurité empêche l’utilisation avec un
récipient de friture mal inséré.
Insérez correctement le récipient de friture. Un
déclic doit se faire entendre.
L’appareil est défectueux. Contactez notre service ou un spécialiste.

PC-FR1269H_IM 29.08.23
23
Problème Cause possible Remède
Les aliments ne sont
pas entièrement cuits.
Le récipient de friture est trop rempli. Réduisez la quantité d’aliments. Les petites quanti-
tés cuisent plus uniformément.
La température est trop basse. Réglez une température plus élevée.
Le temps de cuisson est trop court. Réglez un temps de cuisson plus long.
Les aliments ne sont
pas cuits uniformément.
Les aliments sont superposés. La circu-
lation de l’air n’est pas sufsante.
Secouez les aliments à mi-cuisson.
Les aliments ne sont
pas croustillants.
Vous avez utilisé des aliments qui ne
conviennent qu’à une friteuse classique.
Utilisez des aliments adaptés au four ou tartinez-les
d’un peu d’huile.
De la fumée s’échappe
de l’appareil.
Vous préparez des aliments très gras. Des éclaboussures de graisse à l’intérieur de l’ap-
pareil peuvent provoquer un dégagement de fumée.
Veillez à ce que la ventilation soit sufsante.
Le récipient de friture est trop rempli. Les
aliments touchent l’élément chauffant.
Réduisez la quantité d’aliments.
Il y a encore des résidus d’aliments / de
graisse dans le récipient de friture ou
sur l’élément chauffant provenant d’une
utilisation précédente.
Nettoyez l’appareil après chaque utilisation comme
décrit dans le chapitre « Nettoyage ».
Données techniques
Modèle : ..........................................................PC-FR 1269 H
Alimentation électrique : .....................220 – 240 V~, 50 – 60 Hz
Puissance absorbée : .................................................1800 W
Classe de protection : ............................................................
Poids net : .................................................................env. 6 kg
Nous nous réservons le droit d’apporter des modications
techniques ainsi que des modications de conception dans
le cadre du développement continu de nos produits.
Cet appareil a été testé conformément à toutes les direc-
tives CE applicables et actuelles et a été construit selon les
dernières réglementations en matière de sécurité.
Élimination
Signication du symbole « Poubelle »
Protégez votre environnement, ne jetez pas vos
appareils électriques avec les ordures ména-
gères.
Utilisez, pour l’élimination de vos appareils
électriques, les bornes de collecte prévues à
cet effet où vous pouvez vous débarrasser des
appareils que vous n’utilisez plus.
Vous contribuez ainsi à éviter les impacts potentiels dans
l’environnement et sur la santé de chacun, causés par une
mauvaise élimination de ces déchets.
Vous contribuez aussi au recyclage sous toutes ses formes
des appareils électriques et électroniques usagés.
Vous trouverez toutes les informations sur les bornes
d’élimination des appareils auprès de votre commune ou
de l’administration de votre communauté. Votre revendeur
et partenaire contractuel est également tenu de reprendre
gratuitement l’ancien appareil.

PC-FR1269H_IM 29.08.23
24
IMPORTANTE:
Asegúrese de leer primero las instrucciones de seguridad adjun-
tas por separado.
Manual de instrucciones
Le agradecemos la conanza depositada en este producto
y esperamos que disfrute de su uso.
Lea atentamente el manual de instrucciones y las instruc-
ciones de seguridad adjuntas por separado antes de utilizar
este aparato. Guarde estos documentos, incluyendo el
certicado de garantía, el recibo y, si es posible, la caja
con el embalaje interior en un lugar seguro. Si entrega el
aparato a un tercero, incluya siempre todos los documentos
pertinentes.
Símbolos en este manual de instrucciones
Advertencias importantes para su seguridad están seña-
ladas en especial. Siga estas advertencias incondicional-
mente, para evitar accidentes y daños en el aparato:
AVISO:
Advierte ante los peligros para su salud y demuestra
posibles riesgos de herida.
ATENCIÓN:
Indica los posibles riesgos para el aparato u otros
objetos.
Índice
Indicación de los elementos de manejo ..........................3
Desembalaje del aparato..................................................24
Indicación de los elementos de manejo /
Volumen de entrega ..........................................................24
Advertencias para el uso del aparato .............................25
Notas de uso .....................................................................25
Ubicación ........................................................................25
Conexión eléctrica ..........................................................25
Standby (estado listo) ....................................................25
Encender / apagar el aparato .........................................25
Antes del primer uso ......................................................25
Indicaciones de uso .......................................................25
Botones de función ..........................................................26
Ajuste de la temperatura y del tiempo de cocción.........26
Manejo ................................................................................ 26
Programas automáticos ................................................. 26
Interrupción del manejo .................................................26
Finalización del funcionamiento .....................................27
Limpieza ............................................................................. 27
Almacenamiento ...............................................................27
Solución de problemas ....................................................28
Datos técnicos ..................................................................28
Eliminación ........................................................................ 28
Signicado del símbolo “Cubo de basura” ....................28
Desembalaje del aparato
1. Saque el aparato de su embalaje.
2. Retire todo el material de embalaje, como las láminas, el
material de relleno, las bridas para cables y el embalaje
de cartón.
3. Compruebe que el volumen de entrega está completo.
4. Si el contenido del embalaje está incompleto o si se
detectan daños, no utilice el aparato. Devuélvalo inme-
diatamente al distribuidor.
Indicación de los elementos de manejo /
Volumen de entrega
Aparato
1 Aberturas de entrada de aire
2 Aberturas de salida de aire
3 Panel de mandos
4 Asa del recipiente de freír
5 Recipiente para freír
6 Asa empotrada
7 Pomos de silicona
8 Colador
Panel de mandos
9 Indicadores luminosos de los programas automáticos:
Patatas fritas
Costillas
Gambas
Muslos de pollo
Filete
Pastel
Pescado
10 Pantalla
11 Botón (aumentar el tiempo de cocción)
12 Botón (reducir el tiempo de cocción)
13 Botón (programa automático: Mantener caliente /
Descongelar)
14 Botón (standby)
15 Botón (inicio / parada de la cocción)
16 Botón (seleccionar programa automático)
17 Botón (reducir temperatura)
18 Botón (aumentar temperatura)
19 Pantalla de manejo

PC-FR1269H_IM 29.08.23
25
Advertencias para el uso del aparato
AVISO: ¡Peligro de quemaduras!
• Toque el recipiente de fritura sólo por el asa. En caso
necesario, utilice guantes de cocina.
• Durante el manejo puede salir vapor caliente por la
salida de aire. Mantenga una distancia suciente.
ATENCIÓN:
• Las aberturas de entrada y salida de aire no deben cu-
brirse para garantizar una circulación de aire suciente.
• ¡Mantenga una distancia de seguridad suciente
(30 cm) de objetos fácilmente inamables como mue-
bles, cortinas, etc.!
• No maneje el aparato debajo de armarios empotrados
en la pared debido a la subida de calor y vapores.
• No manipule el interruptor de seguridad.
• ¡Sobrecarga! No utilice una toma de corriente múlti-
ple, ya que este aparato es demasiado potente.
Notas de uso
Ubicación
• Coloque el aparato sobre una supercie antideslizante,
nivelada y resistente al calor.
• No coloque el aparato con la parte posterior directa-
mente contra la pared.
• No coloque nunca el aparato o el cable de alimentación
sobre supercies calientes o cerca de fuentes de calor
(por ejemplo, cocina, placa de cocción).
Conexión eléctrica
Antes de insertar el enchufe en la toma de corriente, ase-
gúrese de que la tensión de red coincide con la del aparato.
Encontrará la información en la placa de características.
Standby (estado listo)
El aparato está en modo de espera cuando sólo está
encendido el botón . El aparato pasa al modo de espera
en las siguientes situaciones:
• Cuando está enchufado a la red.
• Si no se pulsa ningún botón durante unos 60 segundos.
• Cuando ha transcurrido el tiempo de cocción ajustado.
Previamente, aparece brevemente en la pantalla.
Suenan 5 tonos de señal.
Encender / apagar el aparato
Utilice el botón para encender y apagar el aparato.
• En cuanto encienda el aparato, aparecerá la indicación
de listo para el uso.
• Una vez transcurrido el tiempo, aparece en la
pantalla. El ventilador funciona brevemente para enfriar
el aparato. A continuación suenan 5 señales acústicas y
el aparato pasa al modo de espera.
Antes del primer uso
• La resistencia lleva una capa protectora. Para eliminarla,
haga funcionar el aparato durante aprox. 15 minutos
sin contenido. Durante este proceso es normal que se
produzcan ligeros humos y olores. Asegúrese de que
haya suciente ventilación.
• AVISO:
¡Deje enfriar el aparato antes de limpiarlo!
- Desenchufe el aparato de la red eléctrica.
- Limpie el recipiente de fritura, el tamiz y el interior del
aparato antes de utilizarlo.
Indicaciones de uso
• Este aparato está destinado a la preparación de alimen-
tos sólidos. No prepare sopas ni otros alimentos líquidos
en él.
• Un interruptor de seguridad impide el uso del aparato sin
un recipiente para freír.
• Para obtener los mejores resultados, no llene el reci-
piente de fritura más allá de la marca MAX. No llene
nunca en exceso el recipiente de fritura para que los
alimentos no entren en contacto con la resistencia.
• No añada nunca aceite ni ningún otro líquido al reci-
piente de fritura. Para conseguir un resultado crujiente,
se puede untar el alimento con un poco de aceite.
• No prepare alimentos con un alto contenido en grasa
(por ejemplo, salchichas) con el aparato.
• Todos los alimentos que también son aptos para el
horno pueden prepararse en el aparato.
• El tamiz asegura que la grasa acumulada se deposite
en el fondo del recipiente de fritura. Esto hace que los
alimentos queden más crujientes.
• Al hornear pasteles, pan, etc., tenga en cuenta que la
masa se expande. La masa no debe entrar en contacto
con la resistencia.
• Para hornear pan o similares se puede retirar el tamiz.
• Los alimentos que se encuentran unos encima de otros
durante la cocción deben sacudirse a mitad del tiempo
de cocción. Así se optimiza el resultado de la cocción y
se evita una cocción desigual.
• Remoje los productos de patata caseros durante al
menos 30 minutos después de cortarlos para reducir la
fécula de patata. A continuación, seque bien los trozos
de patata con papel de cocina.
• El tiempo de cocción depende de varios factores:
Tamaño, textura, cantidad de alimento y temperatura
establecida.
• Si no precalienta la freidora de aire caliente, añada
3 minutos al tiempo de cocción.
• Fría los letes y las cantidades más grandes de carne
en una sartén antes de cocinarlos en la freidora de aire
caliente. El tiempo y la temperatura dependen del nivel
de cocción deseado.

PC-FR1269H_IM 29.08.23
26
• También puede recalentar alimentos con el aparato.
Seleccione el programa automático “Mantener ca-
liente / Descongelar” con el botón . La temperatura y el
tiempo preajustados pueden ajustarse individualmente.
Botones de función
• Los botones del aparato son botones táctiles. Toque los
botones ligeramente con un dedo para realizar la fun-
ción. Cada pulsación de tecla se conrma con un pitido.
• Si mantiene pulsado el botón o , se inicia una
ejecución rápida.
Ajuste de la temperatura y del tiempo de cocción
Los botones y están presentes dos veces cada uno
en el panel de control.
• Con los botones o situados encima y debajo del
símbolo para ajustar la temperatura (80 – 200 °C).
• Con los botones o situados encima y debajo
del símbolo puede ajustar el tiempo de cocción
(1 – 60 minutos).
• La temperatura y el tiempo de cocción se muestran
alternativamente en la pantalla.
Manejo
1. Asegúrese de que el aparato está desconectado de la
red eléctrica.
2. Saque el recipiente de freír del aparato por el asa.
3. Si es necesario, coloque el tamiz con los botones de
silicona en el aparato. Empuje el tamiz hasta el fondo.
4. Vuelva a introducir el recipiente en el aparato. Debe
encajar de forma audible.
5. Conecte el aparato a una toma de corriente de seguri-
dad correctamente instalada. Oirá un pitido y todos los
símbolos se iluminarán brevemente. A continuación,
sólo se encenderá el botón .
6. Pulse el botón para poner el aparato en modo de
espera. El aparato viene ajustado de fábrica a una
temperatura de 180 °C y 15 minutos.
7. Recomendamos precalentar el aparato durante unos
3 minutos sin cocinar alimentos. Ajuste la temperatura
deseada y el tiempo de cocción a 3 minutos.
8. Pulse el botón para iniciar el proceso de cocción.
9. Cuando haya transcurrido el tiempo, en la pantalla
aparecerá . El ventilador funciona brevemente para
enfriar el aparato. A continuación suenan 5 pitidos y el
aparato pasa al modo de espera.
10. Saque el recipiente de fritura del aparato por el asa.
11. Coloque el recipiente sobre una supercie resistente
al calor.
12. Llene el recipiente de fritura con el alimento deseado.
13. Vuelva a introducir el recipiente en el aparato. Debe
encajar de forma audible.
14. Pulse el botón para que el aparato vuelva al modo
de manejo.
15. Ajuste la temperatura y el tiempo de cocción deseados.
Como alternativa, seleccione un programa automático
(véase el apartado siguiente).
16. Pulse el botón para iniciar el proceso de cocción.
17. Si es necesario, agite los alimentos a mitad del tiempo
de cocción. Para ello, saque el recipiente de fritura por
el asa. A continuación, vuelva a introducir el recipiente
en el aparato. El aparato continúa el manejo en el punto
interrumpido.
Programas automáticos
• Seleccione los programas automáticos pulsando repeti-
damente el botón .
• El programa automático “Mantener caliente / Desconge-
lar” se selecciona con el botón .
• La siguiente tabla muestra las temperaturas preajus-
tadas de fábrica en grados Celsius (°C) y los minutos
(min). Los preajustes son sólo valores orientativos.
Dependiendo del tamaño y peso de los alimentos, es
posible que la temperatura y el tiempo deban ajustarse
individualmente.
• La temperatura preajustada ( ) y el tiempo de cocción
( ) pueden ajustarse con los correspondientes botones
y .
• Observe también la información que gura en el envase
del alimento.
Modo °C min
Patatas fritas 200 20
Costillas 180 15
Gambas 160 20
Muslos de pollo 160 40
Filete 180 25
Pastel 160 20
Pescado 180 20
Mantener caliente /
Descongelar 115 12
Interrupción del manejo
• Saque el recipiente de fritura para interrumpir el manejo.
Vuelva a colocar el recipiente de fritura para reanudar
el manejo.
• El manejo también se puede interrumpir desenchufando
la clavija de red. Vuelva a conectar el enchufe a la toma
de corriente para continuar con el manejo.
• El aparato reanuda el manejo en el punto en que se
interrumpió. Esto también es válido en caso de corte de
corriente.

PC-FR1269H_IM 29.08.23
27
Finalización del funcionamiento
1. Una vez transcurrido el tiempo, aparece en la
pantalla. El ventilador funciona brevemente para enfriar
el aparato. A continuación suenan 5 señales acústicas y
el aparato pasa al modo de espera.
2. También puede nalizar el manejo antes de tiempo
pulsando el botón .
3. Saque el recipiente de fritura por el asa.
4. Coloque los alimentos en un recipiente resistente al
calor.
5. Vuelva a introducir el recipiente en el aparato.
6. Desenchufe el aparato de la red eléctrica.
Limpieza
AVISO:
• Apague siempre el aparato y desenchúfelo de la toma de co-
rriente antes de limpiarlo. Espere hasta que el aparato se haya
enfriado.
• Deje que el tamiz se enfríe antes de sacarlo del recipiente de
freír.
• No sumerja el aparato en agua. Podría provocar una descarga
eléctrica o un incendio.
ATENCIÓN: Revestimiento antiadherente
• No utilice cepillos de alambre ni otros objetos abra-
sivos.
• No utilice limpiadores fuertes o abrasivos.
• Puede limpiar el tamiz en agua tibia con un poco de
líquido lavavajillas a mano.
• Limpie el interior y el exterior del aparato y el recipiente
de fritura con un paño ligeramente humedecido, no
mojado.
• Elimine también con un paño ligeramente humedecido
cualquier resto de comida o grasa que haya sobre la re-
sistencia o junto a ella. ¡No vuelva a encender el aparato
hasta que la resistencia esté completamente seca!
Almacenamiento
• Limpie el aparato como se describe. Deje que los acce-
sorios se sequen completamente.
• Le recomendamos que guarde el aparato en su emba-
laje original si no va a utilizarlo durante un periodo de
tiempo prolongado.
• Guarde siempre el aparato fuera del alcance de los
niños, en un lugar seco y bien ventilado.
Solución de problemas
Problema Posible causa Solución
El aparato no
funciona.
El aparato no tiene alimentación eléctrica. Compruebe la toma de corriente con otro aparato.
Inserte el enchufe correctamente.
Compruebe el fusible de la casa.
El recipiente de fritura no está insertado
correctamente. Un interruptor de seguridad
impide el manejo con un recipiente para freír
introducido incorrectamente.
Inserte el recipiente para freír correctamente.
Debe encajar de forma audible.
El aparato está defectuoso. Póngase en contacto con nuestro servicio técnico
o con un especialista.

PC-FR1269H_IM 29.08.23
28
Problema Posible causa Solución
Los alimentos no es-
tán completamente
cocinados.
El recipiente de fritura está demasiado lleno. Reduzca la cantidad de alimentos. Las cantida-
des más pequeñas se cocinan más uniforme-
mente.
La temperatura es demasiado baja. Ajuste una temperatura más alta.
El tiempo de cocción es demasiado corto. Prolongue el tiempo de cocción.
Los alimentos se
cocinan de forma
desigual.
Los alimentos están unos encima de otros.
Esto no garantiza una circulación de aire
suciente.
Agite los alimentos a mitad del tiempo de cocción.
Los alimentos no
están crujientes.
Ha utilizado alimentos que sólo son adecua-
dos para una freidora convencional.
Utilice alimentos adecuados para el horno o
úntelos con un poco de aceite.
Sale humo del
aparato.
Está preparando alimentos muy grasos. Puede producirse humo debido a salpicaduras de
grasa en el interior del aparato. Asegúrese de que
haya suciente ventilación.
El recipiente de fritura está demasiado lleno.
Los alimentos están tocando la resistencia.
Reduzca la cantidad de alimentos.
Todavía quedan restos de comida / grasa en el
recipiente de fritura o en la resistencia debido
al uso anterior.
Limpie el aparato después de cada uso como se
describe en el capítulo “Limpieza”.
Datos técnicos
Modelo: ...........................................................PC-FR 1269 H
Alimentación: ......................................220 – 240 V~, 50 – 60 Hz
Consumo de energía: .................................................1800 W
Clase de protección: ..............................................................
Peso neto: ............................................................. aprox. 6 kg
El derecho de realizar modicaciones técnicas y de diseño
en el curso del desarrollo continuo del producto esta
reservado.
Este aparato ha sido probado de acuerdo con todas las
directivas CE vigentes y construido de acuerdo con las
últimas normas de seguridad.
Eliminación
Signicado del símbolo “Cubo de basura”
Proteja nuestro medio ambiente, aparatos eléc-
tricos no forman parte de la basura doméstica.
Haga uso de los centros de recogida previstos
para la eliminación de aparatos eléctricos y
entregue allí sus aparatos eléctricos que no
vaya a utilizar más.
Ayudará en evitar las potenciales consecuencias, a causa
de una errónea eliminación de desechos, para el medio
ambiente y la salud humana.
Con ello, contribuirá a la recuperación, al reciclado y a otras
formas de reutilización de los aparatos viejos eléctricos y
electrónicos.
La información cómo se debe eliminar los aparatos, se
obtiene en su ayuntamiento o su administración municipal.
Su distribuidor y socio contractual también está obligado a
recuperar el aparato antiguo sin coste alguno.

PC-FR1269H_IM 29.08.23
29
IMPORTANTE:
Assicuratevi di leggere prima le istruzioni di sicurezza allegate
separatamente.
Istruzioni per l’uso
Grazie per aver scelto il nostro prodotto. Vi auguriamo un
buon utilizzo del dispositivo.
Prima di utilizzare l’apparecchio, leggere attentamente
le istruzioni per l’uso e le istruzioni di sicurezza allegate
separatamente. Conservare questi documenti, compreso il
certificato di garanzia, la ricevuta e, se possibile, la scatola
con l’imballaggio interno in un luogo sicuro. Se si cede
l’apparecchio a terzi, includere sempre tutti i documenti
pertinenti.
Simboli per questo manuale di istruzioni per l’uso
Le indicazioni importanti per la propria sicurezza sono
indicati appropriatamente. Osservare assolutamente queste
indicazioni, per evitare incidenti e danni all’apparecchio:
AVVISO:
Previene i rischi della propria salute ed indica possibili
rischi di ferite.
ATTENZIONE:
Indica possibili pericoli per l’apparecchio o altri oggetti.
Indice
Elementi di comando ..........................................................3
Disimballaggio dell’apparecchio ....................................29
Elementi di comando / Nella fornitura .............................29
Avvertenze per l’uso dell’apparecchio ........................... 30
Note per l’uso ....................................................................30
Posizione ........................................................................30
Collegamento elettrico ...................................................30
Standby (stato di pronto) ................................................30
Accensione e spegnimento dell’apparecchio ................30
Prima del primo utilizzo .................................................. 30
Note sull’uso ...................................................................30
Tasti funzione ....................................................................31
Impostazione della temperatura e del tempo di cottura 31
Utilizzo ................................................................................31
Programmi automatici .................................................... 31
Interruzione dell’utilizzo ..................................................32
Fine del funzionamento ..................................................32
Pulizia ................................................................................. 32
Conservazione ..................................................................32
Risoluzione dei problemi .................................................33
Dati tecnici ......................................................................... 33
Smaltimento ......................................................................33
Significato del simbolo “Eliminazione” ...........................33
Disimballaggio dell’apparecchio
1. Togliere l’apparecchio dal suo imballaggio.
2. Rimuovere tutto il materiale d’imballaggio, come pelli-
cole, materiale di riempimento, fascette e imballaggi di
cartone.
3. Controllare la completezza del contenuto dell’imballag-
gio.
4. Se il contenuto dell’imballaggio è incompleto o se si
rilevano danni, non mettere in funzione l’apparecchio.
Restituirlo immediatamente al rivenditore.
Elementi di comando / Nella fornitura
Apparecchio
1 Aperture di ingresso dell’aria
2 Aperture di uscita dell’aria
3 Pannello di controllo
4 Maniglia del contenitore di frittura
5 Contenitore per friggere
6 Maniglia incassata
7 Manopole in silicone
8 Inserto per setaccio
Pannello di controllo
9 Spie dei programmi automatici:
Patate fritte
Costine
Gamberi
Cosce di pollo
Bistecca
Torta
Pesce
10 Display
11 Tasto (aumenta il tempo di cottura)
12 Tasto (riduzione del tempo di cottura)
13 Tasto (programma automatico: Mantenimento in
caldo / Scongelamento)
14 Tasto (standby)
15 Tasto (avvio / arresto della cottura)
16 Tasto (selezione programma automatico)
17 Tasto (riduzione della temperatura)
18 Tasto (aumentare la temperatura)
19 Display di utilizzo

PC-FR1269H_IM 29.08.23
30
Avvertenze per l’uso dell’apparecchio
AVVISO: Rischio di ustioni!
• Toccare il recipiente di frittura solo dal manico. Se
necessario, utilizzare guanti da forno.
• Durante l’utilizzo, dall’uscita dell’aria può fuoriuscire
vapore caldo. Mantenere una distanza sufficiente.
ATTENZIONE:
• Le aperture di ingresso e di uscita dell’aria non devono
essere coperte per garantire una sufficiente circola-
zione dell’aria.
• Mantenere una distanza di sicurezza sufficiente
(30 cm) da oggetti facilmente infiammabili come mobili,
tende, ecc.
• Non mettere in funzione l’apparecchio sotto i pensili a
causa della risalita di calore e vapori.
• Non manipolare l’interruttore di sicurezza.
• Sovraccarico! Non utilizzare una presa multipla,
poiché l’apparecchio è troppo potente.
Note per l’uso
Posizione
• Collocare l’apparecchio su una superficie antiscivolo,
piana e resistente al calore.
• Non collocare l’apparecchio con la parte posteriore
direttamente contro una parete.
• Non collocare mai l’apparecchio o il cavo di alimenta-
zione su superfici calde o vicino a fonti di calore (ad es.
fornelli, piani di cottura).
Collegamento elettrico
Prima di inserire la spina nella presa di corrente, accertarsi
che la tensione di rete corrisponda a quella dell’apparec-
chio. Le informazioni sono riportate sulla targhetta.
Standby (stato di pronto)
L’apparecchio è in modalità standby quando è acceso solo
il tasto . L’apparecchio passa alla modalità standby nelle
seguenti situazioni:
• Quando viene inserita la spina di rete.
• Se non viene premuto alcun tasto per circa 60 secondi.
• Quando è trascorso il tempo di cottura impostato. In pre-
cedenza, sul display appare brevemente . Vengono
emessi 5 segnali acustici.
Accensione e spegnimento dell’apparecchio
Per accendere e spegnere l’apparecchio, utilizzare il tasto
.
• Non appena si accende l’apparecchio, appare il display
pronto all’uso.
• Allo scadere del tempo, sul display appare . La ven-
tola funziona brevemente per raffreddare l’apparecchio.
Quindi vengono emessi 5 segnali acustici e l’apparec-
chio passa in standby.
Prima del primo utilizzo
• Sull’elemento riscaldante è presente uno strato
protettivo. Per rimuoverlo, far funzionare l’apparecchio
per circa 15 minuti senza contenuto. Durante questo
processo è normale la formazione di un leggero fumo e
di odori. Assicurarsi che la ventilazione sia sufficiente.
• AVVISO:
Lasciare raffreddare l’apparecchio prima di pulirlo!
- Scollegare l’apparecchio dalla rete elettrica.
- Pulire il contenitore di frittura, l’inserto del setaccio e
l’interno dell’apparecchio prima dell’uso.
Note sull’uso
• Questo apparecchio è destinato alla preparazione di ali-
menti solidi. Non preparare zuppe o altri alimenti liquidi.
• Un interruttore di sicurezza impedisce di utilizzare l’appa-
recchio senza un contenitore per friggere.
• Per ottenere risultati ottimali, non riempire il contenitore
di frittura oltre la tacca MAX. Non riempire mai eccessi-
vamente il contenitore per friggere, in modo che gli ali-
menti non entrino in contatto con l’elemento riscaldante.
• Non aggiungere mai olio o altri liquidi al contenitore per
la frittura. Per ottenere un risultato croccante, è possibile
spalmare gli alimenti con un po’ di olio.
• Non preparare con l’apparecchio alimenti ad alto conte-
nuto di grassi (ad es. salsicce).
• Tutti gli alimenti che sono adatti anche al forno possono
essere preparati nell’apparecchio.
• L’inserto del setaccio fa sì che il grasso accumulato si
depositi sul fondo del contenitore di frittura. In questo
modo il cibo diventa più croccante.
• Quando si cuociono torte, pane, ecc. occorre tenere
presente che l’impasto si espande. La pasta non deve
entrare in contatto con l’elemento riscaldante.
• L’inserto del setaccio può essere rimosso per la cottura
di pane o simili.
• Gli alimenti sovrapposti durante la cottura devono essere
scossi a metà del tempo di cottura. In questo modo si
ottimizza il risultato della cottura e si evita una cottura
non uniforme.
• Mettere a bagno i prodotti a base di patate fatti in casa
per almeno 30 minuti dopo il taglio per ridurre l’amido di
patate. Quindi asciugare bene i pezzi di patate con carta
da cucina.
• Il tempo di cottura dipende da vari fattori: Dimensioni,
consistenza, quantità di cibo e temperatura impostata.
• Se non si preriscalda la friggitrice ad aria calda, aggiun-
gere 3 minuti al tempo di cottura.

PC-FR1269H_IM 29.08.23
31
• Friggere le bistecche e le quantità di carne più grandi
in una padella prima di cuocerle nella friggitrice ad aria
calda. Il tempo e la temperatura dipendono dal livello di
cottura desiderato.
• È anche possibile riscaldare gli alimenti con l’apparec-
chio. Selezionare il programma automatico “Mantenere
in caldo / Scongelare” con il tasto . La temperatura e il
tempo preimpostati possono essere regolati individual-
mente.
Tasti funzione
• I tasti dell’apparecchio sono a sfioramento. Per eseguire
la funzione, toccare leggermente i tasti con un dito. Ogni
pressione dei tasti è confermata da un segnale acustico.
• Se si tiene premuto il tasto o , si avvia una corsa
rapida.
Impostazione della temperatura e del tempo di cottura
I tasti e sono presenti due volte sul pannello di
controllo.
• Con il tasto o sopra e sotto il simbolo si impo-
sta la temperatura (80 – 200 °C).
• Con il tasto o sopra e sotto il simbolo si impo-
sta il tempo di cottura (1 – 60 minuti).
• La temperatura e il tempo di cottura vengono visualizzati
alternativamente sul display.
Utilizzo
1. Assicurarsi che l’apparecchio sia scollegato dalla rete
elettrica.
2. Estrarre il recipiente per friggere dall’apparecchio affer-
randolo per la maniglia.
3. Se necessario, inserire nell’apparecchio l’inserto del
setaccio con le manopole in silicone. Spingere l’inserto
del setaccio fino in fondo.
4. Spingere nuovamente il contenitore per friggere nell’ap-
parecchio. Il contenitore deve scattare in posizione in
modo percettibile.
5. Collegare l’apparecchio a una presa di sicurezza corret-
tamente installata. Viene emesso un segnale acustico e
tutti i simboli si accendono brevemente. Poi si accende
solo il tasto .
6. Premere il tasto per mettere l’apparecchio in standby.
L’apparecchio è impostato in fabbrica su una tempera-
tura di 180 °C e 15 minuti.
7. Si consiglia di preriscaldare l’apparecchio per circa
3 minuti senza cuocere gli alimenti. Impostare la tempe-
ratura desiderata e il tempo di cottura di 3 minuti.
8. Premere il tasto per avviare il processo di cottura.
9. Allo scadere del tempo, sul display appare . La ven-
tola funziona brevemente per raffreddare l’apparecchio.
Quindi vengono emessi 5 segnali acustici e l’apparec-
chio passa in standby.
10. Estrarre il contenitore per friggere dall’apparecchio
afferrandolo per la maniglia.
11. Posizionare il contenitore per friggere su una superficie
resistente al calore.
12. Riempire il contenitore per friggere con l’alimento
desiderato.
13. Spingere nuovamente il contenitore per friggere nell’ap-
parecchio. Il contenitore deve scattare in posizione in
modo percettibile.
14. Premere il tasto per riportare l’apparecchio in moda-
lità di utilizzo.
15. Impostare la temperatura e il tempo di cottura desiderati.
In alternativa, selezionare un programma automatico
(vedere la sezione successiva).
16. Premere il tasto per avviare il processo di cottura.
17. Se necessario, scuotere il cibo a metà del tempo di
cottura. A tale scopo, estrarre il recipiente per friggere af-
ferrandolo per il manico. Quindi spingere nuovamente il
contenitore per friggere nell’apparecchio. L’apparecchio
continua il suo utilizzo al punto interrotto.
Programmi automatici
• Per selezionare i programmi automatici, premere ripetu-
tamente il tasto .
• Il programma automatico “Mantenimento in caldo / Scon-
gelamento” si seleziona con il tasto .
• La tabella seguente mostra le temperature preimpostate
in fabbrica in gradi Celsius (°C) e in minuti (min). Le
preimpostazioni sono solo valori indicativi. A seconda
delle dimensioni e del peso dell’alimento, è possibile
che la temperatura e il tempo debbano essere regolati
individualmente.
• La temperatura preimpostata ( ) e il tempo di cottura
( ) possono essere regolati con i tasti e corri-
spondenti.
• Osservare anche le informazioni riportate sulla confe-
zione dell’alimento.
Modalità °C min
Patate fritte 200 20
Costine 180 15
Gamberi 160 20
Cosce di pollo 160 40
Bistecca 180 25
Torta 160 20
Pesce 180 20
Mantenere in
caldo / Scongelare 115 12

PC-FR1269H_IM 29.08.23
32
Interruzione dell’utilizzo
• Estrarre il contenitore per friggere per interrompere
l’utilizzo. Riposizionare il contenitore per friggere per
riprendere l’utilizzo.
• L’utilizzo può essere interrotto anche estraendo la spina
di rete. Ricollegare la spina alla presa di corrente per
continuare l’utilizzo.
• L’apparecchio riprende l’utilizzo al punto interrotto. Que-
sto vale anche in caso di interruzione di corrente.
Fine del funzionamento
1. Allo scadere del tempo, sul display appare . La ven-
tola funziona brevemente per raffreddare l’apparecchio.
Quindi vengono emessi 5 segnali acustici e l’apparec-
chio passa in standby.
2. È possibile terminare l’utilizzo anche prematuramente
premendo il tasto .
3. Estrarre il contenitore per la frittura afferrandolo per il
manico.
4. Mettere il cibo in una ciotola resistente al calore.
5. Reinserire il contenitore per la frittura nell’apparecchio.
6. Scollegare l’apparecchio dalla rete elettrica.
Pulizia
AVVISO:
• Prima di procedere alla pulizia, spegnere sempre l’apparecchio
e scollegare la spina dalla presa di corrente. Attendere che l’ap-
parecchio si sia raffreddato.
• Lasciare raffreddare l’inserto del setaccio prima di rimuoverlo
dal contenitore di frittura!
• Non immergere l’apparecchio in acqua! Potrebbe causare
scosse elettriche o incendi.
ATTENZIONE: Rivestimento antiaderente
• Non utilizzare spazzole metalliche o altri oggetti
abrasivi.
• Non utilizzare detergenti aggressivi o abrasivi.
• È possibile pulire l’inserto del setaccio in acqua tiepida
con un po’ di detersivo per piatti.
• Pulire l’interno e l’esterno dell’apparecchio e il conteni-
tore per la frittura con un panno leggermente umido, non
bagnato.
• Rimuovere anche eventuali residui di cibo / grasso sopra
e accanto all’elemento riscaldante con un panno leg-
germente umido. Non riaccendere l’apparecchio finché
l’elemento riscaldante non è completamente asciutto!
Conservazione
• Pulire l’apparecchio come descritto. Lasciare asciugare
completamente gli accessori.
• Si consiglia di riporre l’apparecchio nell’imballaggio
originale se non si intende utilizzarlo per un periodo di
tempo prolungato.
• Conservare sempre l’apparecchio fuori dalla portata dei
bambini, in un luogo ben ventilato e asciutto.

PC-FR1269H_IM 29.08.23
33
Risoluzione dei problemi
Problema Possibile causa Rimedio
L’apparecchio non funziona. L’apparecchio non ha alimentazione. Controllare la presa di corrente con un altro
apparecchio.
Inserire correttamente la spina di rete.
Controllare il fusibile di casa.
Il contenitore per friggere non è inserito
correttamente. Un interruttore di sicu-
rezza impedisce l’utilizzo di un contenitore
per friggere inserito in modo errato.
Inserire correttamente il contenitore per
friggere. Deve scattare in posizione in modo
percettibile.
L’apparecchio è difettoso. Contattare il nostro servizio o uno specialista.
Il cibo non è completamente
cotto.
Il contenitore per la frittura è troppo pieno. Ridurre la quantità di cibo. Le quantità ridotte
cuociono in modo più uniforme.
La temperatura è impostata troppo bassa. Impostare una temperatura più alta.
Il tempo di cottura è troppo breve. Impostare un tempo di cottura più lungo.
La cottura non è uniforme. Gli alimenti sono sovrapposti. Ciò non
garantisce una sufficiente circolazione
dell’aria.
Scuotere gli alimenti a metà del tempo di
cottura.
Gli alimenti non sono
croccanti.
Sono stati utilizzati alimenti adatti solo a
una friggitrice tradizionale.
Utilizzate alimenti adatti al forno o spalmateli
con un po’ d’olio.
Dall’apparecchio esce del
fumo.
Si stanno preparando alimenti molto
grassi.
Il fumo può svilupparsi a causa di schizzi di
grasso all’interno dell’apparecchio. Assicu-
rarsi che la ventilazione sia sufficiente.
Il contenitore della friggitrice è troppo
pieno. Il cibo tocca l’elemento riscaldante.
Ridurre la quantità di cibo.
Nel contenitore di frittura o sull’elemento
riscaldante ci sono ancora residui di
cibo / grasso dovuti all’uso precedente.
Pulire l’apparecchio dopo ogni utilizzo come
descritto nel capitolo “Pulizia”.
Dati tecnici
Modello: ...........................................................PC-FR 1269 H
Alimentazione:....................................220 – 240 V~, 50 – 60 Hz
Consumo di energia: ................................................... 1800 W
Classe di protezione: .............................................................
Peso netto: ..................................................................ca. 6 kg
Si riserva il diritto di apportare modiche tecniche e di
design nel corso dello sviluppo del prodotto.
Questo apparecchio è stato testato secondo tutte le
direttive CE in vigore e costruito secondo le ultime norme
di sicurezza.
Smaltimento
Significato del simbolo “Eliminazione”
Salvaguardare l’ambiente, gli elettrodomestici
non vanno eliminati come riuti domestici.
Per l’eliminazione degli elettrodomestici, fare
uso dei posti di raccolta previsti per questo tipo
e porre quegli elettrodomestici che non sono
più in uso.
Si contribuisce così ad evitare un effetto potenziale sull’am-
biente e sulla salute, dovuto magari ad una eliminazione
sbagliata.
Questo signica un contributo personale alla riutilizzazione,
al riciclaggio e altre forme di utilizzazione di elettrodomestici
ed apparecchi elettronici usati.
Si possono trovare le corrispondenti informazioni sugli
appositi luoghi di raccolta, nelle amministrazioni dei comuni.
Il vostro rivenditore e partner contrattuale è anche obbligato
a riprendere gratuitamente il vecchio apparecchio.

PC-FR1269H_IM 29.08.23
34
WAŻNE:
Najpierw należy zapoznać się z oddzielnie załączoną instrukcją
bezpieczeństwa.
Instrukcja obsługi
Dziękujemy za wybór naszego produktu. Mamy nadzieję, że
korzystanie z urządzenia sprawi państwu radość.
Przed rozpoczęciem użytkowania urządzenia przeczytaj
uważnie instrukcję obsługi oraz oddzielnie załączone
wskazówki bezpieczeństwa. Przechowuj te dokumenty
wraz z kartą gwarancyjną, paragonem i, jeśli to możliwe,
pudełkiem z opakowaniem wewnętrznym w bezpiecznym
miejscu. Jeżeli przekazujesz urządzenie osobom trzecim,
dołącz zawsze wszystkie istotne dokumenty.
Symbole użyte w tej instrukcji obsługi
Ważne informacje dotyczące bezpieczeństwa użytkownika
są specjalnie wyróżnione. Koniecznie stosuj się do tych
wskazówek, aby uniknąć wypadków i uszkodzenia urzą-
dzenia:
OSTRZEŻENIE:
Ostrzega przed zagrożeniami dla zdrowia i wskazuje na
potencjalne ryzyka obrażeń.
UWAGA:
Wskazuje na potencjalne zagrożenia dla urządzenia lub
innych przedmiotów.
Spis treści
Przegląd elementów obsługi .............................................3
Rozpakowanie urządzenia ............................................... 34
Przegląd elementów obsługi / Zakres dostawy..............34
Ostrzeżenia dotyczące użytkowania urządzenia ..........35
Uwagi dotyczące użytkowania ........................................35
Lokalizacja ......................................................................35
Podłączenie elektryczne ................................................35
Tryb gotowości ...............................................................35
Włączanie / wyłączanie urządzenia ................................35
Przed pierwszym użyciem .............................................35
Uwagi dotyczące użytkowania ....................................... 35
Przyciski funkcyjne...........................................................36
Ustawianie temperatury i czasu gotowania ................... 36
Obsługa .............................................................................. 36
Programy automatyczne ................................................ 36
Przerywanie obsługi ....................................................... 36
Zakończenie operacji .....................................................37
Czyszczenie ....................................................................... 37
Przechowywanie ...............................................................37
Rozwiązywanie problemów .............................................38
Dane techniczne ................................................................38
Warunki gwarancji ............................................................38
Usuwanie ...........................................................................39
Znaczenie symbolu „Pojemnik na śmieci” ..................... 39
Rozpakowanie urządzenia
1. Wyjmij urządzenie z opakowania.
2. Usuń wszystkie materiały opakowaniowe, takie jak folie,
materiały wypełniające, opaski kablowe i opakowania
kartonowe.
3. Sprawdź, czy zawartość opakowania jest kompletna.
4. Jeżeli zawartość opakowania jest niekompletna lub
jeżeli widoczne są uszkodzenia, nie używaj urządzenia.
Natychmiast zwróć je do sprzedawcy.
Przegląd elementów obsługi /
Zakres dostawy
Urządzenie
1 Otwory wlotu powietrza
2 Otwory wylotu powietrza
3 Panel sterowania
4 Uchwyt pojemnika do smażenia w głębokim tłuszczu
5 Pojemnik do smażenia w głębokim tłuszczu
6 Uchwyt wpuszczany
7 Silikonowe pokrętła
8 Wkład sita
Panel sterowania
9 Kontrolki programów automatycznych:
Frytki
Żeberka
Krewetki
Udka z kurczaka
Stek
Ciasto
Ryba
10 Wyświetlacz
11 Przycisk (wydłużenie czasu gotowania)
12 Przycisk (skrócenie czasu gotowania)
13 Przycisk (automatyczny program: Utrzymywanie
ciepła / Rozmrażanie)
14 Przycisk (tryb gotowości)
15 Przycisk (rozpoczęcie / zakończenie gotowania)
16 Przycisk (wybór programu automatycznego)
17 Przycisk (obniżenie temperatury)
18 Przycisk (zwiększenie temperatury)
19 Wyświetlacz obsługi

PC-FR1269H_IM 29.08.23
35
Ostrzeżenia dotyczące
użytkowania urządzenia
OSTRZEŻENIE: Ryzyko poparzenia!
• Pojemnika do smażenia należy dotykać wyłącznie za
uchwyt. W razie potrzeby używaj rękawic kuchennych.
• Podczas obsługi z wylotu powietrza może wydostawać
się gorąca para. Należy zachować odpowiednią
odległość.
UWAGA:
• Otwory wlotu i wylotu powietrza nie powinny być
zakryte, aby zapewnić wystarczającą cyrkulację
powietrza.
• Należy zachować bezpieczną odległość (30 cm) od ła-
twopalnych przedmiotów, takich jak meble, zasłony itp.
• Nie należy obsługiwać urządzenia pod szafkami wi-
szącymi ze względu na unoszące się ciepło i opary.
• Nie manipulować przy wyłączniku bezpieczeństwa.
• Przeciążenie! Nie używaj gniazda wielokrotnego,
ponieważ urządzenie ma zbyt dużą moc.
Uwagi dotyczące użytkowania
Lokalizacja
• Urządzenie należy ustawić na antypoślizgowej, równej
i odpornej na wysoką temperaturę powierzchni.
• Nie umieszczać urządzenia tyłem bezpośrednio przy
ścianie.
• Nigdy nie umieszczaj urządzenia ani przewodu zasilają-
cego na gorących powierzchniach lub w pobliżu źródeł
ciepła (np. kuchenka, płyta grzewcza).
Podłączenie elektryczne
Przed włożeniem wtyczki sieciowej do gniazda należy
upewnić się, że napięcie sieciowe odpowiada napięciu urzą-
dzenia. Informacje na ten temat znajdują się na tabliczce
znamionowej.
Tryb gotowości
Urządzenie znajduje się w trybie gotowości, gdy świeci się
tylko przycisk . Urządzenie przełącza się w tryb gotowo-
ści w następujących sytuacjach:
• Gdy wtyczka sieciowa jest podłączona.
• Jeśli przez około 60 sekund nie zostanie naciśnięty
żaden przycisk.
• Po upływie ustawionego czasu gotowania. Wcześniej
na wyświetlaczu pojawi się na krótko . Rozlegnie się
5 sygnałów dźwiękowych.
Włączanie / wyłączanie urządzenia
Do włączania i wyłączania urządzenia służy przycisk .
• Po włączeniu urządzenia wyświetlany jest ekran gotowo-
ści do pracy.
• Po upływie określonego czasu na wyświetlaczu pojawi
się komunikat . Wentylator uruchomi się na krótko,
aby schłodzić urządzenie. Następnie rozlegnie się 5 sy-
gnałów dźwiękowych i urządzenie przełączy się w tryb
gotowości.
Przed pierwszym użyciem
• Na elemencie grzejnym znajduje się warstwa ochronna.
Aby ją usunąć, urządzenie należy obsługiwać przez
około 15 minut bez zawartości. Nieznaczne dymienie
i nieprzyjemne zapachy są normalne podczas tego pro-
cesu. Należy zapewnić odpowiednią wentylację.
• OSTRZEŻENIE:
Przed przystąpieniem do czyszczenia należy odcze-
kać, aż urządzenie ostygnie!
- Odłącz urządzenie od zasilania.
- Przed użyciem należy wytrzeć pojemnik do smażenia,
wkład sita i wnętrze urządzenia.
Uwagi dotyczące użytkowania
• Urządzenie jest przeznaczone do przygotowywania
potraw stałych. Nie należy przygotowywać w nim zup ani
innych płynnych potraw.
• Wyłącznik bezpieczeństwa uniemożliwia korzystanie
z urządzenia bez pojemnika do smażenia.
• Aby uzyskać najlepsze rezultaty, nie należy napełniać
pojemnika do smażenia powyżej oznaczenia MAX.
Nigdy nie przepełniaj pojemnika do smażenia, aby żyw-
ność nie miała kontaktu z elementem grzejnym.
• Do pojemnika do smażenia nigdy nie należy dodawać
oleju ani innych płynów. Aby uzyskać chrupiący efekt,
żywność można posmarować niewielką ilością oleju.
• W urządzeniu nie należy przygotowywać potraw o wyso-
kiej zawartości tłuszczu (np. kiełbasek).
• W urządzeniu można przygotowywać wszystkie potrawy,
które nadają się również do piekarnika.
• Wkład sita zapewnia, że nagromadzony tłuszcz osiada
na dnie pojemnika do smażenia. Dzięki temu potrawy są
bardziej chrupiące.
• Podczas pieczenia ciast, chleba itp. należy pamiętać,
że ciasto rozszerza się. Ciasto nie może stykać się
z elementem grzejnym.
• Wkład sita można wyjąć do pieczenia chleba itp.
• Potrawy, które leżą na sobie podczas gotowania, należy
wstrząsnąć w połowie czasu gotowania. Zoptymalizuje
to wyniki gotowania i zapobiegnie nierównomiernemu
gotowaniu.
• Domowe produkty ziemniaczane należy moczyć przez
co najmniej 30 minut po pokrojeniu, aby zredukować
skrobię ziemniaczaną. Następnie dobrze osusz kawałki
ziemniaków papierem kuchennym.
• Czas gotowania zależy od różnych czynników: rozmiaru,
tekstury, ilości jedzenia i ustawionej temperatury.
• Jeśli frytownica nie zostanie podgrzana, należy dodać
3 minuty do czasu gotowania.

PC-FR1269H_IM 29.08.23
36
• Smażyć steki i większe ilości mięsa na patelni przed
gotowaniem we frytownicy na gorące powietrze. Czas
i temperatura zależą od żądanego stopnia wysmażenia.
• Urządzenie umożliwia również odgrzewanie potraw.
Wybierz program automatyczny „Utrzymywanie ciepła /
Rozmrażanie” za pomocą przycisku . Ustawioną tem-
peraturę i czas można regulować indywidualnie.
Przyciski funkcyjne
• Przyciski na urządzeniu są przyciskami dotykowymi. Aby
wykonać daną funkcję, należy lekko dotknąć przycisków
palcem. Każde naciśnięcie przycisku jest potwierdzane
sygnałem dźwiękowym.
• Przytrzymanie wciśniętego przycisku lub spowo-
duje uruchomienie szybkiego biegu.
Ustawianie temperatury i czasu gotowania
Przyciski i znajdują się dwa razy na panelu stero-
wania.
• Za pomocą przycisku lub powyżej i poniżej sym-
bolu można ustawić temperaturę (80 – 200 °C).
• Za pomocą przycisku lub powyżej i poniżej sym-
bolu można ustawić czas gotowania (1 – 60 minut).
• Temperatura i czas gotowania są wyświetlane naprze-
miennie na wyświetlaczu.
Obsługa
1. Upewnij się, że urządzenie jest odłączone od zasilania.
2. Wyciągnij pojemnik do smażenia z urządzenia za
uchwyt.
3. W razie potrzeby umieść wkład sita z silikonowymi po-
krętłami w urządzeniu. Wciśnij wkład sita do końca.
4. Wsuń pojemnik do smażenia z powrotem do urządze-
nia. Pojemnik musi zatrzasnąć się w słyszalny sposób.
5. Podłącz urządzenie do prawidłowo zainstalowanego
gniazda bezpieczeństwa. Rozlegnie się sygnał dźwię-
kowy, a wszystkie symbole zaświecą się na krótko.
Następnie zaświeci się tylko przycisk .
6. Naciśnij przycisk , aby przełączyć urządzenie w tryb
gotowości. Urządzenie jest fabrycznie ustawione na
temperaturę 180 °C i 15 minut.
7. Zalecamy wstępne podgrzewanie urządzenia przez
około 3 minuty bez gotowania potraw. Ustaw żądaną
temperaturę i czas gotowania na 3 minuty.
8. Naciśnij przycisk , aby rozpocząć proces gotowania.
9. Po upływie czasu na wyświetlaczu pojawi się komunikat
. Wentylator uruchomi się na chwilę, aby schłodzić
urządzenie. Następnie rozlegnie się 5 sygnałów dźwię-
kowych i urządzenie przełączy się w tryb gotowości.
10. Wyciągnij pojemnik do smażenia z urządzenia za
uchwyt.
11. Umieść pojemnik do smażenia na żaroodpornej po-
wierzchni.
12. Napełnij pojemnik do smażenia wybraną potrawą.
13. Wsuń pojemnik do smażenia z powrotem do urządze-
nia. Pojemnik musi zatrzasnąć się w słyszalny sposób.
14. Naciśnij przycisk , aby przełączyć urządzenie z po-
wrotem do trybu obsługi.
15. Ustaw żądaną temperaturę i czas gotowania. Ewentu-
alnie wybierz program automatyczny (patrz następna
sekcja).
16. Naciśnij przycisk , aby rozpocząć proces gotowania.
17. W razie potrzeby potrząśnij potrawą w połowie czasu
gotowania. W tym celu wyciągnij pojemnik do smażenia
za uchwyt. Następnie wsuń pojemnik z powrotem do
urządzenia. Urządzenie kontynuuje obsługę w przerwa-
nym punkcie.
Programy automatyczne
• Programy automatyczne wybiera się, naciskając kilka-
krotnie przycisk .
• Program automatyczny „Utrzymywanie ciepła / Rozmra-
żanie” wybiera się za pomocą przycisku .
• Poniższa tabela przedstawia fabrycznie ustawione tem-
peratury w stopniach Celsjusza (°C) i minutach (min).
Ustawione wartości są jedynie wartościami orientacyj-
nymi. W zależności od rozmiaru i wagi żywności, tempe-
ratura i czas mogą wymagać indywidualnej regulacji.
• Ustawioną temperaturę ( ) i czas gotowania ( ) można
regulować za pomocą odpowiednich przycisków
i .
• Należy również przestrzegać informacji podanych na
opakowaniu żywności.
Tryb °C min
Frytki 200 20
Żeberka 180 15
Krewetki 160 20
Udka z kurczaka 160 40
Stek 180 25
Ciasto 160 20
Ryba 180 20
Utrzymywanie
ciepła / Rozmra-
żanie
115 12
Przerywanie obsługi
• Wyciągnij pojemnik do smażenia, aby przerwać obsługę.
Ponownie włóż pojemnik do smażenia, aby wznowić
obsługę.

PC-FR1269H_IM 29.08.23
37
• Obsługę można również przerwać, wyciągając wtyczkę
sieciową. Podłącz ponownie wtyczkę zasilania do
gniazda, aby kontynuować obsługę.
• Urządzenie wznowi obsługę w miejscu przerwania.
Dotyczy to również awarii zasilania.
Zakończenie operacji
1. Po upływie czasu na wyświetlaczu pojawi się . Wen-
tylator uruchomi się na krótko, aby schłodzić urządzenie.
Następnie rozlegnie się 5 sygnałów dźwiękowych i urzą-
dzenie przełączy się w tryb gotowości.
2. Można również przedwcześnie zakończyć operację,
naciskając przycisk .
3. Wyciągnij pojemnik do smażenia za uchwyt.
4. Umieść jedzenie w żaroodpornej misce.
5. Wsuń pojemnik do smażenia z powrotem do urządzenia.
6. Odłącz urządzenie od zasilania.
Czyszczenie
OSTRZEŻENIE:
• Przed przystąpieniem do czyszczenia należy zawsze wyłączyć
urządzenie i wyjąć wtyczkę z gniazdka. Poczekaj, aż urządze-
nie ostygnie.
• Przed wyjęciem wkładu sitowego z pojemnika do smażenia na-
leży odczekać, aż ostygnie!
• Nie zanurzać urządzenia w wodzie! Może to spowodować pora-
żenie prądem lub pożar.
UWAGA: Powłoka nieprzywierająca
• Nie używaj szczotki drucianej ani innych przedmiotów
ściernych.
• Nie używaj ostrych lub ściernych środków czyszczą-
cych.
• Wkład sita można czyścić w ciepłej wodzie z niewielką
ilością płynu do ręcznego mycia naczyń.
• Wyczyść wewnętrzną i zewnętrzną część urządzenia
oraz pojemnik do smażenia za pomocą lekko wilgotnej,
ale nie mokrej ściereczki.
• Za pomocą lekko zwilżonej szmatki usuń również
wszelkie resztki jedzenia / tłuszczu znajdujące się na
elemencie grzejnym i obok niego. Nie włączać ponownie
urządzenia, dopóki element grzejny nie będzie całkowi-
cie suchy!
Przechowywanie
• Wyczyść urządzenie zgodnie z opisem. Pozostaw akce-
soria do całkowitego wyschnięcia.
• Jeśli urządzenie nie będzie używane przez dłuższy
czas, zalecamy przechowywanie go w oryginalnym
opakowaniu.
• Urządzenie należy zawsze przechowywać w dobrze
wentylowanym i suchym miejscu, poza zasięgiem dzieci.

PC-FR1269H_IM 29.08.23
38
Rozwiązywanie problemów
Problem Możliwa przyczyna Środek zaradczy
Urządzenie nie działa. Urządzenie nie jest zasilane. Sprawdzić gniazdo sieciowe za pomocą innego
urządzenia.
Włożyć prawidłowo wtyczkę sieciową.
Sprawdzić bezpiecznik domowy.
Pojemnik do frytowania nie jest prawidłowo
włożony. Wyłącznik bezpieczeństwa unie-
możliwia obsługę nieprawidłowo włożonego
pojemnika do smażenia.
Włóż prawidłowo pojemnik do smażenia. Musi on
słyszalnie zatrzasnąć się na swoim miejscu.
Urządzenie jest uszkodzone. Skontaktuj się z naszym serwisem lub specjalistą.
Potrawa nie jest w
pełni ugotowana.
Pojemnik do smażenia jest przepełniony. Zmniejsz ilość jedzenia. Mniejsze ilości gotują się
bardziej równomiernie.
Ustawiono zbyt niską temperaturę. Ustaw wyższą temperaturę.
Ustawiono zbyt krótki czas gotowania. Ustaw dłuższy czas smażenia.
Potrawa jest nierów-
nomiernie ugotowana.
Jedzenie jest ułożone jedno na drugim.
Nie zapewnia to wystarczającej cyrkulacji
powietrza.
Wstrząsnąć potrawą w połowie czasu gotowania.
Potrawa nie jest
chrupiąca.
Użyto żywności, która nadaje się tylko do
konwencjonalnej frytownicy.
Używaj potraw odpowiednich do piekarnika lub
posmaruj je niewielką ilością oleju.
Z urządzenia wydo-
bywa się dym.
Przygotowujesz bardzo tłuste potrawy. Rozpryski tłuszczu wewnątrz urządzenia mogą
powodować powstawanie dymu. Upewnij się, że
wentylacja jest wystarczająca.
Pojemnik do smażenia jest przepełniony.
Żywność dotyka elementu grzejnego.
Zmniejsz ilość jedzenia.
W pojemniku do smażenia lub na
elemencie grzejnym nadal znajdują się
resztki jedzenia / tłuszczu z poprzedniego
użytkowania.
Urządzenie należy czyścić po każdym użyciu
zgodnie z opisem w rozdziale „Czyszczenie”.
Dane techniczne
Model:..............................................................PC-FR 1269 H
Zasilanie: ............................................220 – 240 V~, 50 – 60 Hz
Pobór mocy: ................................................................1800 W
Klasa ochronności: .................................................................
Waga netto: .................................................................ok. 6 kg
Zastrzegamy sobie prawo wprowadzania zmian technicz-
nych i projektowych w trakcie ciągłego rozwoju produktu.
To urządzenie zostało przetestowane zgodnie z wszystkimi
obowiązującymi, aktualnymi dyrektywami CE i zbudowane
zgodnie z najnowszymi przepisami bezpieczeństwa.
Warunki gwarancji
Przyznajemy 24 miesiące gwarancji na produkt licząc od
daty zakupu.
W tym okresie będziemy bezpłatnie usuwać w terminie
14 dni od daty dostarczenia wadliwego sprzętu z kartą
gwarancyjną do miejsca zakupu wszystkie uszkodzenia
powstałe w tym urządzeniu na skutek wady materiałów
lub wadliwego wykonania, naprawiając oraz wymieniając
wadliwe części lub (jeśli uznamy za stosowne) wymieniając
całe urządzenie na nowe.
Sprzęt do naprawy powinien być dostarczony w komplecie
wraz z dowodem zakupu oraz z ważną kartą gwarancyjną
do sprzedawcy w miarę możliwości w oryginalnym opako-
waniu lub innym odpowiednim dla zabezpieczenia przed
uszkodzeniem. W razie braku kompletnego opakowania fa-
brycznego, ryzyko uszkodzenia sprzętu podczas transportu
do i z miejsca zakupu ponosi reklamujący.
Naprawa gwarancyjna nie dotyczy czynności przewidzianych
w instrukcji obsługi, do wykonania których zobowiązany jest
użytkownik we własnym zakresie i na własny koszt.
Gwarancja nie obejmuje:
• mechanicznych, termicznych, chemicznych uszkodzeń
sprzętu i wywołanych nimi wad,

PC-FR1269H_IM 29.08.23
39
• uszkodzeń powstałych w wyniku działania sił zewnętrz-
nych takich jak wyładowania atmosferyczne, zmiana
napięcia zasilania i innych zdarzeń losowych,
• nieprawidłowego ustawienia wartości napięcia elektrycz-
nego, zasilanie z nieodpowiedniego gniazda zasilania,
• sznurów połączeniowych, sieciowych, żarówek, baterii,
akumulatorów,
• uszkodzeń wyrobu powstałych w wyniku niewłaściwego
lub niezgodnego z instrukcją jego użytkowania, przecho-
wywania, konserwacji, samowolnego zrywania plomb
oraz wszelkich przeróbek i zmian konstrukcyjnych doko-
nanych przez użytkownika lub osoby niepowołane,
• roszczeń z tytułu parametrów technicznych wyrobu, o ile
są one zgodne z podanymi przez producenta,
• prawidłowego zużycia i uszkodzeń, które mają nieistotny
wpływ na wartość lub działanie tego urządzenia.
Karta gwarancyjna bez pieczątki sklepu, daty sprzedaży, nie
wypełniona, źle wypełniona, ze śladami poprawek, nieczy-
telna wskutek zniszczenia, bez możliwości ustalenia miejsca
sprzedaży oraz dołączonego dowodu zakupu jest nieważna.
Korzystanie z usług gwarancyjnych nie jest możliwe po
upływie daty ważności gwarancji. Gwarancja na części lub
całe urządzenie, które są wymieniane kończy się, wraz
z końcem gwarancji na to urządzenie.
Wszystkie inne roszczenia, wliczając w to odszkodowania
są wykluczone chyba, że prawo przewiduje inaczej. Rosz-
czenia wykraczające poza tą umowę nie są uwzględniane
przez tą gwarancję.
Gwarancja na sprzedany towar konsumpcyjny nie wyłącza,
nie ogranicza ani nie zawiesza uprawnień kupującego
wynikających z niezgodności towaru z umową.
Gwarancja oraz zawarte w niej warunki obowiązują na
terenie Rzeczpospolitej Polskiej.
Dystrybutor:
CTC Clatronic Sp. z o.o
Ul. Brzeska 1
45-960 Opole
Usuwanie
Znaczenie symbolu „Pojemnik na śmieci”
Proszę oszczędzać nasze środowisko, sprzęt
elektryczny nie należy do śmieci domowych.
Proszę korzystać z punktów zbiorczych, prze-
widzianych do zdawania sprzętu elektrycznego,
i tam proszę oddawać sprzęt elektryczny,
którego już nie będą Państwo używać.
Tym sposobem pomagają Państwo unikać potencjalnych
następstw niewłaściwego usuwania odpadów, mających
wpływ na środowisko i zdrowie ludzi.
Tą drogą przyczyniają się Państwo do ponownego użycia,
do recyklingu i do innych form wykorzystania starego
sprzętu elektrycznego i elektronicznego.
Informacje, gdzie można zdać sprzęt, otrzymają Państwo
w swoich urzędach komunalnych lub w administracji gminy.
Twój sprzedawca i partner umowny jest również zobowią-
zany do bezpłatnego odbioru starego urządzenia.

PC-FR1269H_IM 29.08.23
40
FONTOS:
Először feltétlenül olvassa el a külön mellékelt biztonsági utasítá-
sokat.
Használati utasítás
Köszönjük, hogy a termékünket választotta. Reméljük,
elégedetten használja majd a készüléket.
A készülék használata előtt nagyon gyelmesen olvassa
el a használati útmutatót és a külön mellékelt biztonsági
utasításokat. Tartsa ezeket a dokumentumokat, beleértve
a jótállási jegyet, a blokkot és lehetőség szerint a belső
csomagolással ellátott dobozt is, biztonságos helyen. Ha a
készüléket harmadik félnek adja tovább, mindig mellékelje
az összes vonatkozó dokumentumot.
A használati útmutatóban található szimbólumok
Az ön biztonságára vonatkozó utasítások kifejezetten meg
vannak különböztetve. Kérjük, mindenképpen ügyeljen
ezekre annak érdekében, hogy elkerülje a baleseteket és a
készülék károsodását:
FIGYELMEZTETÉS:
Egészségét károsító veszélyforrásokra gyelmeztet és
rámutat a lehetséges sérülési lehetőségekre.
VIGYÁZAT:
Lehetséges veszélyre utal, mely a készülékben vagy más
tárgyakban kárt tehet.
Tartalom
A kezelőelemek áttekintése ...............................................3
A készülék kicsomagolása ..............................................40
A kezelőelemek áttekintése / A csomag tartalma ..........40
A készülék használatára vonatkozó gyelmeztetések
...41
Használati megjegyzések ................................................41
Helyszín ..........................................................................41
Elektromos csatlakozás .................................................41
Készenléti (készenléti állapot) .......................................41
A készülék be- / kikapcsolása ......................................... 41
Első használat előtt ........................................................ 41
Használatra vonatkozó megjegyzések .......................... 41
Funkciógombok ................................................................42
A hőmérséklet és a főzési idő beállítása .......................42
Működés .............................................................................42
Automatikus programok ................................................. 42
Művelet megszakítása ...................................................42
A működés befejezése ................................................... 43
Tisztítás .............................................................................. 43
Tárolás ...............................................................................43
Hibaelhárítás......................................................................43
Műszaki adatok .................................................................44
Hulladékkezelés ................................................................44
A „kuka” piktogram jelentése..........................................44
A készülék kicsomagolása
1. Vegye ki a készüléket a csomagolásából.
2. Távolítson el minden csomagolóanyagot, például
fóliákat, töltőanyagot, kábelkötegelőket és kartoncso-
magolást.
3. Ellenőrizze a szállítási terjedelem teljességét.
4. Ha a csomagolás tartalma hiányos, vagy ha sérülések
észlelhetők, ne működtesse a készüléket. Azonnal
juttassa vissza a kereskedőhöz.
A kezelőelemek áttekintése /
A csomag tartalma
Készülék
1 Légbeömlő nyílások
2 Légkivezető nyílások
3 Vezérlőpanel
4 Mélysütőtartály fogantyú
5 Mélysütő tartály
6 Süllyesztett fogantyú
7 Szilikon gombok
8 Szűrőbetét
Vezérlőpanel
9 Az automatikus programok jelzőfényei:
Sült krumpli
Bordák
Garnélarák
Csirkecomb
Steak
Torta
Hal
10 Kijelző
11 gomb (főzési idő növelése)
12 gomb (főzési idő csökkentése)
13 gomb (automatikus program: Melegen tartás / Kiol-
vasztás)
14 gomb (készenléti állapot)
15 gomb (főzés indítása / leállítása)
16 gomb (automatikus program kiválasztása)
17 gomb (hőmérséklet csökkentése)
18 gomb (növelje a hőmérsékletet)
19 Működtetési kijelző

PC-FR1269H_IM 29.08.23
41
A készülék használatára
vonatkozó gyelmeztetések
FIGYELMEZTETÉS: Égési sérülések veszélye!
• Csak a fogantyúnál fogva érintse meg a mélysütőe-
dényt. Szükség esetén használjon sütőkesztyűt.
• Működés közben forró gőz távozhat a légkivezető
nyílásból. Tartson elegendő távolságot.
VIGYÁZAT:
• A levegő be- és kimeneti nyílásokat nem szabad leta-
karni a megfelelő légkeringés biztosítása érdekében.
• Tartson megfelelő biztonsági távolságot (30 cm) a
könnyen gyúlékony tárgyaktól, például bútoroktól,
függönyöktől stb.
• Ne üzemeltesse a készüléket fali szekrények alatt a
felszálló hő és gőzök miatt.
• Ne manipulálja a biztonsági kapcsolót.
• Túlterhelés! Ne használjon többszörös konnektoro-
kat, mivel ez a készülék túl nagy teljesítményű.
Használati megjegyzések
Helyszín
• Helyezze a készüléket csúszásmentes, vízszintes és
hőálló felületre.
• Ne helyezze a készüléket hátuljával közvetlenül a falnak.
• Soha ne helyezze a készüléket vagy a tápkábelt forró fe-
lületekre vagy hőforrások (pl. tűzhely, főzőlap) közelébe.
Elektromos csatlakozás
Mielőtt a hálózati dugót a konnektorba dugja, győződjön
meg arról, hogy a hálózati feszültség megfelel a készülék
feszültségének. Az információt a típustáblán találja.
Készenléti (készenléti állapot)
A készülék készenléti állapotban van, ha csak a gomb
világít. A készülék a következő helyzetekben kapcsol
készenléti üzemmódba:
• Amikor a hálózati csatlakozódugó be van dugva.
• Ha körülbelül 60 másodpercig nem nyomják meg a
gombot.
• Ha a beállított főzési idő letelt. Korábban a kijelzőn rövid
időre megjelenik a felirat. Megszólal 5 jelzőhang.
A készülék be- / kikapcsolása
A gombbal kapcsolja be és ki a készüléket.
• Amint bekapcsolja a készüléket, megjelenik a haszná-
latra kész kijelző.
• Az idő letelte után a kijelzőn megjelenik a felirat.
A ventilátor rövid ideig jár, hogy lehűtse a készüléket.
Ezután 5 jelzőhang szólal meg, és a készülék készenléti
állapotba kapcsol.
Első használat előtt
• A fűtőelemen egy védőréteg található. Ennek eltávolítá-
sához üzemeltesse a készüléket kb. 15 percig tartalom
nélkül. Eközben enyhe füst és szagok normálisak.
Gondoskodjon a megfelelő szellőzésről.
• FIGYELMEZTETÉS:
Tisztítás előtt hagyja kihűlni a készüléket!
- Húzza ki a készüléket a hálózatból.
- Használat előtt törölje ki a mélysütőtartályt, a szitabe-
tétet és a készülék belsejét.
Használatra vonatkozó megjegyzések
• Ez a készülék szilárd ételek elkészítésére szolgál. Ne
készítsen benne leveseket vagy más folyékony ételeket.
• Egy biztonsági kapcsoló megakadályozza, hogy a
készüléket mélysütőedény nélkül használja.
• A legjobb eredmény elérése érdekében ne töltse a
mélysütőedényt a MAX jelzésnél nagyobb mértékben.
Soha ne töltse túl a mélysütőtartályt, hogy az étel ne
érintkezzen a fűtőelemmel.
• Soha ne adjon olajat vagy más folyadékot a mélysütőtar-
tályba. A ropogós eredmény elérése érdekében az ételt
kevés olajjal is megkenheti.
• Ne készítsen a készülékkel magas zsírtartalmú ételeket
(pl. kolbászt).
• A készülékben minden olyan étel elkészíthető, amely a
sütőbe is alkalmas.
• A szitálóbetét gondoskodik arról, hogy a felgyülemlett
zsír a mélysütő edény aljára ülepedjen. Így az ételek
ropogósabbak lesznek.
• Sütemények, kenyér stb. sütésekor vegye gyelembe,
hogy a tészta kitágul. A tészta nem érintkezhet a fűtőe-
lemmel.
• Kenyérsütéshez vagy hasonló sütéshez a szitabetét
kivehető.
• A sütés közben egymáson fekvő ételeket a sütési idő fe-
lénél meg kell rázni. Ez optimalizálja a főzési eredményt
és megakadályozza az egyenetlen főzést.
• A házi készítésű burgonyatermékeket vágás után
legalább 30 percig áztassa a burgonyakeményítő
csökkentése érdekében. Ezután a burgonyadarabokat jól
szárítsa meg konyhai papírral.
• A főzési idő különböző tényezőktől függ: Méret, textúra,
az étel mennyisége és a beállított hőmérséklet.
• Ha nem melegíti elő a forrólevegős sütőt, adjon hozzá
3 percet a főzési időhöz.
• A steakeket és a nagyobb mennyiségű húst serpenyő-
ben süsse meg, mielőtt a forrólevegős sütőben megsü-
tné. Az idő és a hőmérséklet a kívánt sütési foktól függ.
• Az ételeket a készülékkel újra is melegítheti. Válassza ki
a „Melegen tartás / Kiolvasztás” automatikus programot
a gombbal . Az előre beállított hőmérséklet és idő
egyénileg beállítható.

PC-FR1269H_IM 29.08.23
42
Funkciógombok
• A készüléken található gombok érintőgombok. Érintse
meg a gombokat enyhén az ujjával a funkció végre-
hajtásához. Minden gombnyomás egy hangjelzéssel
nyugtázódik.
• Ha a vagy a gombot nyomva tartja, gyorsfutás
indul.
A hőmérséklet és a főzési idő beállítása
Az és gombok egyenként kétszer vannak jelen a
kezelőpanelen.
• A szimbólum felett és alatt lévő vagy gombbal
állítsa be a hőmérsékletet (80 – 200 °C).
• A szimbólum felett és alatt lévő vagy gombbal
a főzési időt (1 – 60 perc) állítja be.
• A hőmérséklet és a főzési idő felváltva jelenik meg a
kijelzőn.
Működés
1. Győződjön meg arról, hogy a készülék le van választva
a hálózatról.
2. Húzza ki a mélysütőedényt a fogantyúnál fogva a
készülékből.
3. Szükség esetén helyezze a szilikongombokkal ellátott
szitabetétet a készülékbe. Nyomja a szitabetétet egé-
szen lefelé.
4. Tolja vissza a mélysütőedényt a készülékbe. Hallhatóan
be kell kattanni a helyére.
5. Csatlakoztassa a készüléket egy megfelelően felszerelt
biztonsági aljzathoz. Megszólal egy hangjelzés, és az
összes szimbólum rövid időre kigyullad. Ezután csak a
gomb világít.
6. Nyomja meg a gombot a készülék készenléti álla-
potba kapcsolásához. A készülék gyárilag 180 °C és
15 perc hőmérsékletre van beállítva.
7. Javasoljuk, hogy a készüléket kb. 3 percig előmelegítse
ételek főzése nélkül. Állítsa be a kívánt hőmérsékletet
és a főzési időt 3 percre.
8. Nyomja meg a gombot a főzési folyamat elindítá-
sához.
9. Az idő leteltével a kijelzőn megjelenik a felirat. A
ventilátor rövid ideig jár, hogy lehűtse a készüléket.
Ezután 5 hangjelzés hallatszik, és a készülék készenléti
állapotba kapcsol.
10. Húzza ki a mélysütőedényt a fogantyúnál fogva a
készülékből.
11. Helyezze a mélysütőtartályt egy hőálló felületre.
12. Töltse meg a mélysütőtartályt a kívánt étellel.
13. Nyomja vissza a mélysütőtartályt a készülékbe. Hallha-
tóan be kell kattannia a helyére.
14. Nyomja meg a gombot, hogy a készülék ismét üzem-
módba kapcsoljon.
15. Állítsa be a kívánt hőmérsékletet és sütési időt. Alterna-
tívaként válasszon egy automatikus programot (lásd a
következő fejezetet).
16. Nyomja meg a gombot a főzési folyamat elindítá-
sához.
17. Ha szükséges, a főzési idő felénél rázza fel az ételt.
Ehhez húzza ki a mélysütőedényt a fogantyújánál fogva.
Ezután tolja vissza a mélysütőtartályt a készülékbe. A
készülék a megszakított ponton folytatja a működést.
Automatikus programok
• Válassza ki az automatikus programokat a gomb
ismételt megnyomásával.
• A „Melegen tartás / Kiolvasztás” automatikus program a
gombbal választható ki.
• A következő táblázat a gyárilag beállított hőmérsékle-
teket Celsius fokban (°C) és percben (min) mutatja. Az
előre beállított értékek csak tájékoztató jellegűek. Az étel
méretétől és súlyától függően a hőmérsékletet és az időt
egyedileg kell beállítani.
• Az előre beállított hőmérséklet ( ) és a főzési idő ( ) a
megfelelő és gombokkal állítható.
• Figyelje meg az élelmiszer csomagolásán található
információkat is.
Mód °C min
Sült krumpli 200 20
Bordák 180 15
Garnélarák 160 20
Csirkecomb 160 40
Steak 180 25
Torta 160 20
Hal 180 20
Melegen tar-
tás / Kiolvasztás 115 12
Művelet megszakítása
• A működés megszakításához húzza ki a mélysütő-
tartályt. A működés folytatásához helyezze vissza a
mélysütőtartályt.
• A működés a hálózati csatlakozó kihúzásával is megsza-
kítható. A működés folytatásához csatlakoztassa vissza
a hálózati dugót a konnektorba.
• A készülék a megszakított ponton folytatja a működést.
Ez áramszünet esetén is érvényes.

PC-FR1269H_IM 29.08.23
43
A működés befejezése
1. Az idő leteltével a kijelzőn megjelenik a felirat. A
ventilátor rövid ideig jár, hogy lehűtse a készüléket.
Ezután 5 jelzőhang szólal meg, és a készülék készenléti
állapotba kapcsol.
2. A gomb megnyomásával idő előtt is befejezheti a
működést.
3. Húzza ki a mélysütőtartályt a fogantyúnál fogva.
4. Tegye az ételt egy hőálló tálba.
5. Tolja vissza a mélysütőtartályt a készülékbe.
6. Húzza ki a készüléket a hálózatból.
Tisztítás
FIGYELMEZTETÉS:
• Tisztítás előtt mindig kapcsolja ki a készüléket, és húzza ki a há-
lózati dugót a konnektorból. Várja meg, amíg a készülék lehűl.
• Hagyja kihűlni a szitabetétet, mielőtt kivenné a mélysütőtartály-
ból!
• Ne merítse a készüléket vízbe! Ez áramütést vagy tüzet okoz-
hat.
VIGYÁZAT: Tapadásmentes bevonat
• Ne használjon drótkefét vagy más koptató tárgyakat.
• Ne használjon durva vagy súroló hatású tisztítósze-
reket.
• A szitabetétet meleg öblítővízben, kevés kézi mosogató-
szerrel tisztíthatja.
• A készülék és a mélysütőtartály belső és külső felületét
enyhén nedves, nem vizes ruhával tisztítsa meg.
• Enyhén nedves ruhával távolítsa el a fűtőelemen és a
fűtőelem mellett lévő étel- / zsírmaradványokat is. Ne
kapcsolja be újra a készüléket, amíg a fűtőelem teljesen
meg nem száradt!
Tárolás
• Tisztítsa meg a készüléket a leírtak szerint. Hagyja a
tartozékokat teljesen megszáradni.
• Javasoljuk, hogy a készüléket az eredeti csomagolásban
tárolja, ha hosszabb ideig nem kívánja használni.
• A készüléket mindig gyermekek elől elzárva, jól szellőző
és száraz helyen tárolja.
Hibaelhárítás
Probléma Lehetséges ok Megoldás
A készülék nem működik. A készüléknek nincs tápellátása. Ellenőrizze a hálózati aljzatot egy másik
készülékkel.
Helyesen dugja be a hálózati dugót.
Ellenőrizze a házi biztosítékot.
A mélysütőtartály nincs megfelelően
behelyezve. Egy biztonsági kapcsoló
megakadályozza a működést rosszul
behelyezett mélysütőedénnyel.
Helyezze be helyesen a mélysütőtartályt.
Hallhatóan be kell kattanni a helyére.
A készülék meghibásodott. Forduljon szervizünkhöz vagy szakem-
berhez.

PC-FR1269H_IM 29.08.23
44
Probléma Lehetséges ok Megoldás
Az étel nem főtt meg teljesen. A mélysütőtartály túl van töltve. Csökkentse az étel mennyiségét. A kisebb
mennyiségek egyenletesebben sülnek
meg.
A hőmérséklet túl alacsonyra van
beállítva.
Állítson be magasabb hőmérsékletet.
A sütési idő túl rövidre van beállítva. Állítson be hosszabb főzési időt.
Az étel egyenetlenül főtt meg. Az ételek egymáson vannak. Ez nem
biztosítja a megfelelő légkeringést.
Rázza fel az ételt a sütési idő felénél.
Az étel nem ropogós. Olyan ételt használt, amely csak hagyo-
mányos mélysütőbe való.
Használjon sütőbe való ételeket, vagy
kenje meg őket kevés olajjal.
Füst szivárog a készülékből. Nagyon zsíros ételt készít. A készülék belsejében lévő zsírfröccsené-
sek miatt füst keletkezhet. Gondoskodjon
a megfelelő szellőzésről.
A mélysütőtartály túl van töltve. Az étel
hozzáér a fűtőelemhez.
Csökkentse az étel mennyiségét.
A mélysütőtartályban vagy a fűtőelemen
még mindig vannak étel- / zsírmaradvá-
nyok a korábbi használatból.
Minden használat után tisztítsa meg a
készüléket a „Tisztítás” fejezetben leírtak
szerint.
Műszaki adatok
Modell: .............................................................PC-FR 1269 H
Tápegység: ........................................220 – 240 V~, 50 – 60 Hz
Energiafogyasztás: .....................................................1800 W
Védelmi osztály: .....................................................................
Nettó súly: ...................................................................kb. 6 kg
A műszaki és kivitelezési módosítások jogát a folyamatos
termékfejlesztés miatt fenntartjuk.
Ezt a készüléket az összes vonatkozó, hatályos CE-irány-
elvnek megfelelően tesztelték, és a legújabb biztonsági
előírásoknak megfelelően gyártották.
Hulladékkezelés
A „kuka” piktogram jelentése
Kímélje környezetünket, az elektromos készülé-
kek nem a háztartási szemétbe valók.
Használja az elektromos készülékek ártalmat-
lanítására kijelölt gyűjtőhelyeket, ott adja le
azokat az elektromos készülékeit, amelyeket
többé már nem kíván használni.
Ezzel segítséget nyújt ahhoz, hogy elkerülhetők legyenek
azok a hatások, amelyeket a helytelen „szemétre dobás”
gyakorolhat a környezetre és az emberi egészségre.
Ezzel hozzájárul az újrahasznosításhoz, a recyclinghoz és a
kiöregedett elektromos és elektronikus készülékek értékesí-
tésének egyéb formáihoz.
Az önkormányzatoknál vagy a polgármesteri hivatalokban
tájékoztatást kaphat arról, hogy hova viheti a kiselejtezett
készülékeket. Az Ön kereskedője és szerződéses partnere
köteles a régi készüléket is ingyenesen visszavenni.

PC-FR1269H_IM 29.08.23
45
ВАЖНО:
Обязательно сначала прочитайте отдельно прилагаемые
инструкции по технике безопасности.
Руководство по эксплуатации
Спасибо за выбор нашего продукта. Надеемся, он вам
понравится.
Перед использованием данного прибора внимательно
прочитайте инструкцию по эксплуатации и отдельно при-
лагаемые инструкции по технике безопасности. Храните
эти документы, включая гарантийный талон, чек и, по воз-
можности, коробку с внутренней упаковкой в надежном
месте. Если вы передаете прибор третьему лицу, всегда
прикладывайте к нему все соответствующие документы.
Символы применяемые в
данном руководстве пользователя
Важные рекомендации для обеспечения вашей без-
опасности обозначены по особенному. Обязательно
следуйте этим рекомендациям, чтобы предотвратить
несчастный случай или поломку изделия:
ПРЕДУПРЕЖДЕНИЕ:
Предупреждает об опасности для здоровья и возмож-
ном риске получения травмы.
ВНИМАНИЕ:
Указывает на возможную опасность для изделия и
других окружающих предметов.
Содержание
Обзор деталей прибора ...................................................3
Распаковка прибора ....................................................... 45
Обзор деталей прибора / Комплект поставки ...........45
Предупреждения по использованию прибора.........46
Примечания по использования ................................... 46
Расположение ..............................................................46
Электрическое подключение ......................................46
Режим ожидания (состояние готовности) ..................46
Включение / выключение прибора .............................. 46
Перед первым использованием .................................46
Указания по использованию .......................................46
Функциональные кнопки ..............................................47
Установка температуры и времени приготовления
... 47
Эксплуатация ................................................................... 47
Автоматические программы .......................................47
Прерывание работы ....................................................48
Окончание работы .......................................................48
Чистка ................................................................................ 48
Хранение ........................................................................... 48
Устранение неполадок ................................................... 49
Технические данные ......................................................49
Утилизация ....................................................................... 49
Значение символа «корзина» .....................................49
Распаковка прибора
1. Извлеките прибор из упаковки.
2. Удалите все упаковочные материалы, такие как
фольга, наполнитель, кабельные стяжки и картонная
упаковка.
3. Проверьте комплект поставки на комплектность.
4. Если содержимое упаковки неполное или если можно
обнаружить повреждения, не эксплуатируйте прибор.
Немедленно верните его дилеру.
Обзор деталей прибора /
Комплект поставки
Прибор
1 Отверстия для впуска воздуха
2 Отверстия для выхода воздуха
3 Панель управления
4 Ручка контейнера для фритюра
5 Контейнер для фритюра
6 Утопленная ручка
7 Силиконовые ручки
8 Вставка с ситом
Панель управления
9 Индикаторы автоматических программ:
Картофель фри
Ребрышки
Креветки
Куриные ножки
Стейк
Торт
Рыба
10 Дисплей
11 Кнопка (увеличение времени приготовления)
12 Кнопка (уменьшение времени приготовления)
13 Кнопка (автоматическая программа: Поддержа-
ние тепла / Размораживание)
14 Кнопка (режим ожидания)
15 Кнопка (запуск / остановка приготовления)
16 Кнопка (выбор автоматической программы)
17 Кнопка (снижение температуры)
18 Кнопка (повышение температуры)
19 Дисплей управления

PC-FR1269H_IM 29.08.23
46
Предупреждения по
использованию прибора
ПРЕДУПРЕЖДЕНИЕ: Опасность ожогов!
• Прикасайтесь к контейнеру для фритюра только за
ручку. При необходимости используйте перчатки
для духовки.
• Во время работы из вентиляционного отверстия
может выходить горячий пар. Держитесь на доста-
точном расстоянии.
ВНИМАНИЕ:
• Для обеспечения достаточной циркуляции воздуха
не следует закрывать отверстия для впуска и
выпуска воздуха.
• Соблюдайте достаточное безопасное расстояние
(30 см) от легко воспламеняющихся предметов,
таких как мебель, шторы и т.п.!
• Не эксплуатируйте прибор под настенными шка-
фами из-за поднимающегося тепла и паров.
• Не манипулируйте предохранительным выключа-
телем.
• Перегрузка! Не используйте многоместные ро-
зетки, так как этот прибор слишком мощный.
Примечания по использования
Расположение
• Установите прибор на нескользящую, ровную и
термостойкую поверхность.
• Не ставьте прибор задней частью непосредственно
к стене.
• Никогда не кладите прибор или шнур питания на
горячие поверхности или вблизи источников тепла
(например, плиты, варочной панели).
Электрическое подключение
Перед тем как вставить сетевую вилку в розетку, убеди-
тесь, что напряжение в сети соответствует напряжению
прибора. Информация об этом указана на фирменной
табличке.
Режим ожидания (состояние готовности)
Прибор находится в режиме ожидания, когда горит
только кнопка . Прибор переходит в режим ожидания
в следующих случаях:
• При включении сетевой вилки в розетку.
• Если в течение 60 секунд не нажималась ни одна
кнопка.
• По истечении установленного времени приготовле-
ния. Ранее на дисплее кратковременно появлялось
сообщение . Раздается 5 сигнальных звуков.
Включение / выключение прибора
Для включения и выключения прибора используйте
кнопку .
• Сразу после включения на дисплее появляется инди-
кация готовности к работе.
• По истечении времени на дисплее появляется над-
пись . Для охлаждения прибора кратковременно
включается вентилятор. Затем раздается 5 звуковых
сигналов, и прибор переходит в режим ожидания.
Перед первым использованием
• На нагревательном элементе имеется защитный
слой. Чтобы удалить его, поработайте около 15 ми-
нут без содержимого. Небольшое задымление и
неприятные запахи являются нормальным явлением.
Убедитесь в наличии достаточной вентиляции.
• ПРЕДУПРЕЖДЕНИЕ:
Дайте прибору остыть перед очисткой!
- Отключите прибор от электросети.
- Перед использованием вытрите контейнер для
фритюра, вставку-сито и внутреннюю поверхность
прибора.
Указания по использованию
• Данный прибор предназначен для приготовления
твердых продуктов. Не готовьте в нем супы или
другие жидкие продукты.
• Предохранительный выключатель не позволяет
использовать прибор без емкости для фритюра.
• Для достижения наилучших результатов не запол-
няйте емкость для фритюра больше отметки MAX.
Никогда не переполняйте емкость для фритюра,
чтобы продукты не соприкасались с нагревательным
элементом.
• Никогда не добавляйте в контейнер для фритюра
масло или другую жидкость. Для получения хру-
стящей корочки можно смазать блюдо небольшим
количеством масла.
• Не готовьте во фритюре продукты с высоким содер-
жанием жира (например, сосиски).
• В приборе можно готовить все продукты, которые
также подходят для духовки.
• Благодаря ситовой вставке скопившийся жир осе-
дает на дно емкости для фритюра. Благодаря этому
пища становится более хрустящей.
• При выпечке пирогов, хлеба и т.п. следует учиты-
вать, что тесто расширяется. Тесто не должно сопри-
касаться с нагревательным элементом.
• Для выпечки хлеба или других подобных изделий
вставку-сито можно снять.
• Продукты, лежащие друг на друге во время
приготовления, следует встряхивать в середине
времени приготовления. Это оптимизирует результат

PC-FR1269H_IM 29.08.23
47
приготовления и предотвращает неравномерное
приготовление.
• После нарезки домашние картофельные продукты
следует замочить не менее чем на 30 минут, чтобы
уменьшить количество крахмала в картофеле. Затем
хорошо просушите кусочки картофеля кухонной
бумагой.
• Время приготовления зависит от различных фак-
торов: размера, текстуры, количества продуктов и
установленной температуры.
• Если вы не разогреваете фритюрницу, добавьте к
времени приготовления 3 минуты.
• Стейки и большие куски мяса перед приготовлением
во фритюрнице следует обжарить на сковороде.
Время и температура зависят от желаемой степени
прожарки.
• В приборе можно также разогревать пищу. Выберите
автоматическую программу «Поддержание тепла /
Размораживание» с помощью кнопки . Заданная
температура и время могут быть отрегулированы
индивидуально.
Функциональные кнопки
• Кнопки на приборе являются сенсорными. Для вы-
полнения функции слегка коснитесь кнопок пальцем.
Каждое нажатие кнопки подтверждается звуковым
сигналом.
• Если удерживать кнопку или нажатой, нач-
нется быстрый запуск.
Установка температуры и времени приготовления
Кнопки и присутствуют на панели управления по
два раза.
• Кнопкой или над и под символом устано-
вить температуру (80 – 200 °C).
• Кнопкой или над и под символом устанав-
ливается время приготовления (1 – 60 минут).
• Температура и время приготовления поочередно
отображаются на дисплее.
Эксплуатация
1. Убедитесь, что прибор отключен от электросети.
2. Выньте контейнер для фритюра из прибора за ручку.
3. При необходимости установите в прибор сито с си-
ликоновыми ручками. Задвиньте сито до упора вниз.
4. Вставьте контейнер для фритюра обратно в прибор.
При этом должен раздаться щелчок.
5. Подключите прибор к правильно установленной
защитной розетке. Раздается звуковой сигнал, и все
символы кратковременно загораются. Затем загора-
ется только кнопка .
6. Нажмите кнопку , чтобы перевести прибор в
режим ожидания. На заводе-изготовителе прибор
настроен на температуру 180 °C и 15 минут.
7. Рекомендуется предварительно прогреть прибор в
течение 3 минут без приготовления пищи. Устано-
вите требуемую температуру и время приготовления
3 минуты.
8. Нажмите кнопку , чтобы начать процесс приго-
товления.
9. По истечении времени на дисплее появится надпись
. Для охлаждения прибора кратковременно
включается вентилятор. Затем раздается 5 звуковых
сигналов, и прибор переходит в режим ожидания.
10. Выньте контейнер для фритюра из прибора за ручку.
11. Поместите контейнер для фритюра на жаропрочную
поверхность.
12. Наполните контейнер для фритюра желаемым
блюдом.
13. Вставьте контейнер для фритюра обратно в прибор.
При этом должен раздаться щелчок.
14. Нажмите кнопку , чтобы переключить прибор в
рабочий режим.
15. Установите желаемую температуру и время приго-
товления. В качестве альтернативы можно выбрать
автоматическую программу (см. следующий раздел).
16. Нажмите кнопку , чтобы начать процесс приго-
товления.
17. При необходимости встряхните блюдо в середине
времени приготовления. Для этого вытяните
контейнер для фритюра за ручку. Затем вставьте
контейнер для фритюра обратно в прибор. Прибор
продолжит работу в прерванном режиме.
Автоматические программы
• Выбор автоматических программ осуществляется
нажатием кнопки .
• Автоматическая программа «Поддержание тепла /
Размораживание» выбирается кнопкой .
• В следующей таблице приведены предустановлен-
ные на заводе температуры в градусах Цельсия
(°C) и минутах (min). Указанные значения являются
лишь ориентировочными. В зависимости от размера
и веса продукта температура и время могут быть
установлены индивидуально.
• Заданная температура ( ) и время приготовления
( ) могут быть изменены с помощью соответствую-
щих кнопок и .
• Также обращайте внимание на информацию, указан-
ную на упаковке продукта.
Режим °C min
Картофель фри 200 20
Ребрышки 180 15
Креветки 160 20
Куриные ножки 160 40

PC-FR1269H_IM 29.08.23
48
Режим °C min
Стейк 180 25
Торт 160 20
Рыба 180 20
Поддержание
тепла / Размора-
живание
115 12
Прерывание работы
• Вытащите контейнер для фритюра, чтобы прервать
работу. Для возобновления работы установите кон-
тейнер для фритюра на место.
• Работу можно также прервать, вытащив сетевую
вилку. Для продолжения работы снова подключите
сетевую вилку к розетке.
• Прибор возобновит работу в точке прерывания. Это
также относится к случаям отключения электроэ-
нергии.
Окончание работы
1. По истечении времени на дисплее появляется над-
пись . Для охлаждения прибора кратковременно
включается вентилятор. Затем раздается 5 звуковых
сигналов, и прибор переходит в режим ожидания.
2. Можно также досрочно завершить работу прибора,
нажав кнопку .
3. Вытащите контейнер для фритюра за ручку.
4. Переложите продукты в жаропрочную миску.
5. Вставьте контейнер для фритюра обратно в прибор.
6. Отключите прибор от электросети.
Чистка
ПРЕДУПРЕЖДЕНИЕ:
• Перед чисткой всегда выключайте прибор и вынимайте
сетевую вилку из розетки. Подождите, пока прибор не осты-
нет.
• Дайте ситовой вставке остыть, прежде чем извлекать ее из
контейнера для фритюра!
• Не погружайте прибор в воду! Это может привести к пора-
жению электрическим током или возгоранию.
ВНИМАНИЕ: Антипригарное покрытие
• Не используйте проволочную щетку или другие
абразивные предметы.
• Не используйте жесткие или абразивные чистящие
средства.
• Вставку сита можно очистить в теплой промывочной
воде с добавлением небольшого количества жидко-
сти для мытья посуды.
• Протрите внутреннюю и внешнюю поверхности
прибора и емкости для фритюра слегка влажной, но
не мокрой тряпкой.
• Также удалите остатки пищи / жира на нагреватель-
ном элементе и рядом с ним слегка влажной тряпкой.
Не включайте прибор до тех пор, пока нагреватель-
ный элемент не будет полностью сухим!
Хранение
• Очистите прибор в соответствии с описанием. Дайте
аксессуарам полностью высохнуть.
• Рекомендуется хранить прибор в оригинальной
упаковке, если вы не собираетесь использовать его в
течение длительного времени.
• Всегда храните прибор в недоступном для детей,
хорошо проветриваемом и сухом месте.

PC-FR1269H_IM 29.08.23
49
Устранение неполадок
Проблема Возможная причина Устранение
Прибор не работает. Прибор не имеет электропитания. Проверьте розетку с другим прибором.
Правильно вставьте сетевую вилку.
Проверьте предохранитель в доме.
Неправильно вставлен контейнер для
фритюра. Защитный выключатель
предотвращает работу с неправильно
установленным контейнером для фритюра.
Правильно вставьте контейнер для
фритюра. При этом должен раздаться звук
щелчка.
Прибор неисправен. Обратитесь в нашу сервисную службу или к
специалисту.
Пища приготовлена
не полностью.
Контейнер для фритюра переполнен. Уменьшите количество продуктов. Меньшие
объемы готовятся более равномерно.
Установлена слишком низкая температура. Установите более высокую температуру.
Установлено слишком короткое время приго-
товления.
Установите более длительное время при-
готовления.
Пища приготовлена
неравномерно.
Продукты находятся друг над другом. Это не
обеспечивает достаточной циркуляции воздуха.
Встряхивать продукты в середине времени
приготовления.
Пища не имеет хру-
стящей корочки.
Используются продукты, которые подходят
только для обычной фритюрницы.
Используйте продукты, подходящие для
духовки, или смазывайте их небольшим
количеством масла.
Из прибора выходит
дым.
Готовится очень жирная пища. Из-за брызг жира внутри прибора может
образоваться дым. Убедитесь в наличии
достаточной вентиляции.
Контейнер для фритюра переполнен. Пища
касается нагревательного элемента.
Уменьшите количество продуктов.
В емкости для фритюра или на нагревательном
элементе остались остатки пищи / жира от
предыдущего использования.
Очищайте прибор после каждого
использования, как описано в главе
«Чистка».
Технические данные
Модель: ..........................................................PC-FR 1269 H
Электропитание: ..............................220 – 240 В~, 50 – 60 Гц
Потребляемая мощность: ....................................... 1800 Вт
Класс защиты: ......................................................................
Вес нетто: .............................................................прибл. 6 кг
Сохранено право на технические и конструкционные
изменения в рамках продолжающейся разработки
продукта.
Данный прибор был протестирован в соответствии со
всеми применимыми действующими директивами CE
и изготовлен в соответствии с последними правилами
безопасности.
Утилизация
Значение символа «корзина»
Защита окружающей среды: не допускается
утилизация электроприборов вместе с быто-
выми отходами.
Утилизация устаревшей техники и неис-
правных электроприборов производится в
городских приёмных пунктах.
Не допускайте неправильной утилизации отходов. Это
наносит вред окружающей среде и оказывает негатив-
ное воздействие на здоровье людей.
Оказывайте содействие программе утилизации и дру-
гим формам переработки электронной и электрической
техники.
Информацию о пунктах утилизации бытовой техники
можно получить в местных органах власти. Ваш дилер
и партнер по договору также обязан бесплатно принять
старый прибор.

PC-FR1269H_IM 29.08.23
50
.
.
.
.
.
.
.
.«»
/
.
a
PC-FR 1269 H .................................................................................:
60–50 240–220 ............................:
1800 ...............................................................................:
I .................................................................................................. :
6 ......................................................................:
.
.
« »
:
.
.
.
.
.
.
• /
.
!
•.
•.
•.
.
.
.
.
.
.
.
.
.
.
./
.
.
.
.
.
.
.
.
.
.
.
.
.
.
.

PC-FR1269H_IM 29.08.23
51
3 . .
.
4 . .
.
5 .
. .
6 . .
. 15 180
7 . . 3
. 3
8 ..
9 . .
5 .
.
10 ..
11 ..
12 ..
13 . .
.
14 ..
15 . .
.( )
16 ..
17 . .
.
.
.
•
.
• / »
.«
•
.(min) (°C)
.
.
• ( ) ( )
.
•.
min °C
20 200
15 180
20 160
40 160
25 180
min °C
20 160
20 180
12 115
/
• .
.
• .
.
•
.
.
1 . .
5 .
.
2 ..
3 ..
4 ..
5 ..
6 ..
:
•
.
.
•
!
• !
.
:
•.
•.
•
.
•
.

PC-FR1269H_IM 29.08.23
52
•
.
•.
•
. MAX
.
•
.
•. ( )
•.
•
.
•
.
•.
•
.
•
30
.
• :
.
• 3
.
• /
.
• .
. «/»
.
• .
. .
•.
.
•
.( 200–80)
•
.( 60–1)
•.
1 ..
2 ..
:
•.
• (30)
.
•.
•.
•. !
•.
•
.
•
.( )
.
()
.
:
•.
•. 60
• . .
. 5
/
.
•.
• .
5 .
.
•
15
.
.
: •
!
-. -.

PC-FR1269H_IM 29.08.23
53
:
.
. .
. .
.
.
.
:
:
.
:
.
3 .......................................................................
53 .......................................................................
53 ............................................... /
53 ..................................................................
52 .....................................................................
52...................................................................................................
52.................................................................................
52..................................................................................()
52............................................................... /
52.............................................................................
52..............................................................................
52 ......................................................................................
52.........................................................
52 ............................................................................................
51 ........................................................................................
51 ................................................................................
51 ....................................................................................
51 ............................................................................................
50 .............................................................................................
50 ...............................................................
50 ..................................................................................a
50 .............................................................................
50 ..............................................................« »
1 ..
2 .
.
3 ..
4 .
. .
/
1
2
3
4
5
6
7
8
: 9
10
( ) 11
( ) 12
( / ) 13
(/ ) 14
( /) 15
( ) 16
( ) 17
( ) 18
19
! :
•.
•
.

PC-FR 1269 H
Industriering Ost 40 • 47906 Kempen
Internet: www.procook-germany.de
Made in P.R.C.
PC-FR1269H_IM 29.08.23
Stand 08 / 2023
-
 1
1
-
 2
2
-
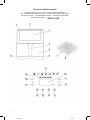 3
3
-
 4
4
-
 5
5
-
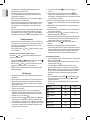 6
6
-
 7
7
-
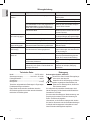 8
8
-
 9
9
-
 10
10
-
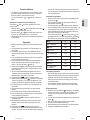 11
11
-
 12
12
-
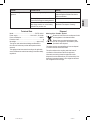 13
13
-
 14
14
-
 15
15
-
 16
16
-
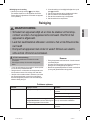 17
17
-
 18
18
-
 19
19
-
 20
20
-
 21
21
-
 22
22
-
 23
23
-
 24
24
-
 25
25
-
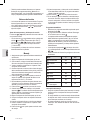 26
26
-
 27
27
-
 28
28
-
 29
29
-
 30
30
-
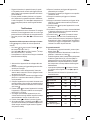 31
31
-
 32
32
-
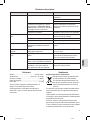 33
33
-
 34
34
-
 35
35
-
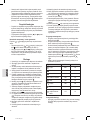 36
36
-
 37
37
-
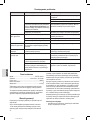 38
38
-
 39
39
-
 40
40
-
 41
41
-
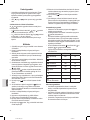 42
42
-
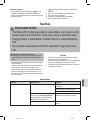 43
43
-
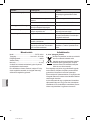 44
44
-
 45
45
-
 46
46
-
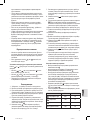 47
47
-
 48
48
-
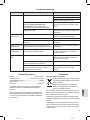 49
49
-
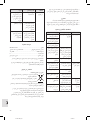 50
50
-
 51
51
-
 52
52
-
 53
53
-
 54
54


ProfiCook PC-FR 1269 H Instrucciones de operación
- Tipo
- Instrucciones de operación
en otros idiomas
Artículos relacionados
Otros documentos
-
BOMANN FR 6057 H CB Instrucciones de operación
-
Tefal FR700930 Manual de usuario
-
-
BOMANN FR 6002 H CB Instrucciones de operación
-
Masterpro BGMP-9175 Manual de usuario
-
SEVERIN FR 2455 Fritteuse El manual del propietario
-
bluMill HIC-AF-8061 Manual de usuario
-
bluMill AFT05008C-GS Manual de usuario