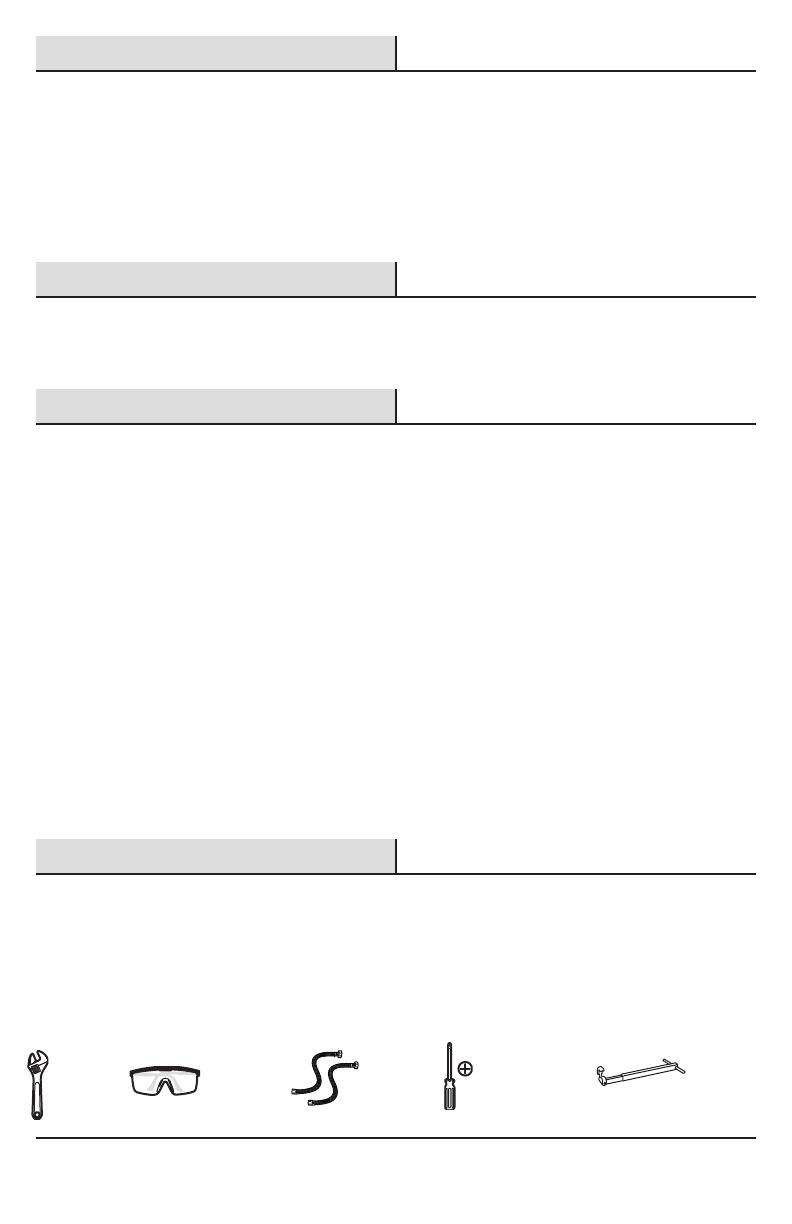
Glacier Bay HD65601-5101 Guía de instalación

Categoría
Artículos sanitarios
Tipo
Guía de instalación

Este manual también es adecuado para

THANK YOU
INSTALLATION AND CARE GUIDE
TWO-HANDLE ROMAN TUB FAUCET
We appreciate the trust and condence you have placed in Glacier Bay through the purchase of this roman tub
faucet. We strive to continually create quality products designed to enhance your home. Visit us online to see
our full line of products available for your home improvement needs. Thank you for choosing Glacier Bay!
Questions, problems, missing parts?
Before returning to the store, call Glacier Bay Customer Service
8 a.m. - 7 p.m., EST, Monday - Friday
9 a.m. - 6 p.m., EST, Saturday
1-855-HD-GLACIER (1-855-434-5224)
HOMEDEPOT.COM
7/2018 REV.01HOMEDEPOT.COM
Model#
HD65601-5101
HD65601-5104
HD65601-5127D
Internet#
306069084
306069105
306069085
SKU#
1003421407
1003421404
1003421406
Phillips
screwdriver
Basin
wrench
2
Table of Contents
Important Information ..............................2
Warranty ...................................................2
Pre-Installation .........................................2
Planning Installation ..............................2
Package Contents ..................................3
Installation ................................................4
Care and Cleaning ....................................7
Troubleshooting ........................................7
Service Parts
...........................................
8
Important Information
Observe all local plumbing and building codes.
Cover the sink drain to avoid losing any parts.
Review the care and cleaning section included in this guide.
Pre-Installation
PLANNING INSTALLATION
Before beginning the installation of this product, ensure all parts are present. Compare parts with the Package
Contents list. If any part is missing or damaged, do not attempt to install the product. Contact Customer Service
for replacement parts.
TOOLS AND HARDWARE REQUIRED
Adjustable
wrench
Safety
goggles
(2) Supply
lines
Tools and Hardware Required ...............2
Operation...................................................7
Warranty
LIMITED LIFETIME WARRANTY
Glacier Bay products are manufactured with superior quality standards and workmanship and are backed by our
limited lifetime warranty. Glacier Bay products are warranted to the original consumer purchaser to be free of
defects in materials or workmanship. We will replace FREE OF CHARGE any product or parts that proves defective.
Simply, return the product / part to any of The Home Depot retail locations or call 1-855-HD-GLACIER (1-855-434-
5224) to receive the replacement item. Proof of purchase (original sales receipt) from the original consumer
purchaser must be made available for all Glacier Bay warranty claims.
This warranty excludes incidental/inconsequential damages and failures due to misuse, abuse or normal wear and
tear. This warranty excludes all industrial, commercial and business usage, whose purchasers are hereby extended
a ve year limited warranty from the date of purchase, with all other terms of this warranty applying except the
duration of warranty.
Some states and provinces do not allow the exclusion or limitation of incidental or consequential damages, so the
above limitations may not apply to you. This warranty gives you specic legal rights and you may also have other
rights that vary from state to state and province to province. Please see a store or contact 1-855-HD-GLACIER for
more details.
Contact the Customer Service Team at 1-855-434-5224 or visit www.HomeDepot.com.
HOMEDEPOT.COM
Please contact 1-855-HD-GLACIER for further assistance.
3
Pre-Installation (continued)
PACKAGE CONTENTS
Part Description Quantity
H Rubber washer 1
I Metal washer 1
J 1
D Index 1
Mounting nut
K 2Handle
Part Description Quantity
A Spout assembly 1
B Set screw 1
C 3.2mm hex wrench 1
G Middle body 1
O Rubber washer 2
P Metal washer 2
Q 2
R Hose 2
E Protective cap 1
F Connector 1
Mounting nut
L Flange 2
M Hot end valve 1
N Cold end valve 1
A
B
C
D
H
I
J
G
F
E
K
L
N
O
P
Q
M
R
S
S Protective cap 2
4
Installation
1
Preparing for installation
CAUTION: Always shut off the water supply before
removing an existing faucet or replacing any part of a
faucet. Open the faucet handle to relieve water pressure
and ensure that the water is completely shut off.
2
Removing the mounting kits
Remove the protective cap (E). Loosen the
connector (F) from the middle body (G). Adjust
the rubber washer (H), metal washer (I) and
mounting nut (J) to the bottom of middle
body (G).
Shut off the water supply. Remove the old
faucet.
Clean the mounting surface.
Drill holes in the nished deck as shown in
the diagram below.
5 in. min.
8~16 in.
3 in. min.
1-7/8 in. MAX. DECK THICKNESS
1-3/8 in.
Diamter
1-1/8 in.
Diamter
1-3/8 in.
Diamter
NOTE: This kit allows up to 1-7/8 in. deck thickness.
3
Installing the middle body
From underneath the deck, insert the middle
body (G) with the rubber washer (H), metal
washer (I) and mounting nut (J) through the
mounting hole.
From above, thread the connector (F) onto
the middle body (G).
Tighten the mounting nut (J) using a basin
wrench, so that the connector (F) sits ush
against the nished deck surface.
H
I
J
G
E
F
H
I
J
G
F
5
Installation (continued)
5
Removing the mounting kits
Remove the protective caps (S).
Loosen the anges (L) from the valve bodys
(M & N). Adjust the rubber washers (O), metal
washers (P) and mounting nuts (Q) to the
bottom of valve bodys (M & N).
HOMEDEPOT.COM
Please contact 1-855-HD-GLACIER for further assistance.
6
Installing the valve bodies
From underneath the deck, insert the cold end
valve (N) with the rubber washer (O), metal
washer (P) and mounting nut (Q) through
the hole on the right (cold) side.
From above, thread the ange (L) onto the
valve body (N).
Tighten the mounting nut (Q) using a basin
wrench, so that the ange (L) sits ush against
the nished deck surface.
Repeat this procedure for the hot end valve (M)
on the left (hot) side.
NOTE: The hot end valve is identied with a label.
4
Installing the spout assembly
Install the spout assembly (A) onto the
connector (F). Be sure the spout assembly (A)
is resting rmly on the deck.
Push down on spout assembly (A) and tighten
set screw (B) with the Hex wrench
(Hex: 3.2mm, C). Insert the index (D).
B
C
A
D
F
S
S
L
N
O
P
Q
L
M
O
P
Q
L
N
O
P
Q
M
6
Installation (continued)
9
Making the water supply
connections
Connect the water supply lines (1) to the
faucet inlets (2). (Supply lines are not
included.)
8
Connecting the hoses
Connect the hoses (R) to the bottom of the hot
and cold end valves (M & N), as shown.
Align the middle body (G) in a position that will
allow maximum clearance to connect the
hoses (R).
Carefully bend the hoses (R) to t in the
available space, and carefully thread the hose
(R) couplings onto the sides of the middle
body (G). Tighten all connections with a wrench.
7
Installing the handle
Thread the handle (K) onto the ange (L).
Place the other handle onto the left (hot) valve
and install the same way.
1
2
NOTE: After install handle assembly, if the handle seat is
not aligned with handle in a line as shown in the above
diagram (1), rotate the handle seat back (the ratating angle
can not exceed 90°) to make the handle seat align with
handle in a line.
1
K
L
R
G
N
R
M
7
Operation
1
Flushing and checking for leaks
Ensure the faucet handles are in the off position,
and turn on the water supply to check for leaks.
If you discover any leaks, check your connections
to ensure they are installed properly.
Turn on the hot and cold handles to allow the
water to run for at least one minute. This
ushes away any debris that could cause
damage to internal parts.
Turn off the water.
Care and Cleaning
To clean, wipe down with a damp cloth and dry with a towel.
Do not use abrasive cleaners, steel wool, or harsh chemicals when cleaning this faucet, or the warranty will
be voided.
Troubleshooting
Problem Possible Cause Solution
There are leaks from the
handle.
The bonnet nut has come loose and/or the
washer is dirty or damaged.
Tighten the bonnet nut.
Clean or replace the washer.
The water will not shut off
completely.
The cartridge is dirty or broken. Remove the handle to check
the cartridge.
Clean or replace.
NOTE: Refer to the service parts section in this manual for
a detailed drawing showing the location of the parts listed
below.
There is a leak from the
spout base when the
faucet is on.
The o-ring which is on the connector
under the spout is worn.
Remove the spout and replace
a new o-ring.
HOMEDEPOT.COM
Please contact 1-855-HD-GLACIER for further assistance.
8
Service Parts
*Specify Finish
Faucet ID tags can be
found by removing
the hot water handle
16 Metal washer RP64036
Part Description Part Number
Rubber washer RP64035
Part Description Part Number
14
15
O-ring RP60094
12
9
10
13
Mounting nut RP56014
Set screw RP50054
O-ring RP60056
Connector RP70459
Hose RP7004218
17 Mounting nut RP56088
11
Index RP10088*
Many replacement cartridges, aerators, and drain
assemblies can be purchased at your local The
Home Depot store or online at HOMEDEPOT.COM
1
RP13651*
3 Flange RP70439
4
5
6
7
Bonnet nut RP70001
8
Cartridge H
RP20079
Handle assembly H
2
RP13652*
Handle assembly C
Rubber washer RP64023
Cartridge C RP20080
Metal washer
RP64024
2
3
4
5
6
7
8
11
12
14
15
16
13
18
1
9
10
17
Questions, problems, missing parts?
Before returning to the store, call Glacier Bay Customer Service
8 a.m. - 7 p.m., EST, Monday - Friday
9 a.m. - 6 p.m., EST, Saturday
1-855-HD-GLACIER (1-855-434-5224)
HOMEDEPOT.COM
Retain this manual for future use.
GRACIAS
GUÍA DE USO Y MANTENIMIENTO
GRIFO DE DOS LLAVES PARA BAÑERA ROMANA
Agradecemos la con anza que has depositado en Glacier Bay al comprar este grifo para bañera romana. Nos
esforzamos por crear continuamente productos de calidad diseñados para mejorar tu hogar. Visítanos en Internet
para ver nuestra línea completa de productos disponibles para las necesidades de mejoras de tu hogar.
¡Gracias por elegir a Glacier Bay!
¿Problemas, preguntas o piezas faltantes?
Antes de regresar a la tienda, llama al servicio al cliente de
Glacier Bay de lunes a viernes entre 8 a.m. y 7 p.m. y los
sábados entre 9 a.m. y 6 p.m.(hora estándar del Este)
1-855-HD-GLACIER (1-855-434-5224)
HOMEDEPOT.COM
Internet núm.
306069084
306069105
306069085
Modelo núm.
HD65601-5101
HD65601-5104
HD65601-5127D
SKU núm.
1003421407
1003421404
1003421406
Destornillador
Phillips
Llave para
grifería
Llave
ajustable
Gafas de
seguridad
Líneas de
suministro
11
Información importante
Cumple con todos los códigos locales de construcción y de plomería.
Cubre el drenaje del lavabo para evitar que se pierda alguna pieza.
Consulta la sección de mantenimiento y limpieza incluida en esta guía.
HERRAMIENTAS Y HERRAJES NECESARIOS
Tabla de contenido
Información importante .........................11
Garantía...................................................11
Pre-instalación .......................................11
.............11
Herramientas y herrajes necesarios ....11
Contenido del paquete .........................12
Instalación ..............................................13
Funcionamiento ......................................16
Cuidado y limpieza ................................16
Piezas de repuesto ................................17
Planicación de la instalación
Solución de problemas ...........................16
Pre-instalación
PLANIFICACIÓN DE LA INSTALACIÓN
Antes de comenzar la instalación de este producto, asegúrate de que no falta ninguna pieza. Compara las piezas
con la lista de Contenido del paquete. Si falta alguna pieza o está dañada, no intentes instalar el producto.
Comunícate con el servicio al cliente para piezas de repuesto.
Garantía
GARANTÍA DE POR VIDA LIMITADA
Los productos de Glacier Bay están fabricados con normas y mano de obra de calidad superior y están respaldados
por nuestra garantía de por vida limitada. Los productos de Glacier Bay están garantizados al comprador consumidor
original de estar libres de defectos en materiales o mano de obra. Reemplazaremos LIBRE DE CARGOS cualquier
producto o pieza que se demuestre está defectuosa. Símplemente, devuelva el producto a cualquiera de las
ubicaciones de venta al detalle de The Home Depot o llame al 1-855-HD-GLACIER (1-855-434-5224) para recibir el
artículo de reemplazo. La prueba de compra (recibo de venta original) del comprador consumidor original debe estar
disponible para todos los reclamos de garantía de Glacier Bay.
Esta garantía excluye daños y fallos incidentales/consecuenciales debido al mal uso, abuso o desgaste normal por
el uso. Esta garantía excluye todos los usos industriales, comerciales y de negocios, a cuyos compradores por la
presente, se les ha ampliado una garantía limitada de cinco años a partir de la fecha de compra, con todos los otros
artículos de esta garantía que aplican excepto la duración de la garantía.
Algunos estados y provincias no permiten la exclusión o la limitación de los daños incidentales o consecuenciales,
por lo tanto, las limitaciones y exclusiones anteriores podrían no aplicar a usted. Esta garantía le otorga derechos
legales especícos y también puede tener otros derechos que varían de un estado a otro. Por favor, vaya a una
tienda o llame al 1-855-HD-GLACIER para más detalles.
Póngase en contacto con el Equipo de Servicio al Cliente llamando al 1-855-434-5224 o visite www.HomeDepot.com.
HOMEDEPOT.COM
Para obtener asistencia, llama al 1-855-HD-GLACIER.
12
Pre-instalación (continuación)
CONTENIDO DEL PAQUETE
Pieza Descripción Cantidad Pieza Descripción Cantidad
A Ensamblaje del caño 1
O Arandela de goma 2
P Arandela metálica 2
Q 2
R Manguera 2
Tuerca de montaje
L Brida 2
M
Válvula de borde
para agua caliente
1
N
Válvula de extremo
para agua fría
1
H Arandela de hule 1
I Arandela metálica 1
J 1Tuerca de montaje
K 2Llave
B Tornillo de jación 1
C
Llave hexagonal
de 3.2 mm
1
G Cuerpo intermedio 1
E Tapa protectora 1
F Conector 1
D Índice 1
A
B
C
D
H
I
J
G
F
E
K
L
N
O
P
Q
M
R
S
S Tapa protectora 2
2
Cómo quitar los kits de montaje
Quita la tapa protectora (E). Aoja el conector (F)
del cuerpo intermedio (G). Ajusta las arandelas
de goma (H) y de metal (I), así como la tuerca
de montaje (J) en la parte inferior del cuerpo
intermedio (G).
13
Instalación
1
Cómo prepararse para la
instalación
Taladra oricios en la plataforma acabada,
como se muestra en el diagrama más abajo.
Cierra el suministro de agua. Retira el grifo
anterior.
Limpia la supercie de montaje.
PRECAUCIÓN: Cierra siempre el suministro de agua
antes de retirar un grifo existente o reemplazar alguna
parte del mismo. Abre la llave del grifo para liberar la
presión de agua y asegúrate de que el suministro de agua
esté completamente cerrado.
12,7 cm mín.
20,32 cm a 40,64 cm
7,62 cm
mín.
GROSOR MÁXIMO DE LA PLATAFORMA DE 4,76 CM
diámetro
de 3,49 cm
diámetro
de 2,86 cm
diámetro
de 3,49 cm
NOTA: Este kit permite un grosor de plataforma de hasta
1-7/8" (4,76 cm).
3
Cómo instalar el cuerpo
intermedio
Desde debajo de la cubierta, inserta el cuerpo
intermedio (G) con la arandela de goma (H), la
arandela de metal (I) y la tuerca de montaje (J)
a través del oricio de montaje.
Desde arriba, enrosca el conector (F) en el
cuerpo intermedio (G).
Aprieta la tuerca de montaje (J) con una llave
para grifería, de modo que el conector (F) quede
a ras de la supercie de la cubierta con acabado.
H
I
J
G
E
F
H
I
J
G
F
Cómo quitar los kits de montaje
5
Quita las tapas protectoras (S).
Quita las bridas (L) de los cuerpos de la válvula
(M y N). Ajusta las arandelas de goma (O) y de
metal (P), así como las tuercas de montaje (Q) en
la parte inferior de los cuerpos de la válvula (M y N).
14
Instalación (continuación)
HOMEDEPOT.COM
Para obtener asistencia, llama al 1-855-HD-GLACIER.
6
Cómo instalar los cuerpos
de la válvula
Desde la parte inferior de la plataforma, inserta
el cuerpo de la válvula con la arandela (N) de
goma (O), la arandela metálica (P) y el tornillo
de montaje (Q) por los oricios del lado derecho
(agua fría).
Desde arriba, enrosca la brida (L) en la válvula
con la arandela (N).
Aprieta la tuerca de montaje (Q) con la llave de
grifería, de modo que la brida (L) quede a ras
con la supercie de la plataforma con acabado.
Repite este procedimiento para la válvula de
extremo para agua caliente (M) del lado
izquierdo (caliente).
NOTA: La válvula de agua caliente está identicada con
una etiqueta.
4
Cómo instalar el ensamblaje
del caño
Instala el ensamblaje del caño (A) en el
conector (F). Asegúrate de que el ensamblaje
del caño (A) descanse rmemente sobre la
cubierta.
Presiona hacia abajo el conjunto del caño (A)
y aprieta el tornillo de jación (B) con la llave
hexagonal (Hex.: 3.2 mm, C). Inserta el índice (D).
B
C
A
D
F
S
S
L
N
O
P
Q
L
M
O
P
Q
L
N
O
P
Q
M
15
Instalación (continuación)
9
Cómo hacer las conexiones
del suministro de agua
Conecta las líneas del suministro de agua (1)
a las entradas del grifo (2). (Las líneas de
suministro no están incluidas).
Alinea el cuerpo intermedio (G) en una posición
que haya espacio suciente para conectar las
mangueras (R).
8
Cómo conectar la mangueras
Conecta las mangueras (R) a la parte inferior
de las válvulas de extremo de agua caliente y
fría (M & N) como se muestra.
Con cuidado, dobla las mangueras (R) para que
quepan en el espacio disponible y con cuidado
enrosca los acopladores de la manguera (R)
a los lados del cuerpo intermedio (G). Aprieta
todas las conexiones con una llave.
7
Cómo instalar la llave
Enrosca la llave (K) en la brida (L).
Coloca la otra llave sobre la válvula izquierda
(agua caliente) e instala de la misma manera.
1
2
NOTA: Después de instalar el ensamblaje de la llave, si el
asiento de la llave no está alineado con la llave como se
muestra en el diagrama anterior (1), rota el asiento de la
llave hacia atrás (el ángulo de rotación no debe exceder los
90°) para alinear el asiento de la llave con la llave.
1
K
L
R
G
N
R
M
16
Funcionamiento
1
Cómo purgar las tuberías y
comprobar que no haya fugas
Asegúrate de que las llaves del grifo estén
cerradas y abre el suministro del agua para
comprobar que no haya ltraciones. Si
descubres alguna ltración, verica tus
conexiones para asegurarte de que estén
instaladas adecuadamente.
Abre los manerales del suministro de agua fría
y caliente y deja que corran durante al menos
un minuto cada una. Esto elimina cualquier
desecho que pudiera dañar las piezas internas.
Cierra el suministro de agua.
Cuidado y limpieza
Para limpiar, usa un paño húmedo y seca con una toalla.
No uses limpiadores abrasivos, esponjas de alambre o productos químicos fuertes para limpiar esta
mezcladora, pues ello anulará la garantía.
Solución de problemas
Problema Posible causa Solución
Hay ltración por el
maneral.
La tuerca del bonete se ha aojado y/o la
arandela está sucia o dañada.
Aprieta la tuerca del bonete.
Limpia la arandela o reemplázala.
El suministro de agua no
se corta completamente.
El cartucho está sucio o dañado. Retira la llave para revisar el
cartucho.
Limpia o reemplaza.
NOTA: Consulta la sección de piezas de repuesto de este
manual para ver un dibujo detallado que muestra la
ubicación de las piezas enumeradas a continuación.
Hay una ltración en la
base del caño cuando
el grifo está abierto.
El aro tórico del conector ubicado debajo
del caño está desgastado.
Quita el caño y coloca un aro
tórico nuevo.
HOMEDEPOT.COM
Para obtener asistencia, llama al 1-855-HD-GLACIER.
17
Piezas de repuesto
Las etiquetas de identicación
de la mezcladora pueden
verse al quitar el maneral
del agua caliente.
*Especicar acabado
Muchos cartuchos de repuesto, aireadores y
ensamblajes de drenaje pueden comprarse en
tu tienda de The Home Depot local o por internet
en WWW.HOMEDEPOT.COM
Pieza Descripción Número de pieza Pieza Descripción Número de pieza
16 Arandela metálica RP64036
Arandela de hule RP64035
14
15
Aro tórico RP60094
12
9
10
13
Tuerca de montaje RP56014
Tornillo de jación RP50054
Aro tórico RP60056
Conector RP70459
Manguera RP7004218
17 Tuerca de montaje RP56088
1 RP13651*
3 Brida RP70439
4
5
6
7
Tuerca del bonete RP70001
8
Cartucho H
RP20079
Ensamblaje de
la llave H
2 RP13652*
Ensamblaje de
la llave C
Arandela de hule RP64023
Cartucho C RP20080
Arandela metálica
RP64024
11
Índice RP10088*
2
3
4
5
6
7
8
11
12
14
15
16
13
18
1
9
10
17
¿Problemas, preguntas o piezas faltantes?
Antes de regresar a la tienda, llama al servicio al cliente de
Glacier Bay de lunes a viernes entre 8 a.m. y 7 p.m. y los
sábados entre 9 a.m. y 6 p.m.(hora estándar del Este)
1-855-HD-GLACIER (1-855-434-5224)
HOMEDEPOT.COM
Conserva este manual para uso futuro.
  • Page 1 1
  • Page 2 2
  • Page 3 3
  • Page 4 4
  • Page 5 5
  • Page 6 6
  • Page 7 7
  • Page 8 8
  • Page 9 9
  • Page 10 10
  • Page 11 11
  • Page 12 12
  • Page 13 13
  • Page 14 14
  • Page 15 15
  • Page 16 16
  • Page 17 17
  • Page 18 18

Glacier Bay HD65601-5101 Guía de instalación

Categoría
Artículos sanitarios
Tipo
Guía de instalación
Este manual también es adecuado para