Samsung HW-T550 Manual de usuario

Categoría
Altavoces de la barra de sonido
Tipo
Manual de usuario
HW-T550
FULL MANUAL
Imagine the possibilities
Thank you for purchasing this Samsung product.
To receive more complete service, please register
your product at www.samsung.com/register
ENG - ii
SAFETY INFORMATION
SAFETY WARNINGS
TO REDUCE THE RISK OF ELECTRIC SHOCK, DO
NOT REMOVE THE COVER (OR BACK).
NO USER-SERVICEABLE PARTS ARE INSIDE.
REFER SERVICING TO QUALIFIED SERVICE
PERSONNEL.
Refer to the table below for an explanation of
symbols which may be on your Samsung product.
CAUTION
RISK OF ELECTRIC SHOCK.
DO NOT OPEN.
This symbol indicates that high voltage
is present inside. It is dangerous to
make any kind of contact with any
internal part of this product.
This symbol indicates that this product
has included important literature
concerning operation and maintenance.
Class II product : This symbol indicates
that it does not require a safety
connection to electrical earth (ground).
If this symbol is not present on a
product with a power cord, the product
MUST have a reliable connection to
protective earth (ground).
AC voltage : This symbol indicates that
the rated voltage marked with the
symbol is AC voltage.
DC voltage : This symbol indicates that
the rated voltage marked with the
symbol is DC voltage.
Caution, Consult instructions for use :
This symbol instructs the user to
consult the user manual for further
safety related information.
WARNING
To reduce the risk of re or electric shock, do
not expose this appliance to rain or moisture.
CAUTION
TO PREVENT ELECTRIC SHOCK, MATCH WIDE
BLADE OF PLUG TO WIDE SLOT, FULLY INSERT.
This apparatus shall always be connected to a
AC outlet with a protective grounding
connection.
To disconnect the apparatus from the mains,
the plug must be pulled out from the mains
socket, therefore the mains plug shall be
readily operable.
Do not expose this apparatus to dripping or
splashing. Do not put objects lled with
liquids, such as vases on the apparatus.
To turn this apparatus off completely, you
must pull the power plug out of the wall
socket. Consequently, the power plug must
be easily and readily accessible at all times.
ENG - iii
PRECAUTIONS
1. Ensure that the AC power supply in your
house complies with the power
requirements listed on the identication
sticker located on the bottom of your
product. Install your product horizontally, on
a suitable base (furniture), with enough
space around it for ventilation (7~10 cm).
Make sure the ventilation slots are not
covered. Do not place the unit on ampliers
or other equipment which may become hot.
This unit is designed for continuous use. To
fully turn off the unit, disconnect the AC plug
from the wall outlet. Unplug the unit if you
intend to leave it unused for a long period of
time.
2. During thunderstorms, disconnect the AC
plug from the wall outlet. Voltage peaks due
to lightning could damage the unit.
3. Do not expose the unit to direct sunlight or
other heat sources. This could lead to
overheating and cause the unit to
malfunction.
4. Protect the product from moisture (i.e.
vases), and excess heat (e.g. a replace) or
equipment creating strong magnetic or
electric elds. Unplug the power cable from
the AC wall socket if the unit malfunctions.
Your product is not intended for industrial
use. It is for personal use only. Condensation
may occur if your product has been stored in
cold temperatures. If transporting the unit
during the winter, wait approximately
2 hours until the unit has reached room
temperature before using.
5. The battery used with this product contains
chemicals that are harmful to the
environment. Do not dispose of the battery
in the general household trash. Do not
expose the battery to excess heat, direct
sunlight, or re. Do not short circuit,
disassemble, or overheat the battery.
Danger of explosion if the battery is replaced
incorrectly. Replace only with the same or
equivalent type.
ABOUT THIS MANUAL
The user manual has two parts: this simple paper
USER MANUAL and a detailed FULL MANUAL you
can download.
USER MANUAL
See this manual for safety instructions,
product installation, components,
connections, and product specications.
FULL MANUAL
You can access the FULL MANUAL on
Samsung’s on-line customer support centre by
scanning the QR code. To see the manual on
your PC or mobile device, download the
manual in document format from Samsung’s
website. (http://www.samsung.com/support)
Design and specications are subject to change
without prior notice.
ENG - iv
CONTENTS
01 Checking the Components 2
Inserting Batteries before using the Remote Control (AA batteries X 2) ------------------------- 2
02 Product Overview 3
Front Panel / Top Panel of the Soundbar ------------------------- 3
Bottom Panel of the Soundbar ------------------------- 4
03 Connecting the Soundbar 5
Connecting Electrical Power
-------------------------
5
Connecting the Soundbar to the Subwoofer
-------------------------
6
Automatic connection between the Subwoofer and the Soundbar
-------------------------
6
Manually connecting the Subwoofer if automatic connection fails
-------------------------
7
Connecting an SWA-8500S (Sold Separately) to your Soundbar
-------------------------
8
04 Connecting to your TV 10
Method 1. Connecting with a Cable
-------------------------
10
Connecting a TV using an HDMI Cable
-------------------------
10
Connecting using an Optical Cable
-------------------------
11
Method 2. Connecting Wirelessly
-------------------------
12
Connecting a TV via Bluetooth
-------------------------
12
05 Connecting an External Device 14
Connecting using an HDMI Cable
-------------------------
14
Connecting using an Optical Cable
-------------------------
15
06 Connecting a USB Storage Device 16
ENG - v
07 Connecting a Mobile Device 17
Connecting via Bluetooth
-------------------------
17
08 Using the Remote Control 21
How to Use the Remote Control
-------------------------
21
Adjusting the Soundbar volume with a TV remote control
-------------------------
24
Using the Hidden Buttons (Buttons with more than one function)
-------------------------
25
Output specications for the different sound effect modes
-------------------------
25
09 Installing the Wall Mount 26
Installation Precautions
-------------------------
26
Wallmount Components
-------------------------
26
10 Software Update 28
How to check the Firmware version
-------------------------
28
Update Procedure
-------------------------
29
If UPDATE is not displayed
-------------------------
29
11 Troubleshooting 30
12 Licence 31
13 Open Source Licence Notice 31
14 Important Notes About Service 31
15 SpecicationsandGuide 32
Specications
-------------------------
32
ENG - 2
01 CHECKING THE COMPONENTS
VOL WOOFER
SOUNDBAR
SOUND
MODE
PAIR
Soundbar Main Unit Subwoofer Remote Control
/ Batteries
x 2
Power Cord
(Subwoofer, Soundbar)
AC/DC Adapter
(Soundbar)
HDMI Cable
x 2
x 2
x 2
Wall Mount Guide Holder-Screw Screw Bracket-Wall Mount
For more information about the power supply and power consumption, refer to the label attached
to the product. (Label: Bottom of the Soundbar Main Unit)
To purchase additional components or optional cables, contact a Samsung Service Centre or
Samsung Customer Care.
Depending on the region, the appearance of the AC plug may differ from the plug displayed above,
or it may be supplied integrated with the AC/DC adapter.
The appearance of the accessories may differ slightly from the illustrations above.
Inserting Batteries before using the Remote Control (AA batteries X 2)
Slide the back cover in the direction of the arrow
until it is completely removed. Insert 2 AA batteries
(1.5V) oriented so that their polarity is correct. Slide
the back cover back into position.
ENG - 3
02 PRODUCT OVERVIEW
Front Panel / Top Panel of the Soundbar
Position the product so that
the SAMSUNG logo is
located on the top.
Top Panel
󰟶
󰟳
󰟴 󰟵
󰟳
Display
Displays the product’s status and current mode.
󰟴
(Power) Button
Turns the power on and off.
Auto Power Down Function
The unit turns off automatically in the following situations:
In D.IN / HDMI / BT / USB Mode : If there is no audio signal for 20 minutes.
󰟵
-/+ (Volume) Button
Adjusts the volume.
When adjusted, the volume level appears on the Soundbar’s front display.
󰟶
(Source) Button
Selects the source input mode.
Input mode Display
Optical Digital input D.IN
ARC (HDMI OUT) input D.IN TV ARC (Auto conversion)
HDMI input HDMI
BLUETOOTH mode BT
USB mode USB
To turn on “BT PAIRING” mode, change the source to “BT” mode, and then press and hold the
(Source) button for more than 5 seconds.
When you plug in the AC cord, the power button will begin working in 4 to 6 seconds.
When you turn on this unit, there will be a 4 to 5 second delay before it produces sound.
If you want to enjoy sound only from the Soundbar, you must turn off the TV’s speakers in the Audio
Setup menu of your TV. Refer to the owner’s manual supplied with your TV.
ENG - 4
Bottom Panel of the Soundbar
DC 24V
HDMI
USB (5V 0.5A)
DIGITAL AUDIO IN
(OPTICAL)
HDMI TO TV
(ARC)
HDMI
HDMI TO TV
(ARC)
DC 24V
HDMI OUT
(TV-ARC)
AUX IN
HDMI IN
USB (5V 0.5A)
DIGITAL AUDIO IN
(OPTICAL)
󰟵
󰟶
󰟷
󰟳
󰟴
󰟳
DIGITAL AUDIO IN (OPTICAL)
Connect to the digital (optical) output of an external device.
󰟴
USB (5V 0.5A)
Connect a USB device here to play music les stored on the USB device through the Soundbar.
󰟵
HDMI
Inputs digital video and audio signals simultaneously using an HDMI cable.
Connect to the HDMI output of an external device.
󰟶
HDMI TO TV (ARC)
Connect to the HDMI (ARC) jack on a TV.
󰟷
DC 24V (Power Supply In)
Connect the AC/DC power adapter.
When disconnecting the power cable of the AC/DC power adaptor from a wall outlet, pull the plug.
Do not pull the cable.
Do not connect this unit or other components to an AC outlet until all connections between
components are complete.
ENG - 5
03 CONNECTING THE SOUNDBAR
Connecting Electrical Power
Use the power components to connect the Subwoofer and Soundbar to an electrical outlet in the following
order:
1. Connect the power cord to the Subwoofer.
2. Connect the power output cable to the power adapter, and then to the Soundbar.
3. Connect the power cord to a wall socket.
See the illustrations below.
For more information about the required electrical power and power consumption, refer to the
label attached to the product. (Label: Bottom of the Soundbar Main Unit)
POWER
Rear of Subwoofer
Power Cord
Connecting
Electrical Power
Bottom of the
Soundbar Main Unit
AC/DC Adapter
Connecting
Electrical Power
DC 24V
USB (5V 0.5A)
DIGITAL AUDIO IN
(OPTICAL)
DC 24V
HDMI
HDMI TO TV
(ARC)
Power Cord
Make sure to rest the AC/DC Adapter at on a table or the oor. If you place the AC/DC Adapter so
that it is hanging with the AC cord input facing upwards, water or other foreign substances could
enter the Adapter and cause the Adapter to malfunction.
ENG - 6
Connecting the Soundbar to the Subwoofer
When the subwoofer is connected, you can enjoy rich bass sound.
Automatic connection between the Subwoofer and the Soundbar
When you turn the power on after connecting the power cables to the Soundbar and subwoofer, the
subwoofer is automatically connected to the Soundbar.
When auto pairing is complete, the blue indicators at the rear of the subwoofer turn on.
LED Indicator Lights on the Rear of Subwoofer
LED Status Description Resolution
Blue
On
Successfully connected
(normal operation)
-
Blinking Recovering the connection
Check if the power cable attached to the
main Soundbar unit is connected properly
or wait about 5 minutes. If blinking persists,
try manually connecting the subwoofer.
See page 7.
Red On
Standby (with the Soundbar
main unit turned off)
Check if the power cable attached to the
main Soundbar unit is connected properly.
Connection failed
Connect again. See the instructions for
manual connection on page 7.
Red and
blue
Blinking Malfunction
See the contact information for the
Samsung Service Centre in this manual.
ENG - 7
Manually connecting the Subwoofer if automatic connection fails
Before performing the manual connection procedure below:
Check whether the power cables for the Soundbar and subwoofer are connected properly.
Make sure that the Soundbar is turned on.
1. Press and hold ID SET on the rear of the subwoofer for at least 5 seconds.
The red indicator on the rear of the subwoofer turns off and the blue indicator blinks.
5 Sec
Rear of Subwoofer
2. Press and hold the Up button on the remote control for at least 5 seconds.
The ID SET message appears on the display of the Soundbar for a moment, and then it
disappears.
The Soundbar will automatically power on when ID SET is complete.
ID SET
SOUND
MODE
PAIR
5 Sec
SAMSUNG logo is on the top
3. Check if the LINK LED is solid blue (connection complete).
Blue is On
The LINK LED indicator stops blinking and
glows a solid blue when a connection is
established between the Soundbar and the
Wireless Subwoofer.
ENG - 8
NOTES
Do not connect the power cord of this product or your TV to a wall outlet until all connections
between components are complete.
Before moving or installing this product, be sure to turn off the power and disconnect the power cord.
If the main unit is powered off, the wireless subwoofer will go into stand-by mode and the
STANDBY LED on the rear of the sub-woofer will turn red after blinking in blue several times.
If you use a device that uses the same frequency (5.8GHz) as the Soundbar near the Soundbar,
interference may cause some sound interruption.
The maximum transmission distance of the main unit’s wireless signal is about 10 m, but may vary
depending on your operating environment. If a steel-concrete or metallic wall is between the main
unit and the wireless subwoofer, the system may not operate at all because the wireless signal
cannot penetrate metal.
PRECAUTIONS
Wireless receiving antennas are built into the wireless subwoofer. Keep the unit away from water
and moisture.
For optimal listening performance, make sure that the area around the wireless subwoofer and the
Wireless Receiver Module (sold separately) is clear of any obstructions.
Connecting an SWA-8500S (Sold Separately) to your Soundbar
Expand to true wireless surround sound by connecting the Samsung Wireless Rear Speaker Kit
(SWA-8500S, sold separately) to your Soundbar.
1. Connect the Wireless Receiver Module to 2 Surround Speakers.
The speaker cables are colour coded.
SURROUND-LEFT
ID SET
L
R
SURROUND SPEAKERS OUT
SPEAKER IMPEDANCE : 3Ω
POWER
ID SET
L
R
SURROUND SPEAKERS OUT
SPEAKER IMPEDANCE : 3Ω
SURROUND-RIGHT
SURROUND-LEFT SURROUND-RIGHT
ENG - 9
2. Check the standby status of the Wireless Receiver Module after plugging it into an electrical outlet.
The LINK LED indicator (blue LED) on the Wireless Receiver Module blinks. If the LED does not
blink, press the ID SET button on the back of the Wireless Receiver Module with a pen tip for
5~6 seconds until the LINK LED indicator blinks (in Blue). For more about the LED, please refer
to the SWA-8500S user manual.
ID SET
L
R
SURROUND SPEAKERS OUT
SPEAKER IMPEDANCE :
POWER
POWER
ID SET
SURROUND SPEAKERS OUT
SPEAKER IMPEDANCE :
STANDBY
LINK
STANDBY
LINK
Blue blinking
5 Sec
3. Press and hold the Up button on the remote control for at least 5 seconds.
The ID SET message appears on the display of the Soundbar for a moment, and then it
disappears.
The Soundbar will automatically power on when ID SET is complete.
ID SET
SOUND
MODE
PAIR
5 Sec
SAMSUNG logo is on the top
CAUTION
If your Soundbar was playing music when it connects to the SWA-8500S, you may hear some
stuttering from the woofer as the connection nalises.
4. Check if the LINK LED is solid blue (connection complete).
STANDBY
LINK
STANDBY
LINK
Blue is On
The LINK LED indicator stops blinking and
glows a solid blue when a connection is
established between the Soundbar and the
Wireless Receiver Module.
5. If the SWA-8500S is not connected, repeat the procedure from Step 2.
ENG - 10
04 CONNECTING TO YOUR TV
Hear TV sound from your Soundbar through wired or wireless connections.
When the Soundbar is connected to selected Samsung TVs, the Soundbar can be controlled using
the TV’s remote control.
This feature is supported by 2017 and later Samsung Smart TVs that support Bluetooth when
you connect the Soundbar to the TV using an optical cable.
This function also allows you to use the TV menu to adjust the sound eld and various settings
as well as the volume and mute.
Method 1. Connecting with a Cable
When the audio in a broadcast is encoded in Dolby Digital and the “Digital Output Audio Format” on
your TV is set to PCM, we recommend that you change the setting to Dolby Digital. When the setting on
the TV is changed, you will experience better sound quality. (The TV menu may use different words for
Dolby Digital and PCM depending on the TV manufacturer.)
Connecting a TV using an HDMI Cable
HDMI TO TV
(ARC)
HDMI IN
(ARC)
Connect to the HDMI IN
(ARC) port of your TV.
Bottom of the Soundbar
Connect to the HDMI TO TV (ARC) port
of the Soundbar main unit.
Top of the Soundbar
HDMI Cable
󰟳
󰟴
TV ARC
1. With the Soundbar and TV turned on, connect the HDMI cable as shown in the gure.
2. TV ARC” appears in the display window of the Soundbar main unit and the Soundbar plays TV
sound.
If TV sound is inaudible, press the (Source) button on the remote control or on the top of
the Soundbar to switch to “D.IN” mode. The screen displays “D.IN” and “TV ARC” in sequence,
and TV sound is played.
ENG - 11
If “TV ARC” does not appear in the display window of the Soundbar main unit, conrm that the
HDMI cable is connected to the correct port.
Use the volume buttons on the TV’s remote control to change the volume on the Soundbar.
NOTES
HDMI is an interface that enables the digital transmission of video and audio data with just a single
connector.
If the TV provides an ARC port, connect the HDMI cable to the HDMI IN (ARC) port.
We recommend you use a coreless HDMI cable if possible. If you use a cored HDMI cable, use one
whose diameter is less than 14 mm.
This function is not available if the HDMI cable does not support ARC.
Connecting using an Optical Cable
OPTICAL OUT
USB (5V 0.5A)
DIGITAL AUDIO IN
(OPTICAL)
Optical Cable
(not supplied)
Bottom of the Soundbar
󰟳
󰟴
Top of the Soundbar
D.IN
1. Connect the DIGITAL AUDIO IN (OPTICAL) jack on the Soundbar to the OPTICAL OUT jack of the TV
with a digital optical cable (not supplied).
2. Press the (Source) button on the top panel or remote control, and then select the “D.IN” mode.
ENG - 12
Method 2. Connecting Wirelessly
Connecting a TV via Bluetooth
When a TV is connected using Bluetooth, you can hear stereo sound without the hassle of cabling.
Only one TV can be connected at a time.
SOUND
MODE
PAIR
OR
The initial connection
1. Press the PAIR button on the remote control to enter the “BT PAIRING” mode.
(OR)
a. Press the (Source) button on the top panel and then select “BT”.
BT” changes to “BT PAIRING” in a few seconds automatically or changes to “BT READY” if
there is a connect record.
b. When “BT READY” appears, press and hold the (Source) button on the top panel of the
Soundbar for more than 5 seconds to display “BT PAIRING”.
2. Select Bluetooth mode on the TV. (For more information, see the TV’s manual.)
3. Select “[AV] Samsung Soundbar T5-Series” from the list on TV’s screen.
An available Soundbar is indicated with “Need Pairing” or “Paired” on the TV’s Bluetooth device
list. To connect the TV to the Soundbar, select the message, and then establish a connection.
When the TV is connected, [TV Name] → BT” appears on the Soundbar’s front display.
4. You can now hear TV sound from the Soundbar.
If the device fails to connect
If a previously connected Soundbar listing (e.g. “[AV] Samsung Soundbar T5-Series”) appears in the
list, delete it.
Then repeat steps 1 through 3.
NOTE
After you have connected the Soundbar to your TV the rst time, use the “BT READY” mode to
reconnect.
ENG - 13
Disconnecting the Soundbar from the TV
Press the (Source) button on the top panel or on the remote control and switch to any mode but “BT”.
Disconnecting takes time because the TV must receive a response from the Soundbar.
(The time required may differ, depending on the TV model.)
To cancel the automatic Bluetooth connection between the Soundbar and TV, press the
Left button
on the remote control for 5 seconds with the Soundbar in “BT READY” status. (Toggle On Off)
What is the difference between BT READY and BT PAIRING?
BT READY : In this mode, you can search for previously connected TVs or connect a previously
connected mobile device to the Soundbar.
BT PAIRING : In this mode, you can connect a new device to the Soundbar. (Press the PAIR button
on the remote control or press and hold the (Source) button on the top of the Soundbar for
more than 5 seconds while the Soundbar is in “BT” mode.)
NOTES
If asked for a PIN code when connecting a Bluetooth device, enter <0000>.
In Bluetooth connection mode, the Bluetooth connection will be lost if the distance between the
Soundbar and the Bluetooth device exceeds 10 meters.
The Soundbar automatically turns off after 20 minutes in the Ready state.
The Soundbar may not perform Bluetooth search or connection correctly under the following
circumstances:
If there is a strong electrical eld around the Soundbar.
If several Bluetooth devices are simultaneously paired with the Soundbar.
If the Bluetooth device is turned off, not in place, or malfunctions.
Electronic devices may cause radio interference. Devices that generate electromagnetic waves
must be kept away from the Soundbar main unit - e.g., microwaves, wireless LAN devices, etc.
ENG - 14
05 CONNECTING AN EXTERNAL DEVICE
Connect to an external device via a wired connection or Bluetooth connection to play the external
device’s sound through the Soundbar.
Connecting using an HDMI Cable
HDMI
HDMI TO TV
(ARC)
HDMI OUT
HDMI IN
(ARC)
HDMI Cable
HDMI Cable
Bottom of the Soundbar
󰟳
󰟴
External Device
󰟶
Top of the Soundbar
󰟵
HDMI
1. Connect an HDMI cable from the HDMI jack on the back of the product to the HDMI OUT jack on
your digital device.
2. Connect an HDMI cable from the HDMI TO TV (ARC) jack on the back of the product to the HDMI IN
jack on your TV.
3. Press the (Source) button on the top panel or on the remote control, and then select “HDMI”.
4. HDMI mode is displayed on the Soundbar display panel and sound plays.
ENG - 15
Connecting using an Optical Cable
USB (5V 0.5A)
DIGITAL AUDIO IN
(OPTICAL)
OPTICAL OUT
Optical Cable
(not supplied)
Bottom of the Soundbar
󰟳
󰟴
Top of the Soundbar
BD / DVD player / Set-top box /
Game console
D.IN
1. Connect DIGITAL AUDIO IN (OPTICAL) on the main unit to the OPTICAL OUT jack of the Source
Device using a digital optical cable (not supplied).
2. Select “D.IN” mode by pressing the (Source) button on the top panel or on the remote control.
ENG - 16
06 CONNECTING A USB STORAGE DEVICE
You can play music les located on USB storage devices through the Soundbar.
USB port
DC 24V
HDMI
USB (5V 0.5A)
DIGITAL AUDIO IN
(OPTICAL)
HDMI TO TV
(ARC)
USB (5V 0.5A)
USB
1. Connect the USB device to the USB port on the bottom of the product.
2. Press the (Source) button on the top panel or on the remote control, and then select “USB”.
3. USB” appears in the display screen.
4. Play music les from the USB storage device through the Soundbar.
The Soundbar automatically turns off (Auto Power Down) if no USB device has been connected
for more than 20 minutes.
File Format Type Compatibility list
Extension Codec Sampling Rate Bit Rate
*.mp3 MPEG 1 Layer2 16kHz ~ 48kHz 80kbps~320kbps
MPEG 1 Layer3 16kHz ~ 48kHz 80kbps~320kbps
MPEG 2 Layer3 16kHz ~ 48kHz 80kbps~320kbps
MPEG 2.5 Layer3 16kHz ~ 48kHz 80kbps~320kbps
*.wma Wave_Format_MSAudio1 16kHz ~ 48kHz 56kbps~128kbps
Wave_Format_MSAudio2 16kHz ~ 48kHz 56kbps~128kbps
*.aac AAC 16kHz ~ 96kHz 48kbps~320kbps
A AC-LC 16kHz ~ 96kHz
128kbps~192kbps
5.1ch 320kbps
HE-AAC 24kHz ~ 96kHz
48kbps~64kbps
5.1ch 160kbps
*.wav - 16kHz ~ 48kHz up to 3000kbps
*.ogg OGG 1.1.0 16kHz ~ 48kHz 50kbps~500kbps
If there are too many folders and les stored on the USB device, it may take the Soundbar some
time to access and play les.
ENG - 17
07 CONNECTING A MOBILE DEVICE
Connecting via Bluetooth
When a mobile device is connected using Bluetooth, you can hear stereo sound without the hassle of
cabling.
The connection is limited to one TV or two Bluetooth devices at the same time.
SOUND
MODE
PAIR
OR
Bluetooth device
The initial connection
1. Press the PAIR button on the remote control to enter the “BT PAIRING” mode.
(OR)
a. Press the (Source) button on the top panel and then select “BT”.
BT” changes to “BT PAIRING” in a few seconds automatically or changes to “BT READY” if
there is a connect record.
b. When “BT READY” appears, press and hold the (Source) button on the top panel of the
Soundbar for more than 5 seconds to display “BT PAIRING”.
2. On your device, select “[AV] Samsung Soundbar T5-Series” from the list that appears.
When the Soundbar is connected to the Bluetooth device, [Bluetooth Device Name] → BT
appears in the front display.
3. Play music les from the device connected via Bluetooth through the Soundbar.
If the device fails to connect
If a previously connected Soundbar listing (e.g. “[AV] Samsung Soundbar T5-Series”) appears in the
list, delete it.
Then repeat steps 1 and 2.
NOTE
After you have connected the Soundbar to your mobile device the rst time, use the “BT READY
mode to reconnect.
ENG - 18
What is the difference between BT READY and BT PAIRING?
BT READY : In this mode, you can search for previously connected TVs or connect a previously
connected mobile device to the Soundbar.
BT PAIRING : In this mode, you can connect a new device to the Soundbar. (Press the PAIR button
on the remote control or press and hold the (Source) button on the top of the Soundbar for
more than 5 seconds while the Soundbar is in “BT” mode.)
NOTES
If asked for a PIN code when connecting a Bluetooth device, enter <0000>.
In Bluetooth connection mode, the Bluetooth connection will be lost if the distance between the
Soundbar and the Bluetooth device exceeds 10 m.
The Soundbar automatically turns off after 20 minutes in the Ready state.
The Soundbar may not perform Bluetooth search or connection correctly under the following
circumstances:
If there is a strong electrical eld around the Soundbar.
If several Bluetooth devices are simultaneously paired with the Soundbar.
If the Bluetooth device is turned off, not in place, or malfunctions.
Electronic devices may cause radio interference. Devices that generate electromagnetic waves
must be kept away from the Soundbar main unit - e.g., microwaves, wireless LAN devices, etc.
The Soundbar supports SBC data (44.1kHz, 48kHz).
Connect only to a Bluetooth device that supports the A2DP (AV) function.
You cannot connect the Soundbar to a Bluetooth device that supports only the HF (Hands Free)
function.
Once you have paired the Soundbar to a Bluetooth device, selecting “[AV] Samsung Soundbar
T5-Series” from the device’s scanned devices list will automatically change the Soundbar to “BT
mode.
Available only if the Soundbar is listed among the Bluetooth device’s paired devices.
(The Bluetooth device and the Soundbar must have been previously paired at least once.)
The Soundbar will appear in the Bluetooth device’s searched devices list only when the Soundbar is
displaying “BT READY”.
Bluetooth Power On (SOUND MODE)
If a previously paired Bluetooth device tries to pair with the Soundbar when the Bluetooth Power On
function is on and the Soundbar is turned off, the Soundbar turns on automatically.
1. Press and hold the SOUND MODE button for more than 5 seconds on the remote while the
Soundbar is turned on.
2. ON-BLUETOOTH POWER” appears on the Soundbar’s display.
ENG - 19
Disconnecting the Bluetooth device from a Soundbar
You can disconnect a Bluetooth device from the Soundbar. For instructions, see the Bluetooth device’s
user manual.
The Soundbar will be disconnected.
When the Soundbar is disconnected from the Bluetooth device, the Soundbar will display
BT DISCONNECTED” on the front display.
Disconnecting the Soundbar from the Bluetooth device
Press the (Source) button on the top panel or on the remote control, and then change to any mode
except “BT”.
Disconnecting takes time because the Bluetooth device must receive a response from the
Soundbar. (Disconnection time may differ, depending on the Bluetooth device)
When the Soundbar is disconnected from the Bluetooth device, the Soundbar will display
BT DISCONNECTED” on the front display.
NOTES
In Bluetooth connection mode, the Bluetooth connection will be lost if the distance between the
Soundbar and the Bluetooth device exceeds 10 m.
The Soundbar automatically turns off after 20 minutes in the Ready state.
More About Bluetooth
Bluetooth is a technology that enables Bluetooth-compliant devices to interconnect easily with each
other using a short wireless connection.
A Bluetooth device may cause noise or malfunction, depending on usage, if:
A part of your body is in contact with the receiving/transmitting system of the Bluetooth
device or the Soundbar.
It is subject to electrical variation from obstructions caused by a wall, corner, or ofce partition.
It is exposed to electrical interference from same frequency-band devices including medical
equipment, microwave ovens, and wireless LANs.
Pair the Soundbar with the Bluetooth device while they are close together.
The further the distance between the Soundbar and Bluetooth device, the worse the quality is.
If the distance exceeds the Bluetooth operational range, the connection is lost.
In poor reception areas, the Bluetooth connection may not work properly.
The Bluetooth connection only works when it is close to the unit. The connection will be
automatically cut off if the Bluetooth device is out of range. Even within range, the sound quality
may be degraded by obstacles such as walls or doors.
This wireless device may cause electric interference during its operation.
ENG - 20
Bluetooth Multi connection
The Soundbar can be connected to 2 Bluetooth devices at the same time.
Bluetooth device A Bluetooth device B
1. Connect the Soundbar to up to two Bluetooth devices. (See page 17)
2. Play music from one of the connected Bluetooth devices while two devices are connected.
3. To play music from the Bluetooth device “B” while playing from the device “A”, pause or stop
playback on the device “A” and then start playing on the device “B”.
The device won’t switch if playing music from the device “B” without pausing or stopping the
device “A” rst.
Bluetooth Multi Pairing
How to pair multiple devices to the Soundbar
1. Turn on the Soundbar.
2. On any source, press and hold the (Source) button on the top of the Soundbar for more than
5 seconds for the Soundbar to go into “BT PAIRING” mode, then on the Bluetooth device side,
switch Bluetooth on, and select the Soundbar from the list of available devices, the Soundbar will
automatically connect to the Bluetooth device.
3. A 2nd Bluetooth device can be paired and connected to the Soundbar using the same method.
If you attempt to connect a 3rd device, a connected device that is not playing audio will lose its
Bluetooth connection, but will still be paired with the Soundbar.
4. Using the same method, you can pair up to 8 Bluetooth devices, but only the last 2 will stay
connected to the Soundbar at the same time.
NOTES
Only 1 Samsung TV, or 2 Bluetooth devices can be connected to the Soundbar at one time.
The Soundbar will be disconnected from Bluetooth devices when it receives a connection request
from a Samsung TV.
ENG - 21
08 USING THE REMOTE CONTROL
How to Use the Remote Control
VOL WOOFER
SOUNDBAR
SOUND
MODE
PAIR
󰟳
󰟴
󰟵
󰟶
󰟷
󰟹
󰟸
󰟺
󰟼
󰟻
󰟳
Power
VOL WOOFER
SOUND
MODE
PAIR
Turns the Soundbar on and off.
󰟴
VOL WOOFER
SOUND
MODE
PAIR
Source
Press to select a source connected to the
Soundbar.
󰟵
Mute
VOL WOOFER
SOUND
MODE
PAIR
Press the (Mute) button to mute the sound.
Press it again to unmute the sound.
󰟶
SOUND MODE
VOL WOOFER
SOUND
MODE
PAIR
You can select the desired sound effect by
choosing STANDARD, SURROUND SOUND,
GAME, SMART, or DTS VIRTUAL:X.
STANDARD
Outputs the original sound.
SURROUND SOUND
Provides a wider sound eld than standard.
GAME
Provides stereoscopic sound to immerse
you in the action while gaming.
SMART
Analyzes the content in real time and
automatically provides the optimal sound
eld based on the characteristics of the
content.
DTS VIRTUAL:X
Immersive 3D sound from any content.
ENG - 22
DRC (Dynamic Range Control)
Lets you apply dynamic range control to Dolby Digital tracks. Press and hold the
SOUND MODE button while the Soundbar is powered off to turn DRC (Dynamic Range
Control) on or off. With the DRC turned on, loud sound is reduced. (The sound may be
distorted.)
Bluetooth Power
This feature automatically turns the Soundbar on when it receives a connection
request from a previously connected TV or Bluetooth device. The setting is On by
default.
Press and hold the SOUND MODE button for more than 5 seconds to turn off the
Bluetooth Power function.
󰟷
VOL WOOFER
SOUND
MODE
PAIR
Bluetooth
PAIR
Press the PAIR button. “BT PAIRING” appears in the Soundbar’s display.
You can connect the Soundbar to a new Bluetooth device in this mode by selecting the
Soundbar from the Bluetooth device's search list.
󰟸
Play / Pause
VOL WOOFER
SOUND
MODE
PAIR
Press the p button to pause a music le temporarily.
When you press the button again, the music le plays.
󰟹
VOL WOOFER
SOUND
MODE
PAIR
Up/Down/
Left/Right
Press the indicated areas to select Up/Down/Left/Right.
Press Up/Down/Left/Right on the button to select or set functions.
Repeat
To use the Repeat function in “USB” mode, press the Up button.
Music Skip
Press the Right button to select the next music le. Press the Left button to select the
previous music le.
ID SET
Press and hold the Up button for 5 seconds to complete ID SET (when connecting to an
accessary item).
ENG - 23
Volume Restriction function
To protect your hearing, the Volume Restriction function restricts the volume to 20 if
you turn on the Soundbar when the volume is set higher than 20.
The default value for the Volume Restriction function is Off. You must turn it on to
activate it.
When turned on, the Volume Restriction function stays on even when the power is
turned off.
To turn Volume Restriction on or off, press and hold the Down button on the
remote control for 5 seconds. With Volume Restriction off, “V FREE” appears on
the front display. With the function on, “V LOCK” appears.
󰟺
Sound Control
VOL WOOFER
SOUND
MODE
PAIR
You can select TREBLE, BASS, or AUDIO SYNC
To control the volume of the treble or bass sound, press the Sound Control button to
select TREBLE or BASS and then adjust the volume between -6~+6 by using the Up/
Down buttons.
Press and hold the (Sound Control) button for about 5 seconds to adjust the sound
for each frequency band. 150Hz, 300Hz, 600Hz, 1.2kHz, 2.5kHz, 5kHz, and 10kHz are
selectable using the Left/Right buttons and each can be adjusted to a setting between
-6 to +6 using the Up/Down buttons.
If the video on the TV and audio from the Soundbar are not synchronised, press the
Sound Control button to select AUDIO SYNC and then
set the audio delay between
0~300 milliseconds
by using the Up/Down buttons. (Not available in “USB” or
BT”mode.)
AUDIO SYNC is only supported for some functions.
󰟻
VOL WOOFER
SOUND
MODE
PAIR
WOOFER
SOUND
MODE
VOL
WOOFER
SOUNDBAR
SOUND
MODE
VOL
WOOFER
SOUNDBAR
SOUND
MODE
VOL
WOOFER
SOUNDBAR
SOUND
MODE
VOL
WOOFER
SOUNDBAR
Rock the WOOFER button forward or backward to adjust the volume of the subwoofer to
-12 or between -6 to +6. To set the subwoofer volume level to 0, press the button in.
󰟼
VOL WOOFER
SOUND
MODE
PAIR
VOL
SOUND
MODE
VOL
WOOFER
SOUNDBAR
SOUND
MODE
VOL
WOOFER
SOUNDBAR
SOUND
MODE
VOL
WOOFER
SOUNDBAR
SOUND
MODE
VOL
WOOFER
SOUNDBAR
Rock the VOL button forward or backward to adjust the volume.
Mute
Press the VOL button in to mute the sound. Press it in again to unmute the sound.
ENG - 24
Adjusting the Soundbar volume
with a TV remote control
If you have a Samsung TV, you can adjust
the Soundbars volume using the IR remote
control that came with your Samsung TV.
First use the TV menu to set the TV audio on your
Samsung TV to external speakers, then use your
Samsung remote to control the Soundbar’s
volume. For more information, see the TV’s user
manual. The default mode for this function is
control by a Samsung TV remote. If your TV is not
a Samsung TV, follow the directions below to
change the settings of this function.
1. Turn Off the Soundbar.
OFF
2. If you do not want to use this function, push
up and hold the WOOFER button for
5 seconds repeatedly until “OFF-TV
REMOTE” appears in the display.
SOUND
MODE
VOL
WOOFER
SOUNDBAR
5 Sec
OFF-TV REMOTE
3. If you want to control the Soundbar with
your TV’s remote, push up and hold the
WOOFER button for 5 seconds repeatedly
until “ALL-TV REMOTE” appears in the
display. Then, use your TV’s menu to select
external speakers.
SOUND
MODE
VOL
WOOFER
SOUNDBAR
5 Sec
ALL-TV REMOTE
4. If you want to return the Soundbar to the
default mode (control by a Samsung TV
remote), push up and hold the WOOFER
button for 5 seconds repeatedly until
SAMSUNG-TV REMOTE” appears in the
display.
SOUND
MODE
VOL
WOOFER
SOUNDBAR
5 Sec
(Default mode)
SAMSUNG-TV REMOTE
Each time you push the WOOFER button
up and hold it for 5 seconds, the mode
switches in the following order:
SAMSUNG-TV REMOTE” (Default mode)
OFFTV REMOTE” → ALL‑TV REMOTE”.
This function may not be available,
depending on the remote control.
Manufacturers supporting this function:
VIZIO, LG, Sony, Sharp, PHILIPS,
PANASONIC, TOSHIBA, Hisense, RCA
ENG - 25
Using the Hidden Buttons (Buttons with more than one function)
Hidden Button
Reference page
Remote Control Button Function
WOOFER (Up) TV remote control On/Off (Standby) page 24
Left TV Auto connect On/Off (BT Ready) page 13
Up ID SET (Standby) page 22
Down Volume Restriction On/Off (Standby) page 23
(Sound Control)
7 Band EQ page 23
SOUND MODE
DRC ON/OFF (Standby) page 22
Bluetooth Power page 22
Outputspecicationsforthedifferentsoundeffectmodes
Effect Input
Output
Without Wireless Rear
Speaker Kit
With Wireless Rear
Speaker Kit
SOUND MODE
Surround
VOL WOOFER
SOUND
MODE
Bluetooth
POWER
STANDARD
2.0 ch
2.1 ch 4.1 ch
5.1 ch 2.1 ch 4.1 ch
SURROUND
SOUND
2.0 ch
2.1 ch 4.1 ch
5.1 ch 2.1 ch 4.1 ch
GAME
2.0 ch
2.1 ch 4.1 ch
5.1 ch 2.1 ch 4.1 ch
SMART
2.0 ch
2.1 ch 4.1 ch
5.1 ch 2.1 ch 4.1 ch
DTS VIRTUAL:X
2.0 ch
2.1 ch 4.1 ch
5.1 ch 2.1 ch 4.1 ch
The Samsung Wireless Rear Speaker Kit can be purchased separately. To purchase a Kit, contact the
vendor you purchased the Soundbar from.
ENG - 26
09 INSTALLING THE
WALL MOUNT
Installation Precautions
Install on a vertical wall only.
Do not install in a place with high
temperature or humidity.
Verify whether the wall is strong enough to
support the product’s weight. If not, reinforce
the wall or choose another installation point.
Purchase and use the xing screws or
anchors appropriate for the kind of wall you
have (plaster board, iron board, wood, etc.). If
possible, x the support screws into wall
studs.
Purchase wall mounting screws according to
the type and thickness of the wall you want to
mount the Soundbar on.
Diameter: M5
Length: 35 mm or longer recommended.
Connect cables from the unit to external
devices before you install the Soundbar on
the wall.
Make sure the unit is turned off and
unplugged before you install it. Otherwise, it
may cause an electric shock.
Wallmount Components
Wall Mount Guide
x 2
x 2
Holder-Screw Screw
x 2
Bracket-Wall Mount
1. Place the Wall Mount Guide against the wall
surface.
The Wall Mount Guide must be level.
If your TV is mounted on the wall, install
the Soundbar at least 5 cm below the TV.
5 cm or more
ENG - 27
2. Align the Wall Mount Guide’s Centre Line
with the centre of your TV (if you are
mounting the Soundbar below your TV), and
then x the Wall Mount Guide to the wall
using tape.
If you are not mounting below a TV, place
the Centre Line in the centre of the
installation area.
Centre Line
3. Push a pen tip or sharpened pencil tip
through the centre of the B-TYPE images on
each end of the Guide to mark the holes for
the supporting screws, and then remove the
Wall Mount Guide.
4. Using an appropriately sized drill bit, drill a
hole in the wall at each marking.
If the markings do not correspond to the
positions of studs, make sure you insert
appropriate anchors or mollies into the
holes before you insert the support
screws. If you use anchors or mollies,
make sure the holes you drill are large
enough for the anchors or mollies you use.
5. Push a screw (not supplied) through each
Holder-Screw, and then screw each screw
rmly into a support screw hole.
6. Install the 2 Bracket-Wall Mounts in the
correct orientation on the bottom of the
Soundbar using 2 Screws.
When assembling, make sure the hanger
part of the Bracket-Wall Mounts are
located behind the rear of the Soundbar.
Rear of Soundbar
Right end of Soundbar
ENG - 28
7. Install the Soundbar with the attached
Bracket-Wall Mounts by hanging the
Bracket-Wall Mounts on the Holder-Screws
on the wall.
8. Slide the Soundbar down as shown below so
that the Bracket-Wall Mounts rest securely
on the Holder-Screws.
Insert the Holder-Screws into the wide
(bottom) part of the Bracket-Wall
Mounts, and then slide the Bracket-Wall
Mounts down so that the Bracket-Wall
Mounts rest securely on the
Holder-Screws.
10 SOFTWARE
UPDATE
Samsung may offer updates for the Soundbar’s
systemrmwareinthefuture.
USB port
DC 24V
HDMI
USB (5V 0.5A)
DIGITAL AUDIO IN
(OPTICAL)
HDMI TO TV
(ARC)
USB (5V 0.5A)
If an update is offered, you can update the
rmware by connecting a USB device with the
rmware update stored on it to the USB port on
your Soundbar. For more information about how
to download update les, go to the Samsung
Electronics website at
www.samsung.com
Support.
Then, select the product type or enter the model
number of your Soundbar, select the Software &
Apps option, and then Downloads. Note that the
option names can vary.
How to check the Firmware
version
1. Turn off the Soundbar.
2. Press and hold the (Sound Control)
button for about 5 seconds on the remote
control.
3. Each version appears in the following order
on the Soundbar display.
(Software version → HDMI Tx Rx )
Tx : Wireless Tx module in the Soundbar.
Rx : Wireless Rx module in the Subwoofer.
R2 VERSION DISPLAY
No connect rear R2---
Connected rear R2xxx
ENG - 29
Update Procedure
Important: The updating function erases all user
settings. We recommend you write down your
settings so that you can easily reset them after
the update. Note that updating the rmware
resets the subwoofer connection too.
1. Connect a USB thumb drive to the USB port
on your computer.
Important: Make sure there are no music
les on the USB thumb drive. This may cause
the rmware update to fail.
2. Go to the Samsung website at
(samsung.com)
select Enter Model
Number and enter the model of your
Soundbar. Select manuals and downloads
and download the latest software le.
3. Save the downloaded software to a USB
stick and select “Extract Here” to unzip the
folder.
4. Turn off the Soundbar and connect the USB
stick containing the software update to the
USB port.
5. Turn on the Soundbar and source change to
USB” mode. Within 3 minutes, “UPDATE” is
displayed and updating begins. When the
update nishes, the Soundbar turns off.
6. Turn on the Soundbar and press the
-/+ (Volume) button on the top panel for
5 seconds. “INIT” appears on the display and
then the Soundbar turns off.
The update is complete.
This product has a DUAL BOOT function.
If the rmware fails to update, you can
update the rmware again.
7. Restore your settings on the Soundbar.
If UPDATE is not displayed
1. Turn off the Soundbar, disconnect and then
reconnect the USB storage device that
contains the update les to the Soundbar’s
USB port.
2. Disconnect the Soundbar’s power cord,
reconnect it, and then turn on the Soundbar.
NOTES
The rmware update may not work properly
if audio les supported by the Soundbar are
stored in the USB storage device.
Do not disconnect the power or remove the
USB device while updates are being applied.
The main unit will turn off automatically after
completing the rmware update.
After the update is completed, the user setup
in the Soundbar is initialised so you can reset
your settings. We recommend you write
down your settings so that you can easily
reset them after the update. Note that
updating rmware resets the subwoofer
connection too.
If the connection to the subwoofer is not
re-established automatically after the
update, refer to page 6.
If the software update fails, check if the USB
stick is defective.
Mac OS users should use MS-DOS (FAT) as the
USB format.
Updating via USB may not be available,
depending on the USB storage device
manufacturer.
ENG - 30
11 TROUBLESHOOTING
Before seeking assistance, check the following.
The unit will not turn on.
Isthepowercordrmlypluggedintothewall
outlet and power adapter?
; Unplug and reconnect the power cord to
the wall outlet and the power adapter to
make sure the connection is secure.
Isthepoweradapterrmlyconnectedtothe
main unit?
; Disconnect the power adapter from the
Soundbar, and reconnect to make sure the
connection is rm and secure.
A function does not work when the button
is pressed.
Is there static electricity in the air?
; Disconnect the power plug and connect it
again.
Sound dropouts occur in BT mode.
; See the Bluetooth connection sections on
pages 12 and 17.
Sound is not produced.
Is the Mute function on?
; Press the (Mute) button to cancel the
mute function.
Is the volume set to minimum?
; Adjust the Volume.
The remote control does not work.
Are the batteries drained?
; Replace with new batteries.
Is the distance between the remote control and
Soundbar main unit too far?
; Move the remote control closer to the
Soundbar main unit.
The red LED on the subwoofer blinks and
the subwoofer is not producing sound.
This issue can occur if the subwoofer is not
connected to the Soundbar main unit.
; Try to connect your subwoofer again. (See
page 6.)
The subwoofer drones and vibrates
noticeably.
Try to adjust the vibration of your subwoofer.
; Rock the WOOFER button on your remote
control forward or backward to adjust the
subwoofer level. (to -12, or between -6 ~
+6).
ENG - 31
12 LICENCE
Manufactured under license from Dolby
Laboratories. Dolby, Dolby Audio, and the
double-D symbol are trademarks of Dolby
Laboratories.
For DTS patents, see http://patents.dts.com.
Manufactured under license from DTS
Licensing Limited. DTS, the Symbol, DTS in
combination with the Symbol, DTS and the
Symbol together, Virtual:X, the DTS Virtual:X
logo, and DTS 2.0 Channel are registered
trademarks or trademarks of DTS, Inc. in the
United States and/or other countries. © DTS,
Inc. All Rights Reserved.
The terms HDMI and HDMI High-Denition
Multimedia Interface, and the HDMI Logo are
trademarks or registered trademarks of HDMI
Licensing LLC in the United States and other
countries.
The Bluetooth® word mark and logos are
registered trademarks owned by the Bluetooth
SIG, Inc. and any use of such marks by Samsung
Electronics Co., Ltd. is under license. Other
trademarks and trade names are those of their
respective owners.
13 OPEN SOURCE
LICENCE NOTICE
To send inquiries and requests regarding open
sources, contact Samsung via Email
(oss.request@samsung.com).
14 IMPORTANT
NOTES ABOUT
SERVICE
Figures and illustrations in this User Manual are
provided for reference only and may differ from
actual product appearance.
ENG - 32
15 SPECIFICATIONS AND GUIDE
Specications
Model Name HW-T550
USB 5V/0.5A
Weight 2.1 kg
Dimensions (W x H x D) 860.0 x 55.0 x 85.0 mm
Operating Temperature Range C to +45°C
Operating Humidity Range 10 % ~ 75 %
AMPLIFIER
Rated Output power
160W(40Wx4)
Supported play formats
(DTS 2.0 and DTS Virtual:X sound is played in
DTS format.)
LPCM 2ch, Dolby Audio™ (supporting Dolby®
Digital), DTS
Subwoofer Name PS-WR55D
Weight 5.0 kg
Dimensions (W x H x D) 200.6 x 353.0 x 290.0 mm
AMPLIFIER
Rated Output power 160W
NOTES
Samsung Electronics Co., Ltd reserves the right to change the specications without notice.
Weight and dimensions are approximate.
SPA - ii
INFORMACIÓN DE SEGURIDAD
ADVERTENCIAS DE SEGURIDAD
PARA REDUCIR EL PELIGRO DE DESCARGA
ELÉCTRICA, NO RETIRE LA TAPA (NI LA PARTE
TRASERA).
NO CONTIENE ELEMENTOS QUE DEBA
REEMPLAZAR EL USUARIO. EN CASO DE AVERÍA,
SOLICITE LA AYUDA DE PERSONAL
ESPECIALIZADO.
Consulte la tabla a continuación para obtener una
explicación de los símbolos que podrían aparecer
en su producto Samsung.
PRECAUCIÓN
RIESGO DE ELECTROCUCION.
NO ABRIR.
Este símbolo indica que el dispositivo
contiene alto voltaje. Es peligroso
establecer cualquier tipo de contacto
con cualquier parte interna del producto.
Este símbolo indica que con este
producto se incluye documentación
importante relativa a la operación y el
mantenimiento.
Producto de Clase II: Este símbolo indica
que no es necesaria una conexión
eléctrica de seguridad (toma de tierra).
Si un producto con un cable de
alimentación no tiene este símbolo, el
producto DEBE tener una conexión
segura a una puesta a tierra.
Voltaje CA: Este símbolo indica que la
tensión nominal marcada con el símbolo
es CA.
Voltaje CC: Este símbolo indica que la
tensión nominal marcada con el símbolo
es CC.
Precaución, consulte las instrucciones
antes de usar: Este símbolo indica que
se debe consultar el manual del usuario
para obtener información relacionada
con la seguridad.
ADVERTENCIA
Para reducir el riesgo de incendio o de
descarga eléctrica, no exponga este aparato a
la lluvia ni a lahumedad.
PRECAUCIÓN
PARA EVITAR DESCARGAS ELÉCTRICA S,
INTRODUZCA TOTALMENTE EL ENCHUFE.
Este aparato deberá conectarse siempre a
una toma de alimentación principal con una
conexión a tierra de protección.
Para desconectar el aparato de la fuente de
alimentación, el enchufe deberá ser
desconectado de la toma principal, lo que
signica que deberá disponer de fácil acceso
al enchufe principal.
No debe exponer este aparato a gotas ni
salpicaduras de agua. No coloque en el
aparato objetos con líquido, como jarrones.
Para apagar completamente este aparato,
debe desconectar su enchufe de la toma de
corriente. Por tanto, el enchufe debe estar
accesible en todo momento.
SPA - iii
PRECAUCIONES
1. Asegúrese de que la fuente de alimentación
de CA de su hogar cumpla con los requisitos
mencionados en la etiqueta de identicación
ubicada en la parte inferior del producto.
Instale el producto horizontalmente, sobre
una base adecuada (mueble), con espacio
suciente a su alrededor para ventilación
7~10 cm. Asegúrese de que los oricios de
ventilación no queden tapados. No coloque
la unidad sobre amplicadores o cualquier
otro equipo que pueda generar calor. Esta
unidad se ha diseñado para utilizarse de
forma continua. Para apagar completamente
la unidad, desconecte el enchufe de CA de la
toma de corriente. Desenchufe la unidad si
no va utilizarla durante un tiempo
prolongado.
2. Durante tormentas, desconecte el enchufe
principal de CA de la toma de corriente.
Los picos de tensión debidos a rayos podrían
dañar la unidad.
3. No exponga la unidad a la luz directa del sol ni a
otras fuentes de calor. Podrían sobrecalentarla
y provocar una avería en la unidad.
4. Proteja el reproductor contra la humedad por
ejemplo, jarrones) y calor excesivo (p. ej.:
chimeneas) o equipos que creen campos
magnéticos o eléctricos potentes.
Desconecte el cable de alimentación de la
fuente de CA si la unidad no funciona
correctamente. El producto no ha sido creado
para uso industrial. Este producto es sólo
para uso personal. Es posible que se
produzca condensación en el producto o en el
disco en situaciones de temperaturas bajas.
Si tiene que transportar el producto durante
el invierno, espere 2 horas aproximadamente
antes de usarlo hasta que la unidad haya
alcanzado la temperatura de la sala.
5. Las pilas utilizadas en este producto contienen
productos químicos que son peligrosos para el
medio ambiente. No tire las pilas con el resto
de la basura doméstica. No deseche las pilas en
el fuego. No cortocircuite, desmonte ni
sobrecaliente las baterías. Si las pilas se
reemplazan de manera incorrecta existe
peligro de explosión. Reemplácelas únicamente
por el mismo tipo o un tipo equivalente.
INFORMACIÓN
SOBRE ESTE MANUAL
El manual del usuario tiene dos partes: este
MANUAL DEL USUARIO sencillo y un MANUAL
COMPLETO detallado que puede descargar.
MANUAL DEL USUARIO
Consulte este manual para obtener información
sobre instrucciones de seguridad, instalación
del producto, componentes, conexiones y
especicaciones del producto.
MANUAL COMPLETO
Puede acceder al MANUAL COMPLETO en el
Centro de Atención al Cliente en línea de
Samsung escaneando el código QR. Para
consultar el manual en su computadora o
dispositivo móvil, descárguelo desde el sitio
web de Samsung en formato de documento.
(http://www.samsung.com/support)
El diseño y las especicaciones están sujetos a
cambio sin previo aviso.
SPA - iv
ÍNDICE
01 VericacióndelosComponentes 2
Colocación de las pilas antes de utilizar el control remoto (2 pilas AA) ------------------------- 2
02 DescripcndelProducto 3
Panel frontal/panel superior de la Soundbar ------------------------- 3
Panel inferior de la Soundbar ------------------------- 4
03 ConexióndelaSoundbar 5
Conexión del suministro eléctrico
-------------------------
5
Conexión de la Soundbar al subwoofer
-------------------------
6
Conexión automática entre el subwoofer y la Soundbar
-------------------------
6
Conexión manual del subwoofer en caso de error en la conexión
automática
-------------------------
7
Conexión del SWA-8500S (se vende por separado) a una Soundbar
-------------------------
8
04 ConexiónasuTelevisor 10
Método 1. Conexión con un cable
-------------------------
10
Conexión de un televisor con un cable HDMI
-------------------------
10
Conexión con un cable óptico
-------------------------
11
Método 2. Conexión inalámbrica
-------------------------
12
Conexión de un televisor vía Bluetooth
-------------------------
12
05 ConexióndeunDispositivoExterno 14
Conexión con un cable HDMI
-------------------------
14
Conexión con un cable óptico
-------------------------
15
06
ConectarundispositivodealmacenamientoUSB
16
SPA - v
07 ConexióndeunDispositivomóvil 17
Conexión vía Bluetooth
-------------------------
17
08 UsodelControlRemoto 21
Cómo utilizar el control remoto
-------------------------
21
Ajuste del volumen de la Soundbar con el control remoto de un televisor
-------------------------
24
Uso de los botones ocultos (botones con más de una función)
-------------------------
25
Especicaciones de salida para los diferentes modos de efectos de sonido
-------------------------
25
09 InstalacióndelSoportedemontajeenlapared 26
Precauciones para la instalación
-------------------------
26
Componentes de soporte
-------------------------
26
10 ActualizacióndelSoftware 28
Cómo comprobar la versión de rmware
-------------------------
28
Procedimiento de actualización
-------------------------
29
Si no aparece la opción UPDATE
-------------------------
29
11 SolucióndeProblemas 30
12 Licencia 31
13 AvisoSobreLicenciadecódigoabierto 31
14 NotaImportanteSobreelServicio 31
15 EspecicacionesyGuía 32
Especicaciones
-------------------------
32
SPA - 2
01 VERIFICACIÓN DE LOS COMPONENTES
VOL WOOFER
SOUNDBAR
SOUND
MODE
PAIR
UnidadprincipaldelaSoundbar Subwoofer Controlremoto/pilas
x 2
Cabledealimentación
(Subwoofer,Soundbar)
AdaptadordeCA/CC
(Soundbar)
CableHDMI
x 2
x 2
x 2
Guíaparamontajeenlapared Tornillode
sujeción
Tornillo
Soportedemontajeenla
pared
Para la fuente de alimentación y el consumo de energía, consulte la etiqueta pegada en el producto.
(Etiqueta : Parte inferior de la unidad principal de la Soundbar)
Para comprar componentes adicionales o cables optativos, comuníquese con un Centro de Servicios
de Samsung o con el Centro de Atención al Cliente de Samsung.
Según la región, el enchufe de CA puede variar en apariencia, o puede venir integrado con el
adaptador de CA/CC.
El aspecto de los accesorios puede diferir ligeramente de las ilustraciones anteriores.
Colocacióndelaspilasantesdeutilizarelcontrolremoto(2pilasAA)
Deslice la contratapa en dirección de la echa
hasta retirarla completamente. Coloque 2 pilas AA
(1.5V) tal como se indica para que la polaridad sea
correcta. Vuelva a deslizar la contratapa hasta su
posición.
SPA - 3
02
DESCRIPCIÓN DEL PRODUCTO
Panelfrontal/panelsuperiordelaSoundbar
Coloque el producto de
manera que el logotipo de
SAMSUNG quede en la
parte superior.
Panelsuperior
󰟶
󰟳
󰟴 󰟵
󰟳
Pantalla
Muestra el estado del producto y el modo actual.
󰟴
Botón (Encendido)
Permite encender y apagar la Soundbar.
FuncióndeAutoPowerDown
La unidad se apaga automáticamente en las siguientes situaciones.
Modo D.IN / HDMI/ BT / USB: Si no hay señal de audio por 20 minutos.
󰟵
Botón-/+(Volumen)
Permite ajustar el volumen.
Una vez que haya ajustado el volumen, el nivel de volumen aparecerá en la pantalla frontal de la Soundbar.
󰟶
Botón (Fuente)
Permite seleccionar el modo de entrada.
Mododeentrada Pantalla
Entrada digital óptica D.IN
Entrada ARC (HDMI OUT) D.IN TV ARC (Autoconversión)
Entrada HDMI HDMI
Modo BLUETOOTH BT
Modo USB USB
Para encender el modo “BT PAIRING”, cambie la fuente a modo “BT” y luego mantenga presionado el
botón (Fuente) durante más de 5 segundos.
Cuando enchufe el cable de CA, la tecla de alimentación funcionará transcurridos entre 4 y
6segundos.
Cuando encienda la unidad, pasarán entre 4 y 5 segundos antes de poder reproducir sonido.
Para disfrutar del sonido sólo desde Soundbar, debe apagar los altavoces del TV en el menú Audio
Setup del TV. Consulte el manual del TV que se facilita con el TV.
SPA - 4
PanelinferiordelaSoundbar
DC 24V
HDMI
USB (5V 0.5A)
DIGITAL AUDIO IN
(OPTICAL)
HDMI TO TV
(ARC)
HDMI
HDMI TO TV
(ARC)
DC 24V
HDMI OUT
(TV-ARC)
AUX IN
HDMI IN
USB (5V 0.5A)
DIGITAL AUDIO IN
(OPTICAL)
󰟵
󰟶
󰟷
󰟳
󰟴
󰟳
DIGITALAUDIOIN(OPTICAL)
Permite conectar la Soundbar a la salida digital (óptica) de un dispositivo externo.
󰟴
USB(5V0.5A)
Conecte un dispositivo USB aquí para reproducir archivos de música que se encuentran en el dispositivo
USB a través de la Soundbar.
󰟵
HDMI
Permite reproducir señales de audio y video digital de manera simultánea con un cable HDMI.
Permite conectar la Soundbar a la salida HDMI de un dispositivo externo.
󰟶
HDMITOTV(ARC)
Permite conectar la Soundbar a un conector HDMI (ARC) de un TV.
󰟷
DC24V(Entradadelafuentedealimentación)
Permite conectar el adaptador de energía CA/CC.
Al desconectar el cable de alimentación del adaptador de energía de CA/CC de una toma de pared,
retire el enchufe. No tire del cable.
No conecte esta unidad ni ningún otro componente a una toma de CA hasta realizar todas las
conexiones entre los componentes.
SPA - 5
03 CONEXIÓN DE LA SOUNDBAR
Conexióndelsuministroeléctrico
Utilice los componentes de alimentación para conectar el subwoofer y la Soundbar a un tomacorriente
en el siguiente orden:
1. Conecte el cable de alimentación al subwoofer.
2. Conecte el cable de alimentación al adaptador de energía y, luego, a la Soundbar.
3. Conecte el cable de alimentación a un enchufe.
Consulte las siguientes ilustraciones.
Para la fuente de alimentación y el consumo de energía, consulte la etiqueta pegada en el producto.
(Etiqueta : Parte inferior de la unidad principal de la Soundbar)
POWER
Parteposteriordel
Subwoofer
Cablede
alimentación
Conexióndel
suministroeléctrico
DC 24V
USB (5V 0.5A)
DIGITAL AUDIO IN
(OPTICAL)
DC 24V
HDMI
HDMI TO TV
(ARC)
Parteinferiordela
unidadprincipaldela
Soundbar
AdaptadordeCA/CC
Conexióndel
suministro
eléctrico
Cablede
alimentación
Asegúrese de colocar el adaptador de CA/CC en posición plana sobre una mesa o sobre el piso. Si
coloca el adaptador de CA/CC de manera que quede colgando con la entrada del cable de CA hacia
arriba, puede ingresar agua o cualquier otra sustancia externa al adaptador y causar su mal
funcionamiento.
SPA - 6
ConexióndelaSoundbaralsubwoofer
Cuando el subwoofer está conectado, puede disfrutar de sonidos graves potentes.
ConexiónautomáticaentreelsubwooferylaSoundbar
Cuando lo enciende después de conectar los cables de alimentación a la Soundbar y el subwoofer, el
subwoofer se conectará automáticamente a la Soundbar.
Cuando naliza el emparejamiento automático, los indicadores azules de la parte posterior del
subwoofer se encienden.
Lucesdelindicadorledenlaparteposteriordelsubwoofer
LED Estado Descripción Resolución
Azul
Activado
Se conectó correctamente
(funcionamiento normal)
-
Intermitente
Se está recuperando la
conexión
Verique si el cable de alimentación
montado a la unidad de Soundbar principal
está debidamente conectado o espere unos
5 minutos. Si el parpadeo persiste, intente
conectar el subwoofer manualmente.
Consulte la página 7.
Rojo Activado
Modo De espera (con la
unidad principal de la
Soundbar apagada)
Verique si el cable de alimentación de la
unidad principal de la Soundbar está
conectado correctamente.
Se produjo un error en la
conexión
Vuelva a conectarlo. Para realizar una
conexión manual consulte las instrucciones
de en la página 7.
Rojo y
azul
Intermitente
No funciona
correctamente
Consulte el manual para obtener la
información de contacto del Centro de
Servicios de Samsung.
SPA - 7
Conexiónmanualdelsubwooferencasodeerrorenlaconexiónautomática
Antesderealizarelprocedimientodeconexiónmanualqueguraacontinuación:
Verique si los cables de alimentación de la Soundbar y el subwoofer están conectados
correctamente.
Asegúrese de que la Soundbar esté encendida.
1. Mantenga presionado ID SET en la parte posterior del subwoofer durante al menos 5 segundos.
El indicador rojo de la parte posterior del subwoofer se apaga y el indicador azul parpadea.
5 Sec
ParteposteriordelSubwoofer
2. Mantenga presionado el botón Arriba en el control remoto al menos 5 segundos.
El mensaje ID SET aparece en la pantalla de la Soundbar durante un momento y luego
desaparece.
La Soundbar se encenderá automáticamente cuando ID SET esté completo.
ID SET
SOUND
MODE
PAIR
5 Sec
EllogotipodeSAMSUNGseubica
enlapartesuperior
3. Verique que el LINK LED no parpadeé (conexión completa).
Elledazules
encendido
El indicador LINK LED deja de parpadear y
queda encendido en azul intenso cuando se
establece una conexión entre la Soundbar y
el subwoofer inalámbrico.
SPA - 8
NOTAS
No conecte el cable de alimentación de este producto ni de su televisor a una toma de pared hasta
realizar todas las conexiones entre los componentes.
Antes de mover o instalar este producto, asegúrese de apagar el equipo y desconectar el cable de
alimentación.
Si la unidad principal está apagada, el subwoofer inalámbrico pasará a modo de espera y el LED de
STANDBY de la parte posterior se verá rojo después de parpadear con una luz azul varias veces.
Si utiliza cerca de la Soundbar un dispositivo que usa la misma frecuencia (5,8 GHz) que esta, la
interferencia puede hacer que se interrumpa el sonido.
La distancia máxima de transmisión de la señal inalámbrica de la unidad principal es de
aproximadamente 10 metros, pero puede variar según su entorno operativo. Si hay una pared
metálica o de amalgama acero-concreto entre la unidad principal y el subwoofer inalámbrico, es
posible que el sistema no funcione porque la señal inalámbrica no puede penetrar el metal.
PRECAUCIONES
El subwoofer inalámbrico tiene incorporadas antenas receptoras inalámbricas. Mantenga las
unidades lejos de fuentes de agua y humedad.
Para obtener un rendimiento óptimo de escucha, asegúrese de que no haya obstrucciones en el
área alrededor de la ubicación del subwoofer inalámbrico y del módulo receptor inalámbrico (se
vende por separado).
ConexióndelSWA-8500S(sevendeporseparado)aunaSoundbar
Conecte el Kit de parlante trasero inalámbrico de Samsung (SWA-8500S: se vende por separado) a la
Soundbar para lograr un verdadero sonido envolvente inalámbrico.
1. Conecte el módulo receptor inalámbrico a 2 parlantes de sonido envolvente.
Los cables del parlante están codicados con colores.
SURROUND-LEFT
ID SET
L
R
SURROUND SPEAKERS OUT
SPEAKER IMPEDANCE : 3Ω
POWER
ID SET
L
R
SURROUND SPEAKERS OUT
SPEAKER IMPEDANCE : 3Ω
SURROUND-RIGHT
SURROUND-LEFT SURROUND-RIGHT
SPA - 9
2. Verique el estado de espera del módulo receptor inalámbrico luego de enchufarlo a un
tomacorriente.
El indicador LED de LINK (LED azul) en el dulo receptor inalámbrico parpadea. Si el LED no
parpadea, presione el botón ID SET en la parte posterior del módulo receptor inalámbrico con
la punta de una lapicera por 5 o 6 segundos hasta que el indicador LED de LINK parpadee (en
Azul). Para obtener más información sobre el LED, consulte el manual del usuario SWA-8500S.
ID SET
L
R
SURROUND SPEAKERS OUT
SPEAKER IMPEDANCE :
POWER
POWER
ID SET
SURROUND SPEAKERS OUT
SPEAKER IMPEDANCE :
STANDBY
LINK
STANDBY
LINK
Azulintermitente
5 Sec
3. Mantenga presionado el botón Arriba en el control remoto al menos 5 segundos.
El mensaje ID SET aparece en la pantalla de la Soundbar durante un momento y luego
desaparece.
La Soundbar se encenderá automáticamente cuando ID SET esté completo.
ID SET
SOUND
MODE
PAIR
5 Sec
EllogotipodeSAMSUNGseubica
enlapartesuperior
PRECAUCIÓN
Si su Soundbar estaba reproduciendo música al momento de conectarse al SWA-8500S, es
posible que escuche una reproducción defectuosa del woofer a medida que la conexión naliza.
4. Verique que el LINK LED no parpadeé (conexión completa).
STANDBY
LINK
STANDBY
LINK
Elledazules
encendido
El indicador LINK LED deja de parpadear y
queda encendido en azul intenso cuando se
establece una conexión entre la Soundbar y
el módulo receptor inalámbrico.
5. Si el SWA-8500S no se conecta, repita el procedimiento desde el Paso 2.
SPA - 10
04 CONEXIÓN A SU TELEVISOR
Escuche el sonido de su televisor desde su Soundbar a través de conexiones por cable o inalámbricas.
Cuando la Soundbar está conectada a un televisor Samsung seleccionado, esta se puede controlar
mediante el control remoto del televisor.
Esta función es compatible con Samsung Smart TV, modelos 2017 o posteriores, que admitan
Bluetooth cuando conecte la Soundbar al televisor usando un cable óptico.
Esta función también le permite utilizar el menú del televisor para ajustar el campo sonoro,
varias conguraciones, el volumen y el silencio.
Método1.Conexiónconuncable
Cuando el audio en una transmisión está codicado en Dolby Digital y el “Formato de salida de audio
digital” en su televisor está congurado en PCM, recomendamos que cambie de conguración a Dolby
Digital. Cuando se cambia la conguración en el televisor, experimentará una mejor calidad de sonido.
(En el menú del televisor se pueden usar diferentes palabras para hacer referencia a Dolby Digital y
PCM según el fabricante del televisor.)
ConexióndeuntelevisorconuncableHDMI
HDMI TO TV
(ARC)
HDMI IN
(ARC)
Veriqueel(ARC)enelpuerto
HDMIINensutelevisor.
ParteinferiordelaSoundbar
VeriqueelpuertoHDMITOTV(ARC)
delaunidadprincipaldelaSoundbar.
PartesuperiordelaSoundbar
CableHDMI
󰟳
󰟴
TV ARC
1. Mientras la Soundbar y el televisor están encendidos, conecte el cable HDMI como muestra la imagen.
2. En la ventana de visualización de la unidad principal de la Soundbar aparece “TV ARC” y la
Soundbar reproduce el sonido del televisor.
Si no se escucha el sonido del televisor, presione el botón (Fuente) en el control remoto o
en la parte superior de la Soundbar para cambiar al modo “D.IN”. En la pantalla aparece “D.IN” y
TV ARC” en secuencia, y se escucha el sonido del televisor.
SPA - 11
Si el “TV ARC” no aparece en la ventana de visualización de la unidad principal de la Soundbar,
verique que el cable HDMI esconectado al puerto correspondiente.
Utilice los botones de volumen en el control remoto del televisor para cambiar el volumen de la
Soundbar.
NOTAS
HDMI es una interfaz que permite la transmisión digital de datos de video y audio con un único
conector.
Si el televisor cuenta con un puerto ARC, conecte el cable HDMI al puerto HDMI IN (ARC).
Le recomendamos usar un cable HDMI sin núcleo, de ser posible. Si usa un cable HDMI con núcleo,
use uno de diámetro menor a 14 mm.
Esta función no está disponible si el cable HDMI no admite ARC.
Conexiónconuncableóptico
OPTICAL OUT
USB (5V 0.5A)
DIGITAL AUDIO IN
(OPTICAL)
Cableóptico
(nosuministrado)
ParteinferiordelaSoundbar
󰟳
󰟴
Partesuperiordela
Soundbar
D.IN
1. Conecte la toma DIGITALAUDIOIN(OPTICAL) de la Soundbar a la toma OPTICAL OUT del televisor
con un cable óptico (no suministrado) digital.
2. Presione el botón (Fuente) en el panel superior o en el control remoto y, luego, seleccione el
modo “D.IN”.
SPA - 12
Método2.Conexióninalámbrica
ConexióndeuntelevisorvíaBluetooth
Cuando un televisor está conectado a través de Bluetooth, puede escuchar sonido estéreo sin utilizar
varios cables.
Solo puede conectar un televisor a la vez.
SOUND
MODE
PAIR
O
Laconexióninicial
1. Presione el botón PAIR en el control remoto para ingresar al modo “BT PAIRING”.
(O)
a. Presione el botón (Fuente) en el panel superior y, luego, seleccione “BT”.
BT” cambia automáticamente a “BT PAIRING” en pocos segundos o cambia a “BT READY
si existe un registro de conexión.
b. Cuando aparezca “BT READY” mantenga presionado el botón (Fuente) en el panel
superior de la Soundbar durante más de 5 segundos hasta que aparezca “BT PAIRING”.
2. Seleccione el modo Bluetooth en el televisor. (Para obtener más información, consulte el manual
del televisor).
3. Seleccione “[AV]SamsungSoundbarT5-Series” en la lista que aparece en la pantalla del televisor.
La Soundbar disponible aparece con la indicación “NeedPairing” o “Paired” en la lista de
dispositivos Bluetooth del televisor. Para conectar la Soundbar, seleccione el mensaje y establezca
una conexión.
Cuando el televisor está conectado, aparecerá [Nombredeltelevisor] → “BT” en la pantalla
frontal de la Soundbar.
4. Ahora puede escuchar el sonido del televisor a través de la Soundbar.
Sieldispositivonoseconecta
Si la lista de la Soundbar que se conectó anteriormente (p. ej. “[AV]SamsungSoundbarT5-Series”)
aparece en la lista, bórrela.
Luego, repita del Paso 1 al 3.
NOTA
Cuando ya ha conectado por primera vez la Soundbar a su televisor, utilice el modo “BT READY
para volver a conectarlo.
SPA - 13
DesconexióndelaSoundbardeltelevisor
Presione el botón (Fuente) en el panel superior o en el control remoto y cambie a cualquier modo
excepto “BT”.
La desconexión lleva tiempo porque el televisor debe recibir una respuesta de la Soundbar.
(El tiempo que dura la desconexión puede variar según el modelo del televisor).
Para cancelar la conexión automática de Bluetooth entre la Soundbar y el televisor, pulse el botón
Izquierda
del control remoto durante 5 segundos con la Soundbar en el estado “BT READY”.
(Alternar Encendido Apagado)
¿CuálesladiferenciaentreBTREADYyBTPAIRING?
BT READY : En este modo, puede buscar los televisores que se conectaron anteriormente o
conectar un dispositivo móvil que conectó anteriormente a la Soundbar.
BT PAIRING : En este modo, puede conectar un dispositivo nuevo a la Soundbar. (Presione el botón
PAIR en el control remoto o mantenga presionado el botón
(Fuente)
en la parte superior de
la Soundbar durante más de 5 segundos mientras la Soundbar está en modo “BT”.)
NOTAS
Si le pide un código PIN mientras conecta un dispositivo Bluetooth, ingrese <0000>.
En el modo Conexión Bluetooth, se perderá la conexión Bluetooth si la distancia entre la Soundbar
y el dispositivo Bluetooth supera los 10 m.
La Soundbar se apaga automáticamente después de permanecer 20 minutos en estado Preparada.
Es posible que la Soundbar no realice la búsqueda de dispositivos Bluetooth ni se conecte
correctamente en los siguientes casos:
Si hay un gran campo eléctrico alrededor de la Soundbar.
Si dos o más dispositivos Bluetooth se emparejan simultáneamente con la Soundbar.
Si el dispositivo Bluetooth se apaga, no se encuentra en el lugar o no funciona correctamente.
Los dispositivos electrónicos pueden ocasionar interferencias de radio. Los dispositivos que
generan ondas electromagnéticas deberán mantenerse alejados de la unidad principal de la
Soundbar, p. ej., dispositivos con redes LAN inalámbricas, microondas, etc.
SPA - 14
05 CONEXIÓN DE UN DISPOSITIVO EXTERNO
Conecte un dispositivo externo a través de un cable o de una conexión de Bluetooth para reproducir el
sonido del dispositivo exterior a través de la Soundbar.
ConexiónconuncableHDMI
HDMI
HDMI TO TV
(ARC)
HDMI OUT
HDMI IN
(ARC)
CableHDMI
CableHDMI
ParteinferiordelaSoundbar
󰟳
󰟴
Dispositivoexterno
󰟶
PartesuperiordelaSoundbar
󰟵
HDMI
1. Conecte un cable HDMI desde la toma HDMI en la parte inferior del producto a la toma HDMI OUT
en su dispositivo digital.
2. Conecte un cable HDMI del conector HDMITOTV(ARC) en la parte posterior del producto al
conector HDMI IN del televisor.
3. Presione el botón (Fuente) en el panel superior o en el control remoto, y luego seleccione
HDMI”.
4. El modo “HDMI” se muestra en el panel de visualización de la Soundbar y se reproduce el sonido.
SPA - 15
Conexiónconuncableóptico
USB (5V 0.5A)
DIGITAL AUDIO IN
(OPTICAL)
OPTICAL OUT
Cableóptico
(nosuministrado)
ParteinferiordelaSoundbar
󰟳
󰟴
Partesuperiordela
Soundbar
ReproductordeBlu-ray/
ReproductordeDVD/
Decodicador/
Consoladejuegos
D.IN
1. Conecte la DIGITALAUDIOIN(OPTICAL)de la unidad principal a la toma OPTICAL OUT del
dispositivo fuente con un cable óptico (no suministrado) digital.
2. Seleccione el modo “D.IN” presionando el botón (Fuente) en el panel superior o en el control
remoto.
SPA - 16
06 CONECTAR UN DISPOSITIVO DE
ALMACENAMIENTO USB
Puede reproducir archivos de música que se encuentran en dispositivos de almacenamiento a través de
la Soundbar.
PuertoUSB
DC 24V
HDMI
USB (5V 0.5A)
DIGITAL AUDIO IN
(OPTICAL)
HDMI TO TV
(ARC)
USB (5V 0.5A)
USB
1. Conecte el dispositivo USB en el puerto USB en la parte inferior del producto.
2. Presione el botón (Fuente) en el panel superior o en el control remoto y, luego, seleccione “USB”.
3. USB” aparece en la ventana de visualización.
4. Reproduzca archivos de música que se encuentran en un dispositivo de almacenamiento a través
de la Soundbar.
La Soundbar se apaga automáticamente (Auto Power Down) si el dispositivo de
almacenamiento estuvo conectado durante más de 20 minutos.
Listadecompatibilidad
Extensión Códec Velocidaddemuestreo Velocidadenbits
*.mp3 MPEG 1 Layer2 16kHz ~ 48kHz 80 ~ 320 kbps
MPEG 1 Layer3 16kHz ~ 48kHz 80 ~ 320 kbps
MPEG 2 Layer3 16kHz ~ 48kHz 80 ~ 320 kbps
MPEG 2.5 Layer3 16kHz ~ 48kHz 80 ~ 320 kbps
*.wma Wave_Format_MSAudio1 16kHz ~ 48kHz 56 ~ 128 kbps
Wave_Format_MSAudio2 16kHz ~ 48kHz 56 ~ 128 kbps
*.aac AAC 16kHz ~ 96kHz 48 ~ 320 kbps
A AC-LC 16kHz ~ 96kHz
128 ~ 192 kbps
5.1 canales 320 kbps
HE-AAC 24kHz ~ 96kHz
48 ~ 64 kbps
5.1 canales 160 kbps
*.wav - 16kHz ~ 48kHz hasta 3000 kbps
*.ogg OGG 1.1.0 16kHz ~ 48kHz 50 ~ 500 kbps
Si hay demasiadas carpetas y archivos almacenados en el dispositivo USB, puede que la Soundbar
demore para acceder y reproducir los archivos.
SPA - 17
07 CONEXIÓN DE UN DISPOSITIVOVIL
ConexiónvíaBluetooth
Cuando un dispositivo móvil está conectado a través de Bluetooth, puede escuchar sonido estéreo sin
utilizar varios cables.
La conexión se limita a un TV o dos dispositivos Bluetooth al mismo tiempo.
SOUND
MODE
PAIR
O
DispositivoBluetooth
Laconexióninicial
1. Presione el botón PAIR en el control remoto para ingresar al modo “BT PAIRING”.
(O)
a. Presione el botón (Fuente) en el panel superior y, luego, seleccione “BT”.
BT” cambia automáticamente a “BT PAIRING” en pocos segundos o cambia a “BT READY
si existe un registro de conexión.
b. Cuando aparezca “BT READY” mantenga presionado el botón (Fuente) en el panel
superior de la Soundbar durante más de 5 segundos hasta que aparezca “BT PAIRING”.
2. Seleccione “[AV]SamsungSoundbarT5-Series” en la lista.
Cuando una Soundbar está conectada al dispositivo Bluetooth, aparecerá
[NombredeldispositivoBluetooth] → “BT” en la pantalla frontal.
3. Reproduzca archivos de música que se encuentran en el dispositivo, conectado vía Bluetooth, a
través de la Soundbar.
Sieldispositivonoseconecta
Si la lista de la Soundbar que se conectó anteriormente (p. ej. “[AV]SamsungSoundbarT5-Series”)
aparece en la lista, bórrela.
Después repita los pasos 1 y 2.
NOTA
Cuando ya ha conectado por primera vez la Soundbar a su dispositivo móvil, utilice el modo “BT
READY” para volver a conectarlo.
SPA - 18
¿CuálesladiferenciaentreBTREADYyBTPAIRING?
BT READY : En este modo, puede buscar los televisores que se conectaron anteriormente o
conectar un dispositivo móvil que conectó anteriormente a la Soundbar.
BT PAIRING : En este modo, puede conectar un dispositivo nuevo a la Soundbar. (Presione el botón
PAIR en el control remoto o mantenga presionado el botón
(Fuente)
en la parte superior de
la Soundbar durante más de 5 segundos mientras la Soundbar está en modo “BT”.)
NOTAS
Si le pide un código PIN mientras conecta un dispositivo Bluetooth, ingrese <0000>.
En el modo Conexión Bluetooth, se perderá la conexión Bluetooth si la distancia entre la Soundbar
y el dispositivo Bluetooth supera los 10 m.
La Soundbar se apaga automáticamente después de permanecer 20 minutos en estado Preparada.
Es posible que la Soundbar no realice la búsqueda de dispositivos Bluetooth ni se conecte
correctamente en los siguientes casos:
Si hay un gran campo eléctrico alrededor de la Soundbar.
Si varios dispositivos Bluetooth se emparejan de manera simultánea con la Soundbar.
Si el dispositivo Bluetooth se apaga, no se encuentra en el lugar o no funciona correctamente.
Los dispositivos electrónicos pueden ocasionar interferencias de radio. Los dispositivos que
generan ondas electromagnéticas deberán mantenerse alejados de la unidad principal de la
Soundbar, p. ej., dispositivos con redes LAN inalámbricas, microondas, etc.
La Soundbar admite datos SBC (44,1 kHz, 48 kHz).
Conecte sólo a un dispositivo Bluetooth que admita la función A2DP (AV).
No puede conectar la Soundbar a un dispositivo Bluetooth que admita solo la función HF (Hands Free).
Una vez que haya emparejado la Barra de sonido a un dispositivo Bluetooth, si selecciona
[AV]SamsungSoundbarT5-Series” en la lista de dispositivos explorados, cambiará
automáticamente la Barra de sonido al modo “BT”.
Solo disponible si la Soundbar aparece en la lista de dispositivos emparejados del dispositivo
Bluetooth.
(El dispositivo Bluetooth y la Soundbar deben emparejarse previamente al menos una vez.)
La Soundbar aparecerá en la lista de dispositivos buscados del dispositivo Bluetooth solo cuando la
Soundbar muestre “BT READY”.
BluetoothPowerEncendido(SOUNDMODE)
Si otro dispositivo con Bluetooth previamente emparejado intenta emparejarse con la Soundbar cuando
la función Bluetooth Power Está encendida y la Soundbar está apagada, la Soundbar se enciende
automáticamente.
1. Mantenga presionado el botón SOUND MODE durante más de 5 segundos en el control remoto
mientras la Soundbar está encendida.
2. En la pantalla de la Soundbar, aparecerá el mensaje “ON-BLUETOOTHPOWER”.
SPA - 19
DesconexióndeldispositivoBluetoothdelaSoundbar
Puede desconectar el dispositivo Bluetooth de Soundbar. Para obtener instrucciones, consulte el
manual del usuario del dispositivo Bluetooth.
Soundbar se desconectará.
Cuando se desconecta la Soundbar del dispositivo Bluetooth, aparecerá “BT DISCONNECTED” en la
pantalla frontal de la Soundbar.
DesconexióndelaSoundbardeldispositivoBluetooth
Presione el botón (Fuente) en el panel superior o en el control remoto y, luego, cambie a cualquier
modo excepto “BT”.
La desconexión lleva tiempo porque el dispositivo Bluetooth debe recibir una respuesta de la
Soundbar. (El tiempo de desconexión puede variar según el dispositivo Bluetooth).
Cuando se desconecta la Soundbar del dispositivo Bluetooth, aparecerá “BT DISCONNECTED” en la
pantalla frontal de la Soundbar.
NOTAS
En el modo de conexión Bluetooth, la conexión Bluetooth se perderá si la distancia entre Soundbar
y el dispositivo Bluetooth supera los 10 m.
Soundbar se apaga automáticamente después de 20 minutos en modo Listo.
InformaciónadicionalsobreBluetooth
Bluetooth es una tecnología que permite que los dispositivos externos compatibles con Bluetooth
puedan fácilmente interconectarse entre sí utilizando una conexión inalámbrica corta.
Un dispositivo Bluetooth puede causar ruidos o un funcionamiento defectuoso, dependiendo del
uso, cuando:
Una parte del cuerpo está en contacto con el sistema de recepción/transmisión del dispositivo
Bluetooth o de Soundbar.
Exista variación eléctrica por obstrucciones causadas por una pared, un rincón o paneles de
división de la ocina.
Esté expuesto a interferencias eléctricas de dispositivos con la misma banda de frecuencia
incluido equipo médico, hornos microondas y LAN inalámbrica.
Empareje Soundbar con el dispositivo Bluetooth a una distancia corta.
Cuando mayor sea la distancia entre Soundbar y el dispositivo Bluetooth, peor será la calidad.
Si la distancia sobrepasa el alcance de funcionamiento de Bluetooth, se pierde la conexión.
En áreas con sensibilidad/recepción pobre es posible que la conexión Bluetooth no funcione
correctamente.
La conexión Bluetooth sólo funciona cuando está cerca del equipo. La conexión se corta
automáticamente si la distancia es superior a la indicada. Incluso dentro de esta distancia, es
posible que la calidad del sonido se degrade debido a obstáculos como muros o puertas.
Este dispositivo inalámbrico puede causar interferencia eléctrica cuando está en funcionamiento.
SPA - 20
ConexiónBluetoothmúltiple
La Soundbar se puede conectar a 2 dispositivos Bluetooth al mismo tiempo.
DispositivoBluetoothA DispositivoBluetoothB
1. Conecte la Soundbar a dos dispositivos Bluetooth. (Consulte la página 17)
2. Reproduzca música de uno de los dispositivos Bluetooth conectados mientras hay dos dispositivos
conectados .
3. Para reproducir música del dispositivo Bluetooth “B” mientras se reproduce desde el dispositivo “A”,
pause o detenga la reproducción en el dispositivo “A” y luego inicie la reproducción en el dispositivo
B”.
El dispositivo no cambia si está reproduciendo música en el dispositivo “B” sin pausar o detener
primero el dispositivo “A.
EmparejamientomúltipleconBluetooth
CómoemparejarvariosdispositivosconlaSoundbar
1. Encienda la Soundbar.
2. En cualquier fuente, mantenga presionado el botón (Fuente) en la parte superior de la
Soundbar durante más de 5 segundos para que la Soundbar entre en modo “BT PAIRING” y, luego,
en la parte lateral del dispositivo Bluetooth, encienda el Bluetooth y seleccione la Soundbar en la
lista de dispositivos disponibles para que la Soundbar se conecte automáticamente al dispositivo
Bluetooth.
3. Se puede emparejar y conectar un segundo dispositivo Bluetooth a la Soundbar usando el mismo
método.
Si intenta conectar un tercer dispositivo, uno de los dispositivos conectados que no es
reproduciendo audio perderá la conexión Bluetooth, pero seguirá emparejado con la Soundbar.
4. Con el mismo método, puede emparejar hasta 8 dispositivos Bluetooth, pero solo los 2 últimos
permanecerán conectados a la Soundbar al mismo tiempo.
NOTAS
Se pueden conectar solo 1 TV Samsung o 2 dispositivos Bluetooth a la Soundbar a la vez.
La Soundbar se desconectará de los dispositivos Bluetooth cuando reciba una solicitud de conexión
desde un TV Samsung.
SPA - 21
08 USO DEL CONTROL REMOTO
moutilizarelcontrolremoto
VOL WOOFER
SOUNDBAR
SOUND
MODE
PAIR
󰟳
󰟴
󰟵
󰟶
󰟷
󰟹
󰟸
󰟺
󰟼
󰟻
󰟳
Encender
VOL BASS
SOUND
MODE
PAIR
Enciende y apaga la Soundbar.
󰟴
VOL BASS
SOUND
MODE
PAIR
Fuente
Presione el botón Fuente para seleccionar una
fuente que esté conectada a la Soundbar.
󰟵
Silencio
VOL BASS
SOUND
MODE
PAIR
Presione el botón (Silencio) para silenciar el
sonido. Vuelva a presionarlo para reanudar el
sonido.
󰟶
SOUND MODE
VOL BASS
SOUND
MODE
PAIR
Puede seleccionar el efecto de sonido que desee
seleccionando STANDARD, SURROUND SOUND,
GAME, SMART
o
DTSVIRTUAL:X
.
STANDARD
Reproduce el sonido original.
SURROUND SOUND
Provee un campo acústico más amplio que
el estándar.
GAME
Provee sonido estereoscópico y lo sumerge
en la acción mientras juega.
SMART
Analiza el contenido en tiempo real y provee
automáticamente el campo acústico
óptimo, según las características del
contenido.
DTSVIRTUAL:X
Sonido 3D envolvente de cualquier
contenido.
SPA - 22
DRC(DynamicRangeControl)
Le permite aplicar el control de rango dinámico a las pistas Dolby Digital. Mantenga
presionado el botón SOUND MODE mientras la Soundbar está apagada para encender
o apagar el DRC (Dynamic Range Control). Cuando el DRC está activado, disminuye el
sonido fuerte. (El sonido puede distorsionarse.)
BluetoothPower
Esta función enciende automáticamente la Soundbar cuando recibe una solicitud de
conexión de un televisor o dispositivo Bluetooth que se conectó anteriormente. La
función está encendida de manera predeterminada.
Mantenga presionado el botón SOUND MODE durante más de 5 segundos para
desactivar la función Bluetooth Power (Encendido con Bluetooth).
󰟷
VOL BASS
SOUND
MODE
PAIR
Bluetooth
PAIR
Presione el botón PAIR. En la pantalla de la Soundbar aparece “BT PAIRING”.
Puede conectar la Soundbar a un nuevo dispositivo con Bluetooth en este modo
seleccionando la Soundbar desde la lista de búsqueda del dispositivo con Bluetooth.
󰟸
Reproducir/
Pausar
VOL BASS
SOUND
MODE
PAIR
Presione el botón p para pausar un archivo de música temporalmente.
Si vuelve a presionar el botón, se reproduce el archivo de música.
󰟹
VOL BASS
SOUND
MODE
PAIR
Arriba/Abajo/
Izquierda/
Derecha
PresionelasáreasindicadasparaseleccionarArriba/Abajo/
Izquierda/Derecha.
Presione Arriba/abajo/izquierda/derecha para seleccionar o congurar las funciones.
Repetir
Para utilizar la función Repetir en el modo “USB”, presione el botón Arriba.
Saltearcanciones
Presione el botón Derecha para seleccionar el próximo archivo de música.
Presione el botón Izquierda para seleccionar el archivo de música anterior.
ID SET
Mantenga presionado el botón Arriba durante 5 segundos para completar la ID SET
(cuando se conecte a un elemento accesorio).
SPA - 23
FuncióndeRestriccióndelvolumen
Para proteger su audición, la función de Restricción de volumen limita el volumen a 20
si activa la Soundbar cuando el volumen está ajustado a más de 20.
La función de Restricción de volumen está desactivada de manera
predeterminada. Debe encenderla para activarla.
Cuando se enciende, la función de Restricción de volumen permanece encendida
incluso cuando se desconecta la alimentación eléctrica.
Para activar o desactivar la función de Restricción de volumen, mantenga
presionado el botón Abajo del control remoto durante 5 segundos. Cuando la
función de Restricción de volumen está desactivada, aparece “V FREE” en la
pantalla frontal. Cuando la función está activada, aparece “V LOCK
󰟺
Controlde
sonido
VOL BASS
SOUND
MODE
PAIR
Puede seleccionar TREBLE, BASS, o AUDIO SYNC.
Para controlar el volumen de los sonidos agudos o graves, presione el botón Control
desonido para seleccionar TREBLE o BASS y luego ajuste el volumen entre -6 y +6
usando los botones Arriba/Abajo.
Para ajustar el volumen de cada banda de frecuencias, mantenga presionado el botón
(Controldesonido) durante unos 5 segundos. Se puede seleccionar una frecuencia
de 150 Hz, 300 Hz, 600 Hz, 1.2 kHz, 2.5 kHz, 5 kHz o 10 kHz con los botones Izquierda/
Derecha. Además, cada banda se puede ajustar a una conguración entre -6 y +6 con
los botones Arriba/Abajo.
Si el video en el televisor y el audio de la Soundbar no están sincronizados, presione el
botón Controldesonido para seleccionar AUDIO SYNC y luego dena la demora de
audio entre 0 y 300 milisegundos utilizando los botones Arriba/Abajo. (No disponible
en modo “USB” o “BT”.)
La opción AUDIO SYNC solo se admite en algunas funciones.
󰟻
VOL WOOFER
SOUND
MODE
PAIR
WOOFER
SOUND
MODE
VOL
WOOFER
SOUNDBAR
SOUND
MODE
VOL
WOOFER
SOUNDBAR
SOUND
MODE
VOL
WOOFER
SOUNDBAR
SOUND
MODE
VOL
WOOFER
SOUNDBAR
Mueva el botón WOOFER hacia adelante o hacia ats para ajustar el volumen del
subwoofer a -12 o entre -6 y +6.
Para ajustar el nivel de volumen del subwoofer en 0, presione
el botón.
󰟼
VOL BASS
SOUND
MODE
PAIR
VOL
SOUND
MODE
VOL
WOOFER
SOUNDBAR
SOUND
MODE
VOL
WOOFER
SOUNDBAR
SOUND
MODE
VOL
WOOFER
SOUNDBAR
SOUND
MODE
VOL
WOOFER
SOUNDBAR
Mueva el botón VOL hacia adelante o hacia atrás para ajustar el volumen.
Silencio
Presione el botón VOL para silenciar el sonido. Vuelva a presionarlo para reanudar el
sonido.
SPA - 24
Ajustedelvolumendela
Soundbarconelcontrolremoto
deuntelevisor
SitieneuntelevisorSamsung,puedeajustar
elvolumendelaSoundbarusandoelcontrol
remotoconpuertoinfrarrojoquevieneconsu
televisorSamsung.
Primero, use el menú del televisor para congurar el
audio del televisor en su televisor Samsung a
altavoces externos, luego use el control remoto
Samsung para controlar el volumen de la Soundbar.
Para obtener más información, consulte el manual del
usuario del televisor. El modo predeterminado para
esta función se controla a través de un control remoto
de televisor Samsung. Si su televisor no es Samsung,
siga las instrucciones que guran a continuación para
cambiar la conguración de esta función.
1. Apague la Soundbar.
OFF
2. Si no desea usar esta función, mantenga
presionado hacia arriba el botón WOOFER
repetidamente durante 5 segundos hasta que
aparezca “OFF-TVREMOTE” en la pantalla.
SOUND
MODE
VOL
WOOFER
SOUNDBAR
5 Sec
OFF-TVREMOTE
3. Si desea controlar la Soundbar usando esta
función, mantenga presionado hacia arriba el
botón WOOFER repetidamente durante
5 segundos hasta que aparezca ALL-TV
REMOTE” en la pantalla. Luego, use el menú del
televisor para seleccionar altavoces externos.
SOUND
MODE
VOL
WOOFER
SOUNDBAR
5 Sec
ALL-TVREMOTE
4. Si quiere que la Soundbar vuelva al modo
predeterminado (control a partir del control
remoto de un televisor Samsung), mantenga
levantado el botón del WOOFER durante
5 segundos repetidamente hasta que
aparezca “SAMSUNG-TVREMOTE” (control
remoto televisor Samsung) en la pantalla.
SOUND
MODE
VOL
WOOFER
SOUNDBAR
5 Sec
(Modo predeterminado)
SAMSUNG-TVREMOTE
Cada vez que mueve hacia arriba el botón
WOOFER y lo mantiene presionado
durante 5 segundos, cambia el modo en
el siguiente orden: “SAMSUNG-TV
REMOTE(Modo predeterminado)
OFF-TVREMOTEALL-TVREMOTE”.
Según el control remoto, es posible que
esta función no esté disponible.
Fabricantes que admiten esta función:
VIZIO, LG, Sony, Sharp, PHILIPS,
PANASONIC, TOSHIBA, Hisense, RCA
SPA - 25
Usodelosbotonesocultos(botonesconmásdeunafunción)
Botónoculto
ginadereferencia
Botóndelmandoadistancia Función
WOOFER (Arriba)
Encendido/Apagado control remoto del TV
(espera)
Página 24
Izquierda Conexión automática del TV (BT listo) Página 13
Arriba ID SET
(espera)
Página 22
Abajo
Encendido/Apagado Restricción del
volumen
(espera)
Página 23
(Control de sonido)
EQ 7 bandas Página 23
SOUND MODE
DRC ON/OFF (espera) Página 22
Bluetooth Power Página 22
Especicacionesdesalidaparalosdiferentesmodosdeefectosde
sonido
Efecto Entrada
Salida
SinKitdeparlantetrasero
inalámbrico
SiConKitdeparlante
traseroinalámbrico
SOUND MODE
Surround
VOL WOOFER
SOUND
MODE
Bluetooth
POWER
STANDARD
2.0 canales
2.1 canales 4.1 canales
5.1 canales 2.1 canales 4.1 canales
SURROUND
SOUND
2.0 canales
2.1 canales 4.1 canales
5.1 canales 2.1 canales 4.1 canales
GAME
2.0 canales
2.1 canales 4.1 canales
5.1 canales 2.1 canales 4.1 canales
SMART
2.0 canales
2.1 canales 4.1 canales
5.1 canales 2.1 canales 4.1 canales
DTS VIRTUAL:X
2.0 canales
2.1 canales 4.1 canales
5.1 canales 2.1 canales 4.1 canales
El Kit de parlante trasero inalámbrico de Samsung se puede comprar por separado. Para comprar
un Kit, póngase en contacto con el proveedor a quien le compró la Soundbar.
SPA - 26
09 INSTALACIÓN
DEL SOPORTE DE
MONTAJE EN LA
PARED
Precaucionesparalainstalación
Inslelo en una pared vertical únicamente.
No lo instale en un lugar donde la
temperatura sea alta o haya humedad.
Verique si la pared es lo sucientemente
resistente como para soportar el peso del
producto.
Si no lo es, refuerce la pared o elija otro lugar
para realizar la instalación.
Compre y utilice tornillos de jación o pernos
adecuados para el tipo de pared que usted
tiene (placa de sello, placa de hierro, madera,
etc.). Si es posible, je los tornillos de sujeción
en los pernos de la pared.
Compre tornillos para realizar montajes en la
pared según el tipo y el espesor de la pared
en la que desea colocar la Soundbar.
Diámetro: M5
Longitud: Se recomienda 35 mm o más.
Conecte los cables de la unidad a los
dispositivos externos antes de instalar la
Soundbar en la pared.
Asegúrese de que la unidad esté apagada y
desconéctela antes de instalarla. De lo
contrario, se puede producir una descarga
eléctrica.
Componentesdesoporte
Guíaparamontajeenlapared
x 2
x 2
Tornillodesujeción Tornillo
x 2
Soportedemontajeenlapared
1. Coloque la Guíaparamontajeenlapared
sobre la supercie de la pared.
La Guíaparamontajeenlapared debe
estar nivelada.
Si el televisor está colocado en la pared,
instale la Soundbar a al menos 5 cm
debajo del televisor.
5cmomás
SPA - 27
2. Haga coincidir la Líneacentraldelaguía
paramontajeenlapared con el centro de su
televisor (si va a montar la Soundbar debajo
de su televisor) y luego je la Guíapara
montajeenlapared a la pared con cinta
adhesiva.
Si no la va a montar debajo del televisor,
coloque la Líneacentral en el centro del
área de instalación.
Líneacentral
3. Pase la punta de una lapicera o la punta de
un lápiz no por el centro de las imágenes
B-TYPE en cada extremo de la Guía para
marcar los oricios en donde irán los
tornillos de sujeción. Luego, quite la Guía
paramontajeenlapared.
4. Utilizando una broca del tamaño adecuado,
taladre un oricio en la pared en cada una de
las marcas.
Si las marcas no coinciden con la posición
de los pernos, asegúrese de colocar tacos
o pernos de expansión tipo Molly
adecuados dentro de los oricios antes de
colocar los tornillos de sujeción. Si utiliza
tacos o pernos de expansión tipo Molly,
asegúrese de que los oricios que taladre
sean lo sucientemente grandes para los
tacos o pernos que va a utilizar.
5. Pase un tornillo (no suministrado) por cada
Tornillodesujeción y luego ajuste cada
tornillo con rmeza en un oricio de soporte
del tornillo.
6. Instale los dos Soportedemontajepara
pared en la dirección correcta en la parte
inferior de la Soundbar utilizando 2 Tornillos.
Al realizar el montaje, asegúrese de que
los ganchos para colgar de los Soportes
depared queden ubicados detrás de la
parte posterior de la Soundbar.
ParteposteriordelaSoundbar
ExtremoderechodelaSoundbar
SPA - 28
7. Para instalar la Soundbar con el Soportede
montajeenlapared ya colocado, cuelgue el
soporte de montaje en la pared de los
Tornillosdesujeción que están en la pared.
8. Deslice la Soundbar hacia abajo, como se
muestra a continuación, de manera que los
Soportesdemontajeparapared se apoyen
rmemente en los Tornillosdesujeción.
Inserte los Tornillosdesujeción en la
parte ancha (inferior) de los Soportesde
montajeparapared y, luego, deslícelos
hacia abajo de manera que se apoyen
rmemente en los Tornillosdesujeción.
10 ACTUALIZACIÓN
DELSOFTWARE
EsposiblequeSamsungofrezcaactualizaciones
paraelrmwaredelsistemadelaSoundbarenel
futuro.
PuertoUSB
DC 24V
HDMI
USB (5V 0.5A)
DIGITAL AUDIO IN
(OPTICAL)
HDMI TO TV
(ARC)
USB (5V 0.5A)
Si le ofrecen una actualización, puede actualizar
el rmware conectando el dispositivo USB con la
actualización del rmware almacenada en mismo
al puerto USB de la Soundbar.
Para obtener más información sobre cómo
descargar los archivos de las actualizaciones,
visite el sitio web de Samsung Electronics en
(www.samsung.com
Support).
Luego, seleccione el tipo de producto o escriba el
número de modelo de la Soundbar, seleccione la
opción Software y aplicaciones, y luego presione
Descargas. Tenga en cuenta que los nombres de
la opciones pueden variar.
mocomprobarlaversiónde
rmware
1. Apague la Soundbar.
2. Mantenga presionado el botón (Control
desonido) por unos 5 segundos en el control
remoto.
3. Cada versión aparece en el siguiente orden
en la pantalla de la Soundbar.
(Versión de software → HDMI Tx Rx )
Tx : Módulo Tx inalámbrico de la Soundbar.
Rx : Módulo Rx inalámbrico del subwoofer.
PANTALLA DE LA VERSIÓN R2
Sin conexión en la parte posterior
R2---
Conectada en la parte posterior R2xxx
SPA - 29
Procedimientodeactualización
Importante:La función de actualización borra todas
las conguraciones del usuario. Le recomendamos
que anote sus conguraciones para poder
restablecerlas fácilmente después de la actualización.
Tenga en cuenta que actualizar el rmware también
restablece la conexión del subwoofer.
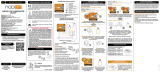
1. Conecte un dispositivo de memoria USB al
puerto USB de su computadora.
Importante: Asegúrese de que no haya
archivos de música en el dispositivo de
memoria USB, ya que podría fallar la
actualización del rmware.
2. Visite el sitio web de Samsung
(samsung.com)
Seleccione Ingresar
número de modelo y escriba el modelo de su
Soundbar. Seleccione Manuales y descargas
y descargue el archivo de software más
reciente.
3. Guarde el software descargado en una
memoria USB y seleccione “Extraer aquí
para descomprimir la carpeta.
4. Apague la Soundbar y conecte en el puerto
USB la memoria USB que contiene la
actualización de software.
5. Encienda la Soundbar y cambie la fuente al
modo “USB”. Dentro de 3 minutos, aparecerá
la opción “UPDATE” y comenzará la
actualización. Cuando la actualización
termina, la Soundbar se apaga.
6. Encienda la Soundbar y presione el botón
-/+(Volumen) en el panel superior durante
5segundos. Aparece la palabra INIT” en la
pantalla y luego la Soundbar se apaga. La
actualización ha terminado.
Este producto tiene una función DUAL
BOOT. Si falla la actualización del
rmware, puede actualizarlo
nuevamente.
7. Restablezca sus ajustes en la Soundbar.
SinoaparecelaopciónUPDATE
1. Apague la Soundbar, desconecte y vuelva a
conectar el dispositivo de almacenamiento
que contiene los archivos actualizados al
puerto USB de la Soundbar.
2. Desconecte el cable de alimentación de la
Soundbar, vuelva a conectarlo y luego
encienda la Soundbar.
NOTAS
La actualización de rmware tal vez no
funcione correctamente si los archivos de
audio admitidos por la Soundbar están
almacenados en el dispositivo de
almacenamiento.
No desconecte el equipo ni quite el dispositivo
USB mientras se están aplicando
actualizaciones. La unidad principal se
apagará automáticamente una vez que
termina la actualización de rmware.
Una vez que se naliza la actualización, se
inicializa la conguración de usuario en la
Soundbar para que pueda restablecer su
conguración. Le recomendamos tomar nota
de su conguración para que pueda
restablecerlas fácilmente después de la
actualización. Tenga en cuenta que la
actualización de rmware restablece también
la conexión del subwoofer. Si la conexión al
subwoofer no se restablece automáticamente
después de la actualización, consulte la
página 6. Si falla la actualización de
software, verique que la memora USB no
esté defectuosa.
Los usuarios con sistema operativo Mac
deben usar MS-DOS (FAT) como formato de
USB.
Quizás no esté disponible la actualización a
través de USB, según el fabricante del
dispositivo de almacenamiento.
SPA - 30
11 SOLUCIÓN DE PROBLEMAS
Antes de buscar ayuda, controle lo siguiente.
Launidadnoenciende.
¿Elcabledealimentaciónestármemente
conectadoalatomadelaparedyaladaptador
decorriente?
; Desconecte y vuelva a conectar el cable de
alimentación a la toma de la pared y el
adaptador de corriente para asegurarse de
que la conexión es segura.
¿Eladaptadordecorrienteestáconectado
rmementealaunidadprincipal?
; Desconecte el adaptador de corriente de la
Soundbar, y vuelva a conectarlo para
asegurarse de que la conexión sea rme y
segura.
Nopuedeutilizarunafuncióncuando
presionaelbotón.
¿Hayelectricidadestáticaenelaire?
; Desconecte el enchufe y vuelva a
conectarlo.
NoseescuchaelsonidoenelmodoBT.
; Consulte las secciones de conexión vía
Bluetooth en las páginas 12 y 17.
Noseescuchaelsonido.
¿EstáactivadalafunciónSilencio?
; Presione el botón (Silencio) para
cancelar la función de silencio.
¿Seencuentraelvolumenenmínimo?
; Ajuste el volumen.
Elcontrolremotonofunciona.
¿Laspilasseagotaron?
; Reemplácelas por pilas nuevas.
¿Elcontrolremotoylaunidadprincipaldela
Soundbaresnmuyalejados?
; Acerque el control remoto a la unidad
principal de la Soundbar.
Elledrojoenelsubwooferparpadeayel
subwoofernoemitesonido.
Esteproblemapuedepresentarsesiel
subwoofernoestáconectadoalaunidad
principaldelaSoundbar.
; Intente conectar el subwoofer otra vez.
(Consulte la página 6)
Elsubwooferzumbayvibradeunaforma
notable.
Intenteajustarlavibracióndelsubwoofer.
; Mueva el botón
WOOFER
de su control
remoto hacia adelante o hacia atrás para
ajustar el nivel del subwoofer. (a -12, o entre
-6 ~ +6)
SPA - 31
12 LICENCIA
Manufactured under license from Dolby
Laboratories. Dolby, Dolby Audio, and the
double-D symbol are trademarks of Dolby
Laboratories.
For DTS patents, see http://patents.dts.com.
Manufactured under license from DTS
Licensing Limited. DTS, the Symbol, DTS in
combination with the Symbol, DTS and the
Symbol together, Virtual:X, the DTS Virtual:X
logo, and DTS 2.0 Channel are registered
trademarks or trademarks of DTS, Inc. in the
United States and/or other countries. © DTS,
Inc. All Rights Reserved.
The terms HDMI and HDMI High-Denition
Multimedia Interface, and the HDMI Logo are
trademarks or registered trademarks of HDMI
Licensing LLC in the United States and other
countries.
The Bluetooth® word mark and logos are
registered trademarks owned by the Bluetooth
SIG, Inc. and any use of such marks by Samsung
Electronics Co., Ltd. is under license. Other
trademarks and trade names are those of their
respective owners.
13 AVISO SOBRE
LICENCIA DE
CÓDIGO ABIERTO
Para enviar consultas sobre fuentes abiertas,
póngase en contacto con Samsung a través del
correo electrónico (oss.request@samsung.com).
14 NOTA
IMPORTANTE
SOBRE EL
SERVICIO
Las guras e ilustraciones de este Manual del
usuario se facilitan sólo como referencia y pueden
diferir del aspecto real del producto.
SPA - 32
15 ESPECIFICACIONES Y GUÍA
Especicaciones
Nombre del modelo HW-T550
USB 5V/0,5A
Peso 2,1 kg
Dimensiones (An x Al x Pr) 860,0 x 55,0 x 85,0 mm
Rango de temperatura de servicio C a +45°C
Rango de humedad de servicio 10 % a 75 %
AMPLIFICADOR
Potencia nominal de salida 160W(40Wx4)
Formatos de reproducción compatibles
(El sonido DTS 2.0 y DTS Virtual:X se reproduce
en formato DTS).
LPCM 2ch, Dolby Audio™
(admite Dolby® Digital), DTS
Nombre del subwoofer PS-WR55D
Peso 5,0 kg
Dimensiones (An x Al x Pr) 200,6 x 353,0 x 290,0 mm
AMPLIFICADOR
Potencia nominal de salida
160W
NOTAS
Samsung Electronics Co., Ltd se reserva el derecho a cambiar las especicaciones sin previo aviso.
Los pesos y dimensiones son aproximados.
© 2020 Samsung Electronics Co., Ltd. All rights reserved.
ContactSAMSUNGWORLDWIDE
If you have any questions or comments relating to Samsung products, please contact the SAMSUNG customer
care Center.
Area Contact Center
Web Site
`
Latin America
MEXICO 01-800-SAMSUNG (726-7864) www.samsung.com/mx/support
BRAZIL
0800-124-421 (Demais cidades e regiões)
4004-0000 (Capitais e grandes centros)
www.samsung.com/br/support
COSTA RICA 00-800-1-SAMSUNG (726-7864)
www.samsung.com/latin/support (Spanish)
www.samsung.com/latin_en/support (English)
DOMINICAN REPUBLIC 1-800-751-2676
ECUADOR 1-800-SAMSUN (72-6786)
EL SALVADOR 8000-SAMSUNG (726-7864)
GUATEMALA 1-800-299-0033
HONDURAS 800-2791-9111
JAMAICA 1-800-SAMSUNG (726-7864) www.samsung.com/latin_en/support (English)
NICARAGUA 001-800-5077267
www.samsung.com/latin/support (Spanish)
www.samsung.com/latin_en/support (English)
PANAMA 800-0101
PUERTO RICO 1-800-682-3180
TRINIDAD & TOBAGO 1-800-SAMSUNG (726-7864)
VENEZUELA 0-800-100-5303
COLOMBIA
Bogotá en el 600 12 72
Sin costo en todo el pais 01 8000 112 112
Y desde tu celular #726
www.samsung.com/co/support
CHILE 800-SAMSUNG (726-7864)
www.samsung.com/cl/support
BOLIVIA 800-10-7260
PERU 080077708 Desde teléfonos fi jos, públicos o celulares www.samsung.com/pe/support
ARGENTINA 0800-555-SAMS (7267) www.samsung.com/ar
URUGUAY 0800-SAMS (7267) www.samsung.com/uy
PARAGUAY 0800-11-SAMS (7267) www.samsung.com/py
1 / 1

Samsung HW-T550 Manual de usuario

Categoría
Altavoces de la barra de sonido
Tipo
Manual de usuario

En otros idiomas