
Software für Schließsysteme
Software-Anleitung . . . . . . . . . . . . . . 3
Software for locking systems
Software manual . . . . . . . . . . . . . . . 72
Logiciel pour systèmes de
verrouillage
Manuel d'utilisation du logiciel. . . . 139
Software para sistemas de
cierre
Instrucciones del software. . . . . . . 210
Software per sistemi di
chiusura
Manuale di istruzioni del software . 280
Programvara för låssystem
Handbok . . . . . . . . . . . . . . . . . . . . 348
DE
EN
FR
ES
IT
SV
Hotel Management


DE
Hotel Management
3
Bitte lesen Sie diese Anleitung vor der Inbetriebnahme sorgfältig durch
und bewahren Sie sie auf. Geben Sie sie im Falle einer Weitergabe des
Produktes an den Nutzer weiter.
Inhaltsverzeichnis
1 Systemanforderungen. . . . . . . . . . . . . . . . . . . . . . . . . . . . . . . . . . .6
2 Zubehör. . . . . . . . . . . . . . . . . . . . . . . . . . . . . . . . . . . . . . . . . . . . . . .6
3 Installation . . . . . . . . . . . . . . . . . . . . . . . . . . . . . . . . . . . . . . . . . . . . 6
4 Erster Programmstart . . . . . . . . . . . . . . . . . . . . . . . . . . . . . . . . . . .7
5 Grundlagen. . . . . . . . . . . . . . . . . . . . . . . . . . . . . . . . . . . . . . . . . . . .9
5.1 Datensatz suchen . . . . . . . . . . . . . . . . . . . . . . . . . . . . . . . . . . 9
5.2 Datensatz bearbeiten. . . . . . . . . . . . . . . . . . . . . . . . . . . . . . . .9
5.3 Datensatz löschen . . . . . . . . . . . . . . . . . . . . . . . . . . . . . . . . .10
5.4 Fenster verlassen, ohne zu speichern. . . . . . . . . . . . . . . . . .10
5.5 Anmelden. . . . . . . . . . . . . . . . . . . . . . . . . . . . . . . . . . . . . . . .11
5.6 Benutzer wechseln . . . . . . . . . . . . . . . . . . . . . . . . . . . . . . . .12
5.7 Das Hauptfenster. . . . . . . . . . . . . . . . . . . . . . . . . . . . . . . . . .13
5.8 Programm verlassen . . . . . . . . . . . . . . . . . . . . . . . . . . . . . . .13
6 Die Software konfigurieren . . . . . . . . . . . . . . . . . . . . . . . . . . . . . . 14
6.1 Sprache auswählen. . . . . . . . . . . . . . . . . . . . . . . . . . . . . . . .14
6.2 Update-Code benutzen . . . . . . . . . . . . . . . . . . . . . . . . . . . . .15
6.3 Zusatzmodule einpflegen. . . . . . . . . . . . . . . . . . . . . . . . . . . .16
7 Benutzer verwalten . . . . . . . . . . . . . . . . . . . . . . . . . . . . . . . . . . . .17
7.1 Benutzertyp anlegen/bearbeiten . . . . . . . . . . . . . . . . . . . . . .18
7.2 Benutzer anlegen/bearbeiten. . . . . . . . . . . . . . . . . . . . . . . . .20
8 Hoteldaten verwalten. . . . . . . . . . . . . . . . . . . . . . . . . . . . . . . . . . .22
8.1 Nach Bereichen filtern . . . . . . . . . . . . . . . . . . . . . . . . . . . . . .23
8.2 Nach Zugängen und Räumen gruppieren . . . . . . . . . . . . . . . 24
8.3 Raumtypen definieren . . . . . . . . . . . . . . . . . . . . . . . . . . . . . . 25
8.4 Zugangspunkte hinzufügen/bearbeiten . . . . . . . . . . . . . . . . .26
8.5 Bereiche definieren . . . . . . . . . . . . . . . . . . . . . . . . . . . . . . . .28

DE
Hotel Management
4
9 Personaldaten verwalten. . . . . . . . . . . . . . . . . . . . . . . . . . . . . . . . 30
9.1 Personal-Zeitpläne definieren . . . . . . . . . . . . . . . . . . . . . . . .30
9.2 Personaldatensatz hinzufügen/bearbeiten . . . . . . . . . . . . . .33
9.3 Mitarbeitern Karten zuweisen . . . . . . . . . . . . . . . . . . . . . . . .35
10 Kundendaten hinzufügen/bearbeiten. . . . . . . . . . . . . . . . . . . . . .38
11 Check-In durchführen . . . . . . . . . . . . . . . . . . . . . . . . . . . . . . . . . .40
11.1 Check-in hinzufügen . . . . . . . . . . . . . . . . . . . . . . . . . . . . . . .41
11.2 Check-In bearbeiten . . . . . . . . . . . . . . . . . . . . . . . . . . . . . . . 44
11.3 Kunden-Zeitpläne definieren . . . . . . . . . . . . . . . . . . . . . . . . .46
11.4 Verpflegungsart definieren. . . . . . . . . . . . . . . . . . . . . . . . . . .49
12 Kundenkarten schnell erzeugen. . . . . . . . . . . . . . . . . . . . . . . . . .50
13 Karten lesen . . . . . . . . . . . . . . . . . . . . . . . . . . . . . . . . . . . . . . . . . .51
14 Monatsübersicht . . . . . . . . . . . . . . . . . . . . . . . . . . . . . . . . . . . . . . 52
14.1 Anderen Monat anzeigen. . . . . . . . . . . . . . . . . . . . . . . . . . . .53
15 Daten ins System laden. . . . . . . . . . . . . . . . . . . . . . . . . . . . . . . . .54
15.1 Daten von einem Zugangspunkt herunterladen. . . . . . . . . . .54
15.2 Karten-Daten ins System laden. . . . . . . . . . . . . . . . . . . . . . .54
16 Zugänge zeigen . . . . . . . . . . . . . . . . . . . . . . . . . . . . . . . . . . . . . . .55
16.1 Nach Zugangsnummer filtern . . . . . . . . . . . . . . . . . . . . . . . .55
16.2 Nach Zugangsdatum filtern . . . . . . . . . . . . . . . . . . . . . . . . . .56
16.3 Den Zugangs-Verlauf löschen. . . . . . . . . . . . . . . . . . . . . . . .57
17 Türschloss programmieren . . . . . . . . . . . . . . . . . . . . . . . . . . . . .58
18 Spezialkarten erzeugen. . . . . . . . . . . . . . . . . . . . . . . . . . . . . . . . .59
18.1 Notfallkarte erzeugen. . . . . . . . . . . . . . . . . . . . . . . . . . . . . . .59
18.2 Dauerauf-Karte erzeugen . . . . . . . . . . . . . . . . . . . . . . . . . . .60
18.3 Verriegelungskarte erzeugen. . . . . . . . . . . . . . . . . . . . . . . . .61
18.4 Komfortzeit-Karte erzeugen. . . . . . . . . . . . . . . . . . . . . . . . . .62
19 Backups erstellen/wiederherstellen. . . . . . . . . . . . . . . . . . . . . . . 63
19.1 Backup erzeugen. . . . . . . . . . . . . . . . . . . . . . . . . . . . . . . . . .63
19.2 Backup wiederherstellen . . . . . . . . . . . . . . . . . . . . . . . . . . . .63
20 Blacklist verwalten. . . . . . . . . . . . . . . . . . . . . . . . . . . . . . . . . . . . .64
20.1 Karten der Blacklist hinzufügen . . . . . . . . . . . . . . . . . . . . . . . 64
20.2 Karten auf der Blacklist einsehen . . . . . . . . . . . . . . . . . . . . .65
20.3 Blacklist-Karte erzeugen . . . . . . . . . . . . . . . . . . . . . . . . . . . .66

DE
Hotel Management
5
21 PMS-Modul verwalten . . . . . . . . . . . . . . . . . . . . . . . . . . . . . . . . . .67
21.1 PMS-Modul konfigurieren . . . . . . . . . . . . . . . . . . . . . . . . . . .69
21.2 Autorisierungen hinzufügen/bearbeiten. . . . . . . . . . . . . . . . .70
21.3 PMS-Verbindung aufbauen . . . . . . . . . . . . . . . . . . . . . . . . . .71

DE
Systemanforderungen Hotel Management
6
1 Systemanforderungen
Minimale Anforderungen:
Betriebssystem: Windows XP Service Pack 3
Bildschirmauflösung: 1024 x 768
Prozessor: Intel Pentium 4 mit 2 GHz oder kompatibel
Arbeitsspeicher: 1 GB RAM
Freier Festplattenspeicher: 1 GB
Schnittstellen: 1x USB 2.0
2 Zubehör
Als Zubehör erhältlich (nicht im Lieferumfang enthalten):
3 Installation
➤ Schließen Sie das Kartenlesegerät an eine freie USB-Buchse an.
➤ Legen Sie den Datenträger mit der Hotel-Management-Software ein.
✓ Das Setup-Programm wird geöffnet.
➤ Folgen Sie den Schritten im Setup-Programm.
Bezeichnung Artikelnummer
Smart Card Energy saver 9106600715
Smart Card Access Control 9106600713
Smart Card Encoder 9106600722
Smart Key Card 9106600724
RFID Access Control 9106600714
RFID Energy saver 9106600716
RFID Encoder 9106600723
RFID Key Card 9106600725

DE
Hotel Management Erster Programmstart
7
4 Erster Programmstart
Beim ersten Programmstart müssen Sie die Hotel-Management-Software
konfigurieren.
➤ Öffnen Sie die Hotel-Management-Software.
➤ Wählen Sie die gewünschte Sprache aus der Liste, und bestätigen Sie mit
Accept (Akzeptieren).
✓ Das Programm führt einen Neustart der Hotel-Management-Software mit
den neuen Einstellungen durch.
➤ Geben Sie den Installations-Code ein, und bestätigen Sie mit Accept
(Akzeptieren).
I
HINWEIS
Den Installations-Code erhalten Sie vom Hersteller.

DE
Erster Programmstart Hotel Management
8
➤ Schieben Sie die Initialisierungs-Karte in das Kartenlesegerät.
➤ Folgen Sie den Anweisungen auf dem Bildschirm.
✓ Das Hauptfenster der Hotel-Management-Software wird geöffnet.

DE
Hotel Management Grundlagen
9
5 Grundlagen
Viele Fenster enthalten eine Symbolleiste am oberen Rand. Die Symbole in
der Symbolleiste wechseln je nach Kontext. Die Bedeutung der Symbole
wird in dieser Anleitung unterhalb der Abbildung des jeweiligen Fensters
erklärt.
Viele Fenster enthalten Listen. Klicken Sie auf einen Eintrag in der Liste, um
einen Bereich mit weiteren Informationen zu dem Eintrag auszuklappen. Ein
Klick auf einen Benutzertyp zeigt z. B. die für diesen Benutzertyp gültigen
Rechte an. Ein Klick auf einen anderen Eintrag in der Liste minimiert den
zuvor ausgeklappten Eintrag und klappt die Informationen zu dem aktuellen
Eintrag aus.
5.1 Datensatz suchen
Viele Fenster enthalten ein Suchfeld am oberen rechten Rand.
➤ Geben Sie den Begriff ein, den Sie finden möchten.
➤ Klicken Sie auf das Lupen-Symbol, um die Suche zu starten.
✓ Die Liste im jeweiligen Fenster wird auf die Ergebnisse Ihrer Suche
beschränkt.
5.2 Datensatz bearbeiten
Bestehende Datensätze können mit dem Symbol bearbeitet werden.
➤ Wählen Sie den gewünschten Datensatz aus.
➤ Klicken Sie auf das Symbol .
I
HINWEIS
Es wird im Folgenden nicht darauf hingewiesen, dass Sie die
Datensätze auswählen müssen, die Sie bearbeiten möchten.

DE
Grundlagen Hotel Management
10
5.3 Datensatz löschen
Die meisten Fenster enthalten die Schaltfläche Delete (Löschen) mit dem
Symbol .
I
➤ Markieren Sie den gewünschten Datensatz in der Liste.
➤ Klicken Sie auf das Symbol .
➤ Bestätigen Sie den Löschvorgang mit Accept (Akzeptieren).
✓ Der Datensatz wird gelöscht.
5.4 Fenster verlassen, ohne zu speichern
Wenn Sie einen Datensatz anlegen oder bearbeiten können Sie den
Vorgang jederzeit abbrechen, ohne die Eingaben zu speichern.
I
➤ Drücken Sie die Schaltfläche Cancel (Abbrechen).
✓ Das aktuelle Fenster wird geschlossen.
HINWEIS
Auf die Schaltfläche Delete (Löschen) wird im Folgenden nicht
ausdrücklich hingewiesen.
HINWEIS
Auf die Schaltfläche Cancel (Abbrechen) wird im Folgenden nicht
ausdrücklich hingewiesen.

DE
Hotel Management Grundlagen
11
5.5 Anmelden
➤ Öffnen Sie die Hotel-Management-Software.
✓ Das Hauptfenster der Hotel-Management-Software wird geöffnet.
Sie müssen sich an der Software anmelden.
➤ Geben Sie den Benutzernamen und das Passwort ein.
I
➤ Bestätigen Sie die Eingaben mit Accept (Akzeptieren).
HINWEIS
Bei der Installation der Hotel-Management-Software wird der
Benutzer „Administrator“ eingerichtet. Für den Benutzer „Admi-
nistrator“ ist kein Passwort vergeben. Ändern Sie das Passwort
nach der ersten Anmeldung (Kapitel „Benutzer anlegen/bearbei-
ten“ auf Seite 20).

DE
Grundlagen Hotel Management
12
5.6 Benutzer wechseln
➤ Wählen Sie im Hauptmenü Users – Change user (Benutzer – Benutzer
wechseln).
➤ Geben Sie den Benutzernamen und das Passwort ein.
➤ Bestätigen Sie die Eingaben mit Accept (Akzeptieren).

DE
Hotel Management Grundlagen
13
5.7 Das Hauptfenster
Das Hauptfenster ist das zentrale Element der Hotel-Management-Software.
Über das Hauptmenü des Hauptfensters erreichen Sie sämtliche Funktionen
der Hotel-Management-Software.
Am unteren rechten Rand des Hauptfensters finden Sie folgende Informatio-
nen:
Version: Version der Software
Current user: Aktuell angemeldeter Benutzer
Type of user: Benutzertyp des aktuell angemeldeten Benutzers
Das Hauptfenster erreichen Sie über den Menüeintrag Desktop im Haupt-
menü.
5.8 Programm verlassen
➤ Wählen Sie im Hauptmenü Exit (Verlassen).

DE
Die Software konfigurieren Hotel Management
14
6 Die Software konfigurieren
6.1 Sprache auswählen
I
➤ Wählen Sie im Hauptmenü Configuration – General configuration
(Konfiguration – Allgemeine Konfiguration).
➤ Klicken Sie auf Language (Sprache).
➤ Wählen Sie die gewünschte Sprache aus der Liste, und bestätigen Sie mit
Accept (Akzeptieren).
✓ Es erscheint ein Hinweis-Fenster, dass die Software neugestartet werden
muss.
➤ Klicken Sie auf Accept (Akzeptieren), um den Neustart durchzuführen
oder führen Sie ihn später manuell durch.
HINWEIS
Die Umstellung der Sprache erfordert einen Neustart der Soft-
ware.

DE
Hotel Management Die Software konfigurieren
15
6.2 Update-Code benutzen
Über Update-Codes wird die Software aktualisiert. Der Hersteller kontaktiert
Sie, wenn die Software aktualisiert werden muss.
➤ Wählen Sie im Hauptmenü Configuration – General configuration
(Konfiguration – Allgemeine Konfiguration).
➤ Klicken Sie auf Updating code (Update-Code).
➤ Geben Sie die Seriennummer und den Update-Code ein.
➤ Bestätigen Sie die Eingabe mit Accept (Akzeptieren).
✓ Die Software wird aktualisiert.

DE
Die Software konfigurieren Hotel Management
16
6.3 Zusatzmodule einpflegen
Die Hotel-Management-Software kann mit Zusatzmodulen erweitert werden.
➤ Wählen Sie im Hauptmenü Configuration – General configuration
(Konfiguration – Allgemeine Konfiguration).
➤ Klicken Sie auf Initialization card (Initialisierungs-Karte).
➤ Schieben Sie die Initialisierungs-Karte in das Kartenlesegerät.
➤ Folgen Sie den Anweisungen auf dem Monitor.

DE
Hotel Management Benutzer verwalten
17
7 Benutzer verwalten
Benutzer können die Hotel-Management-Software verwenden, um Daten zu
verwalten, hinzuzufügen, verändern oder zu löschen. Sie können beliebig
viele Benutzer anlegen.
Über Benutzertypen verwalten Sie die Rechte der Benutzer innerhalb der
Hotel-Management-Software.
Bei der Installation der Hotel-Management-Software wird der Benutzer
„Administrator“ eingerichtet. Der Administrator besitzt umfassende Rechte,
die in der Software hinterlegten Daten zu verändern und zu löschen. Daher
wird nicht empfohlen, dauerhaft mit dem Administrator zu arbeiten. Legen
Sie stattdessen weitere Benutzer an, um die Aufgaben des Hotelbetriebs zu
bearbeiten.
➤ Wählen Sie im Hauptmenü Users – Create users (Benutzer – Benutzer
anlegen).
Symbol Name Beschreibung
Add user Einen neuen Benutzer hinzufügen
Edit user Einen bestehenden Benutzer bearbeiten
Delete user Einen bestehenden Benutzer löschen
Define types
of user
Benutzertyp anlegen, bearbeiten und löschen

DE
Benutzer verwalten Hotel Management
18
7.1 Benutzertyp anlegen/bearbeiten
Benutzertypen bilden die Grundlage für die Rechteverwaltung der einzelnen
Benutzer. Typische Aufgabenbereiche wie Rezeptionisten, Hausmeister und
andere können über die Benutzertypen vordefiniert werden und müssen nur
in Ausnahmefällen für einzelne Benutzer angepasst werden.
➤ Wählen Sie im Hauptmenü Users – Create users (Benutzer – Benutzer
anlegen).
➤ Klicken Sie auf das Symbol .
Im Fenster Types of user (Benutzertypen) sind alle definierten Benutzer-
typen aufgelistet. Klicken Sie auf einen Benutzertyp, um eine Übersicht der
Rechte zu erhalten, die für diesen Benutzertyp definiert sind.
I
➤ Zum Anlegen eines Datensatzes klicken Sie auf das Symbol .
Symbol Name Beschreibung
Add type of
user
Einen neuen Benutzertyp hinzufügen
Edit type of
user
Einen bestehenden Benutzertyp bearbeiten
Delete type
of user
Einen bestehenden Benutzertyp löschen
HINWEIS
Der Benutzertyp „Administrator“ besitzt sämtliche in der Software
verfügbaren Rechte. Der Benutzertyp „Administrator“ kann nicht
verändert oder gelöscht werden.

DE
Hotel Management Benutzer verwalten
19
➤ Zum Bearbeiten eines Datensatzes klicken Sie auf das Symbol .
➤ Geben Sie einen Namen für den Benutzertyp ein.
➤ Wählen Sie die Rechte aus, die der Benutzertyp besitzen soll:
– Create Users: Benutzer anlegen
– Generate programming card: Programmierkarte erzeugen
– Generate data download card: Daten-Download-Karte erzeugen
– Generate free access card: Dauerauf-Karte erzeugen
– Generate closing card: Verriegelungskarte erzeugen
– Programm/read cards: Karten programmieren/lesen
– Blacklist: Blacklist verwalten
– Download card data: Kartendaten herunterladen
– See access operations: Zugangsvorgänge ansehen
– Check-in: Check-Ins durchführen
– Occupation graph: Belegungsübersicht ansehen
– Client records: Kundendaten verwalten
– Employee records: Mitarbeiterdaten verwalten
– Backup: Backups erstellen/wiederherstellen
– General configuration: Allgemeine Einstellungen vornehmen
– Hotel data: Hoteldaten verwalten
– Generate courtesy time card: Komfortzeit-Karte erzeugen
– PMS configuration: Das Property Management System (PMS)
konfigurieren
– Start PMS connection: Verbindung zum Property Management
System (PMS) starten
– Lockers: Schrankschloss
➤ Bestätigen Sie die Eingaben mit Accept (Akzeptieren).

DE
Benutzer verwalten Hotel Management
20
✓ Der neue Benutzertyp wird in der Liste angezeigt.
➤ Klicken Sie auf Exit (Verlassen), um in das Fenster Create users (Benut-
zer anlegen) zurückzukehren.
7.2 Benutzer anlegen/bearbeiten
I
➤ Wählen Sie im Hauptmenü Users – Create users (Benutzer – Benutzer
anlegen).
➤ Zum Anlegen eines Datensatzes klicken Sie auf das Symbol .
➤ Zum Bearbeiten eines Datensatzes klicken Sie auf das Symbol .
HINWEIS
Der Benutzer „Administrator“ besitzt sämtliche in der Software
verfügbaren Rechte. Der Benutzer „Administrator“ kann nicht
gelöscht werden.

DE
Hotel Management Benutzer verwalten
21
➤ Geben Sie einen Namen und ein Passwort für den Benutzer ein.
➤ Wählen Sie den Benutzertyp für den Benutzer aus.
✓ Die Rechte des Benutzers werden entsprechend des Benutzertyps ange-
passt.
➤ Bestätigen Sie die Eingaben mit Accept (Akzeptieren).
✓ Der neue Benutzer wird in der Liste angezeigt.

DE
Hoteldaten verwalten Hotel Management
22
8 Hoteldaten verwalten
Im Menüpunkt Hotel Data (Hoteldaten) erstellen Sie ein virtuelles Abbild des
Hotels. Gestalten Sie dies Abbild so genau wie möglich, um dem Personal
eine optimale Bedienung der Hotel-Management-Software zu ermöglichen.
➤ Wählen Sie im Hauptmenü Hotel Data (Hoteldaten).
Sie können folgende Darstellungsoptionen anwenden:
Nach Bereichen filtern
Nach Zugängen und Räumen gruppieren
Symbol Name Beschreibung
Add access
point
Einen neuen Zugangspunkt hinzufügen
Edit access
point
Einen bestehenden Zugangspunkt bearbeiten
Delete
access point
Einen bestehenden Zugangspunkt löschen
Define types
of room
Raumtypen anlegen, bearbeiten und löschen
Define
areas
Bereiche anlegen, bearbeiten und löschen

DE
Hotel Management Hoteldaten verwalten
23
8.1 Nach Bereichen filtern
Im Bereich Hotel Data (Hoteldaten) fallen viele Daten über die Räumlichkei-
ten an. Stellen Sie Filter ein, um sich einen besseren Überblick verschaffen
zu können.
➤ Aktivieren Sie die Checkbox Area filter (Bereichsfilter) in der oberen
rechten Ecke des Fensters.
➤ Wählen Sie den gewünschten Bereich aus der Drop-Down-Liste aus.
✓ Die Liste zeigt nur noch die Zugangspunkte in dem ausgewählten
Bereich.
I
HINWEIS
Klicken Sie auf das Kreuz links neben der Auswahlliste, um den
Filter zu löschen.

DE
Hoteldaten verwalten Hotel Management
24
8.2 Nach Zugängen und Räumen gruppieren
➤ Aktivieren Sie die Checkbox Group accesses/rooms (Zugänge/Räume
gruppieren) in der oberen rechten Ecke des Fensters.
✓ Die Zugänge und Räume sind in der Ansicht gruppiert.
I
HINWEIS
Deaktivieren Sie die Checkbox Group accesses/rooms
(Zugänge/Räume gruppieren), um den Filter zu löschen.

DE
Hotel Management Hoteldaten verwalten
25
8.3 Raumtypen definieren
➤ Wählen Sie im Hauptmenü Hotel Data (Hoteldaten).
➤ Klicken Sie auf das Symbol .
➤ Zum Anlegen eines Datensatzes klicken Sie auf das Symbol .
➤ Zum Bearbeiten eines Datensatzes klicken Sie auf das Symbol .
➤ Geben Sie einen Namen für den Raumtyp ein.
➤ Bestätigen Sie die Eingabe mit Accept (Akzeptieren).
Symbol Name Beschreibung
Add type of
room
Einen neuen Raumtyp hinzufügen
Edit type of
room
Einen bestehenden Raumtyp bearbeiten
Delete type
of room
Einen bestehenden Raumtyp löschen

DE
Hoteldaten verwalten Hotel Management
26
✓ Der neue Raumtyp wird in der Liste angezeigt.
➤ Klicken Sie auf Exit (Verlassen), um in das Fenster Hotel Data (Hotel-
daten) zurückzukehren.
8.4 Zugangspunkte hinzufügen/bearbeiten
Zugangspunkte sind alle durch ein Schloss gesicherte Orte, wie z. B. Hotel-
zimmer, Konferenzräume und Büros.
➤ Wählen Sie im Hauptmenü Hotel Data (Hoteldaten).
➤ Zum Anlegen eines Datensatzes klicken Sie auf das Symbol .
➤ Zum Bearbeiten eines Datensatzes klicken Sie auf das Symbol .

DE
Hotel Management Hoteldaten verwalten
27
➤ Geben Sie die erforderlichen Daten ein:
– Type: Art des Zugangspunkts; Raum oder Zugangspunkt
– Number: Raumnummer
– Name: Raumname
– Type of room: Raumtyp
– Description: Beschreibung (optional)
➤ Bestätigen Sie die Eingaben mit Accept (Akzeptieren).
✓ Der neue Zugangspunkt wird in der Liste angezeigt.

DE
Hoteldaten verwalten Hotel Management
28
8.5 Bereiche definieren
Bereiche werden verwendet, um Zugangspunkte nach Eigenschaften zu
gruppieren. Bereiche können entweder öffentlich oder nur für das Personal
zugänglich sein.
➤ Wählen Sie im Hauptmenü Hotel Data (Hoteldaten).
➤ Klicken Sie auf das Symbol .
➤ Zum Anlegen eines Datensatzes klicken Sie auf das Symbol .
➤ Zum Bearbeiten eines Datensatzes klicken Sie auf das Symbol .
Symbol Name Beschreibung
Add area Einen neuen Bereich hinzufügen
Edit area Einen bestehenden Bereich bearbeiten
Delete area Einen bestehenden Bereich löschen

DE
Hotel Management Hoteldaten verwalten
29
➤ Geben Sie die erforderlichen Daten ein:
– Name: Name für den Bereich
– Start: Erster Zugangspunkt im Bereich
– End: Letzter Zugangspunkt im Bereich
– Accessibility: Zugangsberechtigung; öffentlich oder nur für Personal
➤ Bestätigen Sie die Eingaben mit Accept (Akzeptieren).
✓ Der neue Bereich wird in der Liste angezeigt.
➤ Klicken Sie auf Exit (Verlassen), um in das Fenster Hotel Data (Hotel-
daten) zurückzukehren.
✓ Die Bereichsinformationen werden unterhalb jedes Zugangspunkts ange-
zeigt.

DE
Personaldaten verwalten Hotel Management
30
9 Personaldaten verwalten
Im Menüpunkt Employee Records (Personaldaten) verwalten Sie
Personendaten, Zugangskarten und Zeitpläne für das Hotelpersonal.
➤ Wählen Sie im Hauptmenü Employee Records (Personaldaten).
9.1 Personal-Zeitpläne definieren
In der Hotel-Management-Software können Sie Arbeitspläne für das
Personal erstellen.
➤ Wählen Sie im Hauptmenü Employee Records (Personaldaten).
Symbol Name Beschreibung
Add
employee
Einen neuen Mitarbeiter hinzufügen
Edit
employee
Einen bestehenden Mitarbeiter bearbeiten
Delete
employee
Einen bestehenden Mitarbeiter löschen
Define staff
schedule
Personal-Zeitpläne anlegen, bearbeiten und löschen
Download
data
Daten von der Karte herunterladen

DE
Hotel Management Personaldaten verwalten
31
➤ Klicken Sie auf das Symbol
➤ Zum Anlegen eines Datensatzes klicken Sie auf das Symbol .
➤ Zum Bearbeiten eines Datensatzes klicken Sie auf das Symbol .
➤ Geben Sie einen Namen für den Zeitplan ein.
Symbol Name Beschreibung
Add
schedule
Einen neuen Zeitplan hinzufügen
Edit
schedule
Einen bestehenden Zeitplan bearbeiten
Delete
schedule
Einen bestehenden Zeitplan löschen

DE
Personaldaten verwalten Hotel Management
32
➤ Geben Sie mindestens einen Zeitraum ein, für den der Zeitplan gelten soll
(Textfelder 2 bis 5).
I
➤ Aktivieren Sie die Checkboxen der Wochentage, für die der Zeitplan gel-
ten soll.
➤ Bestätigen Sie die Eingaben mit Accept (Akzeptieren).
✓ Der neue Zeitplan wird in der Liste angezeigt.
➤ Klicken Sie auf Exit (Verlassen), um in das Fenster Employee records
(Personaldaten) zurückzukehren.
HINWEIS
Wenn Sie nur einen Zeitraum einstellen möchten, wählen Sie die
Start- und Endzeiten so, dass der eine Zeitraum den anderen ent-
hält.

DE
Hotel Management Personaldaten verwalten
33
9.2 Personaldatensatz hinzufügen/bearbeiten
➤ Wählen Sie im Hauptmenü Employee Records (Personaldaten).
➤ Zum Anlegen eines Datensatzes klicken Sie auf das Symbol .
➤ Zum Bearbeiten eines Datensatzes klicken Sie auf das Symbol .
➤ Geben Sie einen Namen für den Mitarbeiter in das Textfeld Name (Name)
ein.
I
➤ Geben Sie gegebenenfalls weitere Daten zu dem Mitarbeiter in die Text-
felder ein:
– NIF: Steueridentifikationsnummer
– Passport: Reisepass
– Gender: Geschlecht
– Date of birth: Geburtsdatum
– Telephone: Telefonnummer
– Mail: E-Mail-Adresse
– Address: Straße und Hausnummer
– City: Stadt
– Postal code: Postleitzahl
– Province: Bundesland
– Country: Staat
– Occupation: Beruf
– Contract: Vertrag
– Comments: Kommentare
HINWEIS
Die Eingabe weiterer Daten ist nicht erforderlich. Für
Verwaltungsaufgaben kann eine detaillierte Beschreibung sinn-
voll sein.

DE
Personaldaten verwalten Hotel Management
34
➤ Bestätigen Sie die Eingaben mit Accept (Akzeptieren).
✓ Der Mitarbeiter wird in der Liste angezeigt.

DE
Hotel Management Personaldaten verwalten
35
9.3 Mitarbeitern Karten zuweisen
Jeder Mitarbeiter benötigt eine Karte zur Erledigung seiner Aufgaben.
I
➤ Wählen Sie im Hauptmenü Employee Records (Personaldaten).
➤ Wählen Sie den Mitarbeiter aus der Liste.
➤ Klicken Sie auf den Pfeil Card Data (Kartendaten).
HINWEIS
Eine verloren gegangene Zugangskarte ist ein Sicherheitsrisiko.
Setzen Sie verloren gegangene Zugangskarten sofort auf die
Blacklist (Kapitel „Blacklist verwalten“ auf Seite 64).

DE
Personaldaten verwalten Hotel Management
36
➤ Am unteren Rand des Datensatzes stehen die folgenden Schaltflächen
zur Verfügung:
– Add/modify card: Karte hinzufügen/bearbeiten
– Add card to blacklist: Karte der Blacklist hinzufügen
– Show pass operations: Benutzung anzeigen
➤ Klicken Sie auf die Schaltfläche Add/modify card (Karte hinzu-
fügen/bearbeiten).

DE
Hotel Management Personaldaten verwalten
37
➤ Geben Sie die erforderlichen Daten ein:
– Type of card: Kartentyp (siehe Tabelle auf Seite 37)
– Valid dates: Gültigkeitsdauer der Karte in Tagen
– Valid from date: Beginn der Gültigkeit (Tag)
– Valid from time: Beginn der Gültigkeit (Uhrzeit)
– Valid until date: Ende der Gültigkeit (Tag)
– Valid until time: Ende der Gültigkeit (Uhrzeit)
– Override privacy: Türen können geöffnet werden, obwohl die Privat-
sphäre-Einstellung des Schlosses eingestellt ist
– Permanent opening: immer offen
– Employee shift: Personal-Zeitplan
– Pass control: Anzahl der Räume, die betreten wurden
– Acces point 1 – 4: Zugangspunkte 1 bis 4
– Access area 1: Zugangsbereich 1.
➤ Bestätigen Sie die Eingaben mit Create card (Karte erzeugen).
➤ Folgen Sie den Anweisungen auf dem Monitor.
Kartentyp Beschreibung
Cleaning Der Kartentyp Cleaning (Reinigung) ist für das Reinigungs-
personal vorgesehen. Das Hauptmerkmal dieses Kartentyps
ist, dass er Zugang zu allen Zugangspunkten eines Bereichs
gewährt.
Staff with entry
control
Der Kartentyp Staff with entry control (Mitarbeiter mit Zutritts-
kontrolle) ist für Mitarbeiter wie z. B. Wartungspersonal, Kellner
und Köche vorgesehen. Das Hauptmerkmal dieses Kartentyps
ist, dass er Zugang zu allen Zugangspunkten eines Bereichs
gewährt.
Staff with access
to all areas
Der Kartentyp Staff with access to all areas (Mitarbeiter mit
Zugang zu allen Bereichen) ist für Mitarbeiter mit Zugangs-
rechten zu allen Bereichen des Hotels vorgesehen. Das
Hauptmerkmal dieses Kartentyps ist, dass er Zugang zu allen
Zugangspunkten erlaubt, denen ein Personal-Zeitplan zuge-
ordnet werden kann.
Master Der Kartentyp Master (Leiter) ist für die höchstrangigen Mitar-
beiter wie z. B. das Management vorgesehen. Das Hauptmerk-
mal dieses Kartentyps ist, dass er jederzeit Zugang zu
sämtlichen Zugangspunkten gewährt, bis die Karte abgelaufen
ist.

DE
Kundendaten hinzufügen/bearbeiten Hotel Management
38
10 Kundendaten hinzufügen/bearbeiten
Mit der Funktion Kundendaten speichern Sie Informationen zu Kunden, die
Ihr Hotel besuchen. Bei weiteren Besuchen des Kunden können Sie auf
diese Daten zugreifen und müssen keinen neuen Datensatz erstellen.
➤ Wählen Sie im Hauptmenü Client Records (Kundendaten).
➤ Zum Anlegen eines Datensatzes klicken Sie auf das Symbol .
➤ Zum Bearbeiten eines Datensatzes klicken Sie auf das Symbol .
Symbol Name Beschreibung
Add client Einen neuen Kunden hinzufügen
Edit client Einen bestehenden Kunden bearbeiten
Delete client Einen bestehenden Kunden löschen

DE
Hotel Management Kundendaten hinzufügen/bearbeiten
39
➤ Geben Sie die erforderlichen Daten ein:
–Name: Name
– NIF: Steueridentifikationsnummer
– Passport: Reisepass
– Telephone: Telefonnummer
– Mail: E-Mail-Adresse
– Address: Straße und Hausnummer
– City: Stadt
– Postal code: Postleitzahl
– Province: Bundesland
– Country: Staat
– Comments: Kommentare
➤ Klicken Sie auf das Bild in der oberen linken Ecke, wenn Sie ein Foto des
Kunden hinzufügen möchten.
I
➤ Bestätigen Sie die Eingaben mit Accept (Akzeptieren).
HINWEIS
Erlaubte Formate für Fotos sind BMP, JPEG oder PNG.

DE
Check-In durchführen Hotel Management
40
11 Check-In durchführen
➤ Wählen Sie im Hauptmenü Occupation – Check-in (Belegung – Check-
In).
Symbol Name Beschreibung
Add check-
in
Einen neuen Check-In hinzufügen
Edit check-
in
Einen bestehenden Check-In bearbeiten
Delete
check-in
Einen bestehenden Check-In löschen
Define client
schedule
Kunden-Zeitpläne anlegen, bearbeiten und löschen
Define meal
plans
Verpflegungsart anlegen, bearbeiten und löschen

DE
Hotel Management Check-In durchführen
41
11.1 Check-in hinzufügen
➤ Wählen Sie im Hauptmenü Occupation – Check-in (Belegung – Check-
In).
➤ Zum Anlegen eines Datensatzes klicken Sie auf das Symbol .
➤ Zum Bearbeiten eines Datensatzes klicken Sie auf das Symbol (Kapi-
tel „Kundendaten hinzufügen/bearbeiten“ auf Seite 38).
➤ Nur Neukunden: Klicken Sie auf das Symbol und legen Sie den
neuen Kunden an (Kapitel „Kundendaten hinzufügen/bearbeiten“ auf
Seite 38).
✓ Der neue Kunde erscheint nun in der Liste.
➤ Geben Sie den Namen des Kunden in das Suchfeld am oberen rechten
Rand ein, und klicken Sie auf das Lupen-Symbol, um die Suche einzu-
grenzen.
➤ Wählen Sie den Namen des Kunden aus der Liste.
➤ Bestätigen Sie die Eingaben mit Accept (Akzeptieren).
Symbol Name Beschreibung
Add client Einen neuen Kunden hinzufügen
Edit client Einen bestehenden Kunden bearbeiten
Delete client Einen bestehenden Kunden löschen

DE
Check-In durchführen Hotel Management
42
➤ Klicken Sie auf das Symbol , um die Daten des Kunden anzupassen
(Kapitel „Kundendaten hinzufügen/bearbeiten“ auf Seite 38).
➤ Klicken Sie auf das Symbol , um eine Zugangskarte für den Kunden
zu erzeugen.
Symbol Name Beschreibung
Modify client Kundendaten bearbeiten
Add/modify
card
Kundenkarte erzeugen

DE
Hotel Management Check-In durchführen
43
➤ Geben Sie die erforderlichen Daten ein:
– Valid dates: Gültigkeitsdauer der Karte in Tagen
– Valid from date: Beginn der Gültigkeit (Tag)
– Valid from time: Beginn der Gültigkeit (Uhrzeit)
– Valid until date: Ende der Gültigkeit (Tag)
– Valid until time: Ende der Gültigkeit (Uhrzeit)
– Meal plan: Verpflegungsart, z. B. Halbpension, Vollpension
– Main room: Hauptzimmer, auf das das Check-In gebucht wird
– Override privacy: Türen können geöffnet werden, obwohl die Privat-
sphäre-Einstellung des Schlosses eingestellt ist
– Configuration of secondary rooms: Sekundäre Zimmer des Kunden,
z. B. für dessen Familie
– Configuration of accesses: Zugänge (wahlweise mit Zeitplan), z. B. für
das Schwimmbad
– Configuration of accesses with sold time: Zugänge mit Zeitmodell
(wahlweise mit Zeitplan), deren Nutzung kostenpflichtig ist
– Configuration of areas: Zugang zu Bereichen (wahlweise mit Zeitplan),
z. B. für das Parkhaus
I
➤ Bestätigen Sie die Eingaben mit Create card (Karte erzeugen).
➤ Folgen Sie den Anweisungen auf dem Monitor.
HINWEIS
Sie können dem Kunden maximal Zugang zu elf Zugangspunkten
inklusive seiner eigenen Zimmer gewähren. Unter den elf
Zugangspunkten dürfen maximal zwei Zugänge mit Zeitmodell
sein.
Unabhängig davon können Sie dem Kunden Zugang zu maximal
zwei Bereichen gewähren.

DE
Check-In durchführen Hotel Management
44
✓ Der neue Check-In wird in der Liste mit allen derzeit gültigen Check-Ins
angezeigt.
✓ Am unteren Rand des Datensatzes steht die folgende Schaltfläche zur
Verfügung:
– Add card to blacklist: Karte der Blacklist hinzufügen
I
11.2 Check-In bearbeiten
➤ Wählen Sie im Hauptmenü Occupation – Check-in (Belegung – Check-
In).
➤ Zum Bearbeiten eines Datensatzes klicken Sie auf das Symbol .
HINWEIS
Um weitere Zugangskarten für den Kunden zu erzeugen, nutzen
Sie die Funktion Check-In bearbeiten (Kapitel „Check-In
bearbeiten“ auf Seite 44).

DE
Hotel Management Check-In durchführen
45
➤ Klicken Sie auf das Symbol , um die Daten des Kunden anzupassen
(Kapitel „Kundendaten hinzufügen/bearbeiten“ auf Seite 38).
➤ Klicken Sie auf das Symbol , um eine Zugangskarte für den Kunden
zu erzeugen.
➤ Nehmen Sie die gewünschten Anpassungen vor.
➤ Bestätigen Sie die Eingaben mit Create card (Karte erzeugen).
➤ Folgen Sie den Anweisungen auf dem Monitor.
Symbol Name Beschreibung
Modify client Kundendaten bearbeiten
Add/modify
card
Kundenkarte erzeugen

DE
Check-In durchführen Hotel Management
46
11.3 Kunden-Zeitpläne definieren
Über Kunden-Zeitpläne können Sie den Zutritt zu Zugangspunkten- und
Bereichen zeitlich einschränken.
I
➤ Wählen Sie im Hauptmenü Occupation – Check-in (Belegung – Check-
In).
➤ Klicken Sie auf das Symbol .
➤ Zum Anlegen eines Datensatzes klicken Sie auf das Symbol .
➤ Zum Bearbeiten eines Datensatzes klicken Sie auf das Symbol .
HINWEIS
Zeitpläne funktionieren nur bei Zugangspunkten mit der
Firmware-Version 2.0 und höher.
Symbol Name Beschreibung
Add
schedule
Einen neuen Zeitplan hinzufügen
Edit
schedule
Einen bestehenden Zeitplan bearbeiten
Delete
schedule
Einen bestehenden Zeitplan löschen

DE
Hotel Management Check-In durchführen
47
➤ Geben Sie die erforderlichen Daten ein:
– Name: Name des Zeitplans
– Start of margin 1: Start-Zeitpunkt 1 (Uhrzeit)
– End of margin 1: End-Zeitpunkt 1 (Uhrzeit)
– Start of margin 2: Start-Zeitpunkt 2 (Uhrzeit)
– End of margin 2: End-Zeitpunkt 2 (Uhrzeit)
– Applicable dates: Wochentage, für die der Zeitplan gelten soll (Montag
bis Sonntag)
I
➤ Bestätigen Sie die Eingaben mit Accept (Akzeptieren).
HINWEIS
Wenn Sie nur einen Zeitraum einstellen möchten, wählen Sie die
Start- und Endzeiten so, dass der eine Zeitraum den anderen
enthält.

DE
Check-In durchführen Hotel Management
48
✓ Der neue Zeitplan erscheint in der Liste.
➤ Klicken Sie auf Exit (Verlassen), um in das Fenster Check-in (Check-In)
zurückzukehren.

DE
Hotel Management Check-In durchführen
49
11.4 Verpflegungsart definieren
➤ Wählen Sie im Hauptmenü Occupation – Check-in (Belegung – Check-
In).
➤ Klicken Sie auf das Symbol .
➤ Zum Anlegen eines Datensatzes klicken Sie auf das Symbol .
➤ Zum Bearbeiten eines Datensatzes klicken Sie auf das Symbol .
➤ Geben Sie einen Namen für die Verpflegungsart ein.
➤ Die neue Verpflegungsart wird in der Liste angezeigt.
➤ Klicken Sie auf Exit (Verlassen), um in das Fenster Check-in (Check-In)
zurückzukehren.
Symbol Name Beschreibung
Add meal
plan
Eine neue Verpflegungsart hinzufügen
Edit meal
plan
Eine bestehende Verpflegungsart bearbeiten
Delete meal
plan
Eine bestehende Verpflegungsart löschen

DE
Kundenkarten schnell erzeugen Hotel Management
50
12 Kundenkarten schnell erzeugen
➤ Wählen Sie im Hauptmenü Management – Program/read cards (Ver-
waltung – Karten programmieren/lesen).
I
➤ Geben Sie die erforderlichen Daten ein:
– Valid dates: Gültigkeitsdauer der Karte in Tagen
– Valid from date: Beginn der Gültigkeit (Tag)
– Valid until date: Ende der Gültigkeit (Tag)
– Meal plan: Verpflegungsart, z. B. Halbpension, Vollpension
– Room: Zimmer, die gebucht werden
– Override privacy: Türen können geöffnet werden, obwohl die Privat-
sphäre-Einstellung des Schlosses eingestellt ist
– Configuration of accesses: Zugänge (wahlweise mit Zeitplan), z. B. für
das Schwimmbad
➤ Bestätigen Sie die Eingaben mit Create card (Karte erzeugen).
➤ Folgen Sie den Anweisungen auf dem Monitor.
➤ Klicken Sie auf Exit (Verlassen), um in das Hauptfenster zurückzukehren.
HINWEIS
Nutzen Sie die Schnell-Erzeugung von Kundenkarten nur in
Ausnahmefällen. Nutzen Sie im Normalfall die Funktion Check-In
durchführen (Kapitel „Check-In durchführen“ auf Seite 40).

DE
Hotel Management Karten lesen
51
13 Karten lesen
➤ Wählen Sie im Hauptmenü Management – Program/read cards (Ver-
waltung – Karten programmieren/lesen).
➤ Klicken Sie auf die Schaltfläche Read card (Karte lesen).
➤ Folgen Sie den Anweisungen auf dem Monitor.
✓ Die Informationen zu der gelesenen Karte erscheinen in einem neuen
Fenster.
➤ Klicken Sie auf Exit (Verlassen), um in das Fenster Program/read cards
(Karten programmieren/lesen) zurückzukehren.

DE
Monatsübersicht Hotel Management
52
14 Monatsübersicht
➤ Wählen Sie im Hauptmenü Occupation – Monthly chart (Belegung –
Monatsübersicht).
In der Voreinstellung zeigt die Monatsübersicht den aktuellen Monat an.
Jeder Raum kann an jedem Tag einen der folgenden Zustände einnehmen.
Symbol Name Beschreibung
Calendar Einen anderen Monat auswählen
Farbe Beschriftung Bedeutung
Grün Free room Der Raum ist frei und kann von Kunden gebucht
werden
Rot Occupied room Der Raum ist belegt. Der Kunde hat eingecheckt. Der
Raum kann nicht gebucht oder reserviert werden.
Gelb Reserved room Der Raum ist reserviert. Der Kunde hat nicht einge-
checkt. Der Raum kann nicht gebucht oder reserviert
werden. (Anzeige nur mit Zusatz-Modul „Planning
Module“.)
Blau Blocked room Der Raum ist geblockt. Der Raum kann nicht gebucht
oder reserviert werden. (Anzeige nur mit Zusatz-Modul
„Planning Module“.)

DE
Hotel Management Monatsübersicht
53
I
14.1 Anderen Monat anzeigen
➤ Klicken Sie auf das Symbol .
✓ Es öffnet sich ein Fenster, in dem Monat und Jahr ausgewählt werden
können.
➤ Wählen Sie den gewünschten Monat und das gewünschte Jahr aus den
beiden Drop-Down-Menüs aus.
➤ Bestätigen Sie die Eingaben mit Accept (Akzeptieren).
✓ Der entsprechende Monat erscheint in der Monatsübersicht.
HINWEIS
Der Tagwechsel erfolgt in der Monatsübersicht nicht um 24 Uhr,
sondern um 12 Uhr am darauffolgenden Tag. Durch diese Einstel-
lung soll die Übersicht der üblichen Check-Out-Zeit in den
Morgenstunden gerecht werden. Ein Raum, der vom 01.10. bis
zum 03.10. belegt angezeigt wird, ist also vom 01.10. um 12 Uhr
bis zum 04.10. um 12 Uhr belegt.

DE
Daten ins System laden Hotel Management
54
15 Daten ins System laden
15.1 Daten von einem Zugangspunkt herunterladen
Bevor Sie Daten von einem Zugangspunkt herunterladen können, müssen
Sie zunächst eine Daten-Download-Karte erzeugen.
➤ Wählen Sie im Hauptmenü Management – Generate data download
card (Verwaltung – Daten-Download-Karte erzeugen).
➤ Folgen Sie den Anweisungen auf dem Monitor.
✓ Die Daten-Download-Karte wurde erzeugt.
➤ Stecken Sie die Daten-Download-Karte in das Schloss, von dem Sie die
Daten herunterladen möchten.
➤ Entnehmen Sie Daten-Download-Karte aus dem Schloss, nachdem der
Download-Vorgang abgeschlossen ist.
I
15.2 Karten-Daten ins System laden
➤ Wählen Sie im Hauptmenü Data – Download card data (Daten – Karten-
Daten herunterladen).
➤ Stecken Sie die Daten-Download-Karte in den Kartenleser.
✓ Die Daten werden in die Datenbank der Software kopiert.
HINWEIS
Sie müssen den kompletten Vorgang für jedes Schloss wieder-
holen, von dem Sie Daten herunterladen möchten.
Verwahren Sie die Daten-Download-Karte an einem sicheren Ort,
da sie wichtige Informationen über das System enthält.

DE
Hotel Management Zugänge zeigen
55
16 Zugänge zeigen
I
➤ Wählen Sie im Hauptmenü Data – See data operations (Daten – Daten-
Vorgänge ansehen).
16.1 Nach Zugangsnummer filtern
➤ Klicken Sie auf das Symbol .
HINWEIS
Je besser die Liste gepflegt wurde, desto mehr Daten stehen
Ihnen zur Verfügung. Pflegen Sie die Liste, indem Sie regelmäßig
die Daten von allen Zugangspunkten herunterladen und in die
Datenbank des Systems kopieren (Kapitel „Daten ins System
laden“ auf Seite 54 und Kapitel „Karten-Daten ins System laden“
auf Seite 54).
Symbol Name Beschreibung
Filter by
access
number
Nach Zugangsnummer filtern
Filter by
date
Nach Zugangsdatum filtern
Delete by
dates
Zugangs-Verlauf löschen

DE
Zugänge zeigen Hotel Management
56
➤ Geben Sie die Start- und Endnummer der Zugangspunkte ein, die ange-
zeigt werden sollen.
➤ Bestätigen Sie die Eingaben mit Accept (Akzeptieren).
✓ Die Zugänge zu den gewählten Zugangspunkten werden angezeigt.
16.2 Nach Zugangsdatum filtern
➤ Klicken Sie auf das Symbol .
➤ Geben Sie das Start- und Enddatum des Zeitraums ein, der angezeigt
werden soll.
➤ Bestätigen Sie die Eingaben mit Accept (Akzeptieren).
✓ Die Zugänge im gewählten Zeitraum werden angezeigt.

DE
Hotel Management Zugänge zeigen
57
16.3 Den Zugangs-Verlauf löschen
Sie können Teile des Zugangs-Verlaufs aus der Datenbank löschen.
I
➤ Klicken Sie auf das Symbol .
➤ Geben Sie das Start- und Enddatum des Zeitraums ein, der gelöscht
werden soll.
➤ Bestätigen Sie die Eingaben mit Accept (Akzeptieren).
✓ Die Zugänge im gewählten Zeitraum werden dauerhaft gelöscht.
HINWEIS
Einmal gelöschte Daten können nicht wiederhergestellt werden.

DE
Türschloss programmieren Hotel Management
58
17 Türschloss programmieren
Um ein Türschloss zu programmieren, wird eine Programmierkarte benötigt.
Mit der Programmierkarte weisen Sie einem Zugangspunkt eine Nummer zu
und stellen das Datum und die Uhrzeit ein.
I
➤ Wählen Sie im Hauptmenü Management – Generate programming
card (Verwaltung – Programmierkarte erzeugen).
➤ Geben Sie die Nummer des Raums oder Zugangspunktes ein, für den die
Programmierkarte gelten soll.
➤ Bestätigen Sie die Eingabe mit Create card (Karte erzeugen).
➤ Folgen Sie den Anweisungen auf dem Monitor.
➤ Stecken Sie die Programmierkarte in das Schloss, das Sie programmie-
ren wollen.
➤ Entnehmen Sie Programmierkarte aus dem Schloss, nachdem der
Programmier-Vorgang abgeschlossen ist.
I
HINWEIS
Zeit und Nummer müssen bei einem Schloss bei der Erst-
installation und nach jedem Batteriewechsel eingestellt werden.
Auf der Programmierkarte wird das Datum und die Uhrzeit des
Computers gespeichert, mit dem die Karte erzeugt wird. Stellen
Sie sicher, dass die Datumsangabe auf Ihrem Computer korrekt
ist.
HINWEIS
Eine Programmierkarte ist nach der ersten Verwendung ungültig.
Dadurch soll verhindert werden, dass die gleiche Raumnummer
zweimal vergeben wird.

DE
Hotel Management Spezialkarten erzeugen
59
18 Spezialkarten erzeugen
I
18.1 Notfallkarte erzeugen
Die Notfallkarte ist eine Zugangskarte, die für den jeweiligen Zugangspunkt
immer gültig ist. Notfallkarten sollten nur verwendet werden, wenn keine
regulären Karten verwendet werden können, z. B. wenn das Computer-
system ausgefallen ist und Gäste darauf warten, auf ihr Zimmer gebracht zu
werden.
➤ Wählen Sie im Hauptmenü Hotel Data (Hoteldaten).
➤ Wählen Sie einen access point (Zugangspunkt) aus.
✓ In der rechten Hälfte des Datensatzes stehen die folgenden Schaltflächen
zur Verfügung:
– Create card: Karte erzeugen
– Add card to blacklist: Karte der Blacklist hinzufügen
➤ Klicken Sie auf Create card (Karte erzeugen).
➤ Stecken Sie die Notfallkarte in den Kartenleser am PC.
✓ Die Notfallkarte wurde erstellt.
HINWEIS
Eine verloren gegangene Zugangskarte ist ein Sicherheitsrisiko.
Setzen Sie verloren gegangene Zugangskarten sofort auf die
Blacklist (Kapitel „Blacklist verwalten“ auf Seite 64).

DE
Spezialkarten erzeugen Hotel Management
60
18.2 Dauerauf-Karte erzeugen
Mit der Dauerauf-Karte öffnen Sie beliebige Zugangspunkte im System
permanent.
I
➤ Wählen Sie im Hauptmenü Management – Generate free access card
(Verwaltung – Dauerauf-Karte erzeugen).
➤ Klicken Sie auf das Symbol .
➤ Folgen Sie den Anweisungen auf dem Monitor.
HINWEIS
Die Dauerauf-Karte kann auf jedes Schloss im System ange-
wendet werden. Für permanent geöffnete Räume ist keine
Zugangskarte notwendig. Verwenden Sie die Dauerauf-Karte mit
Bedacht. Verwahren Sie die Dauerauf-Karte an einem sicheren
Ort.
Symbol Name Beschreibung
Create free
access card
Eine neue Dauerauf-Karte erzeugen
Delete free
access card
Eine bestehende Dauerauf-Karte aus der Datenbank
löschen
Add card to
the blacklist
Die ausgewählte Dauerauf-Karte der Blacklist hinzufü-
gen

DE
Hotel Management Spezialkarten erzeugen
61
18.3 Verriegelungskarte erzeugen
Mit der Verriegelungskarte verriegeln Sie beliebige Zugangspunkte im
System permanent.
I
➤ Wählen Sie im Hauptmenü Management – Generate locking card
(Verwaltung – Verriegelungskarte erzeugen).
➤ Folgen Sie den Anweisungen auf dem Monitor.
HINWEIS
Die Verriegelungskarte kann auf jedes Schloss im System ange-
wendet werden. Verwenden Sie die Verriegelungskarte mit
Bedacht. Verwahren Sie die Verriegelungskarte an einem siche-
ren Ort.

DE
Spezialkarten erzeugen Hotel Management
62
18.4 Komfortzeit-Karte erzeugen
Die sogenannte Komfortzeit-Karte wird in Verbindung mit einer Energiespar-
anlage angewendet. Der Kartenleser der Energiesparanlage liest die einge-
steckte Zugangskarte und reguliert den Energieverbrauch eines Zimmers
entsprechend. Zum Beispiel wird für das Reiningungspersonal nur das Licht
angeschaltet, während für Gäste zusätzlich die Klimaanlage oder die Hei-
zung angeschaltet wird.
Nachdem die Karte aus dem Lesegerät der Energiesparanlage entfernt
wurde, wird der Strom entweder sofort oder nach einem einstellbaren Zeit-
raum abgeschaltet.
Mit der Komfortzeit-Karte kann die Schaltverzögerung eingestellt werden.
➤ Wählen Sie im Hauptmenü Energy economizer – Generate courtesy
card (Energiesparanlage – Komfortzeit-Karte erzeugen).
➤ Geben Sie den gewünschten Zeitraum in Sekunden ein.
➤ Bestätigen Sie die Eingabe mit Create card (Karte erzeugen).
➤ Folgen Sie den Anweisungen auf dem Monitor.
I
HINWEIS
Die Schaltverzögerung kann auf einen Zeitraum von 0 bis 9999
Sekunden eingestellt werden.
Die Werkseinstellung der Energiesparanlagen für die Schalt-
verzögerung beträgt fünf Sekunden.

DE
Hotel Management Backups erstellen/wiederherstellen
63
19 Backups erstellen/wiederherstellen
➤ Wählen Sie im Hauptmenü Backup (Backup).
19.1 Backup erzeugen
➤ Wählen Sie im Hauptmenü Backup (Backup).
➤ Wählen Sie im Unterfenster Selection of data destination/source (Aus-
wahl des Ziel/Quell-Verzeichnisses) das Verzeichnis aus, in dem das
Backup gespeichert werden soll.
➤ Klicken Sie auf Generate backup (Backup erzeugen).
19.2 Backup wiederherstellen
➤ Wählen Sie im Hauptmenü Backup (Backup).
➤ Wählen Sie das Verzeichnis aus, in dem das Backup gespeichert ist, das
wiederhergestellt werden soll.
➤ Klicken Sie auf Restore backup (Backup wiederherstellen).

DE
Blacklist verwalten Hotel Management
64
20 Blacklist verwalten
In der Blacklist werden Karten gespeichert, die gesperrt sind. In der Blacklist
gespeicherte Karten werden von sämtlichen Zugangspunkten abgewiesen.
Karten können nur in den Bereichen der Software auf die Blacklist gesetzt
werden, in denen sie auch erzeugt werden.
I
20.1 Karten der Blacklist hinzufügen
➤ Wählen Sie den Bereich aus, in dem Sie eine Karte sperren möchten.
➤ Klicken Sie auf die Schaltfläche Add card to the blacklist (Karte der
Blacklist hinzufügen) oder das Symbol .
➤ Bestätigen Sie die Eingabe mit Accept (Akzeptieren).
✓ Die Karte wird im Bereich Management – Blacklist (Verwaltung – Black-
list) angezeigt.
HINWEIS
Karten, die in der Blacklist angezeigt werden, sind nicht automa-
tisch in allen Zugangspunkten gesperrt. Stellen Sie sicher, dass
Sie die Blacklist-Karte in sämtlichen Zugangspunkten anwenden.

DE
Hotel Management Blacklist verwalten
65
20.2 Karten auf der Blacklist einsehen
➤ Wählen Sie im Hauptmenü Management – Blacklist (Verwaltung –
Blacklist).
In der oberen Tabelle werden alle Karten angezeigt, die auf die Blacklist
gesetzt wurden.
In der unteren Tabelle werden alle Karten angezeigt, die auf eine Blacklist-
Karte geschrieben wurden.
Symbol Name Beschreibung
Create
blacklist
card
Eine Blacklist-Karte erzeugen
Delete
blacklist
entry
Einen bestehenden Blacklist-Eintrag aus der Daten-
bank löschen

DE
Blacklist verwalten Hotel Management
66
20.3 Blacklist-Karte erzeugen
➤ Wählen Sie im Hauptmenü Management – Blacklist (Verwaltung –
Blacklist).
➤ Klicken Sie auf das Symbol .
➤ Folgen Sie den Anweisungen auf dem Monitor.
✓ Der Inhalt der beiden Tabellen in der Ansicht Blacklist ist nun identisch.
I
HINWEIS
Karten, die in der Blacklist angezeigt werden, sind nicht auto-
matisch in allen Zugangspunkten gesperrt. Stellen Sie sicher,
dass Sie die Blacklist-Karte in sämtlichen Zugangspunkten
anwenden.

DE
Hotel Management PMS-Modul verwalten
67
21 PMS-Modul verwalten
Das PMS-Modul kommt zum Einsatz, um gültige Karten für die Türschlösser
und Zugangspunkte aus einem anderen Property Management System
(PMS) zu erstellen. Dadurch können Arbeitsprozesse vereinheitlicht und
Datendopplungen vermieden werden.
➤ Wählen Sie im Hauptmenü PMS (PMS).
I
Karten, die mithilfe eines anderen Property Management Systems über das
PMS-Modul erstellt werden, besitzen folgende Einschränkungen:
Es können nur Kundenkarten erstellt werden.
Kundenkarten können keine Zugangsbereiche zugewiesen werden.
Kundenkarten können keine Bereiche mit kostenpflichtigem Zeitmodell
zugewiesen werden.
Symbol Name Beschreibung
Add authori-
zation
Eine neue Autorisierung hinzufügen
Edit authori-
zation
Eine bestehende Autorisierung bearbeiten
Delete
authoriza-
tion
Eine bestehende Autorisierung löschen
HINWEIS
Wenn das PMS-Modul verwendet wird, können nicht alle Funkti-
onen der Hotel Management Software genutzt werden.

DE
PMS-Modul verwalten Hotel Management
68
Wenn der PMS-Client beim kopieren von Karten nicht exakt die gleichen
Daten sendet, werden ältere Kundenkarten für das gleiche Zimmer
ungültig.
Wenn der PMS-Client beim erstellen von Kundenkarten nicht die Uhrzeit
des Check-Ins und Check-Outs übermittelt, werden ältere Kundenkarten
für das gleiche Zimmer ungültig.
Wenn Protokoll 2 verwendet wird, wird die Uhrzeit nur mit vollen Stunden
übertragen. Dadurch können Probleme mit Check-In und Check-Out
entstehen.

DE
Hotel Management PMS-Modul verwalten
69
21.1 PMS-Modul konfigurieren
➤ Wählen Sie im Hauptmenü PMS (PMS).
➤ Klicken Sie auf die Schaltfläche Edit general configuration.
➤ Geben Sie die erforderlichen Daten ein:
– PMS control: Auf Local (lokal) einstellen, wenn sich PMS und Hotel
Management Software auf dem gleichen Rechner befinden, ansons-
ten Remote (fernsteuern) einstellen.
– IP address: IP-Adresse des Rechners, auf dem das PMS installiert ist.
– Port: Kommunikations-Port für Client-Anfragen des PMS.
– Terminal number: Identifizierungsnummer für den Kartenleser/schreiber.
– Protocol: Das Übertragungsprotokoll, das für die Kommunikation zwi-
schen PMS und Hotel Management Software verwendet wird (siehe
Tabelle unten).
➤ Bestätigen Sie die Eingabe mit Ok (Ok).
✓ Die geänderten Einstellungen werden oben links im Fenster angezeigt.
Funktion Protokoll 1 Protokoll 2
Anzahl Autorisierungen 20 8
Übermittlung Uhrzeiten Exakte Uhrzeit nur volle Stunden (aus
12:30 wird 12:00)

DE
PMS-Modul verwalten Hotel Management
70
21.2 Autorisierungen hinzufügen/bearbeiten
Autorisierungen werden beim Erstellen von Kundenkarten über einen PMS-
Client automatisch auf die Kundenkarte geschrieben. Je nach gewähltem
Übertragungsprotokoll können bis zu 20 Autorisierungen auf die Kundenkar-
ten geschrieben werden.
➤ Wählen Sie im Hauptmenü PMS (PMS).
➤ Zum Anlegen eines Datensatzes klicken Sie auf das Symbol .
➤ Zum Bearbeiten eines Datensatzes klicken Sie auf das Symbol .
➤ Geben Sie die erforderlichen Daten ein:
– Number: Identifikationsnummer der Autorisierung.
– Type: Typ der Autorisierung, kann entweder Access (Zugang) oder
Public area (öffentlicher Bereich) sein.
– Access: Zugang oder öffentlicher Bereich
➤ Bestätigen Sie die Eingabe mit Accept (Akzeptieren).
✓ Die Autorisierung erscheint in der Tabelle im Fenster PMS configuration
(PMS-Konfiguration).

DE
Hotel Management PMS-Modul verwalten
71
21.3 PMS-Verbindung aufbauen
I
➤ Wählen Sie im Hauptmenü PMS – Start PMS connection (PMS – PMS-
Verbindung starten).
✓ Die Hotel Management Software kann Anfragen des PMS-Clients bear-
beiten.
➤ Um die PMS-Verbindung zu beenden, drücken Sie Exit (Verlassen).
HINWEIS
Nach Aufbau einer PMS-Verbindung arbeitet die Hotel Manage-
ment Software ausschließlich als Server für PMS-Anfragen.
Wenn Sie mit der Hotel Management Software arbeiten möchten,
muss die PMS-Verbindung geschlossen werden.

EN
Hotel Management
72
Please read this instruction manual carefully before first use, and store
it in a safe place. If you pass on the product to another person, hand
over this instruction manual along with it.
Table of contents
1 System requirements . . . . . . . . . . . . . . . . . . . . . . . . . . . . . . . . . .75
2 Accessories . . . . . . . . . . . . . . . . . . . . . . . . . . . . . . . . . . . . . . . . . . 75
3 Installation . . . . . . . . . . . . . . . . . . . . . . . . . . . . . . . . . . . . . . . . . . .75
4 When first starting the program . . . . . . . . . . . . . . . . . . . . . . . . . .76
5 Basic information. . . . . . . . . . . . . . . . . . . . . . . . . . . . . . . . . . . . . . 78
5.1 Searching the data set. . . . . . . . . . . . . . . . . . . . . . . . . . . . . .78
5.2 Editing the data set . . . . . . . . . . . . . . . . . . . . . . . . . . . . . . . . 78
5.3 Deleting the data set . . . . . . . . . . . . . . . . . . . . . . . . . . . . . . .79
5.4 Leaving the window without saving . . . . . . . . . . . . . . . . . . . . 79
5.5 Signing in. . . . . . . . . . . . . . . . . . . . . . . . . . . . . . . . . . . . . . . . 80
5.6 Changing users . . . . . . . . . . . . . . . . . . . . . . . . . . . . . . . . . . .81
5.7 The main window. . . . . . . . . . . . . . . . . . . . . . . . . . . . . . . . . .82
5.8 Exiting the program . . . . . . . . . . . . . . . . . . . . . . . . . . . . . . . .82
6 Configuring the software . . . . . . . . . . . . . . . . . . . . . . . . . . . . . . .83
6.1 Choosing the language . . . . . . . . . . . . . . . . . . . . . . . . . . . . . 83
6.2 Using the update code. . . . . . . . . . . . . . . . . . . . . . . . . . . . . .84
6.3 Populating the additional modules. . . . . . . . . . . . . . . . . . . . .85
7 Managing users . . . . . . . . . . . . . . . . . . . . . . . . . . . . . . . . . . . . . . .86
7.1 Creating/editing a type of user. . . . . . . . . . . . . . . . . . . . . . . .87
7.2 Creating/editing users . . . . . . . . . . . . . . . . . . . . . . . . . . . . . .89
8 Managing hotel data . . . . . . . . . . . . . . . . . . . . . . . . . . . . . . . . . . .91
8.1 Filtering by areas. . . . . . . . . . . . . . . . . . . . . . . . . . . . . . . . . .92
8.2 Grouping by accesses and rooms . . . . . . . . . . . . . . . . . . . . .93
8.3 Defining types of room. . . . . . . . . . . . . . . . . . . . . . . . . . . . . .94
8.4 Adding/editing access points . . . . . . . . . . . . . . . . . . . . . . . . .95
8.5 Defining areas . . . . . . . . . . . . . . . . . . . . . . . . . . . . . . . . . . . .97

EN
Hotel Management
73
9 Managing employee records . . . . . . . . . . . . . . . . . . . . . . . . . . . .99
9.1 Defining staff schedules. . . . . . . . . . . . . . . . . . . . . . . . . . . .100
9.2 Adding/editing staff data sets. . . . . . . . . . . . . . . . . . . . . . . .102
9.3 Allocating cards to employees. . . . . . . . . . . . . . . . . . . . . . .104
10 Adding/editing client records. . . . . . . . . . . . . . . . . . . . . . . . . . .107
11 Completing check-ins . . . . . . . . . . . . . . . . . . . . . . . . . . . . . . . . . 109
11.1 Adding check-ins . . . . . . . . . . . . . . . . . . . . . . . . . . . . . . . . .110
11.2 Editing check-ins . . . . . . . . . . . . . . . . . . . . . . . . . . . . . . . . .113
11.3 Defining client schedules. . . . . . . . . . . . . . . . . . . . . . . . . . . 115
11.4 Defining meal plans . . . . . . . . . . . . . . . . . . . . . . . . . . . . . . . 117
12 Creating client cards quickly . . . . . . . . . . . . . . . . . . . . . . . . . . . 118
13 Reading the cards . . . . . . . . . . . . . . . . . . . . . . . . . . . . . . . . . . . . 119
14 Monthly chart . . . . . . . . . . . . . . . . . . . . . . . . . . . . . . . . . . . . . . . . 120
14.1 Displaying a different month . . . . . . . . . . . . . . . . . . . . . . . .121
15 Loading data into the system. . . . . . . . . . . . . . . . . . . . . . . . . . .122
15.1 Downloading data from a access point . . . . . . . . . . . . . . . . 122
15.2 Loading card data into the system. . . . . . . . . . . . . . . . . . . .122
16 Showing the accesses. . . . . . . . . . . . . . . . . . . . . . . . . . . . . . . . . 123
16.1 Filtering by access number . . . . . . . . . . . . . . . . . . . . . . . . .124
16.2 Filtering by access date. . . . . . . . . . . . . . . . . . . . . . . . . . . .124
16.3 Deleting the access history . . . . . . . . . . . . . . . . . . . . . . . . . 125
17 Programming the door lock . . . . . . . . . . . . . . . . . . . . . . . . . . . . 126
18 Creating special cards. . . . . . . . . . . . . . . . . . . . . . . . . . . . . . . . . 127
18.1 Creating emergency cards. . . . . . . . . . . . . . . . . . . . . . . . . . 127
18.2 Generating free access cards . . . . . . . . . . . . . . . . . . . . . . .128
18.3 Generating locking cards. . . . . . . . . . . . . . . . . . . . . . . . . . . 129
18.4 Generating courtesy time cards. . . . . . . . . . . . . . . . . . . . . . 130
19 Creating/restoring backups . . . . . . . . . . . . . . . . . . . . . . . . . . . .131
19.1 Generating backups. . . . . . . . . . . . . . . . . . . . . . . . . . . . . . .131
19.2 Restoring backups. . . . . . . . . . . . . . . . . . . . . . . . . . . . . . . . 131
20 Managing the blacklist . . . . . . . . . . . . . . . . . . . . . . . . . . . . . . . .132
20.1 Adding cards to the blacklist . . . . . . . . . . . . . . . . . . . . . . . .132
20.2 Viewing cards in the blacklist. . . . . . . . . . . . . . . . . . . . . . . .133
20.3 Creating a blacklist card . . . . . . . . . . . . . . . . . . . . . . . . . . .134

EN
Hotel Management
74
21 Managing the PMS module. . . . . . . . . . . . . . . . . . . . . . . . . . . . . 135
21.1 Configure the PMS module . . . . . . . . . . . . . . . . . . . . . . . . .136
21.2 Adding/editing authorizations. . . . . . . . . . . . . . . . . . . . . . . . 137
21.3 Establishing a PMS connection . . . . . . . . . . . . . . . . . . . . . . 138

EN
Hotel Management System requirements
75
1 System requirements
Minimum requirements:
Operating system: Windows XP Service Pack 3
Screen resolution: 1024 x 768
Processor: Intel Pentium 4 with 2 GHz or compatible
Internal memory: 1 GB RAM
Free hard drive space: 1 GB
Ports: 1x USB 2.0
2 Accessories
Available as accessories (not included in the scope of delivery):
3 Installation
➤ Connect the card reader device to a free USB port.
➤ Insert the data storage medium with the hotel management software.
✓ The setup program is opened.
➤ Follow the steps in the setup program.
Description Item number
Smart Card Energy saver 9106600715
Smart Card Access Control 9106600713
Smart Card Encoder 9106600722
Smart Key Card 9106600724
RFID Access Control 9106600714
RFID Energy saver 9106600716
RFID Encoder 9106600723
RFID Key Card 9106600725

EN
When first starting the program Hotel Management
76
4 When first starting the program
When the program is first started, the hotel management software must be
configured.
➤ Open the hotel management software.
➤ Choose the required language from the list and confirm by pressing
Accept.
✓ The program performs a restart of the hotel management software with
the new settings.
➤ Enter the installation code and confirm by pressing Accept.
I
NOTE
You receive the installation code from the manufacturer.

EN
Hotel Management When first starting the program
77
➤ Insert the installation card into the card reader device.
➤ Follow the on-screen instructions.
✓ The main window of the hotel management software is opened.

EN
Basic information Hotel Management
78
5 Basic information
Many windows contain a toolbar on the top margin. The symbols in the tool-
bar change according to the situation. The meaning of the symbols is
explained underneath the diagram of each window in this instruction manual.
Many windows contain lists. Click on an entry in the list to expand a box with
further information on the entry. For example, clicking on the type of user dis-
plays the rights for this type of user. Clicking on another entry in the list min-
imises the previously expanded entry and expands the information on the
current entry.
5.1 Searching the data set
Many windows contain a search field on the top right margin.
➤ Enter the term you want to find.
➤ Click on the magnifying glass symbol to begin the search.
✓ The list in the respective window is limited to the results of your search.
5.2 Editing the data set
Existing data sets can be edited by pressing the symbol.
➤ Select the required data set.
➤ Click on the symbol.
I
NOTE
In the following, it is not specified that you have to select the data
sets that you want to edit.

EN
Hotel Management Basic information
79
5.3 Deleting the data set
Most windows contain the Delete button with the symbol.
I
➤ Highlight the required data set in the list.
➤ Click on the symbol.
➤ Confirm the deletion process by pressing Accept.
✓ The data set is deleted.
5.4 Leaving the window without saving
When setting up or editing a data set, you can cancel the process at any time
without saving what you have entered.
I
➤ Press the Cancel button.
✓ The current window is closed.
NOTE
In the following, the Delete button is not explicitly specified.
NOTE
In the following, the Cancel button is not explicitly specified.

EN
Basic information Hotel Management
80
5.5 Signing in
➤ Open the hotel management software.
✓ The main window of the hotel management software is opened.
You must sign into the software.
➤ Enter your user name and password.
I
➤ Confirm what you have entered by pressing Accept.
NOTE
When installing the hotel management software, the “administra-
tor” user is created. The “administrator” user is not allocated a
password. Change your password after signing in for the first time
(chapter “Creating/editing users” on page 89).

EN
Hotel Management Basic information
81
5.6 Changing users
➤ Select Users – Change user in the main menu.
➤ Enter your user name and password.
➤ Confirm what you have entered by pressing Accept.

EN
Basic information Hotel Management
82
5.7 The main window
The main window is the central element of the hotel management software.
You can access all functions in the hotel management software via the main
menu of the main window.
On the bottom right margin of the main window, you can find the following
information:
Version: Version of the software
Current user: User currently signed in
Type of user: Currently signed in type of user
You can access the main window through the Desktop menu entry in the
main menu.
5.8 Exiting the program
➤ Select Exit in the main menu.

EN
Hotel Management Configuring the software
83
6 Configuring the software
6.1 Choosing the language
I
➤ Select Configuration – General configuration in the main menu.
➤ Click on Language.
➤ Choose the required language from the list and confirm by pressing
Accept.
✓ A window will appear notifying you that the software needs to be
restarted.
➤ Click on Accept to perform the restart or perform it later manually.
NOTE
Changing the language requires the software to be restarted.

EN
Configuring the software Hotel Management
84
6.2 Using the update code
The software is updated using updating codes. The manufacturer will contact
you if the software needs to be updated.
➤ Select Configuration – General configuration in the main menu.
➤ Click on Updating code.
➤ Enter the series number and the updating code.
➤ Confirm what you have entered by pressing Accept.
✓ The software is updated.

EN
Hotel Management Configuring the software
85
6.3 Populating the additional modules
The hotel management software can be upgraded with additional modules.
➤ Select Configuration – General configuration in the main menu.
➤ Click on Initialization card.
➤ Insert the initialization card into the card reader device.
➤ Follow the instructions on the monitor.

EN
Managing users Hotel Management
86
7 Managing users
Users can use the hotel management software to manage, add, change or
delete data. You can create as many users as you wish.
You can manage the rights of users within the hotel management software
through types of users.
When installing the hotel management software, the “administrator” user is
created. The administrator has full authorisation to change or delete data
stored in the software. Therefore, it is not recommended that you continu-
ously work as the administrator. Instead, create other users to perform tasks
related to the running of the hotel.
➤ Select Users – Create user in the main menu.
Symbol Name Description
Add user Add a new user
Edit user Edit an existing user
Delete user Delete an existing user
Define types
of user
Create, edit or delete types of user

EN
Hotel Management Managing users
87
7.1 Creating/editing a type of user
Types of user form the basis for the rights management of individual users.
Typical areas of responsibility, such as receptionists or caretakers, can be
predefined through the types of user and must only be adapted to individual
users in exceptional cases.
➤ Select Users – Create user in the main menu.
➤ Click on the symbol.
All defined types of user are listed in the Types of user window. Click on a
type of user to obtain an overview of the rights that have been defined for this
type of user.
I
➤ To create a data set, click on the symbol.
➤ To edit a data set, click on the symbol.
Symbol Name Description
Add type of
user
Add a new type of user
Edit type of
user
Edit an existing type of user
Delete type
of user
Delete an existing type of user
NOTE
The “administrator” type of user has all available rights in the soft-
ware. The “administrator” type of user cannot be changed or
deleted.

EN
Managing users Hotel Management
88
➤ Enter a name for the type of user.
➤ Select the rights you want the type of user to have:
– Create Users: Create users
– Generate programming card: Generate programming card
– Generate data download card: Generate data download card
– Generate free access card: Generate free access card
– Generate locking card: Generate locking card
– Program/read cards: Program/read cards
– Blacklist: Manage blacklist
– Download card data: Download card data
– See access operations: See access operations
– Check-in: Complete check-ins
– Occupation graph: See occupation graph
– Client records: Manage client records
– Employee records: Manage employee records
– Backup: Create/restore backup
– General configuration: General configuration
– Hotel data: Manage hotel data
– Generate courtesy time card: Generate courtesy time card
– PMS configuration: Configure the Property Management System
(PMS) module
– Start PMS connection: Establish connection to a Property Manage-
ment System (PMS)
– Lockers: Cabinet lock
➤ Confirm what you have entered by pressing Accept.

EN
Hotel Management Managing users
89
✓ The new type of user is displayed in the list.
➤ Click on Exit to return to the Create users window.
7.2 Creating/editing users
I
➤ Select Users – Create user in the main menu.
➤ To create a data set, click on the symbol.
➤ To edit a data set, click on the symbol.
➤ Enter a name and a password for the user.
➤ Select the type of user for the user.
NOTE
The “administrator” user has all available rights in the software.
The “administrator” user cannot be deleted.

EN
Managing users Hotel Management
90
✓ The rights of the user are adapted to the type of user accordingly.
➤ Confirm what you have entered by pressing Accept.
✓ The new user is displayed in the list.

EN
Hotel Management Managing hotel data
91
8 Managing hotel data
Create a virtual image of the hotel in the Hotel Data menu item. Be as accu-
rate as possible when creating this image so that staff can take full advantage
of the hotel management software's uses.
➤ Select Hotel Data in the main menu.
You can apply the following display options:
Filter by areas
Group by access points and rooms
Symbol Name Description
Add access
point
Add a new access point
Edit access
point
Edit an existing access point
Delete
access point
Delete an existing access point
Define types
of room
Create, edit or delete types of room
Define
areas
Create, edit or delete areas

EN
Managing hotel data Hotel Management
92
8.1 Filtering by areas
In the Hotel Data area, much data about the premises is collected. Apply fil-
ters to obtain a better overview.
➤ Activate the Area filter checkbox in the top right corner of the window.
➤ Select the required area from the drop-down list.
✓ The list only displays the access points in the selected area.
I
NOTE
Click on the cross on the left-hand side next to selection list to
delete the filter.

EN
Hotel Management Managing hotel data
93
8.2 Grouping by accesses and rooms
➤ Activate the Group accesses/rooms checkbox in the top right corner of
the window.
✓ The accesses and rooms are grouped in the view.
I
NOTE
Deactivate the Group accesses/rooms checkbox to delete the
filter.

EN
Managing hotel data Hotel Management
94
8.3 Defining types of room
➤ Select Hotel Data in the main menu.
➤ Click on the symbol.
➤ To create a data set, click on the symbol.
➤ To edit a data set, click on the symbol.
➤ Enter a name for the type of room.
➤ Confirm what you have entered by pressing Accept.
Symbol Name Description
Add type of
room
Add a new type of room
Edit type of
room
Edit an existing type of room
Delete type
of room
Delete an existing type of room

EN
Hotel Management Managing hotel data
95
✓ The new type of room is displayed in the list.
➤ Click on Exit to return to the Hotel Data window.
8.4 Adding/editing access points
Access points are all places secured by a lock, e.g. hotel rooms, conference
rooms and offices.
➤ Select Hotel Data in the main menu.
➤ To create a data set, click on the symbol.
➤ To edit a data set, click on the symbol.

EN
Managing hotel data Hotel Management
96
➤ Enter the required data:
– Type: Type of access point; room or access point
– Number: Room number
– Name: Room name
– Type of room: Type of room
– Description: Description (optional)
➤ Confirm what you have entered by pressing Accept.
✓ The new access point is displayed in the list.

EN
Hotel Management Managing hotel data
97
8.5 Defining areas
Areas are used to group access points according to features. Areas can be
either public or only accessible to staff.
➤ Select Hotel Data in the main menu.
➤ Click on the symbol.
➤ To create a data set, click on the symbol.
➤ To edit a data set, click on the symbol.
Symbol Name Description
Add area Add a new area
Edit area Edit an existing area
Delete area Delete an existing area

EN
Managing hotel data Hotel Management
98
➤ Enter the required data:
– Name: Name for the area
– Start: First access point in the area
– End: Last access point in the area
– Accessibility: Accessibility; public or only for staff
➤ Confirm what you have entered by pressing Accept.
✓ The new area is displayed in the list.
➤ Click on Exit to return to the Hotel Data window.
✓ The area information is displayed underneath each access point.

EN
Hotel Management Managing employee records
99
9 Managing employee records
In the Employee Records menu item, you can manage personal data,
access cards and schedules for hotel staff.
➤ Select Employee Records in the main menu.
Symbol Name Description
Add
employee
Add a new employee
Edit
employee
Edit an existing employee
Delete
employee
Delete an existing employee
Define staff
schedule
Create, edit or delete staff schedules
Download
data
Download data from card

EN
Managing employee records Hotel Management
100
9.1 Defining staff schedules
You can create schedules for staff in the hotel management software.
➤ Select Employee Records in the main menu.
➤ Click on the symbol
➤ To create a data set, click on the symbol.
➤ To edit a data set, click on the symbol.
Symbol Name Description
Add
schedule
Add a new schedule
Edit
schedule
Edit an existing schedule
Delete
schedule
Delete an existing schedule

EN
Hotel Management Managing employee records
101
➤ Enter a name for the schedule.
➤ Enter at least one time period for which the schedule applies (text fields 2
to 5).
I
➤ Activate the weekday checkboxes for which the schedule applies.
➤ Confirm what you have entered by pressing Accept.
✓ The new schedule is displayed in the list.
➤ Click on Exit to return to the Employee records window.
NOTE
If you want to adjust a time period, select the start and end times
so that one time period contains the other.

EN
Managing employee records Hotel Management
102
9.2 Adding/editing staff data sets
➤ Select Employee Records in the main menu.
➤ To create a data set, click on the symbol.
➤ To edit a data set, click on the symbol.
➤ Enter a name for the employee into the 'name' text field.
I
➤ If necessary, enter further data on the employee into the text fields:
– NIF: Tax identification number
– Passport: Passport
– Gender: Gender
– Date of birth: Date of birth
– Telephone: Telephone number
– Email: Email address
– Address: Street and house number
– City: City
– Postal code: Postal code
– Province: Province
– Country: Country
– Occupation: Occupation
– Contract: Contract
– Comments: Comments
➤ Confirm what you have entered by pressing Accept.
NOTE
Entering further data is not required. A detailed description may
be useful for administrative tasks.

EN
Hotel Management Managing employee records
103
✓ The employee is displayed in the list.

EN
Managing employee records Hotel Management
104
9.3 Allocating cards to employees
Each employee requires a card to carry out their tasks.
I
➤ Select Employee Records in the main menu.
➤ Select the employee from the list.
➤ Click on the Card Data arrow.
NOTE
A lost access card is a security risk. Place lost access cards on
the blacklist immediately (chapter “Managing the blacklist” on
page 132).

EN
Hotel Management Managing employee records
105
➤ The following buttons are available on the bottom margin of the data set:
– Add/modify card: Add/modify card
– Add card to blacklist: Add card to blacklist
– Show pass operations: Show pass operations
➤ Click on the Add/modify card button.

EN
Managing employee records Hotel Management
106
➤ Enter the required data:
– Type of card: Type of card (see table on page 106)
– Valid dates: Validity of the card in days
– Valid from date: Valid from (day)
– Valid from time: Valid from (time)
– Valid until date: Valid until (day)
– Valid until time: Valid until (time)
– Override privacy: Open even with the lock privacy on
– Permanent opening: Always open
– Employee shift: Staff schedule
– Pass control: Number of rooms accessed
– Access point 1 – 4: Access points 1 to 4
– Access area 1: Access area 1.
➤ Confirm what you have entered by pressing Create card.
➤ Follow the instructions on the monitor.
Type of card Description
Cleaning The Cleaning type of card is designated for cleaning staff. The
main feature of this type of card is that it allows access to all
access points of an area.
Staff with entry
control
The Staff with entry control type of card is designated for
maintenance staff, waiters and kitchen staff. The main feature
of this type of card is that it allows access to all access points
of an area.
Staff with access
to all areas
The Staff with access to all areas type of card is designated
for employees with access rights to all areas of the hotel. The
main feature of this type of card is that it allows access to all
access points, to which a staff schedule can be assigned .
Master The Master type of card is designated for the most senior
employees, e.g. management. The main feature of this type of
card is that it allows access to all access points until the card
has expired.

EN
Hotel Management Adding/editing client records
107
10 Adding/editing client records
With the client records function, you can save information on clients that have
stayed at your hotel. If the client stays again, you can access this data without
having to create a new data set.
➤ Select Client Records in the main menu.
➤ To create a data set, click on the symbol.
➤ To edit a data set, click on the symbol.
Symbol Name Description
Add client Add a new client
Edit client Edit an existing client
Delete client Delete an existing client

EN
Adding/editing client records Hotel Management
108
➤ Enter the required data:
–Name: Name
– NIF: Tax identification number
– Passport: Passport
– Telephone: Telephone number
– Email: Email address
– Address: Street and house number
– City: City
– Postal code: Postal code
– Province: Province
– Country: Country
– Comments: Comments
➤ Click on the picture in the top left corner if you want to add a photo of the
client.
I
➤ Confirm what you have entered by pressing Accept.
NOTE
BMP, JPEG or PNG are the supported image formats.

EN
Hotel Management Completing check-ins
109
11 Completing check-ins
➤ Select Occupation – Check-in in the main menu.
Symbol Name Description
Add
check-in
Add a new check-in
Edit
check-in
Edit an existing check-in
Delete
check-in
Delete an existing check-in
Define client
schedule
Create, edit or delete client schedules
Define meal
plans
Create, edit or delete meal plans

EN
Completing check-ins Hotel Management
110
11.1 Adding check-ins
➤ Select Occupation – Check-in in the main menu.
➤ To create a data set, click on the symbol.
➤ To edit a data set, click on the symbol (chapter “Adding/editing client
records” on page 107).
➤ New clients only: Click on the symbol and create the new client
(chapter “Adding/editing client records” on page 107).
✓ The new client now appears in the list.
➤ Enter the name of the client in the search field on the top right margin and
click on the magnifying glass symbol to narrow the search.
➤ Select the name of the client from the list.
➤ Confirm what you have entered by pressing Accept.
Symbol Name Description
Add client Add a new client
Edit client Edit an existing client
Delete client Delete an existing client

EN
Hotel Management Completing check-ins
111
➤ Click on the symbol to adjust the records of the client (chapter “Add-
ing/editing client records” on page 107).
➤ Click on the symbol to create an access card for the client.
Symbol Name Description
Modify client Edit client records
Add/modify
card
Create client card

EN
Completing check-ins Hotel Management
112
➤ Enter the required data:
– Valid dates: Validity of the card in days
– Valid from date: Valid from (day)
– Valid from time: Valid from (time)
– Valid until date: Valid until (day)
– Valid until time: Valid until (time)
– Meal plan: Meal plan, e.g. half board, full board
– Main room: Main room booked at check-in
– Override privacy: Open even with the lock privacy on
– Configuration of secondary rooms: Client's secondary rooms, e.g. for
their family
– Configuration of accesses: Accesses (optional with schedule), e.g. for
the swimming pool
– Configuration of accesses with sold time: Accesses with time model
(optional with schedule); their use is liable to costs
– Configuration of areas: Access to areas (optional with schedule), e.g.
for the car park
I
➤ Confirm what you have entered by pressing Create card.
➤ Follow the instructions on the monitor.
NOTE
You can grant the client access to a maximum of eleven access
points, including their own room. There can be a maximum of two
accesses with time model amongst the eleven access points.
Irrespective of that, you can grant the client access to a maximum
of two areas.

EN
Hotel Management Completing check-ins
113
✓ The new check-in is displayed in the list with all check-ins that are cur-
rently valid.
✓ The following button is available on the bottom margin of the data set:
– Add card to blacklist: Add card to blacklist
I
11.2 Editing check-ins
➤ Select Occupation – Check-in in the main menu.
➤ To edit a data set, click on the symbol.
NOTE
To create further access cards for the client, use the Edit check-
in function (chapter “Editing check-ins” on page 113).

EN
Completing check-ins Hotel Management
114
➤ Click on the symbol to adjust the records of the client (chapter “Add-
ing/editing client records” on page 107).
➤ Click on the symbol to create an access card for the client.
➤ Perform the required adjustments.
➤ Confirm what you have entered by pressing Create card.
➤ Follow the instructions on the monitor.
Symbol Name Description
Modify client Edit client records
Add/modify
card
Create client card

EN
Hotel Management Completing check-ins
115
11.3 Defining client schedules
You can impose time restrictions on access to access points and areas
through the client schedules.
I
➤ Select Occupation – Check-in in the main menu.
➤ Click on the symbol.
➤ To create a data set, click on the symbol.
➤ To edit a data set, click on the symbol.
NOTE
Schedules only work for access points with the firmware version
2.0 and higher.
Symbol Name Description
Add
schedule
Add a new schedule
Edit
schedule
Edit an existing schedule
Delete
schedule
Delete an existing schedule

EN
Completing check-ins Hotel Management
116
➤ Enter the required data:
– Name: Name of the schedule
– Start of margin 1: Start of margin 1 (time)
– End of margin 1: End of margin 1 (time)
– Start of margin 2: Start of margin 2 (time)
– End of margin 2: End of margin 2 (time)
– Applicable dates: Weekdays for which the schedule applies (Monday
to Sunday)
I
➤ Confirm what you have entered by pressing Accept.
NOTE
If you want to adjust a time period, select the start and end times
so that one time period contains the other.

EN
Hotel Management Completing check-ins
117
✓ The new schedule appears in the list.
➤ Click on Exit to return to the Check-in window.
11.4 Defining meal plans
➤ Select Occupation – Check-in in the main menu.
➤ Click on the symbol.
➤ To create a data set, click on the symbol.
➤ To edit a data set, click on the symbol.
➤ Enter a name for the meal plan.
➤ The new meal plan is displayed in the list.
➤ Click on Exit to return to the Check-in window.
Symbol Name Description
Add meal
plan
Add a new meal plan
Edit meal
plan
Edit an existing meal plan
Delete meal
plan
Delete an existing meal plan

EN
Creating client cards quickly Hotel Management
118
12 Creating client cards quickly
➤ Select Management – Program/read cards in the main menu.
I
➤ Enter the required data:
– Valid dates: Validity of the card in days
– Valid from date: Valid from (day)
– Valid until date: Valid until (day)
– Meal plan: Meal plan, e.g. half board, full board
– Room: Rooms that are booked
– Override privacy: Open even with the lock privacy on
– Configuration of accesses: Accesses (optional with schedule), e.g. for
the swimming pool
➤ Confirm what you have entered by pressing Create card.
➤ Follow the instructions on the monitor.
➤ Click on Exit to return to the main window.
NOTE
Use the quick creation of client cards function only in exceptional
cases. In normal cases, use the Complete check-in function
(chapter “Completing check-ins” on page 109).

EN
Hotel Management Reading the cards
119
13 Reading the cards
➤ Select Management – Program/read cards in the main menu.
➤ Click on the Read card button.
➤ Follow the instructions on the monitor.
✓ Information on the card being read appears in a new window.
➤ Click on Exit to return to the Program/read cards window.

EN
Monthly chart Hotel Management
120
14 Monthly chart
➤ Select Occupation – Monthly chart in the main menu.
In the default setting, the monthly chart displays the current month. Each
room can have one of the following states on each day.
Symbol Name Description
Calendar Selecting a different month
Colour Label Meaning
Green Free room The room is free and can be book by clients.
Red Occupied room The room is occupied. The client has checked in. The
room cannot be booked or reserved.
Yellow Reserved room The room is reserved. The client has not checked in.
The room cannot be booked or reserved. (Notification
only with additional “planning module”.)
Blue Blocked room The room is blocked. The room cannot be booked or
reserved. (Notification only with additional “planning
module”.)

EN
Hotel Management Monthly chart
121
I
14.1 Displaying a different month
➤ Click on the symbol.
✓ This opens a window in which the month and year can be selected.
➤ Select the required month and the required year from both drop-down
menus.
➤ Confirm what you have entered by pressing Accept.
✓ The corresponding month appears in the monthly chart.
NOTE
In the monthly chart, the day changes not only at midnight but also
at noon on the following day. The overview of the usual check-out
time is calculated in the morning hours through this setting. There-
fore, a room shown to be occupied from 1 to 3 October is occupied
from noon on 1 October to noon on 4 October.

EN
Loading data into the system Hotel Management
122
15 Loading data into the system
15.1 Downloading data from a access point
Before you can download data from an access point, you must first generate
a data download card.
➤ Select Management – Generate data download card in the main menu.
➤ Follow the instructions on the monitor.
✓ The data download card has been generated.
➤ Insert the data download card into the lock from which you want to down-
load data.
➤ Remove the data download card from the lock after the download process
is completed.
I
15.2 Loading card data into the system
➤ Select Data – Download card data in the main menu.
➤ Insert the data download card into the card reader.
✓ The data is copied into the software's database.
NOTE
You have to repeat the entire process for each lock from which
you want to download data.
Keep the data download card in a safe place, since it contains
important information about the system.

EN
Hotel Management Showing the accesses
123
16 Showing the accesses
I
➤ Select Data – See data operations in the main menu.
NOTE
The better the list is maintained, the more data is available to you.
Maintain the list by regularly downloading the data from all access
points and copying it into the system database (chapter “Loading
data into the system” on page 122 and chapter “Loading card data
into the system” on page 122).
Symbol Name Description
Filter by
access num-
ber
Filter by access number
Filter by
date
Filter by access date
Delete by
dates
Delete access history

EN
Showing the accesses Hotel Management
124
16.1 Filtering by access number
➤ Click on the symbol.
➤ Enter the first and last number of the access points that you want to dis-
play.
➤ Confirm what you have entered by pressing Accept.
✓ The accesses to the selected access points are displayed.
16.2 Filtering by access date
➤ Click on the symbol.
➤ Enter the first and last date of the time period that you want to display.
➤ Confirm what you have entered by pressing Accept.
✓ The accesses in the selected time period are displayed.

EN
Hotel Management Showing the accesses
125
16.3 Deleting the access history
You can delete sections of the access history from the database.
I
➤ Click on the symbol.
➤ Enter the first and last date of the time period that you want to delete.
➤ Confirm what you have entered by pressing Accept.
✓ The accesses in the selected time period are permanently deleted.
NOTE
Once deleted, data cannot be restored.

EN
Programming the door lock Hotel Management
126
17 Programming the door lock
A programming card is required to program the door lock. Using the program-
ming card, allocate a number to the access point and adjust the date and
time.
I
➤ Select Management – Generate programming card in the main menu.
➤ Enter the number of the room or access point for which the programming
card applies.
➤ Confirm what you have entered by pressing Create card.
➤ Follow the instructions on the monitor.
➤ Insert the programming card into the lock you want to program.
➤ Remove the programming card from the lock after the programming pro-
cess is completed.
I
NOTE
The time and number must be adjusted during the initial installa-
tion and after every battery change.
The time and date on the computer used to generate the card is
saved on the programming card. Make sure that the date on your
computer is correct.
NOTE
A programming card is invalid after the first use. This is intended
to prevent the same room number being allocated twice.

EN
Hotel Management Creating special cards
127
18 Creating special cards
I
18.1 Creating emergency cards
The emergency card is an access card that is always valid for the respective
access point. Emergency cards should only be used if regular cards cannot
be used, e.g. if the computer system is down and guests are waiting to be
taken to their rooms.
➤ Select Hotel Data in the main menu.
➤ Select an access point.
✓ The following buttons are available in the right half of the data set:
– Create card: Create card
– Add card to blacklist: Add card to blacklist
➤ Click on Create card.
➤ Insert the emergency card into the card reader at the PC.
✓ The emergency card has been created.
NOTE
A lost access card is a security risk. Place lost access cards on
the blacklist immediately (chapter “Managing the blacklist” on
page 132).

EN
Creating special cards Hotel Management
128
18.2 Generating free access cards
Open any access points in the system permanently with the free access card.
I
➤ Select Management – Generate free access card in the main menu.
➤ Click on the symbol.
➤ Follow the instructions on the monitor.
NOTE
The free access card can be used on any lock in the system. No
access card is required for permanently opened rooms. Use the
free access card with caution. Keep the free access card in a safe
place.
Symbol Name Description
Create free
access card
Create a new free access card
Delete free
access card
Delete an existing free access card from the database
Add card to
the blacklist
Add the selected free access card to the blacklist

EN
Hotel Management Creating special cards
129
18.3 Generating locking cards
Lock any access points in the system permanently with the locking card.
I
➤ Select Management – Generate locking card in the main menu.
➤ Follow the instructions on the monitor.
NOTE
The locking card can be used on any lock in the system. Use the
locking card with caution. Keep the locking card in a safe place.

EN
Creating special cards Hotel Management
130
18.4 Generating courtesy time cards
The so-called courtesy time card is used in conjunction with an energy saving
system. The energy saving system card reader reads the inserted access
card and regulates the energy use of a room. For example, only the light is
switched on for cleaning staff, whilst the air-conditioning or heating is also
switched on for guests.
After the card has been removed from the energy saving system reading
device, the electricity is switched off either immediately or after an adjustable
time period.
The switching delay can be adjusted with the courtesy time card.
➤ Select Energy economizer – Generate courtesy card in the main
menu.
➤ Enter the required time period in seconds.
➤ Confirm what you have entered by pressing Create card.
➤ Follow the instructions on the monitor.
I
NOTE
The switching delay can be adjusted between 0 and 9999 seconds.
The energy saving system factory setting for the switching delay
is five seconds.

EN
Hotel Management Creating/restoring backups
131
19 Creating/restoring backups
➤ Select Backup in the main menu.
19.1 Generating backups
➤ Select Backup in the main menu.
➤ In the sub-window Selection of data destination/source, select the
folder where the backup is to be saved.
➤ Click on Generate backup.
19.2 Restoring backups
➤ Select Backup in the main menu.
➤ Select the folder containing the backup that is to be restored.
➤ Click on Restore backup.

EN
Managing the blacklist Hotel Management
132
20 Managing the blacklist
Blocked cards are saved in the blacklist. Cards saved in the blacklist are
refused access to all access points. Cards can only be placed onto the black-
list in the areas of the software where they are also created.
I
20.1 Adding cards to the blacklist
➤ Select the area where you want to block a card.
➤ Click on the Add card to the blacklist button or the symbol.
➤ Confirm what you have entered by pressing Accept.
✓ The card is displayed in the Management – Blacklist area.
NOTE
Cards displayed in the blacklist are not automatically blocked in
all access points. Make sure you apply the blacklist card in all
access points.

EN
Hotel Management Managing the blacklist
133
20.2 Viewing cards in the blacklist
➤ Select Management – Blacklist in the main menu.
The upper table displays all cards that have been placed on the blacklist.
The lower table displays all cards that have been written onto the blacklist.
Symbol Name Description
Create
blacklist
card
Create a blacklist card
Delete
blacklist
entry
Delete an existing blacklist entry from the database

EN
Managing the blacklist Hotel Management
134
20.3 Creating a blacklist card
➤ Select Management – Blacklist in the main menu.
➤ Click on the symbol.
➤ Follow the instructions on the monitor.
✓ The content of both tables in the blacklist view is now identical.
I
NOTE
Cards displayed in the blacklist are not automatically blocked in
all access points. Make sure you apply the blacklist card in all
access points.

EN
Hotel Management Managing the PMS module
135
21 Managing the PMS module
The purpose of the PMS module is to create valid cards for door locks and
accesses using a property management system (PMS) beside the hotel
management software. Thereby work processes can be unified and duplica-
tion of data can be avoided.
➤ Select PMS in the main menu.
I
Cards created by another Property Management Systems using the PMS
module have the following restrictions:
You can only read and write customer cards.
Accesses and schedules cannot be assigned to customer cards.
Accesses with time models cannot be assigned to customer cards.
Symbol Name Description
Add authori-
zation
Add a new authorization
Edit authori-
zation
Edit an existing authorization
Delete
authoriza-
tion
Delete an existing authorization
NOTE
When you use the PMS module, you cannot use all of the features
of the hotel management software.

EN
Managing the PMS module Hotel Management
136
If the PMS client does not transmit the exact data when copying cards,
older cards for the same room will be invalid.
If the PMS client does not transmit the time for check in and check out,
older cards for the same room will be invalid.
When you use protocol 2, the time will be transmitted only in full hours.
Because of that you may face problems with check in and check out.
21.1 Configure the PMS module
➤ Select PMS in the main menu.
➤ Click on Edit general configuration.
➤ Enter the required data:
– PMS control: Set to Local, if the PMS and the hotel management soft-
ware are on the same computer, otherwise set to Remote.
– IP address: IP address of the computer on which the PMS is installed.
– Port: Communication port for client requests of the PMS.
– Terminal number: Identification number of the card reader/writer.
– Protocol: The transmission protocol that is used for communication
between the PMS and the hotel management software (see table
below).
➤ Confirm what you have entered by pressing OK.
✓ The new settings are displayed on the upper left of the window.
Function Protocol 1 Protocol 2
Maximum number of
authorizations
20 8
Time transmission Exact time only full hours (12:30 is
changed to 12:00)

EN
Hotel Management Managing the PMS module
137
21.2 Adding/editing authorizations
Authorizations are automatically written to the customer cards when you use
the PMS client. Depending on the selected transmission protocol, up to 20
authorizations can be written to the customer cards.
➤ Select PMS in the main menu.
➤ To create a data set click on the symbol.
➤ To edit a data set click on the symbol.
➤ Enter the required data:
– Number: Identification number of authorization.
– Type: Type of authorization, can either be an access or a public area.
– Access: Name of the access or pubic area.
➤ Confirm what you have entered by pressing Accept.
✓ The authorization is displayed in the table of the window PMS configura-
tion.

EN
Managing the PMS module Hotel Management
138
21.3 Establishing a PMS connection
I
➤ Select PMS – Start PMS connection in the main menu.
✓ The hotel management software is able to handle requests from the PMS
client.
➤ To close the PMS connection press Exit.
NOTE
After establishing a PMS connection, the hotel management soft-
ware operates exclusively as a server for PMS requests. If you
have to work with the Hotel Management Software itself, the PMS
connection must be closed.

FR
Hotel Management
139
Veuillez lire ce manuel attentivement avant de mettre l'appareil en
service et conservez-le. En cas de passer le produit, veuillez le trans-
mettre au nouvel acquéreur.
Sommaire
1 Configuration requise . . . . . . . . . . . . . . . . . . . . . . . . . . . . . . . . .142
2 Accessoires . . . . . . . . . . . . . . . . . . . . . . . . . . . . . . . . . . . . . . . . . 142
3 Installation . . . . . . . . . . . . . . . . . . . . . . . . . . . . . . . . . . . . . . . . . .142
4 Premier démarrage du programme . . . . . . . . . . . . . . . . . . . . . .143
5 Bases . . . . . . . . . . . . . . . . . . . . . . . . . . . . . . . . . . . . . . . . . . . . . . 145
5.1 Chercher un ensemble de données. . . . . . . . . . . . . . . . . . .145
5.2 Modifier un ensemble de données. . . . . . . . . . . . . . . . . . . .145
5.3 Supprimer un ensemble de données. . . . . . . . . . . . . . . . . .146
5.4 Quitter une fenêtre, sans enregistrer. . . . . . . . . . . . . . . . . . 146
5.5 Se connecter . . . . . . . . . . . . . . . . . . . . . . . . . . . . . . . . . . . . 147
5.6 Changer d'utilisateur . . . . . . . . . . . . . . . . . . . . . . . . . . . . . .148
5.7 La fenêtre principale . . . . . . . . . . . . . . . . . . . . . . . . . . . . . . 149
5.8 Quitter le programme. . . . . . . . . . . . . . . . . . . . . . . . . . . . . .149
6 Configuration du logiciel. . . . . . . . . . . . . . . . . . . . . . . . . . . . . . .150
6.1 Sélectionner la langue. . . . . . . . . . . . . . . . . . . . . . . . . . . . .150
6.2 Utiliser le code de mise à jour . . . . . . . . . . . . . . . . . . . . . . .151
6.3 Compléter de modules supplémentaires. . . . . . . . . . . . . . . 152
7 Gérer les utilisateurs . . . . . . . . . . . . . . . . . . . . . . . . . . . . . . . . . . 153
7.1 Créer/modifier un type d'utilisateur . . . . . . . . . . . . . . . . . . . 154
7.2 Créer/modifier un utilisateur. . . . . . . . . . . . . . . . . . . . . . . . .156
8 Gérer les données de l'hôtel. . . . . . . . . . . . . . . . . . . . . . . . . . . .158
8.1 Filtrer selon les zones . . . . . . . . . . . . . . . . . . . . . . . . . . . . .159
8.2 Grouper selon les accès et les pièces. . . . . . . . . . . . . . . . .160
8.3 Définir les types de pièce. . . . . . . . . . . . . . . . . . . . . . . . . . .161
8.4 Ajouter/modifier des points d'accès. . . . . . . . . . . . . . . . . . . 162
8.5 Définir les zones . . . . . . . . . . . . . . . . . . . . . . . . . . . . . . . . .164

FR
Hotel Management
140
9 Gérer les données du personnel . . . . . . . . . . . . . . . . . . . . . . . .166
9.1 Définir les horaires du personnel. . . . . . . . . . . . . . . . . . . . . 167
9.2 Ajouter/modifier l'ensemble de données du personnel.. . . .170
9.3 Attribuer des cartes à des employés . . . . . . . . . . . . . . . . . .172
10 Ajouter/modifier des données client . . . . . . . . . . . . . . . . . . . . . 175
11 Effectuer le check-in . . . . . . . . . . . . . . . . . . . . . . . . . . . . . . . . . . 177
11.1 Ajouter Check-in . . . . . . . . . . . . . . . . . . . . . . . . . . . . . . . . . 178
11.2 Modifier le check-in . . . . . . . . . . . . . . . . . . . . . . . . . . . . . . .181
11.3 Définir les horaires client . . . . . . . . . . . . . . . . . . . . . . . . . . .183
11.4 Définir la formule d'hébergement. . . . . . . . . . . . . . . . . . . . .186
12 Création rapide de cartes client . . . . . . . . . . . . . . . . . . . . . . . . . 187
13 Lecture de cartes. . . . . . . . . . . . . . . . . . . . . . . . . . . . . . . . . . . . .188
14 Aperçu mensuel. . . . . . . . . . . . . . . . . . . . . . . . . . . . . . . . . . . . . .189
14.1 Afficher un autre mois . . . . . . . . . . . . . . . . . . . . . . . . . . . . . 190
15 Charger des données dans le système. . . . . . . . . . . . . . . . . . .191
15.1 Télécharger les données d'un point d'accès . . . . . . . . . . . . 191
15.2 Charger des données de carte dans le système. . . . . . . . . 192
16 Afficher les accès . . . . . . . . . . . . . . . . . . . . . . . . . . . . . . . . . . . . 193
16.1 Filtrer selon le numéro d'accès . . . . . . . . . . . . . . . . . . . . . .193
16.2 Filtrer selon la date d'accès. . . . . . . . . . . . . . . . . . . . . . . . .194
16.3 Supprimer l'historique des accès. . . . . . . . . . . . . . . . . . . . . 195
17 Programmation de la serrure de porte. . . . . . . . . . . . . . . . . . . .196
18 Créer des cartes spéciales . . . . . . . . . . . . . . . . . . . . . . . . . . . . .197
18.1 Créer une carte d'urgence. . . . . . . . . . . . . . . . . . . . . . . . . .197
18.2 Créer une carte permanente . . . . . . . . . . . . . . . . . . . . . . . .198
18.3 Créer une carte de verrouillage. . . . . . . . . . . . . . . . . . . . . .199
18.4 Créer une carte de courtoisie . . . . . . . . . . . . . . . . . . . . . . .200
19 Effectuer/restaurer des sauvegardes. . . . . . . . . . . . . . . . . . . . . 201
19.1 Créer une sauvegarde. . . . . . . . . . . . . . . . . . . . . . . . . . . . .201
19.2 Restaurer une sauvegarde . . . . . . . . . . . . . . . . . . . . . . . . . 201
20 Gérer la liste noire . . . . . . . . . . . . . . . . . . . . . . . . . . . . . . . . . . . . 202
20.1 Ajouter des cartes à la liste noire. . . . . . . . . . . . . . . . . . . . . 202
20.2 Voir les cartes sur la liste noire . . . . . . . . . . . . . . . . . . . . . .203
20.3 Créer une carte de liste noire . . . . . . . . . . . . . . . . . . . . . . .204

FR
Hotel Management
141
21 Gérer le module PMS. . . . . . . . . . . . . . . . . . . . . . . . . . . . . . . . . . 205
21.1 Configurer le module PMS. . . . . . . . . . . . . . . . . . . . . . . . . .207
21.2 Ajouter/modifier des autorisations . . . . . . . . . . . . . . . . . . . . 208
21.3 Établir une connexion PMS . . . . . . . . . . . . . . . . . . . . . . . . . 209

FR
Configuration requise Hotel Management
142
1 Configuration requise
Configuration minimale :
Système d'exploitation : Windows XP Service Pack 3
Résolution de l'écran : 1024 x 768
Processeur : Intel Pentium 4 avec 2 GHz ou compatible
Mémoire vive : 1 GB de RAM
Espace disque disponible : 1 GB
Interfaces : 1x USB 2.0
2 Accessoires
Disponibles en accessoires (non compris dans la livraison) :
3 Installation
➤ Raccordez le lecteur de carte à une prise USB.
➤ Insérez le support de données avec le logiciel Hotel Management.
✓ Le programme de configuration s'ouvre.
➤ Suivez les étapes du programme de configuration.
Désignation Numéro de produit
Smart Card Energy saver 9106600715
Smart Card Access Control 9106600713
Smart Card Encoder 9106600722
Smart Key Card 9106600724
RFID Access Control 9106600714
RFID Energy saver 9106600716
RFID Encoder 9106600723
RFID Key Card 9106600725

FR
Hotel Management Premier démarrage du programme
143
4 Premier démarrage du programme
Au premier démarrage du programme, vous devez configurer le logiciel Hotel
Management.
➤ Ouvrez le logiciel Hotel Management.
➤ Choisissez la langue souhaitée dans la liste et confirmez avec Accept
(valider).
✓ Le programme effectue un redémarrage du logiciel Hotel Management
avec les nouveaux réglages.
➤ Entrez le code d'installation et confirmez avec Accept (valider).
I
REMARQUE
Vous obtenez le code d'installation auprès du fabricant.

FR
Premier démarrage du programme Hotel Management
144
➤ Insérez la carte d'initialisation dans le lecteur de carte.
➤ Suivez les instructions sur l'écran.
✓ La fenêtre principale du logiciel Hotel Management s'ouvre.

FR
Hotel Management Bases
145
5 Bases
De nombreuses fenêtres contiennent une barre d'outils située en haut. Les
symboles dans la barre d'outils changent selon le contexte. La signification
des symboles est expliquée dans ce manuel en dessous des images de cha-
cune des fenêtres.
De nombreuses fenêtres contiennent des listes. Cliquez sur une entrée dans
la liste pour dérouler une zone avec des informations supplémentaires sur
l'entrée. Un clic sur un type d'utilisateur montre p. ex. les droits valides pour
ce type d'utilisateur. Un clic sur une autre entrée de la liste réduit l'entrée
déroulée précédemment et déroule les informations de l'entrée actuelle.
5.1 Chercher un ensemble de données
De nombreuses fenêtres contiennent un champ de recherche situé en haut
à droite.
➤ Entrez le terme que vous souhaitez trouver.
➤ Cliquez sur la loupe pour démarrer la recherche.
✓ La liste dans la fenêtre correspondante se limite aux résultats de votre
recherche.
5.2 Modifier un ensemble de données
Les ensembles de données peuvent être modifiés avec le symbole .
➤ Sélectionnez l'ensemble de données souhaité.
➤ Cliquez sur le symbole .
I
REMARQUE
Dans ce qui suit, il n'est pas indiqué que vous devez sélectionner
les ensembles de données que vous souhaitez modifier.

FR
Bases Hotel Management
146
5.3 Supprimer un ensemble de données
La plupart des des fenêtres contiennent le bouton Delete (supprimer ) avec
le symbole .
I
➤ Sélectionnerz l'ensemble de données souhaité dans la liste.
➤ Cliquez sur le symbole .
➤ Confirmez la suppression avec Accept (valider).
✓ L'ensemble de données est supprimé.
5.4 Quitter une fenêtre, sans enregistrer
Lorsque vous créez ou modifiez un ensemble de données, vous pouvez
annuler l'opération à tout moment sans enregistrer les entrées.
I
➤ Appuyez sur le bouton Cancel (annuler).
✓ La fenêtre actuelle est fermée.
REMARQUE
Dans ce qui suit, il n'est pas expressément fait référence au bou-
ton Delete (supprimer).
REMARQUE
Dans ce qui suit, il n'est pas expressément fait référence au bou-
ton Cancel (annuler).

FR
Hotel Management Bases
147
5.5 Se connecter
➤ Ouvrez le logiciel Hotel Management.
✓ La fenêtre principale du logiciel Hotel Management s'ouvre.
Vous devez vous connecter au logiciel.
➤ Entrez le nom d'utilisateur et le mot de passe.
I
➤ Confirmez l'entrée avec Accept (valider).
REMARQUE
Lors de l'installation du logiciel Hotel Management, l'utilisateur
« Administrator » est créé. Il n'est attribué aucun mot de passe à
l'utilisateur « Administrator ». Modifiez le mot de passe après la
première connexion (chapitre « Créer/modifier un utilisateur »,
page 156).

FR
Bases Hotel Management
148
5.6 Changer d'utilisateur
➤ Sélectionnez Users – Change user (utilisateurs – changer d'utilisateur)
dans le menu principal.
➤ Entrez le nom d'utilisateur et le mot de passe.
➤ Confirmez les entrées avec Accept (valider).

FR
Hotel Management Bases
149
5.7 La fenêtre principale
La fenêtre principale est l'élément central du logiciel Hotel Management. Par
le menu principal de la fenêtre principale, vous avez accès à toutes les fonc-
tions du logiciel Hotel Management.
Dans la fenêtre principale, en bas à droite, vous trouvez les informations
suivantes :
Version : version du logiciel
Current user : utilisateur connecté actuellement
Type of user : type de l'utilisateur connecté actuellement
Vous accédez à la fenêtre principale par le menu Desktop dans le menu
principal.
5.8 Quitter le programme
➤ Sélectionnez Exit (quitter) dans le menu principal.

FR
Configuration du logiciel Hotel Management
150
6 Configuration du logiciel
6.1 Sélectionner la langue
I
➤ Sélectionnez Configuration – General configuration (configuration –
configuration générale) dans le menu principal.
➤ Cliquez sur Language (langue).
➤ Choisissez la langue souhaitée dans la liste et confirmez avec Accept
(valider).
✓ Il apparaît une fenêtre d'information qui indique que le logiciel doit être
redémarré.
➤ Cliquez sur Accept (valider) pour effectuer le redémarrage ou faites-le
plus tard manuellement.
REMARQUE
Le changement de langue requiert un redémarrage du logiciel.

FR
Hotel Management Configuration du logiciel
151
6.2 Utiliser le code de mise à jour
Le logiciel est actualisé à l'aide de codes de mise à jour. Le fabricant vous
contacte lorsque le logiciel doit être actualisé.
➤ Sélectionnez Configuration – General configuration (configuration –
configuration générale) dans le menu principal.
➤ Cliquez sur Updating code (code de mise à jour).
➤ Entrez le numéro de série et le code de mise à jour.
➤ Confirmez l'entrée avec Accept (valider).
✓ Le logiciel est actualisé.

FR
Configuration du logiciel Hotel Management
152
6.3 Compléter de modules supplémentaires
Le logiciel Hotel Management peut être étendu avec des modules supplé-
mentaires.
➤ Sélectionnez Configuration – General configuration (configuration –
configuration générale) dans le menu principal.
➤ Cliquez sur Initialization card (carte d'initialisation).
➤ Insérez la carte d'initialisation dans le lecteur de carte.
➤ Suivez les instructions sur l'écran.

FR
Hotel Management Gérer les utilisateurs
153
7 Gérer les utilisateurs
Les utilisateurs peuvent utiliser le logiciel Hotel Management pour gérer,
ajouter, modifier ou supprimer des données. Vous pouvez créer des utilisa-
teurs à volonté.
Vous gérez les droits des utilisateurs par le biais des types d'utilisateurs dans
le logiciel Hotel Management.
Lors de l'installation du logiciel Hotel Management, l'utilisateur
« Administrator » est créé. L'administrateur dispose des pleins droits pour
modifier ou supprimer les données enregistrées dans le logiciel. Il n'est donc
pas conseillé de travailler avec l'administrateur sur le long terme. Créez plu-
tôt d'autres utilisateurs pour effectuer les tâches de l'exploitation hôtelière.
➤ Sélectionnez Users – Create users (utilisateurs – créer des utilisateurs)
dans le menu principal.
Symbole Nom Description
Add user Ajouter un nouvel utilisateur
Edit user Modifier un utilisateur
Delete user Supprimer un utilisateur
Define types
of user
Créer, modifier et supprimer le type d'utilisateur

FR
Gérer les utilisateurs Hotel Management
154
7.1 Créer/modifier un type d'utilisateur
Les types d'utilisateurs constituent les bases pour la gestion des droits de
chaque utilisateur. Les domaines d'activités typiques tels que réception,
conciergerie et autres peuvent être prédéfinis dans les types d'utilisateur et
sont adaptés pour des utilisateurs individuels dans des cas particuliers seu-
lement.
➤ Sélectionnez Users – Create users (utilisateurs - créer des utilisateurs)
dans le menu principal.
➤ Cliquez sur le symbole .
Dans la fenêtre Types of user (types d'utilisateur), tous les types d'utilisateur
définis apparaissent dans une liste. Cliquez sur un type d'utilisateur pour
obtenir une vue d'ensemble des droits définis pour ce type d'utilisateur.
I
➤ Pour créer un ensemble de données, cliquez sur le symbole .
Symbole Nom Description
Add type of
user
Ajouter un nouveau type d'utilisateur
Edit type of
user
Modifier un type d'utilisateur
Delete type
of user
Supprimer un type d'utilisateur
REMARQUE
Le type d'utilisateur « Administrator » dispose de tous les droits
disponibles dans le logiciel. Le type d'utilisateur « Administrator »
ne peut être ni modifié ni supprimé.

FR
Hotel Management Gérer les utilisateurs
155
➤ Pour modifier un ensemble de données, cliquez sur le symbole .
➤ Saisissez un nom pour le type d'utilisateur.
➤ Sélectionnez les droits dont le type d'utilisateur doit disposer.
– Create Users : créer des utilisateurs
– Generate programming card : créer une carte de programmation
– Generate data download card : créer une carte de téléchargement de
données
– Generate free access card : créer une carte permanente
– Generate closing card : créer une carte de verrouillage
– Programm/read cards : programmer/lire des cartes
– Blacklist : gérer la liste noire
– Download card data : télécharger des données de cartes
– See access operations : voir les opérations d'accès
– Check-in : effectuer des check-ins
– Occupation graph : voir une vue d'ensemble de l'occupation
– Client records : gérer les données client
– Employee records : gérer les données des employés
– Backup : créer/restaurer des sauvegardes
– General configuration : effectuer des réglages généraux
– Hotel data : gérer les données de l'hôtel
– Generate courtesy time card : créer une carte pour un temps de cour-
toisie
– PMS configuration : configurer le Property Management System
(PMS)
– Start PMS connection : connecter au Property Management System
(PMS)
– Lockers : serrure de l'armoire
➤ Confirmez les entrées avec Accept (valider).

FR
Gérer les utilisateurs Hotel Management
156
✓ Le nouveau type d'utilisateur est affiché dans la liste.
➤ Cliquez sur Exit (quitter) pour revenir à la fenêtre Create users (créer des
utilisateurs).
7.2 Créer/modifier un utilisateur
I
➤ Sélectionnez Users – Create users (utilisateurs - créer des utilisateurs)
dans le menu principal.
➤ Pour créer un ensemble de données, cliquez sur le symbole .
➤ Pour modifier un ensemble de données, cliquez sur le symbole .
REMARQUE
L'utilisateur « Administrator » dispose de tous les droits dispo-
nibles dans le logiciel. L'utilisateur « Administrator » ne peut pas
être supprimé.

FR
Hotel Management Gérer les utilisateurs
157
➤ Entrez un nom et un mot de passe pour l'utilisateur.
➤ Sélectionnez le type d'utilisateur pour l'utilisateur.
✓ Les droits de l'utilisateur sont adaptés en fonction du type d'utilisateur.
➤ Confirmez les entrées avec Accept (valider).
✓ Le nouvel utilisateur est affiché dans la liste.

FR
Gérer les données de l'hôtel Hotel Management
158
8 Gérer les données de l'hôtel
Dans le point de menu Hotel Data (données de l'hôtel), vous pouvez créer
une image virtuelle de l'hôtel. Agencez cette image aussi précisément que
possible pour permettre au personnel une utilisation optimale du logiciel
Hotel Management.
➤ Sélectionnez Hotel Data (données de l'hôtel) dans le menu principal.
Vous pouvez régler les options d'affichage suivantes :
Filtrer selon les zones
Regrouper selon les accès et les pièces
Symbole Nom Description
Add access
point
Ajouter un nouveau point d'accès
Edit access
point
Modifier un point d'accès
Delete
access point
Supprimer un point d'accès
Define types
of room
Créer, modifier et supprimer des types de pièce
Define
areas
Créer, modifier et supprimer des zones

FR
Hotel Management Gérer les données de l'hôtel
159
8.1 Filtrer selon les zones
Hotel Data (données de l'hôtel) comprend de nombreuses données sur les
locaux. Réglez un filtre pour avoir une meilleure vue d'ensemble.
➤ Activez la case Area filter (filtre de zone) dans le coin en haut à droite de
la fenêtre.
➤ Sélectionnez la zone souhaitée dans la liste déroulante.
✓ La liste montre uniquement les points d'accès dans la zone sélectionnée.
I
REMARQUE
Cliquez sur la croix à gauche de la liste de sélection pour enlever
le filtre.

FR
Gérer les données de l'hôtel Hotel Management
160
8.2 Grouper selon les accès et les pièces
➤ Activez la case Group accesses/rooms (grouper les accès/les pièces)
dans le coin en haut à droite de la fenêtre.
✓ Les accès et les pièces sont groupés dans l'affichage.
I
REMARQUE
Désactivez la case Group accesses/rooms (grouper les
accès/les pièces) pour enlever le filtre.

FR
Hotel Management Gérer les données de l'hôtel
161
8.3 Définir les types de pièce
➤ Sélectionnez Hotel Data (données de l'hôtel) dans le menu principal.
➤ Cliquez sur le symbole .
➤ Pour créer un ensemble de données, cliquez sur le symbole .
➤ Pour modifier un ensemble de données, cliquez sur le symbole .
➤ Entrez un nom pour le type de pièce.
➤ Confirmez l'entrée avec Accept (valider).
Symbole Nom Description
Add type of
room
Ajouter un nouveau type de pièce
Edit type of
room
Modifier un point d'accès
Delete type
of room
Supprimer un type de pièce

FR
Gérer les données de l'hôtel Hotel Management
162
✓ Le nouveau type de pièce est affiché dans la liste.
➤ Cliquez sur Exit (quitter) pour revenir à la fenêtre Hotel Data (données
de l'hôtel).
8.4 Ajouter/modifier des points d'accès
Tous les points d'accès sont sécurisés par un système de verrouillage
comme p. ex. les chambres d'hôtel, les salles de conférence et les bureaux.
➤ Sélectionnez Hotel Data (données de l'hôtel) dans le menu principal.
➤ Pour créer un ensemble de données, cliquez sur le symbole .
➤ Pour modifier un ensemble de données, cliquez sur le symbole .

FR
Hotel Management Gérer les données de l'hôtel
163
➤ Entrez les données requises :
– Type : type du point d'accès ; pièce ou point d'accès
– Number : numéro de la pièce
– Name : nom de la pièce
– Type of room : type de pièce
– Description : description (en option)
➤ Confirmez les entrées avec Accept (valider).
✓ Le nouveau point d'accès est affiché dans la liste.

FR
Gérer les données de l'hôtel Hotel Management
164
8.5 Définir les zones
Les zones sont utilisées pour grouper des points d'accès selon leur fonction.
Les zones peuvent être accessibles soit au public soit pour le personnel. Les
points d'accès doivent se trouver à l'intérieur d'une zone.
➤ Sélectionnez Hotel Data (données de l'hôtel) dans le menu principal.
➤ Cliquez sur le symbole .
➤ Pour créer un ensemble de données, cliquez sur le symbole .
➤ Pour modifier un ensemble de données, cliquez sur le symbole .
Symbole Nom Description
Add area Ajouter une nouvelle zone
Edit area Modifier une zone
Delete area Supprimer une zone

FR
Hotel Management Gérer les données de l'hôtel
165
➤ Entrez les données requises :
– Nom : Nom de la zone
– Start : premier point d'accès dans la zone
– End : dernier point d'accès dans la zone
– Accessibility : Droit d'accès ; public ou uniquement pour le personnel
➤ Confirmez les entrées avec Accept (valider).
✓ La nouvelle zone est affichée dans la liste.
➤ Cliquez sur Exit (quitter) pour revenir à la fenêtre Hotel Data (données
de l'hôtel).
✓ Les informations de zone sont affichées en dessous de chaque point
d'accès.

FR
Gérer les données du personnel Hotel Management
166
9 Gérer les données du personnel
Dans le point de menu Employee Records (données du personnel), vous
pouvez gérer les données des personnes, les cartes d'accès et les horaires
du personnel.
➤ Sélectionnez Employee Records (données du personnel) dans le menu
principal.
Symbole Nom Description
Add
employee
Ajouter un nouvel employé
Edit
employee
Modifier un employé
Delete
employee
Supprimer un employé
Define staff
schedule
Créer, modifier et supprimer les horaires du personnel
Download
data
Télécharger les données de la carte

FR
Hotel Management Gérer les données du personnel
167
9.1 Définir les horaires du personnel
Dans le logiciel Hotel Management, vous pouvez définir les horaires du per-
sonnel.
➤ Sélectionnez Employee Records (données du personnel) dans le menu
principal.
➤ Cliquez sur le symbole
➤ Pour créer un ensemble de données, cliquez sur le symbole .
➤ Pour modifier un ensemble de données, cliquez sur le symbole .
Symbole Nom Description
Add
schedule
Ajouter un nouvel horaire
Edit
schedule
Modifier un horaire
Delete
schedule
Supprimer un horaire

FR
Gérer les données du personnel Hotel Management
168
➤ Entrez un nom pour l'horaire.
➤ Entrez au moins une durée pour laquelle l'horaire est valide (zones de
texte 2 à 5)
I
➤ Activez les cases des jours de semaine pour lesquels l'horaire doit être
valable.
➤ Confirmez les entrées avec Accept (valider).
REMARQUE
Si vous souhaitez régler une durée uniquement, sélectionnez les
moments de début et de fin de telle façon que la durée corres-
ponde à l'horaire.

FR
Hotel Management Gérer les données du personnel
169
✓ Le nouvel horaire est affiché dans la liste.
➤ Cliquez sur Exit (quitter) pour revenir à la fenêtre Staff records (données
du personnel).

FR
Gérer les données du personnel Hotel Management
170
9.2 Ajouter/modifier l'ensemble de données du person-
nel.
➤ Sélectionnez Employee Records (données du personnel) dans le menu
principal.
➤ Pour créer un ensemble de données, cliquez sur le symbole .
➤ Pour modifier un ensemble de données, cliquez sur le symbole .
➤ Entrez un nom d'employé dans la zone de texte de nom (Name).
I
REMARQUE
L'entrée de données supplémentaires n'est pas nécessaire. Pour
les tâches de gestion, une description détaillée peut être judi-
cieuse.

FR
Hotel Management Gérer les données du personnel
171
➤ Le cas échéant, entrez des données supplémentaires sur l'employé dans
les zones de texte :
– NIF : numéro d'identification fiscale
– Passport : passeport
– Gender : sexe
– Date of birth : date de naissance
– Telephone : numéro de téléphone
– Mail : adresse e-mail
– Address : rue et numéro
– City : ville
– Postal code : code postal
– Province : province/état
– Country : pays
– Occupation : métier
– Contract : contrat
– Comments : commentaires
➤ Confirmez les entrées avec Accept (valider).
✓ L'employé est affiché dans la liste.

FR
Gérer les données du personnel Hotel Management
172
9.3 Attribuer des cartes à des employés
Chaque employé a besoin d'une carte pour accomplir ses tâches.
I
➤ Sélectionnez Employee Records (données du personnel) dans le menu
principal.
➤ Sélectionnez l'employé dans la liste.
➤ Cliquez sur la flèche Card Data (données de cartes).
REMARQUE
Une carte d'accès perdue représente un risque pour la sécurité.
Mettez les cartes d'accès perdues immédiatement sur liste noire
(chapitre « Gérer la liste noire », page 202).

FR
Hotel Management Gérer les données du personnel
173
➤ En dessous de l'ensemble de données, les boutons suivants sont
disponibles :
– Add/modify card : ajouter/modifier une carte.
– Add card to blacklist : ajouter une carte à la liste noire
– Show pass operations : afficher l'utilisation
➤ Cliquez sur le bouton Add/modify card (ajouter/modifier une carte).

FR
Gérer les données du personnel Hotel Management
174
➤ Entrez les données requises :
– Type of card : type de carte (voir tableau à la page 174)
– Valid dates : durée de validité de la carte en jours
– Valid from date : début de la validité (jour)
– Valid from time : début de la validité (heure)
– Valid until date : fin de la validité (jour)
– Valid until time : fin de la validité (heure)
– Override privacy : les portes peuvent être ouvertes bien que le para-
mètre de confidentialité de la serrure soit réglé.
– Permanent opening : toujours ouvert
– Employee shift : horaires du personnel
– Pass control : nombre de pièces visitées
– Acces point 1 – 4 : points d'accès 1 à 4
– Access area 1 : zone d'accès 1
➤ Confirmez vos entrées avec Create card (créer carte).
➤ Suivez les instructions sur l'écran.
Type de carte Description
Cleaning Le type de carte Cleaning (nettoyage) est prévu pour le per-
sonnel de nettoyage. La caractéristique principale de ce type
de carte réside dans le fait que l'accès à tous les points
d'accès d'une zone est autorisé.
Staff with entry
control
Le type de carte Staff with entry control (employés avec
contrôle d'accès) est prévu pour les employés comme p. ex. le
personnel de maintenance, les serveurs et les cuisiniers. La
caractéristique principale de ce type de carte réside dans le fait
que l'accès à tous les points d'accès d'une zone est autorisé.
Staff with access
to all areas
Le type de carte Staff with access to all areas (employés
avec accès à toutes les zones) est prévu pour les employés
avec des droits d'entrée à toutes les zones de l'hôtel. La carac-
téristique principale de ce type de carte est l'autorisation
d'accès à tous les points d'accès auquels les horaires du per-
sonnel ont pu être attribués.
Master Le type de carte Master (chefs) est prévu pour les niveaux hié-
rarchiques supérieurs tels que les managers par exemple. La
caractéristique principale de ce type de carte réside dans le fait
que l'accès à tous les points d'accès est autorisé à tout
moment, et ce, jusqu'à expiration de la carte.

FR
Hotel Management Ajouter/modifier des données client
175
10 Ajouter/modifier des données client
Avec la fonction « données client », vous pouvez enregistrer les informations
des clients qui séjournent dans votre hôtel. Lors des prochains séjours du
client, vous pouvez accéder à ces données et n'avez donc pas à créer un
nouvel ensemble de données.
➤ Sélectionnez Client Records (données client) dans le menu principal.
➤ Pour créer un ensemble de données, cliquez sur le symbole .
➤ Pour modifier un ensemble de données, cliquez sur le symbole .
Symbole Nom Description
Add client Ajouter un nouveau client
Edit client Modifier un client
Delete client Supprimer un client

FR
Ajouter/modifier des données client Hotel Management
176
➤ Entrez les données requises :
– Nom : Nom
– NIF : numéro d'identification fiscale
– Passport : passeport
– Telephone : numéro de téléphone
– Mail : adresse e-mail
– Address : rue et numéro
– City : ville
– Postal code : code postal
– Province : province/état
– Country : pays
– Comments : commentaires
➤ Cliquez sur l'image dans le coin en haut à gauche lorsque vous souhaitez
ajouter la photo du client.
I
➤ Confirmez les entrées avec Accept (valider).
REMARQUE
Les formats photo acceptés sont BMP, JPEG ou PNG.

FR
Hotel Management Effectuer le check-in
177
11 Effectuer le check-in
➤ Sélectionnez Occupation – Check-in (occupation - check-in) dans le
menu principal.
Symbole Nom Description
Add
check-in
Ajouter un nouveau check-in
Edit
check-in
Modifier un check-in
Delete
check-in
Supprimer un check-in
Define client
schedule
Créer, modifier et supprimer les horaires d'un client
Define meal
plans
Créer, modifier et supprimer la formule d'hébergement

FR
Effectuer le check-in Hotel Management
178
11.1 Ajouter Check-in
➤ Sélectionnez Occupation – Check-in (occupation - check-in) dans le
menu principal.
➤ Pour créer un ensemble de données, cliquez sur le symbole .
➤ Pour modifier un ensemble de données, cliquez sur le symbole (cha-
pitre « Ajouter/modifier des données client », page 175).
➤ Uniquement nouveaux clients : Cliquez sur le symbole et créez le
nouveau client (chapitre « Ajouter/modifier des données client »,
page 175).
✓ Le nouveau client apparaît désormais dans la liste.
➤ Entrez le nom du client dans la zone de texte en haut à droite et cliquez
sur la loupe pour affiner la recherche.
➤ Sélectionnez le nom du client dans la liste.
➤ Confirmez les entrées avec Accept (valider).
Symbole Nom Description
Add client Ajouter un nouveau client
Edit client Modifier un client
Delete client Supprimer un client

FR
Hotel Management Effectuer le check-in
179
➤ Cliquez sur le symbole pour adapter les données du client (chapitre
« Ajouter/modifier des données client », page 175).
➤ Cliquez sur le symbole pour créer une carte d'accès pour un client.
Symbole Nom Description
Modify client Modifier les données client
Add/modify
card
Créer une carte client

FR
Effectuer le check-in Hotel Management
180
➤ Entrez les données requises :
– Valid dates : durée de validité de la carte en jours
– Valid from date : début de la validité (jour)
– Valid from time : début de la validité (heure)
– Valid until date : fin de la validité (jour)
– Valid until time : fin de la validité (heure)
– Meal plan : formule d'hébergement p. ex. demie pension, pension
complète
– Main room : chambre principale sur laquelle le check-in est enregistré
– Override privacy : les portes peuvent être ouvertes bien que le para-
mètre de confidentialité de la serrure soit réglé.
– Configuration of secondary rooms : chambre secondaire du client, p.
ex . pour sa famille
– Configuration of accesses : accès (au choix avec horaire), p. ex. pour
la piscine
– Configuration of accesses with sold time : accès avec plage horaire
(au choix avec horaire) dont l'utilisation est payante
– Configuration of areas : accès à des zones (au choix avec horaire),
p. ex. pour le parking
I
➤ Confirmez vos entrées avec Create card (créer carte).
➤ Suivez les instructions sur l'écran.
REMARQUE
Vous pouvez autoriser au client jusqu'à onze points d'accès maxi-
mum, en incluant sa chambre. Sur ces onze points d'accès, au
maximum deux d'entre eux peuvent être avec plage horaire.
Indépendamment de ce fait, vous pouvez autoriser au client
l'accès à deux zones maximum.

FR
Hotel Management Effectuer le check-in
181
✓ Le nouveau check-in est affiché dans la liste avec tous les autres check-
ins valides actuellement.
✓ En dessous de l'ensemble de données, le boutons suivant est disponible :
– Add card to blacklist : ajouter une carte à la liste noire
I
11.2 Modifier le check-in
➤ Sélectionnez Occupation – Check-in (occupation – check-in) dans le
menu principal.
➤ Pour modifier un ensemble de données, cliquez sur le symbole .
REMARQUE
Pour créer d'autres cartes d'accès pour le client, utilisez la fonc-
tion Modifier check-in (chapitre « Modifier le check-in »,
page 181).

FR
Effectuer le check-in Hotel Management
182
➤ Cliquez sur le symbole pour adapter les données du client (chapitre
« Ajouter/modifier des données client », page 175).
➤ Cliquez sur le symbole pour créer une carte d'accès pour un client.
➤ Procédez à toutes les modifications souhaitées.
➤ Confirmez vos entrées avec Create card (créer carte).
➤ Suivez les instructions sur l'écran.
Symbole Nom Description
Modify client Modifier les données client
Add/modify
card
Créer une carte client

FR
Hotel Management Effectuer le check-in
183
11.3 Définir les horaires client
Par les horaires client, vous pouvez restreindre dans le temps l'entrée aux
points d'accès et aux zones.
I
➤ Sélectionnez Occupation – Check-in (occupation – check-in) dans le
menu principal.
➤ Cliquez sur le symbole .
➤ Pour créer un ensemble de données, cliquez sur le symbole .
➤ Pour modifier un ensemble de données, cliquez sur le symbole .
REMARQUE
Les horaires fonctionnent uniquement aux points d'accès équipés
des versions 2.0 et plus du micrologiciel.
Symbole Nom Description
Add
schedule
Ajouter un nouvel horaire
Edit
schedule
Modifier un horaire
Delete
schedule
Supprimer un horaire

FR
Effectuer le check-in Hotel Management
184
➤ Entrez les données requises :
– Nom : nom de l'horaire
– Start of margin 1 : début de la plage horaire 1 (heure)
– End of margin 1 : fin de la plage horaire 1 (heure)
– Start of margin 2 : début de la plage horaire 2 (heure)
– End of margin 2 : fin de la plage horaire 2 (heure)
– Applicable dates : jours de la semaines utilisables pour l'horaire (lundi
à dimanche)
I
➤ Confirmez les entrées avec Accept (valider).
REMARQUE
Si vous souhaitez régler une durée uniquement, sélectionnez les
moments de début et de fin de telle façon que la durée corres-
ponde à l'horaire.

FR
Hotel Management Effectuer le check-in
185
✓ Le nouvel horaire apparaît dans la liste.
➤ Cliquez sur Exit (quitter) pour revenir à la fenêtre Check-in (check-in).

FR
Effectuer le check-in Hotel Management
186
11.4 Définir la formule d'hébergement
➤ Sélectionnez Occupation – Check-in (occupation – check-in) dans le
menu principal.
➤ Cliquez sur le symbole .
➤ Pour créer un ensemble de données, cliquez sur le symbole .
➤ Pour modifier un ensemble de données, cliquez sur le symbole .
➤ Entrez un nom pour la formule d'hébergement.
➤ La nouvelle formule d'hébergement est affichée dans la liste.
➤ Cliquez sur Exit (quitter) pour revenir à la fenêtre Check-in (check-in).
Symbole Nom Description
Add meal
plan
Ajouter une nouvelle formule d'hébergement
Edit meal
plan
Modifier une formule d'hébergement
Delete meal
plan
Supprimer une formule d'hébergement

FR
Hotel Management Création rapide de cartes client
187
12 Création rapide de cartes client
➤ Sélectionnez Management – Program/read cards (gestion – program-
mer/lire des cartes) dans le menu principal.
I
➤ Entrez les données requises :
– Valid dates : durée de validité de la carte en jours
– Valid from date : début de la validité (jour)
– Valid until date : fin de la validité (jour)
– Meal plan : formule d'hébergement p. ex. demie pension, pension
complète
– Room : chambres réservées
– Override privacy : les portes peuvent être ouvertes bien que le para-
mètre de confidentialité de la serrure soit réglé.
– Configuration of accesses : accès (au choix avec horaire), p. ex. pour
la piscine
➤ Confirmez vos entrées avec Create card (créer carte).
➤ Suivez les instructions sur l'écran.
➤ Cliquez sur Exit (quitter) pour revenir à la fenêtre principale.
REMARQUE
Utilisez la création rapide des cartes client dans des cas particu-
liers uniquement. En règle générale, utilisez plutôt la fonction
Effectuer un check-in (chapitre « Effectuer le check-in »,
page 177).

FR
Lecture de cartes Hotel Management
188
13 Lecture de cartes
➤ Sélectionnez Management – Program/read cards (gestion – program-
mer/lire des cartes) dans le menu principal.
➤ Cliquez sur le bouton Read card (lire carte).
➤ Suivez les instructions sur l'écran.
✓ Les informations de la carte lue apparaissent dans une nouvelle fenêtre.
➤ Cliquez sur Exit (quitter) pour revenir à la fenêtre Program/read cards
(programmer/lire des cartes).

FR
Hotel Management Aperçu mensuel
189
14 Aperçu mensuel
➤ Sélectionnez Occupation – Check-in (occupation – aperçu mensuel)
dans le menu principal.
L'aperçu mensuel affiche par défaut le mois actuel. Chaque chambre peut
prendre chaque jour un des statuts suivants :
Symbole Nom Description
Calendar Sélectionnez un autre mois
Cou-
leur
Inscription Signification
Vert Free room La chambre est libre et peut être réservée par des
clients.
Rouge Occupied room La chambre est occupée. Le client a fait son check-in.
La chambre ne peut pas être réservée.
Jaune Reserved room La chambre est réservée. Le client n'a pas fait son
check-in. La chambre ne peut pas être réservée. (Affi-
chage avec le module supplémentaire « Planning
Module » uniquement.)
Bleu Blocked room La chambre est bloquée. La chambre ne peut pas être
réservée. (Affichage avec le module supplémentaire
« Planning Module » uniquement.)

FR
Aperçu mensuel Hotel Management
190
I
14.1 Afficher un autre mois
➤ Cliquez sur le symbole .
✓ Une fenêtre s'ouvre dans laquelle le mois et l'année peuvent être sélec-
tionnés.
➤ Sélectionnez le mois et l'année souhaités à partir des deux menus dérou-
lants.
➤ Confirmez les entrées avec Accept (valider).
✓ Le mois correspondant apparaît dans l'aperçu mensuel.
REMARQUE
Le changement de mois s'effectue dans l'aperçu mensuel non
pas à 24 heures mais à 12 heures le jour suivant. Ce réglage
d'aperçu permet de tenir compte du fait que le check-out est
généralement effectué dans la matinée. Une chambre dont l'affi-
chage indique occupée du 01.10 au 03.10 est donc occupée du
01.10 à 12 heures au 04.10 à 12 heures.

FR
Hotel Management Charger des données dans le système.
191
15 Charger des données dans le
système.
15.1 Télécharger les données d'un point d'accès
Avant de pouvoir télécharger les données d'un point d'accès, vous devez
tout d'abord créer une carte de téléchargement de données.
➤ Sélectionnez Management – Generate data download card (gestion –
créer une carte de téléchargement de données) dans le menu principal.
➤ Suivez les instructions sur l'écran.
✓ La carte de téléchargement de données est créée.
➤ Insérez la carte de téléchargement de données dans la serrure à partir de
laquelle vous souhaitez télécharger des données.
➤ Retirez la carte de téléchargement de données de la serrure une fois le
processus de téléchargement terminé.
I
REMARQUE
Vous devez répéter l'opération complète pour chaque serrure à
partir desquelles vous souhaitez télécharger des données.
Gardez la carte de téléchargement de données dans un lieu sûr
étant donné qu'elle contient des informations importantes sur le
système.

FR
Charger des données dans le système. Hotel Management
192
15.2 Charger des données de carte dans le système
➤ Sélectionnez Data – Download card data (données – télécharger des
données de carte) dans le menu principal.
➤ Insérez la carte de téléchargement de données dans le lecteur de carte.
✓ Les données sont copiées dans la base de données du logiciel.

FR
Hotel Management Afficher les accès
193
16 Afficher les accès
I
➤ Sélectionnez Data – See data operations (données – voir les opérations
de données) dans le menu principal.
16.1 Filtrer selon le numéro d'accès
➤ Cliquez sur le symbole .
REMARQUE
Plus vous actualisez la liste régulièrement, plus les données à
votre disposition sont nombreuses. Actualisez la liste en téléchar-
geant régulièrement les données de tous les points d'accès et en
les copiant dans la base de données du système (chapitre
« Charger des données dans le système. », page 191 et chapitre
« Charger des données de carte dans le système », page 192).
Symbole Nom Description
Filter by
access
number
Filtrer selon le numéro d'accès
Filter by
date
Filtrer selon la date d'accès
Delete by
dates
Supprimer l'historique des accès

FR
Afficher les accès Hotel Management
194
➤ Entrez le numéro de début et de fin des points d'accès à afficher.
➤ Confirmez les entrées avec Accept (valider).
✓ Les accès des points d'accès souhaités sont affichés.
16.2 Filtrer selon la date d'accès
➤ Cliquez sur le symbole .
➤ Entrez la date de début et la date de fin de la période à afficher.
➤ Confirmez les entrées avec Accept (valider).
✓ Les accès de la période souhaitée sont affichés.

FR
Hotel Management Afficher les accès
195
16.3 Supprimer l'historique des accès
Vous pouvez supprimer une partie de l'historique des accès de la base de
données.
I
➤ Cliquez sur le symbole .
➤ Entrez la date de début et la date de fin de la période à supprimer.
➤ Confirmez les entrées avec Accept (valider).
✓ Les accès de la période choisie sont supprimés définitivement.
REMARQUE
Une fois supprimées, les données ne peuvent plus être restau-
rées.

FR
Programmation de la serrure de porte Hotel Management
196
17 Programmation de la serrure de porte
Afin de programmer une serrure de porte, il faut une carte de programmation.
Avec la carte de programmation, vous attribuez un numéro à un point
d'accès et réglez la date et l'heure.
I
➤ Sélectionnez Management – Generate programming card (gestion –
créer une carte de programmation) dans le menu principal.
➤ Entrez le numéro de la chambre ou du point d'accès pour lequel la carte
de programmation doit être valable.
➤ Confirmez l'entrée avec Create card (créer carte).
➤ Suivez les instructions sur l'écran.
➤ Insérez la carte de programmation dans la serrure que vous voulez pro-
grammer.
➤ Retirez la carte de programmation de la serrure une fois le processus de
programmation terminé.
I
REMARQUE
L'heure et le numéro d'une serrure doivent être réglés lors de la
première installation et après chaque changement de piles.
Sur la carte de programmation sont enregistrés la date et l'heure
de l'ordinateur avec lequel les cartes sont créées. Assurez-vous
que la date sur votre ordinateur est correcte.
REMARQUE
Une carte de programmation devient invalide après la première
utilisation. Cela permet d'éviter que le même numéro de chambre
soit attribué deux fois.

FR
Hotel Management Créer des cartes spéciales
197
18 Créer des cartes spéciales
I
18.1 Créer une carte d'urgence
La carte d'urgence est une carte d'accès qui est toujours valide pour le point
d'accès concerné. Les cartes d'urgence doivent être utilisées uniquement
dans les cas où les cartes régulières ne peuvent pas être utilisées, p. ex.
lorsque le système informatique est en panne et que des clients attendent
pour aller dans leur chambre.
➤ Sélectionnez Hotel Data (données de l'hôtel) dans le menu principal.
➤ Sélectionnez un access point (point d'accès).
✓ Dans le moitié droite de l'ensemble de données, les boutons suivants
sont disponibles :
– Create card : créer carte
– Add card to blacklist : ajouter une carte à la liste noire
➤ Cliquez sur Create card (créer carte).
➤ Insérez la carte d'urgence dans le lecteur de carte sur le PC.
✓ La carte d'urgence est prête.
REMARQUE
Une carte d'accès perdue représente un risque pour la sécurité.
Mettez les cartes d'accès perdues immédiatement sur liste noire
(chapitre « Gérer la liste noire », page 202).

FR
Créer des cartes spéciales Hotel Management
198
18.2 Créer une carte permanente
Avec la carte permanente, vous pouvez ouvrir n'importe quel point d'accès
dans le système de façon permanente.
I
➤ Sélectionnez Management – Generate free access card (gestion –
créer une carte permanente) dans le menu principal.
➤ Cliquez sur le symbole .
➤ Suivez les instructions sur l'écran.
REMARQUE
La carte permanente peut être utilisée sur chaque serrure dans le
système. Pour les pièces ouvertes de façon permanente, une
carte d'accès n'est pas nécessaire. Utilisez la carte permanente
avec prudence. Gardez la carte permanente dans un lieu sûr.
Symbole Nom Description
Create free
access card
Créer une nouvelle carte permanente
Delete free
access card
Supprimer une carte permanente de la banque de don-
nées
Add card to
the blacklist
Ajouter la carte permanente sélectionnée à la liste noire

FR
Hotel Management Créer des cartes spéciales
199
18.3 Créer une carte de verrouillage
Avec la carte de verrouillage, vous pouvez verrouiller n'importe quel point
d'accès dans le système de façon permanente.
I
➤ Sélectionnez Management – Generate locking card (gestion – créer
une carte de verrouillage) dans le menu principal.
➤ Suivez les instructions sur l'écran.
REMARQUE
La carte de verrouillage peut être utilisée sur chaque serrure dans
le système. Utilisez la carte de verrouillage avec prudence. Gar-
dez la carte de verrouillage dans un lieu sûr.

FR
Créer des cartes spéciales Hotel Management
200
18.4 Créer une carte de courtoisie
La « carte de courtoisie » s'utilise en combinaison avec un dispositif d'éco-
nomie d'énergie. Le lecteur de carte du dispositif d'économie d'énergie lit la
carte d'accès insérée et régule la consommation d'énergie en conséquence.
Par exemple, la lumière est allumée pour le personnel de nettoyage alors
que la climatisation ou le chauffage sont allumés en plus pour les clients.
Après que la carte soit retirée du dispositif d'économie d'énergie, le courant
est coupé soit tout de suite soit après une durée réglable.
Avec la carte de courtoisie, la temporisation de la commutation peut être
réglée.
➤ Sélectionnez Energy economizer – Generate courtesy card (économie
d'énergie – créer une carte de courtoisie) dans le menu principal.
➤ Entrez la durée souhaitée en secondes.
➤ Confirmez l'entrée avec Create card (créer carte).
➤ Suivez les instructions sur l'écran.
I
REMARQUE
La temporisation de la commutation peut être réglée pour une
durée de 0 à 9999 secondes.
Le réglage par défaut des dispositifs d'économie d'énergie est de
cinq secondes.

FR
Hotel Management Effectuer/restaurer des sauvegardes
201
19 Effectuer/restaurer des sauvegardes
➤ Sélectionnez Backup (sauvegarder) dans le menu principal.
19.1 Créer une sauvegarde
➤ Sélectionnez Backup (sauvegarder) dans le menu principal.
➤ Sélectionnez le dossier dans lequel la sauvegarde doit être enregistrée
Selection of data destination/source (sélection du dossier source/de
destination) dans la sous-fenêtre.
➤ Cliquez sur Generate backup (créer une sauvegarde).
19.2 Restaurer une sauvegarde
➤ Sélectionnez Backup (sauvegarder) dans le menu principal.
➤ Sélectionnez le dossier à restaurer dans lequel la sauvegarde est enre-
gistrée.
➤ Cliquez sur Restore backup (restaurer une sauvegarde).

FR
Gérer la liste noire Hotel Management
202
20 Gérer la liste noire
Dans la liste noire, les cartes bloquées sont enregistrées. Les cartes enre-
gistrées dans la liste noire sont rejetées de tous les points d'accès.
I
20.1 Ajouter des cartes à la liste noire
➤ Sélectionnez la zone dans laquelle vous souhaitez bloquer une carte.
➤ Cliquez sur le bouton Add card to the blacklist (ajouter carte à la liste
noire) ou sur le symbole .
➤ Confirmez l'entrée avec Accept (valider).
✓ La carte est affichée dans la zone Management – Blacklist (gestion –
liste noire).
REMARQUE
Les cartes qui sont affichées dans la liste noire ne sont pas auto-
matiquement bloquées à tous les points d'accès. Assurez-vous
que vous utilisez la carte de liste noire à tous les points d'accès.

FR
Hotel Management Gérer la liste noire
203
20.2 Voir les cartes sur la liste noire
➤ Sélectionnez Management – Blacklist (gestion – liste noire) dans le
menu principal.
Dans le tableau supérieur sont affichées toutes les cartes qui ont été ajou-
tées à la liste noire.
Dans le tableau supérieur sont affichées toutes les cartes qui ont été enre-
gistrées sur une carte de liste noire.
Symbole Nom Description
Create
blacklist
card
Créer une carte de liste noire
Delete
blacklist
entry
Supprimer une entrée de liste noire de la banque de
données

FR
Gérer la liste noire Hotel Management
204
20.3 Créer une carte de liste noire
➤ Sélectionnez Management – Blacklist (gestion – liste noire) dans le
menu principal.
➤ Cliquez sur le symbole .
➤ Suivez les instructions sur l'écran.
✓ Le contenu des deux tableaux dans l'aperçu Blacklist est à présent iden-
tique.
I
REMARQUE
Les cartes qui sont affichées dans la liste noire ne sont pas auto-
matiquement bloquées à tous les points d'accès. Assurez-vous
que vous utilisez la carte de liste noire à tous les points d'accès.

FR
Hotel Management Gérer le module PMS
205
21 Gérer le module PMS
Le module PMS est utilisé pour créer des cartes pour les serrures de porte
et les points d'accès d'un autre système de gestion du nettoyage, le Property
Management System (PMS). Les processus de travail peuvent ainsi être uni-
formisés et les doublons de données peuvent être évités.
➤ Sélectionnez PMS (PMS) dans le menu principal.
I
Les cartes qui sont créées à l'aide d'un autre système de Property Manage-
ment par le biais du module PMS sont soumises aux restrictions suivantes :
Il est possible de créer uniquement des cartes client.
Il n'est pas possible d'attribuer des zones d'accès à des cartes client.
Il n'est pas possible d'attribuer des zones avec plage horaire dont l'utilisa-
tion est payante à des cartes client.
Symbole Nom Description
Add authori-
zation
Ajouter une nouvelle autorisation
Edit authori-
zation
Modifier une autorisation
Delete
authoriza-
tion
Supprimer une autorisation
REMARQUE
Lorsque le module PMS est utilisé, toutes les fonctions du logiciel
Hotel Management ne peuvent pas être exploitées.

FR
Gérer le module PMS Hotel Management
206
Lors de la copie de cartes, si le client PMS n'envoie pas exactement les
mêmes données, les autres cartes client pour cette chambre deviennent
invalides.
Lors de la création de cartes client, si le client PMS ne transmet pas
l'heure du check-in et l'heure du check-out, les autres cartes client pour
cette chambre deviennent invalides.
Lorsque le protocole 2 est utilisé, l'heure est transmise en heures unique-
ment. Des problèmes avec les check-ins et les check-outs peuvent ainsi
survenir.

FR
Hotel Management Gérer le module PMS
207
21.1 Configurer le module PMS
➤ Sélectionnez PMS (PMS) dans le menu principal.
➤ Cliquez sur le bouton Edit general configuration.
➤ Entrez les données requises :
– PMS control : Si PMS et le logiciel Hotel Management se trouvent sur
le même ordinateur, réglez sur Local (local), sinon réglez sur Remote
(commande à distance).
– IP address : adresse IP de l'ordinateur sur lequel PMS est installé.
– Port : port de communication pour les demandes client de PMS.
– Terminal number : numéro d'identification pour le lecteur/éditeur de
carte.
– Protocol : Le protocole de transmission utilisé pour la communication
entre PMS et le logiciel Hotel Management (voir tableau ci-dessous),
➤ Confirmez l'entrée avec Ok (Ok).
✓ Les réglages modifiés sont affichés dans la fenêtre en haut à gauche.
Fonctionnement Protocole 1 Protocole 2
Nombre d'autorisations 20 8
Heures de transmission Heure exacte en heures (12:30 devient
12:00)

FR
Gérer le module PMS Hotel Management
208
21.2 Ajouter/modifier des autorisations
Lors de la création de cartes client, les autorisations sont enregistrées auto-
matiquement sur la carte client par le biais d'un client PMS. Selon le proto-
cole de transmission choisi, jusqu'à 20 autorisations peuvent être
enregistrées sur les cartes client.
➤ Sélectionnez PMS (PMS) dans le menu principal.
➤ Pour créer un ensemble de données, cliquez sur le symbole .
➤ Pour modifier un ensemble de données, cliquez sur le symbole .
➤ Entrez les données requises :
– Number : numéro d'identification de l'autorisation.
– Type : le type d'autorisation peut être soit Access (accès) ou Public
area (lieu public).
– Access : accès ou lieu public
➤ Confirmez l'entrée avec Accept (valider).
✓ L'autorisation apparaît dans le tableau dans la fenêtre PMS configura-
tion (configuration PMS).

FR
Hotel Management Gérer le module PMS
209
21.3 Établir une connexion PMS
I
➤ Sélectionnez PMS – Start PMS connection (PMS - démarrer connexion
PMS) dans le menu principal.
✓ Le logiciel Hotel Management peut éditer des demandes du client PMS.
➤ Pour interrompre la connexion PMS, cliquez sur Exit (quitter).
REMARQUE
Après avoir établi une connexion PMS, le logiciel Hotel Manage-
ment travaille exclusivement comme serveur pour des demandes
PMS. Si vous souhaitez travailler avec le logiciel Hotel Manage-
ment, la connexion PMS doit être interrompue.

ES
Hotel Management
210
Antes de poner en funcionamiento el producto, lea atentamente estas
instrucciones y consérvelas para futuras consultas. En caso de vender
o entregar el producto a otra persona, entregue también estas instruc-
ciones.
Índice
1 Requisitos del sistema . . . . . . . . . . . . . . . . . . . . . . . . . . . . . . . .213
2 Accesorios . . . . . . . . . . . . . . . . . . . . . . . . . . . . . . . . . . . . . . . . . . 213
3Instalación . . . . . . . . . . . . . . . . . . . . . . . . . . . . . . . . . . . . . . . . . .213
4 Primer inicio del programa . . . . . . . . . . . . . . . . . . . . . . . . . . . . .214
5 Indicaciones generales . . . . . . . . . . . . . . . . . . . . . . . . . . . . . . . . 216
5.1 Buscar conjunto de datos . . . . . . . . . . . . . . . . . . . . . . . . . . 216
5.2 Editar conjunto de datos . . . . . . . . . . . . . . . . . . . . . . . . . . .216
5.3 Borrar conjuntos de datos . . . . . . . . . . . . . . . . . . . . . . . . . . 217
5.4 Salir de la ventana sin guardar las entradas realizadas . . .217
5.5 Iniciar sesión . . . . . . . . . . . . . . . . . . . . . . . . . . . . . . . . . . . .218
5.6 Cambio de usuario. . . . . . . . . . . . . . . . . . . . . . . . . . . . . . . .219
5.7 La ventana principal. . . . . . . . . . . . . . . . . . . . . . . . . . . . . . . 220
5.8 Salir de programa . . . . . . . . . . . . . . . . . . . . . . . . . . . . . . . .220
6 Configurar el software. . . . . . . . . . . . . . . . . . . . . . . . . . . . . . . . .221
6.1 Seleccionar idioma . . . . . . . . . . . . . . . . . . . . . . . . . . . . . . . 221
6.2 Utilizar código de actualización . . . . . . . . . . . . . . . . . . . . . . 222
6.3 Configuración de módulos adicionales . . . . . . . . . . . . . . . .223
7 Administrar usuarios. . . . . . . . . . . . . . . . . . . . . . . . . . . . . . . . . . 224
7.1 Crear/editar tipo de usuario. . . . . . . . . . . . . . . . . . . . . . . . . 225
7.2 Crear/editar usuario. . . . . . . . . . . . . . . . . . . . . . . . . . . . . . .227
8 Administrar datos del hotel . . . . . . . . . . . . . . . . . . . . . . . . . . . . 229
8.1 Filtrar por áreas . . . . . . . . . . . . . . . . . . . . . . . . . . . . . . . . . .230
8.2 Agrupar por accesos y habitaciones . . . . . . . . . . . . . . . . . . 231
8.3 Definir tipo de habitación . . . . . . . . . . . . . . . . . . . . . . . . . . .232
8.4 Añadir/editar puntos de acceso. . . . . . . . . . . . . . . . . . . . . .233
8.5 Definir áreas . . . . . . . . . . . . . . . . . . . . . . . . . . . . . . . . . . . .235

ES
Hotel Management
211
9 Administrar datos del personal . . . . . . . . . . . . . . . . . . . . . . . . .237
9.1 Definir los horarios del personal . . . . . . . . . . . . . . . . . . . . . 238
9.2 Añadir/editar conjunto de datos del personal . . . . . . . . . . .241
9.3 Asignar tarjetas a empleados . . . . . . . . . . . . . . . . . . . . . . .243
10 Añadir/editar conjunto de datos de clientes. . . . . . . . . . . . . . .246
11 Registrar a los clientes . . . . . . . . . . . . . . . . . . . . . . . . . . . . . . . .248
11.1 Añadir registro . . . . . . . . . . . . . . . . . . . . . . . . . . . . . . . . . . .249
11.2 Editar registro . . . . . . . . . . . . . . . . . . . . . . . . . . . . . . . . . . .252
11.3 Definir horarios del cliente . . . . . . . . . . . . . . . . . . . . . . . . . .254
11.4 Definir régimen de pensión . . . . . . . . . . . . . . . . . . . . . . . . .257
12 Crear rápidamente tarjetas de cliente . . . . . . . . . . . . . . . . . . . .258
13 Leer tarjetas . . . . . . . . . . . . . . . . . . . . . . . . . . . . . . . . . . . . . . . . . 259
14 Resumen del mes . . . . . . . . . . . . . . . . . . . . . . . . . . . . . . . . . . . .260
14.1 Mostrar otro mes . . . . . . . . . . . . . . . . . . . . . . . . . . . . . . . . .261
15 Cargar datos en el sistema . . . . . . . . . . . . . . . . . . . . . . . . . . . . .262
15.1 Descargar datos de un punto de acceso. . . . . . . . . . . . . . . 262
15.2 Cargar datos de tarjetas en el sistema . . . . . . . . . . . . . . . . 262
16 Mostrar accesos. . . . . . . . . . . . . . . . . . . . . . . . . . . . . . . . . . . . . .263
16.1 Filtrar por número de acceso. . . . . . . . . . . . . . . . . . . . . . . .264
16.2 Filtrar por fecha de acceso . . . . . . . . . . . . . . . . . . . . . . . . .264
16.3 Borrar la secuencia de accesos. . . . . . . . . . . . . . . . . . . . . . 265
17 Programar la cerradura de la puerta . . . . . . . . . . . . . . . . . . . . .266
18 Crear tarjetas especiales. . . . . . . . . . . . . . . . . . . . . . . . . . . . . . .267
18.1 Crear tarjetas para casos de emergencia . . . . . . . . . . . . . . 267
18.2 Crear tarjeta de libre acceso . . . . . . . . . . . . . . . . . . . . . . . .268
18.3 Crear tarjeta de bloqueo . . . . . . . . . . . . . . . . . . . . . . . . . . . 269
18.4 Crear tarjeta de tiempo de confort. . . . . . . . . . . . . . . . . . . .270
19 Crear/restaurar copias de seguridad. . . . . . . . . . . . . . . . . . . . . 271
19.1 Crear copia de seguridad . . . . . . . . . . . . . . . . . . . . . . . . . . 271
19.2 Restaurar copia de seguridad . . . . . . . . . . . . . . . . . . . . . . .271
20 Administrar lista negra . . . . . . . . . . . . . . . . . . . . . . . . . . . . . . . . 272
20.1 Añadir tarjeta a la lista negra. . . . . . . . . . . . . . . . . . . . . . . . 272
20.2 Ver tarjetas en la lista negra . . . . . . . . . . . . . . . . . . . . . . . .273
20.3 Crear tarjeta de la lista negra . . . . . . . . . . . . . . . . . . . . . . .274

ES
Hotel Management
212
21 Administrar el módulo PMS . . . . . . . . . . . . . . . . . . . . . . . . . . . .275
21.1 Configurar módulo PMS . . . . . . . . . . . . . . . . . . . . . . . . . . . 277
21.2 Añadir/editar autorizaciones . . . . . . . . . . . . . . . . . . . . . . . .278
21.3 Establecer conexión PMS . . . . . . . . . . . . . . . . . . . . . . . . . . 279

ES
Hotel Management Requisitos del sistema
213
1 Requisitos del sistema
Requisitos mínimos:
Sistema operativo: Windows XP Service Pack 3
Resolución de la pantalla: 1024 x 768
Procesador: Intel Pentium 4 de 2 GHz o compatibla
Memoria de trabajo: 1 GB RAM
Espacio libre en el disco duro: 1 GB
Puertos: 1 USB 2.0
2 Accesorios
Disponibles como accesorios (no incluidos en el volumen de entrega):
3 Instalación
➤ Conecte el lector de tarjetas a un conector USB libre.
➤ Coloque el soporte de datos con el software Hotel Management.
✓ Se abre el programa de instalación.
➤ Siga los pasos que se indican en el programa de instalación.
Denominación Número de artículo
Smart Card Energy saver 9106600715
Smart Card Access Control 9106600713
Smart Card Encoder 9106600722
Smart Key Card 9106600724
RFID Access Control 9106600714
RFID Energy saver 9106600716
RFID Encoder 9106600723
RFID Key Card 9106600725

ES
Primer inicio del programa Hotel Management
214
4 Primer inicio del programa
Cuando se inicia por primera vez el programa es necesario configurar el soft-
ware Hotel Management.
➤ Abra el software Hotel Management.
➤ Seleccione en la lista el idioma que desee y confirme con Accept (Acep-
tar).
✓ El programa reinicia el software Hotel Management con los nuevos ajus-
tes configurados.
➤ Introduzca el código de instalación y confirme con Aceptar.
I
NOTA
El fabricante le proporcionará el código de instalación.

ES
Hotel Management Primer inicio del programa
215
➤ Introduzca la tarjeta de inicialización en el lector de tarjetas.
➤ Siga las instrucciones que aparecen en pantalla.
✓ Se abre la ventana principal del software Hotel Management.

ES
Indicaciones generales Hotel Management
216
5 Indicaciones generales
Muchas ventanas contienen una barra de iconos en el margen superior. Los
iconos cambian según el contexto. El significado de estos iconos se explica
debajo de la figura de la ventana correspondiente.
Muchas ventanas contienen listas. Para obtener información detallada sobre
un elemento determinado de la lista, haga clic en el elemento en cuestión y
se desplegará un cuadro informativo. Por ejemplo, haciendo clic sobre un
tipo de usuario se pueden ver las autorizaciones válidas para ese tipo de
usuario. Si se hace clic sobre otro elemento de la lista, desaparece el cuadro
desplegado para el elemento anterior y se abre el nuevo cuadro informativo
relativo al elemento actual.
5.1 Buscar conjunto de datos
Muchas ventanas contienen una cuadro de búsqueda en el margen superior
derecho.
➤ Introduzca el término de búsqueda.
➤ Haga clic en el icono de lupa para iniciar la búsqueda.
✓ La lista de la ventana en cuestión se limita a los resultados de su bús-
queda.
5.2 Editar conjunto de datos
Los conjuntos de datos existentes se pueden editar con el icono .
➤ Seleccione el conjunto de datos que desee.
➤ Haga clic en el icono .
I
NOTA
A continuación se le indica que tiene que elegir los conjuntos de
datos que quiera editar

ES
Hotel Management Indicaciones generales
217
5.3 Borrar conjuntos de datos
La mayoría de las ventanas contienen el botón Delete (Borrar) mcon el icono
.
I
➤ Marque en la lista el conjunto de datos que desee.
➤ Haga clic en el icono .
➤ Confirme el proceso de borrado con Accept (Aceptar).
✓ Se borra el conjunto de datos.
5.4 Salir de la ventana sin guardar las entradas
realizadas
Si está creando o editando un conjunto de datos, puede interrumpir el pro-
ceso en cualquier momento sin guardar las entradas realizadas.
I
➤ Haga clic en el botón Cancel (Cancelar).
✓ Se cierra la ventana actual.
NOTA
A partir de ahora no se mencionará de forma expresa el botón
Delete (Borrar).
NOTA
A partir de ahora no se mencionará de forma expresa el botón
Cancel (Cancelar).

ES
Indicaciones generales Hotel Management
218
5.5 Iniciar sesión
➤ Abra el software Hotel Management.
✓ Se abre la ventana principal del software Hotel Management.
Ahora tiene que iniciar sesión en el software
➤ introduciendo su nombre de usuario y la contraseña.
I
➤ Confirme las entradas realizadas con Accept (Aceptar).
NOTA
Al instalar el software Hotel Management se configura el usuario
“Administrador”. Para el usuario “Administrador” no hay ninguna
contraseña asignada. Cambie la contraseña la primera vez que
inicie sesión (capítulo “Crear/editar usuario” en la página 227).

ES
Hotel Management Indicaciones generales
219
5.6 Cambio de usuario
➤ Seleccione en el menú principal Users – Change user (Usuarios – Cam-
bio de usuario).
➤ introduciendo su nombre de usuario y la contraseña.
➤ Confirme las entradas realizadas con Accept (Aceptar).

ES
Indicaciones generales Hotel Management
220
5.7 La ventana principal
La ventana principal constituye el elemento central del software Hotel Mana-
gement. A través del menú principal de la ventana principal se puede acce-
der a todas las funciones del software Hotel Management.
En el margen inferior derecho de la ventana principal se encuentran los
siguientes datos:
Version: versión del software
Current user: usuario registrado actualmente
Type of user: tipo del usuario actualmente registrado
A la ventana principal se accede a través del elemento Desktop del menú
principal.
5.8 Salir de programa
➤ Seleccione Exit (Salir) en el menú principal.

ES
Hotel Management Configurar el software
221
6 Configurar el software
6.1 Seleccionar idioma
I
➤ En el menú principal seleccione Configuration – General configuration
(Configuración – Configuración general).
➤ Haga clic en Language (Idioma).
➤ Seleccione en la lista el idioma que desee y confirme con Accept (Acep-
tar).
✓ Aparece una ventana indicando que se ha de reiniciar el software.
➤ Haga clic en Accept (Aceptar) para reiniciar el software o bien reinícielo
manualmente más tarde.
NOTA
El cambio de idioma requiere reiniciar el software.

ES
Configurar el software Hotel Management
222
6.2 Utilizar código de actualización
El software se actualiza con códigos de actualización. El fabricante se pon-
drá en contacto con usted cuando sea necesario actualizar el software.
➤ En el menú principal seleccione Configuration – General configuration
(Configuración – Configuración general).
➤ Haga clic en Updating code (Código de actualización.
➤ Introduzca el número de serie y el código de actualización.
➤ Confirme las entradas realizadas con Accept (Aceptar).
✓ A continuación se actualiza el software.

ES
Hotel Management Configurar el software
223
6.3 Configuración de módulos adicionales
El software Hotel Management se puede ampliar con módulos adicionales.
➤ En el menú principal seleccione Configuration – General configuration
(Configuración – Configuración general).
➤ Haga clic en Tarjeta de inicialización (tarjeta de inicialización).
➤ Introduzca la tarjeta de inicialización en el lector de tarjetas.
➤ Siga las instrucciones que aparecen en pantalla.

ES
Administrar usuarios Hotel Management
224
7 Administrar usuarios
Los usuarios pueden utilizar el software Hotel Management para administrar
datos, añadir, modificar o borrar datos. Usted puede crear tantos usuarios
como desee.
En el software Hotel Management, los derechos de los usuarios se adminis-
tran a través de tipos de usuario.
Al instalar el software Hotel Management se configura el usuario “Adminis-
trador”. El administrador tiene autorización para modificar o borrar los datos
guardados en el software. Por este motivo no se recomienda trabajar de
forma permanente con el administrador. En lugar de ello, cree otros usuarios
para editar las tareas del funcionamiento del hotel.
➤ En el menú principal seleccione Users – Change user (Usuarios – Cam-
bio de usuario).
Símbolo Nombre Descripción
Add user Añadir un nuevo usuario
Edit user Editar un usuario ya existente
Delete user Borrar un usuario
Define types
of user
Crear, editar y borrar tipo de usuario

ES
Hotel Management Administrar usuarios
225
7.1 Crear/editar tipo de usuario
Los tipos de usuario constituyen la base para la administración de las auto-
rizaciones de cada usuario. Tareas claramente definidas, como recepcio-
nista o conserje se pueden predefinir a través de los tipos de usuario y solo
en casos excepcionales se tienen que adaptar a usuarios concretos.
➤ En el menú principal seleccione Users – Change user (Usuarios – Cam-
bio de usuario).
➤ Haga clic en el icono .
En la ventana Types of user (Tipos de usuario) se listan todos los tipos de
usuario definidos. Haga clic en un tipo de usuario para obtener una lista
general de las autorizaciones definidas para este tipo de usuario.
I
➤ Para crear un conjunto de datos haga clic en el icono .
Símbolo Nombre Descripción
Add type of
user
Añadir un nuevo tipo de usuario
Edit type of
user
Editar un tipo de usuario ya existente
Delete type
of user
Borrar un tipo de usuario ya existente
NOTA
El tipo de usuario “Administrador” posee todas las autorizaciones
disponibles en el software. El tipo de usuario “Administrador” no
se puede modificar ni borrar.

ES
Administrar usuarios Hotel Management
226
➤ Para editar un conjunto de datos haga clic en el icono .
➤ Introduzca un nombre para el tipo de usuario.
➤ Elija las autorizaciones que deba tener el tipo de usuario:
– Create Users: crear usuarios
– Generate programming card: crear tarjeta de programación
– Generate data download card: crear tarjeta de descarga de datos
– Generate free access card: crear tarjeta de libre acceso
– Generate closing card: crear tarjeta de bloqueo
– Programm/read cards: programar/leer tarjetas
– Blacklist: administrar lista negra
– Download card data: descargar datos de la tarjeta
– See access operations: ver operaciones de acceso
– Check-in: registro de clientes en el hotel
– Occupation graph: ver gráfico de ocupación
– Client records: administrar datos de los clientes
– Employee records: administrar datos de los empleados
– Backup: crear/restaurar copias de seguridad
– General configuration: realizar configuración general
– Hotel data: administrar datos del hotel
– Generate courtesy time card: crear tarjeta de tiempo de confort
– PMS configuration: configuración del Property Management System
(PMS)
– Start PMS connection: iniciar conexión al Property Management Sys-
tem (PMS)
– Lockers: cerradura de armario
➤ Confirme las entradas realizadas con Accept (Aceptar).

ES
Hotel Management Administrar usuarios
227
✓ En la lista se visualiza el nuevo tipo de usuario.
➤ Haga clic en Exit (Salir) para volver a la ventana Create users (Crear
usuarios).
7.2 Crear/editar usuario
I
➤ En el menú principal seleccione Users – Change user (Usuarios – Cam-
bio de usuario).
➤ Para crear un conjunto de datos haga clic en el icono .
➤ Para editar un conjunto de datos haga clic en el icono .
NOTA
El usuario “Administrador” posee todas las autorizaciones dispo-
nibles en el software. El usuario “Administrador” no se puede
borrar.

ES
Administrar usuarios Hotel Management
228
➤ Introduzca un nombre y una contraseña para el usuario.
➤ Seleccione el tipo de usuario para el usuario en cuestión.
✓ Las autorizaciones del usuario se adaptan conforme al tipo de usuario.
➤ Confirme las entradas realizadas con Accept (Aceptar).
✓ En la lista se visualiza el nuevo usuario.

ES
Hotel Management Administrar datos del hotel
229
8 Administrar datos del hotel
En el punto de menú Hotel Data (Datos del hotel) ese puede cerar una ima-
gen virtual del hotel. Diseñe esta imagen con la mayor precisión posible para
posibilitar al personal un manjo óptimo del software Hotel Management.
➤ Ene l menú principal seleccione Hotel Data (Datos del hotel).
Se pueden utilizar las siguientes opciones de representación:
Filtrar por áreas
Agrupar por accesos y habitaciones
Símbolo Nombre Descripción
Add access
point
Añadir un nuevo punto de acceso
Edit access
point
Editar un punto de acceso ya existente
Delete
access point
Borrar un punto de acceso
Define types
of room
Crear, editar y borrar tipos de habitación
Define
areas
Crear, editar y borrar áreas

ES
Administrar datos del hotel Hotel Management
230
8.1 Filtrar por áreas
En el área Hotel Data (Datos del hotel) muchos datos se refieren a las habi-
taciones y salas. Configure un filtro para tener una mejor visión general.
➤ Active la casilla de verificación Area filter (Filtro de áreas) situada en la
esquina superior derecha de la ventana.
➤ Elija el área que desee en la lista desplegable.
✓ Esta lista solo muestra los puntos de acceso del área elegida.
I
NOTA
Para eliminar el filtro, haga clic en la cruz situada a la izquierda
de la lista de selección.

ES
Hotel Management Administrar datos del hotel
231
8.2 Agrupar por accesos y habitaciones
➤ Active la casilla de verificación Group accesses/rooms (Agrupar acce-
sos/habitaciones) situada en la esquina superior derecha de la ventana.
✓ Los accesos y habitaciones están agrupados en la vista.
I
NOTA
Para eliminar el filtro, desactive la casilla de verificación Group
accesses/rooms (Agrupar accesos/habitaciones).

ES
Administrar datos del hotel Hotel Management
232
8.3 Definir tipo de habitación
➤ Ene l menú principal seleccione Hotel Data (Datos del hotel).
➤ Haga clic en el icono .
➤ Para crear un conjunto de datos haga clic en el icono .
➤ Para editar un conjunto de datos haga clic en el icono .
➤ Introduzca un nombre para el tipo de habitación.
➤ Confirme las entradas realizadas con Accept (Aceptar).
Símbolo Nombre Descripción
Add type of
room
Añadir un nuevo tipo de habitación
Edit type of
room
Editar un tipo de habitación ya existente
Delete type
of room
Borrar un tipo de habitación

ES
Hotel Management Administrar datos del hotel
233
✓ En la lista se visualiza el nuevo tipo de habitación.
➤ Haga clic en Exit (Salir) para volver a la ventana Hotel Data (Datos del
hotel).
8.4 Añadir/editar puntos de acceso
Puntos de acceso son todas las dependencias del hotel (habitaciones, salas
de reuniones y oficinas) aseguradas con una cerradura.
➤ Ene l menú principal seleccione Hotel Data (Datos del hotel).
➤ Para crear un conjunto de datos haga clic en el icono .
➤ Para editar un conjunto de datos haga clic en el icono .

ES
Administrar datos del hotel Hotel Management
234
➤ Introduzca los datos necesarios:
– Tipo: tipo del punto de acceso; habitación o punto de acceso
– Number: número de habitación
– Name: nombre de la habitación
– Type of room: tipo de habitación
– Description: descripción (opcional)
➤ Confirme las entradas realizadas con Accept (Aceptar).
✓ En la lista se visualiza el nuevo punto de acceso.

ES
Hotel Management Administrar datos del hotel
235
8.5 Definir áreas
Las áreas se utilizan para agrupar puntos de acceso por características. Las
áreas pueden ser de acceso público o de acceso restringido para el perso-
nal. Los puntos de acceso correspondientes a un área deben
➤ Seleccione Hotel Data (Datos del hotel) en el menú principal.
➤ Haga clic en el icono .
➤ Para crear un conjunto de datos haga clic en el icono .
➤ Para editar un conjunto de datos haga clic en el icono .
Icono Nombre Descripción
Add area Añadir una nueva área
Edit area Editar un área ya existente
Delete area Eliminar un área

ES
Administrar datos del hotel Hotel Management
236
➤ Introduzca los datos necesarios:
– Nombre: nombre del área
– Start: primer punto de acceso en el área
– End: último punto de acceso en el área
– Accessibility: autorización de acceso: público o solo para personal
➤ Confirme las entradas realizadas con Accept (Aceptar).
✓ En la lista se visualiza la nueva área.
➤ Haga clic en Exit (Salir) para volver a la ventana Hotel Data (Datos del
hotel).
✓ La información correspondiente al área se visualiza debajo de cada punto
de acceso.

ES
Hotel Management Administrar datos del personal
237
9 Administrar datos del personal
En el punto de menú Employee Records (Datos del personal) se adminis-
tran los datos personales, las tarjetas de acceso y los horarios del personal
del hotel.
➤ Seleccione Employee Records (Datos del personal) en el menú princi-
pal.
Símbolo Nombre Descripción
Add
employee
Añadir un nuevo empleado
Edit
employee
Editar un empleado ya existente
Delete
employee
Borrar un empleado
Define staff
schedule
Crear, editar y borrar horarios del personal
Download
data
Descargar datos de la tarjeta

ES
Administrar datos del personal Hotel Management
238
9.1 Definir los horarios del personal
Con el software Hotel Management se pueden crear los horarios de trabajo
del personal.
➤ Seleccione Employee Records (Datos del personal) en el menú princi-
pal.
➤ Haga clic en el icono .
➤ Para crear un conjunto de datos haga clic en el icono .
➤ Para editar un conjunto de datos haga clic en el icono .
Símbolo Nombre Descripción
Add
schedule
Añadir un nuevo horario
Edit
schedule
Editar un horario ya existente
Delete
schedule
Borrar un horario

ES
Hotel Management Administrar datos del personal
239
➤ Introduzca un nombre para el horario.
➤ Introduzca por lo menos un intervalo de tiempo para el que deba regir el
horario (cuadros de texto del 2 al 5).
I
➤ Active las casillas de verificación de los días de la semana para los que
rija el horario.
➤ Confirme las entradas realizadas con Accept (Aceptar).
NOTA
Si solo desea configurar un intervalo de tiempo, elija la hora de
inicio y la de finalización de tal modo que un intervalo de tiempo
esté contenido en el otro.

ES
Administrar datos del personal Hotel Management
240
✓ En la lista se visualiza el nuevo horario.
➤ Haga clic en Exit (Salir) para volver a la ventana Employee records
(Datos del personal).

ES
Hotel Management Administrar datos del personal
241
9.2 Añadir/editar conjunto de datos del personal
➤ Seleccione Employee Records (Datos del personal) en el menú princi-
pal.
➤ Para crear un conjunto de datos haga clic en el icono .
➤ Para editar un conjunto de datos haga clic en el icono .
➤ En el cuadro de texto Name (Nombre), introduzca un nombre para el
empleado.
I
NOTA
No es necesario introducir más datos, pero para las tareas admi-
nistrativas puede resultar conveniente tener una descripción
detallada.

ES
Administrar datos del personal Hotel Management
242
➤ Si lo desea, introduzca más datos sobre el empleado en los cuadros de
texto:
– NIF: número de identificación fiscal
– Passport: pasaporte
– Gender: sexo
– Date of birth: fecha de nacimiento
– Telephone: número de teléfono
– Mail: dirección de correo electrónico
– Address: calle y número de finca
– City: ciudad
– Postal code: código postal
– Province: provincia
– Country: país
– Occupation: profesión
– Contract: contrato
– Comments: comentarios
➤ Confirme las entradas realizadas con Accept (Aceptar).
✓ En la lista se visualiza el empleado.

ES
Hotel Management Administrar datos del personal
243
9.3 Asignar tarjetas a empleados
Cada empleado necesita una tarjeta para poder realizar sus tareas.
I
➤ Seleccione Employee Records (Datos del personal) en el menú princi-
pal.
➤ Seleccione el empleado en la lista.
➤ Haga clic en la flecha Card Data (Datos de la tarjeta).
NOTA
La pérdida de una tarjeta de acceso supone un riesgo en la segu-
ridad. Apunte inmediatamente en la lista negra las tarjetas de
acceso perdidas (capítulo “Administrar lista negra” en la
página 272).

ES
Administrar datos del personal Hotel Management
244
➤ En el margen inferior del conjunto de datos se dispone de los siguientes
botones:
– Add/modify card: añadir/editar tarjeta
– Add card to blacklist: añadir tarjeta a la lista negra
– Show pass operations: mostrar operaciones realizadas
➤ Haga clic en el botón Add/modify card (Añadir/modificar tarjeta).

ES
Hotel Management Administrar datos del personal
245
➤ Introduzca los datos necesarios:
– Type of card: tipo de tarjeta (ver tabla en la página 245)
– Valid dates: días de validez de la tarjeta
– Valid from date: fecha en la que comienza la validez
– Valid from time: hora a la que comienza la validez
– Valid until date: fecha en la que finaliza la validez
– Valid until time: hora a la que finaliza la validez
– Override privacy: se pueden abrir las puertas a pesar de que la cerra-
dura tiene el ajuste de esfera privada
– Permanent opening: siempre abierta
– Employee shift: turno del empleado
– Pass control: número de habitaciones a las que se ha accedido
– Acces point 1 – 4: puntos de acceso 1 a 4
– Access area 1: área de acceso 1
➤ Confirme con Create card (Crear tarjeta) las entradas realizadas.
➤ Siga las instrucciones que aparecen en pantalla.
Tipo de tarjeta Descripción
Cleaning El tipo de tarjeta Cleaning (Limpieza) está concebido para el
personal de limpieza. La principal característica de este tipo de
tarjeta es que garantiza el acceso a todos los puntos de
acceso de un área.
Staff with entry
control
El tipo de tarjeta Staff with entry control (Empleado con con-
trol de acceso) está concebido para empleados como, por
ejemplo, personal de mantenimiento, camareros y cocineros.
La principal característica de este tipo de tarjeta es que garan-
tiza el acceso a todos los puntos de acceso de un área.
Staff with access
to all areas
El tipo de tarjeta Staff with access to all areas (Empleado
con acceso a todas las áreas) está concebido para los
empleados autorizados a acceder a todas las áreas del hotel..
La principal característica de este tipo de tarjeta es que garan-
tiza el acceso a todos los puntos de acceso a los que se puede
asignar un horario de trabajo.
Master El tipo de tarjeta Master (Directivo) está concebido para los
empleados de más alto rango como, por ejemplo, el cuadro
directivo. La principal característica de este tipo de tarjeta es
que garantiza en cualquier momento el acceso a todos lo pun-
tos de acceso hasta que expire la tarjeta.

ES
Añadir/editar conjunto de datos de clientes Hotel Management
246
10 Añadir/editar conjunto de datos de
clientes
Con la función Datos de clientes se pueden guardar los datos de los clientes
del hotel. Si en el futuro el cliente se vuelve a alojar en el hotel, se puede
acceder a estos datos, por lo que no es necesario crear un nuevo conjunto
de datos.
➤ Seleccione Client Records (Datos del cliente) en el menú principal.
➤ Para crear un conjunto de datos haga clic en el icono .
➤ Para editar un conjunto de datos haga clic en el icono .
Icono Nombre Descripción
Add client Añadir un nuevo cliente
Edit client Editar un cliente ya existente
Delete client Borrar un cliente

ES
Hotel Management Añadir/editar conjunto de datos de clientes
247
➤ Introduzca los datos necesarios:
– Nombre: Nombre
– NIF: número de identificación fiscal
– Passport: pasaporte
– Telephone: número de teléfono
– Mail: dirección de correo electrónico
– Address: calle y número de finca
– City: ciudad
– Postal code: código postal
– Province: provincia
– Country: país
– Comments: comentarios
➤ Para añadir una foto del cliente, haga clic en la imagen de la esquina
superior izquierda.
I
➤ Confirme las entradas realizadas con Accept (Aceptar).
NOTA
Se autorizan los de foto BMP, JPEG y PNG.

ES
Registrar a los clientes Hotel Management
248
11 Registrar a los clientes
➤ Seleccione Occupation – Check-in (Ocupación – Registro) en el menú
principal.
Icono Nombre Descripción
Add
check-in
Añadir un nuevo registro
Edit
check-in
Editar un registro ya existente
Delete
check-in
Borrar un registro
Define client
schedule
Crear, editar y borrar horarios de clientes
Define meal
plans
Crear, editar y borrar régimen de pensión

ES
Hotel Management Registrar a los clientes
249
11.1 Añadir registro
➤ Seleccione Occupation – Check-in (Ocupación – Registro) en el menú
principal.
➤ Para crear un conjunto de datos haga clic en el icono .
➤ Para editar un conjunto de datos haga clic en el icono (capítulo “Aña-
dir/editar conjunto de datos de clientes” en la página 246).
➤ Solo clientes nuevos: Haga clic en el icono y cree el nuevo cliente
(capítulo “Añadir/editar conjunto de datos de clientes” en la página 246).
✓ Ahora el nuevo cliente figura en la lista.
➤ Introduzca el nombre del cliente en el cuadro de búsqueda situado en el
margen superior derecho y haga clic en el icono de la lupa para delimitar
la búsqueda.
➤ Seleccione el nombre del cliente en la lista.
➤ Confirme las entradas realizadas con Accept (Aceptar).
Símbolo Nombre Descripción
Add client Añadir un nuevo cliente
Edit client Editar un cliente ya existente
Delete client Borrar un cliente

ES
Registrar a los clientes Hotel Management
250
➤ Haga clic en el icono para adaptar los datos del cliente (capítulo “Aña-
dir/editar conjunto de datos de clientes” en la página 246).
➤ Haga clic en el icono para crear una tarjeta de acceso para el cliente.
Icono Nombre Descripción
Modify client Editar los datos del cliente
Add/modify
card
Crear tarjeta de cliente

ES
Hotel Management Registrar a los clientes
251
➤ Introduzca los datos necesarios:
– Valid dates: días de validez de la tarjeta
– Valid from date: fecha en la que comienza la validez
– Valid from time: hora a la que comienza la validez
– Valid until date: fecha en la que finaliza la validez
– Valid until time: hora a la que finaliza la validez
– Meal plan: régimen de alojamiento, por ejemplo a media pensión o a
pensión completa
– Main room: habitación principal a la que se carga el registro
– Override privacy: se pueden abrir las puertas a pesar de que la cerra-
dura tiene el ajuste de esfera privada
– Configuration of secondary rooms: habitación secundaria asociada al
cliente, por ejemplo para su familia
– Configuration of accesses: accesos (si se desea, con horario), por
ejemplo para la piscina
– Configuration of accesses with sold time: accesos con modelo tempo-
ral (si se desea, con horario) cuyo uso está sujeto a pago
– Configuration of areas: accesos áreas (si se desea, con horario), por
ejemplo para el garaje
I
➤ Confirme con Create card (Crear tarjeta) las entradas realizadas.
➤ Siga las instrucciones que aparecen en pantalla.
NOTA
Al cliente se le puede conceder acceso a un máximo de once
puntos, incluyendo su propia habitación. Entre esto once puntos
de acceso solo puede haber un máximo de dos accesos con
modelo temporal.
Independientemente de ello, se le puede conceder al cliente
acceso a un máximo de dos áreas.

ES
Registrar a los clientes Hotel Management
252
✓ En la lista de los registros actuales válidos se visualiza el nuevo registro
realizado.
✓ En el margen inferior del conjunto de datos se dispone del siguiente
botón:
– Add card to blacklist: añadir tarjeta a la lista negra
I
11.2 Editar registro
➤ Seleccione Occupation – Check-in (Ocupación – Registro) en el menú
principal.
➤ Para editar un conjunto de datos haga clic en el icono .
NOTA
Para crear más puntos de acceso para el cliente, utilice la función
Editar registro (capítulo “Editar registro” en la página 252).

ES
Hotel Management Registrar a los clientes
253
➤ Haga clic en el icono para modificar los datos del cliente (capítulo
“Añadir/editar conjunto de datos de clientes” en la página 246).
➤ Haga clic en el icono para crear una tarjeta de acceso para el cliente.
➤ Lleve a cabo las modificaciones que desee.
➤ Confirme con Create card (Crear tarjeta) las entradas realizadas.
➤ Siga las instrucciones que aparecen en pantalla.
Símbolo Nombre Descripción
Modify client Editar los datos del cliente
Add/modify
card
Crear tarjeta de cliente

ES
Registrar a los clientes Hotel Management
254
11.3 Definir horarios del cliente
Con los horarios del cliente se puede restringir temporalmente el acceso a
puntos y áreas de acceso.
I
➤ Seleccione Occupation – Check-in (Ocupación – Registro) en el menú
principal.
➤ Haga clic en el icono .
➤ Para crear un conjunto de datos haga clic en el icono .
➤ Para editar un conjunto de datos haga clic en el icono .
NOTA
Los horarios solo funcionan con puntos de acceso que tengan la
versión de firmware 2.0 o superior.
Símbolo Nombre Descripción
Add
schedule
Añadir un nuevo horario
Edit
schedule
Editar un horario ya existente
Delete
schedule
Borrar un horario

ES
Hotel Management Registrar a los clientes
255
➤ Introduzca los datos necesarios:
– Nombre: Nombre del horario
– Start of margin 1: hora de comienzo 1
– End of margin 1: hora de finalización 1
– Start of margin 2: hora de comienzo 2
– End of margin 2: hora de finalización 2
– Applicable dates: días de la semana (de lunes a domingo) para los
que rige el horario
I
➤ Confirme las entradas realizadas con Accept (Aceptar).
NOTA
Si solo desea configurar un intervalo de tiempo, elija la hora de
inicio y la de finalización de tal modo que un intervalo de tiempo
esté contenido en el otro.

ES
Registrar a los clientes Hotel Management
256
✓ Ahora el nuevo horario figura en la lista.
➤ Haga clic en Exit (Salir) para volver a la ventana Check-in (Registro).

ES
Hotel Management Registrar a los clientes
257
11.4 Definir régimen de pensión
➤ Seleccione Occupation – Check-in (Ocupación – Registro) en el menú
principal.
➤ Haga clic en el icono .
➤ Para crear un conjunto de datos haga clic en el icono .
➤ Para editar un conjunto de datos haga clic en el icono .
➤ Introduzca un nombre para el régimen de pensión.
➤ En la lista se visualiza el nuevo régimen de pensión.
➤ Haga clic en Exit (Salir) para volver a la ventana Check-in (Registro).
Icono Nombre Descripción
Add meal
plan
Añadir un nuevo régimen de pensión
Edit meal
plan
Editar un régimen de pensión ya existente
Delete meal
plan
Borrar un régimen de pensión

ES
Crear rápidamente tarjetas de cliente Hotel Management
258
12 Crear rápidamente tarjetas de cliente
➤ Seleccione Management – Program/read cards (Administración – Pro-
gramar/leer tarjetas) en el menú principal.
I
➤ Introduzca los datos necesarios:
– Valid dates: días de validez de la tarjeta
– Valid from date: fecha en la que comienza la validez
– Valid until date: fecha en la que finaliza la validez
– Meal plan: régimen de alojamiento, por ejemplo a media pensión o a
pensión completa
– Room: habitación que se reserva
– Override privacy: se pueden abrir las puertas a pesar de que la cerra-
dura tiene el ajuste de esfera privada
– Configuration of accesses: accesos (si se desea, con horario), por
ejemplo para la piscina
➤ Confirme con Create card (Crear tarjeta) las entradas realizadas.
➤ Siga las instrucciones que aparecen en pantalla.
➤ Haga clic en Exit (Salir) para volver a la ventana principal.
NOTA
La función de creación rápida de tarjetas solo se debe utilizar en
casos excepcionales. En los casos normales, utilice la función
Realizar registro (capítulo “Registrar a los clientes” en la
página 248).

ES
Hotel Management Leer tarjetas
259
13 Leer tarjetas
➤ Seleccione Management – Program/read cards (Administración – Pro-
gramar/leer tarjetas) en el menú principal.
➤ Haga clic en el botón Read card (Leer tarjeta).
➤ Siga las instrucciones que aparecen en pantalla.
✓ Se abre una nueva ventana que contiene la información leída en la tar-
jeta.
➤ Haga clic en Exit (Salir) para volver a la ventana Program/read cards
(Programar/leer tarjetas).

ES
Resumen del mes Hotel Management
260
14 Resumen del mes
➤ Seleccione Occupation – Monthly chart (Ocupación – Resumen del
mes) en el menú principal.
Por defecto, el resumen del mes muestra el mes actual. Cada habitación
puede presentar cada día uno de los siguientes estados.
Icono Nombre Descripción
Calendar Elegir otro mes
Color Inscripción Significado
Verde Free room La habitación está libre y disponible para clientes
Rojo Occupied room La habitación está ocupada. El cliente se ha registrado.
La habitación no se puede contratar ni reservar.
Amari-
llo
Reserved room La habitación está reservada. El cliente no se ha regis-
trado. La habitación no se puede contratar ni reservar.
La visualización solo es posible con el módulo adicional
“Planning Module”.
Azul Blocked room La habitación está bloqueada. La habitación no se
puede contratar ni reservar. La visualización solo es
posible con el módulo adicional “Planning Module”.

ES
Hotel Management Resumen del mes
261
I
14.1 Mostrar otro mes
➤ Haga clic en el icono .
✓ Se abre una ventana en la que se puede elegir mes y año.
➤ En los dos menús desplegables, elija el mes y el año que desee.
➤ Confirme las entradas realizadas con Accept (Aceptar).
✓ Aparece el mes correspondiente en la vista de resumen del mes.
NOTA
En el resumen del mes, el cambio de día no tiene lugar a las
00:00 h, sino a las 12:00 h del día siguiente. Con este ajuste se
pretende facilitar la vista general de la hora normal en la que se
suele dejar la habitación antes de mediodía. Así, una habitación
que se indica como ocupada del 01.10 al 03.10, está ocupada
realmente desde el 01.10 a las 12:00 h hasta el 04.10 a las
12:00 h.

ES
Cargar datos en el sistema Hotel Management
262
15 Cargar datos en el sistema
15.1 Descargar datos de un punto de acceso
Antes de poder descargar los datos de un punto de acceso es necesario
crear una tarjeta de descarga de datos.
➤ Seleccione Management – Generate data download card
(Administración – Crear tarjeta de descarga de datos) en el menú princi-
pal.
➤ Siga las instrucciones que aparecen en pantalla.
✓ Se ha creado la tarjeta de descarga de datos.
➤ Inserte la tarjeta de descarga de datos en la cerradura de la que quiera
descargar los datos.
➤ Una vez finalizado el proceso de descarga, retire la tarjeta de descarga
de datos de la cerradura.
I
15.2 Cargar datos de tarjetas en el sistema
➤ Seleccione Data – Download card data (Datos – Descargar datos de
tarjetas) en el menú principal.
➤ Introduzca la tarjeta de descarga de datos en el lector de tarjetas.
✓ Los datos se copian en la base de datos del software.
NOTA
Hay que repetir todo el proceso para cada cerradura de la que se
quiera descargar datos.
Guarde la tarjeta de descarga de datos en un lugar seguro, pues
contiene información importante sobre el sistema.

ES
Hotel Management Mostrar accesos
263
16 Mostrar accesos
I
➤ Seleccione Data – See data operations (Datos – Ver operaciones de
datos) en el menú principal.
NOTA
Cuanto más se haya actualizado la lista, más datos habrá dispo-
nibles. Actualice regularmente la lista descargando los datos de
todos los puntos de acceso y copiándolos en la base de datos del
sistema (capítulo “Cargar datos en el sistema” en la página 262 y
capítulo “Cargar datos de tarjetas en el sistema” en la
página 262).
Icono Nombre Descripción
Filter by
access
number
Filtrar por número de acceso
Filter by
date
Filtrar por fecha de acceso
Delete by
dates
Borrar secuencia de acceso

ES
Mostrar accesos Hotel Management
264
16.1 Filtrar por número de acceso
➤ Haga clic en el icono .
➤ Introduzca el primer número y el último de los puntos de acceso que
desee ver.
➤ Confirme las entradas realizadas con Accept (Aceptar).
✓ Se muestran los accesos que han tenido lugar a los puntos de acceso
seleccionados.
16.2 Filtrar por fecha de acceso
➤ Haga clic en el icono .
➤ Introduzca la primera fecha y la última del intervalo de tiempo que desee
ver.
➤ Confirme las entradas realizadas con Accept (Aceptar).
✓ Se muestran los accesos que han tenido lugar en el intervalo de tiempo
seleccionado.

ES
Hotel Management Mostrar accesos
265
16.3 Borrar la secuencia de accesos
Se pueden eliminar de la base de datos partes de la secuencia de accesos.
I
➤ Haga clic en el icono .
➤ Introduzca la primera fecha y la última del intervalo de tiempo que desee
borrar.
➤ Confirme las entradas realizadas con Accept (Aceptar).
✓ Se borran irremisiblemente los accesos que han tenido lugar en el inter-
valo de tiempo seleccionado.
NOTA
Una vez borrados, los datos ya no se pueden restaurar de nuevo.

ES
Programar la cerradura de la puerta Hotel Management
266
17 Programar la cerradura de la puerta
Para programar la cerradura de una puerta hace falta una tarjeta de progra-
mación. Con la tarjeta de programación se asigna un número a un punto de
acceso y se ajusta la fecha y la hora.
I
➤ Seleccione Management – Generate programming card
(Administración – Crear tarjeta de programación) en el menú principal.
➤ Introduzca el número de habitación o del punto de acceso para los que
esté destinada la tarjeta de programación.
➤ Confirme con Create card (Crear tarjeta) la entrada realizada.
➤ Siga las instrucciones que aparecen en pantalla.
➤ Introduzca la tarjeta de programación en la cerradura que desee progra-
mar.
➤ Una vez finalizado el proceso de programación, retire la tarjeta de progra-
mación de la cerradura.
I
NOTA
El número y la fecha y hora se han de ajustar en la primera insta-
lación y cada vez que se cambian las pilas.
En la tarjeta de programación se guarda la fecha y la hora del
ordenador con el que se ha creado la tarjeta. Asegúrese de que
la indicación horaria de su ordenador es correcta.
NOTA
Tras su primer uso, la tarjeta de programación pierde su validez.
De este modo se evita que se pueda asignar dos veces el mismo
número de habitación.

ES
Hotel Management Crear tarjetas especiales
267
18 Crear tarjetas especiales
I
18.1 Crear tarjetas para casos de emergencia
La tarjeta de emergencia es una tarjeta de acceso que siempre es válida
para el punto de acceso en cuestión. Las tarjetas de emergencia solo se
deben utilizar en el caso de que no sea posible utilizar ninguna de las tarjetas
regulares, por ejemplo si se produce una caída del sistema informático y los
huéspedes están esperando a entrar en sus habitaciones.
➤ Seleccione Hotel Data (Datos del hotel) en el menú principal.
➤ Seleccione un access point (punto de acceso).
✓ En la mitad derecha del conjunto de datos se dispone de los siguientes
botones:
– Create card: crear tarjeta
– Add card to blacklist: añadir tarjeta a la lista negra
➤ Haga clic en Create card (Crear tarjeta).
➤ Introduzca la tarjeta de emergencia en el lector de tarjetas del PC.
✓ Así se ha creado la tarjeta de emergencia.
NOTA
La pérdida de una tarjeta de acceso supone un riesgo en la seguri-
dad. Apunte inmediatamente en la lista negra las tarjetas de acceso
perdidas (capítulo “Administrar lista negra” en la página 272).

ES
Crear tarjetas especiales Hotel Management
268
18.2 Crear tarjeta de libre acceso
Con la tarjeta de libre acceso se abren en el sistema tantos puntos de acceso
como se desee.
I
➤ Seleccione Management – Generate free access card
(Administración – Crear tarjeta de libre acceso) en el menú principal.
➤ Haga clic en el icono .
➤ Siga las instrucciones que aparecen en pantalla.
NOTA
La tarjeta de libre acceso se puede utilizar en cualquier cerradura
del sistema. Para las dependencias que siempre están abiertas
no es necesaria ninguna tarjeta de acceso. Utilice con prudencia
la tarjeta de libre acceso. Guarde la tarjeta de libre acceso en un
lugar seguro.
Icono Nombre Descripción
Create free
access card
Crear una nueva tarjeta de libre acceso
Delete free
access card
Borrar de la base de datos una tarjeta de libre acceso
Add card to
the blacklist
Añadir la tarjeta de libre acceso seleccionada a la lista
negra

ES
Hotel Management Crear tarjetas especiales
269
18.3 Crear tarjeta de bloqueo
Con la tarjeta de bloqueo se bloquean en el sistema de forma permanente
tantos puntos de acceso como se desee.
I
➤ Seleccione Management – Generate locking card (Administración –
Crear tarjeta de bloqueo) en el menú principal.
➤ Siga las instrucciones que aparecen en pantalla.
NOTA
La tarjeta de bloqueo se puede utilizar en cualquier cerradura del
sistema. Utilice con prudencia la tarjeta de bloqueo. Guarde la
tarjeta de bloqueo en un lugar seguro.

ES
Crear tarjetas especiales Hotel Management
270
18.4 Crear tarjeta de tiempo de confort
La llamada “tarjeta de tiempo de confort” se utiliza en combinación con un
sistema de ahorro de energía. El lector de tarjetas del sistema de ahorro de
energía lee la tarjeta de acceso insertada y regula en consecuencia el con-
sumo de energía de la habitación. Por ejemplo, para el personal de limpieza
solo se enciende la luz, mientras que para los huéspedes se enciende tam-
bién el aire acondicionado o la calefacción.
Cuando se retira la tarjeta del lector del sistema de ahorro de energía, la
corriente se desconecta inmediatamente o después de un intervalo de
tiempo ajustable.
Con la tarjeta de tiempo de confort se puede ajustar un retardo de conmuta-
ción.
➤ Seleccione Energy economizer – Generate courtesy card (Sistema de
ahorro de energía – Crear tarjeta de confort) en el menú principal.
➤ Introduzca en segundos el intervalo de tiempo que desee.
➤ Confirme con Create card (Crear tarjeta) la entrada realizada.
➤ Siga las instrucciones que aparecen en pantalla.
I
NOTA
El retardo de conmutación se puede ajustar para un intervalo
entre 0 y 9999 segundos.
El ajuste por defecto para el retardo de conmutación en los siste-
mas de ahorro de energía es de cinco segundos.

ES
Hotel Management Crear/restaurar copias de seguridad
271
19 Crear/restaurar copias de seguridad
➤ Seleccione Backup (Copia de seguridad) en el menú principal.
19.1 Crear copia de seguridad
➤ Seleccione Backup (Copia de seguridad) en el menú principal.
➤ En la subventana Selection of data destination/source (Selección del
destino/fuente de datos) seleccione el directorio en el que quiera guardar
la copia de seguridad.
➤ Haga clic en Generate backup (Crear copia de seguridad).
19.2 Restaurar copia de seguridad
➤ Seleccione Backup (Copia de seguridad) en el menú principal.
➤ Seleccione el directorio en el que está guardada la copia de seguridad
que desea restaurar.
➤ Haga clic en Restore backup (Restaurar copia de seguridad).

ES
Administrar lista negra Hotel Management
272
20 Administrar lista negra
En la lista negra se guardan tarjetas que están bloqueadas. Las tarjetas
guardadas en la lista negra se rechazan en todos los puntos de acceso. Las
tarjetas solo se pueden poner en la lista negra en las áreas del software en
las que se crean.
I
20.1 Añadir tarjeta a la lista negra
➤ Elija el área en la que desee bloquear la tarjeta.
➤ Haga clic en el botón Add card to the blacklist (Añadir tarjeta a la lista
negra) o en el icono .
➤ Confirme las entradas realizadas con Accept (Aceptar).
✓ La tarjeta se visualiza en el área Management – Blacklist
(Administración – Lista negra).
NOTA
Las tarjetas que se muestran en la lista negra no están automáti-
camente bloqueadas para todos los puntos de acceso. Asegú-
rese de utilizar la tarjeta de la lista negra en todos los puntos de
acceso.

ES
Hotel Management Administrar lista negra
273
20.2 Ver tarjetas en la lista negra
➤ Seleccione Management – Blacklist (Administración– Lista negra) en el
menú principal.
En la tabla superior se muestran todas las tarjetas puestas en la lista negra.
En la tabla inferior se muestran todas las tarjetas escritas en una tarjeta de
la lista negra.
Icono Nombre Descripción
Create
blacklist
card
Crear una tarjeta de la lista negra
Delete
blacklist
entry
Borrar de la base de datos una entrada de la lista negra

ES
Administrar lista negra Hotel Management
274
20.3 Crear tarjeta de la lista negra
➤ Seleccione Management – Blacklist (Administración – Lista negra) en el
menú principal.
➤ Haga clic en el icono .
➤ Siga las instrucciones que aparecen en pantalla.
✓ Ahora el contenido de ambas tablas en la vista Lista negra es idéntido.
I
NOTA
Las tarjetas que se muestran en la lista negra no están automáti-
camente bloqueadas para todos los puntos de acceso. Asegú-
rese de utilizar la tarjeta de la lista negra en todos los puntos de
acceso.

ES
Hotel Management Administrar el módulo PMS
275
21 Administrar el módulo PMS
El módulo PMS se utiliza para crear tarjetas válidas para las cerraduras de
puerta y puntos de acceso de otro sistema Property Management (PMS). De
este modo se pueden unificar procesos de trabajo y evitar que haya datos
por duplicado.
➤ Seleccione PMS (PMS) en el menú principal.
I
Las tarjetas creadas con ayuda de otro sistema Property Management a tra-
vés del módulo PMS tienen las siguientes restricciones:
Solo se pueden crear tarjetas de clientes.
No es posible asignar ningún área de acceso a las tarjetas de clientes.
No es posible asignar a las tarjetas de clientes ningún área con modelo
temporal sujeto a pago.
Icono Nombre Descripción
Add authori-
zation
Añadir una nueva autorización
Edit authori-
zation
Editar una régimen autorización ya existente
Delete
authoriza-
tion
Eliminar una autorización
NOTA
Si se usa el módulo PMS, no es posible utilizar todas las funcio-
nes del software Hotel Management.

ES
Administrar el módulo PMS Hotel Management
276
Si, al copiar las tarjetas, el cliente PMS no envía exactamente los mismos
datos, se invalidan las tarjetas de cliente anteriores para la misma habi-
tación.
Si, al crear tarjetas de cliente, el cliente PMS no transmite la hora de
registro en el hotel y la hora en la que se deja la habitación, se invalidan
las tarjetas de cliente anteriores para la misma habitación.
Si se utiliza el protocolo 2, la hora se transmite solo en horas sin indica-
ción de minutos. Esto podría suponer problemas cuando los clientes se
registran o dejan la habitación.

ES
Hotel Management Administrar el módulo PMS
277
21.1 Configurar módulo PMS
➤ Seleccione PMS (PMS) en el menú principal.
➤ Haga clic en el botón Edit general configuration.
➤ Introduzca los siguientes datos necesarios:
– PMS control: si el PMS y el software Hotel Management están en el
mismo ordenador se ha de configurar a Local (local) y en caso con-
trario, a Remote (remoto).
– IP address: dirección IP del ordenador en el que está instalado el
PMS.
– Port: puerto de comunicación para consultas de cliente del PMS.
– Terminal number: número de identificación del lector/escritor de tarjetas.
– Protocol: protocolo de transmisión utilizado para la comunicación
entre el PMS y el software Hotel Management (ver tabla de abajo).
➤ Confirme la entrada realizada con Ok (Aceptar).
✓ Los ajustes que se hayan cambiado aparecen en la parte superior
izquierda de la ventana.
Función Protocolo 1 Protocolo 2
Número de autorizacio-
nes
20 8
Transmisión de hora Hora exacta Solo hora sin indicación de
minutos (las 12:30 se
transmite como las 12:00)

ES
Administrar el módulo PMS Hotel Management
278
21.2 Añadir/editar autorizaciones
Al crear tarjetas de clientes a través de un cliente PMS, las autorizaciones
se escriben automáticamente en la tarjeta del cliente. Según sea el protocolo
de transmisión elegido, se podrán escribir hasta 20 autorizaciones en las tar-
jetas de cliente.
➤ Seleccione PMS (PMS) en el menú principal.
➤ Para crear un conjunto de datos haga clic en el icono .
➤ Para editar un conjunto de datos haga clic en el icono .
➤ Introduzca los siguientes datos necesarios:
– Number: número de identificación de la autorización.
– Type: el tipo de la autorización puede ser Access (Acceso) o Public
area (Área pública).
– Access: acceso o área pública
➤ Confirme las entradas realizadas con Accept (Aceptar).
✓ La autorización aparece en la tabla de la ventana PMS configuration
(Configuración PMS).

ES
Hotel Management Administrar el módulo PMS
279
21.3 Establecer conexión PMS
I
➤ Seleccione PMS – Start PMS connection (PMS – Iniciar conexión PMS)
en el menú principal.
✓ El software puede procesar consultas del cliente PSM.
➤ Pulse Exit (Salir) cuando desee finalizar la conexión PSM.
NOTA
Tras haber establecido una conexión PMS, el software Hotel
Management solo funciona como servidor para consultas PMS.
Si se desea trabajar con el software Hotel Management, se ha de
finalizar la conexión PMS.

IT
Hotel Management
280
Prima di effettuare la messa in funzione, leggere accuratamente questo
manuale di istruzioni, conservarlo e, nel caso in cui il prodotto venga
consegnato ad un altro utente, consegnare anche le relative istruzioni.
Indice
1 Requisiti di sistema. . . . . . . . . . . . . . . . . . . . . . . . . . . . . . . . . . .283
2 Accessori . . . . . . . . . . . . . . . . . . . . . . . . . . . . . . . . . . . . . . . . . . . 283
3 Installazione . . . . . . . . . . . . . . . . . . . . . . . . . . . . . . . . . . . . . . . . .283
4 Primo avvio del programma . . . . . . . . . . . . . . . . . . . . . . . . . . . . 284
5 Presupposti . . . . . . . . . . . . . . . . . . . . . . . . . . . . . . . . . . . . . . . . .286
5.1 Ricerca del record di dati. . . . . . . . . . . . . . . . . . . . . . . . . . .286
5.2 Modifica del record di dati . . . . . . . . . . . . . . . . . . . . . . . . . .286
5.3 Cancellazione del record di dati. . . . . . . . . . . . . . . . . . . . . .287
5.4 Come uscire dalla finestra senza salvare . . . . . . . . . . . . . .287
5.5 Registrazione nel sistema . . . . . . . . . . . . . . . . . . . . . . . . . .288
5.6 Cambio dell’utente. . . . . . . . . . . . . . . . . . . . . . . . . . . . . . . .289
5.7 La finestra principale . . . . . . . . . . . . . . . . . . . . . . . . . . . . . . 290
5.8 Come uscire dal programma . . . . . . . . . . . . . . . . . . . . . . . .290
6 La configurazione del software . . . . . . . . . . . . . . . . . . . . . . . . .291
6.1 Selezione della lingua . . . . . . . . . . . . . . . . . . . . . . . . . . . . .291
6.2 Impiego del codice di aggiornamento . . . . . . . . . . . . . . . . .292
6.3 Gestione dei moduli aggiuntivi. . . . . . . . . . . . . . . . . . . . . . .293
7 Gestione utenti. . . . . . . . . . . . . . . . . . . . . . . . . . . . . . . . . . . . . . .294
7.1 Creazione/modifica di un tipo di utente . . . . . . . . . . . . . . . .295
7.2 Creazione/modifica di utenti . . . . . . . . . . . . . . . . . . . . . . . .297
8 Gestione dei dati dell’hotel . . . . . . . . . . . . . . . . . . . . . . . . . . . . . 299
8.1 Filtraggio in base alle aree. . . . . . . . . . . . . . . . . . . . . . . . . . 300
8.2 Raggruppamento in base ad accessi e locali . . . . . . . . . . . 301
8.3 Definizione dei tipi di locali. . . . . . . . . . . . . . . . . . . . . . . . . . 302
8.4 Aggiunta/modifica dei punti di accesso . . . . . . . . . . . . . . . .303
8.5 Definizione delle aree . . . . . . . . . . . . . . . . . . . . . . . . . . . . .305

IT
Hotel Management
281
9 Gestione dei dati del personale . . . . . . . . . . . . . . . . . . . . . . . . .307
9.1 Definizione degli orari del personale . . . . . . . . . . . . . . . . . .307
9.2 Aggiunta/modifica del record di dati del personale . . . . . . .310
9.3 Assegnazione delle schede ai collaboratori. . . . . . . . . . . . . 312
10 Aggiunta/modifica dei dati del cliente . . . . . . . . . . . . . . . . . . . .315
11 Esecuzione del check-in . . . . . . . . . . . . . . . . . . . . . . . . . . . . . . .317
11.1 Come aggiungere il check-in . . . . . . . . . . . . . . . . . . . . . . . .318
11.2 Modifica del check-in. . . . . . . . . . . . . . . . . . . . . . . . . . . . . . 321
11.3 Definizione degli orari del cliente. . . . . . . . . . . . . . . . . . . . .323
11.4 Definizione del tipo di trattamento . . . . . . . . . . . . . . . . . . . .325
12 Creazione rapida delle schede del cliente. . . . . . . . . . . . . . . . . 326
13 Lettura delle schede . . . . . . . . . . . . . . . . . . . . . . . . . . . . . . . . . . 327
14 Planner mensile . . . . . . . . . . . . . . . . . . . . . . . . . . . . . . . . . . . . . . 328
14.1 Visualizzazione di un altro mese . . . . . . . . . . . . . . . . . . . . . 329
15 Caricamento dei dati nel sistema. . . . . . . . . . . . . . . . . . . . . . . .330
15.1 Download dei dati da un punto di accesso . . . . . . . . . . . . .330
15.2 Caricamento dei dati della scheda nel sistema . . . . . . . . . .330
16 Visualizzazione degli accessi. . . . . . . . . . . . . . . . . . . . . . . . . . .331
16.1 Filtraggio in base al numero di accessi . . . . . . . . . . . . . . . .332
16.2 Filtraggio in base alla data di accesso. . . . . . . . . . . . . . . . .332
16.3 Cancellazione della cronologia accessi. . . . . . . . . . . . . . . .333
17 Programmazione della serratura della porta. . . . . . . . . . . . . . .334
18 Creazione di schede speciali . . . . . . . . . . . . . . . . . . . . . . . . . . . 335
18.1 Creazione di una scheda di emergenza . . . . . . . . . . . . . . .335
18.2 Creazione della scheda di accesso libero . . . . . . . . . . . . . . 336
18.3 Crea una scheda di bloccaggio . . . . . . . . . . . . . . . . . . . . . .337
18.4 Crea scheda orario comfort . . . . . . . . . . . . . . . . . . . . . . . . . 338
19 Creazione/ripristino dei backup . . . . . . . . . . . . . . . . . . . . . . . . .339
19.1 Creazione del backup . . . . . . . . . . . . . . . . . . . . . . . . . . . . . 339
19.2 Ripristino del backup . . . . . . . . . . . . . . . . . . . . . . . . . . . . . . 339
20 Gestione della blacklist. . . . . . . . . . . . . . . . . . . . . . . . . . . . . . . . 340
20.1 Come aggiungere schede alla blacklist . . . . . . . . . . . . . . . .340
20.2 Visualizzazione delle schede sulla blacklist. . . . . . . . . . . . .341
20.3 Creazione di una scheda per la blacklist . . . . . . . . . . . . . . .342

IT
Hotel Management
282
21 Gestione del modulo PMS. . . . . . . . . . . . . . . . . . . . . . . . . . . . . . 343
21.1 Configurazione del modulo PSM. . . . . . . . . . . . . . . . . . . . .345
21.2 Aggiunta/modifica delle autorizzazioni. . . . . . . . . . . . . . . . .346
21.3 Creazione di un collegamento PMS . . . . . . . . . . . . . . . . . .347

IT
Hotel Management Requisiti di sistema
283
1 Requisiti di sistema
Requisiti minimi:
Sistema operativo: Windows XP Service Pack 3
Risoluzione schermo: 1024 x 768
Processore: Intel Pentium 4 con 2 GHz o compatibile
Memoria di lavoro: 1 GB RAM
Memoria libera sul disco rigido: 1 GB
Interfacce: 1 x USB 2.0
2 Accessori
Disponibili come accessori (non in dotazione):
3 Installazione
➤ Collegare il lettore di schede a una presa USB libera.
➤ Inserire il supporto dati con il software di gestione hotel.
✓ Il programma di installazione viene aperto.
➤ Segui i passi nel programma di installazione.
Denominazione Numero articolo
Smart Card Energy saver 9106600715
Smart Card Access Control 9106600713
Smart Card Encoder 9106600722
Smart Key Card 9106600724
RFID Access Control 9106600714
RFID Energy saver 9106600716
RFID Encoder 9106600723
RFID Key Card 9106600725

IT
Primo avvio del programma Hotel Management
284
4 Primo avvio del programma
La prima volta che si avvia il programma è necessario configurare il software
di gestione hotel.
➤ Aprire il software di gestione hotel.
➤ Seleziona la lingua desiderata dall’elenco e conferma con Accept
(Accetta).
✓ Il programma esegue un riavvio del software di gestione hotel con le
nuove impostazioni.
➤ Digita il codice di installazione e conferma con Accept (Accetta).
I
NOTA
Il codice di installazione viene fornito dal produttore.

IT
Hotel Management Primo avvio del programma
285
➤ Inserisci la scheda di inizializzazione nel lettore di schede.
➤ Segui le indicazioni sullo schermo.
✓ La finestra principale del software di gestione hotel si apre.

IT
Presupposti Hotel Management
286
5 Presupposti
In molte finestre è presente una barra dei simboli sul margine superiore. I
simboli della barra dei simboli cambiano in base al contesto. Il significato dei
simboli viene spiegato in questo manuale sotto l’immagine della rispettiva
finestra.
In molte finestre sono presenti elenchi. Clicca su una voce nell’elenco per
espandere un campo con ulteriori informazioni sulla voce. Un clic su un tipo
di utente, indica ad es., i diritti validi per questo tipo di utente. Un clic su
un’altra voce nell’elenco minimizza la voce aperta precedentemente ed
espande le informazioni sulla voce attuale.
5.1 Ricerca del record di dati
Sul margine superiore a destra di molte finestre è presente un campo di
ricerca.
➤ Inserisci il termine che desideri trovare.
➤ Per avviare la ricerca, clicca sul simbolo della lente di ingrandimento.
✓ La lista nella rispettiva finestra è limitata ai risultati della tua ricerca.
5.2 Modifica del record di dati
I record di dati esistenti possono essere modificati con il simbolo .
➤ Seleziona il record di dati desiderato.
➤ Clicca sul simbolo .
I
NOTA
In seguito non verrà specificato che devi selezionare i record di
dati che desideri modificare.

IT
Hotel Management Presupposti
287
5.3 Cancellazione del record di dati
Nella maggior parte delle finestre è presente il tasto Delete (Cancella) con il
simbolo .
I
➤ Nella lista, seleziona il record di dati desiderato.
➤ Clicca sul simbolo .
➤ Conferma l’operazione di cancellazione con Accept (Accetta).
✓ Il record di dati viene cancellato.
5.4 Come uscire dalla finestra senza salvare
Se desideri creare o modificare un record di dati, puoi interrompere l’opera-
zione in ogni momento senza salvare le immissioni.
I
➤ Premi il tasto Cancel (Interrompi).
✓ L’attuale finestra viene chiusa.
NOTA
In seguito il tasto Delete (Cancella) non verrà esplicitamente spe-
cificato.
NOTA
In seguito il tasto Cancel (Interrompi) non verrà esplicitamente
specificato.

IT
Presupposti Hotel Management
288
5.5 Registrazione nel sistema
➤ Apri il software di gestione hotel.
✓ La finestra principale del software di gestione hotel si apre.
Devi registrarti nel software.
➤ Immetti il nome utente e la password.
I
➤ Conferma le immissioni con Accept (Accetta).
NOTA
Durante l’installazione del software di gestione hotel viene confi-
gurato l’utente “Administrator”. Per l’utente “Administrator” non è
stata assegnata nessuna password. Modifica la password dopo
esserti registrato nel sistema per la prima volta (capitolo “Crea-
zione/modifica di utenti” a pagina 297).

IT
Hotel Management Presupposti
289
5.6 Cambio dell’utente
➤ Nel menu principale seleziona Users – Change user (Utenti – Cambia
utente).
➤ Immetti il nome utente e la password.
➤ Conferma le immissioni con Accept (Accetta).

IT
Presupposti Hotel Management
290
5.7 La finestra principale
La finestra principale è l’elemento centrale del software di gestione hotel.
Attraverso il menu principale della finestra principale si accede a tutte le fun-
zioni del software di gestione hotel.
Sul margine inferiore destro della finestra principale trovi le seguenti informa-
zioni:
Versione: Versione del software
Current user: Utente attualmente registrato
Type of user: Tipo di utente dell’utente attualmente registrato
Alla finestra principale si accede attraverso la voce di menu Desktop del
menu principale.
5.8 Come uscire dal programma
➤ Nel menu principale seleziona Exit (Esci).

IT
Hotel Management La configurazione del software
291
6 La configurazione del software
6.1 Selezione della lingua
I
➤ Nel menu principale seleziona Configuration – General configuration
(Configurazione – Configurazione generale).
➤ Clicca su Language (Lingua).
➤ Seleziona la lingua desiderata dall’elenco e conferma con Accept
(Accetta).
✓ Apparirà una finestra informativa che avvisa sulla necessità di un riavvio
del software.
➤ Clicca su Accept (Accetta) per eseguire il riavvio o eseguirlo manual-
mente più tardi.
NOTA
La modifica della lingua necessita un riavvio del software.

IT
La configurazione del software Hotel Management
292
6.2 Impiego del codice di aggiornamento
Mediante il codice di aggiornamento il software viene aggiornato. Il produt-
tore ti contatterà quando il software dovrà essere aggiornato.
➤ Nel menu principale seleziona Configuration – General configuration
(Configurazione – Configurazione generale).
➤ Clicca su Updating code (Codice di aggiornamento).
➤ Immetti il numero di serie e il codice di aggiornamento.
➤ Conferma l’immissione con Accept (Accetta).
✓ Il software viene aggiornato.

IT
Hotel Management La configurazione del software
293
6.3 Gestione dei moduli aggiuntivi
Il software di gestione hotel può essere ampliato con moduli aggiuntivi.
➤ Nel menu principale seleziona Configuration – General configuration
(Configurazione – Configurazione generale).
➤ Clicca su Initialization card (Scheda di inizializzazione).
➤ Inserisci la scheda di inizializzazione nel lettore di schede.
➤ Segui le indicazioni sullo schermo.

IT
Gestione utenti Hotel Management
294
7 Gestione utenti
Gli utenti possono utilizzare il software di gestione hotel, per gestire, aggiun-
gere, modificare o cancellare dati. È possibile creare un numero di utenti a
piacere.
È possibile gestire i diritti degli utenti attraverso i tipi di utente all’interno del
software di gestione hotel.
Durante l’installazione del software di gestione hotel viene configurato
l’utente “Administrator”. L’amministratore possiede tutti i diritti per modificare
e cancellare i dati presenti nel software. Perciò raccomandiamo di non lavo-
rare permanentemente con l’amministratore. Raccomandiamo invece di cre-
are altri utenti per gestire i compiti dell’hotel.
➤ Nel menu principale seleziona Users – Create users (Utenti – Crea
utenti).
Simbolo Nome Descrizione
Add user Aggiungi un nuovo utente
Edit user Modifica un utente esistente
Delete user Cancella un utente esistente
Define types
of user
Crea, modifica e cancella un tipo di utente

IT
Hotel Management Gestione utenti
295
7.1 Creazione/modifica di un tipo di utente
I tipi di utente creano la base per la gestione dei diritti dei singoli utenti. Tipi-
che sfere di competenza come il personale della reception, i custodi o altre
persone possono essere predefiniti mediante tipi di utenti e devono essere
adattati solo in casi eccezionali per i singoli utenti.
➤ Nel menu principale seleziona Users – Create users (Utenti – Crea
utenti).
➤ Clicca sul simbolo .
Nella finestra Types of user (Tipi di utente) sono elencati tutti i tipi di utente
definiti. Clicca su un tipo di utente per ottenere una panoramica dei diritti che
sono stati definiti per questo tipo di utente.
I
➤ Per creare un record di dati, clicca sul simbolo .
Simbolo Nome Descrizione
Add type of
user
Aggiungi un nuovo tipo di utente
Edit type of
user
Modifica un tipo di utente esistente
Delete type
of user
Cancella un tipo di utente esistente
NOTA
Il tipo di utente “Administrator” possiede tutti i diritti disponibili nel
software. Il tipo di utente “Administrator” non può essere modifi-
cato o cancellato.

IT
Gestione utenti Hotel Management
296
➤ Per modificare un record di dati, clicca sul simbolo .
➤ Immetti un nome per il tipo di utente.
➤ Seleziona i diritti che il tipo di utente deve possedere:
– Create Users: Crea utente
– Generate programming card: Genera scheda di programmazione
– Generate data download card: Genera scheda di download dati
– Generate free access card: Genera scheda di accesso libero
– Generate closing card: Genera scheda di bloccaggio
– Programm/read cards: Programma/leggi schede
– Blacklist: Gestisci blacklist
– Download card data: Scarica dati scheda
– See access operations: Visualizza operazioni di accesso
– Check-in: Esegui check-in
– Occupation graph: Visualizza panoramica prenotazioni
– Client records: Gestisci dati clienti
– Employee records: Gestisci dati collaboratori
– Backup: Crea/ripristina backup
– General configuration: Esegui impostazioni generali
– Hotel data: Gestisci dati hotel
– Generate courtesy time card: Crea scheda orario comfort
– PMS configuration: Configura Property Management System (PMS)
– Start PMS connection: Avvia la connessione con il Property Manage-
ment System (PMS)
– Lockers: Serratura per armadio
➤ Conferma le immissioni con Accept (Accetta).

IT
Hotel Management Gestione utenti
297
✓ Il nuovo tipo di utente viene visualizzato nella lista.
➤ Clicca su Exit (Esci) per ritornare alla finestra Create users (Crea utenti).
7.2 Creazione/modifica di utenti
I
➤ Nel menu principale seleziona Users – Create users (Utenti – Crea
utenti).
➤ Per creare un record di dati, clicca sul simbolo .
➤ Per modificare un record di dati, clicca sul simbolo .
➤ Immetti un nome e una password per l’utente.
➤ Seleziona il tipo di utente per l’utente.
NOTA
L’utente “Administrator” possiede tutti i diritti disponibili nel sof-
tware. L’utente “Administrator” non può essere cancellato.

IT
Gestione utenti Hotel Management
298
✓ I diritti dell’utente vengono adeguati in modo corrispondente al tipo di
utente.
➤ Conferma le immissioni con Accept (Accetta).
✓ Il nuovo utente viene visualizzato nella lista.

IT
Hotel Management Gestione dei dati dell’hotel
299
8 Gestione dei dati dell’hotel
Alla voce di menu Hotel Data (Dati hotel) è possibile creare una immagine
virtuale dell’hotel. Crea questa immagine nel modo più dettagliato possibile
per consentire al personale una gestione ottimale del software per gestione
hotel.
➤ Nel menu principale seleziona Hotel Data (Dati hotel).
È possibile utilizzare le seguenti opzioni di rappresentazione:
Filtra in base alle aree
Raggruppa in base ad accessi e locali
Simbolo Nome Descrizione
Add access
point
Aggiungi un nuovo punto di accesso
Edit access
point
Modifica un punto di accesso esistente
Delete
access point
Cancella un punto di accesso esistente
Define types
of room
Crea, modifica e cancella tipi di locali
Define
areas
Crea, modifica e cancella aree

IT
Gestione dei dati dell’hotel Hotel Management
300
8.1 Filtraggio in base alle aree
Nell’area Hotel Data (Dati dell’hotel) sono raccolti molti dati sui locali. Per
poter avere una panoramica migliore, imposta il filtro.
➤ Attiva la casella di spunta Area Filter (Filtri aree) nell’angolo in alto a
destra della finestra.
➤ Seleziona l’area desiderata dalla lista a cascata.
✓ La lista indica solo i punti di accesso nell’area selezionata.
I
NOTA
Per cancellare il filtro, clicca sulla croce a sinistra in prossimità
della lista di selezione.

IT
Hotel Management Gestione dei dati dell’hotel
301
8.2 Raggruppamento in base ad accessi e locali
➤ Attiva la casella di spunta Group accesses/rooms (Raggruppa
accessi/locali) nell’angolo in alto a destra della finestra.
✓ Gli accessi e i locali sono raggruppati nella schermata.
I
NOTA
Per cancellare il filtro, disattiva la casella di spunta Group acces-
ses/rooms (Raggruppa accessi/locali).

IT
Gestione dei dati dell’hotel Hotel Management
302
8.3 Definizione dei tipi di locali
➤ Nel menu principale seleziona Hotel Data (Dati dell’hotel).
➤ Clicca sul simbolo .
➤ Per creare un record di dati, clicca sul simbolo .
➤ Per modificare un record di dati, clicca sul simbolo .
➤ Immetti un nome per il tipo di locale.
➤ Conferma l’immissione con Accept (Accetta).
Simbolo Nome Descrizione
Add type of
room
Aggiungi un nuovo tipo di locale
Edit type of
room
Modifica un tipo di locale esistente
Delite type
of room
Cancella un tipo di locale esistente

IT
Hotel Management Gestione dei dati dell’hotel
303
✓ Il nuovo tipo di locale viene visualizzato nella lista.
➤ Clicca su Exit (Esci) per ritornare alla finestra Hotel Data (Dati hotel).
8.4 Aggiunta/modifica dei punti di accesso
I punti di accesso sono tutti ambienti assicurati da una serratura, come ad es.
camere d’albergo, sale conferenze e uffici.
➤ Nel menu principale seleziona Hotel Data (Dati hotel).
➤ Per creare un record di dati, clicca sul simbolo .
➤ Per modificare un record di dati, clicca sul simbolo .

IT
Gestione dei dati dell’hotel Hotel Management
304
➤ Immetti i dati necessari:
– Type: Tipo di punto di accesso; locale o punto di accesso
– Numero: Numero locale
– Name: Nome locale
– Type of room: Tipo di locale
– Descrizione: Descrizione (opzionale)
➤ Conferma le immissioni con Accept (Accetta).
✓ Il nuovo punto di accesso viene visualizzato nella lista.

IT
Hotel Management Gestione dei dati dell’hotel
305
8.5 Definizione delle aree
Le aree sono utilizzate per raggruppare i punti di accesso in base alle carat-
teristiche. Le aree possono essere o pubbliche o accessibili solo al perso-
nale. I punti di accesso devono trovarsi all’interno di un’area
➤ Nel menu principale seleziona Hotel Data (Dati hotel).
➤ Clicca sul simbolo .
➤ Per creare un record di dati, clicca sul simbolo .
➤ Per modificare un record di dati, clicca sul simbolo .
Simbolo Nome Descrizione
Add area Aggiungi un nuovo locale
Edit area Modifica un locale esistente
Delete area Cancella un locale esistente

IT
Gestione dei dati dell’hotel Hotel Management
306
➤ Immetti i dati necessari:
– Name: Nome per l’area
– Start: Primo punto di accesso nell’area
– End: Ultimo punto di accesso nell’area
– Accessibility: Autorizzazione di accesso; pubblica o solo per il perso-
nale
➤ Conferma le immissioni con Accept (Accetta).
✓ La nuova area viene visualizzata nella lista.
➤ Clicca su Exit (Esci) per ritornare alla finestra Hotel Data (Dati hotel).
✓ Le informazioni sull’area vengono visualizzate al di sotto di ogni punto di
accesso.

IT
Hotel Management Gestione dei dati del personale
307
9 Gestione dei dati del personale
Alla voce di menu Employee Records (Dati del personale) vengono gestiti i
dati personali, le schede di accesso e gli orari per il personale dell’hotel.
➤ Nel menu principale seleziona Employee Records (Dati del personale).
9.1 Definizione degli orari del personale
Nel software per gestione hotel è possibile creare i piani di lavoro per il per-
sonale.
➤ Nel menu principale seleziona Employee Records (Dati del personale).
Simbolo Nome Descrizione
Add
employee
Aggiungi un nuovo collaboratore
Edit
employee
Modifica un collaboratore esistente
Delete
employee
Cancella un collaboratore esistente
Define staff
schedule
Crea, modifica e cancella gli orari del personale
Download
data
Scarica i dati dalla scheda

IT
Gestione dei dati del personale Hotel Management
308
➤ Clicca sul simbolo
➤ Per creare un record di dati, clicca sul simbolo .
➤ Per modificare un record di dati, clicca sul simbolo .
➤ Immetti un nome per l’orario.
Simbolo Nome Descrizione
Add
schedule
Aggiungi un nuovo orario
Edit
schedule
Modifica un orario esistente
Delete
schedule
Cancella un orario esistente

IT
Hotel Management Gestione dei dati del personale
309
➤ Immetti almeno un intervallo di tempo per il quale deve valere l’orario
(campi di testo da 2 a 5).
I
➤ Attiva le caselle di spunta dei giorni della settimana per i quali deve valere
l’orario.
➤ Conferma le immissioni con Accept (Accetta).
✓ Il nuovo orario viene visualizzato nella lista.
➤ Clicca su Exit (Esci) per ritornare alla finestra Staff records (Dati del per-
sonale).
NOTA
Se desideri impostare solo un intervallo di tempo, seleziona il
tempo di inizio e di fine in modo che un intervallo contenga l’altro.

IT
Gestione dei dati del personale Hotel Management
310
9.2 Aggiunta/modifica del record di dati del personale
➤ Nel menu principale seleziona Employee Records (Dati del personale).
➤ Per creare un record di dati, clicca sul simbolo .
➤ Per modificare un record di dati, clicca sul simbolo .
➤ Immetti un nome per il collaboratore nel campo di testo Name (Nome).
I
➤ Immetti eventualmente altri dati sul collaboratore nei campi di testo:
– NIF: Codice fiscale
– Passport: Passaporto
– Gender: Sesso
– Date of birth: Data di nascita
– Telephone: Numero telefonico
– Mail: Indirizzo e-mail
– Address: Via e numero civico
– City: Città
– Postal code: Codice di avviamento postale
– Province: Provincia
– Country: Paese
– Occupation: Professione
– Contract: Contratto
– Comments: Commenti
➤ Conferma le immissioni con Accept (Accetta).
NOTA
L’immissione di altri dati non è necessaria. Per i compiti ammini-
strativi può essere opportuna una descrizione dettagliata.

IT
Hotel Management Gestione dei dati del personale
311
✓ Il nuovo collaboratore viene visualizzato nella lista.

IT
Gestione dei dati del personale Hotel Management
312
9.3 Assegnazione delle schede ai collaboratori
Ogni collaboratore necessita di una scheda per eseguire i propri compiti.
I
➤ Nel menu principale seleziona Employee Records (Dati del personale).
➤ Seleziona il collaboratore dalla lista.
➤ Clicca sulla freccia Card Data (Dati scheda).
NOTA
Una scheda di accesso perduta è un rischio per la sicurezza.
Metti le schede di ingresso perdute immediatamente nella
blacklist (capitolo “Gestione della blacklist” a pagina 340).

IT
Hotel Management Gestione dei dati del personale
313
➤ Sul margine inferiore del record di dati sono disponibili i seguenti tasti:
– Add/modify card: Aggiungi/modifica scheda
– Add card to blacklist: Aggiungi scheda alla blacklist
– Show pass operations: Visualizza l’utilizzo
➤ Clicca sul tasto Add/modify car (Aggiungi/Modifica scheda).

IT
Gestione dei dati del personale Hotel Management
314
➤ Inserisci i dati necessari:
– Type of card: Tipo di scheda (vedi tabella a pagina 314)
– Valid dates: Validità della scheda in giorni
– Valid from date: Valida da (giorno)
– Valid from time: Valida da (ora)
– Valid until date: Termine della validità (giorno)
– Valid until time: Termine della validità (ora)
– Override privacy: Le porte possono essere aperte anche quando
l’impostazione della privacy della serratura è impostata
– Permanent opening: Sempre aperta
– Employee shift: Orario del personale
– Pass control: Numero dei locali dove si è avuto accesso
– Acces point 1 – 4: Punti di accesso da 1 a 4
– Access area 1: Area di accesso 1.
➤ Conferma le immissioni con Create card (Crea scheda).
➤ Segui le indicazioni sullo schermo.
Tipo di scheda Descrizione
Cleaning Il tipo di scheda Cleaning (Pulizia) è prevista per il personale
addetto alla pulizia. La caratteristica principale di questo tipo di
scheda è di consentire l’accesso a tutti i punti di accesso di
un’area.
Staff with entry
control
Il tipo di scheda Staff with entry control (Collaboratori con
controlli di accesso) è prevista per collaboratori come ad es.
personale addetto alla manutenzione, camerieri e cuochi. La
caratteristica principale di questo tipo di scheda è di consentire
l’accesso a tutti i punti di accesso di un’area.
Staff with access
to all areas
Il tipo di scheda Staff with access to all areas (Collaboratori
con accesso a tutte le aree) è prevista per collaboratori con
diritti di accesso a tutte le aree dell’hotel. La caratteristica prin-
cipale di questo tipo di scheda è di consentire l’accesso a tutti i
punti di accesso ai quali può essere assegnato un orario del
personale.
Master Il tipo di scheda Master (Principale) è prevista per quei colla-
boratori con funzioni di alto livello ad es. di carattere gestio-
nale. La caratteristica principale di questo tipo di scheda è di
garantisce l’accesso in ogni momento a tutti i punti di accesso
finché la scheda non è scaduta.

IT
Hotel Management Aggiunta/modifica dei dati del cliente
315
10 Aggiunta/modifica dei dati del cliente
Con la funzione dati del cliente è possibile salvare le informazioni dei clienti
che frequentano il tuo hotel. Se il cliente torna è possibile avere accesso a
questi dati e non è necessario creare un nuovo record di dati.
➤ Nel menu principale seleziona Client Records (Dati cliente).
➤ Per creare un record di dati, clicca sul simbolo .
➤ Per modificare un record di dati, clicca sul simbolo .
Simbolo Nome Descrizione
Add client Aggiungi un nuovo cliente
Edit client Modifica un cliente esistente
Delete client Cancella un cliente esistente

IT
Aggiunta/modifica dei dati del cliente Hotel Management
316
➤ Immetti i dati necessari:
–Name: Nome
– NIF: Codice fiscale
– Passport: Passaporto
– Telephone: Numero telefonico
– Mail: Indirizzo e-mail
– Address: Via e numero civico
– City: Città
– Postal code: Codice di avviamento postale
– Province: Provincia
– Country: Paese
– Comments: Commenti
➤ Se desideri aggiungere una foto del cliente, clicca sull’immagine
nell’angolo in alto a sinistra.
I
➤ Conferma le immissioni con Accept (Accetta).
NOTA
Sono supportati i formati foto BMP, JPEG o PNG.

IT
Hotel Management Esecuzione del check-in
317
11 Esecuzione del check-in
➤ Nel menu principale seleziona Occupation – Check-in (Prenotazione –
check-in).
Simbolo Nome Descrizione
Add
check-in
Aggiungi un nuovo check-in
Edit
check-in
Modifica un check-in esistente
Delete
check-in
Cancella un check-in esistente
Define client
schedule
Crea, modifica e cancella gli orari del cliente
Define meal
plans
Crea, modifica e cancella tipo di trattamento

IT
Esecuzione del check-in Hotel Management
318
11.1 Come aggiungere il check-in
➤ Nel menu principale seleziona Occupation – Check-in (Prenotazione –
check-in).
➤ Per creare un record di dati, clicca sul simbolo .
➤ Per modificare un record di dati, clicca sul simbolo (capitolo
“Aggiunta/modifica dei dati del cliente” a pagina 315).
➤ Solo nuovi clienti: Clicca sul simbolo e crea il nuovo cliente (capitolo
“Aggiunta/modifica dei dati del cliente” a pagina 315).
✓ Il nuovo cliente ora viene visualizzato nella lista.
➤ Immetti il nome del cliente nel campo di ricerca sul margine in alto a
destra e clicca sul simbolo della lente di ingrandimento per circoscrivere
la ricerca.
➤ Seleziona il nome del cliente dalla lista.
➤ Conferma le immissioni con Accept (Accetta).
Simbolo Nome Descrizione
Add client Aggiungi un nuovo cliente
Edit client Modifica un cliente esistente
Delete client Cancella un cliente esistente

IT
Hotel Management Esecuzione del check-in
319
➤ Per conformare i dati del cliente, clicca sul simbolo (capitolo
“Aggiunta/modifica dei dati del cliente” a pagina 315).
➤ Per creare una scheda di accesso per il cliente, clicca sul simbolo .
Simbolo Nome Descrizione
Modify client Modifica i dati del cliente
Add/modify
card
Crea i dati del cliente

IT
Esecuzione del check-in Hotel Management
320
➤ Immetti i dati necessari:
– Valid dates: Validità della scheda in giorni
– Valid from date: Valida da (giorno)
– Valid from time: Valida da (ora)
– Valid until date: Termine della validità (giorno)
– Valid until time: Termine della validità (ora)
– Meal plan: Tipo di trattamento, ad es. mezza pensione, pensione com-
pleta
– Main room: Stanza principale, per la quale è stato registrato il check-in
– Override privacy: Le porte possono essere aperte anche quando
l’impostazione privacy della serratura è impostata
– Configuration of secondary rooms: Stanze secondarie del cliente,
ad es. per la sua famiglia
– Configuration of accesses: Accessi (a scelta con orario), ad es. per la
piscina
– Configuration of accesses with sold time: Accessi con modello orario
(a scelta con orario) il cui utilizzo è a pagamento
– Configuration of areas: Accesso alle aree (a scelta con orario), ad es.
per il parcheggio
I
➤ Conferma le immissioni con Create card (Crea scheda).
➤ Segui le indicazioni sullo schermo.
NOTA
È possibile concedere al cliente l’accesso a un massimo di undici
punti di accesso, inclusa la sua stessa camera. Fra gli undici punti
di accesso possono esserci al massimo due accessi con modello
orario.
Indipendente da ciò, è possibile concedere al cliente accesso a
un massimo di due aree.

IT
Hotel Management Esecuzione del check-in
321
✓ Il nuovo check-in viene visualizzato nella lista con tutti i check-in validi
attualmente.
✓ Sul margine inferiore del record di dati è disponibile il seguente tasto:
– Add card to blacklist: Aggiungi scheda alla blacklist
I
11.2 Modifica del check-in
➤ Nel menu principale seleziona Occupation – Check-in (Prenotazione –
check-in).
➤ Per modificare un record di dati, clicca sul simbolo .
NOTA
Per creare altre schede di accesso per il cliente, utilizza la fun-
zione Modifica check-in (capitolo “Modifica del check-in” a
pagina 321).

IT
Esecuzione del check-in Hotel Management
322
➤ Per conformare i dati del cliente, clicca sul simbolo (capitolo
“Aggiunta/modifica dei dati del cliente” a pagina 315).
➤ Per creare una scheda di accesso per il cliente, clicca sul simbolo .
➤ Esegui tutti gli adattamenti desiderati.
➤ Conferma le immissioni con Create card (Crea scheda).
➤ Segui le indicazioni sullo schermo.
Simbolo Nome Descrizione
Modify client Modifica i dati del cliente
Add/modify
card
Crea scheda cliente

IT
Hotel Management Esecuzione del check-in
323
11.3 Definizione degli orari del cliente
Attraverso gli orari del cliente è possibile limitare l’accesso ai punti e alle aree
di accesso temporalmente.
I
➤ Nel menu principale seleziona Occupation – Check-in (Prenotazione –
check-in).
➤ Clicca sul simbolo .
➤ Per creare un record di dati, clicca sul simbolo .
➤ Per modificare un record di dati, clicca sul simbolo .
NOTA
Gli orari funzionano solo per i punti di accesso con la versione del
firmware 2.0 o superiore.
Simbolo Nome Descrizione
Add
schedule
Aggiungi un nuovo orario
Edit
schedule
Modifica un orario esistente
Delete
schedule
Cancella un orario esistente

IT
Esecuzione del check-in Hotel Management
324
➤ Immetti i dati necessari:
– Name: Nome dell’orario
– Start of margin 1: Inizio margine di tempo 1 (ora)
– End of margin 1: Termine margine di tempo 1 (ora)
– Start of margin 2: Inizio margine di tempo 2 (ora)
– End of margin 2: Inizio margine di tempo 2 (ora)
– Applicable dates: Giorni della settimana per i quali vale l’orario (da
lunedì a domenica)
I
➤ Conferma le immissioni con Accept (Accetta).
NOTA
Se desideri impostare solo un intervallo di tempo, seleziona il
tempo di inizio e di fine in modo che un intervallo contenga l’altro.

IT
Hotel Management Esecuzione del check-in
325
✓ Il nuovo orario viene visualizzato nella lista.
➤ Clicca su Exit (Esci) per ritornare alla finestra Check-in (Check-in).
11.4 Definizione del tipo di trattamento
➤ Nel menu principale seleziona Occupation – Check-in (Prenotazione –
check-in).
➤ Clicca sul simbolo .
➤ Per creare un record di dati, clicca sul simbolo .
➤ Per modificare un record di dati, clicca sul simbolo .
➤ Immetti un nome per il tipo di trattamento.
➤ Il nuovo tipo di trattamento viene visualizzato nella lista.
➤ Clicca su Exit (Esci) per ritornare alla finestra Check-in (Check-in).
Simbolo Nome Descrizione
Add meal
plan
Aggiungi un nuovo tipo di trattamento
Edit meal
plan
Modifica un tipo di trattamento esistente
Delete meal
plan
Cancella un tipo di trattamento esistente

IT
Creazione rapida delle schede del cliente Hotel Management
326
12 Creazione rapida delle schede del
cliente
➤ Nel menu principale seleziona Management – Program/read cards
(Gestione – Programma/leggi schede).
I
➤ Immettere i dati necessari:
– Valid dates: Validità della scheda in giorni
– Valid from date: Valida da (giorno)
– Valid until date: Termine della validità (giorno)
– Meal plan: Tipo di trattamento, ad es. mezza pensione, pensione com-
pleta
– Room: Stanze che vengono prenotate
– Override privacy: Le porte possono essere aperte anche quando
l’impostazione privacy della serratura è impostata
– Configuration of accesses: Accessi (a scelta con orario), ad es. per la
piscina
➤ Conferma le immissioni con Create card (Crea scheda).
➤ Segui le indicazioni sullo schermo.
➤ Clicca su Exit (Esci) per ritornare alla finestra principale.
NOTA
Utilizza la creazione rapida delle schede del cliente solo in casi
eccezionali. Di norma utilizza la funzione Esegui check-in (capi-
tolo “Esecuzione del check-in” a pagina 317).

IT
Hotel Management Lettura delle schede
327
13 Lettura delle schede
➤ Nel menu principale seleziona Management – Program/read cards
(Gestione – Programma/leggi schede).
➤ Clicca sul tasto Read card (Leggi scheda).
➤ Segui le indicazioni sullo schermo.
✓ Le informazioni sulla scheda da leggere vengono visualizzate in una
nuova finestra.
➤ Per ritornare alla finestra Program/read cards (Programma/leggi
schede), clicca su Exit (Esci).

IT
Planner mensile Hotel Management
328
14 Planner mensile
➤ Nel menu principale seleziona Occupation – Monthly chart (Prenota-
zione – Planner mensile).
Nella preimpostazione il planner mensile visualizza il mese attuale. Ogni
locale può assumere ogni giorno uno dei seguenti stati.
Simbolo Nome Descrizione
Calender Seleziona un altro mese
Colore Dicitura Significato
Verde Free room Il locale è libero e può essere prenotato dal cliente
Rosso Occupied room Il locale è occupato. Il cliente ha fatto il check-in. Il
locale non può essere prenotato o riservato.
Giallo Locale riservato Il locale è riservato. Il cliente non ha fatto check-in. Il
locale non può essere prenotato o riservato. (Visualiz-
zazione solo con modulo supplementare “Planning
Module”).
Blu Blocked room Il locale è bloccato. Il locale non può essere prenotato o
riservato. (Visualizzazione solo con modulo supplemen-
tare “Planning Module”).

IT
Hotel Management Planner mensile
329
I
14.1 Visualizzazione di un altro mese
➤ Clicca sul simbolo .
✓ Si apre una finestra dove è possibile selezionare il mese e l’anno.
➤ Seleziona il mese e l’anno desiderati da entrambi i menu a discesa.
➤ Conferma le immissioni con Accept (Accetta).
✓ Il mese corrispondente viene visualizzato nel planner mensile.
NOTA
Il cambio del giorno avviene nel planner mensile non solo alle
24:00, ma anche alle 12:00 del giorno seguente. Attraverso que-
sta impostazione la panoramica dell’orario consueto del check-
out viene calcolata in mattinata. Un locale che viene visualizzato
come occupato dall’01.10. al 03.10., è quindi occupato dall’01.10.
alle 12:00 al 04.10. alle ore 12:00.

IT
Caricamento dei dati nel sistema Hotel Management
330
15 Caricamento dei dati nel sistema
15.1 Download dei dati da un punto di accesso
Prima di poter scaricare i dati da un punto di acceso è necessario innanzitutto
creare una scheda di download per i dati.
➤ Nel menu principale Management – Generate data download card
(Gestione – Crea scheda di download dati).
➤ Segui le indicazioni sullo schermo.
✓ La scheda di download dati è stata creata.
➤ Inserire la scheda di download dati nella serratura dalla quale desideri
scaricare i dati.
➤ Terminata l’operazione di download, estrarre la scheda di download dati
dalla serratura.
I
15.2 Caricamento dei dati della scheda nel sistema
➤ Nel menu principale seleziona Data – Download card data (Dati – Sca-
rica dati scheda).
➤ Inserisci la scheda di download dati nel lettore di schede.
✓ I dati vengono copiati nella banca dati del software.
NOTA
È necessario ripetere l’operazione completa per ogni serratura
dalla quale desideri scaricare i dati.
Conserva la scheda di download dati in un posto sicuro poiché
contiene informazioni importanti sul sistema.

IT
Hotel Management Visualizzazione degli accessi
331
16 Visualizzazione degli accessi
I
➤ Nel menu principale seleziona Data – See data operations (Dati – Visua-
lizza operazioni dei dati).
NOTA
Più la lista è aggiornata, più dati si hanno a disposizione.
Aggiorna la lista scaricando regolarmente i dati da tutti i punti di
accesso e copiandoli nella banca dati del sistema (capitolo “Cari-
camento dei dati nel sistema” a pagina 330 e capitolo “Carica-
mento dei dati della scheda nel sistema” a pagina 330).
Simbolo Nome Descrizione
Filter by
access num-
ber
Filtra in base al numero di accessi
Filter by
date
Filtra in base alla data di accesso
Delete by
dates
Cancella cronologia accessi

IT
Visualizzazione degli accessi Hotel Management
332
16.1 Filtraggio in base al numero di accessi
➤ Clicca sul simbolo .
➤ Immetti il numero di inizio e di fine dei punti di accesso che vuoi visualiz-
zare.
➤ Conferma le immissioni con Accept (Accetta).
✓ Gli accessi dei punti di accesso selezionati vengono visualizzati.
16.2 Filtraggio in base alla data di accesso
➤ Clicca sul simbolo .
➤ Immetti la data di inizio e di fine del periodo che vuoi visualizzare.
➤ Conferma le immissioni con Accept (Accetta).
✓ Gli accessi del periodo selezionato vengono visualizzati.

IT
Hotel Management Visualizzazione degli accessi
333
16.3 Cancellazione della cronologia accessi
È possibile cancellare parti della cronologia accessi dalla banca dati.
I
➤ Clicca sul simbolo .
➤ Immetti la data di inizio e di fine del periodo che vuoi cancellare.
➤ Conferma le immissioni con Accept (Accetta).
✓ Gli accessi del periodo selezionato vengono cancellati in modo perma-
nente.
NOTA
I dati una volta cancellati non possono essere ripristinati.

IT
Programmazione della serratura della porta Hotel Management
334
17 Programmazione della serratura della
porta
Per programmare una serratura della porta è necessaria una scheda di pro-
grammazione. La scheda di programmazione permette di assegnare a un
punto di accesso un numero e di impostare la data e l’ora.
I
➤ Nel menu principale seleziona Management – Generate programming
card (Gestione – Crea scheda di programmazione).
➤ Immetti il numero del locale o del punto di accesso per il quale deve
essere valida la carta di programmazione.
➤ Conferma l’immissione con Create card (Crea scheda).
➤ Segui le indicazioni sullo schermo.
➤ Inserisci la scheda di programmazione nella serratura che desideri pro-
grammare.
➤ Terminata l’operazione di programmazione, estrai la scheda di program-
mazione dalla serratura.
I
NOTA
L’orario e il numero devono essere sempre impostati nella serra-
tura durante la prima installazione e dopo ogni cambio della bat-
teria.
Sulla scheda di programmazione vengono salvate la data e l’ora
del computer con il quale è stata creata la scheda. Assicurati che
l’indicazione della data sul tuo computer sia corretta.
NOTA
Una scheda di programmazione non è più valida dopo il primo uti-
lizzo. In questo modo si impedisce che lo stesso numero del
locale venga assegnato due volte.

IT
Hotel Management Creazione di schede speciali
335
18 Creazione di schede speciali
I
18.1 Creazione di una scheda di emergenza
La scheda di emergenza è una scheda di accesso sempre valida per il rispet-
tivo punto di accesso. Utilizza le schede di emergenza solo se le schede
regolari non possono essere usate, ad es. se il sistema computerizzato è
guasto e i clienti aspettano di essere accompagnati nella loro stanza.
➤ Nel menu principale seleziona Hotel Data (Dati hotel).
➤ Seleziona un access point (punto di accesso).
✓ Nella metà a destra del record di dati sono disponibili i seguenti tasti:
– Create card: Crea una scheda
– Add card to blacklist: Aggiungi una scheda alla blacklist
➤ Clicca su Create card (Crea scheda).
➤ Inserisci la scheda di emergenza nel lettore di schede del PC.
✓ La scheda di emergenza è stata creata.
NOTA
Una scheda di accesso perduta è un rischio per la sicurezza. Met-
tere le schede di accesso perdute immediatamente nella blacklist
(capitolo “Gestione della blacklist” a pagina 340).

IT
Creazione di schede speciali Hotel Management
336
18.2 Creazione della scheda di accesso libero
Con la scheda di acceso libero è possibile aprire qualsiasi punto di accesso
nel sistema in modo permanente.
I
➤ Nel menu principale, seleziona Management – Generate free access
card (Gestione – Crea scheda di accesso libero).
➤ Clicca sul simbolo .
➤ Segui le indicazioni sullo schermo.
NOTA
La scheda di accesso libero può essere usata su ogni serratura
del sistema. Per i locali permanentemente aperti non è necessa-
ria alcuna scheda di accesso. Utilizza la scheda di accesso libero
con accortezza. Conservare la scheda di accesso libero in un
posto sicuro.
Simbolo Nome Descrizione
Generate free
access card
Crea una nuova scheda di accesso libero
Delete free
access card
Cancella una scheda di acceso libero esistente dalla
banca dati
Add card to
the blacklist
Aggiungi la scheda di accesso libero selezionata alla
blacklist

IT
Hotel Management Creazione di schede speciali
337
18.3 Crea una scheda di bloccaggio
Con la scheda di bloccaggio è possibile bloccare un qualsiasi punto di
accesso nel sistema in modo permanente.
I
➤ Nel menu principale, seleziona Management – Generate locking card
(Gestione – Crea scheda di bloccaggio).
➤ Segui le indicazioni sullo schermo.
NOTA
La scheda di bloccaggio può essere usata su ogni serratura del
sistema. Utilizza la scheda di bloccaggio con accortezza. Con-
serva la scheda di bloccaggio in un posto sicuro.

IT
Creazione di schede speciali Hotel Management
338
18.4 Crea scheda orario comfort
La cosiddetta scheda di orario comfort viene utilizzata insieme a un sistema
a risparmio energetico. Il lettore di schede del sistema a risparmio energetico
legge la scheda di accesso inserita e regola il consumo di energia di una
stanza in modo corrispondente. Ad esempio, se per il personale addetto alla
pulizie viene accesa solo la luce, per i clienti verrà acceso anche il climatiz-
zatore o il riscaldamento.
Dopo avere estratto la scheda dal lettore del sistema a risparmio energetico,
la corrente viene spenta o immediatamente o dopo un intervallo di tempo
impostabile.
Con la scheda orario comfort è possibile impostare un ritardo di commuta-
zione.
➤ Nel menu principale, seleziona Energy economizer – Generate
courtesy card (Sistema a risparmio energetico – Crea scheda orario
comfort).
➤ Immettere l’intervallo di tempo desiderato in secondi.
➤ Conferma l’immissione con Create card (Crea scheda).
➤ Segui le indicazioni sullo schermo.
I
NOTA
Il ritardo di commutazione può essere impostato in un intervallo di
tempo da 0 a 9999 secondi.
L’impostazione di fabbrica dei sistemi a risparmio energetico per
il ritardo di commutazione è cinque secondi.

IT
Hotel Management Creazione/ripristino dei backup
339
19 Creazione/ripristino dei backup
➤ Nel menu principale seleziona Backup (Backup).
19.1 Creazione del backup
➤ Nel menu principale seleziona Backup (Backup).
➤ Nella finestra in basso seleziona Selection of data destination/source
(Selezione della directory di destinazione/origine) la directory dove vuoi
salvare il backup.
➤ Clicca su Generate backup (Crea backup).
19.2 Ripristino del backup
➤ Nel menu principale seleziona Backup (Backup).
➤ Seleziona la directory nella quale è salvato il backup che vuoi ripristinare.
➤ Clicca su Restore backup (Ripristina backup).

IT
Gestione della blacklist Hotel Management
340
20 Gestione della blacklist
Nella blacklist vengono salvate le schede che sono bloccate. Le schede sal-
vate nella blacklist vengono respinte da tutti i punti di accesso. Le schede
possono essere inserite nella blacklist solo nelle aree del software nelle quali
sono anche create.
I
20.1 Come aggiungere schede alla blacklist
➤ Seleziona un’area nella quale desideri bloccare una scheda.
➤ Clicca sul tasto Add card to the blacklist (Aggiungi una scheda alla
blacklist) o sul simbolo .
➤ Conferma l’immissione con Accept (Accetta).
✓ La scheda viene visualizzata nell’area Management – Blacklist
(Gestione – Blacklist).
NOTA
Le schede che vengono visualizzate nella blacklist non sono bloc-
cate automaticamente in tutti i punti di accesso. Assicurati di uti-
lizzare la scheda della blacklist in tutti i punti di accesso.

IT
Hotel Management Gestione della blacklist
341
20.2 Visualizzazione delle schede sulla blacklist
➤ Nel menu principale seleziona Management – Blacklist (Gestione –
Blacklist).
Nella tabella in alto vengono visualizzate tutte le schede che sono state
messe sulla blacklist.
Nella tabella in basso vengono visualizzate tutte le schede che sono state
scritte su una blacklist.
Simbolo Nome Descrizione
Create
blacklist
card
Crea una scheda per la blacklist
Delete
blacklist
entry
Cancella una voce della blacklist esistente dalla banca
dati

IT
Gestione della blacklist Hotel Management
342
20.3 Creazione di una scheda per la blacklist
➤ Nel menu principale seleziona Management – Blacklist (Gestione –
Blacklist).
➤ Clicca sul simbolo .
➤ Segui le indicazioni sullo schermo.
✓ Il contenuto delle due tabelle nella schermata Blacklist è ora identico.
I
NOTA
Le schede che vengono visualizzate nella blacklist non sono bloc-
cate automaticamente in tutti i punti di accesso. Assicurati di uti-
lizzare la scheda per la blacklist in tutti i punti di accesso.

IT
Hotel Management Gestione del modulo PMS
343
21 Gestione del modulo PMS
Il modulo PMS viene utilizzato per creare schede valide per le serrature delle
porte e i punti di accesso da un altro Property Management System (PMS).
In questo modo è possibile uniformare processi operativi ed evitare duppli-
cazioni di dati.
➤ Nel menu principale, seleziona PMS (PMS).
I
Le schede che sono state create da un altro Property Management System
utilizzando il modulo PMS hanno le seguenti limitazioni:
Possono essere create solo schede clienti.
Le schede clienti non possono essere assegnate a nessuna area di
accesso.
Le schede clienti non possono essere assegnate ad aree con modello
orario a pagamento.
Simbolo Nome Descrizione
Add authori-
zation
Aggiungi una nuova autorizzazione
Edit authori-
zation
Modifica una autorizzazione esistente
Delete
authoriza-
tion
Cancella una autorizzazione esistente
NOTA
Se viene usato il modulo PMS, non tutte le funzioni del software
di gestione hotel possono essere utilizzate.

IT
Gestione del modulo PMS Hotel Management
344
Se il client PMS non trasmette esattamente gli stessi dati copiando le
schede, le schede più vecchie dei clienti diventano invalide per la stessa
stanza.
Se il client PMS, creando le schede clienti, non trasmette l’ora del check-
in e del check-out, le schede dei clienti più vecchie diventano invalide per
la stessa stanza.
Se si utilizza il protocollo 2, l’orario viene trasmesso solo con ore piene.
In questo modo possono insorgere problemi con il check-in e check-out.

IT
Hotel Management Gestione del modulo PMS
345
21.1 Configurazione del modulo PSM
➤ Nel menu principale seleziona PMS (PMS).
➤ Clicca sul pulsante Edit general configuration.
➤ Immetti i dati necessari:
– PMS control: Imposta su Local (locale), se il PMS e il software di
gestione hotel si trovano sullo stesso computer, altrimenti su Remote
(Comandare a distanza).
– IP address: Indirizzo IP del computer sul quale è installato il PSM.
– Port: Porta di comunicazione per richieste del client del PMS.
– Terminal number: Numero di identificazione per il lettore/scrittore di
schede.
– Protocol: Il protocollo di trasmissione usato per la comunicazione fra
PMS e software di gestione hotel (vedi tabella in basso).
➤ Conferma l’immissione con Ok (Ok).
✓ Le impostazioni modificate vengono visualizzate nella finestra in alto a
sinistra.
Funzione Protocollo 1 Protocollo 2
Numero di autorizzazioni 20 8
Trasmissione orari Ora esatta solo ore piene (12:30
diventa 12:00)

IT
Gestione del modulo PMS Hotel Management
346
21.2 Aggiunta/modifica delle autorizzazioni
Le autorizzazioni vengono scritte automaticamente sulla scheda cliente
quando si usa un client PMS. A seconda del protocollo di trasmissione sele-
zionato è possibile scrivere sulle schede clienti fino a 20 autorizzazioni.
➤ Nel menu principale seleziona PMS (PMS).
➤ Per creare un record di dati, clicca sul simbolo .
➤ Per modificare un record di dati, clicca sul simbolo .
➤ Immetti i dati necessari:
– Numero: Numero di identificazione dell’autorizzazione.
– Type: Il tipo di autorizzazione può essere un Access (Accesso) o
Public area (Area pubblica).
– Access: Accesso o area pubblica
➤ Conferma l’immissione con Accept (Accetta).
✓ L’autorizzazione appare nella tabella nella finestra PMS configuration
(Configurazione PMS).

IT
Hotel Management Gestione del modulo PMS
347
21.3 Creazione di un collegamento PMS
I
➤ Nel menu principale seleziona PMS – Start PMS connection (PMS –
Avvia collegamento PMS).
✓ Il software di gestione hotel può elaborare le richieste del client PMS.
➤ Per terminare il collegamento PMS, premi su Exit (Esci).
NOTA
Dopo la creazione di un collegamento PMS il software di gestione
hotel funziona solo come server per le richieste PMS. Se si desi-
dera lavorare con il software di gestione hotel, il collegamento
PMS deve essere chiuso.

SV
Hotel Management
348
Läs igenom anvisningarna noga innan produkten tas i drift. Spara
bruksanvisningen för senare bruk. Överlämna bruksanvisningen till
den nya ägaren vid ev. vidareförsäljning.
Innehållsförteckning
1 Systemkrav. . . . . . . . . . . . . . . . . . . . . . . . . . . . . . . . . . . . . . . . . .351
2 Tillbehör . . . . . . . . . . . . . . . . . . . . . . . . . . . . . . . . . . . . . . . . . . . . 351
3 Installation . . . . . . . . . . . . . . . . . . . . . . . . . . . . . . . . . . . . . . . . . .351
4 Första programstart. . . . . . . . . . . . . . . . . . . . . . . . . . . . . . . . . . . 352
5 Grunder. . . . . . . . . . . . . . . . . . . . . . . . . . . . . . . . . . . . . . . . . . . . .354
5.1 Söka efter dataposter . . . . . . . . . . . . . . . . . . . . . . . . . . . . . 354
5.2 Redigera datapost . . . . . . . . . . . . . . . . . . . . . . . . . . . . . . . .354
5.3 Radera datapost . . . . . . . . . . . . . . . . . . . . . . . . . . . . . . . . . 355
5.4 Lämna skärmen utan att spara . . . . . . . . . . . . . . . . . . . . . .355
5.5 Logga in. . . . . . . . . . . . . . . . . . . . . . . . . . . . . . . . . . . . . . . .356
5.6 Byta användare . . . . . . . . . . . . . . . . . . . . . . . . . . . . . . . . . .357
5.7 Startskärmen . . . . . . . . . . . . . . . . . . . . . . . . . . . . . . . . . . . . 358
5.8 Avsluta programmet. . . . . . . . . . . . . . . . . . . . . . . . . . . . . . .358
6 Konfigurera programvaran . . . . . . . . . . . . . . . . . . . . . . . . . . . . . 359
6.1 Välja språk. . . . . . . . . . . . . . . . . . . . . . . . . . . . . . . . . . . . . .359
6.2 Använda uppdateringskod. . . . . . . . . . . . . . . . . . . . . . . . . . 360
6.3 Lägga till tillvalsmoduler. . . . . . . . . . . . . . . . . . . . . . . . . . . .361
7 Förvalta användare . . . . . . . . . . . . . . . . . . . . . . . . . . . . . . . . . . .362
7.1 Skapa/redigera användartyp . . . . . . . . . . . . . . . . . . . . . . . .363
7.2 Skapa/redigera användare . . . . . . . . . . . . . . . . . . . . . . . . .365
8 Förvalta hotelldata. . . . . . . . . . . . . . . . . . . . . . . . . . . . . . . . . . . .367
8.1 Filtrera efter utrymmen . . . . . . . . . . . . . . . . . . . . . . . . . . . . 368
8.2 Gruppera efter åtkomster och rum. . . . . . . . . . . . . . . . . . . . 369
8.3 Definiera rumstyp. . . . . . . . . . . . . . . . . . . . . . . . . . . . . . . . .370
8.4 Lägga till/redigera åtkomstpunkter. . . . . . . . . . . . . . . . . . . .371
8.5 Definiera utrymmen . . . . . . . . . . . . . . . . . . . . . . . . . . . . . . .373

SV
Hotel Management
349
9 Förvalta personaluppgifter . . . . . . . . . . . . . . . . . . . . . . . . . . . . . 375
9.1 Definiera arbetsschema. . . . . . . . . . . . . . . . . . . . . . . . . . . .375
9.2 Lägga till/redigera personaluppgiftspost . . . . . . . . . . . . . . . 378
9.3 Tilldelning av kort till medarbetare. . . . . . . . . . . . . . . . . . . . 380
10 Lägga till/redigera kunduppgifter. . . . . . . . . . . . . . . . . . . . . . . .383
11 Genomföra incheckning . . . . . . . . . . . . . . . . . . . . . . . . . . . . . . .385
11.1 Lägga till incheckning . . . . . . . . . . . . . . . . . . . . . . . . . . . . .386
11.2 Bearbeta incheckning . . . . . . . . . . . . . . . . . . . . . . . . . . . . .389
11.3 Definiera kundscheman. . . . . . . . . . . . . . . . . . . . . . . . . . . .391
11.4 Definiera typ av boende. . . . . . . . . . . . . . . . . . . . . . . . . . . .393
12 Snabbskapande av kort. . . . . . . . . . . . . . . . . . . . . . . . . . . . . . . .394
13 Läsa kort. . . . . . . . . . . . . . . . . . . . . . . . . . . . . . . . . . . . . . . . . . . .395
14 Månadsöversikt . . . . . . . . . . . . . . . . . . . . . . . . . . . . . . . . . . . . . .396
14.1 Visa annan månad. . . . . . . . . . . . . . . . . . . . . . . . . . . . . . . . 397
15 Läsa in uppgifter i systemet . . . . . . . . . . . . . . . . . . . . . . . . . . . . 398
15.1 Hämta uppgifter från en åtkomstpunkt. . . . . . . . . . . . . . . . .398
15.2 Läsa in kortuppgifter i systemet. . . . . . . . . . . . . . . . . . . . . . 398
16 Visa åtkomster . . . . . . . . . . . . . . . . . . . . . . . . . . . . . . . . . . . . . . . 399
16.1 Filtrera efter åtkomstnummer. . . . . . . . . . . . . . . . . . . . . . . . 400
16.2 Filtrera efter åtkomstdatum . . . . . . . . . . . . . . . . . . . . . . . . .400
16.3 Radera åtkomstförlopp . . . . . . . . . . . . . . . . . . . . . . . . . . . . 401
17 Programmera dörrlåset. . . . . . . . . . . . . . . . . . . . . . . . . . . . . . . .402
18 Skapa specialkort . . . . . . . . . . . . . . . . . . . . . . . . . . . . . . . . . . . .403
18.1 Skapa nödfallskort. . . . . . . . . . . . . . . . . . . . . . . . . . . . . . . .403
18.2 Skapa kort för universalåtkomst . . . . . . . . . . . . . . . . . . . . .404
18.3 Skapa förreglingskort. . . . . . . . . . . . . . . . . . . . . . . . . . . . . . 405
18.4 Skapa kort för energisnål användning . . . . . . . . . . . . . . . . .406
19 Skapa/återställa backups . . . . . . . . . . . . . . . . . . . . . . . . . . . . . .407
19.1 Skapa backup . . . . . . . . . . . . . . . . . . . . . . . . . . . . . . . . . . .407
19.2 Återställa backup . . . . . . . . . . . . . . . . . . . . . . . . . . . . . . . . . 407
20 Förvalta Blacklist. . . . . . . . . . . . . . . . . . . . . . . . . . . . . . . . . . . . . 408
20.1 Lägga till kort i Blacklist . . . . . . . . . . . . . . . . . . . . . . . . . . . .408
20.2 Visa kort i Blacklist. . . . . . . . . . . . . . . . . . . . . . . . . . . . . . . .409
20.3 Skapa Blacklist-kort. . . . . . . . . . . . . . . . . . . . . . . . . . . . . . .410

SV
Hotel Management
350
21 Förvalta PMS-modul . . . . . . . . . . . . . . . . . . . . . . . . . . . . . . . . . . 411
21.1 Konfigurera PMS-modul . . . . . . . . . . . . . . . . . . . . . . . . . . . 412
21.2 Lägga till/redigera behörigheter. . . . . . . . . . . . . . . . . . . . . .413
21.3 Upprätta PMS-anslutning. . . . . . . . . . . . . . . . . . . . . . . . . . .414

SV
Hotel Management Systemkrav
351
1 Systemkrav
Minimikrav:
Operativsystem: Windows XP Service Pack 3
Bildskärmsupplösning: 1024 x 768
Processor: Intel Pentium 4 med 2 GHz eller kompatibel
Minne: 1 GB RAM
Ledigt hårddiskutrymme: 1 GB
Gränssnitt: 1x USB 2.0
2 Tillbehör
Följande tillbehör finns tillgängliga (ingår inte i leveransen):
3 Installation
➤ Anslut kortläsaren till ett ledigt USB-uttag.
➤ Lägg i databäraren med programvaran Hotel-Management.
✓ Setup-programmet öppnas.
➤ Följ instruktionerna i setup-programmet.
Beteckning Artikelnummer
Smart Card Energy saver 9106600715
Smart Card Access Control 9106600713
Smart Card Encoder 9106600722
Smart Key Card 9106600724
RFID Access Control 9106600714
RFID Energy saver 9106600716
RFID Encoder 9106600723
RFID Key Card 9106600725

SV
Första programstart Hotel Management
352
4 Första programstart
Första gången programmet startas måste du konfigurera Hotel-Manage-
ment.
➤ Öppna Hotel-Management.
➤ Välj språk ur listan och bekräfta med Accept (Acceptera).
✓ Programmet startar om Hotel-Management med de nya inställningarna.
➤ Ange installationskoden och bekräfta med Accept (Acceptera).
I
ANVISNING
Installationskoden får du från tillverkaren.

SV
Hotel Management Första programstart
353
➤ Skjut in initieringskortet i kortläsaren.
➤ Följ anvisningarna på bildskärmen.
✓ Startskärmen för Hotel-Management öppnas.

SV
Grunder Hotel Management
354
5Grunder
Många skärmar har en symbollist i den övre kanten. Symbolerna i symbollis-
ten ändras beroende på kontext. Symbolernas betydelse förklaras i denna
bruksanvisning under bilden till den aktuella skärmen.
Många skärmar innehåller listor. Klicka på en post i listan för att öppna ett
fönster med ytterligare information om posten. Klicka på en användartyp för
att visa t.ex. gällande behörigheter för denna användartyp. Klicka på en
annan post i listan för att stänga den redan öppnade posten. Information om
den nya posten visas istället.
5.1 Söka efter dataposter
Många skärmar har ett sökfält uppe till höger.
➤ Ange ett begrepp som du vill söka efter.
➤ Klicka på förstoringsglassymbolen för att påbörja sökningen.
✓ Listan på den aktuella skärmen begränsas till resultaten från din sökning.
5.2 Redigera datapost
Befintliga dataposter kan redigeras med symbolen .
➤ Välj datapost.
➤ Klicka på symbolen .
I
ANVISNING
Nedan nämns inte att du måste välja dataposten för att kunna
redigera den.

SV
Hotel Management Grunder
355
5.3 Radera datapost
De flesta skärmar innehåller knappen Delete (Radera) med symbolen .
I
➤ Markera en datapost i listan.
➤ Klicka på symbolen .
➤ Bekräfta raderingen med Accept (Acceptera).
✓ Dataposten raderas.
5.4 Lämna skärmen utan att spara
Om du skapar eller redigerar en datapost kan du när som helst avbryta pro-
cessen utan att spara uppgifterna.
I
➤ Tryck på knappen Cancel (Avbryta).
✓ Den öppna skärmen stängs.
ANVISNING
Nedan refererar vi inte uttryckligen till knappen Delete (Radera).
ANVISNING
Nedan refererar vi inte uttryckligen till knappen Cancel (Avbryta).

SV
Grunder Hotel Management
356
5.5 Logga in
➤ Öppna Hotel-Management.
✓ Startskärmen för Hotel-Management öppnas.
Du måste logga in på programvaran.
➤ Ange användarnamnet och lösenordet.
I
➤ Bekräfta med Accept (Acceptera).
ANVISNING
Vid installationen av Hotel-Management skapas användaren
”Administrator”. Inget lösenord ges för användaren ”Administra-
tor”. Ändra lösenordet efter den första inloggningen (kapitel
”Skapa/redigera användare” på sidan 365).

SV
Hotel Management Grunder
357
5.6 Byta användare
➤ Välj Users – Change user (Användare – Byta användare) i huvudmenyn.
➤ Ange användarnamnet och lösenordet.
➤ Bekräfta med Accept (Acceptera).

SV
Grunder Hotel Management
358
5.7 Startskärmen
Startskärmen är det viktigaste elementet i programvaran Hotel-Manage-
ment. Via startskärmens huvudmeny har du tillgång till samtliga funktioner i
Hotel-Management.
Vid startskärmens nedre kant finns följande information:
Version: Programvaruversion
Current user: Användare som för tillfället är inloggad
Type of user: Användartyp på den användare som för tillfället är inloggad
Du når startskärmen via menyalternativet Desktop på huvudmenyn.
5.8 Avsluta programmet
➤ Välj Exit (Avsluta) i huvudmenyn.

SV
Hotel Management Konfigurera programvaran
359
6 Konfigurera programvaran
6.1 Välja språk
I
➤ Välj Configuration – General configuration (Konfiguration – Allmän
konfiguration) i huvudmenyn.
➤ Klicka på Language (Språk).
➤ Välj språk ur listan och bekräfta med Accept (Acceptera).
✓ Ett fönster öppnas med meddelandet om att programvaran måste startas
om.
➤ Klicka på Accept (Acceptera) för att starta om programvaran eller starta
om manuellt.
ANVISNING
Programvaran måste startas om när ett annat språk väljs.

SV
Konfigurera programvaran Hotel Management
360
6.2 Använda uppdateringskod
Programvaran uppdateras via uppdateringskoder. Tillverkaren kontaktar dig
när programvaran måste uppdateras.
➤ Välj Configuration – General configuration (Konfiguration – Allmän
konfiguration) i huvudmenyn.
➤ Klickar på Updating code (Uppdateringskod).
➤ Ange serienummer och uppdateringskod.
➤ Bekräfta med Accept (Acceptera).
✓ Programvaran uppdateras.

SV
Hotel Management Konfigurera programvaran
361
6.3 Lägga till tillvalsmoduler
Programvaran Hotel-Management kan kompletteras med tillvalsmoduler.
➤ Välj Configuration – General configuration (Konfiguration – Allmän
konfiguration) i huvudmenyn.
➤ Klicka på Initialization card (Initieringskort).
➤ Skjut in initieringskortet i kortläsaren.
➤ Följ anvisningarna på monitorn.

SV
Förvalta användare Hotel Management
362
7 Förvalta användare
Hotel-Management kan användas till att förvalta, lägga till, ändra eller radera
data. Du kan skapa ett oändligt antal användare.
Via användartyper kan du förvalta användarnas behörigheter i Hotel-Mana-
gement.
Vid installationen av Hotel-Management skapas användaren ”Administrator”.
Administratören har omfattande behörigheter att ändra eller radera data som
sparats i programvaran. Därför rekommenderar vi att du inte kontinuerligt
jobbar med administratörsrättigheter. Skapa istället ytterligare användare för
att kunna redigera hotellverksamhetens olika uppgifter.
➤ Välj Users – Create users (Användare – Skapa användare) i huvudme-
nyn.
Symbol Namn Beskrivning
Add user Lägga till en ny användare
Edit user Redigera en befintlig användare
Delete user Radera en befintlig användare
Define types
of user
Skapa, redigera och radera användartyp

SV
Hotel Management Förvalta användare
363
7.1 Skapa/redigera användartyp
Användartyper utgör grunden för att kunna förvalta de olika användarnas
behörigheter. Vanliga ansvarsområden som receptionist, vaktmästare etc.
kan fördefinieras via användartyper och får endast i undantagsfall anpassas
till enskilda användare.
➤ Välj Users – Create users (Användare – Skapa användare) i huvudme-
nyn.
➤ Klicka på symbolen .
På skärmen Types of user (Användartyper) listas alla definierade använd-
artyper. Klicka på en användartyp för att visa en översikt över de behörighe-
ter som ingår för denna användartyp.
I
➤ Klicka på för att skapa en datapost.
Symbol Namn Beskrivning
Add type of
user
Lägga till en ny användartyp
Edit type of
user
Redigera en befintlig användartyp
Delete type
of user
Radera en befintlig användartyp
ANVISNING
I användartypen ”Administrator” ingår samtliga behörigheter i pro-
gramvaran. Användartypen ”Administrator” kan inte ändras eller
raderas.

SV
Förvalta användare Hotel Management
364
➤ Klicka på för att redigera en datapost.
➤ Ange ett namn för användartypen.
➤ Välj vilka behörigheter som ska ingå i användartypen:
– Create Users: Skapa användare
– Generate programming card: Skapa programmeringskort
– Generate data download card: Skapa kort för uppgiftshämtning
– Generate free access card: Skapa kort för universalåtkomst
– Generate closing card: Skapa förreglingskort
– Programm/read cards: Programmera/läsa kort
– Blacklist: Förvalta Blacklist
– Download card data: Hämta kortdata
– See access operations: Visa åtkomstprocesser
– Check-in: Genomföra incheckning
– Occupation graph: Visa översikt över beläggning
– Client records: Förvalta kunduppgifter
– Employee records: Förvalta medarbetaruppgifter
– Backup: Skapa/återställa backups
– General configuration: Utföra allmänna inställningar
– Hotel data: Förvalta hotelldata
– Generate courtesy time card: Skapa kort för energisnål användning
– PMS configuration: Konfigurera Property Management System (PMS)
– Start PMS connection: Upprätta anslutningen till Property Manage-
ment System (PMS)
–Lockers: Skåplås
➤ Bekräfta med Accept (Acceptera).

SV
Hotel Management Förvalta användare
365
✓ Den nya användartypen visas i listan.
➤ Klicka på Exit (Avsluta) för att återgå till skärmen Create users (Skapa
användare).
7.2 Skapa/redigera användare
I
➤ Välj Users – Create users (Användare – Skapa användare) i huvudme-
nyn.
➤ Klicka på för att skapa en datapost.
➤ Klicka på för att redigera en datapost.
➤ Ange ett namn och lösenord för användaren.
ANVISNING
Användaren ”Administrator” har samtliga behörigheter i program-
varan. Användaren ”Administrator” kan inte raderas.

SV
Förvalta användare Hotel Management
366
➤ Välj användartyp för användaren.
✓ Användarens behörigheter anpassas i enlighet med användartypen.
➤ Bekräfta med Accept (Acceptera).
✓ Den nya användaren visas i listan.

SV
Hotel Management Förvalta hotelldata
367
8 Förvalta hotelldata
Under menyalternativet Hotel Data (Hotelldata) kan du skapa en virtuell
avbild av hotellet. Utforma avbilden så exakt som möjligt så att personalen
kan använda Hotel-Management så effektivt som möjligt.
➤ Välj Hotel Data (Hotelldata) i huvudmenyn.
Du kan använda följande visningsalternativ:
Filtrera efter utrymmen
Gruppera efter åtkomster och rum
Symbol Namn Beskrivning
Add access
point
Lägga till en ny åtkomstpunkt
Edit access
point
Redigera en befintlig åtkomstpunkt
Delete
access point
Radera en befintlig åtkomstpunkt
Define types
of room
Skapa, redigera och radera rumstyper
Define
areas
Skapa, redigera och radera utrymmen

SV
Förvalta hotelldata Hotel Management
368
8.1 Filtrera efter utrymmen
Under Hotel Data (Hotelldata) visas många uppgifter om de olika rummen.
Ställ in filter för att skaffa en bättre överblick.
➤ Markera kryssrutan Area filter (Utrymmesfilter) i skärmens övre högra
hörn.
➤ Välj utrymme i rullgardinsmenyn.
✓ Listan innehåller bara åtkomstpunker i det valda utrymmet.
I
ANVISNING
Klicka på krysset till vänster om urvalslistan för att ta bort filtret.

SV
Hotel Management Förvalta hotelldata
369
8.2 Gruppera efter åtkomster och rum
➤ Markera kryssrutan Group accesses/rooms (Gruppera åtkomster/rum)
på skärmens övre högra hörn.
✓ Åtkomsterna och rummen är grupperade i vyn.
I
ANVISNING
Avmarkera kryssrutan Group accesses/rooms (Gruppera
åtkomster/rum) för att radera filtret.

SV
Förvalta hotelldata Hotel Management
370
8.3 Definiera rumstyp
➤ Välj Hotel Data (Hotelldata) i huvudmenyn.
➤ Klicka på symbolen .
➤ Klicka på för att skapa en datapost.
➤ Klicka på för att redigera en datapost.
➤ Ange ett namn för rumstypen.
➤ Bekräfta med Accept (Acceptera).
Symbol Namn Beskrivning
Add type of
room
Lägga till en ny rumstyp
Edit type of
room
Redigera en befintlig rumstyp
Delete type
of room
Radera en befintlig rumstyp

SV
Hotel Management Förvalta hotelldata
371
✓ Den nya rumstypen visas i listan.
➤ Klicka på Exit (Avsluta) för att återgå till skärmen Hotel data (Hotelldata).
8.4 Lägga till/redigera åtkomstpunkter
Åtkomstpunkter är alla platser som skyddas av en dörr med lås, t.ex. hotell-
rum, konferensrum och kontorslokaler.
➤ Välj Hotel Data (Hotelldata) i huvudmenyn.
➤ Klicka på för att skapa en datapost.
➤ Klicka på för att redigera en datapost.

SV
Förvalta hotelldata Hotel Management
372
➤ Ange nödvändiga data:
– Type: Typ av åtkomstpunkt; rum eller åtkomstpunkt
– Number: Rumsnummer
– Name: Namn på rum
– Type of room: Rumstyp
– Description: Beskrivning (alternativ)
➤ Bekräfta med Accept (Acceptera).
✓ Den nya åtkomstpunkten visas i listan.

SV
Hotel Management Förvalta hotelldata
373
8.5 Definiera utrymmen
Utrymmen används för att gruppera åtkomstpunkter efter egenskaper.
Utrymmen kan vara antingen offentliga eller bara åtkomliga för personalen.
Åtkomstpunkterna inom ett utrymme måste
➤ Välj Hotel Data (Hotelldata) i huvudmenyn.
➤ Klicka på symbolen .
➤ Klicka på för att skapa en datapost.
➤ Klicka på för att redigera en datapost.
Symbol Namn Beskrivning
Add area Lägga till ett nytt utrymme
Edit area Redigera ett befintligt utrymme
Delete area Radera ett befintligt utrymme

SV
Förvalta hotelldata Hotel Management
374
➤ Ange nödvändiga data:
– Name: Namn på utrymmet
– Start: Första åtkomstpunkt i utrymmet
– End: Sista åtkomstpunkt i utrymmet
– Accessibility: Åtkomstbehörighet; offentlig eller bara för personal
➤ Bekräfta med Accept (Acceptera).
✓ Det nya utrymmet visas i listan.
➤ Klicka på Exit (Avsluta) för att återgå till skärmen Hotel data (Hotelldata).
✓ Utrymmesinformationen visas under varje åtkomstpunkt.

SV
Hotel Management Förvalta personaluppgifter
375
9 Förvalta personaluppgifter
Under menyalternativet Employee Records (Personaluppgifter) kan du för-
valta personuppgifter, kort och arbetsscheman för hotellpersonalen.
➤ Välj Employee Records (Personaluppgifter) i huvudmenyn.
9.1 Definiera arbetsschema
I Hotel-Management kan du skapa arbetsscheman för personalen.
➤ Välj Employee Records (Personaluppgifter) i huvudmenyn.
➤ Klicka på symbolen
Symbol Namn Beskrivning
Add
employee
Lägga till en ny medarbetare
Edit
employee
Redigera en befintlig medarbetare
Delete
employee
Radera en befintlig medarbetare
Define staff
schedule
Skapa, redigera och radera arbetsscheman
Download
data
Hämta data från kortet

SV
Förvalta personaluppgifter Hotel Management
376
➤ Klicka på för att skapa en datapost.
➤ Klicka på för att redigera en datapost.
➤ Ange ett namn för schemat.
Symbol Namn Beskrivning
Add
schedule
Lägga till ett nytt schema
Edit
schedule
Redigera ett befintligt schema
Delete
schedule
Radera ett befintligt schema

SV
Hotel Management Förvalta personaluppgifter
377
➤ Ange minst en tidsperiod under vilken schemat ska gälla (textfält 2 till 5).
I
➤ Markera vilka veckodagar som ska schemat ska gälla för genom att mar-
kera motsvarande kryssrutor.
➤ Bekräfta med Accept (Acceptera).
✓ Det nya schemat visas i listan.
➤ Klicka på Exit (Avsluta) för att återgå till skärmen Staff records (Perso-
naluppgifter).
ANVISNING
Om du bara vill ställa in en tidsperiod, välj start- och sluttid så att
den ena tidsperioden innehåller den andra.

SV
Förvalta personaluppgifter Hotel Management
378
9.2 Lägga till/redigera personaluppgiftspost
➤ Välj Employee Records (Personaluppgifter) i huvudmenyn.
➤ Klicka på för att skapa en datapost.
➤ Klicka på för att redigera en datapost.
➤ Ange ett namn för medarbetaren i textfältet Name (Namn).
I
➤ Ange vid behov ytterligare uppgifter om medarbetaren i textfältet:
– NIF: Skatteregistreringsnummer
– Passport: Pass
– Gender: Kön
– Date of birth: Födelsedatum
– Telephone: Telefonnummer
– Mail: E-postadress
– Address: Gata och husnummer
– City: Ort
– Postal code: Postnummer
– Province: Region
– Country: Land
– Occupation: Yrke
– Contract: Kontrakt
– Comments: Kommentarer
➤ Bekräfta med Accept (Acceptera).
ANVISNING
Inga fler uppgifter behöver anges. För förvaltingsuppgifter kan en
detaljerad beskrivning behövas.

SV
Hotel Management Förvalta personaluppgifter
379
✓ Medarbetaren visas i listan.

SV
Förvalta personaluppgifter Hotel Management
380
9.3 Tilldelning av kort till medarbetare
Alla medarbetare behöver ett kort för att kunna utföra sina uppgifter.
I
➤ Välj Employee Records (Personaluppgifter) i huvudmenyn.
➤ Välj en medarbetare i listan.
➤ Klicka på pilen Card Data (Kortuppgifter).
ANVISNING
Ett borttappat kort utgör en säkerhetsrisk. Lägg omedelbart till
borttappade kort i Blacklist (kapitel ”Förvalta Blacklist” på
sidan 408).

SV
Hotel Management Förvalta personaluppgifter
381
➤ På datapostens nedre kant finns följande knappar:
– Add/modify card: Lägga till/redigera kort
– Add card to blacklist: Lägga till kort i Blacklist
– Show pass operations: Visa användning
➤ Klicka på knappen Add/modify card (Lägga till/redigera kort).

SV
Förvalta personaluppgifter Hotel Management
382
➤ Ange nödvändiga data:
– Type of card: Korttyp (se tabellen på sida 382)
– Valid dates: Kortets giltighet i dagar
– Valid from date: Giltigt från och med (dag)
– Valid from time: Giltigt från och med (tid)
– Valid until date: Giltigt till och med (dag)
– Valid until time: Giltigt till och med (tid)
– Override privacy: Dörrar kan öppnas även om låsets privatsfärsinställ-
ning har ställts in
– Permanent opening: alltid öppen
– Employee shift: Arbetsschema
– Pass control: Antal rum som beträtts
– Acces point 1 – 4: Åtkomstpunkt 1 till 4
– Access area 1: Åtkomstutrymme 1.
➤ Bekräfta med Create card (Skapa kort).
➤ Följ anvisningarna på monitorn.
Korttyp Beskrivning
Cleaning Korttypen Cleaning (Rengöring) är avsedd för rengöringsper-
sonalen. Denna korttyps huvudegenskap är att man har till-
gång till alla åtkomstpunkter inom ett utrymme.
Staff with entry
control
Korttypen Staff with entry control (Medarbetare med
åtkomstkontroll) är avsedd för medarbetare som t.ex. under-
hållspersonal, kypare och kockar. Denna korttyps huvudegen-
skap är att man har tillgång till alla åtkomstpunkter inom ett
utrymme.
Staff with access
to all areas
Korttypen Staff with access to all areas (Medarbetare med
åtkomst till alla områden) är avsedd för medarbetare med
behörighet till alla utrymmen i hotellen. Denna korttyps huvud-
egenskap är att man har tillgång till alla åtkomstpunkter som
har tilldelats ett arbetsschema.
Master Korttypen Master (Föreståndare) är avsedd för medarbetare
med hög rang, t.ex. personal i ledningen. Detta korttyps huvud-
egenskap är att man med hjälp av kortet har tillgång till alla
åtkomstpunkter tills det att kortet inte längre är giltigt.

SV
Hotel Management Lägga till/redigera kunduppgifter
383
10 Lägga till/redigera kunduppgifter
Med funktionen Kunduppgifter lagrar du information om kunderna som besö-
ker ditt hotell. När kunden besöker hotellet nästa gång kan du på en gång ta
fram kundens uppgifter och behöver inte skapa en ny datapost.
➤ Välj Client Records (Kunduppgifter) i huvudmenyn.
➤ Klicka på för att skapa en datapost.
➤ Klicka på för att redigera en datapost.
Symbol Namn Beskrivning
Add client Lägga till en ny kund
Edit client Redigera en befintlig kund
Delete client Radera en befintlig kund

SV
Lägga till/redigera kunduppgifter Hotel Management
384
➤ Ange nödvändiga data:
–Name: Namn
– NIF: Skatteregistreringsnummer
– Passport: Pass
– Telephone: Telefonnummer
– Mail: E-postadress
– Address: Gata och husnummer
– City: Ort
– Postal code: Postnummer
– Province: Region
– Country: Land
– Comments: Kommentarer
➤ Klicka på bilden i det övre vänstra hörnet om du vill lägga till ett foto av
kunden.
I
➤ Bekräfta med Accept (Acceptera).
ANVISNING
Tillåtna format för foton är BMP, JPEG eller PNG.

SV
Hotel Management Genomföra incheckning
385
11 Genomföra incheckning
➤ Välj Occupation – Check-in (Beläggning – Incheckning) i huvudmenyn.
Symbol Namn Beskrivning
Add
check-in
Lägga till en ny incheckning
Edit
check-in
Redigera en befintlig incheckning
Delete
check-in
Radera en befintlig incheckning
Define client
schedule
Skapa, redigera och radera kundscheman
Define meal
plans
Skapa, redigera och radera typ av boende

SV
Genomföra incheckning Hotel Management
386
11.1 Lägga till incheckning
➤ Välj Occupation – Check-in (Beläggning – Incheckning) i huvudmenyn.
➤ Klicka på för att skapa en datapost.
➤ Klicka på (kapitel ”Lägga till/redigera kunduppgifter” på sidan 383) för
att redigera en datapost.
➤ Endast nya kunder: Klicka på och skapa den nya kunden (kapitel
”Lägga till/redigera kunduppgifter” på sidan 383).
✓ Den nya kunden visas nu i listan.
➤ Ange kundens namn i sökfältet på den övre högra kanten och klicka på
förstoringsglassymbolen för att begränsa sökningen.
➤ Välj kundens namn i listan.
➤ Bekräfta med Accept (Acceptera).
Symbol Namn Beskrivning
Add client Lägga till en ny kund
Edit client Redigera en befintlig kund
Delete client Radera en befintlig kund

SV
Hotel Management Genomföra incheckning
387
➤ Klicka på för att redigera kundens uppgifter (kapitel ”Lägga till/redi-
gera kunduppgifter” på sidan 383).
➤ Klicka på för att skapa ett kort för kunden.
Symbol Namn Beskrivning
Modify client Redigera kunduppgifter
Add/modify
card
Skapa kundkort

SV
Genomföra incheckning Hotel Management
388
➤ Ange nödvändiga data:
– Valid dates: Kortets giltighet i dagar
– Valid from date: Giltigt från och med (dag)
– Valid from time: Giltigt från och med (tid)
– Valid until date: Giltigt till och med (dag)
– Valid until time: Giltigt till och med (tid)
– Meal plan: Typ av boende, t.ex. halvpension, helpension
– Main room: Huvudrum till vilket incheckningen bokas
– Override privacy: Dörrar kan öppnas även om låsets privatsfärsinställ-
ning har ställts in
– Configuration of secondary rooms: Sekundära rum för kunden, t.ex.
för dennes familj
– Configuration of accesses: Åtkomst (alternativt med tidsschema), t.ex.
för poolutrymme
– Configuration of accesses with sold time: Åtkomst med tidsmodell
(alternativt med tidsschema) vars användning debiteras
– Configuration of areas: Åtkomst till utrymmen (alternativt med tids-
schema), t.ex. för parkeringshus
I
➤ Bekräfta med Create card (Skapa kort).
➤ Följ anvisningarna på monitorn.
ANVISNING
Du kan ge kunden åtkomst till max. elva åtkomstpunkter inklusive
det egna rummet. Bland de elva åtkomstpunkterna får max. två
vara med tidsmodell.
Oberoende av detta kan du ge kunden åtkomst till max. två utrym-
men.

SV
Hotel Management Genomföra incheckning
389
✓ Den nya incheckningen visas i listan med alla incheckningar som är till-
gängliga för tillfället.
✓ På datapostens nedre kant återfinns följande knapp:
– Add card to blacklist: Lägga till kortet i Blacklist
I
11.2 Bearbeta incheckning
➤ Välj Occupation – Check-in (Beläggning – Incheckning) i huvudmenyn.
➤ Klicka på för att redigera en datapost.
ANVISNING
För att skapa fler kort för kunden, använd funktionen Bearbeta
incheckning (kapitel ”Bearbeta incheckning” på sidan 389).

SV
Genomföra incheckning Hotel Management
390
➤ Klicka på för att redigera kundens uppgifter (kapitel ”Lägga till/redi-
gera kunduppgifter” på sidan 383).
➤ Klicka på för att skapa ett kort för kunden.
➤ Genomför önskade anpassningar.
➤ Bekräfta med Create card (Skapa kort).
➤ Följ anvisningarna på monitorn.
Symbol Namn Beskrivning
Modify client Redigera kunduppgifter
Add/modify
card
Skapa kundkort

SV
Hotel Management Genomföra incheckning
391
11.3 Definiera kundscheman
Via kundscheman kan du begränsa åtkomsten till åtkomstpunkter och utrym-
men till vissa tider.
I
➤ Välj Occupation – Check-in (Beläggning – Incheckning) i huvudmenyn.
➤ Klicka på symbolen .
➤ Klicka på för att skapa en datapost.
➤ Klicka på för att redigera en datapost.
ANVISNING
Scheman fungerar endast vid åtkomstpunkter med firmware-ver-
sion 2.0 och högre.
Symbol Namn Beskrivning
Add
schedule
Lägga till ett nytt schema
Edit
schedule
Redigera ett befintligt schema
Delete
schedule
Radera ett befintligt schema

SV
Genomföra incheckning Hotel Management
392
➤ Ange nödvändiga data:
– Name: Schemats namn
– Start of margin 1: Starttid 1 (tid)
– End of margin 1: Sluttid 1 (tid)
– Start of margin 2: Starttid 2 (tid)
– End of margin 2: Sluttid 2 (tid)
– Applicable dates: Veckodagar då schemat ska gälla (måndag till sön-
dag)
I
➤ Bekräfta med Accept (Acceptera).
ANVISNING
Om du bara vill ställa in en tidsperiod, välj start- och sluttid så att
den ena tidsperioden innehåller den andra.

SV
Hotel Management Genomföra incheckning
393
✓ Det nya schemat visas i listan.
➤ Klicka på Exit (Avsluta) för att återgå till skärmen Check-in (Incheckning).
11.4 Definiera typ av boende
➤ Välj Occupation – Check-in (Beläggning – Incheckning) i huvudmenyn.
➤ Klicka på symbolen .
➤ Klicka på för att skapa en datapost.
➤ Klicka på för att redigera en datapost.
➤ Ange ett namn för typen av boendet.
➤ Den nya typen av boende visas i listan.
➤ Klicka på Exit (Avsluta) för att återgå till skärmen Check-in (Incheckning).
Symbol Namn Beskrivning
Add meal
plan
Lägga till en ny typ av boende
Edit meal
plan
Redigera en befintlig typ av boende
Delete meal
plan
Radera en befintlig typ av boende

SV
Snabbskapande av kort Hotel Management
394
12 Snabbskapande av kort
➤ Välj Management – Program/read cards (Förvaltning – Program-
mera/läsa kort).
I
➤ Ange nödvändiga data:
– Valid dates: Kortets giltighet i dagar
– Valid from date: Giltigt från och med (dag)
– Valid until date: Giltigt till och med (dag)
– Meal plan: Typ av boende, t.ex. halvpension, helpension
– Room: Rum som bokas
– Override privacy: Dörrar kan öppnas även om låsets privatsfärsinställ-
ning har ställts in
– Configuration of accesses: Åtkomster (alternativt med tidsschema),
t.ex. för badrummet
➤ Bekräfta med Create card (Skapa kort).
➤ Följ anvisningarna på monitorn.
➤ Klicka på Exit (Avsluta) för att återgå till startskärmen.
ANVISNING
Använd endast i undantagsfall funktionen för snabbskapande av
kort. Använd i normala fall funktionen Genomföra incheckning
(kapitel ”Genomföra incheckning” på sidan 385).

SV
Hotel Management Läsa kort
395
13 Läsa kort
➤ Välj Management – Program/read cards (Förvaltning – Program-
mera/läsa kort).
➤ Klicka på knappen Read card (Läsa kort).
➤ Följ anvisningarna på monitorn.
✓ Informationen om det lästa kortet visas på en ny skärm.
➤ Klicka på Exit (Avsluta) för att återgå till skärmen Program/read cards
(Programmera/läsa kort).

SV
Månadsöversikt Hotel Management
396
14 Månadsöversikt
➤ Välj Occupation – Monthly chart (Beläggning – Månadsöversikt).
Som förinställning visar månadsöversikten den aktuella månaden. Varje rum
kan varje dag tilldelas någon av följande statusar.
Symbol Namn Beskrivning
Calendar Välj en annan månad
Färg Påskrift Betydelse
Grön Free room Rummet är ledigt och kan bokas
Röd Occupied room Rummet är belagt. Kunden har checkat in. Rummet kan
inte bokas eller reserveras.
Gul Reserved room Rummet är reserverat. Kunden har inte checkat in.
Rummet kan inte bokas eller reserveras. (Visas bara
med tillvalsmodulen ”Planning Module”.)
Blå Blocked room Rummet är blockerat. Rummet kan inte bokas eller
reserveras. (Visas bara med tillvalsmodulen ”Planning
Module”.)

SV
Hotel Management Månadsöversikt
397
I
14.1 Visa annan månad
➤ Klicka på symbolen .
✓ Ett fönster öppnas där man kan välja månad och år.
➤ Välj månad och år i de båda rullgardinsmenyerna.
➤ Bekräfta med Accept (Acceptera).
✓ Motsvarande månad visas i månadsöversikten.
ANVISNING
På månadsöversikten börjar inte nästa dag vid midnatt utan kl 12
nästföljande dag. Med denna inställning ska man även på morgo-
nen kunna se vilka rum som är lediga. Ett rum som visas som
belagt från 01.10 till 03.10 är alltså belagt från 01.10 kl 12 till 04.10
kl 12.

SV
Läsa in uppgifter i systemet Hotel Management
398
15 Läsa in uppgifter i systemet
15.1 Hämta uppgifter från en åtkomstpunkt
Innan du kan hämta uppgifter från en åtkomstpunkt måste du först skapa ett
kort för uppgiftshämtning.
➤ Välj Management – Generate data download card (Förvaltning –
Skapa kort för uppgiftshämtning) i huvudmenyn.
➤ Följ anvisningarna på monitorn.
✓ Kortet för uppgiftshämtning har skapats.
➤ Sätt i kortet för uppgiftshämtning i låset som du vill hämta uppgifter från.
➤ Ta ut kortet för uppgiftshämtning ur låset efter att hämtningen är klar.
I
15.2 Läsa in kortuppgifter i systemet
➤ Välj Data – Download card data (Uppgifter – Hämta uppgifter från kor-
tet).
➤ Sätt i kortet för uppgiftshämtning i kortläsaren.
✓ Uppgifterna kopieras till programvarans databas.
ANVISNING
Du måste upprepa processen för varje lås som du hämtar uppgif-
ter från.
Förvara kortet för uppgiftshämtning på en säker plats eftersom
det innehåller viktig information om systemet.

SV
Hotel Management Visa åtkomster
399
16 Visa åtkomster
I
➤ Välj Data – See data operations (Uppgifter – Visa åtkomster).
ANVISNING
Ju bättre listan underhålls desto mer uppgifter har du tillgång till.
Underhåll listan genom att regelbundet hämta uppgifterna från
alla åtkomstpunkter och kopiera dessa till systemets databas
(kapitel ”Läsa in uppgifter i systemet” på sidan 398 och kapitel
”Läsa in kortuppgifter i systemet” på sidan 398).
Symbol Namn Beskrivning
Filter by
access num-
ber
Filtrera efter åtkomstnummer
Filter by
date
Filtrera efter åtkomstdatum
Delete by
dates
Radera åtkomstförlopp

SV
Visa åtkomster Hotel Management
400
16.1 Filtrera efter åtkomstnummer
➤ Klicka på symbolen .
➤ Ange start- och slutnummer på de åtkomstpunkter som ska visas.
➤ Bekräfta med Accept (Acceptera).
✓ Åtkomster till de valda åtkomstpunkterna visas.
16.2 Filtrera efter åtkomstdatum
➤ Klicka på symbolen .
➤ Ange start- och slutdatum på den tidsperiod som ska visas.
➤ Bekräfta med Accept (Acceptera).
✓ Åtkomsterna i den valda tidsperioden visas.

SV
Hotel Management Visa åtkomster
401
16.3 Radera åtkomstförlopp
Du kan radera delar av åtkomstförloppet ur databasen.
I
➤ Klicka på symbolen .
➤ Ange start- och slutdatum på den tidsperiod som ska raderas.
➤ Bekräfta med Accept (Acceptera).
✓ Åtkomsterna i den valda tidsperioden raderas permanent.
ANVISNING
Uppgifter som en gång raderats kan inte återställas.

SV
Programmera dörrlåset Hotel Management
402
17 Programmera dörrlåset
För att programmera ett dörrlås behövs ett programmeringskort. Med pro-
grammeringskortet tilldelar du ett nummer till en åtkomstpunkt och ställer in
datum och tid.
I
➤ Välj Management – Generate programming card (Förvaltning – Skapa
programmeringskort).
➤ Ange numret på det rum eller den åtkomstpunkt som programmeringskor-
tet ska gälla för.
➤ Bekräfta med Create card (Skapa kort).
➤ Följ anvisningarna på monitorn.
➤ Sätt i programmeringskortet i låset som du vill programmera.
➤ Ta ut programmeringskortet ur låset efter att programmeringen är klar.
I
ANVISNING
Tid och nummer måste ställas in när låset monteras för första
gången och efter varje batteribyte.
På programmeringskortet lagras datumet och tiden på den dator
som använts till att skapa kortet. Se till att datumet på datorn är
korrekt.
ANVISNING
Programmeringskort blir ogiltiga efter att de använts en gång. På
så sätt hindrar man att samma rumsnummer ges ut två gånger.

SV
Hotel Management Skapa specialkort
403
18 Skapa specialkort
I
18.1 Skapa nödfallskort
Nödfallskortet ska alltid kunna användas vid den aktuella åtkomstpunkten.
Nödfallskort bör endast användas när inga vanliga kort kan användas, t.ex.
när datorsystemet ligger nere och gäster väntar på att få tillträde till sina rum.
➤ Välj Hotel Data (Hotelldata) i huvudmenyn.
➤ Välj en access point (Åtkomstpunkt).
✓ På datapostens högra hälft finns följande knappar:
– Create card: Skapa kort
– Add card to blacklist: Lägga till kortet i Blacklist
➤ Klicka på Create card (Skapa kort).
➤ Sätt i nödfallskortet i kortläsaren på PC:n.
✓ Nödfallskortet har skapats.
ANVISNING
Ett borttappat kort utgör en säkerhetsrisk. Lägg omedelbart till
borttappade kort i Blacklist (kapitel ”Förvalta Blacklist” på
sidan 408).

SV
Skapa specialkort Hotel Management
404
18.2 Skapa kort för universalåtkomst
Med kortet för universalåtkomst kan du alltid öppna valfri åtkomstpunkt i sys-
temet.
I
➤ Välj Management – Generate free access card (Förvaltning – Skapa
kort för universalåtkomst) i huvudmenyn.
➤ Klicka på symbolen .
➤ Följ anvisningarna på monitorn.
ANVISNING
Detta kort kan användas på alla lås i systemet. För rum som alltid
är öppna behövs inget kort. Var försiktig när du använder kortet
för universalåtkomst. Förvara kortet för universalåtkomst på en
säker plats.
Symbol Namn Beskrivning
Create free
access card
Skapa ett nytt kort för universalåtkomst
Delete free
access card
Radera ett befintligt kort för universalåtkomst från data-
basen.
Add card to
the blacklist
Lägga till det valda kortet för universalåtkomst i Black-
list

SV
Hotel Management Skapa specialkort
405
18.3 Skapa förreglingskort
Med förreglingskortet kan du alltid spärra valfri åtkomstpunkt i systemet.
I
➤ Välj Management – Generate locking card (Förvaltning – Skapa förreg-
lingskort).
➤ Följ anvisningarna på monitorn.
ANVISNING
Detta kort kan användas på alla lås i systemet. Var försiktig när
du använder förreglingskortet. Förvara förreglingskortet på en
säker plats.

SV
Skapa specialkort Hotel Management
406
18.4 Skapa kort för energisnål användning
Kortet för energisnål användning används tillsammans med en energisparar-
anläggning. Energisparanläggningens kortläsare läser av det insatta kortet
och reglerar energiförbrukningen i rummet enligt typen av kort som satts i. Till
exempel slås endast ljuset på för rengöringspersonalen. För gäster slås även
klimatanläggning och element på.
Efter att kortet avlägsnats ur energisparanläggningens läsare slås strömmen
av antingen på en gång eller efter en inställd tid.
Med energisnål användning kan man även ställa in avstängningsfördröjning.
➤ Välj Energy economizer – Generate courtesy card
(Energisparanläggning – Skapa kort för energisnål användning) i huvud-
menyn.
➤ Ange önskad tidsperiod i sekunder.
➤ Bekräfta med Create card (Skapa kort).
➤ Följ anvisningarna på monitorn.
I
ANVISNING
Avstängningsfördröjningen kan ställas in till mellan 0 och 9 999
sekunder.
Fabriskinställningen på energisparanläggningar för avstäng-
ningsfördröjning är fem sekunder.

SV
Hotel Management Skapa/återställa backups
407
19 Skapa/återställa backups
➤ Välj Backup (Backup) i huvudmenyn.
19.1 Skapa backup
➤ Välj Backup (Backup) i huvudmenyn.
➤ Välj därefter i Selection of data destination/source (Val av mål- och
källmapp) den mapp där backupen ska sparas.
➤ Klicka på Generate backup (Skapa backup).
19.2 Återställa backup
➤ Välj Backup (Backup) i huvudmenyn.
➤ Välj den mapp där den backup som ska återställas har sparats.
➤ Klicka på Restore backup (Återställa backup).

SV
Förvalta Blacklist Hotel Management
408
20 Förvalta Blacklist
I Blacklist lagras kort som har spärrats. Kort som lagts till i Blacklist kan inte
användas på något av anläggningens lås. Kort kan endast läggas till i Black-
list för de utrymmen som de skapats för i programvaran.
I
20.1 Lägga till kort i Blacklist
➤ Välj det utrymme där vill spärra ett kort.
➤ Klicka på knappen Add card to the blacklist (Lägga till kort i Blacklist)
eller på .
➤ Bekräfta med Accept (Acceptera).
✓ Kortet visas i Management – Blacklist (Förvaltning – Blacklist).
ANVISNING
Kort som visas i Blacklist spärras inte automatiskt för alla åtkomst-
punkter. Se till att du använder Blacklist-kortet på samtliga
åtkomstpunkter.

SV
Hotel Management Förvalta Blacklist
409
20.2 Visa kort i Blacklist
➤ Välj Management – Blacklist (Förvaltning – Blacklist) i huvudmenyn.
I den övre tabellen visas alla kort som lagts till i Blacklist.
I den nedre tabellen visas alla kort som skrivits till ett Blacklist-kort.
Symbol Namn Beskrivning
Create
blacklist
card
Skapa Blacklist-kort
Delete
blacklist
entry
Radera befintlig Blacklist-post från databasen.

SV
Förvalta Blacklist Hotel Management
410
20.3 Skapa Blacklist-kort
➤ Välj Management – Blacklist (Förvaltning – Blacklist) i huvudmenyn.
➤ Klicka på symbolen .
➤ Följ anvisningarna på monitorn.
✓ Innehållet i de båda tabellerna i vyn är nu identiskt.
I
ANVISNING
Kort som visas i Blacklist spärras inte automatiskt för alla åtkomst-
punkter. Se till att du använder Blacklist-kortet på samtliga
åtkomstpunkter.

SV
Hotel Management Förvalta PMS-modul
411
21 Förvalta PMS-modul
PMS-modulen används för att skapa giltiga kort för dörrlås och åtkomstpunk-
ter tillhörande ett annat Property Management System (PMS). På så sätt kan
arbetsprocesser göras enhetliga och uppgiftsdubbletter förhindras.
➤ Välj PMS (PMS) i huvudmenyn.
I
Kort som har skapats med ett annat Property Management Systems via
PMS-modulen, har följande begränsningar:
Endast kundkort kan skapas.
Man kan inte tilldela kundkorten hela utrymmen till vilken kunden har till-
gång.
Kundkort kan inte tilldelas utrymmen med debiterbar tidsmodell.
Om PMS-klienten inte skickar exakt samma data vid kopiering av kort blir
äldre kundkort för samma rum ogiltiga.
Symbol Namn Beskrivning
Add authori-
zation
Lägga till en ny behörighet
Edit authori-
zation
Redigera en befintlig behörighet
Delete aut-
horization
Radera en befintlig behörighet
ANVISNING
Om PMS-modulen används kan inte alla funktioner i Hotel Mana-
gement användas.

SV
Förvalta PMS-modul Hotel Management
412
Om PMS-klienten inte överför tid för incheckning och utcheckning vid ska-
pande av kort, blir äldre kundkort för samma rum ogiltiga.
Om Protokoll 2 används överförs klockslaget endast med hela timmar.
Det kan leda till att det uppstår problem med in- och utcheckningen.
21.1 Konfigurera PMS-modul
➤ Välj PMS (PMS) i huvudmenyn.
➤ Klicka på knappen Edit general configuration.
➤ Ange nödvändiga data:
– PMS control: Använd Local (Lokal) för inställning om PMS och Hotel
Management befinner sig på samma dator. Använd annars Remote
(Fjärruppkoppling).
– IP address: IP-adress på den dator där PMS har installerats.
– Port: Kommunikationsport för klientförfrågningar från PMS.
– Terminal number: Identifieringsnummer för kortläsaren/skrivaren.
– Protocol: Överföringsprotokoll som används för kommunikationen
mellan PMS och Hotel Management (se tabellen nedan).
➤ Bekräfta med Ok (Ok).
✓ De ändrade inställningarna visas uppe till vänster på skärmen.
Funktion Protokoll 1 Protokoll 2
Antal behörigheter 20 8
Överföring av klockslag Exakt klockslag Endast hela timmar (12:30
blir 12:00)

SV
Hotel Management Förvalta PMS-modul
413
21.2 Lägga till/redigera behörigheter
Vid skapande av kundkort skrivs behörigheter automatiskt över till kundkortet
av en PMS-klient. Beroende på vilket överföringsprotokoll som valts kan upp
till 20 behörigheter skrivas till kundkort.
➤ Välj PMS (PMS) i huvudmenyn.
➤ Klicka på för att skapa en datapost.
➤ Klicka på för att redigera en datapost.
➤ Ange nödvändiga data:
– Number: Behörighetens identifikationsnummer.
– Type: Typ av behörighet kan vara antingen Access (Åtkomst) eller
Public area (Offentligt utrymme).
– Access: Åtkomst till offentligt utrymme
➤ Bekräfta med Accept (Acceptera).
✓ Behörigheten visas i tabellen på skärmen PMS configuration (PMS-kon-
figuration).

SV
Förvalta PMS-modul Hotel Management
414
21.3 Upprätta PMS-anslutning
I
➤ Välj PMS – Start PMS connection (PMS – Upprätta PMS-anslutning).
✓ Hotel Management bearbeta förfrågningar från PMS-klienten.
➤ För att avsluta PMS-anslutningen, tryck på Exit (Avsluta).
ANVISNING
Efter att en PMS-anslutningen upprättats fungerar Hotel Manage-
ment endast som server för PMS-förfrågningar. Om du vill arbeta
med Hotel Management måste PMS-anslutningen avslutas.


AUSTRALIA
Dometic Australia Pty. Ltd.
1 John Duncan Court
Varsity Lakes QLD 4227
+61 7 55076000
+61 7 55076001
Mail: sales@dometic-waeco.com.au
AUSTRIA
Dometic Austria GmbH
Neudorferstrasse 108
2353 Guntramsdorf
+43 2236 908070
+43 2236 90807060
Mail: [email protected]
BENELUX
Dometic Benelux B.V.
Ecustraat 3
NL-4879 NP Etten-Leur
+31 76 5029000
+31 76 5029090
Mail: [email protected]
DENMARK
Dometic Denmark A/S
Nordensvej 15, Taulov
DK-7000 Fredericia
+45 75585966
+45 75586307
Mail: [email protected]
FINLAND
Dometic Finland OY
Mestarintie 4
FIN-01730 Vantaa
+358 20 7413220
+358 9 7593700
Mail: [email protected]
FRANCE
Dometic SAS
ZA du Pré de la Dame Jeanne
F-60128 Plailly
+33 3 44633500
+33 3 44633518
Commercial : info@dometic.fr
SAV/Technique : ser[email protected]
HONG KONG
WAECO Impex Ltd.
Suites 2207-2211 · 22/F · Tower 1
The Gateway · 25 Canton Road,
Tsim Sha Tsui · Kowloon
Hong Kong
+852 24611386
+852 24665553
Mail: info@dometic-waeco.com.hk
HUNGARY
Dometic Plc. Sales Office
Kerékgyártó u. 5.
H-1147 Budapest
+36 1 468 4400
+36 1 468 4401
Mail: budape[email protected]
ITALY
Dometic Italy S.r.l.
Via Virgilio, 3
I-47100 Forlì
+39 0543 754901
+39 0543 756631
Mail: [email protected]
NORWAY
Dometic Norway AS
Skolmar 24
N-3232 Sandefjord
+47 33428450
+47 33428459
Mail: firmapost@waeco.no
POLAND
Dometic Poland Sp. z o.o.
Ul. Puławska 435A
02-801 Warszawa
Poland
+48 22 414 32 00
+48 22 414 32 01
Mail: [email protected]
RUSSIA
Dometic RUS LLC
Komsomolskaya square 6-1
107140 Moscow
Russia
+7 495 780 79 39
+7 495 916 56 53
Mail: [email protected]
SLOVAKIA
Dometic Slovakia s.r.o.
Tehelná 8
SK-98601 Fiľakovo
+421 47 4319 107
+421 47 4319 166
Mail: [email protected]
SPAIN
Dometic Spain S.L.
Avda. Sierra del Guadarrama, 16
E-28691 Villanueva de la Cañada
Madrid
+34 902 111 042
+34 900 100 245
Mail: [email protected]
SWEDEN
Dometic Scandinavia AB
Gustaf Melins gata 7
S-42131 Västra Frölunda (Göteborg)
+46 31 7341100
+46 31 7341101
Mail: [email protected]
SWITZERLAND
Dometic Switzerland AG
Riedackerstrasse 7a
CH-8153 Rümlang (Zürich)
+41 44 8187171
+41 44 8187191
Mail: info@dometic-waeco.ch
TAIWAN
WAECO Impex Ltd.
Taipei Office
2 FL-3 · No. 56 Tunhua South Rd, Sec 2
Taipei 106, Taiwan
+886 2 27014090
+886 2 27060119
Mail: marketing@dometic-waeco.com.tw
UNITED KINGDOM
Dometic UK Ltd.
Dometic House · The Brewery
Blandford St. Mary
Dorset DT11 9LS
+44 844 626 0133
+44 844 626 0143
Mail: [email protected]
UNITED ARAB STATES
Dometic Middle East FZCO
P. O. Box 17860
S-D 6, Jebel Ali Freezone
Dubai, United Arab Emirates
+971 4 883 3858
+971 4 883 3868
Mail: [email protected]
UNITED STATES OF AMERICA
Dometic Marine Division
2000 N. Andrews Ave. Extension
Pompano Beach, FL 33069 USA
+1 954 973 2477
+1 954 979 4414
Mail: marinesa[email protected]
GERMANY
Dometic WAECO International GmbH
Hollefeldstraße 63 · D-48282 Emsdetten
+49 (0) 2572 879-195 · +49 (0) 2572 879-322
Mail: info@dometic-waeco.de · Internet: www.dometic-waeco.de
www.dometic-waeco.com
4445100845 01/2014
-
 1
1
-
 2
2
-
 3
3
-
 4
4
-
 5
5
-
 6
6
-
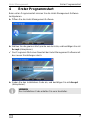 7
7
-
 8
8
-
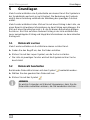 9
9
-
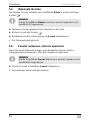 10
10
-
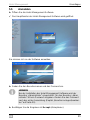 11
11
-
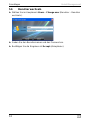 12
12
-
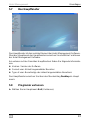 13
13
-
 14
14
-
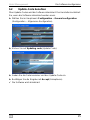 15
15
-
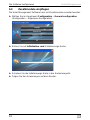 16
16
-
 17
17
-
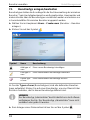 18
18
-
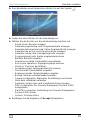 19
19
-
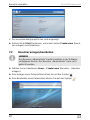 20
20
-
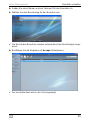 21
21
-
 22
22
-
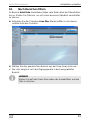 23
23
-
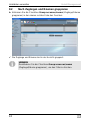 24
24
-
 25
25
-
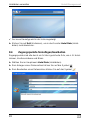 26
26
-
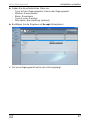 27
27
-
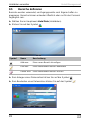 28
28
-
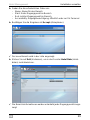 29
29
-
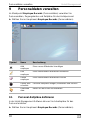 30
30
-
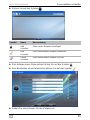 31
31
-
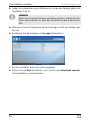 32
32
-
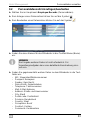 33
33
-
 34
34
-
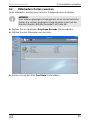 35
35
-
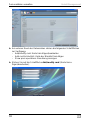 36
36
-
 37
37
-
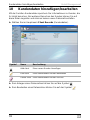 38
38
-
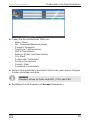 39
39
-
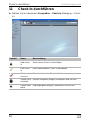 40
40
-
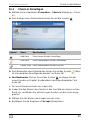 41
41
-
 42
42
-
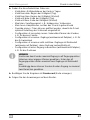 43
43
-
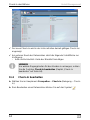 44
44
-
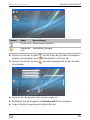 45
45
-
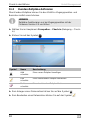 46
46
-
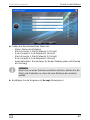 47
47
-
 48
48
-
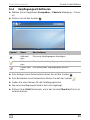 49
49
-
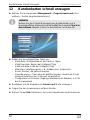 50
50
-
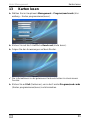 51
51
-
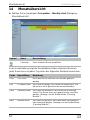 52
52
-
 53
53
-
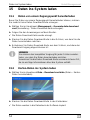 54
54
-
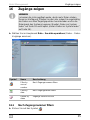 55
55
-
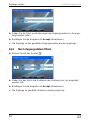 56
56
-
 57
57
-
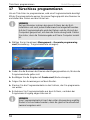 58
58
-
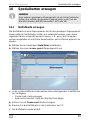 59
59
-
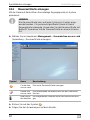 60
60
-
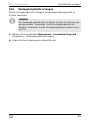 61
61
-
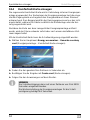 62
62
-
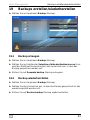 63
63
-
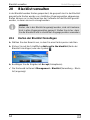 64
64
-
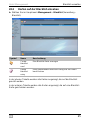 65
65
-
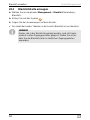 66
66
-
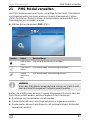 67
67
-
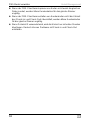 68
68
-
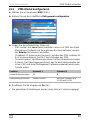 69
69
-
 70
70
-
 71
71
-
 72
72
-
 73
73
-
 74
74
-
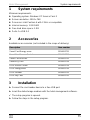 75
75
-
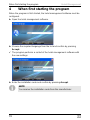 76
76
-
 77
77
-
 78
78
-
 79
79
-
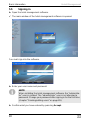 80
80
-
 81
81
-
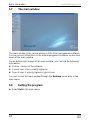 82
82
-
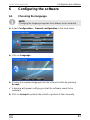 83
83
-
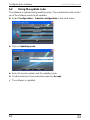 84
84
-
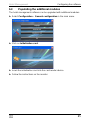 85
85
-
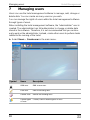 86
86
-
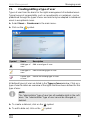 87
87
-
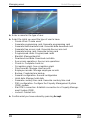 88
88
-
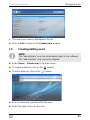 89
89
-
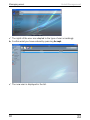 90
90
-
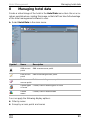 91
91
-
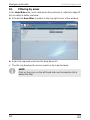 92
92
-
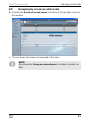 93
93
-
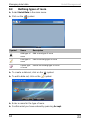 94
94
-
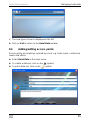 95
95
-
 96
96
-
 97
97
-
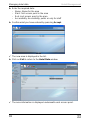 98
98
-
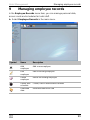 99
99
-
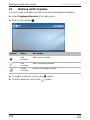 100
100
-
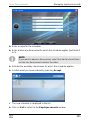 101
101
-
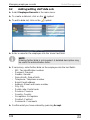 102
102
-
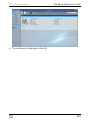 103
103
-
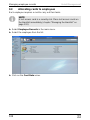 104
104
-
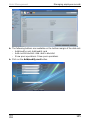 105
105
-
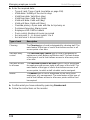 106
106
-
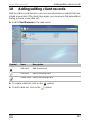 107
107
-
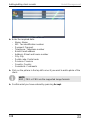 108
108
-
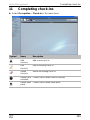 109
109
-
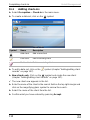 110
110
-
 111
111
-
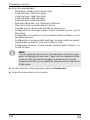 112
112
-
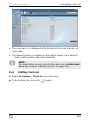 113
113
-
 114
114
-
 115
115
-
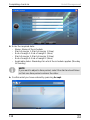 116
116
-
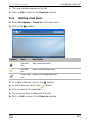 117
117
-
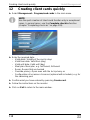 118
118
-
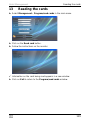 119
119
-
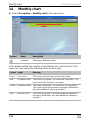 120
120
-
 121
121
-
 122
122
-
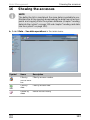 123
123
-
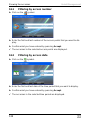 124
124
-
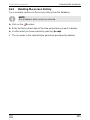 125
125
-
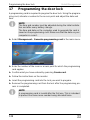 126
126
-
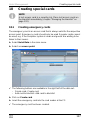 127
127
-
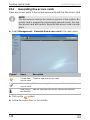 128
128
-
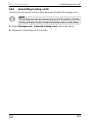 129
129
-
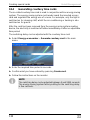 130
130
-
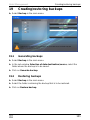 131
131
-
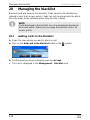 132
132
-
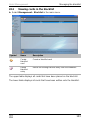 133
133
-
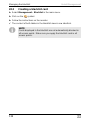 134
134
-
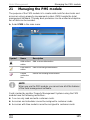 135
135
-
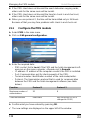 136
136
-
 137
137
-
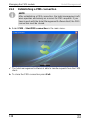 138
138
-
 139
139
-
 140
140
-
 141
141
-
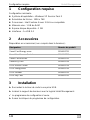 142
142
-
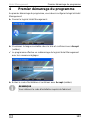 143
143
-
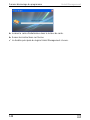 144
144
-
 145
145
-
 146
146
-
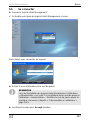 147
147
-
 148
148
-
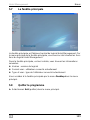 149
149
-
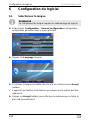 150
150
-
 151
151
-
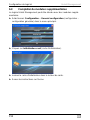 152
152
-
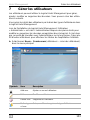 153
153
-
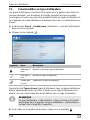 154
154
-
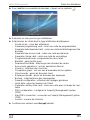 155
155
-
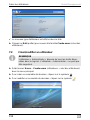 156
156
-
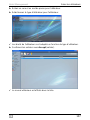 157
157
-
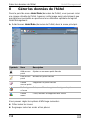 158
158
-
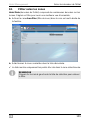 159
159
-
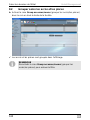 160
160
-
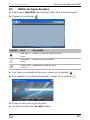 161
161
-
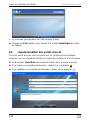 162
162
-
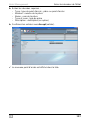 163
163
-
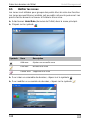 164
164
-
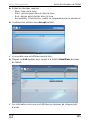 165
165
-
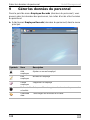 166
166
-
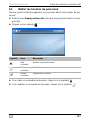 167
167
-
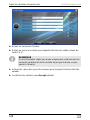 168
168
-
 169
169
-
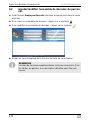 170
170
-
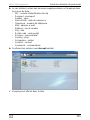 171
171
-
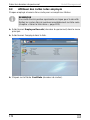 172
172
-
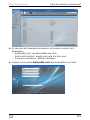 173
173
-
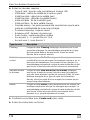 174
174
-
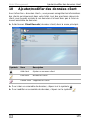 175
175
-
 176
176
-
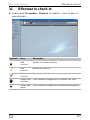 177
177
-
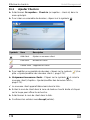 178
178
-
 179
179
-
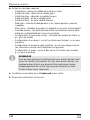 180
180
-
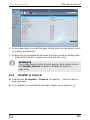 181
181
-
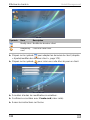 182
182
-
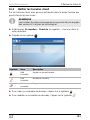 183
183
-
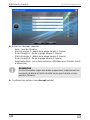 184
184
-
 185
185
-
 186
186
-
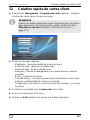 187
187
-
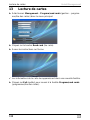 188
188
-
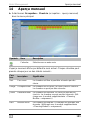 189
189
-
 190
190
-
 191
191
-
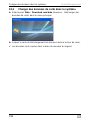 192
192
-
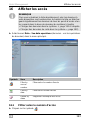 193
193
-
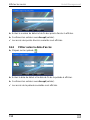 194
194
-
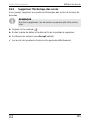 195
195
-
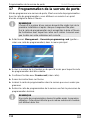 196
196
-
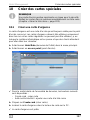 197
197
-
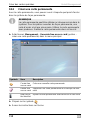 198
198
-
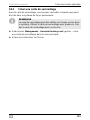 199
199
-
 200
200
-
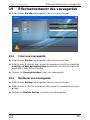 201
201
-
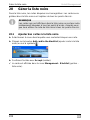 202
202
-
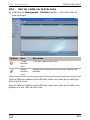 203
203
-
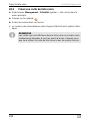 204
204
-
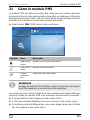 205
205
-
 206
206
-
 207
207
-
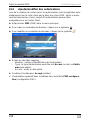 208
208
-
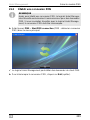 209
209
-
 210
210
-
 211
211
-
 212
212
-
 213
213
-
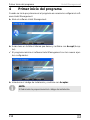 214
214
-
 215
215
-
 216
216
-
 217
217
-
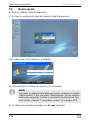 218
218
-
 219
219
-
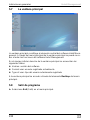 220
220
-
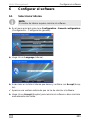 221
221
-
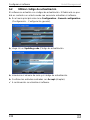 222
222
-
 223
223
-
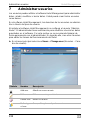 224
224
-
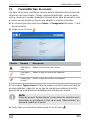 225
225
-
 226
226
-
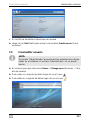 227
227
-
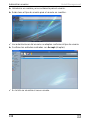 228
228
-
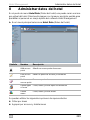 229
229
-
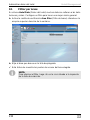 230
230
-
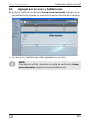 231
231
-
 232
232
-
 233
233
-
 234
234
-
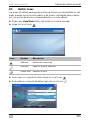 235
235
-
 236
236
-
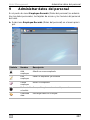 237
237
-
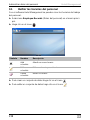 238
238
-
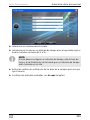 239
239
-
 240
240
-
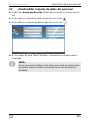 241
241
-
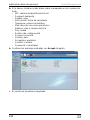 242
242
-
 243
243
-
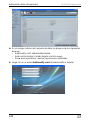 244
244
-
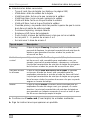 245
245
-
 246
246
-
 247
247
-
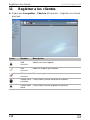 248
248
-
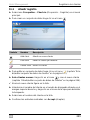 249
249
-
 250
250
-
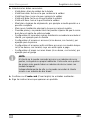 251
251
-
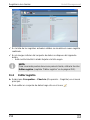 252
252
-
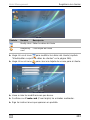 253
253
-
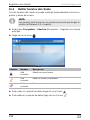 254
254
-
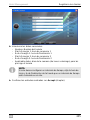 255
255
-
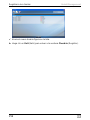 256
256
-
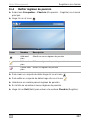 257
257
-
 258
258
-
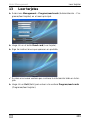 259
259
-
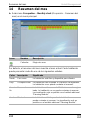 260
260
-
 261
261
-
 262
262
-
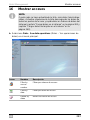 263
263
-
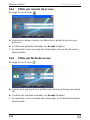 264
264
-
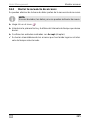 265
265
-
 266
266
-
 267
267
-
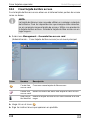 268
268
-
 269
269
-
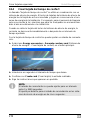 270
270
-
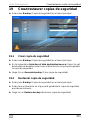 271
271
-
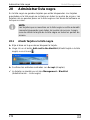 272
272
-
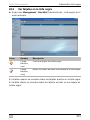 273
273
-
 274
274
-
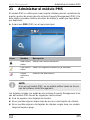 275
275
-
 276
276
-
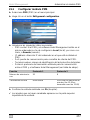 277
277
-
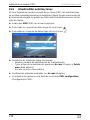 278
278
-
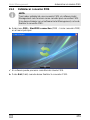 279
279
-
 280
280
-
 281
281
-
 282
282
-
 283
283
-
 284
284
-
 285
285
-
 286
286
-
 287
287
-
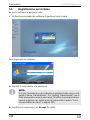 288
288
-
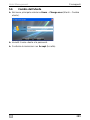 289
289
-
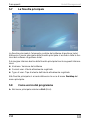 290
290
-
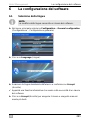 291
291
-
 292
292
-
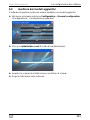 293
293
-
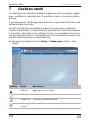 294
294
-
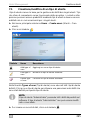 295
295
-
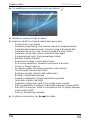 296
296
-
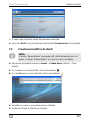 297
297
-
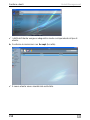 298
298
-
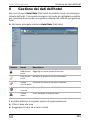 299
299
-
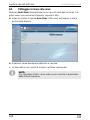 300
300
-
 301
301
-
 302
302
-
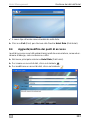 303
303
-
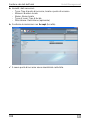 304
304
-
 305
305
-
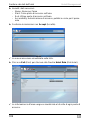 306
306
-
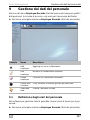 307
307
-
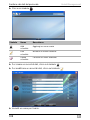 308
308
-
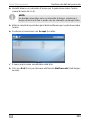 309
309
-
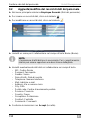 310
310
-
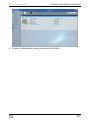 311
311
-
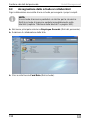 312
312
-
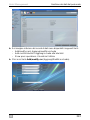 313
313
-
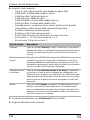 314
314
-
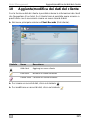 315
315
-
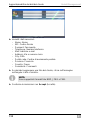 316
316
-
 317
317
-
 318
318
-
 319
319
-
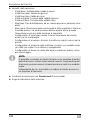 320
320
-
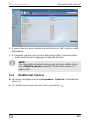 321
321
-
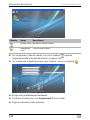 322
322
-
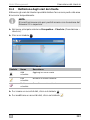 323
323
-
 324
324
-
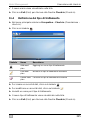 325
325
-
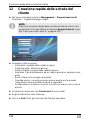 326
326
-
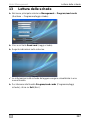 327
327
-
 328
328
-
 329
329
-
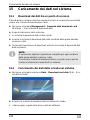 330
330
-
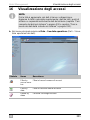 331
331
-
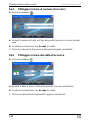 332
332
-
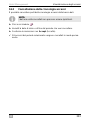 333
333
-
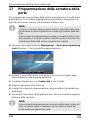 334
334
-
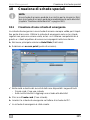 335
335
-
 336
336
-
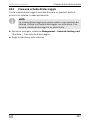 337
337
-
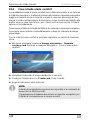 338
338
-
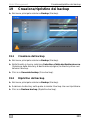 339
339
-
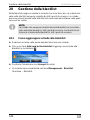 340
340
-
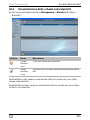 341
341
-
 342
342
-
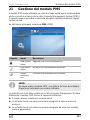 343
343
-
 344
344
-
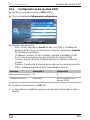 345
345
-
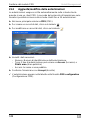 346
346
-
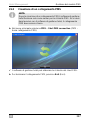 347
347
-
 348
348
-
 349
349
-
 350
350
-
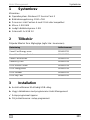 351
351
-
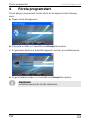 352
352
-
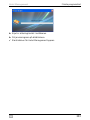 353
353
-
 354
354
-
 355
355
-
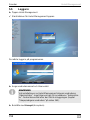 356
356
-
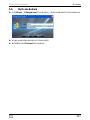 357
357
-
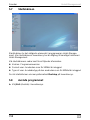 358
358
-
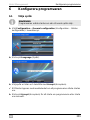 359
359
-
 360
360
-
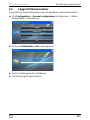 361
361
-
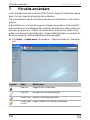 362
362
-
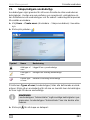 363
363
-
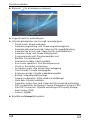 364
364
-
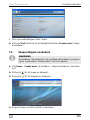 365
365
-
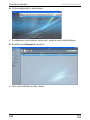 366
366
-
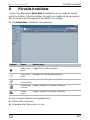 367
367
-
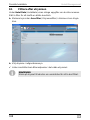 368
368
-
 369
369
-
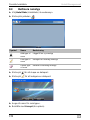 370
370
-
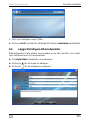 371
371
-
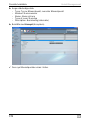 372
372
-
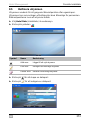 373
373
-
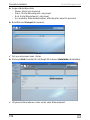 374
374
-
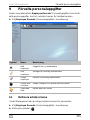 375
375
-
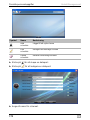 376
376
-
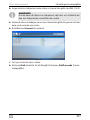 377
377
-
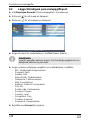 378
378
-
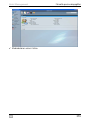 379
379
-
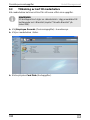 380
380
-
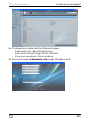 381
381
-
 382
382
-
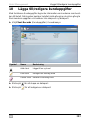 383
383
-
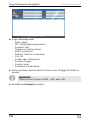 384
384
-
 385
385
-
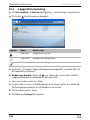 386
386
-
 387
387
-
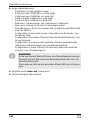 388
388
-
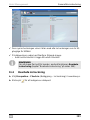 389
389
-
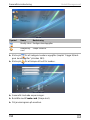 390
390
-
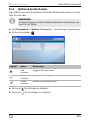 391
391
-
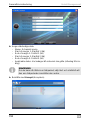 392
392
-
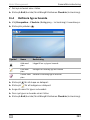 393
393
-
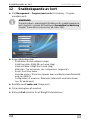 394
394
-
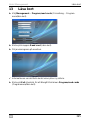 395
395
-
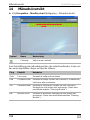 396
396
-
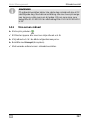 397
397
-
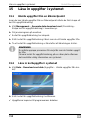 398
398
-
 399
399
-
 400
400
-
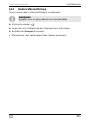 401
401
-
 402
402
-
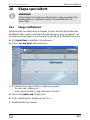 403
403
-
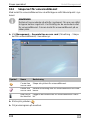 404
404
-
 405
405
-
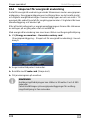 406
406
-
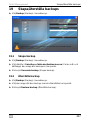 407
407
-
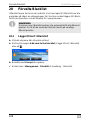 408
408
-
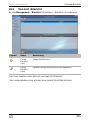 409
409
-
 410
410
-
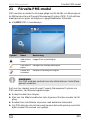 411
411
-
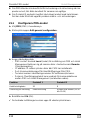 412
412
-
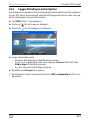 413
413
-
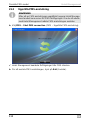 414
414
-
 415
415
-
 416
416


Dometic DM100, DP100 Software Hotel Management Instrucciones de operación
- Tipo
- Instrucciones de operación
- Este manual también es adecuado para
En otros idiomas
- français: Dometic DM100, DP100 Software Hotel Management Mode d'emploi
- italiano: Dometic DM100, DP100 Software Hotel Management Istruzioni per l'uso
- English: Dometic DM100, DP100 Software Hotel Management Operating instructions
- Deutsch: Dometic DM100, DP100 Software Hotel Management Bedienungsanleitung
Otros documentos
-
 ACV Italia RC40 / RC45 Instrucciones de operación
-
ACV RC40 Guía del usuario
-
Retekess T-AC01 Manual de usuario
-
Honeywell T3 Guía del usuario
-
-
 Learning Resources LER2418 Guía del usuario
-
Bosch Appliances MBV-BPRO-40 Manual de usuario
-
 WAFERLOCK C210 Outdoor Weatherproof Smart Padlock Manual de usuario
-
Amazon B06XSFPDFX Manual de usuario
-
Abus TVVR36000 Manual de usuario


