Archos Activity Tracker El manual del propietario
- Categoría
- Iluminación de conveniencia
- Tipo
- El manual del propietario
El Archos Activity Tracker es un dispositivo portátil que te ayuda a llevar una vida más activa y saludable. Puede realizar un seguimiento de tus pasos, la distancia recorrida, las calorías quemadas y las horas de sueño. También puedes utilizarlo para establecer objetivos, recibir notificaciones y compartir tu progreso con amigos y familiares.
El Archos Activity Tracker es un dispositivo portátil que te ayuda a llevar una vida más activa y saludable. Puede realizar un seguimiento de tus pasos, la distancia recorrida, las calorías quemadas y las horas de sueño. También puedes utilizarlo para establecer objetivos, recibir notificaciones y compartir tu progreso con amigos y familiares.


Transcripción de documentos
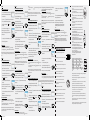
9 QR code iOs ty Warran ty Warran D last mo Rev 05-11-2013 mm 1 scale 1:1 ty Warran ty Warran last modification: Rev DRAWING CONFIDENTIAL 10 ARCHOS Pedometer 4 Uitpakken 11 05-11-2013 ty Warran ty Warran 1. Download op uw mobiele telefoon de app ARCHOS Connected via de Google Play store of AppStore. OF Scan de QR-code op de omslag van deze handleiding. 2. Na de installatie start u de app . 3. Kies Sign Up (Registreren) om een account aan te maken. 4. Volg de aanwijzingen op het scherm. Als u klaar bent, kunt u een apparaat toevoegen. Lees de achterkant van de handleiding om een apparaat toe te voegen. 1 last modification: Rev 1. Lijst met gebruikers - Gebruiker toevoegen 2. Meldingen 3. Instellingen 4. Gebruikersnaam 5. Overzicht van gegevens 6. Delen met vrienden 7. De interface wijzigen 8. Vorige-knop 9. Tabelweergave van activiteiten 10. Grafiekweergave van activiteiten 11. Gerealiseerde activiteit t.o.v. doelstelling 1. Lista de utilizadores: adicionar novo utilizador 2. Notificações 3. Definições 4. Nome do utilizador 5. Resumo dos dados 6. Partilhar com os amigos 7. Personalizar a interface 8. Botão "Voltar" 1. Список пользователей — Добавить 9. Boletim de atividade нового пользователя 10. Gráfico de atividade 11. Conseguido vs. objetivo 2. Уведомления 3. Настройки 4. Имя пользователя 5. Сводные данные 6. Поделиться с друзьями 7. Настроить интерфейс 8. Кнопка «Назад» 9. Активность панели 10. Активность графика 11. Реализовано/Цель 1. Liste der Nutzer - Neuen Nutzer hinzufügen 2. Benachrichtigungen 3. Einstellungen 4. Name des Nutzers 5. Zusammenfassung der Daten 6. Mit Freunden teilen 7. Den Anschluss anpassen 8. Zurück-Knopf 9. Tafel Aktivität 10. Graph Aktivität 11. Durchgeführt vs Ziel mm 7 scale 1:1 6 1. Scaricare sul cellulare l’applicazione ARCHOS Connected Self dallo Store di Google Play o dall’App Store. OPPURE Rilevare il codice QR mostrato sulla copertina di questa guida per l’utente. 2. Dopo l’installazione, avviare l’applicazione . 3. Selezionare Sign Up [Iscriviti] per creare un account. 4. Seguire le istruzioni visualizzate sullo schermo. Quindi verrà richiesto all’utente di aggiungere un dispositivo. Per le istruzioni che spiegano come aggiungere un dispositivo, consultare il retro della presente guida. Aan de slag -- ARCHOS activity tracker -- Verkorte handleiding -- Garantieverklaring en veiligheidsinformatie 5 1. List of users - Add new user 1. Liste des utilisateurs - ajout d’utilisateur 2. Notifications 2. Notifications 3. Settings 3. Réglages 4. User’s name 4. Nom de l’utilisateur 5. Data summary 5. Résumé des données 1. Laden Sie die ARCHOS Connected Self Anwendung von dem Google Play 6. Share with friends 6. Partager ses exploits 7. Customize the interface 7. Personnaliser l’interface Store oder vom AppStore auf Ihrem Mobiltelefon herunter. 8. Back button 8. Bouton Retour ODER Beleuchten Sie den QR Kode im Deckblatt dieser 9. Board activity 9. Données d’activités en tableau Bedienungsanleitung. 10. Graph activity 10. Données d’activités en graphique 2. Nach der Installation, starten Sie die App . 11. Performance vs Objectif 11. Realized vs Goal 3. Wählen Sie Sign Up um ein Konto zu erstellen. 1. Lista de usuarios - Añadir nuevo usuario 4. Folgen Sie den Bildschirmanleitungen. 2. Notificaciones Sobald Sie dies beendet haben, wird Ihnen angeboten ein Gerät 3. Ajustes hinzuzufügen. Um herauszufinden, wie man ein Gerät hinzufügt, schauen Sie 4. Nombre de usuario auf die Rückseite dieser Anleitung 5. Resumen de datos 6. Compartir con amigos 7. Personalizar la interfaz 8. Botón volver 9. Tablón de actividades 1. Descargue la aplicación ARCHOS Connected Self de la Google Play store o 10. Gráfico de actividades 11. Realizado frente a objetivo la AppStore en su teléfono móvil. 1. Elenco utenti - Aggiungi nuovo utente O 2. Notifiche Capture el código QR en la cubierta de esta guía de usuario. 3. Impostazioni 4. Nome utente 2. Una vez instalada, abra la aplicación . 5. Riepilogo dati 3. Seleccione “Sign Up” (Registrarse) para crear una cuenta. 6. Condividi con gli amici 4. Siga las instrucciones en pantalla. 7. Personalizza l’interfaccia Una vez terminado, se le pedirá añadir un dispositivo. Para saber cómo 8. Pulsante Indietro añadir un dispositivo, consulte el dorso de esta guía. 9. Vista delle attività 10. Grafico attività 11. Obiettivo raggiunto vs Obiettivo Inicio -- Rastreador de actividad ARCHOS -- Guía de inicio rápido -- Folleto de garantía legal y seguridad scale 1:1 CO Material suministrado ARCHOS Activity Tracker.indd 1 1. Sur votre appareil mobile, télécharger l’application ARCHOS Connected Self dans le Google Play store ou à partir de l’Appstore. OU Flashez le code-barres apposé sur la couverture du guide d’utilisation. 2. A la fin de l’installation, lancez l’applications ARCHOS . 3. Sélectionnez “Inscrivez-vous” pour créer un compte. 4. Suivez les instructions à l’écran. A la fin de la création de compte, vous avez la possibilité d’ajouter un appareil. Consultez le verso du guide pour savoir comment associer un appareil. Beginnen -- ARCHOS Activity Tracker -- Quick Start Guide -- Garantie gesetzliche Vorschriften & Sicherheitshinweise ty Warran ty Warran QR code Play store 3 8 DRAWING last modification: mm 05-11-2013 1 scale 1:1 Rev DRAWING CONFIDENTIAL ARCHOS Pedometer ty Warran ty Warran Auspacken English - French - German - Spanish Italian - Dutch - Portuguese - Russian 2 1 Introduzione Contenuto della confezione -- ARCHOS Activity Tracker -- Guida introduttiva -- Libretto di garanzia con informazioni legali e sulla sicurezza Premiers Pas -- ARCHOS Activity tracker -- Guide de démarrage rapide -- Notice des garanties et des mentions légales Quick User Guide ARCHOS Connected Self application CONFIDENTIAL 1 Rev Déballage 1. On your mobile phone, download the ARCHOS Connected Self application from the Google Play store or from the AppStore. OR Flash the QR code in the cover of this user guide. 2. After the installation, launch the app . 3. Select Sign Up to create an account. 4. Follow the on-screen instructions. Once you have finished, you are offered to add a device. To know how to add a device, see the verso of this guide ARCHOS Pedometer 05-11-2013 ty Warran ty Warran last modification: mm DRAWING scale 1:1 CONFIDENTIAL -- ARCHOS activity tracker -- Quick Start Guide -- Warranty Legal & Safety sheet ARC last mo scale 1: Rev C ARC Getting Started Unpacking ARCHOS Pedometer ARCHOS Activity Tracker Na embalagem Início -- ARCHOS Activity Tracker (monitor de atividade) -- Guia de início rápido -- Documentação de garantia legal e segurança ty Warran ty Warran Распаковка 1. Transfira a aplicação ARCHOS Connected Self, para o seu dispositivo móvel, a partir da Google Play Store ou da Apple App Store, ou ainda analisando o código QR na capa deste manual do utilizador. 2. Inicie a aplicação , após a instalação. 3. Selecione “Sign Up” (Registar) para criar uma conta. 4. Siga as instruções no ecrã. Para finalizar, terá a possibilidade de adicionar um dispositivo. Consulte o verso deste manual, para aprender a adicionar um dispositivo. Начало работы -- Трекер активности ARCHOS -- Краткое руководство -- Гарантия и паспорт безопасности ty Warran ty Warran 1. Загрузите на мобильный телефон приложение ARCHOS Connected Self из магазина Google Play store или AppStore. ИЛИ Сфотографируйте QR-код, расположенный на обложке данного руководства пользователя. 2. Запустите приложение после установки. 3. Выберите «Подписаться», чтобы создать учетную запись. 4. Следуйте инструкциям, отображающимся на экране. По завершении вам будет предложено добавить устройство. Информация о том, как добавлять устройство, приведена на обратной стороне данного руководства. PN: 112495 03/06/2014 12:14:51 Success! 5. Une fois l’association faite, vou pouvez lier votre podomètre avec votre profil utilisateur. 3. Coja el rastreador y mantenga pulsado el botón de emparejamiento durante 6 segundos. El proceso de detección empezará cuando el rastreador muestre . botón de emparejamiento 4. Seleccione el dispositivo para iniciar el proceso de emparejamiento. Note: *Votre appareil (tablette ou téléphone) doit être équipé du Bluetooth norme BLE. En cas de problème d’association, vérifiez la batterie du podomètre et assurez-vous que le Bluetooth est activé sur l’appareil. 2. Kies het pictogram . Het apparaat zoekt naar een tracker om verbinding mee te maken (pairing). 05-11-2013 last modification: mm 05-11-2013 Rev 1 last modification: DRAWING CONFIDENTIAL scale 1:1 05-11-2013 1 last modification: Rev scale 1:1 mm DRAWING CONFIDENTIAL 1 last modification: 05-11-2013 1 Rev mm DRAWING CONFIDENTIAL scale 1:1 ARCHOS Pedometer Meet uw pols en knip het overlappende stuk polsband af. 11:55 0.00 0.0 11:55 0 0.0 0.00 11:55 0.0 0.00 0 Добавление устройства во время создания учетной записи Beginnen Sie binnen 10 Schritten zu laufen, sodass das Zählen beginnt. Das Zählen wird um Mitternacht zurückgestellt und eine Sicherung aller Daten wird 7 Tage auf dem Tracker erhalten. Um den Tracker anzuziehen, benutzen Sie die Schnalle um das Armband anzuschnallen. Fare 10 passi per avviare il calcolo. Il calcolo viene azzerato a mezzanotte e per 7 giorni viene conservato nel tracker il backup dei dati. Per indossare il tracker, utilizzare la fibbia per allacciare il braccialetto. Begin binnen 10 stappen met lopen zodat het tellen begint. Om middernacht wordt de telling gereset. Er wordt een back-up gemaakt van de gegevens. Deze wordt 7 dagen bewaard op de tracker. Dê alguns passos para iniciar a contagem. O contador é reiniciado à meia-noite, mas os dados são guardados no monitor durante 7 dias. 1 Abroche la pulsera para llevar puesto el rastreador. 1. После создания учетной записи выберите ответ «Да» на вопрос «Вы хотите добавить устройство?» и следуйте инструкциям, отображающимся на экране. 5. Als de pairing is voltooid, kunt u de tracker koppelen aan uw gebruikersprofiel. Success! Misurare il diametro del polso e tagliare la parte in eccesso del braccialetto. 0.0 русский 3. Возьмите трекер и удерживайте кнопку соединения в течение 6 секунд. Когда на дисплее трекера появится , начнется процесс определения. 6. Stel een weekdoel vast en sla dit op. Time 2 Calories burned 3 Walking distance 4 Number of steps Heure 2 Calories dépensées 3 Distance marchée 4 Nombre de pas 1 Tiempo 2 Calorías quemadas 3 Distancia caminada 4 Número de pasos 1 Zeit 2 verbrannte Kalorien 3 zurückgelegte Strecke 4 Anzahl der Schritte 1 Tempo 2 Calorie bruciate 3 Distanza a piedi 4 Numero di passi 1 Tijd 2 Verbrande calorieën 3 Loopafstand 4 Aantal stappen 1 Tempo 2 Calorias queimadas 3 Distância percorrida 4 Número de passos 1 Время 2 Сожженные калории 3 Пройденное расстояние 4 Количество шагов 1 11:55 Portez votre podomètre comme une montre et utilisez le crochet de fermeture pour l’attacher. 4. Kies het apparaat om het pairing-proces te starten. Añadir otro dispositivo 1. Conéctese a su cuenta con el nombre de usuario y contraseña. 2. En la interfaz principal de ARCHOS Connected Self, seleccione - Press the Navigation button to display the last displayed screen and keep pressing to navigate among menus. - Appuyez sur le bouton de Navigation pour voir le dernier écran affiché et utilisez le bouton pour naviguer dans les menus. - Pulse el botón de Navegación para mostrar la última pantalla visualizada, y siga pulsando para pasar de un menú a otro - Drücken Sie den Navigationsknopf um das zuletzt angezeigte Bild anzuzeigen und drücken Sie weiterhin um zwischen den Menus zu navigieren. - Premere il pulsante di navigazione per visualizzare le ultime schermate consultate e tenere premuto per navigare tra i menu. - Druk op de navigatieknop om het laatst weergegeven scherm weer te geven en houd de knop ingedrukt om door de menu’s te bladeren. - Prima o botão de navegação para que seja apresentado o último ecrã. Volte a premi-lo para navegar entre menus. - Нажмите кнопку «Навигация» для перехода к последнему отображенному экрану и продолжайте ее нажимать, чтобы перемещаться по меню. Start walking within 10 steps so that the counting begins. The counting is reset at 0.00 midnight and a backup of all data is kept for 7 days on the tracker. 0 Marchez 10 pas environ avant que le comptage ne débute. Il y a une mémoire interne pour un stockage de données de 7 jours. 0 El contador empezará a funcionar al cabo de 10 pasos. El contador se pone a cero a medianoche, guardándose una copia de todos los datos durante 7 días en el rastreador. 2. Выберите значок . Устройство начнет поиск трекера, с которым требуется соединиться. Success! ARCHOS Pedometer last modification: Rev 05-11-2013 Adicionar outro dispositivo 1. Inicie sessão com as suas credenciais. 2. Selecione na interface inicial do ARCHOS Connected Self, para aceder às definições. 3. Selecione nas definições e siga as instruções acima, para adicionar um monitor. 6. Establezca un objetivo semanal y guárdelo. Pairing-knop Messen Sie Ihr Handgelenk und schneiden Sie den überragenden Teil des Armbands ab. Success! last modification: ARCHOS Pedometer Mida la muñeca y corte la parte sobrante de la pulsera. 5. Una vez emparejado, podrá vincular el rastreador a su perfil de usuario. Si el emparejamiento se realiza correctamente, el rastreador mostrará:”Success!” (¡Correcto!). De lo contrario, deberá volver a iniciar el proceso. ARCHOS Pedometer 05-11-2013 mm 1 DRAWING last modification: Rev 05-11-2013 1 Rev scale 1:1 mm DRAWING ARCHOS Pedometer CONFIDENTIAL CONFIDENTIAL 10. O monitor apresentará a mensagem "Success!" (Efetuado!), após confirmar o emparelhamento. Terá de reiniciar o processo caso este não seja bem-sucedido. To put on the tracker, insert the bracelet which has the USB icon into the USB connector. Portez votre podomètre comme une montre et utilisez la partie du bracelet avec l’icône USB pour l’attacher. Para poner el rastreador, inserte la pulsera con el icono USB en el conector USB Um den Tracker anzuschalten, setzen Sie das Armband mit dem USB Symbol in die USB Anschlusstelle ein. Per indossare il tracker, inserire la parte del braccialetto con l’icona USB nella porta USB. Om de tracker om te doen, sluit u de polsband met het USB-pictogram aan op de USB-aansluiting. Insira a parte da bracelete com o ícone USB na ficha USB, para colocar o monitor no pulso. Чтобы надеть трекер, вставьте браслет с иконкой USB в разъем USB. 1 9. Crie um objetivo semanal e guarde-o. Rev last modification: Mesurez votre tour de poignet et coupez la partie du bracelet qui dépasse. 8. Pode associar o monitor ao seu perfil de utilizador, após o emparelhamento. mm 05-11-2013 1 mm 05-11-2013 1 scale 1:1 Measure your wrist and cut the overlapping part of the bracelet. Nota: *O seu dispositivo (tablet ou smartphone) deve estar equipado com a tecnologia Bluetooth Low Energy (Bluetooth de baixo consumo). Em caso de mau funcionamento, verifique a bateria e certifique-se de que o Bluetooth do dispositivo está ligado. 1. Nadat u een account heeft aangemaakt, kiest u Yes (Ja) na de vraag “Do you want to add a device?” (Wilt u een apparaat toevoegen) en volgt u de aanwijzingen op het scherm. ARCHOS Activity Tracker device Botão de emparelhamento 3. Pak de tracker en houd de pairing-knop 6 seconden lang ingedrukt. Als de tracker weergeeft, wordt het detectieproces gestart. 6. Définissez un objectif hebdomadaire et enregistez. Ajouter un appareil supplémentaire 1. Connectez vous à votre compte avec votre identifiant et votre mot de passe. 2. Sur l’écran d’accueil du ARCHOS Connected Self, sélectionnez pour accéder aux paramètres. 3. Dans la page des paramètres, sélectionnez pour ajouter un podomètre et suivez le procédé d’association décrit précédemment. Rev Een apparaat toevoegen tijdens het aanmaken van een account . El dispositivo buscará un rastreador para scale 1:1 CONFIDENTIAL 2. Seleccione el icono emparejarse. DRAWING CONFIDENTIAL Bouton d’association Nederlands Добавление другого устройства 1. Войдите в свою учетную запись при помощи ID и пароля. 2. В основном интерфейсе ARCHOS Connected Self выберите для доступа к настройкам. 3. На странице настроек выберите , чтобы добавить трекер, и следуйте процессу, описанному выше. Примечание. * Ваше устройство (планшет или мобильный телефон) должно поддерживать технологию Bluetooth с низким энергопотреблением. В случае неисправной работы проверьте батарею и убедитесь, что на устройстве включен Bluetooth. 7. Selecione o dispositivo para iniciar o processo de emparelhamento. last modification: Rev mm DRAWING CONFIDENTIAL scale 1:1 05-11-2013 1 last modification: Rev scale 1:1 mm 6. Definire un obiettivo settimanale e salvarlo. Ein weiteres Gerät hinzufügen Success! Quando il processo di associazione è stato completato, il 1. Loggen Sie sich in Ihr Konto ein, indem Sie Ihre ID und Ihr Passwort eingeben. 2. Wählen Sie Im ARCHOS Connected Self Hauptanschluss um auf die Einstellungen tracker mostra il messaggio “Success!” [Riuscito], in caso zuzugreifen. contrario sarà necessario ripeterlo 3. Wählen Sie auf der Seite Einstellungen um einen Tracker hinzuzufügen und folgen Sie dem oben angezeigten Prozess. Aggiunta di un altro dispositivo 1. Effettuare l’accesso al proprio account inserendo ID e password. Anmerkung: *Ihr Gerät (Tablett oder Mobiltelefon) muss mit Bluetooth Low Energy 2. Nell’interfaccia principale di ARCHOS Connected Self, selezionare per accedere alle Technologie ausgestattet sein. Im Falle einer Betriebsstörung, überprüfen Sie den Akku, impostazioni. stellen Sie sicher, dass Bluetooth auf dem Gerät AN-geschaltet ist. 3. Nella pagina delle impostazioni, selezionare per aggiungere un tracker e seguire le istruzioni sopra indicate. ESPAÑOL Nota: *il dispositivo (tablet o telefono cellulare) deve essere dotato di tecnologia Bluetooth Crear una cuenta y a la vez añadir un dispositivo Low Energy. In caso di malfunzionamento, controllare la batteria e assicurarsi che il Bluetooth sia ATTIVO sul dispositivo. 1. Una vez creada la cuenta, responda "Yes" (Sí) a la DRAWING ARCHOS Pedometer 5. Al termine, è possibile collegare il tracker al proprio profilo utente. pregunta “Do you want to add a device?” (¿Desea añadir un dispositivo?) y siga las instrucciones en pantalla. . O dispositivo iniciará a busca ao monitor com que se 6. Mantenha o botão de emparelhamento do monitor premido durante 6 segundos. O processo de deteção começa, após o monitor apresentar a imagem . scale 1:1 Success! CONFIDENTIAL . L’appareil va rechercher un podomètre à associer. ARCHOS Pedometer 1 5. Selecione o ícone emparelhar. mm 05-11-2013 mm last modification: DRAWING scale 1:1 Rev CONFIDENTIAL ARCHOS Pedometer last modification: mm 05-11-2013 1 scale 1:1 Rev DRAWING . Il dispositivo cercherà un tracker a cui associarsi. 4. Selezionare il dispositivo per iniziare il processo di associazione. ARCHOS Pedometer 1. Une fois que vous avez terminé de créer votre compte, sélectionnez Oui à la question “Voulez-vous ajouter un appareil?” et suivez les instructions à l’écran. ARCHOS Activity Tracker.indd 2 4. Siga as instruções no ecrã, após criar uma conta e escolher "Yes" (Sim) na pergunta "Do you want to add a device?" (Quer adicionar um dispositivo?). DRAWING Ajouter un appareil pendant la création de compte ARCHOS Pedometer CONFIDENTIAL Français 6. Legen Sie ein wöchentliches Ziel fest und speichern Sie dies. DRAWING Note: *Your device (tablet or mobile phone) must be equipped with Bluetooth Low Energy technology. In case of malfunctioning, check the battery, make sure Bluetooth is ON on the device Adicionar um dispositivo durante a criação da conta 3. Prendere il tracker e tenere premuto il pulsante per l’associazione per 6 secondi. Quando il tracker mostra , Pulsante per l’associazione ha inizio il processo di rilevazione. 5. Sobald der Pairingprozess erfolgreich war, können Sie den Tracker mit Ihrem Nutzer Profil verknüpfen. Sollte der Pairingprozess gelingen, zeigt der Tracker: "Erfolg!" an. Sollte das Pairing fehlschlagen, müssen Sie den Prozess neu starten. CONFIDENTIAL Adding another device 1. Log into your account using your ID and password. 2. In the ARCHOS Connected Self main interface, select to access the settings. 3. In the settings page, select to add a tracker and follow the process shown above. ARCHOS Pedometer 6. Define a weekly goal and save it. 4. Sélectionnez le podomètre affiché pour débuter l’association. A la suite d’une association réussie, le podomètre affiche:”Success!”. Si l’association échoue, vous devrez recommencer la procédure. 2. Selezionare l’icona Success! соединения не удался, вам потребуется повторить его заново. PORTUGUÊS ARCHOS Pedometer 0 4. Wählen Sie das Gerät um den Pairingprozess zu beginnen. 5. Once paired, you can bind the tracker with your user profile. 3. Prenez le podomètre et maintenez le bouton d’association pendant 6 secondes. Lorsque le podomètre affiche , il est mode association. 1. Dopo aver creato un account, selezionare Yes [Sì] in risposta alla domanda “Do you want to add a device?” [Vuoi aggiungere un dispositivo?] e seguire le istruzioni visualizzate sullo schermo. Pairingknopf Success! 6. Определите цель на неделю и сохраните ее. Opmerking: *Uw apparaat (tablet of mobiele telefoon) moet zijn uitgerust met Bluetooth Low Energy technology. Bij een storing controleert u de batterij en controleert u of Bluetooth По завершении процесса соединения на дисплее is ingeschakeld op het apparaat. трекера появится сообщение «Успешно!». Если процесс Aggiunta di un dispositivo durante la creazione dell’account scale 1:1 mm 1 last modificati DRAW scale 1:1 Rev ARCHOS P CONFID 4. Select the device to start the pairing process. When the pairing process succeeds, the tracker displays:”Success!”If the pairing fails, you will need to restart the process. 2. Sélectionnez l’icône 3. Nehmen Sie Ihren Tracker und drücken Sie den Pairingknopf 6 Sekunden lang. Wenn der Tracker anzeigt, beginnt der Ermittlungsprozess. Pairing button CONFIDENTIAL CONFIDENTIAL CONFIDENTIAL CONFIDENTIAL 3. Take your tracker and hold the pairing button for 6 seconds. When the tracker displays , the detection process starts. ITALIANO 4. Выберите устройство, чтобы начать процесс соединения. 5. После соединения вы можете привязать трекер к своему профилю пользователя. ARCHOS ARCHOS ARCHOS Pedometer ARCHOS Pedometer Pedometer Pedometer 2. Wählen Sie das Symbol . Das Gerät wird nach einem Tracker suchen, mit dem es sich zusammensetzen kann. . The device will look for a tracker to be paired with. Nog een apparaat toevoegen 1. Log in bij uw account met uw gebruikersnaam en wachtwoord. 2. In het hoofdscherm van ARCHOS Connected Self kiest u om naar de instellingen te gaan. 3. Op de pagina met instellingen kiest u om een tracker toe te voegen en volgt u de hierboven beschreven stappen. mm 2. Select the icon Nota: *Su dispositivo (tableta o teléfono móvil) debe estar equipado con tecnología Bluetooth de baja energía. En caso de un funcionamiento defectuoso, compruebe la pila y asegúrese de que el Bluetooth está activado en el dispositivo DRAWING DRAWING DRAWING DRAWING 1. Sobald Sie ein Konto erstellt haben, wählen Sie Ja bei der Frage "Möchten Sie ein Gerät hinzufügen?" und folgen Sie den Bildschirmanleitungen. Als de pairing is voltooid, geeft de tracker de melding ”Success!” (Geslaagd) weer. Als de pairing is mislukt, moet u het pairing-proces herhalen. para añadir un rastreador y siga el procedimiento 111 1 1. Once you have created an account, select Yes to the question “ Do you want to add a device?” and follow the onscreen instructions. ajustes. 3. En la página de ajustes, seleccione arriba indicado. mm scale scale 1:1scale 1:1mm 1:1mm scale 1:1 Adding a device while creating your account Ein Gerät hinzufügen während Sie Ihr Konto erstellen lastlast modification: last modification: modification: last modification: Deutsch 05-11-2013 05-11-2013 05-11-2013 Rev Rev Rev 05-11-2013 Rev English 3 Meça o seu pulso e corte o excedente da bracelete. Измерьте свое запястье и отрежьте лишнюю часть браслета. To put on the tracker, use the buckle to buckle up the bracelet. Gebruik de gesp om de tracker om te doen en af te stellen. Verifique se o fecho está seguro, antes de colocar o monitor no pulso. Чтобы надеть трекер, застегните браслет при помощи пряжки. Сделайте около 10 шагов, чтобы начался отсчет. Отсчет сбрасывается в полночь, и резервная копия всех данных хранится на трекере на протяжении 7 дней. Кнопка Спаривание para acceder a los 03/06/2014 12:15:07-
 1
1
-
 2
2


Archos Activity Tracker El manual del propietario
- Categoría
- Iluminación de conveniencia
- Tipo
- El manual del propietario
El Archos Activity Tracker es un dispositivo portátil que te ayuda a llevar una vida más activa y saludable. Puede realizar un seguimiento de tus pasos, la distancia recorrida, las calorías quemadas y las horas de sueño. También puedes utilizarlo para establecer objetivos, recibir notificaciones y compartir tu progreso con amigos y familiares.
en otros idiomas
- français: Archos Activity Tracker Le manuel du propriétaire
- italiano: Archos Activity Tracker Manuale del proprietario
- English: Archos Activity Tracker Owner's manual
- Deutsch: Archos Activity Tracker Bedienungsanleitung
- русский: Archos Activity Tracker Инструкция по применению
- Nederlands: Archos Activity Tracker de handleiding
- português: Archos Activity Tracker Manual do proprietário
Artículos relacionados
-
Archos Connected Scale El manual del propietario
-
-
Archos 70 Series User 70 Titanium Manual de usuario
-
Archos 79 Series User 79 Cobalt Manual de usuario
-
Archos 70 Series User 70 Xenon Manual de usuario
-
Archos 80 ChildPad El manual del propietario
-
-
Archos 101 Series User Xenon 101 Manual de usuario
-