Hampton Bay GS-W041401BN Guía del usuario
- Tipo
- Guía del usuario
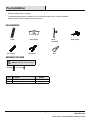
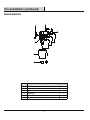
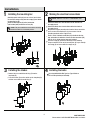
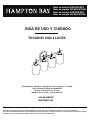
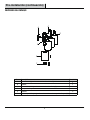
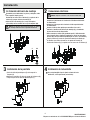
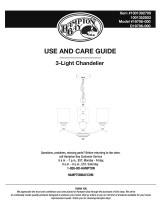
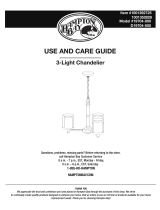
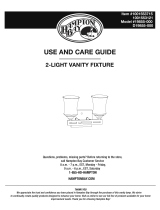
El Hampton Bay GS-W041401BN es un tocador de baño con cuatro luces que combina estilo y funcionalidad. Elaborado con materiales de alta calidad, este tocador está diseñado para proporcionar una iluminación brillante y uniforme en tu baño. Con su elegante acabado y diseño clásico, el Hampton Bay GS-W041401BN complementará perfectamente la decoración de tu hogar. Además, su instalación es sencilla, por lo que podrás hacerlo tú mismo en poco tiempo.
El Hampton Bay GS-W041401BN es un tocador de baño con cuatro luces que combina estilo y funcionalidad. Elaborado con materiales de alta calidad, este tocador está diseñado para proporcionar una iluminación brillante y uniforme en tu baño. Con su elegante acabado y diseño clásico, el Hampton Bay GS-W041401BN complementará perfectamente la decoración de tu hogar. Además, su instalación es sencilla, por lo que podrás hacerlo tú mismo en poco tiempo.


-
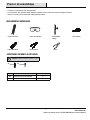
 1
1
-
 2
2
-
 3
3
-
 4
4
-
 5
5
-
 6
6
-
 7
7
-
 8
8
-
 9
9
-
 10
10
-
 11
11
-
 12
12
-
 13
13
-
 14
14


Hampton Bay GS-W041401BN Guía del usuario
- Tipo
- Guía del usuario
El Hampton Bay GS-W041401BN es un tocador de baño con cuatro luces que combina estilo y funcionalidad. Elaborado con materiales de alta calidad, este tocador está diseñado para proporcionar una iluminación brillante y uniforme en tu baño. Con su elegante acabado y diseño clásico, el Hampton Bay GS-W041401BN complementará perfectamente la decoración de tu hogar. Además, su instalación es sencilla, por lo que podrás hacerlo tú mismo en poco tiempo.
en otros idiomas
- English: Hampton Bay GS-W041401BN User guide
Artículos relacionados
-
 Hampton Bay 20556-001 Instrucciones de operación
-
 Hampton Bay 19712-000 Instrucciones de operación
-
 Hampton Bay 19708-000 Instrucciones de operación
-
 Hampton Bay 19706-000 Guía de instalación
-
 Hampton Bay 19704-000 Instrucciones de operación
-
 Hampton Bay 19855-000 Guía de instalación
-
 Hampton Bay 19059-001 Instrucciones de operación
-
Hampton Bay DS19069 Guía del usuario
-
 Hampton Bay 2416J2-1 Guía del usuario


