

· 2 ·
REF. 54040
MANUAL DE INSTRUCCIONES
ES
DESCRIPCIÓN DEL PRODUCTO
El comprobador de baterías con impresora mide la ca-
pacidad de arranque en frío de la batería de arranque
del vehículo, el estado de salud de la propia batería y
los fallos comunes del sistema de arranque y del sis-
tema de carga del vehículo. Esta herramienta puede
ayudar al personal de mantenimiento a encontrar el
problema de forma rápida y precisa, y así conseguir
una rápida reparación del vehículo.
INSTRUCCIONES GENERALES DE SEGURIDAD
¡ADVERTENCIA! Este producto puede exponerlo
a usted a químicos incluyendo arsénico, el cual es co-
nocido en el Estado de California por causar cáncer.
• Trabajar cerca de una batería de plomo-ácido
es peligroso. Las baterías generan hidrógeno,
gas explosivo, durante su funcionamiento. Lea
estas instrucciones con cuidado antes de utilizar
el probador.
• Para reducir el riesgo de explosión de la batería,
siga estas instrucciones y las publicadas por el
fabricante de la batería.
• No exponga el probador a la lluvia o nieve.
INSTRUCCIONES DE SEGURIDAD PERSONAL
• Alguien deba estar dentro del alcance de su voz
o lo bastante cerca para poder ayudarle cuando
usted esté trabajando cerca de una batería de
plomo ácido.
• Tenga agua fresca y jabón cerca de usted, en
caso de que el ácido de la batería haga contacto
con la piel, la ropa o los ojos.
• Lleve gafas de seguridad y ropa adecuada.
• Si el ácido de la batería hace contacto con la piel
o ropa, lave inmediatamente con jabón y agua.
Si el ácido entra en los ojos, inmediatamente
lávelos con abundante agua corriente por lo me-
nos durante 10 minutos y busque atención medi-
ca inmediatamente.
• No fume y evite chispa o ama en las inmedia-
ciones de la batería o del motor.
• Por ningún motivo, vaya a colocar una herra-
mienta metálica en la parte superior de la bate-
ría. Se puede provocar una chispa la que puede
ocasionar una explosión.
• Remueva las cosas metálicas personales como
los anillos, brazaletes, collares y relojes cuando
esté trabajando con una batería de plomo ácido.
Se puede producir un fuerte cortocircuito, como
para fundir un anillo, y provocar quemaduras
graves.
Preparación de la comprobación:
• Asegúrese que el área alrededor de la batería
esté bien ventilada mientras que la batería es
examinada.
• Limpie las terminales de la batería. Tenga cui-
dado de que los polvos de la corrosión en las
terminales no hagan contacto con sus ojos.
• Examine la batería en busca de roturas en la
caja o tapa. Si la batería está dañada, no utilice
el probador.
• Si la batería no es libre de mantenimiento (MF),
añada el agua destilada necesaria, en cada cel-
da, hasta cubrir 2 centímetros arriba de las pla-
cas. Esto ayuda a eliminar el gas excesivo que
pudiera haber en cada celda. No rebase este
nivel.
• Si es necesario remover la batería del vehículo
para la comprobación, siempre desconecte la
terminal de tierra de la batería, primero (-). Ase-
gúrese que todos los accesorios en el vehículo
están apagados para estar seguro de no causar
un corto circuito.
OPERACIÓN Y USO
• Antes de que usted examine la batería de un ve-
hículo, apague la ignición, todos los accesorios y
las cargas. Cierre todas las puertas del vehículo
y la tapa del maletero.
• Observe que nada se verá en la pantalla hasta
que el testador es conectado a una batería del
vehículo.
• Asegúrese que las terminales de la batería están
limpias. Con un cepillo metálico las puede limpiar
si es necesario. Conecte el caimán negro a la
terminal negativa de la batería y el rojo a la ter-
minal positiva de la batería. Se le ruega grapar la
parte de plomo del terminal solamente. El grapar
la parte con erro del terminal puede provocar
resultados erróneos de la comprobación.
• Carga de papel: Abra la tapa clara. Inserte el pa-
pel en el cajón de papel para que el papel entre
en la impresora automáticamente.
NOTA: Cada vez que conecta el probador a una ba-
tería, el probador vericara rápidamente el cable para
asegurar la conexión apropiada a través de los cables
de salida a los sensores en las abrazaderas de ama-
rre. Si la conexión esta OK, el probador ira a la pantalla
de Inicio. Si la conexión es pobre, la pantalla mostrara
“VERIFIQUE EL CABLE”. En este caso, verique las
conexiones del cable por señales visibles de daño, de
pronto debe reconectar las abrazaderas a la batería o
remplazar el nal del cable.
Siga los siguientes pasos para utilizar la herramienta
correctamente:
1. Conecte la pinza de comprobación roja al ánodo
de la batería y la pinza de comprobación negra al

· 3 ·
REF. 54040
cátodo, el comprobador se encenderá automáti-
camente. El voltaje de la batería por debajo de
7,0VDC no puede ser probado correctamente.
2. A continuación, pulse la tecla OK para continuar.
3. De acuerdo con el comprobador, puede pulsar la
tecla ARRIBA/ABAJO para elegir:
1. Comprobación de la batería
2. Comprobación de arranque
3. Comprobación de carga
4. Comprobación de revisión
5. Imprimir datos
6. Datos de exportación
Comprobación de la batería
Seleccione la comprobación de la batería y pulse la
tecla OK para continuar:
• Tipo de batería: seleccione el tipo de batería,
normalmente es “Regular Flooded”.
• Estándar de comprobación de entrada: el es-
tándar que puede ver en el frente de la batería,
como CCA, BCI, DIN. Si no encuentra informa-
ción sobre el estándar, puede elegir el estándar
GB. La elección de la norma GB puede dar lugar
a una pequeña tolerancia.
• Capacidad nominal de entrada: puede ver los es-
tándares de corriente de arranque delante de la
batería, como BCI/300A.
• A continuación, pulse la tecla OK para iniciar la
comprobación.
NOTA: Para la pérdida de energía de la batería (como
un vehículo durante mucho tiempo en espera, la bate-
ría no se carga en el tiempo, se olvide de cerrar las lu-
ces, las puertas de crear graves pérdidas de la batería
del vehículo eléctrico y no puede arrancar, etc.), en el
proceso de comprobación real también se puede pedir
para reemplazar la batería. Para este tipo de baterías,
por favor consulte a los fabricantes de baterías.
Comprobación de arranque
NOTA: Esto es para que el personal de mantenimiento
conozca rápidamente el estado completo del sistema
de arranque según los datos. Si no se puede detectar
el arranque del motor, puede que no haya salida de
tensión de carga, es necesario comprobar el genera-
dor.
Comprobación de carga
Después de entrar en
la segunda función
de comprobación del
sistema de arranque,
pulse la tecla OK.
Al arrancar el motor
como se indica, el
comprobador comple-
tará automáticamente
la comprobación de
arranque y mostrará el
resultado.
Normalmente, el va-
lor de la tensión de
arranque por debajo
de 9,6V se considera
anormal, y por encima
de 9,6V está bien.
El resultado de la
comprobación del
comprobador incluye
la tensión de arranque
real y el tiempo de
arranque real.
Cuando la comproba-
ción de arranque es
anormal, el resultado
de la comprobación
de la batería también
se mostrará al mismo
tiempo.
Al entrar en la com-
probación de carga, el
comprobador indicará
“Charging Test” (“Com-
probación de carga”).
NOTA: No apague el
motor durante la com-
probación. Todos los
aparatos y dispositivos
eléctricos están en es-
tado OFF. Encender o
apagar cualquier dispo-
sitivo eléctrico del ve-
hículo durante la com-
probación afectará a la
precisión del resultado
de la comprobación.
Actúa en consecuencia
para aumentar la veloci-
dad de rotación del mo-
tor a 2500 revoluciones,
y mantenerla durante 5
segundos.

· 4 ·
REF. 54040
Resultado de la comprobación de carga
1. Tensión de carga: Normal. La salida del genera-
dor es normal, no se detecta ningún problema.
2. Tensión de carga: Baja. Compruebe si la correa
de transmisión del generador patina o se despla-
za. Compruebe si la conexión entre el generador
y la batería es normal o no. Si tanto la correa
de transmisión como la conexión están en buen
estado, siga las sugerencias del fabricante para
eliminar el fallo del generador.
3. Tensión de carga: Alta. Como la mayoría de los
generadores de los vehículos utilizan un regula-
dor interno, el conjunto del generador debe ser
sustituido (algunos coches de estilo más antiguo
utilizan un regulador externo, entonces sustituya
el regulador directamente). La tensión normal
del regulador de tensión es de un máximo de
14,7±0,5V. Si la tensión de carga es demasia-
do alta, se sobrecargará la batería. Por lo tanto,
la vida de la batería se acortará, y se causarán
problemas.
4. No hay salida de voltios: No se detecta la salida
de voltios del generador. Compruebe el cable de
conexión del generador, la correa de transmisión
del generador y el motor si es normal o no.
5. Comprobación de diodos: A través de la compro-
bación de ondulación de la corriente de carga,
el comprobador averiguará si el diodo es normal
o no. Si la tensión de ondulación es demasiado
alta, indica que al menos un diodo está dañado.
Compruebe y sustituya el diodo.
Revisar los datos
Después de introducir la cuarta función, pulse la tecla
OK para ver el resultado nal de la comprobación.
Imprimir datos
Imprime el resultado de la última comprobación con la
impresora de este comprobador de baterías.
Exportar Datos
Conecte este comprobador de baterías al ordenador
con la línea de datos y exporte los datos al ordenador.
(Conéctese a nuestra empresa para obtener el último
software).
SUSTITUCIÓN DEL PAPEL
1. Abra la cubierta transparente.
2. Inserte el rollo de papel sustituido en el alimenta-
dor de papel para la introducción automática del
papel en la impresora.
3. Tire del papel lentamente y en línea recta desde
el rollo de papel en la cámara.
FUNCIONES ADICIONALES
Pulse “Menú” para acceder a la función adicional:
• Idioma:
• Versión continental: chino tradicional, japo-
nés, coreano, ruso e inglés
• Versión de idiomas nórdicos: inglés, ho-
landés, sueco, nlandés, noruego y danés
• Versión en idiomas de Europa Occidental:
inglés, francés, alemán, español, italiano y
polaco
• Ajuste de la hora: ajuste de cualquier hora.
El comprobador inicia
la comprobación de
tensión de carga tras
detectar el aumento de
revoluciones.
Una vez nalizada la
comprobación, el com-
probador muestra los
voltios de carga efecti-
vos, el resultado de la
comprobación de on-
dulación y el resultado
de la comprobación de
carga.
Por último, compruebe
la conexión entre el ge-
nerador y la batería, y
vuelva a realizar la com-
probación.

· 5 ·
REF. 54040
INSTRUCTION MANUAL
EN
PRODUCT DESCRIPTION
Battery tester with printer measures the cold cranking
amps capability of the vehicle starting battery, the heal-
thy state of the battery itself, and the common faults of
the vehicle starting system and charging system. This
tool can aid maintenance personnel to nd the problem
quickly and accurately, thus, to achieve quick vehicle
repair.
GENERAL SAFETY INSTRUCTIONS
WARNING! This product can expose you to che-
micals including arsenic, which is known to the State of
California to cause cancer.
• Working in the vicinity of a lead acid battery is
dangerous. Batteries generate explosive gases
during normal battery operation. For this reason,
it is of utmost importance, if you have any doubt,
that each time before using your tester, you read
these instructions very carefully.
• To reduce risk of battery explosion, follow these
instructions and those published by the battery
manufacturer and manufacturer of any equi-
pment you intend to use in the vicinity of the
battery. Observe cautionary markings on these
items.
• Do not expose the tester to rain or snow.
PERSONAL SAFETY INSTRUCTIONS
• Someone should be within range of your voice or
close enough to come to your aid when you work
near a lead acid battery.
• Have plenty of fresh water and soap nearby in
case battery acid contacts skin, clothing or eyes.
• Wear safety glasses and protective clothing.
• If battery acid contacts skin or clothing, wash im-
mediately with soap and water. If acid enters eye,
immediately ood eye with running cold water for
at least ten minutes and get medical attention
immediately.
• Never smoke or allow a spark or ame in vicinity
of battery or engine.
• Be extra cautious to reduce risk of dropping
a metal tool onto the battery. It could spark or
short-circuit the battery or other electrical parts
and could cause an explosion.
• Remove personal metal items such as rings,
bracelets, necklaces and watches when working
with a lead acid battery. It can produce a short
circuit current high enough to weld a ring or the
like to metal causing a severe burn.
Preparing for Test
• Be sure area around battery is well ventilated
while battery is being tested.
• Clean battery terminals. Be careful to keep corro-
sion from coming in contact with eyes.
• Inspect the battery for cracked or broken case or
cover. If battery is damaged, do not use tester.
• If the battery is not sealed maintenance free,
add distilled water in each cell until battery acid
reaches level specied by the manufacturer. This
help purge excessive gas from cells. Do not over-
ll.
• If necessary to remove battery from vehicle to
test, always remove ground terminal from battery
rst. Make sure all accessories in the vehicle are
o to ensure you do not cause any arcing.
OPERATION AND USE
• Before you test a battery in a vehicle, turn o the
ignition, all accessories, and loads. Close all the
vehicle doors and the trunk lid.
• Note that nothing will be seen on the display until
the tester is connected to a vehicle battery.
• Make sure the battery terminals are clean. Wire
brush them if necessary. Clamp the black load
lead to the vehicle negative battery terminal.
Clamp the red load lead to the vehicle positive
battery terminal. Please clamp on the lead part of
the terminal only. Clamping on the iron part of the
terminal will lead to wrong test results.
• Paper load: Open the clear cover. Insert paper
to the paper feeding for auto running the paper
into printer.
NOTE: Each time you connect the tester to a battery,
the tester will run a quick cable verication to ensure
a proper connection through the output cables to sen-
sors in the clamp jaws. If the connection checks out
OK, the tester will proceed to the Home Screen. If the
connection is poor, the display will show “CHECK CA-
BLE”. In this case, check cable connections for visible
signs of damage, as you may need to re-connect the
clamps to the battery or replace the cable end.
Follow the steps below to use the tool correctly:
1. Connect the red test clamp to the anode of the
battery and the black test clamp to the cathode,
the tester will turn on automatically. Battery volta-
ge below 7.0VDC cannot be tested properly.
2. Then press OK key to continue.
3. According to the tester, you can press UP/DOWN
key to choose:
1. Battery Test
2. Cranking Test
3. Charging Test
4. Review Test
5. Print Data
6. Export Data

· 6 ·
REF. 54040
Battery Test
Select the battery test and press OK key to continue:
• Battery Type: select your battery type, usually is
“Regular Flooded”.
• Input testing standard: the standard which you
can see the front of the battery, such as CCA,
BCI,DIN. If you cannot nd any information about
the standard, you can choose GB standard.
Choosing GB standards would lead to a small
tolerance.
• Input rated capacity: you can see the starting
current standards in front of the battery, such as
BCI/300A.
• Then press OK key to start testing.
NOTE: For battery power loss (such as a vehicle for a
long time in standby, the battery is not charged in time,
forget to close the lights, doors create serious losses
of electric vehicle battery and cannot start, etc.), in the
actual test process can also be asked to replace the
battery. For this type of batteries, please consult the
battery manufacturers.
Cranking Test
NOTE: This is for the convenience of the maintenance
personnel to quickly know the whole state of the star-
ting system according to the data. If the engine starting
cannot be detected, there may be no output of char-
ging voltage, you need to check the generator.
Charging Test
After entering the se-
cond start system test
function, press OK
key.
Starting the engine as
prompted, tester will
automatically comple-
te the cranking test
and display the result.
Normally, cranking vol-
tage value below 9.6V
is considered abnor-
mal, and above 9.6V is
all right.
The test result of the
tester includes the ac-
tual cranking voltage
and actual cranking
time.
When cranking test is
abnormal, battery test
result shall also be
displayed at the same
time.
When entering the
Charging Test, the tes-
ter will indicate “Char-
ging Test”.
NOTE: Do not switch
o the engine during
the test. All electrical
appliances and devices
are in the OFF state.
Turning ON or OFF any
electrical device on the
vehicle during the test
will aect the accuracy
of the test result.
Act accordingly to in-
crease the rotational
speed of the engine to
2500 revolutions, and
hold for 5 seconds.
The tester starts the
charging voltage test af-
ter detecting the increa-
se of revolutions.
When the test is com-
pleted, the tester dis-
plays the eective char-
ging volts, the result of
the ripple test and the
result of the charging
test.
Finally, check the con-
nection between gene-
rator and battery, then
retest.

· 7 ·
REF. 54040
Charging Test Result
1. Charging voltage: Normal. Generator output is
normal, no problem detected.
2. Charging voltage: Low. Check if the generator
drive belt slips or shifts. Check whether the con-
nection between the generator and the battery is
normal or not. If both the drive belt and connec-
tion are in good condition, follow the manufactu-
rer’s suggestions to eliminate the generator fault.
3. Charging voltage: High. Since most vehicle ge-
nerators use an internal regulator, the generator
assembly must be replaced (some older style
cars are using an external regulator, then replace
the regulator directly). The normal voltage of the
voltage regulator is a maximum of 14.7±0.5V. If
the charging voltage is too high, it will overchar-
ge the battery. Therefore, the battery life will be
shortened, and problems will be caused.
4. No volt output: No volt output from the generator
is detected. Check generator connection cable,
generator drive belt and engine if normal or not.
5. Diode test: Through the charging current ripple
test, the tester will nd out whether the diode
is normal or not. When the ripple voltage is too
high, it shows that at least one diode is damaged.
Check and replace the diode.
Review Data
After entering the fourth function, press the OK key to
view the nal test result.
Print Data
Print the last test result with the printer of this battery
tester.
Export Data
Connect this battery tester to computer with Data Line
and export the data to computer. (Connect our com-
pany to get the latest software).
PAPER REPLACEMENT
1. Open the clear cover.
2. Insert replaced paper roll into the paper feeding
for auto running the paper into the printer.
3. Pull the paper slowly and straightly from the pa-
per roll in the chamber.
ADDITIONAL FUNCTIONS
Press “Menu” to enter the additional function:
• Language:
• Mainland Version: Traditional Chinese, Ja-
panese, Korean, Russian and English
• Nordic Language Version: English, Dutch,
Sweden, Finnish, Norwegian and Danish
• Western European Language Version:
English, French, German, Spanish, Italian
and Polish
• Time adjustment: adjust any time.

· 8 ·
REF. 54040
GUIDE D’UTILISATION
FR
DESCRIPTION DU PRODUIT
Le testeur de batterie avec imprimante mesure l’ampé-
rage en ampères de démarrage à froid de la batterie
de démarrage du véhicule, évalue l’état de la batterie
elle-même et identie les dysfonctionnements généra-
ux du système de démarrage du véhicule et du systè-
me de charge. Cet outil aide le personnel de service à
identier rapidement et avec précision le problème et à
assurer des réparations rapides du véhicule.
CONSIGNES GÉNÉRALES DE SÉCURITÉ
ATTENTION ! Ce produit peut exposer une per-
sonne à des produits chimiques, dont l’arsenic qui est
connu pour causer le cancer suivant les données con-
cernant l’État de Californie, États-Unis.
• Il est dangereux de travailler à proximité d’une
batterie au plomb. Lors du fonctionnement nor-
mal, les batteries génèrent des gaz explosifs.
Par conséquent, en cas de toute doute, il est im-
pératif que vous lisiez attentivement ce manuel
chaque fois que vous utilisez le testeur.
• Pour réduire le risque d’explosion de la batterie,
suivez les instructions de ce manuel, les instruc-
tions du fabricant de la batterie et celles du fabri-
cant de tout autre équipement utilisé à proximité
de la batterie. Faites attention aux signes d’aver-
tissement sur eux.
• N’exposez pas le testeur à la pluie et/ou à la
neige.
CONSIGNES DE SÉCURITÉ PERSONNELLE
• Assurez-vous d’avoir quelqu’un à proximité pour
vous aider lorsqu’une autre personne travaille à
proximité d’une batterie au plomb.
• Pour le cas du contact de l’acide de batterie avec
la peau, les vêtements ou les yeux, gardez beau-
coup d’eau fraîche et du savon à portée de main.
• Portez des lunettes de sécurité et des vêtements
spéciaux.
• Si de l’acide de batterie entre en contact avec
votre peau ou vos vêtements, lavez-les immédia-
tement avec de l’eau et du savon. Si de l’acide
pénètre dans vos yeux, rincez à l’eau courante
froide pendant au moins dix minutes et consultez
immédiatement un médecin.
• Ne fumez pas à proximité d’une batterie ou d’un
moteur et ne laissez jamais des étincelles ou des
ammes se former.
• Faites très attention pour réduire le risque de
chute d’outils métalliques sur la batterie. Cela
pourrait provoquer une étincelle ou un court-cir-
cuit de la batterie ou d’autres pièces électriques
et provoquer une explosion.
• Lorsque vous manipulez une batterie au plomb,
retirez les objets métalliques tels que bagues,
bracelets, colliers et montres. Ils peuvent créer
un courant de court-circuit qui peut être susam-
ment élevé pour souder une bague ou un autre
objet au métal et provoquer de graves brûlures.
Préparation aux tests
• Lorsque vous testez la batterie, assurez-vous
que la zone autour de la batterie est bien ven-
tilée.
• Nettoyez les bornes de la batterie. Ne laissez
pas les pièces corrodées entrer en contact avec
vos yeux.
• Inspectez la batterie pour des ssures, des dom-
mages au boîtier ou au couvercle. N’utilisez pas
le testeur si la batterie est endommagée.
• Si la batterie n’est pas scellée, ajoutez de l’eau
distillée à chaque cellule jusqu’à ce que l’acide
de batterie atteigne le niveau spécié par le fa-
bricant. Cela aidera à éliminer l’excès de gaz des
cellules. N’utilisez pas trop d’eau distillée.
• Si vous devez retirer la batterie du véhicule
pour eectuer un test, assurez-vous d’abord de
déconnecter la borne de terre de la batterie. As-
surez-vous que tous les accessoires du véhicule
sont éteints et ne provoqueront pas d’étincelles.
UTILISATION ET APPLICATION
• Avant de vérier la batterie dans le véhicule, cou-
pez le contact et tous les accessoires. Fermez
les portes de la voiture et le couvercle du core.
• Notez que tant que le testeur n’est pas connec-
té à la batterie du véhicule, rien ne s’ache à
l’écran.
• Assurez-vous que les bornes de batterie sont
propres. Nettoyez-les avec une brosse métalli-
que si nécessaire. Connectez les ls de charge
noirs à la borne négative de la batterie du véhi-
cule. Connectez le l de charge rouge à la borne
positive de la batterie du véhicule. Connectez
uniquement la partie de sortie de la borne. La
connexion de la partie en fer de la borne entraî-
nera des résultats de test incorrects.
• Chargement du papier : Ouvrez le couvercle
transparent. Insérez le papier dans le chargeur
automatique de papier de l’imprimante.
REMARQUE : Chaque fois que le testeur est connecté
à une batterie, une vérication rapide des câbles est
eectuée pour s’assurer que les câbles de sortie sont
correctement connectés aux capteurs dans les outils
de serrage. Si la connexion est correcte, le testeur
achera l’écran principal. Si la connexion est mau-
vaise, l’écran achera la mention « CHECK CABLE »
(« Vériez le câble »). Dans ce cas, vériez que les
connexions des câbles ne présentent pas de signes

· 9 ·
REF. 54040
visibles de dommages, car il peut être nécessaire de
reconnecter les pinces à la batterie ou de remplacer
l’extrémité du câble.
Pour utiliser correctement l’appareil, procédez comme
suit :
1. Connectez la pince de test rouge à l’anode de la
batterie, la pince de test noire à la cathode, et le
testeur s’allumera automatiquement. Il n’est pas
possible de tester correctement la tension de la
batterie en dessous de 7,0 V de courant continu.
2. Cliquez sur le bouton OK pour continuer.
3. Selon le type de testeur, vous pouvez appuyer
sur les boutons UP/DOWN (Haut/Bas) pour sé-
lectionner :
1. Battery Test (Test de batterie)
2. Cranking Test (Test de démarrage)
3. Charging Test (Test de charge)
4. Review Test (Révision)
5. Print Data (Imprimer les données)
6. Export Data (Exporter les données)
Battery Test (Test de batterie)
Sélectionnez Battery Test et cliquez sur le bouton OK
pour continuer :
• Battery Type (Type de batterie) : sélectionnez le
type de batterie, généralement « Regular Floo-
ded » (standard avec électrolyte liquide).
• Input testing standard (Entrez la norme de test) :
sélectionnez la norme indiquée sur la face de la
batterie, telle que CCA, BCI, DIN. S’il n’y a pas
d’informations relatives à la norme, la norme GB
peut être sélectionnée. Le choix des normes GB
se traduira par de faibles tolérances.
• Input rated capacity (Entrez la capacité nomina-
le) : la face de la batterie a des normes de cou-
rant de démarrage telles que BCI/300A.
• Appuyez ensuite sur le bouton OK pour lancer
le test.
REMARQUE : En cas de perte de puissance de la ba-
tterie (par exemple, le véhicule est inactif pendant une
longue période, la batterie ne se charge pas à temps,
les lumières extérieures n’ont pas été éteintes, les
portes n’ont pas été fermées, ce qui crée de graves
pertes et conduit à l’impossibilité de démarrer, etc.) lors
du test réel, un message vous invitant à remplacer la
batterie peut apparaître. Consultez le fabricant pour la
batterie appropriée.
Cranking Test (Test de démarrage)
REMARQUE : Ceci est nécessaire pour faciliter le tra-
vail du personnel de service et pour obtenir rapidement
des informations relatives à l’état de l’ensemble du sys-
tème de démarrage conformément aux données. Si le
démarrage du moteur ne peut pas être détecté, il se
peut qu’il n’y ait aucune sortie de tension de charge, il
est nécessaire de vérier le générateur.
Charging Test (Test de charge)
Après avoir entré la
deuxième fonction de
test du système de dé-
marrage, appuyez sur
la touche OK.
En entrant dans le mode
de test de charge, le tes-
teur achera la mention
« Charging Test ».
REMARQUE : Ne
coupez pas le moteur
pendant le test. Tous
les équipements et
appareils électriques
sont éteints. Si allumer
et éteindre tout appareil
électrique du véhicule
pendant le test, cela
aectera la précision
des résultats.
Augmentez la vitesse
de rotation du moteur à
2500 tr/min et mainte-
nez cette vitesse pen-
dant 5 secondes.
Une fois démarré,
le moteur eectuera
automatiquement un
test de démarrage et
achera le résultat en
fonction de la deman-
de du testeur.
En général, une ten-
sion de démarrage
inférieure à 9,6 V est
considérée comme
anormale et celle su-
périeure à 9,6 V est
considérée comme
normale.
Le résultat du test par
le testeur comprend la
tension de démarrage
réelle et le temps de
démarrage réel.
Si le test de démarra-
ge du moteur est anor-
mal, le résultat du test
de batterie sera aché
en même temps.
Test de démarrage.
Démarrez le moteur
Test de charge.
TEST DE CHARGE
EN COURS
Test de démarrage.
Nombre de tours par
minute déterminé
Test de démarrage.
Temps 1758 ms
Démarrage normal
10,56 V
Test de démarrage.
Temps 1020 ms.
Démarrage bas
9,12 V
Test de charge. Augmentez
le nombre de tours par
minute (RPM) à 2500 tr/
min et maintenez pendant
5 secondes. Appuyez sur
ENTER pour continuer

· 10 ·
REF. 54040
Résultat du test de charge
4. Charging voltage: Normal. (Tension de charge :
normale) La puissance du générateur est norma-
le, aucun problème n’a été détecté.
5. Charging voltage: Low. (Tension de charge : fai-
ble) Vériez que la courroie d’entraînement du
générateur n’a pas glissée ou déplacée. Vériez
si la connexion entre le générateur et la batterie
est normale. Si la courroie d’entraînement et la
connexion sont en bon état, suivez les recom-
mandations du fabricant pour dépanner le géné-
rateur.
6. Charging voltage: High. (Tension de charge : éle-
vée) Étant donné que la plupart des générateurs
de véhicule utilisent un régulateur interne, il est
nécessaire de remplacer le générateur complet
(certains véhicules anciens utilisent un régula-
teur externe, dans ce cas remplacez-le directe-
ment). La tension normale du régulateur est au
maximum de 14,7±0,5 V. Si la tension de charge
est trop élevée, cela surchargera la batterie. Par
conséquent, sa durée de vie sera raccourcie, ce
qui entraînera des dysfonctionnements.
7. No volt output (Aucune sortie de tension) : Au-
cune sortie de tension du générateur n’est dé-
tectée. Vériez l’état du câble de connexion du
générateur, de la courroie d’entraînement du gé-
nérateur et du moteur.
8. Diode test (Test de diode) : Au moyen du test
d’ondulation du courant de charge, le testeur dé-
termine si les diodes sont normales. Si la tension
d’ondulation est trop élevée, cela indique des do-
mmages à au moins une diode. Vériez la diode
et remplacez-la.
Review Data (Données de révision)
Après être entré la quatrième fonction, appuyez sur le
bouton OK pour acher le résultat nal du test.
Print Data (Imprimer les données)
Utilisez l’imprimante du testeur pour imprimer le der-
nier résultat du test.
Export Data (Exporter les données)
Connectez le testeur de batterie à l’ordinateur à l’aide
de la ligne de données (Data Line) et exportez les don-
nées. (Veuillez contacter notre société pour obtenir la
dernière version du logiciel).
REMPLACEMENT DU PAPIER
1. Ouvrez le couvercle transparent.
2. Insérez le rouleau de papier de remplacement
dans le chargeur automatique de papier de l’im-
primante.
3. Tirez le papier lentement et uniformément du
rouleau dans le compartiment.
FONCTIONS SUPPLÉMENTAIRES
Appuyez sur « Menu » pour accéder à une fonction
supplémentaire.
• Langue :
• Version continentale : chinois traditionnel,
japonais, coréen, russe et anglais.
• Version scandinave : anglais, néerlandais,
suédois, nnois, norvégien et danois.
• Version Europe de l’Ouest : anglais,
français, allemand, espagnol, italien et
polonais.
• Réglage de l’heure : réglez toute heure.
Le testeur commence
à tester la tension de
charge après avoir dé-
tecté une augmentation
du nombre de tours.
À la n du test, le tes-
teur ache la tension
de charge eective en
volts, les résultats du
test d’ondulation et du
test de charge.
Enn, vériez la conne-
xion entre le générateur
et la batterie, puis refai-
tes le test.
Test de charge.
TEST EN COURS
Test de charge.
Chargé 13,97 V.
Déchargé 14,23 V.
Ondulation 15 mV.
Charge normale

· 11 ·
REF. 54040
BEDIENUNGSANLEITUNG
DE
BESCHREIBUNG DES PRODUKTES
Der Batterietester mit Drucker misst die Stromstärke
in Ampere des Kaltstarts der Fahrzeugstarterbatterie,
schätzt den Zustand der Batterie selbst ein und ermi-
ttelt allgemeine Fehler des Fahrzeugstartsystems und
des Ladesystems. Dieses Werkzeug hilft dem War-
tungspersonal, Problem schnell und präzis zu iden-
tizieren und schnelle Reparatur des Fahrzeugs zu
gewährleisten.
ALLGEMEINE SICHERHEITSHINWEISE
ACHTUNG! Dieses Produkt kann die Person Che-
mikalien, einschließlich Arsen, aussetzen, das nach
Angaben für den US-Bundesstaate Kalifornien Krebs
verursacht.
• Der Betrieb in der Nähe von einer Blei-Säure-Ba-
tterie ist gefährlich. Beim normalen Betrieb set-
zen die Batterien explosive Gase frei. In diesem
Zusammenhang ist es in Zweifelfällen äußerst
wichtig, diese Anleitung jedes Mal vor dem Ein-
satz des Testers sorgfältig zu lesen.
• Befolgen Sie die Anweisungen in dieser Anlei-
tung, die Anleitung des Batterieherstellers und
des Herstellers anderer Geräte, die in der Nähe
von der Batterie verwendet werden, um das Risi-
ko einer Batterieexplosion zu verringern. Beach-
ten Sie Warnzeichen an solchen Geräten.
• Setzen Sie den Tester Regen und/oder Schnee
nicht aus.
PERSÖNLICHE SICHERHEITSVORSCHRIFTEN
• Eine Person muss unbedingt in der Nähe sein,
um bei Notfall zu helfen, wenn eine andere Per-
son in der Nähe der Blei-Säure-Batterie arbeitet.
• Es sollte ein große Mengen an frischem Wasser
und Seife für den Fall bereitgehalten werden,
wenn die Batteriesäure auf die Haut, Kleidung
oder Augen gelangt.
• Tragen Sie Schutzbrille und spezielle Kleidung.
• Beim Gelangen der Batteriesäure auf die Haut
oder Kleidung spülen Sie sie sofort mit Wasser
und Seife ab. Beim Kontaktieren der Säure mit
den Augen spülen Sie sie mindestens zehn Mi-
nuten lang mit ießendem kaltem Wasser ab und
suchen Sie die ärztliche Hilfe sofort auf.
• Rauchen Sie in der Nähe von der Batterie oder
dem Motor nicht und lassen Sie niemals Funken
oder Flammen entstehen.
• Seien Sie sehr vorsichtig, um das Risiko zu ve-
rringern, dass Metallwerkzeuge auf die Batterie
fallen. Dies kann zur Funkenbildung oder zum
Kurzschluss der Batterie oder anderer elektris-
cher Teile führen und eine Explosion verursa-
chen.
• Ziehen Sie Metallgegenstände wie Ringe, Arm-
bänder, Ketten und Uhren aus, wenn Sie die
Blei-Säure-Batterie betreiben.
• Sie können einen Kurzschlussstrom erzeugen,
der hoch genug sein kann, um einen Ring oder
einen anderen Gegenstand mit dem Metall zu
schweißen und eine starke Verbrennung zu
verursachen.
Vorbereitung zum Testen
• Achten Sie beim Testen der Batterie darauf, dass
der Raum um die Batterie herum gut belüftet
wird.
• Reinigen Sie die Batterieklemmen. Vermeiden
Sie den Kontakt zwischen korrosiven Teilen und
den Augen.
• Überprüfen Sie die Batterie auf Risse, Beschä-
digungen des Gehäuses oder der Abdeckung.
Verwenden Sie den Tester nicht, wenn die Bat-
terie beschädigt ist.
• Wenn die Batterie nicht dicht ist, fügen Sie des-
tilliertes Wasser zu jeder Zelle hinzu, bis die
Batteriesäure den vom Hersteller vorgesehenen
Spiegel erreicht, was überschüssiges Gas aus
den Zellen entfernen lässt. Verwenden Sie zu
viel destilliertes Wasser nicht.
• Wenn die Batterie aus dem Fahrzeug zum Tes-
ten herausgenommen werden sollte, trennen
Sie zuerst die Erdungsklemme von der Batterie
unbedingt. Stellen Sie sicher, dass alle Zusatz-
geräte des Fahrzeugs ausgeschaltet sind und
keine Funkenbildung verursachen.
BETRIEBS- UND ANWENDUNGSVERFAHREN
• Schalten Sie die Zündung sowie alle Zusatz-
geräte aus, bevor Sie die Batterie im Fahrzeug
überprüfen. Schließen Sie die Autotüren und den
Koerraumdeckel.
• Beachten Sie, dass solange der Tester an die
Batterie des Fahrzeugs nicht angeschlossen ist,
nichts auf dem Display angezeigt wird.
• Stellen Sie sicher, dass die Batterieklemmen
sauber sind. Reinigen Sie sie ggf. mit einer Dra-
htbürste. Schließen Sie die schwarzen Lastans-
chlüsse an die negative Klemme der Fahrzeugba-
tterie an. Schließen Sie den roten Lastanschluss
an die positive Klemme der Fahrzeugbatterie an.
Schließen Sie nur den Anschlussteil der Klemme
an. Der Anschluss des Eisenteils der Klemme
führt zu falschen Testergebnissen.
• Einlegen des Papiers: Önen Sie die transpa-
rente Abdeckung. Legen Sie das Papier in den
automatischen Papierzuführungsschacht des
Druckers ein.
HINWEIS: Jedes Mal, wenn der Tester an die Batterie
angeschlossen wird, wird eine schnelle Kabelprüfung

· 12 ·
REF. 54040
durchgeführt, um sicherzustellen, dass die Ausgangs-
kabel mit den Sensoren in den Spannvorrichtungen
korrekt verbunden sind. Wenn die Verbindung normal
ist, zeigt der Tester den Startbildschirm an. Wenn die
Verbindung von schlechter Qualität ist, wird „CHECK
CABLE“ („Prüfen Sie den Kabel“) auf dem Display
angezeigt. Überprüfen Sie in diesem Fall die Kabel-
verbindungen auf sichtbare Zeichen von Beschädi-
gungen, da die Klemmen an die Batterie erneut anges-
chlossen werden sollten oder der Endteil des Kabels
ausgetauscht werden sollte.
Führen Sie folgende Handlungen durch, um das Gerät
ordnungsgemäß zu betreiben:
1. Schließen Sie die rote Testklemme an die Anode
der Batterie, die schwarze Testklemme an die
Kathode an, dabei schaltet sich der Tester auto-
matisch ein. Es ist unmöglich, die Batteriespan-
nung unter 7,0 VDC richtig zu überprüfen.
2. Klicken Sie auf OK zur Fortsetzung.
3. Je nach Art des Testers können Sie die Tasten
UP/DOWN (Auf/Ab) zur Auswahl betätigen:
1. Battery Test (Batterietest)
2. Cranking Test (Starttest)
3. Charging Test (Ladetest)
4. Review Test (Übersicht)
5. Print Data (Datendruck)
6. Export Data (Datenexport)
Battery Test (Batterietest)
Wählen Sie Battery Test und klicken Sie auf OK, um
fortzufahren:
• Battery Type (Batterietyp): Wählen Sie den Ba-
tterietyp, normalerweise ist das „Regular Floo-
ded“ (Standardtyp mit üssigem Elektrolyt).
• Input testing standard (Geben Sie die Testungs-
norm ein): Wählen Sie eine Norm, die auf der
Vorderseite der Batterie angegeben ist, z.B.
CCA, BCI, DIN. Wenn keine Informationen über
die Norm vorhanden sind, kann die GB-Norm
ausgewählt werden. Die Auswahl von GB-Nor-
men ist mit geringen zulässigen Abweichungen
verbunden.
• Input rated capacity (Geben Sie die Nennleis-
tung ein): Auf der Vorderseite der Batterie sind
Normen für den Einschaltstrom angegeben, z.B.
BCI/300A.
• Drücken Sie dann OK, um den Test zu starten.
HINWEIS: Beim Leistungsverlust der Batterie (z.B.
wenn sich das Fahrzeug längere Zeit im Leerlaufbetrieb
bendet, die Batterie rechtzeitig nicht geladen wird, die
Außenbeleuchtungen nicht ausgeschaltet sind, die
Türen nicht geschlossen wurden, was schwerwiegen-
de Verluste verursacht und zu einer Unmöglichkeit des
Startens usw. führt) kann eine Meldung während des
tatsächlichen Testens angezeigt werden, die den Ba-
tterieaustausch vorschlägt. Wenden Sie sich an den
Hersteller der Batterie, um die erforderliche Batterie zu
erhalten.
Cranking Test (Starttest)
HINWEIS: Dies ist notwendig, um die Arbeit des War-
tungspersonals zu erleichtern und die Information über
den Status des ganzen Startsystems gemäß den Da-
ten schnell zu erhalten. Wenn der Motorstart nicht er-
kannt wird, so fehlt der Ladespannungsausgang wahr-
scheinlich und sollte der Generator überprüft werden.
Charging Test (Ladetest)
Drücken Sie die Taste
OK nach der Eingabe
der zweiten Funk-
tion des Testens des
Startsystems ein.
Beim Starten führt der
Motor den Starttest
gemäß der Abfrage
des Testers automa-
tisch durch und zeigt
das Ergebnis an.
Im Allgemeinen
wird ein Startspan-
nungswert unter 9,6
V als abnormal und
über 9,6 V als normal
angesehen.
Das Testergebnis
beinhaltet die tatsä-
chliche Startspannung
und die tatsächliche
Startzeit.
Wenn der Motorstar-
ttest der Norm nicht
entspricht, wird das
Ergebnis des Batte-
rietests gleichzeitig
angezeigt.
Bei der Aktivierung des Ladetest-
modus zeigt der Tester „Char-
ging Test“ an.
HINWEIS: Schalten Sie den Mo-
tor während des Tests nicht aus.
Alle elektrischen Ausrüstungen
und Geräte benden sich im aus-
geschalteten Zustand. Das Ein-/
Ausschalten eines elektrischen
Geräts am Fahrzeug während
des Tests beeinusst die Ge-
nauigkeit der Ergebnisse.
Starttest.
Starten Sie den Motor
Ladetest. ES WIRD
DER LADETEST
DURCHGEFÜHRT
Starttest.
Gemessene Umdre-
hungen pro Minute
Starttest.
Zeit 1758 ms.
Normaler Start 10,56 V
Starttest. Zeit 1020 ms.
Niedriger Start
9,12 V

· 13 ·
REF. 54040
Erhöhen Sie die Motordrehzahl
bis auf 2500 Umdrehungen und
halten Sie diese Geschwindigkeit
für 5 Sekunden.
Der Tester beginnt den Test der
Ladespannung, nachdem die
Erhöhung der Drehzahl erkannt
wurde.
Nach Abschluss des Tests zeigt
der Tester die eektive Lades-
pannung in Volt, sowie Ergeb-
nisse des Welligkeits- und Lade-
tests an.
Überprüfen Sie abschließend die
Verbindung zwischen Generator
und Batterie und führen Sie dann
einen erneuten Test durch.
Ladetest. Erhöhen Sie
die Drehzahl pro Minute
(RPM) bis auf 2500 U/
min und halten Sie sie für
5 Sekunden. Drücken Sie
ENTER, um fortzusetzen
Ladetest.
ES WIRD GE-
TESTET
Ladetest.
Geladen 13,97 V.
Entladen 14,23 V
Pulsation 15 mW.
Normale Ladung
Das Ergebnis des Ladetests
1. Charging voltage: Normal. (Ladespannung: nor-
mal) Die Generatorleistung ist normal, es sind
keine Probleme gefunden.
2. Charging voltage: Low. (Ladespannung: niedrig)
Überprüfen Sie den Antriebsriemen des Gene-
rators, ob er schlüpft oder sich verschiebt, oder
nicht. Überprüfen Sie, ob die Verbindung zwis-
chen dem Generator und der Batterie normal
ist. Wenn sowohl der Antriebsriemen als auch
die Verbindung in einwandfreiem Zustand sind,
befolgen Sie Empfehlungen des Herstellers zur
Fehlerbehebung des Generators.
3. Charging voltage: High. (Ladespannung: hoch)
Da die meisten Fahrzeuggeneratoren mit ei-
nem internen Regler ausgerüstet sind, sollte
der Generator komplett ersetzt werden (einige
ältere Fahrzeuge sind mit einem externen Regler
ausgerüstet, dann ersetzen Sie ihn direkt). Die
normale Spannung des Reglers beträgt maximal
14,7±0,5 V. Wenn die Ladespannung zu hoch
ist, führt dies zu einer Überlastung der Batterie.
Demzufolge wird die Lebensdauer kürzer, was
zu Problemen führen kann.
4. No volt output (kein Spannungsausgang): Die
Ausgangsspannung des Generators wurde nicht
erkannt. Überprüfen Sie den Zustand des Ans-
chlusskabels des Generators, Antriebsriemens
des Generators und Motors.
5. Diode test (Diodentest): Mit Hilfe von Lades-
trom-Welligkeitstest ermittelt der Tester, ob die
Dioden in Ordnung sind. Wenn die Welligkeitss-
pannung zu hoch ist, spricht das über eine Bes-
chädigung von mindestens einer Diode. Über-
prüfen Sie die Diode und ersetzen Sie sie.
Review Data (Übersichtsdaten)
Drücken Sie die OK-Taste nach Eingabe der vierten
Funktion, um das endgültige Testergebnis anzuzeigen.
Print Data (Datendruck)
Drucken Sie das letzte Testergebnis mittels des Druc-
kers des Testers aus.
Export Data (Datenexport)
Schließen Sie den Batterietester mittels des Informa-
tionsbusses (Data Line) an den Computer an und ex-
portieren Sie die Daten. (Um die neueste Software zu
erhalten, kontaktieren Sie unsere Firma).
PAPIER AUSTAUSCHEN
1. Önen Sie die transparente Abdeckung.
2. Legen Sie die auswechselbare Papierrolle in den
automatischen Papierzuführungsschacht des
Druckers ein.
3. Ziehen Sie das Papier von der Rolle ins Fach
langsam und gleichmäßig.
ZUSÄTZLICHE FUNKTIONEN
Drücken Sie „Menu“, um auf die zusätzlichen Funktio-
nen zuzugreifen.
• Sprache:
• Kontinentale Version: Traditionelles Chi-
nesisch, Japanisch, Koreanisch, Russisch
und Englisch.
• Skandinavische Version: Englisch, Nieder-
ländisch, Schwedisch, Finnisch, Norwe-
gisch und Dänisch.
• Westeuropäische Version: Englisch, Fran-
zösisch, Deutsch, Spanisch, Italienisch und
Polnisch.
• Zeiteinstellung: Stellen Sie die beliebige Uhrzeit
ein.

· 14 ·
REF. 54040
MANUALE D’USO
IT
DESCRIZIONE DEL PRODOTTO
Il tester per batterie ricaricabili con stampante misura
l’amperaggio in ampere di un avviamento a freddo de-
lla batteria di avviamento di un veicolo, valuta le con-
dizioni della batteria stessa e identica anche i guasti
generali nel sistema di avviamento dell’auto e nel sis-
tema di ricarica. Questo strumento aiuta il personale
addetto all’assistenza a identicare rapidamente e con
precisione il problema e ad assicurare riparazioni rapi-
de del veicolo.
ISTRUZIONI GENERALI DI SICUREZZA
ATTENZIONE! Questo prodotto può esporre le
persone a sostanze chimiche, tra cui l’arsenico, che,
secondo i dati dello stato della California, USA, causa
il cancro.
• Lavorare in prossimità di una batteria ricaricabile
al piombo-acido è pericoloso. Le batterie ricari-
cabili emettono gas esplosivi durante il normale
funzionamento. Pertanto, in caso di dubbio, è es-
senziale leggere attentamente queste istruzioni
ogni volta prima di usare il tester.
• Per ridurre il rischio di esplosione della batteria,
seguire le istruzioni di questo manuale, le is-
truzioni del produttore della batteria e le istruzioni
del produttore di altre apparecchiature utilizzate
in prossimità della batteria. Prestare attenzione
ai segnali di avvertimento apposti su di essi.
• Non esporre il tester alla pioggia e/o alla neve.
NORME DI SICUREZZA PERSONALE
• Qualcuno deve essere presente nelle vicinanze
per aiutare in caso di emergenza quando un’altra
persona lavora vicino alla batteria ricaricabile al
piombo-acido.
• Tenere a portata di mano molta acqua dolce e
sapone nel caso in cui l’acido della batteria entri
in contatto con la pelle, i vestiti o gli occhi.
• Indossare occhiali di sicurezza e indumenti spe-
ciali.
• Se l’acido della batteria entra in contatto con
la pelle o i vestiti, lavarlo immediatamente con
acqua e sapone. Se l’acido entra negli occhi,
sciacquarli con acqua corrente fredda per alme-
no dieci minuti e consultare immediatamente un
medico.
• Non fumare vicino alla batteria ricaricabile o al
motore e non permettere mai che si formino scin-
tille o amme.
• Prestare particolare attenzione per ridurre il ris-
chio che strumenti metallici cadano sulla batteria.
Ciò potrebbe provocare scintille o cortocircuitare
la batteria o altre parti elettriche e causare un’es-
plosione.
• Quando si lavora con una batteria ricaricabile
al piombo-acido, rimuovere gli oggetti metallici
come anelli, bracciali, catene e orologi. Essi pos-
sono creare una corrente di cortocircuito che può
essere abbastanza alta da saldare un anello o un
altro oggetto al metallo e causare gravi ustioni.
Preparazione per il test
• Quando si testa una batteria ricaricabile, assicu-
rarsi che l’area circostante sia ben ventilata.
• Pulire i terminali della batteria. Evitare il contatto
delle parti corrose con gli occhi.
• Ispezionare la batteria per vericare la presenza
di crepe, danni all’alloggiamento o al coperchio.
Non utilizzare il tester se la batteria è danneg-
giata.
• Se la batteria non è sigillata, aggiungere acqua
distillata ad ogni cella nché l’acido della batteria
non raggiunge il livello specicato dal produttore.
Questo aiuterà a rimuovere il gas in eccesso da-
lle celle. Non usare troppa acqua distillata.
• Se la batteria deve essere rimossa dal veico-
lo per il test, assicurarsi di scollegare prima la
presa di terra dalla batteria. Assicurarsi che tutte
le apparecchiature aggiuntive sul veicolo siano
spente e non causino scintille.
MODALITÀ DI UTILIZZO E DI APPLICAZIONE
• Prima di controllare la batteria ricaricabile del vei-
colo, spegnere l’accensione e tutti gli equipag-
giamenti aggiuntivi. Chiudere le porte del veicolo
e il cofano del bagagliaio.
• Si noti che mentre il tester non è collegato alla
batteria del veicolo, sul display non viene visua-
lizzato nulla.
• Assicurarsi che i terminali della batteria siano pu-
liti. Pulirli con una spazzola metallica se neces-
sario. Collegare i cavi di carico neri al terminale
negativo della batteria del veicolo. Collegare il
cavo di carico rosso al terminale positivo della
batteria del veicolo. Collegare solo l’estremità del
terminale. Il collegamento della parte in ferro del
terminale comporterà risultati del test errati.
• Caricamento della carta: Aprire il coperchio tras-
parente. Inserire la carta nell’alimentatore auto-
matico della carta nella stampante.
NOTA: Ogni volta che il tester viene collegato alla ba-
tteria, viene eseguito un rapido controllo dei cavi per
assicurarsi che i cavi di uscita siano correttamente
collegati ai sensori nei dispositivi di serraggio. Se la
connessione è corretta, il tester visualizzerà la scher-
mata principale. Se la connessione è scarsa, sul dis-
play appare la scritta “CHECK CABLE” (“Controllare
il cavo”). In questo caso, controllare i collegamenti
dei cavi per segni visibili di danni, in quanto potrebbe

· 15 ·
REF. 54040
essere necessario ricollegare i morsetti alla batteria o
sostituire l’estremità del cavo.
Per utilizzare correttamente il dispositivo, procedere
come segue:
1. Collegare il morsetto di test rosso all’anodo della
batteria e il morsetto nero al catodo e il tester si
accende automaticamente. Non è possibile con-
trollare correttamente la tensione della batteria al
di sotto di 7,0 V CC.
2. Premere il pulsante OK per continuare.
3. A seconda del tipo di tester, si possono premere i
tasti UP/DOWN (Su/Giù) per selezionare:
1. Battery Test
(Test della batteria ricaricabile)
2. Cranking Test (Test di lancio)
3. Charging Test (Test di carica)
4. Review Test (Anteprima)
5. Print Data (Stampa dei dati)
6. Export Data (Esportazione dei dati)
Battery Test (Test della batteria ricaricabile)
Selezionare Battery Test e premere OK per continuare:
• Battery Type (Tipo della batteria ricaricabile): se-
lezionare il tipo della batteria, di solito è “ Regular
Flooded” (standard con elettrolita liquido).
• Input testing standard (Inserire lo standard del
test): selezionare lo standard indicato sulla parte
anteriore della batteria, ad esempio CCA, BCI,
DIN. Se non ci sono informazioni sullo standard,
si può selezionare lo standard GB. La scelta degli
standard GB comporterà delle piccole tolleranze.
• Input rated capacity (Inserire la potenza nomi-
nale): gli standard della corrente di spunto sono
indicati sulla parte frontale della batteria, ad es-
empio BCI/300A.
• Poi premere il pulsante OK per iniziare il test.
NOTA: Se la potenza della batteria viene persa (ad es-
empio, il veicolo è stato inattivo per un lungo periodo di
tempo, la batteria non è stata caricata in tempo, le luci
esterne non sono state spente, le porte non sono state
chiuse, il che crea gravi perdite e porta all’impossibilità
di avvio, ecc) durante il test eettivo, potrebbe apparire
un messaggio che richiede di sostituire la batteria. Per
ottenere la batteria giusta, è necessario consultare i
loro produttori.
Cranking Test (Test di lancio)
NOTA: Questo è necessario per facilitare il lavoro del
personale di manutenzione e per ottenere rapidamente
informazioni sullo stato dell’intero sistema di avviamen-
to in conformità con i dati. Se non è possibile rilevare
l’avvio del motore, potrebbe non esserci un’uscita di
tensione di carica, è necessario controllare il genera-
tore.
Charging Test (Test di carica)
Dopo aver inserito la
seconda funzione di
test per il sistema di
avviamento, premere
il tasto OK.
Quando si accede alla
modalità di test di cari-
ca, il tester visualizzerà
la scritta “Charging
Test”.
NOTA: Non spegnere il
motore durante il test.
Tutte le attrezzature e gli
apparecchi elettrici sono
spenti. L’accensione e
lo spegnimento di qual-
siasi dispositivo elettrico
sul veicolo durante il test
inuisce sulla precisione
dei risultati.
Aumentare la velocità
di rotazione del motore
a 2500 giri e mantene-
re questa velocità per 5
secondi.
All’avvio, il motore
eseguirà automatica-
mente un test di avvia-
mento e visualizzerà
il risultato in base alla
richiesta del tester.
In generale, il valore
della tensione d’avvia-
mento inferiore a 9,6 V
è considerato anorma-
le e superiore a 9,6 V
- normale.
Il risultato del test del
tester include la ten-
sione di avviamento
eettiva e il tempo di
avviamento eettivo.
Se il test di avviamen-
to del motore non co-
rrisponde alla norma,
contemporaneamente
verrà visualizzato il
risultato del test della
batteria.
Test di lancio.
Avviare il motore
Test di carica.
VIENE EFFETTUATO
UN TEST DI CARICA
Test di lancio.
Giri al minuto deter-
minati
Test di lancio.
Tempo 1758 ms.
Avvio normale 10,56 V
Test di lancio.
Tempo 1020 ms.
Avvio basso 9,12 V
Test di carica. Aumentare
il numero dei giri al minuto
(RPM) a 2500 giri/min e
mantenere per 5 secondi.
Premere ENTER per
continuare

· 16 ·
REF. 54040
Risultato del test di carica
1. Charging voltage: Normal. (Tensione di carica:
normale) La potenza del generatore è in norma,
nessun problema rilevato.
2. Charging voltage: Low. (Tensione di carica: bas-
sa) Controllare che la cinghia di trasmissione del
generatore non sia slittata o spostata. Controlla-
re che il collegamento tra il generatore e la bat-
teria sia a posto. Se la cinghia di trasmissione e
il collegamento sono in buone condizioni, seguite
le raccomandazioni del produttore del generato-
re per risolvere il problema.
3. Charging voltage: High. (Tensione di carica: alta)
Poiché in maggior parte dei generatori di veico-
li viene usato il regolatore interno, è necessario
sostituire il generatore completo (alcuni veicoli
più vecchi usano un regolatore esterno, quindi
bisogna sostituire solo quello). La tensione nor-
male del regolatore è il massimo di 14,7±0,5V.
Se la tensione di carica è troppo alta, la batteria
si sovraccaricherà. Di conseguenza, la sua du-
rata di vita sarà ridotta, il che porterà a malfun-
zionamenti.
4. No volt output (Nessuna uscita di tensione): Ten-
sione in uscita dal generatore non rilevata. Con-
trollare le condizioni del cavo di collegamento
del generatore, della cinghia di trasmissione del
generatore e del motore.
5. Diode test (Controllo dei diodi): Con il test de-
ll’ondulazione della corrente di carica, il tester
scopre se i diodi sono in norma. Se la tensione
di ondulazione è troppo alta, questo indica che
almeno un diodo è danneggiato. Controllare il
diodo e sostituirlo.
Il tester comincia il test
della tensione di carica
dopo aver rilevato un
aumento del numero
dei giri.
Alla ne del test, il tester
visualizza la tensione di
carica eettiva in volt,
risultati di test di ondula-
zione e di carica.
Terminate controllando
il collegamento tra il
generatore e la batteria
ricaricabile, poi rifate il
test.
Review Data (Dati riassuntivi)
Dopo aver inserito la quarta funzione, premere il pul-
sante OK per visualizzare il risultato nale del test.
Print Data (Stampa dei dati)
Utilizzare la stampante del tester per stampare l’ultimo
risultato del test.
Export Data (Esportazione dei dati)
Collegare il tester delle batterie ricaricabili al computer
utilizzando il bus di dati (Data Line) ed esportare i dati.
(Per ottenere l’ultimo software, contattate la nostra
azienda).
SOSTITUZIONE DELLA CARTA
1. Aprire il coperchio trasparente.
2. Inserire un rotolo di carta di ricambio nell’alimen-
tatore automatico della carta nella stampante.
3. Tirare la carta lentamente e uniformemente dal
rotolo nello scomparto.
FUNZIONI AGGIUNTIVE
Per accedere a una funzione aggiuntiva, premere
“Menu”.
• La lingua:
• Versione continentale: cinese, giappone-
se, coreano, russo e inglese tradizionale.
• Versione nordica: inglese, olandese, sve-
dese, nlandese, norvegese e danese.
• Versione dell’Europa occidentale: inglese,
francese, tedesco, spagnolo, italiano e
polacco.
• Impostazione dell’ora: impostare qualsiasi ora.
Test di carica.
VIENE TESTATO
Test di carica.
Caricato 13,97 V.
Scaricato 14,23 V.
Ondulazione 15mV.
La ricarica è normale

· 17 ·
REF. 54040
MANUAL DE INSTRUÇÕES
PT
DESCRIÇÃO DO PRODUTO
O testador de baterias com impressora mede a ampe-
ragem em amperes de arranque a frio da bateria de
arranque do carro, avalia o estado da própria bateria
e identica avarias gerais do sistema de arranque do
carro e do sistema de carga. Esta ferramenta ajuda o
pessoal de serviço a localizar o problema com rapidez
e precisão e garantir reparos rápidos do carro.
INSTRUÇÕES GERAIS DE SEGURANÇA
ATENÇÃO! Este produto pode expor uma pessoa
a produtos químicos, incluindo arsênico, que é conhe-
cido por causar câncer no estado da Califórnia, EUA.
• Trabalhar próximo a uma bateria de chumbo-áci-
do é perigoso. As baterias geram gases explo-
sivos durante a operação normal. Portanto, em
caso de dúvida, é fundamental que você leia
atentamente este manual sempre que usar o
testador.
• Para reduzir o risco de explosão da bateria, siga
as instruções neste manual, as instruções do fa-
bricante da bateria e do fabricante de qualquer
outro equipamento usado nas proximidades da
bateria. Preste atenção aos sinais de aviso ne-
les.
• Não exponha o testador à chuva e/ou neve.
REGRAS DE SEGURANÇA PESSOAL
• Certique-se de ter alguém por perto para aju-
dá-lo quando outra pessoa estiver a trabalhar
perto de uma bateria de chumbo-ácido.
• Caso o ácido da bateria entre em contato com a
pele, roupas ou olhos, mantenha bastante água
doce e sabão pronto para o uso.
• Use óculos de segurança e roupas especiais.
• Se o ácido da bateria entrar em contato com a
sua pele ou roupas, lave imediatamente com
água e sabão. Se o ácido entrar em contato com
os seus olhos, lave com água fria corrente por
pelo menos dez minutos e procure atendimento
médico imediatamente.
• Não fume perto de baterias ou motores e nunca
permita que faíscas ou chamas se formem.
• Tome cuidado extra para reduzir o risco de fe-
rramentas de metal caírem na bateria. Isso pode
causar faíscas ou curto-circuito na bateria ou em
outras peças elétricas e causar uma explosão.
• Ao manusear uma bateria de chumbo-ácido,
remova objetos de metal como anéis, pulseiras,
colares e relógios. Eles podem criar uma corren-
te de curto-circuito que pode ser alta o suciente
para soldar um anel ou outro objeto ao metal e
causar queimaduras graves.
•
Preparação para o teste
• Ao testar uma bateria, certique-se de que a
área ao redor da bateria seja bem ventilada.
• Limpe os terminais da bateria. Não permita que
peças corroídas entrem em contato com os seus
olhos.
• Inspecione a bateria para ver se há rachaduras,
danos à caixa ou tampa. Não use o testador se a
bateria estiver danicada.
• Se a bateria não estiver selada, adicione água
destilada a cada célula até que o ácido da ba-
teria atinja o nível especicado pelo fabricante.
Isso ajudará a remover o excesso de gás das
células. Não use muita água destilada.
• Se você precisar remover a bateria do carro para
teste, certique-se de desconectar o terminal de
aterramento da bateria primeiro. Certique-se de
que todos os acessórios do carro estejam desli-
gados e não causem faíscas.
PROCEDIMENTO DE OPERAÇÃO E APLICAÇÃO
• Antes de vericar a bateria do carro, desligue a
ignição e todos os acessórios. Feche as portas
do carro e a tampa do porta-malas.
• Observe que, embora o testador não esteja co-
nectado à bateria do carro, nada é mostrado no
visor.
• Certique-se de que os terminais da bateria es-
tão limpos. Limpe-os com uma escova de aço,
se necessário. Conecte os cabos pretos de
carga ao terminal negativo da bateria do carro.
Conecte o cabo de carga vermelho ao terminal
positivo da bateria do carro. Conecte apenas a
parte de saída do terminal. Conectar a parte de
ferro do terminal resultará em resultados de teste
incorretos.
• Colocação de papel: Abra a tampa transparente.
Insira o papel no alimentador automático de pa-
pel da impressora.
NOTA: Cada vez que o testador é conectado à bate-
ria, uma vericação rápida do cabo é realizada para
garantir que os cabos de saída estejam conectados
corretamente aos sensores nos gabaritos. Se a co-
nexão estiver OK, o testador exibirá a tela principal.
Se a conexão estiver ruim, o display mostrará “CHECK
CABLE” (“Verique o cabo”). Neste caso, verique as
conexões do cabo em busca de sinais visíveis de da-
nos, pois pode ser necessário reconectar as braçadei-
ras à bateria ou substituir a extremidade do cabo.
Para usar o dispositivo corretamente, siga estas eta-
pas:
1. Conecte a pinça de teste vermelha ao ânodo
da bateria, a pinça de teste preta ao cátodo e

· 18 ·
REF. 54040
o testador ligará automaticamente. Não é possí-
vel testar adequadamente a tensão da bateria
abaixo de 7,0 VCC.
2. Clique em OK para continuar.
3. Dependendo do tipo de testador, você pode
pressionar os botões UP/DOWN (PARA CIMA/
PARA BAIXO) para selecionar:
1. Battery Test (Teste de bateria)
2. Cranking Test (Teste de arranque)
3. Charging Test (Teste de carga)
4. Review Test (Teste de revisão)
5. Print Data (Dados de impressão)
6. Export Data (Exportar dados)
Battery Test (Teste de bateria)
Selecione Battery Test (Teste de bateria) e clique em
OK para continuar:
• Battery Type (Tipo de bateria): Selecione o tipo
de bateria, geralmente “Regular Flooded” (pa-
drão de eletrólito líquido).
• Input testing standard (Padrão de teste de en-
trada): Selecione o padrão impresso na face da
bateria, como CCA, BCI, DIN. Se não houver in-
formações sobre o padrão, o padrão GB pode
ser selecionado. A escolha dos padrões GB re-
sultará em tolerâncias pequenas.
• Input rated capacity (Capacidade nominal de
entrada): A face da bateria possui padrões de
corrente de pico, como BCI/300A.
• Em seguida, pressione o botão OK para iniciar
o teste.
NOTA: Se a bateria for perdida (por exemplo, o carro
ca parado por muito tempo, a bateria não carrega na
hora certa, as luzes externas não foram apagadas, as
portas não foram fechadas, o que cria sérias perdas e
leva à incapacidade de iniciar, etc.)) Durante o teste
real, uma mensagem solicitando que você substitua a
bateria pode aparecer. Consulte o fabricante para ob-
ter a bateria correta.
Cranking Test (Teste de arranque)
NOTA: Isso é necessário para facilitar o trabalho do
pessoal de serviço e para obter rapidamente infor-
mações sobre o status de todo o sistema de arranque
de acordo com os dados. Se o arranque do motor não
puder ser detectado, pode não haver saída de tensão
de carga, é necessário vericar o gerador.
Charging Test (Teste de carregamento)
Após entrar na segun-
da função de teste de
arranque, pressione a
tecla OK.
Ao dar a partida, o
motor executará auto-
maticamente um teste
de arranque e exibirá
o resultado de acordo
com a solicitação do
testador.
Ao entrar no modo de
teste de carregamento,
o testador exibirá “Char-
ging Test” (Teste de ca-
rregamento).
NOTA: Não desligue o
motor durante o teste.
Todos os equipamentos
e aparelhos elétricos es-
tão desligados. Ligar e
desligar qualquer dispo-
sitivo elétrico no veículo
durante o teste afeta a
precisão dos resultados.
Aumente a velocidade
do motor para 2500 rpm
e mantenha essa velo-
cidade por 5 segundos.
O testador começa a
testar a tensão de car-
ga após detectar um
aumento no número de
rotações.
Em geral, a tensão ini-
cial abaixo de 9,6 V é
considerada anormal
e acima de 9,6 V é
normal.
O resultado do teste
do testador inclui a
tensão de arranque
real e o tempo de
arranque real.
Se o teste de arranque
do motor for anormal,
o resultado do teste da
bateria será exibido ao
mesmo tempo.
Teste de arranque.
Lance o motor
Teste de carrega-
mento. TESTE DE
CARREGAMENTO
EM ANDAMENTO
Teste de
carregamento.
TESTE EM
ANDAMENTO
Teste de arranque.
Rotações por minuto
determinadas
Teste de arranque.
Tempo 1758 ms.
Arranque normal 10,56 V
Teste de arranque.
Tempo 1020 ms.
Baixo arranque
9,12 V
Teste de carregamento.
Aumente o número de
rotações por minuto (RPM)
para 2500 rpm e mantenha
por 5 segundos. Pressione
ENTER para continuar

· 19 ·
REF. 54040
Resultado de teste de carregamento
1. Charging voltage (Tensão de carregamento):
Normal. A potência do gerador está normal, nen-
hum problema foi encontrado.
2. Charging voltage (Tensão de carregamento):
Baixa. Verique a correia de transmissão do ge-
rador quanto a deslizamento ou deslocamento.
Verique se a conexão entre o gerador e a bate-
ria está normal. Se a correia de transmissão e a
conexão estiverem em boas condições, siga as
recomendações do fabricante para solucionar o
problema do gerador.
3. Charging voltage (Tensão de carregamento):
Alta. Como a maioria dos geradores dos carros
usa um regulador interno, é necessário substi-
tuir o gerador em conjunto (alguns carros mais
antigos usam um regulador externo e, em segui-
da, substitua-o diretamente). A tensão normal
do regulador é de no máximo 14,7 ± 0,5 V. Se
a tensão de carregamento for muito alta, isso
sobrecarregará a bateria. Consequentemente,
a sua vida útil será encurtada, causando mau
funcionamento.
4. No volt output (Sem saída de tensão): Nenhuma
tensão de saída do gerador é detectada. Veri-
que a condição do cabo de conexão do gerador,
da correia de transmissão do gerador e do motor.
5. Diode test (Teste de diodo): Por meio do teste de
pulsação da corrente de carga, o testador desco-
bre se os diodos estão normais. Se a tensão de
pulsações for muito alta, isso indica danos a pelo
menos um diodo. Verique o diodo e substitua-o.
Review Data (Dados de revisão)
Depois de entrar na quarta função, pressione o botão
OK para ver o resultado nal do teste.
Print Data (Impressão de dados)
Use a impressora do testador para imprimir o resultado
do teste mais recente.
Export Data (Exportação de dados)
Conecte o testador de bateria ao computador usando
a linha de dados (Data Line) e exporte os dados. (En-
tre em contato com da nossa empresa para obter o
software mais recente).
SUBSTITUIÇÃO DE PAPEL
1. Abra a tampa transparente.
2. Insira o rolo de papel de reposição no alimenta-
dor automático de papel da impressora.
3. Puxe o papel lentamente e uniformemente do
rolo no compartimento.
FUNÇÕES ADICIONAIS
Pressione Menu para acessar funções adicionais.
• Idioma:
• Versão continental: chinês tradicional, ja-
ponês, coreano, russo e inglês.
• Versão escandinava: inglês, holandês,
sueco, nlandês, norueguês e dinamar-
quês.
• Versão da Europa Ocidental: inglês, fran-
cês, alemão, espanhol, italiano e polonês.
• Conguração de hora: dena qualquer hora.
No nal do teste, o tes-
tador exibe a tensão de
carregamento efetiva
em volts, o teste de pul-
sação e os resultados
do teste de carrega-
mento.
Por m, verique a co-
nexão entre o gerador
e a bateria e teste no-
vamente.
Teste de carregamento.
Carregado 13,97 V.
Descarregado 14,23 V.
Pulsação 15 mV.
Carregamento normal

· 20 ·
REF. 54040
MANUAL DE INSTRUCŢIUNI
RO
DESCRIEREA PRODUSULUI
Testerul de baterie cu imprimantă măsoară în amperi
intensitatea bateriei de acumulatoare a vehiculului la
pornire la rece, evaluează starea bateriei și identică
defecțiunile generale ale sistemului de pornire și ale
sistemului de încărcare. Acest instrument ajută perso-
nalul de service să identice problema rapid și cu exac-
titate și să asigure reparația rapidă a mașinii.
INSTRUCȚIUNI GENERALE DE SIGURANŢĂ
ATENȚIE! Acest produs poate expune oamenii
la substanțe chimice, inclusiv arsenic, care provoacă
cancer conform datelor din statul California, SUA.
• Lucrul în apropierea directă a bateriei cu acid
și plumb este periculos. Bateriile generează
gaze explozive în timpul funcționării normale.
Din acest motiv, dacă aveți vreo îndoială, este
extrem de important să citiți aceste instrucțiuni
foarte atent înainte de a utiliza testerul.
• Pentru a reduce riscul de explozie a bateriei, ur-
mați instrucțiunile din acest manual, instrucțiunile
producătorului bateriei și instrucțiunile producă-
torului oricărui alt echipament utilizat în vecinăta-
tea bateriei. Acordați atenție semnelor de averti-
zare de pe aceste articole.
• Nu expuneți testerul la ploaie și/sau zăpadă.
REGULI DE SIGURANȚĂ PERSONALĂ
• Asigurați-vă că aveți pe cineva în apropiere care
să vă ajute în caz de necesitate atunci când lu-
crați cu o baterie cu acid și plumb.
• Păstrați multă apă proaspătă și săpun gata de
utilizare pentru cazul în care acidul bateriei intră
în contact cu pielea, hainele sau ochii.
• Purtați ochelari de protecție și îmbrăcăminte spe-
cială.
• Dacă acidul bateriei intră în contact cu pielea sau
hainele, spălați imediat cu apă și săpun. Dacă
acidul vă pătrunde în ochi, spălați cu apă rece
timp de cel puțin zece minute și imediat solicitați
asistență medicală.
• Nu fumați în apropierea bateriei sau a motorului
și nu lăsați să se formeze scântei sau ăcări.
• Fiți foarte precaut pentru a reduce riscul de a
scăpa un instrument metalic pe baterie. Acest
lucru poate provoca formare de scântei, scurtcir-
cuit a bateriei sau a altor componente electrice și
poate provoca explozie.
• Când manipulați o baterie cu acid și plumb, în-
depărtați obiectele metalice, cum ar inele,
brățări, coliere și ceasuri. Ele pot crea un curent
de scurtcircuit care poate sucient de mare
pentru a sudura un inel sau alt obiect la metal și
a provoca arsuri grave.
Pregătirea pentru testare
• Asigurați-vă că zona din jurul bateriei este bine
ventilată în timpul testării bateriei.
• Curățați bornele bateriei. Nu permiteți coroziu-
nea să intre în contact cu ochii.
• Vericați dacă bateria nu prezintă suri, dete-
riorări ale carcasei sau ale capacului. Nu utilizați
testerul dacă bateria este deteriorată.
• Dacă bateria nu este sigilată, adăugați apă dis-
tilată la ecare celulă până când acidul bateriei
atinge nivelul specicat de producător. Acest lu-
cru va ajuta la eliminarea excesului de gaz din
celule. Nu turnați prea multă apă distilată.
• Dacă pentru testare trebuie să scoateți bateria
din vehicul, asigurați-vă că deconectați mai în-
tâi borna de masă de la baterie. Asigurați-vă că
toate accesoriile vehiculului sunt oprite și nu vor
provoca scântei.
FUNCȚIONAREA ȘI UTILIZAREA
• Înainte de a începe testarea bateriei din vehicul,
opriți contactul de pornire și toate accesoriile. În-
chideți ușile mașinii și capacul portbagajului.
• Rețineți că în timp ce testerul nu este conectat
la bateria vehiculului, pe așaj nu apare nimic.
• Asigurați-vă că bornele bateriei sunt curate.
Curățați-le cu o perie de sârmă, dacă este ne-
cesar. Conectați cablurile de sarcină negre la
borna negativă a bateriei vehiculului. Conectați
cablul roșu de sarcină la borna pozitivă a bateriei
vehiculului. Fixați numai partea de plumb a bor-
nei. Conectarea părții de er a bornei va duce la
rezultate incorecte ale testului.
• Încărcarea hârtiei: Deschideți capacul transpa-
rent. Introduceți hârtia în alimentatorul automat
de hârtie din imprimantă.
NOTĂ: De ecare dată când testerul este conectat la
baterie, se efectuează o vericare rapidă a cablului
pentru a se asigura că cablurile de ieșire sunt conecta-
te corect la senzorii din fălcile clemei. Dacă conexiunea
este normală, testerul va așa ecranul principal. Dacă
conexiunea este incorectă, așajul va așa “CHECK
CABLE” («Vericați cablul»). În acest caz, vericați co-
nexiunile cablului pentru semne vizibile de deteriorare,
deoarece poate necesar să reconectați clemele la
baterie sau să înlocuiți capătul cablului.
Pentru a utiliza dispozitivul corect, urmați acești pași:
1. Conectați clema roșie a testerului la anodul bate-
riei și clema neagră a testerului la catod, testerul
se va porni automat. Nu este posibil să testați
corect tensiunea bateriei sub 7,0 V DC.
2. Pentru a continua apăsați butonul OK
3. În funcție de tipul de tester, puteți apăsa butoa-
nele UP/DOWN (SUS/JOS) pentru a selecta:

· 21 ·
REF. 54040
1.Battery Test (Testarea bateriei)
2. Cranking Test (Test de pornire)
3. Charging Test (Test de încărcare)
4. Review Test (Date generale)
5. Print Data (Imprimare date)
6. Export Data (Export de date)
Battery Test (Testarea bateriei)
Selectați Battery Test și apăsați butonul OK, pentru a
continua:
• Battery Type (Tip baterie): Selectați tipul bateriei,
de obicei este “Regular Flooded” (standard, cu
electrolit lichid).
• Input testing standard (Introduceți standardul de
testare): selectați standardul care este imprimat
pe fața bateriei, cum ar , CCA, BCI, DIN. Dacă
nu găsiți nicio informație despre standard, puteți
alege standardul GB. Alegerea standardelor GB
va avea ca rezultat toleranțe mici.
• Input rated capacity (Introduceți puterea nomi-
nală): pe partea din față a bateriei puteți vedea
standardele curentului de pornire, cum ar ,
BCI/300A.
• Apăsați butonul OK pentru a începe testul.
NOTĂ: În cazul în care s-a pierdut puterea bateriei (de
exemplu, mașina a fost în repaus de mult timp, bate-
ria nu a fost încărcată la timp, luminile externe nu au
fost stinse, ușile nu au fost închise, ceea ce creează
pierderi de energie și duce la incapacitatea de a por-
ni vehiculul etc.) în timpul testării reale poate apărea
un mesaj care vă solicită să înlocuiți bateria. Pentru a
obține o baterie de acest model, vă rugăm să consultați
producătorii de baterii.
Cranking Test
NOTĂ: Acest lucru este necesar pentru a facilita mun-
ca personalului de service și pentru a obține rapid in-
formații despre starea întregului sistem de pornire în
conformitate cu datele. Dacă pornirea motorului nu
poate detectată, este posibil să nu existe tensiune
de încărcare la ieșire, este necesar să vericați gene-
ratorul.
Charging Test (Test de încărcare)
După ce ați trecut la
a doua funcție de tes-
tare a sistemului de
pornire, apăsați buto-
nul OK.
La pornire, motorul va
efectua automat un
test de pornire și va
așa rezultatul con-
form semnalului tes-
terului.
În general, tensiunea
de pornire sub 9,6 V
este considerată anor-
mală, iar peste 9,6 V
este normală.
Rezultatul testului
arată tensiunea de
pornire reală și timpul
efectiv de pornire.
Când intrați în modul de
testare a încărcării, tes-
terul va așa “Charging
Test” („Test de încărca-
re”).
NOTĂ: Nu opriți motorul
în timpul testării. Toate
echipamentele și apara-
tele electrice sunt oprite.
Pornirea și oprirea ori-
cărui dispozitiv electric
de pe vehicul în timpul
testului va afecta preci-
zia rezultatelor.
Măriți viteza motorului
până la 2500 RPM și ți-
neți această viteză timp
de 5 secunde.
Testerul începe testul
de încărcare a tensiunii
după ce a detectat o
creștere a numărului de
rotații.
La sfârșitul testării tes-
terul așează tensiunea
efectivă de încărcare în
volți, rezultatele testului
de pulsație și de încăr-
care.
La încheiere vericați
conexiunea dintre ge-
nerator și baterie, apoi
repetați testarea.
Dacă testul de pornire
a motorului nu respec-
tă norma, în același
timp va așat rezul-
tatul testului bateriei.
Test de pornire Porniți
motorul
Test de încărcare.
TESTAREA
ÎNCĂRCĂRII
Test de încărcare.
ÎN PROCES DE
TESTARE
Test de pornire
Detectat rotații pe
minut
Test de pornire Timp
1758 ms.
Pornire normală 10,56 V
Test de pornire Timp
1020 ms
Pornire slabă
9,12 V
Test de încărcare. Măriți
rotațiile până la 2500 RPM
și țineți timp de 5 secunde.
Apăsați ENTER, pentru a
continua.
Test de încărcare.
Încărcat 13,97 V
Descărcat 14,23 V
Pulsație 15mV
Încărcare normală

· 22 ·
REF. 54040
Rezultatul testării încărcării
1. Charging voltage: Normal. (Tensiune de încărca-
re: normală) Puterea generatorului este normală,
nu sunt detectate probleme.
2. Charging voltage: Low. (Tensiune de încărca-
re: scăzută) Vericați cureaua de transmisie a
generatorului dacă nu se alunecă sau nu este
înlăturată. Vericați dacă conexiunea dintre ge-
nerator și baterie este normală. Dacă cureaua
de transmisie și conexiunea sunt în stare bună,
atunci urmați recomandările producătorului pen-
tru eliminarea defectelor generatorului.
3. Charging voltage: High. (Tensiunea de încăr-
care: mare) Deoarece majoritatea generatorilor
auto sunt proiectate cu regulator încorporat, este
necesar să înlocuiți generatorul complet asam-
blat (unele mașini mai vechi folosesc un regula-
tor extern, în acest caz este necesar să înlocuiți
numai regulatorul). Tensiunea normală a regula-
torului este de maxim 14,7 ± 0,5 V. Dacă tensiu-
nea de încărcare este prea mare, acest lucru va
supraîncărca bateria. În consecință, durata de
viață a acestuia va scurtată, ceea ce va duce
la defecțiuni.
4. No volt output (Lipsește ieșirea tensiunii): Nu a
fost detectată nicio ieșire de tensiune de la ge-
nerator. Vericați starea cablului de conectare a
generatorului, a curelei de transmisie a genera-
torului și a motorului.
5. Diode test (Testarea diodelor): Prin testarea
pulsației curentului de încărcare, testerul veri-
că dacă diodele sunt normale. Dacă tensiunea
pulsațiilor este prea mare, aceasta indică dete-
riorarea a cel puțin unei diode. Vericați dioda și
înlocuiți-o.
Review Data (Date generale)
După ce ați intrat în a patra funcție, apăsați butonul OK
pentru a vizualiza rezultatul nal al testului.
Print Data (Imprimare date)
Utilizați imprimanta testerului pentru a imprima ultimul
rezultat al testului.
Export Data (Export de date)
Conectați testerul de baterie la computer utilizând linia
de date (Data Line) și exportați datele. (Vă rugăm să
contactați compania noastră pentru a obține cel mai
recent software).
ÎNLOCUIREA HÂRTIEI
1. Deschideți capacul transparent.
2. Introduceți rola de hârtie de schimb în alimenta-
torul automat de hârtie în imprimantă.
3. Trageți hârtia încet și uniform din rola din com-
partiment.
FUNCȚII SUPLIMENTARE
Pentru a accesa o funcție suplimentară, apăsați “Menu”.
• Limba
• Versiunea continentală: Limbile chineză
tradițională, japoneză, coreeană, rusă și
engleză.
• Versiunea scandinavă: Limbile engleză,
olandeză, suedeză, nlandeză, norvegiană
și daneză.
• Versiunea din Europa de Vest: Limbile
engleză, franceză, germană, spaniolă, ita-
liană și poloneză.
• Setarea orei: setați ora potrivită.

· 23 ·
REF. 54040
INSTRUCTIEHANDLEIDING
NL
PRODUCTBESCHRIJVING
Accutester met printer meet de stroomsterkte in ampe-
re van de koude start van de startbatterij van de auto,
beoordeelt de conditie van de batterij zelf en identi-
ceert ook algemene storingen van het startsysteem
van de auto en het oplaadsysteem. Dit gereedschap
helpt onderhoudspersoneel, om het probleem snel en
nauwkeurig te bepalen en snelle voertuigreparaties te
garanderen.
ALGEMENE VEILIGHEIDSINSTRUCTIES
LET OP! Dit product kan mensen aan chemicaliën
blootstellen, waaronder arseen, dat volgens gegevens
uit de staat Californië, VS, kanker veroorzaakt.
• Werken in de nabijheid van een lood-zuur-batte-
rij is gevaarlijk. Batterijen genereren explosieve
gassen tijdens normaal gebruik. Daarom is het
bij enige twijfel absoluut noodzakelijk, dat u deze
handleiding zorgvuldig elke keer leest, voordat u
de tester gebruikt.
• Volg de aanwijzingen in deze handleiding, de
instructies van de fabrikant van de batterij en de
fabrikant van alle andere uitrusting, die in de na-
bijheid van de batterij wordt gebruikt, om het ri-
sico van een batterijexplosie te verminderen. Let
op de waarschuwingssignalen, die erop staan.
• Stel de tester niet bloot aan regen en/of sneeuw.
PERSOONLIJKE VEILIGHEIDSVOORSCHRIFTEN
• Iemand moet in de buurt zijn om te helpen, als
dat nodig is, wanneer een andere persoon in de
nabijheid van een lood-zuur-batterij werkt.
• Houd voldoende vers water en zeep klaar voor
het geval, dat batterijzuur in contact met uw huid,
kleding of ogen komt.
• Draag een veiligheidsbril en speciale kleding.
• Als er batterijzuur op uw huid of kleding komt,
was dit dan onmiddellijk met water en zeep af.
Als er zuur in uw ogen komt, spoel dan geduren-
de ten minste tien minuten met koud stromend
water en zoek onmiddellijk medische hulp.
• Rook niet in de buurt van de batterijof motor en
zorg ervoor dat er nooit vonken of vlammen onts-
taan.
• Wees extra voorzichtig, om het risico te verklei-
nen, dat metalen gereedschap op de batterij
valt. Dit kan vonken of kortsluiting in de batterij of
andere elektrische onderdelen en een explosie
veroorzaken.
• Verwijder bij werkzaamheden aan een
lood-zuur-batterij alle metalen voorwerpen, zoals
ringen, armbanden, halskettingen en horloges.
Ze kunnen een kortsluitstroom veroorzaken,
die hoog genoeg kan zijn, om een ring of an-
der voorwerp aan metaal te lassen en ernstige
brandwonden te veroorzaken.
Voorbereiden op testen
• Zorg er bij het testen van een batterij voor, dat
het gebied eromheen goed geventileerd is.
• Reinig de batterij-polen. Vermijd contact van ge-
corrodeerde onderdelen met ogen.
• Inspecteer de batterij op scheuren, schade aan
de behuizing of het deksel. Gebruik de tester
niet, als de batterij beschadigd is.
• Als de batterij niet is afgedicht, voegt u gedis-
tilleerd water aan elke cel toe, totdat het bat-
terijzuur het door de fabrikant gespeciceerde
niveau bereikt. Dit zal helpen overtollig gas uit
de cellen te verwijderen. Gebruik niet te veel ge-
destilleerd water.
• Als het nodig is om de batterij uit het voertuig te
verwijderen, om te testen, zorg er dan voor, dat
u eerst de aardklem van de batterij loskoppelt.
Zorg ervoor, dat alle optionele uitrusting van het
voertuig is uitgeschakeld en geen vonken veroor-
zaakt.
ORDE VAN BEDIENING EN GEBRUIK
• Schakel het contact en alle accessoires uit, voor-
dat u de batterij in de auto controleert. Sluit auto-
deuren en koerdeksel.
• Merk op, dat hoewel de tester op de batterij van
het voertuig niet is aangesloten, er niets op het
display wordt weergegeven.
• Zorg ervoor, dat de polen van de batterij schoon
zijn. Reinig ze met een staalborstel indien nodig.
Sluit de zwarte laadkabels op de negatieve pool
van de batterij van het voertuig aan. Sluit de rode
laadkabel op de positieve pool van de batterij
van het voertuig aan. Sluit alleen het uitgaande
deel van de terminal aan. Het aansluiten van het
ijzeren deel van de terminal zal in onjuiste testre-
sultaten resulteren.
• Papier laden: Open het transparante deksel. Pla-
ats papier in de automatische papierinvoer in de
printer.
OPMERKING: Elke keer, dat de tester op de batterij
wordt aangesloten, wordt er een snelle kabelcontrole
uitgevoerd, om ervoor te zorgen dat de uitgangska-
bels correct op de sensoren in de kleminrichtingen
zijn aangesloten. Als de verbinding in orde is, geeft de
tester het hoofdscherm weer. Als de verbinding slecht
is, toont het display “CHECK CABLE” («Controleer de
kabel»). Controleer in dit geval de kabelaansluitingen
op zichtbare tekenen van beschadiging, het kan nodig
zijn, om de klemmen weer op de batterij aan te sluiten
of het uiteinde van de kabel te vervangen.

· 24 ·
REF. 54040
Om het apparaat correct te gebruiken, volg deze sta-
ppen:
1. Sluit de rode testklem op de anode van de ba-
tterij aan, de zwarte op de kathode, en de tes-
ter wordt automatisch ingeschakeld. Het is niet
mogelijk, om de batterij-spanning onder 7,0 VDC
goed te testen.
2. Klik op OK-knop, om door te gaan.
3. Afhankelijk van het type tester, kunt u op de kno-
ppen UP/DOWN (Omhoog/Omlaag) drukken, om
te selecteren:
1. Battery Test (Batterijtest)
2. Cranking Test (Starttest)
3. Charging Test (Oplaadtest)
4. Review Test (Overzicht)
5. Print Data (Gegevens afdrukken)
6. Export Data (Gegevens exporteren)
Battery Test (Batterijtest)
Selecteer Battery Test en klik op OK, om door te gaan:
• Battery Type (Baterij-type): selecteer het type ba-
tterij, meestal dit is “Regular Flooded” (standaard
met vloeibaar elektrolyt).
• Input testing standard (Voer teststandaard in):
selecteer de standaard die op de voorkant van
de batterij staat, bijvoorbeeld, CCA, BCI, DIN.
Als er geen informatie over de standaard is, kunt
u de GB-standaard selecteren. Het kiezen van
GB-standaarden zal resulteren in kleine toelaat-
bare toleranties.
• Input rated capacity (Voer het nominale vermo-
gen in): op de voorkant van de batterij staan de
startstroomnormen aangegeven, bijvoorbeeld,
BCI/300A.
• Klik vervolgens op de OK-knop, om de test te
starten.
OPMERKING: In geval van een verlies van batterij-
vermogen tijdens de eigenlijke test (de auto staat bi-
jvoorbeeld lange tijd stil, de batterij laadt niet op tijd
op, de buitenverlichting was niet uit, de deuren waren
niet gesloten, wat ernstige verliezen veroorzaakt en tot
onvermogen om te starten, enz. leidt), kan er een beri-
cht verschijnen waarin u wordt gevraagd de batterij te
vervangen. Raadpleeg de fabrikanten, om de vereiste
batterij te verkrijgen.
Cranking Test (Starttest)
OPMERKING: Dit is nodig, om het werk van het onder-
houdspersoneel te vergemakkelijken, en om snel in-
formatie over de toestand van het gehele startsysteem
in overeenstemming met de gegevens te verkrijgen.
Als het starten van de motor niet kan worden gedetec-
teerd, is er dan misschien geen laadspanningsuitgang,
het is noodzakelijk om de generator te controleren.
Charging Test (Oplaadtest)
Nadat u de tweede
testfunctie van het
systeem hebt inge-
voerd, drukt u op de
OK-knop.
Bij het openen van de
oplaadtestmodus zal de
tester “Charging Test”
tonen.
OPMERKING: Zet de
motor niet tijdens de test
af. Alle elektrische appa-
ratuur en apparaten zijn
uitgeschakeld. Het in-
en uitschakelen van een
elektrisch apparaat op
het voertuig tijdens de
test heeft invloed op de
nauwkeurigheid van de
resultaten.
Verhoog het motortoe-
rental tot 2500 tpm en
houd dit toerental 5 se-
conden vast.
Bij het starten voert
de motor op verzoek
van de tester automa-
tisch een starttest uit
en geeft het resultaat
weer.
Over het algemeen
wordt een startspan-
ning onder 9,6 V als
abnormaal en boven
9,6 V als normaal bes-
chouwd.
Het testresultaat van
de tester omvat de
werkelijke startspan-
ning en de werkelijke
starttijd.
Als de starttest van de
motor abnormaal is,
wordt tegelijkertijd het
resultaat van de bat-
terijtest weergegeven.
Starttest.
Start de motor
Oplaadtest.
OPLAADTEST IN
UITVOERING
Starttest.
RPM bepaald
Starttest. Tijd 1758 ms.
Opstarten normaal
10.56V
Starttest. Tijd 1020 ms.
Opstarten laag 9.12V
Oplaadtest. Verhoog het
aantal omwentelingen per
minuut (RPM) tot 2500 tpm
en houd 5 seconden vast.
Druk op ENTER, om door
te gaan

· 25 ·
REF. 54040
Resultaat van de oplaadtest
4. Charging voltage: Normal. (Laadspanning: nor-
maal) Generatorvermogen is normaal, geen pro-
blemen gevonden.
5. Charging voltage: Low. (Laadspanning: laag)
Controleer de aandrijfriem van de generator op
slippen of verplaatsing. Controleer of de verbin-
ding tussen de generator en de batterij normaal
is. Als zowel de aandrijfriem als de verbinding in
goede staat zijn, volg dan de aanbevelingen van
de fabrikant, om problemen met de generator op
te lossen.
6. Charging voltage: High. (Laadspanning: hoog)
Aangezien de meeste autogeneratoren een in-
terne regelaar gebruiken, is het noodzakelijk om
de complete generator te vervangen (sommige
oudere auto’s gebruiken een externe regelaar en
u moet deze dan direct vervangen). De norma-
le spanning van de regelaar is maximaal 14,7 ±
0,5 V. Als de laadspanning te hoog is, wordt de
batterij overbelast. Hierdoor wordt de levensduur
verkort, wat tot storingen zal leiden.
7. No volt output (Geen spanningsuitgang): Geen
uitgangsspanning van de generator gedetec-
teerd. Controleer de staat van de verbindings-
kabel van de generator, de aandrijfriem van de
generatoren de motor.
8. Diode test (Diodetest): Door het testen van de
rimpel van de laadstroom, zoekt de tester uit, of
de diodes normaal zijn. Als de rimpelspanning te
hoog is, is minstens een diode beschadigd. Con-
troleer de diode en vervang deze.
Review Data (Overzicht gegevens)
Nadat u de vierde functie hebt ingevoerd, drukt u op de
knop OK, om het uiteindelijke testresultaat te bekijken.
Print Data (Gegevens afdrukken)
Met behulp van printer van de tester, drukt u het laatste
testresultaat af.
Export Data (Gegevens exporteren)
Sluit de batterijtester op de computer met behulp van
de datalijn (Data Line) aan en exporteer de gegevens.
(Neem voor de nieuwste software contact op met ons
bedrijf).
PAPIER VERVANGEN
1. Open het transparante deksel.
2. Plaats de vervangende papierrol in de automatis-
che papierinvoerinrichting van de printer.
3. Trek het papier langzaam en gelijkmatig van de
rol in het compartiment.
EXTRA FUNCTIES
Om toegang tot een extra functie te krijgen, drukt u op
“Menu”.
• Taal:
• Continentale versie: Traditioneel Chinees,
Japans, Koreaans, Russisch en Engels.
• Scandinavische versie: Engels, Neder-
lands, Zweeds, Fins, Noors en Deens.
• West-Europese versie: Engels, Frans,
Duits, Spaans, Italiaans en Pools.
• Tijdinstelling: u kunt elke tijd instellen.
De tester begint de
laadspanning na het
detecteren van een
toename van het aan-
tal omwentelingen te
testen.
Aan het einde van de
test geeft de tester de
eectieve laadspanning
in volt, rimpeltest en laa-
dtestresultaten weer.
Controleer ten slotte de
verbinding tussen de
generator en de batterij
en test vervolgens op-
nieuw.
Oplaadtest.
WORDT GETEST
Oplaadtest.
Opgeladen 13,97 V.
Ontladen 14,23 V.
Rimpel 15mV.
Opladen is normaal

· 26 ·
REF. 54040
ÜZEMELTETÉSI UTASÍTÁS
HU
TERMÉKLEÍRÁS
A nyomtatóval is ellátott akkumulátor-tesztelő méri
az autót indító akkumulátornak, a hidegindító ampe-
res, áramerősségét, felméri az akkumulátor állapotát,
valamint azonosítja az autó indítórendszerének és a
töltőrendszernek az általános meghibásodásait. Ez az
eszköz segít a szervizszemélyzetnek gyorsan és pon-
tosan felismerni a felmerült problémát, ezáltal biztosít-
ja a jármű gyors javítását.
ÁLTALÁNOS BIZTONSÁGI UTASÍTÁSOK
FIGYELEM! Ez az eszköz vegyi anyagok hatá-
sának teheti ki az embereket, beleértve az arzént is,
amely az USA-beli Kalifornia állam adatai szerint rákot
okoz.
• Az ólomakkumulátor közvetlen közelében végze-
tt munka veszélyekkel jár. Az akkumulátorok nor-
mál üzem közben robbanásveszélyes gázokat
generálnak. Ezért ha kétségei merülnek fel, fel-
tétlenül olvassa el gyelmesen és értelmezze,
ezt a kézikönyvet, minden alkalommal, amikor a
tesztert használja.
• Az akkumulátor robbanásveszélyének csökken-
tése érdekében kövesse a kézikönyv utasításait,
az akkumulátor gyártójának utasításait, valamint
az akkumulátor közelében használt egyéb be-
rendezések gyártói által mellékelt utasításokat.
Ügyeljen a rajtuk található gyelmeztető jelzé-
sekre.
• Ne tegye ki a tesztelő eszközt esőnek és/vagy
hónak.
SZEMÉLYES BIZTONSÁGI SZABÁLYOK
• Ügyeljen arra, hogy legyen valaki a közelben az
eszközzel végzett munka során, ha ólom-sav
akkumulátor közelében dolgozik, aki probléma
fellépése esetén segíthet Önnek.
• Arra at esetre ha, akkumulátorsav bőrre, ruháza-
tra vagy szembe kerül, tartson sok friss vizet és
szappant használatra készen.
• Viseljen védőszemüveget és speciális ruházatot.
• Ha akkumulátorsav kerül a bőrére vagy a ruhá-
zatára, azonnal mossa le szappannal és vízzel.
Ha sav kerül a szemébe, legalább tíz percig
öblítse azt hideg folyó vízzel, és azonnal fordul-
jon orvoshoz.
• Soha ne dohányozzon akkumulátor vagy motor
közelében, és soha ne engedje, hogy szikra vagy
láng keletkezzen ezek közelében.
• Különösen ügyeljen arra, hogy csökkentse an-
nak kockázatát, hogy a fém szerszámok az
akkumulátorra essenek. Ez szikrát és/vagy rövi-
dzárlatot okozhataz akkumulátorban, vagy más
elektromos alkatrészekben, ami robbanáshoz
vezethet.
• Ólom-sav akkumulátoron végzett munka során,
távolítsa el testéről és ruházatárol az összes fé-
mtárgyat, például: gyűrűket, karkötőket, nyaklán-
cokat és órákat. Ezek ugynanis olyan rövidzár-
lati áramot hozhatnak létre, amely elég nagy
ahhoz, hogy a gyűrűt vagy más tárgyat fémhez
hegesszen, ami súlyos égési sérülésekhez veze-
thet.
Felkészülés a tesztelésre
• Az akkumulátor tesztelése előtt ellenőrizze, hogy
az akkumulátor környéke jól szellőző-e.
• Tisztítsa meg az akkumulátor pólusait. Ne ha-
gyja, hogy a korrodálódott részek a szemébe
kerüljenek.
• Ellenőrizze az akkumulátort, hogy nincs-e rajta
repedés, sérülés a házon vagy a burkolaton. Ne
használja a tesztelő készüléket, ha az akkumulá-
tor sérült.
• Ha az akkumulátor nincs lezárva, adjon deszti-
llált vizet minden cellához, amíg az akkumulátor
sav el nem éri a gyártó által megadott szintet. Ez
segít eltávolítani a felesleges gázt a cellákból. Ne
használjon túl sok desztillált vizet.
• Ha teszteléshez ki kell vennie az akkumulátort
a járműből, akkor mindenekelőtt győződjön meg
róla, hogy leválasztotta a földelő kapcsokat az
akkumulátorról. Győződjön meg arról, hogy az
összes jármű tartozék ki van kapcsolva, és nem
okozhat szikrát.
MŰKÖDTETÉSI ÉS ALKALMAZÁSI ELJÁRÁSOK
• Mielőtt tesztelné az autó akkumulátorát, kapc-
solja ki a gyújtást valamint az összes tartozékot.
Csukja be az autó összes ajtaját és a csomag-
tartó fedelét is.
• Vegye gyelembe, hogy amíg a tesztelő készülék
nincs csatlakoztatva a jármű akkumulátorához, a
kijelzőn semmi sem jelenik meg.
• Ellenőrizze, hogy az akkumulátor pólusai tisz-
ták-e. Szükség esetén drótkefével tisztítsa meg
azokat. Csatlakoztassa a fekete terhelő veze-
tékeket a jármű akkumulátorának negatív pólu-
sához. Csatlakoztassa a piros töltőkábelt a jár-
mű akkumulátorának pozitív kapcsához. Csak
a pólus kivezető észét csatlakoztassa. A pólus
vasrészének csatlakoztatása hibás vizsgálati
eredményeket fog eredményezni.
• Papír betöltése: Nyissa ki az átlátszó fedelet.
Helyezzen papírt a nyomtató automatikus papí-
radagolójába.
MEGJEGYZÉS: Minden alkalommal, amikor a tesztelő
készüléket csatlakoztatja az akkumulátorhoz, hajtson
végre egy gyors kábelellenőrzést, hogy megbizonyo-

· 27 ·
REF. 54040
sodjon arról, hogy a kimeneti kábelek megfelelően
vannak-e csatlakoztatva a szerszámok érzékelőihez.
Amennyiben a kapcsolat megfelelő, a tesztelő megje-
leníti a főképernyőt. Ha a kapcsolat gyenge, a kijelzőn
a “CHECK CABLE” (Ellenőrizze a kábeleket) felirat
jelenik meg. Ebben az esetben ellenőrizze újra, hogy
a kábelcsatlakozásokban nincs-e látható sérülés, mert
szükség lehet a bilincsek újracsatlakoztatására az
akkumulátorra, vagy akár a kábel végének cseréjére
is.
Az eszköz helyes használatához kövesse az alábbi
lépéseket:
1. Csatlakoztassa a piros tesztbilincset az akku-
mulátor anódjához, a fekete tesztbilincset a ka-
tódhoz, ettől a tesztelő készülék automatikusan
bekapcsol. 7,0 VDC alatt nem lehet megfelelően
tesztelni egy akkumulátor feszültségét.
2. A folytatáshoz kattintson az „OK” gombra.
3. A tesztelő típusától függően a UP/DOWN (Fel/
Le) gombokkal válassza ki:
1. Battery Test (Akkumulátor tesztelése)
2. Cranking Test (Indítás tesztelése)
3. Charging Test (Töltés tesztelése)
4. Review Test (Áttekintés)
5. Print Data (Adatok nyomtatása)
6. Export Data (Adatok exportálása)
Battery Test (Akkumulátor tesztelése)
Válassza ki Battery Test funkciót, majd a folytatáshoz
nyomja meg az „OK” gombot:
• BatteryType (Az akkumulátor típusa): Válassza
ki az akkumulátor típusát, ez általában “Normal
Flooded” (Alapértelmezett, vagyis folyékony ele-
ktrolit)
• Inputtestingstandard (Adja meg a tesztelési
szabványt): válassza ki az akkumulátor felületén
feltüntetett szabványt, például: CCA, BCI, DIN.
Ha nincs információ a szabványról, akkor a GB
szabvány választható ki. A GB szabványok kivá-
lasztása kis hibaszázalékot eredményez.
• Inputratedcapacity (Adja meg a névleges teljesít-
ményt): Az akkumulátor előlapján fel vannak tün-
tetve az indítási szabványok, például: BCI/300A.
• Ezután nyomja meg az „OK” gombot a teszt elin-
dításához.
MEGJEGYZÉS: Ha az akkumulátor lemerül (például
az autó hosszú ideig üresjáratban van, az akkumulátor
nem töltődik időben, a külső lámpákat nem kapcsolják
ki, az ajtókat nem csukják be, ami súlyos veszteség,
és így az autó nem indul el, stb.) a tényleges tesztelés
során megjelenhet egy üzenet, amely arra kéri Önt,
hogy cserélje ki az akkumulátort. A megfelelő akku-
mulátorért forduljon annak gyártójához.
Cranking Test (Indítás tesztelése)
MEGJEGYZÉS: Erre azért van szükség, hogy me-
gkönnyítse a szervizelő személyzet munkáját, és hogy
az adatoknak megfelelően gyorsan információkat sze-
rezzenek a teljes indítórendszer állapotáról. Amenn-
yiben a motor indítása nem észlelhető, akkor előfor-
dulhat, hogy nincs töltőfeszültség kimenet, ilyenkor
ellenőrizni kell a generátort.
Charging Test (Töltés tesztelése)
A második indító teszt
funkció beírása után
nyomja meg az „OK”
gombot.
Indításkor a motor au-
tomatikusan elvégzi az
indítási tesztet, és az
eredményt a tesztelő
készülék kérésének
megfelelően fogja me-
gjeleníteni.
Általánosságban a 9,6
V alatti indítási feszült-
séget rendellenesnek,
a 9,6 V felett pedig
normálisnak tekintik.
A tesztelő készülék
teszt eredménye tar-
talmazza a tényleges
indítási feszültséget
és a tényleges indítá-
si időt.
Amennyiben a mo-
tor indítási tesztje
rendellenes, akkor
az akkumulátor teszt
eredménye egyből
megjelenik a képer-
nyőn.
A töltés teszt üzemmódba
lépve a tesztelőkészülék
megjeleníti a “Charging-
Test” feliratot.
MEGJEGYZÉS: Teszte-
lés közben ne kapcsolja
ki a motort. Minden ele-
ktromos berendezés és
készülék ki kell legyen
kapcsolva. A tesztelés
során a jármű bármely
elektromos eszközének
be- és kikapcsolása be-
folyásolja az eredmények
pontosságát.
Indítási teszt. Indítsa el
a motort
Töltési teszt.
TÖLTŐ VIZSGÁLAT
FOLYAMATBAN
Indítási teszt.
RPM meghatározva
Indítási teszt.
Idő 1758 ms.
Indítási normál 10.56V
Indítási teszt.
Idő 1020 ms.
Lemerülőben
9.12V

· 28 ·
REF. 54040
Töltési teszt eredménye:
1. Chargingvoltage: Normal. (A töltési feszültség:
normális) A generátor teljesítménye normális,
nem észleltek problémát.
2. Chargingvoltage: Low. (A töltési feszültség:
alacsony) Ellenőrizze a generátor hajtószíjának
csúszását vagy elmozdulását. Ellenőrizze, hogy
a generátor és az akkumulátor közötti kapcsolat
megfelelő-e. Ha a hajtószíj és a csatlakozás is
jó állapotban van, kövesse a gyártó ajánlásait a
generátor hibaelhárításához.
3. Chargingvoltage: High. (A töltési feszültség: ma-
gas) Mivel a legtöbb autóváltó generátor belső
szabályozót használ, ezért a teljes generátort ki
kell cserélni (néhány régebbi autó típusnál külső
szabályozót használtak, ilyenkor közvetlenül azt
kell kicserélni). A szabályozó normál feszültsége
legfeljebb 14,7 ± 0,5 V. Ha a töltési feszültség
túl magas, az túlterheli az akkumulátort. Köve-
tkezésképpen az akkumulátor élettartama lerövi-
dül, ami meghibásodásokhoz vezet.
4. Novoltoutput (Nincs feszültségkimenet): A ge-
nerátorból nem észlelhető feszültségkimenet.
Ellenőrizze a generátor csatlakozókábelének,
a generátor hajtószíjának, valamint magának a
motornak az állapotát.
5. Diodetest (Diódateszt): A töltőáram hullámzá-
sának tesztelésével a tesztelő kideríti, hogy a
diódák megfelelő állapotban vannak-e. Ha a hu-
llámzás feszültsége túl magas, ez legalább egy
dióda károsodását jelenti. Ellenőrizze a diódát,
és cserélje ki azt.
Növelje a motor fordulats-
zámát 2 500 fordulat/perc
értékig, és tartsa ezt a se-
bességet 5 másodpercen
keresztül.
A tesztelő készülék me-
gkezdi a töltési feszült-
ség tesztelését, miután
észlelte a sebesség nö-
vekedését.
A tesztelés végén a tesz-
telő készülék megjeleníti
a tényleges töltési feszült-
séget voltban, valamint a
hullámteszt és a töltési
teszt eredményeit.
Végül ellenőrizze a gene-
rátor és az akkumulátor
közötti kapcsolatot, majd
ismételje meg a teszte-
lést.
Review Data (Adatok áttekintése)
Miután belépett a negyedik funkcióba, nyomja meg az
„OK” gombot a végső tesztelési eredményének meg-
tekintéséhez.
Print Data (Adatok nyomtatása)
A tesztelő készülék nyomtatójának segítségével nyom-
tassa ki a legfrissebb tesztelési eredményeket.
Export Data (Adatok exportálása)
Csatlakoztassa az akkumulátor-tesztert a számító-
géphez a Data Line segítségével, és exportálja az
adatokat. (A legújabb szoftver beszerzéséhez, kérjük,
vegye fel a kapcsolatot cégünkkel).
A PAPÍR CSERÉJE
1. Nyissa ki az átlátszó fedelet.
2. Helyezze a papírtekercset a nyomtató automati-
kus papíradagolójába.
3. Húzza lassan és egyenletesen a papírt a rekesz-
ben lévő tekercsből.
TOVÁBBI FUNKCIÓK
Nyomja meg a „Menü” gombot a további funkciók
eléréséhez.
• Nyelv:
• Kontinentális változat: hagyományos kínai,
japán, koreai, orosz és angol.
• Skandináv változat: angol, holland, svéd,
nn, norvég és dán.
• Nyugat-európai változat: angol, francia,
német, spanyol, olasz és lengyel.
• Időbeállítás: bármilyen időt beállíthat.
Töltési teszt. Növelje a
percenkénti fordulatszámot
(RPM) 2 500 fordulat/perc
értékre, és tartsa ezt a
sebességet 5 másodpercig. A
folytatáshoz nyomja meg az
ENTER gombot
Töltési teszt.
TESZTELÉS
FOLYAMATBAN
Töltési teszt.
Töltve 13,97 volt.
14,23 V. lemerült
Hullámteszt 15mV.
A töltés normális

· 29 ·
REF. 54040
РУКОВОДСТВО ПО ЭКСПЛУАТАЦИИ
RU
ОПИСАНИЕ ИЗДЕЛИЯ
Тестер аккумуляторных батарей с принтером
измеряет силу тока в амперах холодного пуска
стартерной батареи автомобиля, оценивает
состояние самой батареи, а также определяет
общие неисправности системы запуска автомобиля
и системы зарядки. Этот инструмент помогает
обслуживающему персоналу быстро и точно
определить проблему и обеспечить быстрый
ремонт автомобиля.
ОБЩИЕ УКАЗАНИЯ ПО ТЕХНИКЕ
БЕЗОПАСНОСТИ
ВНИМАНИЕ! Это изделие может подвергнуть
человека воздействию химических веществ,
включая мышьяк, который, согласно данным по
штату Калифорния, США, вызывает рак.
• Работа в непосредственной близости
от свинцово-кислотного аккумулятора
является опасной. При нормальной
работе аккумуляторные батареи выделяют
взрывоопасные газы. В связи с этим при
наличии любых сомнений крайне важно
каждый раз перед использованием тестера
внимательно читать данную инструкцию.
• Чтобы снизить риск взрыва батареи, следуйте
указаниям в данной инструкции, инструкции
производителя батареи и производителя
иного оборудования, используемого в
непосредственной близости от батареи.
Обращайте внимание на нанесенные на них
предупреждающие знаки.
• Не подвергайте тестер воздействию дождя и/
или снега.
ПРАВИЛА ЛИЧНОЙ БЕЗОПАСНОСТИ
• Кто-то обязательно должен находиться
рядом, чтобы в случае необходимости прийти
на помощь, когда другое лицо работает рядом
со свинцово-кислотным аккумулятором.
• На случай попадания аккумуляторной кислоты
на кожу, одежду или в глаза необходимо
держать наготове большое количество
пресной воды и мыла.
• Надевайте защитные очки и специальную
одежду.
• При попадании аккумуляторной кислоты на
кожу или одежду немедленно смойте ее водой
с мылом. При попадании кислоты в глаза
промойте их проточной холодной водой в
течение не менее десяти минут и немедленно
обратитесь за медицинской помощью.
• Не курите, находясь рядом с аккумулятором
или двигателем, и ни в коем случае не
допускайте образования искры или пламени.
• Проявите повышенную осторожность,
чтобы снизить риск падения на аккумулятор
металлического инструмента. Это может
привести к искрообразованию или короткому
замыканию аккумулятора или иных
электрических частей и вызвать взрыв.
• При работе со свинцово-кислотным
аккумулятором снимите с себя металлические
предметы, такие как кольца, браслеты,
цепочки и часы. Они могут создать ток
короткого замыкания, который может
быть достаточно высоким для того, чтобы
приварить кольцо или иной предмет к металлу
и вызвать сильный ожог.
Подготовка к тестированию
• Во время тестирования аккумуляторной
батареи убедитесь, что пространство вокруг
нее хорошо вентилируется.
• Очистите клеммы аккумулятора. Не
допускайте контакта частей, затронутых
коррозией, с глазами.
• Осмотрите аккумулятор на наличие
трещин, повреждений корпуса или крышки.
Не используйте тестер, если батарея
повреждена.
• Если батарея не является герметично,
добавляйте в каждую ячейку
дистиллированную воду, пока аккумуляторная
кислота не достигнет предусмотренного
производителем уровня. Это поможет вывести
из ячеек излишки газа. Не используйте
слишком много дистиллированной воды.
• Если для тестирования необходимо снять
аккумулятор с автомобиля, то обязательно
сначала отсоедините от аккумулятора
клемму заземления. Убедитесь, что все
дополнительное оборудование автомобиля
выключено и не вызовет искрообразования.
ПОРЯДОК ЭКСПЛУАТАЦИИ И ПРИМЕНЕНИЯ
• Перед проверкой аккумулятора в автомобиле
выключите зажигание, а также все
дополнительное оборудование. Закройте
двери автомобиля и крышку багажника.
• Обратите внимание, что пока тестер не
подключен к аккумулятору автомобиля, на
дисплее ничего не отображается.
• Убедитесь, что клеммы аккумулятора
чистые. При необходимости почистите их
проволочной щеткой. Подключите черные
выводы нагрузки к отрицательной клемме
аккумулятора автомобиля. Подключите
красный вывод нагрузки к положительной
клемме аккумулятора автомобиля.

· 30 ·
REF. 54040
ПРИМЕЧАНИЕ: При потере мощности
аккумулятора (например, автомобиль в
течение длительного времени находится в
режиме простоя, аккумулятор не заряжается
вовремя, приборы внешнего освещения не были
отключены, двери не были закрыты, что создает
серьезные потери и приводит к невозможности
запуска и т.д.) в процессе фактического
тестирования может появиться сообщение
с предложением замены аккумулятора. Для
получения необходимого аккумулятора следует
проконсультироваться с их производителями.
Cranking Test (Испытание запуска)
ПРИМЕЧАНИЕ: Это необходимо для облегчения
работы обслуживающего персонала и для
быстрого получения информации о состоянии
всей системы запуска в соответствии с данными.
Если запуск двигателя не удается обнаружить,
то, возможно, отсутствует выход зарядного
напряжения, необходимо проверить генератор
Подключайте только выводную часть клеммы.
Подключение железной части клеммы
приведет к неправильным результатам
тестирования.
• Загрузка бумаги: Откройте прозрачную
крышку. Вставьте бумагу в устройство для
автоматической подачи бумаги в принтер.
ПРИМЕЧАНИЕ: Каждый раз при подключении
тестера к аккумуляторной батарее выполняется
быстрая проверка кабеля, чтобы обеспечить
правильное подключение выходных кабелей к
датчикам в зажимных приспособлениях. Если
соединение установлено нормально, тестер
отобразит главный экран. Если соединение
некачественное, то на дисплее появится надпись
“CHECK CABLE” («Проверьте кабель»). В этом
случае проверьте соединения кабеля на наличие
видимых признаков повреждения, так как может
потребоваться повторное подключение зажимов
к батарее или замена концевой части кабеля.
Для правильного использования устройства
выполните следующие действия:
1. Подключите красный тестовый зажим к
аноду батареи, черный — к катоду, и тестер
включится автоматически. Проверить
должным образом напряжение батареи ниже
7,0 В постоянного тока невозможно.
2. Для продолжения нажмите кнопку OK.
3. В зависимости от вида тестера можно нажать
кнопки UP/DOWN (Вверх/Вниз) для выбора:
1. Battery Test
(Испытание аккумуляторной батареи)
2. Cranking Test (Испытание запуска)
3. Charging Test (Испытание зарядки)
4. Review Test (Обзор)
5. Print Data (Печать данных)
6. Export Data (Экспорт данных)
Battery Test (Испытание аккумуляторной батареи)
Выберите Battery Test и нажмите кнопку OK, чтобы
продолжить:
• Battery Type (Тип аккумуляторной батареи):
выберите тип аккумулятора, обычно это
“Regular Flooded” (стандартный с жидким
электролитом).
• Input testing standard (Введите стандарт
тестирования): выберите стандарт, который
указан на лицевой стороне батареи,
например, CCA, BCI, DIN. Если информаця
о стандарте отсутствует, то можно выбрать
стандарт GB. Выбор стандартов GB приведет
к небольшим допустимым отклонениям.
• Input rated capacity (Введите номинальную
мощность): на лицевой части батареи
указаны стандарты пускового тока, например,
BCI/300A.
• Затем нажмите кнопку OK, чтобы начать тест.
После ввода второй
функции тестирования
системы запуска
нажмите клавишу OK.
При запуске двигатель
в соответствии с
запросом тестера
автоматически
выполнит тест на
запуск и отобразит
результат.
В общем случае
значение напряжения
при запуске ниже
9,6 В считается
ненормальным, а выше
9,6 В — нормальным.
Результат испытания
тестером включает
в себя фактическое
напряжение запуска
и фактическое время
запуска.
Если испытание
запуска двигателя
не соответствует
норме, одновременно
будет отображен
результат испытания
аккумуляторной
батареи.
Испытание запуска.
Запустите двигател
Испытание запуска.
Определено оборотов
в минуту
Испытание запуска.
Время 1758 мс.
Запуск нормальный
10,56 В
Испытание запуска.
Время 1020 мс.
Запуск низкий
9,12 В

· 31 ·
REF. 54040
При входе в режим
испытания зарядки тестер
отобразит надпись “Char-
ging Test”.
ПРИМЕЧАНИЕ: Во
время испытания не
выключайте двигатель.
Все электрическое
оборудование и
приборы находятся в
выключенном состоянии.
Включение-выключение
любого электрического
устройства на
автомобиле во время
испытания влияет на
точность результатов.
Увеличивайте скорость
вращения двигателя
до 2500 оборотов, и
удерживайте данную
скорость на протяжении 5
секунд.
Тестер начинает испытание
зарядного напряжения
после обнаружения
увеличения числа оборотов.
По завершении испытания
тестер отображает
эффективное зарядное
напряжение в вольтах,
результаты испытаний на
пульсацию и на зарядку.
В завершение
проверьте соединение
между генератором и
аккумуляторной батареей,
затем проведите повторное
испытание.
Charging Test (Испытание зарядки)
Результат испытания зарядки
1. Charging voltage: Normal. (Зарядное
напряжение: нормальное) Мощность
генератора в норме, проблем не обнаружено.
2. Charging voltage: Low. (Зарядное
напряжение: низкое) Проверьте ремень
привода генератора: не проскальзывает
ли он или не смещается. Проверьте, в
норме ли соединение между генератором и
аккумуляторной батареей. Если и приводной
ремень, и соединение находятся в исправном
состоянии, то для устранения неисправности
генератора следуйте рекомендациям
производителя.
3. Charging voltage: High. (Зарядное
напряжение: высокое) Поскольку в
большинстве автомобильных генераторов
используется внутренний регулятор, то
необходимо заменить генератор в сборе (в
некоторых автомобилях старого образца
используется внешний регулятор, тогда
замените непосредственно его). Нормальное
напряжение регулятора составляет максимум
14,7±0,5 В. Если зарядное напряжение
слишком высокое, это приведет к перегрузке
батареи. Следовательно, срок ее службы
сократится, что приведет к возникновению
неполадок.
4. No volt output (Отсутствует выход напряжения):
Выходное напряжение от генератора
не обнаружено. Проверьте состояние
соединительного кабеля генератора,
приводного ремня генератора и двигателя.
5. Diode test (Проверка диодов): С помощью
испытания пульсаций зарядного тока
тестер выясняет, в норме ли диоды. Если
напряжение пульсаций слишком высокое,
это свидетельствует о повреждении хотя бы
одного диода. Проверьте диод и замените его.
Review Data (Обзорные данные)
После ввода четвертой функции нажмите кнопку
OK, чтобы просмотреть окончательный результат
испытаний.
Print Data (Печать данных)
С помощью принтера тестера распечатайте
последний результат испытаний.
Export Data (Экспорт данных)
Подключите тестер аккумуляторных батарей к
компьютеру с помощью информационной шины
(Data Line) и экспортируйте данные. (Чтобы
получить новейшее программное обеспечение,
свяжитесь с нашей компанией).
ЗАМЕНА БУМАГИ
1. Откройте прозрачную крышку.
2. Вставьте сменный рулон бумаги в устройство
для автоматической подачи бумаги в принтер.
3. Медленно и ровно потяните бумагу из рулона
в отделении.
ДОПОЛНИТЕЛЬНЫЕ ФУНКЦИИ
Для получения доступа к дополнительной функции
нажмите “Menu”.
• Язык:
• Континентальная версия: Традиционный
китайский, японский, корейский, русский
и английский языки.
• Скандинавская версия: Английский,
нидерландский, шведский, финский,
норвежский и датский языки.
• Западноевропейская версия:
Английский, французский, немецкий,
испанский, итальянский и польский
языки.
• Установка времени: настройте любое время.
Испытание зарядки.
ПРОВОДИТСЯ
ИСПЫТАНИЕ
ЗАРЯДКИ
Испытание зарядки.
Увеличьте количество
оборотов в минуту
(RPM) до 2500 об/мин и
удерживайте в течение 5
секунд. Нажмите ENTER,
чтобы продолжить
Испытание зарядки.
ТЕСТИРУЕТСЯ
Испытание зарядки.
Заряжено 13,97 В.
Разряжено 14,23 В.
Пульсация 15мВ.
Зарядка нормальная

· 32 ·
REF. 54040
INSTRUKCJA OBSŁUGI
PL
OPIS PRODUKTU
Tester akumulatorów z drukarką mierzy natężenie
prądu w amperach zimnego rozruchu akumulatora
rozruchowego samochodu, ocenia stan samego aku-
mulatora, a także identykuje typowe usterki układu
rozruchowego samochodu i systemu ładowania. To
narzędzie pomaga personelowi serwisowemu szybko
i dokładnie zidentykować problem oraz zapewnić szy-
bką naprawę samochodu.
OGÓLNE INSTRUKCJE BEZPIECZEŃSTWA
UWAGA! Ten produkt może narazić osobę na
działanie chemikaliów, w tym arsenu, który według
stanu Kalifornia w USA powoduje raka.
• Praca w pobliżu akumulatora kwasowo-ołowiowe-
go jest niebezpieczna. Podczas normalnego
działania akumulatory emitują wybuchowe gazy.
W związku z tym, w razie jakichkolwiek wątpli-
wości, niezwykle ważne jest dokładne przeczyta-
nie tej instrukcji za każdym razem przed użyciem
testera.
• Aby zmniejszyć ryzyko wybuchu akumulatora,
należy postępować zgodnie ze wskazówkami
zawartymi w niniejszej instrukcji, instrukcji produ-
centa akumulatora i producenta innych urządzeń
używanych w pobliżu akumulatora. Zwróć uwagę
na umieszczone na nich znaki ostrzegawcze.
• Nie wystawiaj testera na działanie deszczu i / lub
śniegu.
ZASADY BEZPIECZEŃSTWA OSOBISTEGO
• Ktoś musi być w pobliżu, aby w razie potrzeby
przyjść z pomocą, gdy druga osoba pracuje w
pobliżu akumulatora kwasowo-ołowiowego.
• W przypadku kontaktu kwasu akumulatorowego
ze skórą, ubraniami lub oczami konieczne jest
przygotowanie dużej ilości świeżej wody i mydła.
• Noś okulary ochronne i specjalną odzież.
• Jeśli kwas akumulatorowy dostanie się na skórę
lub odzież, natychmiast spłucz go mydłem i
wodą. Jeśli kwas dostanie się do oczu, przepłucz
je bieżącą zimną wodą przez co najmniej dzie-
sięć minut i natychmiast uzyskaj pomoc lekarską.
• Nie palić w pobliżu akumulatora lub silnika i w
żadnym wypadku nie dopuszczać do powstania
iskry lub płomienia.
• Zachowaj szczególną ostrożność, aby zmnie-
jszyć ryzyko upadku na baterię metalowego nar-
zędzia. Może to prowadzić do iskrzenia lub zwar-
cia akumulatora lub innych części elektrycznych i
spowodować wybuch.
• Podczas pracy z akumulatorem kwa-
sowo-ołowiowym zdejmij metalowe przedmioty,
takie jak pierścionki, bransoletki, łańcuchy i ze-
garki. Mogą wytwarzać prąd zwarciowy, który
może być wystarczająco wysoki, aby przys-
pawać pierścień lub inny przedmiot do metalu i
powodować poważne oparzenia.
Przygotowanie do testów
• Podczas testowania akumulatora upewnij się, że
przestrzeń wokół niego jest dobrze wentylowana.
• Wyczyść zaciski akumulatora. Nie pozwól, aby
części dotknięte korozją zetknęły się z oczami.
• Sprawdź akumulator pod kątem pęknięć, uszko-
dzeń obudowy lub pokrywy. Nie używaj testera,
jeśli bateria jest uszkodzona.
• Jeśli bateria nie jest szczelna, dodaj wodę des-
tylowaną do każdej komórki, aż kwas akumu-
latorowy osiągnie poziom przewidziany przez
producenta. Pomoże to wyprowadzić z komórek
nadmiar gazu. Nie używaj zbyt dużej ilości wody
destylowanej.
• Jeśli do testowania konieczne jest usunięcie aku-
mulatora z samochodu, należy najpierw odłączyć
zacisk uziemiający od akumulatora. Upewnij się,
że wszystkie dodatkowe wyposażenie samocho-
du jest wyłączone i nie spowoduje iskier.
PROCEDURA OBSŁUGI I STOSOWANIA
• Przed sprawdzeniem akumulatora w samocho-
dzie wyłącz zapłon, a także cały dodatkowy
sprzęt. Zamknij drzwi samochodu i pokrywę ba-
gażnika.
• Należy pamiętać, że dopóki tester nie jest po-
dłączony do akumulatora samochodu, nic nie
jest wyświetlane na wyświetlaczu.
• Upewnij się, że zaciski akumulatora są czyste.
W razie potrzeby wyczyść je szczotką drucianą.
Podłącz czarne przewody obciążenia do ujem-
nego zacisku akumulatora samochodu. Podłącz
czerwony przewód obciążenia do dodatniego
zacisku akumulatora samochodu. Podłącz tylko
część wyjściową zacisku. Podłączenie żelaznej
części zacisku spowoduje nieprawidłowe wyniki
testu.
• Ładowanie papieru: Otwórz przezroczystą
pokrywę. Włóż papier do automatycznego poda-
jnika papieru do drukarki.
UWAGA: Za każdym razem, gdy tester jest podłąc-
zony do akumulatora, przeprowadzany jest szybki test
kabla, aby zapewnić prawidłowe podłączenie kabli
wyjściowych do czujników w oprawach zaciskowych.
Jeśli połączenie zostanie nawiązane normalnie, tes-
ter wyświetli ekran główny. Jeśli połączenie jest złej
jakości, na wyświetlaczu pojawi się napis “CHECK
CABLE” (“Sprawdź kabel”). W takim przypadku spraw-
dź połączenia kablowe pod kątem widocznych oznak
uszkodzenia, ponieważ może być konieczne ponowne

· 33 ·
REF. 54040
podłączenie zacisków do akumulatora lub wymiana
końcówki kabla.
Aby prawidłowo korzystać z urządzenia, wykonaj nas-
tępujące kroki:
1. Podłącz czerwony zacisk testowy do anody aku-
mulatora, сzarny - do katody, a tester włączy się
automatycznie. Nie można prawidłowo spraw-
dzić napięcia akumulatora poniżej 7,0 V DC.
2. Aby kontynuować, kliknij przycisk OK.
3. W zależności od rodzaju testera można nacisnąć
przyciski UP/DOWN (Góra/Dół), aby wybrać:
1. Battery Test
(Test baterii akumulatorowej)
2. Cranking Test (Test uruchamiania)
3. Charging Test (Test ładowania)
4. Review Test (Przegląd)
5. Print Data (Drukowanie danych)
6. Export Data (Eksport danych)
Battery Test (Test baterii akumulatorowej)
Wybierz Battery Test i kliknij przycisk OK, aby konty-
nuować:
• Battery Type (Typ baterii akumulatorowej): wy-
bierz typ baterii, zwykle jest to “Regular Floode-
d”(standardowa z ciekłym elektrolitem).
• Input testing standard (Wprowadź standard tes-
towy): wybierz standard wymieniony na przedniej
stronie akumulatora, taki jak CCA, BCI, DIN. Jeśli
nie ma informacji o standardzie, możesz wybrać
standard GB. Wybór standardów GB spowoduje
niewielkie dopuszczalne odchylenia.
• Input rated capacity (Wprowadź moc znamio-
nową): na przedniej części akumulatora znajdu-
ją się standardy prądu rozruchowego, takie jak
BCI/300A.
• Następnie kliknij przycisk OK, aby rozpocząć
test.
UWAGA: W przypadku utraty mocy akumulatora (np.
samochód przez długi czas jest w trybie bezczynności,
akumulator nie ładuje się na czas, oświetlenie otocze-
nia nie zostało wyłączone, drzwi nie zostały zamknięte,
co powoduje poważne straty i powoduje niemożność
uruchomienia itp.) podczas rzeczywistego procesu
testowania może pojawić się komunikat z prośbą o wy-
mianę akumulatora. Aby uzyskać niezbędną baterię,
należy skonsultować się z producentami.
Cranking Test (Test uruchamiania)
UWAGA: Jest to konieczne, aby ułatwić prace person-
elu technicznego i szybko uzyskać informacje o stanie
całego systemu rozruchowego zgodnie z danymi. Jeśli
rozruch silnika nie może zostać wykryty, możliwe jest,
że nie ma wyjścia napięcia ładowania, należy spraw-
dzić alternator.
Charging Test (Test ładowania)
Po wejściu w tryb tes-
tu ładowania tester
wyświetli komunikat
“Charging Test”.
UWAGA: Podczas tes-
tu nie wyłączaj silnika.
Wszystkie urządzenia
i sprzęt elektryczny są
w stanie wyłączonym.
Włączanie i wyłączanie
dowolnego urządzenia
elektrycznego w samo-
chodzie podczas testu
wpływa na dokładność
wyników.
Zwiększ prędkość obro-
tową silnika do 2500
obrotów i utrzymaj tę
prędkość przez 5 se-
kund.
Po uruchomieniu silnik
zgodnie z zapytaniem
testera automatycz-
nie wykona test uru-
chamiania i wyświetli
wynik.
Ogólnie rzecz biorąc,
wartość napięcia
rozruchowego poniżej
9,6 V jest uważana
za nienormalną, a
powyżej 9,6 V jest
uważana za normalną.
Wynik testu testera
obejmuje rzeczywiste
napięcie rozruchowe
i rzeczywisty czas
rozruchu.
Jeśli test rozruchu
silnika nie spełnia
normy, wynik testu
akumulatora zostanie
wyświetlony w tym
samym czasie.
Po wprowadzeniu dru-
giej funkcji testowania
systemu startowego
naciśnij klawisz OK. Test uruchamiania.
Uruchom silnik
Test uruchamiania.
Określono obrotów na
minutę
Test uruchamiania.
Czas 1758 ms.
Rozruch normalny
10,56 V
Test uruchamiania.
Czas 1020 ms.
Uruchomienie niskie
9,12 V
Test ładowania.
PRZEPROWAD-
ZANY JEST TEST
ŁADOWANIA
Test ładowania. Zwiększ
obroty na minutę (RPM) do
2500 obr./min i utrzymaj
przez 5 sekund. Naciśnij
ENTER, aby kontynuować

REF. 54040
Wynik testu ładowania
1. Charging voltage: Normal. (Napięcie ładowania:
normalne) Moc alternatora jest normalna, nie
wykryto żadnych problemów.
2. Charging voltage: Low. (Napięcie ładowania: nis-
kie) Sprawdź pasek napędowy alternatora: czy
nie ślizga się lub nie przesuwa. Sprawdź, czy
połączenie między alternatorem a baterią aku-
mulatorową jest normalne. Jeśli zarówno pasek
napędowy, jak i połączenie są w dobrym stanie,
postępuj zgodnie z zaleceniami producenta, aby
rozwiązać problem alternatora.
3. Charging voltage: High. (Napięcie ładowania:
wysokie) ponieważ większość alternatorów
samochodowych wykorzystuje wewnętrzny
alternator, zespół alternatora musi zostać wy-
mieniony (niektóre stare samochody używają
zewnętrznego regulatora, w takim razie wymień
go bezpośrednio). Normalne napięcie regulatora
wynosi maksymalnie 14,7±0,5 V. Jeśli napięcie
ładowania jest zbyt wysokie, spowoduje to pr-
zeciążenie akumulatora. W związku z tym jego
żywotność zostanie skrócona, co doprowadzi do
usterek.
4. No volt output (Brak napięcia wyjściowego): Nie
wykryto napięcia wyjściowego z alternatora.
Sprawdź stan kabla połączeniowego alternatora,
paska napędowego alternatora i silnika.
5. Diode test (Sprawdzanie diod): Za pomocą testu
tętnienia prądu ładowania tester sprawdza, czy
diody są normalne. Jeśli napięcie tętnienia jest
zbyt wysokie, oznacza to uszkodzenie co najm-
niej jednej diody. Sprawdź diodę i wymień ją.
Tester rozpoczyna test
napięcia ładowania po
wykryciu wzrostu prę-
dkości obrotowej.
Po zakończeniu tes-
tu tester wyświetla
skuteczne napięcie
ładowania w woltach,
wyniki testu tętnienia i
ładowania.
Na koniec sprawdź
połączenie między alter-
natorem a baterią aku-
mulatorową, a następ-
nie ponownie przetestuj.
Review Data (Dane przeglądowe)
Po wprowadzeniu czwartej funkcji kliknij przycisk OK,
aby wyświetlić ostateczny wynik testu.
Print Data (Drukowanie danych)
Za pomocą drukarki testera wydrukuj ostatni wynik
testu.
Export Data (Eksport danych)
Podłącz tester akumulatorów do komputera za pomo-
cą magistrali informacyjnej (Data Line) i wyeksportuj
dane. (Aby uzyskać najnowsze oprogramowanie,
skontaktuj się z naszą rmą).
WYMIANA PAPIERU
1. Otwórz przezroczystą pokrywę.
2. Włóż wymienną rolkę papieru do automatyczne-
go podajnika papieru do drukarki.
3. Powoli i równomiernie wyciągnij papier z rolki w
komorze.
DODATKOWE FUNKCJE
Aby uzyskać dostęp do dodatkowej funkcji, kliknij
“Menu”.
• Język:
• Wersja kontynentalna: chiński tradycyjny,
japoński, koreański, rosyjski i angielski.
• Wersja skandynawska: angielski, holen-
derski, szwedzki, ński, norweski i duński.
• Wersja zachodnioeuropejska: angielski,
francuski, niemiecki, hiszpański, włoski i
polski.
• Ustawienie czasu: dostosuj w dowolnym mo-
mencie.
Test ładowania.
TESTUJE SIĘ
Test ładowania.
Naładowano 13,97 V
Rozładowano 14,23 V
Pulsacja 15mV.
Ładowanie normalne
C/ Rejas, 2 - P5, Ocina 17
28821 Coslada (Madrid)
jbm@jbmcamp.com
Tel. +34 972 405 721
Fax. +34 972 245 437
-
 1
1
-
 2
2
-
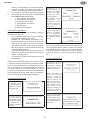 3
3
-
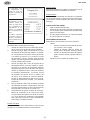 4
4
-
 5
5
-
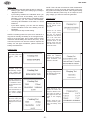 6
6
-
 7
7
-
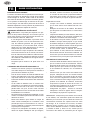 8
8
-
 9
9
-
 10
10
-
 11
11
-
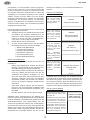 12
12
-
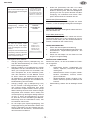 13
13
-
 14
14
-
 15
15
-
 16
16
-
 17
17
-
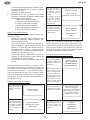 18
18
-
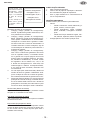 19
19
-
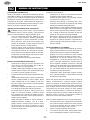 20
20
-
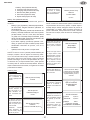 21
21
-
 22
22
-
 23
23
-
 24
24
-
 25
25
-
 26
26
-
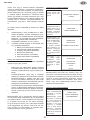 27
27
-
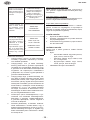 28
28
-
 29
29
-
 30
30
-
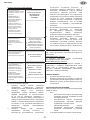 31
31
-
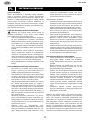 32
32
-
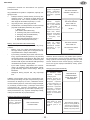 33
33
-
 34
34


en otros idiomas
- français: JBM 54040 Mode d'emploi
- italiano: JBM 54040 Guida utente
- Nederlands: JBM 54040 Gebruikershandleiding
- português: JBM 54040 Guia de usuario
- polski: JBM 54040 instrukcja
- română: JBM 54040 Manualul utilizatorului