Conair GMT100RQCS Manual de usuario
- Categoría
- Recortadoras de precisión
- Tipo
- Manual de usuario

TAKING CARE
OF YOUR TRIMMER
OILING THE BLADES
About once a month you should oil the
trimmer blades with the oil provided in your
kit. It is best to do this over a piece of
newspaper. Turn the trimmer on and hold
it so that the blades are pointed downward.
Spread one drop of oil across the blades,
then turn the trimmer off and wipe away the
excess oil with a soft cloth.
Be careful not to use too much oil and don’t oil your
trimmer more than necessary, as this could damage
the motor. (Never attempt to oil the motor bearing as
it is permanently lubricated.)
After oiling the blades, replace the trimmer and oil
packet in the trimmer storage stand.
BLADE CARE
Because the trimmer blades are precision made
for a very special use, they should always be
handled with care. This trimmer comes with
a removable blade set for easy cleaning. To
remove the blades follow these steps:
1.Make sure the trimmer is off, and the bat-
teries have been removed.
2.With the power switch facing you, gently push
up under the blades until they pop off.
3.To replace, align the tabs on the bottom of
the blades inside the mounting area on the
back of the trimmer and push down until the
blades snap into place.
Each time you finish using the trimmer, take the
cleaning brush provided and brush away any
loose hair that has collected in the blades. Then
store the trimmer in its storage stand until the
next use.
Be especially careful when changing or
adjusting blades. When you have your
trimmer serviced, be sure that all blades are
sharpened or replaced at the same time.
To promote the long life of the appliance, use
your trimmer only for the purpose intended
by the manufacturer- to trim your beard and
mustache.
GROWING A BEARD
AND MUSTACHE
There are three key factors that deter-
mine which beard or mustache style is most
suitable for your face:
1. The shape and dimensions of your face.
2. The natural growth of your beard/mustache.
3. The thickness of your beard/mustache.
If you are unsure of the type of beard or mus-
tache that most suits your face, speak with a
professional hair stylist and ask for an opinion
on what style would be best.
TYPES OF BEARDS/MUSTACHES
Once your beard or mustache has been styled,
it is essential that you maintain its appearance.
To do this, use your shaper to trim your beard/
mustache weekly.
For the best trimming results, your beard should
be slightly damp (not wet) before using the trim-
mer. This will prevent the trimmer from removing
more hair than desired.
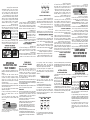
GETTING STARTED
OUTLINING YOUR BEARD
1. It is always best to begin with a clean, slightly
damp beard.
2. After you have combed
through your beard in the
direction it grows natu-
rally, you will want to out-
line the desired shape,
beginning under your jawline.
3. Begin defining your beard’s shape under your
chin and work upward on each side of your face
toward your ears. Then define the upper outline
of your beard across your cheeks, past your side-
burns and toward your hairline.
NOW YOU’RE READY
TO TRIM YOUR BEARD
1. Your trimmer adjusts to five positions so you
can have a beard length from 1/8” (shortest) to
5/8” (longest).
2. To use the 5-posi-
tion comb, slide it over
the trimmer blades
and snap down into
position. At first, until
you become familiar
with the adjustments, use the longest trim setting
(5/8”). (You can always go back and make your
beard a little shorter.)
3. Begin trimming your beard using smooth,
even strokes. Start with your sideburns and work
downward toward your chin. (Never attempt to trim
against the natural growth of your beard, because the
hair will be cut too short.)
4. If you decide you want a closer trim, you can
now adjust the 5-position comb to a shorter
setting (such as 1/2” or 3/8”) and go over
your beard again until you achieve the desired
length.
OPERATING
INSTRUCTIONS FOR
YOUR TRIMMER
1. Remove the battery compartment cover by
pushing in and down toward the bottom of the
trimmer.
2. Align the two “AA”* batteries with the
positive and negative positions indicat-
ed inside the battery compartment. Being
careful not to bend the clips, insert the
negative end of each battery first so it will slip
easily into position.
3. Return the battery cover to its original posi-
tion by pushing it in and up until you hear a small
click as it locks into place.
4. To use your trimmer, push ON/OFF switch
upwards to ON position.
5. After you finish using your trimmer, push
down on the ON/OFF switch to turn the
trimmer off.
6. For your convenience, the trimmer comes
with a storage base to hold the trimmer and
accessories.
*Requires 2 AA batteries (not included). We rec-
ommend using alkaline batteries in your trimmer
because they last longer.
On/Off Switch
CUIDADO DE SU
RECORTADOR
LUBRICACIÓN DE LAS HOJAS
Aproximadamente una vez por mes debe lubricar
las hojas del recortador con el aceite provisto en
su equipo. Lo mejor es hacerlo sobre una hoja
de periódico. Encienda el recortador y sosténgalo
de manera que las hojas apunten hacia abajo.
Distribuya una gota de aceite a lo largo de las
mismas, luego apague el recortador y quite el
exceso de aceite con un paño suave.
Tenga cuidado de no usar demasiado aceite y no
lubrique su recortador más de lo necesario, ya
que puede dañar el motor. (Nunca intente lubri-
car el cojinete del motor, ya que éste se lubrica
permanentemente).
Luego de lubricar las hojas, vuelva a colocar el
recortador y el envase de aceite en el soporte.
CUIDADO DE LAS HOJAS.
Dado que las hojas son instrumentos de pre-
cisión fabricados para un uso muy específico,
deberán tratarse siempre con cuidado. Este
recortador se entrega con un conjunto remov-
ible de hojas para facilitar su limpieza. Para
retirar las hojas, siga los pasos descritos a
continuación:
1. Asegúrese que el recortador está apagado y
que se han quitado las pilas.
2. Con el interruptor de encendido mirando
hacia usted, empuje las hojas suavemente
hacia arriba hasta que éstas se desprendan.
3. Para volver a colocarlas, alinee las lengüe-
tas de la parte inferior de las hojas dentro
del área de montaje en la parte trasera del
recortador y empuje hacia abajo hasta que
traben en su posición.
Cada vez que termine de usar el recortador,
tome el cepillo de limpieza provisto y quite
cualquier pelo suelto que se haya acumulado
en las hojas. A continuación, guarde el
recortador en su soporte hasta que vuelva a
utilizarlo.
Tenga especial cuidado cuando cambie o ajuste
hojas. Cuando envíe su recortador, a reparar,
asegúrese que todas las hojas se afilen o reem-
placen al mismo tiempo.
Para prolongar la vida útil del aparato, use su
recortador únicamente para el propósito para el
que fue fabricado – el de recortar su barba y su
bigote.
LA BARBA Y EL BIGOTE APROPIADOS
Existen tres factores clave que determinan qué
estilo de barba y bigote es el más apropiado
para su rostro:
1. La forma y dimensiones de su rostro.
2. El crecimiento natural de su barba o bigote.
3. La espesura de su barba o bigote.
Si no está seguro respecto a qué tipo de barba
o bigote es el más adecuado para su cara, hable
con un peluquero y pídale su opinión sobre el
estilo que más le conviene.
TIPOS DE BARBAS Y BIGOTES
Una vez que le ha dado forma a su barba o
bigote, es esencial que mantenga su aspecto.
Para ello, use su modelador para recortarla/o
semanalmente.
Para obtener los mejores resultados, debe
humedecer (no mojar) ligeramente su barba.
Esto evitará que el recortador quite más pelo
que el deseado.
PRIMEROS PASOS
DELINEACIÓN DE SU BARBA
1. Siempre es mejor comenzar con la barba
limpia y ligeramente humedecida.
2. Una vez que la ha pei-
nado en la dirección de su
crecimiento natural, querrá
delinear la forma deseada,
comenzando bajo la línea
de la mandíbula.
3. Comience definiendo la forma de su barba
bajo la barbilla y trabaje hacia arriba a ambos
lados de la cara en dirección hacia sus orejas.
Luego defina el contorno superior a lo largo de
sus mejillas, más allá de sus patillas y hacia el
nacimiento del cabello.
AHORA ESTÁ LISTO PARA
RECORTAR SU BARBA
1. Su recortador se ajusta en cinco posiciones,
por lo que puede obtener longitudes de barba
entre 3 mm (1/8") (la más corta) y 16 mm
(5/8") (la más larga).
2. Para usar el peine
guía de 5 posiciones,
deslícelo sobre las
hojas de su recorta-
dor y trábelo hacia
abajo en su posición.
Al principio, y hasta que se familiarice con los
ajustes, use la posición de recorte más larga
(16 mm ó 5/8"). (Siempre tiene la posibilidad
de acortar su barba).
3. Comience a recortar su barba mediante
pasadas suaves y parejas. Empiece por las
patillas y siga hacia abajo en dirección hacia
la barbilla. (Nunca intente recortar en sentido
contrario a la dirección natural de crecimiento,
dado que cortará el pelo demasiado corto).
4. Si decide que quiere la barba más corta,
ahora puede ajustar el peine guía de 5 posi-
ciones a una opción más corta (12 mm ó ½"
o bien 9 mm ó 3/8") y pasarlo nuevamente
hasta alcanzar el largo deseado.
INSTRUCCIONES
DE MANEJO DE SU
RECORTADOR
1. Quite la tapa del compartimiento de pilas
presionando hacia adentro y abajo de la parte
inferior de su recortador.
2. Alinee las dos pilas AA* con las posiciones
positiva y negativa indicadas dentro del com-
partimiento de pilas. Cuidando de no doblar
los clips, inserte en primer lugar el extremo
negativo de cada pila para que éstas se desli-
cen fácilmente a su posición.
3. Vuelva a colocar la tapa del compartimiento
en su posición original presionándola hacia
adentro y arriba hasta escuchar un clic que
indica que se ha trabado en su posición.
4. Para usar su recortador, deslice el inter-
ruptor ENCENDIDO/APAGADO hacia arriba a la
posición ENCENDIDO.
5. Luego de usarlo, apague el recortador desli-
zando el interruptor ENCENDIDO/APAGADO
hacia abajo a la posición APAGADO.
6. Para guardarlo más cómodamente, el
recortador viene con un soporte que sostiene
el aparato y los accesorios.
* Requiere 2 pilas AA (no incluidas). Recomendamos
usar pilas alcalinas en su recortador, porque son de
mayor duración.
Interruptor ENCENDIDO/APAGADO

TO TRIM YOUR MUSTACHE
1. For best results, start with a clean, slightly
damp mustache.
2. Comb through your
mustache in the direc-
tion it grows.
3. Place the 5-position
comb over the trimmer
blades and snap it into position. It is a good
idea to start with the longest trim setting adjust-
ment. (You can always go back and cut your
mustache more closely with a shorter setting.)
ALWAYS TRIM YOUR MUSTACHE
FROM THE TOP DOWN
After your mustache has
been trimmed to the
desired length, remove
the 5-way trimming
attachment and, using the
blades only, define the outline of the bottom of
your mustache.
USING THE NOSE AND EAR
TRIMMER ATTACHMENT
Make sure the trimmer on/off switch is in
the “off” position. Detach the normal trim-
ming blade (see section on Blade Care). Fit
the tab on the back of the nose trimmer into
the notch inside the trimmer head. Push the
nose trimmer towards the front of the trim-
mer until it snaps into place. Turn the on/off
switch to the “on” position. Gently use the
trimmer to trim away long nose hairs and
ear hairs being very careful not to insert
the trimmer too far into the ear or nose. The
LIMITED TWO YEAR WARRANTY
Conair will repair or replace, at our option, your
appliance free of charge for 24 months from the
date of purchase if the appliance is defective in
workmanship or materials.
To obtain service under this warranty, return the
defective product to the service center nearest
you, together with your sales slip and $3.00 for
postage and handling. California residents need
only provide proof of purchase and should call
1-800-3-CONAIR for shipping instructions. In the
absence of a receipt, the warranty period shall be
24 months from the date of manufacture.
ANY IMPLIED WARRANTIES, OBLIGATIONS, OR
LIABILITIES, INCLUDING BUT NOT LIMITED TO THE
IMPLIED WARRANTY OF MERCHANTABILITY AND
FITNESS FOR A PARTICULAR PURPOSE, SHALL
BE LIMITED IN DURATION TO THE 24 MONTH
DURATION OF THIS WARRANTY. Some states do not
allow limitations on how long an implied warranty lasts,
so the above limitations may not apply to you.
IN NO EVENT SHALL CONAIR BE LIABLE FOR
ANY SPECIAL, INCIDENTAL, OR CONSEQUENTIAL
DAMAGES FOR BREACH OF THIS OR ANY OTHER
WARRANTY, EXPRESS OR IMPLIED, WHATSOEVER.
Some states do not allow the exclusion or limita-
tion of special, incidental, or consequential dam-
ages, so the above limitation may not apply to you.
This warranty gives you specific legal rights, and
you may also have other rights which vary from
state to state.
©Conair 2006
Service Center:
Conair Corporation
Service Department
7475 North Glen Harbor Blvd.
Glendale, AZ 85307
06PG10117
PARA RECORTAR SU BIGOTE
1. Para obtener los mejores resultados,
comience con un bigote limpio, ligeramente
humedecido.
2. Peine el bigote en la
dirección de su creci-
miento.
3. Coloque el peine guía
de 5 posiciones sobre las
hojas del recortador y trábelo hacia abajo en
su posición. Es una buena idea comenzar con
el ajuste de recorte más largo. (Siempre tiene
la posibilidad de acortarlo con un ajuste más
corto).
RECORTE SIEMPRE SU BIGOTE
DESDE ARRIBA HACIA ABAJO
Una vez que su bigote
ha sido recortado al largo
deseado, remueva el peine
de 5 posiciones y, usando
las navajas solamente,
defina la línea exterior de
la parte baja del bigote.
CORTAR EL PELO DE LA NARIZ Y
DE LOS OÍDOS
Asegúrese que el aparato esté apagado
(“OFF”). Saque las cuchillas (véase la sección
de mantenimiento de las cuchillas). Coloque
la lengüeta ubicada en la parte trasera del
accesorio para el pelo de la nariz y los oídos en
la hendidura ubicada en la parte posterior de
la cortadora. Oprima el accesorio para el pelo
de la nariz y de los oídos hacia adelante hasta
sujetarlo. Encienda el aparato (“ON”). Corte el
pelo de la nariz o de los oídos suavemente,
GMT100RQCS
RECORTADOR DE BARBA Y BIGOTE
GARANTÍA LIMITADA
POR DOS AÑOS
Conair reparará o reemplazará su aparato, a nuestra
elección, sin cargo por 24 meses a partir de la fecha de
compra, si el mismo presenta defectos de mano de obra
o en los materiales.
Para obtener servicio técnico bajo esta garantía, devuelva
el producto defectuoso al centro de servicio técnico más
cercano a su domicilio, junto con su factura de compra y
US$ 3,00 para franqueo postal y gastos administrativos.
Los residentes de California sólo necesitan presentar una
prueba de compra y deben llamar al 1-800-3-CONAIR
para recibir instrucciones de envío. Ante la ausencia de un
recibo, el período de garantía será de 24 meses a partir de
la fecha de manufactura.
LA DURACIÓN DE TODA GARANTÍA, OBLIGACIÓN O
RESPONSABILIDAD IMPLÍCITA, INCLUIDA PERO
NO LIMITADA A LA GARANTÍA IMPLÍCITA DE
COMERCIABILIDAD O APTITUD PARA UN PROPÓSITO
EN PARTICULAR, ESTARÁ LIMITADA A LA DURACIÓN
DE 24 MESES DE LA PRESENTE GARANTÍA. Algunos
Estados no aceptan limitaciones respecto a la duración de
una garantía implícita, por lo tanto las limitaciones antes
mencionadas pueden no corresponderle a usted.
CONAIR NO SERÁ RESPONSABLE EN NINGÚN CASO
POR CUALQUIER DAÑO ESPECIAL, INCIDENTAL O
CONSECUENCIAL DEBIDO AL INCUMPLIMIENTO DE
ÉSTA O DE CUALQUIER OTRA GARANTÍA, EXPLÍCITA
O IMPLÍCITA. Algunos estados no aceptan la exclusión
o limitación de daños especiales, incidentales o conse-
cuenciales y por lo tanto, la limitación antes mencionada
puede no corresponderle a usted. Esta garantía le otorga
derechos legales específicos y usted también podrá tener
otros derechos, los que varían de un Estado al otro.
©Conair 2006
Centros de Servicio Técnico:
Conair Corporation
Service Department
7475 North Glen Harbor Blvd.
Glendale, AZ 85307
06PG10117
Conair wants to thank you for choosing our
beard/mustache trimmer. We know it will
provide you with years of reliable service.
For your safety and continued enjoyment
of this product, always read the instruction
booklet carefully before using.
®
Beard &
Mustache
Trimmer
Model GMT100RQCS
Instruction Booklet
Cordless
Battery Operated
®
Recortador de
Barba y bigote
Modelo GMT100RQCS
Folleto de instrucciones
Conair le agradece por elegir nuestro
recortador de barba y bigote. Sabemos que le
proporcionará años de servicio confiable.
Para su seguridad y para disfrutar
continuamente de este producto, lea siempre el
folleto de instrucciones cuidadosamente
antes de utilizarlo.
Inalámbrico, funciona
con pilas
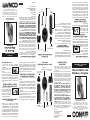
Aceite lubricante
Cepillo de
limpieza
Soporte de
almacenamiento
Interruptor de
ENCENDIDO/
APAGADO
Peine
Peine guía de
5 posiciones
GMT100RQCS
BEARD/MUSTACHE TRIMMER
IB-6922
IB-6922
trimmer should go no farther than the inside
edge of your nose or ear. While detaching the
nose/ear attachment, make sure the power
switch is facing you and press the attach-
ment away from you.
SAVE THESE INSTRUCTIONS
TROUBLE SHOOTING
There are several things to look for if your
trimmer fails to operate:
1. Be sure the trimmer is turned ON.
2. Make sure that the batteries are properly
placed in the battery compartment. Test the
batteries to be sure they are working. (For
optimum trimmer operation, always replace
all two AA batteries at the same time.)
3. Check the blades to see if they are clogged
with hair clippings; if so, use the cleaning
brush to remove hair.
4. If the trimmer still fails to operate, take or
send it to a Conair Service Center (see war-
ranty procedure and addresses).
teniendo cuidado de no introducir mucho el
aparato en el orifico nasal o en el canal del
oído. No lo introduzca más allá del borde de la
nariz o del oído. Para remover el accesorio para
la nariz y los oídos, asegúrese que el interrup-
tor de encendido/apagado esté frente suyo y
deslice el accesorio lejos de usted.
GUARDE ESTAS INSTRUCCIONES
RESOLUCIÓN DE PROBLEMAS
Si su recortador deja de funcionar, haga lo
siguiente:
1. Asegúrese que su recortador está encendido.
2. Asegúrese que las pilas estén correcta-
mente instaladas en el compartimiento. Pruebe
las mismas para asegurarse que funcionen.
(Reemplace siempre las dos pilas AA al mismo
tiempo para el correcto funcionamiento del
recortador).
3. Revise las hojas para ver si están obstruidas
con restos de pelo; si es así, use el cepillo de
limpieza para eliminar el cabello.
4. Si el recortador aún falla, llévelo o envíelo a
un Centro de Servicio Técnico Conair (ver los
procedimientos y direcciones de la garantía).
Storage Stand
Lubricating Oil
Cleaning
Brush
ON/OFF
Switch
Comb
5-Position Comb
Nose/Ear Trimmer
Attachment
Accesorio para la
nariz y los oídos
Transcripción de documentos
1. It is always best to begin with a clean, slightly damp beard. 2. After you have combed through your beard in the direction it grows naturally, you will want to outline the desired shape, beginning under your jawline. 3. Begin defining your beard’s shape under your chin and work upward on each side of your face toward your ears. Then define the upper outline of your beard across your cheeks, past your sideburns and toward your hairline. OUTLINING YOUR BEARD GETTING STARTED 2. To use the 5-position comb, slide it over the trimmer blades and snap down into position. At first, until you become familiar with the adjustments, use the longest trim setting (5/8”). (You can always go back and make your beard a little shorter.) 3. Begin trimming your beard using smooth, even strokes. Start with your sideburns and work downward toward your chin. (Never attempt to trim against the natural growth of your beard, because the hair will be cut too short.) 4. If you decide you want a closer trim, you can now adjust the 5-position comb to a shorter setting (such as 1/2” or 3/8”) and go over your beard again until you achieve the desired length. 1. Your trimmer adjusts to five positions so you can have a beard length from 1/8” (shortest) to 5/8” (longest). NOW YOU’RE READY TO TRIM YOUR BEARD For the best trimming results, your beard should be slightly damp (not wet) before using the trimmer. This will prevent the trimmer from removing more hair than desired. INSTRUCCIONES DE MANEJO DE SU RECORTADOR 1. Quite la tapa del compartimiento de pilas presionando hacia adentro y abajo de la parte inferior de su recortador. 2. Alinee las dos pilas AA* con las posiciones positiva y negativa indicadas dentro del compartimiento de pilas. Cuidando de no doblar los clips, inserte en primer lugar el extremo negativo de cada pila para que éstas se deslicen fácilmente a su posición. 3. Vuelva a colocar la tapa del compartimiento en su posición original presionándola hacia adentro y arriba hasta escuchar un clic que indica que se ha trabado en su posición. 4. Para usar su recortador, deslice el interruptor ENCENDIDO/APAGADO hacia arriba a la posición ENCENDIDO. 5. Luego de usarlo, apague el recortador deslizando el interruptor ENCENDIDO/APAGADO hacia abajo a la posición APAGADO. 6. Para guardarlo más cómodamente, el recortador viene con un soporte que sostiene el aparato y los accesorios. Interruptor ENCENDIDO/APAGADO CUIDADO DE SU RECORTADOR LUBRICACIÓN DE LAS HOJAS Aproximadamente una vez por mes debe lubricar las hojas del recortador con el aceite provisto en su equipo. Lo mejor es hacerlo sobre una hoja de periódico. Encienda el recortador y sosténgalo de manera que las hojas apunten hacia abajo. Distribuya una gota de aceite a lo largo de las mismas, luego apague el recortador y quite el exceso de aceite con un paño suave. Tenga cuidado de no usar demasiado aceite y no lubrique su recortador más de lo necesario, ya que puede dañar el motor. (Nunca intente lubricar el cojinete del motor, ya que éste se lubrica permanentemente). Luego de lubricar las hojas, vuelva a colocar el recortador y el envase de aceite en el soporte. CUIDADO DE LAS HOJAS. Once your beard or mustache has been styled, it is essential that you maintain its appearance. To do this, use your shaper to trim your beard/ mustache weekly. TYPES OF BEARDS/MUSTACHES There are three key factors that determine which beard or mustache style is most suitable for your face: 1. The shape and dimensions of your face. 2. The natural growth of your beard/mustache. 3. The thickness of your beard/mustache. If you are unsure of the type of beard or mustache that most suits your face, speak with a professional hair stylist and ask for an opinion on what style would be best. GROWING A BEARD AND MUSTACHE Be especially careful when changing or adjusting blades. When you have your trimmer serviced, be sure that all blades are sharpened or replaced at the same time. To promote the long life of the appliance, use your trimmer only for the purpose intended by the manufacturer- to trim your beard and mustache. Dado que las hojas son instrumentos de precisión fabricados para un uso muy específico, deberán tratarse siempre con cuidado. Este recortador se entrega con un conjunto removible de hojas para facilitar su limpieza. Para retirar las hojas, siga los pasos descritos a continuación: 1. Asegúrese que el recortador está apagado y que se han quitado las pilas. 2. Con el interruptor de encendido mirando hacia usted, empuje las hojas suavemente hacia arriba hasta que éstas se desprendan. 3. Para volver a colocarlas, alinee las lengüetas de la parte inferior de las hojas dentro del área de montaje en la parte trasera del recortador y empuje hacia abajo hasta que traben en su posición. Cada vez que termine de usar el recortador, tome el cepillo de limpieza provisto y quite cualquier pelo suelto que se haya acumulado en las hojas. A continuación, guarde el recortador en su soporte hasta que vuelva a utilizarlo. Tenga especial cuidado cuando cambie o ajuste hojas. Cuando envíe su recortador, a reparar, asegúrese que todas las hojas se afilen o reemplacen al mismo tiempo. Para prolongar la vida útil del aparato, use su recortador únicamente para el propósito para el que fue fabricado – el de recortar su barba y su bigote. LA BARBA Y EL BIGOTE APROPIADOS Existen tres factores clave que determinan qué estilo de barba y bigote es el más apropiado para su rostro: 1. La forma y dimensiones de su rostro. 2. El crecimiento natural de su barba o bigote. 3. La espesura de su barba o bigote. Si no está seguro respecto a qué tipo de barba o bigote es el más adecuado para su cara, hable con un peluquero y pídale su opinión sobre el estilo que más le conviene. Because the trimmer blades are precision made for a very special use, they should always be handled with care. This trimmer comes with a removable blade set for easy cleaning. To remove the blades follow these steps: 1.Make sure the trimmer is off, and the batteries have been removed. 2.With the power switch facing you, gently push up under the blades until they pop off. 3.To replace, align the tabs on the bottom of the blades inside the mounting area on the back of the trimmer and push down until the blades snap into place. Each time you finish using the trimmer, take the cleaning brush provided and brush away any loose hair that has collected in the blades. Then store the trimmer in its storage stand until the next use. BLADE CARE About once a month you should oil the trimmer blades with the oil provided in your kit. It is best to do this over a piece of newspaper. Turn the trimmer on and hold it so that the blades are pointed downward. Spread one drop of oil across the blades, then turn the trimmer off and wipe away the excess oil with a soft cloth. Be careful not to use too much oil and don’t oil your trimmer more than necessary, as this could damage the motor. (Never attempt to oil the motor bearing as it is permanently lubricated.) After oiling the blades, replace the trimmer and oil packet in the trimmer storage stand. OILING THE BLADES TAKING CARE OF YOUR TRIMMER * Requiere 2 pilas AA (no incluidas). Recomendamos usar pilas alcalinas en su recortador, porque son de mayor duración. Una vez que le ha dado forma a su barba o bigote, es esencial que mantenga su aspecto. Para ello, use su modelador para recortarla/o semanalmente. Para obtener los mejores resultados, debe humedecer (no mojar) ligeramente su barba. Esto evitará que el recortador quite más pelo que el deseado. PRIMEROS PASOS DELINEACIÓN DE SU BARBA 1. Siempre es mejor comenzar con la barba limpia y ligeramente humedecida. 2. Una vez que la ha peinado en la dirección de su crecimiento natural, querrá delinear la forma deseada, comenzando bajo la línea de la mandíbula. 3. Comience definiendo la forma de su barba bajo la barbilla y trabaje hacia arriba a ambos lados de la cara en dirección hacia sus orejas. Luego defina el contorno superior a lo largo de sus mejillas, más allá de sus patillas y hacia el nacimiento del cabello. TIPOS DE BARBAS Y BIGOTES ommend using alkaline batteries in your trimmer because they last longer. *Requires 2 AA batteries (not included). We recOn/Off Switch 1. Remove the battery compartment cover by pushing in and down toward the bottom of the trimmer. 2. Align the two “AA”* batteries with the positive and negative positions indicated inside the battery compartment. Being careful not to bend the clips, insert the negative end of each battery first so it will slip easily into position. 3. Return the battery cover to its original position by pushing it in and up until you hear a small click as it locks into place. 4. To use your trimmer, push ON/OFF switch upwards to ON position. 5. After you finish using your trimmer, push down on the ON/OFF switch to turn the trimmer off. 6. For your convenience, the trimmer comes with a storage base to hold the trimmer and accessories. OPERATING INSTRUCTIONS FOR YOUR TRIMMER AHORA ESTÁ LISTO PARA RECORTAR SU BARBA 1. Su recortador se ajusta en cinco posiciones, por lo que puede obtener longitudes de barba entre 3 mm (1/8") (la más corta) y 16 mm (5/8") (la más larga). 2. Para usar el peine guía de 5 posiciones, deslícelo sobre las hojas de su recortador y trábelo hacia abajo en su posición. Al principio, y hasta que se familiarice con los ajustes, use la posición de recorte más larga (16 mm ó 5/8"). (Siempre tiene la posibilidad de acortar su barba). 3. Comience a recortar su barba mediante pasadas suaves y parejas. Empiece por las patillas y siga hacia abajo en dirección hacia la barbilla. (Nunca intente recortar en sentido contrario a la dirección natural de crecimiento, dado que cortará el pelo demasiado corto). 4. Si decide que quiere la barba más corta, ahora puede ajustar el peine guía de 5 posiciones a una opción más corta (12 mm ó ½" o bien 9 mm ó 3/8") y pasarlo nuevamente hasta alcanzar el largo deseado. Cleaning Brush Comb USING THE NOSE AND EAR TRIMMER ATTACHMENT ©Conair 2006 Centros de Servicio Técnico: Conair Corporation Service Department 7475 North Glen Harbor Blvd. Glendale, AZ 85307 06PG10117 TO TRIM YOUR MUSTACHE 5-Position Comb Storage Stand GMT100RQCS BEARD/MUSTACHE TRIMMER Cepillo de Peine limpieza trimmer should go no farther than the inside edge of your nose or ear. While detaching the nose/ear attachment, make sure the power switch is facing you and press the attachment away from you. Nose/Ear Trimmer Attachment Interruptor de ENCENDIDO/ APAGADO Aceite lubricante SAVE THESE INSTRUCTIONS TROUBLE SHOOTING LIMITED TWO YEAR WARRANTY Si su recortador deja de funcionar, haga lo siguiente: 1. Asegúrese que su recortador está encendido. 2. Asegúrese que las pilas estén correctamente instaladas en el compartimiento. Pruebe las mismas para asegurarse que funcionen. (Reemplace siempre las dos pilas AA al mismo tiempo para el correcto funcionamiento del recortador). 3. Revise las hojas para ver si están obstruidas con restos de pelo; si es así, use el cepillo de limpieza para eliminar el cabello. 4. Si el recortador aún falla, llévelo o envíelo a un Centro de Servicio Técnico Conair (ver los procedimientos y direcciones de la garantía). Conair reparará o reemplazará su aparato, a nuestra elección, sin cargo por 24 meses a partir de la fecha de compra, si el mismo presenta defectos de mano de obra o en los materiales. Para obtener servicio técnico bajo esta garantía, devuelva el producto defectuoso al centro de servicio técnico más cercano a su domicilio, junto con su factura de compra y US$ 3,00 para franqueo postal y gastos administrativos. Los residentes de California sólo necesitan presentar una prueba de compra y deben llamar al 1-800-3-CONAIR para recibir instrucciones de envío. Ante la ausencia de un recibo, el período de garantía será de 24 meses a partir de la fecha de manufactura. LA DURACIÓN DE TODA GARANTÍA, OBLIGACIÓN O RESPONSABILIDAD IMPLÍCITA, INCLUIDA PERO NO LIMITADA A LA GARANTÍA IMPLÍCITA DE COMERCIABILIDAD O APTITUD PARA UN PROPÓSITO EN PARTICULAR, ESTARÁ LIMITADA A LA DURACIÓN DE 24 MESES DE LA PRESENTE GARANTÍA. Algunos Estados no aceptan limitaciones respecto a la duración de una garantía implícita, por lo tanto las limitaciones antes mencionadas pueden no corresponderle a usted. CONAIR NO SERÁ RESPONSABLE EN NINGÚN CASO POR CUALQUIER DAÑO ESPECIAL, INCIDENTAL O CONSECUENCIAL DEBIDO AL INCUMPLIMIENTO DE ÉSTA O DE CUALQUIER OTRA GARANTÍA, EXPLÍCITA O IMPLÍCITA. Algunos estados no aceptan la exclusión o limitación de daños especiales, incidentales o consecuenciales y por lo tanto, la limitación antes mencionada puede no corresponderle a usted. Esta garantía le otorga derechos legales específicos y usted también podrá tener otros derechos, los que varían de un Estado al otro. 1. For best results, start with a clean, slightly damp mustache. 2. Comb through your mustache in the direction it grows. 3. Place the 5-position comb over the trimmer blades and snap it into position. It is a good idea to start with the longest trim setting adjustment. (You can always go back and cut your mustache more closely with a shorter setting.) Soporte de almacenamiento Peine guía de 5 posiciones Accesorio para la nariz y los oídos GARANTÍA LIMITADA POR DOS AÑOS ALWAYS TRIM YOUR MUSTACHE FROM THE TOP DOWN There are several things to look for if your trimmer fails to operate: 1. Be sure the trimmer is turned ON. 2. Make sure that the batteries are properly placed in the battery compartment. Test the batteries to be sure they are working. (For optimum trimmer operation, always replace all two AA batteries at the same time.) 3. Check the blades to see if they are clogged with hair clippings; if so, use the cleaning brush to remove hair. 4. If the trimmer still fails to operate, take or send it to a Conair Service Center (see warranty procedure and addresses). GMT100RQCS RECORTADOR DE BARBA Y BIGOTE After your mustache has been trimmed to the desired length, remove the 5-way trimming attachment and, using the blades only, define the outline of the bottom of your mustache. Conair will repair or replace, at our option, your appliance free of charge for 24 months from the date of purchase if the appliance is defective in workmanship or materials. To obtain service under this warranty, return the defective product to the service center nearest you, together with your sales slip and $3.00 for postage and handling. California residents need only provide proof of purchase and should call 1-800-3-CONAIR for shipping instructions. In the absence of a receipt, the warranty period shall be 24 months from the date of manufacture. ANY IMPLIED WARRANTIES, OBLIGATIONS, OR LIABILITIES, INCLUDING BUT NOT LIMITED TO THE IMPLIED WARRANTY OF MERCHANTABILITY AND FITNESS FOR A PARTICULAR PURPOSE, SHALL BE LIMITED IN DURATION TO THE 24 MONTH DURATION OF THIS WARRANTY. Some states do not allow limitations on how long an implied warranty lasts, so the above limitations may not apply to you. IN NO EVENT SHALL CONAIR BE LIABLE FOR ANY SPECIAL, INCIDENTAL, OR CONSEQUENTIAL DAMAGES FOR BREACH OF THIS OR ANY OTHER WARRANTY, EXPRESS OR IMPLIED, WHATSOEVER. Some states do not allow the exclusion or limitation of special, incidental, or consequential damages, so the above limitation may not apply to you. This warranty gives you specific legal rights, and you may also have other rights which vary from state to state. GUARDE ESTAS INSTRUCCIONES RESOLUCIÓN DE PROBLEMAS ON/OFF Switch ® Conair wants to thank you for choosing our beard/mustache trimmer. We know it will provide you with years of reliable service. For your safety and continued enjoyment of this product, always read the instruction booklet carefully before using. Model GMT100RQCS Instruction Booklet Trimmer Beard & Mustache Cordless Battery Operated Asegúrese que el aparato esté apagado (“OFF”). Saque las cuchillas (véase la sección de mantenimiento de las cuchillas). Coloque la lengüeta ubicada en la parte trasera del accesorio para el pelo de la nariz y los oídos en la hendidura ubicada en la parte posterior de la cortadora. Oprima el accesorio para el pelo de la nariz y de los oídos hacia adelante hasta sujetarlo. Encienda el aparato (“ON”). Corte el pelo de la nariz o de los oídos suavemente, ©Conair 2006 Service Center: Conair Corporation Service Department 7475 North Glen Harbor Blvd. Glendale, AZ 85307 CORTAR EL PELO DE LA NARIZ Y DE LOS OÍDOS teniendo cuidado de no introducir mucho el aparato en el orifico nasal o en el canal del oído. No lo introduzca más allá del borde de la nariz o del oído. Para remover el accesorio para la nariz y los oídos, asegúrese que el interruptor de encendido/apagado esté frente suyo y deslice el accesorio lejos de usted. Lubricating Oil IB-6922 Una vez que su bigote ha sido recortado al largo deseado, remueva el peine de 5 posiciones y, usando las navajas solamente, defina la línea exterior de la parte baja del bigote. 06PG10117 RECORTE SIEMPRE SU BIGOTE DESDE ARRIBA HACIA ABAJO Make sure the trimmer on/off switch is in the “off” position. Detach the normal trimming blade (see section on Blade Care). Fit the tab on the back of the nose trimmer into the notch inside the trimmer head. Push the nose trimmer towards the front of the trimmer until it snaps into place. Turn the on/off switch to the “on” position. Gently use the trimmer to trim away long nose hairs and ear hairs being very careful not to insert the trimmer too far into the ear or nose. The PARA RECORTAR SU BIGOTE 1. Para obtener los mejores resultados, comience con un bigote limpio, ligeramente humedecido. 2. Peine el bigote en la dirección de su crecimiento. 3. Coloque el peine guía de 5 posiciones sobre las hojas del recortador y trábelo hacia abajo en su posición. Es una buena idea comenzar con el ajuste de recorte más largo. (Siempre tiene la posibilidad de acortarlo con un ajuste más corto). Inalámbrico, funciona con pilas Recortador de Barba y bigote Modelo GMT100RQCS Folleto de instrucciones Conair le agradece por elegir nuestro recortador de barba y bigote. Sabemos que le proporcionará años de servicio confiable. Para su seguridad y para disfrutar continuamente de este producto, lea siempre el folleto de instrucciones cuidadosamente antes de utilizarlo. ® IB-6922-
 1
1
-
 2
2


Conair GMT100RQCS Manual de usuario
- Categoría
- Recortadoras de precisión
- Tipo
- Manual de usuario
En otros idiomas
- English: Conair GMT100RQCS User manual
Documentos relacionados
-
Conair GMTL2R Manual de usuario
-
Conair GMTL1R Manual de usuario
-
-
-
-
-
-
-
-