TC HELICON MP-70 Mikrofon El manual del propietario
- Categoría
- Amplificador de instrumentos musicales
- Tipo
- El manual del propietario

MP-75 / MP-70
Modern Performance
Vocal Microphones
USER’S MANUAL
BEDIENUNGSANLEITUNG
MANUAL DE INSTRUCCIONES
MANUALE D’USO
MODE D’EMPLOI
www.tc-helicon.com - Prod. No: E60521911
MP-75 Mic Control works with these products
(Firmware update may be required)
MP-75
With Mic
Control
MP-70
www.tc-helicon.com
Einleitung
Ausgewogenes Klangbild / Patentierte Steuerungsfunktionen
Diese Mikrofone wurden entwickelt, um den klanglichen Anforderungen moderner Sängerinnen und Sänger
auf der Bühne gerecht zu werden. Darüber hinaus ermöglicht das MP-75 es Ihnen, auf der Bühne mit einem
einzigen Schalter die Funktionen Ihrer Effekte von TC-Helicon zu steuern – eine revolutionäre Neuentwicklung.
Von der speziell entwickelten Lismer-Mikrofonkapsel über die optimierte Charakteristik und den Frequenzgang
bis hin zur ergonomischen Form und natürlich der neuen, zum Patent angemeldeten Steuerungsfunktion Mic
Control: TC-Helicon hat sehr viel Zeit und Know-how in die Entwicklung dieser Mikrofone investiert.
Leistungsmerkmale (beide Mikrofonmodelle)
• HervorragendeRückkopplungsfestigkeitundUnterdrückungvonHintergrundrauschen
• KombinierterStoff-/Schaumstoff-FilterunterdrückteffektivPopp-undAtemgeräusche
• UnterdrückungvonHandhabungsgeräuschen
• Dual-ClipzurMontagesowohlanUS-amerikanischenalsaucheuropäischenMikrofonständern.
Funktion Mic Control (nur MP-75)
• ZumPatentangemeldeteFunktionMicControlzurSteuerungUSB-fähigerVocal-Prozessorenvon
TC-Helicon
• KannmitnormalenMikrofonkabelnverwendetwerden.
Funktion Mic Control (nur verfügbar beim Mikrofon MP-75)
ProduktevonTC-Helicon,diemiteinemUSB-Anschlussausgestattetsind,könnenmitderFunktionMic
Control gesteuert werden. Bei allen Produkten (mit Ausnahme der Geräte der Produktreihe VoiceTone
Singles) muss ggf. die Firmware des Produkts aktualisiert werden, um diese Funktion nutzen zu können.
So aktualisieren Sie die Firmware eines Produkts:
1. VerbindenSieIhrTC-Helicon-GerätübereinUSB-KabelmitIhremComputer.
2. Laden Sie (falls Sie es nicht schon getan haben) das kostenlose Programm VoiceSupport von
www.tc-helicon.com/voicesupportherunter.
3. Starten Sie die Software VoiceSupport.
4. SobalddieSoftwareVoiceSupportIhrProdukterkennthat,klickenSieaufdasRegister„Firmware“,um
die im Gerät installierte und die aktuelle Firmware-Version anzeigen zu lassen. Lesen Sie die Hinweise zur
aktuellenFirmware-Version,umdiesekorrektzuinstallieren,bevorSiedasFirmware-Updatedurchführen.
5. FührenSiedasFirmware-Updatedurch.
MitderneuestenFirmware-VersionwirddieUnterstützungfürdieFunktionMicControlinIhremProdukt
installiert. Anschließend müssen Sie diese Funktion noch aktivieren. Nachfolgend finden Sie weitere
Informationen zur Nutzung von Mic Control mit den auf der linken Seite abgebildeten Produkten.
UmaktuelleInformationenzurUnterstützungvonMicControlbeiIhremProduktzuerhalten,rufenSiedie
Website www.tc-helicon.com auf und wählen Sie dort Ihr Produkt aus.
4. Wiederholen Sie die angegebenen Schritte bei allen Ihren VoiceTone Singles-Geräten mit Ausnahme des
letzten Gerätes im Signalweg. Beim letzten VoiceTone Singles-Gerät im Signalweg sollte die Weiterleitung
abgeschaltet bleiben.
Der gewählte Status der Weiterleitungsfunktion bleibt auch nach dem Ausschalten des Gerätes erhalten.
Dementsprechend müssen Sie die beschriebene Prozedur erst dann wieder ausführen, wenn Sie den Status
(Weiterleitungein/aus)aneinemGerätändern wollen.
Funktion Mic Control bei VoiceTone-Geräten: Create XT, Harmony-G XT, Correct XT und Synth
Bei allen genannten Geräten wird die Funktion Mic Control in derselben Weise an- und abgeschaltet. Der
gewählte Status der Phantomspeisung sowie der für die Steuerung ausgewählte Taster bleiben auch nach dem
Ausschalten des Gerätes erhalten.
So aktivieren Sie die Funktion Mic Control an Ihrem VoiceTone-Gerät:
1. Schließen Sie Ihr Mikrofon MP-75 an den Mikrofoneingang Ihres VoiceTone-Gerätes an und schalten Sie
das Gerät an.
2. AktivierenSiediePhantomspeisung,indemSiediebeidenTastenunterderBeschriftung„48V“kurz
gedrückt halten.
So wählen Sie bei einem VoiceTone-Gerät den Taster aus, der mit der Funktion Mic Control
gesteuert werden soll:
1. Drücken Sie die zweite und dritte Taste von links. Die Leuchtdiode des Fußtasters, der aktuell mit der
Funktion Mic Control gesteuert wird, blinkt. Halten Sie die Tasten weiter gedrückt.
2. Drücken Sie den Schalter am Mikrofon, um zwischen den beiden steuerbaren Tastern umzuschalten.
3. UmdieAuswahlzubeenden,lassenSiediezweiteunddritteTasteanIhremVoiceTone-Gerätwiederlos.
Funktion Mic Control beim VoiceLive 2:
Sie können die Taste an Ihrem Mikrofon MP-75 verwenden, um die Funktion zu aktivieren, die dem
SHORTCUT-TasterdesVoiceLive2zugeordnetist.WieSiediewerksseitiggewählteZuordnungdes
SHORTCUT-Tastersändernkönnen,entnehmenSiebittederBedienungsanleitungdesVoiceLive2.
So aktivieren Sie die Funktion Mic Control beim VoiceLive 2:
1. RegelnSiedenPegeldesVerstärkersherunter,andenSiedasVoiceLive2angeschlossenhaben.
Schalten Sie das VoiceLive 2 an.
2. DrückenSiedieTasteSetupundwechselnSiezurI/O-Ansicht.NotierenodermerkenSiesichdenneben
demParameter„Phantom“angezeigtenWertdesParameters„InGain“.
3. StellenSiedenParameter„Phantom“auf„MicControl“.
4. StellenSiedenParameter„InGain“aufdenWertein,denSieinSchritt2festgehaltenhaben.Siekönnen
stattdessen auch zur Hauptansicht (Home) wechseln und dort die Einrichtung des Mikrofonpegels erneut
ausführen.
Sie können nun mit dem Schalter an Ihrem Mikrofon die Funktion an- oder abschalten, die dem
SHORTCUT-Tasterzugeordnetist–auchdasAktivierenderLoop-Funktion.
Das Aktivieren der Funktion Mic Control beim VoiceLive TouchwirdaufderRückseitedieserAnleitunggezeigt.
Funktion Mic Control
bei den VoiceTone Single-Geräten
Jedes Gerät der Produktreihe VoiceTone Singles ist an der Seite mit einem
Mic Control-Schalter ausgestattet. Drücken Sie ihn, um diese Funktion zu
aktivieren. Sie können nun den Schalter am Mikrofon MP-75 verwenden,
umIhrenVoiceToneSingles-Effektein-undauszuschalten.Ummehrere
VoiceTone Singles-Geräte zu steuern, führen Sie bitte die folgenden
Schritte aus. Diese Konfiguration ist nur ein einziges Mal erforderlich.
Konfiguration der Signalweiterleitung
Damit Sie zwei oder mehr VoiceTone Singles-Geräte mit der Funktion Mic
Control steuern können, müssen Sie bei allen Geräten (mit Ausnahme des letzten Gerätes im Signalweg) die
Signalweiterleitung aktivieren. Im Auslieferungszustand ist die Signalweiterleitung (Pass Through) abgeschaltet.
Nur die Geräte der Produktreihe VoiceTone Singles sind mit der Funktion Signalweiterleitung (Pass Through)
ausgestattet.
So aktivieren Sie die Signalweiterleitung:
1. Schließen Sie Ihr Mikrofon MP-75 an ein einzelnes Gerät an und versorgen Sie dieses Gerät mit Spannung.
2. Halten Sie nach dem Anschalten des Gerätes den Fußschalter des VoiceTone Singles-Gerätes und den
Schalter am Mikrofon gleichzeitig drei Sekunden lang gedrückt.
3. Die mittlere Leuchtdiode leuchtet auf, um anzuzeigen, dass der Status der Weiterleitungsfunktion geändert
wurde. Beachten Sie, dass dies auch bedeuten kann, dass die Weiterleitung angeschaltet war und nun
abgeschaltet ist.
Technische Daten
Mikrofontyp: Dynamisch
Charakteristik: Super-Nierencharakteristik
Impedanz: 300 Ohm
Empfindlichkeit: -54dBV/Pa(1,99mV)–1Pa=94dBSchalldruckgemessenbei1kHz
Frequenzgang: 50Hzbis18kHz
Gewicht: 0,29kg(0,63Pfund)
Abmessungen: Höhe:185mm(7,25Zoll),Durchmesser(max.):50mm(2Zoll)
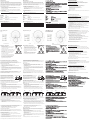
Frequenzgang (typisch)
8
6
4
2
0
-2
-4
100 200 500 1K 2K 5K 10K 20K
Measured@3cm
Richtcharakteristik (typisch)
MP-75
Mic
Pass-Thru
Enabled
To
PA
MP-75
Mic
Pass-Thru
Enabled
Pass-Thru
Enabled
To
PA
Angaben können sich ohne weitere Ankündigung ändern.
(Abb.: VoiceTone C1)
Mikrofon-Gebrauchsanweisung
– RichtenSiedasMikrofonmöglichstnicht direkt auf Ihren
Bühnenmonitor oder die PA.
– Der optimale Winkel zwischen Mikrofon- und Monitorachse beträgt
120°.
– UmRückkopplungenzuvermeiden,solltenSiedenMonitorpegel
einstellen,währendSieingeringemAbstand(=unter3cm)inIhr
Mikrofon singen.
– UmdieFunktionMicControldesMP-75zuaktivieren,genügtes,
die Mic Control-Taste leicht zu berühren. Vermeiden Sie übermäßige
Kraftanwendung.
– Verwenden Sie die Tone-Funktion Ihres TC-Helicon-Produkts, um
eine unerwünschte Bassbetonung beim Singen nahe am Mikrofon
(Nahbesprechungseffekt) zu vermeiden, die Dynamik Ihres Gesangs
zu steuern und den Mikrofonsound höhenreicher zu gestalten.
120°
www.tc-helicon.com
(SP) Introducción
Sonido balanceado y control patentado
Hemos diseñado estos micrófonos para cubrir todas las necesidades sónicas de los cantantes más
exigentes.Además,elMP-75ofreceunrevolucionariocontroldeefectosvocalesTC-Heliconconun
único botón. Hemos dedicado un gran esfuerzo en el diseño y voicing para producir la cápsula Lismer,
el patrón de captura y respuesta de frecuencias que queríamos, su forma ergonómica y, por supuesto,
lo último en micrófonos para directo: El Mic Control (pendiente de patente).
Características (de ambos micros)
• Unexcelenteratioderechazoderuidodefondoyresistenciaalarealimentación
• Unacombinacióndefiltrodetela/espumaofreceunmejorrechazoalospetardeosyrespiraciones
• Bajonivelderuidodemanejo
• Undobleclippermitesucolocaciónensoportestantoestadounidensescomoeuropeos
Características del Mic Control (solo MP-75)
• LafunciónMicControl(pendientedepatente)controlaprocesadoresvocalesTC-Helicon
equipadosconUSB
• Funcionaconcablesdemicrostandard
La función Mic Control (solo MP-75)
LosproductosTC-HeliconequipadosconunconectorUSBsoncompatiblesconestafunciónMic
Control. Para acceder a esta función es posible que deba actualizar el firmware de todos estos
aparatos(aexcepcióndelosVoiceToneSingles).
Para actualizar el firmware del producto:
1. ConectesuproductoTC-HeliconasuordenadorpormediodelcableUSB.
2. Descárguese e instale el programa gratuito VoiceSupport desde la web www.tc-helicon.com\
voicesupport si es que no lo había hecho ya.
3. EjecuteelprogramaVoiceSupport.
3.
Cuando el VoiceSupport reconozca su producto, haga clic en la página Firmware del VoiceSupport
para ver cuál es su versión de firmware activa y si hay alguna posterior. Consulte la información de
dicha versión para asegurarse de que realiza los pasos correctos antes de iniciar la actualización.
4. Inicie la actualización del firmware de su producto.
La última actualización instalará la función Mic Control en su producto. Después deberá activar esa
función.VeaabajolosdetallessobreestafunciónMicControlencadaunodelosproductos.
Para ver la última información disponible acerca del Mic Control y su producto, vaya a la página web
www.tc-helicon.com y haga clic sobre su producto.
ElestadodeestafunciónPassThroughseguirátalcomolohayadejadoaunqueapaguelaunidad.No
hace falta que vuelva a realizar este proceso salvo que quiera cambiar el estado.
Mic Control en productos VOICETONE: Create XT, Harmony-G XT, Correct XT y Synth
Todosestosproductoscompartenelmismoprocedimientoparalaactivación/desactivacióndelMicControl.
La alimentación fantasma y la selección de pedal seguirán como estén aunque apague la unidad.
Para activar el Mic Control en los productos de la serie VoiceTone:
1. Conecte el micro MP-75 a la entrada Mic del VoiceTone.
2. Active la alimentación fantasma manteniendo pulsados durante un momento los dos botones que
estándebajodelaindicación“48V”.
3. A la vez que enciende la unidad, mantenga pulsados el segundo y tercer botones desde la
izquierda. Esto también desactivará el Mic Control.
Para elegir qué pedal será activado por el Mic Control en los productos de la serie VoiceTone:
1. Mantenga pulsados el segundo y tercero empezando por la izquierda. El pedal que esté siendo
controlado en ese momento parpadeará. Siga pulsando los botones.
2. Pulse el interruptor del micro para cambiar entre los dos pedales posibles.
3. Dejedepulsarelsegundoytercerbotonesparasalirdeesteproceso.
Mic Control en VOICELIVE 2
El interruptor Mic Control del MP-75 puede ser configurado para activar funciones asignadas al botón
Shortcut del VoiceLive 2. Vea en el manual del VoiceLive 2 las instrucciones relativas al cambio de las
asignaciones de fábrica para el botón Shortcut.
Para activar el Mic Control en VoiceLive 2:
1. BajealmínimoelamplificadorconectadoalVoiceLive2yenciendaelVoiceLive2.
2. PulseelbotónSetupydesplácesehastalapestañaI/O.ApunteelvalordelparámetroInGain
que está al lado del parámetro Phantom.
3. AjustePhantomaMicControl.
4. AjusteelvalorInGainalqueanotóenelpaso2ovuelvaalinicioyrealicedenuevola
configuración Mic Gain.
El interruptor del micro activará o desactivará o conmutará las funciones Shortcut incluyendo los
bucles.Vea en la contraportada de este manual cómo activar el Mic Control en el VoiceLive Touch
Mic Control en VOICETONE SINGLES
En el lateral de los VoiceTone Singles encontrará el interruptor
de activación del Mic Control. Púlselo para activar la función. El
interruptordelmicroMP-75actuaráahoracomopedalon/off.Ahora
podrácontrolarvariosSinglestraselprocesodeajustesiguiente.
Configuración del Pass Through de la señal de control
Para que el Mic Control actúe con más de dos Singles, debe activar
esta función en todos los pedales de la cadena salvo el último.
Estos aparatos salen de fábrica con el Pass Through desactivado.
UnicamentelosVoiceToneSinglesdisponendefunciónPassThrough.
Para activar el Pass Through:
1. Conecte el micro MP-75 a una de las unidades y enciéndala.
2. Tras el proceso de encendido, mantenga pulsado a la vez durante 3 segundos el interruptor del
micro y el pedal del producto.
3. El piloto central parpadeará para indicarle que el estado de la función Pass Through ha cambiado.
Tenga en cuenta que esto también puede indicar que el Pass Through antes estaba activo y
ahora está desactivado.
4. Repitaestospasosentodoslospedalessalvoelúltimodelacadena.Lerecomendamosque
siempredejedesactivadoelPassThroughenelúltimopedalquevayaasusistemaPA.
Especificaciones técnicas
Tipo de elemento: Dinámico
Patrón de captura: Super-cardioide
Impedancia: 300 Ohmios
Sensibilidad: -54dBV/Pa(1.99mV)–1Pa=94dBSPLmedido@1kHz
Respuestafrecuencia:50Hza18kHz
Peso: 0.29kg(0.63lb.)
Dimensiones Longitud:185mm(7.25inches),Diámetro(máximo):50mm(2inches)
Respuesta de frecuencia (típica)
8
6
4
2
0
-2
-4
100 200 500 1K 2K 5K 10K 20K
Measured@3cm
Gráfico de patrón polar
(típico)
MP-75
Mic
Pass-Thru
Enabled
To
PA
MP-75
Mic
Pass-Thru
Enabled
Pass-Thru
Enabled
To
PA
Estas especificaciones están sujetas a cambios sin previo aviso
(aquí aparece el VoiceTone C1)
Guía de uso del micrófono
- Evite orientar los monitores o altavoces PA hacia el micro
- La posición óptima para los monitores es a unos 120º fuera
deleje
- Elajustarelniveldemonitorizaciónmientrascantacercadel
micro (a menos de 3 cm) es una buena forma de evitar la
realimentación.
- UnligerotoqueenelinterruptorMicControldelMP-75estodo
lo que se necesita para activar su función. Evite aplicar una
fuerzaexcesivasobreesteinterruptor.
- El uso de la función Tone en los productos TC-Helicon
reducirá el reforzamiento de graves producido al cantar cerca
delmicro(tambiénconocidocomoefectodeproximidad),
mantendrá controlado el dinamismo y añadirá algo de brillo al
sonido del micro.
120°
www.tc-helicon.com
(EN) Introduction
Balanced Tone and Patented Control
These microphones have been engineered for the sonic demands of modern vocal performance.
In addition, the MP-75 offers singers revolutionary one-button control of TC-Helicon vocal effects.
Intensive voicing and design effort was undertaken by TC-Helicon to produce the Lismer capsule,
the desired pickup pattern and frequency response, the ergonomic shape and of course, the all-new
feature for stage microphones: Mic Control (patent pending).
Features (both microphones)
• Excellentbackgroundnoiserejectionandresistancetofeedback
• Cloth/foamcombinationfilterprovidessuperiorpopandbreathnoiserejection
• Lowhandlingnoise
• DualclipacceptsbothNAandEuropeanthreadedstands
Mic Control Feature (MP-75 only)
• Patent-pendingMicControlfeaturecontrolsTC-HeliconUSB-equippedvocalprocessors
• Workswithstandardmiccables
The Mic Control feature (MP-75 microphone only)
TC-HeliconproductsequippedwithaUSBconnectorarecompatiblewiththeMicControlfeature.A
firmware update on all but the VoiceTone Singles may be required in order to access this feature.
To update product firmware:
1. ConnectyourTC-HeliconproductviaUSBcabletoyourcomputer.
2. Download and install the free VoiceSupport application from www.tc-helicon.com\voicesupport if
you haven’t previously done so.
3. RunVoiceSupport.
4. When VoiceSupport recognizes your product, click on the Firmware page in VoiceSupport to see
whatyourfirmwareversionisandwhatthelatestversionis.Consultthetextinthemostrecent
version to ensure you are taking the correct steps before initiating the update.
5. Initiate the product firmware update.
ThelatestupdatewillinstalltheMicControlfeatureinyourproduct.Nextitwillneedtobeenabled.
See below for details on Mic Control in the products pictured at left.
For the latest information on Mic Control in your product, go to www.tc-helicon.com and click on your
product.
Control Pass Through state will remain over power up cycles. There is no need to apply it again until
you need to change it.
Mic Control in VOICETONE products: Create XT, Harmony-G XT, Correct XT and Synth
TheseproductsallsharethesameprocedureforenablingMicControlon/off.Phantompowerand
footswitch selection will remain in effect over subsequent power ups.
To enable Mic Control in VoiceTone products:
1. Connect the MP-75 mic to the VoiceTone’s Mic input.
2. Enablephantompowerbyholdingthetwobuttonsbelowthe“48V”legendforamoment.
3. While powering up, hold the second and third buttons from the left. This also disables Mic Control.
To select which footswitch is activated by Mic Control in VoiceTone products:
1. Hold the second and third buttons from the left. The footswitch that is currently controlled will blink.
Continue holding the buttons.
2. Tap the mic switch to toggle between the two footswitch options.
3. Releasethesecondandthirdbuttonstoexit.
Mic Control in VOICELIVE 2
The MP-75 Mic Control switch can be configured to activate functions assigned to the Shortcut button
in VoiceLive 2. See the VoiceLive 2 manual for instructions on changing the factory assignments for the
Shortcut button.
To enable Mic Control in VoiceLive 2:
1. Turn down the amplifier connected to VoiceLive 2. Turn on VoiceLive 2.
2. PresstheSetupbuttonandnavigatetotheI/Otab.NotethevalueoftheInGainparameterbeside
the Phantom parameter.
3. Set Phantom to Mic Control.
4. AdjusttheInGainvaluetothevalueyounotedinstep2orexittoHomeandredoMicGainsetup.
Theswitchonthemicwillnowactivateon/offandheldShortcutfunctionsincludinglooping.
See back page of this manual to enable Mic Control in VoiceLive Touch
Mic Control in VOICETONE SINGLES
At the side of the VoiceTone Singles is the Mic Control enable
switch. Push it in to activate the feature. The switch on the MP-75
microphonewillnowactliketheon/offfootswitch.Youcancontrola
group of Singles after the one-time setup process below.
Control Signal Pass Through Setup
In order for Mic Control to work with two or more Singles, this feature
must be enabled on all but the last footpedal in the chain. The
products are shipped from the factory with Pass Through off. Only
VoiceTone Singles feature the Pass Through feature.
To enable Pass Through:
1. Connect the MP-75 mic to an individual unit and apply power.
2. After power-up, simultaneously hold the switch on the mic and the footswitch on the product for 3
seconds.
3. The center LED will flash indicating the Pass Through state has been changed. Note that this
could also mean that Pass Through was previously on and now it is off.
4. Repeatfromsteponeforallbutthelastfootpedalinyourchain.It’srecommendedtohavePass
Through turned off on the last footpedal going to your PA system.
Specifications
Element type: Dynamic
Pickup pattern: Super-cardioid
Impedance: 300 Ohms
Sensitivity -54dBV/Pa(1.99mV)–1Pa=94dBSPLmeasured@1kHz
Frequencyresponse 50Hzto18kHz
Weight .63lb.(.29kg)
Dimensions Height:7.25inches(185mm),Diameter(max):2inches(50mm)
Frequency response (typical)
8
6
4
2
0
-2
-4
100 200 500 1K 2K 5K 10K 20K
Measured@3cm
Polar pattern graph (typical)
MP-75
Mic
Pass-Thru
Enabled
To
PA
MP-75
Mic
Pass-Thru
Enabled
Pass-Thru
Enabled
To
PA
Specifications subject to change without notice
(VoiceTone C1 pictured)
Microphone Usage Guide
- Avoid facing monitor or PA speakers into the mic
- Theoptimumlocationformonitorspeakersis120°off-axis
- Setting monitor levels while singing close (<3cm) to the mic is
best for avoiding feedback.
- A light touch on the MP-75’s Mic Control switch is all that is
requiredtoactivatethefeature.Avoidusingexcessiveforce.
- UsingtheTonefeatureonTC-Heliconproductswillreduce
bassbuildupduetoclose-insinging(proximityeffect),control
dynamics and add brightness to the mic’s sound.
120°
La página se está cargando ...
Transcripción de documentos
MP-75 / MP-70 Modern Performance Vocal Microphones USER’S MANUAL BEDIENUNGSANLEITUNG MANUAL DE INSTRUCCIONES MANUALE D’USO MODE D’EMPLOI (EN) Introduction Einleitung (SP) Introducción Balanced Tone and Patented Control These microphones have been engineered for the sonic demands of modern vocal performance. In addition, the MP-75 offers singers revolutionary one-button control of TC-Helicon vocal effects. Intensive voicing and design effort was undertaken by TC-Helicon to produce the Lismer capsule, the desired pickup pattern and frequency response, the ergonomic shape and of course, the all-new feature for stage microphones: Mic Control (patent pending). Diese Mikrofone wurden entwickelt, um den klanglichen Anforderungen moderner Sängerinnen und Sänger auf der Bühne gerecht zu werden. Darüber hinaus ermöglicht das MP-75 es Ihnen, auf der Bühne mit einem einzigen Schalter die Funktionen Ihrer Effekte von TC-Helicon zu steuern – eine revolutionäre Neuentwicklung. Sonido balanceado y control patentado Hemos diseñado estos micrófonos para cubrir todas las necesidades sónicas de los cantantes más exigentes. Además, el MP-75 ofrece un revolucionario control de efectos vocales TC-Helicon con un único botón. Hemos dedicado un gran esfuerzo en el diseño y voicing para producir la cápsula Lismer, el patrón de captura y respuesta de frecuencias que queríamos, su forma ergonómica y, por supuesto, lo último en micrófonos para directo: El Mic Control (pendiente de patente). Ausgewogenes Klangbild / Patentierte Steuerungsfunktionen Von der speziell entwickelten Lismer-Mikrofonkapsel über die optimierte Charakteristik und den Frequenzgang bis hin zur ergonomischen Form und natürlich der neuen, zum Patent angemeldeten Steuerungsfunktion Mic Control: TC-Helicon hat sehr viel Zeit und Know-how in die Entwicklung dieser Mikrofone investiert. Leistungsmerkmale (beide Mikrofonmodelle) Features (both microphones) • Excellent background noise rejection and resistance to feedback • Cloth/foam combination filter provides superior pop and breath noise rejection • Low handling noise • Dual clip accepts both NA and European threaded stands • • • • Funktion Mic Control (nur MP-75) • Zum Patent angemeldete Funktion Mic Control zur Steuerung USB-fähiger Vocal-Prozessoren von TC-Helicon • Kann mit normalen Mikrofonkabeln verwendet werden. Mic Control Feature (MP-75 only) • Patent-pending Mic Control feature controls TC-Helicon USB-equipped vocal processors • Works with standard mic cables www.tc-helicon.com 8 Charakteristik: Super-Nierencharakteristik Impedanz: 300 Ohm Empfindlichkeit: -54 dBV/Pa (1,99 mV) – 1 Pa = 94 dB Schalldruck gemessen bei 1 kHz Frequenzgang: 50 Hz bis 18 kHz Gewicht: 0,29 kg (0,63 Pfund) Abmessungen: Höhe: 185 mm (7,25 Zoll), Durchmesser (max.): 50 mm (2 Zoll) Tipo de elemento: Patrón de captura: Impedancia: Sensibilidad: Respuesta frecuencia: Peso: Dimensiones 8 6 Measured @ 3cm 4 0 0 -2 0 100 200 500 1K 2K 5K 10K 20K Measured @ 3cm 2 2 -4 Dinámico Super-cardioide 300 Ohmios -54 dBV/Pa (1.99 mV) – 1 Pa = 94 dB SPL medido @ 1 kHz 50 Hz a 18 kHz 0.29 kg (0.63 lb.) Longitud: 185 mm (7.25 inches), Diámetro (máximo): 50 mm (2 inches) Respuesta de frecuencia (típica) 4 6 -2 With Mic Control Dynamisch 8 2 MP-75 Especificaciones técnicas Mikrofontyp: Frequenzgang (typisch) Measured @ 3cm 4 www.tc-helicon.com Technische Daten Dynamic Super-cardioid 300 Ohms -54dBV/Pa (1.99mV) – 1 Pa = 94 dB SPL measured @ 1 kHz 50 Hz to 18 kHz .63 lb. (.29 kg) Height: 7.25 inches (185 mm), Diameter (max): 2 inches (50 mm) Frequency response (typical) 6 Características del Mic Control (solo MP-75) • La función Mic Control (pendiente de patente) controla procesadores vocales TC-Helicon equipados con USB • Funciona con cables de micro standard www.tc-helicon.com Specifications Element type: Pickup pattern: Impedance: Sensitivity Frequency response Weight Dimensions Características (de ambos micros) • Un excelente ratio de rechazo de ruido de fondo y resistencia a la realimentación • Una combinación de filtro de tela/espuma ofrece un mejor rechazo a los petardeos y respiraciones • Bajo nivel de ruido de manejo • Un doble clip permite su colocación en soportes tanto estadounidenses como europeos Hervorragende Rückkopplungsfestigkeit und Unterdrückung von Hintergrundrauschen Kombinierter Stoff-/Schaumstoff-Filter unterdrückt effektiv Popp- und Atemgeräusche Unterdrückung von Handhabungsgeräuschen Dual-Clip zur Montage sowohl an US-amerikanischen als auch europäischen Mikrofonständern. -4 -2 100 200 500 1K 2K 5K 10K 20K -4 100 Polar pattern graph (typical) 200 500 1K 2K 5K 10K 20K Richtcharakteristik (typisch) Gráfico de patrón polar (típico) MP-70 Specifications subject to change without notice Microphone Usage Guide Avoid facing monitor or PA speakers into the mic - The optimum location for monitor speakers is 120° off-axis - Setting monitor levels while singing close (<3cm) to the mic is best for avoiding feedback. - Mikrofon-Gebrauchsanweisung - 120° A light touch on the MP-75’s Mic Control switch is all that is required to activate the feature. Avoid using excessive force. - Using the Tone feature on TC-Helicon products will reduce bass buildup due to close-in singing (proximity effect), control dynamics and add brightness to the mic’s sound. Estas especificaciones están sujetas a cambios sin previo aviso Angaben können sich ohne weitere Ankündigung ändern. – Richten Sie das Mikrofon möglichst nicht direkt auf Ihren Bühnenmonitor oder die PA. – Der optimale Winkel zwischen Mikrofon- und Monitorachse beträgt 120°. – Um Rückkopplungen zu vermeiden, sollten Sie den Monitorpegel einstellen, während Sie in geringem Abstand (= unter 3 cm) in Ihr Mikrofon singen. – Um die Funktion Mic Control des MP-75 zu aktivieren, genügt es, die Mic Control-Taste leicht zu berühren. Vermeiden Sie übermäßige Kraftanwendung. – Verwenden Sie die Tone-Funktion Ihres TC-Helicon-Produkts, um eine unerwünschte Bassbetonung beim Singen nahe am Mikrofon (Nahbesprechungseffekt) zu vermeiden, die Dynamik Ihres Gesangs zu steuern und den Mikrofonsound höhenreicher zu gestalten. Guía de uso del micrófono - Evite orientar los monitores o altavoces PA hacia el micro La posición óptima para los monitores es a unos 120º fuera del eje - 120° El ajustar el nivel de monitorización mientras canta cerca del 120° micro (a menos de 3 cm) es una buena forma de evitar la realimentación. - Un ligero toque en el interruptor Mic Control del MP-75 es todo lo que se necesita para activar su función. Evite aplicar una fuerza excesiva sobre este interruptor. - El uso de la función Tone en los productos TC-Helicon reducirá el reforzamiento de graves producido al cantar cerca del micro (también conocido como efecto de proximidad), mantendrá controlado el dinamismo y añadirá algo de brillo al sonido del micro. MP-75 Mic Control works with these products (Firmware update may be required) The Mic Control feature (MP-75 microphone only) Funktion Mic Control (nur verfügbar beim Mikrofon MP-75) TC-Helicon products equipped with a USB connector are compatible with the Mic Control feature. A firmware update on all but the VoiceTone Singles may be required in order to access this feature. Produkte von TC-Helicon, die mit einem USB-Anschluss ausgestattet sind, können mit der Funktion Mic Control gesteuert werden. Bei allen Produkten (mit Ausnahme der Geräte der Produktreihe VoiceTone Singles) muss ggf. die Firmware des Produkts aktualisiert werden, um diese Funktion nutzen zu können. To update product firmware: 1. Connect your TC-Helicon product via USB cable to your computer. 2. Download and install the free VoiceSupport application from www.tc-helicon.com\voicesupport if you haven’t previously done so. 3. Run VoiceSupport. 4. When VoiceSupport recognizes your product, click on the Firmware page in VoiceSupport to see what your firmware version is and what the latest version is. Consult the text in the most recent version to ensure you are taking the correct steps before initiating the update. 5. Initiate the product firmware update. The latest update will install the Mic Control feature in your product. Next it will need to be enabled. See below for details on Mic Control in the products pictured at left. For the latest information on Mic Control in your product, go to www.tc-helicon.com and click on your product. Mic Control in VOICETONE SINGLES At the side of the VoiceTone Singles is the Mic Control enable switch. Push it in to activate the feature. The switch on the MP-75 microphone will now act like the on/off footswitch. You can control a group of Singles after the one-time setup process below. (VoiceTone C1 pictured) Pass-Thru Enabled Pass-Thru Enabled Control Pass Through state will remain over power up cycles. There is no need to apply it again until you need to change it. Mic Control in VOICETONE products: Create XT, Harmony-G XT, Correct XT and Synth These products all share the same procedure for enabling Mic Control on/off. Phantom power and footswitch selection will remain in effect over subsequent power ups. To enable Mic Control in VoiceTone products: 1. Connect the MP-75 mic to the VoiceTone’s Mic input. 2. Enable phantom power by holding the two buttons below the “48V” legend for a moment. 3. While powering up, hold the second and third buttons from the left. This also disables Mic Control. www.tc-helicon.com - Prod. No: E60521911 Funktion Mic Control bei den VoiceTone Single-Geräten (Abb.: VoiceTone C1) Damit Sie zwei oder mehr VoiceTone Singles-Geräte mit der Funktion Mic Control steuern können, müssen Sie bei allen Geräten (mit Ausnahme des letzten Gerätes im Signalweg) die Signalweiterleitung aktivieren. Im Auslieferungszustand ist die Signalweiterleitung (Pass Through) abgeschaltet. Nur die Geräte der Produktreihe VoiceTone Singles sind mit der Funktion Signalweiterleitung (Pass Through) ausgestattet. So aktivieren Sie die Signalweiterleitung: 1. Schließen Sie Ihr Mikrofon MP-75 an ein einzelnes Gerät an und versorgen Sie dieses Gerät mit Spannung. 2. Halten Sie nach dem Anschalten des Gerätes den Fußschalter des VoiceTone Singles-Gerätes und den Schalter am Mikrofon gleichzeitig drei Sekunden lang gedrückt. 3. Die mittlere Leuchtdiode leuchtet auf, um anzuzeigen, dass der Status der Weiterleitungsfunktion geändert wurde. Beachten Sie, dass dies auch bedeuten kann, dass die Weiterleitung angeschaltet war und nun abgeschaltet ist. MP-75 Mic To PA Pass-Thru Enabled To PA MP-75 Mic Pass-Thru Enabled Pass-Thru Enabled 4. Wiederholen Sie die angegebenen Schritte bei allen Ihren VoiceTone Singles-Geräten mit Ausnahme des letzten Gerätes im Signalweg. Beim letzten VoiceTone Singles-Gerät im Signalweg sollte die Weiterleitung abgeschaltet bleiben. Der gewählte Status der Weiterleitungsfunktion bleibt auch nach dem Ausschalten des Gerätes erhalten. Dementsprechend müssen Sie die beschriebene Prozedur erst dann wieder ausführen, wenn Sie den Status (Weiterleitung ein/aus) an einem Gerät ändern wollen. Funktion Mic Control bei VoiceTone-Geräten: Create XT, Harmony-G XT, Correct XT und Synth Bei allen genannten Geräten wird die Funktion Mic Control in derselben Weise an- und abgeschaltet. Der gewählte Status der Phantomspeisung sowie der für die Steuerung ausgewählte Taster bleiben auch nach dem Ausschalten des Gerätes erhalten. So aktivieren Sie die Funktion Mic Control an Ihrem VoiceTone-Gerät: 1. Schließen Sie Ihr Mikrofon MP-75 an den Mikrofoneingang Ihres VoiceTone-Gerätes an und schalten Sie das Gerät an. 2. Aktivieren Sie die Phantomspeisung, indem Sie die beiden Tasten unter der Beschriftung „48V“ kurz gedrückt halten. To select which footswitch is activated by Mic Control in VoiceTone products: 1. Hold the second and third buttons from the left. The footswitch that is currently controlled will blink. Continue holding the buttons. 2. Tap the mic switch to toggle between the two footswitch options. 3. Release the second and third buttons to exit. So wählen Sie bei einem VoiceTone-Gerät den Taster aus, der mit der Funktion Mic Control gesteuert werden soll: Mic Control in VOICELIVE 2 The MP-75 Mic Control switch can be configured to activate functions assigned to the Shortcut button in VoiceLive 2. See the VoiceLive 2 manual for instructions on changing the factory assignments for the Shortcut button. Funktion Mic Control beim VoiceLive 2: To enable Mic Control in VoiceLive 2: 1. Turn down the amplifier connected to VoiceLive 2. Turn on VoiceLive 2. 2. Press the Setup button and navigate to the I/O tab. Note the value of the In Gain parameter beside the Phantom parameter. 3. Set Phantom to Mic Control. 4. Adjust the In Gain value to the value you noted in step 2 or exit to Home and redo Mic Gain setup. The switch on the mic will now activate on/off and held Shortcut functions including looping. 1. Regeln Sie den Pegel des Verstärkers herunter, an den Sie das VoiceLive 2 angeschlossen haben. Schalten Sie das VoiceLive 2 an. 2. Drücken Sie die Taste Setup und wechseln Sie zur I/O-Ansicht. Notieren oder merken Sie sich den neben dem Parameter „Phantom“ angezeigten Wert des Parameters „In Gain“. 3. Stellen Sie den Parameter „Phantom“ auf „Mic Control“. 4. Stellen Sie den Parameter „In Gain“ auf den Wert ein, den Sie in Schritt 2 festgehalten haben. Sie können stattdessen auch zur Hauptansicht (Home) wechseln und dort die Einrichtung des Mikrofonpegels erneut ausführen. Sie können nun mit dem Schalter an Ihrem Mikrofon die Funktion an- oder abschalten, die dem SHORTCUT-Taster zugeordnet ist – auch das Aktivieren der Loop-Funktion. See back page of this manual to enable Mic Control in VoiceLive Touch Los productos TC-Helicon equipados con un conector USB son compatibles con esta función Mic Control. Para acceder a esta función es posible que deba actualizar el firmware de todos estos aparatos (a excepción de los VoiceTone Singles). Para actualizar el firmware del producto: 1. Conecte su producto TC-Helicon a su ordenador por medio del cable USB. 2. Descárguese e instale el programa gratuito VoiceSupport desde la web www.tc-helicon.com\ voicesupport si es que no lo había hecho ya. 3. Ejecute el programa VoiceSupport. 3. Cuando el VoiceSupport reconozca su producto, haga clic en la página Firmware del VoiceSupport para ver cuál es su versión de firmware activa y si hay alguna posterior. Consulte la información de dicha versión para asegurarse de que realiza los pasos correctos antes de iniciar la actualización. 4. Inicie la actualización del firmware de su producto. La última actualización instalará la función Mic Control en su producto. Después deberá activar esa función. Vea abajo los detalles sobre esta función Mic Control en cada uno de los productos. Para ver la última información disponible acerca del Mic Control y su producto, vaya a la página web www.tc-helicon.com y haga clic sobre su producto. To PA MP-75 Mic Pass-Thru Enabled Um aktuelle Informationen zur Unterstützung von Mic Control bei Ihrem Produkt zu erhalten, rufen Sie die Website www.tc-helicon.com auf und wählen Sie dort Ihr Produkt aus. Konfiguration der Signalweiterleitung To enable Pass Through: 1. Connect the MP-75 mic to an individual unit and apply power. 2. After power-up, simultaneously hold the switch on the mic and the footswitch on the product for 3 seconds. 3. The center LED will flash indicating the Pass Through state has been changed. Note that this could also mean that Pass Through was previously on and now it is off. 4. Repeat from step one for all but the last footpedal in your chain. It’s recommended to have Pass Through turned off on the last footpedal going to your PA system. To PA 1. Verbinden Sie Ihr TC-Helicon-Gerät über ein USB-Kabel mit Ihrem Computer. 2. Laden Sie (falls Sie es nicht schon getan haben) das kostenlose Programm VoiceSupport von www.tc-helicon.com/voicesupport herunter. 3. Starten Sie die Software VoiceSupport. 4. Sobald die Software VoiceSupport Ihr Produkt erkennt hat, klicken Sie auf das Register „Firmware“, um die im Gerät installierte und die aktuelle Firmware-Version anzeigen zu lassen. Lesen Sie die Hinweise zur aktuellen Firmware-Version, um diese korrekt zu installieren, bevor Sie das Firmware-Update durchführen. 5. Führen Sie das Firmware-Update durch. Mit der neuesten Firmware-Version wird die Unterstützung für die Funktion Mic Control in Ihrem Produkt installiert. Anschließend müssen Sie diese Funktion noch aktivieren. Nachfolgend finden Sie weitere Informationen zur Nutzung von Mic Control mit den auf der linken Seite abgebildeten Produkten. Jedes Gerät der Produktreihe VoiceTone Singles ist an der Seite mit einem Mic Control-Schalter ausgestattet. Drücken Sie ihn, um diese Funktion zu aktivieren. Sie können nun den Schalter am Mikrofon MP-75 verwenden, um Ihren VoiceTone Singles-Effekt ein- und auszuschalten. Um mehrere VoiceTone Singles-Geräte zu steuern, führen Sie bitte die folgenden Schritte aus. Diese Konfiguration ist nur ein einziges Mal erforderlich. Control Signal Pass Through Setup In order for Mic Control to work with two or more Singles, this feature must be enabled on all but the last footpedal in the chain. The products are shipped from the factory with Pass Through off. Only VoiceTone Singles feature the Pass Through feature. MP-75 Mic So aktualisieren Sie die Firmware eines Produkts: La función Mic Control (solo MP-75) 1. 2. 3. Drücken Sie die zweite und dritte Taste von links. Die Leuchtdiode des Fußtasters, der aktuell mit der Funktion Mic Control gesteuert wird, blinkt. Halten Sie die Tasten weiter gedrückt. Drücken Sie den Schalter am Mikrofon, um zwischen den beiden steuerbaren Tastern umzuschalten. Um die Auswahl zu beenden, lassen Sie die zweite und dritte Taste an Ihrem VoiceTone-Gerät wieder los. Sie können die Taste an Ihrem Mikrofon MP-75 verwenden, um die Funktion zu aktivieren, die dem SHORTCUT-Taster des VoiceLive 2 zugeordnet ist. Wie Sie die werksseitig gewählte Zuordnung des SHORTCUT-Tasters ändern können, entnehmen Sie bitte der Bedienungsanleitung des VoiceLive 2. So aktivieren Sie die Funktion Mic Control beim VoiceLive 2: Das Aktivieren der Funktion Mic Control beim VoiceLive Touch wird auf der Rückseite dieser Anleitung gezeigt. Mic Control en VOICETONE SINGLES (aquí aparece el VoiceTone C1) En el lateral de los VoiceTone Singles encontrará el interruptor de activación del Mic Control. Púlselo para activar la función. El interruptor del micro MP-75 actuará ahora como pedal on/off. Ahora podrá controlar varios Singles tras el proceso de ajuste siguiente. Configuración del Pass Through de la señal de control Para que el Mic Control actúe con más de dos Singles, debe activar esta función en todos los pedales de la cadena salvo el último. Estos aparatos salen de fábrica con el Pass Through desactivado. Unicamente los VoiceTone Singles disponen de función Pass Through. Para activar el Pass Through: 1. Conecte el micro MP-75 a una de las unidades y enciéndala. 2. Tras el proceso de encendido, mantenga pulsado a la vez durante 3 segundos el interruptor del micro y el pedal del producto. 3. El piloto central parpadeará para indicarle que el estado de la función Pass Through ha cambiado. Tenga en cuenta que esto también puede indicar que el Pass Through antes estaba activo y ahora está desactivado. 4. Repita estos pasos en todos los pedales salvo el último de la cadena. Le recomendamos que siempre deje desactivado el Pass Through en el último pedal que vaya a su sistema PA. MP-75 Mic Pass-Thru Enabled To PA To PA MP-75 Mic Pass-Thru Enabled Pass-Thru Enabled El estado de esta función Pass Through seguirá tal como lo haya dejado aunque apague la unidad. No hace falta que vuelva a realizar este proceso salvo que quiera cambiar el estado. Mic Control en productos VOICETONE: Create XT, Harmony-G XT, Correct XT y Synth Todos estos productos comparten el mismo procedimiento para la activación/desactivación del Mic Control. La alimentación fantasma y la selección de pedal seguirán como estén aunque apague la unidad. Para activar el Mic Control en los productos de la serie VoiceTone: 1. Conecte el micro MP-75 a la entrada Mic del VoiceTone. 2. Active la alimentación fantasma manteniendo pulsados durante un momento los dos botones que están debajo de la indicación “48V”. 3. A la vez que enciende la unidad, mantenga pulsados el segundo y tercer botones desde la izquierda. Esto también desactivará el Mic Control. Para elegir qué pedal será activado por el Mic Control en los productos de la serie VoiceTone: 1. Mantenga pulsados el segundo y tercero empezando por la izquierda. El pedal que esté siendo controlado en ese momento parpadeará. Siga pulsando los botones. 2. Pulse el interruptor del micro para cambiar entre los dos pedales posibles. 3. Deje de pulsar el segundo y tercer botones para salir de este proceso. Mic Control en VOICELIVE 2 El interruptor Mic Control del MP-75 puede ser configurado para activar funciones asignadas al botón Shortcut del VoiceLive 2. Vea en el manual del VoiceLive 2 las instrucciones relativas al cambio de las asignaciones de fábrica para el botón Shortcut. Para activar el Mic Control en VoiceLive 2: 1. Baje al mínimo el amplificador conectado al VoiceLive 2 y encienda el VoiceLive 2. 2. Pulse el botón Setup y desplácese hasta la pestaña I/O. Apunte el valor del parámetro In Gain que está al lado del parámetro Phantom. 3. Ajuste Phantom a Mic Control. 4. Ajuste el valor In Gain al que anotó en el paso 2 o vuelva al inicio y realice de nuevo la configuración Mic Gain. El interruptor del micro activará o desactivará o conmutará las funciones Shortcut incluyendo los bucles.Vea en la contraportada de este manual cómo activar el Mic Control en el VoiceLive Touch-
 1
1
-
 2
2


TC HELICON MP-70 Mikrofon El manual del propietario
- Categoría
- Amplificador de instrumentos musicales
- Tipo
- El manual del propietario
En otros idiomas
Documentos relacionados
-
TC HELICON VOICETONE X1 El manual del propietario
-
-
-
-
-
-
TC HELICON VOICELIVE 3 EXTREME El manual del propietario
-
TC HELICON VOICETONE H1 El manual del propietario
-


