
1
1ABFY
Abatidor
Manual de instalación y uso

2
Índice
1. INTRODUCCIÓN ......................................................................................................................................... 4
1.1 Advertencias generales ..................................................................................................................... 4
1.2 Advertencias sobre seguridad ........................................................................................................... 4
1.3 Transporte y desplazamiento ............................................................................................................ 5
1.4 Desembalaje ...................................................................................................................................... 6
2. INSTALACIÓN ............................................................................................................................................ 6
2.1 Datos de placa ................................................................................................................................... 6
2.2 Advertencias para la instalación ........................................................................................................ 7
2.3 Colocación ......................................................................................................................................... 7
2.4 Temperatura ambiente y renovación de aire .................................................................................... 8
2.5 Verificaciones finales ......................................................................................................................... 8
2.6 Dispositivos de protección ................................................................................................................ 8
3. UTILIZACIÓN .............................................................................................................................................. 8
3.1 Advertencias para el usuario ............................................................................................................. 8
3.2 Limpieza interna preliminar .............................................................................................................. 8
3.3 La sonda de aguja .............................................................................................................................. 8
3.4 Recipientes y tapas que deben utilizarse .......................................................................................... 9
3.5 Colocación de los alimentos .............................................................................................................. 9
3.6 Eficacia de los programas de abatimiento y ultracongelación .......................................................... 9
3.7 Conservación de los alimentos abatidos o ultracongelados ............................................................. 9
3.8 Programas ........................................................................................................................................ 10
3.9 La pantalla y la interacción con el usuario ...................................................................................... 11
3.10 Significado de los iconos .................................................................................................................. 11
3.11 Encendido y apagado....................................................................................................................... 12
3.12 Selección del programa ................................................................................................................... 12
3.12.1 Fin del programa ...................................................................................................................... 12
3.12.2 Pre-enfriamiento ...................................................................................................................... 13
3.12.3 Abatimiento .............................................................................................................................. 13
3.12.4 Ultracongelación ...................................................................................................................... 14
3.12.5 Enfriamiento ............................................................................................................................. 14
3.12.6 Bebidas ..................................................................................................................................... 15
3.12.7 Conservación a 0°C ................................................................................................................... 15
3.12.8 Pescado crudo .......................................................................................................................... 15
3.12.9 Descongelación......................................................................................................................... 16
3.12.10 Listo para servir ........................................................................................................................ 16
3.12.11 Cocción lenta ............................................................................................................................ 17
3.12.12 Fermentación ........................................................................................................................... 18
4. MANTENIMIENTO RUTINARIO ............................................................................................................... 19
4.1 Información sobre seguridad........................................................................................................... 19
4.2 Limpieza de superficies externas ..................................................................................................... 19
4.3 Limpieza de la cámara ..................................................................................................................... 19

3
4.4 Períodos de inactividad ................................................................................................................... 19
5. MANTENIMIENTO EXTRAORDINARIO .................................................................................................... 20
5.1 Mal funcionamiento ........................................................................................................................ 20
5.2 Eliminación del aparato ................................................................................................................... 20
6. LOCALIZACIÓN DE AVERÍAS .................................................................................................................... 21
6.1 Tabla de alarmas .............................................................................................................................. 21
7. DATOS TÉCNICOS .................................................................................................................................... 21
7.1 Dimensiones .................................................................................................................................... 21
9. INFORMACIÓN ........................................................................................................................................ 22
9.1 Servicio ............................................................................................................................................ 22
9.2 Los datos del cliente ........................................................................................................................ 22

4
1. INTRODUCCIÓN
1.1 Advertencias generales
Este manual forma parte integrante del producto, contiene información sobre la instalación, la utilización y
la seguridad del aparato. Lea detenidamente las instrucciones aquí incluidas.
El usuario así como el técnico instalador deben leer obligatoriamente este manual y hacer referencia al
mismo en todo momento.
Es aconsejable guardar este manual en un lugar conocido y accesible para todos los operadores autorizados
(usuario, técnico instalador, encargado de mantenimiento), para que sea posible consultarlo en todo
momento y adjuntarlo al aparato en caso de traspaso del mismo.
Durante la fase de transporte, desplazamiento e instalación, apoye el aparato con su base sobre un
plano, evitando dejar el aparato en posición inclinada por periodos de tiempo prolongados.
El fabricante de este aparato declara la conformidad de cada aparato con las normativas
vigentes.
1.2 Advertencias sobre seguridad
La responsabilidad de aquellos trabajos realizados en el aparato sin cumplir las indicaciones incluidas en
este manual, recae en el usuario.
El aparato no puede ser utilizado por niños menores de 8 años o por personas con capacidades físicas,
sensoriales o mentales reducidas, sin experiencia o conocimientos necesarios, salvo si éstas se encuentran
vigiladas o han recibido instrucciones previas sobre la utilización segura del aparato y los peligros que
conlleva la misma. Los niños no deben jugar con el aparato. La limpieza y el mantenimiento que deben ser
realizadas por el usuario, no deben ser llevadas a cabo por niños sin supervisión.
El cable eléctrico y la toma de corriente deben ser accesibles incluso con el aparato instalado. El cable no
debe estar doblado ni aplastado puesto que podría afectar su aislamiento. No coloque tomas múltiples ni
dispositivos de alimentación portátiles en la parte trasera del aparato.
Una vez instalado el aparato asegúrese de que las ranuras de ventilación no estén obstruidas.
¡Atención! No utilice dispositivos mecánicos u otros medios para acelerar el proceso de desescarchado,
que no sean aquellos recomendados por el fabricante.
ATENCIÓN: RIESGO DE INCENDIO / MATERIAL INFLAMABLE
Todas las partes eléctricas y las partes del circuito refrigerante deben ser controladas periódicamente
únicamente por personal técnico autorizado.
El fabricante se exime de toda responsabilidad y toda obligación de garantía en caso de que se produzcan
daños a los aparatos, las personas u objetos atribuibles a:
• instalación y/o utilización incorrectas y/o no conformes con la legislación vigente;
• incumplimiento, durante la instalación, de las normas de prevención de accidentes y de la
legislación vigente;
• modificaciones y/o intervenciones no específicas para el modelo;
• utilización de piezas de repuesto no originales o no específicas para el modelo;
• incumplimiento, aunque parcial, de las instrucciones de este manual.

5
1.3 Transporte y desplazamiento
Las operaciones de carga y descarga del aparato del medio de transporte deben ser llevadas a cabo
utilizando los medios adecuados, como por ejemplo una carretilla elevadora, faltando los cuales se
requieren dos personas para realizar dichas tareas.
¡Atención! Durante las operaciones de desplazamiento deben respetarse todas aquellas medidas de
precaución necesarias para no ocasionar daños a las personas, la propiedad o el aparato mismo. Las
indicaciones específicas figuran en el embalaje.

6
1.4 Desembalaje
Abra la caja por la parte superior, doblando lateralmente los bordes para facilitar la operación,
posteriormente quite la protección superior y los elementos angulares laterales de poliestireno (fig.1).
Quite el plástico de protección (fig.2), por último, usando las asas de elevación correspondientes, extraiga
el aparato de la caja, tirando de éste hacia arriba (fig.3).
Fig.1 Fig.2 Fig.3
Después de haber retirado el embalaje y antes de realizar cualquier operación, compruebe la integridad del
aparato. En caso de apreciar anomalías, no encienda el aparato y póngase en contacto con el vendedor.
Los materiales que forman el embalaje deben ser eliminados de acuerdo con las normativas vigentes en el
país de utilización del aparato y en ningún caso deben ser arrojados al medio ambiente.
Levante el aparato usando un medio adecuado, usando guantes de protección y colocarlo en el lugar de
instalación previsto.
Quite las películas protectoras, eliminando todo resto de adhesivo con un paño suave y un producto
neutro. No utilice estropajos o esponjas que puedan rayar de forma irreparable las superficies.
¡Atención! Los materiales que constituyen el embalaje pueden ser potencialmente peligrosos para los
niños y los animales.
2. INSTALACIÓN
2.1 Datos de placa
Las características del aparato figuran en la placa da datos situada en el costado del aparato (fig. 4).
Fig. 4 – Placa de datos del aparato
Nota: no quitar, alterar, dañar o modificar la placa de datos.

7
2.2 Advertencias para la instalación
La instalación debe ser llevada a cabo únicamente por personal autorizado y especializado, respetando las
advertencias, instrucciones y requisitos incluidos en este documento.
Antes de instalar el aparato, asegúrese de que las instalaciones eléctricas ya existentes cumplan con la legislación
vigente y los datos de placa del aparato que se debe instalar en términos de tensión [V], frecuencia [Hz] y potencia
[W].
El aparato está dotado de un cable de alimentación con clavija Schuko de 16A.
Asegúrese de que el cable de alimentación no esté aplastado, doblado o dañado.
No enrolle el cable eléctrico y asegúrese de que no constituya un estorbo ni un peligro para el tránsito de personas.
El cable de alimentación no debe mojarse con líquidos, tampoco debe estar en contacto con objetos afilados o
calientes, ni estar expuesto a sustancias corrosivas.
No toque el aparato con manos/pies húmedos o mojados sin protecciones (p.ej. guantes y calzado adecuados).
No introduzca destornilladores, utensilios de cocina u otros objetos entre las protecciones y las partes en
movimiento.
No deje que niños o animales entren en contacto con el cable de alimentación.
No coloque tomas múltiples ni dispositivos de alimentación portátiles en la parte trasera del aparato.
No utilice cables de prolongación para el cable de alimentación para evitar problemas de sobrecalentamiento.
¡Atención! ¡Una vez finalizada la instalación, el enchufe debe ser accesible en todo momento! Cuando esto no sea
posible, la instalación de alimentación del aparato debe estar equipada con un dispositivo de corte omnipolar
adecuado.
2.3 Colocación
Se desaconseja instalar el aparato en lugares con escasa renovación de aire y con alta temperatura, así como en
lugares expuestos a la luz solar directa o bien a los agentes atmosféricos. No realice la instalación cerca de fuentes
de calor.
¡Atención! Asegúrese de que, una vez finalizada la instalación, no haya obstáculos que impidan la apertura de la
puerta.
Nota: para que el aparato funcione correctamente, es obligatorio asegurar una chimenea de aire con sección
mínima de 250 cm
2
(fig. 5) detrás del aparato.
¡Atención! Una vez colocado el aparato en el hueco de empotrar, fije el aparato usando los tornillos adecuados.

8
Fig.5 – Dimensiones del hueco de empotrar y del producto
2.4 Temperatura ambiente y renovación de aire
Las prestaciones del aparato están garantizadas para valores de temperatura ambiente de hasta 32°C,
siempre que se asegure la renovación de aire adecuada tal como indicado en el apartado 2.3.
2.5 Verificaciones finales
Una vez finalizada la colocación y la conexión eléctrica del aparato:
• verifique la correcta conexión eléctrica;
• espere al menos 4 horas antes de encender el aparato para que el circuito termodinámico se
estabilice.
2.6 Dispositivos de protección
El aparato está equipado con los dispositivos de protección siguientes:
• fusible en la tarjeta de potencia como protección frente a posibles sobrecargas;
• protector térmico en el compresor como protección frente a posibles sobrecargas o anomalías de
funcionamiento;
• disyuntor térmico doble como protección frente a fallos de la resistencia eléctrica.
3. UTILIZACIÓN
Este aparato está destinado principalmente al abatimiento y la ultracongelación de alimentos. Cuando los
alimentos han sido sometidos a cocción o abatimiento, pueden mantener prácticamente inalteradas sus
propiedades organolépticas durante 5-7 días; en cambio estando los alimentos congelados, mantienen su
textura y sabor original posteriormente a su descongelación.
3.1 Advertencias para el usuario
• lea detenidamente este manual y utilícelo como referencia;
• en el caso de que se apreciaran anomalías en el aparato, por ejemplo cable de alimentación dañado
o avería en el panel de mandos, apague de inmediato el aparato y contacte con el centro de
asistencia;
• el aparato no puede ser utilizado por niños menores de 8 años o por personas con capacidades
físicas, sensoriales o mentales reducidas, sin experiencia o conocimientos necesarios, salvo si éstas
se encuentran vigiladas o han recibido instrucciones previas sobre la utilización segura del aparato
y los peligros que conlleva la misma. Los niños no deben jugar con el aparato;
• no introduzca en el aparato sustancias explosivas, tales como aerosoles con propelente inflamable;
• este aparato está destinado al uso doméstico;
• durante el funcionamiento y según el tipo de programa en ejecución el aparato puede calentarse.
Tome las medidas de precaución adecuadas cuando se trabaja en el interior del aparato. Mantener
fuera del alcance de los niños.
• este aparato debe utilizarse exclusivamente para las funciones para las que ha sido concebido:
abatimiento, ultracongelación, sanitización, descongelación, fermentación, calentamiento, cocción
lenta, enfriamiento de alimentos y bebidas en ámbito doméstico. Cualquier otro uso se debe
considerar inadecuado y potencialmente peligroso.
3.2 Limpieza interna preliminar
Una vez realizada la conexión eléctrica y la colocación del aparato, antes de ponerlo en marcha es preciso
limpiar a fondo el interior de la cámara usando un paño suave y un detergente neutro. Posteriormente,
elimine del aparato todo residuo de detergente.
No utilice estropajos de acero inoxidable, raspadores, sustancias abrasivas, ácidas o agresivas que podrían
dañar de forma irreparable las superficies internas.
3.3 La sonda de aguja
La sonda de aguja es un accesorio utilizado para medir la temperatura en el interior de los alimentos.

9
En los programas que prevén la utilización de la sonda de aguja, el final de proceso se produce de forma
automática tras la consecución de la temperatura prevista en el alimento.
En el caso de que la sonda de aguja no esté conectada al aparato y el usuario quisiera utilizar el modo
sonda de aguja, en la pantalla aparece “Conectar la sonda para ejecutar el programa”.
Para utilizar correctamente la sonda de aguja es preciso introducirla dentro del alimento antes de ejecutar
el programa.
Nota: la sonda de aguja debe introducirse en el centro del alimento para que no sobresalga del alimento.
Para mejorar la eficacia de los programas, introduzca la sonda en la pieza de mayores dimensiones.
En caso de que la sonda de aguja no esté introducida en el alimento, porque ha sido olvidada en el fondo
de la cámara o bien porque se ha salido del alimento, el aparato al cabo de 5 minutos desde la puesta en
marcha, activa automáticamente el programa el modo “según receta”, manteniendo invariados “Tipo de
alimento” y “Preparación” configurados.
Maneje con cuidado la sonda y tenga cuidado con la punta. Después de utilizarla, límpiela con un paño
suave y agua templada, luego guárdela.
Seleccionando el modo “según receta” en abatimiento o ultracongelación, el empleo de la sonda de aguja
no afecta la ejecución del programa.
3.4 Recipientes y tapas que deben utilizarse
Los alimentos deben introducirse en este aparato únicamente utilizando recipientes y tapas adecuadas
para alimentos.
Asegúrese de que los recipientes sean compatibles con la utilización a baja temperatura (-40°C).
En los programas que prevén funciones calientes, procure utilizar recipientes de metal, cerámica o
materiales idóneos para valores de temperatura de hasta +80°C.
El empleo de bandejas y recipientes de poca profundidad favorece la ventilación interna y por lo tanto son
preferibles.
3.5 Colocación de los alimentos
Para aumentar la eficacia del programa seleccionado se recomienda:
• distribuir en la mayor medida posible la porción de alimento en contacto con el flujo de aire;
• no apilar los alimentos en la bandeja; optando por una distribución sobre una superficie lo más
amplia posible, para favorecer una mejor ventilación interna.
3.6 Eficacia de los programas de abatimiento y ultracongelación
Los mejores resultados de abatimiento y ultracongelación se consiguen introduciendo los alimentos en el
aparato apenas finalizada la cocción, evitando la exposición prolongada de los alimentos a temperatura
ambiente, puesto que ello conlleva la pérdida de humedad y el deterioro de las características originales de
color, aroma y sabor.
Recomendación: los programas de abatimiento y ultracongelación, ejecutados en alimentos muy calientes
o de mayor peso, resultan más breves y permiten obtener mejores resultados cuando se ejecute
previamente el programa de pre-enfriamiento.
3.7 Conservación de los alimentos abatidos o ultracongelados
La nevera es el lugar adecuado de conservación de los alimentos abatidos, en cambio, para los alimentos
ultracongelados es el congelador; por lo tanto se aconseja utilizar estos aparatos para la conservación de
los alimentos.
Puesto que los alimentos ultracongelados se pueden conservar por largos períodos de tiempo (6-12 meses)
es preciso colocar en los recipientes una etiqueta que indique el contenido y las fechas de preparación y
caducidad.
Recomendación: para mejorar aún más los plazos de conservación de los alimentos abatidos o
ultracongelados es posible recurrir, utilizando aparatos adecuados para dicha función, a la conservación al
vacío, respetando las indicaciones relativas a los valores de temperatura y tiempo.

10
3.8 Programas
ABATIMIENTO
Permite conservar los alimentos en la nevera durante 5÷7 días, gracias al enfriamiento rápido de los
alimentos a +3°C. El enfriamiento impide la evaporación del agua contenida en los productos recién
d
eshornados y reduce la proliferación bacteriana, prolongando así el tiempo de conservación del
alimento.
ULTRACONGELACIÓN
Permite conservar los alimentos en el congelador durante varios meses, gracias al enfriamiento
rápido a -18°C. Se mantienen intacta
s las propiedades organolépticas, el sabor, aroma y el aspecto
de los alimentos mediante la micro-
cristalización del agua contenida en el alimento, evitando así la
destrucción de las estructuras moleculares internas.
PRE-ENFRIAMIENTO
Permite reducir los
plazos de ejecución de los programas, tales como el abatimiento o la
ultracongelación, que prevén el enfriamiento de alimentos aún muy calientes y de mayor peso.
Consiste en enfriar las partes internas del aparato, lo que permite optimizar el tiempo de
elaboración en la cocina dado que puede ser ejecutado mientras se preparan las recetas.
ENFRIAMIENTO
Permite acelerar el proceso de enfriamiento de un alimento recién cocinado y por lo tanto aún muy
caliente, hasta la temperatura prevista, sin tener que
esperar la aclimatización natural, permitiendo
así el consumo en un plazo muy breve.
BEBIDAS
Permite reducir la temperatura de una bebida según el tiempo disponible. La conservación de las
bebidas a la temperatura deseada es una función propia de una vi
noteca, sin embargo el abatidor
cuenta con características de funcionamiento de gran utilidad cuando no se dispone de tiempo
suficiente .
CONSERVACIÓN A 0°C
Permite preservar las propiedades organolépticas de los alimentos crudos y es adecuada cuando se
desea conservar alimentos (p.ej carne, pescado y verduras) durante unas horas antes de su
preparación.
PESCADO CRUDO
Permite reproducir a nivel doméstico, el proceso de sanitización a baja temperatura empleando las
altas prestaciones del abatidor. La m
ala conservación de los productos de la pesca puede provocar
peligros para la salud en relación con la contaminación por Anisakis, un parásito que puede ser
eliminado mediante procesos prolongados de cocción o conservación a -30°C.
DESCONGELACIÓN
Permit
e llevar la temperatura de un alimento de la temperatura de congelación al valor de 4°C, sin
pérdida de líquidos y sin empezar su cocción, evitando así la transformación de las proteínas que se
produce por ejemplo cuando se descongela la carne en el microondas.
LISTO PARA SERVIR
Permite calentar un alimento previamente cocinado y conservado en la nevera y servirlo a la
temperatura correcta para consumir.
COCCIÓN LENTA
Permite cocinar un alimento a una temperatura constante durante un intervalo de temp
o
determinado. Esta técnica, gracias a la reducida evaporación del agua de los alimentos, permite
mantener las propiedades y la ternura de los alimentos.
FERMENTACIÓN
Permite crear un microclima con temperatura y humedad controladas, para que la ferment
ación se
realice en condiciones ideales produciendo el natural aumento de volumen de la masa.
Programando la duración de la fermentación se puede reducir la cantidad de levadura, obteniendo
así un producto más ligero y digerible, favoreciendo el desarrollo del aroma deseado.

11
3.9 La pantalla y la interacción con el usuario
El panel de mandos está compuesto por una pantalla táctil de 4,3 pulgadas y un botón de encendido
ubicado lateralmente.
Fig.6 – Menú principal y ejemplo de pantalla de selección
1. Icono “Programa”: tocando el icono se abre la pantalla de ejecución del programa correspondiente.
2. Icono “Ajustes”: la selección de este icono permite acceder al entorno de ajuste del idioma, hora,
luminosidad de la pantalla y volumen de la señal acústica.
3. Hora actual: indica la hora del reloj de sistema.
4. Icono “Atrás”: para volver a la pantalla anterior.
5. Icono “Inicio”: para volver a la pantalla “Menú principal” de selección de los programas.
6. Icono de desplazamiento: indica el área de la pantalla que se puede “hojear” para visualizar todas las
opciones di elección disponibles.
3.10 Significado de los iconos
Independientemente del programa seleccionado, algunos iconos se presentan con frecuencia durante la
interacción del usuario con la pantalla. A continuación se describe su significado.
INICIO
Para volver al Menú Principal.
Cada dato que se introduce se borra.
AJUSTES
Para acceder al modo de modificación de los ajustes principales del aparato: luminosidad de la pantalla,
volumen de la señal acústica, idioma, hora del sistema.
ATRÁS
Para volver a la pantalla anterior.
Estando en una pantalla de selección de programa, los datos de las pantallas anteriores se guardan.
INICIAR
Para ejecutar el programa seleccionado.
Pulsando este botón, el icono del programa en
ejecución se vuelve de color celeste (ciclos fríos) o rojo
(ciclos calientes), indica el estado de funcionamiento del aparato.
DETENER
Para detener el programa en curso.
Es necesario confirmar la cancelación pulsando “sí” en la pantalla sucesiva.
El programa se interrumpe y la pantalla regresa a la pantalla del Menú Principal.
LUZ
Para encender/apagar la iluminación interna de la cámara: la luz estará encendida o apagada según la
bombilla sea de color blanco o negro, respectivamente. La ausencia prol
ongada de interacción del
usuario con el aparato determina el apagado de la luz interna.
1
2
3
4
5
6

12
3.11 Encendido y apagado
Para encender el aparato pulse el botón ON/OFF ubicado al lado de la pantalla durante al menos 2
segundos. Aparece el logotipo, luego la pantalla del “Menú principal”.
En ausencia de interacción durante 5 minutos, en la pantalla aparece el salvapantallas de la hora actual.
Para apagar el aparato pulse el botón ON/OFF ubicado al lado de la pantalla durante al menos 2 segundos.
Esta operación se puede realizar en todo momento: en caso de apagado durante la ejecución de un
programa la pantalla muestra un mensaje, luego el programa se interrumpe definitivamente.
3.12 Selección del programa
La selección del programa se realiza desde la pantalla “Menú principal”, tocando el icono deseado. Tocando de
forma prolongada cada uno de los iconos aparece una pantalla de explicación del respectivo programa (fig.7).
Fig.7 – Ejemplo de pantalla de información
Una vez iniciado el programa, en ausencia de interacción durante 2 minutos, en la pantalla aparece el
salvapantallas con el icono del programa en curso.
Para quitar el salvapantallas basta con tocar un punto cualquiera de la pantalla.
3.12.1 Fin del programa
Al final de cada programa, el aparato emite una señal acústica para avisar que es posible sacar el alimento.
Algunos programas prevén que el aparato, mediante una pantalla específica, active de modo automático el
modo de mantenimiento, durante el cual el alimento puede permanecer dentro del abatidor. Para
interrumpir este modo de funcionamiento, basta con pulsar el botón “detener”, sacando a la vez el
alimento del abatidor.
Los programas “Abatimiento”, “Ultracongelación”, “Pescado Crudo” y “Conservación a 0°C” también
prevén una fase automática de desescarchado que tiene lugar al final de mantenimiento o bien cuando el
usuario interrumpe el mantenimiento. El desescarchado está indicado mediante una pantalla y tiene una
duración de 15 minutos, al cabo de dicho intervalo la pantalla muestra de nuevo el Menú Principal. El
desescarchado automático puede interrumpirse en todo momento pulsando el botón “detener”.

13
3.12.2 Pre-enfriamiento
El pre-enfriamiento es aconsejable para reducir los plazos de ejecución de los programas de abatimiento y
ultracongelación.
PRE-ENFRIAMIENTO
Antes de iniciar el programa Es posible verificar la información en la pantalla de resumen.
Programa en curso La pantalla muestra los ajustes y el tiempo restante para finalizar el ciclo.
AL FINAL DEL PROGRAMA
El aparato emite una señal acústica y muestra una pantalla de aviso.
No está prevista ninguna acción de mantenimiento y desescarchado, el aparato está preparado para ejecutar otros
programas.
3.12.3 Abatimiento
El abatimiento permite conservar los alimentos en la nevera durante 5÷7 días, gracias a un rápido proceso
de enfriamiento que bloquea la evaporación del agua y la pérdida de vitaminas, proteínas y sales minerales
de los productos recién deshornados. Reduciendo el tiempo de permanencia del alimento en el intervalo
de temperatura de proliferación de las bacterias se prolonga el tiempo de conservación del alimento
mismo. Además se pueden tratar alimentos recién cocinados a temperaturas de hasta 90°C.
ABATIMIENTO
Es posible elegir entre dos modos de abatimiento: “según receta” y “en corazón”.
El abatimiento según receta no requiere el empleo de la sonda de aguja, pero es necesario indicar el peso y la
temperatura inicial del alimento que se debe procesar.
El abatimiento en el corazón permite conocer la temperatura en el interior del alimento durante el ciclo.
ABATIMIENTO SEGÚN RECETA
Selecciones
Tipo de alimento: especificar la naturaleza del alimento que se debe procesar.
Preparación: especificar las características del alimento que se debe procesar
(consistencia y forma, p. ej. pasta-carne y entero-en trozos…).
Peso: especificar la cantidad de alimento que se debe procesar.
Estado inicial: si el alimento ha sido recién cocinado al horno, o cuando su
temperatura es alta, seleccione “caliente”. Si se encuentra a temperatura ambiente
o apenas tibio, seleccione “ambiente”.
Antes de iniciar el programa Es posible verificar la información en la pantalla de resumen.
Programa en curso La pantalla muestra los ajustes y el tiempo restante para finalizar el ciclo.
ABATIMIENTO EN EL CORAZÓN
Selecciones
Tipo de alimento: especificar la naturaleza del alimento que se debe procesar.
Preparación: especificar las características del alimento que se debe procesar
(consistencia y forma, p. ej. pasta-carne y entero-en trozos...).
Estos ajustes son necesarios para que el aparato establezca el ciclo de trabajo que
garantiza el abatimiento perfecto.
Antes de iniciar el programa Es posible verificar la información en la pantalla de resumen.
Programa en curso La pantalla muestra los ajustes y la temperatura efectiva del alimento.
AL FINAL DEL PROGRAMA
Independientemente del modo de abatimiento seleccionado, al final del programa el aparato emite una señal
acústica y visualiza una pantalla de aviso. Entonces se activa el modo de mantenimiento, que se encarga de
mantener la temperatura de la cámara a +5°C hasta la sucesiva intervención del operador. Al final está previsto el
desescarchado.
Nota: la apertura de la puerta durante la ejecución del abatimiento conlleva la introducción de aire caliente
y húmedo, aumentando la duración del programa. En el modo “según receta” la duración del ciclo es fija:
abrir repetidamente la puerta del aparato podría conllevar un abatimiento imperfecto. No abra la puerta
del aparato durante el ciclo de abatimiento.

14
3.12.4 Ultracongelación
La ultracongelación permite reducir rápidamente la temperatura de un alimento a -18°C, permitiendo
conservarlo posteriormente durante varios meses en el congelador. Se mantienen intactas las propiedades
organolépticas, el sabor, el aroma y el aspecto de los alimentos mediante la micro-cristalización del agua
contenida en el alimento, evitando así la destrucción de las estructuras moleculares internas
.
ULTRACONGELACIÓN
Es posible elegir entre dos modos de ultracongelación: “según receta” y “en corazón”.
La ultracongelación según receta no requiere el empleo de la sonda de aguja, pero es necesario indicar el peso y la
temperatura inicial del alimento que se debe procesar.
La ultracongelación en el corazón permite conocer la temperatura en el interior del alimento durante el ciclo.
ULTRACONGELACIÓN SEGÚN RECETA
Selecciones
Tipo de alimento: especificar la naturaleza del alimento que se debe procesar.
Preparación: especificar las características del alimento que se debe procesar
(consistencia y forma, p. ej. pasta-carne y entero-en trozos...).
Peso: especificar la cantidad de alimento que se debe procesar.
Estado inicial: si el alimento ha sido recién cocinado al horno, o cuando su
temperatura es alta, seleccione “caliente”. Si se encuentra a temperatura ambiente
o apenas tibio, seleccione “ambiente”.
Antes de iniciar el programa Es posible verificar la información en la pantalla de resumen.
Programa en curso La pantalla muestra los ajustes y el tiempo restante para finalizar el ciclo.
ULTRACONGELACIÓN EN EL CORAZÓN
Selecciones
Tipo de alimento: especificar la naturaleza del alimento que se debe procesar.
Preparación: especificar las características del alimento que se debe procesar
(consistencia y forma, p. ej. pasta-carne y entero-en trozos…).
Estos ajustes son necesarios para que el aparato establezca el ciclo de trabajo que
garantiza la ultracongelación perfecta.
Antes de iniciar el programa Es posible verificar la información en la pantalla de resumen.
Programa en curso La pantalla muestra los ajustes y la temperatura efectiva del alimento.
AL FINAL DEL PROGRAMA
Independientemente del modo de ultracongelación seleccionado, al final del programa el aparato emite una señal
acústica y visualiza una pantalla de aviso. Entonces se activa el modo de mantenimiento, que se encarga de mantener
la temperatura de la cámara a -21°C hasta la sucesiva intervención del operador. Al final está previsto el
desescarchado.
Nota: la apertura de la puerta durante la ejecución de la ultracongelación conlleva la introducción de aire
caliente y húmedo, aumentando la duración del programa. En el modo “según receta” la duración del ciclo
es fija: abrir repetidamente la puerta del aparato podría conllevar una ultracongelación imperfecta. No abra
la puerta del aparato durante el ciclo de ultracongelación.
3.12.5 Enfriamiento
El enfriamiento permite reducir el tiempo de espera para la utilización de alimentos calientes. Con esta
función, los alimentos cocinados recién deshornados pueden ser servidos o utilizados para otras
elaboraciones en la cocina, sin necesidad de esperar la normal aclimatización.
ENFRIAMIENTO
Selecciones
Temperatura del aire: especificar la temperatura del aire utilizada para enfriar el
alimento
Duración: especificar el intervalo de tiempo durante el cual se desea enfriar el
alimento.
Antes de iniciar el programa Es posible verificar la información en la pantalla de resumen.
Programa en curso La pantalla muestra los ajustes y el tiempo restante para finalizar el ciclo.
AL FINAL DEL PROGRAMA

15
Al final del programa el aparato emite una señal acústica y visualiza una pantalla de aviso.
No se realiza ninguna tarea de mantenimiento de la temperatura de la cámara.
Al final no está previsto el desescarchado.
3.12.6 Bebidas
El programa “Bebidas” permite reducir la temperatura de una bebida según el tiempo disponible. El
abatidor cuenta con características de funcionamiento de gran utilidad cuando no se dispone de tiempo
suficiente para la preparación normal para la degustación de bebidas.
Nota: este aparato no es un conservador de botellas y no reemplaza a una vinoteca. El enfriamiento
excesivo de las botellas podrías conllevar la congelación del líquido en su interior y causar la rotura de los
recipientes.
PREPARACIÓN BEBIDAS
Selecciones
Cantidad de botellas: especificar la cantidad de botellas que se quiere enfriar. Se
pueden introducir hasta 6 botellas.
Duración: especificar durante cuanto tiempo se quieren enfriar las botellas.
Antes de iniciar el programa Es posible verificar la información en la pantalla de resumen.
Programa en curso La pantalla muestra los ajustes y el tiempo restante para finalizar el ciclo.
AL FINAL DEL PROGRAMA
Al final del programa el aparato emite una señal acústica y visualiza una pantalla de aviso.
No se ejecuta ninguna acción de mantenimiento de la temperatura de la cámara y al final no está previsto el
desescarchado.
Nota: La botella “tipo” es “Bordolese” de 75cl; cabe recordar que, a igualdad de capacidad, un recipiente de vidrio
aísla más que una lata de aluminio, por lo que es más fácil enfriar una bebida en lata que una bebida en vidrio.
3.12.7 Conservación a 0°C
La conservación a 0°C permite replicar las condiciones ambientales presentes en un conservador a cero
grados. El desarrollo microbiano en los alimentos es un fenómeno natural que se produce según las
condiciones ambientales. La temperatura es un factor capaz de influir en el crecimiento y la proliferación de
bacterias que producen la degradación de los alimentos. Este programa mantiene constante la temperatura
interna del aparato a +3°C aproximadamente durante un plazo máximo de 36 horas y 20 minutos o hasta
que el usuario interviene.
Nota: este aparato no es un conservador de alimentos. Si desea conservar un alimento o una comida
durante un largo período de tiempo es aconsejable utilizar aparatos diseñados específicamente para ello.
CONSERVACIÓN A 0°C
Antes de iniciar el programa Es posible verificar la información en la pantalla de resumen.
Programa en curso La pantalla muestra los ajustes y el tiempo restante para finalizar el ciclo.
AL FINAL DEL PROGRAMA
Al final del programa el aparato emite una señal acústica y visualiza una pantalla de aviso.
No se ejecuta ninguna acción de mantenimiento de la temperatura de la cámara y al final no está previsto el desescarchado.
3.12.8 Pescado crudo
El programa Pescado crudo permite el mantenimiento del alimento durante 24 horas a -30°C
aproximadamente (sanitización mediante baja temperatura). La mala conservación de los productos de la
pesca puede provocar peligros para la salud en relación con la contaminación por Anisakis, un parásito que
puede ser eliminado mediante procesos prolongados de cocción o enfriamiento.
¡Atención! El fabricante se exime de toda responsabilidad por la utilización incorrecta o el incumplimiento
de las normas vigentes en materia sanitaria.

16
PESCADO CRUDO
Antes de iniciar el programa Es posible verificar la información en la pantalla de resumen.
Programa en curso La pantalla muestra los ajustes y el tiempo restante para finalizar el ciclo.
AL FINAL DEL PROGRAMA
Al final del programa el aparato emite una señal acústica y visualiza una pantalla de aviso.
Entonces se activa el modo de mantenimiento, que se encarga de mantener la temperatura de la cámara a -21°C
hasta la sucesiva intervención del operador. Al final del ciclo está previsto el desescarchado.
3.12.9 Descongelación
La descongelación permite llevar la temperatura de un alimento de la temperatura de congelación al valor
de +4°C, sin pérdida de líquidos y sin empezar su cocción, evitando así la transformación de las proteínas
que se produce por ejemplo cuando se descongela la carne en el microondas.
DESCONGELACIÓN
Selecciones
Tipo de alimento: especificar la naturaleza del alimento que se debe procesar.
Preparación: especificar las características del alimento que se debe procesar
(consistencia y forma, p. ej. pasta-carne y entero-en trozos…).
Peso: especificar la cantidad de alimento que se debe procesar.
Antes de iniciar el programa Es posible verificar la información en la pantalla de resumen.
Programa en curso La pantalla muestra los ajustes y el tiempo restante para finalizar el ciclo.
AL FINAL DEL PROGRAMA
Al final del programa el aparato emite una señal acústica y visualiza una pantalla de aviso.
Entonces se activa el modo de mantenimiento, que se encarga de mantener la temperatura de la cámara a +4°C
hasta la sucesiva intervención del operador. Al final no está previsto el desescarchado.
3.12.10 Listo para servir
El programa Listo para servir, permite calentar y servir a la temperatura adecuada para consumir, alimentos
anteriormente cocinados y conservados en la nevera, o bien que han alcanzado la temperatura ambiente.
¡Atención! Durante el funcionamiento en este modo, las partes accesibles pueden estar muy calientes: los
niños deben mantenerse alejados de estas partes. Tenga cuidado de no tocar las superficies calientes del
aparato y procure utilizar siempre los guantes de horno para extraer o introducir accesorios u ollas
resistentes al calor.
LISTO PARA SERVIR
Es posible elegir entre dos modos de Listo para servir: “inmediato” y “retardado”.
En el modo “Listo para servir inmediato”, el calentamiento inicia cuando se ejecuta el ciclo.
En el modo “Listo para servir retardado”, el calentamiento tiene lugar al finalizar el período de espera durante el cual
el aparato conserva la comida a la temperatura de +4°C, lo que permite ejecutar el programa por la mañana para
encontrar el alimento a la temperatura adecuada a la hora de la comida/cena.
LISTO PARA SERVIR INMEDIATO
Selecciones
Temperatura: especificar la temperatura del aire que calienta el alimento.
Duración: especificar el intervalo de tiempo durante el cual se quiere calentar el
alimento.
Antes de iniciar el programa Es posible verificar la información en la pantalla de resumen.
Programa en curso La pantalla muestra los ajustes y el tiempo restante para finalizar el ciclo.
LISTO PARA SERVIR RETARDADO
Selecciones
Retardo: especificar la cantidad de tiempo que debe transcurrir desde el inicio del
programa antes de ejecutar el calentamiento.
Temperatura: especificar la temperatura del aire que calienta el alimento.
Duración: especificar el intervalo de tiempo durante el cual se quiere calentar el
alimento.
Antes de iniciar el programa Es posible verificar la información en la pantalla de resumen.

17
Período de espera
La pantalla muestra los ajustes seleccionados, la hora de fin de ciclo y la hora en la
que inicia el calentamiento.
Programa en curso La pantalla muestra los ajustes y el tiempo restante para finalizar el ciclo.
AL FINAL DEL PROGRAMA
Al final del programa el aparato emite una señal acústica y visualiza una pantalla de aviso.
Entonces se activa el modo de mantenimiento hasta la intervención del usuario (inicialmente durante 30 minutos a
la temperatura de calentamiento configurada, sucesivamente a +4°C). Al final no está previsto el desescarchado.
3.12.11 Cocción lenta
La cocción lenta, o cocción a baja temperatura, permite cocinar de modo uniforme el alimento, preservar la
estructura de las células que lo componen y retener, durante el proceso, mayor cantidad de agua y grasas
en comparación con otros métodos de cocción a alta temperatura, con el fin de preparar alimentos más
tiernos y sabrosos.
Dependiendo de la receta, la cocción lenta podría requerir un mayor nivel de humedad. En este caso, se
aconseja introducir en el aparato, por debajo de la parrilla donde está colocado el recipiente con el
alimento, una fuente con agua.
¡Atención! Durante el funcionamiento en este modo, las partes accesibles pueden estar muy calientes: los
niños deben mantenerse alejados de estas partes. Tenga cuidado de no tocar las superficies calientes del
aparato y procure utilizar siempre los guantes de horno para extraer o introducir accesorios u ollas
resistentes al calor.
COCCIÓN LENTA
Es posible elegir entre dos modos de cocción lenta: “inmediata” y “retardada”.
En la “Cocción lenta inmediata” la cocción inicia cuando se ejecuta el ciclo.
En la “Cocción lenta retardada” la cocción tiene lugar al finalizar el período de espera durante el cual el aparato
conserva la comida a la temperatura de +4°C, lo que permite ejecutar el programa por la mañana para que el
alimento esté cocinado a la hora de la comida/cena.
COCCIÓN LENTA INMEDIATA
Selecciones
Temperatura: especificar la temperatura del aire a la que se desea cocinar el
alimento.
Duración: especificar el intervalo de tiempo durante el cual se quiere cocinar el
alimento.
Antes de iniciar el programa Es posible verificar la información en la pantalla de resumen.
Programa en curso La pantalla muestra los ajustes y el tiempo restante para finalizar el ciclo.
COCCIÓN LENTA RETARDADA
Selecciones
Hora de fin de ciclo: especificar a qué hora se quiere finalizar el ciclo completo.
Temperatura: especificar la temperatura del aire a la que se desea cocinar el
alimento.
Duración: especificar el intervalo de tiempo durante el cual se quiere cocinar el
alimento.
Antes de iniciar el programa Es posible verificar la información en la pantalla de resumen.
Período de espera
La pantalla muestra los ajustes seleccionados, la hora de fin de ciclo y la hora en la
que inicia la cocción.
Programa en curso La pantalla muestra los ajustes y el tiempo restante para finalizar el ciclo.
AL FINAL DEL PROGRAMA
Al final del programa el aparato emite una señal acústica y visualiza una pantalla de aviso.
Entonces se activa el modo de mantenimiento hasta la intervención del usuario (inicialmente durante 30 minutos a
la temperatura de cocción configurada, sucesivamente a +4°C). Al final no está previsto el desescarchado.

18
3.12.12 Fermentación
La fermentación permite crear un microclima con temperatura y humedad controladas, para favorecer la
activación y transformación de las levaduras. De este modo la fermentación puede tener lugar en
condiciones ideales produciendo el natural aumento de volumen de la masa. Programando la duración de
la fermentación se puede reducir la cantidad de levadura, obteniendo así un producto más ligero y
digerible, favoreciendo el desarrollo del aroma deseado.
Para una fermentación ideal se recomienda colocar la masa en un recipiente abierto en la parte superior y
tapar el recipiente mismo con un paño húmedo.
Si desea realizar la fermentación en un ambiente especialmente húmedo, es aconsejable introducir, junto
al recipiente con la masa, también una cubeta con agua caliente.
FERMENTACIÓN
Es posible elegir entre dos modos de fermentación: “inmediata”, “conservada” y “retardada”.
En la fermentación “inmediata” el proceso comienza de inmediato.
Si desea empezar enseguida la fermentación pero no se puede extraer la masa al final de la fermentación, es posible
mantener la masa a la temperatura adecuada en el modo “conservada”.
Si desea iniciar la fermentación al cabo de unas horas desde la introducción en el aparato, está disponible el modo
“retardada”.
FERMENTACIÓN INMEDIATA
Selecciones
Temperatura: especificar la temperatura del aire deseada para la fermentación de
las levaduras.
Duración: especificar el intervalo de tiempo durante el cual se quiere hacer
fermentar el alimento.
Humedad: especificar el nivel de humedad deseado en el interior del aparato. Si
desea un alto nivel de humedad, es preciso colocar junto al recipiente con la masa,
una cubeta con agua.
Antes de iniciar el programa Es posible verificar la información en la pantalla de resumen.
Programa en curso La pantalla muestra los ajustes y el tiempo restante para finalizar el ciclo.
FERMENTACIÓN CONSERVADA
Selecciones
Hora de fin de ciclo: especificar a qué hora se quiere finalizar el ciclo completo.
Temperatura: especificar la temperatura del aire deseada para la fermentación de
las levaduras.
Duración: especificar el intervalo de tiempo durante el cual se quiere hacer
fermentar el alimento. El aparato inicia de inmediato la fermentación; cuando
finaliza la masa se mantiene a +4°C (conservación) para inhibir la fermentación, por
último se mantiene a +15°C (reactivación).
Humedad: especificar el nivel de humedad deseado en el interior del aparato. Si
desea un alto nivel de humedad, es preciso colocar junto al recipiente con la masa,
una cubeta con agua caliente.
Antes de iniciar el programa Es posible verificar la información en la pantalla de resumen.
Período de espera
La pantalla muestra los ajustes seleccionados, la hora de fin de ciclo y la hora en la
que inicia la fermentación.
Programa en curso La pantalla muestra los ajustes y el tiempo restante para finalizar el ciclo.
FERMENTACIÓN RETARDADA
Selecciones
Hora de fin de ciclo: especificar a qué hora se quiere finalizar el ciclo completo.
Temperatura: especificar la temperatura del aire deseada para la fermentación de
las levaduras.
Duración: especificar el intervalo de tiempo durante el cual se quiere hacer
fermentar el alimento. El aparato no empieza de inmediato la fermentación,
primero activa el modo de espera en el que la temperatura se mantiene en principio
a +4°C (conservación) luego a +15°C (reactivación); al finalizar el tiempo de espera
tiene la lugar la fermentación durante el tiempo previsto.
Humedad: especificar el nivel de humedad deseado en el interior del aparato. Si
desea un alto nivel de humedad, es preciso colocar junto al recipiente con la masa,
una cubeta con agua caliente.

19
Antes de iniciar el programa Es posible verificar la información en la pantalla de resumen.
Período de espera
La pantalla muestra los ajustes seleccionados, la hora de fin de ciclo y la hora en la
que inicia la fermentación.
Programa en curso La pantalla muestra los ajustes y el tiempo restante para finalizar el ciclo.
AL FINAL DEL PROGRAMA
Independientemente del modo de fermentación seleccionado, al final del programa el aparato emite una señal
acústica y visualiza una pantalla de aviso. Entonces se activa el modo de mantenimiento hasta la posterior
intervención del usuario (en principio a +15°C durante 45 minutos, sucesivamente a +4°C). Al final no está previsto el
desescarchado
4. MANTENIMIENTO RUTINARIO
4.1 Información sobre seguridad
Se recomienda realizar las operaciones de limpieza y mantenimiento rutinario en condiciones de seguridad,
respetando escrupulosamente las normas siguientes:
• desconecte el aparato de la red eléctrica antes de trabajar con el mismo;
• para desconectar el aparato no tire del cable de alimentación;
• no toque el aparato con manos/pies húmedos o mojados sin protecciones (p.ej. guantes y calzado
adecuados);
• no introduzca destornilladores, utensilios de cocina u otros objetos entre las protecciones y las
partes en movimiento;
• no utilice dispositivos mecánicos u otros medios para acelerar el proceso de desescarchado, que no
sean aquellos recomendados por el fabricante;
• no permita a niños sin supervisión ejecutar las operaciones arriba descritas.
Durante las operaciones de mantenimiento rutinario queda prohibido desconectar o desmontar los
dispositivos de seguridad; el fabricante se exime de toda responsabilidad por los accidentes causados por el
incumplimiento de esta obligación.
4.2 Limpieza de superficies externas
Bastidor: las superficies externas en acero inoxidable del aparato deben limpiarse con un paño suave o una
esponja y un detergente neutro siguiendo el sentido del satinado. No utilice estropajos de acero inoxidable,
raspadores, sustancias abrasivas, ácidas o agresivas que podrían dañar de forma irreparable las superficies
de acero inoxidable.
Al finalizar la limpieza se recomienda proteger las superficies externas con productos específicos para acero
inoxidable con base aceitosa.
¡Atención! La placa de datos contiene información importante y útil para la asistencia técnica: procure no
quitarla durante la limpieza.
Pantalla: para una limpieza sencilla de la pantalla en vidrio, utilice productos específicos para superficies de
vidrio y un paño suave.
4.3 Limpieza de la cámara
La limpieza interna de la cámara es necesaria para garantizar la higiene y la calidad de los productos
procesados; por ello se recomienda limpiar el aparato al final de cada utilización. Las partes internas
redondeadas y la distribución de los accesorios en la cámara están concebidas para facilitar el lavado, que
deberá realizarse usando un paño suave o una esponja antirayado y un detergente neutro.
No utilice estropajos de acero inoxidable, raspadores, sustancias abrasivas, ácidas o agresivas que podrían
dañar de forma irreparable las superficies de acero inoxidable. Al finalizar la limpieza enjuague con agua
tibia y seque cuidadosamente.
4.4 Períodos de inactividad

20
En el caso de que esté previsto no utilizar el aparato durante un largo período de tiempo, es aconsejable
desconectarlo de la red de alimentación y realizar una atenta limpieza interna y externa siguiendo las
instrucciones de los apartados 4.2 y 4.3.
Además se aconseja dejar la puerta entreabierta durante todo el período de inactividad.
Cuando se vuelve a utilizar el aparato es preciso realizar las operaciones de limpieza preliminar indicadas en
el apartado 3.2.
5. MANTENIMIENTO EXTRAORDINARIO
5.1 Mal funcionamiento
Las intervenciones de mantenimiento extraordinario y/o sustitución de cualquier parte del aparato, así
como lo referente al sistema de iluminación, deben ser llevadas a cabo por personal cualificado y
autorizado.
Nota: en caso de apreciar mal funcionamientos, antes de contactar con el centro de asistencia, asegúrese
de que el cable de alimentación esté introducido correctamente y que reciba corriente. Si después de
hacerlo, el mal funcionamiento persiste póngase en contacto con el centro de asistencia comunicando:
• los datos de la placa de datos situada en el costado del aparato (apdo. 2.1, fig.4);
• la fecha de la compra;
• el código de alarma visible en la pantalla.
Nota: cualquier intento de modificar o reparar el aparato conlleva la anulación de la garantía. Encargue
dichas tareas exclusivamente a técnicos cualificados y autorizados.
5.2 Eliminación del
aparato
INFORMACIÓN AL USUARIO
Según las Directivas 2011/65/EU y 2012/19/EU, relativas a la reducción del uso de
sustancias peligrosas en los aparatos eléctricos y electrónicos, como también de la
eliminación de los residuos.
El símbolo de contenedor de basura tachado, presente en el aparato o en su envase,
indica que el producto al final de su vida útil debe ser recogido por separado de los otros
residuos.
ELIMINACIÓN DEL EMBALAJE: los componentes del embalaje (bolsas, películas, poliestireno) son
potencialmente peligrosos para niños y animales (peligro de asfixia). El embalaje está realizado con
materiales que pueden ser reciclados según las directivas del país en el que debe ser eliminado.
ELIMINACIÓN DEL APARATO: El usuario, cuando finaliza la vida útil del aparato, debe entregarlo a los
centros de recogida selectiva de residuos electrónicos y electrotécnicos idóneos, o bien, entregarlo al
revendedor cuando se adquiere un nuevo equipo similar, en razón de uno a uno.
La recogida selectiva apropiada de las partes para el posterior reciclado, tratamiento y eliminación
ambiental compatible del equipo, contribuye a evitar posibles efectos negativos en el medio ambiente y en
la salud, y favorece el reciclado de los materiales que constituyen el equipo.
La eliminación no autorizada del producto por parte del usuario implica la aplicación de las sanciones
administrativas previstas por la normativa vigente.
Los materiales principales que componen este aparato son los siguientes:
• Acero;
• Plástico;
• Cobre;
• Aluminio;
• Poliuretano.

21
6. LOCALIZACIÓN DE AVERÍAS
6.1 Tabla de alarmas
CÓDIGO DESCRIPCIÓN ACCIÓN
AS1 Sonda de aire averiada
Contactar con la asistencia para la
reparación
AS4
Fallo de comunicación de datos entre
la tarjeta de potencia y la interfaz de
usuario
Contactar con la asistencia para la
reparación
7. DATOS TÉCNICOS
Capacidad abatimiento 3 kg
Capacidad ultracongelación 3 kg
Cantidad de estantes (para parrillas) 3
Parámetros eléctricos 220/240V 50Hz
Corriente máxima 2,5 A
Potencia máxima (enfriamiento) 300 W
Potencia máxima (calentamiento) 220 W
Cable de alimentación Cable tripolar con clavija Schuko de 16A
Refrigerante R290
Clase climática SN
Peso neto 38 Kg
Peso bruto 40 Kg
7.1 Dimensiones
Fig.8 – Dimensiones del producto Fig.9 – Dimensiones del embalaje
4
38 mm
530 mm

22
8. ESQUEMA ELÉCTRICO
Fig.10 – Esquema eléctrico
1 Tarjeta de potencia 8 Ventilador condensador
2 Fusible 9 Ventilador condensador
3 Toma IEC con filtro EMI 10 Pantalla
4 Borne de tierra 11 Spot-LED
5 Resistencia de calentamiento 12 Ventilador evaporador
6 Compresor 13 Sonda de aire
7 Protección de bimetal 14 Sonda de aguja
9. INFORMACIÓN
9.1 Servicio
La asistencia técnica del producto la proporcionan los centros autorizados locales, cuyas direcciones de
referencia para la zona específica figuran en el anexo a este manual.
9.2 Los datos del cliente
Es posible aprovechar un servicio de asistencia más eficiente y rápido en caso de necesidad, cuando el
cliente comunica de forma tempestiva los siguientes datos relativos a su compra:
• número de factura;
• titular de la factura;
• fecha de la compra;
• número de serie del aparato.
3
4
5
6
10
11
12
13
14
7
1
9
2
8

23

24
Cod.1ABFY6 rev. ENG-021568D -03.05.2018
Barazza srl
31025 Sarano di S.Lucia di Piave (TV) ITALIA
Via Risorgimento, 14
Tel. +39 0438 62888
Fax + 39 0438 64901
www.barazzasrl.it

1
1ABFY
Blaster chiller
Installation and use manual

2
Contents
1. INTRODUCTION ......................................................................................................................................... 4
1.1 General warnings ............................................................................................................................... 4
1.2 Safety warnings ................................................................................................................................. 4
1.3 Transport and handling ..................................................................................................................... 4
1.4 Unpacking .......................................................................................................................................... 5
2. INSTALLATION ........................................................................................................................................... 5
2.1 Plate data ........................................................................................................................................... 5
2.2 Installation warnings ......................................................................................................................... 6
2.3 Positioning ......................................................................................................................................... 6
2.4 Ambient temperature and air exchange ........................................................................................... 7
2.5 Final checks ........................................................................................................................................ 7
2.6 Protective devices.............................................................................................................................. 7
3. USE ............................................................................................................................................................. 7
3.1 User warnings .................................................................................................................................... 7
3.2 Preliminary internal cleaning ............................................................................................................. 7
3.3 The core probe .................................................................................................................................. 7
3.4 Usable containers and lids ................................................................................................................. 8
3.5 Food layout ........................................................................................................................................ 8
3.6 Efficiency of blast chilling and freezing programmes ........................................................................ 8
3.7 Preservation of blast chilled or frozen foods .................................................................................... 8
3.8 Programmes ...................................................................................................................................... 9
3.9 Display and user interaction ............................................................................................................ 10
3.10 Meaning of icons ............................................................................................................................. 10
3.11 Power-on and power-off ................................................................................................................. 11
3.12 Programme selection ...................................................................................................................... 11
3.12.1 End of programme.................................................................................................................... 11
3.12.2 Pre-cooling................................................................................................................................ 12
3.12.3 Blast chilling .............................................................................................................................. 12
3.12.4 Blast freezing ............................................................................................................................ 13
3.12.5 Cooling ...................................................................................................................................... 13
3.12.6 Beverages ................................................................................................................................. 14
3.12.7 0°C Preservation ....................................................................................................................... 14
3.12.8 Raw fish .................................................................................................................................... 14
3.12.9 Thawing .................................................................................................................................... 16
3.12.10 Ready to serve .......................................................................................................................... 16
3.12.11 Slow cooking ............................................................................................................................. 17
3.12.12 Proofing .................................................................................................................................... 18

3
4.
ROUTINE MAINTENANCE
................................
................................
................................
........................
19
4.1 Safety information ........................................................................................................................... 19
4.2 External surface cleaning ................................................................................................................. 19
4.3 Cell cleaning ..................................................................................................................................... 19
4.4 Periods of inactivity ......................................................................................................................... 19
5. CORRECTIVE MAINTENANCE .................................................................................................................. 20
5.1 Malfunctioning ................................................................................................................................ 20
5.2 Disposal of device ............................................................................................................................ 20
6. TROUBLESHOOTING ................................................................................................................................ 21
6.1 Table of alarms ................................................................................................................................ 21
7. TECHNICAL SPECIFICATIONS ................................................................................................................... 21
7.1 Dimensions ...................................................................................................................................... 21
9. INFO ......................................................................................................................................................... 22
9.1 Service ............................................................................................................................................. 22
9.2 Customer data ................................................................................................................................. 22

4
1. INTRODUCTION
1.1 General warnings
This manual constitutes an integral part of the product. It contains information on the installation, use and
safety of the device. Read the instructions carefully.
It is mandatory for the user and installer to read this manual carefully and to always use it as a reference.
It is recommended to store this manual in a known location that is accessible to all authorised operators
(installer, user, maintenance technician) for consultation at all times, and to attach it to the device if
ownership is transferred.
During transport, handling and installation, lay the device with its base on a surface and do not keep it
on sloping surfaces for extended periods of time.
The manufacturer of this device declares that all equipment conforms to current regulations.
1.2 Safety warnings
The user shall be liable for any operations performed on the device without regard for the instructions
contained in this manual.
The device can be used by children over the age of eight and by people with reduced physical, sensory and
mental capabilities, or who lack experience and adequate knowledge, provided they are supervised or have
already received instructions on how to use the device safely and understand the dangers inherent to its
use. Children must not play with the device. Cleaning and maintenance operations, which can be carried
out by the user, must not be performed by children without supervision.
The power cord and outlet must be accessible even with the device is installed. The power cord must not
be subject to bending or crushing, which may compromise its insulation. Do not position power strips or
portable power packs on the rear of the device.
With the device installed, ventilation outlets must not be obstructed.
Caution! Do not use mechanical devices or other means to accelerate the defrosting process other than
those recommended by the manufacturer.
CAUTION: RISK OF FIRE / FLAMMABLE MATERIAL
All electrical parts and cooling circuit parts must be regularly inspected by authorised technical staff only.
The manufacturer declines all liability and all warranty obligations in the event of damage to the device,
persons or property attributable to:
• incorrect installation and/or use, and/or use in breach of current legislation;
• failure to comply with health and safety regulations and current legislation during installation;
• modifications and/or operations not specific to the model;
• use of non-original spare parts, or which are not specific to the model;
• failure, even partial, to comply with the instructions in this manual.
1.3 Transport and handling
The device must be loaded and unloaded using suitable transport means, for example a forklift, in the
absence of which at least two persons will be needed for said operations.
Caution! During handling operations all necessary precautions must be taken to avoid damage to persons,
property or the device itself. Specific instructions are reported on the packaging.

5
1.4 Unpacking
Open the box from the top, folding down the flaps to facilitate operations. Then remove the top and corner
protections in polystyrene (fig.1). Extract the protective bag (fig.2), then using the dedicated lifting handles,
extract the device from the box by lifting it upwards (fig.3).
Fig.1 Fig.2 Fig.3
After removing the packaging and before doing anything else, check the integrity of the device. If anomalies
are found, do not turn the device on and contact the Retailer.
The packaging materials must be disposed of in accordance with current legislation in the country of use
and under no circumstances may they be dispersed in the environment.
Lift the device using a suitable means and wearing safety gloves and place it in its designated location.
Remove any protective film, eliminating all adhesive residue using a soft cloth and neutral product. Do not
use scrapers or sponges that may irreparably scratch the surfaces.
Caution! The materials constituting the packaging may be potentially hazardous to children and animals.
2. INSTALLATION
2.1 Plate data
The characteristics of the device are reported on the ID plate affixed to the side of the device itself (fig. 4).
Fig. 4 - ID plate of device
Note: do not remove, alter, damage or modify the ID plate.

6
2.2 Installation warnings
Installation must be carried out only by authorised and specialised personnel in respect of the warnings,
instructions and provisions contained in this document.
Before installing the device, make sure the pre-existing electrical systems comply with current legislation
and are compatible with the ID plate of the device being installed in terms of voltage [V], frequency [Hz]
and power [W].
The device is supplied with a power cord with 16A Schuko plug.
Make sure the power cord is not crumpled, crushed or bent.
Do not wind up the power cord and make sure it does not create an obstacle or hazard to people.
The power cord must not come into contact with liquids, sharp or hot objects and must not be exposed to
corrosive substances.
Do not touch the device with damp or wet hands/feet or without protection (e.g. suitable gloves and
shoes).
Do not insert screwdrivers, kitchen tools or other objects between the protective devices or in moving
parts.
Do not allow children or animals to come into contact with the power cord.
Do not position power strips or portable power packs on the rear of the device.
Do not use extension cords with the power cord to prevent overheating.
Caution! The plug must be accessible when installation is complete! If this is not possible, the device’s
power system must be equipped with a suitable omnipolar disconnection device.
2.3 Positioning
It is recommended not to install the device in locations with a poor air exchange or high temperatures such
as places exposed to direct sunlight or atmospheric agents. Do not install the device near sources of heat.
Caution! When installation is complete, make sure there is nothing obstructing the opening of the door.
Note: in order for the device to function properly, it is mandatory to guarantee a vent stack with minimum
section 250 cm
2
(fig. 5) behind the device itself.
Caution! Once positioned in the recess, secure the device using suitable screws.
Fig.5 - Dimensions of recess and product

7
2.4 Ambient temperature and air exchange
The performance of the device is guaranteed up to an ambient temperature of 32°C provided there is a
suitable air exchange as indicated in paragraph 2.3.
2.5 Final checks
Once the device has been positioned and electrically connected:
• check that the electrical connection has been correctly made;
• wait at least 4 hours before powering up the device, thus giving the thermodynamic circuit time to
stabilise.
2.6 Protective devices
The device is equipped with the following protective devices:
• fuse on power board to protect against overloading;
• thermal cut-off switch in compressor to protect against overloading and malfunctions;
• double circuit-breaker to protect against malfunctions by the heating element.
3. USE
This device is intended mainly for the blast chilling and blast freezing of foods. If foods are cooked and blast
chilled, they maintain their sensory properties for 5-7 days; if foods are blast frozen, they maintain their
consistency and original flavour after thawing.
3.1 User warnings
• read this handbook carefully and always use it as a reference;
• if malfunctions are identified in the device, for example a damaged power cord or faulty control
panel, turn the device off immediately and contact the service centre;
• the device can be used by children over the age of eight and by people with reduced physical,
sensory and mental capabilities, or who lack experience and adequate knowledge, provided they
are supervised or have already received instructions on how to use the device safely and
understand the dangers inherent to its use. children must not play with the device;
• do not introduce explosive substances such as spray cans with flammable propellant into the
device;
• this device is intended for domestic use;
• during operation and depending on the programme being run, the device may heat up. Take
suitable precautions when working inside the device. Keep children away.
• this device is intended only for the specific use for which it was designed: i.e., blast chilling, blast
freezing, sanitation, thawing, proofing, heating, slow cooking, cooling of foods and beverages in a
domestic setting. All other uses shall be considered improper and potentially hazardous.
3.2 Preliminary internal cleaning
Once electrically connected and positioned, before turning the device on the inside of the cell must be
thoroughly cleaned using a soft cloth and neutral detergent. When finished, remove any cleaning residue.
Do not use stainless steel scrapers, abrasive, acidic or aggressive substances that may irreparably damage
the internal surfaces.
3.3 The core probe
The core probe is an accessory used to measure the temperature inside foods.
In programmes including use of the core probe, the process automatically ends when the set food
temperature is reached.
If the core probe is not connected to the device and the user wishes to use the probe mode, the message
“Connect probe to start programme” appears on the display.
Correct use involves the insertion of the probe into the food before the programme starts.

8
Note: the core probe must be inserted through to the centre of the food to make sure it doesn’t fall out. To
improve the efficiency of programmes, insert the probe in the largest piece.
If the core probe is not inserted in the food because it has been forgotten on the floor of the cell or
because it has fallen out of the food itself, after 5 minutes the device automatically switches to “recipe”
programme mode without altering the “Food type” and “Preparation” parameters.
Handle the probe with care and pay attention to the tip. After use, clean it with a soft cloth using warm
water, then put it away.
When “recipe” mode is selected for either blast chilling or freezing, use of the core probe has no effect on
the execution of the programme.
3.4 Usable containers and lids
Foods can only be inserted in this device if placed inside suitable food-grade containers with lids.
Make sure the containers are suitable for use at low temperatures (-40°C).
In programmes with hot functions it is better to use containers made of metal, ceramic or materials suited
to temperatures up to +80°C.
Use of shallow trays and containers will encourage internal ventilation and are therefore preferred.
3.5 Food layout
To increase the efficiency of the selected programme, it is recommended to:
• spread out the portion of food lapped by the flow of air as much as possible;
• do not pile foods up in the tray; spread the foods out as much as possible on a large surface to
encourage improved internal ventilation.
3.6 Efficiency of blast chilling and freezing programmes
Best blast chilling and freezing results are obtained by inserting freshly cooked foods into the device,
without exposing foods to ambient temperatures for extended periods of time; this is what determines the
loss of moisture and the deterioration of the food’s original colour, scent and flavour.
Suggestion: when blast chilling or blast freezing programmes are run with foods that are very hot or have a
certain weight, the cycles are shorter and offer improved results if the pre-cooling programme is run first.
3.7 Preservation of blast chilled or frozen foods
The correct place to store blast chilled foods is in the fridge, whereas blast frozen foods must be stored in
the freezer; therefore, it is recommended to use these devices to preserve foods.
Given that blast frozen foods can be preserved for long periods of time (6-12 months), they should be
stored in containers with a label indicating the contents and date of preparation and expiry.
Suggestion: vacuum packaging, using specific devices and following instructions regarding temperature and
time, can be used to further extend the preservation time of blast chilled or frozen foods.

9
3.8 Programmes
BLAST CHILLING
Allows foods to be stored in the fridge for 5÷7 days thanks to their rapid cooling down to +3°C. This
cooling blocks the evaporation of water from freshly cooked products and reduces the spre
ad of
bacteria, thus extending the preservation time of the food itself.
BLAST FREEZING
Allows foods to be stored in the freezer for several months thanks to their rapid cooling down to -
18°C. The sensory properties of food, its flavour, smell and appea
rance are all maintained through
the micro-
crystallisation of the food’s water content, thus preventing the destruction of its internal
molecular structures.
PRE-COOLING
Reduces the run time of programmes such as blast chilling and blast freezing in cas
es where very
hot foods or foods with a certain weight are pre-
cooled. This involves cooling the internal parts of
the device, thus optimising preparation times in the kitchen because this can be done while
preparing other recipes.
COOLING
Accelerates
the cooling of freshly cooked and therefore very hot foods down to the desired
temperature, without needing to wait for natural acclimatisation, thus quickly preparing them for
consumption.
BEVERAGES
Reduces the temperature of a beverage in accordance w
ith the available time. The storage of
beverages at their desired temperature is a task for wine cellars, however the blast chiller has
excellent and very useful characteristics in cases where there isn’t enough time.
0°C PRESERVATION
Preserves the sens
ory properties of raw foods and is perfect for foods (e.g. meats, fish and
vegetables) that need to be stored for a few hours before their preparation.
RAW FISH
Reproduces the low temperature sanitation process at home, using the high performance of the
blast chiller. The poor preservation of fish products may be a source of risk to human health due to
contamination by Anisakis, a parasite that can be eliminated by long cooking processes or
preservation at -30°C.
THAWING
Brings the temperature of a bl
ast frozen product up to 4°C without losing any liquids and without
starting the cooking process, thus avoiding the transformation of proteins, which typically occurs
when meat is defrosted in the microwave.
READY TO SERVE
Heats food previously cooked a
nd stored in the fridge, making it ready to serve at the table at the
right temperature.
SLOW COOKING
Cooks food at a constant temperature for a fixed period of time. This technique, thanks to the
limited evaporation of the food’s water content, helps t
o maintain the quality and tenderness of
foods.
PROOFING
Creates a micro-
climate with controlled temperature and humidity so that fermentation occurs in
optimal conditions, allowing the dough to rise naturally. By programming the duration of proofing,
i
t is possible to reduce the amount of yeast, thus obtaining a lighter, more digestible product,
encouraging the development of the desired aroma.

10
3.9 Display and user interaction
The control panel consists in a 4.3 inch touch display and power-on button located on the side.
Fig.6 - Main menu and example of selection screen
1. “Programme” icon: when this icon is touched, the run screen for the relative programme opens.
2. “Settings” icon: by selecting this icon it is possible to adjust the language, time, display brightness
and buzzer volume.
3. Current time: indicates the system clock time.
4. “Back” icon: to return to the previous screen.
5. “Home” icon: to return to the “Main menu” programme selection screen.
6. Scroll icon: indicates the area of the screen that can be “browsed” to view all selection options.
3.10 Meaning of icons
Regardless of the selected programme, there are certain icons that repeatedly appear during the user’s
interaction with the display. Their meaning is explained below.
HOME
To return to the Main Menu.
Any inserted data is deleted.
SETTINGS
To enter edit mode to modify the main settings of the device: display brightness, buzzer volume,
language, system time.
BACK
To return to the previous screen.
If the user is in a programme selection screen, the data from the previous screens will be saved.
START
To start the selected programme.
Once this key is pressed, the icon for the running programme will turn light blue (cold cycles) or red (hot
cycles) to indicate the operating status of the device.
STOP
To interrupt the running programme.
Cancellation must be confirmed by pressing “yes” in the next screen.
The programme will be interrupted and the display will return to the Main Menu screen.
LIGHT
To turn internal cell lighting on/off: the l
ight is either on or off depending on whether the bulb is
respectively white or black. After a long period of non-
interaction between the user and the device, the
internal light will turn off.
1
2
3
4
5
6

11
3.11 Power-on and power-off
To power on the device press the ON/OFF key on the side of the display for at least 2 seconds. The logo will
appear and therefore the “Main Menu” screen.
After 5 minutes of no interaction, a screen-saver with the current time will appear on the display.
To power off the device press the ON/OFF key on the side of the display for at least 2 seconds. This
operation is possible at any time: if the device is powered off while a programme is still running, a message
will appear on the display and the programme will be permanently stopped.
3.12 Programme selection
The programme is selected from the “Main Menu” screen by touching the desired icon. A long touch on
each icon will open up an explanatory box for the relative programme (fig.7).
Fig.7 - Example of information screen
Once the programme is running, after 2 minutes of no interaction a screen-saver with the icon of the
current programme will appear on the display.
Simply touch any point on the display to make the screen-saver disappear.
3.12.1 End of programme
At the end of each programme, the device emits an acoustic signal to inform that the food can be removed.
In some programmes the device automatically enters holding mode with a relative message on the display,
during which time the food can remain inside the blast chiller. To interrupt this mode simply press the
“stop” key and at the same time remove the food from the blast chiller.
“Blast Chilling”, “Blast Freezing”, “Raw Fish” and “0°C Preservation” programmes also include an automatic
defrosting phase which occurs after holding, or when holding is interrupted by the user. Defrosting is
indicated by a dedicated screen and lasts for 15 minutes, after which the display returns to the Main Menu
screen. Automatic defrosting can be interrupted at any time by pressing the “stop” key.

12
3.12.2 Pre-cooling
Pre-cooling is recommended to reduce the run time of blast chilling and blast freezing programmes.
PRE-COOLING
Before starting the
programme
It is possible to check the information in the summary screen.
Programme running The display shows the settings and remaining time until the end of the cycle.
AT THE END OF THE PROGRAMME
The device emits an acoustic signal and opens up a notification screen.
There is no holding or defrosting phase, the device is ready to run other programmes.
3.12.3 Blast chilling
Blast chilling allows foods to be stored in the fridge for 5÷7 days thanks to a rapid cooling process, which
blocks the evaporation of water and the loss of vitamins, protein and mineral salts from freshly cooked
products. By reducing the amount of time a food is exposed to temperatures allowing the spread of
bacteria, the preservation time of the food itself is extended. Moreover, it is also possible to process freshly
cooked foods even at temperatures of 90°C.
BLAST CHILLING
There are two blast chilling modes: “recipe” and “probe”.
Recipe blast chilling does not require use of the core probe, but it is necessary to indicate the weight and starting
temperature of the food being processed.
Probe blast chilling allows the temperature at the centre of the food to be measured during the cycle.
RECIPE BLAST CHILLING
Selections
Type of food: specify the type of food being processed.
Preparation: specify the characteristics of the food being processed (consistency
and form, e.g. pasta-meat and whole-pieces...).
Weight: specify the quantity of food being processed.
Initial state: if the food has just been cooked in the oven, or if its temperature is
nonetheless high, select “hot”. If the food is at ambient temperature or lukewarm,
select “ambient”.
Before starting the
programme
It is possible to check the data inserted through a summary screen.
Programme running The display shows the settings and remaining time until the end of the cycle.
PROBE BLAST CHILLING
Selections
Type of food: specify the type of food being processed.
Preparation: specify the characteristics of the food being processed (consistency
and form, e.g. pasta-meat and whole-pieces...).
These settings are necessary for the device to determine the operating cycle that
will guarantee best blast chilling.
Before starting the
programme
It is possible to check the data inserted through a summary screen.
Programme running The display shows the settings and effective temperature of the food.
AT THE END OF THE PROGRAMME
Regardless of the blast chilling mode selected, at the end of the programme the device emits an acoustic signal and
opens up a notification screen. It therefore enters holding mode, where the cell temperature is held at +5°C until the
user intervenes. Defrosting occurs at the end.
Note: if the door is opened during blast chilling, hot and humid air will be introduced and therefore the
programme will run for longer. In “recipe” mode the duration of the cycle is fixed: if the door is repeatedly
opened, blast chilling may not be perfect. Do not open the door of the device during the blast chilling cycle.

13
3.12.4 Blast freezing
Blast freezing rapidly reduces the temperature of food down to -18°C, thus allowing it to be stored for
several months in the freezer. The sensory properties, taste, aroma and appearance of food is maintained
through the rapid micro-
crystallisation of the food's water content, thus preventing the destruction of its internal
molecular structure.
BLAST FREEZING
There are two blast freezing modes: “recipe” and “probe”.
Recipe blast freezing does not require use of the core probe, but it is necessary to indicate the weight and starting
temperature of the food being processed.
Core blast freezing allows the temperature at the centre of the food to be measured during the cycle.
RECIPE BLAST FREEZING
Selections
Type of food: specify the type of food being processed.
Preparation: specify the characteristics of the food being processed (consistency
and form, e.g. pasta-meat and whole-pieces...).
Weight: specify the quantity of food being processed.
Initial state: if the food has just been cooked in the oven, or if its temperature is
nonetheless high, select “hot”. If the food is at ambient temperature or lukewarm,
select “ambient”.
Before starting the
programme
It is possible to check the data inserted through a summary screen.
Programme running The display shows the settings and remaining time until the end of the cycle.
CORE BLAST FREEZING
Selections
Type of food: specify the type of food being processed.
Preparation: specify the characteristics of the food being processed (consistency
and form, e.g. pasta-meat and whole-pieces...).
These settings are necessary for the device to determine the operating cycle that
will guarantee best blast freezing.
Before starting the
programme
It is possible to check the data inserted through a summary screen.
Programme running The display shows the settings and effective temperature of the food.
AT THE END OF THE PROGRAMME
Regardless of the blast freezing mode selected, at the end of the programme the device emits an acoustic signal and
opens up a notification screen. It therefore enters holding mode, where the cell temperature is held at -21°C until the
user intervenes. Defrosting occurs at the end.
Note: if the door is opened during blast freezing, hot and humid air will be introduced and therefore the
programme will run for longer. In “recipe” mode the duration of the cycle is fixed: if the door is repeatedly
opened, blast freezing may not be perfect. Do not open the door of the device during the blast freezing
cycle.
3.12.5 Cooling
Cooling reduces the wait time to use hot foods. Using this function, freshly cooked foods can be served at
the table or used for further preparation in the kitchen without waiting for normal acclimatisation.
COOLING
Selections
Air temperature: specify the air temperature used to cool the food
Duration: specify for how long the food must be cooled.
Before starting the
programme
It is possible to check the data inserted through a summary screen.
Programme running The display shows the settings and remaining time until the end of the cycle.

14
AT THE END OF THE PROGRAMME
At the end of the programme the device emits an acoustic signal and opens up a notification screen.
There is no cell temperature holding phase.
There is no defrosting phase at the end.
3.12.6 Beverages
The “Beverages” programme reduces the temperature of a beverage in accordance with the available time.
The blast chiller has very useful performance characteristics when there is not enough time for the normal
preparation of beverages.
Note: this device is not a bottle storage rack and is not a replacement for wine cellars. Excessive cooling of
bottles may cause their liquid to freeze and subsequent breakage of the bottle.
BEVERAGE PREPARATION
Selections
Number of bottles: specify the number of bottles that need to be cooled. Up to 6
bottles can be inserted.
Duration: specify for how long the bottles must be cooled.
Before starting the
programme
It is possible to check the data inserted through a summary screen.
Programme running The display shows the settings and remaining time until the end of the cycle.
AT THE END OF THE PROGRAMME
At the end of the programme the device emits an acoustic signal and opens up a notification screen.
There is no cell temperature holding phase and no defrosting phase at the end.
Note: The bottle “type” is a 75cl “Bordolese”; consider that capacity being equal, a glass container insulates
more than an aluminium can, therefore it will be easier to cool a canned drink than a glass bottled drink.
3.12.7 0°C Preservation
0°C preservation replicates the environmental conditions in a zero degree storage container. Microbial
development in food is a natural phenomenon that occurs depending on the environmental conditions.
Temperature is a factor able to influence the growth and reproduction of bacteria, which determines the
deterioration of food. This programme maintains the internal temperature of the device at about +3°C for a
maximum of 36 hours and 20 minutes or until the user intervenes.
Note: this device is not a food storage device. If you wish to store foods for long periods of time, it is
recommended to use devices specifically designed for this purpose.
0°C PRESERVATION
Before starting the
programme
It is possible to check the data inserted through a summary screen.
Programme running The display shows the settings and remaining time until the end of the cycle.
AT THE END OF THE PROGRAMME
At the end of the programme the device emits an acoustic signal and opens up a notification screen.
There is no cell temperature holding phase and no defrosting phase at the end.
3.12.8 Raw fish
The Raw Fish programme allows food to be held for 24 hours at approximately -30°C (low temperature
sanitation). The poor preservation of fish products may be a source of risk to human health due to
contamination by Anisakis, a parasite that can be eliminated only by long cooking or cooling processes.
Caution! The manufacturer denies all liability resulting from incorrect use of the device or the violation of
current hygiene laws.

15

16
RAW FISH
Before starting the
programme
It is possible to check the data inserted through a summary screen.
Programme running The display shows the settings and remaining time until the end of the cycle.
AT THE END OF THE PROGRAMME
At the end of the programme the device emits an acoustic signal and opens up a notification screen.
It therefore enters holding mode, where the cell temperature is held at -21°C until the user intervenes. There is a
defrosting phase at the end.
3.12.9 Thawing
Thawing increases the temperature of a blast frozen product up to +4°C without losing any liquids and
without starting the cooking process, thus avoiding the transformation of proteins, which typically occurs
when meat is defrosted in the microwave.
THAWING
Selections
Type of food: specify the type of food being processed.
Preparation: specify the characteristics of the food being processed (consistency
and form, e.g. pasta-meat and whole-pieces...).
Weight: specify the quantity of food being processed.
Before starting the
programme
It is possible to check the data inserted through a summary screen.
Programme running The display shows the settings and remaining time until the end of the cycle.
AT THE END OF THE PROGRAMME
At the end of the programme the device emits an acoustic signal and opens up a notification screen.
It therefore enters holding mode, where the cell temperature is held at +4°C until the user intervenes. There is no
defrosting phase at the end.
3.12.10 Ready to serve
Ready to serve allows food previously cooked and stored in the fridge, or which has cooled to ambient
temperature, to be heated and served at the right temperature.
Caution! In this operating mode, the accessible parts of the device become very hot: children must be kept
at a distance. Take care not to touch the hot surfaces of the device and always use oven mitts to extract or
insert accessories or heat-resistant pots.
READY TO SERVE
There are two ready to serve modes: “immediate” and “delayed”.
In “Immediate ready to serve” heating begins when the cycle starts.
In “Delayed ready to serve” heating begins after a delay, during which the device preserves the food at a
temperature of +4°C, thus making it possible to start the programme in the morning and have the dish ready to serve
in time for lunch or dinner.
IMMEDIATE READY TO SERVE
Selections
Temperature: specify the temperature of the air heating the food.
Duration: specify for how long the food must be heated.
Before starting the
programme
It is possible to check the data inserted through a summary screen.
Programme running The display shows the settings and remaining time until the end of the cycle.
DELAYED READY TO SERVE
Selections
Delay: specify how long after starting the programme heating should begin.
Temperature: specify the temperature of the air heating the food.
Duration: specify for how long the food must be heated.

17
Before starting the
programme
It is possible to check the data inserted through a summary screen.
z
Wait period
The display shows the selected settings, the end cycle time and the time when
heating will begin.
Programme running The display shows the settings and remaining time until the end of the cycle.
AT THE END OF THE PROGRAMME
At the end of the programme the device emits an acoustic signal and opens up a notification screen.
The holding phase therefore begins until the user intervenes (initially for 30 minutes at the set heating temperature,
and then at +4°C). There is no defrosting phase at the end.
3.12.11 Slow cooking
Slow cooking or low-temperature cooking allows food to be evenly cooked. This method preserves the
structure of the food cells and retains a higher water and fat content during the cooking process as
compared to other high-temperature cooking methods, offering smoother and more flavoursome dishes.
Depending on the recipe, slow cooking may require a higher humidity rate. In this case, it is recommended
to insert a tray filled with water inside the device, underneath the grille on which the food container is
positioned.
Caution! In this operating mode, the accessible parts of the device become very hot: children must be kept
at a distance. Take care not to touch the hot surfaces of the device and always use oven mitts to extract or
insert accessories or heat-resistant pots.
SLOW COOKING
There are two slow cooking modes: “immediate” and “delayed”.
In “Immediate slow cooking”, cooking begins when the cycle starts.
In “Delayed slow cooking”, cooking begins after a delay, during which the device preserves the food at a temperature
of +4°C, thus making it possible to start the programme in the morning and have the dish cooked in time for lunch or
dinner.
IMMEDIATE SLOW COOKING
Selections
Temperature: specify the air temperature at which the food must be cooked.
Duration: specify for how long the food must be cooked.
Before starting the
programme
It is possible to check the data inserted through a summary screen.
Programme running The display shows the settings and remaining time until the end of the cycle.
DELAYED SLOW COOKING
Selections
End cycle time: specify at what time the entire cycle should end.
Temperature: specify the air temperature at which the food must be cooked.
Duration: specify for how long the food must be cooked.
Before starting the
programme
It is possible to check the data inserted through a summary screen.
Wait period
The display shows the selected settings, the end cycle time and the time when
cooking will begin.
Programme running The display shows the settings and remaining time until the end of the cycle.
AT THE END OF THE PROGRAMME
At the end of the programme the device emits an acoustic signal and opens up a notification screen.
The holding phase therefore begins until the user intervenes (initially for 30 minutes at the set cooking temperature,
and then at +4°C). There is no defrosting phase at the end.

18
3.12.12 Proofing
Proofing allows the creation of a micro-climate with controlled temperature and humidity to encourage the
activation and transformation of the yeast. Fermentation thus occurs in best conditions, producing
naturally, perfectly risen dough. By programming the duration of proofing, it is possible to reduce the
amount of yeast, thus obtaining a lighter, more digestible product while at the same time encouraging the
development of the desired aroma.
For best proofing, it is recommended to place the dough in a container without a lid and to cover the
container itself with a damp cloth.
If you need to proof in a particularly humid environment, it is recommended to insert a tray of warm water
next to the container holding the dough.
PROOFING
There are three proofing modes: “immediate, “preserved” and “delayed”.
In “immediate” proofing the process begins immediately.
If proofing needs to start immediately, but it is not possible to extract the dough at the end of proofing itself, the
dough can be held at the right temperature in the “preserved” mode.
If proofing needs to start a few hours after being placed in the device, this is possible using the “delayed” mode.
IMMEDIATE PROOFING
Selections
Temperature: specify the desired air temperature for the fermentation of the yeast.
Duration: specify for how long the food must be proofed.
Humidity: specify the desired humidity rate inside the device. If a high humidity rate
is needed, insert a tray of water next to the container holding the dough.
Before starting the
programme
It is possible to check the data inserted through a summary screen.
Programme running The display shows the settings and remaining time until the end of the cycle.
PRESERVED PROOFING
Selections
End cycle time: specify at what time the entire cycle should end.
Temperature: specify the desired air temperature for the fermentation of the yeast.
Duration: specify for how long the food must be proofed. The device starts proofing
immediately; at the end, the dough is held at +4°C (preservation) to inhibit
fermentation, then the temperature is brought back up to 15°C (awakening).
Humidity: specify the desired humidity rate inside the device. If a high humidity rate
is needed, insert a tray of warm water next to the container holding the dough.
Before starting the
programme
It is possible to check the data inserted through a summary screen.
Wait period
The display shows the selected settings, the end cycle time and the time when
proofing will begin.
Programme running The display shows the settings and remaining time until the end of the cycle.
DELAYED PROOFING
Selections
End cycle time: specify at what time the entire cycle should end.
Temperature: specify the desired air temperature for the fermentation of the yeast.
Duration: specify for how long the food must be proofed. The device does not begin
proofing straight away but rather enters into wait mode, during which time the
temperature is held initially at +4°C (preservation) and then at 15°C (awakening); at
the end of the wait time, proofing begins for the desired time.
Humidity: specify the desired humidity rate inside the device. If a high humidity rate
is needed, insert a tray of warm water next to the container holding the dough.

19
Before starting the
programme
It is possible to check the data inserted through a summary screen.
Wait period
The display shows the selected settings, the end cycle time and the time when
proofing will begin.
Programme running The display shows the settings and remaining time until the end of the cycle.
AT THE END OF THE PROGRAMME
Regardless of the proofing mode selected, at the end of the programme the device emits an acoustic signal and
opens up a notification screen. The holding phase therefore begins until the user intervenes (initially at 15°C for 45
minutes, then at +4°C). There is no defrosting phase at the end
4. ROUTINE MAINTENANCE
4.1 Safety information
It is recommended to perform routine cleaning and maintenance operations in safe conditions, in strict
compliance with the following rules:
• disconnect the device from the power network before operating on it;
• do not pull on the power cord when disconnecting the device;
• do not touch the device with damp or wet hands/feet or without protection (e.g. suitable gloves
and shoes);
• do not insert screwdrivers, kitchen tools or other objects between the protective devices or in
moving parts;
• do not use mechanical devices or other means to accelerate the defrosting process other than
those recommended by the manufacturer;
• do not allow unsupervised children to carry out the above-described operations.
During routine maintenance operations, it is prohibited to deactivate or remove the safety devices: the
Manufacturer denies all liability for accidents caused by the violation of this obligation.
4.2 External surface cleaning
Shell: external surfaces of the device in stainless steel must be cleaned with a soft cloth or sponge and a
neutral detergent, in the direction of the satin finish. Do not use stainless steel scrapers or abrasive, acidic
or aggressive substances, which may permanently damage the stainless steel surfaces.
At the end of cleaning, it is recommended to protect the external surfaces with specific oil-based products
for stainless steel.
Caution! The ID plate contains important information that is useful when requesting technical support: take
care not to remove it during cleaning.
Display: for easy cleaning of the glass display, use specific products for glass surfaces and a soft cloth.
4.3 Cell cleaning
The inside of the cell must be cleaned to guarantee the hygiene and quality of processed products; for this
reason, the device must be cleaned after each use. The curvature of the internal parts and the layout of the
cell’s accessories have been designed to facilitate cleaning, which must be carried out using a soft cloth or
scratchproof sponge and a neutral detergent.
Do not use stainless steel scrapers or abrasive, acidic or aggressive substances, which may permanently
damage the stainless steel surfaces. After cleaning, rinse with lukewarm water and dry thoroughly.
4.4 Periods of inactivity
If the device will not be used for a long period of time, it is recommended to disconnect it from the power
and perform a thorough internal and external clean, following the instructions in paragraphs 4.2 and 4.3.
Moreover, it is recommended to leave the door slightly ajar for the entire period of inactivity.
The next time the device is used, perform the preliminary cleaning operations described in paragraph 3.2.

20
5. CORRECTIVE MAINTENANCE
5.1 Malfunctioning
Corrective maintenance operations, the replacement of spare parts, and all operations regarding the
lighting system must be carried out by qualified and authorised staff.
Note: if malfunctions are identified, before calling the service centre make sure the power cord is properly
inserted and check for power. If the malfunction persists, call the service centre providing details of:
• the data on the ID plate affixed to the side of the device (par. 2.1, fig.4);
• the date of purchase;
• any alarm codes visible on the display.
Note: any attempts to modify or repair the device shall invalidate the warranty. Turn to qualified and
authorised technicians only.
5.2 Disposal of device
USER INFORMATION
Pursuant to Directive 2011/65/EU, and 2012/19/EU on the restriction of the use of
certain hazardous substances in electrical and electronic equipment, as well as the
disposal of waste.
The crossed-out wheelie bin symbol on the device or its packaging indicates that the
product must be collected separately from other waste, at the end of its useful life.
DISPOSAL OF PACKAGING: the components of the packaging (bags, film, polystyrene) are
potentially hazardous to children and animals (danger of suffocation). The packaging is made using
materials that can be recycled pursuant to the Directives in the country where the device must be disposed
of.
DISPOSAL OF DEVICE: at the end of its useful life, the user must deliver the device to suitable waste sorting
centres for electrical and electronic equipment, or return it to the retailer at the time of purchase of a new
equivalent device, in a one to one ratio.
The proper sorting of parts for their subsequent recycling, treatment and/or environmentally friendly
disposal, helps to avoid negative effects on the environment and on human health, and encourages the
reuse and/or recycling of the materials composing the device.
The illegal disposal of the product by the user may lead to the application of the administrative penalties
laid down by the legislation in force.
The main materials composing the device in question are:
• Steel;
• Plastic;
• Copper;
• Aluminium;
• Polyurethane.

21
6. TROUBLESHOOTING
6.1 Table of alarms
CODE DESCRIPTION ACTION
AS1 Faulty air probe Contact service centre for repair
AS4
No data communication between
power board and user interface
Contact service centre for repair
7. TECHNICAL SPECIFICATIONS
Blast chilling capacity 3 kg
Blast freezing capacity 3 kg
Number of levels (for grilles) 3
Electrical parameters 220/240V 50Hz
Maximum current 2.5 A
Maximum power (cooling) 300 W
Maximum power (heating) 220 W
Power cord 3-pole with 16A Schuko outlet
Refrigerant R290
Climate class SN
Net weight 38 Kg
Gross weight 40 Kg
7.1 Dimensions
Fig.8 – Product dimensions Fig.9 – Packaging dimensions
438 mm
530 mm

22
8. WIRING DIAGRAM
Fig.10 - Wiring diagram
1 Power board 8 Capacitor fan
2 Fuse 9 Capacitor fan
3 IEC outlet with EMI filter 10 Display
4 Ground terminal 11 Spot-LED
5 Heating element 12 Evaporative cooler
6 Compressor 13 Air probe
7 Bimetallic protection 14 Core probe
9. INFO
9.1 Service
Technical support for products is provided by authorised centres in your area. Addresses for specific areas
are provided in the attachment to the manual.
9.2 Customer data
We are able to provide faster and more efficient technical support if the customer provides the following
information regarding their purchase:
• invoice number;
• name on invoice;
• date of purchase;
• serial number of device.
3
4
5
6
10
11
12
13
14
7
1
9
2
8

23

24
Cod.1ABFY1 rev. ENG-021568D -03.05.2018
Barazza srl
31025 Sarano di S.Lucia di Piave (TV) ITALIA
Via Risorgimento, 14
Tel. +39 0438 62888
Fax + 39 0438 64901
www.barazzasrl.it
-
 1
1
-
 2
2
-
 3
3
-
 4
4
-
 5
5
-
 6
6
-
 7
7
-
 8
8
-
 9
9
-
 10
10
-
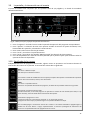 11
11
-
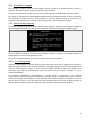 12
12
-
 13
13
-
 14
14
-
 15
15
-
 16
16
-
 17
17
-
 18
18
-
 19
19
-
 20
20
-
 21
21
-
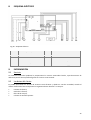 22
22
-
 23
23
-
 24
24
-
 25
25
-
 26
26
-
 27
27
-
 28
28
-
 29
29
-
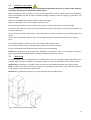 30
30
-
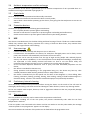 31
31
-
 32
32
-
 33
33
-
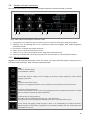 34
34
-
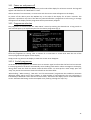 35
35
-
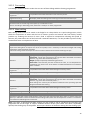 36
36
-
 37
37
-
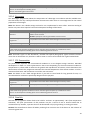 38
38
-
 39
39
-
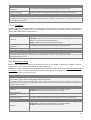 40
40
-
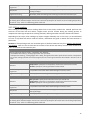 41
41
-
 42
42
-
 43
43
-
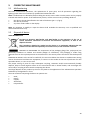 44
44
-
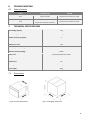 45
45
-
 46
46
-
 47
47
-
 48
48


En otros idiomas
- English: Barazza 1ABFY Operating instructions
Otros documentos
-
KitchenAid KCBSX 60600 Guía del usuario
-
-
-
-
KitchenAid KOSCX 45600 Guía del usuario
-
KitchenAid KOQCX 45600 Guía del usuario
-
Samsung RSG5DURS Guía de inicio rápido
-
-
-
GGM Gastro SFF1046NR El manual del propietario