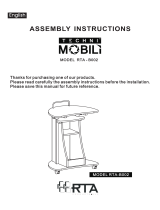
Techni Mobili RTA-S06-GPH06 Guía de instalación
- Tipo
- Guía de instalación

MODEL RTA - S06
Thanks for purchasing one of our products.
Please read carefully the assembly instructions before the installation.
Please save this manual for future reference.
English

Spanish
Gracias por comprar uno de nuestros productos.
Por favor lea cuidadosamente las instrucciones de ensamblaje antes de
instalar la unidad.
Por favor guarde este manual para referencias futuras.
MODELO RTA - S06

RTA-S06
DIMENSIONS
MAXIMUM WEIGHT CAPACITIES
DO NOT exceed this limit
Please use care and good judgement
when placing objects on wood surface
Product Size: 16"W x 18"D x 24"H

P.4
x4
x2
x2
x2SETS
x2

P.5
x4
4X35 MM
6X35 MM
L Bracket and Nut
Soporte y Tuerca

P.6

P.7
RTA-S06
30mm

RTA-S06

P.9
RTA-S06
1
2
2
8
23B
23B
C
4PCS
3X15 MM
1
2
4
1
2
5
4PCS
6X40 MM
A
Use screws C to assemble the Metal Fitting (23B) to the Top Drawer
Right Panel (2) & Bottom Drawer Right Panel (8).
Use tornillos C para ensemblar el Accesorio de Metal (23B) al Panel
Derecho de la Gaveta Superior (2) & Panel Derecho de Gaveta Inferior.
Insert the Bolts A in the holes of the back face of the Top Drawer Front Panel (4) and tighten them
with the screwdriver, then place the Top Drawer Left Panel (1) and the Top Drawer Right Panel (2)
over the Bolts and tighten the cam locks on the inside face.
Slide in the Drawer Bottom Panel (5).
Insert los Pernos A en los agujeros de la cara posterior del Panel Frontal de Gaveta Superior (4) y
aj stelos con el destornillador, luego coloque sobre ellos el Panel Izquierdo de Gaveta Superior (1)
y el Panel Derecho de Gaveta Superior (2) y ajuste los cerrajes situados en la cara interna de los
Paneles.
Deslice el Panel Inferior de Gaveta (5).
ú
1
2
6
4PCS
4X35 MM
B
3
Use Screws B to fix the Top Drawer Back Panel (6) to the Top Drawer’s
Left and Right Panels (1&2).
Use tornillos B para fijar el Panel Posterior de Gaveta Superior (6) a los
Paneles Izquierdo y Derecho de Gaveta Superior (1 y 2).

P.10
RTA-S06
C
4PCS
3X15 MM
4
Right
Left
1
12
12
5
4
13
4X20 MM
D
2PCS
4
23G
23D
C
2PCS
3X15 MM
6
Fix the Metal Ring (23G) to the front face of the Top Drawer Front Panel (4).
Use Screws C to fix the Lock (23D) to the back face of Top Drawer Front Panel (4).
Coloque el Aro de Metal (23G) en la parte frontal del Panel Frontal de Gaveta Superior (4).
Use tornillos C para fijar la Cerradura (23D) a la patre posterior del Panel Frontal de Gaveta Superior (4).
Set aside the flat sliders (12), they are used until step 15.
Turn drawer upside-down and assemble the “L” type
sliders (12) to the side panels (1)&(2), making the holes
align with the pre-drilled holes, and with the wheels
facing to the back, then fix them with screws (C). Make
sure the sliders are in contact with the side panels, and
that there is no part of them “up in the air”.
Separe los deslizadores planos (12) para ser usados luego hasta el
paso 15. Vire la gaveta hacia abajo y ensamble los deslizadores (12)
tipo “L” a los paneles laterales (1) y (2), haciendo coincidir los agujeros
con los pre-taladrados y con las ruedas en la parte trasera, luego fíjelos
con tornillos (C). Asegúrese que los deslizadores hagan contacto con los
paneles laterales, sin que haya parte de ellos “sobresaltando en el aire”.
IMPORTANT: For the lock to operate correctly, its rod MUST face down, and the key Must turn
counter-clockwise.
IMPORTANTE: Para que la cerradura funcione correctamente, la barra DEBE quedar viendo hacia abajo,
y la llave DEBE girar countra las manecillas del reloj.

P.11
RTA-S06
9
19
19
20
4X14 MM
E
F
6X12 MM
2PCS
1PC
7
8
9
4PCS
6X40 MM
A
F
E
E
7
8
Insert the Bolts A in the holes of the back face of the Bottom Drawer Front Panel (9) and tighten
them with the screwdriver, then place the Bottom Drawer Left Panel (7) and the Bottom Drawer
Right Panel (8) over the Bolts and tighten the cam locks on the inside faces.
Use screws E & F to assemble the L Bracket (19) to the Bottom Drawer Front Panel (9).
Fix the Front Wheel (20) to the L Bracket (19) with the nut and tighten it well.
Use tornillos E & F para ensamblar el Ángulo de Soporte (19) al Panel Frontal de Gaveta Inferior (9).
Fije la Rueda Frontal (20) al Ángulo de Soporte (19) con la tuerca y apriételo bien.
Inserte los Pernos A en los agujeros de la cara interna del Panel Frontal de Gaveta Inferior y
ajústelos con el destornillador, luego coloque el Panel Izquierdo de Gaveta Inferior (7) y el Panel
Derecho de Gaveta Inferior (8) sobre los pernos y ajuste los cerrajes en la cara interna de los
Paneles.

P.12
RTA-S06
9
10
8
7
5
10
7
8
9
10
11
4PCS
4X35 MM
B
Right
Left
7
12
12
C
4PCS
3X15 MM
11
Slide in the Drawer Bottom Panel (5).
Use Screws B to fix the Bottom Drawer
Back Panel (10) to the Bottom Drawer’s
Left and Right Panels (7&8).
Deslice el Panel Inferior de Gaveta (5).
Use tornillos B para fijar el Panel Posterior de
Gaveta Inferior (10) a los Paneles Izquierdo y
Derecho de Gaveta Inferior (7 y 8).
Set aside the flat sliders (12), they are used until step 15.
Turn drawer upside-down and assemble the “L” type
sliders (12) to the side panels (7)&(8), making the holes
align with the pre-drilled holes, and with the wheels
facing to the back, then fix them with screws (C). Make
sure the sliders are in contact with the side panels, and
that there is no part of them “up in the air”.
Separe los deslizadores planos (12) para ser usados luego
hasta el paso 15. Vire la gaveta hacia abajo y ensamble los
deslizadores (12) tipo “L” a los paneles laterales (7) y (8),
haciendo coincidir los agujeros con los pre-taladrados y con
las ruedas en la parte trasera, luego fíjelos con tornillos (C).
Asegúrese que los deslizadores hagan contacto con los
paneles laterales, sin que haya parte de ellos “sobresaltando
en el aire”.
WARNING: DO NOT OVERTIGHTEN
the tubes as they may perforate
and damage the front panel. Such
damage is not covered by the
product’s warranty.
ADVERTENCIA: NO APRIETE LOS
TUBOS DEMASIADO porque pueden
perforar y dañar el panel frontal. Este
tipo de daño no está cubierto por la
garantía del producto.

P.13
RTA-S06
12
9
13
4X20 MM
D
2PCS
13
14
Tighten the metal plates
on the marked position
of the metal bar
23F
23F
23A
23A
23C
23E
15
23A
C
8PCS
3X15 MM
X2
First slide into the Metal Bar (23E) the 4 Metal Fittings in the order shown in the
drawing (23A,23C,23C.23A). Then, tighten the metal plates 23C on the marked
position of the Metal Bar (23E) with 23F.
Primero deslice en la Barra de Metal (23E) los cuatro accesorios de metal en el
orden que muestra el dibujo (23A,23C,23C,23A).Apriete las Placas de Metal (23F)
en la posicion marcada sobre la Barra de Metal. Luego ajuste los Accesorios
de Metal (23C) en la posicion marcada sobre la Barra de Metal (23E) con 23F.

P.14
RTA-S06
15
14
15
X2
X2
12
Left
Right
12
C
8PCS
3X15 MM
16
16
15
14
4PCS
6X40 MM
A
Match the flat Sliders (12) with the holes of the inside faces of the Left & Right Panels (14 & 15).
Then fix them to the Panels using screws C.
Haga coincidir los Deslizadores planos (12) con los agujeros de la cara interna de los Paneles
Izquierdo y Derecho (14 y 15). Luego fíjelos a los Paneles usando tornillos C.
Insert two Bolots A in the holes of the inside faces of the Left & Right Panles (14 & 15) and
tighten them with the screwdriver. Place the Bottom Panel (16) over the Bolts of the Right
Panel (14), then place Left Panel (15) over the Bottom Panel (16) and tighten all cam locks
on the inside faces of panels (16).
Inserte los Pernos A en los agujeros de la cara interna de los Paneles Izquierdo y Derecho (14 y 15)
y ajústelos con el destornillador. Coloque el Panel Inferior (16) sobre los Pernos de los
Paneles Izquierdo y Derecho (14 y 15) y aprete los cerrajes ubicadas en la cara interna del Panel
Inferior (16).

P.15
RTA-S06
17
18
17
18
14
15
15
14
3
3
X2
X2
16
16PCS
4X14 MM
E
4PCS
6X40 MM
A
Slide in Back Panel (17) between the Left & Right Panels (14 & 15).
Insert the Bolts A in the holes of the Top Panel (18) and put it over the Left & Right
Panels (14 & 15) and tighten all cam locks.
Deslice el Panel Posterior (17) entre los Paneles Izquierdo y Derecho (14 y 15).
Inserte los Pernos A en los agujeros del Panel Superior (18) y coloque éste sobre los Paneles
Izquierdo y Derecho (14 y 15) y ajuste bién les cerrajes.

P.16
RTA-S06
19
20
21
22
21
18
4PCS
6X20 MM
G
4PCS
6X35 MM
H
X4
22
21
X4
9
4
Use Screws G to assemble the Support Tubes (21) with
the Top Glass Panel (22).
Use tornillos G para ensamblar los Tubos de Soporte (21)
con el Vidrio del Panel Superior (22).
Use Screws H to assemble the Support Tubes (21) with
the Top Panel (18).
Use tornillos H para ensamblar los Tubos de Soporte (21)
con el Panel Superior (18).
Slide in the drawers.
Deslice las Gavetas.
Tighten all screw well and enjoy the cabinet.
Ajuste bien los tornillos y disfrute su gabinete.

English
- NO EXPONGA LAS SUPERFICIES A LA LUZ SOLAR DIRECTA,
O A CONDICIONES AMBIENTALES EXTREMAS. ESTE TIPO DE
DAÑOS NO SON CUBIERTOS POR LA GARANTÍA DEL PRODUCTO.
- NO USE SOLVENTES SOBRE LAS SUPERFICIES O TUBOS
ESTRUCTURALES. LAS SUPERFICIES DEBEN SER LIMPIADOS
CON UN JABÓN SUAVE Y AGUA, Y SECADOS IMMEDIATAMENTE
CON UNA TOALLA LIMPIA Y SECA.
- PRODUCTOS QUE SON PESADOS DEBEN LEVANTARSE O
MOVERSE POR AL MENOS 2 PERSONAS, Y TODOS LOS
OBJETOS DEBEN SER REMOVIDOS DEL PRODUCTO.
- DO NOT EXPOSE THE SURFACES TO DIRECT SUNLIGHT, OR
EXTREME ENVIRONMENTAL CONDITIONS. EXPOSURE WILL
DAMAGE THE PRODUCT, WHICH IS NOT COVERED BY THE
WARRANTY.
- DO NOT USE SOLVENTS OVER SURFACES OR STRUCTURAL
TUBES. SURFACES MUST BE CLEANED WITH A SOLUTION OF
A SMOOTH SOAP AND WATER, THEN CLEARED WITH A DRY
TOWEL.
- PRODUCTS THAT ARE HEAVY SHOULD BE LIFTED OR MOVED
BY AT LEAST 2 PERSONS, AND ALL OBJECTS SHOULD BE
REMOVED FROM THE PRODUCT.
CARE AND MAINTENANCE
Spanish
-
 1
1
-
 2
2
-
 3
3
-
 4
4
-
 5
5
-
 6
6
-
 7
7
-
 8
8
-
 9
9
-
 10
10
-
 11
11
-
 12
12
-
 13
13
-
 14
14
-
 15
15
-
 16
16
-
 17
17
Techni Mobili RTA-S06-GPH06 Guía de instalación
- Tipo
- Guía de instalación
en otros idiomas
Artículos relacionados
Otros documentos
-
 OfficeMax Schoolio Assembly Instructions Manual
-
KitchenAid 760-0024 El manual del propietario
-
KitchenAid 760-0023 El manual del propietario
-
KitchenAid 770-0024-NG El manual del propietario
-
Kyosho 31333 El manual del propietario
-
 RiverRidge Home 06-082 Guía de instalación
-
 RiverRidge Home 06-126 Guía de instalación
-
Techly ICA-TB 3581 Schreibtisch El manual del propietario
-
Ega Master 90188 El manual del propietario


