F4135

HP F4135, Deskjet F4100 All-in-One Printer series Guía de instalación

  • ¡Hola! Soy un chatbot de IA específicamente entrenado para ayudarte con el HP F4135 Guía de instalación. He revisado el documento y puedo ayudarte a encontrar la información que necesitas o explicarla de manera clara y sencilla. ¡Pregunta lo que necesites!
  • ¿Cómo instalar el software de mi HP Deskjet F4100?
    ¿Cómo conectar mi impresora HP Deskjet F4100 a mi computadora con Windows?
    ¿Cómo conectar mi impresora HP Deskjet F4100 a mi computadora con Mac?
    ¿Cómo cargar papel en mi impresora HP Deskjet F4100?
    ¿Cómo instalar los cartuchos de tinta en mi impresora HP Deskjet F4100?
1
2
a.
b.
3
HP Deskjet F4100 All-in-One series
*CB580-90014*
*CB580-90014*
*CB580-90014*
*
Guide de conguration
AVERTISSEMENT : pour garantir une installation
correcte du logiciel, ne connectez pas le câble USB
avant l’étape 14.
Abaissez le bac d’alimentation du papier et ouvrez
la porte d’accès aux cartouches d’impression.
IMPORTANT : retirez tout matériel d’emballage du
périphérique.
FR
Vériez le contenu du carton. Le contenu du carton peut
varier.
* Achetez un câble USB séparément si aucun n’est
inclus.
ES
Guía de instalación
ATENCIÓN: Para asegurarse de que el software se
ha instalado correctamente, no conecte el cable USB
hasta el paso 14.
Baje la bandeja de papel y la puerta de los
cartuchos de impresión.
IMPORTANTE: Extraiga todo el material de
embalaje del dispositivo.
Compruebe el contenido de la caja. El contenido de su
caja puede ser distinto.
* Compre un cable USB por separado si no es
incluido.
Setup Guide
WARNING: To ensure that the software is installed
correctly, do not connect the USB cable until step 14.
Lower the paper tray and the print cartridge door.
IMPORTANT: Remove all packing material from the
device.
Verify the box contents. The contents of your box may
differ.
* Purchase a USB cable separately if it is not included.
EN
EN
EN
EN
ES
FR
ES
FR
ES
FR
HP Deskjet F4100 All-in-One series
Basics Guide
8
9
HP Deskjet F4100 All-in-One series • 3
Retirez le ruban adhésif de la cartouche.
ATTENTION : ne touchez pas les contacts en cuivre
et ne replacez pas le ruban adhésif sur la cartouche.
a. Tenez la cartouche de manière à ce que le logo
HP soit vers le haut.
b. Insérez la cartouche d’impression couleur dans
le logement gauche. Assurez-vous d’appuyer
fermement sur la cartouche jusqu’à ce qu’elle
s’enclenche dans son logement.
Retire la cinta de los dos cartuchos.
PRECAUCIÓN: No toque los contactos de color
cobre ni vuelva a colocar la cinta en los cartuchos.
a. Coloque los cartuchos de forma que el logotipo
de HP quede situado en la parte superior.
b. Inserte el cartucho de
tres colores en la ranura
de cartucho izquierda y el cartucho negro en
la ranura de cartucho derecha. Asegúrese de
empujar los cartuchos rmemente hasta que
encajen en su lugar.
Remove the tape from both cartridges.
CAUTION: Do not touch the copper-colored contacts
or re-tape the cartridges.
a. Hold the cartridges with the HP logo on top.
b. Insert the
tri-color cartridge in the left cartridge
slot and the black cartridge in the right cartridge
slot. Make sure you push the cartridges in rmly
until they snap into place.
EN
EN
ES
FR
ES
FR
4 • HP Deskjet F4100 All-in-One series
10
11
12
Fermez la porte d’accès aux cartouches d’impression.
IMPORTANT : attendez que la page d’alignement
s’imprime automatiquement.
Après l’impression de la page d’alignement, placez-la
sur la vitre, face vers le bas, comme illustré. Fermez le
capot.
Appuyez sur (bouton Numérisation) pour lancer
l’alignement.
Attendez que le voyant vert Marche ne clignote plus.
Cierre la puerta de los cartuchos de impresión.
IMPORTANTE: Espere mientras se imprime
automáticamente la página de alineación.
Una vez que se haya impreso la página de alineación,
colóquela boca abajo sobre el cristal como se muestra
en la imagen. Cierre la tapa.
Presione (botón Escanear) para completar la
alineación.
Espere hasta que la luz verde de encendido deje de
parpadear.
Close the print cartridge door.
IMPORTANT: Wait while the alignment page prints
automatically.
After the alignment page is printed, place it face down
on the glass as shown in the picture. Close the lid.
Press (Scan button) to complete alignment.
Wait until the green On light stops blinking.
EN
EN
EN
ES
FR
ES
FR
ES
FR
HP Deskjet F4100 All-in-One series • 5
13
14a
Windows: Mac:
Choisissez le CD-ROM du logiciel du
périphérique.
Windows : allumez l’ordinateur et attendez qu’il
ait démarré pour insérer le CD-ROM dans le
lecteur.
IMPORTANT : si l’écran de démarrage ne s’afche
pas, double-cliquez sur l’icône Poste de travail,
puis sur l’icône du CD-ROM ayant le logo HP, puis
sur le chier setup.exe.
Mac : connectez le câble USB au port situé
à l’arrière de l’appareil HP Tout-en-un, puis à
n’importe quel port USB de l’ordinateur.
Un CD-ROM de documentation peut
également être inclus dans le carton.
Seleccione el CD de software del dispositivo.
Windows: introduzca el CD en el equipo una vez
encendido e iniciado éste.
IMPORTANTE: Si no aparece la pantalla de inicio,
haga doble clic en Mi PC, haga doble clic en el
icono del CD-ROM con el logotipo de HP y, a
continuación, haga doble clic en setup.exe.
Mac: conecte el cable USB al puerto ubica-
do en la parte posterior del dispositivo
HP All-in-One y, a continuación, a cualquier
puerto USB del equipo.
Es posible que su caja también incluya un CD
de documentación.
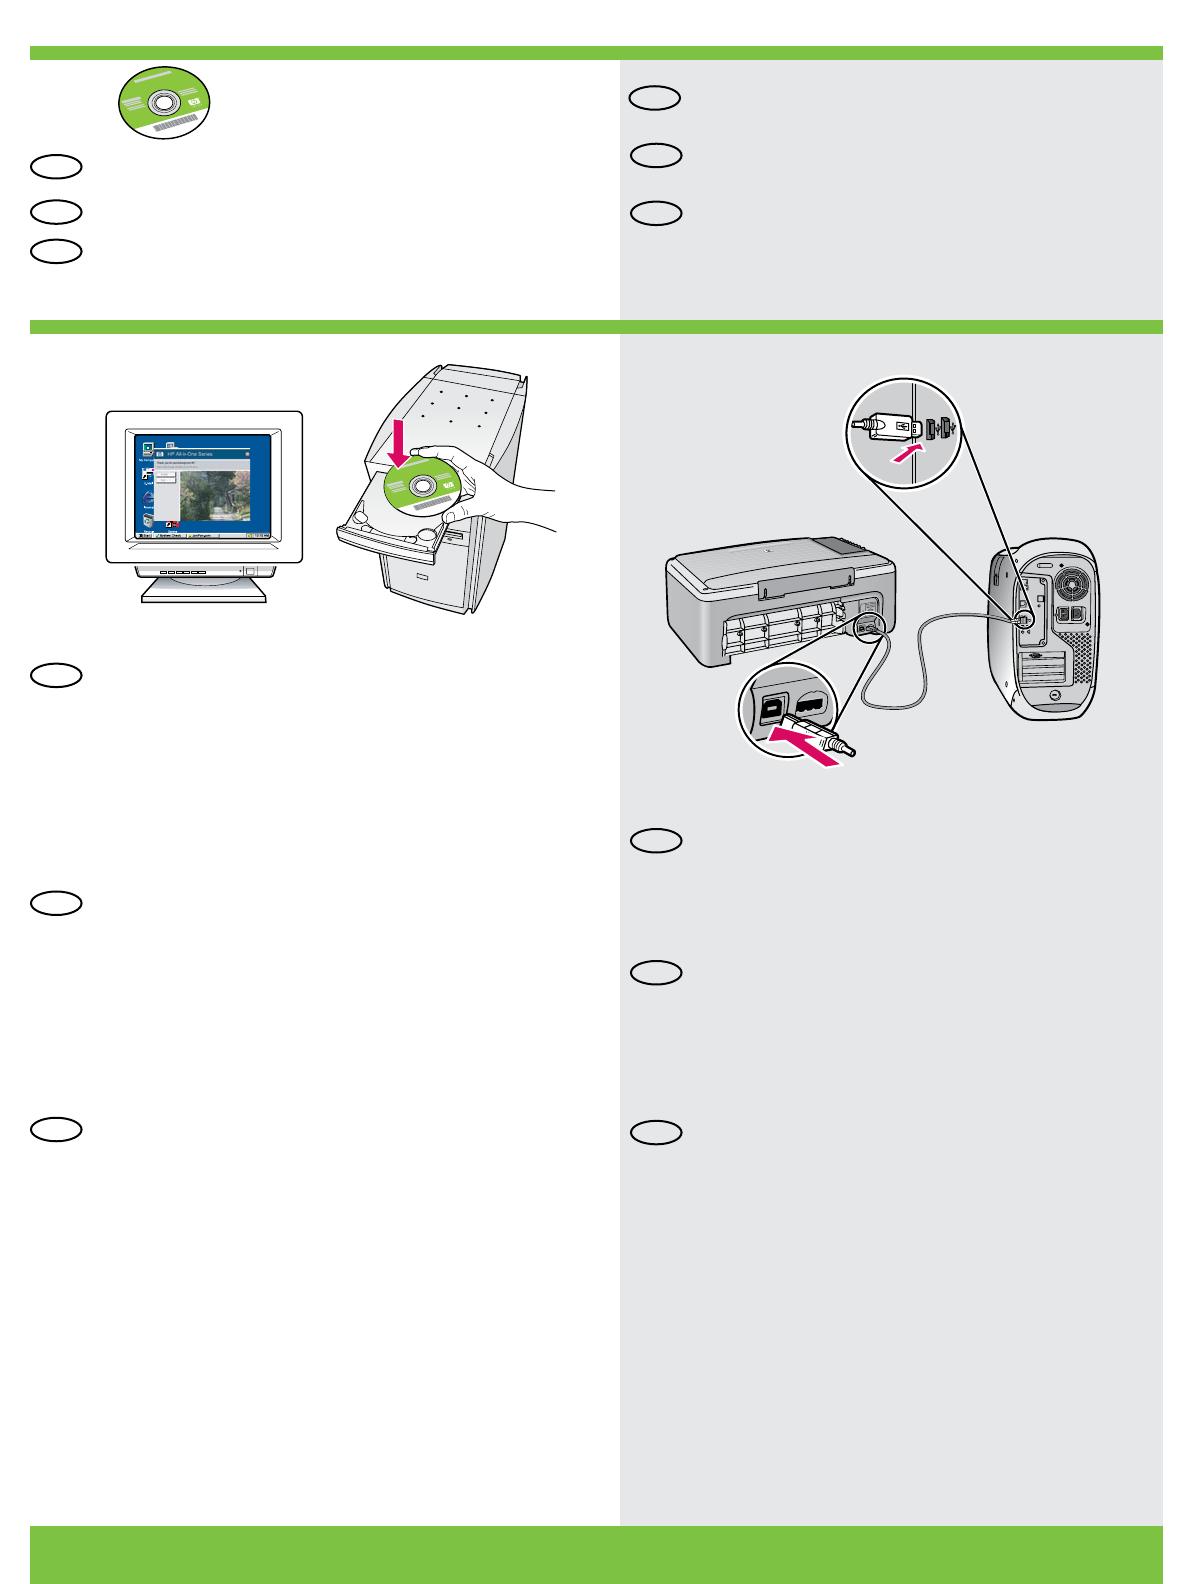
Select the device software CD.
A Documentation CD might also be included
with your box contents.
Windows: Insert the CD into the computer after it
has been turned on and started up.
IMPORTANT: If the startup screen does not appear,
double-click My Computer, double-click the
CD-ROM icon with the HP logo, and then
double-click setup.exe.
Mac: Connect the USB cable to the port on the
back of the HP All-in-One, and then to any USB
port on the computer.
EN
EN
EN
EN
ES
FR
ES
FR
ES
FR
ES
FR
6 • HP Deskjet F4100 All-in-One series
14b
Windows: Mac:
15
Windows: Mac:
Windows : une fois l’invite USB afchée, connectez
le câble USB au port situé à l’arrière de l’appareil
HP Tout-en-un, puis à n’importe quel port USB de
l’ordinateur.
Windows : suivez les instructions afchées à
l’écran pour installer le logiciel.
Mac : insérez le CD-ROM. Double-cliquez
sur l’icône HP All-in-One Installer. Suivez les
instructions afchées à l’écran.
Mac : renseignez l’écran de l’assistant de
conguration.
Windows: una vez que aparezca el indicador
USB, conecte el cable USB al puerto ubicado en
la parte posterior del dispositivo HP All-in-One y, a
continuación, a cualquier puerto USB del equipo.
Windows: siga las instrucciones que aparecen
en pantalla para completar la instalación del
software.
Mac: introduzca el CD. Haga doble clic en
el icono HP All-in-One Installer. Siga las
instrucciones que aparecen en pantalla.
Mac: complete la pantalla del asistente de
conguración.
Windows: Once the USB prompt appears, connect
the USB cable to the port on the back of the
HP All-in-One, and then to any USB port on the
computer.
Windows: Follow the onscreen instructions to
complete the software installation.
Mac: Insert the CD. Double-click the
HP All-in-One Installer icon. Follow the
onscreen instructions.
Mac: Complete the Setup Assistant screen.
EN EN
EN EN
ES
FR
ES
FR
ES
FR
ES
FR
2006 Hewlett-Packard Development Company, L.P.
Windows is a registered trademark of Microsoft Corporation.
Marche
Photosmart Essential
Type de papier
Annuler
Voyants Vérier cartouche
d’impression
Reprendre
Copier, Noir
Copier, Couleur
Numérisation
Panneau de commande
Problème : (Windows uniquement) l’écran Microsoft Ajout de matériel
s’afche.
Action : cliquez sur Annuler sur tous les écrans afchés. Débranchez le
câble USB, puis introduisez le CD-ROM vert du logiciel HP Tout-en-un
pour Windows. Reportez-vous aux étapes 13 et 14.
Luces de comprobación de
cartuchos de impresión
Encender
Photosmart Essential
Tipo de papel
Cancelar
Reanudar
Iniciar copia en blanco y negro
Comenzar copia en color
Escanear
Panel de control
Problema: (sólo en Windows) aparece la pantalla Agregar hardware de
Microsoft.
Acción: cierre todas las pantallas. Desconecte el cable USB y, a continu-
ación, inserte el CD de Windows verde del dispositivo HP All-in-One.
Consulte los pasos 13 y 14.
Check print cartridge lights
Control panel
Printed in <country>
Problem: (Windows only) The Microsoft Add Hardware screens display.
Action: Cancel all screens. Unplug the USB cable, and then insert the
green HP All-in-One Windows CD. Refer to Steps 13 and 14.
On
Photosmart Essential
Paper Type
Cancel
Resume
Start Copy Black
Start Copy Color
Scan
EN
ES
FR
/