Cuisinart DHR-20P1 El manual del propietario
- Categoría
- Secadores de frutas
- Tipo
- El manual del propietario
Este manual también es adecuado para

Dehydrator
INSTRUCTION AND
RECIPE BOOKLET
DHR-20
For your safety and continued enjoyment of this product, always read
the Instruction Book carefully before using.

CONTENTS
Important Safeguards ........................................ 2
Special Cord Instructions .................................. 2
Introduction ........................................................ 3
Operating Instructions ....................................... 3
Before Using ...................................................... 3
Usage ................................................................. 3
Parts and Features ............................................ 4
Cleaning and Maintenance ................................ 5
Food Selection ................................................... 5
Vegetable Preparation and Treatment ............. 5
Fruits and Nuts, Preparation and Treatment ..... 7
Herbs and Flowers ............................................. 8
Useful Tips ........................................................ 8
Food Storage ..................................................... 8
Recipes .............................................................. 9
Warranty ........................................................... 12
IMPORTANT
SAFEGUARDS
When using electrical appliances, basic safety
precautions should always be taken, including
the following:
1. READ ALL INSTRUCTIONS.
2. Always unplug appliance from outlet when
not in use or before cleaning. Allow plenty
of time to cool before adding or removing
parts.
3. Never touch hot surfaces. Use handles or
knobs.
4.
Avoid using the appliance in the presence
of children. Close supervision is necessary
when appliance is used by or near children
or individual with certain disabilities.
5. To avoid electrical shock, never immerse
plugs, cord, or the base assembly in any
liquids.
6. Never operate any appliance with a
damaged cord or plug, or one that has
malfunctioned or been damaged
in any way. Immediately return the
appliance to the nearest authorized
service facility for analysis.
7. Using accessory attachments not
recommended or sold by the appliance
manufacturer may cause electric shock,
injury, or re.
8. Never use outdoors.
9. Never let the cord hang over the edge of a
table or counter or touch hot surfaces.
10. Never place on or near a hot gas or
electric burner or in a heated oven.
11. Never use this appliance for any other use
than that for which it is intended.
12. To disconnect, rst turn control knob
to OFF, then unplug from electrical wall
outlet.
13. Never pour liquids into the appliance.
14. Never operate near combustible or
pressurized spray cans.
15. Do not operate your appliance in
an appliance garage or under a wall
cabinet.When storing in an appliance
garage, always unplug the unit from
the electrical outlet. Not doing so
could create a risk of re, especially if the
appliance touches the walls of the garage
or the door touches the unit as it closes.
SAVE THESE
INSTRUCTIONS
FOR HOUSEHOLD
USE ONLY
SPECIAL CORD
INSTRUCTIONS
A short power-supply cord is provided to reduce
the risks resulting from becoming entangled in
or tripping over a longer cord. Longer extension
cords are available and may be used if care is
exercised in their use.
If a long extension cord is used, the marked
electrical rating of the extension cord should be
at least as great as the electrical rating of the ap-
pliance, and the longer cord should be arranged
so that it will not drape over the counter top or
tabletop, where it can be pulled on by children or
tripped over.
2

INTRODUCTION
The dehydration of fruits and vegetables is one of
the earliest methods of food preservation. Since
their discovery and cultivation, plums and grapes
have been sun-dried into prunes and raisins.
These dried fruits and vegetables make great
snacks or desserts, and it’s easy to dehydrate
different meats to make jerky. Dehydration is a
healthy way of preserving food because bacteria
growth is inhibited by the removal of moisture.
You can even use your food dehydrator to dry
owers and make potpourri! Before using your
food dehydrator, be sure to take time to read the
“Important Safeguards” and all other instructions
in this manual.
OPERATING
INSTRUCTIONS
This appliance is meant for household use only.
First, place it on a level surface, and then insert
the plug into a 120V rated electrical outlet. Do
not use any other rated type outlet. This food
dehydrator has a polarized plug (one blade is
wider than the other). To reduce risk of electric
shock, this plug is intended to t into a polarized
outlet only one way. If the plug does not t fully
into the outlet, reverse the plug and try again. If
it still does not t, contact a qualied electrician.
Do not attempt to modify the plug in any way. At-
tempting to defeat this safety feature may result
in damage to the plug or the outlet.
The food dehydrator is equipped with a short
power-supply cord, reducing the risk of tangling
or tripping over a longer cord. Extension cords
can be used with the proper attention paid to
safety concerns. When using a longer, detach-
able power-supply cord or extension cord, the
marked electrical rating of the extension cord
should be the same or greater as the electri-
cal rating of the appliance, and the longer cord
should not drape over the counter top or table
where children could pull it or it could be tripped
over unintentionally.
BEFORE USING
1. Unpack the food dehydrator with care.
2. Wash all of the dehydrator trays and lid
in warm, soapy water. Rinse well and dry
completely.
3. Wipe the dehydrator base with a clean and
dry, soft cloth or sponge. Never immerse
base, plug or cord in water or any other
liquids.
USAGE
1. First, ensure the unit is turned to the OFF
position and unplugged before preparing
to use.
2. Wash the trays and lid before each use to
prevent food contamination.
3. Place the base on a at, smooth counter
top surface.
4. Prepare food to be dehydrated as
instructed, depending on the type of food;
never overlap food or overload trays.
5. Arrange food on trays, stack up the trays,
and set them aside.
6. Trays can accommodate a variety of food
sizes with small adjustments.
7. Plug unit into electrical wall outlet. Set
control knob to desired setting.
8. Place stacked trays on base and cover the
top tray with the lid. Then allow the food
to dry for the recommended length of time
(drying time depends on the food type).
9. Top lid vent holes must be kept clear of
any objects.
10. Monitor the food while it is dehydrating
and check it for desired doneness. It may
be necessary to rotate the racks during
drying as bottom racks will dehydrate
faster than top racks. Once cooled,
remove individual pieces and store in
food-safe containers or plastic bags,
preferably airtight. Leave the pieces that
are not yet done in the dehydrator and
monitor them until done.
11. Store the pieces that are not going to be
eaten in the next few days in the freezer.
When storing food in the freezer, use
containers or bags designed specically
for freezer storage.
12. Switch the unit to OFF and unplug after
using.
13. Wash the dehydrator trays and lid after
each use. Wipe the base with a soft,
slightly damp cloth or sponge; never let
water or any other liquid get into the base.
Be sure the trays and lid are completely
dry before storing them back on the base.
CAUTION:
– Do not block cover vents.
– Do not block bottom vents.
3

PARTS AND FEATURES
Vented Lid
Fruit Roll-Up
Sheet
Dehydrating
Trays
Base
4

HOW TO USE THE FRUIT
ROLL-UP SHEET
Your unit comes with
one fruit roll-up sheet.
To prepare fruit
roll-up sheet, lightly
spray a paper towel
with cooking spray
and rub over the fruit
roll-up sheet. Follow
preheating preparation
instructions which
can be found in the
recipe section of the instruction book for Yogurt
Roll-Ups, Spiced Apple Trail Mix Leather and
Strawberry Banana Leather. Once your fruit
roll-up sheet is ready, place on top rack of unit
as shown in Fig. 1.
CLEANING AND
MAINTENANCE
Dehydrator racks, top cover and fruit roll-up
sheet are all dishwasher safe.
To clean unit base, unplug from outlet and wipe
clean using a damp cloth. Wipe dry with a clean
cloth.
NOTE: Any other servicing should be performed
by an authorized service representative.
FOOD SELECTION
Select foods for dehydration that are in good
condition. Fruits should have just become ripe
since they contain the highest amount of natural
sugar and provide the best results. Vegetables
should be fresh and crisp. Avoid fruits that are
not ripe; they yield unpredictable results and
often have a at, bitter taste. Overripe fruits and
vegetables with spoiled portions should also be
avoided. Cut off any bruised or marred portions
of the fruits and vegetables before dehydration.
Meat, poultry and sh should be fresh and lean.
Preparation, dehydration time and foodstorage
method will also inuence their quality and
taste. Follow preparation, dehydration and
storage instructions in this manual to ensure
the best-tasting, highest quality dried foods.
IMPORTANT
If you suspect food contamination, do not
attempt to use the dehydrator. Discard the
food.
VEGETABLE
PREPARATION AND
TREATMENT
Vegetables are low in acid and have less sugar
than fruits, so they require a little more effort.
Some vegetables are better frozen than dried,
so remember to be selective in the vegetables
you choose.
PREPARATION
Only the highest quality vegetables should be
selected for drying. Wash them carefully just
before dehydrating to remove dirt and bacteria.
Most vegetables should be peeled, trimmed,
cut or shredded prior to drying.
PRETREATMENT
Blanching vegetables prior to drying is
recommended. This destroys the enzymes
that can produce “off” avors when stored
and lead to poor texture and poor rehydration.
Steam blanching is a better method than water
blanching because more avor and vitamins are
retained. Vegetables can also be microwaved.
STEAM BLANCHING
Layer prepared vegetables in the top portion of
a steamer or a steamer insert and steam until
the vegetables are heated through, but are not
cooked enough to eat (usually 2 to 3 minutes).
Stir to ensure all vegetables are evenly
blanched. Quickly transfer steamed vegetables
directly to drying trays.
MICROWAVE BLANCHING
Microwave ovens can easily be used to blanch
fresh vegetables. Prepare vegetables the same
way as for steam blanching. Place vegetables
in a covered casserole dish with a small amount
of water (refer to your microwave oven cooking
chart). Cook for ¼ to
1
⁄3 the time listed in the
chart, stirring after half of the blanching time.
Vegetables blanched in a microwave will be
more brightly colored than those that are steam
blanched. Quickly transfer blanched vegetables
directly to drying tray.
Fig. 1
5

VEGETABLE PREP
Asparagus Divide tips from stems by snapping in half. Tips are best for
drying, but dried stems can be crushed and used for seasoning.
Beans
(green)
Snip off ends and cut as desired. Blanch, then place in the
freezer for 30 to 45 minutes.
Beets Trim, leaving about an inch of the top and root. Blanch, allow to
cool, then cut off the top and root. Slice.
Broccoli Trim and cut into pieces. Steam for about 4 to 5 minutes.
Carrots Wash, peel, and cut into ½-inch long pieces. Steam for about 4
to 5 minutes.
Corn Remove husk, wash and steam blanch the whole piece of corn.
Allow to cool, then shear the corn from the cob.
Celery Break leaves off their stems. Place leaves separate from stalks
in tray(s).
Chives Wash, dry, and mince.
Cucumber Wash, peel, trim and slice about ¼-inch thick.
Garlic Separate and peel cloves. Cut cloves into halves or slices.
Mushrooms Remove any soil and remove stem. Dry the mushroom whole,
cut in half or sliced.
Onions Trim off the ends and peel. Cut into rings or dice.
Peppers
(pimentos)
Wash and remove core. Cut into halves, quarters, rings or strips.
Peppers
(jalapeños)
Wash and dry whole.
Potatoes Wash, peel, and cut or slice as desired; steam blanch. Rinse
under cold water and pat dry before placing on tray(s).
Note: If you wish to leave the skin on, you must wash and scrub
the potato and remove all the eyes and scars with the tip of a
potato peeler or paring knife.
Tomatoes Wash and remove stems. Using a ladle or tongs, dip into boiling
water and then into an ice water bath. You will be able to remove
the skin easily. Cut into halves, quarters or thick slices.
6

Fruit and Nuts Preparation
and Treatment
FRUIT
Nearly all fruits can be dried at home, but some
will require more drying time than others; the
guidelines offered here will help get you started.
It is recommended that you select the fruits that
are in season and experiment with those rst.
Preparation
Wash and inspect fruits and remove any bruised
or overripe parts. Peel if desired. Cut larger fruits
in half. If the pieces vary too much in size, slice
them to
3
⁄8" to ½" thick for even drying. Smaller
fruits such as grapes and cherries may be dried
whole. Remove pits or stones from fruits such
as plums, cherries, apricots, etc. Always peel
fruits that have been articially waxed. Peeling
is optional with other fruits – for instance, dried
pear skins tend to be grainy, and peach skin
peels are a little fuzzy.
Most fruits, like pineapples, grapes, strawberries,
and plums, can be placed directly on the drying
trays as they are prepared. However, some fruits
will turn brown when exposed to air (apples,
apricots, peaches, and pears). Following the
guidelines set below, you can pretreat these
fruits to slow this browning and to prevent loss
of vitamins A and C. To pretreat them, the cut
pieces should be kept in a holding solution until
you have sufcient fruit to dry.
Pretreatment
Below are several optional methods of
pretreatment. You don’t always need to pretreat
food in order to dry it; however, pretreatment can
make food look better, increase the shelf life and
even enhance the nutritional value. Experiment
with both treated and untreated food to see
which will work best. Remember, proper storage
is critical to the quality of the nal product,
whether treated or untreated.
Sodium Bisulfite
Use food-safe (USP) grade only. Dissolve 1
teaspoon of sodium bisulte in 1 quart of water.
Dip small amounts of fruit in the solution for 2
minutes. This helps prevent loss of vitamin C
and maintains a bright color. Sodium bisulte is
available in most pharmacies/drugstores.
Natural Pre-Dips
With their high vitamin C content, pineapple
and lemon juice are natural alternatives to other
pretreatments to reduce browning. Slice fruit
directly into juice. Remove after about 2 minutes
and place on trays. Fruits may also be dipped
in honey, lime or orange juice, gelatin powders
or sprinkled with coconut to give them an exotic
avor. Use your imagination!
When drying fruit halves, especially apricots,
it has been suggested that popping the back
(“inside out”) will speed drying time. This is true,
but it also results in the loss of the nutritional
juices to the bottom of the dehydrator. Instead,
cut each half in half again to give the end product
more nutritional value, a brighter color, and faster
reconstitution capabilities.
Apples Wash thoroughly and peel if you wish.
Cut in half and core, then slice into
smaller pieces. Pretreat with lemon
juice to prevent browning.
Apricots Wash, cut open and remove pit. If
desired, cut into quarters.
Bananas Peel and slice. Pretreat with lemon
juice to prevent browning.
Cherries Wash and remove pits.
Coconut Drain the milk, open shell and remove
coconut meat. Dry and cut into small
chunks.
Figs Wash, remove stems and cut into
halves or quarters. Place dry skin
side up.
Grapes Remove stems and wash.
Papaya Wash, peel and cut into chunks.
Peaches Wash, slice in half and remove pit. If
desired, cut into quarters.
Pears Wash, peel, slice in half to remove
core. Cut into chunks or slices.
Pretreat with lemon juice to prevent
browning.
Pineapple Remove spiny skin, core and cut into
chunks or wedges.
Plums Wash, cut in half and remove pit. If
desired, cut into quarters.
Strawberries Hull, wash and slice or leave whole,
as desired.
7

NUTS
To dry nuts, rst shell and rinse them with warm
water. Pat dry and spread out on trays. Most
nuts will take approximately 20 to 30 hours
to dehydrate and they should be allowed to
dehydrate until brittle.
Allow them to cool after dehydrating. Any nuts
that will not be consumed within a few days
should be frozen to ensure freshness. Allow them
to defrost before eating.
HERBS AND FLOWERS
To dry herbs and owers, rst rinse and pat dry.
Remove any dead, mushy or discolored portions,
leaving the stem intact. Spread herbs or owers
on tray and allow to dehydrate for about 2 to 7
hours, depending on their type and size. Remove
from tray and allow to cool when drying is
complete. Remove the leaves or buds from stem
and break them apart. Crush if desired.
For best results, pick owers after the rising sun
evaporates the morning dew and before the cool
evening mist settles on the petals. Be aware of
owers that have been sprayed with insecticides
or other harmful chemicals; do not use these.
If you are dehydrating owers at the same time
as herbs, place owers on the bottom trays and
herbs on the top trays; this prevents any debris
from the owers falling on the herbs.
USEFUL TIPS
• Wash and clean the dehydrator before
using if it has been stored for a long time.
• Fresh vegetables and fruits are best
for dehydrating; canned goods do not
dehydrate well.
• All vegetables and fruits should be
cleaned before preparation and
pretreatment.
• Prepare and pretreat fruits and vegetables
as outlined in this manual for best results.
• It is usually not dangerous to leave the
dehydrator on for a long period of time
when required, but make sure that it is
in a safe location. Read the Important
Safeguards section on page 2 of this
manual, and exercise caution when using
the dehydrator.
• Exact dehydrating time can vary greatly,
depending on the type of food used, its
size and quality, the quantity placed on
trays and your personal preferences.
Keeping your own notes on the type of
food, weight before and after drying, total
drying time, and nal results will enable
you to achieve the desired outcome, every
time!
• Most recipes will work well with dried
foods. By experimenting with the recipes
offered in this manual, you’ll soon discover
your own unique ways of using dried
foods. You’ll also be able to nd books on
the topic in bookstores, both locally and
online.
• For best results, it is recommended
to rotate the trays midway through the
dehydration process. For example, move
the bottom tray to the top, as items in the
bottom rack will dehydrate faster than
those on top.
FOOD STORAGE
Packaging
In order to keep well, dried foods must be
carefully packaged. Pack dried foods in plastic
freezer bags, squeezing out as much air as
possible. (You can also use heat-sealable bags.)
Store plastic bags inside airtight metal, plastic or
glass containers. When you store foods in rigid
containers without putting them into freezer bags
rst, you expose the dried foods to air, which will
negatively impact them. Vacuum packaging will
greatly extend the shelf life of your dried foods –
vacuum packaging equipment for home use can
be found in some stores.
Storage Conditions
Store appropriately packaged dried foods in a
cool, dark place. The colder the food is kept, the
longer the quality will be maintained. For every
18˚F drop in temperature, the shelf life increases
2 to 3 times, so if you have room in a refrigerator
or freezer, keep your dried foods there. If not,
nd the coolest place in your home to store dried
foods. Light also causes the quality and nutritive
value to deteriorate, so keep dried foods in
opaque or dark-colored containers.
8

Shelf Life
Because fruits have a naturally high sugar and
acid content, they dry well and store for longer
periods of time than vegetables. When properly
packaged and stored at room temperature or
below (70˚F or less), most fruits will maintain a
high quality and nutritional value up to a year.
Most vegetables are best when eaten within six
months. FRUITS AND VEGETABLES KEPT
BEYOND THE RECOMMENDED TIME MAY
NOT BE AS NUTRITIOUS OR TASTE AS
GOOD, BUT WILL NOT SPOIL UNLESS THE
PACKAGING IS NO LONGER INTACT.
RECIPES
Beef Jerky ......................... 8
Tuna Jerky ......................... 8
Spicy Beef Sticks.................... 9
Teriyaki Chicken..................... 9
“Sun”-Dried Tomato Basil Spread....... 9
Yogurt Roll-Ups ................... 10
Spiced Apple Trail Mix Leather ....... 10
Tropical Granola.................... 10
Strawberry Banana Leather............11
Salt and Vinegar Potato Crisps .........11
Beef Jerky
8 servings
1½ pounds flank steak
1
⁄3 cup Worcestershire sauce
2 tablespoons Liquid Smoke
¼ cup light soy sauce
2 tablespoons light brown sugar
2 cloves fresh garlic
¼ teaspoon fresh ground black pepper
Place meat on a plate and freeze for 1 hour.
This will make it easier to slice the meat into
thin strips. Slice meat into ¼-inch-wide strips,
cutting against the grain. Combine remaining
ingredients. Marinate beef strips for a minimum
of 30 minutes in the refrigerator. Place strips
on the racks. Do not overcrowd; leave enough
space so that pieces are not touching. Cover and
dehydrate on medium for 8 hours, or until desired
doneness, ipping strips once about halfway
through. Depending on the uniformity of the
strips, the racks may require rotating throughout
the dehydrating process, as bottom racks will
dehydrate faster than top racks. Store beef
jerky in an airtight container in the refrigerator or
freezer.
Nutritional information per serving:
Calories 165 • carb. 6g • pro. 18g • fat 7g • sat. fat 3g
• chol. 34mg • sod. 423mg • calc. 39.9mg • fiber 0g
Tuna Jerky
6 servings
1 pound fresh tuna steak
1 tablespoon fresh, grated ginger
2 teaspoons crushed fresh garlic
¼ cup light soy sauce
¼ cup orange juice
2 tablespoons rice wine vinegar
1 teaspoon light brown sugar
Place the tuna steak at on a cutting board and
cut in half. Place the tuna on a plate and freeze
for 1 hour. This will make it easier to cut the tuna
into thin strips. Stand tuna up with at, cut edge
on the board. Slice into ¼-inch pieces, then cut
into about 1-inch-wide strips. Combine ginger,
9

garlic, soy sauce, orange juice, rice wine vinegar
and brown sugar. Marinate tuna for a minimum
of 30 minutes in the refrigerator. Place strips on
racks. Do not overcrowd; leave enough space
so that pieces are not touching. Cover and
dehydrate on medium for 6 hours, or until desired
doneness, ipping strips once about halfway
through. It may be necessary to rotate the racks
during drying, as bottom racks will dehydrate
faster than top racks. Store tuna jerky in an
airtight container in the refrigerator or freezer.
Nutritional information per serving:
Calories 124 • carb. 3g • pro. 18g • fat 4g • sat. fat 1g
• chol. 28mg • sod. 384mg • calc. 11.6mg • fiber 0g
Spicy Beef Sticks
About 15 servings, 2 sticks each
3 pounds ground beef
1 tablespoon paprika
1½ teaspoons cayenne pepper
1½ teaspoons crushed red pepper
1 tablespoon garlic powder
4 tablespoons Worcestershire sauce
2 teaspoons curing salt
In a large bowl, combine all ingredients until just
incorporated. To make the sticks, form a small
piece of the meat mixture into a ball and then roll
into 5-inch by ½-inch sticks. Place the sticks on
a sheet pan. Refrigerate overnight, uncovered.
Place the sticks on the dehydrating racks. Do
not overcrowd; leave enough space so that
pieces are not touching. Cover and dehydrate on
medium for 6 hours or until desired doneness.
It may be necessary to rotate the racks during
drying, as bottom racks will dehydrate faster
than top racks. Store beef sticks in an airtight
container in the refrigerator or freezer.
Nutritional information per serving:
Calories 201 • carb. 2g • pro. 17g • fat 14g • sat. fat 5g
• chol. 61mg • sod. 182mg • calc. 20mg • fiber 0g
Teriyaki Chicken Jerky
8 servings
2½ pounds boneless, skinless chicken
breasts
½ cup teriyaki sauce, your favorite brand
¾ cup pineapple juice
1½ tablespoons Liquid Smoke
¾ teaspoon crushed red pepper
Trim the chicken breast of any fat. Place trimmed
breasts on a sheet pan and freeze for 1 hour.
This will make it easier to slice the chicken
into thin strips. Slice the chicken into ¼-inch
strips. Combine teriyaki sauce, pineapple
juice, Liquid Smoke, and crushed red pepper.
Marinate chicken strips for a minimum of 1
hour in the refrigerator. Place strips on racks.
Do not overcrowd; leave enough space so that
pieces are not touching. Cover and dehydrate on
medium for 6 hours, or until desired doneness,
ipping strips once about halfway through. It may
be necessary to rotate the racks during drying,
as bottom racks will dehydrate faster than top
racks. Store chicken jerky in an airtight container
in the refrigerator or freezer.
Nutritional information per serving:
Calories 179 • carb. 5g • pro. 33g • fat 2g • sat. fat 0g
• chol. 81mg • sod. 340mg • calc. 22mg • fiber 0g
“Sun”-Dried Tomato Basil
Spread
10 servings, ¼ cup each
10 Roma tomatoes, all close in size
8 ounces
1
⁄3-less-fat cream cheese
½ cup light mayonnaise
¾ cup light sour cream
1 fresh garlic clove, crushed
¼ cup fresh grated Parmesan cheese
2 tablespoons chopped fresh basil
2 scallions, light to dark green, chopped
Salt and pepper, to taste
Quarter the tomatoes and place on racks, cut
side up. Cover and dehydrate on medium for
15 hours or until dry and leathery. It may be
10

necessary to rotate the racks during drying.
Chop the dehydrated tomatoes into smaller
pieces. Combine tomatoes, cream cheese,
and mayonnaise in a food processor until the
tomatoes are incorporated and it becomes a
consistent mixture. Move the tomato mixture to a
large bowl. Stir in sour cream, garlic, Parmesan,
basil, scallions, and salt and pepper. Serve with
your favorite bread or crackers.
Nutritional information per serving:
Calories 124 • carb. 6g • pro. 4g • fat 10g • sat. fat 4g
• chol. 18mg • sod. 320mg • calc. 83mg • fiber 1g
Yogurt Roll-Ups
Makes 2 roll-ups
1 8-ounce cup vanilla yogurt, your
favorite brand
2 tablespoons jam, your favorite flavor
Combine yogurt and jam. Using a rubber spatula,
spread the yogurt in an even, thin layer on the
fruit roll-up sheet. Place the sheet on a rack.
Cover and dehydrate on high for 5 hours, or until
the yogurt is no longer gooey throughout. Peel
leather from sheet and cut in half. The leather
may be rolled up in plastic wrap and stored at
room temperature for later use.
*Fruited yogurt can be substituted for vanilla, but
fruit chunks do not easily spread evenly.
Nutritional information per half sheet roll-up:
Calories 152 • carb. 29g • pro. 6g • fat 1g • sat. fat 1g
• chol. 6mg • sod. 81mg • calc. 198mg • fiber 0g
Spiced Apple Trail Mix
Leather
Makes 2 fruit leathers
2
⁄3 cup unsweetened applesauce
Pinch ground cinnamon
Pinch ground nutmeg
½ teaspoon honey
¼ teaspoon fresh lemon juice
1 tablespoon dried cranberries,
chopped fine
1 tablespoon walnuts, chopped fine
In a medium bowl, combine the applesauce,
cinnamon, nutmeg, honey, and lemon juice.
Using a rubber spatula, spread the applesauce
in a thin, even layer on the fruit roll-up sheet.
Sprinkle evenly with dried cranberries and
walnuts. Lightly press the cranberries and
walnuts into the applesauce. Cover and
dehydrate on medium for 4 hours, or until the
applesauce is no longer wet throughout. Peel
leather from sheet and cut in half. The leather
may be rolled up in plastic wrap and stored at
room temperature for later use.
Nutritional information per half sheet fruit leather:
Calories 94 • carb. 15g • pro. 0g • fat 3g • sat. fat 0g
• chol. 0mg • sod. 2mg • calc. 8mg • fiber 1g
Tropical Granola
7 servings, ½ cup each
3 cups old-fashioned oats
¾ cup coconut, shredded and dried
½ cup wheat germ
1
⁄3 cup brown sugar
½ cup dried cranberries
½ cup dried pineapple, small chunks
½ cup banana chips, small pieces
1 cup pecans, chopped
1 tablespoon orange zest
1 tablespoon vanilla extract
¼ cup butter, melted
2 tablespoons agave nectar, or honey
1
⁄3 cup maple syrup
¼ teaspoon salt
In a large bowl, combine the dry ingredients and
vanilla. In a small bowl combine the
butter, agave or honey, maple syrup and salt.
Pour the butter/syrup mixture over the oat
mixture. Stir to combine. Divide the granola
mixture among three dehydrating trays, using
parchment paper to line the trays. Clump
the mixture in your hand as you divide it to
form clusters. Cover and dehydrate on high
for 3 hours, or until the granola is no longer
wet. Rotate the clusters halfway through the
11

dehydrating process. It may be necessary to
rotate the racks during drying, as bottom racks
will dehydrate faster than top racks. Store
the granola in an airtight container at room
temperature.
Nutritional information per serving:
Calories 318 • carb. 44g • pro. 8g • fat 13g • sat. fat 5g
• chol. 9mg • sod. 59mg • calc. 45.8mg • fiber 6g
Strawberry Banana Leather
Makes 2 fruit leathers
¾ cup fresh strawberries, hulled and
chopped
½ fresh banana, sliced
½ tablespoon honey
½ teaspoon fresh lemon juice
Cooking spray
Combine all ingredients except cooking spray in
a blender and purée until smooth. Lightly spray a
paper towel with cooking spray and rub over the
fruit roll-up sheet. Pour the strawberry mixture
evenly on the sheet. Cover and dehydrate on high
for 4 hours, or until the purée is no longer wet
throughout. Peel leather from sheet and cut in
half. The leather may be rolled up in plastic wrap
and stored at room temperature for later use.
Nutritional information per half sheet fruit leather:
Calories 63 • carb. 16g • pro. 1g • fat 0g • sat. fat 0g
• chol. 0mg • sod. 1mg • calc. 12mg • fiber 2g
Salt and Vinegar Potato
Crisps
4 servings
3 medium-size russet potatoes, skin
removed if desired
1 cup apple cider vinegar
2 tablespoons olive oil
Coarse salt to taste
Cut the potatoes into thin slices about
1
⁄8-inch
thick, creating round chips. Soak the potatoes
in the vinegar for 8 to 12 hours. This step is
necessary so the potatoes do not taste chalky.
Drain the potato slices well, transfer to a bowl,
and toss with olive oil. Lay the potatoes in a
single layer on parchment paper-lined racks.
Sprinkle with salt. Cover and dehydrate on high
for 8 to 12 hours or until desired crispiness. It
may be necessary to rotate the racks during
drying, as bottom racks will dehydrate faster than
top racks. Store the crisps in an airtight container
at room temperature.
Nutritional information per serving:
Calories 198 • carb. 29g • pro. 3g • fat 7g • sat. fat 1g
• chol. 0mg • sod. 302mg • calc. 25mg • fiber 2g
Limited Three-Year Warranty
(U.S. and Canada ONLY)
This warranty is available to consumers only. You are a
consumer if you own a Cuisinart
®
Dehydrator that was
purchased at retail for personal, family or household
use. Except as otherwise required under applicable
law, this warranty is not available to retailers or other
commercial purchasers or owners.
We warrant that your Cuisinart
®
Dehydrator will
be free of defects in materials and workmanship
under normal home use for 3 years from the date of
original purchase. We recommend that you visit our
website, www.cuisinart.com for a fast, efcient
way to complete your product registration. However,
product registration does not eliminate the need for the
consumer to maintain the original proof of purchase in
order to obtain the warranty benets. In the event that
you do not have proof of purchase date, the purchase
date for purposes of this warranty will be the date of
manufacture.
If your Cuisinart
®
Dehydrator should prove to be
defective within the warranty period, we will repair it,
or if we think necessary, replace it. To obtain warranty
service, simply call our toll-free number 1-800-726-
0190 for additional information from our Consumer
Service Representatives, or send the defective product
to Consumer Service at Cuisinart, 7475 North Glen
Harbor Blvd., Glendale, AZ 85307.
To facilitate the speed and accuracy of your return,
please enclose $10.00 for shipping and handling of the
product.
12

Please pay by check or money order make payable to
Cuisinart (California residents need only supply proof of
purchase and should call 1-800-726-0190 for shipping
instructions).
NOTE: For added protection and secure handling
of any Cuisinart product that is being returned, we
recommend you use a traceable, insured delivery
service. Cuisinart cannot be held responsible for in-
transit damage or for packages that are not delivered
to us. Lost and/or damaged products are not covered
under warranty. Please be sure to include your return
address, daytime phone number, description of the
product defect, product model number (located on
bottom of product), original date of purchase, and any
other information pertinent to the product’s return.
CALIFORNIA RESIDENTS ONLY
California law provides that for In-Warranty Service,
California residents have the option of returning a
nonconforming product (A) to the store where it was
purchased or (B) to another retail store that sells
Cuisinart products of the same type.
The retail store shall then, at its discretion, either repair
the product, refer the consumer to an independent
repair facility, replace the product, or refund the
purchase price less the amount directly attributable to
the consumer’s prior usage of the product. If the above
two options do not result in the appropriate relief to the
consumer, the consumer may then take the product
to an independent repair facility if service or repair
can be economically accomplished. Cuisinart and not
the consumer will be responsible for the reasonable
cost of such service, repair, replacement, or refund for
nonconforming products under warranty.
California residents may also, according to their
preference, return nonconforming products directly to
Cuisinart for repair, or if necessary, replacement, by
calling our Consumer Service Center toll-free at
1-800-726-0190. Cuisinart will be responsible for the
cost of the repair, replacement, and shipping and
handling for such products under warranty.
BEFORE RETURNING YOUR CUISINART
PRODUCT
If you are experiencing problems with your
Cuisinart product, we suggest that you call our
Cuisinart Service Center at 1-800-726-0190 before
returning the product for service. If servicing is
needed, a Representative can conrm whether the
product is under warranty and direct you to the
nearest service location.
Your
Cuisinart
®
Dehydrator
has been manufactured
to the strictest specications and has been
designed for use only in 120-volt outlets and only
with authorized accessories and replacement
parts. This warranty expressly excludes any
defects or damages caused by attempted use of
this unit with a converter, as well as by use with
accessories, replacement parts or repair service
other than those authorized by Cuisinart. This
warranty does not cover any damage caused
by accident, misuse, shipment or other than
ordinary household use. This warranty excludes
all incidental or consequential damages. Some
states do not allow the exclusion or limitation of
these damages, so these exclusions may not apply
to you. You may also have other rights, which vary
from state to state.
Important: If the nonconforming product is to be
serviced by someone other than Cuisinart’s Authorized
Service Center, please remind the servicer to call our
Consumer Service Center at 1-800-726-0190 to ensure
that the problem is properly diagnosed, the product is
serviced with the correct parts, and the product is still
under warranty.
13

14
NOTES:

15
NOTES:

IB-14023
©2015 Cuisinart
150 Milford Road
East Windsor, NJ 08520
Printed in China
15CE017387
Trademarks or service marks of third parties used herein
are the trademarks or service marks of their respective
owners.

Deshidratador de alimentos
INSTRUCCIONES Y
LIBRO DE RECETAS
DHR-20
Para su seguridad y para disfrutar plenamente de este producto,
siempre lea cuidadosamente las instrucciones antes de usarlo.

ÍNDICE
Medidas de seguridad importantes ................... 2
Uso de extensiones ............................................ 2
Introducción ....................................................... 3
Instrucciones de operación ................................ 3
Antes del primer uso .......................................... 3
Modo de empleo ................................................ 3
Piezas y características ...................................... 4
Limpieza y mantenimiento ................................ 5
Selección de los alimentos ................................. 5
Preparación de los vegetales ............................. 5
Preparación de las frutas y nueces .................... 7
Hierbas aromáticas y flores ................................ 8
Consejos útiles ................................................... 8
Conservación de los alimentos .......................... 8
Recetas ............................................................. 9
Garantía ............................................................ 12
MEDIDAS DE
SEGURIDAD
IMPORTANTES
Al usar aparatos eléctricos, siempre debe tomar
precauciones básicas de seguridad, incluso las
siguientes:
1. LEA TODAS LAS INSTRUCCIONES.
2.
Siempre desconecte el aparato cuando no
está en uso y antes de limpiarlo. Permita
que se enfríe antes de instalar/sacar piezas.
3. No toque las superficies calientes; utilice
los mango/asas y los botones/perillas.
4.
Evite utilizar el aparato en presencia de
niños. Supervise el uso de este aparato
cuidadosamente cuando sea usado por
o cerca de niños o personas con ciertas
discapacidades.
5. Para evitar el riesgo de electrocución,
nunca sumerja el cable, la clavija o el
aparato en agua u otro líquido.
6. No utilice este aparato si el cable o la
clavija estuviesen dañados, después de
que hubiese funcionado mal o que se
hubiese caído o si estuviese dañado;
regréselo a un centro de servicio
autorizado para su revisión, reparación o
ajuste.
7. El uso de accesorios no recomendados
o proveídos por el fabricante presenta
un riesgo de incendio, electrocución o
heridas.
8. No lo use en exteriores.
9. No permita que el cable cuelgue del borde
de la encimera o de la mesa, ni que haga
contacto con superficies calientes.
10. No coloque el aparato sobre o cerca de
un quemador a gas o una hornilla eléctrica
caliente, ni en un horno caliente.
11. No utilice el aparato para ningún otro fin
que no sea el indicado.
12.
Siempre ponga el control sobre "OFF"
(apagado) antes de desconectar el aparato.
13. Nunca vierta líquidos en el aparato.
14. Nunca lo utilice cerca de combustibles o
aerosoles.
15. No haga funcionar el aparato debajo o
dentro de un armario/gabinete.Siempre
desconecte el aparato antes de
guardarlo en un armario/gabinete. Dejar
el aparato conectado presenta un riesgo
de incendio, especialmente si este toca las
paredes o la puerta del armario/gabinete
cuando cierra.
GUARDE ESTAS
INSTRUCCIONES
PARA
USODOMÉSTICO
SOLAMENTE
USO DE EXTENSIONES
El cable provisto con este aparato es corto, para
reducir el peligro de que alguien se enganche o
tropiece con un cable más largo. Se podrá usar
una extensión eléctrica, pero con cuidado.
La clasificación nominal de la extensión debe ser
por lo menos igual a la del aparato. Es importante
acomodar el cable más largo de manera que no
cuelgue de la encimera/mesa donde puede ser
jalado por niños o puede causar tropiezos.
2

INTRODUCCIÓN
La deshidratación de frutas/vegetales es uno de
los más antiguos métodos de conservación de
alimentos. Los pueblos más antiguos ya secaban
las ciruelas y las uvas al sol. Las frutas y los
vegetales deshidratados son sabrosos tentempiés
o postres. También es fácil deshidratar carne.
La deshidratación es una forma saludable de
conservación de alimentos, porque el crecimiento
de bacterias es inhibido por la eliminación de
la humedad. ¡Usted puede incluso utilizar sus
deshidratador de alimentos para secar flores y
hacer popurrí! Antes de utilizar el deshidratador
de alimentos por primera vez, tómese el tiempo
de leer la sección "Medidas de seguridad
importantes" y otras instrucciones a continuación.
INSTRUCCIONES
DE OPERACIÓN
Para uso doméstico solamente. Ponga el aparato
sobre una superficie llana y segura y enchufe
el cable en una toma de corriente de 120V. No
intente conectar el aparato a otro tipo de toma de
corriente. El cable de este aparato está dotado
de una clavija polarizada (una pata es más
ancha que otra). Como medida de seguridad,
se podrá enchufar de una sola manera en la
toma de corriente polarizada. Si no entrara en la
toma de corriente, inviértela. Si aún no entrara
completamente, comuníquese con un electricista.
No intente modificarla; esto podría dañar la clavija
o la toma de corriente.
El cable proveído con este aparato es corto, para
reducir el peligro de que alguien se enganche o
tropiece con un cable más largo. Se podrá usar
una extensión eléctrica, pero con cuidado. La
clasificación nominal de la extensión debe ser
por lo menos igual a la del aparato. Es importante
colocar la extensión sobre la encimera o la
mesa de tal forma que niños no puedan jalarla o
tropezar con ella.
ANTES DEL PRIMER USO
1. Desembale el aparato con cuidado.
2. Lave las bandejas y la cubierta en agua
jabonosa tibia. Enjuague y seque las piezas
completamente.
3. Limpie la base con una esponja o un paño
humedecido. Nunca sumerja el cable, la clavija
o la base en agua u otro líquido.
MODO DE EMPLEO
1. Asegúrese de que el control esté sobre
"OFF" (apagado) y de que el aparato esté
desconectado.
2. Lave las bandejas y la cubierta antes de cada
uso para evitar la contaminación cruzada.
3. Ponga la base sobre una superficie plana y
segura.
4. Prepare los alimentos según se indica en la
sección "Preparación". Nunca superponga los
alimentos, ni sobrecargue las bandejas.
5. Disponga los alimentos sobre las bandejas,
luego apílelas y resérvelas.
6. Las bandejas son perfectas para una gran
variedad de alimentos con pequeños ajustes.
7. Enchufe el aparato. Ponga el botón de control
en la posición deseada.
8.
Instale las bandejas sobre la base y cierre la
tapa. Permita que los alimentos se deshidraten
(el tiempo dependerá del tipo de alimentos).
9. No tape los orificios de ventilación de la
cubierta.
10. Averigüe los resultados a menudo durante el
proceso de deshidratación. Alterne la posición
de las bandejas a mitad del proceso de
deshidratación si es necesario (los alimentos
en las bandejas de abajo suelen deshidratarse
más rápidamente). Tras enfriarse, retire los
alimentos y guárdelos en recipientes o bolsas
herméticas. Si algunos alimentos requieren
más tiempo en el deshidratador, déjelos en las
bandejas y siga deshidratándolos.
11.
Guarde los alimentos que no van a ser
consumidos en los próximos días en el
congelador, usando recipientes o bolsas
diseñadas específicamente para este propósito.
12. Después del uso, apague ("OFF") y
desconecte el aparato.
13.
Lave las bandejas y la tapa después de cada
uso. Limpie la base con una esponja o un paño
humedecido en agua jabonosa. No permita que
agua penetre adentro de la base. Permita que
las bandejas y la tapa se sequen completamente
antes de ensamblarlas de nuevo.
PRECAUCIÓN:
– Asegúrese de que las ventilaciones de la
cubierta no estén obstruidas.
– Asegúrese de que las ventilaciones de la base
no estén obstruidas.
3

PIEZAS Y
CARACTERÍSTICAS
Tapa
ventilada
Hoja para
láminas/rollitos/
cueros de fruta
Bandejas
de deshidratación
Base
4

USO DE LA HOJA PARA
"CUERO" DE FRUTA
Su deshidratador de
alimentos cuenta con
una hoja para preparar
"cuero" de fruta
(láminas/rollitos de
fruta deshidratada).
Para preparar la hoja,
rocíe un poco de
spray vegetal sobre
una toallita de papel y
engrase la hoja. Siga
las instrucciones de preparación incluidas en
las recetas al final de este manual para preparar
rollitos de yogur, rollitos de compota de
manzana y frutas secas, y rollitos de banana y
fresa. Cuando la hoja esté lista, póngala encima
de las bandejas (Fig. 1).
LIMPIEZA Y
MANTENIMIENTO
Las bandejas, la cubierta y la hoja para preparar
"cuero" de fruta son aptas para lavavajillas.
Siempre desconecte el aparato antes
de limpiarlo; limpie la base con un paño
humedecido y séquela con un paño limpio.
NOTA: cualquier otro servicio debe ser realizado
por un técnico autorizado.
SELECCIÓN DE LOS
ALIMENTOS
Elija alimentos en buenas condiciones. Las
frutas deben ser justo maduras, puesto que es el
momento en que contienen el máximo nivel de
azúcar natural y ofrecen los mejores resultados.
Los vegetales deben ser frescos y crujientes.
Evite utilizar frutas verdes; esto logra resultados
imprevisibles y produce un sabor insípido y
amargo. También evite utilizar frutas/vegetales
estropeados. Corte las partes estropeadas
de las frutas y de los vegetales antes de
deshidratarlos. La carne, las aves y el pescado
deben ser frescos y magros. La calidad y el
sabor del producto final también dependen de la
preparación, del tiempo de deshidratación y del
método de almacenaje. Siga las instrucciones
de preparación, deshidratación y almacenaje
incluidas en este manual para lograr resultados
óptimos.
IMPORTANTE
Si usted sospecha que los alimentos están
contaminados, no intente deshidratarlos; tírelos.
PREPARACIÓN DE LOS
VEGETALES
Los vegetales contienen menos ácido y azúcar
que las frutas; esto hace que requieren un poco
más de preparación. Algunos vegetales son
mejores congelados que secos, así que sea
selectivo en los vegetales que usted elija.
PREPARACIÓN
Solamente utilice vegetales de la más alta
calidad. Lávelos cuidadosamente, justo antes
de deshidratarlos, para eliminar la suciedad y
las bacterias. La mayoría de los vegetales deben
ser pelados y cortados/rallados antes de ser
deshidratados.
PRETRATAMIENTO
Se recomienda escaldar los vegetales antes de
deshidratarlos. Esto destruye las enzimas que
pueden modificar el sabor y la textura de los
alimentos e impedir la reconstitución. Escaldar
los alimentos al vapor es el mejor método para
conservar el sabor y las vitaminas, pero también
pueden escaldarse en el microondas.
ESCALDADO AL VAPOR
Disponga los vegetales limpios y cortados en
la parte superior de una olla de vapor o en una
cesta de cocción al vapor y cuézalos durante
2–3 minutos, hasta que estén muy calientes,
pero no completamente cocidos. Revuelva
para asegurar que todos los vegetales estén
escaldados uniformemente. Disponga los
vegetales sobre las bandejas.
ESCALDADO AL
MICROONDAS
El microondas es muy práctico para escaldar los
vegetales frescos. Limpie y corte los vegetales.
Coloque los vegetales en una cacerola apta para
microondas, junto con una pequeña cantidad de
agua, y tape la cacerola. Cueza las verduras ¼
a
1
⁄3 del tiempo indicado en la tabla de cocción
del microondas, revolviendo a la mitad del
tiempo. Los vegetales escaldados al microondas
tendrán colores más vivos que los escaldados al
vapor. Disponga los vegetales escaldados sobre
las bandejas.
Fig. 1
5

PREPARACIÓN DE LOS
VEGETALES
Ajo Separar y pelar los dientes. Cortar cada diente a la mitad o en rodajas.
Apio Separar las hojas de los tallos. Colocar las hojas y los tallos en bandejas
diferentes.
Brécol Limpiar y cortar en pedazos. Escaldar al vapor durante 4–5 minutos.
Cebollas Cortar los extremos y pelar. Picar o cortar en aros.
Cebollinos
("chives")
Lavar, secar y picar.
Champiñones/
Hongos
Limpiar y quitar los tallos. Secar y cortar a la mitad o en rodajas.
Espárragos Cortar las puntas/cabezas. Las puntas/cabezas son mejores
deshidratadas que los tallos. Sin embargo, éstos también puede
deshidratarse y machacarse para servir de sazón.
Judías/Ejotes/
Habichuelas
Cortar las puntas y cortar en pedazos si desea. Escaldar, y luego
congelar por 30–45 minutos.
Maíz Quitar las hojas, lavar y escaldar al vapor. Dejar enfriar, y luego separar el
maíz de la mazorca.
Papas y otros
tubérculos
Lavar, pelar y cortar en cubos o rodajas; escaldar al vapor. Lavar en agua
fría y secar antes de colocar en las bandejas.
Nota: si no desea pelarlas, lavarlas, restregarlas y quitar los ojos y las
marcas con la punta de un cuchillo.
Pepino Lavar, pelar si desea y cortar en rodajas de ¼ pulgada (5 mm).
Pimientos dulces Lavar y quitar las semillas. Cortar a la mitad, en cuartos, en aros o en
tiras.
Pimientos
(jalapeños)
Lavar y secar; deshidratar enteros.
Remolachas Cortar, dejando aproximadamente 1 pulgada (2.5 cm) de tallo y raíces.
Escaldar, dejar enfriar y luego cortar la parte de arriba y la de abajo.
Cortar en rodajas.
Tomates Lavar y quitar los tallos. Escaldar en agua hirviendo, usando un cucharón
o pinzas, luego enfriar en un baño de hielo. Pelar. Cortar a la mitad, en
cuartos o en rodajas gruesas.
Zanahorias Lavar, pelar y cortar en trozos de ½ pulgada (1.5 cm). Escaldar al vapor
durante 4–5 minutos.
6

Preparación de las frutas
y nueces
FRUTAS
Casi todas las frutas pueden deshidratarse, pero
algunas requieren más preparación que otras. Las
instrucciones a continuación pueden servir de
pauta para preparar una gran variedad de frutas.
Le aconsejamos que experimente con frutas de
temporada.
Preparación
Lave las frutas y corte las partes magulladas o
muy maduras. Pélelas si desea. Corte las frutas
grandes a la mitad. Si los pedazos de frutas
varían mucho en tamaño, córtelos en rodajas
de
3
⁄8 a ½ pulgada (0.5–1.5 cm) de espesor.
Frutas pequeñas, como las uvas y las cerezas,
no necesitan cortarse. Quite las pepas o los
huesos de las ciruelas, cerezas, albaricoques/
chabacanos/damascos, etc. Siempre pele las
frutas si están enceradas. Pelar otras frutas es
opcional; si desea, pele las peras, cuya piel es
granosa, y los duraznos, cuya piel es velluda.
La mayoría de las frutas, como la piña, las
uvas, las fresas y las ciruelas, pueden ser
colocadas directamente sobre las bandejas tras
cortarse. Otras frutas, como las manzanas, los
albaricoques, los duraznos y las peras, que se
ponen marrones cuando están expuestas al aire,
deben ser pretratadas. Esto conservará su color
así como las vitaminas A y C.
Pretratamiento
Hay varios métodos para pretratar los alimentos.
No siempre es necesario pretratar los alimentos
antes de deshidratarlos; sin embargo, hacerlo
puede hacer que se ven mejor, alargar su
duración de conservación e incluso aumentar
su valor nutricional. Pruebe varios métodos de
deshidratación, con o sin tratamiento previo, para
determinar cuál método le conviene. Recuerde:
que hayan sido pretratados o no, es esencial
conservar los alimentos de manera adecuada para
garantizar su calidad.
Pretratamiento con bisulfito sódico
Utilice productos de grado alimenticio solamente.
Disuelva 1 cucharadita de bisulfito sódico en
1 cuarto de galón (1 L) de agua. Sumerja los
pedazos de fruta en esta solución durante 2
minutos. Esto evitará la pérdida de vitamina C y
mantendrá un color brillante. El bisulfito sódico
está disponible en la mayoría de las farmacias.
Pretratamientos naturales
El jugo de piña y el jugo de limón, por su alto
contenido en vitamina C, son alternativas
naturales a otros pretratamientos para evitar que
las frutas se pongan marrones. Ponga las frutas
en el jugo inmediatamente después de cortarlas.
Sacarlas del jugo después de aproximadamente
2 minutos y dispóngalas sobre las bandejas. Las
frutas también pueden meterse en miel o jugo de
lima/naranja, o esparcirse con polvo de gelatina
o coco rallado para darle un sabor más exótico.
¡Utilice su imaginación!
A veces se recomienda darle la vuelta a las
mitades de fruta, especialmente los albaricoques/
chabacanos/damasco, para que se sequen
más rápidamente. Esto es cierto, pero también
desperdicia jugo, alta fuente de nutrientes. En vez
de hacer esto, corte las frutas en cuartos; esto
conservará sus nutrientes y su color, y facilitará su
reconstitución en agua.
Manzanas Lavar bien; pelar si desea. Cortar a
la mitad, quitar el corazón y luego
cortar en pedazos más pequeños.
Pretratar con jugo de limón para
evitar que se vuelvan marrones.
Albaricoques/
Chabacanos/
Damascos
Lavar, abrir y quitar el hueso.
Cortar en cuartos si desea.
Bananas Pelar y cortar en rodajas. Pretratar
con jugo de limón para evitar que
se vuelvan marrones.
Cerezas Lavar y sacar los huesos.
Coco Tirar la leche, abrir y sacar la
carne. Secar y cortar en pedacitos.
Higos Lavar, quitar el tallo y cortar a la
mitad o en cuartos. Poner a secar
con la piel apuntando hacia arriba.
Uvas Quitar los tallos y lavar.
7

NUECES
Antes de deshidratar nueces como avellanas,
almendras, etc., quite la cáscara, y lave las nueces
con agua. Séquelas y dispóngalas sobre las
bandejas. La mayoría de las nueces demorarán
entre 20 y 30 horas en secarse. Permita que se
deshidraten hasta que se vuelvan quebradizas.
Permita que se enfríen después de deshidratarlas.
Las nueces que no se van a consumir dentro
de los días siguientes deben ser congeladas.
Descongélelas antes de comerlas.
HIERBAS AROMÁTICAS Y
FLORES
Lave y seque las hierbas aromáticas y las flores
antes de secarlas. Quite las partes muertas,
blandas o descoloridas, dejando los tallos
intactos. Disponga las hierbas o las flores sobre
las bandejas y permita que se sequen durante 2–7
horas, dependiendo del tipo de hierbas/flores y
de su tamaño. Retírelas de las bandejas y permita
que se enfríen. Quite las hojas y separe los
capullos si desea. Machácalas si desea.
Para obtener resultados óptimos, recoja las flores
en la mañana, después de que el sol haya secado
el rocío, o al atardecer, antes de que la bruma
empañe los pétalos. No utilice flores que hayan
sido tratadas con insecticidas u otras sustancias
químicas dañinas. Si desea deshidratar flores y
hierbas al mismo tiempo, coloque las flores en las
bandejas de abajo y las hierbas en las bandejas
de arriba; esto evitará que desechos de flores
caigan sobre las hierbas.
CONSEJOS
• Lave y seque las bandejas antes de usarlas
si no ha usado el deshidratador desde
hace mucho tiempo.
• Utilice frutas/vegetales frescos; los
alimentos enlatados no se deshidratan
bien.
• Lave las frutas/los vegetales antes de
prepararlos.
• Para obtener resultados óptimos, prepare
las frutas/los vegetales según se indica en
este manual.
• Por lo general, no es peligroso dejar
el aparato encendido durante un largo
período de tiempo; sin embargo asegúrese
de que esté en un lugar seguro. Lea y
siga las medidas de seguridad incluidas al
principio de este manual.
• El tiempo de deshidratación puede variar
mucho, dependiendo del tipo de alimento,
su tamaño, su calidad, y la cantidad
dispuesta sobre cada bandeja. Tomar
notas acerca del tipo de alimento, de su
peso antes y después de la deshidratación,
del tiempo de deshidratación y de los
resultados finales le ayudará a obtener el
resultado deseado cada vez.
• Frutas/vegetales deshidratados pueden
sustituirse a frutas/vegetales frescos en la
mayoría de las recetas. Experimente con
las recetas incluidas en este manual; no
tardará en descubrir formas creativas de
utilizar alimentos deshidratados. También
hay muchos libros sobre este tema.
• Para lograr resultados óptimos, se
recomienda alternar la posición de las
bandejas a la mitad del proceso de
deshidratación (los alimentos en las
bandejas de abajo suelen deshidratarse
más rápidamente).
CONSERVACIÓN DE LOS
ALIMENTOS
Envoltorios
Los alimentos deshidratados deben ser
empaquetados con mucho cuidado para
conservarse. Guárdelos en bolsas herméticas,
sacando un máximo de aire (también puede usar
Papaya Lavar, pelar y cortar en trozos.
Duraznos Lavar, cortar a la mitad y quitar el
hueso. Cortar en cuartos si desea.
Peras Lavar, cortar a la mitad y quitar
el corazón. Cortar en pedazos o
en rodajas. Pretratar con jugo de
limón para evitar que se vuelvan
marrones.
Piña Pelar, quitar el corazón y cortar en
pedacitos.
Ciruelas Lavar, cortar a la mitad y quitar el
hueso. Cortar en cuartos si desea.
Fresas Lavar; cortar en rodajas si desea.
8

bolsas termosellables) Guarde las bolsas en
recipientes herméticos de metal, plástico o vidrio.
Guardar los alimentos deshidratados directamente
en un recipiente, sin colocarlos previamente en
una bolsa hermética, los expone al aire, lo que
puede tener consecuencias negativas. Empacar
los alimentos deshidratados al vacío es un
excelente método de conservación.
Condiciones de almacenaje
Guarde los alimentos deshidratados en un lugar
fresco y oscuro. Cuanto más frías las condiciones
de almacenaje, más largo el tiempo de
conservación. El tiempo de conservación es 2–3
veces más largo por cada bajada de temperatura
de 18°F (10°C). Por lo tanto, si tiene espacio
en su refrigerador o congelador, guarde los
alimentos deshidratados adentro. Si no, busque
el lugar más fresco en su casa para almacenarlos.
La luz también puede hacer que la calidad y el
valor nutritivo de los alimentos deshidratados se
deterioren. Por lo tanto, guárdelos en recipientes
oscuros.
Tiempo de conservación
Debido a su alto contenido en azúcar y ácido,
las frutas se conservarán durante más tiempo
que los vegetales. Siempre que hayan sido
empaquetadas debidamente y almacenadas a
temperatura ambiente (70°F/21 °C) o menos, las
frutas conservarán su valor nutricional y su calidad
durante hasta un año. La mayoría de los vegetales
se conservarán durante hasta 6 meses. AUNQUE
LAS FRUTAS Y LOS VEGETALES GUARDADOS
MÁS ALLÁ DEL TIEMPO RECOMENDADO NO
ESTÁN TAN NUTRITIVOS NI SABROSOS, NO
SE ECHARÁN A PERDER A MENOS QUE EL
ENVASE YA NO ESTÉ INTACTO.
RECETAS
Carne seca ......................... 8
Atún seco .......................... 8
"Salchichas" de res picantes ........... 9
Pollo Teriyaki seco ................... 9
Crema para untar de tomates
deshidratados y albahaca ............. 9
Rollitos de yogur ................... 10
Rollitos de compota de manzana y
frutas secas ....................... 10
Muesli tropical ..................... 10
Rollitos de banana y fresa . . . . . . . . . . . . 11
Papas crujientes con sabor a vinagre ... 11
Carne seca
Rinde 8 porciones
1½ libra (680 g) de bistec de falda/
arrachera/entraña ("flank steak")
1
⁄3 taza (80 ml) de salsa Worcestershire
2 cucharadas de salsa barbacoa
ahumada
¼ taza (60 ml) de salsa de soya baja
en sodio
2 cucharadas de azúcar rubia
2 dientes de ajo
¼ cucharadita de pimienta negra recién
molida
Poner la carne sobre un plato y congelar durante
1 hora (esto permitirá cortarla más fácilmente).
Cortar la carne en tiras de ¼ pulgada (5 mm),
en contra del grano. Revolver con el resto de
los ingredientes. Dejar marinar en el refrigerador
durante 30 minutos o más. Escurrir y disponer
las tiras sobre las bandejas, sin permitir que se
toquen. Deshidratar en "Medium" durante 8 horas
o hasta obtener la consistencia deseada, dando
vuelta a las tiras a mitad de tiempo. Alternar la
9

posición de las bandejas a mitad de proceso de
deshidratación si es necesario (los alimentos en
las bandejas de abajo suelen deshidratarse más
rápidamente). Conservar en el refrigerador o en el
congelador, en un recipiente hermético.
Información nutricional por porción:
Calorías 165 • Carbohidratos 6g • Proteínas 18g
• Grasa 7g • grasa saturada 3g • Colesterol 34mg
• Sodio 423mg • Calcio 40mg • Fibra 0g
Atún seco
Rinde 6 porciones
1 libra (455 g) de bistec de atún fresco
1 cucharada de jengibre fresco rallado
2 cucharadas de ajo machacado
¼ taza (60 ml) de salsa de soya baja
en sodio
¼ taza (60 ml) de jugo de naranja
2 cucharadas de vinagre de vino de arroz
1 cucharadita de azúcar rubia
Poner el bistec de atún sobre una tabla de picar
y cortarlo a la mitad. Poner el atún sobre un plato
y congelar durante 1 hora (esto permitirá cortarlo
más fácilmente). Sostener el atún verticalmente,
el lado cortado encima de la tabla de picar. Cortar
en lonjas de ¼ pulgada (5 mm), y luego en tiras
de 1 pulgada (2.5 cm) de ancho. Revolver con
el resto de los ingredientes. Dejar marinar en el
refrigerador durante 30 minutos o más. Escurrir y
disponer las tiras sobre las bandejas, sin permitir
que se toquen. Deshidratar en "Medium" durante
6 horas o hasta obtener la consistencia deseada,
dando vuelta a las tiras a mitad de tiempo.
Alternar la posición de las bandejas a mitad
de proceso de deshidratación si es necesario
(los alimentos en las bandejas de abajo suelen
deshidratarse más rápidamente). Conservar en el
refrigerador o en el congelador, en un recipiente
hermético.
Información nutricional por porción:
Calorías 124 • Carbohidratos 3g • Proteínas 18g
• Grasa 4g • grasa saturada 1g • Colesterol 28mg
• Sodio 384mg • Calcio 12mg • Fibra 0g
"Salchichas" de res
picantes
Rinde 15 porciones (30 "salchichas")
3 libras (1.4 kg) de carne de res molida
1 cucharada de páprika
1½ cucharadita de pimienta de Cayena
1½ cucharadita de hojuelas de pimiento
rojo
1 cucharadita de ajo en polvo
4 cucharadas de salsa Worcestershire
2 cucharaditas de sal de salmuera
Revolver todos los ingredientes en un tazón
grande. Separar una pequeña porción de carne.
Formar una bola, y luego extenderla para
formar una "salchicha" de 5 x ½ pulgadas
(12 cm x 1.5cm). Poner las "salchichas" sobre
una bandeja de hornear. Refrigerar por 8–12
horas, sin cubrir. Disponer las "salchichas"
sobre las bandejas, sin permitir que se toquen.
Deshidratar en "Medium" durante 6 horas o hasta
obtener la consistencia deseada. Alternar la
posición de las bandejas a mitad de proceso de
deshidratación si es necesario (los alimentos en
las bandejas de abajo suelen deshidratarse más
rápidamente). Conservar en el refrigerador o en el
congelador, en un recipiente hermético.
Información nutricional por porción:
Calorías 201 • Carbohidratos 2g • Proteínas 17g
• Grasa 14g • grasa saturada 5g • Colesterol 61mg
• Sodio 182mg • Calcio 20mg • Fibra 0g
Pollo Teriyaki seco
Rinde 8 porciones
2½ libras (910 g) de pechuga de pollo
deshuesada y sin piel
½ taza (120 ml) de salsa Teriyaki
¾ taza (175 ml) de jugo de piña
1½ cucharada de salsa barbacoa ahumada
¾ cucharadita de hojuelas de pimiento
rojo
Quite la grasa del pollo. Poner el pollo en una
bandeja y congelar durante 1 hora (esto permitirá
10

cortarlo más fácilmente). Cortar el pollo en tiras
de ¼ pulgada (5 mm). Mezclar los ingredientes
restantes. Dejar marinar en el refrigerador
durante 1 hora o más. Escurrir y disponer las tiras
sobre las bandejas, sin permitir que se toquen.
Deshidratar en "Medium" durante 6 horas o
hasta obtener la consistencia deseada, dando
vuelta a las tiras a mitad de tiempo. Alternar la
posición de las bandejas a mitad de proceso de
deshidratación si es necesario (los alimentos en
las bandejas de abajo suelen deshidratarse más
rápidamente). Conservar en el refrigerador o en el
congelador, en un recipiente hermético.
Información nutricional por porción:
Calorías 179 • Carbohidratos 5g • Proteínas 33g
• Grasa 2g • grasa saturada 0g • Colesterol 81mg
• Sodio 340mg • Calcio 22mg • Fibra 0g
Crema para untar de
tomates deshidratados y
albahaca
Rinde 10 porciones
10 tomates Roma del mismo tamaño
8 onzas (225 g) de queso crema bajo
en grasa
½ taza (120 ml) de mayonesa baja
en grasa
¾ taza (175 ml) de crema agria baja
en grasa
1 diente de ajo, machacado
¼ taza (25 g) de queso Parmesano rallado
2 cucharadas de albahaca fresca picada
2 cebolletas ("scallions"), picadas
Sal y pimienta, a gusto
Cortar los tomates en cuartos y disponerlos sobre
las bandejas, la parte cortada apuntando hacia
arriba. Deshidratar en "Medium" durante 15 horas
o hasta que estén secos y curtidos. Alternar la
posición de las bandejas a mitad de proceso de
deshidratación si es necesario (los alimentos en
las bandejas de abajo suelen deshidratarse más
rápidamente). Picar los tomates deshidratados.
Poner los tomates, el queso crema y la mayonesa
en el recipiente de una procesadora de alimentos;
procesar hasta obtener una mezcla homogénea.
Colocar la mezcla en un tazón grande. Agregar
la crema agria, el ajo, el queso Parmesano, la
albahaca, los cebollinos, la sal y la pimienta;
revolver. Servir con su pan o galletas favoritos.
Información nutricional por porción:
Calorías 124 • Carbohidratos 6g • Proteínas 4g
• Grasa 10g • grasa saturada 4g • Colesterol 18mg
• Sodio 320mg • Calcio 83mg • Fibra 1g
Rollitos de yogur
Rinde 2 rollitos
8 onzas (235 ml) de yogur de vainilla
2 cucharadas de su mermelada favorita
Revolver el yogur con la mermelada. Usando
una espátula, esparcir la mezcla en una capa
fina sobre la hoja para preparar "cuero" de
fruta. Colocar la hoja sobre una de las bandejas.
Deshidratar en "High" durante 5 horas o hasta que
el yogur esté seco. Despegar la lámina de la hoja
y cortarla a la mitad. Enrollar cada mitad y guardar
en papel film/plástico, a temperatura ambiente.
Nota: también puede usar yogur de fruta.
Información nutricional por rollito:
Calorías 152 • Carbohidratos 29g • Proteínas 6g
• Grasa 1g • grasa saturada 1g • Colesterol 6mg
• Sodio 81mg • Calcio 198mg • Fibra 0g
Rollitos de compota de
manzana y frutas secas
Rinde 2 rollitos
2
⁄3 taza (160 ml) de compota de manzana
sin azúcar
1 pizca de canela en polvo
1 pizca de nuez moscada rallada
½ cucharadita de miel
¼ cucharadita de jugo de limón fresco
1 cucharada de arándanos agrios secos,
finamente picados
1 cucharada de nueces, finamente
picadas
Mezclar la compota de manzana, la canela,
la nuez moscada, la miel y el jugo de limón
11

en un tazón mediano. Usando una espátula,
esparcir la mezcla en una capa fina sobre la
hoja para preparar "cuero" de fruta. Esparcir
los arándanos agrios y las nueces encima y
hundirlos ligeramente. Deshidratar en "Medium"
durante 4 horas o hasta que la compota esté
seca. Despegar la lámina de la hoja y cortarla a la
mitad. Enrollar cada mitad y guardar en papel film/
plástico, a temperatura ambiente.
Información nutricional por rollito:
Calorías 94 • Carbohidratos 15g • Proteínas 0g
• Grasa 3g • grasa saturada 0g • Colesterol 0mg
• Sodio 2mg • Calcio 8mg • Fibra 1g
Muesli tropical
Rinde 7 porciones
3 tazas (240 g) de copos de avena
(no utilice avena instantánea)
¾ taza (65 g) de coco rallado
½ taza (55 g) de germen de trigo
1
⁄3 taza (65 g) de azúcar moreno
½ taza (60 g) de arándanos agrios secos
½ taza (80 g) de trocitos de piña
deshidrata
½ taza (30 g) de chips de banana,
pedacitos
1 taza (100 g) de pacanas, picadas
1 cucharada de ralladura de naranja
1 cucharada de extracto natural de
vainilla
¼ taza (55 g) de mantequilla, derretida
2 cucharadas de néctar de agave o
de miel
1
⁄3 taza (80 ml) de jarabe de arce/maple
¼ cucharadita de sal
Revolver los ingredientes secos y la vainilla, en
un tazón grande. Colocar la mantequilla, el néctar
de agave o la miel, el jarabe de arce y la sal en un
tazón pequeño; revolver Verter la mezcla sobre los
ingredientes secos. Revolver. Forrar tres bandejas
con papel sulfurizado y dividir la mezcla entre
las bandejas, formando montoncitos de muesli
con los dedos. Deshidratar en "High" durante 3
horas o hasta que el muesli esté seco. Alternar la
posición de los montoncitos a mitad de proceso
de deshidratación. Alternar la posición de las
bandejas a mitad de proceso de deshidratación si
es necesario (los alimentos en las bandejas de
abajo suelen deshidratarse más rápidamente).
Guardar el muesli a temperatura ambiente, en un
recipiente hermético.
Información nutricional por porción:
Calorías 318 • Carbohidratos 44g • Proteínas 8g
• Grasa 13g • grasa saturada 5g • Colesterol 9mg
• Sodio 59mg • Calcio 46mg • Fibra 6g
Rollitos de banana y fresa
Rinde 2 rollitos
¾ taza (150 g) de fresas, picadas
½ banana fresca, en rodajas
½ cucharada de miel
½ cucharadita de jugo de limón fresco
Spray vegetal
Poner todos los ingredientes, excepto el spray
vegetal, en la jarra de una licuadora y licuar
hasta obtener una mezcla suave. Rociar un poco
de spray vegetal sobre una toallita de papel y
engrasar la hoja para preparar "cuero" de fruta.
Esparcir el puré de fruta sobre la hoja. Deshidratar
en "High" durante 4 horas o hasta que el puré esté
seco. Despegar la lámina de la hoja y cortarla a la
mitad. Enrollar cada mitad y guardar en papel film/
plástico, a temperatura ambiente.
Información nutricional por rollito:
Calorías 63 • Carbohidratos 16g • Proteínas 1g
• Grasa 0g • grasa saturada 0g • Colesterol 0mg
• Sodio 1mg • Calcio 12mg • Fibra 2g
Papas crujientes con sabor
a vinagre
Rinde 4 porciones
3 papas "Russet" medianas, peladas si
desea
1 taza (235 ml) de vinagre de sidra de
manzana
2 cucharadas de aceite de oliva
Sal gruesa, a gusto
12

Cortar las papas en rodajas de
1
⁄8 pulgada
(3 mm). Dejar macerando en vinagre durante
8–12 horas Este paso es necesario para que las
papas no tengan un sabor pastoso. Escurrir las
papas y revolverlas con el aceite de oliva. Forrar
las bandejas con papel sulfurizado y disponer las
rodajas sobre las bandejas, sin superponerlas.
Sazonar con sal. Deshidratar en "High" durante
8–12 horas o hasta que estén crujientes a gusto.
Alternar la posición de las bandejas a mitad
de proceso de deshidratación si es necesario
(los alimentos en las bandejas de abajo suelen
deshidratarse más rápidamente). Conservar a
temperatura ambiente, en un recipiente hermético.
Información nutricional por porción:
Calorías 198 • Carbohidratos 29g • Proteínas 3g
• Grasa 7g • grasa saturada 1g • Colesterol 0mg
• Sodio 302mg • Calcio 25mg • Fibra 2g
GARANTÍA LIMITADA
DE TRES AÑOS
(válida en los EE.UU. y
en Canadá solamente)
Esta garantía es para los consumidores solamente.
Usted es un consumidor si ha comprado su aparato
Cuisinart
®
en una tienda, para uso personal o casero. A
excepción de los estados donde la ley lo permita, esta
garantía no es para los detallistas u otros comerciantes.
Cuisinart garantiza este aparato contra todo defecto
de materiales o fabricación durante 3 años después
de la fecha de compra original, siempre que el aparato
haya sido utilizado para uso doméstico y según las
instrucciones. Le aconsejamos que llene el formulario
de registro disponible en www.cuisinart.com a fin de
facilitar la verificación de la fecha de compra original.
Sin embargo, no es necesario registrar el producto
para recibir servicio bajo esta garantía. En ausencia del
recibo de compra, el período de garantía será calculado
a partir de la fecha de fabricación.
Si este aparato presentara algún defecto de materiales
o fabricación durante el período de garantía, la
reparemos o reemplazaremos (a nuestra opción). Para
obtener servicio bajo esta garantía, llame a nuestra línea
directa gratuita al 1-800-726-0190 o regrese el aparato
defectuoso a: Cuisinart, Service Department, 7475
North Glen Harbor Blvd., Glendale, AZ 85307.
Regrese el aparato defectuoso, junto con su recibo de
compra y un cheque o giro postal de US$10.00 por
gastos de manejo y envío. Los residentes de California
solo necesitan dar una prueba de compra y deben
llamar al 1-800-726-0190 para recibir instrucciones de
envío.
NOTA: para más seguridad, le aconsejamos que
mande su paquete por un método de entrega con
seguro y seguimiento. Cuisinart no será responsable
por los daños ocurridos durante el transporte o por los
paquetes mandados a una dirección equivocada. Los
productos perdidos y/o lastimados durante el envío
no serán cubiertos bajo esta garantía. Recuerde incluir
su nombre, dirección y teléfono, la descripción del
problema, así como cualquier información pertinente.
RESIDENTES DE CALIFORNIA SOLAMENTE
La ley del estado de California ofrece dos opciones bajo
el período de garantía. Los residentes del estado de
California pueden (A) regresar el producto defectuoso
a la tienda donde lo compraron o (B) a otra tienda que
venda productos Cuisinart
®
de este tipo.
La tienda, a su opción, reparará el producto, referirá
al consumidor a un centro de servicio independiente,
cambiará el producto o reembolsará al consumidor
por el precio original del producto, menos la cantidad
imputable al uso del producto por el consumidor hasta
que este se dañe. Si estas dos opciones no satisfacen
al consumidor, podrá llevar el producto a un centro de
servicio independiente, siempre que se pueda ajustar
o reparar el producto de manera económica. Cuisinart
será responsable por los gastos de servicio, reparación,
reemplazo o reembolso de los productos defectuosos
durante el período de garantía.
Los residentes de California también pueden, si lo
desean, mandar el aparato defectuoso directamente a
Cuisinart para que lo reparen o lo cambien. Para esto,
se debe llamar a nuestro servicio posventa al 1-800-
726-0190. Cuisinart será responsable por los gastos de
reparación, reemplazo, manejo y envío de los productos
defectuosos durante el período de garantía.
ANTES DE HACER REPARAR SU
APARATO
Si su aparato tiene algún problema, le
recomendamos que llame a nuestro servicio
posventa al 1-800-726-0190 antes de regresar
el aparato a Cuisinart. Un representante le
confirmará si su aparato sigue bajo garantía y le
indicará la dirección del centro de servicio más
cercano.
13

Este aparato satisface las más altas exigencias
de fabricación y ha sido diseñado para uso sobre
corriente de 120V, usando accesorios y piezas
de repuesto autorizados solamente. Esta garantía
excluye expresamente los daños causados por
accesorios, piezas o reparaciones no autorizados
por Cuisinart, así como los daños causados
por el uso de un convertidor de voltaje. Esta
garantía no cubre el uso institucional o comercial
del producto, y no es válida en caso de daños
causados por mal uso, negligencia o accidente.
Esta garantía excluye expresamente todos los
daños incidentales o consecuentes. Algunos
Estados no permiten la exclusión o limitación de
daños incidentales o consecuentes, de modo que
las limitaciones mencionadas pueden no regir
para usted. Usted puede tener otros derechos que
varían de un Estado a otro.
Importante: si debe llevar el aparato defectuoso a un
centro de servicio no autorizado, por favor informe al
personal del centro de servicio que deberían llamar al
servicio posventa de Cuisinart al 1-800-726-0190 a fin
de diagnosticar el problema correctamente, usar las
piezas correctas para repararlo y asegurarse de que el
producto esté bajo garantía.
14

15
NOTAS:

IB-14023-ESP
©2016 Cuisinart
150 Milford Road
East Windsor, NJ 08520
Impreso en China
15CE017387
Todas marcas registradas o marcas de comercio
mencionadas en esta pertenecen a sus titulares
respectivos.
-
 1
1
-
 2
2
-
 3
3
-
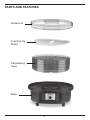 4
4
-
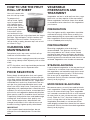 5
5
-
 6
6
-
 7
7
-
 8
8
-
 9
9
-
 10
10
-
 11
11
-
 12
12
-
 13
13
-
 14
14
-
 15
15
-
 16
16
-
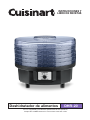 17
17
-
 18
18
-
 19
19
-
 20
20
-
 21
21
-
 22
22
-
 23
23
-
 24
24
-
 25
25
-
 26
26
-
 27
27
-
 28
28
-
 29
29
-
 30
30
-
 31
31
-
 32
32


Cuisinart DHR-20P1 El manual del propietario
- Categoría
- Secadores de frutas
- Tipo
- El manual del propietario
- Este manual también es adecuado para
en otros idiomas
- English: Cuisinart DHR-20P1 Owner's manual
Otros documentos
-
Waring WDH10 Manual de usuario
-
-
Waring Commercial H10 10-Tray Food Dehydrator Manual de usuario
-
Magic Chef MCL10PFDRT Manual de usuario
-
-
-
Aroma AFD-615 Manual de usuario
-
Hamilton Beach 32100 El manual del propietario
-
Nesco FD-61WHC Manual de usuario
-
Weston 75-0450-RE Guía del usuario