Conair GMT100R Manual de usuario
- Categoría
- Recortadores de barba
- Tipo
- Manual de usuario
El Conair GMT100R es una recortadora de barba y bigote versátil con cinco ajustes de longitud de corte para personalizar su apariencia. Fácil de usar, con cuchillas de precisión removibles para una limpieza sencilla y un accesorio recortador de pelo para nariz y orejas para mantener un aspecto cuidado. Funciona con dos pilas AA (no incluidas) y cuenta con un botón de encendido/apagado simple para un funcionamiento intuitivo.
El Conair GMT100R es una recortadora de barba y bigote versátil con cinco ajustes de longitud de corte para personalizar su apariencia. Fácil de usar, con cuchillas de precisión removibles para una limpieza sencilla y un accesorio recortador de pelo para nariz y orejas para mantener un aspecto cuidado. Funciona con dos pilas AA (no incluidas) y cuenta con un botón de encendido/apagado simple para un funcionamiento intuitivo.


Transcripción de documentos
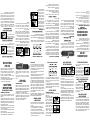
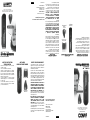
1. No utilice pilas que no sean del tamaño o de la potencia indicada para uso con este aparato. 2. Cambie todas las pilas al mismo tiempo. 3. Limpie los contactos del aparato y los de la(s) pila(s) antes de instalar ésta(s). 4. Siempre respete los signos de polaridad (+/-) al instalar la(s) pila(s). 5. Retire la(s) pila(s) si no va a usar el aparato durante un largo período de tiempo. 6. Retire las pilas usadas sin demora. INSTRUCCIONES DE USO LUBRICACIÓN Mantenimiento de su cortadora *Requiere 2 pilas AA (no incluidas) Le aconsejamos que utilice pilas alcalinas, las cuales son más duraderas. No junte pilas nuevas con pilas usadas. No junte pilas alcalinas con pilas regulares (carbón-zinc) o pilas recargables (níquel cadmio). Botón de encendido/apagado LIMPIEZA DE LAS CUCHILLAS 1. It is always best to begin with a clean, slightly damp beard. 2. After you have combed through your beard in the direction it grows naturally, you will want to outline the desired shape, beginning under your jawline. 3. Begin defining your beard’s shape under your chin and work upward on each side of your face toward your ears. Then define the upper outline of your beard across your cheeks, past your sideburns and toward your hairline. GUARDE ESTAS INSTRUCCIONES Getting Started Outlining Your Beard 1. Your trimmer adjusts to five positions so you can have a beard length from 1/8" (shortest) to 5/8" (longest). 2. To use the 5-position comb, slide it over the trimmer blades and snap down into position. At first, until you become familiar with the adjustments, use the longest trim setting (5/8"). (You can always go back and make your beard a little shorter.) 3. Begin trimming your beard using smooth, even strokes. Start with your sideburns and work downward toward your chin. (Never attempt to trim against the natural growth of your beard, because the hair will be cut too short.) 4. If you decide you want a closer trim, you can now adjust the 5-position comb to a shorter setting (such as 1/2" or 3/8") and go over your beard again until you achieve the desired length. PARA USO DOMÉSTICO SOLAMENTE EL CONTORNEO Funcionamiento básico Después de dar forma a su barba o a su bigote, deberá mantener su aspecto, usando la cortadora una vez por semana. Para lograr resultados óptimos, humedezca ligeramente la barba antes de cortarla (NO LA MOJE). Esto evitará cortar demasiado pelo. TIPOS DE BARBAS Y BIGOTES There are three key factors that determine which beard or mustache style is most suitable for your face: 1. The shape and dimensions of your face. 2. The natural growth of your beard/mustache. 3. The thickness of your beard/mustache. If you are unsure of the type of beard or mustache that most suits your face, speak with a professional hair stylist and ask for an opinion on what style would be best. Once your beard or mustache has been styled, it is essential that you maintain its appearance. To do this, use your shaper to trim your beard/ mustache weekly. For the best trimming results, your beard should be slightly damp (not wet) before using the trimmer. This will prevent the trimmer from removing more hair than desired. Now You’re Ready to Trim Your Beard INSTRUCCIONES DE OPERACIÓN Growing a Beard and Mustache Las cuchillas de su aparato fueron diseñadas con precisión para un uso específico, y deben recibir un cuidado muy especial. Su recortadora está equipada con un juego de cuchilla extraíble para facilitar la limpieza. Para sacar las cuchillas: 1. Asegúrese de que el aparato esté apagado y de que las pilas hayan sido retiradas de su compartimiento. 2. Sostenga el aparato con el interruptor hacia su cuerpo y empuje las cuchillas suavemente hacia arriba para desencajarlas. 3. Para volver a instalar las cuchillas, introduzca la lengüeta de montaje en la hendidura en la parte trasera del cabezal y empuje las cuchillas hasta que calcen emitiendo un chasquido. Limpie las cuchillas después de cada uso con el cepillo de limpieza provisto. Guarde el aparato hasta el próximo uso. Tenga cuidado cuando sea necesario cambiar o ajustar las cuchillas. Asegúrese de que las dos cuchillas siempre estén cambiadas o afiladas al mismo tiempo. Para seguir disfrutando de su aparato durante mucho tiempo, utilícelo únicamente con el propósito para el cual fue diseñado: cortar la barba y el bigote. 1. Su cortadora incluye una guía ajustable con 5 posiciones que corta el pelo de 3 mm (1/8 pulgada) a 16 mm (5/8 pulgada). 2. Instale la guía ajustable encima de la cuchilla para la barba. Le recomendamos que utilice el ajuste más largo (16 mm) para empezar. Siempre podrá volver a acortar la barba. 3. Empiece a cortar su barba con movimientos parejos y suaves, desde las patillas hasta la quijada. Nunca corte en dirección contraria al crecimiento natural del pelo. El recorte resultaría demasiado corto. 4. Si desea un recorte aún más corto, escoja un largo de recorte más corto, como 9.5 mm (3/8 pulgada) o 12.5 mm (1/2 pulgada), y siga acortando su barba hasta conseguir el tamaño deseado. ACCESORIO CORTAPELO PARA NARIZ/OREJAS Después de terminar, retire la guía y dé forma a la parte inferior de su bigote. SIEMPRE CORTE SU BIGOTE DESDE ARRIBA HASTA ABAJO 1. Se le hará más fácil cortar su bigote si está limpio y ligeramente humedecido. 2. Peine su bigote en la dirección del crecimiento natural del pelo. 3. Instale la guía ajustable sobre las cuchillas. Empiece con la posición más larga (siempre podrá volver a acortar el bigote). CÓMO CORTAR SU BIGOTE EL RECORTE 1. Remove the battery compartment cover by pushing in and down toward the bottom of the trimmer. 2. Align the AA batteries with the positive and negative positions indicated inside the battery compartment. Being careful not to bend the clips, insert the negative end of each battery first so it will slip easily into position. 3. Return the battery cover to its original position by pushing it in and up until you hear a small click as it locks into place. 4. To use your trimmer, push ON/OFF switch upwards to ON position. 5. After you finish using your trimmer, push down on the ON/OFF switch to turn the trimmer off. About once a month you should oil the trimmer blades. It is best to do this over a piece of newspaper. Turn the trimmer on and hold it so that the blades are pointed downward. Spread one drop of oil across the blades, then turn the trimmer off and wipe away the excess oil with a soft cloth. Be careful not to use too much oil and don’t oil your trimmer more than necessary, as this could damage the motor. (Never attempt to oil the motor bearing as it is permanently lubricated.) Keep oil out of reach of children. Types of Beards/Mustaches Lubrique las cuchillas aproximadamente una vez al mes. Para no ensuciar, haga esto encima de un periódico. Sostenga el aparato al revés y enciéndalo. Coloque una gota de aceite sobre las cuchillas, apague el aparato y limpie el exceso de aceite con un paño suave. No use demasiado aceite y no lubrique el aparato más de lo necesario. Esto podría dañar el motor. Tampoco no intente lubricar las piezas del motor, las cuales son lubricadas de por vida. Mantenga el aceite fuera del alcance de los niños. Operating Instructions: Oiling the Blades Because the trimmer blades are precision made for a very special use, they should always be handled with care. This trimmer comes with a removable blade set for easy cleaning. To remove the blades follow these steps: 1. Make sure the trimmer is off, and the batteries have been removed. 2. With the power switch facing you, gently push up under the blades until they pop off. 3. To replace, align the tabs on the bottom of the blades inside the mounting area on the back of the trimmer and push down until the blades snap into place. Each time you finish using the trimmer, take the cleaning brush provided and brush away any loose hair that has collected in the blades. Then store the trimmer until the next use. Be especially careful when changing or adjusting blades. When you have your trimmer serviced, be sure that all blades are sharpened or replaced at the same time. To promote the long life of the appliance, use your trimmer only for the purpose intended by the manufacturer to trim your beard and mustache. BARBAS Y BIGOTES 1. Asegúrese de que el aparato esté apagado. Retire la cuchilla regular (véase la sección "Mantenimiento de las cuchillas"). Introduzca la lengüeta de montaje del accesorio cortapelo para nariz/orejas en la hendidura que se encuentra en la parte trasera del cabezal. Empuje el accesorio hacia adelante hasta que calce emitiendo un chasquido. Encienda el aparato (ON). Para retirar el accesorio, sostenga el aparato con el interruptor apuntando hacia su cuerpo y empuje el accesorio hacia adelante. FOR HOUSEHOLD USE ONLY Taking Care of Your Trimmer 1. Se le hará más fácil cortar la barba si está limpia y ligeramente humedecida. 2. Peine la barba en la dirección del crecimiento natural del pelo antes de empezar a darle forma. 3. Dé forma a su barba empezando debajo de la quijada y subiendo hacia la oreja, en cada lado del rostro. Siga dando forma al área de la mejilla, a las patillas y a la línea de nacimiento del cabello. Save These instructions *Requires 2 AA batteries (not included). We recommend using alkaline batteries in your trimmer because they last longer. Do not mix old and new batteries. Do not mix alkaline, standard (carbon zinc), or rechargeable (nickel cadmium) batteries Blade Care 1. Deslice la cubierta del compartimiento de la(s) pila(s) hacia abajo para abrirlo. 2. Instale dos pilas AA, respetando los signos de polaridad. Introduzca el polo negativo primero, teniendo cuidado de no doblar las patas de contacto. 3. Cierre la cubierta del compartimiento de la(s) pila(s), empujando hasta que haga clic. 4. Para encender el aparato, deslice el interruptor hacia arriba (ON). 5. Para apagar el aparato, deslice el interruptor hacia abajo (OFF). 1. Always purchase the correct size and grade of battery most suitable for the intended use. 2. Replace all batteries of a set at the same time. 3. Clean the battery contacts and also those of the device prior to battery installation. 4. Ensure the batteries are installed correctly with regard to polarity (+ and -). 5. Remove batteries from equipment which is not to be used for an extended period of time. 6. Remove used batteries promptly On/Off Switch El tipo de barba o de bigote que más conviene a una persona depende de: 1. La forma y el tamaño de su rostro. 2. La forma del crecimiento natural de su barba o de su bigote. 3. El espesor de su barba o de su bigote. Si no está seguro del tipo de barba o bigote que le conviene, pida consejo a un barbero. INSTRUCTIONS FOR USE To Trim Your Mustache 1. For best results, start with a clean, slightly damp mustache. 2. Comb through your mustache in the direction it grows. 3. Place the 5-position comb over the trimmer blades and snap it into position. It is a good idea to start with the longest trim setting adjustment. (You can always go back and cut your mustache more closely with a shorter setting.) ALWAYS TRIM YOUR MUSTACHE FROM THE TOP DOWN After your mustache has been trimmed to the desired length, remove the 5-way trimming attachment and, using the blades only, define the outline of the bottom of your mustache. USING THE NOSE/EAR HAIR ATTACHMENT 1. Make sure the trimmer on/off switch is in the “off” position. Detach the normal trimming blade (see section on Blade Care). Fit the tab on the back of the nose/ear hair attachment into the notch inside the trimmer head. Push the attachment towards the front of the trimmer until it snaps into place. Turn the on/off switch to the “on” position. While detaching the attachment, make sure the power switch is facing you and press the attachment away from you. This warranty gives you specific legal rights, and you may also have other rights which vary from state to state. IN NO EVENT SHALL CONAIR BE LIABLE FOR ANY SPECIAL, INCIDENTAL, OR CONSEQUENTIAL DAMAGES FOR BREACH OF THIS OR ANY OTHER WARRANTY, EXPRESS OR IMPLIED, WHATSOEVER. Some states do not allow the exclusion or limitation of special, incidental, or consequential damages, so the above limitation may not apply to you. 12PG128105 IB-11162 ® ©2012 Conair Corporation Service Center: Conair Corporation Service Department 7475 North Glen Harbor Blvd. Glendale, AZ 85307 Model GMT100RDCS For your safety and continued enjoyment of this product, always read the instruction booklet carefully before using. Please register this product at: www.conair.com/registration ANY IMPLIED WARRANTIES, OBLIGATIONS, OR LIABILITIES, INCLUDING BUT NOT LIMITED TO THE IMPLIED WARRANTY OF MERCHANTABILI TY AND FITNESS FOR A PARTICULAR PURPOSE, SHALL BE LIMITED IN DURATION TO THE 24 MONTH DURATION OF THIS WARRANTY. Some states do not allow limitations on how long an implied warranty lasts, so the above limitations may not apply to you. NOSE/ear trimmer To obtain service under this warranty, return the defective product to the service center listed on back, together with your sales slip and $3.00 for postage and handling. California residents need only provide proof of purchase and should call 1-800-3-CONAIR for shipping instructions. In the absence of a receipt, the warranty period shall be 24 months from the date of manufacture. Conair will repair or replace, at our option, your appliance free of charge for 24 months from the date of purchase if the appliance is defective in workmanship or materials. B AT T E R Y O P E R AT E D TRIMMER BEARD MUSTACHE GUARDE ESTAS INSTRUCCIONS RESOLUCIÓN DE PROBLEMAS Si su aparato no funcionase correctamente: 1. Asegúrese de que el aparato esté encendido. 2. Asegúrese de que la(s) pila(s) esté(n) debidamente instalada(s). Cerciórese de que la(s) pila(s) no esté(n) agotada(s). Nota: Para lograr resultados óptimos, siempre reemplace ambas pilas AA al mismo tiempo. 3. Revise las cuchillas y límpielas si fuera necesario, usando el cepillo de limpieza provisto. 4. Si esto no soluciona el problema, regrese el aparato a un centro de servicio autorizado (véase la información de garantía). GMT100RDCS Cortadora de barba/bigote Guía ajustable con 5 posiciones Accesorio cortapelo para nariz/orejas LIMITED TWO YEAR WARRANTY Cortadora de barba/bigote Trimmer Nose/Ear Hair Attachment 5-Position Comb GMT100RDCS Beard/Mustache Trimmer GARANTÍA LIMITADA DE DOS AÑOS Conair reparará o remplazará (a su opción) su aparato sin cargo por un período de 24 meses a partir de la fecha de compra si presentara defectos de materiales o fabricación. Para obtener servicio técnico bajo esta garantía, regrese su aparato al Centro de Servicio indicado al dorso, junto con su recibo de compra y un cheque o giro postal de US$3.00 por gastos de manejo y envío. Los residentes de California sólo necesitan dar una prueba de compra y deben llamar al 1-800-3-CONAIR para recibir instrucciones de envío. En ausencia del recibo de compra, el período de garantía será de 24 meses a partir de la fecha de fabricación. CUALQUIER GARANTÍA, OBLIGACIÓN O RESPONSABILIDAD IMPLÍCITAS, INCLUYENDO PERO NO LIMITADAS A LA GARANTÍA IMPLÍCITA DE COMERCIABILIDAD Y APTITUD PARA UN PROPÓSITO ESPECÍFICO, ESTARÁN LIMITADAS POR LOS 24 MESES DE LA PRESENTE GARANTÍA ESCRITA. Algunos Estados no permiten limitaciones sobre la duración de una garantía implícita, de modo que las limitaciones mencionadas pueden no regir para usted. CONAIR NO SERÁ RESPONSABLE, EN NINGÚN CASO, POR NINGÚN DAÑO ESPECIAL, INCIDENTAL O CONSECUENTE DEBIDO AL INCUMPLIMIENTO DE ESTA O CUALQUIER OTRA GARANTÍA, EXPRESA O IMPLÍCITA. Algunos Estados no permiten la exclusión o limitación de daños especiales, incidentales o consecuentes, de modo que las limitaciones mencionadas pueden no regir para usted. Esta garantía le otorga derechos legales específicos y usted puede tener otros derechos que varían de un Estado a otro. There are several things to look for if your trimmer fails to operate: 1. Be sure the trimmer is turned ON. 2. Make sure that the batteries are properly placed in the battery compartment. Test the batteries to be sure they are working. (For optimum trimmer operation, always replace all two AA batteries at the same time.) 3. Check the blades to see if they are clogged with hair clippings; if so, use the cleaning brush to remove hair. 4. If the trimmer still fails to operate, take or send it to a Conair Service Center (see warranty procedure and addresses). SAVE THESE INSTRUCTIONS TROUBLE SHOOTING C O R TA D O R A Barba bigote FUNCIONAMIENTO INALÁMBRICO CORTAPELO PARA NARIZ/OREJAS Para registrar su producto, visítenos en: www.conair.com/registration ©2012 Conair Corporation Para su seguridad y para disfrutar plenamente de este producto, siempre lea las instrucciones cuidadosamente antes de usarlo. Centro de servicio: Conair Corporation Service Department 7475 North Glen Harbor Blvd. Glendale, AZ 85307 12PG128105 Modelo GMT100RDCS ® IB-11162-
 1
1
-
 2
2


Conair GMT100R Manual de usuario
- Categoría
- Recortadores de barba
- Tipo
- Manual de usuario
El Conair GMT100R es una recortadora de barba y bigote versátil con cinco ajustes de longitud de corte para personalizar su apariencia. Fácil de usar, con cuchillas de precisión removibles para una limpieza sencilla y un accesorio recortador de pelo para nariz y orejas para mantener un aspecto cuidado. Funciona con dos pilas AA (no incluidas) y cuenta con un botón de encendido/apagado simple para un funcionamiento intuitivo.
en otros idiomas
- English: Conair GMT100R User manual
Artículos relacionados
-
Conair GMT189GB Manual de usuario
-
Conair GMT176CS Manual de usuario
-
-
-
-
-
Conair THE CHOPPER HCT420CSC Manual de usuario
-
-
Conair GMTL1R Manual de usuario
-