3
V2018.01 English
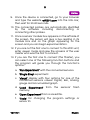
NeuLog logger sensors
Welcome to the new age of experimental data
acquisition with plug and play smart logger sensors.
NeuLog logger sensors offer a myriad of didactic tools to
meet your needs in the field of scientific studies.
The NeuLog system works as a set of independent
computer-based modules complete with a data logger,
flash memory and a sensor – all in each individual
sensor.
Sensors plug into each other and have the ability to
connect as a chain of sensors and then stream data to
any computer system or smart device.
The NeuLog system can connect to nearly any
computer platform or operating system (PC, MAC, iPad,
Tablets, Android, smart phones, etc). All that is needed is
a USB connection or wireless connectivity.
Note: NeuLog products are intended for educational
use.
Home

4
V2018.01 English
NeuLog user guide
This is a general guide for all NeuLog sensors and
modules instructing how to use them at various
operation modes. Specific user guides for each sensor
and module can be found at www.NeuLog.com. Choose
"Products" on the main menu, and then choose the
relevant sensor or module.
Each specific user guide contains the following sections:
What is included with the sensor
Sensor specifications
Technical background
Maintenance and storage
Sensor offset (if needed)
Note: There are some sensors (listed below) that due to
their specific nature require different instructions than
the rest of the NeuLog sensors. For these sensors please
make sure to refer to www.NeuLog.com before use:
NUL-209, Photo gate sensor
NUL-243, GPS
Home

5
V2018.01 English
Quick start procedure
PC or Mac Computer – Wired Connection
Materials needed:
NeuLog sensor or sensors
USB-200 USB Module, or WIFI-201/WIFI-202 (using WiFi as
USB connection)
USB to mini USB cable (included with the USB-200 module)
Your sensor needs to be connected to a USB-200
module. The USB-200 module then connects to a
computer via USB (this can also be done with WIFI-201
or WIFI-202). Please note that you cannot plug the
sensor directly into the computer.
The browser-based application can be downloaded for
free at www.NeuLog.com as well as a full application
user guide.
Choose "Downloads" on the main menu and then
choose "Software and Application".
Home

6
V2018.01 English
Procedure:
1. Install the NeuLog application.
2. Connect the USB-200 module to the PC or Mac.
3. Connect the sensor or sensors to the USB-200
module (they directly plug together). Please note that
no calibration is required for NeuLog sensors. You
should see the red LED on the sensor flash as you
plug them in.
4. Open the NeuLog application by clicking on the
shortcut on the screen.
5. The connected probes are automatically identified
by the software; including disconnecting or
connecting other probes.
6. Once a sensor module box appears on the left side of
the screen, the sensor will give a live reading in its
module box and on the graph appearing on the
screen and you can begin experimentation.
Home

7
V2018.01 English
7. Select one of the following function buttons and the
software will guide you through the function's
options:
a. 'Run Experiment' with the connected sensors.
b. 'Single Step' experiment.
c. 'Visual' display with four options for one of the
connected sensors values: Digital, Bar, Analog,
gauge and Accumulated graph.
d. 'Load Experiment' from the sensors' flash
memory.
e. 'Open Experiment' from a saved file.
f. 'Tools' for changing the software settings or
sensor ID.
Tablet, smart phone or any device with WIFI connectivity
Materials needed:
NeuLog sensor or sensors
WiFi Module (WIFI-201 or WIFI-202)
Battery Module (BAT-200 or BAT-202)
Your sensor or sensors needs to be connected to a WiFi
module. The WiFi module will create a closed NeuLog
WiFi network which will stream the NeuLog data to the
device of your choosing. Once your device is wirelessly
connected to the NeuLog network, you can run
experiments and collect data through a browser of your
choosing.
Home

8
V2018.01 English
Procedure:
1. Connect the sensor or sensors directly to the left side
of a WiFi module (no wires required).
2. Connect a BAT-200 module to the right side of the
WiFi module or BAT-202 to its left side.
3. Although not required, we recommend plugging the
BAT-200 to an outlet using a USB to mini USB cord.
The WiFi module will run for 60-90 minutes
(depending on the sensor) without being plugged in.
4. The WiFi module can be directly powered using a
mini USB to USB cord and plugging it into your
computer or a wall charger. Please note that this
function is only available on WiFi modules with the
mini USB port.
5. For further WiFi module instructions or the WIFI-201
or WIFI-202 quick start guide please visit:
www.NeuLog.com. Choose "Products" on the main
menu, then choose "WiFi Communication module".
6. The WiFi module indicator lights will flash. Take no
action until the LED turns blue. This can take up to
one minute.
7. Take your tablet or smart phone, go to the WiFi
settings and select the NeuLog network
(NeuLog0184 for example) which matches the ID
found on the back of the WiFi module (0184 for this
example).
8. Give your device about 20 seconds to connect to the
WiFi module.
Home

9
V2018.01 English
9. Once the device is connected, go to your browser
and type the website wifi201.com into the URL bar,
then wait for 30-60 seconds.
10. The connected probes are automatically identified
by the software including disconnecting or
connecting other probes.
11. Once a sensor module box appears on the left side of
the screen, the sensor will give a live reading in its
module box and on the graph appearing on the
screen and you can begin experimentation.
12. If you are not the first one to connect to this WiFi unit,
enter viewer mode and view the screens of the user
master who was the first to connect.
13. If you are the first one to connect (the Master), you
can select one of the following function buttons and
the program will guide you through the function's
options:
a. 'Run Experiment' with the connected sensors.
b. 'Single Step' experiment.
c. 'Visual' display with four options for one of the
connected sensors values: Digital, Bar, Analog,
gauge and Accumulated graph.
d. 'Load Experiment' from the sensors' flash
memory.
e. 'Open Experiment' from a saved file.
f. 'Tools' for changing the program settings or
sensor ID.
Home

10
V2018.01 English
14. You can click on the 'Release Master' button in the
'Tools' options and all the connected viewers will
have a new 'Be Master' button. The first one to click
becomes the 'Master'.
15. The 'Tools' also includes a 'WiFi Options' button that
enables to connect the WiFi module as a client to the
WiFi network and to connect to the module through
this network. This option allows using the internet
while using the NeuLog sensors.
16. If you have a newer generation of WIFI-201 module
(with the USB icon on the cover) or a WIFI-202
module this can be used as a USB-200, meaning you
can tether the probes directly to the computer using
the WiFi module. To engage operation in this fashion,
press three times on the panel button. Repeating this
operation will return the module to WiFi mode.
Tablet, smart phone with Bluetooth connectivity
Materials needed:
NeuLog sensor or sensors
BLT-200 – Bluetooth Module (requires IOS 10 and up
for Apple devices and BLE (Bluetooth Low Energy) for
Androids devices)
Download the NeuLog app from the "App Store" or from
"Google Play".
Home

11
V2018.01 English
Procedure:
1. Connect the sensor or sensors directly to the right
side of the Bluetooth module (no wires required).
2. Turn the Bluetooth module ON by pressing the BLT-
200 button, the blue LED will flash.
3. Run the app. The app will search for the module and
connect automatically. After connecting, the blue
LED on the module will light constantly, and at the
app the Bluetooth sign (on the right top corner) will
turn green.
4. If the connection fails, press the gray Bluetooth sign
(on the right top corner) to refresh the connectivity.
5. If there is more than one Bluetooth module available,
the app will ask you to choose which module to
connect.
6. The connected sensors are automatically identified
by the software including disconnecting or
connecting other probes.
7. Once a sensor module box appears on the left side of
the screen, the sensor will give a live reading in its
module box and on the graph appearing on the
screen and you can begin experimentation.
Home

12
V2018.01 English
8. You can select one of the following function buttons
and the software will guide you through the
function's options:
a. 'Run Experiment' with the connected sensors.
b. 'Single Step' experiment.
c. 'Visual' display with four options for one of the
connected sensors values: Digital, Bar, Analog,
gauge and Accumulated graph.
d. 'Load Experiment' from the sensors' flash
memory.
e. 'Open Experiment' from a saved file.
f. 'Tools' for changing the program settings or
sensor ID.
Operation with NeuLog Graphic Display Module (viewer)
Materials needed:
NeuLog sensor or sensors
VIEW-101 Graphic Display Module
BAT-200 or BAT-202 Battery Module
Home

13
V2018.01 English
Procedure:
1. Connect the sensor or sensors to the viewer.
2. Connect the BAT-200 or the BAT-202 to the viewer.
3. The VIEW-101 will automatically detect the sensor
and you will see it appear on the left side of the
screen.
4. Once the sensor appears it will be monitoring data in
real time.
5. To run an experiment and collect data, press the run
icon (little green person).
Off-line experiments
Off-line experiments are when you do not have a sensor
connected directly to a computer, tablet, smart phone,
or NeuLog viewer.
Materials needed:
NeuLog sensor or sensors
BAT-200 or BAT-202 Battery Module
Materials needed to configure your offline experiment:
USB-200 Module, WiFi module (WIFI-201 or WIFI-202)
or VIEW-101 Module
USB to mini USB cable (included with the USB-200
module).
Home

14
V2018.01 English
Procedure:
1. To determine the experiment settings, first connect
to your chosen device (PC, Mac, tablet, smart device)
and wait until the sensor search has ended.
2. Click on each sensor's module box, on the left side of
the screen, and set the experiment parameters
(Range, Duration, Rate and Trigger) for this sensor.
The setting parameters will be saved in the sensor's
flash memory.
3. Connect the sensor or sensors to a charged BAT-200
or BAT-202 module.
4. When ready to collect data, press the "Start/Stop"
button on the sensor. A red light will turn on for the
duration of the experiment.
5. After the experiment has concluded (the "Start/Stop"
button is pressed again or the data collection period
ends). Connect the sensor or sensors to your chosen
device (you can find full instructions in each device's
quick start procedure section).
6. Open the NeuLog application.
7. Click the 'Load experiment' icon.
8. Select which experimental data to upload (up to 5
experimental runs can be stored at one time on the
sensor).
Home

15
V2018.01 English
Operation with NeuLog Digital Display Module (viewer)
Materials needed:
NeuLog sensor or sensors
VIEW-200 Digital Display Module
BAT-200 or BAT-202 Battery Module
Prior to data collection, it is recommended that you
configure your sensors' settings to your specific
experimental needs. Instructions for off-line experiments
configuration procedure can be found in the "Off-line
experiments" section in the previous page.
If you only use the VIEW-200 to take live readings without
collecting data it is not required to configure your
sensors' settings (unless, if needed, for changing the
sensors' range).
Home

16
V2018.01 English
Procedure:
1. Connect up to 5 NeuLog sensors of your choice
together and into the left side of your viewer.
2. Connect a charged battery module into the right side
of the viewer. The screen will automatically turn on.
3. The viewer will begin searching for sensors at this
time – the screen will read "Search… %". This process
should take roughly 25 seconds to complete.
Note: If no sensors are found, disconnect and
reconnect the battery module.
4. Once the sensors have been detected, you can
begin collecting data directly onto the internal
memory of each sensor. To do this you simply need
to press the "Start/Stop" button on the front of each
sensor you wish to collect data with.
5. You can change which sensor data is displayed on
the VIEW-200 by pressing the button on the front of
the module.
Home


18
V2018.01 English
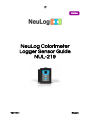
NeuLog colorimeter logger sensor NUL-219
The colorimeter sensor can be used for any science
experiment where liquid samples of different colors and
concentrations are utilized such as in the fields of
Chemistry, Biology, Pharmacology, Biochemistry,
Environmental Science, Physics, or even just to study the
behavior of light waves.
Colorimeters are used to determine absorbance or
transmittance of given wavelengths (generally red,
green, and blue) in a liquid solution. Absorbance and
transmittance are directly related to the concentration
of known solutes in the solution which is calculated using
the Beer-Lambert law. One parameter can be
calculated from the other.
The sensor comes pre-calibrated so you can start
experimentation right out of the box using this guide.
Hundreds of possible experiments that can be
performed with the NUL-219 sensor are: Analyzing
chemical reactions, studying Beer’s Law, water quality
testing, monitoring of ecological systems, study of
photosynthesis, studying light waves. The colorimeter
could take the place of a spectrophotometer in many
experiments.
The NeuLog colorimeter sensor's measurement units
are:
% Transmittance: The amount of light that passes
through a sample.
Absorbance: The amount of light which is absorbed by
a sample.
Home

19
V2018.01 English
Cuvette usage and handling
It is important to maintain a standard for cuvette usage
as their quality will directly impact the results of your
experiments. If the cuvette has fingerprints, smudges, or
cracks the sensor will detect them and give off an
improper colorimeter reading. Smudges left from
handling can easily be wiped off with tissue paper.
Proper usage:
1. Carefully remove the cuvettes from their packaging.
2. Load your liquid sample into the cuvette before
placing it into the sensor to prevent spilling and
damaging the sensor.
3. Plug the cap into the cuvette and gently invert a few
times. Shaking will create air bubbles which will be
detected by the sensor and give an incorrect
reading.
4. Before placing the cuvette in the sensor; hold it as far
towards the top as you can and wipe off the bottom
with a tissue. Do not touch the bottom of the cuvette
again as this will leave a residue which could affect
the results of the experiment.
Home

20
V2018.01 English
5. If you have a cuvette with four clear sides, place it in
the colorimeter sensor.
If you have a cuvette with two opaque sides:
a. Determine which sides of the cuvette are clear
and which sides have an opaque finish.
b. The clear opposing sides must be positioned
facing the front and back of the sensor (they
won’t fit the other way) while the glossy sides face
either side.
c. If the cuvette does not fit with a gentle push,
rotate 90° in either direction and try again.
6. After experimentation, empty your samples, gently
rinse out the cuvettes with distilled water and let
them air-dry.
Home

21
V2018.01 English
Selecting a wavelength
Selecting the correct wavelength is important to get the
best data and can easily be determined using one of two
different methods. There is no incorrect wavelength, just
some which are more informative than others. Lab
experiments often come with a predetermined
wavelength to use. If your experiment does not, follow
one of these methods for best results:
Knowing that the color we see solutions is based on
the color reflected from them (and not absorbed):
Choose a color you know will be absorbed. For
example, if the solution is red try the blue LED option.
Once the sensor is connected and the NeuLog
software is open (follow one of the guides below for
more instruction) click the “Module setup” button in
the module box and try the different LED color options
to determine which has the highest absorbance (it will
appear in real time on the sensor’s module box).
Select the color which has the highest absorbance
reading.
Home

22
V2018.01 English
Included with sensor
NeuLog General Guide.
Three plastic cuvettes with three lids.
Sensors specifications
Transmittance
Absorbance
Range and
operation modes
0-100% red, green,
blue, and orange
0-4 red, green,
blue, and orange
ADC resolution
14 bit
Resolution
0.02%T
0.01 abs.
Max sample rate (S/sec)
100
Experiment Duration: 1 second to 31 days.
Sensor’s features
Fully digital data.
Rugged plastic ergonomic case.
Pushbutton switch for Start/Stop experiments in off
line mode.
Red, green, blue and orange LEDs for four different
wavelength tests.
Testing in both transmittance and absorbance
Internal photodiode for detecting light.
Note: NeuLog products are intended for educational
use.
Home

23
V2018.01 English
Videos and experiment examples
Videos, literature and other probes can be found at
www.neulog.com.
In order to access the colorimeter sensor's page,
choose "Products" on the main menu and then
"Colorimeter logger sensor".
In order to access the coloriemeter sensor's
experiments, choose "Example Labs":
Beer-Lambert law (C-28)
Color Absorption (C-31)
Technical background
The philosophy behind NeuLog’s plug and play
technology is based on each sensor’s ability to store its
own data due to an internal flash memory chip and
micro-controller in each plastic NeuLog body. This
technology allows the sensor to collect and then store
the digital data in the correct scientific units (for
example: °C, °F, Lux, %, ppm).
The sensor is pre-calibrated at the factory. The built-in
software in the logger can be upgraded for free at any
time using the provided firmware update.
Inside the sensor’s plastic body there are four LED lights
(red, green, blue and orange) to test various
wavelengths.
Home

24
V2018.01 English
Light is transmitted from four different colored LEDs
inside the sensor's body, one color at a time, passed
through the cuvette containing a solution and then
detected at the other end to determine the absorbance
or transmittance of light at a specific wavelength.
The sensor works off of Beer's Law which is explained in
the section "Beer's Law" below.
The four wavelengths emitted are:
Red: 634-662 nm
Blue: 452-476 nm
Green: 500-530 nm
Orange: 595-625 nm
Beer's Law
Beer’s Law is an extremely useful concept for solution
concentration testing in the fields of Chemistry and
Biology.
Standard curves are created by using solutions of
known concentrations which are analyzed in a
colorimeter to determine the absorbance and then plot a
graph. The absorption for unknown samples can easily
be tested and plotted on the standard curve to
determine their concentration.
Home

25
V2018.01 English
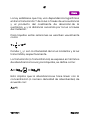
The law states that there is a logarithmic dependence
between the transmission T of light through a substance,
the product of the absorption coefficient of the
substance α, and the distance the light travels through
the material l.
For liquids, these relations are usually written as:
T = I
I0
= 10-l
Where: I0 and I are the intensity of the incident light and
the transmitted light, respectively.
The transmission (or transmittance) is expressed in
terms of absorbance which, for liquids, is defined as:
A = -log10 I
I0 = -log10(T)
This implies that the absorbance becomes linear with
the concentration (or number density of absorbers)
according to:
A = αl
Home

26
V2018.01 English
Maintenance and storage
Never submerge the NeuLog plastic body in any
liquid.
Never place anything in the colorimeter sensor’s
opening on the faceplate except the approved
cuvettes.
Do not allow liquid into the NeuLog plastic body.
After using the probe wipe off all excess material,
liquid or residue from the colorimeter probe.
Store in a box at room temperature out of direct
sunlight.
The cuvette handling and storage guide can be found
at the beginning of this document.
Warranty
We promise to deliver our module free of defects in
materials and workmanship for a period of 3 years from
the date of purchase. Our warranty does not cover
damage of the product caused by improper use, abuse,
or incorrect storage. Sensors with a shelf life such as ion
selective probes have a warranty of 1 year. Should you
need to act upon the warranty please contact your
distributor. Your module will be repaired or replaced.
Thank you for using NeuLog.
Home


28
V2018.01 Español
Sensores interface NeuLog
Bienvenido a la nueva era de recolección de datos
experimentales con sensores interface inteligentes "plug
and play".
Los sensores interface NeuLog ofrecen una gran
cantidad de herramientas didácticas para satisfacer tus
necesidades en el área de experimentación científica.
El sistema NeuLog funciona como un conjunto de
módulos independientes basados en la computadora,
completos con una interface, memoria flash y sensor –
todo en cada sensor individual.
Los sensores se conectan unos con otros y tienen la
habilidad de conectarse en cadena para luego
transmitir los datos a cualquier sistema de computadora
o aparato inteligente.
Las necesidades del sistema NeuLog son hardware y
software agnóstico ya que puede conectarse a casi
cualquier plataforma de computadora o sistema
operativo (PC, MAC, iPad, Tabletas, Android, teléfonos
inteligentes, etc). Sólo se necesita una conexión USB o
conectividad inalámbrica.
Nota: Los productos NeuLog son para uso educativo.
Inicio

29
V2018.01 Español
Guías de usuario NeuLog
Esta es una guía general para todos los sensores y
módulos NeuLog con instrucciones para su uso en los
distintos modos operativos. Las guías específicas para
cada sensor se pueden encontrar en www.NeuLog.com;
elije "Productos" en el menú principal y selecciona el
sensor o módulo relevante.
Cada guía de usuario específica contiene:
Qué incluye cada sensor
Las especificaciones del sensor
Videos y ejemplos de experimentos
Información técnica
Mantenimiento y almacenamiento
Compensación del sensor (si es necesaria)
Nota: Algunos sensores (en la lista a continuación)
requieren de instrucciones diferentes debido a la
naturaleza específica del sensor. En el caso de estos
sensores, por favor dirígete a www.NeuLog.com antes
de usarlos:
NUL-209, Foto compuerta
NUL-243, GPS
Inicio

30
V2018.01 Español
Procedimiento inicial rápido
Computadora PC o Mac – Conexión por cable
Materiales necesarios:
Sensor NeuLog.
Módulo USB-200 o WIFI-201 (para usarlo como
conexión USB).
Cable USB a mini USB (incluido en el módulo USB-
200).
El sensor debe conectarse al módulo USB-200. El
módulo USB-200 se conecta a la computadora a través
del USB (también puede hacerse con un WIFI-201). Por
favor tome en cuenta que no se puede conectar el
sensor directamente a la computadora.
La aplicación basada en el navegador puede
descargarse gratuitamente en www.NeuLog.com así
como una guía completa del uso de la aplicación.
Elije "Downloads" en el menú principal y luego elige
"Software y Application".
Inicio

31
V2018.01 Español
Procedimiento:
1. Instala la aplicación NeuLog.
2. Conecta el módulo USB-200 a la PC o Mac.
3. Conecta el sensor o sensores al módulo USB-200 (se
conectan directamente entre sí). Por favor nota que
los sensores NeuLog no necesitan calibración.
Debes ver que el LED rojo del sensor parpadea al
conectarlo.
4. Abre la aplicación NeuLog haciendo clic en el
acceso directo de la pantalla.
5. Los sensores conectados son identificados
automáticamente por el software; el software
también reconoce cuando se conectan otros
sensores o se desconecta alguno.
6. Cuando aparece la caja del módulo del sensor a la
izquierda de la pantalla, ya aparece una lectura en
tiempo real y una gráfica en la pantalla; el
experimento puede comenzar.
Inicio

32
V2018.01 Español
7. Selecciona uno de los siguientes botones y el
programa te guiará por medio de las siguientes
opciones de funciones:
a. 'Ejecutar Experimento' con los mismos
parámetros del experimento para todos los
sensores o con los parámetros de cada sensor.
b. Experimento de 'Medición Única'.
c. 'Visuales' enseña cuatro opciones para presentar
los valores de uno de los sensores conectados:
Digital, Barra, Medidor Análogo y Gráfica
Acumulada.
d. 'Cargar Experimento' de la memoria flash del
sensor.
e. 'Abrir Experimento' de un archivo guardado.
f. 'Herramientas' para cambiar la configuración del
programa o el número de identidad del sensor.
Tableta, teléfono inteligente o cualquier aparato con
conectividad WiFi
Materiales necesarios:
Sensor(es) NeuLog
Módulo WiFi (WIFI-201 o WIFI-202)
Módulo de batería BAT-200
Tu sensor(es) debe conectarse a un módulo WiFi el cual
crea una red cerrada de WiFi NeuLog; así se transmiten
los datos de NeuLog al aparato elegido. Una vez que el
aparato se conecta de manera inalámbrica a la red
NeuLog, se pueden realizar experimentos y recolectar
datos por medio de un navegador.
Inicio

33
V2018.01 Español
Procedimiento:
1. Conecta el sensor directamente al lado izquierdo del
módulo WiFi (no se requieren cables).
2. Conecta el módulo de batería BAT-200 al lado
derecho del módulo WiFi.
3. Aunque no es necesario, recomendamos conectar el
módulo BAT-200 a un toma corriente por medio de
un cargador USB a mini USB (como un típico
cargador de teléfono celular). El módulo WiFi puede
funcionar de 60 a 90 minutos (dependiendo del
sensor) sin estar conectado.
4. El módulo WiFi puede ser alimentado directamente
por medio de un cable mini a USB y conectándolo a
la computadora o a un toma corriente. Por favor nota
que esta función sólo está disponible en módulos
WiFi con puerto mini USB.
5. Para más instrucciones sobre el módulo WiFi o la
guía rápida del WIFI-201 o WIFI-202 por favor visita:
www.NeuLog.com; Elige "Productos" en el menú
principal, luego elige "Módulo de Comunicación
WiFi".
6. Las luces indicadoras del módulo WiFi parpadearán;
No hagas nada hasta que el LED cambie a azul; esto
puede tomar un minuto.
Inicio

34
V2018.01 Español
7. Toma la tableta o teléfono inteligente, ve a
configuración de WiFi y elige la red NeuLog
(NeuLog0184 por ejemplo) que coincida con el
número de identificación en la parte de atrás del
módulo WiFi (0184 por ejemplo).
8. Espera unos 20 segundos para que el aparato se
conecte al módulo WiFi.
9. Una vez que el aparato se conecte, ve al navegador
y escribe el sitio web wifi201.com en la barra del URL;
espera unos 30-60 segundos.
10. Los sensores conectados son automáticamente
identificados por la aplicación; así mismo si se
conecta otro sensor o desconecta alguno.
11. Cuando aparece la caja del módulo del sensor a la
izquierda de la pantalla, ya aparece una lectura en
tiempo real y una gráfica en la pantalla; el
experimento puede comenzar.
12. Si no eres el primero en conectarte a este módulo
WiFi, entrarás en el modo observador y podrás ver
las pantallas del controlador que fue el primero en
conectarse.
Inicio

35
V2018.01 Español
13. Si eres el primero en conectarte (el controlador),
puedes elegir los siguientes botones de funciones y
el programa te guiará para realizar las opciones de
funciones:
a. 'Ejecutar Experimento' con los mismos
parámetros de experimento para todos los
sensores o con distintos parámetros para cada
sensor.
b. Experimento 'Medición Única'.
c. 'Visuales' enseña cuatro opciones para presentar
los valores de uno de los sensores conectados:
Digital, Barra, Medidor Análogo y Gráfica
Acumulada.
d. 'Cargar Experimento' de la memoria flash del
sensor.
e. 'Abrir Experimento' de un archivo guardado.
f. 'Herramientas' para cambiar la configuración del
programa o el número de identidad del sensor.
14. Puedes hacer clic en el botón 'Liberar Control' en la
opción 'Herramientas' para que todos los
observadores conectados tengan un nuevo botón
'Ser controlador'. El primero en hacer clic será el
'Controlador'.
15. 'Herramientas' también incluye un botón 'Opciones
WiFi' que permite conectar el módulo WiFi como un
cliente de la red WiFi para conectarse al módulo por
medio de esta red. Esta opción permite el uso de
internet mientras se usan los sensores NeuLog.
Inicio

36
V2018.01 Español
16. Si tienes un módulo WIFI-201 de una nueva
generación (con el icono USB al frente) o un módulo
WIFI-202 estos pueden usarse como módulo USB-
200; esto quiere decir que puedes conectar los
sensores directamente a la computadora usando el
módulo WiFi. Para hacer esto, presiona 3 veces el
botón del módulo. Si lo vuelves a hacer regresarás el
módulo al modo WiFi.
Tablet, teléfono inteligente con conectividad Bluetooth
Materiales necesarios:
Sensor o sensores de NeuLog
BLT-200 – Módulo Bluetooth (requiere iOS 10 y
superior para dispositivos Apple y BLE (Bluetooth Low
Energy) para dispositivos Android)
Descargue la aplicación NeuLog de la "App Store" o de
"Google Play".
Inicio

37
V2018.01 Español
Procedimiento:
1. Conecte el sensor o los sensores directamente al
lado derecho del módulo Bluetooth (no se requieren
cables).
2. Encienda el módulo Bluetooth presionando el botón
BLT-200, el LED azul parpadeará.
3. Ejecuta la aplicación. La aplicación buscará el
módulo y se conectará automáticamente. Después
de la conexión, el LED azul del módulo se encenderá
constantemente, y en la aplicación, el icono de
Bluetooth (en la esquina superior derecha) se pondrá
verde.
4. Si la conexión falla, presione el signo de Bluetooth
gris (en la esquina superior derecha) para actualizar
la conectividad.
5. Si hay más de un módulo Bluetooth disponible, la
aplicación le pedirá elegir a qué módulo conectar.
6. Los sensores conectados serán identificados
automáticamente por el software, incluyendo la
desconexión o conexión de otras sondas.
7. Una vez que aparece un cuadro de módulo de
sensor en el lado izquierdo de la pantalla, el sensor
dará una medición en vivo en su cuadro de módulo y
en el gráfico que aparece en la pantalla y podrá
comenzar la experimentación.
Inicio

38
V2018.01 Español
8. Puede seleccionar uno de los siguientes botones de
función y el software lo guiará a través de las
opciones de la función:
a. 'Ejecutar Experimento' con los mismos
parámetros del experimento para todos los
sensores o con los parámetros de cada sensor.
b. Experimento de 'Medición Única'.
c. 'Visuales' enseña cuatro opciones para presentar
los valores de uno de los sensores conectados:
Digital, Barra, Medidor Análogo y Gráfica
Acumulada.
d. 'Cargar Experimento' de la memoria flash del
sensor.
e. 'Abrir Experimento' de un archivo guardado.
f. 'Herramientas' para cambiar la configuración del
programa o el número de identidad del sensor.
Trabajo con el Visor Gráfico NeuLog
Materiales necesarios:
Sensor(es) NeuLog
Visor gráfico VIEW-101
Módulo de batería BAT-200
Inicio

39
V2018.01 Español
Procedimiento:
1. Conecta el sensor(es) al lado izquierdo del visor.
2. Conecta el módulo BAT-200 al lado derecho del
visor.
3. El módulo VIEW-101 auto detecta el sensor y lo
puedes ver en el lado izquierdo de la pantalla.
4. Una vez que aparece el sensor estará midiendo en
tiempo real.
5. Para correr un experimento y recolectar datos,
presiona el icono Medir.
Experimentos fuera de línea
(Experimentos fuera de línea es cuando no tenemos un
sensor conectado directamente a la computadora,
tableta, teléfono inteligente o visor NeuLog).
Materiales necesarios:
Sensor(es) NeuLog
Módulo de batería BAT-200
Materiales necesarios para configurar un experimento
Fuera de línea:
Módulo USB-200, módulo WiFi (WIFI-201 o WIFI-202) o
módulo VIEW-101.
Cable USB a mini USB cable (incluido en el módulo
USB-200).
Inicio

40
V2018.01 Español
Procedimiento:
1. Para determinar la configuración del experimento,
primero conecta el sensor al aparato elegido (PC,
Mac, tableta, aparato inteligente) y espera a que
termine la búsqueda de sensores.
2. Haz clic en la caja del módulo de cada sensor, a la
izquierda de la pantalla, y configura los parámetros
del experimento (Rango, Duración, Velocidad y
Condición de inicio) para cada sensor. Los
parámetros configurados se guardarán en la
memoria flash del sensor.
3. Conecta el sensor(es) directamente al lado izquierdo
de un módulo BAT-200 cargado.
4. Cuando estés listo para recolectar datos, presiona el
botón "Comenzar/Detener" en el sensor; se
encenderá una luz roja por el tiempo que dure el
experimento.
5. Al terminar el experimento (El botón
"Comenzar/Detener" fue presionado nuevamente o
terminó el periodo de recolección de datos) conecta
el sensor al aparato elegido (encontrarás todas las
instrucciones en la sección procedimiento de inicio
rápido de cada aparato).
6. Abre la aplicación NeuLog.
7. Haz clic en el icono 'Cargar experimento'.
8. Selecciona qué datos experimentales deseas cargar
(se puede almacenar hasta 5 experimentos en el
sensor).
Inicio

41
V2018.01 Español
Trabajo con el Visor Digital NeuLog
Materiales necesarios:
Sensor(es) NeuLog
Módulo Visor Digital VIEW-200
Módulo de batería BAT-200
Antes de recolectar datos, recomendamos configurar
los parámetros del sensor a tus necesidades
experimentales específicas. Las instrucciones para la
configuración de experimentos fuera de línea se
encuentran en la sección "Experimentos fuera de línea"
en la página anterior.
Si sólo estás usando el VIEW-200 para hacer
mediciones en tiempo real, sin recolectar datos no es
necesario configurar los parámetros del experimento (a
menos que sea necesario para cambiar el rango del
sensor).
Inicio

42
V2018.01 Español
Procedimiento:
1. Conecta hasta 5 sensores NeuLog juntos al lado
izquierdo del visor.
2. Conecta un módulo de batería cargado del lado
derecho del visor. La pantalla se encenderá
automáticamente.
3. El visor comenzará a buscar sensores – en la
pantalla aparecerá "Búsqueda… %". Este proceso
debe tomar unos 25 segundos.
Nota: Si no se encuentran sensores: desconecta y
vuelve a conectar el módulo de batería.
4. Cuando los sensores son detectados, puedes
comenzar la recolección de datos directamente en
la memoria interna de cada sensor. Sólo presiona el
botón “Comenzar/Detener” de cada sensor con el
cual quieres recolectar datos.
5. Puedes cambiar el sensor que aparece en el VIEW-
200 presionando el botón al frente del módulo.
Inicio


44
V2018.01 Español
Sensor interface de colorímetro NeuLog NUL-219
El sensor colorímetro puede usarse para cualquier
experimento científico con muestras líquidas de
diferentes colores y concentraciones como en las áreas
de química, biología, farmacología, bioquímica, ciencias
del medio ambiente, física o tan sólo para estudiar el
comportamiento de ondas de luz.
Los colorímetros se usan para determiner la
absorbancia o transmitancia de longitudes de onda
determinadas (generalmente rojo, verde y azul) en una
solución líquida. Absorbancia y transmitancia están
directamente relacionadas con la concentración de
solutos conocidos en la solución lo cual se calcula por
medio de la ley Beer-Lambert. Un parámetro puede
calcularse a partir de otro.
El sensor viene pre-calibrado de manera que se puede
comenzar el experimento inmediatamente siguiendo
esta guía.
Unos cuantos de los cientos de experimentos que es
posible realizar con el sensor NUL-219 son: Monitoreo de
sistemas ecológicos, estudios de fotosíntesis, análisis de
reacciones químicas, pruebas de calidad del agua,
estudio de ondas de luz, estudio de la ley de Beer. El
sensor puede usarse en lugar de un espectómetro en
muchos experimentos.
El sensor colorímetro NeuLog puede recolectar datos
usando las siguientes unidades de medición:
% de Transmitancia: La cantidad de luz que pasa por
una muestra.
Absorbancia: La cantidad de luz absorbida por una
muestra.
Inicio

45
V2018.01 Español
Uso y manejo de la cubeta
Es importante mantener un uso estándar de la cubeta
ya qaue su calidad impactará directamente el resultado
de los experimentos. Si la cubeta tiene huellas digitales,
manchas o está rajada, el sensor lo detectará y emitirá
lecturas erróneas. Manchas provocadas por el uso se
pueden limpiar fácilmente con un pañuelo desechable.
Uso adecuado:
1. Saca cuidadosamente las cubetas del empaque.
2. Vierte la muestra líquida en la cubeta antes de
colocarla en el sensor para evitar dañar el sensor en
caso de que la muestra se derrame.
3. Ponle la tapa a la cubeta y voltéala varias veces
suavemente. Si sacudes la cubeta se formarán
burbujas las cuales serán detectadas por el sensor
por lo que la lectura emitida será incorrecta.
4. Antes de colocar la cubeta en el sensor, sosténla lo
más alto posible y limpia la parte de debajo de la
cubeta con un pañuelo desechable. No toques la
parte de abajo de la cubeta ya que esto dejaría
residuos que pueden afectar los resultados del
experimento.
Inicio

46
V2018.01 Español
5. Si tienes una cubeta con cuatro lados claros,
colócala en el sensor del colorímetro.
Si tienes una cubeta con dos lados opacos:
a. Determina qué lados de la cubeta son claros y
cuales son opacos.
b. Los lados claros deben colocarse hacia las
partes de enfrente y atrás del sensor (no se
pueden poner de otra manera) mientras que los
lados opacos deben quedar hacia los lados.
c. Si la cubeta no entra empujando suavemente,
gírala 90° en cualquier dirección y vuelve a tratar.
6. Al terminar el experimento, vacía las muestras, lava
cuidadosamente las cubetas con agua destilada y
déjalas secar al aire.
Inicio

47
V2018.01 Español
Selección de una longitud de onda
Es importante seleccionar la longitude de onda correcta
para obtener los mejores datos. Esto puede hacerse por
medio de uno de los dos métodos siguientes. No hay
longitud de onda incorrecta, es solo que unas son más
informativas que otras. Los experimentos de laboratorio
generalmente vienen con una longitud de onda
predeterminada que debe usarse. Si no es así, usa unos
de los siguientes métodos para obtener los mejores
resultados:
Debes saber que el color de la solución se refleja de
ésta (no se absorbe). Elige un color que sabes que
será absorbido. Por ejemplo, si la solución es roja trata
la opción del LED azul.
Cuando el sensor está conectado y el software
NeuLog está abierto (sigue una de las guías a
continuación para más instrucciones) haz clic en el
botón “Configuración de módulo” y trata las
diferentes opciones de colores LED para determinar
cuál tiene la mayor absorbancia (cuál mostrará
lectura en tiempo real en el icono del sensor).
Selecciona el color que tenga la mayor lectura de
absorbancia.
Inicio

48
V2018.01 Español
Incluido con el sensor
Guía General de NeuLog.
Tres cubetas de plástico con tres tapas.
Especificaciones del sensor
Transmitancia
Absorbencia
Rango y modos de
operación
0-100% rojo, verde,
azul, y naranja
0-4 rojo, verde,
azul, y naranja
Resolución CAD
14 bit
Resolución
0.02%T
0.01 abs.
Velocidad máxima de
muestreo (S/sec)
100
Duración de experimentos: 1 segundo a 31 días.
Características del sensor
Datos totalmente digitales.
Caja ergonómica de plástico resistente.
Botón para Comenzar/Detener experimentos en el
modo Fuera de línea.
LEDs rojo, verde, azul y naranja para cuatro pruebas
diferentes de longitud de onda.
Pruebas en transmitancia y absorbencia.
Fotodiodo interno para detección de luz.
Nota: los productos NeuLog son sólo para uso
educativo.
Inicio

49
V2018.01 Español
Videos y ejemplos de experimentos
Videos, literatura y otras sondas de prueba pueden
encontrarse en www.NeuLog.com.
Para acceder a la página del sensor de colorímetro,
seleccione "Productos" en el menú principal y luego
"Sensor Registrador de Colorímetro".
Para acceder a los experimentos del sensor de
colorímetro, seleccione "Laboratorios de ejemplo":
Ley de Beer-Lambert (C-28)
Absorción de Color (C-31)
Antecedentes técnica
La filosofía que respalda la tecnología "plug and play"
NeuLog se basa en la habilidad de cada sensor de
guardar sus propios datos. Esto se lo permite un circuito
integrado con memoria flash y micro-controlador en
cada cuerpo de plástico NeuLog. Esta tecnología le
permite al sensor recolectar y guardar los datos
digitales en las unidades científicas correctas (oC, oF,
Lux, %, ppm, por ejemplo).
El sensor viene pre-calibrado de fábrica. El software
integrado en la interface puede actualizarse en
cualquier momento por medio de software.
Dentro del cuerpo de plástico del sensor hay cuatro
luces LED (roja, verde, azul y naranja) para hacer
pruebas de varias longitudes de onda.
Inicio

50
V2018.01 Español
La luz es transmitida desde cuatro LEDs de diferente
color dentro del cuerpo del sensor, un color cada vez,
pasa a través de la cubeta con una solución y luego es
detectada en el otro extremo para determinar la
absorbancia o transmitancia de la luz en una longitud de
onda específica.
El sensor trabaja a partir de la Ley de Beer la cual fue
explicada en la sección "Ley de Beer", a continuación.
Las cuatro longitudes de onda transmitidas son:
Rojo: 634-662 nm
Azul: 452-476 nm
Verde: 500-530 nm
Naranja: 595-625 nm
Ley de Beer
La ley de Beer es un concepto extremadamente útil en
pruebas de la concentración de soluciones en las áreas
de química y biología.
Se crean curvas estándar usando soluciones de
concentración conocida las cuales se analizan con un
colorímetro para determinar la absorbancia y graficarla.
La absorción de muestras desconocidas se puede
probar fácilmente y dibujar en la curva estándar para
determinar su concentración.
Inicio

51
V2018.01 Español
La ley establece que hay una dependencia logarítmica
entre la transmición T de la luz a través de una sustancia
y el producto del coeficiente de absorción de la
sustancia, α y la distancia recorrida por la luz a través
del material l.
Para líquidos estas relaciones se escriben usualmente
como:
T = I
I0
= 10-l
Donde: I0 y I son la intensidad de la luz incidente y la luz
transmitida, respectivamente.
La transmición (o transmitancia) se expresa en términos
de absorbancia la cual, para líquidos, se define como:
A = -log10 I
I0 = -log10(T)
Esto implica que la absorbancia se hace linear con la
concentración (o número densidad de absorbentes) de
acuerdo con:
A = αl
Inicio

52
V2018.01 Español
Mantenimiento y almacenaje
Nunca sumerjas la caja de plástico de NeuLog en
ningún líquido.
Nunca coloques nada en la abertura del sensor
colorímetro que no sea las cubetas aprobadas.
No permitas que entre líquido a la caja de plástico del
sensor Neulog.
Después de usar el sensor, limpia todo el exceso de
material, líquido o residuo del colorímetro.
Guárdalo en una caja a temperatura ambiente donde
no le dé luz solar directamente.
La guía para el mantenimiento y almacenaje de las
cubetas puede encontrarse al principio de este
documento.
Garantía
Prometemos entregar el sensor libre de defectos en los
materiales y manufactura. La garantía es por un periodo
de 3 años desde la fecha de compra y no cubre daños al
producto causados por uso inadecuado, abuso o
almacenaje incorrecto. Sensores con fecha de
caducidad, como aquellos que son de iones selectivos
tienen una garantía de un año. Si deseas activar la
garantía, por favor contacta a tu distribuidor. El sensor
será reparado o reemplazado.
¡Gracias por usar NeuLog.
Inicio
-
 1
1
-
 2
2
-
 3
3
-
 4
4
-
 5
5
-
 6
6
-
 7
7
-
 8
8
-
 9
9
-
 10
10
-
 11
11
-
 12
12
-
 13
13
-
 14
14
-
 15
15
-
 16
16
-
 17
17
-
 18
18
-
 19
19
-
 20
20
-
 21
21
-
 22
22
-
 23
23
-
 24
24
-
 25
25
-
 26
26
-
 27
27
-
 28
28
-
 29
29
-
 30
30
-
 31
31
-
 32
32
-
 33
33
-
 34
34
-
 35
35
-
 36
36
-
 37
37
-
 38
38
-
 39
39
-
 40
40
-
 41
41
-
 42
42
-
 43
43
-
 44
44
-
 45
45
-
 46
46
-
 47
47
-
 48
48
-
 49
49
-
 50
50
-
 51
51
-
 52
52


en otros idiomas
- English: NeuLog NUL-219 User guide
Artículos relacionados
-
NeuLog NUL-202 Guía del usuario
-
NeuLog NUL-207 Guía del usuario
-
-
-
-
-
-
NeuLog NUL-205 Guía del usuario
-
-