
Bayco Products, Inc. • 640 South Sanden Blvd. • Wylie, TX 75098 • 1-800-233-2155 • 1-469-326-9400 • www.nightstick.com
INS-USB-4510-22
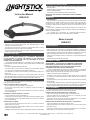
Instruction Manual
USB-4510
WARNINGS
yNOT FOR USE ABOVE HAZARDOUS LOCATIONS
yDO NOT use in explosive atmospheres, near ammable liquids, or where
explosion proof lamps are required.
yDO NOT use in the proximity of vehicles or equipment when there is a risk of
ammable liquids coming into contact with the ashlight.
yDO NOT expose the battery to water or salt water, or allow the battery to get wet.
yKeep out of the reach of children.
CHARGING THE LIGHT
CHARGER INPUT: 5 VDC Max
WARNING: TO PREVENT IGNITION OF A HAZARDOUS ATMOSPHERE,
DO NOT ATTEMPT TO CHARGE THIS PRODUCT IN THE HAZARDOUS
ENVIRONMENT. THIS TASK MUST ONLY BE PERFORMED IN AN AREA
KNOWN TO BE NON-HAZARDOUS.
Fully charge the light before the rst use, or if the battery is new or has been unused
for several months. For best performance, charge the light when the headlamp beam
starts to dim.
yUse only the supplied Nightstick USB cable.
yLocate the USB port on the side of the headlamp, remove the rubber USB port
cover, and plug the USB cable into the headlamp’s USB port.
yThe total time to full charge varies depending on the remaining charge in the
battery pack.
yWhen the USB cable is connected, the charging indicator lights on the top will
glow red while the light is charging and then turn green when it is fully charged.
When the cable is disconnected, the charging indicator lights will turn off.
OPERATION
The two switches control all functions on the headlamp. The below instructions
apply while wearing the headlamp.
WHITE FLOODLIGHT SWITCH - RIGHT SIDE
yPress and release to turn the oodlight to low-brightness.
yPress quickly a second time (within 1.5 seconds) to change the oodlight to
high-brightness.
yPress and release from any mode after it has been on for more than 1.5 seconds
to turn the oodlight off.
RED/GREEN FLOODLIGHT SWITCH - LEFT SIDE
yPress and release to turn the red oodlight on.
yPress quickly a second time (within 1.5 seconds) to change the oodlight to green.
yPress and release from any mode after it has been on for more than 1.5 seconds
to turn the oodlight off.
BATTERY SHUT OFF MODE
yPress and hold both switches at the same time for 3 seconds to enable or
disable battery shut off mode.
yAfter three seconds the white oodlight will ash on and off 1 time to conrm a
change in the battery safe mode.
NOTE: The battery safe mode reverts to disabled when battery is fully discharged.
PSA MOUNTING INSTRUCTIONS
yEnsure mounting surface is clean and oil-free. Use included alcohol wipe to
clean the surface.
yDetermine best location that does not interfere with brim.
yRemove adhesive backing.
yFirmly press mount into place and hold for 30-60 seconds.
IMPORTANT: WAIT 24 HOURS FOR ADHESIVE TO REACH MAXIMUM
STRENGTH.
WARRANTY
2 YEAR WARRANTY
Bayco Products, Inc. warrants this product to be free from defects in workmanship
and materials to the original purchaser for 2 years from the date of purchase, and
includes the LEDs, housing, lenses, electronics, switches, rechargeable batteries
and chargers. Bulbs (other than LEDs) are covered for 90 days from the date of
purchase.
We will repair or replace this product should we determine it to be defective. This
is the only warranty, expressed or implied, including any warranty of merchantability or
tness for a particular purpose.
For a complete copy of the warranty, go to www.baycoproducts.com/bayco-
product-support/warranties. Retain your receipt for proof of purchase.
Mode d’emploi
USB-4510
AVERTISSEMENTS
yNE PAS UTILISER AU-DESSUS D’ENDROITS DANGEREUX.
yNE PAS utiliser ce produit dans une atmosphère explosive, à proximité de
liquides inammables, ou dans des endroits exigeant un éclairage antidéagrant.
yNE PAS utiliser ce produit à proximité de véhicules ou d’équipement quand des
liquides inammables pourraient entrer en contact avec la lampe torche.
yNE PAS exposer la batterie à l’eau ou à l’eau salée, et ne pas laisser la batterie
se mouiller.
yNe pas laisser pas à la portée des enfants
CHARGER LA LAMPE
ENTRÉE CHARGEUR: 5 VDC Max
AVERTISSEMENT : POUR ÉVITER L’INFLAMMATION D’ATMOSPHÈRE
DANGEREUSE, NE PAS ESSAYER DE CHARGER CE PRODUIT DANS
UNE ZONE DANGEREUSE. CETTE TÂCHE DOIT ÊTRE EFFECTUÉE
UNIQUEMENT DANS UNE ZONE NON DANGEREUSE.
Charger complètement la lampe avant la première utilisation ou si la pile est
neuve ou n’a pas été utilisée pendant plusieurs mois. Pour de meilleurs résultats,
charger la lampe lorsque le faisceau de lumière commence à faiblir.
yUtiliser uniquement le cable USB Nightstick.
yLocalisez le port USB sur le côté de la lampe frontale, retirez le couvercle
en caoutchouc du port USB et branchez le câble USB dans le port USB de la
lampe frontale.
yLe temps total pour une charge complète varie en fonction de la charge restante
dans la batterie.
yLorsque le câble USB est connecté, les voyants de charge sur le dessus s’allument
en rouge pendant la charge, puis deviennent verts lorsqu’ils sont complètement
chargés. Lorsque le câble est déconnecté, les voyants de charge s’éteignent.
FONCTIONNEMENT
Les deux interrupteurs contrôlent toutes les fonctions du phare. Les instructions
ci-dessous s’appliquent lorsque vous portez la lampe frontale.
INTERRUPTEUR DE PROJECTEUR BLANC - CÔTÉ DROIT
yAppuyez et relâchez pour allumer le projecteur à faible luminosité.
yAppuyez rapidement une deuxième fois (dans les 1,5 secondes) pour faire
passer le projecteur à une luminosité élevée.
yAppuyez et relâchez à partir de n’importe quel mode après qu’il a été allumé
pendant plus de 1,5 seconde pour éteindre le projecteur.
INTERRUPTEUR DE PROJECTEUR ROUGE/VERT - CÔTÉ GAUCHE
yAppuyez et relâchez pour allumer le projecteur rouge.
yAppuyez rapidement une deuxième fois (dans les 1,5 secondes) pour passer
le projecteur au vert.
yAppuyez et relâchez à partir de n’importe quel mode après qu’il a été allumé
pendant plus de 1,5 seconde pour éteindre le projecteur.

Bayco Products, Inc. • 640 South Sanden Blvd. • Wylie, TX 75098 • 1-800-233-2155 • 1-469-326-9400 • www.nightstick.com
INS-USB-4510-22
FUNCIONAMIENTO
Los dos interruptores controlan todas las funciones del faro. Las siguientes
instrucciones se aplican mientras se usa el faro.
INTERRUPTOR PROYECTOR BLANCO - LADO DERECHO
yPresione y suelte para encender el reector a bajo brillo.
yPresione rápidamente una segunda vez (dentro de 1,5 segundos) para cambiar
el foco a alto brillo.
yPresione y suelte desde cualquier modo después de que haya estado encendido
durante más de 1,5 segundos para apagar el reector.
INTERRUPTOR FOCO ROJO/VERDE - LADO IZQUIERDO
yPresione y suelte para encender el reector rojo.
yPresione rápidamente una segunda vez (dentro de 1,5 segundos) para cambiar
el foco a verde.
yPresione y suelte desde cualquier modo después de que haya estado encendido
durante más de 1,5 segundos para apagar el reector.
MODO DE APAGADO DE BATERÍA
yMantenga presionados ambos interruptores al mismo tiempo durante 3
segundos para habilitar o deshabilitar el modo de apagado de la batería.
yDespués de tres segundos, el reector blanco se encenderá y apagará 1 vez
para conrmar un cambio en el modo seguro de la batería.
NOTA: El modo seguro de la batería vuelve a desactivarse cuando la batería
está completamente descargada.
INSTRUCCIONES DE MONTAJE DE PSA
yAsegúrese de que la supercie de montaje esté limpia y sin aceite. Use una
toallita con alcohol incluida para limpiar la supercie.
y Antes de la instalación, determine la mejor ubicación que no interera con el ala.
yRetire el respaldo adhesivo.
yMantenga pulsado durante 30 a 60 segundos.
IMPORTANT: EL ADHESIVO ALCANZA LA RESISTENCIA MÁXIMA DESPUÉS
DE 24 HORAS.
GARANTÍA
GARANTÍA LIMITADA DE 2 AÑO
Bayco Products, Inc. garantiza que este producto está libre de defectos de
mano de obra y materiales para el comprador original durante 2 año a partir de
la fecha de compra e incluye los LED, la carcasa, los lentes, la electrónica, los
interruptores, las pilas recargables y los cargadores. Las bombillas (excepto los
LED) están cubiertas durante 90 días a partir de la fecha de compra.
Repararemos o reemplazaremos este producto si lo determinamos como
defectuoso. Esta es la única garantía, expresa o implícita, incluyendo cualquier
garantía de comerciabilidad o idoneidad para un propósito particular.
Para obtener una copia completa de la garantía, visite www.baycoproducts.
com/bayco-product-support/warranties. Conserve su recibo para comprobar la
compra.
MODE D’ARRÊT DE LA BATTERIE
yAppuyez et maintenez les deux commutateurs en même temps pendant 3
secondes pour activer ou désactiver le mode d’arrêt de la batterie.
yAprès trois secondes, le projecteur blanc clignotera 1 fois pour conrmer un
changement dans le mode sans échec de la batterie.
REMARQUE : REMARQUE : Le mode de sécurité de la batterie redevient
désactivé lorsque la batterie est complètement déchargée.
INSTRUCTIONS DE MONTAGE PSA
yAssurez-vous que la surface de montage est propre et sans huile. Utilisez la
lingette imbibée d’alcool incluse pour nettoyer la surface.
yDéterminez le meilleur emplacement qui n’interfère pas avec le bord.
yRetirez le support adhésif.
yAppuyez et maintenez pendant 30 à 60 secondes.
IMPORTANT : EL ADHESIVO ALCANZA LA RESISTENCIA MÁXIMA DESPUÉS
DE 24 HORAS.
GARANTIE
GARANTIE LIMITÉE DE 2 AN
Bayco Products, Inc. garantit que ce produit est exempt de défauts de
matériaux et de fabrication à l’acheteur original pour une période d’un (2) an à partir
de la date d’achat, et inclut les DEL, les boîtiers, les lentilles, les électroniques, les
interrupteurs, les batteries rechargeables et les chargeurs. Les ampoules (autres
que les DEL) sont couvertes pour une période de 90 jours à partir de la date d’achat.
Ce produit sera réparé ou remplacé si nous déterminons qu’il est défectueux.
Ceci est la seule garantie explicite ou implicite, y compris toute garantie de qualité
marchande ou d’adéquation à un usage particulier.
Pour une copie détaillée de la garantie, vous rendre sur le site www.
baycoproducts.com/bayco-product-support/warranties. Gardez ce reçu comme
preuve d’achat.
Manual de Instrucción
USB-4510
ADVERTENCIAS
yNO PARA USO SOBRE ZONAS PELIGROSAS
yNO utilizar en atmosferas explosivas, cerca de líquidos inamables o donde se
requieran lámparas a prueba de explosión.
yNO utilizar en la proximidad de vehículos o equipo cuando hay riesgo de que
líquidos inamables hagan contacto con la linterna.
yNO exponga la batería al agua ni al agua salada, ni permita que la batería se
mojen.
yMantener fuera del alcance de los niños.
CARGAR LA LÁMPARA
ENTRADA DE CARGADOR: 5 VDC Máx
ADVERTENCIA: PARA EVITAR LA IGNICIÓN DE UNA ATMÓSFERA
PELIGROSA, NO INTENTE CARGAR ESTE PRODUCTO EN UN AMBIENTE
PELIGROSO. ESTA TAREA SOLAMENTE DEBE REALIZARSE EN UNA ZONA
QUE SE SABE NO PELIGROSA.
Cargue completamente la batería antes del primer uso, o si la pila es nueva
o no se ha utilizado durante varios meses. Para un mejor rendimiento, cargue
cuando el rayo de luz comienza a disminuir.
yUtilice únicamente el cable USB Nightstick suministrado.
yUbique el puerto USB en el costado del faro, retire la cubierta de goma del
puerto USB y conecte el cable USB al puerto USB del faro.
yEl tiempo total para la carga completa varía según la carga restante en el
paquete de baterías.
yCuando el cable USB está conectado, las luces indicadoras de carga en la
parte superior se iluminarán en rojo mientras la luz se está cargando y luego
se volverán verdes cuando esté completamente cargada. Cuando el cable esté
desconectado, las luces indicadoras de carga se apagarán.
-
 1
1
-
 2
2


en otros idiomas
- français: NightStick USB-4510 Manuel utilisateur
- English: NightStick USB-4510 User manual
Artículos relacionados
-
NightStick XPR-5553G Intrinsically Safe Dual-Light Rechargeable Headlamp Manual de usuario
-
NightStick XPP-5422GM Manual de usuario
-
-
NightStick XPP-5422GMXA Intrinsically Safe Dual-Light Flashlight Manual de usuario
-
NightStick XPP-5452G Manual de usuario
-
-
-
NightStick XPP-5420B Manual de usuario
-
-
NightStick XPR-5568 Manual de usuario