LG G1500S El manual del propietario
- Categoría
- Teléfonos móviles
- Tipo
- El manual del propietario
Este manual también es adecuado para

P/N : MMBB0110902
ISSUE 1.0
PRINTED IN KOREA
MANUAL DE USUARIO
MODELO: G1500
ESPAÑOL
ENGLISH
T•E•L•É•F•O•N•O•G•P•R•S
Teléfono GPRS
MANUAL DE USUARIO
MODELO: G1500
Por favor, lea este manual cuidadosamente
antes de utilizar su teléfono.
Consérvelo para su futura consulta.

Teléfono GPRS
MANUAL DE USUARIO
MODELO: G1500
Por favor, lea este manual cuidadosamente
antes de utilizar su teléfono.
Consérvelo para su futura consulta.
ESPAÑOL


ESPAÑOL
3
G1500 Teléfono
El G1500 presenta un magnífico acabado que
proporciona a su usuario un agradable tacto y
gran practicidad.

Para su seguridad
ESPAÑOL
4
Información importante
Esta guía del usuario contiene información importante acerca del
uso y funcionamiento de este teléfono.Lea toda la información con
cuidado para obtener un desempeño óptimo y para evitar cualquier
daño o mal uso del teléfono. Cualquier cambio o modificación que
no esté explícitamente aprobado en esta guía del usuario podría
invalidar la garantía que se tiene para este equipo.
Antes de comenzar
Instrucciones de seguridad
¡ADVERTENCIA! Para reducir la posibilidad de sufrir descargas
eléctricas, no exponga el teléfono a áreas de mucha humedad,
como serían el baño, una piscina, etc.
Mantenga su telefono alejado de temperaturas extremas.
Nunca almacene el teléfono en ambientes que puedan exponerlo a
temperaturas menores a los 0°C o superiores a los 40°C, como por
ejemplo al aire libre durante una tormenta de nieve o dentro del
automóvil en un día caluroso. La exposición al frío o calor excesivos
causará desperfectos, daños y posiblemente una falla catastrófica.
Sea cuidadoso al usar su teléfono cerca de otros dispositivos
electrónicos. Las emisiones de radiofrecuencia del teléfono celular
pueden afectar a equipos electrónicos cercanos que no estén
adecuadamente blindados. Debe consultar con los fabricantes de
cualquier dispositivo médico personal, como sería el caso de
marcapasos o audífonos para determinar si son susceptibles de
recibir interferencia del teléfono celular. Apague el teléfono cuando
esté en una instalación médica o en una gasolinera. Nunca coloque
el teléfono en un horno de microondas ya que esto haría que
estallara la batería.
¡Importante! Lea por favor la INFORMACIÓN DE SEGURIDAD DE
LA ASOCIACIÓN DE LA INDUSTRIA DE LAS TELECOMUNICA-
CIONES (TIA) en la página 89 antes de utilizar su teléfono.

ESPAÑOL
5
Información de seguridad
Por favor lea y atienda la información siguiente para el uso seguro y
adecuado de su teléfono y para evitar cualquier daño imprevisto
debido a un accidente. Igualmente, mantenga el manual del usuario
en un sitio accesible en todo momento después de leerlo.
• Desconecte el cable de corriente y el cargador si hay una
tormenta eléctrica para evitar descargas eléctricas o incendios.
• No use su teléfono en áreas altamente explosivas, ya que puede
generar chispas.
• No coloque el teléfono en un sitio sometido a exceso de polvo y
mantenga la distancia mínima requerida entre el cable de
corriente y las fuentes de calor.
• Desconecte el cable de corriente antes de limpiar el teléfono y
limpie la clavija de corriente cuando esté sucia.
• No dañe el cable de corriente doblándolo, retorciéndolo, tirando
de él o calentándolo. No use la clavija si está suelta, ya que esto
puede ocasionar incendios o descargas eléctricas.
• Sostenga firmemente la clavija para conectar y desconectar el
cable de corriente. Cerciórese de que la clavija esté firmemente
conectada. Si no lo está, puede producir calor excesivo o un
incendio.
• No coloque objetos pesados sobre el cable de corriente. No
permita que el cable de corriente se doble, ya que esto puede
ocasionar incendios o descargas eléctricas.
• Cuide de no dejar que la batería entre en contacto con
conductores metálicos como pueden serlo un collar o algunas
monedas. Al sufrir un corto circuito, puede causar una explosión.
• No desarme la batería ni la golpee, ya que esto puede ocasionar
descargas eléctricas, corto circuitos e incendios. Almacene la
batería en un sitio alejado del alcance de los niños.
• El uso de una batería dañada o el colocar la batería en la boca
puede ocasionar graves lesiones.

• No coloque cerca del teléfono artículos que contengan
componentes magnéticos, como tarjetas de crédito, tarjetas
telefónicas, libretas bancarias y boletos del metro. El teléfono
puede dañar la banda magnética.
• No sostenga la antena ni permita que entre en contacto con su
cuerpo durante las llamadas.
• Hablar por el teléfono durante un largo período de tiempo puede
reducir la calidad de la llamada debido al calor que se genera
durante el uso.
• No permita que el teléfono se vea sometido a vibraciones
excesivas o golpes
• Cuando no use el teléfono durante un período prolongado,
almacénelo en un área segura con el cable de corriente
desconectado.
Información sobre la exposición a radiofrecuencias de la FCC
¡ADVERTENCIA! Lea esta información antes de hacer funcionar el
teléfono.
En agosto de 1996, la Comisión federal de comunicaciones (FCC)
de los Estados Unidos, con su acción en el informe y orden FCC
96-326, adoptó una norma de seguridad actualizada para la
exposición humana a la energía electromagnética de
radiofrecuencias (RF) que emiten los transmisores regulados por la
FCC. Esos lineamientos se corresponden con la norma de
seguridad establecida previamente por organismos de estándares
tanto de los EE.UU. como internacionales.
El diseño de este teléfono cumple con los lineamientos de la FCC y
esas normas internacionales.
ESPAÑOL
6
Para su seguridad

PRECAUCIÓN
Utilice solamente la antena incluida y aprobada. EL uso de antenas
no autorizadas o el hacerles modificaciones podría deteriorar la
calidad de la llamada, dañar el teléfono, invalidar la garantía o dar
como resultado una violación de los reglamentos de la FCC.
No utilice el teléfono con una antena dañada. Si una antena dañada
entra en contacto con la piel, puede producirse una pequeña
quemadura. Comuníquese con su distribuidor local para obtener un
reemplazo de la antena.
Funcionamiento en el cuerpo
Este dispositivo se ha probado para un funcionamiento típico en el
cuerpo, manteniendo la parte posterior del teléfono a 2 cm (3/4 de
pulgada) del cuerpo. Para cumplir los requisitos de exposición a RF
de la FCC, debe mantenerse una distancia de separación mínima
de 2 cm (3/4 de pulgada) entre el cuerpo del usuario y la parte
posterior del teléfono. No deben utilizarse clips para cinturón,
fundas y accesorios similares de otros fabricantes que tengan
componentes metálicos. Es posible que los accesorios usados
sobre el cuerpo que no puedan mantener una distancia de
separación de 2 cm (3/4 de pulgada) entre el cuerpo del usuario y
la parte posterior del teléfono, y que no hayan sido probados para
el funcionamiento típico en el cuerpo no cumplan con los límites de
exposición a RF de la FCC y deberán evitarse.
Antena externa montada sobre el vehículo
(opcional, en caso de estar disponible)
Debe mantenerse una distancia de separación mínima de 20 cm (8
pulgadas) entre el usuario o transeúnte y la antena externa
montada en el vehículo para satisfacer los requisitos de exposición
a RF de la FCC. Para obtener más información sobre la exposición
a RF, visite el sitio Web de la FCC en www.fcc.gov.
ESPAÑOL
7

Cumplimiento de clase B según el artículo 15 de la FCC
Este dispositivo y sus accesorios cumplen con el artículo 15 de las
reglas de la FCC. La operación está sujeta a las dos condiciones
siguientes: (1) Este dispositivo y sus accesorios no podrán causar
interferencias dañinas y (2) este dispositivo y sus accesorios deben
aceptar cualquier interferencia que reciban, incluida la que pudiera
causar un funcionamiento indeseable.
Precauciones con la batería
• No la desarme.
• No le provoque un corto circuito.
• No la exponga a altas temperaturas. 60°C (140°F).
• No la incinere.
Eliminación de las baterías
• Por favor deshágase de la batería en forma correcta o llévela a su
proveedor de servicios inalámbricos para que sea reciclada.
• No se deshaga de ella en el fuego ni utilizando materiales
peligrosos o inflamables.
Precauciones con el adaptador (cargador)
• El uso de un cargador de baterías incorrecto puede dañar su
teléfono e invalidar su garantía.
• El adaptador o cargador de baterías está diseñado solamente
para su uso en interiores.
No exponga el adaptador o cargador de baterías a la luz directa del
sol, ni lo utilice en sitios con elevada humedad, como por ejemplo el
baño.
ESPAÑOL
8
Para su seguridad

ESPAÑOL
9
Vista previa
Partes del Teléfono
..............................................................
13
• Parte Frontal del Teléfono
.................................................
13
• Parte Posterior del Teléfono
..............................................
14
Descripción de Teclas
........................................................
15
• Teclas Alfanuméricas
.........................................................
17
Información en Pantalla
Información en Pantalla
......................................................
18
• Iconos en Pantalla
.............................................................
18
Primeros Pasos
Instalación
...........................................................................
20
• Colocación de la tarjeta SIM
..............................................
20
• Colocación de la Batería
....................................................
20
• Carga de la Batería
............................................................
21
• Desconexión del Cargador
................................................
22
Secuencia de Encendido
.....................................................
23
• Primeros pasos con el teléfono
..........................................
23
• Apagado del teléfono
........................................................
23
Códigos de Acesso
.............................................................
24
• Código PIN (4 a 8 dígitos)
..................................................
24
• Código PIN2 (4 a 8 dígitos)
................................................
24
• Código PUK (4 a 8 dígitos)
................................................
24
• Código PUK2 (4 a 8 dígitos)
..............................................
24
• Código de Seguridad (4 a 8 dígitos)
.................................
25
Índice

ESPAÑOL
10
Acceso al Menú
Agenda
..................................................................................
26
• Buscar [Nombres 1]
...........................................................
27
• Añadir nuevo [Nombres 2]
.................................................
28
• Marc. rápida [Nombres 3]
..................................................
30
• Lista de voz [Nombres 4]
....................................................
30
• Grupos [Nombres 5]
...........................................................
31
• Copiar todos [Nombres 6]
..................................................
32
• Borrar todos [Nombres 7]
...................................................
32
• Configuración [Nombres 8]
................................................
33
• Información [Nombres 9]
....................................................
34
Árbol de Menús
....................................................................
35
Mensajes [Menú 1]
...............................................................
37
• Escribir [Menú 1-1]
.............................................................
37
• Buzón entrada [Menú 1-2]
.................................................
41
• Buzón salida [Menú 1-3] .....................................................42
• Servicio info. [Menú 1-4]
....................................................
43
• Mensajes voz [Menú 1-5]
...................................................
45
• Tarjeta [Menú 1-6]
..............................................................
46
• Plantilla [Menu 1-7]
............................................................
46
• Configuración [Menú 1-8]................................................... 46
• Estado mem. [Menú 1-9].................................................... 47
Registro llam. [Menú 2]
.......................................................
48
• Llam. Perdidas. [Menú 2-1]................................................ 48
• Llam. recibidas [Menú 2-2]................................................. 48
• Llam. realizadas [Menú 2-3]
...............................................
48
• Borrar llamadas [Menú 2-4]
................................................
48
• Costo llamad. [Menú 2-5]
...................................................
49
• Info GPRS [Menú 2-6]
........................................................
51

ESPAÑOL
11
Perfiles [Menú 3]
..................................................................
52
• Sólo vibrar [Menú 3-1]
........................................................
52
• Silencio [Menú 3-2]
............................................................
52
• General [Menú 3-3]
............................................................
52
• Alto [Menú 3-4]
..................................................................
53
• Auriculares [Menú 3-5]
.......................................................
53
Configuración [Menú 4]
.......................................................
55
• Alarma [Menú 4-1]
.............................................................
55
• Fecha y Hora [Menú 4-2]
...................................................
56
• Config. telf. [Menú 4-3]
.......................................................
57
• Config. llamadas [Menú 4-4]
..............................................
58
• Config. seguridad [Menú 4-5]
.............................................
61
• Config. red [Menú 4-6]
.......................................................
65
• ¿Recup. val. de fábrica? [Menú 4-7]
..................................
65
Desvíos [Menú 5]
..................................................................
66
• Todas llam. voz [Menú 5-1]
................................................
66
• Ocupado [Menú 5-2]
..........................................................
66
• No responde [Menú 5-3]
....................................................
66
• Ilocalizable [Menú 5-4]
.......................................................
66
• Llamad. datos [Menú 5-5]
..................................................
66
• Llamadas fax [Menú 5-6]
...................................................
66
• Cancel. todas [Menú 5-7]
...................................................
67
Planificador [Menú 6]
...........................................................
68
• Añadir nueva [Menú 6-1]
....................................................
68
• Ver día [Menú 6-2]
.............................................................
70
• Ver todas [Menú 6-3]
.........................................................
70
• Borrar último [Menú 6-4]
....................................................
70
• Borrar todos [Menú 6-5]
......................................................
70

ESPAÑOL
12
Accesorios [Menú 7]
............................................................
71
• Juegos [Menú 7-1]
.............................................................
71
• Conver. unidad [Menú 7-2]
...............................................
72
• Calculadora [Menú 7-3]
......................................................
72
• Reloj mundial [Menú 7-4]
...................................................
73
Internet [Menú 8]
.................................................................
74
• Casa [Menú 8-1]
................................................................
74
• Favoritos [Menú 8-2]
..........................................................
74
• Perfiles [Menú 8-3]
.............................................................
74
• Ir a URL [Menú 8-4]
...........................................................
77
• Config. caché [Menú 8-5]
...................................................
77
• Certif. seg. [Menú 8-6]
.......................................................
78
• Rest. perfil [Menú 8-7]
........................................................
78
Menú On-line de Internet
.....................................................
79
Funciones adicionales
Como usar las llamadas de Datos y Fax
............................
80
• Envío de llamadas de datos y fax
......................................
80
• Recepción de llamadas de datos o fax
..............................
80
Menú durante llamadas
.......................................................
82
• Durante una llamada
.........................................................
82
• Llamadas en Multiconferencia
...........................................
84
Accesorios
............................................................................
87
Indicaciones de seguridad
..................................................
89
Datos Técnicos
...................................................................
106

ESPAÑOL
13
Partes del Teléfono
Vista previa
Parte Frontal del Teléfono
1 Altavoz
2 Pantalla
3 Tecla Multifuncional
Izquierda
4 Teclas de Navegación
5 Tecla de Envío
6 Tecla Asterisco
7 Tecla Multifuncional
Derecha
8 Tecla de Encendido/
Apagado
9 Teclas Numéricas
10 Tecla Almohadilla
11 Micrófono
12 Conector de Auricular
13 Tecla WAP, borrar,
confirmar

Parte Posterior del Teléfono
ESPAÑOL
14
1 Batería
2 Conector de Cable/
Conector de Carga/
Conector Manos Libres de Coche
3 Terminales de Batería
4 Alojamiento para Tarjeta SIM
5 Alojamiento Correa de Transporte
6 Anclaje de Batería
7 Conector para Manos Libres Portátil
5
7
6
4
3
2
1
Partes del Teléfono
Vista previa

ESPAÑOL
15
Descripción de Teclas
Vista previa
A continuación se muestran las diferentes teclas del teléfono.
Descripción del Teclado
Tecla Descripción
Tecla Multifunción Izquierda /
Tecla Multifunción Derecha
Cada una de estas teclas realiza la función indicada
por el texto que aparece justo encima de ellas en la
pantalla.
Tecla WAP
Se usa para realizar una conexión directa a WAP.
También se usa para borrar caracteres.
Teclas de Navegación
Se usan para desplazarse entre nombres, números
de teléfono, menús u opciones de configuración.
Se usa para entrar en el menú Mensajes
directamente.
Se usa para desplazarse entre nombres o números
de teléfono.
Tecla de Envío
Puede marcar un número o responder una llamada.
Si presiona esta tecla sin haber introducido un
número, el teléfono mostrará el ultimo número
marcado.
Teclas Numéricas
Estas teclas se usan principalmente para marcar en
el modo de espera y para introducir números o
caracteres en el modo de edición. Cuando se dejan
presionadas por un cierto tiempo sirven para:
• Llamar al buzón de voz
1.
• Realizar llamadas internacionales 0.
• Marcación rápida desde 2 hasta 9.
< >
D
U
S
0
9
~

ESPAÑOL
16
Descripción de Teclas
Vista previa
Tecla Descripción
Se usa para cambiar al modo de vibración cuando
se mantiene presionada durante un cierto tiempo
Se usa para llamar mediante la voz cuando se
mantiene presionada durante un cierto tiempo.
Esta tecla se utiliza también como tecla de conexión
cuando se conecta el auricular.
Tecla de Encendido / Apagado
Se usa para finalizar o rechazar llamadas. Esta tecla
se usa también como Tecla de Encendido si se
mantiene pulsada durante varios segundos.
*
#
E

ESPAÑOL
17
Vista previa
Teclas Alfanuméricas
La lista de caracteres relacionados con el teclado alfabético y
numérico se muestra a continuación en la siguiente tabla.
Tecla Descripción
1 . , / ? ! - : ' " 1
2 A B C 2 Ä À Á Â Ã Å Æ Ç a b c ä à á â ã å æ ç
3
D E F 3 Ë È É Ê d e f ë è é ê
4 G H I 4 Ï Ì Í Î ˝ g h i ï ì í î ©
5 J K L 5 j k l
6 M N O 6 Ñ Ö Ò Ó Ô Õ Œ m n o ñ ö ò ó ô õ œ
7 P Q R S 7 ß Í p q r s ß ß
8 T U V 8 Ü Ù Ú Û t u v ü ù ú û
9 W X Y Z 9 w x y z
0 [espacio] 0

La pantalla muestra diversos iconos. A continuación se describe
cada uno de ellos.
Iconos en Pantalla
Icon/Indicador
Descripción
Indica la potencia de la señal de red.
Llamada en curso.
La alarma ha sido programada y está activa.
Indica el estado de carga de la batería.
Ha recibido un mensaje de texto.
Ha recibido un mensaje de voz (depende de la
subscripción).
Ha recibido un correo electrónico.
Puede ver su calendario.
Todas las señales de audio han sido
desconectadas.
Perfil General activado
Perfil Alto activado
Perfil Silencio activado
Puede ser utilizado el servicio GPRS.
Perfil Auricular activado
Perfil Coche activado
Puede desviar una llamada.
Información en Pantalla
Información en Pantalla
ESPAÑOL
18

ESPAÑOL
19
Información en Pantalla
Icono Descripción
Mensajes
Registro llam.
Perfiles
Configuración
Desvíos
Planificador
Accesorios
Internet
Aplicaciones
Iconos del Menú Principal

ESPAÑOL
20
Instalación
Primeros Pasos
Colocación de la tarjeta SIM
Localice el alojamiento de la tarjeta SIM
en la parte posterior del teléfono.
Siga los siguientes pasos para instalar
la tarjeta SIM.
1. Quite la batería si estaba puesta.
2. Deslice la tarjeta SIM en la ranura,
bajo los soportes plateados, con los
conectores dorados hacia abajo y la
esquina recortada hacia la derecha.
Colocación de la Batería
Nota
• Los contactos metálicos de la tarjeta SIM peden ser
fácilmente dañados por rasguños. Ponga por tanto
especial atención en su manejo e instalación. Siga las
instrucciones suministradas con la tarjeta SIM.
➊
➋
1. Coloque la batería en la parte
posterior del teléfono.

ESPAÑOL
21
Primeros Pasos
Carga de la Batería
Para conectar el cargador de viaje al teléfono, debe tener instalada
la batería.
1. Conecte uno de los extremos del
cargador de viaje en la parte inferior
del teléfono.
2. Conecte el otro extremo del cargador
de viaje a una toma de corriente.
Utilice solo el cargador incluido en el
empaque del teléfono.
Atención
• No fuerce el conector pues se podrían dañar el teléfono o el
cargador.
➌
2. Presionela hasta que escuche un clic.

ESPAÑOL
22
Nota
• La batería suministrada con el teléfono debe ser cargada
totalmente antes de usar el teléfono.
• No retire la batería ni la tarjeta SIM mientras el teléfono
esté cargando.
• El mensaje “Cargando” se mostrará en la pantalla durante
la carga. Cuando la batería esté totalmente descargada, se
encenderá la luz de fondo sin mostrar mensaje alguno.
• La barras en movimiento que aparecen en pantalla durante
la carga se pararán cuando la batería esté totalmente
cargada.
Desconexión del Cargador
Desconecte el cargador de viaje del
teléfono presionando los botones
laterales.
➍
Instalación
Primeros Pasos

ESPAÑOL
23
Secuencia de Encendido
Primeros Pasos
Primeros pasos con el teléfono
1. Mantenga presionada la tecla E
hasta que escuche un tono.
2. Dependiendo de la configuración
del código PIN [Menú 4-5-1],
tendra que introducir el código
PIN o no.
3. Si su teléfono se conecta a una
red, el nombre de esta será
mostrado en pantalla en breves
instantes.
Apagado del teléfono
En el modo de espera, mantenga presionada la tecla hasta que
escuche un tono.
➊
➋

ESPAÑOL
24
Puede usar los códigos de acceso descritos en esta sección para
evitar una utilización no autorizada de su teléfono. Los códigos de
acceso (excepto el PUK y el PUK2) pueden ser cambiados
mediante el uso del menú [Menú 4-5-6].
Código PIN (4 a 8 dígitos)
El código PIN (Número de Identificación Personal) protege su
tarjeta SIM de usos no autorizados.
El código PIN se suministra normalmente junto con la tarjeta SIM.
Cuando el código PIN está Habilitado, su teléfono le pedirá este
código PIN cada vez que sea encendido.
Al contrario, cuando el código PIN está Deshabilitado, su teléfono
se conecta directamente a la red (si ésta está presente) sin pedir el
código PIN.
Código PIN2 (4 a 8 dígitos)
El código PIN2, suministrado con algunas tarjetas SIM,
es requerido para acceder a determinadas funciones como el Costo
de Llamadas o los Números de Marcación Fija. Estas funciones
estarán disponibles solo si la tarjeta SIM las soporta.
Código PUK (4 a 8 dígitos)
El código PUK (Código Personal de Desbloqueo) es requerido para
cambiar un código PIN bloqueado.
El código PUK puede ser suministrado junto con la tarjeta SIM.
En caso contrario, contacte con su proveedor local de servicio para
pedirlo. Si pierde el código, contacte también con éste.
Código PUK2 (4 a 8 dígitos)
El código PUK2, suministrado con algunas tarjetas SIM, es
requerido para cambiar un código PIN2 bloqueado. Si pierde el
código, contacte con su proveedor local de servicio para pedirlo.
Códigos de Acesso
Primeros Pasos

ESPAÑOL
25
Primeros Pasos
Código de Seguridad (4 a 8 dígitos)
El código de seguridad protege su teléfono contra el uso no
autorizado del mismo. Normalmente se suministra con el teléfono.
Este código es requerido para borrar todas las entradas del teléfono
y para activar el menú “Restablecer Valores de Fábrica”. El Número
de Seguridad por defecto es “0000”. Puede cambiarlo en el menú
Seguridad.

ESPAÑOL
26
Agenda
Acceso al Menú
Para seleccionar un menú en la
agenda, presione > [Nombr.] en el
modo de espera y desplácese al
objeto deseado.
Name Description
1 Buscar Permite buscar un nombre o número
determinados.
2 Añadir nuevo Permite añadir nuevos números y nombres.
3 Marc. rápida Permite asignar hasta 8 posiciones de
memoria a números de la agenda para
marcarlos mediante una sola pulsación
(teclas numéricas del 2 al 9).
4 Lista de voz
Permite ver una lista de los números de
teléfono que tienen una etiqueta de voz
asociada.
5 Grupos Permite ver una lista de grupos.
6 Copiar todos Permite copiar entradas de la agenda desde
la memoria del teléfono a la tarjeta SIM y
viceversa.
7 Borrar todos Permite borrar todos los datos de la agenda
tanto de la memoria del teléfono como de la
tarjeta SIM.
8
Configuración
Permite ajustar la memoria y buscar por
nombre, número o variable.
9 Información Permite comprobar el estado de la memoria,
lo números SDN (Marcación de números de
Servicio) y el número propio.
Nombre Descripción

ESPAÑOL
27
Acceso al Menú
Buscar [Nombres 1]
(Llamar desde la agenda)
1. Abra la agenda mediante la pulsación de la tecla > [Nombr.]
en el modo de espera.
2. Pulse Buscar < [Selec.] para entrar.
3. Dependiendo de la configuración de búsqueda (Buscar por), el
menú siguiente puede no aparecer:
• Nombre
• Número
4. Puede buscar una entrada por el nombre o por el número.
5. Seleccione
< [Buscar].
6. Puede comprobar los números y nombres presionando <
[Lista].
7. Si lo desea, puede editar, borrar o copiar una entrada, o añadir
otra, o asignar una etiqueta de voz a una mediante la selección
de < [Opcs.]. El siguiente menú será mostrado.
• Editar : Permite editar el nombre, el número, el
correo electrónico y el fax presionando <
[Aceptar].
• Borrar : Permite borrar una entrada.
• Copiar : Permite copiar una entrada de la SIM al
teléfono y viceversa.
• Llamar : Puede llamar a la entrada seleccionada.
• Voz : Puede asignar una etiqueta de voz a una
entrada o cambiarla si ya estaba presente.
• Núm. principal : Número principal: puede seleccionar uno
entre móvil, casa u oficina según sea su
preferencia. El número principal será
mostrado en primer lugar en tal caso.

ESPAÑOL
28
Añadir nuevo [Nombres 2]
Puede añadir una nueva entrada en la agenda mediante esta
función.
La capacidad de la memoria del teléfono es de 200 entradas.
La capacidad de memoria de la tarjeta SIM depende del proveedor
de servicio.
También puede guardar 20 caracteres del nombre en la memoria
del teléfono. La tarjeta SIM también permite guardar una serie de
caracteres, pero el número de estos dependerá de las
características de la tarjeta.
1. Abra la agenda mediante la pulsación de la tecla > [Nombr.]
en el modo de espera.
2. Desplácese hasta Añadir nuevo y presione < [Selec.] para
acceder.
3. Selecione en qué memoria desea guardar la entrada nueva:
SIM o Teléfono.
• SIM : Puede añadir un nombre y un número para la
entrada.
a. Escriba el nombre deseado.
b. Presione
< [Aceptar], entonces podrá introducir
un número.
c. Presione < [Aceptar].
d. Si desea añadir una etiqueta de voz pulse
<
[Si].
Agenda
Acceso al Menú

ESPAÑOL
29
• Teléfono : Puede añadir un nombre, un número de móvil, casa,
oficina o fax y una dirección de correo electrónico.
a. Escriba el nombre deseado.
b. Presione
< [Aceptar].
c. Introduzca los números siguientes como móvil,
casa, oficina o fax mediante la pulsación de <
[Aceptar]. También puede introducir direcciones
de correo electrónico.
d. Si desea añadir una etiqueta de voz pulse
<
[Si].
Debe decir una palabra en 2 segundos y el teléfono le pedirá que la
diga de nuevo para asegurar la precisión del reconocimiento de
voz. Después de que el reconocimiento de voz haya concluido, la
voz será asignada automáticamente.
Nota
• La voz solo puede ser asignada al teléfono principal que
haya definido. Por ejemplo, si cambia el número principal la
etiqueta de voz será automáticamente asignada al número
cambiado.
•
Puede añadir una etiqueta de voz a un número en la SIM. La
etiqueta puede ser eliminada quitando o cambiando la
tarjeta SIM. La etiqueta de voz asignada a un número de
teléfono de la SIM puede ser asignada a otro número de
teléfono cuando cambia la SIM. ¿Por qué?. La respuesta es
porque la tarjeta SIM no contiene información sobre la
etiqueta de voz.
Acceso al Menú

ESPAÑOL
30
Marc. rápida [Nombres 3]
Puede asociar cualquiera de las teclas del 2 al 9 con una
entrada de la lista de nombres. Puede llamar directamente
pulsando esa tecla durante 2-3 segundos.
1. Abra la agenda primero mediante la pulsación de > [Nombr.]
en el modo de espera.
2. Desplácese hasta Marc. rápida y presione < [Selec.] para
acceder a este menú.
3. La lista de Números de Marcación Rápida será mostrada.
4. Si desea añadir un Número de Marcación Rápida, seleccione
<Vacío>. Entonces, puede buscar el nombre en la agenda.
5. Si selecciona un número asignado a marcación rápida, podrá ver
los siguientes submenús:.
• Cambiar : Puede cambiar la asignación del número de
marcación rápida.
• Des. marc. ráp. : Puede borrar el número de marcación rápida
asignado.
Lista de voz [Nombres 4]
Puede ver los números de teléfono que tienen una etiqueta de voz
asignada. Puede también llamar directamente mediante S
[Enviar]. Tras seleccionar un número de teléfono mediante U y
D y presione < [Opcs.], podrá ver los siguientes submenús:
• Reproducir : Puede reproducir la voz asignada al número de
teléfono.
• Cambiar :
Puede cambiar la voz asignada al número de
teléfono.
• Borrar : Puede borrar la voz asignada al número de teléfono.
• Llamar : Puede llamar si selecciona este menú.
Agenda
Acceso al Menú

ESPAÑOL
31
Grupos [Nombres 5]
Puede incluir hasta 20 miembros para cada grupo.
Puede tener hasta 7 grupos distintos.
1. Pulse > [Nombr.] para acceder a la agenda en el modo de
espera.
2. Desplácese hasta Grupos y pulse < [Selec.] para entrar en
este menú.
3. La lista de grupos será mostrada : Familia, Amigos,
Compañeros, VIP, etc.
4. Seleccione el nombre del Grupo que desea gestionar mediante
< [Selec.].
5. Los siguientes submenús serán mostrados:
• Añada miemb.
Puede añadir un número en Grupos.
• Ver miembros
- Puede ver la lista de números en Grupos.
- Puede seleccionar el miembro deseado mediante
<
[Opcs.] y entonces habilitar los submenús como Editar,
Borrar.
• Timbre grupo
- Puede asignar una melodía de timbre a un grupo.
• Icono grupo
- Puede asignar un icono a un grupo.
• Cambiar nombre
- Puede cambiar y editar el nombre de un Grupo.
Nota
• El menú “Cambiar nombre” será mostrado sólo cuando
se seleccione “Vacío”.
Acceso al Menú

ESPAÑOL
32
Copiar todos [Nombres 6]
Puede copiar/mover entradas de la tarjeta SIM a la memoria del
teléfono y viceversa.
1. Abra la agenda primero mediante la pulsación de > [Nombr.]
en el modo de espera.
2. Desplácese hasta Copiar todos y presione < [Selec.] para
acceder a este menú.
3. Los siguientes submenús serán mostrados:
• SIM a teléf. : Puede copiar la entrada de la tarjeta SIM a la
memoria del teléfono.
• Teléf. a SIM : Puede copiar la entrada de la memoria del
teléfono a la tarjeta SIM.
Borrar todos [Nombres 7]
Puede borrar todas las entradas de la SIM o del Teléfono y las
Voces. Esta función requiere el código de seguridad.
1. Pulse > [Nombr.] para acceder a la agenda desde en modo de
espera.
2. Desplácese hasta Borrar todos y pulse < [Selec.].
3. Seleccione la memoria que desee borrar: SIM, teléfono o Voz.
4. Se le pedirá el Código de Seguridad.
5. Pulse
< [Aceptar] o pulse > [Volver] para cancelar.
Agenda
Acceso al Menú

ESPAÑOL
33
Configuración [Nombres 8]
Puede seleccionar la memoria preferida que incluye Variable, SIM
o Teléfono y la búsqueda preferida que incluye Variable, Nombre
y Número.
1. Abra la agenda primero mediante la pulsación de
> [Nombr.]
en el modo de espera.
2. Desplácese hasta Configuración y pulse < [Selec.].
3. Aparecerán los siguientes submenús.
• Config. memoria
1. Resalte la opción Config. memoria, y pulse < [Selec.].
2. Los siguientes submenús serán mostrados:
- Variable : Si selecciona Variable, el teléfono le
preguntará dónde almacenar las entradas que
añada en la Agenda.
- SIM : Si selecciona SIM, el teléfono guardará las
entradas directamente en la SIM sin hacer
ninguna pregunta.
- Teléfono : Si selecciona Teléfono, el teléfono guardará
las entradas directamente en su memoria sin
hacer ninguna pregunta.
• Buscar por
1. Desplácese hasta Buscar por y pulse
< [Selec.] para
acceder.
2. Los siguientes submenús serán mostrados.
- Variable : Si selecciona Variable, el teléfono le
preguntará cómo buscar las entradas.
- Nombre : Si selecciona Nombre, el teléfono busca las
entradas por nombre.
- Número : Si selecciona Número, el teléfono busca las
entradas por número.
Acceso al Menú

ESPAÑOL
34
Información [Nombres 9]
SDN (Marcación de números de servicio)
Utilice esta función para acceder a una lista de servicios ofrecidos
por su operador de red (si lo soporta la tarjeta SIM).
1. Abra la agenda primero mediante la pulsación de > [Nombr.]
en el modo de espera.
2. Desplácese hasta SDN y pulse
< [Selec.] para acceder.
3. Se mostrarán los nombres de los servicios disponibles.
4. Use U y D para seleccionar un servicio. Pulse S [Enviar].
Estado mem.
Esta función permite comprobar cuantas
memorias libres o usadas hay en el teléfono.
1. Abra la agenda primero mediante la
pulsación de > [Nombr.] en el modo de
espera. Seleccione Información pulsando
< [Selec.].
2. Desplácese hasta Estado mem. y
entonces pulse > [Selec.] para acceder
a este menú.
Número propio (dependiente de la SIM)
Puede comprobar su propio número en la tarjeta SIM.
Agenda
Acceso al Menú

ESPAÑOL
35
Árbol de Menús
Acceso al Menú
1 Mensajes
1 Escribir
2 Buzón entrada
3 Buzón salida
4 Servicio info.
5 Mensajes voz
6 Tarjeta
7 Plantillas
8 Configuración
9 Estado mem.
2 Registro llam.
1 Llam. Perdidas.
2 Llam. recibidas
3 Llam. realizadas
4 Borrar llamadas
5 Costo llamad.
6 Info GPRS
3 Perfiles
1 Sólo vibrar
2 Silencio
3 General
4 Alto
5 Auriculares
4 Configuración
1 Alarma
2 Fecha y Hora
3 Config. telf.
4 Config. llamadas
5 Config. seguridad
6 Config. red
7 ¿Recup. val. de fábrica?

ESPAÑOL
36
5 Desvíos
1 Todas llam. voz
2 Ocupado
3 No responde
4 Ilocalizable
5 Llamad. datos
6 Llamadas fax
7 Cancel. todas
6 Planificador
1 Añadir nueva
2 Ver día
3 Ver todas
4 Borrar último
5 Borrar todos
7 Accesorios
1 Juegos
2 Conver. unidad
3 Calculadora
4 Reloj mundial
8 Internet
1 Casa
2 Favoritos
3 Perfiles
4 Ir a URL
5 Config. caché
6 Certif. seg.
7 Rest. perfil
9 Aplicaciones
Este menú depende de la
tarjeta SIM y de los servicios
de red.
Árbol de Menús
Acceso al Menú

ESPAÑOL
37
Mensajes [Menú 1]
Acceso al Menú
Este menú incluye funciones relacionadas con SMS (servicios de
mensajes cortos), buzón de voz y mensajes de servicio de red.
Escribir [Menú 1-1]
Puede escribir y editar mensajes de hasta 1024 caracteres,
dependiendo del proveedor de servicios. Además, puede
comprobar el número de caracteres.
1. Entre en el menú Mensajes pulsando < [Selec.].
2. Si desea escribir un mensaje nuevo, seleccione Escribir en el
menú.
3.
Para que la escritura del texto sea más sencilla, utilice T9. Para
obtener más información, consulte Cómo utilizar T9 en la página
39.
4. Cuando termine de escribir el mensaje, pulse < [Opcs.].
Aparecerá el siguiente menú de opciones:
Enviar
Envía el mensaje de texto.
1. Si desea enviar el mensaje de texto, introduzca el número al que
lo va a mandar.
2. El teléfono preguntará el número al que desea enviar el
mensaje.
3. Después de enviarlo, el teléfono preguntará si desea almacenar
el mensaje.
4. Pulse < si desea guardarlo en la Bandeja de salida o > si no
es así.
Guardar
Almacena el mensaje en la Bandeja de salida.
1. El teléfono preguntará si desea almacenar el mensaje.
2. Pulse
< si desea guardarlo en la Bandeja de salida o > si no
es así.

ESPAÑOL
38
Usar plant.
Una plantilla es un mensaje predefinido. Puede añadir una plantilla
de la lista al mensaje que desea editar.
Usa tarjeta
Los elementos de la tarjeta de visita son nombre, móvil, oficina y
memo. Puede anexar un tarjeta de visita al mensaje.
Añad. dicc.
Si añade una palabra que use a menudo, podrá introducirla
mediante la pulsación de una sola tecla para cada carácter.
1. Acceda al menú.
2. Desplácese hasta Añad. dicc. y pulse < [Selec.].
3. Introduzca una palabra y pulse < [Añadir].
Listar dicc.
Puede ver la lista de palabras que ya ha añadido al diccionario.
1. Acceda al menú.
2. Desplácese hasta Listar dicc. y pulse
< [Selec.].
3. Puese comprobar la lista de palabras.
4. Si desea borrar una palabra pulse < [Borrar].
5. Si desea borrar todas las palabra de la lista, seleccione Borrar
todos al final de la lista mediante la pulsación de < [Selec.].
Mensajes [Menú 1]
Acceso al Menú

ESPAÑOL
39
T9 le permite introducir texto de un modo rápido.
Con el modo T9, sólo tiene que pulsar la tecla de la letra
correspondiente una vez. Esta función se basa en un
diccionario integrado al que también puede agregar palabras
nuevas.
• Escribir palabras con T9
1. Comience a escribir una palabra con las teclas 2 a 9.
Para escribir una letra, pulse sólo una vez la tecla
correspondiente.
Ejemplo de escritura de la palabra ‘campos’:
La palabra va cambiado después de cada pulsación. Por lo
tanto, no es necesario que preste mucha atención a cómo
aparece la palabra en la pantalla hasta haber pulsado
todas las teclas apropiadas.
Para eliminar un carácter anterior, pulse C.
Para insertar varios números, mantenga pulsada la tecla
# y escriba los números.
Si mantiene pulsada la tecla *, puede cambiar el tipo de
idioma. (También puede usar las opciones.)
Además, el teléfono admite tres modos: Predictivo
(T9Abc, T9ABC, T9abc), Multipulsación (ABC, abc) y
Numérico (123).
Si desea cambiar de modo, pulse la tecla#.
Cómo utilizar T9
aca
can caos campo campos
2 (para la c)
2 (para la a)
6 (para la m)
7 (para la p) 6 (para la o) 7 (para la s)
Acceso al Menú

ESPAÑOL
40
Idiomas T9
• Puede seleccionar Idioma T9 si selecciona el menú.
En el modo T9, también puede seleccionar el menú
T9 desactivado. (El valor predeterminado es T9
activado.)
Alternativa : Pulse la tecla * y elija la opción de
insertar símbolos. Seleccione el carácter
que desee y elija Seleccionar.
2. Cuando haya terminado de escribir una palabra,
compruebe que está escrita correctamente.
Si la palabra es : Presiona 0 y escribe la siguiente
correcta palabra.
Si la palabra : Busque otras palabras con U , D
y no es correcta (palabra anterior y siguiente).
Alternativa : Si no aparece la palabra que desea,
puede agregarla.
Pulse < [Opcs.] en el modo de
edición Predictivo. Seleccione el
menú Añadir diccionario T9.
3. Para insertar un signo de puntuación, pulse 1
repetidamente hasta que aparezca el signo que desea.
Mensajes [Menú 1]
Acceso al Menú
ABC
Simbol
Guarda
Simbol
Guarda
Escriba la
palabra
➭

ESPAÑOL
41
Acceso al Menú
Buzón entrada [Menú 1-2]
Cuando recibe un mensaje de texto, su teléfono muestra el símbolo
y guarda el mensaje en la lista de mensajes entrantes.
Desplácese hasta el mensaje deseado mediante U y D
Además, podrá ver al final de la lista la opción Borrar todos para
borrar todos los mensajes recibidos.
Mientras lee el mensaje, puede pulsar < [Opcs.] para acceder a
las opciones disponibles.
Borrar
El mensaje seleccionado es borrado.
Editar
Puede editar un mensaje recibido y enviarlo o guardarlo.
Reenviar
Puede enviar el mensaje seleccionado a otra persona.
Usar número
Si el mensaje seleccionado contiene un número de teléfono, puede
extraerlo y guardarlo en la agenda. También puede llamar a ese
número.
Responder
Puede responder a la persona que envío el mensaje.
Devolver llamada
Puede llamar a la persona que envió el mensaje automáticamente.

ESPAÑOL
42
Buzón salida [Menú 1-3]
Cuando acceda a este menú, podrá ver los mensajes contenidos.
Desplácese hasta el mensaje deseado mediante U , D y
presione < para verlo.
Si desea salir del Buzón de salida pulse >.
Además, podrá ver al final de la lista la opción Borrar todos para
borrar todos los mensajes contenidos en este menú.
Después de leer el mensaje, pulse < [Opcs.] para acceder a los
siguientes submenús.
Borrar
El mensaje seleccionado es borrado.
Editar
Puede editar un mensaje y enviarlo o guardarlo.
Reenviar
Puede enviar el mensaje seleccionado a otra persona.
Usar número
Si el mensaje seleccionado contiene un número de teléfono, puede
extraerlo y guardarlo en la agenda. También puede llamar a ese
número.
Mensajes [Menú 1]
Acceso al Menú

ESPAÑOL
43
Acceso al Menú
Servicio info. [Menú 1-4]
(Depende de la red y de la subscripción)
Los mensaje de Difusión de Celda (CB Messages) son mensajes
de texto enviados por la red a los usuarios de teléfonos GSM.
Proporcionan información general como predicciones
meteorológicas o noticias sobre tráfico, taxis, farmacias o bolsa.
Cada tipo de información tiene un número, por lo que puede llamar
a su proveedor de servicio.
Cuando recibe un mensaje CB, puede leerlo de la siguiente
manera:
Leer [Menú 1-4-1]
1. Cuando recibe un mensaje CB, será mostrado en pantalla.
Puede leer el mensaje desplazándose por él mediante U o
D.
2. Después de leer el mensaje, pulse E para volver al modo de
espera. Además, puede guardarlo hasta que llegué otro
mensaje.
Recepción CB [Menú 1-4-2]
• Sí
Si selecciona este menú, su teléfono recibirá mensajes CB.
• No
Si selecciona este menú, su teléfono no recibirá mensajes CB.

ESPAÑOL
44
Alerta [Menú 1-4-3]
• Sí
Si selecciona este menú, su teléfono le avisará cuando llegue un
mensaje CB.
• No
Si selecciona este menú, su teléfono no le avisará cuando llegue
un mensaje CB.
Idioma [Menú 1-4-4]
Puede seleccionar el idioma que desee. En tal caso, su teléfono
recibirá los mensajes CB en el idioma seleccionado.
Puede seleccionar el idioma de los mensajes CB pulsando <
[Selec.]. El idioma seleccionado será mostrado con una indicación.
Asunto [Menú 1-4-5]
(Dependiente de la red y la subscripción)
• Añadir [Menú 1-4-5-1]
Si selecciona este menú, añadirá una categoría de mensajes CB
en la memoria del teléfono.
• Ver lista [Menú 1-4-5-2]
Si selecciona este menú, puede ver la categoría de los mensajes
CB. Si pulsa < [Opcs.], podrá editarla y borrarla.
• Lista activa [Menú 1-4-5-3]
Puede seleccionar la categoría de mensajes CB en la lista activa
mediante < [Selec.].
Mensajes [Menú 1]
Acceso al Menú

ESPAÑOL
45
Acceso al Menú
Mensajes voz [Menú 1-5]
Puede escuchar sus mensajes voz y obtener el número del centro
de buzón de voz.
Llam. Buzón voz [Menú 1-5-1]
Puede llamar al centro de buzón de voz si desea oír sus mensajes
voz.
Núm. Buzón voz [Menú 1-5-2]
Puede obtener el número de buzón de voz si esta función es
soportada por el proveedor de servicios de red.
Cuando llega un mensaje de voz, el símbolo correspondiente sera
mostrado en pantalla. Por favor, compruebe con su proveedor de
servicios de red los detalles del servicio para poder configurar el
teléfono de acuerdo con estos.
1. Pulse la tecla
1 durante varios segundos en el modo de
espera.
2. Puede comprobar los siguientes submenús.
• Casa [Menú 1-5-2-1]
Número marcado en la red doméstica para escuchar el buzón de
voz.
• Otros [Menú 1-5-2-2]
Número marcado desde otras redes para escuchar el buzón de
voz.

ESPAÑOL
46
Tarjeta [Menú 1-6]
Permite editar la Tarjeta de presentación. Los elementos de la
Tarjeta de presentación son nombre, móvil, oficina y memo.
• Editar : Permite editar la Tarjeta de presentación.
• Borrar : Permite borrar la Tarjeta de presentación.
Plantilla [Menu 1-7]
Sirve para editar mensajes predefinidos. Puede ver 11 mensajes
predefinidos en la lista. Puede guardar 6 plantillas antes de editar.
Pero puede cambiarlas. Las demás están <Vacías>.
• Editar : Permite editar una plantilla.
• Borrar : Permite borrar una plantilla.
Configuración [Menú 1-8]
Tipo mensaje [Menú 1-8-1]
Texto, Voz, Fax, Búsq. nac., X.400, E-mail, ERMES
Normalmente, el tipo de mensaje está por defecto en modo Texto.
Puede convertir ese texto en formatos alternativos que sean
compatibles con el dispositivo que recibirá el mensaje.
Contacte con su proveedor de servicio para comprobar la
disponibilidad de esta función.
Per. validez [Menú 1-8-2]
Este servicio de red permite definir durante cuanto tiempo deben
ser almacenados los mensajes de texto en el centro de mensajes
mientras éste intenta enviárselos.
Infor. estado [Menú 1-8-3]
Si selecciona Sí en este menú podrá comprobar si sus mensajes
han sido enviados correctamente o no.
Mensajes [Menú 1]
Acceso al Menú

ESPAÑOL
47
Acceso al Menú
Pago por resp.? [Menú 1-8-4]
Cuando haya enviado un mensaje, permite a la persona a la que
envió el mensaje responder al mismo pero siéndole el costo de éste
facturado a usted.
Centro SMS [Menú 1-8-5]
Si desea enviar el mensaje de texto, puede acceder a la dirección
del centro de mensajes SMS a través de este menú.
Estado mem. [Menú 1-9]
Si selecciona este menú, el teléfono mostrará la memoria usada y
la disponible, El total de memoria es la suma de las memorias de la
tarjeta SIM y del teléfono.

ESPAÑOL
48
Llam. Perdidas. [Menú 2-1]
Este menú muestra la llamadas perdidas más recientes.
En este menú puede guardar estos números, llamar a ellos o ver la
fecha y hora de las llamadas.
Llam. recibidas [Menú 2-2]
Puede comprobar las llamadas recibidas recientes.
En este menú puede guardar estos números, llamar a ellos o ver la
fecha y hora de las llamadas.
Llam. realizadas [Menú 2-3]
Puede comprobar las llamadas realizadas recientes.
En este menú puede guardar estos números, llamar a ellos o ver la
fecha y hora de las llamadas.
Borrar llamadas [Menú 2-4]
Puede borrar todos los registros de llamada.
1. Pulse < [Menú] en el modo de espera.
2. Pulse 2 para acceder o use U y D para entrar al
Registro llam.
3. Desplácese hasta Borrar llamadas y pulse < [Selec.] para
acceder
4. Existen cuatro submenús: Llam. perd., Llam. recibidas, Llam.
realizadas y Todas llam.
5. Borrar Todos los mensajes será mostrado; entonces pulse
<
[Sí].
Registro llam. [Menú 2]
Acceso al Menú

ESPAÑOL
49
Acceso al Menú
Costo llamad. [Menú 2-5]
Dentro de estos submenús podrá ver la duración y el costo de las
llamadas.
Duración llam. [Menú 2-5-1]
Esta función permite ver la duración de la Última Llamada, de
Todas las Llamadas, de las Llamadas Recibidas y de las Llamadas
Realizadas en horas, minutos y segundos. También puede
reinicializar todos los contadores.
1. Pulse < [Menú] en el modo de espera.
2. Pulse 2 para acceder directamente o use U y D para
acceder al Registro llam.
3. Desplácese hasta Duración llam. y pulse < [Selec.].
Existen cinco submenús: Última llam., Todas llam., Llam.
recibidas, Llam. realizadas y Borrar
todos.
Costo llamadas [Menú 2-5-2]
Esta función le permite comprobar el coste de la última llamada, de
todas las llamadas, el coste restante y el reinicio de todos los
costos. Para esto último, necesita el código PIN2.
1. Pulse < [Menú] en el modo de espera.
2. Pulse 2 para acceso directo o use U y D para entrar en
el Registro llam.
3. Desplácese hasta Costo llamadas y pulse < [Selec.] para
acceder.
Existen cuatro submenús: Última llam., Todas llam., Crédito y
Borrar todos.
Nota
• El costo de llamadas real puede variar dependiendo de las
características de red, de la facturación, de las tasas.

ESPAÑOL
50
Config. costo [Menú 2-5-3]
(Dependiente de la SIM)
• Establ. tarifa [Menú 2-5-3-1]
Puede determinar el tipo de moneda y el precio unitario. Contacte
con sus proveedores de servicio para obtener los precios unitarios
de facturación. Para seleccionar la moneda o la unidad, necesita
el código PIN2.
1. Pulse < [Menú] en el modo de espera.
2. Pulse
2 para acceder directamente o use U y D para
entrar en el Registro llam.
3. Desplácese hasta Config. costo y pulse < [Selec.] para
acceder.
4. Selecciones Establ. tarifa.
• Def. crédito [Menú 2-5-3-2]
Este servicio de red permite limitar los costos de sus llamadas
mediante la selección de unidades de facturación. Si selecciona
Leer, los números de unidades restantes serán mostrados.
Si selecciona Cambiar, podrá cambiar su límite de costo.
1. Pulse < [Menú] en el modo de espera.
2. Pulse 2 para acceder directamente o use U y D para
entrar en el Registro llam.
3. Desplácese hasta Config. costo y pulse < [Selec.] para
acceder.
4. Seleccione Def. crédito.
Registro llam. [Menú 2]
Acceso al Menú
Nota
• Cuando se hayan consumido todas las unidades, no se
podrán realizar llamadas excepto si son de emergencia.
Dependiendo de su tarjeta SIM, necesitará el código PIN2
para determinar un costo de llamadas.

ESPAÑOL
51
• Mostr. auto [Menú 2-5-3-3]
Este servicio de red permite ver automáticamente el coste de la
última llamada. Si selecciona Sí en el menú Mostr. auto, podrá
ver el ultimo coste cuando finalice la llamada.
1. Pulse < [Menú] en el modo de espera.
2. Pulse 2 para acceder directamente o use U y D para
entrar en el Registro llam.
3. Desplácese hasta Config. coste y pulse < [Selec.] para
acceder.
4. Seleccione Mostr. auto.
Info GPRS [Menú 2-6]
Usted puede comprobar el volumen de datos transferidos a través
de la Red mediante el sistema GPRS. De la misma manera podrá
comprobar el tiempo que ha permanecido conectado.
Duración llam.
Usted puede comprobar la duración de su conexión GPRS. De la
misma manera puede resetear los contadores de llamadas.
• Última llam.
• Todas llam.
• Borrar todos
Volum. datos
Usted puede comprobar el volumen de datos transferidos.
• Enviado
• Recibidas
• Todos
• Borrar todos
Acceso al Menú

ESPAÑOL
52
En este menú puede ajustar y personalizar los tonos del teléfono
para diferentes eventos, situaciones y grupos de usuarios (por
ejemplo, cuando el terminal está conectado a un manos libres de
auricular el teléfono activará el perfil Auriculares).
1. Pulse < [Menú] en modo de espera.
2. Pulse 3 para acceder directamente o use U y D para
entrar en el menú Perfiles.
Sólo vibrar [Menú 3-1]
• Habilitar : Puede activar el perfil Vibración si necesita el modo de
vibración.
Silencio [Menú 3-2]
• Habilitar : Puede activar el perfil Silencio si está en un lugar
silencioso.
• Cambiar : Puede cambiar los valores de este perfil.
General [Menú 3-3]
• Habilitar : Puede activar el perfil General para un uso habitual del
teléfono.
• Cambiar : Puede cambiar los valores de este perfil.
Nota
• En caso que el teléfono esté conectado a un accesorio
como un manos libres portátil no podrá cambiar
manualmente a otros perfiles.
• El menú perfiles dispone de un submenú “Habilitar”
(excepto para Auricular) mediante el que puede seleccionar
el perfil deseado salvo en el caso anterior.
Perfiles [Menú 3]
Acceso al Menú

ESPAÑOL
53
Acceso al Menú
Alto [Menú 3-4]
• Habilitar : Puede activar el perfil Alto si está en un lugar ruidoso.
• Cambiar : Puede cambiar los valores de este perfil.
Auriculares [Menú 3-5]
• Cambiar : Puede cambiar los valores de este perfil.
Grupo de Submenús dentro de Perfiles [Menú 3-x-x]
El menú Perfiles contiene los siguientes submenús:
Avis. entrada [Menú 3-x-1]
Permite determinar el tipo de alerta para las llamadas entrantes.
Timbre llam. [Menú 3-x-2]
Permite definir el tipo de melodía de timbre o tono para las
llamadas entrantes.
Vol. timbre [Menú 3-x-3]
Permite definir el volumen del timbre para las llamadas entrantes.
Alerta mens. [Menú 3-x-4]
Permite activar uno de los siguientes tipos de aviso cuando se
recibe un mensaje: Aviso, Vibrador o Sin aviso.
Tecla volumen [Menú 3-x-5]
Permite determinar el volumen del sonido al pulsar las teclas.

ESPAÑOL
54
Resp. autom. [Menú 3-x-6]
Permite que se responda de manera automática. Por favor, observe
que solo en el perfil de Auricular se dispone de esta opción.
• Deshabilitado
El teléfono no responderá automáticamente a las llamadas
entrantes.
• Tras 5 seg.
Después de 5 segundos, el teléfono responderá automáticamente.
• Tras 10 seg.
Después de 10 segundos, el teléfono responderá
automáticamente.
Perfiles [Menú 3]
Acceso al Menú

ESPAÑOL
55
Puede encontrar los siguientes menús que le permitirán adaptar el
teléfono según sus preferencias y necesidades.
1. Pulse < [Menú] en el modo de espera.
2. Pulse 4 para acceder directamente a Configuración.
Alarma [Menú 4-1]
Dentro de este menú puede configurar la alarma del teléfono para
que le avise cuando lo necesite.
Habilitar [Menú 4-1-1]
Puede ajustar la hora a la que la alarma debe sonar.
1. Entre en el menú.
2. Seleccione Habilitar pulsando
< [Selec.], y después defina la
hora a la que desee que la alarma le avise.
3. Pulse < [Aceptar].
4. Seleccione el periodo de repetición: Una vez, Diaria, Semanal o
Mensual.
Deshabilitado [Menú 4-1-2]
Puede cancelar la configuración que hubiera establecido para la
alarma.
1. Acceda al menú.
2. Seleccione Deshabilitado pulsando
< [Selec.].
3. Se mostrará el mensaje Cancelar alarma si está había sido
activada previamente.
4. Si desea cancelarla, pulse < [Sí]. Si no, pulse >[No].
Configuración [Menú 4]
Acceso al Menú

ESPAÑOL
56
Fecha y Hora [Menú 4-2]
Fecha [Menú 4-2-1]
• Fecha
En este menú, puede ajustar la fecha del teléfono.
1. Acceda al menú.
2. Seleccione Fecha pulsando
< [Selec.].
3. Introduzca el valor que desee para la fecha.
4. Pulse < [Aceptar].
• Formato fecha
Puede determinar el Formato fecha en este menú.
Hora [Menú 4-2-2]
El teléfono tiene su propio reloj. En este menú puede ajustar la hora
y seleccionar el formato de presentación de la misma: 12 ó 24
horas.
1. Acceda al menú.
2. Desplácese hasta Hora pulsando < [Selec.].
• Hora :
En este menú puede ajustar la hora.
1. Seleccione Hora pulsando
< [Selec.].
2. Introduzca el valor que desee para la hora.
3. Seleccione el formato de hora am/pm que desse mediante la
pulsación larga de las teclas U o D.
4. Pulse
< [Aceptar].
Configuración [Menú 4]
Acceso al Menú

ESPAÑOL
57
• Formato hora :
Puede definir el formato de hora entre 12 ó 24 horas.
1. Desplácese hasta Formato hora pulsando
< [Selec.].
2. Seleccione 12 ó 24 horas pulsando
< [Selec.].
Config. telf. [Menú 4-3]
Puede definir los ajustes que desee para el teléfono. Desplácese
hasta el menú Cong. telf. y pulse < [Selec.].
Pantalla [Menú 4-3-1]
• Salvapant. [Menú 4-3-1-1]
Una imagen aparecerá en la pantalla en el modo de espera si no
se realiza ninguna acción con el teléfono en 20 segundos.
• Saludo [Menú 4-3-1-2]
Este menú permite definir un mensaje que será presentado
durante unos instantes en pantalla cuando se enciende el
teléfono.
1. Seleccione Configuración – Config. telf.– Pantalla –Saludo.
2. El texto que usted defina se mostrará en pantalla. Si
selecciona este elemento, su teléfono le pedirá que edite el
mensaje.
• Luz fondo [Menú 4-3-1-3]
Puede determinar la duración de la luz de fondo que aparece
cada vez que pulsa una tecla: Deshabilitado, 5 segundos o
10 segundos.
• Contr. pant. [Menú 4-3-1-4]
Puede ajustar el brillo de la pantalla deseado mediante U o
D.
Acceso al Menú

ESPAÑOL
58
Puerto serie [Menú 4-3-2]
• FAX
Puede configurar la velocidad del puerto serie hasta 19.200 bps
para conectar el equipo aun PC o FAX.
• GPRS & Datos
Puede ajustar la velocidad del puerto serie hasta 115.200 bps
para poder utilizar programas de PC mediante GPRS o llamadas
de datos.
Idioma [Menú 4-3-3]
Puede seleccionar el idioma de será mostrado en el teléfono.
Config. llamadas [Menú 4-4]
Puede ajustar el menú relativo a llamadas pulsando < [Selec.] en
el menú Configuración.
Aviso minut. [Menú 4-4-1]
Si selecciona Sí, podrá escuchar un tono cada minuto durante una
llamada.
Cualq. tecla [Menú 4-4-2]
• Sí [Menú 4-4-2-1]
Si selecciona esta opción, podrá contestar a una llamada entrante
pulsando cualquier tecla excepto > y E.
• No [Menu 4-4-2-2]
Si selecciona esta opción, podrá contestar a una llamada entrante
pulsando < [Responder] o S.
Configuración [Menú 4]
Acceso al Menú

ESPAÑOL
59
Enviar número [Menú 4-4-3]
(dependiente de la red y la subscripción)
• Sí [Menú 4-4-3-1]
Si selecciona esta opción, puede enviar su número de teléfono a
la otra persona. Esto quiere decir que su número de teléfono será
mostrado en la pantalla de la persona a la que llame.
• No [Menú 4-4-3-2]
Si selecciona esta opción, no podrá enviar su número de teléfono.
• Por defecto [Menú 4-4-3-3]
Si selecciona esta opción, el teléfono se ajustará al valor por
defecto.
Llam. espera [Menú 4-4-4]
(dependiente de la red)
Si este servicio está disponible, podrá responder a una llamada
entrante en espera.
• Habilitar [Menú 4-4-4-1]
Permite activar el servicio correspondiente.
• Deshabilitado [Menú 4-4-4-2]
Permite desactivar el servicio correspondiente.
• Estado [Menú 4-4-4-3]
Comprobación del estado del servicio.
Nota
• Como usar un Manos libres portátil:
Cuando esté usando un manos libres portátil (auricular),
para responder una llamada mediante el botón de
respuesta del mismo deberá mantener éste pulsado
durante unos segundos.
Acceso al Menú

ESPAÑOL
60
Rellam. auto [Menú 4-4-5]
• Sí [Menú 4-4-5-1]
Cuando esta función está activada, el teléfono realizará hasta 10
intentos de conexión de la llamada.
• No [Menú 4-4-5-2]
El teléfono no realizará ningún reintento de conexión de la
llamada.
Próx. entr. [Menú 4-4-6]
(dependiente de la red)
En caso del Servicio de Número Único, podrá conectar su teléfono
a un ordenador personal para enviar y recibir faxes, datos y voz.
Si selecciona el modo, podrá recibir datos, faxes o voz en cada
caso. Una vez que acceda a esté menú se mostrarán las siguientes
opciones.
• Voz
Puede recibir la llamada de voz.
• Datos
Puede recibir la llamada de datos.
• Fax
Puede recibir la llamada de fax.
Nota
• El Servicio de Número Único implica que el número de fax
o datos es el mismo que el de voz. Estos modos dependen
de las características de red.
Configuración [Menú 4]
Acceso al Menú

ESPAÑOL
61
Acceso al Menú
Config. seguridad [Menú 4-5]
Código PIN [Menú 4-5-1]
En este menú, podrá definir que el teléfono le pida el código PIN de
su tarjeta SIM cuando se enciente el teléfono. Si esta función está
activada, se le pedirá que introduzca el código PIN.
1. Pulse < [Menú] en el modo de espera.
2. Pulse 4 para acceder directamente o use U y D para
entrar en Configuración.
3. Desplácese hasta el menú Config. seguridad.
4. Seleccione código PIN mediante las pulsación de
< [Selec.].
5. Podrá ver los siguientes submenús.
• Habilitar : Habilita la petición del código PIN.
• Deshabilitado : Deshabilita la petición del código PIN.

ESPAÑOL
62
Telf. Bloq [Menú 4-5-2]
Puede utilizar el bloqueo de teléfono para impedir el uso no
autorizado de su teléfono.
Cuando encienda su teléfono, éste le pedirá que introduzca el
código de seguridad siempre si está habilitado.
Si define el bloqueo de teléfono como “Automático”, el teléfono le
pedirá que lo intriduzca sólo cuando cambie de tarjeta SIM.
Las posibilidades, por tanto, son:
• Habilitar
• Deshabilitado
• Automático
Bloq. auto [Menú 4-5-3]
Cuando active el Bloqueo automático del teclado, éste se bloqueará
automáticamente cuando no se realice ninguna acción en 25
segundos.
• Habilitar
• Deshabilitado
Nota
• Si desea bloquear el teclado manualmente, acceda al
menú Principal y pulse *.
• Si desea desbloquear el teclado, pulse la tecla
[desbloquear] y a continuación presione *. Pero si había
activado el Bloqueo automático del teclado anteriormente,
el teclado se bloqueará automáticamente después de 25
segundos.
Configuración [Menú 4]
Acceso al Menú

ESPAÑOL
63
Acceso al Menú
Restr. llam. [Menú 4-5-4]
El servicio de Restricción de llamadas evita que el teléfono realice o
reciba determinados tipos de llamadas.
Esta función requiere la clave de Restricción de llamadas. Puede
ver los siguientes submenús.
• Salientes :
Restringe todas las llamadas salientes.
• Sal. intern. :
Restringe todas las llamadas salientes internacionales.
• Sal. Int. itin. :
Restringe todas las llamadas salientes internacionales excepto a
la red propia.
• Todas entran. :
Restringe todas las llamadas entrantes.
• Entr. en itin. :
Restringe todas las llamadas entrantes cuando se está en
itinerancia (roaming).
• Cancel. todas :
Cancela todas las restricciones.
• Camb. contr. :
Puede cambiar la clave de Restricción de llamadas.

ESPAÑOL
64
Marca. fija [Menú 4-5-5]
(dependiente de la SIM)
Puede restringir las llamadas salientes a determinados números.
Los números están protegidos por el código PIN2.
1. Pulse < [Menú] en el modo de espera.
2. Pulse 4 para acceder directamente o pulse U y D para
entrar en Configuración.
3. Desplácese hasta el menú Config. seguridad.
4. Seleccione código PIN mediante
< [Selec.].
5. Si el código PIN2 es correcto, podrá ver los siguientes
submenús.
• Activ. : Puede restringir las llamadas salientes a
determinados números de teléfono.
• Desac. : Puede llamar sin ningún tipo de restricción.
• List núm : Puede ver la lista de números guardada como
Número de marcación fija.
Camb. código [Menú 4-5-6]
Puede cambiar los códigos de acceso: Código PIN, Código PIN2 y
Código segur..
1. Pulse < [Menú] en el modo de espera.
2. Pulse 4 para acceder directamente o use U y D para
acceder a Configuración.
3. Desplácese hasta el menú Config. seguridad.
4. Seleccione Camb. código mediante
< [Selec.].
5. Si desea cambiar uno de PIN/PIN2/Código de seguridad,
introduzca el código original y pulse < [Aceptar].
6. Introduzca el nuevo PIN/PIN2/ Código de seguridad y
verifíquelo.
Configuración [Menú 4]
Acceso al Menú

ESPAÑOL
65
Acceso al Menú
Config. red [Menú 4-6]
Puede seleccionar la red en la que estará registrado de manera
manual o automática. Normalmente, la selección de la red será
automática.
Automático [Menú 4-6-1]
El teléfono seleccionará automáticamente la red que esté
disponible en su área.
Manual [Menú 4-6-2]
El teléfono buscará la lista de redes disponibles y la mostrará.
Entonces, podrá seleccionar la que prefiera usar si disponde de un
acuerdo de itinerancia (roaming) con su operador de red local.
Preferidas [Menú 4-6-3]
Puede establecer una lista de redes preferidas en las que el
teléfono debe intentar registrarse en primer lugar, antes de
intentarlo en otras. Esta lista es creada a partir de la lista de redes
conocidas predefinidas en el teléfono.
Def. usuar. [Menú 4-6-4]
Puede añadir o eliminar redes de la lista predefinida.
Ésta puede incluso contemplar nuevas redes cuyos códigos no
sean conocidos por el teléfono.
Para hacer esto, seleccione y después introduzca el código de red,
el código de país y el nombre de la red.
¿Recup. val. de fábrica? [Menú 4-7]
Puede devolver el teléfono a la configuración por defecto con la que
salió de fábrica mediante la selección de la opción Restablecer
Valores de Fábrica/Configuración y su confirmación posterior.

ESPAÑOL
66
El desvío de llamadas le permite desviar llamadas entrantes de voz,
fax y datos a otro número. Para ampliar información, contacte con
su proveedor de servicio.
1. Pulse < [Menú] en el modo de espera.
2. Pulse 5 para acceder directamente o U y D para entrar
en Desvíos.
Todas llam. voz [Menú 5-1]
Desviar todas las llamadas de voz incondicionalmente.
Ocupado [Menú 5-2]
Desvía las llamadas cuando hay una en curso.
No responde [Menú 5-3]
Desvía las llamadas cuando no responde.
Ilocalizable [Menú 5-4]
Desvía las llamadas cuando el teléfono está apagado o sin
cobertura.
Llamad. datos [Menú 5-5]
Desvía a un número con una conexión a ordenador
incondicionalmente.
Llamadas fax [Menú 5-6]
Desvía a un número con una conexión a fax incondicionalmente.
Desvíos [Menú 5]
Acceso al Menú
(dependiente de la red y la subscripción)

ESPAÑOL
67
Acceso al Menú
Los submenús [Menú 5-x-x]
Los menús de Desvío de llamadas disponen de los siguientes
submenús:
Habilitar [Menú 5-x-1]
Activa el correspondiente servicio.
• Buzón de voz [Menú 5-x-x-1]
Reenvía al centro de mensajes.
Esta función no está disponible en los menús Todas las
llamadas de datos y Todas las llamadas de fax.
• Otro número [Menú 5-x-x-2]
Define el número al que desviar.
• Favorito [Menú 5-x-x-3]
Muestra una lista con 5 números de desvío.
Deshabilitado [Menú 5-x-2]
Desactiva el servicio correspondiente.
Estado [Menú 5-x-3]
Comprueba el estado del servicio correspondiente.
Cancel. todas [Menú 5-7]
Cancela todos los servicios de desvío.
Nota
•
Puede elegir el número deseado en el menú Favoritos.

ESPAÑOL
68
Planificador [Menú 6]
Acceso al Menú
1 3 Anual
* # Mensual
U D
Si pulsa estas teclas brevemente, podrá ajustar la
alarma diaria. Si las pulsa por un periodo largo,
podrá hacerlo semanalmente.
Tecla Descripción
Cuando acceda a este menú se mostrará un calendario. En la parte
alta de la pantalla hay secciones para la fecha e iconos.
Cuando cambie la fecha, el calendario se actualizará de acuerdo a
ésta. Se utilizará un cursor cuadrado para localizar un cierto día.
Cuando exista un evento dentro de un día, este aparecerá marcado
con un símbolo de subrayado. Esta función sirve para recordarle
sus eventos y citas.
El teléfono hará sonar un tono de alarma para cada evento si usted
así lo desea.
Para cambiar el día, el mes y el año:
Añadir nueva [Menú 6-1]
Puede editar hasta 30 caractéres. Puede tomar una nota. Puede
escoger los siguientes tipos de notas. Puede tomar hasta 20 notas.
Plan [Menú 6-1-1]
Introduzca el asunto, la hora del evento, el frecuencia de repetición
y la hora de la alarma pulsando < [Selec.].

ESPAÑOL
69
Acceso al Menú
• Repetir [Menú 6-1-1-1]
- Una vez : no habrá repetición.
- Diaria : repetición diaria durante 5 días.
- Semanal : repetición semanal durante 5 semanas.
- Mensual : repetición mensual durante 5 meses.
- Anual : repetición anual durante 5 años.
• Hora alarma [Menú 6-1-1-1-1]
- Hora precisa : alarma en el momento preciso del evento.
- 10 min. antes : alarma 10 minutos antes del momento
preciso del evento.
- 30 min. antes : alarma 30 minutos antes del momento
preciso del evento.
- 1 hora antes : alarma 1 hora antes del momento preciso del
evento.
- 1 día antes : alarma 1 día antes del momento preciso del
evento.
Memoria [Menú 6-1-2]
1. Seleccione Añadir nueva pulsando < [Selec.].
2. Desplácese hasta Memoria.
3. Pulse < [Selec.].
4. Introduzca el recordatorio y pulse < [Selec.].

ESPAÑOL
70
Planificador [Menú 6]
Acceso al Menú
Ver día [Menú 6-2]
Muestra la nota del día elegido.
Use U y D para desplazarse entre la lista de notas.
Si asoció una alarma a la nota, un reloj de alarma será mostrado.
Pulse < [Opcs.] para borrar o editar la nota seleccionada.
Ver todas [Menú 6-3]
Muestra las notas presentes de todos los días.
Use U y D para desplazarse entre la lista de notas.
Pulsando < [Opcs.] podrá acceder al mismo menú que en “Ver
día”.
Borrar último [Menú 6-4]
Puede borrar el ultimo evento que se le haya notificado.
Borrar todos [Menú 6-5]
Puede borrar todas las notas.

ESPAÑOL
71
Accesorios [Menú 7]
Acceso al Menú
Juegos [Menú 7-1]
Su teléfono dispone de divertidos juegos para su distracción.
Nota
Las teclas de Control son diferentes para cada juego, pero
cada uno dispone de pantallas de ayuda en la tecla de control
principal.
Otras teclas de control comunes son mostradas a
continuación:
[Teclas de Función Comunes]
•
< [Tecla multifunción 1] : Empezar Juego
•
C [CLR] : Pausa
•
> [Tecla multifunción 2] : Atrás
•
E [Fin] : Salir
• * [Tecla Asterisco] : Luz de fondo
•
< [Tecla multifunción 1] : Guardar tanteador
•
U, D, 0 ~ 9 : Control de Nivel
[Arriba/Abajo, teclas numéricas]

ESPAÑOL
72
Accesorios [Menú 7]
Acceso al Menú
Conver. unidad [Menú 7-2]
Esta función permite convertir una unidad de
medida determinada en la que desee. Hay
cuatro tipos que pueden ser convertidas a
otras unidades: Longitud, Area, Peso y
Volumen.
1. Puede seleccionar una de las cuatro
pulsando < [Selec.].
2. Seleccione la unidad que desea convertir mediante U y D.
3. Puede cambiar la unidad pulsando < [Camb.].
4. Puede introducir el primer número pulsando
#.
5. Puede borrar el primer número pulsando C.
6. Pulse E o > [Volver] si desea finalizar el proceso de
conversión de valor.
Calculadora [Menú 7-3]
Contiene funciones estándar como Sumar, Restar, Multiplicar y
Dividir.
1. Introduzca los números mediante las teclas numéricas.
2. Pulse < [Opcs.] para seleccionar la opción que desee: Sumar,
Restar, Multiplicar, Dividir, Negativo, Punto decimal e Igual.
3. Puede ver el resultado de la operación pulsando
< [Opcs.] y
seleccionando Igual.
4. Si desea continuar los cálculos, repita el proceso.
5. Puede borrar un signo o número mediante C.
6. Pulse E si desea finalizar el proceso de cálculo.
Camb.
Volver

ESPAÑOL
73
Acceso al Menú
Reloj mundial [Menú 7-4]
Puede ver la hora de varias ciudades del mundo.
Cuando pulse U o D brevemente, podrá ver ciudades
pertenecientes a diferentes usos horarios, y cuando pulse durante
cierto tiempo U o D , podrá ver todas las ciudades de un
mismo huso.
Para seleccionar el país que desee, pulse < [Conf.].

ESPAÑOL
74
Su teléfono soporta servicios basados en el Protocolo de
Aplicaciones Inalámbricas (WAP).
Podrá acceder a una serie de servicios WAP que soporte su red.
Estos servicios pueden incluir información como noticias,
previsiones meteorológicas u horarios de vuelo.
Casa [Menú 8-1]
Puede conectar con la página principal que esté configurada en el
perfil activo.
Favoritos [Menú 8-2]
Cuando acceda a este menú, podrá ver sus Favoritos.
Entonces, pulse < para acceder a las opciones disponibles o >
para salir.
• Conectar : Conectar con el Favorito seleccionado.
• Añadir nueva : Permite añadir un Favorito nuevo manualmente.
• Editar : Permite editar el nombre y la dirección del
Favorito seleccionado.
• Borrar : Borra el Favorito seleccionado de la lista.
Perfiles [Menú 8-3]
Puede determinar hasta 5 perfiles y activar uno de ellos.
Desplácese hasta el perfil deseado y pulse < para acceder a las
opciones disponibles.
• Activar [Menú 8-3-1-1]
Puede activar el perfil seleccionado.
• Configuración [Menú 8-3-1-2]
Puede editar y cambiar la configuración WAP del perfil
seleccionado.
Internet [Menú 8]
Acceso al Menú

ESPAÑOL
75
Acceso al Menú
- Casa
Esta opción le permite introducir la dirección (URL) de la página
que desea usar como principal. No necesita escribir “http://”
delante de cada URL dado que el navegador WAP lo añadirá
automáticamente.
- Mostrar imág
Puede seleccionar si las imagines contenidas en cada página
WAP son mostradas en pantalla o no.
- Tipo conexión
Las opciones disponibles son Continua o Temporal y dependen
de la pasarela de acceso (gateway).
Continuado
Es un mecanismo con confirmación de entrega; genera mucho
tráfico de red.
Temporal
Servicio sin confirmación (sin conexión).
- Config. seg.
Las opciones son Activ. y Desac., y dependen del gateway de
acceso usada.
- Info pasarela
La mayoría de gateways WAP no necesitan Identidad de
Usuario ni Clave de Acceso.
Si su gateway las necesita para conectar con ella, su operador
de red deberá suministrárselas y usted las deberá configurar
correctamente para navegar por un sitio WAP.

ESPAÑOL
76
- Portadora
Datos
GPRS
- Config. datos
Estos valores de configuración deben ser suministrados por su
operador de red.
Dirección IP : Introduzca la dirección IP del gateway WAP que
utilice para el acceso.
Marcar núm. : Introduzca el número de teléfono al que hay
que llamar para acceder a su gateway WAP.
Tipo llamada : Selecciona el tipo de llamada de datos,
Analógica o Digital (RDSI).
Vel. llamada : Velocidad de la conexión.
Id. usuario : Identidad de usuario requerida para llamar al
servidor (NO al gateway WAP).
Contraseña : Clave de Acceso requerida para llamar al
servidor (y NO al gateway WAP) y que le
identifica.
- Config. GPRS
La configuración GPRS solo estará disponible cuando elija esa
modalidad de servidor.
Dirección IP : Escribe la dirección IP del gateway WAP al que
quieres accesar.
APN : Escribe al APN de la red GPRS.
Id. usuario : Escribe el nombre de usuario con el que el
servidor APN te identificara.
Contraseña : Escribe es password que identificara el servidor
APN.
Internet [Menú 8]
Acceso al Menú

ESPAÑOL
77
Acceso al Menú
- Lím. tiempo
Necesita seleccionar uno de los 5 periodos de espera definidos.
Después de seleccionar uno de ellos, el servicio dejará de estar
disponible si no se ha introducido o transmitido ningún dato
durante ese periodo.
• Renombrar [Menú 8-3-1-3]
Edite el nombre del perfil.
• Serv. e-mail [Menú 8-3-1-4]
Guarde la dirección (URL) del servidor de correo electrónico
(e-mail) que utilice con mayor frecuencia.
- Conectar
Conecta con el servidor de correo electrónico que haya
configurado.
- Editar dirección
Edite la URL del servidor de correo electrónico.
Ir a URL [Menú 8-4]
Puede conectar directamente con el sitio que desee. Necesita
introducir la URL específica con la que desee conectar
directamente.
Config. caché [Menú 8-5]
Puede eliminar los contenidos de la memoria caché y cambiar el
modo de comprobación de la misma.
Borrar caché [Menú 8-5-1]
Los contenidos de la caché serán eliminados.

ESPAÑOL
78
Compr. caché [Menú 8-5-2]
Puede cambiar la frecuencia de comprobación de la memoria
caché.
• Siempre [Menú 8-5-2-1]
La caché siempre será comprobada cuando una URL sea cargada
o se navegue por ella.
• Sólo casa [Menú 8-5-2-2]
La caché sólo sera comprobada al abrir el navegador WAP.
• Desact. [Menú 8-5-2-3]
La caché nunca será comprobada.
Certif. seg. [Menú 8-6]
Muestra una lista de los certificados disponibles.
Rest. perfil [Menú 8-7]
Puede reiniciar la configuración de los perfiles actuales a los
valores de fábrica por defecto.
Internet [Menú 8]
Acceso al Menú

ESPAÑOL
79
Si está conectado, podrá ver los siguientes menús:
❏ Casa
Es igual que el [Menú 8-1].
❏ Actualizar
Recarga la página actual.
❏ Favoritos
Es igual que el [Menú 8-2].
❏ Guardar como Favoritos
Guarda la URL actual como un Favorito.
También puede editar el nombre del Favorito.
❏ Ir a URL
Igual que [Menú 8-4].
❏ Ir a servidor e-mail
Conecta con el servidor de correo electrónico que haya
configurado.
❏ Determinar como servidor e-mail
Guarda la URL actual como servidor de correo electrónico.
Menú On-line de Internet
Acceso al Menú

ESPAÑOL
80
Para poder hacer uso de los servicios de datos y/o fax, necesita
una aplicación o programa de comunicaciones de datos y/o fax.
Antes de usar estas funciones, necesitará conectar su teléfono con
un ordenador o asegurarse que su teléfono está conectado a un
dispositivo compatible.
Envío de llamadas de datos y fax
1. Conecte su computadora al teléfono.
2. Tras abrir el programa de comunicaciones, realice una llamada y
transmita datos o fax.
3. Después de esa transmisión, puede finalizar la llamada
simplemente cerrando su aplicación de comunicaciones,
pulsando E [Fin].
Recepción de llamadas de datos o fax
Si dispone de números diferentes para las llamadas de voz, datos y
fax, su teléfono reconocerá el tipo de llamada.
Recepción de llamadas de datos o fax – Números
separados (Multi-numeros)
Al usar el servicio de datos o fax, la pantalla muestra el tipo de
llamada que se está recibiendo.
Para recibir una llamada de datos o fax:
1. Conecte su computadora al teléfono.
2. Después de abrir el programa de comunicaciones, acepte una
llamada y reciba la llamada de datos o fax (si no ha sido
respondida automáticamente).
3. Tras la recepción, puede finalizar la llamada simplemente
cerrando su aplicación de comunicaciones, pulsando
E [Fin].
Como usar las llamadas de Datos y Fax
Funciones adicionales

ESPAÑOL
81
Funciones adicionales
Recepción de llamadas de datos o fax – Número único
Si dispone de una tarjeta SIM que no soporte números de voz,
datos y fax separados, el teléfono no reconoce el tipo de llamada
entrante.
Para usar el servicio de datos o fax, asegúrese que desea recibir
una llamada en modo datos o fax. Antes de recibirla, deberá
configurar el teléfono para una de la siguientes opciones en el
submenú de modo de llamada (Configuración ➝ Conf. llamadas ➝
Próx. entr.).
Para recibir un llamada de datos o fax:
1. Pulse < [Menú] en el modo de espera.
2. Seleccione Configuración ➝ Conf. llamadas ➝ Próx. entr.
3. Seleccione el tipo de llamada deseada (Voz, Datos o Fax) y
pulse < [Selec.].
4. Conecte su computadora al teléfono.
5. Después de abrir el programa de comunicaciones, acepte una
llamada y reciba los datos o el fax (si la llamada no ha sido
respondida automáticamente).
6. Tras la recepción, puede finalizar la llamada simplemente
cerrando su aplicación de comunicaciones, pulsando
E [Fin].
Una vez que haya configurado el teléfono para recibir un tipo
específico de llamadas, permanecerá así hasta que lo cambie.
PC Sync
PC Sync es un programa para intercambiar datos entre el
teléfono y una computadora a través de un cable. Por lo tanto,
si desea usar esta función necesita el kit apropiado que existe
como accesorio. Para obtener más detalles sobre su
utilización, consulte el fichero de Ayuda de PC Sync en el CD
de PC Sync.

ESPAÑOL
82
Menú durante llamadas
Funciones adicionales
Durante una llamada estarán disponibles los siguientes menús que
no aparecen en el modo de espera.
1 Durante una llamada
1-1 Poner llamada en espera
Puede poner una llamada en espera o recuperarla simplemente
mediante la tecla
S
[Enviar]. Cuando una llamada es realizada o
contestada, pulse
S
[Enviar] para ponerla en espera.
Cuando una llamada está retenida, pulse S [Enviar] para hacerla
activa.
1-2 Haciendo una segunda llamada
Puede recuperar un número de la agenda para realizar una
segunda llamada. Pulse > [Nombr.] y seleccione Buscar.
Para guardar el número marcado en la agenda durante la llamada,
pulse > [Nombr.] y seleccione Añadir neuva.
1-3 Alternando entre dos llamadas
Para cambiar de una llamada a otra, seleccione < [Opcs.] y luego
seleccione Alternar o pulse la tecla S [Enviar].
Puede retener la llamada activa mediante las flechas arriba/abajo.
Si desea finalizar una de las llamadas, active la llamada deseada y
pulse E [Fin].
1-4 Respondiendo una llamada entrante
Para responder una llamada entrante, simplemente pulse la tecla
S [Enviar].
El teléfono permite también avisar de una llamada cuando ya hay
otra activa. Esto se realiza mediante un tono que suena por el
auricular; además, la pantalla muestra que la segunda llamada está
en espera.
Si la llamada en espera está presente, puede retener la primera
llamada y responder a la segunda mediante
S
[Enviar] o
seleccionando la tecla < [Respoder] y luego Retener y
Responder.

ESPAÑOL
83
Funciones adicionales
Puede finalizar la actual y responder a la llamada en espera
mediante la tecla > [Menú] y luego Finalizar y Responder.
1-5 Rechazando un llamada entrante
Puede rechazar un llamada entrante sin necesidad de aceptarla
simplemente pulsando la tecla E [Fin].
Cuando haya una llamada activa, puede rechazar una segunda
llamada mediante la tecla > [Menú] y seleccionando
Multiconferencia / Rechazar o pulsando la tecla E [Fin].
1-6 Controlando el volumen durante una llamada
Puede controlar el volumen durante una llamada pulsando <
[Opcs.] y seleccionando Volumen.
1-7 Silenciando el Micrófono
Puede silenciar el micrófono durante una llamada pulsando la tecla
< [Opcs.] y seleccionando Silencio.
El teléfono puede volver a su funcionamiento normal pulsando <
[Volver].
Cuando el teléfono esté silenciado, la persona en el otro extremo
no podrá oirle, pero usted si podrá escucharla.
1-8 Activando los tonos DTMF durante una llamada
Para activar los tonos DTMF durante una llamada, por ejemplo,
para permitir que su teléfono haga uso de una centralita
automática, seleccione < [Opcs.] y luego DTMF On.
Los tonos DTMF se pueden desactivar de la misma manera.
1-9 Accediendo al Menú Principal
Las opciones principales de Mensajes y Aplicaciones pueden ser
utilizadas desde el menú Durante una llamada mediante la tecla
< [Opcs.] y luego Mensajes o Menú Principal.
El menú Aplicaciones solo estará disponible si su tarjeta SIM
soporta los Aplicaciones Tool kit.

ESPAÑOL
84
2 Llamadas en Multiconferencia
El servicio de multiconferencia proporciona la capacidad de
mantener conversaciones simultáneas con más de una persona
siempre que su operador de red soporte esta particularidad.
Una llamada de multiconferencia puede ser establecida solo
cuando tenga una llamada activa y otra retenida, habiendo
respondido ya a ambas.
Una vez que una llamada de multiconferencia está activa, otras
llamadas pueden ser añadidas, desconectadas o apartadas (esto
significa que no participan en la multiconferencia pero aún están
conectadas con usted) por la persona que estableció la
multiconferencia.
Estas opciones están disponibles desde el menú Durante una
llamada y aparecen en Sección.
El número máximo de personas que pueden estar conectadas en
una llamada de multiconferencia es cinco. Una vez iniciada por
usted esa llamada, usted llevará el control de la misma y será el
único que podrá añadir llamadas a la misma.
2-1 Haciendo una segunda llamada
Puede realizar una segunda llamada cuando tenga una activa ya.
Para hacer esto, introduzca el segundo número y pulse
S
[Enviar].
Cuando haya activado la segunda llamada, la primera quedará
automáticamente retenida. Puede alternar entre ambas llamadas
seleccionando < [Opcs.] y luego Alternar.
2-2 Configurando una Llamada en Multiconferencia
Puede conectar una llamada retenida a la actual que está activa
para formar una llamada de multiconferencia mediante la selección
de < [Opcs.] y luego Multiconferencia / Unir todas.
Menú durante llamadas
Funciones adicionales

ESPAÑOL
85
2-3 Reteniendo una Llamada en Multiconferencia
Para retener un llamada de multiconferencia, seleccione <
[Opcs.] y luego Multiconferencia / Retener todas.
2-4 Activar la Llamada en Multiconferencia Retenida
Para activar una llamada de multiconferencia retenida, seleccione
< [Opcs.] y luego Multiconferencia / Unir todas.
2-5 Añadiendo llamadas a una Llamada en
Multiconferencia
Para añadir una llamada activa a la llamada de multiconferencia
retenida, seleccione < [Opcs.] y luego Multiconferencia / Unir
todas.
2-6 Mostrar las personas conectadas en una Llamada
en Multiconferencia
Para desplazarse en la pantalla del teléfono por los números de las
llamadas conectadas, pulse las teclas U y D.
2-7 Reteniendo a un miembro de una Llamada en
Multiconferencia
Para retener a una determinada persona de las que estaban
conectadas (cuyo número esté siendo mostrado en pantalla) en una
llamada de multiconferencia retenida, seleccione < [Opcs.] y
luego Multiconferencia / Excluir.
2-8 Una llamada privada dentro de una Llamada en
Multiconferencia
Para mantener una conversación privada con otra persona dentro
de una llamada en multiconferencia, muestre el número de la
persona con la que desee abler en la pantalla, seleccione <
[Opcs.] y luego Multiconferencia / Privada para retener al resto de
llamadas.
Funciones adicionales

ESPAÑOL
86
2-9 Finalizando una Llamada en Multiconferencia
El miembro actualmente presentado en pantalla de una llamada en
multiconferencia puede ser desconectado mediante la tecla E
[Fin].
Para finalizar una llamada en multiconferencia, pulse < [Opcs.] y
luego Multiconferencia/Fin.
Sleccionando la tecla < [Opcs.] y luego Multiconferencia /
Finalizar todas, desconectará todas las llamadas activas y
retenidas.
2-10 Transferencia de Llamadas Explícita (ECT)
Si tiene una llamada retenida y a otra activa, puede conectar ambas
llamadas entre si y luego abandonar la llamada.
Esto se hace mediante la selección de la opción Multiconferencia /
Transferir en el menú Durante un llamada.
Menú durante llamadas
Funciones adicionales

ESPAÑOL
87
Accesorios
Existe una diversidad de accesorios para el teléfono. Puede usted
seleccionar estas opciones de acuerdo con sus propias
necesidades en materia de communicación.
Batería Estándar
Manos Libres Portátil
Cuando lo conecta al teléfono, le permite
hablar sin sujetarlo con las manos.
Cargador de Viaje
Este cargador le permite cargar la batería
cuando no esté en casa o en la oficina.
Cargador de coche
Pues usar su teléfono y cargar la batería a
la vez cuando esté en el coche mediante el
uso del cargador de mechero.
Correa

Solución para Datos/CD
Puede conectar su teléfono con una
computadora para intercambiar datos entre
ellos.
ESPAÑOL
88
Nota
• La información y especificaciones de este menú están
sujetos a cambio sin previo aviso.
• Los accesorios pueden variar según las regiones; por
favor, consulte con su compañía o agente local para
obtener más información.
Accesorios

Información de seguridad de la TIA
Aquí se incluye la información completa de seguridad de la TIA
(Asociación de la industria de las telecomunicaciones) sobre
teléfonos inalámbricos de mano. La inclusión en el manual del
usuario del texto referente a Marcapasos, audífonos para sordera y
otros dispositivos médicos es obligatoria para obtener la
certificación CTIA. El uso del lenguaje restante de la TIA se
recomienda cuando resulte pertinente.
Exposición a las señales de radiofrecuencia
Su teléfono portátil de mano inalámbrico es un transmisor y
receptor de radio de baja potencia.Cuando está encendido, recibe y
también envía señales de radiofrecuencia (RF).
En agosto de 1996, la Comisión federal de comunicaciones (FCC)
de los EE.UU. adoptó lineamientos de exposición a RF con niveles
de seguridad para teléfonos inalámbricos de mano.
Esos lineamientos se corresponden con la norma de seguridad
establecida previamente por organismos de estándares tanto de los
EE.UU. como internacionales:
ANSI C95.1 (1992) *
Informe NCRP 86 (1986)
ICNIRP (1996)
Estos estándares se basaron en evaluaciones amplias y periódicas
de la literatura científica pertinente. Por ejemplo, más de 120
científicos, ingenieros y médicos de universidades, instituciones de
salud gubernamentales y la industria analizaron el corpus de
investigación disponible para desarrollar el estándar ANSI (C95.1).
*Instituto de estándares nacional estadounidense, Consejo nacional
de protección contra la radiación y mediciones, Comisión
internacional de protección de radiación no ionizante
ESPAÑOL
89
Indicaciones de seguridad

El diseño de su teléfono cumple los lineamientos de la FCC (y esas
normas internacionales).
Cuidado de la antena
Utilice solamente la antena incluida o una antena de reemplazo
aprobada. Las antenas, modificaciones o accesorios no autorizados
pueden dañar el teléfono y violar los reglamentos de la FCC.
Funcionamiento del teléfono
POSICIÓN NORMAL: Sostenga el teléfono como cualquier otro
teléfono.
Manejo
Compruebe las leyes y reglamentos referidos al uso de teléfonos
inalámbricos en las áreas donde usted maneja.Obedézcalos
siempre. Igualmente, si va a usar el teléfono mientras maneja, por
favor:
• Preste toda su atención al manejo, manejar con seguridad es su
primera responsabilidad;
• Use la operación a manos libres, si la tiene;
• Salga del camino y estaciónese antes de hacer o recibir una
llamada si las condiciones de manejo así lo demandan.
Dispositivos electrónicos
La mayoría del equipo electrónico moderno está blindado contra las
señales de RF.
Sin embargo, algunos equipos electrónicos pueden no estar
blindados contra las señales de RF de su teléfono inalámbrico.
ESPAÑOL
90
Indicaciones de seguridad

Marcapasos
La Asociación de fabricantes de la industria médica recomienda
una separación mínima de quince (15) centímetros o seis (6)
pulgadas entre el teléfono inalámbrico de mano y un marcapasos
para evitar la posible interferencia con éste. Estas
recomendaciones son coherentes con las investigaciones
independientes y las recomendaciones de Investigación en
tecnología inalámbrica.
• Las personas con marcapasos:
• Deben SIEMPRE mantener el teléfono a más de quince
centímetros (seis pulgadas) del marcapasos cuando el teléfono
esté encendido;
• No deben llevar el teléfono en un bolsillo del pecho.
• Deben usar la oreja opuesta al marcapasos para reducir al mínimo
la posibilidad de interferencia.
• Si tiene cualquier motivo para sospechar que está ocurriendo una
interferencia, apague el teléfono inmediatamente.
Aparatos para la sordera
Algunos teléfonos inalámbricos digitales pueden interferir con
algunos aparatos para la sordera. En caso de tal interferencia, le
recomendamos que consulte a su proveedor de servicios.
Otros dispositivos médicos
Si usa cualquier otro dispositivo médico personal, consulte al
fabricante de dicho dispositivo para saber si está adecuadamente
blindado contra la energía de RF externa. Su médico puede
ayudarle a obtener esta información.
ESPAÑOL
91

Apague el teléfono cuando esté en instalaciones de atención
médica cuando así lo indiquen las reglas de esas áreas. Los
hospitales o las instalaciones de atención médica pueden estar
empleando equipo que podría ser sensible a la energía de RF
externa.
Vehículos
Las señales de RF pueden afectar a los sistemas electrónicos mal
instalados blindados de manera inadecuada en los vehículos
automotores. Compruebe con el fabricante o con su representante
respecto de su vehículo.
También debería consultar al fabricante de cualquier equipo que le
haya añadido a su vehículo.
Instalaciones con letreros
Apague el teléfono en cualquier instalación donde así lo exijan los
letreros de aviso.
Aviones
Los reglamentos de la FCC prohíben el uso del teléfono en el
aire.Apague el teléfono antes de abordar una nave aérea.
Áreas de explosivos
Para evitar la interferencia con operaciones de explosión, apague el
teléfono cuando esté en un “área de explosiones” o en áreas con
letreros que indiquen: "Apague los radios de dos vías".
Obedezca todos los letreros e instrucciones.
ESPAÑOL
92
Indicaciones de seguridad

Atmósfera potencialmente explosiva
Apague el teléfono cuando esté en un área con una atmósfera
potencialmente explosiva y obedezca todos los letreros e
instrucciones. Las chispas en dichas áreas pueden causar una
explosión o un incendio que den como resultado lesiones
personales o incluso la muerte.
Las áreas con una atmósfera potencialmente explosiva están
claramente marcadas con frecuencia, pero no siempre.Entre las
áreas potenciales tenemos:áreas de abastecimiento de combustible
(como las estaciones de gasolina); áreas bajo la cubierta en navíos;
instalaciones de transferencia o almacenamiento de productos
químicos, vehículos que usan gas de petróleo licuado (como el
propano o el butano), áreas donde el aire contiene sustancias o
partículas (como granos, polvo o polvillos metálicos) y cualquier
otra área donde normalmente se le indicaría que apague el motor
de su vehículo.
Para vehículos equipados con bolsas de aire
Una bolsa de aire se infla con gran fuerza.NO coloque objetos,
incluido el equipo inalámbrico, ya sea instalado o portátil, en el área
que está sobre la bolsa de aire o en el área donde se despliega la
bolsa de aire. Si el equipo inalámbrico del interior del vehículo está
mal instalado y se infla la bolsa de aire, pueden producirse graves
lesiones.
ESPAÑOL
93

Actualización de la FDA para los consumidores
Actualización para consumidores sobre teléfonos móviles del
Centro de dispositivos y salud radiológica de la Administración de
alimentos y medicamentos (FDA)de los EE.UU.
1. ¿Representan un riesgo para la salud los teléfonos
inalámbricos?
La evidencia científica disponible no muestra que haya ningún
problema de salud asociado con el uso de teléfonos inalámbricos.
Sin embargo, no hay pruebas de que los teléfonos inalámbricos
sean totalmente seguros. Los teléfonos inalámbricos emiten bajos
niveles de energía de radiofrecuencia (RF) en el rango de
microondas cuando se usan. También emiten muy bajos niveles de
RF cuando están en modo de espera. Mientras que altos niveles de
RF pueden producir efectos en la salud (calentando los tejidos), la
exposición a RF de bajo nivel no produce efectos de calentamiento
y no causa efectos conocidos adversos para la salud.Muchos
estudios sobre la exposición a RF de bajo nivel no han encontrado
ningún efecto biológico. Algunos estudios han sugerido que puede
haber algunos efectos biológicos, pero tales conclusiones no se
han visto confirmadas por investigaciones adicionales. En algunos
casos, los investigadores han tenido dificultades en reproducir tales
estudios o en determinar los motivos por los que los resultados no
son consistentes.
2. ¿Cuál es el papel de la FDA respecto de la seguridad de
los teléfonos inalámbricos?
Según las leyes, la FDA no comprueba la seguridad de los
productos para el consumidor que emitan radiación antes de que
puedan venderse, como sí lo hace con los nuevos medicamentos o
dispositivos médicos. No obstante, la agencia tiene autoridad para
emprender acciones si se demuestra que los teléfonos inalámbricos
emiten energía de radiofrecuencia (RF) a un nivel que sea peligroso
para el usuario.
ESPAÑOL
94
Indicaciones de seguridad

En tal caso, la FDA podría exigir a los fabricantes de teléfonos
inalámbricos que informaran a los usuarios del riesgo para la salud
y reparen, reemplacen o saquen del mercado los teléfonos de
modo que deje de existir el riesgo.
Aunque los datos científicos existentes no justifican que la FDA
emprenda acciones reglamentarias, la agencia ha instado a la
industria de los teléfonos inalámbricos para que dé determinados
pasos, entre ellos los siguientes:
• Apoyar la necesaria investigación sobre los posibles efectos
biológicos de RF del tipo que emiten los teléfonos inalámbricos;
• Diseñar teléfonos inalámbricos de tal modo que se minimice la
exposición del usuario a RF que no sea necesaria para la función
del dispositivo y
• Cooperar para dar a los usuarios de teléfonos inalámbricos la
mejor información sobre los posibles efectos del uso de los
teléfonos inalámbricos sobre la salud humana.
La FDA pertenece a un grupo de trabajo interinstitucional de
dependencias federales que tienen responsabilidad en distintos
aspectos de la seguridad de las RF para garantizar la coordinación
de esfuerzos a nivel federal. Las siguientes instituciones
pertenecen a este grupo de trabajo:
• National Institute for Occupational Safety and Health (Instituto
nacional para la seguridad y salud laborales)
• Environmental Protection Agency (Agencia de protección
medioambiental) o Occupational Safety y Health Administration
(Administración de la seguridad y salud laborales)
• National Telecommunications and Information Administration
(Administracion nacional de telecomunicaciones e información)
El National Institutes of Health (Institutos nacionales de salud)
también participa en algunas actividades del grupo de trabajo
interinstitucional.
ESPAÑOL
95

La FDA comparte las responsabilidades reglamentarias sobre los
teléfonos inalámbricos con la Comisión federal de comunicaciones
(FCC). Todos los teléfonos que se venden en los EE.UU. deben
cumplir con los lineamientos de seguridad de la FCC que limitan la
exposición a la RF. La FCC depende de la FDA y de otras
instituciones de salud para las cuestiones de seguridad de los
teléfonos inalámbricos.
La FCC también regula las estaciones de base de las cuales
dependen los teléfonos inalámbricos. Mientras que estas
estaciones de base funcionan a una potencia mayor que los
teléfonos inalámbricos mismos, la exposición a RF que recibe la
gente de estas estaciones de base es habitualmente miles de
veces menor de la que pueden tener procedente de los teléfonos
inalámbricos. Las estaciones de base por tanto no están sujetas a
las cuestiones de seguridad que se analizan en este documento.
3. ¿Qué tipos de teléfonos son sujetos de esta
actualización?
El término “teléfonos inalámbricos” se refiere a los teléfonos
inalámbricos de mano con antenas interconstruidas, con frecuencia
llamados teléfonos “celulares”, “móviles” o “PCS”. Estos tipos de
teléfonos inalámbricos pueden exponer al usuario a una energía de
radiofrecuencia (RF) mensurable debido a la corta distancia entre el
teléfono y la cabeza del usuario. Estas exposiciones a RF están
limitaras por los lineamientos de seguridad de la FCC que se
desarrollaron con indicaciones de la FDA y otras dependencias
federales de salud y seguridad. Cuando el teléfono se encuentra a
distancias mayores del usuario, la exposición a RF es
drásticamente menor, porque la exposición a RF de una persona
disminuye rápidamente al incrementarse la distancia de la fuente.
Los así llamados “teléfonos inalámbricos” que tienen una unidad de
base conectada al cableado telefónico de una casa habitualmente
funcionan a niveles de potencia mucho menores y por tanto
producen exposiciones a RF que están muy por debajo de los
límites de seguridad de la FCC.
ESPAÑOL
96
Indicaciones de seguridad

4. ¿Cuáles son los resultados de la investigación que ya se
ha realizado?
La investigación realizada hasta la fecha ha producido resultados
contradictorios y muchos estudios han sufrido de fallas en sus
métodos de investigación. Los experimentos con animales que
investigan los efectos de la exposición a las energías de
radiofrecuencia (RF) características de los teléfonos inalámbricos
han producido resultados contradictorios que con frecuencia no
pueden repetirse en otros laboratorios. Unos pocos estudios con
animales, sin embargo, sugieren que bajos niveles de RF podrían
acelerar el desarrollo del cáncer en animales de laboratorio. Sin
embargo, muchos de los estudios que mostraron un desarrollo de
tumores aumentado usaron animales que habían sido alterados
genéticamente o tratados con sustancias químicas causantes de
cáncer de modo que estuvieran predispuestos a desarrollar cáncer
aún sin la presencia de una exposición a RF. Otros estudios
expusieron a los animales a RF durante períodos de hasta 22 horas
al día. Estas condiciones no se asemejan a las condiciones bajo las
cuales la gente usa los teléfonos inalámbricos, de modo que no
sabemos con certeza qué significan los resultados de dichos
estudios para la salud humana. Se han publicado tres grandes
estudios epidemiológicos desde diciembre de 2000. Juntos, estos
estudios investigaron cualquier posible asociación entre el uso de
teléfonos inalámbricos y cáncer primario del cerebro, glioma,
meningioma o neuroma acústica, tumores cerebrales o de las
glándulas salivales, leucemia u otros cánceres. Ninguno de los
estudios demostró la existencia de ningún efecto dañino para la
salud originado en la exposición a RF de los teléfonos inalámbricos.
No obstante, ninguno de los estudios puede responder a preguntas
sobre la exposición a largo plazo, ya que el período promedio de
uso del teléfono en estos estudios fue de alrededor de tres años.
ESPAÑOL
97

5. ¿Qué investigaciones se necesitan para decidir si la
exposición a RF de los teléfonos inalámbricos representa
un riesgo para la salud?
Una combinación de estudios de laboratorio y estudios
epidemiológicos de gente que realmente utiliza teléfonos
inalámbricos si proporcionaría algunos de los datos necesarios.
Dentro de algunos años se podrán realizar estudios de exposición
animal durante toda la vida. Sin embargo, se necesitarían grandes
cantidades de animales para proporcionar pruebas confiables de un
efecto promotor del cáncer, si existiera. Los estudios
epidemiológicos pueden proporcionar datos directamente aplicables
a poblaciones humanas, pero puede ser necesario un seguimiento
de 10 años o más para proporcionar respuestas acerca de algunos
efectos sobre la salud, como lo sería el cáncer. Esto se debe a que
al intervalo entre el momento de la exposición a un agente
cancerígeno y el momento en que se desarrollan los tumores, en
caso de hacerlo, puede ser de muchos, muchos años. La
interpretación de los estudios epidemiológicos se ve entorpecida
por la dificultad de medir la exposición real a RF durante el uso
cotidiano de los teléfonos inalámbricos. Muchos factores afectan
esta medición, como el ángulo al que se sostiene el teléfono, o el
modelo de teléfono que se usa.
6. ¿Qué está haciendo la FDA para averiguar más acerca de
los posibles efectos en la salud de la RF de los teléfonos
inalámbricos?
La FDA está trabajando con el Programa nacional de toxicología de
los EE.UU. y con grupos de investigadores de todo el mundo para
asegurarse de que se realicen estudios de alta prioridad con
animales para resolver importantes preguntas acerca de la
exposición a la energía de radiofrecuencia (RF).
ESPAÑOL
98
Indicaciones de seguridad

La FDA ha sido un participante líder del Proyecto de campos
electromagnéticos (EMF) internacional de la Organización mundial
de la salud desde su creación en 1996. Un influyente resultado de
este trabajo ha sido el desarrollo de una agenda detallada de
necesidades de investigación que ha impulsado el establecimiento
de nuevos programas de investigaciones en todo el mundo. El
proyecto también ha ayudado a desarrollar una serie de
documentos de información pública sobre temas de EMF. La FDA y
la Asociación de telecomunicaciones e Internet celular (CTIA)
tienen un Acuerdo de investigación y desarrollo en colaboración
(CRADA) formal para realizar investigaciones sobre la seguridad de
los teléfonos inalámbricos. La FDA proporciona la supervisión
científica, recibiendo informes de expertos de organizaciones
gubernamentales, de la industria y académicas. La investigación
patrocinada por la CTIA se realiza por medio de contratos con
investigadores independientes. La investigación inicial incluirá tanto
estudios de laboratorio como estudios de los usuarios de teléfonos
inalámbricos.El CRADA también incluirá una amplia evaluación de
las necesidades de investigación adicionales en el contexto de los
más recientes desarrollos de investigación del mundo.
7. ¿Cómo puedo averiguar cuánta exposición a energía de
radiofrecuencia puedo recibir al usar mi teléfono
inalámbrico?
Todos los teléfonos que se venden en los Estados Unidos deben
cumplir con los lineamientos de la Comisión federal de
comunicaciones (FCC) que limitan las exposiciones a la energía de
radiofrecuencia (RF). La FCC estableció esos lineamientos
asesorada por la FDA y otras dependencias federales de salud y
seguridad. El límite de la FCC para exposición a RF de teléfonos
inalámbricos se ha fijado a una Tasa de absorción específica
(Specific Absorption Rate, SAR) de 1.6 watts por kilogramo (1.6
W/kg).
ESPAÑOL
99

El límite de la FCC es consistente con los estándares de seguridad
desarrollados por el Instituto de ingeniería eléctrica y electrónica
(Institute of Electrical and Electronic Engineering, IEEE) y el
Consejo nacional para la protección y medición de la radiación
(National Council on Radiation Protection and Measurement). El
límite de exposición toma en consideración la capacidad del cuerpo
de eliminar el calor de los tejidos que absorben energía de los
teléfonos inalámbricos y se ha fijado muy por debajo de los niveles
que se sabe que tienen algún efecto. Los fabricantes de teléfonos
inalámbricos deben informar a la FCC del nivel de exposición a RF
de cada modelo de teléfono. El sitio Web de la FCC
(http://www.fcc.gov/oet/ rfsafety) ofrece direcciones para ubicar el
número de certificación de la FCC en su teléfono de modo que
puede encontrar el nivel de exposición a RF de su teléfono en la
lista que aparece en línea.
8. ¿Qué ha hecho la FDA para medir la energía de
radiofrecuencia que proviene de los teléfonos
inalámbricos?
El Instituto de Ingenieros eléctricos y electrónicos (IEEE) está
desarrollando un estándar técnico para la medición de la exposición
a energía de radiofrecuencias (RF) proveniente de los teléfonos
inalámbricos y otros dispositivos inalámbricos con la participación y
el liderazgo de científicos e ingenieros de la FDA. El estándar
denominado “Práctica recomendada para determinar la Tasa de
absorción específica (SAR) pico espacial en el cuerpo humano
debida a los dispositivos de comunicación inalámbrica: técnicas
experimentales” establece la primera metodología coherente de
pruebas para medir la tasa a la cual se depositan las RF en la
cabeza de los usuarios de teléfonos inalámbricos. El método de
prueba utiliza un modelo de la cabeza humana que simula sus
tejidos. Se espera que la metodología de pruebas de SAR
estandarizada mejore notablemente la coherencia de las
mediciones realizadas en distintos laboratorios con el mismo
teléfono.
ESPAÑOL
100
Indicaciones de seguridad

La SAR es la medición de la cantidad de energía que absorben los
tejidos, ya sea de todo el cuerpo o de una pequeña parte de él. Se
mide en watts/kg (o miliwatts/g) de materia. Esta medición se
emplea para determinar si un teléfono inalámbrico cumple con los
lineamientos de seguridad.
9. ¿Qué pasos puedo dar para reducir mi exposición a la
energía de radiofrecuencia de mi teléfono inalámbrico?
Si estos productos presentan un riesgo, cosa que en este momento
no sabemos que ocurra, es probablemente muy pequeño. Pero si le
preocupa evitar incluso los riesgos potenciales, puede dar unos
pasos sencillos para reducir al mínimo su exposición a la energía
de radiofrecuencia (RF). Dado que el tiempo es un factor clave en
la cantidad de exposición que una persona puede recibir, la
reducción del tiempo dedicado al uso de teléfonos inalámbricos
reducirá la exposición a RF. Si debe mantener conversaciones
prolongadas con teléfonos inalámbricos todos los días, puede
aumentar la distancia entre su cuerpo y la fuente de la RF, dado
que el nivel de exposición cae drásticamente con la distancia. Por
ejemplo, podría usar un auricular y llevar el teléfono inalámbrico
lejos del cuerpo o usar teléfonos inalámbricos conectados a una
antena remota. Nuevamente, los datos científicos no demuestran
que los teléfonos inalámbricos sean dañinos. Pero si le preocupa la
exposición a RF de estos productos, puede usar medidas como las
descritas arriba para reducir su exposición a RF producto del uso
de teléfonos inalámbricos.
10. ¿Qué hay del uso de teléfonos inalámbricos por parte de
los niños?
La evidencia científica no muestra ningún peligro para los usuarios
de teléfonos inalámbricos, incluidos los niños y adolescentes. Si
desea dar pasos para reducir la exposición a la energía de
radiofrecuencia (RF), las medidas arriba descritas se aplicarían a
niños y adolescentes que usen teléfonos inalámbricos.
ESPAÑOL
101

La reducción del tiempo de uso de teléfonos inalámbricos y
aumentar la distancia entre el usuario y la fuente de RF disminuirá
la exposición a RF. Algunos grupos patrocinados por otros
gobiernos nacionales han aconsejado que se desaliente el uso de
teléfonos inalámbricos del todo para los niños. Por ejemplo, el
gobierno del Reino Unido distribuyó volantes con una
recomendación así en diciembre de 2000. Observaron que no hay
evidencias que indiquen que usar un teléfono inalámbrico cause
tumores cerebrales ni otros efectos dañinos. Su recomendación
para que se limitara el uso de teléfonos inalámbricos por parte de
los niños era estrictamente precautoria, no estaba basada en
ninguna evidencia científica de que exista ningún riesgo para la
salud.
11. ¿Qué hay de la interferencia de los teléfonos
inalámbricos con el equipo médico?
La energía de radiofrecuencia (RF) de los teléfonos inalámbricos
puede interactuar con algunos dispositivos electrónicos. Por este
motivo, la FDA ayudó al desarrollo de un método de prueba
detallado para medir la interferencia electromagnética (EMI) de los
teléfonos inalámbricos en los marcapasos implantados y los
desfibriladores. El método de prueba ahora es parte de un estándar
patrocinado por la Asociación para el avance de la instrumentación
médica (Association for the Advancement of Medical
instrumentation, AAMI). La versión final, un esfuerzo conjunto de la
FDA, los fabricantes de dispositivos médicos y muchos otros
grupos, se finalizó a fines de 2000. Este estándar permitirá a los
fabricantes asegurarse de que los marcapasos y los desfibriladores
estén a salvo de la EMI de teléfonos inalámbricos. La FDA ha
probado aparatos para la sordera para determinar si reciben
interferencia de los teléfonos inalámbricos de mano y ayudó a
desarrollar un estándar voluntario patrocinado por el Instituto de
ingenieros eléctricos y electrónicos (IEEE).
ESPAÑOL
102
Indicaciones de seguridad

Este estándar especifica los métodos de prueba y los requisitos de
desempeño de los aparatos para la sordera y los teléfonos
inalámbricos de modo que no ocurra ninguna interferencia cuando
una persona use al mismo tiempo un teléfono “compatible” y un
aparato para la sordera “compatible”. Este estándar fue aprobado
por la IEEE en 2000.
La FDA sigue supervisando el uso de los teléfonos inalámbricos
para detectar posibles interacciones con otros dispositivos médicos.
Si se determinara que se presenta una interferencia dañina, la FDA
realizará las pruebas necesarias para evaluar la interferencia y
trabajará para resolver el problema.
12. ¿Dónde puedo hallar información adicional?
Para obtener información adicional, por favor consulte los recursos
siguientes:
La página Web de la FDA sobre teléfonos inalámbricos
(http://www.fda.gov/cdrh/phones/index.html)
Programa de seguridad de RF de la Comisión federal de
comunicaciones (FCC) (http://www.fcc.gov/oet/rfsafety)
Comisión internacional para la protección contra radiación no
ionizante (http://www.icnirp.de)
Proyecto EMF internacional de la Organización mundial de la salud
(OMS) (http://www.who.int/emf)
Junta nacional de protección radiológica (R.U.)
(http://www.nrpb.org.uk/)
ESPAÑOL
103

Información al consumidor sobre la SAR
(Tasa de absorción específica, Specific Absorption
Rate)
Este modelo de teléfono cumple con los requisitos
gubernamentales de exposición a las ondas de radio.
Su teléfono inalámbrico es un transmisor y receptor de radio. Está
diseñado y fabricado para que no supere los límites de emisión de
exposición a la energía de radiofrecuencia (RF) fijado por la
Comisión federal de comunicaciones (FCC) del gobierno de los
EE.UU. Estos límites son parte de extensos lineamientos y
establecen los niveles permitidos de energía de RF para la
población general. Estos lineamientos están basados en
estándares que desarrollaron organizaciones científicas
independientes por medio de una evaluación periódica y exhaustiva
de los estudios científicos. Los estándares incluyen un notable
margen de seguridad diseñado para garantizar la seguridad de
todas las personas sin importar su edad o estado de salud.
El estándar de exposición para los teléfonos celulares inalámbricos
emplea una unidad de medida llamada Tasa de absorción
específica o SAR. El límite de SAR establecido por la FCC es de
1.6W/kg. * Las pruebas de la SAR se realizan utilizando posiciones
estándar de funcionamiento especificadas por la FCC con el
teléfono transmitiendo a su más alto nivel de potencia certificado en
todas las bandas de frecuencia probadas.Aunque la SAR se
determina al nivel de potencia más alto certificado, el nivel de SAR
real del teléfono en funcionamiento puede estar muy por debajo del
valor máximo. Dado que el teléfono está diseñado para funcionar a
varios niveles de potencia para usar solamente la potencia
necesaria para llegar a la red, en general mientras más cerca esté
de una antena de estación de base inalámbrica, menor será la
potencia que se emitirá.
ESPAÑOL
104
Indicaciones de seguridad

Antes de que un modelo de teléfono esté disponible para su venta
al público, debe ser probarse y certificarse ante la FCC que no
supera el límite establecido por el requisito adoptado por el
gobierno para la exposición segura.
Las pruebas se realizan en posiciones y ubicaciones (por ejemplo,
en la oreja y llevándolo en el cuerpo) según lo demanda la FCC
para cada modelo. El valor de SAR más alto de este modelo de
teléfono al probarse para su uso en la oreja es de 0.714 W/kg y al
usarlo en el cuerpo como se describe en este manual del usuario
es de 0.482 W/kg. (Las mediciones del uso en el cuerpo varían en
función de los modelos de los teléfonos, y dependen de los
accesorios disponibles y los requisitos de la FCC.) Aun cuando
puede haber diferencias entre los niveles de SAR de varios
teléfonos y en varias posiciones, todos ellos cumplen el requisito
gubernamental para una exposición segura.
La FCC ha otorgado una Autorización de equipo para este modelo
de teléfono con todos los niveles de SAR reportados y evaluados
en cumplimiento de los lineamientos de emisión de RF de la FCC.
La información sobre SAR de este modelo de teléfono está
archivada con la FCC y puede encontrarse en la sección Display
Grant (Mostrar subvención) de http://www.fcc.gov/oet/ fccid
después de buscar el ID de la FCC BEJG5300S. Se puede
encontrar información adicional sobre Tasas de absorción
específica (SAR) en el sitio Web de la Asociación de la industria de
las telecomunicaciones celulares (Cellular Telecommunications
Industry Association, CTIA) en http://www.wow-com.com
*En los Estados Unidos y Canadá, el límite de SAR de los teléfonos
celulares usados por el público es de 1.6 watts/kg (W/kg)
promediados sobre un gramo de tejido. El estándar incluye un
margen sustancial de seguridad para dar una protección adicional
al público y para tomar en cuenta cualquier variación en las
mediciones.
ESPAÑOL
105

ESPAÑOL
106
General
Nombre del Producto : G1500
Sistema : GSM 900 / DCS 1800
Temperaturas Ambiente
Máxima : +55°C
Mínima : -10°C
Datos Técnicos

Memo
ESPAÑOL
107

ESPAÑOL
108
Memo

GPRS Phone
USER’S MANUAL
MODEL: G1500
Please read this manual carefully
before operating your set.
Retain it for future reference.
ENGLISH


ENGLISH
3
G1500 Phone
G1500 has a polished style which provides
users’ a better feel and convenience.

For Your Safety
ENGLISH
4
Important Information
This user guide contains important information on the use and
operation of this phone. Please read all the information carefully for
optimal performance and to prevent any damage to, or misuse of,
the phone. Any changes or modifications not expressly approved in
this user guide could void your warranty for this equipment.
Before You Start
Safety Instructions
WARNING! To reduce the possibility of electric shock, do not
expose your phone to high humidity areas, such as the bathroom,
swimming pool, etc.
Always store your phone away from heat. Never store your phone in
settings that may expose it to temperatures less than 32°F or
greater than 104°F, such as outside during a snowstorm or in your
car on a hot day. Exposure to excessive cold or heat will result in
malfunction, damage and/or catastrophic failure.
Be careful when using your phone near other electronic
devices. RF emissions from your mobile phone may affect nearby
inadequately shielded electronic equipment. You should consult
with manufacturers of any personal medical devices such as
pacemakers and hearing aides to determine if they are susceptible
to interference from your mobile phone. Turn off your phone in a
medical facility or at a gas station. Never place your phone in a
microwave oven as this will cause the battery to explode.
IMPORTANT! Please read the TIA SAFETY INFORMATION on
page 88 before using your phone.

ENGLISH
5
Safety Information
Please read and observe the following information for the safe and
proper use of your phone and to prevent any unanticipated damage.
Also, keep the user’s manual in an accessible place at all the times
after reading it.
• Unplug the power cord and charger during a lightning storm to
avoid electric shock or fire.
• Do not use your phone in high explosive areas as the phone may
generate sparks.
• Do not put your phone in a place subject to excessive dust, and
keep the minimum required distance between the power cord and
heat sources.
• Unplug the power cord prior to cleaning your phone, and clean the
power plug pin when it is dirty.
• Do not damage the power cord by bending, twisting, pulling, or
subjecting it to heat. Do not use the plug if it is loose as it may
cause fire or electric shock.
• Hold the power cord plug firmly to plug and unplug the power cord.
Ensure the plug is firmly connected. If it is not firmly connected, it
may cause excessive heat or fire.
• Do not place a heavy item on the power cord. Do not allow the
power cord to be crimped as it may cause fire or electric shock.
• Be careful not to let the battery contact metal conductors such as a
necklace or coins. When shorted, it may cause an explosion.
• Do not disassemble or impact the battery as it may cause electric
shock, short-circuit, and fire. Store the battery in a place out of
reach of children.
• Using a damaged battery or placing a battery in your mouth may
cause serious injury.

• Do not place items containing magnetic components such as a
credit card, phone card, bank book or a subway ticket, near your
phone. The magnetic strip can be damaged by the phone.
• Do not hold or let the antenna come in contact with your body
during a call.
• Talking on your phone for a long period of time may reduce the
call quality due to heat generated during the use of the phone.
• Do not allow excessive vibration or impact to the phone.
• When you do not plan to use the phone for a long period of time,
store it in a safe area with the power cord unplugged.
FCC RF Exposure Information
WARNING! Read this information before operating the phone. In
August 1996, the Federal Communications (FCC) of the United
States, with its action in Report and Order FCC 96-326, adopted an
updated safety standard for human exposure to radio frequency
(RF) electromagnetic energy emitted by FCC regulated transmitters.
Those guidelines are consistent with the safety standard previously
set by both U.S. and international standards bodies.
The design of this phone complies with the FCC guidelines and
these international standards.
CAUTION
Use only the supplied and approved antenna. Use of unauthorized
antennas or modifications could impair call quality, damage the
phone, void your warranty and/or result in violation of FCC
regulations. Do not use the phone with a damaged antenna. If a
damaged antenna comes into contact with skin, a minor burn may
result. Contact your local dealer for a replacement of antenna.
ENGLISH
6
For Your Safety

Body-worn Operation
This device was tested for typical body-worn operations with the
back of the phone kept 3/4 inch (2 cm) from the body. To comply
with FCC RF exposure requirements, a minimum separation
distance of 3/4 inches (2 cm) must be maintained between the
user’s body and the back of the phone. Third-party belt-clips,
holsters, and similar accessories containing metallic components
should not be used. Body-worn accessories that cannot maintain
3/4 inch (2 cm) separation distance between the user’s body and
the back of the phone, and have not been tested for typical body-
worn operations may not comply with FCC RF exposure limits and
should be avoided.
Vehicle Mounted External Antenna (optional, if available)
A minimum separation distance of 8 inches (20 cm) must be
maintained between the user/bystander and the vehicle mounted
external antenna to satisfy FCC RF exposure requirements. For
more information about RF exposure, visit the FCC website at
www.fcc.gov
FCC Part 15 Class B Compliance
This device and its accessories comply with part 15 of FCC rules.
Operation is subject to the following two conditions: (1) This device
and its accessories may not cause harmful interference, and (2) this
device and its accessories must accept any interference received,
including interference that may cause undesired operation.
Cautions for Battery
• Do not disassemble.
• Do not short-circuit.
• Do not expose to high temperature: 60°C (140°F).
• Do not incinerate.
ENGLISH
7

Battery Disposal
• Please dispose of your battery properly or bring to your local
wireless carrier for recycling.
• Do not dispose in fire or with hazardous or flammable materials.
Adapter (Charger) Cautions
• Using the wrong battery charger could damage your phone and
void your warranty.
• The adapter or battery charger is intended for indoor use only.
Do not expose the adapter or battery charger to direct sunlight or
use it in places with high humidity, such as the bathroom.
ENGLISH
8
For Your Safety

ENGLISH
9
Overview
Part of the Phone
................................................................
13
• Front of the Phone
............................................................
13
• Rear of the Phone
.............................................................
14
Key Description
...................................................................
15
• Alphanumeric Keys
............................................................
16
Display Information
Display Information
.............................................................
17
• On-Screen Icons
...............................................................
17
Getting Started
Installation
...........................................................................
19
• Inserting the SIM Card
.......................................................
19
• Installing the Battery
..........................................................
19
• Charging the Battery
.........................................................
20
• Disconnecting the charger
.................................................
21
Powering On Sequence
.......................................................
22
• To get started with the phone
...........................................
22
• To turn off the phone
.........................................................
22
Access Codes
.....................................................................
23
• PIN code (4 to 8 digits)
.....................................................
23
• PIN2 code (4 to 8 digits)
...................................................
23
• PUK code (4 to 8 digits)
....................................................
23
• PUK2 code (4 to 8 digits)
..................................................
23
• Security code (4 to 8 digits)
.............................................
23
Contents

ENGLISH
10
Accessing the Menu
Phone book
..........................................................................
24
• Search [Names 1]
.............................................................
25
• Add new [Names 2]
...........................................................
26
• Speed dial [Names 3]
........................................................
27
• Voice list [Names 4]
...........................................................
28
• Caller groups [Names 5]
....................................................
28
• Copy all [Names 6]
.............................................................
29
• Delete all [Names 7]
..........................................................
30
• Settings [Names 8]
............................................................
30
• Information [Names 9]
........................................................
31
Menu Tree
............................................................................
32
Messages [Menu 1]
.............................................................
34
• Write message [Menu 1-1]
.................................................
34
• Inbox [Menu 1-2]
................................................................
38
• Outbox [Menu 1-3]
.............................................................
39
• Info service [Menu 1-4]
......................................................
40
• Voice messages [Menu 1-5]
..............................................
41
• Namecard [Menu 1-6]
........................................................
42
• Templates [Menu 1-7]
........................................................
42
• Settings [Menu 1-8]
............................................................
43
• Check memory [Menu 1-9]
................................................
43
Call Register [Menu 2]
.........................................................
44
• Missed calls [Menu 2-1]
.....................................................
44
• Received calls [Menu 2-2]
..................................................
44
• Dialled calls [Menu 2-3]
......................................................
44
• Clear recent calls [Menu 2-4]
.............................................
44
• Call charge [Menu 2-5]
.......................................................
45
•
GPRS info
[Menu 2-6]
........................................................
47

ENGLISH
11
Profiles [Menu 3]
..................................................................
48
• Vibrate only [Menu 3-1]
......................................................
48
• Quiet [Menu 3-2]
................................................................
48
• General [Menu 3-3]
............................................................
48
• Loud [Menu 3-4]
.................................................................
49
• Headset [Menu 3-5]
...........................................................
49
Settings [Menu 4]
.................................................................
51
• Alarm clock [Menu 4-1]
......................................................
51
• Date & Time [Menu 4-2]
.....................................................
52
• Phone settings [Menu 4-3]
.................................................
53
• Call settings [Menu 4-4]
.....................................................
54
• Security settings [Menu 4-5]
.............................................
57
• Network settings [Menu 4-6]
..............................................
60
• Restore factory settings [Menu 4-7]
..................................
61
Call Divert [Menu 5]
..............................................................
62
• All voice calls [Menu 5-1]
...................................................
62
• If busy [Menu 5-2]
..............................................................
62
• If no reply [Menu 5-3]
........................................................
62
• If unreachable [Menu 5-4]
..................................................
62
• All data calls [Menu 5-5]
.....................................................
62
• All fax calls [Menu 5-6]
......................................................
62
• Cancel all [Menu 5-7]
.........................................................
63
Scheduler [Menu 6]
..............................................................
64
• Add new [Menu 6-1]
...........................................................
64
• View day [Menu 6-2]
..........................................................
66
• View all [Menu 6-3]
............................................................
66
• Delete passed [Menu 6-4]
..................................................
66
• Delete all [Menu 6-5]
..........................................................
66

ENGLISH
12
Fun & Tools [Menu 7]
...........................................................
67
• Game [Menu 7-1]
...............................................................
67
• Unit convert [Menu 7-2]
......................................................
68
• Calculator [Menu 7-3]
.........................................................
68
• World time [Menu 7-4]
........................................................
69
Internet [Menu 8]
.................................................................
70
• Home [Menu 8-1]
..............................................................
70
• Bookmarks [Menu 8-2]
......................................................
70
• Profiles [Menu 8-3]
...........................................................
70
• Go to URL [Menu 8-4]
.......................................................
73
• Cache settings [Menu 8-5]
................................................
73
• Security [Menu 8-6]
............................................................
74
• Reset profiles [Menu 8-7]
..................................................
74
Internet On-line menu
.........................................................
75
Additional Functions
How to Use Data and Fax call
............................................
76
• Sending Data or Fax Calls
................................................
76
• Receiving Data or Fax Calls
.............................................
76
In call Menu
..........................................................................
78
• During a call
.......................................................................
78
• Multiparty or Conference Calls
..........................................
80
Accessories
.........................................................................
82
Safety Guidelines
................................................................
84
Technical Data
.....................................................................
99

ENGLISH
13
Part of the Phone
Overview
Front of the Phone
1 Earpiece
2 Display Screen
3 Soft Left Key
4 Navigation Keys
5 Send Key
6 Star Key
7 Soft Right Key
8 END/PWR keys
9 Numeric Keys
10 Hash Key
11 Microphone
12 Ear Microphone
Connector
13 WAP Hotkey/
Clear key

Rear of the Phone
ENGLISH
14
1 Battery
2 Cable Connector/
Battery Charging Connector/
Hands-Free Car kit Connector
3 Battery Terminals
4 SIM Card Socket
5 Handstrap Hole
6 Battery Lock
7 Ear Microphone Connector
5
7
6
4
3
2
1
Part of the Phone
Overview

ENGLISH
15
The following shows key components of the phone.
Keypad Description
Key Description
Soft Left Key / Soft Right Key
Each of these keys performs the function indicated
by the text on the display immediately above it.
WAP Hotkey
Used to connect to WAP directly by pressing this key.
Used to delete character(s).
Navigation Keys
Used to scroll through name, phone numbers, menus
or setting options.
Used to enter Message menu directly.
Used to scroll through names, phone numbers.
Send Key
You can dial a phone number and answer a call.
If you press this key without entering a number,
your phone shows the most recently dialed number.
Numeric Keys
These keys are used mainly to dial in standby mode
and enter numbers or characters in editing mode.
When you press these keys for a long time.
• Used to call your voicemail box by 1.
• Used to call for international call by 0.
• Used to call Speed dials by from 2 to 9.
Used to enter the vibration mode by pressing this
key for a long time
Used to call by voice dial with long pressing this key.
This key is also used as Ear mic. hook key when
connecting Ear mic.
Key Description
Overview
< >
D
U
S
0
9
~
*
#

ENGLISH
16
Key Description
END/PWR Key
Used to end or reject a call. This key is also used as
Power Key. Pressing and holding this key for a few
seconds.
E
Alphanumeric Keys
The alphabet and numerical keypad mapping relation are listed as
the following table.
Key Description
1 . , / ? ! - : ' " 1
2 A B C 2 Ä À Á Â Ã Å Æ Ç a b c ä à á â ã å æ ç
3
D E F 3 Ë È É Ê d e f ë è é ê
4 G H I 4 Ï Ì Í Î ˝ g h i ï ì í î ©
5 J K L 5 j k l
6 M N O 6 Ñ Ö Ò Ó Ô Õ Œ m n o ñ ö ò ó ô õ œ
7 P Q R S 7 ß Í p q r s ß ß
8 T U V 8 Ü Ù Ú Û t u v ü ù ú û
9 W X Y Z 9 w x y z
0 [Space Key] 0
Key Description
Overview

ENGLISH
17
The screen displays several icons the following describe each of
them you may see on the phone.
On-Screen Icons
Icon/Indicator
Description
Tells you the strength of the network signal.
Call is connected.
The alarm has been set and is on.
Tells you the status of the battery.
You have received a text message.
You have received a voice message depending
on your subscription.
You have received an E-mail.
You can view your schedule.
All audible signals are turned off.
General menu in profiles.
Loud menu in profiles.
Quiet menu in profiles.
You can use GPRS service.
Headset menu in profiles.
Handsfree menu in profiles.
You can divert a call.
Display Information
Display Information

ENGLISH
18
Icon Description
Messages
Call Register
Profiles
Settings
Call Divert
Scheduler
Fun & Tools
Internet
Sim service
Top Menu Icons
Display Information
Display Information

ENGLISH
19
Inserting the SIM Card
Locate the SIM card socket in the back
of the phone.
Follow the steps below to install the SIM
card.
1. Remove the battery if attached.
2. Slide the SIM card into the slot,
under the silvery holders, with the
golden connectors facing down and
the cut corner to the right.
Installing the Battery
Notice
• Before installing always make sure that the phone is
switched off and remove the battery.
• The metal contact of the SIM card can be easily damaged
by scratches. Pay special attention to the SIM card when
you handle and install. Follow the instructions supplied
with the SIM card.
➊
➋
1. Place the battery on the back of the
phone.
Installation
Getting Started

ENGLISH
20
Installation
Getting Started
Charging the Battery
To connect the travel adapter to the phone, you must have installed
the battery.
1. Insert one end of the travel adapter
into the bottom of the phone.
2. Connect the other end of the travel
adapter to an AC wall outlet.
Use only the included packing
charger.
Warning
• Do not force the connector as this may damage the phone
and/or the travel adapter.
2. Push it until you hear a click.
➌

ENGLISH
21
Getting Started
Notice
• The battery delivered with your phone has to be fully
charged before using it.
• Do not remove your battery or the SIM card while charging.
• “Charging” is displayed on the screen after connecting the
travel adapter. Only if the battery is totally empty, Back light
is on without displaying “Charging”.
• The moving bars of battery icon will stop after charging
completely.
Disconnecting the charger
Disconnect the travel adapter from the
phone by pressing its side buttons.
➍

ENGLISH
22
Powering On Sequence
Getting Started
To get started with the phone
1. Press and hold E key until you
hear a tone.
2. Depending on setting PIN Code
[Menu 4-5-1], you can enter PIN
code or not.
3. If your phone connects to a
network, the network name will be
displayed shortly.
To turn off the phone
In stand by mode, press and hold E key until you hear a tone.
➊
➋

ENGLISH
23
Access Codes
Getting Started
You can use the access codes described in this section to avoid
unauthorized use of your phone. The access codes (except PUK
and PUK2 codes) can be changed by using [Menu 4-5-6].
PIN code (4 to 8 digits)
The PIN (Personal Identification Number) code protects your SIM
card against unauthorized use. The PIN code is usually supplied
with the SIM card. When PIN code is set Enable, your phone will
request the PIN code every time it is switched on. On the contrary,
when PIN code is set Disable, your phone connects to the network
directly without the request PIN code.
PIN2 code (4 to 8 digits)
The PIN2 code, supplied with some SIM cards, is required to
access some functions such as Advice of call charge, Fixed Dial
number. These functions are only available if supported by your SIM
card.
PUK code (4 to 8 digits)
The PUK(Personal Unblocking Key) code is required to change a
blocked PIN code. The PUK code may be supplied with the SIM
card. If not, contact your local service provider for the code. If you
lose the code, also contact your service provider.
PUK2 code (4 to 8 digits)
The PUK2 code, supplied with some SIM cards, is required to
change a blocked PIN2 code. If you lose the code, also contact your
service provider.
Security code (4 to 8 digits)
The security code protects the unauthorized use of your phone. It is
usually supplied with the phone. This code is required to delete all
phone entries and to activate “Factory reset” menu. The default
number of Security code is “0000”. You can also change it in
Security menu.

ENGLISH
24
Phone book
Accessing the Menu
To select a menu in phonebook,
press > [Names] in standby mode
and then scroll to a desired item.
Name Description
1 Search Allows you to search for a specific name,
number.
2 Add new Allows you to add new names and numbers.
3 Speed dial Allows you to assign up to 8 (2-9)
one-touch dial allocations.
4 Voice list Allows you to list phone numbers which
is attached voice.
5 Caller groups Allows you to show group list.
6 Copy all Allows you to copy entries from your Phone
memory to SIM card or from SIM card to
Phone memory.
7 Delete all Allows you to erase all the data in either
your phonebook or the SIM card to the
phone memory.
8 Settings Allows you to set the memory and to search
item by Variable, name and number.
9 Information Allows you to check the status of memory,
SDN (Service Dial Number), and Own
number.
Name Description

ENGLISH
25
Accessing the Menu
Search [Names 1]
(Calling from phonebook)
1. Open the phonebook first by pressing > [Names] in a standby
mode.
2. Search by Pressing
< [Select] to enter.
3. Depending on setting Search by, the below menu may not
appear.
• Name
• Number
4. You can find an entry by name and number.
5. Select
< [Search].
6. You can check the names and numbers by pressing < [List].
7. If you want to edit, delete, copy an entry, or to add the voice to
one, select < [Options]. The below menu will be displayed.
• Edit : You can edit the name, number, E-mail, and
fax by pressing < [OK].
• Delete : You can delete an entry.
• Copy : You can copy a entry from SIM to phone or
from phone to SIM.
• Call : You can call thru the chosen entry.
• Voice : You can add the voice to the entry or change
the voice tag.
• Main number : You can select the one out of mobile, home,
office that you often use. The main number will
be displayed first, if you set this.

ENGLISH
26
Add new [Names 2]
You can add phonebook entry by using this function.
Phone memory capacity is 200 entries. SIM card memory capacity
depends on the service provider.
You can also save 20 characters of name in the Phone memory,
and you can save characters in the SIM card. the number of
character is SIM dependent feature.
1. Open the phonebook first by pressing > [Names] in standby
mode.
2. Scroll to highlight Add new, and press < [Select] to enter.
3. Select the memory you want to save: SIM or Phone.
• SIM : You can add name and number for entry.
a. Write a name to add.
b. Press
< [OK], then you can input a number.
c. Press
< [OK].
d. If you want to add the voice, press < [Yes].
• Phone : You can add name, mobile, home, office, fax no. and
E-mail address.
a. Write a name to add.
b. Press
< [OK].
c. Enter the numbers following as mobile, home,
office, and fax by pressing < [OK]. Also you can
input
E-mail address.
d. If you want to add the voice, press
< [Yes].
You should speak a word within 2 seconds, and the phone asks you
to speak it again to ensure the accuracy of voice recognition. After
voice recognition has finished, Voice is attached automatically.
Phone book
Accessing the Menu

ENGLISH
27
Speed dial [Names 3]
You can associate any of the keys 2 to 9 with a Name list
entry. You can call directly by pressing this key for 2-3 seconds.
1. Open the phonebook first by pressing > [Names] in a standby
mode.
2. Scroll to Speed dial, then press
< [Select] to enter this menu.
3. Every Speed dial will be displayed.
4. If you want to add Speed dial, select <Is Empty>. Then, you can
search the name in phonebook.
5. If you select allocated name by speed dial, you can view
following the submenus.
• Change : You can change the allocation of speed dial
number.
•
Undo
: You can delete the allocated speed dial number.
speed dial
Note
• The voice can only be attached to main number which you
set. For example, if you change main number voice will be
automatically attached changed number.
•
You can add voice tag to phone number in SIM card.
The voice tag can be erased removing or changing SIM
card. And voice tag attached to phone number in SIM card
may be attached to another phone number when you
changed SIM card. Why? The answer is that SIM card
doesn’t contain information about voice tag.
Accessing the Menu

ENGLISH
28
Voice list [Names 4]
You can see all phone numbers which contain voice. You can also
call directly by pressing S [Send]. After selecting phone number by
using U and D and press < [Options], you can see following
the submenus.
• Play : You can play voice which is attached to phone number.
• Change : You can change voice which is attached to phone
number.
• Delete : You can delete voice which is attached to phone
number.
• Call : You can call by selecting this menu.
Caller groups [Names 5]
You can list up to 20 members per one group. There are 7 groups
you can make lists to.
1. Press > [Names] to enter into the phonebook in standby mode.
2. Scroll to Caller groups then press
< [Select] to enter this
menu.
3. Every Group list will be displayed: Family, Friend, Colleague,
VIP, etc.
4. Select Group name that you want to manage by pressing <
[Select].
5. Then submenus below will be displayed.
• Add member
You can add the number in Caller groups.
• View member
- You can view the number list in Caller groups.
- You can select the member you want by pressing <
[Options] then you can enable the submenu such as Edit,
Delete.
Phone book
Accessing the Menu

ENGLISH
29
• Group ring tone
- You can set the ring tone depending on Group.
• Group icon
- You can set icon depending on Group.
• Change name
- You can change and edit the Group name.
Copy all [Names 6]
You can copy/move entries from SIM card memory to Phone
memory or from Phone memory to SIM card memory.
1. Open the phonebook first by pressing > [Names] in standby
mode.
2. Scroll to Copy all, then press
< [Select] to enter this menu.
3. Then submenus below will be displayed.
• SIM to Phone : You can copy the entry from SIM Card to
Phone memory.
• Phone to SIM : You can copy the entry from Phone memory
to SIM Card.
Note
• This menu “Change name” will be displayed only when
you select “Empty”.
Accessing the Menu

ENGLISH
30
Delete all [Names 7]
You can delete all entries in SIM, Phone and Voice. This function
requires security code.
1. Press > [Names] to enter into the phonebook in standby mode.
2. Scroll to Delete all, then press < [Select].
3. Then select a memory to erase: SIM, Phone, Voice.
4. And then you will be requested to enter Security code.
5. Press < [OK] or, press > [Back] to cancel.
Settings [Names 8]
You can set preferred memory which includes Variable, SIM or
Phone and preferred search which includes Variable, Name and
Number.
1. Open the phonebook first by pressing > [Names] in a standby
mode.
2. Scroll to Settings, then Press < [Select] to enter.
3. Then submenus below will be displayed.
• Set memory
1. Scroll to highlight Set memory, then press < [Select] to
enter.
2. The three submenus are displayed.
- Variable : If you select Variable, the phone asks you
where to store whenever you add entries in
Phonebook.
- SIM : If you select SIM, the phone stores entries to
SIM directly without asking you where to store.
- Phone : If you select Phone, the phone stores entries to
Phone directly without asking you where to
store.
Phone book
Accessing the Menu

ENGLISH
31
• Search by
1. Scroll to highlight Search by,then press < [Select] to
enter.
2. The three submenus are displayed.
- Variable : If you select Variable, the phone asks you how
to search the entries.
- Name : If you select Name, the phone searches
entries by name.
- Number : If you select Number, the phone searches
entries by number.
Information [Names 9]
SDN (Service Dial Number)
Use this function to access a particular list of services provided by
your network operator (if supported by the SIM card).
1. Open the phonebook first by pressing > [Names] in a standby
mode.
2. Scroll to SDN, then Press < [Select] to enter.
3. The names of the available services will be shown.
4. Use U and D to select a service. Press S [Send].
Check memory
This feature allows you to see how many free
and in-use are in your phonebook.
1. Open the phonebook first by pressing >
[Names] in standby mode. Select
Information by pressing < [Select].
2. Scroll to Check memory, then press <
[Select] to enter this menu.
Own number (SIM dependent)
You can check your own number in SIM card.
Accessing the Menu

ENGLISH
32
1 Messages
1 Write message
2 Inbox
3 Outbox
4 Info service
5 Voice messages
6 Namecard
7 Templates
8 Settings
9 Check memory
2 Call Register
1 Missed calls
2 Received calls
3 Dialled calls
4 Clear recent calls
5 Call charge
6 GPRS info
3 Profiles
1 Vibrate only
2 Quiet
3 General
4 Loud
5 Headset
4 Settings
1 Alarm clock
2 Date & Time
3 Phone settings
4 Call settings
5 Security settings
6 Network settings
7 Restore factory settings
Menu Tree
Accessing the Menu

ENGLISH
33
5 Call Divert
1 All voice calls
2 If busy
3 If no reply
4 If unreachable
5 All data calls
6 All fax calls
7 Cancel all
6 Scheduler
1 Add new
2 View day
3 View all
4 Delete passed
5 Delete all
7 Fun & Tools
1 Game
2 Unit convert
3 Calculator
4 World time
8 Internet
1 Home
2 Bookmarks
3 Profiles
4 Go to URL
5 Cache settings
6 Security
7 Reset profiles
9 Sim Service
This menu depends on SIM
and the network services.
Accessing the Menu

ENGLISH
34
This menu includes functions related to SMS (Short Message
Service), voice mail, as well as the network’s service messages.
Write message [Menu 1-1]
You can write and edit text message up to 1024 characters. Also,
you can check the number of characters.
1. Enter the Messages menu by pressing
< [Select].
2. If you want to write a new message, select Write message in the
menu.
3. To write a message, use T9 text. For details, see How to Use T9
(Page 36).
4. When you finish writing your message, press
< [Options]. Then
following option menu will be displayed.
Send
Sends the text message.
1. If you want to send the text message, enter the number you
want.
2. Your phone asks you to enter the number that you want to send
it to.
3. After sending it, your phone asks whether you will store the
edited message.
4. Press
< if you want to store it in Outbox and press > if you
don’t want to.
Save
Stores the message in Outbox.
1. Your phone asks whether you will save the edited message.
2. Press
< if you want to save it in Outbox and press > if you
don’t want to.
Messages [Menu 1]
Accessing the Menu

ENGLISH
35
Use template
The template is pre-defined message. You can add the template of
the list to the message when you edit it.
Use namecard
The items of the name card are a name, mobile, office, and memo.
You can add a namecard to the message.
Add dictionary
If you add a word you use often, you can input it by pressing a key
once for each character.
1. Enter the menu.
2. Scroll to highlight Add dictionary, and then press < [Select].
3. Input a word, and then press < [Add].
List dictionary
You can view the list you already saved words in a dictionary.
1. Enter the menu.
2. Scroll to highlight List dictionary, and then press < [Select].
3. You can check the word list.
4. If you want to delete a word, press
< [Delete].
5. If you want to delete all words in a list, select Delete all at the
bottom of the list by pressing < [Select].
Accessing the Menu

ENGLISH
36
How to Use T9
T9 allows you to input text quickly.
In T9, you only need to press the key with the corresponding
letter once. This is based on a built-in dictionary to which you
can also add new words.
• Writing words by using T9.
1. Start writing a word by using the keys 2 to 9.
Press each key only once for one letter.
To write for instance ‘Girl’.
The word changes after each keystroke. Therefore you
shouldn’t pay too much attention to how the word appears
on the display until you have pressed all the appropriate
keys.
To delete a character to the left, press C.
To insert several numbers, hold # down and key in the
numbers.
If you hold * down, you can change the type of
language. (You can also use options.)
Also, the phone supports three modes: Predictive (T9Abc,
T9ABC, T9abc), Multitap (ABC, abc), Numeric (123). If
you want to change a mode, press # key.
4 (For g) 4 (For i)
7 (For r) 5 (For l)
Messages [Menu 1]
Accessing the Menu

ENGLISH
37
Alternatively : Press * key and select insert
symbols. Select the desired character
and press Select.
2. When you have finished wirting a word, check whether the
word is correct.
• If the word is correct:
Press 0 and write the next word.
• If the word is not correct:
Search by U , D (Previous and Next word).
• Alternatively:
If there is no word you want you can add your own word.
Press < [Options] in the Predictive edit mode. Select
Add T9 dictionary Menu. You can see the following.
3. To insert a punctuation mark, press 1 repeatedly until the
desired mark appears.
Accessing the Menu
ABC
Symbol
Save
Symbol
Save
Input your
word
➭
T9 languages
• You can select T9 Languages by selecting Menu.
In T9 mode, you can also select T9 Off menu.
(Default is T9 On)

ENGLISH
38
Inbox [Menu 1-2]
When you receive a text message, your phone shows the symbol
and stores it in the incoming message lists. Scroll to the desired
message by using U , D. In addition, you can see Delete all for
deleting all incoming messages at the bottom of the list. While
reading the message, press < [Options] to access the available
options.
Delete
The selected message is deleted.
Edit
You can edit an incoming message and send or save the edited
message.
Forward
You can forward the selected message to the other party.
Get number
If the selected message has the phone number, you can extract and
save it in a phonebook. Also, you can call by this number.
Reply
You can reply to the sender by message.
Return call
You can call back to the sender who sent the message
automatically.
Messages [Menu 1]
Accessing the Menu

ENGLISH
39
Accessing the Menu
Outbox [Menu 1-3]
When you enter this menu, you can see the message(s). Scroll to
the desired message by using U , D and press < to see the
message. And if you want to exit Outbox menu, press >.
And if you want to exit outbox menu, press >. In addition, you can
see Delete all for deleting all outgoing messages at the bottom of
the list.
After reading message, press < [Options] to access the following
submenus.
Delete
The selected message is deleted.
Edit
You can edit an outgoing message and send or save it.
Forward
You can forward the selected message to the other party.
Get number
If the selected message has the phone number, you can extract and
save it in a phonebook. Also, you can call by this number.

ENGLISH
40
Info service [Menu 1-4]
(Dependent to network and subscription)
Cell Broadcast messages (CB Message) are text messages by the
network to GSM phone users. They provide general information
such as weather reports, traffic news, taxis, pharmacies, and stock
prices. Each type of information has the number; therefore, you can
contact service provider. When you receive CB message, you can
read it following sequence:
Read [Menu 1-4-1]
1. When you receive CB message, it will be displayed on the
screen. You can read the message by scrolling U , D.
2. After reading the message, press E to return to the standby
mode. In addition, you can save it until another message is
reached.
Receive CB [Menu 1-4-2]
• Yes
If you select this menu, your phone will receive the Cell Broadcast
message.
• No
If you select this menu, your phone will not receive the Cell
Broadcast message any more.
Alert [Menu 1-4-3]
• Yes
If you select this menu, your phone will beep when Cell broadcast
message is received.
• No
If you select this menu, your phone will not beep despite Cell
broadcast message is received.
Messages [Menu 1]
Accessing the Menu

ENGLISH
41
Accessing the Menu
Language [Menu 1-4-4]
You can select the language you want. Then your phone will receive
the cell broadcast message in the language selected by you.
You can select Cell broadcast language pressing < [Select]. The
language list which you selected already will be displayed with
check box.
Topics [Menu 1-4-5]
(Dependent to network and subscription)
• Add [Menu 1-4-5-1]
If you select this menu, you will add the CB message category in
Phone memory.
• View list [Menu 1-4-5-2]
If you select this menu, you can see CB message category. If you
press < [Options], you can edit and delete it.
• Active list [Menu 1-4-5-3]
You can select the CB message category in active list by pressing
< [Select].
Voice messages [Menu 1-5]
You can listen to your voice message(s) and get the voicemail
centre number.
Listen to voice message [Menu 1-5-1]
You can call voicemail centre if you want to listen to voice message.

ENGLISH
42
Voice mailbox number [Menu 1-5-2]
You can get the voicemail if this feature is supported by the network
service provider. When new voicemail is arrived, the symbol will be
displayed on the screen. Please check with your network service
provider for details of their service in order to configure the handset
accordingly.
1. Press 1 key for a long time in standby mode.
2. You can check the following submenus.
• Home [Menu 1-5-2-1]
The number dialed on the home network to listen to voicemail.
• Roam [Menu 1-5-2-2]
The number dialed when other networks to listen to voicemail.
Namecard [Menu 1-6]
It’s for editing the namecard. The items of the namecard are a
name, mobile, office, and memo.
• Edit : You can edit a namecard.
• Delete : You can delete a namecard.
Templates [Menu 1-7]
It’s for editing pre-defined messages. You can see 11 pre-defined
messages in the list. You can save 6 templates before you edit.
But you can change them. The others are <Empty>.
• Edit : You can edit a template.
• Delete : You can delete the template.
Messages [Menu 1]
Accessing the Menu

ENGLISH
43
Settings [Menu 1-8]
Message type [Menu 1-8-1]
Text, Voice, Fax, Natl. paging, X400, E-mail, ERMES
Usually, the type of message is set to Text. You can convert your
text into alternative formats, which are suitable for the device that
will be received the message. Contact your service provider for the
availability of this function.
Validity period [Menu 1-8-2]
This network service allows you to set how long your text messages
will be stored at the message center while attempts are made to
deliver them to you.
Status report [Menu 1-8-3]
If you set Yes in this menu, you can check whether your message is
sent successfully or not.
Pay for reply? [Menu 1-8-4]
When a message is sent, it allows the person to whom you sent the
message to reply and charges the cost of the reply to your
telephone bill.
SMS centre [Menu 1-8-5]
If you want to send the text message, you can get the address of
SMS center thru this menu.
Check memory [Menu 1-9]
If you select this menu, the phone shows an used memory and total
amount of memory. The total memory is the sum of SIM and Phone
memory.
Accessing the Menu

ENGLISH
44
Missed calls [Menu 2-1]
This menu shows recent missed call number(s). You can call by this
number, save it or view date and time in this menu.
Received calls [Menu 2-2]
You can check the recent received numbers. You can call by this
number, save it or view date and time in this menu.
Dialled calls [Menu 2-3]
You can check the recent dialled numbers. You can call by this
number, save it or view date and time in this menu.
Clear recent calls [Menu 2-4]
You can delete all call records.
1. Press < [Menu] in standby mode.
2. Press 2 for direct access or use U and D to enter Call
Register.
3. Scroll to highlight Clear recent calls and press < [Select] to
enter.
4. The following four submenus : Missed calls, Received calls,
Dialled calls, All calls.
5. Delete all message will be displayed and then press <
[Select], then, press one more time < [Yes] to confirm.
Call Register [Menu 2]
Accessing the Menu

ENGLISH
45
Call charge [Menu 2-5]
Within these submenus, you can view the duration and the call cost.
Call duration [Menu 2-5-1]
This function allows you to view the duration of your Last Call, All
Calls, Incoming Calls and Outgoing Calls in hours, minutes and
seconds. You can also reset the call timers.
1. Press < [Menu] in standby mode.
2. Press 2 for direct access or use U and D to enter Call
Register.
3. Scroll to highlight Call duration and press < [Select].
The following 5 submenus: Last call, All calls, Received calls,
Dialled calls and Reset all.
Show call costs [Menu 2-5-2]
This function allows you to check the cost of your last call, all calls,
remaining and reset the costs. To reset the cost, you need the PIN2
code.
1. Press < [Menu] in standby mode.
2. Press
2 for direct access or use U and D to enter Call
Register.
3. Scroll to highlight Show call costs and Press < [Select] to
enter.
The following 4 submenus: Last call, All calls, Remaining and
Reset all.
Accessing the Menu
Note
• The actual call cost may be different depending on network
features, billing, and tax.

ENGLISH
46
Cost settings [Menu 2-5-3] (SIM Dependent)
• Set tariff [Menu 2-5-3-1]
You can set the currency type and the unit price. Contact your
services providers to obtain charging unit prices. To select the
currency or unit in this menu, you need the PIN2 code.
1. Press < [Menu] in standby mode.
2. Press 2 for direct access or Use U and D to enter Call
Register.
3. Scroll to highlight Cost settings and Press < [Select] to
enter.
4. Select Set tariff.
• Set credit [Menu 2-5-3-2]
This network service allows you to limit the costs of your calls by
selected charging units. If you select Read, the number of
remaining unit is shown. If you select Change, you can change
your charge limit.
1. Press < [Menu] in a standby mode.
2. Press 2 for direct access or use U and D to enter
Call Register.
3. Scroll to highlight Cost settings and press < [Select] to
enter.
4. Select Set credit.
Note
• When all units have been used, no calls can be made
except emergency calls. Depending on SIM card, you need
the PIN2 code to set a call cost limit.
Call Register [Menu 2]
Accessing the Menu

ENGLISH
47
• Auto display [Menu 2-5-3-3]
This network service allows you to see automatically cost of your
last call. If you select Yes in Auto display menu, you can see the
last cost when the call is released.
1. Press < [Menu] in standby mode.
2. Press 2 for direct access or use U and D to enter Call
register.
3. Scroll to highlight Settings and press < [Select] to enter.
4. Select Auto display.
GPRS info [Menu 2-6]
You can check the amount of data transferred over the network
through GPRS. In addition, you can also view how much time you
are online.
Call duration
You can check the duration of GPRS call. You can also reset the
call timers.
• Last call
• All calls
• Reset all
Data volume
You can check the data volume.
• Sent
• Received
• All
• Reset all
Accessing the Menu

ENGLISH
48
In this menu, you can adjust and customize the phone tones for
different events, environments and caller’s group. (e.g. When your
phone is connected to the Handsfree kit, it'll be automatically set to
the Car profiles menu and when your phone is connected to the
Earmic, it’ll be automatically set to Headset profiles menu.)
1. Press < [Menu] in standby mode.
2. Press 3 for direct access or use U and D to enter
Profiles.
Vibrate only [Menu 3-1]
• Enable : You can adjust the Profiles as Vibration if you need
vibration mode.
Quiet [Menu 3-2]
• Enable : You can adjust the Profiles as Quiet if you are in Silent
place.
• Change : You can change the values of Profiles submenus.
General [Menu 3-3]
• Enable : You can adjust the Profiles as General
• Change : You can change the values of Profiles submenus.
Profiles [Menu 3]
Accessing the Menu
Note
• In case that your phone is connected to Accessories such
as Earmic and Handsfree, you cannot enable Profiles
menu manually.
• Profiles menu has “Enable” submenu except Headset and
Car so that you can set Profiles menu at any time except
above case.

ENGLISH
49
Accessing the Menu
Loud [Menu 3-4]
• Enable : You can adjust the Profiles as Loud if you are in a noisy
environment.
• Change : You can change the values of Profiles submenus.
Headset [Menu 3-5]
• Change : You can change the values of Profiles submenus.
A Group of Profiles submenus [Menu 3-x-x]
Profiles menu have the submenus as shown below.
Incoming alert type [Menu 3-x-1]
Allows to set alert type for the incoming call for adjusting
environment.
Ringing tone [Menu 3-x-2]
Allows to set the ringing tone for adjusting environment.
Ringing volume [Menu 3-x-3]
Allows to set the ringing volume for adjusting environment.
Message alert [Menu 3-x-4]
Allows to alert when receiving a message for adjusting
environment.: Beep, Vibrator, and No alert.
Key volume [Menu 3-x-5]
Allows to set the keypad volume for adjusting environment.

ENGLISH
50
Automatic answer [Menu 3-x-6]
Allows to set to answer automatically for adjusting environment.
Please note that only Car and Headset has this sub menu so that
you can activate this function.
• Disable
Even though your phone is ringing, your phone will not answer
automatically.
• After 5 secs
After 5 seconds your phone will answer automatically.
• After 10 secs
After 10 seconds your phone will answer automatically.
Profiles [Menu 3]
Accessing the Menu

ENGLISH
51
Settings [Menu 4]
Accessing the Menu
You can set the following menus for your convenience and
preferences.
1. Press < [Menu] in standby mode.
2. Press 4 for direct access to enter Setting.
Alarm clock [Menu 4-1]
You can set the phone to alarm at a specified within this menu.
Enable [Menu 4-1-1]
You can set the time (Hour and Minute) for raising the alarm.
1. Enter the menu.
2. Select Enable by pressing < [Select], and then enter the alarm
time you want.
3. Press < [OK].
4. Select the repeat period: Once, Daily, Weekly, and Monthly.
Disable [Menu 4-1-2]
You can cancel setting the alarm time.
1. Enter the menu.
2. Select Disable by pressing < [Select].
3. Clear alarm message will be displayed when the phone is set to
alarm before.
4. If you want to cancel, press < [Yes]. If not, press > [No].

ENGLISH
52
Settings [Menu 4]
Accessing the Menu
Date & Time [Menu 4-2]
Date [Menu 4-2-1]
• Set date
In this menu, you can set the date of your phone.
1. Enter the menu.
2. Select Set date by pressing
< [Select].
3. Enter the number you want to set the date.
4. Press
< [OK].
• Date format
You can set the Date format in this menu.
Time [Menu 4-2-2]
The phone has its own clock. In this menu you can set the time and
select between the 12-hour or 24-hour time formats.
1. Enter the menu.
2. Scroll to highlight Time by pressing < [Select].
• Set time:
You can set time of your phone in this menu.
1. Select Set time by pressing
< [Select].
2. Enter the number you want to set the time.
3. Select the am/pm you want to set the time format by long
pressing
U , D key.
4. Press < [OK].

ENGLISH
53
Accessing the Menu
• Time format:
Your can select time format between 12-hour or 24-hour.
1. Scroll to highlight Time format by pressing
< [Select].
2. Select 12 hour or 24 hour you want by pressing < [Select].
Phone settings [Menu 4-3]
You can set the phone setting you want. Scroll to highlight Phone
settings menu, and then press < [Select].
Display [Menu 4-3-1]
• Screen saver [Menu 4-3-1-1]
If you don't activate any function for 20 seconds, the picture will be
displayed in a standby mode.
• Welcome note [Menu 4-3-1-2]
This menu allows you to set the message, which is shown briefly
when the phone is switched on.
1. Select Settings–Phone settings–Display–Welcome note.
2. Your own text can be displayed. If you select this item, your
phone asks you to edit the message.
• Backlight [Menu 4-3-1-3]
You can set the light-up duration you want whenever you press a
key.
• LCD contrast [Menu 4-3-1-4]
You can set the brightness of LCD you want by pressing U ,
D.

ENGLISH
54
Serial port [Menu 4-3-2]
• FAX
You can set the rate of serial port to 19200bps for using the
application between PC and fax.
• GPRS & Data
You can set the rate of serial port to 115200bps for using PC
application for GPRS call and Data call.
Language [Menu 4-3-3]
You can select the language that will be displayed on the phone.
Call settings [Menu 4-4]
You can set the menu relevant to a call by pressing < [Select] in
Setting menu.
Minute minder [Menu 4-4-1]
If you select Yes, you can check the call duration by beep sound
every minute during a call.
Any key answer [Menu 4-4-2]
• Yes [Menu 4-4-2-1]
If you select this menu, you can receive an incoming call by
pressing any key except > key and E key
• No [Menu 4-4-2-2]
If you select this menu, you can receive an incoming call by <
[Answer] or S.
Settings [Menu 4]
Accessing the Menu

ENGLISH
55
Accessing the Menu
Note
• How to use Handsfree portable:
If you want to use the handsfree portable (earphone),
Please press the button for a long time after inserting it to
the connector when incoming a call.
Send number [Menu 4-4-3]
(network and subscription dependent)
• Yes [Menu 4-4-3-1]
If you select this, you can send your phone number to the other
party. That is, your phone number will be displayed on receiver’s
phone.
• No [Menu 4-4-3-2]
If you select this, you can’t send your phone number.
• Default [Menu 4-4-3-3]
If you select this menu, this phone will be set to the default value.
Call waiting [Menu 4-4-4]
(network dependent)
If this service is available, you can accept a waiting (incoming) call.
• Enable [Menu 4-4-4-1]
Activating the corresponding service.
• Disable [Menu 4-4-4-2]
Deactivating the corresponding service.
• Check status [Menu 4-4-4-3]
Checking the Status of the service.

ENGLISH
56
Auto redial [Menu 4-4-5]
• Yes [Menu 4-4-5-1]
When this function is set on, your phone will make up to 10
attempts for a call after not connecting.
• No [Menu 4-4-5-2]
Your phone will not make any attempts to connect the call after not
connecting.
Next incoming [Menu 4-4-6]
(network dependent)
In case of Single Numbering Service, you can use the phone and a
connected PC to send and receive fax, data, and voice. If you select
the mode, you can receive data, fax, or voice each mode. Once you
enter this menu, you following options are displayed.
• Voice
You can receive the voice call.
• Data
You can receive the data call.
• Fax
You can receive the fax call.
Note
• Single numbering service means that the number of fax or
data service is identical with the number of voice service.
And, these modes depend on network feature.
Settings [Menu 4]
Accessing the Menu

ENGLISH
57
Security settings [Menu 4-5]
PIN code [Menu 4-5-1]
In this menu, you can set the phone to ask for the PIN code of your
SIM card when the pone is switched on. If this function is activated,
you’ll be requested to enter the PIN code.
1. Press < [Menu] in standby mode.
2. Press 4 key for direct access or use U and D to enter
Settings.
3. Scroll to highlight Security settings menu.
4. Select PIN code by pressing
< [Select].
5. You can view the following submenus.
• Enable : Enable PIN code request.
• Disable : Disable PIN code request.
Phone lock [Menu 4-5-2]
You can use security code to avoid unauthorized use of your phone.
When you switch on your phone, Your phone will request security
code always if you set phone lock to “Enable”. if you set phone lock
to “Automatic”. Your phone will request security code only when you
change your SIM card.
• Enable
• Disable
• Automatic
Accessing the Menu

ENGLISH
58
Automatic key lock [Menu 4-5-3]
When you enable Automatic key lock, keypad will be lock
automatically on a idle screen after 25 seconds without any key
requesting.
• Enable
• Disable
Call barring [Menu 4-5-4]
The Call barring service prevents your phone from making or
receiving certain category of calls. This function requires the call
barring password. You can view the following submenus.
• All outgoing:
The barring service of all outgoing calls.
• Outgoing Intl:
The barring service of all outgoing international calls.
• Outg. intl roam:
The barring service of all international outgoing calls except home
network.
Note
• If you want to lock your phone keypad manually, enter Top
menu and press * key.
• If you want to unlock your phone keypad, press [unlock] key
and then press * key. But if you enabled Automatic key
lock before, your phone keypad will be unlock and then
after 25 seconds the keypad will be lock up again
automatically.
Settings [Menu 4]
Accessing the Menu

ENGLISH
59
• All incoming:
The barring service of all incoming calls.
• Inc when roam:
The barring service of all incoming calls when roaming.
• Cancel all:
You can cancel all barring service.
• Change passwd:
You can change the password for Call Barring Service.
Fixed dial num [Menu 4-5-5] (SIM dependent)
You can restrict your outgoing calls to selected phone number. The
numbers are protected by your PIN2 code.
1. Press < [Menu] in standby mode.
2. Press 4 key for direct access or use U and D to enter
Settings.
3. Scroll to highlight Security settings menu.
4. Select PIN code by pressing < [Select].
5. If the PIN 2 code is correct, you can view the following
submenus.
• On : You can restrict your outgoing calls to selected
phone number.
• Off : you can call without restricting phone number.
• Number list : You can view the number list saved as Fixed
dial number.
Accessing the Menu

ENGLISH
60
Change code [Menu 4-5-6]
You can change the access codes: PIN, PIN2, and Security code.
1. Press < [Menu] in standby mode.
2. Press 4 key for direct access or use U and D to enter
Settings.
3. Scroll to highlight Security settings menu.
4. Select Change code by pressing
< [Select].
5. If you want to change the PIN/PIN2/Security code, input your
original code, and then press < [OK].
6. Input new PIN/PIN2/Security code, and verify the them.
Network settings [Menu 4-6]
You can select the network which you will be registered either
automatically or manually. Usually, the selection of the network
used by the handset is automatic.
Automatic [Menu 4-6-1]
The phone automatically selects network which is available in the
your area.
Manual [Menu 4-6-2]
The phone will find the list of available networks and show you
them. Then you can select the network which you want to use if this
network has a roaming agreement with your home network
operator.
Preferred [Menu 4-6-3]
You can set a list of preferred networks the handset should attempt
to register with first, before attempting to register to any other
networks. This list is created from the handset’s predefined list of
known networks.
Settings [Menu 4]
Accessing the Menu

ENGLISH
61
Accessing the Menu
User define [Menu 4-6-4]
You can add entries or delete new ones from the network list. This
can even include new networks whose network codes are not
known to the handset. To do this, select and then enter the network
code, country code and network name.
Restore factory settings [Menu 4-7]
You can set the handset to the default configuration by selecting the
Settings/Restore factory settings option, and then confirming this
selection.

ENGLISH
62
Call Divert [Menu 5]
Accessing the Menu
(network and subscription dependent)
The Call Divert service allows to divert incoming voice calls, fax
calls, and data calls to another number. For details, contact your
service provider.
1. Press < [Menu] in standby mode.
2. Press 5 for direct access or use U and D to enter
Call Divert.
All voice calls [Menu 5-1]
Diverts voice calls unconditionally.
If busy [Menu 5-2]
Diverts voice calls when the phone is in progress.
If no reply [Menu 5-3]
Diverts voice calls which you do not answer.
If unreachable [Menu 5-4]
Diverts voice calls when the phone is switched off or out of range.
All data calls [Menu 5-5]
Diverts to a number with a PC connection unconditionally.
All fax calls [Menu 5-6]
Diverts to a number with a fax connection unconditionally.

ENGLISH
63
Accessing the Menu
The submenus [Menu 5-x-x]
Call Divert menus have the submenus as shown below.
Enable [Menu 5-x-1]
Activating the corresponding service.
• Voicemail box [Menu 5-x-x-1]
Forwards to message center. This function is not included in All
data calls and All fax calls menus.
• Other number [Menu 5-x-x-2]
Inputs the number for diverting.
• Favorite [Menu 5-x-x-3]
Shows the list of 5 diverting numbers.
Disable [Menu 5-x-2]
Deactivating the corresponding service.
Check status [Menu 5-x-3]
Checking the Status of the corresponding service.
Cancel all [Menu 5-7]
Cancels all call divert service.
Note
•
You can select the number you want in Favorite menu.

ENGLISH
64
When you enter this menu a Calendar will show up. On top of the
screen there are sections for date and icons. Whenever you change
the date, the calendar will be updated according to the date. And
square cursor will be used to locate the certain day. If you see
under bar on the calendar, it means that there is a schedule that
day. This function helps to remind you of your schedule and memo.
The phone will sound an alarm tone if you set alarm for the note.
For changing the day, month, and year.
Add new [Menu 6-1]
You can edit maximum 30 characters. You can take a note. You can
choose the following types of note. You can make up to maximum
20 notes.
Schedule [Menu 6-1-1]
Input the subject, the schedule time, the repeat time, alarm time by
pressing < [Select].
1 3 Yearly
* # Monthly
U D
If you press these keys shortly, you can set the
alarm daily. In case of pressing for a long time,
you can set it weekly.
Key Description
Scheduler [Menu 6]
Accessing the Menu

ENGLISH
65
Accessing the Menu
• Repeat [Menu 6-1-1-1]
- Once : no repeat.
- Daily : repeat schedule daily for 5 days.
- Weekly : repeat schedule weekly for 5 weeks.
- Monthly : repeat schedule monthly for 5 months.
- Yearly : repeat schedule yearly for 5 years.
• Alarm time [Menu 6-1-1-1-1]
- On time : alarm on time you set already.
- 10 min before : alarm before 10 minutes from the schedule you
set already.
- 30 min before : alarm before 30 minutes from the schedule you
set already.
- 1 hour before : alarm before 1 hour from the schedule you set
already.
- 1 day before : alarm before 1 day from the schedule you set
already.
Memo [Menu 6-1-2]
1. Select Add new by pressing < [Select].
2. Scroll to highlight Memo.
3. Press < [Select].
4. Input the memo and then press
< [Select].

ENGLISH
66
View day [Menu 6-2]
Shows the note for the chosen day. Use U , D to browse
through the note lists. If you set alarm for the note, Alarm watch is
displayed. Press < [Options] to delete, edit the note you selected.
View all [Menu 6-3]
Shows the notes that are set for all days. Use U , D to browse
through the note lists. Pressing < [Options] allows access to the
same menu as in 'View day'.
Delete passed [Menu 6-4]
You can delete for the last schedule already is notified you.
Delete all [Menu 6-5]
You can delete for the all note(s).
Scheduler [Menu 6]
Accessing the Menu

ENGLISH
67
Fun & Tools [Menu 7]
Accessing the Menu
Game [Menu 7-1]
Your phone offers you enjoyable games to play with.
Note
The Control keys are different for each game. But each game
has screens to explain the main control key. Other common
control keys are below.
[Common Key Function]
• < [Soft 1 Key] : Start Game
•
C [CLR] : Pause
•
> [Soft 2 Key] : Back
•
E [END] : Exit
•
* [Star Key] : Backlight
•
< [Soft 1 Key] : Save score
•
U , D , 0 ~ 9: Level control
[Up/Down, numeric key]

ENGLISH
68
Unit convert [Menu 7-2]
This converts any measurement into a unit
you want. There are 4 types that can be
converted into units: Length, Area, Weight,
and Volume.
1. You can select one of four unit types by
pressing < [Select] key.
2. Select the unit you want to convert by pressing U and D.
3. You can change unit by pressing < [Change] key.
4. You can input the prime number after the decimal place by
pressing
# key.
5. You can delete the number you want by pressing C.
6. Press E key or > [Back] key if you want to end the process
for converting the value.
Calculator [Menu 7-3]
This contains the standard functions such as +, –, *, ÷ : Add,
Subtract, Multiply, Divide
1. Input the numbers by pressing numeric keys.
2. Press < [Options] to select menu you want such as Add,
Subtract, Multiply, Divide, Negative, Decimal point, Equals.
3. You can view the result by pressing < [Options] key and select
equals.
4. If you want to continue the calculation, repeat the process.
5. You can delete the number or sign you want by pressing
C.
6. Press E key if you want to end the calculation process.
Change
Back
Fun & Tools [Menu 7]
Accessing the Menu

ENGLISH
69
World time [Menu 7-4]
You can view the time for each city around the world.
when you press U , D shortly, you can view the city belonged
to the different time zone and when you press U , D long, you
can view the all of city on the same time zone.
If you want to select the country you want, press < [Set] key.
Accessing the Menu

ENGLISH
70
Internet [Menu 8]
Accessing the Menu
Your phone supports services based on Wireless Application
Protocol(WAP). You can access services supported by your
network. The services menu allows you to get the information such
as news, weather reports, and flight times.
Home [Menu 8-1]
You can connect to the configured homepage of the activated
profile.
Bookmarks [Menu 8-2]
When you enter this menu, you can see the bookmarks. Then press
< button to access available option, or press > to exit it.
• Connect : Connect to selected bookmark.
• Add new : Add a new bookmark manually.
• Edit : Edit the title and the address of the selected
bookmark.
• Delete : Delete the selected bookmark from the bookmark list.
Profiles [Menu 8-3]
You can make up to 5 profiles and activate only one of them. Scroll
to the desired profile and press < to access available options.
• Activate [Menu 8-3-1-1]
You can activate the selected profile.
• Settings [Menu 8-3-1-2]
You can edit and change WAP settings of the selected profile.

ENGLISH
71
Accessing the Menu
- Homepage
This setting allows you to enter the address (URL) of the site you
want to use as homepage. You do not need to type “http://” in
front of each URL as the WAP Browser will automatically add it.
- Display image
You can select whether images on WAP cards are displayed or
not.
- Conn. type
The options for connection type are Continuous or Temporary
and depend on the gateway.
Continuous
A confirmed delivery mechanism but generates more network
traffic.
Temporary
A non-confirmed (connectionless) service.
- Secure setting
The options are On and Off depend on the gateway you are
using.
- Gateway info.
Most of WAP gateways do not require a User ID and Password.
If your gateway need them to connect to it, then your network
should provide them, and you must set them up correctly before
trying to browse a WAP site.
- Bearer
Data
GPRS

ENGLISH
72
- Data setting
These values of setting are provided by your network.
IP address : Enter the IP address of the WAP gateway you
are using to access.
Dial number : Enter the telephone number to dial to access
your WAP gateway.
Call type : Select the type of data call.: Analogue or ISDN
(Digital).
Call speed : The speed of your data connection.
User ID : The user identity for your dial-up server (and
NOT the WAP gateway).
Password : The password required by your dial-up server
(and NOT the WAP gateway) to identify you.
- GPRS setting
The service settings are only available when GPRS is chosen as
a bearer service.
IP address : Input the IP address of the WAP gateway you
access.
APN : Input the APN of the GPRS.
User ID : The users identify for your APN server.
Password : The password required by your APN server.
- Linger time
You need to select one of 5 timeout periods. After selecting one
of them, the service will be unavailable if any data wasn't input or
transferred.
• Rename [Menu 8-3-1-3]
Edit the Profile Name.
Internet [Menu 8]
Accessing the Menu

ENGLISH
73
• Email server [Menu 8-3-1-4]
Save the URL of the E-mail server that you frequently use.
- Connect
Connect to the E-mail server that you configured.
- Edit address
Edit the URL of the E-mail server.
Go to URL [Menu 8-4]
You can directly connect to the site that you want. You need to
enter the specific URL that you want to directly connect.
Cache settings [Menu 8-5]
You can remove the contents of Cache memory and change the
Cache check mode.
Clear cache [Menu 8-5-1]
The contents of Cache memory will be removed.
Cache check [Menu 8-5-2]
You can change the time for checking the Cache memory.
• Always [Menu 8-5-2-1]
The cache is always checked whenever URL is loaded or
navigated.
• Start only [Menu 8-5-2-2]
The cache is only checked when the WAP is started.
• Off [Menu 8-5-2-3]
The cache is never checked.
Accessing the Menu

ENGLISH
74
Security [Menu 8-6]
A list of the available certificates is shown.
Reset profiles [Menu 8-7]
You can reset all the current settings of profiles to the factory
default.
Internet [Menu 8]
Accessing the Menu

ENGLISH
75
If you are on line, you can see the following menus.
❏ Home
This is the same as [Menu 8-1].
❏ Reload
This reloads the current page.
❏ Bookmarks
This is the same as [Menu 8-2].
❏ Save as bookmarks
Save the current URL as a bookmark. You can also edit the
bookmark title.
❏ Go to URL
Same as [Menu 8-4].
❏ Go to e-mail server
Connect to the E-mail server that you configured.
❏ Set as e-mail server
Save the current URL as an E-mail server.
Internet On-line menu
Accessing the Menu

ENGLISH
76
To be able to data or fax service, you need the communicate
software such as a data or a fax program. Before using these
functions, you need to connect your phone to a computer or make
sure that your phone is in connection with a compatible device.
Sending Data or Fax Calls
1. Connect your computer to the phone.
2. After starting the communicate software, make a call and
transmit a data or fax.
3. After the data or fax transmission, you can end the call by just
ending of the communicate software, pressing
E [End].
Receiving Data or Fax Calls
If you have separate numbers for voice, data and fax calls, your
phone recognizes the type of call.
Receiving Data or Fax Calls– Separate numbers
(Multi-numbers)
To use a data or a fax service, the display shows which type of call
you are receiving.
To receive a data or fax call
1. Connect your computer to the phone.
2. After starting the communicate software, accept a call and
receive a data or fax (if it is not answered automatically).
3. After the data or fax reception, you can end the call by just
ending of the communicate software, pressing E [End].
How to Use Data and Fax call
Additional Functions

ENGLISH
77
Additional Functions
Receiving Data or Fax Calls– Single number
If you have a SIM card that does not support separate voice, data
and fax numbers, the phone does not recognize the type of
incoming call.
To use a data or a fax service, make sure that you want to receive a
data or fax call mode. You first have to set the phone to one of
these options in the call mode (Settings ➝ Call Setting ➝ Next
Incoming) sub menu.
To receive a data or fax call
1. Press < [Menu] in standby mode.
2. Select the Settings ➝ Call setting ➝ Next Incoming.
3. Select the call type you want (Voice, Data or Fax) and press
<
[Select].
4. Connect your computer to the phone.
5. After starting the communicate software, accept a call and
receive a data or fax (if it is not answered automatically).
6. After the data or fax reception, you can end the call by just
ending of the communicate software, pressing E [End].
Once you have set your phone for a specific incoming call, it
remains set until you change it.
PC Sync
PC Sync is a program for data exchange PC & Phone by data
cable. Therefore, if you want to use this function, you have to
buy accessory kit. About more detail for using guide refers to
PC Sync Help file on the PC Sync CD.

ENGLISH
78
During a call, the following menus will be displayed, not in a standby
mode.
1 During a call
1-1 Putting a Call on Hold
You can place a call on hold or retrieve by just pressing the S
[Send] key. When a call is made or answered, press the S [Send]
key to place it on hold. When a call is held, press the S [Send] key
to make it active.
1-2 Making a Second Call
You can get a dial number from phonebook to make a second call.
Press > [Names] key then select Search. To save the dial
number into phonebook during call, press > [Names] key then
select Add Entry.
1-3 Swapping Between Two Calls
To switch between two calls, select the < [Options] key, then
select Swap or just press S [Send] key.
You can make one of two calls focused by pressing up/down arrow
key. If you want to end one of two calls, make the call you want to
end focused, then press E [End] key when the call you want to
end is focused.
1-4 Answering an Incoming Call
To answer an incoming call, simply press the S [Send] key.
The handset is also able to warn you of an incoming call while you
are already in a call. A tone sounds in the earpiece, and the display
will show that a second call is waiting.
If Call Waiting is on, you can put the first call on hold and answer
the second, by pressing S [Send] or by selecting the < [Menu]
key, then Hold & Answer.
In call Menu
Additional Functions

ENGLISH
79
Additional Functions
You can end the current call and answer the waiting call by
selecting the < [Menu] key, then End & Answer.
1-5 Rejecting an Incoming Call
You can reject an incoming call without answering by simply
pressing the E [End] key.
When in a call you can reject an incoming call by pressing the <
[Menu] key and selecting Multiparty/Reject or by pressing E
[End] key.
1-6 Controlling the volume during a call
You can control the volume during a call by pressing < [Options]
key and selecting Volume.
1-7 Muting the Microphone
You can mute the microphone during a call by pressing the <
[Options] key then selecting Mute. The handset can be unmuted by
pressing the < [Unmute] .
When the handset is muted, the caller cannot hear you, but you can
still hear them.
1-8 Switching DTMF Tones on During a Call
To turn DTMF tones on during a call, for example, to allow your
handset to make use of an automated switchboard, select the <
[Options] key, then DTMF On. DTMF tones can be turned off the
same way.
1-9 Calling up the Main Menu
The Messages and SIM Tool kit main menu options can be reached
from the in-call menu by selecting the < [Options] key, then Main
Menu. SIM Tool kit menu is shown only when SIM in the handset
supports SIM Tool kit service.

ENGLISH
80
2 Multiparty or Conference Calls
The multiparty or conference service provides you with the ability to
have a simultaneous conversation with more than one caller, if your
network service provider supports this feature.
A multiparty call can only be set up when you have one active call
and one call on hold, both calls having been answered. Once a
multiparty call is set up, calls may be added, disconnected or
separated (that is, removed from the multiparty call but still
connected to you) by the person who set up the multiparty call.
These options are all available from the in-call menu and are listed
in Section.
The maximum callers in a multiparty call is five. Once started, you
are in control of the multiparty call, and only you can add calls to the
multiparty call.
2-1 Making a Second Call
You can make a second call while you are already in a call. To do
this, enter the second number and press S [Send]. When you get
second call the first call is automatically put on hold. You can swap
between calls by selecting the < [Options] key then Swap.
2-2 Setting up a Multiparty Call
You can connect a call on hold to the currently active call to form a
multiparty call by selecting the < [Options] key then
Multiparty/Join all.
2-3 Putting the Multiparty Call on Hold
To put a multiparty call on hold, select the < [Options] key then
Multiparty/Hold all.
2-4 Activate the Multiparty Call on Hold
To make a multiparty call on hold active, select the < [Options]
key then Multiparty/Join all.
In call Menu
Additional Functions

ENGLISH
81
2-5 Adding Calls to the Multiparty Call
To join an active call to the held multiparty call, select the <
[Options] key then Multiparty/Join all.
2-6 Displaying Callers in a Multiparty Call
To scroll through the numbers of the callers who make up a
multiparty call on the handset screen, press U and D keys.
2-7 Putting a Member of a Multiparty Call on Hold
To place one selected caller (whose number is currently displayed
on-screen) of a multiparty call on hold, select the < [Options] key
then Multiparty/Exclude.
2-8 A Private Call in a Multiparty Call
To have a private call with one caller of a multiparty call, display the
number of the caller you wish to talk to on the screen, then select
the < [Options] key and Multiparty/Private to put all the other
callers on hold.
2-9 Ending a Multiparty Call
The currently displayed caller of a multiparty call can be
disconnected by pressing the E [End] key. To end a multiparty
call, press the < [Options] key then select Multiparty/End
multiparty.
Selecting the < [Options] key then Multiparty/End all, will end all
the active and held calls.
2-10 Explicit Call Transfer (ECT)
If you have one caller on hold and another active call, you may
connect one call party to another call party and then leave the call.
This is done by selecting the Multiparty/Transfer option from the
in-call menu.
Additional Functions

There are various accessories for your mobile phone. You can
select these options according to your personal communication
requirements.
Standard Battery
Portable Handsfree
This connects to your phone, allowing
handsfree operation.
Travel Adapter
This charger allows you to charge the
battery while away from home or your
office.
Cigar Lighter Adapter
You can operate the phone and trickle
charge the phone's battery from your
vehicle by using the cigarette lighter
charger.
Neckstrap
ENGLISH
82
Accessories

ENGLISH
83
Data Kit/CD
You can connect your phone to PC to
exchange the data between them.
Note
• Information and specification in this menu is subject to
change without prior notice.
• Accessories may be different in different regions; please
check with our regional service company or agent for further
enquiries.

TIA Safety Information
Provided herein is the complete TIA Safety Information for Wireless
Handheld phones. Inclusion of the text covering Pacemakers,
Hearing Aids, and Other Medical Devices is required in the owner’s
manual for CTIA Certification. Use of the remaining TIA language is
encouraged when appropriate.
Exposure to Radio Frequency Signal
Your wireless handheld portable telephone is a low-power radio
transmitter and receiver. When it is ON, it receives and also sends
out radio frequency (RF) signals. In August, 1996, the Federal
Communications Commissions (FCC) adopted RF exposure
guidelines with safety levels for handheld wireless phones. Those
guidelines are consistent with the safety standards previously set by
both U.S. and international standards bodies:
ANSI C95.1 (1992) *
NCRP Report 86 (1986)
ICNIRP (1996)
Those standards were based on comprehensive and periodic
evaluations of the relevant scientific literature. For example, over
120 scientists, engineers, and physicians from universities,
government health agencies, and industry reviewed the available
body of research to develop the ANSI Standard (C95.1).
*American National Standards Institute; National Council on
Radiation Protection and Measurements; International Commission
on Non-Ionizing Radiation Protection
The design of your phone complies with the FCC guidelines (and
those standards).
ENGLISH
84
Safety Guidelines

Antenna Care
Use only the supplied or an approved replacement antenna.
Unauthorized antennas, modifications, or attachments could
damage the phone and may violate FCC regulations.
Phone Operation
NORMAL POSITION: Hold the phone as you would any other
telephone with the antenna pointed up and over your shoulder.
Driving
Check the laws and regulations on the use of wireless phones in the
areas where you drive. Always obey them. Also, if using your phone
while driving, please:
• Give full attention to driving – driving safely is your first
responsibility;
• Use hands-free operation, if available;
• Pull off the road and park before making or answering a call if
driving conditions so require.
Electronic Devices
Most modern electronic equipment is shielded from RF signals.
However, certain electronic equipment may not be shielded against
the RF signals from your wireless phone.
ENGLISH
85

Pacemakers
The Health Industry Manufacturers Association recommends that a
minimum separation of six (6”) inches be maintained between a
handheld wireless phone and a pacemaker to avoid potential
interference with the pacemaker. These recommendations are
consistent with the independent research by and recommendations
of Wireless Technology Research.
Persons with pacemakers:
• Should ALWAYS keep the phone more than six inches from
theirpacemaker when the phone is turned ON;
• Should not carry the phone in a breast pocket.
• Should use the ear opposite the pacemaker to minimize
thepotential for interference.
• If you have any reason to suspect that interference is takingplace,
turn your phone OFF immediately.
Hearing Aids
Some digital wireless phones may interfere with some hearing
aids.In the event of such interference, you may want to consult your
service provider.
Other Medical Devices
If you use any other personal medical device, consult the
manufacturer of your device to determine if they are adequately
shielded from external RF energy. Your physician may be able to
assist you in obtaining this information.
Turn your phone OFF in health care facilities when any regulations
posted in these areas instruct you to do so. Hospitals or health care
facilities may be using equipment that could be sensitive to external
RF energy.
ENGLISH
86
Safety Guidelines

Vehicles
RF signals may affect improperly installed or inadequately shielded
electronic systems in motor vehicles. Check with the manufacturer
or its representative regarding your vehicle.
You should also consult the manufacturer of any equipment that has
been added to your vehicle.
Posted Facilities
Turn your phone OFF in any facility where posted notices so
require.
Aircraft
FCC regulations prohibit using your phone while in the air. Turn
your phone OFF before boarding an aircraft.
Blasting Areas
To avoid interfering with blasting operations, turn your phone OFF
when in a “blasting area” or in areas posted: “Turn off two-way
radio”. Obey all signs and instructions.
Potentially Explosive Atmosphere
Turn your phone OFF when in any area with a potentially explosive
atmosphere and obey all signs and instructions. Sparks in such
areas could cause an explosion or fire resulting in bodily injury or
even death.
Areas with a potentially explosive atmosphere are often, but not
always, marked clearly. Potential areas may include: fueling areas
(such as gasoline stations); below deck on boats; fuel or chemical
transfer or storage facilities; vehicles using liquefied petroleum gas
(such as propane or butane); areas where the air contains
chemicals or particles (such as grain, dust, or metal powders); and
any other area where you would normally be advised to turn off your
vehicle engine.
ENGLISH
87

For Vehicles Equipped with an Air Bag
An air bag inflates with great force. DO NOT place objects, including
either installed or portable wireless equipment, in the area over the
air bag or in the air bag deployment area. If in-vehicle wireless
equipment is improperly installed and the air bag inflates, serious
injury could result.
TIA Safety Information
The U.S. Food and Drug Administration’s Center for Devices and
Radiological Health Consumer Update on Mobile Phones.
1. Do wireless phones pose a health hazard?
The available scientific evidence does not show that any health
problems are associated with using wireless phones. There is no
proof, however, that wireless phones are absolutely safe. Wireless
phones emit low levels of radiofrequency energy (RF) in the
microwave range while being used. They also emit very low levels
of RF when in the standby mode. Whereas high levels of RF can
produce health effects (by heating tissue), exposure to low level RF
that does not produce heating effects causes no known adverse
health effects. Many studies of low level RF exposures have not
found any biological effects. Some studies have suggested that
some biological effects may occur, but such findings have not been
confirmed by additional research. In some cases, other researchers
have had difficulty in reproducing those studies, or in determining
the reasons for inconsistent results.
ENGLISH
88
Safety Guidelines

2. What is the FDA's role concerning the safety of wireless
phones?
Under the law, the FDA does not review the safety of radiation-
emitting consumer products such as wireless phones before they
can be sold, as it does with new drugs or medical devices.
However, the agency has authority to take action if wireless phones
are shown to emit radiofrequency energy (RF) at a level that is
hazardous to the user. In such a case, the FDA could require the
manufacturers of wireless phones to notify users of the health
hazard and to repair, replace, or recall the phones so that the
hazard no longer exists. Although the existing scientific data do not
justify FDA regulatory actions, the FDA has urged the wireless
phone industry to take a number of steps, including the following:
• Support needed research into possible biological effects of RF of
the type emitted by wireless phones;
• Design wireless phones in a way that minimizes any RF exposure
to the user that is not necessary for device function; and
• Cooperate in providing users of wireless phones with the best
possible information on possible effects of wireless phone use on
human health.
The FDA belongs to an interagency working group of the federal
agencies that have responsibility for different aspects of RF safety
to ensure coordinated efforts at the federal level. The following
agencies belong to this working group:
• National Institute for Occupational Safety and Health
• Environmental Protection Agency
• Occupational Safety and Health Administration
• National Telecommunications and Information Administration
ENGLISH
89

The National Institutes of Health participates in some interagency
working group activities, as well.
The FDA shares regulatory responsibilities for wireless phones with
the Federal Communications Commission (FCC). All phones that
are sold in the United States must comply with FCC safety
guidelines that limit RF exposure. The FCC relies on the FDA and
other health agencies for safety questions about wireless phones.
The FCC also regulates the base stations that the wireless phone
networks rely upon. While these base stations operate at higher
power than do the wireless phones themselves, the RF exposures
that people get from these base stations are typically thousands of
times lower than those they can get from wireless phones. Base
stations are thus not the subject of the safety questions discussed in
this document.
3. What kinds of phones are the subject of this update?
The term “wireless phone” refers here to handheld wireless phones
with built-in antennas, often called “cell”, “mobile”, or “PCS” phones.
These types of wireless phones can expose the user to measurable
radiofrequency energy (RF) because of the short distance between
the phone and the user’s head. These RF exposures are limited by
FCC safety guidelines that were developed with the advice of the
FDA and other federal health and safety agencies. When the phone
is located at greater distances from the user, the exposure to RF is
drastically lower because a person's RF exposure decreases rapidly
with increasing distance from the source. The so-called “cordless
phones,” which have a base unit connected to the telephone wiring
in a house, typically operate at far lower power levels, and thus
produce RF exposures far below the FCC safety limits.
ENGLISH
90
Safety Guidelines

4. What are the results of the research done already?
The research done thus far has produced conflicting results, and
many studies have suffered from flaws in their research methods.
Animal experiments investigating the effects of radiofrequency
energy (RF) exposures characteristic of wireless phones have
yielded conflicting results that often cannot be repeated in other
laboratories. A few animal studies, however, have suggested that
low levels of RF could accelerate the development of cancer in
laboratory animals. However, many of the studies that showed
increased tumor development used animals that had been
genetically engineered or treated with cancer-causing chemicals so
as to be pre-disposed to develop cancer in the absence of RF
exposure. Other studies exposed the animals to RF for up to 22
hours per day. These conditions are not similar to the conditions
under which people use wireless phones, so we don’t know with
certainty what the results of such studies mean for human health.
Three large epidemiology studies have been published since
December 2000. Between them, the studies investigated any
possible association between the use of wireless phones and
primary brain cancer, glioma, meningioma, or acoustic neuroma,
tumors of the brain or salivary gland, leukemia, or other cancers.
None of the studies demonstrated the existence of any harmful
health effects from wireless phone RF exposures. However, none of
the studies can answer questions about long-term exposures, since
the average period of phone use in these studies was around three
years.
5. What research is needed to decide whether RF exposure
from wireless phones poses a health risk?
A combination of laboratory studies and epidemiological studies of
people actually using wireless phones would provide some of the
data that are needed. Lifetime animal exposure studies could be
completed in a few years. However, very large numbers of animals
would be needed to provide reliable proof of a cancer promoting
effect if one exists.
ENGLISH
91

Epidemiological studies can provide data that is directly applicable
to human populations, but 10 or more years follow-up may be
needed to provide answers about some health effects, such as
cancer. This is because the interval between the time of exposure to
a cancer-causing agent and the time tumors develop – if they do –
may be many, many years. The interpretation of epidemiological
studies is hampered by difficulties in measuring actual RF exposure
during day-to-day use of wireless phones. Many factors affect this
measurement, such as the angle at which the phone is held, or
which model of phone is used.
6. What is the FDA doing to find out more about the possible
health effects of wireless phone RF?
The FDA is working with the U.S. National Toxicology Program and
with groups of investigators around the world to ensure that high
priority animal studies are conducted to address important
questions about the effects of exposure to radiofrequency energy
(RF). The FDA has been a leading participant in the World Health
Organization International Electromagnetic Fields (EMF) Project
since its inception in 1996. An influential result of this work has been
the development of a detailed agenda of research needs that has
driven the establishment of new research programs around the
world. The project has also helped develop a series of public
information documents on EMF issues.
The FDA and the Cellular Telecommunications & Internet
Association (CTIA) have a formal Cooperative Research and
Development Agreement (CRADA) to do research on wireless
phone safety. The FDA provides the scientific oversight, obtaining
input from experts in government, industry, and academic
organizations. CTIA-funded research is conducted through
contracts with independent investigators. The initial research will
include both laboratory studies and studies of wireless phone users.
The CRADA will also include a broad assessment of additional
research needs in the context of the latest research developments
around the world.
ENGLISH
92
Safety Guidelines

7. How can I find out how much radio frequency energy
exposure I can get by using my wireless phone?
All phones sold in the United States must comply with Federal
Communications Commission (FCC) guidelines that limit radio
frequency energy (RF) exposures. The FCC established these
guidelines in consultation with the FDA and the other federal health
and safety agencies. The FCC limit for RF exposure from wireless
telephones is set at a Specific Absorption Rate (SAR) of 1.6 watts
per kilogram (1.6 W/kg). The FCC limit is consistent with the safety
standards developed by the Institute of Electrical and Electronic
Engineering (IEEE) and the National Council on Radiation
Protection and Measurement. The exposure limit takes into
consideration the body’s ability to remove heat from the tissues that
absorb energy from the wireless phone and is set well below levels
known to have effects. Manufacturers of wireless phones must
report the RF exposure level for each model of phone to the FCC.
The FCC website (http://www.fcc.gov/oet/ rfsafety) gives directions
for locating the FCC identification number on your phone so you can
find your phone’s RF exposure level in the online listing.
8. What has the FDA done to measure the radio frequency
energy coming from wireless phones?
The Institute of Electrical and Electronic Engineers (IEEE) is
developing a technical standard for measuring the radio frequency
energy (RF) exposure from wireless phones and other wireless
handsets with the participation and leadership of FDA scientists and
engineers. The standard, “Recommended Practice for Determining
the Spatial-Peak Specific Absorption Rate (SAR) in the Human
Body Due to Wireless Communications Devices: Experimental
Techniques,” sets forth the first consistent test methodology for
measuring the rate at which RF is deposited in the heads of
wireless phone users. The test method uses a tissue-simulating
model of the human head.
ENGLISH
93

Standardized SAR test methodology is expected to greatly improve
the consistency of measurements made at different laboratories on
the same phone. SAR is the measurement of the amount of energy
absorbed in tissue, either by the whole body or a small part of the
body. It is measured in watts/kg (or milliwatts/g) of matter. This
measurement is used to determine whether a wireless phone
complies with safety guidelines.
9. What steps can I take to reduce my exposure to
radiofrequency energy from my wireless phone?
If there is a risk from these products – and at this point we do not
know that there is – it is probably very small. But if you are
concerned about avoiding even potential risks, you can take a few
simple steps to minimize your exposure to radiofrequency energy
(RF). Since time is a key factor in how much exposure a person
receives, reducing the amount of time spent using a wireless phone
will reduce RF exposure. If you must conduct extended
conversations by wireless phone every day, you could place more
distance between your body and the source of the RF, since the
exposure level drops off dramatically with distance.
For example, you could use a headset and carry the wireless phone
away from your body or use a wireless phone connected to a
remote antenna. Again, the scientific data do not demonstrate that
wireless phones are harmful. But if you are concerned about the RF
exposure from these products, you can use measures like those
described above to reduce your RF exposure from wireless phone
use.
ENGLISH
94
Safety Guidelines

10. What about children using wireless phones?
The scientific evidence does not show a danger to users of wireless
phones, including children and teenagers. If you want to take steps
to lower exposure to radiofrequency energy (RF), the measures
described above would apply to children and teenagers using
wireless phones. Reducing the time of wireless phone use and
increasing the distance between the user and the RF source will
reduce RF exposure. Some groups sponsored by other national
governments have advised that children be discouraged from using
wireless phones at all. For example, the government in the United
Kingdom distributed leaflets containing such a recommendation in
December 2000. They noted that no evidence exists that using a
wireless phone causes brain tumors or other ill effects. Their
recommendation to limit wireless phone use by children was strictly
precautionary; it was not based on scientific evidence that any
health hazard exists.
11. What about wireless phone interference with medical
equipment?
Radio frequency energy (RF) from wireless phones can interact with
some electronic devices. For this reason, the FDA helped develop a
detailed test method to measure electromagnetic interference (EMI)
of implanted cardiac pacemakers and defibrillators from wireless
telephones. This test method is now part of a standard sponsored
by the Association for the Advancement of Medical instrumentation
(AAMI).
The final draft, a joint effort by the FDA, medical device
manufacturers, and many other groups, was completed in late 2000.
This standard will allow manufacturers to ensure that cardiac
pacemakers and defibrillators are safe from wireless phone EMI.
The FDA has tested hearing aids for interference from handheld
wireless phones and helped develop a voluntary standard
sponsored by the Institute of Electrical and Electronic Engineers
(IEEE).
ENGLISH
95

This standard specifies test methods and performance requirements
for hearing aids and wireless phones so that no interference occurs
when a person uses a “compatible” phone and a “compatible”
hearing aid at the same time. This standard was approved by the
IEEE in 2000.
The FDA continues to monitor the use of wireless phones for
possible interactions with other medical devices. Should harmful
interference be found to occur, the FDA will conduct testing to
assess the interference and work to resolve the problem.
12. Where can I find additional information?
For additional information, please refer to the following resources:
FDA web page on wireless phones
(http://www.fda.gov/cdrh/phones/index.html) Federal
Communications Commission (FCC) RF Safety Program
(http://www.fcc.gov/oet/rfsafety) International Commission on Non-
lonizing Radiation Protection (http://www.icnirp.de) World Health
Organization (WHO) International EMF Project
(http://www.who.int/emf) National Radiological Protection Board
(UK) (http://www.nrpb.org.uk/)
ENGLISH
96
Safety Guidelines

Consumer Information on SAR (Specific Absorption
Rate)
This Model Phone Meets the Government’s Requirements for
Exposure to Radio Waves.
Your wireless phone is a radio transmitter and receiver. It is
designed and manufactured not to exceed the emission limits for
exposure to radio frequency (RF) energy set by the Federal
Communications Commission (FCC) of the U.S. Government.
These limits are part of comprehensive guidelines and establish
permitted levels of RF energy for the general population. The
guidelines are based on standards that were developed by
independent scientific organizations through periodic and thorough
evaluation of scientific studies. The standards include a substantial
safety margin designed to assure the safety of all persons,
regardless of age and health.
The exposure standard for wireless mobile phones employs a unit
of measurement known as the Specific Absorption Rate, or SAR.
The SAR limit set by the FCC is 1.6W/kg. * Tests for SAR are
conducted using standard operating positions specified by the FCC
with the phone transmitting at its highest certified power level in all
tested frequency bands. Although SAR is determined at the highest
certified power level, the actual SAR level of the phone while
operating can be well below the maximum value. Because the
phone is designed to operate at multiple power levels to use only
the power required to reach the network, in general, the closer you
are to a wireless base station antenna, the lower the power output.
Before a phone model is available for sale to the public, it must be
tested and certified to the FCC that it does not exceed the limit
established by the government-adopted requirement for safe
exposure. The tests are performed in positions and locations (e.g.,
at the ear and worn on the body) as required by the FCC for each
model.
ENGLISH
97

The highest SAR value for this model phone when tested for use at
the ear is 0.714 W/kg and when worn on the body, as described in
this user’s manual, is 0.482 W/kg. (Body-worn measurements differ
among phone models, depending upon available accessories and
FCC requirements.) While there may be differences between SAR
levels of various phones and at various positions, they all meet the
government requirement for safe exposure.
The FCC has granted an Equipment Authorization for this model
phone with all reported SAR levels evaluated as in compliance with
the FCC RF emission guidelines. SAR information on this model
phone is on file with the FCC and can be found under the Display
Grant section of http://www.fcc.gov/oet/fccid after searching on FCC
ID BEJG5300S.
Additional information on Specific Absorption Rates (SAR) can be
found on the Cellular Telecommunications Industry Association
(CTIA) website at http://www.wow-com.com
*In the United States and Canada, the SAR limit for mobile phones
used by the public is 1.6 watts/kg (W/kg) averaged over one gram of
tissue. The standard incorporates a substantial margin of safety to
give additional protection for the public and to account for any
variations in measurements.
ENGLISH
98
Safety Guidelines

ENGLISH
99
General
Product Name : G1500
System : GSM 900 / DCS 1800
Ambient Temperatures
Max : +55°C
Min : -10°C
Technical Data

ENGLISH
100
Memo
-
 1
1
-
 2
2
-
 3
3
-
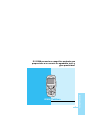 4
4
-
 5
5
-
 6
6
-
 7
7
-
 8
8
-
 9
9
-
 10
10
-
 11
11
-
 12
12
-
 13
13
-
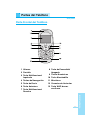 14
14
-
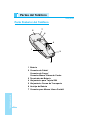 15
15
-
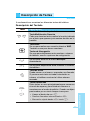 16
16
-
 17
17
-
 18
18
-
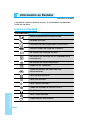 19
19
-
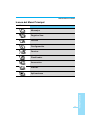 20
20
-
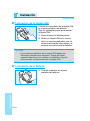 21
21
-
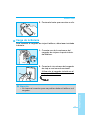 22
22
-
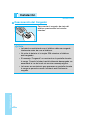 23
23
-
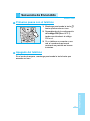 24
24
-
 25
25
-
 26
26
-
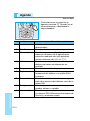 27
27
-
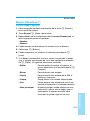 28
28
-
 29
29
-
 30
30
-
 31
31
-
 32
32
-
 33
33
-
 34
34
-
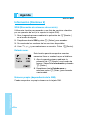 35
35
-
 36
36
-
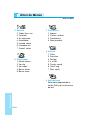 37
37
-
 38
38
-
 39
39
-
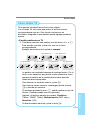 40
40
-
 41
41
-
 42
42
-
 43
43
-
 44
44
-
 45
45
-
 46
46
-
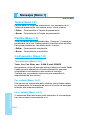 47
47
-
 48
48
-
 49
49
-
 50
50
-
 51
51
-
 52
52
-
 53
53
-
 54
54
-
 55
55
-
 56
56
-
 57
57
-
 58
58
-
 59
59
-
 60
60
-
 61
61
-
 62
62
-
 63
63
-
 64
64
-
 65
65
-
 66
66
-
 67
67
-
 68
68
-
 69
69
-
 70
70
-
 71
71
-
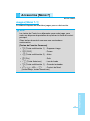 72
72
-
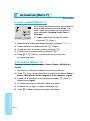 73
73
-
 74
74
-
 75
75
-
 76
76
-
 77
77
-
 78
78
-
 79
79
-
 80
80
-
 81
81
-
 82
82
-
 83
83
-
 84
84
-
 85
85
-
 86
86
-
 87
87
-
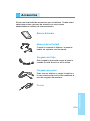 88
88
-
 89
89
-
 90
90
-
 91
91
-
 92
92
-
 93
93
-
 94
94
-
 95
95
-
 96
96
-
 97
97
-
 98
98
-
 99
99
-
 100
100
-
 101
101
-
 102
102
-
 103
103
-
 104
104
-
 105
105
-
 106
106
-
 107
107
-
 108
108
-
 109
109
-
 110
110
-
 111
111
-
 112
112
-
 113
113
-
 114
114
-
 115
115
-
 116
116
-
 117
117
-
 118
118
-
 119
119
-
 120
120
-
 121
121
-
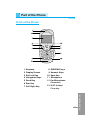 122
122
-
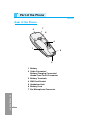 123
123
-
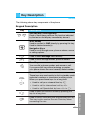 124
124
-
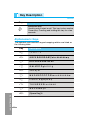 125
125
-
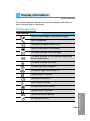 126
126
-
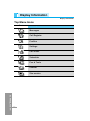 127
127
-
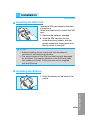 128
128
-
 129
129
-
 130
130
-
 131
131
-
 132
132
-
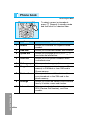 133
133
-
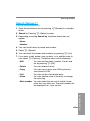 134
134
-
 135
135
-
 136
136
-
 137
137
-
 138
138
-
 139
139
-
 140
140
-
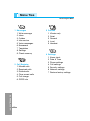 141
141
-
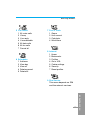 142
142
-
 143
143
-
 144
144
-
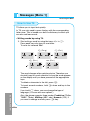 145
145
-
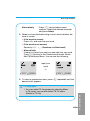 146
146
-
 147
147
-
 148
148
-
 149
149
-
 150
150
-
 151
151
-
 152
152
-
 153
153
-
 154
154
-
 155
155
-
 156
156
-
 157
157
-
 158
158
-
 159
159
-
 160
160
-
 161
161
-
 162
162
-
 163
163
-
 164
164
-
 165
165
-
 166
166
-
 167
167
-
 168
168
-
 169
169
-
 170
170
-
 171
171
-
 172
172
-
 173
173
-
 174
174
-
 175
175
-
 176
176
-
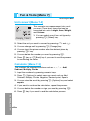 177
177
-
 178
178
-
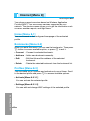 179
179
-
 180
180
-
 181
181
-
 182
182
-
 183
183
-
 184
184
-
 185
185
-
 186
186
-
 187
187
-
 188
188
-
 189
189
-
 190
190
-
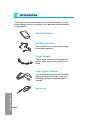 191
191
-
 192
192
-
 193
193
-
 194
194
-
 195
195
-
 196
196
-
 197
197
-
 198
198
-
 199
199
-
 200
200
-
 201
201
-
 202
202
-
 203
203
-
 204
204
-
 205
205
-
 206
206
-
 207
207
-
 208
208
-
 209
209


LG G1500S El manual del propietario
- Categoría
- Teléfonos móviles
- Tipo
- El manual del propietario
- Este manual también es adecuado para
en otros idiomas
- English: LG G1500S Owner's manual
Artículos relacionados
-
LG Série W3000.THABL Manual de usuario
-
LG Série C3100.WINWR Manual de usuario
-
LG C3100 Manual de usuario
-
LG Série G7100.INDMS Manual de usuario
-
-
LG C1100.NLDSV Manual de usuario
-
LG L3100.CZESV Manual de usuario
-
LG L1100.TURCO Manual de usuario
-
LG Série G5300I Manual de usuario
-