La página se está cargando...

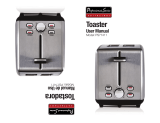
Toaster
Tostadora
User Manual
Manual de Uso
Model: PS77401
Modelo: PS77401

IMPORTANT SAFEGUARDS
CAUTION HOT SURFACES: This appliance generates heat and
escaping steam during use. Proper precautions must be taken to prevent the risk of
burns, res, or other injury to persons or damage to property.
1. A person who has not read and understood all operating, toasting, and safety
instructions is not qualied to operate this appliance. All users of this appliance must
read and understand this Instruction Manual before operating or cleaning this appli-
ance.
2. If this appliance falls or accidentally becomes immersed in water, unplug it from
the wall outlet immediately. Do not reach into the water!
3. When using this appliance, provide adequate air space above and on all sides for
air circulation. Do not operate this appliance while it is touching or near curtains, wall
coverings, clothing, dish towels or other ammable materials.
4. To reduce the risk of re, do not leave this appliance unattended during use.
5. If this appliance begins to malfunction during use, immediately press the CANCEL
button(s) and unplug the cord. Do not use or attempt to repair a malfunctioning ap-
pliance!
6. The cord to this appliance should only be plugged into a 120V AC electrical wall
outlet.
7. The cord to this appliance in an unstable position.
8. Use the Toaster on a hard, at surface. Do not place it near a ame or heat or
on a soft surface (such as carpet). Avoid placing it where it may tip over during use.
Dropping the toaster could cause it to malfunction.
WARNING: ELECTRICAL SHOCK HAZARD. Never
attempt to dislodge food inside the toaster while the taster is plugged in. Doing so
could cause an electrical shock hazard or a risk of re.
CAUTION: This appliance is hot during operation and retains heat for some time
after turning off. Always use oven mitts when handling hot material and allow metal
parts to cool before cleaning. Do not place anything on top of the toaster while it is
operating or while it is hot.
CAUTION:
DO NOT toast pastries with runny llings or frosting.
DO NOT toast torn slices of bread.
DO NOT place buttered bread or wrapped food into the Toaster.
DO NOT toast small-size bread, mini-baguettes, breadsticks, etc.
SAVE THESE INSTRUCTIONS
INSTRUCCIONES DE SEGURIDAD
CUIDADO SUPERFICIES CALIENTES: Este electrodoméstico genera calor
y vapor durante el funcionamiento. Debe de tomarse las precauciones necesarias
para evitar el riesgo de que se produzca una quemadura, fuego o cualquier otro tipo
de daño personal o a la propiedad.
1.Una persona que no haya leído y comprendido todas las instrucciones de
funcionamiento y de seguridad no está preparada para utilizar este electrodoméstico.
Cualquier persona que use este electrodoméstico debe de leer y comprender esta
guía de uso y mantenimiento antes de poner a funcionar o proceder a limpiar este
aparato.
2. Si el electrodoméstico sufriera una caída o accidentalmente se sumergiera en
el agua, desenchúfelo inmediatamente. ¡No meta las manos dentro del agua para
sacarlo!
3. Al momento de usar este electrodoméstico, deje suciente espacio por encima y
alrededor del aparato para una buena circulación del aire. No utilice el electrodoméstico
si éste entra en contacto con cortinas, paredes empapeladas, prendas de ropa, toallas
de papel u otros materiales inamables.
4. Si el electrodoméstico mostrara algún desperfecto durante el funcionamiento,
presione el botón CANCEL (cancelar) y luego desenchúfelo. ¡No use ni intente
reparar un electrodoméstico averiado!
5. Sólo debe de enchufarse este electrodoméstico a un tomacorriente de 120V AC.
6. No utilice el electrodoméstico si se encuentra en una posición inestable.
7. Coloque la tostadora sobre una supercie rme y plana. No la coloque cerca al
fuego vivo o calor, o sobre una supercie blanda (por ejemplo una alfombra). Evite
colocarla en un lugar donde pueda tumbarse durante el uso. Si se hace caer la
tostadora, podrían ocurrir desperfectos.
ADVERTENCIA: PELIGRO DE DESCARGA ELÉCTRICA. Nunca trate
de desatascar la comida dentro de la tostadora mientras ésta se encuentre enchufada.
Esto podría ocasionar una descarga eléctrica o el riesgo de un incendio.
PRECAUCIÓN: El electrodoméstico se encuentra caliente durante el
funcionamiento y retiene calor durante un tiempo después de haberlo apagado.
Siempre utilice guantes para manipular utensilios calientes y siempre deje que las
partes metálicas se enfríen antes de proceder a limpiar. No coloque nada sobre la
tostadora mientras esté funcionamiento o cuando se encuentre caliente.
PRECAUCIÓN:
NO tueste pasteles con rellenos líquidos o con cubiertas.
NO tueste trozos de pan quebrados.
NO coloque pan con mantequilla o alimentos envueltos o empaquetados dentro de
la tostadora.
NO tueste panes de tamaño pequeño, mini baguettes, palitos de pan, etc.
GUARDE ESTAS INSTRUCCIONES

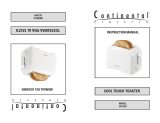
DESCRIPCIÓN DE LAS PARTES
A. Palanca de carga
B. Botón de recalentamiento
C. Botón de descongelado
D. Control para el dorado
E. Botón para rosquillas (“bagels”).
F. Botón cancelar
G. Bandeja para migas removible
PART DESCRIPTION
A. Loading lever
B. Reheat button
C. Defrost button
D. Browning control
E. Bagel button
F. Cancel button
G. Removable crumb tray
BEFORE USING FOR THE FIRST TIME
1. Remove all packaging materials including those that may be inside the
toasting slots or toasting lever slots.
2. Wipe the exterior with a damp sloth. Dry thoroughly. Do not use abrasive
cleaners.
3. Do not put the toaster, cord or plug in water.
4. Be sure crumb tray is pushed all the way into the back of the toaster and
the toasting lever is in the UP position.
5. Unwrap power cord from cord storage area on underside of toaster and
plug into a 120V AC outlet.
6. Turn the browning selector knob to (1), the lightest setting.
7. Lower both of the toasting levers until they lock in place. Operate without
bread once or twice to burn off any manufacturing residue. You may notice
a light amount of smoke; this is normal and will stop as the heating elements
continue to heat.
bowl rst. Start with the lowest setting and gradually increase as the
cream begins to thicken.
NOTE: If the power supply cord is damaged, it must be replaced by the
manufacturer or its service agent or a similarly qualied person in order to
avoid a hazard.
G
G
ANTES DEL PRIMER USO
1. Retire todos los materiales de empaque incluyendo aquellos que se
encuentren dentro de las ranuras de tostado u otras aberturas.
2. Limpie la parte exterior con un paño húmedo. Seque completamente.
No utilice limpiadores abrasivos.
3. No coloque la tostadora, el cordón ni el enchufe en agua.
4. Asegúrese de que la bandeja para migas se encuentre totalmente
insertada hasta el fondo de la tostadora y que las palancas de tostado se
encuentren en la posición “UP” (hacia arriba).
5. Desenrolle el cordón del área de almacenamiento ubicada en la parte
inferior de la tostadora y proceda a enchufar a un tomacorriente de 120V.
6. Gire la perilla selectora de dorado al nivel 1, el nivel de dorado más
bajo.
7. Baje ambas palancas de tostado hasta que queden enganchadas en su
lugar. Haga funcionar el electrodoméstico sin pan una o dos veces para
quemar cualquier residuo de fabricación. Al inicio se podrá notar una lig-
era emisión de humo. Esto es normal y se detendrá conforme los elemen-
tos de calentamiento continúen funcionando.

THIS APPLIANCE IS FOR HOUSEHOLD
USE ONLY!
¡ESTE APARATO ES SOLO DE USO
DOMESTICO!
AUTOMATIC CENTERING GUIDES
1. Lowering the toasting lever closes the centering guides, and holds the bread or
toaster food centrally in the toasting slots.
Note: The toasting lever(s) will not lock down unless the toaster is plugged into a
120V AC electrical outlet.
TOASTING INSTRUCTIONS
1. Make sure crumb tray is pushed all the way into the back of the Toaster and the
toasting levers are in the UP position.
2. Make sure no bread or other objects are inside the toasting slots. Place Toaster
on a at, level, heat resistant surface.
3. Plug the power cord into a 120V AC electrical outlet.
4. Position the browning selector knob to desired setting(s). To test toasting times
for browning, it is best to use both toasting slots’ position the browning selector
know between (3) and (4) medium; then adjust each subsequent toasting to your
preference.
5. Remove all protective wrappings from food before placing into the toasting
slot(s).
6. Insert bread or toaster food into the toasting slot(s). Lower the toasting lever
until locked into place. The automatic centering guides hold food upright for uni-
form side-to-side toasting. When the bread is lowered into position, toasting will
begin.
NOTE: The toasting lever will not lock into position unless the toaster is plugged
into a 120V AC electrical outlet.
NOTE: When toasting a single slice, the bread may be placed in any toasting slot.
NOTE: To prevent a re hazard, never place bread over the opening of the
toaster, always place bread into the slots.
NOTE: DO NOT change the browning selector knob selection during the toast-
ing cycle. First press the CANCEL button; then turn the browning selector knob
to adjust the browning lever. Lower the toasting lever and toast until the desired
toast color is achieved.
7. When the toast reaches the selected browning lever, it will pop up automati-
cally.
8. Remove bread from toasting slot(s). Use care when removing bread as the
bread and the top of the toaster will still be hot.
9. To interrupt toasting, press the corresponding CANCEL button.
10. Unplug cord from wall outlet when not in use.
IMPORTANT: Never use a fork or sharp-edged utensil to remove toast, because
that may damage the heating element or cause injury.
GUÍAS DE CENTRADO AUTOMÁTICAS
1. Al bajar las palancas de tostado, las guías de centrado se cierran y sujetan el pan o
los alimentos a tostarse de manera centrada dentro de la ranuras para el tostado.
Nota: Las palancas de tostado no quedarán enganchadas su lugar a menos que se
haya enchufado la tostadora a un tomacorriente de 120V.
INSTRUCCIONES PARA EL TOSTADO
1. Asegúrese de que la bandeja para migas se encuentre totalmente insertada hasta
el fondo de la tostadora y que las palancas de tostado se encuentren en la posición
“UP” (hacia arriba).
2. Asegúrese de que no haya pan u otros objetos dentro de las ranuras de tostado.
Coloque la tostadora sobre una supercie plana y nivelada, resistente al calor.
3. Proceda a enchufar a un tomacorriente de 120V.
4. Coloque el selector de nivel de dorado según la opción deseada. A manera de
prueba para establecer el nivel de dorado, se recomienda utilizar el nivel entre las
opciones 3 y 4 (medio), y luego regular con las siguientes tandas de tostado según
sus preferencias.
5. Retire todos los empaques o envolturas de los alimentos antes de colocarlos dentro
de las ranuras de tostado.
6. Inserte el pan o los alimentos o tostarse dentro de las ranuras de tostado. Baje la
palanca de tostado hasta que quede enganchada en su lugar. Las guías de centrado
automáticas sujetarán los alimentos de manera vertical para permitir un tostado
uniforme de ambos lados. Una vez que se baje la palanca con el pan en su lugar, el
proceso de tostado comenzará.
NOTA: La palanca que tostado no quedará enganchada en su lugar a menos que se
haya enchufado la tostadora a un tomacorriente de 120V AC
NOTA: Si se tuesta una sola rebanada de pan, se podrá colocar el pan en cualquiera
de las dos ranuras de tostado.
NOTA: Con el n de evitar el riesgo de que se produzca un incendio, nunca coloque el
pan encima la abertura de la tostadora. Siempre colóquelo dentro de las ranuras.
NOTA: NO cambie la perilla selectora de nivel del dorado durante el proceso de to-
stado. Primero presione el botón CANCEL (cancelar) y luego proceda a girar la perilla
selectora de dorado para regular el nivel de dorado. Vuelva a bajar la palanca de
tostado hasta lograr el nivel o color de tostado deseado.
7. Cuando la tostada haya alcanzado el nivel de tostado o color deseado, ésta saltará
automáticamente.
8. Retire el pan de las ranuras de tostado. Tenga cuidado al retirar el pan tostado ya
que el pan y la parte superior de la tostadora se encuentran aún calientes.
9. Para interrumpir el proceso de tostado, presione el botón CANCEL (cancelar).
10. Desenchufe el electrodoméstico si no lo va a utilizar.
IMPORTANTE: Nunca utilice un tenedor ni ningún otro utensilio de bordes alados
para retirar el pan tostado ya que esto podría dañar los componentes de calentamien-
to o causar lesiones.

Toaster
Tostadora
User Manual
Manual de Uso
Model: PS77401
Modelo: PS77401

IMPORTANT SAFEGUARDS
CAUTION HOT SURFACES: This appliance generates heat and
escaping steam during use. Proper precautions must be taken to prevent the risk of
burns, res, or other injury to persons or damage to property.
1. A person who has not read and understood all operating, toasting, and safety
instructions is not qualied to operate this appliance. All users of this appliance must
read and understand this Instruction Manual before operating or cleaning this appli-
ance.
2. If this appliance falls or accidentally becomes immersed in water, unplug it from
the wall outlet immediately. Do not reach into the water!
3. When using this appliance, provide adequate air space above and on all sides for
air circulation. Do not operate this appliance while it is touching or near curtains, wall
coverings, clothing, dish towels or other ammable materials.
4. To reduce the risk of re, do not leave this appliance unattended during use.
5. If this appliance begins to malfunction during use, immediately press the CANCEL
button(s) and unplug the cord. Do not use or attempt to repair a malfunctioning ap-
pliance!
6. The cord to this appliance should only be plugged into a 120V AC electrical wall
outlet.
7. The cord to this appliance in an unstable position.
8. Use the Toaster on a hard, at surface. Do not place it near a ame or heat or
on a soft surface (such as carpet). Avoid placing it where it may tip over during use.
Dropping the toaster could cause it to malfunction.
WARNING: ELECTRICAL SHOCK HAZARD. Never
attempt to dislodge food inside the toaster while the taster is plugged in. Doing so
could cause an electrical shock hazard or a risk of re.
CAUTION: This appliance is hot during operation and retains heat for some time
after turning off. Always use oven mitts when handling hot material and allow metal
parts to cool before cleaning. Do not place anything on top of the toaster while it is
operating or while it is hot.
CAUTION:
DO NOT toast pastries with runny llings or frosting.
DO NOT toast torn slices of bread.
DO NOT place buttered bread or wrapped food into the Toaster.
DO NOT toast small-size bread, mini-baguettes, breadsticks, etc.
SAVE THESE INSTRUCTIONS
INSTRUCCIONES DE SEGURIDAD
CUIDADO SUPERFICIES CALIENTES: Este electrodoméstico genera calor
y vapor durante el funcionamiento. Debe de tomarse las precauciones necesarias
para evitar el riesgo de que se produzca una quemadura, fuego o cualquier otro tipo
de daño personal o a la propiedad.
1.Una persona que no haya leído y comprendido todas las instrucciones de
funcionamiento y de seguridad no está preparada para utilizar este electrodoméstico.
Cualquier persona que use este electrodoméstico debe de leer y comprender esta
guía de uso y mantenimiento antes de poner a funcionar o proceder a limpiar este
aparato.
2. Si el electrodoméstico sufriera una caída o accidentalmente se sumergiera en
el agua, desenchúfelo inmediatamente. ¡No meta las manos dentro del agua para
sacarlo!
3. Al momento de usar este electrodoméstico, deje suciente espacio por encima y
alrededor del aparato para una buena circulación del aire. No utilice el electrodoméstico
si éste entra en contacto con cortinas, paredes empapeladas, prendas de ropa, toallas
de papel u otros materiales inamables.
4. Si el electrodoméstico mostrara algún desperfecto durante el funcionamiento,
presione el botón CANCEL (cancelar) y luego desenchúfelo. ¡No use ni intente
reparar un electrodoméstico averiado!
5. Sólo debe de enchufarse este electrodoméstico a un tomacorriente de 120V AC.
6. No utilice el electrodoméstico si se encuentra en una posición inestable.
7. Coloque la tostadora sobre una supercie rme y plana. No la coloque cerca al
fuego vivo o calor, o sobre una supercie blanda (por ejemplo una alfombra). Evite
colocarla en un lugar donde pueda tumbarse durante el uso. Si se hace caer la
tostadora, podrían ocurrir desperfectos.
ADVERTENCIA: PELIGRO DE DESCARGA ELÉCTRICA. Nunca trate
de desatascar la comida dentro de la tostadora mientras ésta se encuentre enchufada.
Esto podría ocasionar una descarga eléctrica o el riesgo de un incendio.
PRECAUCIÓN: El electrodoméstico se encuentra caliente durante el
funcionamiento y retiene calor durante un tiempo después de haberlo apagado.
Siempre utilice guantes para manipular utensilios calientes y siempre deje que las
partes metálicas se enfríen antes de proceder a limpiar. No coloque nada sobre la
tostadora mientras esté funcionamiento o cuando se encuentre caliente.
PRECAUCIÓN:
NO tueste pasteles con rellenos líquidos o con cubiertas.
NO tueste trozos de pan quebrados.
NO coloque pan con mantequilla o alimentos envueltos o empaquetados dentro de
la tostadora.
NO tueste panes de tamaño pequeño, mini baguettes, palitos de pan, etc.
GUARDE ESTAS INSTRUCCIONES

DESCRIPCIÓN DE LAS PARTES
A. Palanca de carga
B. Botón de recalentamiento
C. Botón de descongelado
D. Control para el dorado
E. Botón para rosquillas (“bagels”).
F. Botón cancelar
G. Bandeja para migas removible
PART DESCRIPTION
A. Loading lever
B. Reheat button
C. Defrost button
D. Browning control
E. Bagel button
F. Cancel button
G. Removable crumb tray
BEFORE USING FOR THE FIRST TIME
1. Remove all packaging materials including those that may be inside the
toasting slots or toasting lever slots.
2. Wipe the exterior with a damp sloth. Dry thoroughly. Do not use abrasive
cleaners.
3. Do not put the toaster, cord or plug in water.
4. Be sure crumb tray is pushed all the way into the back of the toaster and
the toasting lever is in the UP position.
5. Unwrap power cord from cord storage area on underside of toaster and
plug into a 120V AC outlet.
6. Turn the browning selector knob to (1), the lightest setting.
7. Lower both of the toasting levers until they lock in place. Operate without
bread once or twice to burn off any manufacturing residue. You may notice
a light amount of smoke; this is normal and will stop as the heating elements
continue to heat.
bowl rst. Start with the lowest setting and gradually increase as the
cream begins to thicken.
NOTE: If the power supply cord is damaged, it must be replaced by the
manufacturer or its service agent or a similarly qualied person in order to
avoid a hazard.
G
G
ANTES DEL PRIMER USO
1. Retire todos los materiales de empaque incluyendo aquellos que se
encuentren dentro de las ranuras de tostado u otras aberturas.
2. Limpie la parte exterior con un paño húmedo. Seque completamente.
No utilice limpiadores abrasivos.
3. No coloque la tostadora, el cordón ni el enchufe en agua.
4. Asegúrese de que la bandeja para migas se encuentre totalmente
insertada hasta el fondo de la tostadora y que las palancas de tostado se
encuentren en la posición “UP” (hacia arriba).
5. Desenrolle el cordón del área de almacenamiento ubicada en la parte
inferior de la tostadora y proceda a enchufar a un tomacorriente de 120V.
6. Gire la perilla selectora de dorado al nivel 1, el nivel de dorado más
bajo.
7. Baje ambas palancas de tostado hasta que queden enganchadas en su
lugar. Haga funcionar el electrodoméstico sin pan una o dos veces para
quemar cualquier residuo de fabricación. Al inicio se podrá notar una lig-
era emisión de humo. Esto es normal y se detendrá conforme los elemen-
tos de calentamiento continúen funcionando.

THIS APPLIANCE IS FOR HOUSEHOLD
USE ONLY!
¡ESTE APARATO ES SOLO DE USO
DOMESTICO!
AUTOMATIC CENTERING GUIDES
1. Lowering the toasting lever closes the centering guides, and holds the bread or
toaster food centrally in the toasting slots.
Note: The toasting lever(s) will not lock down unless the toaster is plugged into a
120V AC electrical outlet.
TOASTING INSTRUCTIONS
1. Make sure crumb tray is pushed all the way into the back of the Toaster and the
toasting levers are in the UP position.
2. Make sure no bread or other objects are inside the toasting slots. Place Toaster
on a at, level, heat resistant surface.
3. Plug the power cord into a 120V AC electrical outlet.
4. Position the browning selector knob to desired setting(s). To test toasting times
for browning, it is best to use both toasting slots’ position the browning selector
know between (3) and (4) medium; then adjust each subsequent toasting to your
preference.
5. Remove all protective wrappings from food before placing into the toasting
slot(s).
6. Insert bread or toaster food into the toasting slot(s). Lower the toasting lever
until locked into place. The automatic centering guides hold food upright for uni-
form side-to-side toasting. When the bread is lowered into position, toasting will
begin.
NOTE: The toasting lever will not lock into position unless the toaster is plugged
into a 120V AC electrical outlet.
NOTE: When toasting a single slice, the bread may be placed in any toasting slot.
NOTE: To prevent a re hazard, never place bread over the opening of the
toaster, always place bread into the slots.
NOTE: DO NOT change the browning selector knob selection during the toast-
ing cycle. First press the CANCEL button; then turn the browning selector knob
to adjust the browning lever. Lower the toasting lever and toast until the desired
toast color is achieved.
7. When the toast reaches the selected browning lever, it will pop up automati-
cally.
8. Remove bread from toasting slot(s). Use care when removing bread as the
bread and the top of the toaster will still be hot.
9. To interrupt toasting, press the corresponding CANCEL button.
10. Unplug cord from wall outlet when not in use.
IMPORTANT: Never use a fork or sharp-edged utensil to remove toast, because
that may damage the heating element or cause injury.
GUÍAS DE CENTRADO AUTOMÁTICAS
1. Al bajar las palancas de tostado, las guías de centrado se cierran y sujetan el pan o
los alimentos a tostarse de manera centrada dentro de la ranuras para el tostado.
Nota: Las palancas de tostado no quedarán enganchadas su lugar a menos que se
haya enchufado la tostadora a un tomacorriente de 120V.
INSTRUCCIONES PARA EL TOSTADO
1. Asegúrese de que la bandeja para migas se encuentre totalmente insertada hasta
el fondo de la tostadora y que las palancas de tostado se encuentren en la posición
“UP” (hacia arriba).
2. Asegúrese de que no haya pan u otros objetos dentro de las ranuras de tostado.
Coloque la tostadora sobre una supercie plana y nivelada, resistente al calor.
3. Proceda a enchufar a un tomacorriente de 120V.
4. Coloque el selector de nivel de dorado según la opción deseada. A manera de
prueba para establecer el nivel de dorado, se recomienda utilizar el nivel entre las
opciones 3 y 4 (medio), y luego regular con las siguientes tandas de tostado según
sus preferencias.
5. Retire todos los empaques o envolturas de los alimentos antes de colocarlos dentro
de las ranuras de tostado.
6. Inserte el pan o los alimentos o tostarse dentro de las ranuras de tostado. Baje la
palanca de tostado hasta que quede enganchada en su lugar. Las guías de centrado
automáticas sujetarán los alimentos de manera vertical para permitir un tostado
uniforme de ambos lados. Una vez que se baje la palanca con el pan en su lugar, el
proceso de tostado comenzará.
NOTA: La palanca que tostado no quedará enganchada en su lugar a menos que se
haya enchufado la tostadora a un tomacorriente de 120V AC
NOTA: Si se tuesta una sola rebanada de pan, se podrá colocar el pan en cualquiera
de las dos ranuras de tostado.
NOTA: Con el n de evitar el riesgo de que se produzca un incendio, nunca coloque el
pan encima la abertura de la tostadora. Siempre colóquelo dentro de las ranuras.
NOTA: NO cambie la perilla selectora de nivel del dorado durante el proceso de to-
stado. Primero presione el botón CANCEL (cancelar) y luego proceda a girar la perilla
selectora de dorado para regular el nivel de dorado. Vuelva a bajar la palanca de
tostado hasta lograr el nivel o color de tostado deseado.
7. Cuando la tostada haya alcanzado el nivel de tostado o color deseado, ésta saltará
automáticamente.
8. Retire el pan de las ranuras de tostado. Tenga cuidado al retirar el pan tostado ya
que el pan y la parte superior de la tostadora se encuentran aún calientes.
9. Para interrumpir el proceso de tostado, presione el botón CANCEL (cancelar).
10. Desenchufe el electrodoméstico si no lo va a utilizar.
IMPORTANTE: Nunca utilice un tenedor ni ningún otro utensilio de bordes alados
para retirar el pan tostado ya que esto podría dañar los componentes de calentamien-
to o causar lesiones.
1/8