Style Selections 1678VA-49-311-934 Manual de usuario
- Tipo
- Manual de usuario

1
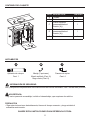
SC22353
ITEM #5054887
MODEL #1678VA-49-311-934
Serial Number Purchase Date
ATTACH YOUR RECEIPT HERE
Español p. XX
Español p. 9
STYLE SELECTIONS and logo design are trademarks
or registered trademarks of LF, LLC. All rights reserved.
Questions, problems, missing parts? Before returning to your retailer, call our customer service
department at 877-888-8225, 8 a.m. - 8 p.m., EST, Monday - Sunday. You could also contact us at
48.875-IN VANITY
WITH TOP

2
TABLE OF CONTENTS
Package Contents...........................................................................................................................3
Hardware Contents..........................................................................................................................3
Safety Information............................................................................................................................3
Preparation......................................................................................................................................4
Assembly or Installation Instructions ...............................................................................................4
Care and Maintenance....................................................................................................................7
Warranty..........................................................................................................................................7
Replacement Parts List................................................................................................................... .8

3
PACKAGE CONTENTS
SAFETY INFORMATION
Please read and understand this entire manual before attempting to assemble, operate, or install this
product.
CAUTION
• Follow these instructions closely, take your time, and use care while assembling this vanity.
KEEP THESE INSTRUCTIONS FOR FUTURE REFERENCE.
PART DESCRIPTION QUANTITY
A Vanity 1
B 1Top
C 1
Left Door (preassembled
to vanity (A))
D 1
Right Door (preassembled
to vanity (A))
E 1
Shelf
WARNING
• There are several assembly steps, including unpacking, that require two adults.
A
E
B
C
D
HARDWARE CONTENTS
AA
Touch-Up Pen
Qty. 1
Shelf Pin
Qty. 4
Handle (2 Options)
Brushed Nickel (Qty. 8)
Matte Black (Qty. 8)
CCBB

4
PREPARATION
INSTALLATION INSTRUCTIONS
Estimated Installation Time: 20-30 minutes (24 hours for silicone caulk to dry)
Tools Required for Installation (not included): Phillips screwdriver, utility knife or scissors, silicone caulk,
power drill with drill bit
Helpful Tools (not included): Measuring tape, level
Before beginning assembly of product, make sure all parts are present. Compare parts with package
contents list and hardware contents list. If any part is missing or damaged, do not attempt to
assemble the product.
WARNING
Vanity (A) MUST be secured to wall.
Note: Clean area where the vanity (A) will be
permanently located prior to beginning installation,
ensuring the vanity (A) will not interfere with any
water supply and drain lines once mounted.
1. With two people, carefully place vanity (A)
against the wall in its final location.
While holding the vanity base firmly against the
wall, use the pre-assembled levelers on the
bottom of each leg of the vanity (A) to level the
item. Twisting the levelers counterclockwise
will raise the height of the vanity (A), and
twisting them clockwise will lower the vanity.
Once the vanity is in place, against the wall,
and level from front to back and side to side,
drill a hole through the vanity mounting area
and into the wall studs (as illustrated in
diagram 1). Using appropriate mounting
hardware (not included), secure the vanity (A)
to a wall stud. If possible, secure the vanity
(A) to two wall studs for increased stability.
1
12
A

5
INSTALLATION INSTRUCTIONS
Note: A
t this stage it may be easier to install the faucet
and drain kit (not included) to top (B) per the
manufacturer’s instructions, before moving on to Step 2.
2.
Apply stain free silicone caulk (not included) to the top
edge of vanity (A). With the help of another adult, gently
lower top (B) onto the vanity (A). Wipe away any
excess caulk with a soft cloth, and wait approximately
24 hours for it to dry.
2
1
A
B
2
2
3. From the front of the assembly, insert shelf pins (CC)
at desired height, ensuring they are level. Place
shelf (E) on top of shelf pins (CC).
CC
Hardware Used
Shelf Pin x 4
3
1
CC
E
2

6
INSTALLATION INSTRUCTIONS
4.
If you need to adjust the doors, do so in the following manner.
To adjust door up or down, loosen screws (a) on both hinges, adjust door, and retighten screws.
To adjust door left or right, turn screws (b) on both hinges, in or out.
To adjust door in or out, loosen screws (c) on both hinges, adjust door, and retighten screws.
4
2
2
2
2
22
a
1
a
3
b
1
1
c
1
c
3
Handle x 8
BB
Hardware Used
5. One set of handles (BB) are packaged
separately in the box. If you would like to
switch handles, simply remove the existing
handles and attach the other finish, as
illustrated in the diagram.
Assembly is now complete. Install desired faucet
and drain assemblies (neither included) per the
manufacturers’ instructions to complete the installation.
Note: This vanity base comes with two different
handle options. 5
BB
C
D
BB

7
CARE AND MAINTENANCE
WARRANTY
IMPORTANT
• DO NOT use products to clean the top that contain acetone, lemon, vinegar or other acids as
these may cause damage to the top surface.
The manufacturer warrants this item against defects in materials and workmanship for a period of
one (1) year from the date of original retail purchase. This warranty applies only to the original
purchaser. This warranty does not apply to any damage on the product by accident, misuse, or
modified, improper installation or by affixing accessories not produced by the manufacturer. The
manufacturer will not be held liable for damages caused from cleaners or soaps that etch or stain
the stone top. The manufacturer is not accountable whatsoever for product installation during the
warranty period. There is no further expressed warranty. The manufacturer shall not be legally
responsible for incidental, consequential or special damages arising at or in connection with
product use or performance except as may otherwise be accorded by law. The manufacturer
disclaims any and all implied warranties.
• Dust the vanity regularly with a soft, non-lint producing cloth or household dusting product.
• You can clean the vanity with a gentle, non-abrasive household cleaner.
• Make sure to dry the wood immediately with a soft cloth or towel.
• The gel coat cultured marble combo top can be clean with standard non-abrasive all surface cleaner.
• Tips for using touch-up pen (AA): For scratches, stroke in direction of scratch; for worn areas,
stroke in direction of wood grain. Rub off excess colorant promptly with a soft cloth.

8
REPLACEMENT PARTS LIST
Printed in Vietnam
For replacement parts, call our customer service department at 877-888-8225, 8 a.m. - 8 p.m., EST,
Monday - Sunday. You could also contact us at [email protected].
F
B
C
E
D
BB CCAA DD EE FF
PART DESCRIPTION PART #
BTop 7000VTG-49-934
CLeft Door 1678VA-49-311-
DOOR SET
DRight Door
BB Handle-Brushed Nickel
Handle-Matte Black
CC Shelf Pin
AA Touch-Up Pen OF-0010
1678VA-BN HANDLE
1678VA-MB HANDLE
EShelf 1678VA-49-311-SHELF
F Drawer 1678VA-49-311-
DRAWER
DD Hinge C-90-107-NB
B1044
FF Drawer Glide Set BBG-14x45-SILVER
EE Leveler T-1007

9
ARTÍCULO #5054887
MODELO #1678VA-49-311-934
Número de serie Fecha de compra
ADJUNTE SU RECIBO AQUÍ
SC22353
¿Preguntas, problemas, piezas faltantes? Antes de volver a la tienda, llame a nuestro Departamento
de Servicio al Cliente al 877-888-8225, de lunes a domingo, de 8 a.m. a 8 p.m., hora estándar del Este.
También puede ponerse en contacto con nosotros en [email protected].
STYLE SELECTIONS y el diseño del logotipo son
marcas comerciales o marcas registradas de LF,
LLC. Todos los derechos reservados.
124,14 CM TOCADOR
CON CUBIERTA

10
ÍNDICE
Contenido del paquete..................................................................................................................11
Aditamentos........................................................................................................................11
Información de seguridad.............................................................................................................11
Preparación...................................................................................................................................12
Instrucciones de ensamblaje o instalación...................................................................................12
Cuidado y mantenimiento..............................................................................................................15
Garantía........................................................................................................................................15
Lista de piezas de repuesto...........................................................................................................16

11
CONTENIDO DEL PAQUETE
PIEZA DESCRIPCIÓN CANTIDAD
A Tocador 1
B 1Cubierta
C 1
Puerta izquierda
(preensamblada al
tocador (A))
D 1
Puerta derecha
(preensamblada al
tocador (A))
E 1Estante
INFORMACIÓN DE SEGURIDAD
Lea y comprenda completamente este manual antes de intentar ensamblar, usar o instalar este producto.
PRECAUCIÓN
• Siga estas instrucciones detenidamente, tómese el tiempo necesario y tenga cuidado al
ensamblar este tocador.
GUARDE ESTAS INSTRUCCIONES PARA REFERENCIA FUTURA.
ADVERTENCIA
• Hay varios pasos de ensamblaje, incluido el desembalaje, que requieren dos adultos.
ADITAMENTOS
A
E
B
C
D
AA
Aplicador de retoque
Cant. 1
CC
Pasador de repisa
Cant. 4
BB
Manija (2 opciones)
Níquel cepillado (Cant. 8)
Negro mate (Cant. 8)

12
INSTRUCCIONES DE INSTALACIÓN
PREPARACIÓN
Antes de comenzar a ensamblar el producto, asegúrese de tener todas las piezas. Compare las piezas
con la lista del contenido del paquete y la lista de aditamentos. No intente ensamblar el producto si falta
alguna pieza o si estas están dañadas.
1
12
A
Tiempo estimado de instalación:
entre 20 y 30 minutos (24 horas para que se seque la masilla de
calafateo de silicona)
ADVERTENCIA
El tocador (A) DEBE fijarse a la pared.
Nota: limpie el área donde se colocará el tocador (A)
antes de comenzar con la instalación permanente y
asegúrese de que el tocador (A) no interfiera con ningún
suministro de agua ni desagües una vez montado.
1. Junto a otras dos personas, coloque cuidadosamente el
tocador (A) contra la pared en su ubicación final. Mientras
sostiene la base del tocador firmemente contra la pared,
use los niveladores preensamblados en la parte inferior
de cada pata del tocador (A) para nivelar el artículo. Si
gira los niveladores en dirección contraria a las
manecillas del reloj, la altura del tocador (A) aumentará;
si los gira en dirección de las manecillas del reloj, la
altura disminuirá.
Una vez que el tocador esté en su lugar, contra la pared
y nivelado de adelante hacia atrás y de lado a lado,
taladre un orificio a través del área de montaje del tocador
y en los montantes de la pared (como se ilustra en
el diagrama 1). Utilizando los aditamentos de montaje
adecuados (no se incluyen), asegure el tocador (A) al
montante de pared. De ser posible, asegure el tocador
(A) a dos montantes de pared para darle mayor estabilidad.
Herramientas necesarias para la instalación (no incluidas): destornillador Phillips, cuchillo para uso
general o tijeras, masilla de calafateo de silicona, taladro eléctrico con broca para taladro.
Herramientas útiles (no incluidas): cinta métrica, nivel.

13
INSTRUCCIONES DE INSTALACIÓN
Nota:
en esta etapa puede resultar más sencillo
instalar el kit de grifo y desagüe (no se incluye) en la
cubierta (B) de acuerdo con las instrucciones del
fabricante antes de continuar con el paso 2.
2.
Coloque masilla de calafateo de silicona que no
mancha (no se incluye) en los bordes superiores del
tocador (A). Con la ayuda de otro adulto, baje la
cubierta (B) con cuidado sobre el tocador (A). Quite
el exceso de masilla de calafateo con un paño suave
y espere 24 horas aproximadamente para que seque.
2
1
A
B
2
2
3.
Desde la parte delantera del ensamblaje, coloque los
soportes para estante (CC) a la altura deseada,
asegurándose que queden nivelados. Luego, coloque
el estante (E) en la parte superior de los soportes
para estante (CC).
CC
Aditamentos utilizados
x 4
3
1
CC
E
2
Pasador de repisa

14
INSTRUCCIONES DE INSTALACIÓN
4
2
2
2
2
22
a
1
a
3
b
1
1
c
1
c
3
4. Si necesita ajustar las puertas, hágalo de la siguiente manera:
Para ajustar las puertas hacia arriba o abajo, afloje los tornillos (a) en ambas bisagras, ajuste la
puerta y vuelva a apretar los tornillos.
Para ajustar la puerta hacia la izquierda o hacia la derecha, gire los tornillos (b) en ambas
bisagras hacia adentro o hacia fuera.
Para ajustar las puertas hacia adentro o afuera, afloje los tornillos (c) en ambas bisagras, ajuste la
puerta y vuelva a apretar los tornillos.
5. Un juego de manijas (BB) se empaca por
separado en la caja. Si desea cambiar las
manijas, simplemente retire las manijas
existentes y coloque el otro acabado, como
se ilustra en el diagrama.
Ya ha terminado el ensamblaje. Instale los
ensambles del grifo y el desagüe (no se incluyen)
según las instrucciones del fabricante para
completar la instalación.
Nota: esta base de tocador viene con dos
opciones de manijas diferentes. 5
BB
C
D
BB
Manija x 8
BB
Aditamentos utilizados

15
CUIDADO Y MANTENIMIENTO
GARANTÍA
IMPORTANTE
• NO utilice productos que contengan acetona, limón, vinagre u otros ácidos para limpiar la parte
superior, ya que estos pueden dañar la superficie superior.
• Limpie el tocador regularmente con un paño suave que no deje pelusas o con un producto de
limpieza doméstico.
• Puede limpiar el tocador con un limpiador doméstico suave no abrasivo.
• Asegúrese de secar la madera inmediatamente con un paño o una toalla suave.
• La cubierta de mármol curtido con capa de gel se puede limpiar con limpiador para todo tipo de
superficie no abrasivo estándar.
• Consejos para usar el aplicador de retoque (AA): para rayones, aplique en dirección del rayón;
para áreas desgastadas, aplique en dirección de la veta de madera. Frote el exceso de colorante
rápidamente con un paño suave para retirarlo.
El fabricante garantiza este artículo contra defectos en los materiales y la mano de obra por un
período de un (1) año a partir de la fecha de compra original. Esta garantía es válida solo para el
comprador original. Esta garantía no se aplica a ningún daño al producto producido por accidente,
uso indebido, modificación o instalación incorrecta, o a causa de elementos accesorios que no son
del fabricante. El fabricante no será responsable por daños causados de limpiadores o jabones que
produzcan decapado o manchas en la cubierta de piedra. El fabricante no asume ningún tipo de
responsabilidad por la instalación del producto durante el período de garantía. No existe otro tipo
de garantía explícita. El fabricante no será responsable legal por daños accidentales, resultantes
o especiales que surjan en relación con el uso o el funcionamiento del producto, excepto que la
ley indique lo contrario. El fabricante rechaza cualquiera y todas las garantías implícitas.

16
Impreso en Vietnam
LISTA DE PIEZAS DE REPUESTO
Para obtener piezas de repuesto, llame a nuestro Departamento de Servicio al Cliente al
877-888-8225, de lunes a domingos, de 8 a. m. a 8 p. m., hora estándar del Este. También puede
ponerse en contacto con nosotros en [email protected].
F
B
C
E
D
BB CCAA DD EE FF
PIEZA DESCRIPCIÓN PIEZA #
BCubierta 7000VTG-49-934
CPuerta izquierda 1678VA-49-311-
DOOR SET
DPuerta derecha
BB Manija: níquel cepillado
Manija: negro mate
CC Pasador de repisa
AA Aplicador de retoque OF-0010
1678VA-BN HANDLE
1678VA-MB HANDLE
EEstante 1678VA-49-311-SHELF
F Gaveta 1678VA-49-311-
DRAWER
DD Bisagra C-90-107-NB
B1044
FF Juego de deslizadores
de gaveta BBG-14x45-SILVER
EE Nivelador T-1007
-
 1
1
-
 2
2
-
 3
3
-
 4
4
-
 5
5
-
 6
6
-
 7
7
-
 8
8
-
 9
9
-
 10
10
-
 11
11
-
 12
12
-
 13
13
-
 14
14
-
 15
15
-
 16
16


Style Selections 1678VA-49-311-934 Manual de usuario
- Tipo
- Manual de usuario
en otros idiomas
Artículos relacionados
Otros documentos
-
allen+roth allen roth 1483VA-48-201 48-In Vanity Manual de usuario
-
Allen + Roth 1652VA-30-200 Guía de instalación
-
-
-
-
-