
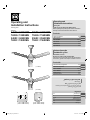
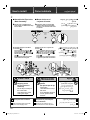
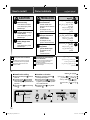
Operating and
Installation Instructions
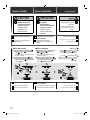
Ceiling Fan
Thank you for purchasing this KDK product.
Before operating this product, please read the instructions
carefully, and save this manual for future reference.
Model No.
X48XG / X48XGMN X56XG / X56XGMN
T48XG / T48XGMN T56XG / T56XGMN
X48XC / X48XCMN X56XC / X56XCMN
T48XC / T48XCMN T56XC / T56XCMN
Operating and
Installation Instructions
Ceiling Fan
Safety precautions 2-3
Name of parts 8
How to install 9-21
How to use 21
Maintenance 22
Specifi cations 23
Precauciones de seguridad 4-5
Nombre de las partes 8
Cómo instalarlo 9-21
Cómo utilizarlo 21
Mantenimiento 22
Especifi caciones 23
6-7 ﻥﺎﻣﻵﺍ ﺕﺎﻃﺎﻴﺘﺣﺍ
8
ﺀﺍﺰﺟﻷﺍ ﺀﺎﻤﺳﺃ
21-9
ﺐﻴﻛﺮﺘﻟﺍ ﺔﻴﻔﻴﻛ
21 ﻝﺎﻤﻌﺘﺳﻻﺍ ﺔﻴﻔﻴﻛ
22 ﺔﻧﺎﻴﺼﻟﺍ
23
ﺕﺎﻔﺻﺍﻮﻣ
Contents
Contenido
Instrucciones de
Instalación y Uso
Ventilador de Techo
Gracias por comprar este producto KDK.
Antes de poner en marcha este producto, lea atentamente las
instrucciones y guarde el manual para consultarlo en el futuro.
ﺕﺎﻳﻮﺘﺤﻤﻟﺍ
ﻞﻴﻐﺸﺘﻟﺍﻭ ﺐﻴﻛﺮﺘﻟﺍ ﺕﺎﻤﻴﻠﻌﺗ
ﻒﻘﺳ ﺔﺣﻭﺮﻣ
.KDK ﻦﻣ ﺞﺘﻨﳌﺍ ﺍﺬﻫ ﺀﺍﺮﺷ ﻰﻠﻋ ﺍﺮﻜﺷ
ﺍﺬﻫ ﻆﻔﺣﺃﻭ ،ﺔﻳﺎﻨﻌﺑ ﺕﺎﻤﻴﻠﻌﺘﻟﺍ ﺓﺀﺍﺮﻗ ﻰﺟﺮﻳ ،ﺔﺣﻭﺮﻤﻟﺍ ﻩﺬﻫ ﻞﻴﻐﺸﺗ ﻞﺒﻗ
.ﻞﺒﻘﺘﺴﻤﻟﺍ ﻲﻓ ﻪﻴﻟﺇ ﻉﻮﺟﺮﻠﻟ ﺐﹼﻴﺘﻜﻟﺍ
(T -series)
(T-XC / XCMN -series)
(X -series)
(X-XC / XCMN -series)
(T-XG / XGMN -series)
(X-XG / XGMN -series)
F48_56ZX_TZ_KDK.indd 1F48_56ZX_TZ_KDK.indd 1 3/7/2018 3:42:44 PM3/7/2018 3:42:44 PM

2
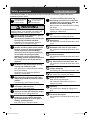
Safety precautions
To avoid the possibility of causing injury to users or damage to properties, please follow all the
explanations written below.
This symbol denotes
an action that is
COMPULSORY.
This symbol denotes
an action that is
PROHIBITED.
WARNING
A state that may be caused by the mishandling of
products, which, if not avoided, may lead to the
possibility of death or serious injury of users.
Follow strictly all the instructions given in
this manual for installation.
Electrical and installation work needs to be
performed by a qualifi ed individual.
Installation error can cause fi re, electrical
shock, injury or Ceiling Fan to drop.
This appliance is not intended for use by
persons (including children) with reduced
physical, sensory or mental capabilities,
or lack of experience and knowledge,
unless they have been given supervision
or instruction concerning use of the
appliance by a person responsible for
their safety. Children should be supervised
to ensure that they do not play with the
appliance.
Switch off the power supply and wait until
the Blades is fully static, before cleaning
or doing any maintenance jobs.
Can cause injury or electrical shock if Ceiling
Fan move suddenly.
Kindly refer to your authorized dealer for
repairing or maintenance.
Ensure that the Pipe has been fully tighten to
Motor Shaft (Bolt tightening torque is 800 ~
1200 N·cm) and Cotter Pin must fi x into Bolt
and bent.
Can cause injury if the Ceiling Fan drops.
Tighten the Blade Screws fi rmly using a
screwdriver. (250-300 N•cm)
Can cause injury if Blade drops.
Ensure that the ceiling hook can sustain
more than 10 times the Ceiling Fan weight.
Can cause injury if Ceiling Fan drops.
Ensure that the mounting of the
suspension system shall be performed
by the manufacturer, its service agent or
suitably qualifi ed persons.
Can cause injury if Ceiling fan drops.
If unusual oscillating movement, any
abnormality or failure occur is observed,
imediately stop using and turn “OFF” the
Miniature Circuit Breaker (MCB).
Risk of smoke, fi re, electrical shock or Ceiling
Fan drops.
Please contact your authorized dealer for
repairing or maintenance.
Dismantle the broken or damaged Ceiling
Fan.
Can cause injury if Ceiling Fan drops.
Do not install the Ceiling Fan at oily and
dusty places.
Can cause fi re or electrical shock due to short
circuit.
Do not install the Ceiling Fan near
fl ammable areas such as a gas cooker.
Can cause fi re or electrical shock due to short
circuit.
Do not install the Ceiling Fan near
chemicals and alkali.
Can cause fi re or electrical shock due to short
circuit.
Do not damage the wire during installation
e.g. deform due to heat, twist, bend, etc.
Can cause fi re or electrical shock due to short
circuit.
Do not use power supply other than rated
voltage mentioned.
Overheating can cause electrical shock or fi re.
Do not hang onto the Ceiling Fan.
Can cause injury if Ceiling Fan drops.
Do not disassemble the Ceiling Fan unless
stated by this manual.
Must use only supplied parts.
Can cause fi re, electrical shock, injury or
Ceiling Fan to drop.
Do not touch the Ceiling Fan while it is
operating.
Can cause injury, damage or Ceiling Fan to
drop.
Do not sprinkle water to Ceiling Fan or do
not wet the Ceiling Fan.
Can cause fi re or electrical shock due to short
circuit.
Always follow these instructions
F48_56ZX_TZ_KDK.indd 2F48_56ZX_TZ_KDK.indd 2 3/7/2018 3:42:49 PM3/7/2018 3:42:49 PM

3
CAUTION
A state that may be caused by the mishandling of
products, which, if not avoided, may result in the
injury of users or property damage.
To avoid the possibility of causing injury
to users or damage to properties, please
follow all the explanation written in this
manual. The manufacturer will not be
responsible for any accidents or injuries
caused by defective, defi cient installation
or installation which does not follow the
instruction manual.
Ceiling Fan must be mounted above 2.3 m
from the fl oor and 1 m from the wall to the
Blade.
Can cause unstable air fl ow and affect the
Ceiling Fan to wobble.
Can cause injury if Ceiling Fan drops.
Refer to Step 4 on page 14 for the
measurement method.
After installation make sure the Ceiling Fan
does not wobble extremely.
Can cause injury if Ceiling Fan drops.
Replace all the Blades if any of them
breaks or cracks.
Can cause injury if Ceiling Fan drops due to
wobbling.
Do not install the Ceiling Fan at a wet, high
temperature and high humidity area such
as shower room.
If an electrical current leakage occurs, it can
cause electrical shock or fi re easily.
This product is for in house use only. Do
not install at a windy places.
Can cause rust, discolour, damage or injury.
Do not install at places where there is high
vibration and impact.
Can cause injury if Ceiling Fan drops.
Avoid fi xing inside dome ceiling.
Can cause unstable air fl ow and affect the
Ceiling Fan to wobble.
Can cause injury if Ceiling Fan drops.
Do not connect Ceiling Fan to a dimmer
switch.
It can damage the Ceiling Fan.
Do not expose yourself continuously to
direct wind from the Ceiling Fan.
It may cause discomfort.
Wipe away dirt with a clean soft cloth,
ordinary soap and water to keep the
Ceiling Fan clean. Do not use solvents
(gasoline, petroleum, thinner, benzine,
alcohol, cleaning powder, alkaline
detergent) or any other chemicals.
Can cause plastic part deformation or metal
corrosion.Can cause injury if parts drop.
Safety precautions Always follow these instructions
F48_56ZX_TZ_KDK.indd 3F48_56ZX_TZ_KDK.indd 3 3/7/2018 3:42:52 PM3/7/2018 3:42:52 PM

4
Para evitar la posibilidad de causar lesiones a usuarios o daños a propiedades, por favor siga todas las
indicaciones que aparecen escritas abajo.
Este símbolo
representa una
acción que es
OBLIGATORIA.
Este símbolo
representa una acción
que está PROHIBIDA.
ADVERTENCIA
Un estado que puede provocarse debido a un manejo
equivocado de los productos, que si no se evita, puede
provocar la muerte o graves lesiones a los usuarios.
Siga estrictamente todas las instrucciones
expresadas en este manual para la instalación.
El cableado eléctrico debe ser realizado por
personal competente.
La instalación debe ser realizada por personal
califi cado.
Cualquier error de instalación puede causar un
incendio, descarga eléctrica, caída del ventilador del
techo o lesiones.
Este aparato no está pensado para el uso por
personas (incluyendo niños) con capacidades
mentales, sensoriales o físicas reducidas, o falta
de experiencia y conocimiento, a menos que se
les haya dado control o formación en relación al
uso apropiado por una persona responsable de su
seguridad. Los niños deberían estar controlados
para asegurar que no juegan con el aparato.
Apague toda la alimentación eléctrica y espera
hasta que el aspa está totalmente parada, antes
de limpiarla o realizar cualquier trabajo de
mantenimiento.
En caso contrario, podría causar lesiones y descarga
eléctrica, o provocar que el ventilador del techo se
moviese repentinamente.
Por favor, contacte con su distribuidor autorizado para
las reparaciones o el mantenimiento.
Asegúrese de que la Tubería está totalmente
apretada al eje del motor (el par de apriete del
perno es 800~1200N•cm), y el pasador ha de estar
fi jado al perno y a la curva.
Si el ventilador del techo se cae, puede causar
lesiones.
Apriete fi rmemente los tornillos del aspa utilizando
un destornillador. (250-300 N•cm)
Puede provocar lesiones si se cae el aspa.
Asegúrese de que el gancho puede aguantar 10
veces el peso del ventilador de techo.
Si el ventilador del techo se cae, puede causar
lesiones.
Asegúrese de que el montaje del sistema de
suspensión lo realice el fabricante, su agente de
servicio o personas debidamente cualifi cadas.
Si el ventilador del techo se cae, puede causar
lesiones.
Si detecta movimientos oscilantes
inusuales o cualquier anomalía o avería,
detenga inmediatamente su uso y ponga
en “OFF” el interruptor automático en
miniatura (MCB, por sus siglas en inglés).
Existe riesgo de humo, incendio, descarga eléctrica o
caída del ventilador de techo.
Contacte con su distribuidor autorizado para las
reparaciones o el mantenimiento.
Desmonte el ventilador del techo dañado o roto.
En caso contrario, podría causar la caída del ventilador
del techo, y lesiones.
Evite instalar el ventilador de techo en ambientes
oleosos y polvorosos.
Puede causar un incendio o una descarga eléctrica por
cortocircuito.
No lo instale cerca de una zona infl amable como
una cocina a gas.
Puede causar un incendio o una descarga eléctrica por
cortocircuito.
No lo instale cerca de sustancias químicas y álcali.
Puede causar un incendio o una descarga eléctrica por
cortocircuito.
Evite dañar el cable durante la instalación. P.ej. que
se deforme por el calor, girarlo, curvarlo, etc..
Puede causar un incendio o una descarga eléctrica por
cortocircuito.
No utilice una alimentación eléctrica diferente del
voltaje especifi cado mencionado.
Un sobrecalentamiento puede causar un incendio o
descarga eléctrica.
No se cuelgue del ventilador de techo.
En caso contrario, podría causar la caída del
ventilador del techo, y lesiones.
No desmonte las piezas del ventilador de
techo a no ser que lo indique este manual.
Deberá utilizar accesorios originales.
En caso contrario, podría causar un incendio,
descarga eléctrica, caida del ventilador del
techo, o lesiones.
No toque el ventilador del techo mientras se
encuentre en funcionamiento.
En caso contrario, puede causar lesiones,
daños, o podría caerse el ventilador del techo.
No rocíe con agua el ventilador de techo, ni
lo moje.
Puede causar un incendio o una descarga eléctrica por
cortocircuito.
Precauciones de seguridad Respete siempre las siguientes instrucciones
F48_56ZX_TZ_KDK.indd 4F48_56ZX_TZ_KDK.indd 4 3/7/2018 3:42:53 PM3/7/2018 3:42:53 PM

5
PRECAUCIÓN
Un estado que puede provocarse debido a un manejo
equivocado de los productos, que si no se evita puede
provocar graves lesiones a los usuarios o daños a las
propiedades.
Para evitar la posibilidad de causar lesiones a
usuarios o daños a propiedades, por favor siga
todas las indicaciones que aparecen escritas en
este manual. El fabricante no se responsabilizará
por ningún accidente o lesión causados por
una instalación incorrecta, insufi ciente, o que
no se realice de acuerdo con este manual de
instrucciones.
El ventilador del techo debe montar a más de 2,3
m desde el suelo y a 1 m desde la pared al aspa.
Evite fi jarlo por dentro de un techo con bóveda.
Golpearse con las aspas puede provocar lesiones.
Provocando una inestabilidad en la circulación del fl ujo
de aire y que el ventilador de techo vibre.
Consulte la página 14 (paso 4) para el método de
medición.
Después de la instalación asegúrese de que el
ventilador de techo no se tambalea.
Si el ventilador del techo cae, puede causar lesiones.
Después de la instalación asegúrese de que el
ventilador de techo no se tambalea.
Puede provocar lesiones si el ventilador de techo se
cae al tambalearse.
No instale el ventilador de techo en ambientes
mojados, con elevado nivel de humedad y altas
temperaturas, tales como las duchas.
Si se produce una fuga de corriente eléctrica, puede
originar un incendio y descarga eléctrica con facilidad.
Este producto es únicamente para uso en casa. No
lo instale en lugares ventosos.
Puede provocar óxido, decolorarse, provocar daños y
lesiones.
No lo instale en lugares con alta vibración e
impacto.
Si el ventilador del techo cae, puede causar lesiones.
Evite fi jarlo al techo en cúpula.
Puede generar un fl ujo de aire inestable y hacer que el
ventilador de techo se tambalee.
Si el ventilador del techo cae, puede causar lesiones.
No conecte el ventilador de techo al interruptor
regulador.
Puede dañar el ventilador de techo.
Evite la exposición directa al aire del ventilador de
techo.
Podría causarle malestar.
No utilice disolventes (gasolina, petróleo,
diluyente, bencina, alcohol, polvo limpiador,
sustancia alcalina, detergente) o cualquier otra
sustancia química. Limpie la suciedad con un paño
suave y limpio, jabón normal y agua para mantener
el ventilador limpio.
Puede provocar deformaciones en piezas de plástico y
corrosión en el metal.
Precauciones de seguridad Respete siempre las siguientes instrucciones
F48_56ZX_TZ_KDK.indd 5F48_56ZX_TZ_KDK.indd 5 3/7/2018 3:42:54 PM3/7/2018 3:42:54 PM

6
.ﻞﻔﺳﻻﺍ ﻲﻓ ﺏﻮﺘﻜﻤﻟﺍ ﺡﺮﺸﻟﺍ ﻉﺎﺒﺗﺍﻰﺟﺮﻳ ،ﺕﺎﻜﻠﺘﻤﻤﻠﻟ ﻭﺍ ﻦﻴﻠﻤﻌﺴﺘﻤﻟﺍ ﺹﺎﺨﺷﻼﻟ ﺕﺎﺣﻭﺮﺟ ﻝﻮﺼﺣ ﺔﻴﻧﺎﻜﻣﺍ ﺐﹼﻨﺠﺘﻟ
ﻰﻠﻋ ﺰﻣﺮﻟﺍ ﺍﺬﻫ ﻝﺪﻳ
.ﺭﻮﻈﺤﻣ ﻞﻤﻋ
ﻰﻠﻋ ﺰﻣﺮﻟﺍ ﺍﺬﻫ ﻝﺪﻳ
.ﻲﻣﺍﺰﻟﺇ ﻞﻤﻋ
ﺮﻳﺬﺤﺗ
،ﻲﺘﻟﺍﻭ ،ﺕﺎﺠﺘﻨﻤﻟﺍ ﻝﺎﻤﻌﺘﺳﺍ ﺓﺀﺎﺳﺇ ﺎﻬﺒﺒﺳ ﻥﻮﻜﻳ ﺪﻗ ﻲﺘﻟﺍ ﺔﻟﺎﺤﻟﺍ
ﺡﻭﺮﺠﻟﺍ ﻭﺃ ﺕﻮﻤﻟﺍ ﺔﻴﻧﺎﻜﻣﺇ ﻰﻟﺇ ﻱﺩﺆﺗ ﺪﻗ ،ﺎﻬﻳﺩﺎﻔﺗ ﻢﺘﻳ ﻢﻟ ﻥﺇ
.ﻦﻴﻠﻤﻌﺘﺴﻤﻠﻟ ﺔﻳﺪﺠﻟﺍ
ﻞﺟﺍ ﻦﻣ ﺐﻴﺘﻜﻟﺍ ﺍﺬﻫ ﻲﻓ ﺓﺎﻄﻌﻤﻟﺍ ﺕﺎﻤﻴﻠﻌﺘﻟﺍ ﻞﻛ ﺔﻗﺪﺑ ﻊﺒﺗﺍ
.ﺐﻴﻛﺮﺘﻟﺍ
ﺔﻴﻟﺎﻋ ﺔﺟﺭﺩ ﻰﻠﻋ ﺺﺨﺷ ﺔﻴﺋﺎﺑﺮﻬﻜﻟﺍ ﺕﻼﺻﻮﻟﺍ ﻞﻤﻌﺑ ﻡﻮﻘﻳ ﻥﺃ ﺐﺠﻳ
.ﺓﺀﺎﻔﻜﻟﺍ ﻦﻣ
.ﻞﻫﺆﻣ ﺺﺨﺷ ﺐﻴﻛﺮﺘﻟﺎﺑ ﻡﻮﻘﻳ ﻥﺃ ﺐﺠﻳ
ﻁﻮﻘﺳ ،ﺔﻴﺋﺎﺑﺮﻬﻛ ﺔﺑﺮﺿ ،ﻖﻳﺮﺣ ﺊﻃﺎﺨﻟﺍ ﺐﻴﻛﺮﺘﻟﺍ ﺐﺒﺴﻳ ﻥﺍ ﻦﻜﻤﻳ
.ﺕﺎﺣﻭﺮﺟ ﻝﻮﺼﺣ
ﻭﺃ
ﺔﺣﻭﺮﻤﻟﺍ
ﺹﺎﺨﺷﺍ ﻞﺒﻗ ﻦﻣ ﻝﺎﻤﻌﺘﺳﻼﻟ ﺔﺼﺼﺨﻣ ﺮﻴﻏ ﺔﺣﻭﺮﻤﻟﺍ ﻩﺬﻫ
ﻻ ﻦﻳﺬﻟﺍ ﻭﺍ ،ﺔﻴﻠﻘﻌﻟﺍ ﺕﺎﻗﺎﻋﻻﺍ ﻱﻭﺫ ﻭﺍ ﻦﻴﻗﺎﻌﻣ (ﻝﺎﻔﻃﻻﺍ ﻰﻟﺍ ﺔﻓﺎﺿﻻﺎﺑ)
ﺕﺎﻤﻴﻠﻌﺗ ﻭﺍ ﺩﺎﺷﺭﺍ ﻢﻫﺪﻨﻋ ﻥﺎﻛ ﺍﺫﺍ ﻻﺇ ﺔﻓﺮﻌﻣ ﻭﺍ ﺓﺮﺒﺧ ﻢﻫﺪﻨﻋ ﺪﺟﻮﻳ
ﺀﻻﻮﻫ ﺔﻣﻼﺳ ﻦﻋ ﻝﻮﺌﺴﻣ ﺺﺨﺷ ﻞﺒﻗ ﻦﻣ ﺔﺣﻭﺮﻤﻟﺍ ﺓﺬﻬﺑ ﻖﻠﻌﺘﺗ
.ﺹﺎﺨﺷﻻﺍ
ﺔﺣﻭﺮﻤﻟﺍ ﺔﺸﻳﺭ ﻒﻗﻮﺘﺗ ﻰﺘﺣ ﺮﻈﺘﻧﺍﻭ ﺔﻴﺋﺎﺑﺮﻬﻜﻟﺍ ﺔﻗﺎﻄﻟﺍ ﺪﻳﻭﺰﺗ ﻞﺼﻓﺍ
.ﺔﺣﻭﺮﻤﻟﺍ ﺔﻧﺎﻴﺻ ﻝﺎﻤﻋﺃ ﻦﻣ ﻞﻤﻋ ﻱﺃ ﺀﺍﺮﺟﺇ ﻞﺒﻗ ﺔﻠﻣﺎﻛ ﺓﺭﻮﺼﺑ
ﺔﺑﺮﺿﻭ ﺕﺎﺣﻭﺮﺟ ﺐﺒﺴﺗﻭ ،ﺔﺌﺟﺎﻔﻣ ﺓﺭﻮﺼﺑ ﺔﺣﻭﺮﻤﻟﺍ ﻞﻐﺘﺸﺗ ﻥﺍ ﻦﻜﻤﻳ
.ﺔﻴﺋﺎﺑﺮﻬﻛ
.ﺔﻧﺎﻴﺼﻟﺍ ﻭﺃ ﺡﻼﺻﻹﺍ ﻝﺎﻤﻋﻷ ﺪﻤﺘﻌﳌﺍ ﻞﻴﻛﻮﻟﺍ ﻰﻟﺇ ﻉﻮﺟﺮﻟﺍ ﻰﺟﺮﹸﻳ
ﻙﺮﺤﻤﻟﺍ ﺩﻮﻤﻋ ﻰﻠﻋ ﺔﻠﻣﺎﻛ ﺓﺭﻮﺼﺑ ﻩﺪﺷ ﻢﺗ ﺏﻮﺒﻧﻷﺍ ﻥﺃ ﻦﻣ ﺪﻛﺄﺗ
ﺱﻮﺑﺪﻟﺍ ﺖﻴﺒﺜﺗ ﺐﺠﻳﻭ (N•cm 1200 ~ 800 ﻮﻫ ﻲﻏﺮﺒﻟﺍ ﺪﺷ ﻡﺰﻋ)
.ﻲﻨﺤﻣﻭ ﺭﺎﻤﺴﻤﻟﺍ ﺔﺤﺘﻓ ﻰﻠﻋ ﻱﺭﻮﺑﺎﺨﻟﺍ
.ﻑﻘﺳﻟﺍ ﺔﺣﻭﺭﻣ ﻁﻭﻘﺳ ﺔﻟﺎﺣ ﻲﻓ ﺔﺑﺎﺻﺇ ﺙﻭﺩﺣ ﻲﻓ ﺏﺑﺳﺗﻳ ﻥﺃ ﻥﻛﻣﻳ
.ﻲﻏﺍﺮﺑ ﻚﻔﻣ ﻝﺎﻤﻌﺘﺳﺎﺑ ﻢﻜﺤﻣ ﻞﻜﺸﺑ ﺔﺸﻳﺮﻟﺍ ﻲﻏﺍﺮﺑ ﺪﺷ
(N•cm 300 ~ 250)
.ﺔﺸﻳﺮﻟﺍ ﺖﻄﻘﺳ ﺍﺫﺇ ﺡﻭﺮﺟ ﻞﺼﺤﻳ ﻥﺃ ﻦﻜﻤﻳ
ﺔﺣﻭﺮﻣ ﻥﺯﻭ ﻑﺎﻌﺿﺃ 10 ﻦﻣ ﺮﺜﻛﺃ ﻞﹼﻤﺤﺘﻳ ﻑﺎﻄﺨﻟﺍ ﻥﺃ ﻦﻣ ﺪﻛﺄﺗ
.ﻒﻘﺴﻟﺍ
.ﻑﻘﺳﻟﺍ ﺔﺣﻭﺭﻣ ﻁﻭﻘﺳ ﺔﻟﺎﺣ ﻲﻓ ﺔﺑﺎﺻﺇ ﺙﻭﺩﺣ ﻲﻓ ﺏﺑﺳﺗﻳ ﻥﺃ ﻥﻛﻣﻳ
ﻭﺃ ﺔﻌﹼﻨﺼﳌﺍ ﺔﻛﺮﺸﻟﺍ ﺔﻄﺳﺍﻮﺑ ﻖﻴﻠﻌﺘﻟﺍ ﻡﺎﻈﻧ ﺐﻴﻛﺮﺗ ﻰﻠﻋ ﺹﺮﺣﺍ
.ﺐﺳﺎﻨﻣ ﹴ
ﻞﻜﺸﺑ ﲔﻠﻫﺆﻣ ﺹﺎﺨﺷﺃ ﻭﺃ ﺎﻬﻟ ﻊﺑﺎﺘﻟﺍ ﺕﺎﻣﺪﳋﺍ ﻞﻴﻛﻭ
.ﻑﻘﺳﻟﺍ ﺔﺣﻭﺭﻣ ﻁﻭﻘﺳ ﺔﻟﺎﺣ ﻲﻓ ﺔﺑﺎﺻﺇ ﺙﻭﺩﺣ ﻲﻓ ﺏﺑﺳﺗﻳ ﻥﺃ ﻥﻛﻣﻳ
ﻭﺃ ﻞﻠﺧ ﻱﺃ ﻭﺃ ،ﺔﻳﺩﺎﻋ ﺮﻴﻏ ﺔﺑﺬﺑﺬﺘﻣ ﺔﻛﺮﺣ ﺙﻭﺪﺣ ﺔﻈﺣﻼﻣ ﺔﻟﺎﺣ ﻲﻓ
ﻊﻃﺎﻗ “ﻞﻴﻐﺸﺗ ﻑﺎﻘﻳﺇ” ﺏ ﻢﻗﻭ ﺍﹰﺭﻮﻓ ﻡﺍﺪﺨﺘﺳﻻﺍ ﻒﻗﻭﺃ ،ﺭﻮﺼﻗ
.(MCB)ﺮﻴﻐﺼﻟﺍ ﺓﺭﺍﺪﻟﺍ
ﺔﺣﻭﺮﻣ ﻁﻮﻘﺳ ﻭﺃ ،ﺔﻴﺋﺎﺑﺮﻬﻜﻟﺍ ﺔﻣﺪﺼﻟﺍ ﻭﺃ ،ﻖﻳﺮﳊﺍ ﻭﺃ ،ﻥﺎﺧﺪﻟﺍ ﺙﻭﺪﺣ ﺮﻄﺧ
.ﻒﻘﺴﻟﺍ
.ﺔﻧﺎﻴﺼﻟﺍ ﻭﺃ ﺡﻼﺻﻹﺍ ﻝﺎﻤﻋﻷ ﺪﻤﺘﻌﳌﺍ ﻞﻴﻛﻮﻟﺎﺑ ﻝﺎﺼﺗﻻﺍ ﻰﺟﺮﹸﻳ
.ﺓﺭﺮﻀﺘﻤﻟﺍ ﻭﺍ ﺓﺭﻮﺴﻜﻤﻟﺍ ﻒﻘﺴﻟﺍ ﺔﺣﻭﺮﻣ ﻚﻴﻜﻔﺗ
.ﻑﻘﺳﻟﺍ ﺔﺣﻭﺭﻣ ﻁﻭﻘﺳ ﺔﻟﺎﺣ ﻲﻓ ﺔﺑﺎﺻﺇ ﺙﻭﺩﺣ ﻲﻓ ﺏﺑﺳﺗﻳ ﻥﺃ ﻥﻛﻣﻳ
.ﺔﺑﺮﺘﳌﺍ ﻦﻛﺎﻣﻷﺍ ﻭ ﺔﻴﺘﻳﺰﻟﺍ ﻲﻓ ﻒﻘﺴﻟﺍ ﺔﺣﻭﺮﻣ ﺖﻴﺒﺜﺘﺑ ﻢﻘﺗ ﻻ
ﺐﺒﺴﺑ ﺔﻴﺋﺎﺑﺮﻬﻛ ﺔﻣﺪﺼﻟ ﺽﺮﻌﺘﻟﺍ ﻭﺃ ﻖﻳﺮﺣ ﺏﻮﺸﻧ ﻲﻓ ﺐﺒﺴﺘﻟﺍ ﻦﻜﳝ
.ﻰﺋﺎﺑﺮﻬﻛ ﺱﺎﻣ
ﺔﻘﻄﻨﻣ ﻞﺜﻣ ﻝﺎﻌﺘﺷﻼﻟ ﺔﻠﺑﺎﻗ ﻖﻃﺎﻨﻣ ﻲﻓ ﻒﻘﺴﻟﺍ ﺔﺣﻭﺮﻣ ﺐﻛﺮﺗ ﻻ
.ﺯﺎﻐﻟﺍ ﺥﺎﹼﺒﻃ
ﺐﺒﺴﺑ ﺔﻴﺋﺎﺑﺮﻬﻛ ﺔﻣﺪﺼﻟ ﺽﺮﻌﺘﻟﺍ ﻭﺃ ﻖﻳﺮﺣ ﺏﻮﺸﻧ ﻲﻓ ﺐﺒﺴﺘﻟﺍ ﻦﻜﳝ
.ﻰﺋﺎﺑﺮﻬﻛ ﺱﺎﻣ
ﺔﻴﺋﺎﻴﻤﻴﻜﻟﺍ ﺩﺍﻮﳌﺍ ﻦﻣ ﺏﺮﻘﻟﺎﺑ ﻒﻘﺴﻟﺍ ﺔﺣﻭﺮﻣ ﺖﻴﺒﺜﺘﺑ ﻢﻘﺗ ﻻ
.ﺕﺎﻳﻮﻠﻘﻟﺍﻭ
ﺐﺒﺴﺑ ﺔﻴﺋﺎﺑﺮﻬﻛ ﺔﻣﺪﺼﻟ ﺽﺮﻌﺘﻟﺍ ﻭﺃ ﻖﻳﺮﺣ ﺏﻮﺸﻧ ﻲﻓ ﺐﺒﺴﺘﻟﺍ ﻦﻜﳝ
.ﻰﺋﺎﺑﺮﻬﻛ ﺱﺎﻣ
،ﺓﺭﺍﺮﺤﻟﺍ ﺐﺒﺴﺑ ﻙﻼﺳﻷﺍ ﺭﺮﻀﺗﻼﺜﻣ ،ﺐﻴﻛﺮﺘﻟﺍ ﺀﺎﻨﺛﺃ ﻙﻼﺳﻷﺍ ﺭﺮﻀﺗﻻ
.ﺦﻟﺍ ،ﻲﻨﺜﻟﺍ ،ﺢﺟﺭﺄﺘﻟﺍ
ﺐﺒﺴﺑ ﺔﻴﺋﺎﺑﺮﻬﻛ ﺔﻣﺪﺼﻟ ﺽﺮﻌﺘﻟﺍ ﻭﺃ ﻖﻳﺮﺣ ﺏﻮﺸﻧ ﻲﻓ ﺐﺒﺴﺘﻟﺍ ﻦﻜﳝ
.ﻰﺋﺎﺑﺮﻬﻛ ﺱﺎﻣ
ﺓﺭﺪﻘﻤﻟﺍ ﺔﻴﻄﻟﻮﻔﻟﺍ ﺮﻴﻏ ﺔﻴﺋﺎﺑﺮﻬﻛ ﺔﻗﺎﻃ ﺪﻳﻭﺰﺗ ﺭﺪﺼﻣ ﻞﻤﻌﺘﺴﺗ ﻻ
.ﺓﺭﻮﻛﺬﻤﻟﺍ
.ﻖﻳﺮﺣ ﻭﺍ ﺔﻴﺋﺎﺑﺮﻬﻛ ﺔﺑﺮﺿ ﻁﺮﻔﻤﻟﺍ ﻦﻴﺨﺴﺘﻟﺍ ﺐﺒﺴﻳ ﻥﺍ ﻦﻜﻤﻳ
.ﻒﻘﺴﻟﺍ ﺔﺣﻭﺮﻤﺑ ﻖﹼﻠﻌﺘﺗ ﻻ
.ﻑﻘﺳﻟﺍ ﺔﺣﻭﺭﻣ ﻁﻭﻘﺳ ﺔﻟﺎﺣ ﻲﻓ ﺔﺑﺎﺻﺇ ﺙﻭﺩﺣ ﻲﻓ ﺏﺑﺳﺗﻳ ﻥﺃ ﻥﻛﻣﻳ
ﺍﺬﻫ ﻲﻓ ﺢﺿﻮﻣ ﻮﻫ ﺎﻤﻛ ﻻﺇ ﻒﻘﺴﻟﺍ ﺔﺣﻭﺮﻣ ﺀﺍﺰﺟﺃ ﻚﻴﻜﻔﺗ ﻝﻭﺎﺤﺗ ﻻ
.ﺐﻴﺘﻜﻟﺍ
.ﺔﻴﻠﺻﻻﺍ ﺕﺎﻘﺤﻠﻤﻟﺍ ﻝﺎﻤﻌﺘﺳﺍ ﺐﺠﻳ
ﻝﻮﺼﺣ
ﻭﺃ
ﺔﺣﻭﺮﻤﻟﺍ ﻁﻮﻘﺳ ،ﺔﻴﺋﺎﺑﺮﻬﻛ ﺔﺑﺮﺿ ،ﻖﻳﺮﺣ ﻚﻟﺫ ﺐﺒﺴﻳ ﻥﺍ ﻦﻜﻤﻳ
.ﺕﺎﺣﻭﺮﺟ
.ﻞﻴﻐﺸﺗ ﺔﻟﺎﺣ ﻲﻓ ﻥﻮﻜﺗ ﺎﻣﺪﻨﻋ ﺔﺣﻭﺮﻤﻟﺍ ﺲﻤﻠﺗ ﻻ
.ﺔﺣﻭﺮﻤﻟﺍ ﻁﻮﻘﺳ
ﻭﺃ
ﺭﺮﺿﻭ ،ﺡﺮﺟ ﻚﻟﺫ ﺐﺒﺴﻳ ﻥﺍ ﻦﻜﻤﻳ
.ﻒﻘﺴﻟﺍ ﺔﺣﻭﺮﻣ ﺐﻃﺮﺗ ﻻ ،ﻭﺃ ﻒﻘﺴﻟﺍ ﺔﺣﻭﺮﻣ ﻰﻠﻋ ﺀﺎﻤﻟﺍ ﻖﺷﺮﺗ ﻻ
ﺐﺒﺴﺑ ﺔﻴﺋﺎﺑﺮﻬﻛ ﺔﻣﺪﺼﻟ ﺽﺮﻌﺘﻟﺍ ﻭﺃ ﻖﻳﺮﺣ ﺏﻮﺸﻧ ﻲﻓ ﺐﺒﺴﺘﻟﺍ ﻦﻜﳝ
.ﻰﺋﺎﺑﺮﻬﻛ ﺱﺎﻣ
ﻥﺎﻣﻵﺍ ﺕﺎﻃﺎﻴﺘﺣﺍ
ﺎﹰﻤﺋﺍﺩ ﺕﺎﻤﻴﻠﻌﺘﻟﺍ ﻩﺬﻫ ﺓﺎﻋﺍﺮﲟ ﻢﻗ
F48_56ZX_TZ_KDK.indd 6F48_56ZX_TZ_KDK.indd 6 3/7/2018 3:42:55 PM3/7/2018 3:42:55 PM

7
ﻪﻴﺒﻨﺗ
،ﻲﺘﻟﺍﻭ ،ﺕﺎﺠﺘﻨﻤﻟﺍﻝﺎﻤﻌﺘﺳﺍ ﺓﺀﺎﺳﺇ ﺎﻬﺒﺒﺳ ﻥﻮﻜﻳ ﺪﻗ ﻲﺘﻟﺍ ﺔﻟﺎﺤﻟﺍ
ﺭﺮﻀﺗ ﻭﺃ ﻦﻴﻠﻤﻌﺘﺴﻤﻠﻟ ﺔﻳﺪﺠﻟﺍ ﺡﻭﺮﺠﻟﺍ ﺔﻴﻧﺎﻜﻣﺇ ﻰﻟﺇ ﻱﺩﺆﺗ ﺪﻗ ،ﺎﻬﻳﺩﺎﻔﺗ ﻢﺘﻳ ﻢﻟ ﻥﺇ
.ﺕﺎﻜﻠﺘﻤﻤﻟﺍ
ﻭﺍ ﻦﻴﻠﻤﻌﺴﺘﻤﻟﺍ ﺹﺎﺨﺷﻼﻟ ﺕﺎﺣﻭﺮﺟ ﻝﻮﺼﺣ ﺔﻴﻧﺎﻜﻣﺍ ﺐﹼﻨﺠﺘﻟ
.ﺐﻴﺘﻜﻟﺍ ﺍﺬﻫ ﻲﻓ ﺏﻮﺘﻜﻤﻟﺍ ﺡﺮﺸﻟﺍ ﻉﺎﺒﺗﺍ ﻰﺟﺮﻳ ،ﺕﺎﻜﻠﺘﻤﻤﻠﻟ
ﻦﻋ ﺔﺒﺒﺴﺘﻤﻟﺍ ﺕﺎﺣﻭﺮﺠﻟﺍﻭ ﺙﺩﺍﻮﺣ ﺔﻳﺍ ﻦﻋ ﻝﻮﺌﺴﻣ ﺮﻴﻏ ﻊﻧﺎﺼﻟﺍ
،ﻞﻄﻌﻟﺍ
ﺍﺬﻫ ﺕﺎﻤﻴﻠﻌﺗ ﻊﻣ ﻖﻓﺍﻮﺘﻳ ﻻ ﻱﺬﻟﺍ ﺐﻴﻛﺮﺘﻟﺍ ﻭﺍ ﺺﻗﺎﻨﻟﺍ ﺐﻴﻛﺮﺘﻟﺍﻭ
.ﺐﻴﺘﻜﻟﺍ
ﺔﻴﺿﺭﻻﺍ ﻕﻮﻓ ﺮﺘﻣ 2.3 ﻦﻣ ﺮﺜﻛﺍ ﺔﻓﺎﺴﻣ ﻰﻠﻋ ﺔﺣﻭﺮﻤﻟﺍ ﺐﻴﻛﺮﺗ ﺐﺠﻳ
.ﺔﺣﻭﺮﻤﻟﺍ ﺔﺸﻳﺭﻭ ﺭﺍﺪﺠﻟﺍ ﻦﻴﺑ ﺮﺘﻣ 1 ﻦﻣ ﺮﺜﻛﺍ ﺔﻓﺎﺴﻣ ﻰﻠﻋﻭ
.ﺔﺣﻭﺮﻤﻟﺍ ﺕﺍﺮﻔﺷ ﺭﺍﺪﺠﻟﺍ ﺏﺎﺻﺃ ﺍﺫﺇ ﺡﻭﺮﺟ ﻞﺼﺤﻳ ﻥﺃ ﻦﻜﻤﻳ
ﻒﻘﺴﻟﺍ ﺔﺣﻭﺮﻣ ﻰﻠﻋ ﺮﺛﺆﻳ ﻭ ﺖﺑﺎﺛ ﺮﻴﻏ ﺀﺍﻮﻫ ﻖﻓﺪﺗ ﻚﻟﺫ ﺐﺒﺴﻳ ﻥﺃ ﻦﻜﻤﻳ
.ﺀﺍﺩﻷﺍ ﻲﻓ ﺏﺬﺑﺬﺘﺗ ﺎﻬﻠﻌﺠﻳﻭ
.ﺱﺎﻳﻘﻟﺍ ﺔﻘﻳﺭﻁ ﻰﻠﻋ ﻑﺭﻌﺗﻠﻟ (4 ﺓﻭﻁﺧ) 11 ﺔﺣﻔﺻ ﻰﻟﺇ ﻊﺟﺭﺍ
ﺮﻴﻏ ﺓﺭﻮﺼﺑ ﻞﻳﺎﻤﺘﺗ ﻻ ﻒﻘﺴﻟﺍ ﺔﺣﻭﺮﻣ ﻥﺃ ﻦﻣ ﺪﻛﺄﺗ ﺐﻴﻛﺮﺘﻟﺍ ﺪﻌﺑ
.ﺔﻳﺩﺎﻋ
.ﻑﻘﺳﻟﺍ ﺔﺣﻭﺭﻣ ﻁﻭﻘﺳ ﺔﻟﺎﺣ ﻲﻓ ﺔﺑﺎﺻﺇ ﺙﻭﺩﺣ ﻲﻓ ﺏﺑﺳﺗﻳ ﻥﺃ ﻥﻛﻣﻳ
.ﺔﺸﻳﺭ ﺔﻳﻻ ﺀﺎﻨﺤﻧﺍ ﻭﺍ ﺮﺴﻛ ﻞﺼﺣ ﺍﺫﺍ ﺕﺍﺮﻔﺸﻟﺍ ﻞﻛ ﺮﹼﻴﻏ
ﺐﺒﺴﺑ ﻒﻘﺴﻟﺍ ﺔﺣﻭﺮﻣ ﻁﻮﻘﺳ ﺔﻟﺎﺣ ﻲﻓ ﺕﺎﺑﺎﺻﺇ ﻉﻮﻗﻭ ﻦﻜﳝ
.ﺢﺟﺭﺄﺘﻟﺍ
ﺔﺑﻮﻃﺮﻟﺍﻭ ﺓﺭﺍﺮﺤﻟﺍ ﺔﻴﻟﺎﻋ ،ﺔﺒﻃﺭ ﻖﻃﺎﻨﻣ ﻲﻓ ﻒﻘﺴﻟﺍ ﺔﺣﻭﺮﻣ ﺐﹼﻛﺮﺗ ﻻ
.ﻡﺎﻤﺤﻟﺍ ﺔﻓﺮﻏ ﻞﺜﻣ
ﺔﺑﺮﺻ ﻚﻟﺫ ﺐﺒﺴﻳ ﻥﺍ ﻦﻜﻤﻳ ،ﻲﺋﺎﺑﺮﻬﻜﻟﺍ ﺭﺎﻴﺘﻠﻟ ﺏﺮﺴﺗ ﻞﺼﺣ ﺍﺫﺍ
.ﻖﻳﺮﺣ ﻭﺃ ﺔﻴﺋﺎﺑﺮﻬﻛ
ﺔﺣﻭﺮﻤﻟﺍ ﺖﻴﺒﺜﺘﺑ ﻢﻘﺗ ﻻ .ﻂﻘﻓ ﻲﻟﺰﻨﻤﻟﺍ ﻝﺎﻤﻌﺘﺳﻼﻟ ﻮﻫ ﺞﺘﻨﻤﻟﺍ ﺍﺬﻫ
.ﺍﺪﻳﺪﺷ ﺀﺍﻮﻬﻟﺍ ﺭﺎﻴﺗ ﺎﻬﺑ ﻥﻮﻜﻳ ﻲﺘﻟﺍ ﻦﻛﺎﻣﻷﺍ ﻲﻓ
،ﻥﻮﻠﻟ ﺮﻴﻴﻐﺗ ،ﺃﺪﺻ ﻝﻮﺼﺣ ﻝﺰﻨﻤﻟﺍ ﺝﺭﺎﺧ ﻝﺎﻤﻌﺘﺳﻻﺍ ﺐﺒﺴﻳ ﻥﺍ ﻦﻜﻤﻳ
.ﺡﻭﺮﺟ ﻭﺃ ﺭﺮﺿ
ﺕﺍﺮﺛﺆﻣﻭ ﺕﺍﺯﺍﺰﺘﻫﺍ ﻰﻠﻋ ﻯﻮﺘﺤﺗ ﻦﻛﺎﻣﺍ ﻲﻓ ﻒﻘﺴﻟﺍ ﺔﺣﻭﺮﻣ ﺐﻴﻛﺮﺗ ﻻ
.ﺔﻴﻟﺎﻋ
.ﻑﻘﺳﻟﺍ ﺔﺣﻭﺭﻣ ﻁﻭﻘﺳ ﺔﻟﺎﺣ ﻲﻓ ﺔﺑﺎﺻﺇ ﺙﻭﺩﺣ ﻲﻓ ﺏﺑﺳﺗﻳ ﻥﺃ ﻥﻛﻣﻳ
.ﺔﺒﺒﻘﳌﺍ ﻒﻘﺳﻷﺍ ﻞﺧﺍﺩ ﺖﻴﺒﺜﺘﻟﺍ ﺐﹼﻨﲡ
ﻒﻘﺴﻟﺍ ﺔﺣﻭﺮﻣ ﻰﻠﻋ ﺮﺛﺆﻳﻭ ﺀﺍﻮﻬﻟﺍ ﻖﻓﺪﺗ ﺭﺍﺮﻘﺘﺳﺍ ﻡﺪﻋ ﺐﺒﺴﻳ ﺪﻗ ﺚﻴﺣ
.ﺎﻬﺤﺟﺭﺄﺗ ﻲﻓ ﺎﹰﺒﺒﺴﺘﻣ
.ﻑﻘﺳﻟﺍ ﺔﺣﻭﺭﻣ ﻁﻭﻘﺳ ﺔﻟﺎﺣ ﻲﻓ ﺔﺑﺎﺻﺇ ﺙﻭﺩﺣ ﻲﻓ ﺏﺑﺳﺗﻳ ﻥﺃ ﻥﻛﻣﻳ
ﺕﺍﺮﺛﺆﻣﻭ ﺕﺍﺯﺍﺰﺘﻫﺍ ﻰﻠﻋ ﻯﻮﺘﺤﺗ ﻦﻛﺎﻣﺍ ﻲﻓ ﻒﻘﺴﻟﺍ ﺔﺣﻭﺮﻣ ﺐﻴﻛﺮﺗ ﻻ
.ﺔﻴﻟﺎﻋ
.ﻑﻘﺳﻟﺍ ﺔﺣﻭﺭﻣ ﻁﻭﻘﺳ ﺔﻟﺎﺣ ﻲﻓ ﺔﺑﺎﺻﺇ ﺙﻭﺩﺣ ﻲﻓ ﺏﺑﺳﺗﻳ ﻥﺃ ﻥﻛﻣﻳ
.ﻒﻘﺴﻟﺍ ﺔﺣﻭﺮﻣ ﻦﻣ ﺮﺷﺎﺒﻤﻟﺍ ﺀﺍﻮﻬﻠﻟ ﺮﻤﺘﺴﻤﻟﺍ ﺽﺮﻌﺘﻟﺍ ﺐﹼﻨﺠﺗ
.ﺔﺣﺍﺭ ﻡﺪﻋ ﻚﻟﺫ ﺐﺒﺴﻳ ﻥﺍ ﻦﻜﻤﻳ
ﻦﻳﺰﻨﺒﻟﺍ ،ﺀﻼﻄﻟﺍ ﻖﻗﺮﻣ ،ﻝﻭﺮﺘﺒﻟﺍ ،ﲔﻟﻭﺯﺎﳉﺍ) ﺕﺎﺒﻳﺬﳌﺍ ﻞﻤﻌﺘﺴﺗ ﻻ
ﺩﺍﻮﳌﺍ ﻭﺍ (ﺕﺎﻔﻈﻨﳌﺍ ،ﺕﺎﻳﻮﻠﻘﻟﺍ ،ﻒﻴﻈﻨﺘﻟﺍ ﻕﻮﺤﺴﻣ ،ﻝﻮﺤﻜﻟﺍ،
ﻱﺩﺎﻋ ﻥﻮﺑﺎﺻ ،ﺔﻤﻋﺎﻧ ﺵﺎﻤﻗ ﺔﻌﻄﻘﺑ ﺭﺎﺒﻐﻟﺍ ﺢﺴﻣﺍ ﻯﺮﺧﻻﺍ ﺔﻳﻭﺎﻤﻴﻜﻟﺍ
.ﺔﻔﻴﻈﻧ ﺓﺭﻮﺼﺑ ﺔﺣﻭﺮﳌﺍ ﻆﻔﳊ ﺀﺎﻣﻭ
.ﻥﺪﻌﻤﻠﻟ ﻞﻛﺂﺗﻭ ﺔﻴﻜﻴﺘﺳﻼﺒﻟﺍ ﺀﺍﺰﺟﻸﻟ ﻒﻠﺗ ﻚﻟﺫ ﺐﺒﺴﻳ ﻥﺃ ﻦﻜﳝ
ﻥﺎﻣﻵﺍ ﺕﺎﻃﺎﻴﺘﺣﺍ
ﺎﹰﻤﺋﺍﺩ ﺕﺎﻤﻴﻠﻌﺘﻟﺍ ﻩﺬﻫ ﺓﺎﻋﺍﺮﲟ ﻢﻗ
F48_56ZX_TZ_KDK.indd 7F48_56ZX_TZ_KDK.indd 7 3/7/2018 3:42:56 PM3/7/2018 3:42:56 PM

8
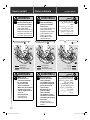
Parts pieces
AUpper Canopy ………………… 1
BPipe …………………………… 1
(9, 12, 16, 18 or 22 inches)
CLower Canopy ………………… 1
DMotor Assembly ……………… 1
EBlade …………………………… 3
FSpeed Regulator ……………… 1
GPulley Set ……………………… 1
HEllipse Bolt …………………… 1
IP-R Washers ………………… 1
JSpring Washer ……………… 1
KHexa Nut ……………………… 1
LCotter Pin ……………………… 1
Partes piezas
ACubierta superior …………… 1
BTubo …………………………… 1
(9, 12, 16, 18 o 22 pulgadas)
CCubierta inferior ……………… 1
DConjunto del motor ………… 1
EAspa …………………………… 3
FRegulador de velocidad …… 1
GConjunto de polea …………… 1
HPerno de elipse ……………… 1
IArandelas P-R ………………… 1
JArandela de resorte ………… 1
KTuerca hexagonal …………… 1
LPasador ………………………… 1
ﺩﺪﻌﻟﺍ ﺀﺍﺰﺟﻻﺍ
1 ……………………… ﺔﻳﻮﻠﻌﻟﺍ ﺔﹼﺒﻘﻟﺍ A
1 ……………………………… ﺏﻮﺒﻧﻻﺍ
(ﺔﺻﻮﺑ 22 ﻭﺃ 18 ﻭﺃ 16 ﻭﺃ 12 ﻭﺃ 9)
B
1 ……………………… ﺔﻴﻠﻔﺴﻟﺍ ﺔﹼﺒﻘﻟﺍ C
1 ……………………ﻙﺮﺤﻤﻟﺍ ﺔﻋﻮﻤﺠﻣ D
3 ……………………………… ﻞﺼﻨﻟﺍ E
1 ……………………… ﺔﻋﺮﺴﻟﺍ ﻢﻈﻨﻣ F
1 …………………… ﺓﺮﻜﺒﻟﺍ ﺔﻋﻮﻤﺠﻣ G
1 …………………… ﻱﻭﺎﻀﻴﺑ ﺭﺎﻤﺴﻤﻟﺍ H
1 ………………………… P-R ﺔﻜﻠﻔﻟﺍ I
1 …………………… ﺔﻀﺑﺎﻨﻟﺍ ﺔﻜﻠﻔﻟﺍ J
1 ………………… ﺔﻴﺳﺍﺪﺳ ﺔﻟﻮﻤﺼﻟﺍ K
1 …………………… ﻱﺭﻮﺑﺎﺨﻟﺍ ﺱﻮﺑﺪﻟﺍ L
Name of parts Nombre de las partes ﺀﺍﺰﺟﻷﺍ ﺀﺎﻤﺳﺃ
■
Attention:
• Do not place the Ceiling Fan directly on
the fl oor.
Can cause scratches to the product.
■
Atención:
• No coloque el ventilador de techo
directamente sobre el suelo.
Puede provocar arañazos al producto.
:ﻩﺎﺒﺘﻧﺍ
■
.ﺓﺮﺷﺎﺒﻣ ﺽﺭﻸﻟ ﺔﺴﻣﻼﻣ ﻒﻘﺴﻟﺍ ﺔﺣﻭﺮﻣ ﻊﻀﺗ ﻻ •
.ﺞﺘﻨﻤﻟﺎﺑ ﺵﻭﺪﺧ ﺙﺍﺪﺣﺇ ﻲﻓ ﺐﺒﺴﺘﻳ ﺪﻗ ﺍﺬﻫ ﻥﻷ
:ﺔﻈﺣﻼﻣ
■
ﺽﺍﺮﻏﻷ ﻞﻴﻟﺪﻟﺍ ﺍﺬﻫ ﻲﻓ ﺔﺿﻭﺮﻌﳌﺍ ﺭﻮﺼﻟﺍ •
.ﻲﻟﺎﳊﺍ ﺯﺎﻬﳉﺍ ﻦﻋ ﻒﻠﺘﺨﺗ ﺪﻗﻭ ﻂﻘﻓ ﺡﺮﺸﻟﺍ
■
Note:
• The illustrations in this manual are for
explanation purposes only and may differ
from the actual unit.
■
Nota:
• Las ilustraciones de este manual son
para fi nes ilustrativos solamente y
pueden ser diferentes de la unidad real.
(T-XC / XCMN -series)
(X-XC / XCMN -series)
60
47
30
85
85
43
(mm)
12
F
(T -series)
(X -series)
B
C
D
E
A
G
HIJKL
(mm)
F
62~64
80.6
80.6
57
4~5
7~8
9~10
(T-XG / XGMN -series)
(X-XG / XGMN -series)
F48_56ZX_TZ_KDK.indd 8F48_56ZX_TZ_KDK.indd 8 3/7/2018 3:42:58 PM3/7/2018 3:42:58 PM

9
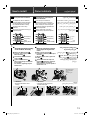
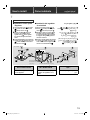
1Pull out the Safety Wire a from the
Pipe B as shown.
Remove the Safety Wire screw
b
from the Pipe and keep it for step 4-
4
on page 15.
Remove the Lower Canopy screw
c
from the Pipe and keep it for step 6-
2
on page 18.
1
Extraiga el cable de seguridad
a
del
tubo
B
como se muestra en la fi gura.
Quite el tornillo del cable de
seguridad b del tubo y guarde
estos tornillos para el paso 4-
4 de
la página 15.
Quite el tornillo de la cubierta
inferior c
del tubo y guarde para el
paso 6 - 2 en la página 18.
2Pull out the safety wire a from the
slit of the Pipe B.
3
Insert the Lower Canopy
C
to the
Pipe. Then insert the Upper Canopy
A
(with brand logo) to the Pipe.
• Do not tighten the Lower Canopy
screw
c
and the Upper Canopy
screw d.
2Extraiga el cable de seguridad
a
de la hendidura del tubo
B.
3Introduzca la cubierta inferior C
en el tubo. Después introduzca la
cubierta superior A (con marca de
logo) en el tubo.
• No apriete el tornillo de la cubierta
inferior c ni el de la cubierta
superior d.
■
Insert the canopy
■
Introduzca la cubierta
1
Check point after installation Compruebe el punto después
de la instalación ﺐﻴﻛﺮﺘﻟﺍ ﺪﻌﺑ ﺺﺤﻔﻟﺍ ﻁﺎﻘﻧ
Insert the Lower Canopy and the
Upper Canopy to the Pipe. The
screws are not tightened.
Introduzca la cubierta inferior y
superior en el tubo. Los tornillos no
están apretados.
ﻲﻓ ﻱﻮﻠﻌﻟﺍ ﺀﺎﻄﻐﻟﺍﻭ ﻲﻠﻔﺴﻟﺍ ﺀﺎﻄﻐﻟﺍ ﻞﺧﺩﺃ
.ﺔﻃﻮﺑﺮﻣ ﺖﺴﻴﻟ ﻲﻏﺍﺮﺒﻟﺍ .ﺏﻮﺒﻧﻷﺍ
The Upper Canopy (with brand
logo) is on top of the Lower Canopy
(without brand logo).
Cubierta superior (con marca de logo)
está encima de la cubierta inferior (sin
marca de logo).
ﺔﻤﻗ ﻰﻠﻋ (ﺔﻳﺭﺎﺠﺘﻟﺍ ﺔﻣﻼﻌﻟﺍ ﻊﻣ) ﺔﻳﻮﻠﻌﻟﺍ ﺔﹼﺒﻘﻟﺍ
.(ﺔﻳﺭﺎﺠﺘﻟﺍ ﺔﻣﻼﻌﻟﺍ ﻥﻭﺪﺑ) ﺔﻴﻠﻔﺴﻟﺍ ﺔﹼﺒﻘﻟﺍ
How to install Cómo instalarlo ﺐﻴﻛﺮﺘﻟﺍ ﺔﻴﻔﻴﻛ
B ﺏﻮﺒﻧﻷﺍ ﻦﻣ a ﻥﺎﻣﻷﺍ ﻚﻠﺳ ﺐﺤﺳﺍ
ﺢﺿﻮﻣ ﻮﻫ ﺎﻤﻛ
ﺏﻭﺑﻧﻷﺍ ﻥﻣ b ﻥﺎﻣﻷﺍ ﻙﻠﺳ ﻲﻏﺭﺑ ﻙﻔﺑ ﻡﻗ
.15 ﺔﺣﻔﺻ ﻲﻓ 4 -4 ﺓﻭﻁﺧﻠﻟ ﻪﺑ ﻅﻔﺗﺣﺍﻭ
ﺏﻭﺑﻧﻷﺍ ﻥﻣ c ﻲﻠﻔﺳﻟﺍ ﺀﺎﻁﻐﻟﺍ ﻲﻏﺭﺑ ﻙﻔﺑ ﻡﻗ
.18 ﺔﺣﻔﺻ ﻲﻓ 2 -6 ﺓﻭﻁﺧﻠﻟ ﻪﺑ ﻅﻔﺗﺣﺍﻭ
1
ﺔﹼﺒﻘﻟﺍ ﻝﺎﺧﺩﺇ
■
ﻕﺷ ﻥﻣ ﺝﺭﺎﺧﻠﻟ a ﻥﺎﻣﻷﺍ ﻙﻠﺳ ﺏﺣﺳﺍ
.Bﺏﻭﺑﻧﻷﺍ
2
.ﺏﻮﺒﻧﻷﺍ ﻲﻓ C ﻲﻠﻔﺴﻟﺍ ﺀﺎﻄﻐﻟﺍ ﻞﺧﺩﺃ
ﺭﺎﻌﺷ ﻪﺑ ﻱﺬﻟﺍ) A ﻱﻮﻠﻌﻟﺍ ﺀﺎﻄﻐﻟﺍ ﻞﺧﺩﺃ ﻢﺛ
.ﺏﻮﺒﻧﻷﺍ ﻲﻓ (ﺔﻛﺭﺎﳌﺍ
cﻲﻠﻔﺴﻟﺍ ﺀﺎﻄﻐﻟﺍ ﻲﻏﺮﺑ ﻂﺑﺭ ﻢﻜﺤﺗ ﻻ •
.dﻱﻮﻠﻌﻟﺍ ﺀﺎﻄﻐﻟﺍ ﻲﻏﺮﺑﻭ
3
B
B
C A
a
a
b
c
d
2 3
c
F48_56ZX_TZ_KDK.indd 9F48_56ZX_TZ_KDK.indd 9 3/7/2018 3:43:02 PM3/7/2018 3:43:02 PM

B
D
e
f
g
10
1
Pull the power cord
A
(from the
power supply) and insert into the Pipe
hole as shown.
1Extraiga el cable de corriente
A
(desde la alimentación eléctrica) e
insertelo en el orifi cio del tubo como
se muestra.
2Assemble the Pipe to the Motor
Assembly D.
First, ensure that the shaft cap
e
sits on the motor shaft
f
and is
tightened with the stopping screw
g
.
Then fi x the Pipe B to the shaft
cap e.
Ensure that the Pipe hole and the
motor shaft hole are aligned.
2Monte el tubo en el conjunto del
motor D.
Primero, asegúrese de que la tapa del eje
e
se sientan en el eje del motor
f
y
se aprieta con el tornillo de parada
g
.
Después, fi jar el tubo B a la tapa
de eje e.
Asegúrese de que el agujero de la tubería y
el agujero de eje del motor están alineados.
■
Assemble the Pipe to the
Motor Assembly
■
Monte el tubo en el
conjunto del motor
2
Check point after installation Compruebe el punto después
de la instalación
Make sure that the shaft cap and the
Pipe sit on the stopping screw.
Asegúrese de que la tapa del eje y el
tubo se asientan en el tornillo de parada.
CAUTION
Do not remove the
Stopping Screw.
Do not remove the
Shaft Cap.
Fix the Pipe correctly to
the motor shaft.
Can cause injury if the
Ceiling Fan drops.
ﻪﻴﺒﻨﺗ
.ﺯﺎﺠﺘﺣﻻﺍ ﻲﻏﺮﺑ ﻚﻔﺑ ﻢﻘﺗ ﻻ
.ﺩﻮﻤﻌﻟﺍ ﺀﺎﻄﻏ ﻚﻔﺑ ﻢﻘﺗ ﻻ
ﺩﻭﻣﻋ ﻊﻣ ﺏﻭﺑﻧﻷﺍ ﺕﻳﺑﺛﺗﺑ ﻡﻗ
.ﺢﻳﺣﺻ ﻝﻛﺷﺑ ﻙﺭﺣﻣﻟﺍ ﻥﺍﺭﻭﺩ
ﺔﺑﺎﺻﺇ ﺙﻭﺩﺣ ﻲﻓ ﺏﺑﺳﺗﻳ ﻥﺃ ﻥﻛﻣﻳ
ﺔﺣﻭﺭﻣ ﻁﻭﻘﺳ ﺔﻟﺎﺣ ﻲﻓ
.ﻑﻘﺳﻟﺍ
PRECAUCIÓN
No quite el tornillo de
parada.
No quite el tapa de eje.
Fijar el tubo
correctamente en el eje
del motor.
Si el ventilador del techo
se cae, puede causar
lesiones.
ﺭﺪﺼﻣ ﻦﻣ) A ﺀﺎﺑﺮﻬﻜﻟﺍ ﻚﻠﺳ ﺐﺤﺳﺍ
ﺏﻮﺒﻧﻷﺍ ﺔﺤﺘﻓ ﻲﻓ ﻪﻠﺧﺩﺃﻭ (ﺔﻗﺎﻄﻟﺍ ﺩﺍﺪﻣﺇ
.ﺢﺿﻮﻣ ﻮﻫ ﺎﻤﻛ
1
.Dﻙﺭﺣﻣﻟﺍ ﺔﻋﻭﻣﺟﻣ ﻊﻣ ﺏﻭﺑﻧﻷﺍ ﻊﻳﻣﺟﺗﺑ ﻡﻗ
ﻰﻠﻋ ﺭﻘﺗﺳﻣ eﻥﺍﺭﻭﺩﻟﺍ ﺩﻭﻣﻋ ﺀﺎﻁﻏ ﻥﺃ ﺩﻛﺄﺗ ،ﹰﻻﻭﺃ
ﻲﻏﺭﺑ ﻊﻣ ﻁﻭﺑﺭﻣﻭ f ﻙﺭﺣﻣﻟﺍ ﻥﺍﺭﻭﺩ ﺩﻭﻣﻋ
.g ﻑﺎﻘﻳﻹﺍ
ﺩﻭﻣﻋ ﺀﺎﻁﻏ ﻊﻣ B ﺏﻭﺑﻧﻷﺍ ﺕﻳﺑﺛﺗﺑ ﻡﻗ ﻙﻟﺫ ﺩﻌﺑ
.e ﻥﺍﺭﻭﺩﻟﺍ
ﺩﻭﻣﻋ ﺔﺣﺗﻓ ﻊﻣ ﺏﻭﺑﻧﻷﺍ ﺔﺣﺗﻓ ﺓﺍﺫﺎﺣﻣ ﻥﻣ ﺩﻛﺄﺗ
.ﻙﺭﺣﻣﻟﺍ ﻥﺍﺭﻭﺩ
2
ﺔﻋﻮﻤﺠﻣ ﻰﻠﻋ ﺏﻮﺒﻧﻷﺍ ﻊﻴﻤﺠﺗ
■
ﻙﺮﺤﻤﻟﺍ
ﻰﻠﻋ ﺏﻮﺒﻧﻷﺍﻭ ﺩﻮﻤﻌﻟﺍ ﺀﺎﻄﻏ ﺖﻴﺒﺜﺗ ﻦﻣ ﺪﻛﺄﺗ
.ﺯﺎﺠﺘﺣﻻﺍ ﻲﻏﺮﺑ
ﺐﻴﻛﺮﺘﻟﺍ ﺪﻌﺑ ﺺﺤﻔﻟﺍ ﻁﺎﻘﻧ
How to install Cómo instalarlo ﺐﻴﻛﺮﺘﻟﺍ ﺔﻴﻔﻴﻛ
ACeiling /
Techo /
ﻒﻘﺴﻟﺍ
F48_56ZX_TZ_KDK.indd 10F48_56ZX_TZ_KDK.indd 10 3/7/2018 3:43:04 PM3/7/2018 3:43:04 PM

11
3
Fix the Pipe and the Motor Assembly
with the Ellipse Bolt
H
, the P-R
Washers
I
, the Spring Washer
J
,
the Hexa Nut
K
and the Cotter Pin
L
.
The slit
h
of the Ellipse Bolt should
be at top and bottom.
Bend the Cotter Pin
L
at last as
shown.
3
Fije el tubo y el conjunto del motor
con perno de elipse
H
, Arandelas
P-R
I
, arandela de presión
J
,
tuerca hexagonal
K
y pasador
L
.
La hendiduras
h
del perno de elipse
deben quedar arriba y abajo.
Doble el pasador
L
al fi nal como se
muestra.
4Remove the safety wire screw
i
at the motor shaft
f. Fix the safety
wire
a fi rmly to the motor shaft
with safety wire screw
i.
Tighten the safety wire screw
i.
4
Quite el tornillo del cable de seguridad
i
en el eje del motor
f
.
Fije el cable de seguridad
a
fi rmemente en el eje del motor con el
tornillo del cable de seguridad
i
.
Apriete el tornillo del cable de
seguridad
i
.
WARNING
Ensure that the Pipe
is fully tightened to
the motor shaft. (Bolt
tightening torque is
800 ~ 1200 N·cm). And
the Cotter Pin must
be inserted into the
Ellipse Bolt hole and
bent.
Can cause injury if the
Ceiling Fan drops.
ADVERTENCIA
Asegúrese de que el
tubo esté totalmente
apretado en el eje del
motor. (Par de apriete
del perno es 800~1200
N•cm).
El pasador debe
fi jarse en el agujero
del perno y doblarse.
Si el ventilador del techo
cae, puede causar
lesiones.
f
i
(a) 40~45°
ﻡﺍﺪﺨﺘﺳﺎﺑ ﻙﺮﶈﺍ ﺔﻋﻮﻤﺠﻣﻭ ﺏﻮﺒﻧﻷﺍ ﺖﻴﺒﺜﺘﺑ ﻢﻗ
ﺓﺩﺭﻮﻟﺍﻭ
I
P-R
ﺕﺍﺩﺭﻭﻭ
H
ﻱﻭﺎﻀﻴﺒﻟﺍ ﺭﺎﻤﺴﳌﺍ
ﻚﻟﺬﻛﻭ
K
ﺔﻴﺳﺍﺪﺴﻟﺍ ﺓﺩﺭﻮﻟﺍﻭ
J
ﺔﻴﻀﺑﺎﻨﻟﺍ
.
L
ﻕﻮﻘﺸﳌﺍ ﺭﺎﻤﺴﳌﺍ
ﻱﻭﺎﻀﻴﺒﻟﺍ ﺭﺎﻤﺴﻤﻠﻟ
h
ﻖﺸﻟﺍ ﻥﻮﻜﻳ ﻥﺃ ﺐﺠﻳ
ﻕﻮﻘﺸﳌﺍ ﺭﺎﻤﺴﳌﺍ ﻲﻨﺜﺑ ﻢﻗ .ﻞﻔﺳﺃﻭ ﻰﻠﻋﺄﺑ
.ﺢﺿﻮﻣ ﻮﻫ ﺎﻤﻛ ﺔﻳﺎﻬﻨﻟﺍ ﻲﻓ
L
3
ﺮﻳﺬﺤﺗ
ﺍﺩﻭﺪﺸﻣ ﺏﻮﺒﻧﻷﺍ ﻥﺃ ﻦﻣ ﺪﻛﺄﺗ
.ﻙﺮﺤﻤﻟﺍ ﺩﻮﻤﻋ ﻰﻠﻋ ﺔﻠﻣﺎﻛ ﺓﺭﻮﺼﺑ
1200 ~ 800 ﻮﻫ ﻲﻏﺮﺒﻟﺍ ﺪﺷ ﻡﺰﻋ)
.(N•cm
ﻱﺭﻮﺑﺎﺨﻟﺍ ﺱﻮﺑﺪﻟﺍ ﺖﻴﺒﺜﺗ ﺐﺠﻳﻭ
ﺱﻮﺑﺪﻟﺍ ﺖﻴﺒﺜﺗ ﺐﺠﻳﻭ ﻰﻠﻋ
ﺭﺎﻤﺴﻤﻟﺍ ﺔﺤﺘﻓ ﻰﻠﻋ ﻱﺭﻮﺑﺎﺨﻟﺍ
.ﻲﻨﺤﻣﻭ ﻱﻭﺎﻀﻴﺒﻟﺍ
ﺔﺑﺎﺻﺇ ﺙﻭﺩﺣ ﻲﻓ ﺏﺑﺳﺗﻳ ﻥﺃ ﻥﻛﻣﻳ
.ﻑﻘﺳﻟﺍ ﺔﺣﻭﺭﻣ ﻁﻭﻘﺳ ﺔﻟﺎﺣ ﻲﻓ
ﻥﺍﺭﻭﺩ ﺩﻮﻤﻋ ﻰﻠﻋ i ﻥﺎﻣﻷﺍ ﻚﻠﺳ ﻲﻏﺮﺑ ﻊﻠﺧﺍ
a ﻥﺎﻣﻷﺍ ﻚﻠﺳ ﺖﻴﺒﺜﺘﺑ ﻢﻗ . f ﻙﺮﶈﺍ
.i ﻥﺎﻣﻷﺍ ﻚﻠﺳ ﻲﻏﺮﺑ ﻡﺍﺪﺨﺘﺳﺎﺑ ﻡﺎﻜﺣﺈﺑ
. i ﻥﺎﻣﻷﺍ ﻚﻠﺳ ﻲﻏﺮﺑ ﻂﺑﺭﺍ
4
How to install Cómo instalarlo ﺐﻴﻛﺮﺘﻟﺍ ﺔﻴﻔﻴﻛ
a
i
H
I J K L
hL
F48_56ZX_TZ_KDK.indd 11F48_56ZX_TZ_KDK.indd 11 3/7/2018 3:43:11 PM3/7/2018 3:43:11 PM

12
5Connect the Power Cord A to
the 3 pin terminal j.
5
Conecte el cable de alimentación
A
al terminal de 3 pins
j
.
Make sure all
the terminals are
connected correctly
by a competent
person to avoid
electrical hazards.
Make sure all the wires
must be fully insert
and the 3 pin terminal
screw is
fi rmly tightened.
Can cause fi re,
electrical shock.
Asegúrese de que
todos los terminales
están conectados
correctamente por parte
de personal competente
para evitar riesgo de
cortocircuitos.
Asegúrese de que
todos los cables
están insertados
correctamente y que la
terminal de 3 conexiones
atornillable está apretada
fi rmemente.
Puede provocar un
incendio o una descarga
eléctrica.
Neutral (blue)
Live (brown)
Earth (green.yellow)
Neutral (Azul)
Vivo (Marrón)
Tierra (verde.amarillo)
(ﻕﺭﺯﺍ) ﺪﻳﺎﺤﻣ
(ﻲﻨﺑ) ﻲﺣ
ﻱﺫ ﻑﺮﻄﻟﺍ ﻊﻣ
A
ﺀﺎﺑﺮﻬﻜﻟﺍ ﻚﻠﺳ ﻞﻴﺻﻮﺘﺑ ﻢﻗ
.
j
ﻥﻮﻨﺳ 3
5
ﻞﻴﺻﻮﺘﻟﺍ ﻑﺍﺮﻃﺃ ﻥﺃ ﻦﻣ ﺪﻛﺄﺗ
ﻞﺒﻗ ﻦﻣ ﺔﺤﻴﺤﺻ ﺓﺭﻮﺼﺑ ﺔﻟﻮﺻﻮﻣ
ﺐﹼﻨﺠﺘﻟ ﻚﻟﺫﻭ ﻦﻴﺼﺘﺨﻣ ﻦﻴﻔﻇﻮﻣ
.ﺔﻴﺋﺎﺑﺮﻬﻜﻟﺍ ﺮﻃﺎﺨﻤﻟﺍ
ﻢﺗ ﻙﻼﺳﻷﺍ ﻊﻴﻤﺟ ﻥﺃ ﻦﻣ ﺪﻛﺄﺗ
ﻭ ﺢﻴﺤﺼﻟﺍ ﻞﻜﺸﻟﺎﺑ ﺎﻬﻟﺎﺧﺩﺇ
ﺲﻴﺑﺎﺑﺩ 3 ﻦﻣ ﻞﻴﺻﻮﺘﻟﺍ ﻑﺮﻃ ﻥﺃ
.ﺍﺪﻴﺟ ﻢﻜﺤﻣ
ﺔﻣﺪﺻ ،ﻖﻳﺮﺣ ﺐﺒﺴﻳ ﻥﺃ ﻦﻜﻤﻳ
.ﺔﻴﺋﺎﺑﺮﻬﻛ
How to install Cómo instalarlo ﺐﻴﻛﺮﺘﻟﺍ ﺔﻴﻔﻴﻛ
The safety wire must
be fi xed correctly and
connected at all times.
Can cause injury if the
Ceiling Fan drops.
Ensure that the angle (a)
keeps 40-45 degree and
the safety wire does not
touch the motor surface.
El cable de seguridad debe
fi jarse correctamente y
permanecer conectado
todo el tiempo.
Si el ventilador del techo cae,
puede causar lesiones.
Asegúrese de que el ángulo
(a) se mantiene a 40-45
grados y que el cable
de seguridad no toca la
superfi cie del motor.
ﺮﻳﺬﺤﺗ
ﺓﺭﻮﺼﺑ ﻥﺎﻣﻵﺍ ﻚﻠﺳ ﺖﻴﺒﺜﺗ ﺐﺠﻳ
ﻞﻛ ﻲﻓ ﻻﻮﺻﻮﻣﻭ ﺔﺤﻴﺤﺻ
.ﺕﺎﻗﻭﻷﺍ
ﻲﻓ ﺔﺑﺎﺻﺇ ﺙﻭﺩﺣ ﻲﻓ ﺏﺑﺳﺗﻳ ﻥﺃ ﻥﻛﻣﻳ
.ﻑﻘﺳﻟﺍ ﺔﺣﻭﺭﻣ ﻁﻭﻘﺳ ﺔﻟﺎﺣ
ﺔﻣﻳﻗ ﻰﻠﻋ ﺔﺗﺑﺎﺛ (a) ﺔﻳﻭﺍﺯﻟﺍ ﻥﺃ ﺩﻛﺄﺗ
ﻻ ﻥﺎﻣﻷﺍ ﻙﻠﺳ ﻥﺃﻭ ﺔﺟﺭﺩ 45-40
.ﻙﺭﺣﻣﻟﺍ ﺢﻁﺳ ﺱﻣﻠﻳ
WARNING
ADVERTENCIA
WARNING
ADVERTENCIA
ﺮﻳﺬﺤﺗ
ﻲﺻﺭﻻﺍ (ﺮﻔﺻﺃ.ﺮﻀﺧﺃ)
j
A
j
A
j
A
F48_56ZX_TZ_KDK.indd 12F48_56ZX_TZ_KDK.indd 12 3/7/2018 3:43:19 PM3/7/2018 3:43:19 PM

13
Check point after installation Compruebe el punto después
de la instalación
All wires are connected correctly by a
competent person.
Todos los cables están conectados
correctamente por personal competente.
The Ellipse Bolt, the P-R Washers,
the Spring Washer and the Hexa Nut
are fi rmly tightened, and the Cotter
Pin is inserted and bent for safety.
El perno de elipse, la arandelas P-R,
arandela de presión y la tuerca hexagonal
están fi rmemente apretados y el pasador está
pasado y doblado por motivos de seguridad.
The safety wire screw is fi rmly
tightened.
El tornillo del cable de seguridad está
fi rmemente apretado.
Neutral (blue) Neutral (Azul)
Live (brown) Vivo (Marrón)
Earth
(green.yellow)
Tierra
(verde.amarillo)
(ﻕﺭﺯﺍ) ﺪﻳﺎﺤﻣ
(ﻲﻨﺑ) ﻲﺣ
ﻲﺻﺭﻻﺍ
(ﺮﻔﺻﺃ.ﺮﻀﺧﺃ)
ﺔﻀﺑﺎﻨﻟﺍ ﺔﻜﻠﻔﻟﺍ ،P-R ﺔﻜﻠﻓ ،ﻱﻭﺎﻀﻴﺒﻟﺍ ﺭﺎﻤﺴﻤﻟﺍ
ﺔﻤﻜﺤﻣ ﺓﺭﻮﺼﺑ ﺓﺩﻭﺪﺸﻣ ﺔﻴﺳﺍﺪﺴﻟﺍ ﺔﻟﻮﻤﺼﻟﺍﻭ
.ﻥﺎﻣﻵﺍ ﻞﺟﺍ ﻦﻣ ﻲﻨﺤﻣﻭ ﺔﻠﺧﺪﻣ ﻱﺭﻮﺑﺎﺨﻟﺍ ﺱﻮﺑﺪﻟﺍﻭ
.ﺔﻤﻜﺤﻣ ﺓﺭﻮﺼﺑ ﺩﻭﺪﺸﻣ ﻥﺎﻣﻵﺍ ﻚﻠﺳ ﻲﻏﺮﺑ
ﻞﺒﻗ ﻦﻣ ﺔﺤﻴﺤﺻ ﺓﺭﻮﺼﺑ ﻙﻼﺳﻷﺍ ﻞﻴﺻﻮﺗ ﺐﺠﻳ
.ﻦﻴﻠﻫﺆﻣ ﻦﻴﻔﻇﻮﻣ
ﺐﻴﻛﺮﺘﻟﺍ ﺪﻌﺑ ﺺﺤﻔﻟﺍ ﻁﺎﻘﻧ
■
Attention:
• Ensure that the Blade is fi xed
correctly.
■
Atención:
• Asegúrese de que el aspa esté
correctamente fi jada.
1Remove the Blade Screws
k
(6 pieces, silver colour) from the
Motor Assembly
D.
2
Assemble the Blade towards the
cover hook
l
.
3Tighten the Blade Screws k
(Silver colour) fi rmly. Use 2 screws
for one Blade.
For reference, tightening torque is
250-300 N•cm.
1Quite el tornillo del aspa
k
(6 unidades, plateados) del conjunto
del motor
D.
2Monte las aspas hacia el gancho de
la tapa
l.
3Apriete fi rmemente las aspas con
tornillos
k (plateados). Cada aspa
utiliza 2 unidades de tornillos.
Como referencia, el par de apriete es
de 250-300 N • cm.
■
Assemble the Blade assembly
set to the Motor Assembly
■
Monte el conjunto de montaje
de las aspas al conjunto del
motor
3
2 3
l
ﺔﺸﻳﺮﻟﺍ ﺔﻋﻮﻤﺠﻣ ﻢﻘﻃ ﻊﻴﻤﺠﺗ
■
ﻙﺮﺤﻤﻟﺍ ﺔﻋﻮﻤﺠﻣ ﻰﻠﻋ
(ﻲﻀﻓ ﻥﻮﻠﺑ ،ﻲﻏﺍﺮﺑ 6) k ﻞﺼﻨﻟﺍ ﻲﻏﺍﺮﺑ ﻚﻔﺑ ﻢﻗ
.D ﻙﺮﶈﺍ ﺔﻋﻮﻤﺠﻣ ﻦﻣ
1
.lﺀﺎﻄﻐﻟﺍ ﻑﺎﻄﺧ ﻩﺎﲡﺎﺑ ﻞﺼﻨﻟﺍ ﻊﻴﻤﺠﺘﺑ ﻢﻗ 2
.ﻡﺎﻜﺣﺈﺑ (ﻲﻀﻓ ﻥﻮﻠﺑ) k ﻞﺼﻨﻟﺍ ﻲﻏﺍﺮﺑ ﻂﺑﺭﺍ
.ﺪﺣﺍﻮﻟﺍ ﻞﺼﻨﻠﻟ ﲔﻴﻏﺮﺑ ﻡﺪﺨﺘﺳﺍ
300-250 ﻎﻠﺒﻳ ﻂﺑﺮﻟﺍ ﻡﺰﻋ ،ﺔﻳﺩﺎﺷﺭﺇ ﺔﻤﻴﻘﻛ
.ﻢﺳ•ﻦﺗﻮﻴﻧ
3
:ﻩﺎﺒﺘﻧﺍ
■
.ﺢﻴﺤﺻ ﻞﻜﺸﺑ ﻞﺼﻨﻟﺍ ﺖﻴﺒﺜﺗ ﻦﻣ ﺪﻛﺄﺗ •
1
k
D
How to install Cómo instalarlo ﺐﻴﻛﺮﺘﻟﺍ ﺔﻴﻔﻴﻛ
Blade Safety Hanger /
Aspa de seguridad
percha /
ﺮﺠﻨﻫ ﺔﻣﻼﺴﻟﺍ ﻞﺼﻨﻟﺍ
F48_56ZX_TZ_KDK.indd 13F48_56ZX_TZ_KDK.indd 13 3/7/2018 3:43:21 PM3/7/2018 3:43:21 PM

B
21 3
m
G
BC
n
14
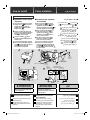
1Take out the Pulley Set G from the
parts set.
2Cross the C hook
m of the Pulley
Set to the Pipe B, inclining the C
hook and aligning it parallel with the
Pipe hole.
3Place the pulley
n onto the ceiling
hook B.
1Saque el conjunto de la polea G
del conjunto de partes.
2
Cruzar el gancho C
m
del conjunto
de la polea con el tubo
B
, inclinando
el gancho C y alineándolo en paralelo
con el orifi cio del tubo.
3Coloque la polea
n en el gancho
del techo B.
■
Install to the ceiling
■
Instalar en el techo
4
L
(L > 1 m)
(H > 2.3 m)H
ﻒﻘﺴﻟﺍ ﻰﻠﻋ ﺐﻴﻛﺮﺘﻟﺍ
■
.ﺀﺍﺰﺟﻷﺍ ﺔﻋﻮﻤﺠﻣ ﻦﻣ G ﺓﺮﻜﺒﻟﺍ ﻢﻘﻃ ﺝﺮﺨﺘﺳﺍ 1
ﻰﻟﺇ ﺕﺍﺮﻜﺒﻟﺍ ﺔﻋﻮﻤ m C ﻑﺎﻄﳋﺍ ﺯﻭﺎﲡ
ﻪﺗﺍﺫﺎﺤﻣﻭ C ﻑﺎﻄﳋﺍ ﺔﻟﺎﻣﺇ ﻊﻣ ،B ﺏﻮﺒﻧﻷﺍ
.ﺏﻮﺒﻧﻷﺍ ﺔﺤﺘﻓ ﺓﺍﺯﺍﻮﲟ
2
.Bﻒﻘﺴﻟﺍ ﻑﺎﻄﺧ ﻰﻠﻋ n ﺓﺮﻜﺒﻟﺍ ﻊﺿ 3
How to install Cómo instalarlo ﺐﻴﻛﺮﺘﻟﺍ ﺔﻴﻔﻴﻛ
The Blade must be
fi xed correctly.
Can cause no air fl ow.
Can cause injury if the
Blade drops.
Tighten the Blade
Screws fi rmly using a
screw driver.
Can cause injury if the
Blade drops.
Do not remove Blade
Safety Hanger from
Blade.
Can cause injury if the
Blade drops.
El aspa debe fi jarse
correctamente.
Podría causar una
ausencia de circulación
de aire.
Si el aspa se cae,
puede causar lesiones.
Apriete los tornillos
del aspa fi rmemente
utilizando un
destornillador.
Si el aspa se cae,
puede causar lesiones.
No quite la aspa de
seguridad
percha desde aspa.
Si el aspa se cae,
puede
causar lesiones.
Check point after installation Compruebe el punto después
de la instalación
The Blade Screws (6 pieces) fi xing the
Blade assembly are securely tightened.
Los tornillos del aspa (6 unidades) para
asegurar el montaje del aspa están
atornillados fi rmemente.
Blade Safety Hanger must fi x at the
position on Blade. Aspa de seguridad percha debe fi jar en la
posición en la aspa.
ﺐﻴﻛﺮﺘﻟﺍ ﺪﻌﺑ ﺺﺤﻔﻟﺍ ﻁﺎﻘﻧ
ﺔﻋﻮﻤﺠﻣ ﺖﻴﺒﺜﺘﻟ (ﻲﻏﺍﺮﺑ 6) ﺔﺸﻳﺮﻟﺍ ﻲﻏﺍﺮﺑ
.ﺔﻤﻜﺤﻣ ﺓﺭﻮﺼﺑ ﺓﺩﻭﺪﺸﻣ ﺔﺸﻳﺮﻟﺍ
ﺐﺠﻳ ﻞﺼﻨﻟﺍ ﺔﺘﺑﺎﺛ ﻲﻓ ﺎﻬﻔﻗﻮﻣ ﻥﺄﺸﺑ ﻞﺼﻧ
.ﺮﺠﻨﻫ ﺔﻣﻼﺴﻟﺍ
CAUTION
PRECAUCIÓN
ﺔﺣﻭﺮﻤﻟﺍ ﺕﺍﺮﻔﺷ ﺖﻴﺒﺜﺗ ﺐﺠﻳ
.ﺔﺤﻴﺤﺻ ﺓﺭﻮﺼﺑ
ﻙﺎﻨﻫ ﻥﻮﻜﻳ ﻻ ﻥﺍ ﻦﻜﻤﻳ ﻚﻟﺫ ﻑﻼﺨﺑ
.ﺀﺍﻮﻬﻠﻟ ﻖﻓﺪﺗ
ﺪﺸﻟﺍ ﻡﺪﻋ ﺐﺒﺴﻳ ﻥﺍ ﻦﻜﻤﻳ
.ﺔﺣﻭﺮﻤﻟﺍ ﺖﻄﻘﺳ ﺍﺫﺍ ﺡﺮﺟ
ﻢﻜﺤﻤﻟﺍ
ﺓﺭﻮﺼﺑ ﺔﺸﻳﺮﻟﺍ ﻲﻏﺍﺮﺑ ﺪﺷ
.ﻲﻏﺍﺮﺑ ﻚﻔﻣ ﻝﺎﻤﻌﺘﺳﺎﺑ ﺔﻤﻜﺤﻣ
ﺪﺸﻟﺍ ﻡﺪﻋ ﺐﺒﺴﻳ ﻥﺍ ﻦﻜﻤﻳ
ﺖﻄﻘﺳ ﺍﺫﺍ ﺡﺮﺟ ﻢﻜﺤﻤﻟﺍ
.ﺔﺣﻭﺮﻤﻟﺍ
ﺮﺠﻨﻫ ﺔﻣﻼﺴﻟﺍ ﻞﺼﻧ ﺔﻟﺍﺯﺈﺑ ﻢﻘﺗ ﻻ
.ﻞﺼﻨﻟﺍ ﻦﻣ
ﺪﺸﻟﺍ ﻡﺪﻋ ﺐﺒﺴﻳ ﻥﺍ ﻦﻜﻤﻳ
.ﺔﺣﻭﺮﻤﻟﺍ ﺖﻄﻘﺳ ﺍﺫﺍ ﺡﺮﺟ
ﻢﻜﺤﻤﻟﺍ
ﻪﻴﺒﻨﺗ
Ceiling /
Techo /
ﻒﻘﺴﻟﺍ
F48_56ZX_TZ_KDK.indd 14F48_56ZX_TZ_KDK.indd 14 3/7/2018 3:43:35 PM3/7/2018 3:43:35 PM

15
■
Note:
• Step 3 can be done before
step 2. In this case, make sure
that the Ceiling Fan maintains a
straight position to avoid the Blade
from touching the ceiling during
installation.
• In case “U” hook C is being used,
installation method is the same.
■
Nota:
• El paso
3
se puede realizar antes del
paso
2
.
En este caso, asegúrese de que el
ventilador de techo mantiene una
posición recta para evitar que el aspa
toque el techo durante la instalación.
• En el caso de que se utilice un
gancho en “U”, C el procedimiento
de instalación es el mismo.
Ensure that the ceiling
hook can afford more
than 10 times the
Ceiling Fan weight.
Can cause injury if the
Blade drops.
• Product weight
approximately 6
kg
Ensure that the Ceiling
Fan is not tilted so
that the Blade does
not touch the ceiling
during installation.
Can cause injury if the
Ceiling Fan drops
Asegúrese de que
el gancho puede
aguantar 10 veces el
peso del ventilador de
techo.
Si el aspa se cae,
puede causar lesiones.
• Peso del producto 6
kg
aproximadamente
Asegure que el
ventilador de techo
no está inclinado de
forma que el aspa no
toque el techo durante
la instalación.
Si el ventilador del techo
cae, puede causar
lesiones.
Check point after installation Compruebe el punto después
de la instalación
The Ceiling Fan is securely fi xed onto
the ceiling hook.
El ventilador de techo está fi jado
seguro al gancho del techo.
:ﺔﻈﺣﻼﻣ
■
.
2 ﺓﻭﻁﺧﻟﺍ ﻝﺑﻗ 3 ﺓﻭﻁﺧﻟﺍ ﺀﺍﺭﺟﺇ ﻥﻛﻣﻳ •
ﺔﺣﻭﺮﻣ ﺀﺎﻘﺑ ﻦﻣ ﻖﻘﲢ ،ﺔﻟﺎﳊﺍ ﻩﺬﻫ ﻲﻓ
ﺔﺴﻣﻼﻣ ﺐﻨﺠﺘﻟ ﻢﻴﻘﺘﺴﻣ ﻊﺿﻭ ﻲﻓ ﻒﻘﺴﻟﺍ
.ﺐﻴﻛﺮﺘﻟﺍ ﺀﺎﻨﺛﺃ ﻒﻘﺴﻠﻟ ﻞﺼﻨﻟﺍ
ﻑﺮﺣ ﻞﻜﺷ ﻰﻠﻋ ﻑﺎﻄﺧ ﻡﺍﺪﺨﺘﺳﺍ ﺔﻟﺎﺣ ﻲﻓ •
.ﻲﻫ ﺎﻤﻛ ﺐﻴﻛﺮﺘﻟﺍ ﺔﻘﻳﺮﻃ ﻥﻮﻜﺗ ، C “U”
ﻑﺎﻄﺧ ﻰﻠﻋ ﻦﻣﺁ ﻞﻜﺸﺑ ﺔﺘﺒﺜﻣ ﻒﻘﺴﻟﺍ ﺔﺣﻭﺮﻣ
.ﻒﻘﺴﻟﺍ
ﺐﻴﻛﺮﺘﻟﺍ ﺪﻌﺑ ﺺﺤﻔﻟﺍ ﻁﺎﻘﻧ
4Loop the safety wire a to the
ceiling hook B and fi x it to the Pipe
B with the safety wire screw b
removed in page 9, 1- 1.
4Asegure el cable de protección a
al gancho del techo B y sujételo al
tubo B con el tornillo del cable de
seguridad b que se retiró en 1- 1
Página 9.
ﻑﺎﻄﳋ a ﻥﺎﻣﻷﺍ ﻚﻠﺳ ﻦﻣ ﺓﻭﺮﻋ ﻊﻨﺻﺍ
B ﺏﻮﺒﻧﻻﺍ ﻊﻣ ﻪﺘﻴﺒﺜﺘﺑ ﻢﻗﻭ B ﻒﻘﺴﻟﺍ
ﰎ ﻱﺬﻟﺍ b ﻥﺎﻣﻷﺍ ﻚﻠﺳ ﻲﻏﺮﺑ ﻡﺍﺪﺨﺘﺳﺎﺑ
. 1 -1 ،9 ﺔﺤﻔﺻ ﻲﻓ ﻪﻜﻓ
4
How to install Cómo instalarlo ﺐﻴﻛﺮﺘﻟﺍ ﺔﻴﻔﻴﻛ
CAUTION
PRECAUCIÓN
ﻞﹼﻤﺤﺘﻳ ﻑﺎﻄﺨﻟﺍ ﻥﺃ ﻦﻣ ﺪﻛﺄﺗ
ﺔﺣﻭﺮﻣ ﻥﺯﻭ ﻑﺎﻌﺿﺃ 10 ﻦﻣ ﺮﺜﻛﺃ
.ﻒﻘﺴﻟﺍ
ﺪﺸﻟﺍ ﻡﺪﻋ ﺐﺒﺴﻳ ﻥﺍ ﻦﻜﻤﻳ
ﺖﻄﻘﺳ ﺍﺫﺍ ﺡﺮﺟ ﻢﻜﺤﻤﻟﺍ
.ﺔﺣﻭﺮﻤﻟﺍ
ﻢﺠﻛ 6 ﻲﻟﺍﻮﺣ ﺞﺘﻨﳌﺍ ﻥﺯﻭ •
ﺮﻴﻏ ﻒﻘﺴﻟﺍ ﺔﺣﻭﺮﻣ ﻥﺍ ﻦﻣ ﺪﻛﺄﺗ
ﺲﻣﻼﺗ ﻻ ﺶﻳﺮﻟﺍ ﻥﺍ ﺚﻴﺤﺑ ﺔﻠﺋﺎﻣ
.ﺐﻴﻛﺮﺘﻟﺍ ﺀﺎﻨﺛﺃ ﻒﻘﺴﻟﺍ
ﺔﺑﺎﺻﺇ ﺙﻭﺩﺣ ﻲﻓ ﺏﺑﺳﺗﻳ ﻥﺃ ﻥﻛﻣﻳ
.ﻑﻘﺳﻟﺍ ﺔﺣﻭﺭﻣ ﻁﻭﻘﺳ ﺔﻟﺎﺣ ﻲﻓ
ﻪﻴﺒﻨﺗ
ﺮﻳﺬﺤﺗ
ADVERTENCIA
WARNING
B
a
Bb
F48_56ZX_TZ_KDK.indd 15F48_56ZX_TZ_KDK.indd 15 3/7/2018 3:43:38 PM3/7/2018 3:43:38 PM

16
How to install Cómo instalarlo ﺐﻴﻛﺮﺘﻟﺍ ﺔﻴﻔﻴﻛ
Connect to the power supply
according to the wiring instruction
below.
Conecte la alimentación eléctrica
según las instrucciones de cableado
de abajo. ﺕﺎﻤﻴﻠﻌﺗ ﺐﺴﺣ ﺔﻴﺋﺎﺑﺮﻬﻜﻟﺍ ﺔﻗﺎﻄﻟﺍ ﻚﻠﺳ ﻞﺻﻭﺃ
.ﻞﻔﺳﻷﺍ ﻲﻓ ﺓﺩﻮﺟﻮﳌﺍ ﻙﻼﺳﻷﺍ
■
Wiring instruction
■
Instrucción de cableado
5
Wiring diagram / Esquema del cableado / ﺕﻼﻴﺻﻮﺘﻟﺍ ﺢﺿﻮﻳ ﻞﻜﺷ
Check point after installation Compruebe el punto después
de la instalación
The safety wire is looped to the ceiling
hook and securely fi xed to the Pipe.
El cable de seguridad es asegurado
al gancho del techo y atornillado al
tubo.
The safety wire must
be fi xed correctly.
Can cause injury if the
Ceiling Fan drops.
El cable de seguridad
se ha de fi jar
correctamente.
Si el ventilador del techo
cae, puede causar
lesiones.
Ceiling Fan / Ventilador de techo / ﻒﻘﺳ ﺔﺣﻭﺮﻣ
Neutral / Neutral / ﺪﻳﺎﺤﻣ
Source / Fuente / ﺭﺪﺼﻣ
Live in / Vivo dentro / ﻲﺤﻟﺍ ﻝﻮﺧﺩ
Earth / Tierra / ﻲﺻﺭﻻﺍ
Live / Vivo / ﻲﺣ
Connector / Conector / ﻞﺻﻮﻣ
Black / Negro / ﺩﻮﺳﺍ
Yellow or White /
Amarillo o blanco /
ﺾﻴﺑﺃ ﻭﺍ ﺮﻔﺻﺃ
Speed Regulator /
Regulador de velocidad /
ﺔﻋﺮﺴﻟﺍ ﻢﻈﻨﻣ
Green·Yellow /
Verde·Amarillo /
ﺮﻔﺻﺍ·ﺮﻀﺧﺍ
Capacitor /
Condensador /
ﻒﺜﻜﻣ
Live in /
Vivo dentro /
ﻲﺤﻟﺍ ﻝﻮﺧﺩ
Black /
Negro /
ﺩﻮﺳﺍ
Terminal /
Terminal /
ﻞﻴﺻﻮﺘﻟﺍ ﻑﺮﻃ
Terminal /
Terminal /
ﻞﻴﺻﻮﺘﻟﺍ ﻑﺮﻃ
Capacitor / Condensador / ﻒﺜﻜﻣ
Motor /
Motor /
ﻙﺮﺤﻤﻟﺍ
Red /
Rojo /
ﺮﻤﺣﺍ
ﻁﻮﺑﺮﻣﻭ ﻒﻘﺴﻟﺍ ﻑﺎﻄﺧ ﻲﻓ ﺖﺒﺜﻣ ﻥﺎﻣﻷﺍ ﻚﻠﺳ
.ﺏﻮﺒﻧﻷﺍ ﻲﻓ ﻡﺎﻜﺣﺈﺑ
ﺐﻴﻛﺮﺘﻟﺍ ﺪﻌﺑ ﺺﺤﻔﻟﺍ ﻁﺎﻘﻧ
ﻙﻼﺳﻷﺍ ﺕﺎﻤﻴﻠﻌﺗ
■
Brown /
Marrón /
ﻲﻨﺑ
CAUTION
PRECAUCIÓN
ﻞﻜﺸﺑ ﻥﺎﻣﻻﺍ ﻚﻠﺳ ﺖﻴﺒﺜﺗ ﺐﺠﻳ
.ﺢﻴﺤﺻ
ﺔﺑﺎﺻﺇ ﺙﻭﺩﺣ ﻲﻓ ﺏﺑﺳﺗﻳ ﻥﺃ ﻥﻛﻣﻳ
.ﻑﻘﺳﻟﺍ ﺔﺣﻭﺭﻣ ﻁﻭﻘﺳ ﺔﻟﺎﺣ ﻲﻓ
ﻪﻴﺒﻨﺗ
F48_56ZX_TZ_KDK.indd 16F48_56ZX_TZ_KDK.indd 16 3/7/2018 3:43:40 PM3/7/2018 3:43:40 PM

17
El cableado eléctrico lo
tiene que hacer personal
cualifi cado.
En caso contrario, podría
causar un incendio,
descarga eléctrica.
Este producto no incluye
cable y enchufe u otros
medios para su conexión
eléctrica. Para evitar
cualquier peligro, la
conexión o cambio del
cable de alimentación o
cable principal deberá
ser realizada por
personal califi cado.
Por favor, utilice
227IEC53 (RVV) o un
tubo con un grosor de
1 mm o superior. (Para
otros requisitos como
el diámetro del cable
principal, por favor
utilícelo de acuerdo con
la normativa de su país).
Debería instalarse con un
interruptor unidireccional
de dos polos (disyuntor)
con un espacio de
contacto de un mínimo
de 3 mm. en el circuito de
instalación fi jado.
Puede causar un incendio,
descarga eléctrica.
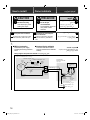
Electrical wiring
must be done by a
competent person.
Can cause fi re,
electrical shock.
This product is not
provided with a cord and
plug or with other means
for connection to the
supply.
When connecting or
changing the power cord
or lead wire, it must be
performed by a qualifi ed
person in order to avoid a
hazard.
Please use
227IEC53(RVV) or
thickness of tube 1 mm or
above. (If there are other
requirements such as
the diameter of lead wire,
please use according
to the regulation of the
country). This product
should be installed with a
double poles single throw
switch (breaker switch)
with a minimum of 3 mm
contact gap in the fi xed
installation circuit.
Can cause fi re, electrical
shock.
ﻭ ﻚﻠﺴﺑ ﺓﺩﹼﻭﺰﻣ ﺮﻴﻏ ﺔﺣﻭﺮﻤﻟﺍ ﻩﺬﻫ
ﻯﺮﺧﺃ ﻞﺋﺎﺳﻭ ﺔﻳﺃ ﻭﺍ ﺲﺑﺎﻗ
ﺔﻗﺎﻄﻟﺍ ﺭﺪﺼﻣ ﻦﻣ ﻞﻴﺻﻮﺘﻠﻟ
.ﺔﻴﺋﺎﺑﺮﻬﻜﻟﺍ
ﻚﻠﺳ ﺮﻴﻴﻐﺗ ﻭﺍ ﻞﻴﺻﻮﺗ ﺪﻨﻋ
ﻚﻠﺴﻟﺍ ﻭﺍ ﺔﻴﺋﺎﺑﺮﻬﻜﻟﺍ ﺔﻗﺎﻄﻟﺍ
ﻚﻟﺫ ﻞﻤﻋ ﺐﺠﻳ ﻪﻧﺎﻓ،ﻲﺻﺎﺻﺮﻟﺍ
ﻚﻟﺫﻭ ﲔﻠﻫﺆﻣ ﺹﺎﺨﺷﺍ ﺔﻄﺳﺍﻮﺑ
ﻰﺟﺮﻳ .ﺮﻃﺎﺨﻣ ﻝﻮﺼﺣ ﺐﹼﻨﺠﺘﻟ
227IEC53(RVV) ﻝﺎﻤﻌﺘﺳﺍ
.ﺮﺜﻛﺍ ﻭﺍ ﱈ 1 ﺏﻮﺒﻧﺍ ﺔﻛﺎﻤﺳ ﻭﺍ
ﻯﺮﺧﻻﺍ ﺕﺎﺒﻠﻄﺘﻤﻠﻟ)
،ﻲﺻﺎﺻﺮﻟﺍ ﻚﻠﺴﻟﺍ ﺮﻄﻗ ﻞﺜﻣ
ﲔﻧﺍﻮﻗ ﺐﺴﺣ ﻝﺎﻤﻌﺘﺳﻻﺍ ﻰﺟﺮﻳ
ﺔﺣﻭﺮﳌﺍ ﺐﻴﻛﺮﺗ ﺐﺠﻳ .(ﺪﻠﺒﻟﺍ
ﺩﺮﻔﻣ ﻁﻮﺷ ﺡﺎﺘﻔﻣ ﺔﻄﺳﺍﻮﺑ
ﻊﻣ (ﻊﻃﺎﻗ ﺡﺎﺘﻔﻣ) ﺐﻄﻘﻟﺍ ﻲﺋﺎﻨﺛ
ﻞﻗﻻﺍ ﻰﻠﻋ ﱈ 3 ﺲﻣﻼﺗ ﻍﺍﺮﻓ ﺩﻮﺟﻭ
.ﺔﺘﺑﺎﺜﻟﺍ ﺐﻴﻛﺮﺘﻟﺍ ﺓﺮﺋﺍﺩ ﻲﻓ
ﺔﺑﺮﺿ ،ﻖﻳﺮﺣ ﻚﻟﺫ ﺐﺒﺴﻳ ﻥﺍ ﻦﻜﻤﻳ
.ﺔﻴﺋﺎﺑﺮﻬﻛ
ﺔﻴﺋﺎﺑﺮﻬﻜﻟﺍ ﻙﻼﺳﻷﺍ ﻞﻴﺻﻮﺗ ﺐﺠﻳ
.ﻦﻴﻠﻫﺆﻤﻟﺍ ﻦﻴﻔﻇﻮﻤﻟﺍ ﻞﺒﻗ ﻦﻣ
ﺔﺑﺮﺿ ،ﻖﻳﺮﺣ ﻚﻟﺫ ﺐﺒﺴﻳ ﻥﺍ ﻦﻜﻤﻳ
.ﺔﻴﺋﺎﺑﺮﻬﻛ
Earth /
Tierra /
ﻲﺻﺭﻻﺍ
Connecting to the power supply / Conexión de la alimentación eléctrica / ﺔﻴﺋﺎﺑﺮﻬﻜﻟﺍ ﺔﻗﺎﻄﻟﺍ ﺭﺪﺼﻣ ﻞﻴﺻﻮﺗ
Ceiling Fan /
Ventilador de techo /
ﻒﻘﺴﻟﺍ ﺔﺣﻭﺮﻣ
Power supply /
Fuente de alimentación /
ﺔﻴﺋﺎﺑﺮﻬﻜﻟﺍ ﺔﻗﺎﻄﻟﺍ ﺪﻳﻭﺰﺗ ﺭﺪﺼﻣ
Connect directly /
Conectar directamente /
ﺓﺮﺷﺎﺒﻣ ﻞﺻﻭﺍ
Dimmer switch /
Interruptor regulador de voltaje /
ﺖﻓﺎﺧ ﺡﺎﺘﻔﻣ
Wall Switch (OFF / ON) /
Interruptor de Pared (OFF / ON) /
(ON ﻞﻴﻐﺸﺗ OFF ﻑﺎﻘﻳﺍ) ﺭﺍﺪﺠﻟﺍ ﺡﺎﺘﻔﻣ
Rated voltage is mentioned on product. /
La tensión nominal se cita en este producto. /
.ﺞﺘﻨﻤﻟﺍ ﻰﻠﻋ ﺓﺭﻮﻛﺬﻣ ﺓﺭﺪﻘﻤﻟﺍ ﺔﻴﻄﻟﻮﻔﻟﺍ
Regulator /
Regulador /
ﻢﻈﻨﻣ
Blue (Neutral) / Azul (Neutral) / (ﺪﻳﺎﺤﻣ) ﻕﺭﺯﺍ
Brown (Live) /
Marrón (Vivo) /
(ﻲﺣ) ﻲﻨﺑ
Green / Yellow (Earth) /
Verde / Amarillo (Tierra) /
(ﻲﺻﺭﻻﺍ) ﺮﻔﺻﺍ / ﺮﻀﺧﺍ
How to install Cómo instalarlo ﺐﻴﻛﺮﺘﻟﺍ ﺔﻴﻔﻴﻛ
CAUTION
PRECAUCIÓN
ﻪﻴﺒﻨﺗ
WARNING
ADVERTENCIA
ﺮﻳﺬﺤﺗ
F48_56ZX_TZ_KDK.indd 17F48_56ZX_TZ_KDK.indd 17 3/7/2018 3:43:42 PM3/7/2018 3:43:42 PM

18
Si hay un interruptor
regulador,
desconéctelo y
reconecte el cableado
como se muestra.
Puede causar un
incendio, descarga
eléctrica.
If there is a dimmer
switch, disconnect
it and reconnect the
wiring as shown.
Connect directly.
Can cause fi re,
electrical shock.
،ﺀﻮﺿ ﺡﺎﺘﻔﻣ ﺩﻮﺟﻭ ﺔﻟﺎﺣ ﻲﻓ
ﻙﻼﺳﻷﺍ ﻞﻴﺻﻮﺗ ﺪﻋﺍﻭ ﻪﻠﺼﻓﺍ
.ﻦﹼﻴﺒﻣ ﻮﻫ ﺎﻤﻛ
.ﺮﺷﺎﺒﻣ ﻞﻜﺸﺑ ﻞﻴﺻﻮﺘﻟﺎﺑ ﻢﻗ
ﺔﺑﺮﺿ ،ﻖﻳﺮﺣ ﻚﻟﺫ ﺐﺒﺴﻳ ﻥﺍ ﻦﻜﻤﻳ
.ﺔﻴﺋﺎﺑﺮﻬﻛ
CAUTION
PRECAUCIÓN
ﻪﻴﺒﻨﺗ
Check point after installation Compruebe el punto después
de la instalación
The wiring is connected properly to
the power supply.
El cableado está conectado
adecuadamente a la alimentación
eléctrica.
ﺭﺪﺼﻣ ﻊﻣ ﺔﺤﻴﺤﺻ ﺓﺭﻮﺼﺑ ﻝﻮﺻﻮﻣ ﻚﻠﺴﻟﺍ
.ﺔﻴﺋﺎﺑﺮﻬﻜﻟﺍ ﺔﻗﺎﻄﻟﺍ ﺪﻳﻭﺰﺗ
ﺐﻴﻛﺮﺘﻟﺍ ﺪﻌﺑ ﺺﺤﻔﻟﺍ ﻁﺎﻘﻧ
■
Fix the Canopy
■
Fije la cubierta
6ﺔﹼﺒﻘﻟﺍ ﺖﻴﺒﺜﺗ
■
ﻪﺘﻴﺒﺜﺘﺑ ﻢﻗﻭ A ﻱﻮﻠﻌﻟﺍ ﺀﺎﻄﻐﻟﺍ ﻊﺿﻭ ﻂﺒﺿﺍ
.ﻡﺎﻜﺣﺈﺑ d ﻲﻏﺮﺒﻟﺍ ﻂﺑﺭ ﻊﻣ B ﺏﻮﺒﻧﻷﺎﺑ
5 < ﻎﻠﺒﺗ ﻒﻘﺴﻟﺍﻭ ﻱﻮﻠﻌﻟﺍ ﺀﺎﻄﻐﻟﺍ ﲔﺑ ﺔﻓﺎﺴﳌﺍ
.ﻢﺳ
1
ﻥﺃ ﻰﻟﺇ ﻞﻔﺳﻷ C ﻲﻠﻔﺴﻟﺍ ﺀﺎﻄﻐﻟﺍ ﺐﺤﺳﺍ
ﺀﺎﻄﻐﻟﺍ ﻲﻏﺮﺑ ﻂﺑﺭ .ﺏﻮﺒﻧﻷﺎﺑ ﻪﺘﻴﺒﺜﺘﺑ ﻢﻗﻭ ﻒﻗﻮﺘﻳ
ﺓﻮﻄﳋﺍ ،9 ﺔﺤﻔﺻ ﻲﻓ ﻙﻮﻜﻔﳌﺍ c ﻲﻠﻔﺴﻟﺍ
.ﻡﺎﻜﺣﺈﺑ 1 -1
2
Check point after installation Compruebe el punto después
de la instalación
The Upper Canopy is securely fi xed.
The Lower Canopy is securely fi xed.
La cubierta superior está fi jada con seguridad.
La cubierta inferior está fi jada con seguridad.
ﺐﻴﻛﺮﺘﻟﺍ ﺪﻌﺑ ﺺﺤﻔﻟﺍ ﻁﺎﻘﻧ
.ﻦﻣﺁ ﻞﻜﺸﺑ ﺔﺘﺒﺜﻣ ﺔﻳﻮﻠﻌﻟﺍ ﺔﹼﺒﻘﻟﺍ
.ﻢﻜﺤﻣ ﻞﻜﺸﺑ ﻪﺘﺒﺜﻣ ﺔﻴﻠﻔﺴﻟﺍ ﺔﹼﺒﻘﻟﺍ
1
Adjust the position of Upper Canopy
A
and fi x it to the Pipe
B
tightening the
screw
d
fi rmly.
The distance between the Upper Canopy and
the ceiling is > 5 mm.
2
Pull down the Lower Canopy
C
until it
stops and fi x it to the Pipe tightening the
Lower Canopy screw
c
removed in page
9, step 1-
1
fi rmly.
1
Ajuste la posición de la cubierta superior
A
y fíjela al tubo
B
apretando el
tornillo
d
con fi rmeza.
La distancia entre la cubierta superior y el
techo es de > 5 mm.
2
Tire hacia abajo la cubierta inferior
C
hasta que se pare y fíjela al tubo apretando
el tornillo de la cubierta inferior
c
que se
retiró 1-
1
Página 9 con fi rmeza.
How to install Cómo instalarlo ﺐﻴﻛﺮﺘﻟﺍ ﺔﻴﻔﻴﻛ
> 5 mm
21
C
d
c
A
B
F48_56ZX_TZ_KDK.indd 18F48_56ZX_TZ_KDK.indd 18 3/7/2018 3:43:43 PM3/7/2018 3:43:43 PM

19
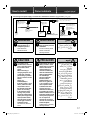
■
Installation of the Speed
Regulator
■
Instalación del regulador
de velocidad
7
ﺔﻋﺮﺴﻟﺍ ﻢﻈﻨﻣ ﺐﻴﻛﺮﺗ
■
1
Loosen the screw covers
o
and screws
p
from the rear side of the front panel
q
and keep them for step
3
.
2
Insert the Live Wire
D
from the wall
through the hole of the wall-built-in
regulator casing
E
into the regulator
2 pin terminal and tighten the terminal
screws.
3
Fix the Speed Regulator to the wall-built-in
regulator casing
E
tightening the screws
p
as shown. Cover up the screw holes
with the screw covers
o
.
1
Afl ojar los tornillos de la tapa
o
y los
tornillos
p
del lado posterior del panel
frontal
q
y conservar para el paso
3
.
2
Introduzca el cable con corriente
D
que
sale desde la pared a través del agujero
de la caja del regulador
E
en la carcasa
de 2 agujeros del regulador y apriete los
tornillos de la carcasa.
3
Asegure la caja del regulador de velocidad
a la pared
E
apretando los tornillos
p
como se indica. Cubra los agujeros de los
tornillos con los embellecedores
o
.
p ﻲﻏﺍﺭﺑﻟﺍﻭ o ﻲﻏﺍﺭﺑﻟﺍ ﺔﻳﻁﻏﺃ ﻝﺣﺑ ﻡﻗ
ﻅﻔﺗﺣﺍﻭ q ﺔﻳﻣﺎﻣﻷﺍ ﺔﺣﻭﻠﻟ ﻲﻔﻠﺧﻟﺍ ﺏﻧﺎﺟﻟﺍ ﻥﻣ
.3 ﺓﻭﻁﺧﻠﻟ ﺎﻬﺑ
1
ﺔﺒﻠﻋ ﺮﺒﻋ ﺭﺍﺪﺠﻟﺍ ﻦﻣ D ﻥﺎﻣﻷﺍ ﻚﻠﺳ ﻞﺧﺩﺃ
ﻞﺧﺍﺩ ﻲﻓ E ﺭﺍﺪﺠﻟﺎﺑ ﺔﺘﺒﺜﻤﻟﺍ ﻢﻈﻨﻤﻟﺍ
ﻂﺑﺭ ﻢﻜﺣﺃﻭ ﻦﻳﺭﺎﻤﺴﻤﻟﺎﺑ ﻢﻈﻨﻤﻟﺍ ﺔﺑﺍﻮﺑ
.ﺔﺑﺍﻮﺒﻟﺍ ﻲﻏﺍﺮﺑ
2
ﻢﻈﻨﻤﻟﺍ ﺔﺒﻠﻋ ﻊﻣ ﺕﺎﻋﺮﺴﻟﺍ ﻢﻈﻨﻣ ﺖﻴﺒﺜﺘﺑ ﻢﻗ
ﻲﻏﺍﺮﺒﻟﺍ ﻂﺑﺭ ﻡﺎﻜﺣﺇ ﻊﻣ E ﺭﺍﺪﺠﻟﺍ ﻲﻓ ﺖﺒﺜﻤﻟﺍ
ﺔﻴﻄﻐﺘﺑ ﻢﻗ ﺢﺿﻮﻣ ﻮﻫ ﺎﻤﻛ p
.oﻲﻏﺍﺮﺒﻟﺍ ﺔﻴﻄﻏﺄﺑ ﻲﻏﺍﺮﺒﻟﺍ ﺕﺍﻮﺠﻓ
3
How to install Cómo instalarlo ﺐﻴﻛﺮﺘﻟﺍ ﺔﻴﻔﻴﻛ
(TZ5 & XZ5 -series)
(T-XC / XCMN & X-XC / XCMN -series)
Wall-built-in regulator casing
is not supplied.
No se suministra la caja para
empotrar el regulador en la
pared.
ﺮﻴﻏ ﻂﺋﺎﳊﺎﺑ ﺖﻴﺒﺜﺘﻠﻟ ﺺﺼﺍ ﻢﻈﻨﳌﺍ ﺔﺒﻠﻋ
ﺓﺮﻓﻮﺘﻣ.
ATTENTION ATENCIÓN ﻩ ﺎﺑﺗﻧ ﺍ
From Supply source /
de la fuente de suministro /
ﺪﻳﺭﻮﺘﻟﺍ ﺭﺪﺼﻣ ﻦﻣ From Motor / desde el motor / ﻙﺭﺤﻤﻟﺍ ﻦﻣ
q
2 31
D E
p
o
F48_56ZX_TZ_KDK.indd 19F48_56ZX_TZ_KDK.indd 19 3/7/2018 3:43:46 PM3/7/2018 3:43:46 PM

20
Check point after installation Compruebe el punto después
de la instalación
All wires are connected correctly by a
competent person.
The live wire must be fully insert,
and the 2 pin terminal screw is fi rmly
tightened.
Todos los cables han sido conectados
correctamente por una persona competente.
El cable de alta tensión se debe insertar
completamente, y el los tornillos de la
carcasa de 2 agujeros están fi rmemente
apretados.
ﻰﻠﻋ ﺢﻴﺤﺻ ﻞﻜﺸﺑ ﺔﻠﺻﻮﻣ ﻙﻼﺳﻷﺍ ﻞﻛ
.ﺺﺼﺨﺘﻣﻭ ﺀﻒﻛ ﺺﺨﺷ ﺪﻳ
2ﻭ ﻞﻣﺎﻜﻟﺎﺑ ﺝﺍﺭﺩﺇ ﺐﺠﻳ ﻲﺤﻟﺍ ﻚﻠﺴﻟﺍ
.ﺪﻳﺪﺸﺗ ﻡﺰﺤﺑ ﺭﺎﻤﺴﻤﻟﺍ ﺔﻄﺤﻣ ﺱﻮﺑﺩ
ﺐﻴﻛﺮﺘﻟﺍ ﺪﻌﺑ ﺺﺤﻔﻟﺍ ﻁﺎﻘﻧ
■
Installation of the Speed
Regulator
■
Instalación del regulador
de velocidad ﺔﻋﺮﺴﻟﺍ ﻢﻈﻨﻣ ﺐﻴﻛﺮﺗ
■
1
Loosen the screws
p
from the Speed
Regulator Cover
q
. Open the Speed
Regulator by lifting up the Speed
Regulator Cover
q
from the Speed
Regulator Base
E
.
2
Insert the Live Wire
D
from the wall
through the hole of the Speed Regulator
Base
E
. Fix the Speed Regulator by
screwing the screws as shown.
3
Connect the Live Wire
D
with the
regulator 2 pin terminal and tighten the
terminal screws.
4
To close the Speed Regulator, insert the
two holes on top of the Speed Regulator
Cover
q
to the two protruding parts at
the Speed Regulator Base
E
.
Finally screw them together.
1
Afl oje los tornillos
p
de la cubierta
del regulador de velocidad
q
. Abra el
regulador de velocidad levantando la
cubierta del regulador de velocidad
q
de
la base del regulador de velocidad
E
.
2
Inserte el cable bajo tensión
D
de la
pared hasta el orifi cio de la base del
regulador de velocidad
E
. Sujete el
regulador de velocidad apretando los
tornillos como se muestra.
3
Conecte el cable bajo tensión
D
al
terminal de 2 clavijas del regulador y
apriete los tornillos del terminal.
4
Para cerrar el regulador de velocidad,
coloque los dos orifi cios de la parte
superior de la cubierta del regulador de
velocidad
q
a las dos piezas salientes
de la base del regulador de velocidad
E
.
Por último, apriete.
ﺔﻋﺮﺴﻟﺍ ﻢﻈﻨﻣ ﺀﺎﻄﻏ ﻦﻣ p ﻲﻏﺍﺮﺒﻟﺍ ﻚﻔﺑ ﻢﻗ
ﻦﻣ q ﻪﺋﺎﻄﻏ ﻊﻓﺮﺑ ﺔﻋﺮﺴﻟﺍ ﻢﻈﻨﻣ ﺢﺘﻓﺍ.q
.Eﻪﺗﺪﻋﺎﻗ
1
Dﻲﺋﺎﺑﺮﻬﻜﻟﺍ ﺭﺎﻴﺘﻠﻟ ﻞﻣﺎﳊﺍ ﻚﻠﺴﻟﺍ ﻞﺧﺩﺃ
ﻢﻈﻨﻣ ﺓﺪﻋﺎﻗ ﺔﺤﺘﻓ ﺮﺒﻋ ﻂﺋﺎﳊﺍ ﻦﻣ ﺝﺭﺎﳋﺍ
ﻦﻣ ﺔﻋﺮﺴﻟﺍ ﻢﻈﻨﻣ ﺖﹼﺒﺛ . Eﺔﻋﺮﺴﻟﺍ
.ﺢﺿﻮﳌﺍ ﻮﺤﻨﻟﺍ ﻰﻠﻋ ﻲﻏﺍﺮﺒﻟﺍ ﻂﺑﺭ ﻝﻼﺧ
2
D ﻲﺋﺎﺑﺮﻬﻜﻟﺍ ﺭﺎﻴﺘﻠﻟ ﻞﻣﺎﳊﺍ ﻚﻠﺴﻟﺍ ﻞﹼ
ﺻﻭ
ﻢﻜﺣﺃﻭ ،ﻢﻈﻨﳌﺎﺑ ﺹﺎﳋﺍ ﻲﺋﺎﻨﺜﻟﺍ ﻞﻴﺻﻮﺘﻟﺍ ﻑﺮﻄﺑ
.ﻞﻴﺻﻮﺘﻟﺍ ﻑﺮﻃ ﻲﻏﺍﺮﺑ ﻂﺑﺭ
3
ﲔﺘﺤﺘﻔﻟﺍ ﻞﺧﺩﺃ ،ﺔﻋﺮﺴﻟﺍ ﻢﻈﻨﻣ ﻕﻼﻏﻹ
ﻢﻈﻨﻣ ﺀﺎﻄﻐﻟ ﻱﻮﻠﻌﻟﺍ ﺀﺰﳉﺍ ﻲﻓ ﲔﺗﺩﻮﺟﻮﳌﺍ
ﻦﻳﺯﺭﺎﺒﻟﺍ ﻦﻳﺃﺰﳉﺍ ﻲﻓ qﺔﻋﺮﺴﻟﺍ
.Eﺔﻋﺮﺴﻟﺍ ﻢﻈﻨﻣ ﺓﺪﻋﺎﻗ ﻲﻓ ﻦﻳﺩﻮﺟﻮﳌﺍ
.ﻲﻏﺍﺮﺒﻟﺎﺑ ﺎﹰﻌﻣ ﻢﻬﻄﺑﺭﺍ ،ﺔﻳﺎﻬﻨﻟﺍ ﻲﻓ
4
How to install Cómo instalarlo ﺐﻴﻛﺮﺘﻟﺍ ﺔﻴﻔﻴﻛ
Holes
/
Agujeros
/
ȝƾƇƄƱŽȚ
Wall Plug
/
Enchufe de Pared
/
ȝƾſǞƳƵŽȚ ȤȚNjƆŽȚ
L1
Terminal 1 / Terminal 1 / 1 ȯǍŶ
L 1
Holes /
Agujeros /
ȝƾƇƄƱŽȚ
Protruding Parts /
Piezas Sobresalientes /
ȜȥȤƾƃŽȚ ȔȚǎűLjȚ
Wood Screw / Tornillo de Madera /
ǠŹǍŮ ƿƪƈŽȚ
3
p
2
qD
D
1
4
EE
E
q
Wood Screw and Wall Plug
is not supplied.
El Tornillo de Madera y
Enchufe de Pared no vienen
suministrados.
.ﺭﺍﺪﳉﺍ ﺲﺑﺎﻗ ﻭﺃ ﻲﺒﺸﳋﺍ ﺭﺎﻤﺴﳌﺍ ﺮﻴﻓﻮﺗ ﻢﺘﻳ ﻻ
ATTENTION ATENCIÓN ﻩ ﺎﺑﺗﻧ ﺍ
p
(T-XG / XGMN & X-XG / XGMN -series)
F48_56ZX_TZ_KDK.indd 20F48_56ZX_TZ_KDK.indd 20 3/7/2018 3:43:47 PM3/7/2018 3:43:47 PM

21
Measure the distance using a
measuring tape.
Adjust all the Blades to get an equal
distance from the ceiling to the tip of
the Blade (within 1 mm tolerance).
Mida la distancia utilizando un metro.
Ajuste todas las aspas para tener
las distancias idénticas del techo a
la punta del aspa (dentro de 1 mm
de tolerancia).
■
Final confi rmation
■
Confi rmación fi nal
8
After installation,
make sure that the
Ceiling Fan does not
tremble extremely.
Can cause injury if the
Ceiling Fan drops.
Después de
la instalación
asegúrese de que el
ventilador de techo
no se tambalea.
Si el ventilador del
techo cae, puede
causar lesiones.
Hold the Motor Assembly by hand and
adjust the distance (L) by pushing up
or pressing down the Blades gently
until the difference of distance (L)
should be ± 1 mm.
Sujete el conjunto del motor con la mano
y ajuste la distancia (L) empujando hacia
arriba o presionando hacia abajo las
aspas con cuidado hasta que la diferencia
de la distancia (L) sea de ± 1 mm.
(L) ﺔﻓﺎﺴﳌﺍ ﻂﺒﺿﺍﻭ ﻙﺪﻴﺑ ﻙﺮﶈﺍ ﺔﻋﻮﻤﺠﻣ ﻚﺴﻣﺃ
ﻞﻔﺳﻷ ﻭﺃ ﻰﻠﻋﻷ ﻖﻓﺮﺑ ﻝﺎﺼﻧﻷﺍ ﻂﻐﺿ ﻝﻼﺧ ﻦﻣ
.ﱈ 1 -+ (L) ﺔﻓﺎﺴﳌﺍ ﻕﺮﻓ ﺢﺒﺼﻳ ﻥﺃ ﻰﻟﺇ
Pitching method Método de Inclinacion ﺐﻴﺗﺮﺘﻟﺍ ﺔﻘﻳﺮﻃ
(L)
ﻲﺋﺎﻬﻨﻟﺍ ﺪﻴﻛﺄﺘﻟﺍ
■
ﺔﺣﻭﺮﻣ ﻥﺃ ﻦﻣ ﺪﻛﺄﺗ ﺐﻴﻛﺮﺘﻟﺍ ﺪﻌﺑ
ﺮﻴﻏ ﺓﺭﻮﺼﺑ ﻞﻳﺎﻤﺘﺗ ﻻ ﻒﻘﺴﻟﺍ
.ﺔﻳﺩﺎﻋ
ﺔﺑﺎﺻﺇ ﺙﻭﺩﺣ ﻲﻓ ﺏﺑﺳﺗﻳ ﻥﺃ ﻥﻛﻣﻳ
.ﻑﻘﺳﻟﺍ ﺔﺣﻭﺭﻣ ﻁﻭﻘﺳ ﺔﻟﺎﺣ ﻲﻓ
.ﺱﺎﻴﻗ ﻂﻳﺮﺷ ﻡﺍﺪﺨﺘﺳﺎﺑ ﺔﻓﺎﺴﳌﺍ ﺱﺎﻴﻘﺑ ﻢﻗ
ﺔﻓﺎﺴﻣ ﻰﻠﻋ ﻝﻮﺼﺤﻠﻟ ﻝﺎﺼﻧﻷﺍ ﻊﻴﻤﺟ ﻂﺒﺿﺍ
ﻞﺼﻨﻟﺍ ﻑﺮﻃ ﻰﻟﺇ ﻒﻘﺴﻟﺍ ﻦﻣ ﺔﻳﻭﺎﺴﻣ
.(ﱈ 1 ﻩﺭﺪﻗ ﺕﻭﺎﻔﺗ ﺩﻭﺪﺣ ﻲﻓ)
How to use Cómo utilizarlo
ﻝﺎﻤﻌﺘﺳﻻﺍ ﺔﻴﻔﻴﻛ
How to install Cómo instalarlo ﺐﻴﻛﺮﺘﻟﺍ ﺔﻴﻔﻴﻛ
CAUTION
PRECAUCIÓN
ﻪﻴﺒﻨﺗ
r
r
To turn on the Ceiling Fan,
simply turn the switch knob
r to any position (1,2,3,4
or 5).
To turn off the Ceiling Fan,
turn the switch knob r to
“0” position.
ﻯﻮﺳ ﻚﻴﻠﻋ ﻻ ،ﻒﻘﺴﻟﺍ ﺔﺣﻭﺮﻣ ﻞﻴﻐﺸﺘﻟ
ﻊﺿﻮﻣ ﻱﺃ ﻰﻟﺇ r ﺡﺎﺘﻔﳌﺍ ﺓﺭﺎﻃ ﺮﻳﻭﺪﺗ
.(5 ﻭﺃ 4 ﻭﺃ 3 ﻭﺃ 2 ﻭﺃ 1)
ﺡﺎﺘﻔﳌﺍ ﺓﺭﺎﻃ ﺭﺩﺃ ،ﻒﻘﺴﻟﺍ ﺔﺣﻭﺮﻣ ﻑﺎﻘﻳﻹ
.“0” ﻊﺿﻮﳌﺍ ﻰﻟﺇ r
Para encender el
ventilador, simplemente
gire el tirador interruptor
r a cualquier posición (1,
2, 3, 4 o 5).
Para apagar el ventilador,
gire el tirador interruptor
r a la posición “0”.
F48_56ZX_TZ_KDK.indd 21F48_56ZX_TZ_KDK.indd 21 3/7/2018 3:43:49 PM3/7/2018 3:43:49 PM

22
Maintenance Mantenimiento
ﺔﻧﺎﻴﺼﻟﺍ
1Check the Ceiling Fan condition
annually. If a problem occurs, stop
using the Ceiling Fan. Then refer to
authorized dealer.
Check point:
Loosened screws, safety wire
condition, motor shaft damage, etc.
2Keep the Ceiling Fan clean. Wipe
away dirt with a clean soft cloth,
ordinary soap and water. Wipe it
again to dry it. Do not use solvents
(gasoline, petroleum, thinner,
benzine, alcohol, cleaning powder,
alkaline detergent) or any other
chemicals.
• Do not bend the Blade while cleaning.
3Do not paint the Blades. If damaged,
order a new set of Blades (3 pieces)
from an authorized dealer.
4When referring to an authorized
dealer, show these instructions to
them so that maintenance will be
done correctly.
5If the product is broken or damaged,
remove it from the ceiling and
replace with new. This is to avoid
the Ceiling Fan from drops.
6The Ceiling Fan suspension system
should be examined at least once
every two years.
7The replacement of parts of
the safety suspension system
device shall be performed by the
manufacturer, its service agent or
suitably qualifi ed persons.
1Compruebe cada año el estado del
ventilador de techo. En caso de
problema, deje de usar el ventilador
de techo. Después, contacte con el
distribuidor autorizado.
Puntos a controlar:
Tornillos afl ojados, estado del cable de
seguridad, daño del eje del motor, etc.
2Mantenga el ventilador del techo
limpio. Quite el polvo usando
un trapo suave y limpio, jabón
normal y agua. Límpielo de nuevo
para secarlo. No use disolventes
(gasolina, petróleo, diluyente,
bencina, alcohol, polvo limpiador,
sustancia alcalina, detergente).
No tuerza el aspa durante la limpieza.
3
No pinte las aspas. Si presentan daños,
pida un conjunto nuevo de aspas
(3 unidades) a un distribuidor
autorizado.
4
Cuando contacte con un distribuidor
autorizado, muéstrele estas
instrucciones para que realice el
mantenimiento correctamente.
5
Si el producto está roto o dañado, retírelo
del techo y sustitúyalo por otro nuevo.
Con ello, evitará que el ventilador de techo
se caiga.
6
Se recomienda controlar el sistema de
suspensión del ventilador del techo al
menos una vez cada dos años.
7La sustitución de piezas del
dispositivo del sistema de
suspensión de seguridad debe ser
llevada a cabo por el fabricante,
su agente de servicio o personas
debidamente cualifi cadas.
ﺔﻟﺎﺣ ﻲﻓ .ﺎﹰﻳﻮﻨﺳ ﻒﻘﺴﻟﺍ ﺔﺣﻭﺮﻣ ﺔﻟﺎﺣ ﺺﺤﻓﺍ
ﺔﺣﻭﺮﻣ ﻡﺍﺪﺨﺘﺳﺍ ﻦﻋ ﻒﻗﻮﺗ ،ﺔﻠﻜﺸﻣ ﺙﻭﺪﺣ
ﻞﻴﻛﻮﻟﺍ ﻰﻟﺇ ﻚﻟﺫ ﺪﻌﺑ ﻊﺟﺭﺍ ﻢﺛ .ﻒﻘﺴﻟﺍ
.ﺪﻤﺘﻌﳌﺍ
1
:ﺺﺤﻔﻟﺍ ﻁﺎﻘﻧ
ﺩﻮﻤﻋ ﺭﺮﻀﺗ ،ﺖﻧﺎﻣﻻﺍ ﻚﻠﺳ ﺔﻟﺎﺣ ،ﻲﻏﺍﺮﺒﻟﺍ ﺀﺎﺨﺗﺭﺍ
.ﺦﻟﺍ ،ﻙﺮﶈﺍ
ﺢﺴﻣﺍ .ﻒﻘﺳ ﺔﺣﻭﺮﳌﺍ ﺔﻓﺎﻈﻧ ﻰﻠﻋ ﻆﻗﺎﺣ
ﻱﺩﺎﻋ ﻥﻮﺑﺎﺻ ،ﺔﻤﻋﺎﻧ ﺵﺎﻤﻗ ﺔﻌﻄﻘﺑ ﺭﺎﺒﻐﻟﺍ
ﺓﺮﻣ ﺢﺴﻣﺍ .ﺔﻔﻴﻈﻧ ﺓﺭﻮﺼﺑ ﺔﺣﻭﺮﳌﺍ ﻆﻔﳊ ﺀﺎﻣﻭ
ﺕﺎﺒﻳﺬﳌﺍ ﻞﻤﻌﺘﺴﺗ ﻻ .ﺔﺣﻭﺮﳌﺍ ﻒﻴﺸﻨﺘﻟ ﺔﻴﻧﺎﺛ
ﻝﻮﺤﻜﻟﺍ ،ﻦﻳﺰﻨﺒﻟﺍ ،ﺀﻼﻄﻟﺍ ﻖﻗﺮﻣ ،ﻝﻭﺮﺘﺒﻟﺍ ،ﲔﻟﻭﺯﺎﳉﺍ
)
.(ﺕﺎﻔﻈﻨﳌﺍ ،ﺕﺎﻳﻮﻠﻘﻟﺍ ،ﻒﻴﻈﻨﺘﻟﺍ ﻕﻮﺤﺴﻣ،
ﻒﻴﻈﻨﺘﻟﺍ ﺀﺎﻨﺛﺍ ﺔﺣﻭﺮﳌﺍ ﺶﻳﺭ ﻲﻨﺣ ﻡﺪﻋ ﻰﺟﺮﻳ •
2
،ﻒﻠﺘﻠﻟ ﺎﻬﺿﺮﻌﺗ ﺔﻟﺎﺣ ﻲﻓ .ﺶﻳﺮﻟﺍ ﺀﻼﻄﺑ ﻢﻘﺗ ﻻ
ﺪﺣﺃ ﻦﻣ (ﻊﻄﻗ 3 ) ﺓﺪﻳﺪﺟ ﺶﻳﺭ ﺔﻋﻮﻤﺠﻣ ﺐﻠﻃﺍ
.ﻦﻳﺪﻤﺘﻌﳌﺍ ﺀﻼﻛﻮﻟﺍ
3
ﺽﺮﻋﺍ ،ﻦﻳﺪﻤﺘﻌﳌﺍ ﺀﻼﻛﻮﻟﺍ ﺪﺣﺃ ﻰﻟﺇ ﻉﻮﺟﺮﻟﺍ ﺪﻨﻋ
ﻰﻠﻋ ﺔﻧﺎﻴﺼﻟﺍ ﻯﺮ ﹸ
ﲡ ﺚﻴﺤﺑ ﺕﺎﻤﻴﻠﻌﺘﻟﺍ ﻩﺬﻫ ﻪﻴﻠﻋ
.ﺢﻴﺤﺻ ﹴﻮﺤﻧ
4
ﻪﻋﺰﻧﺍ ،ﻒﻠﺘﻟﺍ ﻭﺃ ﺮﺴﻜﻠﻟ ﺞﺘﻨﳌﺍ ﺽﺮﻌﺗ ﺔﻟﺎﺣ ﻲﻓ
.ﺪﻳﺪﺟ ﺮﺧﺂﺑ ﻪﻟﺪﺒﺘﺳﺍﻭ ،ﻒﻘﺴﻟﺍ ﻦﻣ
.ﻒﻘﺴﻟﺍ ﺔﺣﻭﺮﻣ ﻁﻮﻘﺳ ﺐﻨﺠﺘﻟ ﺍﺬﻫﻭ
5
ﻒﻘﺳ ﺔﺣﻭﺮﻤﻟﺍ ﻖﻴﻠﻌﺗ ﻡﺎﻈﻧ ﺭﺎﺒﺘﺧﺎﺑ ﺢﺼﻨﻳ
.ﻦﻴﻣﺎﻋ ﻞﻛ ﻞﻗﻷﺍ ﻰﻠﻋ ﺓﺪﺣﺍﻭ ﺓﺮﻣ
6
ﻡﺎﻈﻧ ﺯﺎﻬﺟ ﺀﺍﺰﺟﺃ ﻝﺍﺪﺒﺘﺳﺍ ﺔﻴﻠﻤﻋ ﺀﺍﺮﺟﺇ ﺐﺠﻳ
ﻞﻴﻛﻭ ﻭﺃ ﺔﻌﹼﻨﺼﳌﺍ ﺔﻛﺮﺸﻟﺍ ﺔﻄﺳﺍﻮﺑ ﻥﺎﻣﻷﺍ ﻖﻴﻠﻌﺗ
ﹴ
ﻞﻜﺸﺑ ﲔﻠﻫﺆﻣ ﺹﺎﺨﺷﺃ ﻭﺃ ﺎﻬﻟ ﻊﺑﺎﺘﻟﺍ ﺕﺎﻣﺪﳋﺍ
.ﺐﺳﺎﻨﻣ
7
F48_56ZX_TZ_KDK.indd 22F48_56ZX_TZ_KDK.indd 22 3/7/2018 3:43:53 PM3/7/2018 3:43:53 PM

23
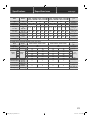
Model
Modelo X48XG / X48XGMN / X48XC / X48XCMN/
T48XG / T48XGMN / T48XC / T48XCMN
X56XG / X56XGMN / X56XC / X56XCMN/
T56XG / T56XGMN / T56XC / T56XCMN
ﻞﻳﺩﻮﻤﻟﺍ
Type Tipo
TB AA VB TB AA VB ﻉﻮﻨﻟﺍ
Voltage (VAC) Voltaje (VAC)
220 230 220 240 220 230 220 240
(VAC) ﺔﻴﻄﻟﻮﻔﻟﺍ
Frequency (Hz) Frecuencia (Hz)
50 50 60 50 50 50 60 50
(ﺰﺗﺮﻫ) ﺩﺩﺮﺘﻟﺍ
Wattage (W)
Low / High
Potencia eléctrica
(W)
Baja / Alta
15 / 45 16 / 49 15 / 44 15 / 55 18 / 51 14 / 70 15 / 75 16 / 62 17 / 76 17 / 76 (W) ﻁﺍﻮﻟﺎﺑ ﺓﺭﺪﻘﻟﺍ
ﺾﻔﺨﻨﻣ / ﻲﻟﺎﻋ
Rotation (RPM)
Low / High
Rotación (RPM)
Baja / Alta
137 /
285
146 /
296
137/
285
129 /
311
154 /
303
103 /
268
109 /
275
106 /
246
106 /
268
115 /
273
(ﺔﻔﻴﻓﺪﻟﺎﺑ ﺓﺭﻭﺩ) ﻥﺍﺭﻭﺪﻟﺍ
ﺾﻔﺨﻨﻣ / ﻲﻟﺎﻋ
Air Velocity (m/min) Velocidad del aire
(m/min)
160 165 160 175 170 165 170 155 170 165
(ﺔﻘﻴﻗﺩ/ﺮﺘﻣ) ﺀﺍﻮﻬﻟﺍ ﺔﻋﺮﺳ
Air Delivery (m3/min) Reparto del aire
(m3/min)
155 170 155 170 165 220 225 200 225 220
ﺀﺍﻮﻬﻟﺍ ﻝﻮﺻﻭ ﻝﺪﻌﻣ
(ﺔﻘﻴﻗﺩ/٣ﺮﺘﻣ)
Net Weight (kg) Peso Neto (kg)
5.3 5.6
(ﻢﺠﻛ) ﻲﻓﺎﺼﻟﺍ ﻥﺯﻮﻟﺍ
Specifi cations Especifi caciones
ﺕﺎﻔﺻﺍﻮﻣ
Model
Modelo X48XG / X48XC / T48XG / T48XC X56XG / X56XC / T56XG / T56XC
ﻞﻳﺩﻮﻤﻟﺍ
Type
Tipo
AA AA ﻉﻮﻨﻟﺍ
Voltage (VAC) Voltaje (VAC)
220 220
(VAC) ﺔﻴﻄﻟﻮﻔﻟﺍ
Frequency (Hz) Frecuencia (Hz)
50 60 50 60
(ﺰﺗﺮﻫ) ﺩﺩﺮﺘﻟﺍ
Rotation
(RPM)
Low
Rotación
(RPM)
Baja
137 129
106 106
ﺾﻔﺨﻨﻣ
ﻥﺍﺭﻭﺪﻟﺍ
(ﺔﻔﻴﻓﺪﻟﺎﺑ ﺓﺭﻭﺩ)
22
174 160
142 138
2
33
216 199
184 174
3
44
244 236
217 208
4
High Alta
285 311
246 268
ﻲﻟﺎﻋ
Power Factor
Factor Energítico
0.99
0.97
0.99 0.99
ﺓﺭﺪﻘﻟﺍ ﻞﻣﺎﻋ
Number of Speed
Número de
Velocidad
5555
ﺔﻋﺮﺴﻟﺍ ﻢﻗﺭ
Fan Size (cm)
Tama o del
Ventilador (cm) 120 140
(ﻝﻮﻄﻟﺍ) ﺔﺣﻭﺮﻤﻟﺍ ﻢﺠﺣ
Type of Insulation
Tipo de
Aislamiento
EEEE
ﻝﺰﻌﻟﺍ ﻉﻮﻧ
Net Weight (kg) Peso Neto (kg)
5.3 5.6
(ﻢﺠﻛ) ﻲﻓﺎﺼﻟﺍ ﻥﺯﻮﻟﺍ
For Saudi Arabia / Para Arabia Saudita /
ﺔﻳﺩﻮﻌﺴﻟﺍ ﺔﻴﺑﺮﻌﻟﺍ ﺔﻜﻠﻤﻤﻠﻟ
F48_56ZX_TZ_KDK.indd 23F48_56ZX_TZ_KDK.indd 23 3/7/2018 3:43:54 PM3/7/2018 3:43:54 PM

X56XC8002ZM
M0318-0
KDK Company, Division of PES
Head Office: 4017, Takaki-cho, Kasugai, Aichi, Japan.
© KDK Company, Division of PES 2018
Printed in Malaysia
F48_56ZX_TZ_KDK.indd 24F48_56ZX_TZ_KDK.indd 24 3/7/2018 3:43:54 PM3/7/2018 3:43:54 PM
-
 1
1
-
 2
2
-
 3
3
-
 4
4
-
 5
5
-
 6
6
-
 7
7
-
 8
8
-
 9
9
-
 10
10
-
 11
11
-
 12
12
-
 13
13
-
 14
14
-
 15
15
-
 16
16
-
 17
17
-
 18
18
-
 19
19
-
 20
20
-
 21
21
-
 22
22
-
 23
23
-
 24
24


en otros idiomas
- English: KDK T48XG Installation guide
Artículos relacionados
Otros documentos
-
McQuay E Series Guía de instalación
-
Acson 5SLY28CR Guía de instalación
-
Acson 5CCY25C/CR Guía de instalación
-
Whirlpool AKPM 658 Guía del usuario
-
Hikoki DB10DL Manual de usuario
-
Indesit MTM 1711 T Guía del usuario
-
Hotpoint FC 52.2 /V (AN) El manual del propietario
-
Whirlpool 3LWTW4800YQ Manual de usuario
-
Ariston FH 51 (WH) S Guía del usuario