ATEN CS22D Guía de inicio rápido
- Categoría
- Conmutadores KVM
- Tipo
- Guía de inicio rápido

CS22D 2-Port USB DVI KVM Switch Quick Start Guide Conmutador KVM de 2 puertos para USB con DVI CS22D - Guía rápida
Guide de démarrage rapide du commutateur KVM DVI USB à 2 ports CS22D Switch KVM USB DVI CS22D a 2 porte – Guida rapida
CS22D2-Port-KVM-SwitchmitUSBfürDVI-GrakKurzanleitung Краткоеруководствопользователя2-портовогоKVM-переключателяUSBDVICS22D
www.aten.com www.aten.com
www.aten.com www.aten.com
www.aten.com www.aten.com
Package Contents
1 CS22D 2-Port USB DVI KVM Switch
1 User Instructions
© Copyright 2013 ATEN
®
International Co., Ltd.
ATEN and the ATEN logo are trademarks of ATEN International Co., Ltd. All rights reserved.
All other trademarks are the property of their respective owners.
This product is RoHS compliant.
Part No. PAPE-1223-A60G Printing Date: 09/2013
2-Port USB DVI KVM Switch
Quick Start Guide
CS22D
Simply Better Connections
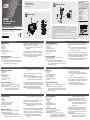
Hardware Review
A
1. Port LEDs
2. KVMCables
3. ConsolePorts
4. USB Power In
5. RemotePortSelector
6. USB Keyboard and Mouse Connectors
7. DVI Connectors
Hardware Installation
B
1.PlugyourUSBkeyboard,USBmouse,andmonitorintotheirrespective
ports on the CS22D.
Note :TheUSBport(s)canbeusedforUSBperipheralsharing.Todoso,
plugtheperipheralsandyourkeyboardormouseintoaUSBhub,
thenplugthehubintothekeyboardormouseport.
Presentación del hardware
A
1. IndicadoresLEDdelospuertos
2. CablesKVM
3. Puertosdeconsola
4. EntradadealimentaciónUSB
5. Selectordepuertosindependiente
6. ConectoresUSBparatecladoymouse
7. Conectores DVI
Instalar el hardware
B
1.ConectesutecladoUSB,mouseUSBymonitoralospuertos
correspondientesdelCS22D.
Nota : El/lospuerto(s)USBsepuede(n)utilizarparacompartir
dispositivosUSB.Paraello,conectelosperiféricosysutecladoo
mouseaunconcentradorUSByluegoconecteelconcentradoral
puertoparatecladoomouse.
Description de l’appareil
A
1. Voyants des ports
2. CâblesKVM
3. Portsdeconsole
4. Entréed’alimentationUSB
5. Sélecteurdeportdistant
6. ConnecteursclavieretsourisUSB
7. Connecteurs DVI
Installation du matériel
B
1.BranchezvotreclavierUSB,votresourisUSBetvotremoniteursurles
ports correspondants du CS22D.
Remarque : Vouspouvezutiliserleoulesport(s)USBpourpartager
plusieurspériphériquesUSB.Pourcefaire,brancher
lespériphériquesetvotreclavierouvotresourisàun
Hardware
A
1. LEDdelleporte
2. CaviKVM
3. Portedicollegamentoallaconsole
4. IngressoalimentazioneUSB
5. Selettoreremotodellaporta
6. Connettori USB di tastiera e mouse
7. Connettori DVI
Installazione dell’hardware
B
1.CollegarelatastieraUSB,ilmouseUSBeilmonitorallerispettiveporte
sulCS22D.
Nota : La/eporta/eUSBpuò/possonoessereutilizzata/eperla
condivisionediperifericheUSB.Atalne,collegareleperiferichee
latastieraoilmouseaunhubUSBepoiinserirel’hubnellaporta
dellatastieraodelmouse.
Hardwareübersicht
A
1. Port-LEDs
2. KVM-Kabel
3. Konsolports
4. BuchsefürStromversorgungüberUSB-Bus
5. UnabhängigerPort-Auswahlschalter
6. USB-Tastatur-undMausanschlüsse
7. AnschlüssefürDVI
Hardware installieren
B
1.SchließenSieIhreUSB-Tastatur,USB-MausunddenMonitorandie
entsprechenden Buchsen des CS22D an.
Hinweis: Derbzw.dieUSB-Port(s)kannbzw.könnenauchfür
freigegebeneUSB-Peripheriegeräteverwendetwerden.Dazu
schließenSiediePeripheriegeräteundIhreTastaturbzw.Maus
Обзор оборудования
A
1. Индикаторыпортов
2. KVM-кабели
3. Портыконсоли
4. ВходпитанияUSB
5. Удаленныйпереключательпорта
6. РазъемыклавиатурыимышиUSB
7. РазъемыDVI
Установка оборудования
B
1.ПодключитеклавиатуруUSB,мышьUSBимониторк
соответствующимпортамCS22D.
Примечание.USB-порт(ы)можетиспользоватьсядляобщего
доступакпериферийнымUSB-устройствам.Дляэтого
подключитепериферийныеустройстваиклавиатуру
илимышькUSB-концентратору,азатемподключите
2.PlugtheUSBandDVIconnectorsoftheattachedKVMcablesintotheir
respectiveportsonthecomputersyouareinstalling.
Note: IfthereisonlyoneUSBportonthecomputer,youcanconnecta
USBhubtothecomputer,thenplugtheKeyboard/Mousecable
into the USB hub.
3.(Optional)IfthepowersupplytoyourattachedUSBperipheral(s)isnot
sufcient,pluginUSBcabletotheMiniUSBpowerjacktogetpowerfrom
anotherUSBpowersource.(i.e.,PC,USBhub,5VUSBpoweradapter)
Note :TheUSBtominiUSBcableisnotincludedinthispackage.
Contactyourproductdealerformoredetails.
2.ConectelosconectoresUSByDVIdeloscablesKVMincluidosalos
puertoscorrespondientesdecadaunadelascomputadorasquequiera
instalar.
Nota : sisucomputadorasolotieneunpuertoUSB,podráconectarun
concentradorUSBalacomputadorayconectarloscablespara
tecladoymousealconcentradorUSB.
3.(Opcional)SielsuministroeléctricodelosperiféricosUSBconectados
noessuciente,enchufeuncableUSBalatomaMiniUSBparaobtener
energíaeléctricadeunafuentedeenergíaUSBexterna.(Porejemploun
PC,concentradorUSB,adaptadordealimentaciónUSBde5V)
Nota : ElcableUSBaMiniUSBnoestáincluidoenelpaquete.Póngase
encontactoconsurevendedorparamásinformación.
concentrateurUSBetcederniersurleportdeclavierou
souris.
2.ReliezlesconnecteursDVIetUSBdescâblesKVMfournisauxports
correspondantsdesordinateursàinstaller.
Remarque : S’iln’yaqu’unseulportUSBsurl’ordinateur,vouspouvez
connecterunconcentrateurUSBàl’ordinateuretbrancher
ensuitelecâbledeclavier/sourissurleconcentrateurUSB.
3.(Enoption)Sil’alimentationduoudespériphériquesUSBraccordésn’est
passufsante,raccordezuncâbleUSBauconnecteurd’alimentationmini
USBpourobtenirdel’alimentationdepuisuneautresourced’alimentation
USB(PC,concentrateurUSB,adaptateursecteurUSB5V,etc.).
Remarque :LecâbleUSBversminiUSBn’estpasinclusdansla
livraison.Contactezvotrerevendeurpourplusdedétails.
2.InserireiconnettoriUSBeDVIdeicaviKVMindotazionenellerispettive
portesuicomputerchesistannoinstallando.
Nota : SeilcomputerèdotatodiunasolaportaUSB,èpossibile
collegarciunhubUSBepoiinserireilcavodellatastiera/mouse
nell’hubUSB.
3.(Opzionale)Sel’alimentazionedelleperifericheUSBcollegateè
insufciente,collegareilcavoUSBallapresadialimentazioneMiniUSB
perriceverealimentazionedaun'altrasorgented'alimentazioneUSB.
(p.es.PC,hubUSB,alimentatoreUSBda5V)
Nota :ilcavodaUSBaminiUSBnonèinclusonellaconfezione.
Rivolgersialpropriorivenditorepermaggioridettagli.
aneinUSB-HubunddenHubandenTastatur-bzw.Mausport
an.
2.VerbindenSiedieUSB-undDVIdesmitgeliefertenKVM-Kabelsmitden
entsprechendenPortsderzuinstallierendenComputer.
Hinweis: BesitztIhrComputernureinenUSB-Port,könnenSieeinen
USB-HubmitdemComputerunddieTastatur-undMauskabel
mitdemUSB-Hubverbinden.
3.(Optional)FallsdieStromversorgungderangeschlossenenUSB-Geräte
nichtausreicht,verbindenSiedasUSB-KabelmitderMini-USB-Buchse
fürdieStromversorgung,ummehrStromvoneineranderenUSB-
Stromquellezuerhalten.(ZumBeispielPC,USB-Hub,5-V-USB-Netzteil)
Hinweis: DasUSB-auf-Mini-USB-KabelistnichtimLieferumfang
enthalten.WendenSiesichfürweitereDetailsanIhren
Fachhändler.
концентраторкпортуклавиатурыилимыши.
2.ПодключитеразъемыUSBиDVIкомплектныхKVM-кабелейк
соответствующимпортамустанавливаемыхкомпьютеров.
Примечание.ЕслинакомпьютереимеетсятолькоодинUSB-порт,
можноподключитьккомпьютеруUSB-концентратор,
азатемподключитькUSB-концентраторукабель
клавиатуры/мыши.
3.(Дополнительно)ЕслинаподключенноепериферийноеUSB-
оборудованиеподаетсянедостаточнопитания,подключитеUSB-
кабельвгнездопитаниямини-USB,чтобыполучатьпитаниеиз
другогоисточникапитанияUSB.(т.е.,ПК,концентраторUSB,5В
адаптерпитанияUSB)
Примечание.КабельUSBнамини-USBневходитвкомплект
поставки.Дляполучениядополнительныхсведений
обращайтеськвашемупоставщикупродуктов.
Important Notice
Consideringenvironmental protection,ATEN
doesnot providea fullyprinted usermanual
for this product. If the information contained
in the Quick Start Guide is not enough for
youto configureand operateyour product,
please visit our website www.aten.com, and
download the full user manual.
Online Registration
http://eservice.aten.com
Technical Phone Support
International:
886-2-86926959
North America:
1-888-999-ATENExt:4988
United Kingdom:
44-8-4481-58923
Allinformation, documentation,and
specicationscontainedinthispackageare
subjectto changewithoutpriornotication
by the manufacturer.
A
Hardware Review
B
Hardware Installation
Thefollowingcontainsinformationthatrelates
to China:
1
5
6
7
3
4
2
2
1
3
2
FEDERALCOMMUNICATIONSCOMMISSIONINTERFERENCESTATEMENT
Thisequipmenthas beentestedandfound tocomplywith the limitsfora ClassAdigital device,pursuanttoPart 15oftheFCC Rules.
Theselimitsare designedtoprovide reasonable protectionagainstharmful interferencewhentheequipment isoperatedina commercial
environment.Thisequipmentgenerates,uses,andcanradiateradiofrequencyenergyand,ifnotinstalledandusedinaccordancewiththe
instructionmanual,may causeharmfulinterferenceto radiocommunications.Operation ofthisequipmentin aresidentialareais likelyto
causeharmfulinterferenceinwhichcasetheuserwillberequiredtocorrecttheinterferenceathisownexpense.
FCCCaution:Anychangesormodicationsnotexpresslyapprovedbythepartyresponsibleforcompliancecouldvoidtheuser'sauthority
tooperatethisequipment.
Warning:
ThisisaclassAproduct.Inadomesticenvironmentthisproductmaycauseradiointerferenceinwhichcasetheusermayberequiredto
takeadequatemeasures.
La página se está cargando...
Transcripción de documentos
Package Contents B 1 CS22D 2-Port USB DVI KVM Switch 1 User Instructions A Considering environmental protection, ATEN does not provide a fully printed user manual for this product. If the information contained in the Quick Start Guide is not enough for you to configure and operate your product, please visit our website www.aten.com, and download the full user manual. Online Registration http://eservice.aten.com 2 Hardware Review 3 Technical Phone Support International: 886-2-86926959 2 North America: 1-888-999-ATEN Ext: 4988 1 CS22D Part No. PAPE-1223-A60G Printing Date: 09/2013 CS22D 2-Port USB DVI KVM Switch Quick Start Guide A 1. Port LEDs 2. KVM Cables 3. Console Ports 4. USB Power In 5. Remote Port Selector 6. USB Keyboard and Mouse Connectors 7. DVI Connectors Hardware Installation B 1. Plug your USB keyboard, USB mouse, and monitor into their respective ports on the CS22D. Note : The USB port(s) can be used for USB peripheral sharing. To do so, plug the peripherals and your keyboard or mouse into a USB hub, then plug the hub into the keyboard or mouse port. Guide de démarrage rapide du commutateur KVM DVI USB à 2 ports CS22D Description de l’appareil A 1. Voyants des ports 2. Câbles KVM 3. Ports de console 4. Entrée d’alimentation USB 5. Sélecteur de port distant 6. Connecteurs clavier et souris USB 7. Connecteurs DVI Installation du matériel 1. Branchez votre clavier USB, votre souris USB et votre moniteur sur les ports correspondants du CS22D. Remarque : Vous pouvez utiliser le ou les port(s) USB pour partager plusieurs périphériques USB. Pour ce faire, brancher les périphériques et votre clavier ou votre souris à un CS22D 2-Port-KVM-Switch mit USB für DVI-Grafi k Kurzanleitung Hardwareübersicht A 1. Port-LEDs 2. KVM-Kabel 3. Konsolports 4. Buchse für Stromversorgung über USB-Bus 5. Unabhängiger Port-Auswahlschalter 6. USB-Tastatur- und Mausanschlüsse 7. Anschlüsse für DVI Hardware installieren 3 FCC Caution: Any changes or modifi cations not expressly approved by the party responsible for compliance could void the user's authority to operate this equipment. 4 Warning: This is a class A product. In a domestic environment this product may cause radio interference in which case the user may be required to take adequate measures. www.aten.com 2. Plug the USB and DVI connectors of the attached KVM cables into their respective ports on the computers you are installing. Note: If there is only one USB port on the computer, you can connect a USB hub to the computer, then plug the Keyboard/Mouse cable into the USB hub. 3. (Optional) If the power supply to your attached USB peripheral(s) is not suffi cient, plug in USB cable to the Mini USB power jack to get power from another USB power source. (i.e., PC, USB hub, 5V USB power adapter) Note : The USB to mini USB cable is not included in this package. Contact your product dealer for more details. www.aten.com concentrateur USB et ce dernier sur le port de clavier ou souris. 2. Reliez les connecteurs DVI et USB des câbles KVM fournis aux ports correspondants des ordinateurs à installer. Remarque : S’il n’y a qu’un seul port USB sur l’ordinateur, vous pouvez connecter un concentrateur USB à l’ordinateur et brancher ensuite le câble de clavier/souris sur le concentrateur USB. B B 1. Schließen Sie Ihre USB-Tastatur, USB-Maus und den Monitor an die entsprechenden Buchsen des CS22D an. Hinweis: Der bzw. die USB-Port(s) kann bzw. können auch für freigegebene USB-Peripheriegeräte verwendet werden. Dazu schließen Sie die Peripheriegeräte und Ihre Tastatur bzw. Maus FEDERAL COMMUNICATIONS COMMISSION INTERFERENCE STATEMENT This equipment has been tested and found to comply with the limits for a Class A digital device, pursuant to Part 15 of the FCC Rules. These limits are designed to provide reasonable protection against harmful interference when the equipment is operated in a commercial environment. This equipment generates, uses, and can radiate radio frequency energy and, if not installed and used in accordance with the instruction manual, may cause harmful interference to radio communications. Operation of this equipment in a residential area is likely to cause harmful interference in which case the user will be required to correct the interference at his own expense. 7 ATEN® This product is RoHS compliant. The following contains information that relates to China: 6 Simply Better Connections © Copyright 2013 International Co., Ltd. ATEN and the ATEN logo are trademarks of ATEN International Co., Ltd. All rights reserved. All other trademarks are the property of their respective owners. United Kingdom: 44-8-4481-58923 1 5 2 2-Port USB DVI KVM Switch Quick Start Guide Hardware Review Important Notice Hardware Installation 3. (En option) Si l’alimentation du ou des périphériques USB raccordés n’est pas suffi sante, raccordez un câble USB au connecteur d’alimentation mini USB pour obtenir de l’alimentation depuis une autre source d’alimentation USB (PC, concentrateur USB, adaptateur secteur USB 5 V, etc.). Remarque : Le câble USB vers mini USB n’est pas inclus dans la livraison. Contactez votre revendeur pour plus de détails. www.aten.com an ein USB-Hub und den Hub an den Tastatur- bzw. Mausport an. 2. Verbinden Sie die USB- und DVI des mitgelieferten KVM-Kabels mit den entsprechenden Ports der zu installierenden Computer. Hinweis: Besitzt Ihr Computer nur einen USB-Port, können Sie einen USB-Hub mit dem Computer und die Tastatur- und Mauskabel mit dem USB-Hub verbinden. 3. (Optional) Falls die Stromversorgung der angeschlossenen USB-Geräte nicht ausreicht, verbinden Sie das USB-Kabel mit der Mini-USB-Buchse für die Stromversorgung, um mehr Strom von einer anderen USBStromquelle zu erhalten. (Zum Beispiel PC, USB-Hub, 5-V-USB-Netzteil) Hinweis: Das USB-auf-Mini-USB-Kabel ist nicht im Lieferumfang enthalten. Wenden Sie sich für weitere Details an Ihren Fachhändler. Conmutador KVM de 2 puertos para USB con DVI CS22D - Guía rápida Presentación del hardware A 1. Indicadores LED de los puertos 2. Cables KVM 3. Puertos de consola 4. Entrada de alimentación USB 5. Selector de puertos independiente 6. Conectores USB para teclado y mouse 7. Conectores DVI Instalar el hardware B 1. Conecte su teclado USB, mouse USB y monitor a los puertos correspondientes del CS22D. Nota : El/los puerto(s) USB se puede(n) utilizar para compartir dispositivos USB. Para ello, conecte los periféricos y su teclado o mouse a un concentrador USB y luego conecte el concentrador al puerto para teclado o mouse. www.aten.com 2. Conecte los conectores USB y DVI de los cables KVM incluidos a los puertos correspondientes de cada una de las computadoras que quiera instalar. Nota : si su computadora solo tiene un puerto USB, podrá conectar un concentrador USB a la computadora y conectar los cables para teclado y mouse al concentrador USB. 3. (Opcional) Si el suministro eléctrico de los periféricos USB conectados no es sufi ciente, enchufe un cable USB a la toma Mini USB para obtener energía eléctrica de una fuente de energía USB externa. (Por ejemplo un PC, concentrador USB, adaptador de alimentación USB de 5 V) Nota : El cable USB a Mini USB no está incluido en el paquete. Póngase en contacto con su revendedor para más información. Switch KVM USB DVI CS22D a 2 porte – Guida rapida Hardware www.aten.com 2. Inserire i connettori USB e DVI dei cavi KVM in dotazione nelle rispettive porte sui computer che si stanno installando. Nota : Se il computer è dotato di una sola porta USB, è possibile collegarci un hub USB e poi inserire il cavo della tastiera/mouse nell’hub USB. A 1. LED delle porte 2. Cavi KVM 3. Porte di collegamento alla console 4. Ingresso alimentazione USB 5. Selettore remoto della porta 6. Connettori USB di tastiera e mouse 7. Connettori DVI Installazione dell’hardware B 1. Collegare la tastiera USB, il mouse USB e il monitor alle rispettive porte sul CS22D. Nota : La/e porta/e USB può/possono essere utilizzata/e per la condivisione di periferiche USB. A tal fi ne, collegare le periferiche e la tastiera o il mouse a un hub USB e poi inserire l’hub nella porta della tastiera o del mouse. 3. (Opzionale) Se l’alimentazione delle periferiche USB collegate è insuffi ciente, collegare il cavo USB alla presa di alimentazione Mini USB per ricevere alimentazione da un'altra sorgente d'alimentazione USB. (p.es. PC, hub USB, alimentatore USB da 5V) Nota : il cavo da USB a mini USB non è incluso nella confezione. Rivolgersi al proprio rivenditore per maggiori dettagli. Краткое руководство пользователя 2-портового KVM-переключателя USB DVI CS22D Обзор оборудования www.aten.com концентратор к порту клавиатуры или мыши. A 1. Индикаторы портов 2. KVM-кабели 3. Порты консоли 4. Вход питания USB 5. Удаленный переключатель порта 6. Разъемы клавиатуры и мыши USB 7. Разъемы DVI Установка оборудования A l l i n f o r m a t i o n , d o c u m e n t a t i o n , a n d specifi cations contained in this package are subject to change without prior notifi cation by the manufacturer. 2. Подключите разъемы USB и DVI комплектных KVM-кабелей к соответствующим портам устанавливаемых компьютеров. Примечание.Если на компьютере имеется только один USB-порт, можно подключить к компьютеру USB-концентратор, а затем подключить к USB-концентратору кабель клавиатуры/мыши. B 1. Подключите клавиатуру USB, мышь USB и монитор к соответствующим портам CS22D. Примечание.USB-порт(ы) может использоваться для общего доступа к периферийным USB-устройствам. Для этого подключите периферийные устройства и клавиатуру или мышь к USB-концентратору, а затем подключите 3. (Дополнительно) Если на подключенное периферийное USBоборудование подается недостаточно питания, подключите USBкабель в гнездо питания мини-USB, чтобы получать питание из другого источника питания USB. (т.е., ПК, концентратор USB, 5 В адаптер питания USB) Примечание. Кабель USB на мини-USB не входит в комплект поставки. Для получения дополнительных сведений обращайтесь к вашему поставщику продуктов.-
 1
1
-
 2
2


ATEN CS22D Guía de inicio rápido
- Categoría
- Conmutadores KVM
- Tipo
- Guía de inicio rápido
en otros idiomas
- français: ATEN CS22D Guide de démarrage rapide
- italiano: ATEN CS22D Guida Rapida
- English: ATEN CS22D Quick start guide
- Deutsch: ATEN CS22D Schnellstartanleitung
- русский: ATEN CS22D Инструкция по началу работы
- português: ATEN CS22D Guia rápido
- 日本語: ATEN CS22D クイックスタートガイド
Artículos relacionados
-
ATEN CS22D Guía de inicio rápido
-
ATEN CS1642A Guía de inicio rápido
-
-
ATEN 2-Port USB DisplayPort Cable KVM Switch Manual de usuario
-
-
-
ATEN CS1922M Guía de inicio rápido
-
-
ATEN CS1922 Guía de inicio rápido