La página se está cargando...

www.littletikes.com
www.littletikes.co.uk
www.littletikes.fr
www.littletikes.es
www.littletikes.nl
www.littletikes.pl
634826C
634826E4
627378C
627378E4
XIM634826-0 - 09/13
Tool required
Outil requis
Herramienta necesaria
Benötigtes Werkzeug
Vereist gereedschap
Wymagane narzędzia
K
Z
Z1
L
B
E
F
S
R
H
R1
S1
I
O
J
D
Y
C
G
T1
T
W
V
Q
P
A
X
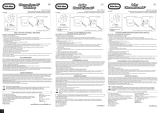
ENGLISH
4-in-1 Trike
Age grade: 9-36 months
Please save sales receipt for proof of purchase.
WARNING:
ADULT ASSEMBLY REQUIRED.
Read entire instructions carefully before
assembling this product.
WARNING: ASSEMBLY
• Keep these instructions for future reference.
• Prior to assembly, this package contains small parts:
hardware which is a choking hazard and may contain
sharp edges and sharp points. Keep away from children
until assembled.
• Ensure working area is free of danger, always dispose
packaging material in such a way that it may not cause
any harm. Plastic bags can be dangerous. To avoid
suocation keep plastic bags away from babies and
children.
• To prevent serious injury, children must not use the
equipment until completely assembled.
• This product is intended for outdoor domestic family use
only.
• This product is for private, residential use only (no
commercial or public use).
• Adult assembly required. Choking hazard to children under
the age of 3 years - contains small parts prior to assembly.
ASSEMBLY HINT
IMPORTANT: Assemble all parts together loosely at rst. Check
that assembly is correct then tighten locknut and screws.
IMPORTANT - MUST READ CAREFULLY
WARNING: USE
TO AVOID SERIOUS INJURY: Continuous adult supervision
required. Never use near motor vehicles; Never use near
streets, swimming pools, hills, steps, or sloped driveways;
Always wear closed shoes when using the tricycle. Never allow
more than one rider.
• Instruct children on proper use of this product, only after
properly placed, and not in a manner other than intended.
• Recommendation that rider should always wear a properly
tted helmet that complies with U. S. Consumer Product
Safety Commission (CPSC) standard 16 CFR 1203.
• Ride-on toys should be used with caution since skill is
required to avoid falls or collisions which may cause injury
to the user.
• WARNING! Not to be used by children over 36 months
due to size limitation.
• Maximum child’s weight: 50 lbs. (23 kg).
• The maximum permissible load for basket: 5 lbs.
(2.27 kg). Excessive weight may cause a hazardous or
unstable condition.
• Safeguard the product against rolling away when
parking it.
MAINTENANCE & CLEANING
• Check all hardware during usage period and tighten as
required. It is particularly important that this procedure be
followed at the beginning of each season. If these checks
are not carried out, the toy could overturn or otherwise
become a hazard. Replacement should be made in
accordance with the manufacturer's instructions.
• Do not attempt to modify or repair this product. For help
contact Little Tikes Consumer Service.
• Clean trike with a slightly damp cloth (cold water) and mild
soap. Never use a corrosive or abrasive substance to clean
the product.
DISPOSAL
• Disassemble and dispose of equipment in such a manner
that no hazardous conditions, such as but not limited to,
small parts and sharp edges, exist at the time equipment is
discarded.
CONSUMER SERVICE TOLL-FREE NUMBER:
United States:
www.littletikes.com
1-800-321-0183
Monday - Friday
The Little Tikes Company
2180 Barlow Road
Hudson, OH 44236
United Kingdom:
www.littletikes.co.uk
Little Tikes
MGA Entertainment (UK) Ltd.
50 Presley
Crownhill
Milton Keynes, MK8 0ES
Bucks, UK
+0800 521 558
Printed in China.
D.R.©2011 The Little Tikes Company
© The Little Tikes Company, an MGA Entertainment company. LITTLE TIKES® is a
trademark of Little Tikes in the U.S. and other countries. All logos, names, characters,
likenesses, images, slogans, and packaging appearance are the property of Little
Tikes. Please keep this address and packaging for reference since it contains
important information. Contents, including specications and colors, may vary
from photos depicted on package. Instructions included. Please remove all
packaging including tags, ties & tacking stitches before giving this product to a
child.
LIMITED WARRANTY
The Little Tikes Company makes fun, high quality toys. We warrant to the original
purchaser that this product is free of defects in materials or workmanship for one
year * from the date of purchase (dated sales receipt is required for proof of
purchase). At the sole election of The Little Tikes Company, the only remedies
available under this warranty will be either replacement of the defective part of the
product or replacement of the product. This warranty is valid only if the product has
been assembled and maintained per the instructions. This warranty does not cover
abuse, accident, cosmetic issues such as fading or scratches from normal wear, or
any other cause not arising from defects in material and workmanship. *The
warranty period is three (3) months for daycare or commercial purchasers.
U.S.A and Canada: For warranty service or replacement part information, please
visit our website at www.littletikes.com, call 1-800-321-0183 or write to: Consumer
Service, The Little Tikes Company, 2180 Barlow Road, Hudson OH 44236, U.S.A.
Some replacement parts may be available for purchase after warranty
expires—contact us for details.
Outside U.S.A and Canada: Contact place of purchase for warranty service. This
warranty gives you specic legal rights, and you may also have other rights, which
vary from country/state to country/state. Some countries/states do not allow the
exclusion or limitation of incidental or consequential damages, so the above
limitation or exclusion may not apply to you.
Please keep this manual as it contains important information.
Patent No. 8,313,117
Visit our website at
www.littletikes.com
to register your product and
to enter our sweepstakes.
(No purchase necessary)
Visitez www.littletikes.com
pour enregistrer votre produit
MANTENIMIENTO Y LIMPIEZA
• Verique todas las piezas y jaciones durante el período de
utilización y apriételas según sea necesario. Será
particularmente importante observar este procedimiento al
principio de cada temporada de utilización. De no llevarse a
cabo dichas vericaciones, el juguete podría ser
susceptible de volcarse o suponer un peligro. La sustitución
de las piezas deberá llevarse a cabo conforme a las
instrucciones del fabricante.
• No intente modicar ni reparar este producto por su
cuenta. De ser necesario, póngase en contacto con el
Departamento de atención al consumidor de Little Tikes
para solicitar asistencia.
• Limpie el triciclo utilizando un paño ligeramente húmedo
(solución de agua fría y un tipo de detergente suave).
Nunca utilice sustancias corrosivas o abrasivas para limpiar
el producto.
INSTRUCCIONES A TENER EN CUENTA A LA HORA DE
DESECHAR EL PRODUCTO
• Desmonte y deseche el juguete de manera que no
constituya un peligro. Esto incluye pero sin limitación
alguna aquellas piezas pequeñas y bordes alados
existentes en el momento de desechar el producto.
SERVICIO AL CLIENTE
www.littletikes.es
Impreso en China.
© The Little Tikes Company, una compañía de MGA Entertainment. LITTLE TIKES® es
una marca registrada de Little Tikes en EE.UU. y otros países. Todos los logotipos,
nombres, personajes, representaciones, imágenes, eslóganes y apariencia del
embalaje son propiedad de Little Tikes. Conserve esta dirección y embalaje para
referencia ya que contiene información importante. El contenido, incluyendo
especicaciones y colores, puede ser diferente a las fotos que se muestran en el
paquete. Instrucciones incluidas. Antes de darle este producto al niño quítele todo el
embalaje, incluyendo etiquetas, amarres y costuras.
GARANTIA
La compañía Little Tikes fabrica juguetes divertidos de alta calidad. Le garantizamos
al comprador original que este producto está libre de defectos de material o mano
de obra por un año * a partir de la fecha de compra (se requiere el recibo de compra
fechado como prueba). Bajo la sola discreción de The Little Tikes Company, los únicos
recursos disponibles bajo esta garantía son la sustitución de la pieza defectuosa del
producto o el reemplazo del producto. Esta garantía es válida solamente si el
producto ha sido montado y mantenido según las instrucciones. Esta garantía no
cubre abuso, accidente, aspectos cosméticos tales como el descoloramiento o las
rayas como consecuencia de un uso normal, ni ningún otro problema que no surja
de defectos de material o mano de obra. *El período de garantía es de tres (3) meses
para guarderías o compradores comerciales.
Fuera de EE.UU. y Canadá: Póngase en contacto con el lugar de compra para el
servicio de garantía. Esta garantía le otorga derechos legales
especícos y es posible
también que tenga otros derechos que varían según el país/estado. Algunos
países/estados no permiten la exclusión o limitación de daños concomitantes o
consecuentes, por lo cual la limitación o exclusión mencionada puede no aplicarse a
usted.
4-in-1 Dreirad
Alter: ab 9-36 Monaten
Bitte den Kassenzettel als Beleg aufbewahren.
ACHTUNG :
ZUSAMMENBAU DURCH EINEN
ERWACHSENEN ERFORDERLICH.
Bitte lesen Sie die gesamte Anleitung sorgfältig durch, bevor
Sie dieses Produkt zusammenbauen.
ACHTUNG: ZUSAMMENBAU
• Diese Anleitung für mögliche Rückfragen bitte aufbewahren.
• Die Verpackung enthält für den Zusammenbau benötigte
Kleinteile, die verschluckt werden können oder
möglicherweise scharfe Spitzen oder Kanten besitzen. Bitte
von Kindern fernhalten, bis der Zusammenbau vollständig
beendet ist.
• Bitte darauf achten, dass der Arbeitsbereich frei von
Gefahren ist. Das Verpackungsmaterial so entsorgen, dass
keine Gefährdung davon ausgehen kann. Plastikbeutel
können eine Gefahr darstellen. Die Beutel daher von Babys
und Kindern fernhalten.
• Um ernsthafte Verletzungen zu vermeiden, darf das Produkt
erst dann von Kindern benutzt werden, wenn es vollständig
zusammengebaut ist.
• Dieses Produkt ist ausschließlich für den häuslichen
Gebrauch im Freien gedacht.
• Dieses Produkt ist nur für den privaten, häuslichen Gebrauch
geeignet (keine kommerzielle oder öentliche Nutzung).
• Zusammenbau durch einen Erwachsenen erforderlich.
Enthält für den Zusammenbau benötigte verschluckbare
Kleinteile. Erstickungsgefahr! Von Kindern unter 3 Jahren
fernhalten.
HINWEIS FÜR DEN ZUSAMMENBAU
WICHTIG: Zuerst alle Teile lose zusammenbauen. Danach
überprüfen, ob das Produkt richtig zusammengebaut wurde
und erst dann die Mutter und die Schrauben richtig festziehen.
WICHTIG – BITTE SORGFÄLTIG DURCHLESEN
ACHTUNG: GEBRAUCH
UM ERNSTHAFTE VERLETZUNGEN ZU VERMEIDEN:
Kontinuierliche Beaufsichtigung durch einen Erwachsenen ist
erforderlich. Niemals in der Nähe von Motorfahrzeugen
verwenden. Niemals in der Nähe von Straßen,
Schwimmbecken, Hügeln, Stufen, Abhängen oder
abschüssigen Flächen benutzen. Beim Fahren müssen
jederzeit geschlossene Schuhe getragen werden. Immer nur
für einen Fahrer geeignet.
Nous garantissons à l’acheteur d’origine que ce produit est exempt de vices de
matériau ou de fabrication pendant une année* à compter de sa date d’achat (le
reçu d’achat daté est exigé comme preuve d’achat). Au seul gré de The Little Tikes
Company, le seul recours en vertu de cette garantie se limite au remplacement de la
pièce défectueuse du produit ou au remplacement du produit. La présente garantie
est valable uniquement si le produit a été assemblé et entretenu conformément aux
instructions fournies. La présente garantie ne couvre ni les dommages résultant
d’une utilisation abusive ou d’un accident, ni l’apparence esthétique telles les
décolorations ou les rayures dues à l’usure normale ou à toute autre cause ne
relevant pas de vices de matériau ou de fabrivcation. *La période de garantie est de
trois (3) mois pour les services de garderie et les acheteurs commerciaux.
États-Unis et Canada : Pour obtenir des informations sur le service de garantie ou de
remplacement des pièces, veuillez visiter notre site Web : www.littletikes.com,
appeler le 1-800-321-0183 ou écrire à : Consumer Service, The Little Tikes Company,
2180 Barlow Road, Hudson OH 44236, U.S.A. Certaines pièces de rechange peuvent
être achetées après l’expiration de la garantie – veuillez nous contacter pour obtenir
de plus amples informations.
À l’extérieur des États-Unis et du Canada : Veuillez contacter le magasin où le produit
a été acheté pour vous informer sur le service de garantie. La présente garantie vous
ore des droits spéciques reconnus par la loi, mais il se peut que vous ayez d’autres
droits qui varient de pays / province à pays / province. Certains pays ou certaines
provinces n’autorisent pas l’exclusion ou la limitation pour les dommages
consécutifs ou fortuits, par conséquent la limitation ou l’exclusion qui précède peut
ne pas s’appliquer à votre cas.
Triciclo 4-en-1
Banda de edad: de 9 a 36 meses
Guarde el recibo de caja como comprobante de compra.
ADVERTENCIA!
EL MONTAJE DEBERÁ EFECTUARLO UN ADULTO.
Lea detenidamente todas las instrucciones antes de proceder
al montaje del producto.
¡ADVERTENCIA! MONTAJE
• Conserve estas instrucciones como referencia futura.
• Antes de proceder al montaje, tenga en cuenta que este
embalaje contiene piezas pequeñas: se trata de tornillería
que podría suponer un peligro de atragantamiento y que,
además, podría incluir cantos cortantes y puntas aladas.
Mantenga el producto fuera del alcance de niños hasta que
esté totalmente ensamblado.
• Asegúrese de que la zona de trabajo esté libre de peligros y
deseche siempre el material de embalaje de manera que
no perjudique el medio ambiente o pueda causar daños a
terceros. Las bolsas de plásticos pueden ser peligrosas. Para
evitar posibles riesgos de asxia, mantenga las bolsas de
plástico fuera del alcance de bebés y niños.
• A n de evitar lesiones físicas graves, no permita que los
niños utilicen el producto hasta que esté totalmente
ensamblado.
• Este producto ha sido diseñado únicamente para ser
utilizado al aire libre en un entorno doméstico y familiar.
• Este producto ha sido diseñado únicamente para uso en
propiedades privadas y residenciales (no deberá utilizarse
en entornos comerciales ni en la vía pública).
• El montaje deberá efectuarlo un adulto. Riesgo de asxia
en niños menores de 3 años - Contiene pequeñas piezas
sueltas antes de su ensamblaje.
CONSEJOS PARA FACILITAR EL MONTAJE
IMPORTANTE: Monte todas las piezas sin apretarlas
demasiado. Compruebe primero que el montaje es correcto y
apriete la tuerca y tornillos a continuación.
IMPORTANTE: LEA DETENIDAMENTE ESTA INFORMACIÓN
¡ADVERTENCIA! UTILIZACIÓN
PARA EVITAR LESIONES FÍSICAS GRAVES, TENGA EN CUENTA LO
SIGUIENTE: Se requerirá la constante supervisión de un adulto
mientras se utilice el producto. Nunca utilice el producto a
proximidad de automóviles y vehículos motorizados; Nunca
utilice el producto cerca de piscinas, ni tampoco en la vía pública,
en pendientes, rampas o entradas de vehículos inclinadas; Deberá
calzar siempre un tipo de calzado cerrado cuando se utilice el
triciclo. Nunca permita que se monte más de una persona.
• Una vez ensamblado y ubicado en una zona adecuada,
enseñe a los niños a utilizar correctamente este producto y
no de cualquier otra manera que no sea la prevista.
• Se recomienda que el ciclista utilice siempre un casco bien
ajustado y que sea conforme a los requisitos exigidos por la
norma 16 CFR 1203 de la Comisión para la Seguridad de
Productos de Consumo (CPSC) de los EE. UU.
• Los juguetes autoportantes deberán utilizarse con
precaución, ya que requieren cierta destreza y equilibrio
para evitar caídas o colisiones que pudieran ocasionar
lesiones tanto al usuario como a terceros.
• ¡ADVERTENCIA! El producto no es adecuado para ser
utilizado por niños de más de 36 meses debido a sus
limitaciones de tamaño.
• Peso máximo del niño (usuario): 50 libras (23 kg).
• Carga máxima admisible para la cesta: 5 libras (2,27 kg).
Una carga excesiva podrá ocasionar inestabilidad y
situaciones de peligro.
• Tome las medidas oportunas para que el producto no salga
rodando al aparcarlo.
FRANÇAIS
ESPAÑOL
DEUTSCH
Gardez ce manuel car il renferme des renseignements importants.
Conserve este manual ya que contiene información importante.
Tricycle 4 en 1
Âge : 9-36 mois
Conservez le reçu comme preuve d’achat.
ATTENTION :
UN ADULTE DOIT EFFECTUER L’ASSEMBLAGE.
Lisez toutes les instructions attentivement avant d’assembler
ce produit.
MISES EN GARDE : ASSEMBLAGE
• Gardez ces instructions pour référence future.
• Avant l’assemblage, cet emballage renferme des petites
pièces qui peuvent poser un risque d’étouement. Ces
pièces peuvent avoir des bords coupants ou des
extrémités pointues. Gardez l’emballage hors de la portée
des enfants tant que le produit ne sera pas assemblé.
• L’aire de travail doit être exempte de danger. Jetez
toujours les matériaux d’emballage de manière à ne
blesser personne. Les sacs de plastique peuvent être
dangereux. Pour éviter l’étouement, gardez les sacs de
plastique loin des bébés et enfants.
• Pour prévenir les blessures graves, les enfants ne doivent
pas utiliser le produit tant qu’il ne sera pas entièrement
assemblé.
• Ce produit est conçu pour un usage familial à l’extérieur
seulement.
• Ce produit est conçu pour un usage privé et résidentiel
seulement (aucun usage commercial ou public).
• Un adulte doit eectuer l’assemblage. Risque
d’étouement pour les enfants de moins de 3 ans ;
contient des petites pièces avant l’assemblage.
CONSEILS POUR L’ASSEMBLAGE
IMPORTANT : assemblez toutes les pièces sans trop les serrer.
Vériez si l’assemblage est correct, puis serrez les écrous de
blocage et les vis.
IMPORTANT : LISEZ ATTENTIVEMENT CE QUI SUIT
MISES EN GARDE : UTILISATION
POUR ÉVITER LES BLESSURES GRAVES : un adulte doit
constamment eectuer la surveillance. N’utilisez jamais le
produit près des véhicules motorisés. Ne l’utilisez jamais sur
des routes, près des piscines, des côtes, des pentes, ni sur des
entrées inclinées. Portez toujours des chaussures fermées lors
de l’utilisation du tricycle.
Ne permettez qu’un seul
promeneur à la fois.
• Montrez aux enfants à utiliser correctement ce produit,
seulement après l’avoir assemblé correctement et
conformément aux ns prévues.
• Il est recommandé que l’enfant porte toujours un casque
bien ajusté, conforme à la norme 16 CFR 1203 de la
« U.S. Consumer Product Safety Commission » (CPSC).
• Les trotteurs doivent être utilisés prudemment,
puisqu’une certaine aptitude est requise pour éviter les
chutes ou les collisions qui pourraient blesser l’utilisateur
ou des tiers.
• ATTENTION ! Ce produit ne doit pas être utilisé par
des enfants de plus de 36 mois en raison des restrictions
de taille.
• Poids maximal de l’enfant : 23 kg (50 lb).
• La charge maximale permise pour le panier est de 2,27 kg
(5 lb). Un poids excessif pourrait causer une condition
dangereuse ou instable.
• Prenez les mesures nécessaires pour que le produit ne
roule pas lorsque vous le rangez.
ENTRETIEN ET NETTOYAGE
• Vériez toutes les pièces d’assemblage régulièrement
durant l’usage et resserrez-les au besoin. Il est
particulièrement important de suivre cette procédure
au début de chaque saison. Si ces vérications ne
sont pas eectuées, le jouet pourrait se renverser ou
poser un risque pour la sécurité. Le remplacement doit
être eectué conformément aux instructions du
fabricant.
• N’essayez pas de modier ou de réparer ce produit.
Pour obtenir de l’aide, contactez le service à la clientèle
de Little Tikes.
• Nettoyez le tricycle avec un chion légèrement humecté
d’eau froide et d’un savon doux. Ne nettoyez pas le
tricycle avec un produit corrosif ou abrasif.
MISE AU REBUT
• Démontez le produit et mettez-le au rebut de manière à
ce que les petites pièces ou les bords coupants ou
pointus ne posent aucun risque pour la sécurité.
SERVICE CONSOMMATEURS
www.littletikes.fr
Little Tikes
klantenservice@mgae.com
Fax : +31 (0)20 659 8034
Imprimé en Chine.
© The Little Tikes Company et MGA Entertainment company. LITTLE TIKES
®
/MD
est
une marque de commerce de Little Tikes aux États-Unis et dans d’autres pays. Les
logos, noms, personnages, ressemblances, images, slogans et modèles
d'emballages appartiennent à Little Tikes. Merci de conserver cette adresse et cet
emballage car ils contiennent des informations importantes. Merci d’enlever
l’emballage, y compris les étiquettes, liens et ls cousus, avant de donner ce jouet
à un enfant. Le contenu, y compris les spécications et les couleurs, peut varier des
illustrations de l’emballage. Instructions incluses.
GARANTIE
The Little Tikes Company fabrique des jouets amusants de qualité exceptionnelle.
Brevet nº 8,313,117
Patente nº 8.313.117
N1 x 2
Included • Inclus
Incluida • Enthalten
Inbegrepen • Dołączono
M1 x 5
M2 x 4
M3 x 1
M5 x 2
M4 x 2
M6 x 1

0913-0-C/E4
ASSEMBLY • ASSEMBLAGE • MONTAJE • ZUSAMMENBAU • MONTAGE • MONTAŻ
3
M3
M3
B
A
6
I
H
Y
M1 x 4
4
G
Point to front
À orienter vers le
devant
Orientar hacia
delante
Zeigt nach vorne
Wijst naar voren
Punkt skierowany do
przodu
• Erklären Sie Kindern den richtigen Gebrauch dieses
Produkts an einem entsprechenden Ort und ausschließlich
wie vorgesehen.
• Es wird empfohlen, dass der Fahrer einen gut sitzenden
Helm, der TÜV-geprüft ist und der EN 1078 entspricht, trägt.
• Fahrzeuge sollten immer mit Vorsicht benutzt werden, da
bestimmte motorische Fähigkeiten erforderlich sind, um
Stürze oder Zusammenstöße zu vermeiden, bei denen der
Fahrer oder Dritte verletzt werden könnten.
• ACHTUNG! Aufgrund der Größenbegrenzung nicht für
Kinder über 36 Monaten geeignet.
• Maximales Gewicht des Kindes: 23 kg.
• Die maximal zulässige Belastung für die Wanne: 2,3 kg. Eine
übermäßige Beladung kann gefährliche bzw. instabile
Situationen verursachen.
• Das Produkt beim Abstellen so sichern, dass es nicht
wegrollen kann.
WARTUNG UND REINIGUNG
• Während des Gebrauchs alle Schrauben und Muttern
überprüfen und gegebenenfalls nachziehen. Es ist
besonders wichtig, dass dies zu Beginn jeder Saison
geschieht. Sollten diese Überprüfungen nicht durchgeführt
werden, kann das Fahrzeug möglicherweise umkippen
oder anderweitig eine Gefahr darstellen. Ersatzteile müssen
in Absprache mit dem Hersteller verwendet werden.
• Bitte keine Veränderungen an diesem Produkt vornehmen
oder es reparieren. Sollten Sie Hilfe benötigen, wenden Sie
sich bitte an unseren Kundendienst.
• Das Dreirad mit einem leicht feuchten Lappen (kaltes
Wasser) und milder Seife reinigen. Niemals aggressive
Reinigungs- oder Scheuermittel verwenden, um das
Produkt zu säubern.
ENTSORGUNG
• Das Produkt so auseinanderbauen und entsorgen,
dass keine gefährlichen Situationen, wie z. B. durch
Kleinteile und scharfe Kanten, entstehen, wenn das
Produkt entsorgt wird.
KUNDENSERVICE:
www.littletikes.com
Zapf Creation AG
Mönchrödener Str. 13
D-96472 Rödental, Germany
Tel: +49 (0) 9563 7251-0
Gedruckt in China.
© The Little Tikes Company, ein Unternehmen von MGA Entertainment. LITTLE
TIKES® ist in den USA und anderen Ländern ein Warenzeichen von Little Tikes. Alle
Logos, Namen, Charaktere, Ähnlichkeiten, Bilder, Claims und das Erscheinungsbild
der Verpackung sind in Besitz von Little Tikes. Diese Verpackung bitte für mögliche
Rückfragen aufbewahren. Sie enthält wichtige Informationen. Bitte entfernen Sie die
Verpackung sowie jegliche Anhänger, Befestigungen und Fäden, bevor das Produkt
in die Hände eines Kindes gelangt. Abweichungen des Inhalts in Farbe und
Gestaltung gegenüber den Abbildungen auf der Verpackung vorbehalten.
Anleitung enthalten.
GARANTIE
The Little Tikes Company stellt lustige, hochwertige Spielsachen her. Wir gewähren dem
Erstkäufer vom Zeitpunkt des Erwerbs eine auf ein Jahr * befristete Garantie hinsichtlich
Materialien und Verarbeitung (Kaufbeleg mit Datum ist erforderlich). Nach der alleinigen
Entscheidung von The Little Tikes Company sind die einzigen möglichen Maßnahmen,
die unter die Garantie fallen entweder der Ersatz des defekten Teils des Produkts oder das
Ersetzen des Produkts. Garantieanspruch besteht nur, wenn das Produkt den
Anweisungen entsprechend zusammengebaut und gewartet wurde. Die Garantie
erstreckt sich nicht auf Missbrauch, Unfall, Schönheitsfehler wieVerblassen oder Kratzer
durch normale Abnutzung oder alle anderen Ursachen, die sich nicht aus Material- oder
Verarbeitungsfehlern ergeben. *Die Garantiefrist beträgt drei (3) Monate für
Kindertagesstätten oder kommerzielle Käufer.
Außerhalb der U.S.A und Kanadas: Kontaktieren Sie bei Garantieansprüchen die
Verkaufsstelle. Diese Garantie gibt Ihnen spezifische gesetzliche Rechte. Sie mögen
noch weitere Rechte haben, die von Land/Staat zu Land/Staat unterschiedlich sind.
Einige Länder/Staaten gestatten nicht den Ausschluss von beiläufig entstandenen
oder Folgeschäden, so dass die obigen Einschränkungen auf Sie möglicherweise
nicht zutreffen.
4 w 1 Trójkołowiec
Wiek: od 9-36 miesiecy
Prosimy zachowac paragon jako dowód zakupu.
OSTRZEŻENIE:
WYMAGA MONTAŻU PRZEZ OSOBĘ DOROSŁĄ.
Przed montażem produktu dokładnie przeczytaj całą
instrukcję.
UWAGA: MONTAŻ
• Niniejszą instrukcję zachowaj na przyszłość.
• Przed montażem uważaj na zawartość małych elementów:
zawiera elementy konstrukcyjne, którymi można się
zadławić i które mogą posiadać ostre krawędzie i miejsca.
Zanim zmontujesz chroń przed dziećmi.
• Usuń wszystkie elementy opakowania tak aby uniknąć
zagrożeń i ryzyka uszkodzeń. Plastikowe worki mogą być
niebezpieczne. Aby uniknąć ryzyka uduszenia trzymaj
plastikowe worki z dala od dzieci.
• Aby uniknąć poważnych urazów, dzieci nie mogą używać
produktu przed całkowitym zmontowaniem.
• Produkt ten jest przeznaczony wyłącznie do rodzinnego
użytku poza domem.
• Produkt ten jest przeznaczony wyłącznie do użytku
prywatnego (nie do użytku komercyjnego ani
publicznego).
• Wymaga montazu przez osobe dorosła. Zawiera małe
elementy przed zmontowaniem, ryzyko zadławienia.
Niedozwolone dla dzieci ponizej trzeciego roku zycia.
Diese Anleitung für mögliche Rückfragen bitte aufbewahren.
Sie enthält wichtige Informationen.
POLSKI
NEDERLANDS
WSKAZÓWKI MONTAŻOWE
WAŻNE: Wstępnie wszystkie elementy zmontuj luźno.
Sprawdź czy zestaw jest poprawny a następnie dokręć śruby i
nakrętki.
WAŻNE – PRZECZYTAJ DOKŁADNIE
OSTRZEŻENIE! UŻYTKOWANIE
ABY UNIKNĄĆ POWAŻNYCH OBRAŻEŃ: Wymagany jest
stały nadzór osoby dorosłej; Nigdy nie używaj w pobliżu
pojazdów silnikowych. Nigdy nie używaj w pobliżu ulic,
basenów, wzgórz, przystanków, stopni lub podjazdów
drogowych. Podczas korzystania z pojazdu zawsze
zakładaj pełne obuwie. Na zabawce moze przebywac
tylko jedno dziecko.
• Poinstruuj dzieci o właściwym używaniu tego produktu
po prawidłowym umieszczeniu, i nie w sposób inny od
przeznaczenia produktu.
• Zaleca się aby jeżdżący zawsze używał prawidłowo
dopasowany kask spełniający normy bezpieczeństwa U.S.
Consumer Product Safety Commission (CPSC)16 CFR 1203.
• Na zabawkach należy jeździć ostrożnie aż osiągnie się
umiejętność unikania wypadku lub kolizji mogącej
spowodować obrażenia użytkownika lub osób trzecich.
• OSTRZEŻENIE! Nie nadaje się do użytku dla dzieci
powyżej wieku 36 miesięcy z powodu ograniczeń
wielkościowych.
• Maksymalna waga dziecka: 50 lbs (23 kg).
• Maksymalne dopuszczalne obciążenie koszyka: 5 lbs (2,27
kg). Przekroczenie wagi może spowodować
niebezpieczne lub niestabilne sytuacje.
• Po zaparkowaniu zabezpiecz produkt przed odjechaniem.
KONSERWACJA I CZYSZCZENIE
• Przed okresem używania sprawdź wszystkie elementy i
jeśli to konieczne dociśnij je. Szczególnie ważne jest
aby ta procedura była powtarzana przed każdym
sezonem. Jeśli nie przeprowadzi się tej kontroli, zabawka
może się przewrócić lub w inny sposób stanie się
niebezpieczna. Wymiana będzie miała miejsce zgodnie z
instrukcją producenta.
• Nie próbuj modykować ani naprawiać tego produktu. O
pomoc kontaktuj się z obsługą klienta Little Tikes.
• Wyczyść trójkołowiec wilgotną tkaniną (zimną wodą) i
łagodnym mydłem. Do czyszczenia produktu nigdy nie
używaj żrących środków ani substancji ściernych.
DEMONTAŻ
• Rozmontuj i usuń wyposażenie w taki sposób aby nie było
na nim żadnych drobnych lub ostrych krawędzi w czasie
gdy nie jest używany.
OBSŁUGA KLIENTA
www.littletikes.pl
MGA Entertainment Poland Sp. z o.o.
ul. Grottgera 15a
76-200 Słupsk
Polska
tel. + 48 59 847 44 17
fax + 48 59 847 44 46
Wydrukowano w Chinach.
© The Little Tikes Company nalezy do koncernu MGA Entertainment. LITTLE TIKES®
jest znakiem towarowym Little Tikes w Stanach Zjednoczonych i innych krajach.
Wszystkie logo, nazwy, znaki, wizerunki, obrazy, hasła i wygląd opakowań są
własnością rmy Little Tikes. Adres i opakowanie należy zachowac do konsultacji,
poniewaz zawiera wazne informacje. Zawartosc, w tym specykacja i kolory, moga
sie róznic od zdjec umieszczonych na opakowaniu. Instrukcja dołączona. Przed
przekazaniem tego produktu dziecku należy usunąć całe opakowanie, w tym
etykiety, taśmy i zszywki.
GWARANCJA
Firma Little Tikes produkuje wesołe zabawki wysokiej jakości. Kupujący otrzymuje od
nas gwarancję, że nasz produkt jest wolny od wad w materiałach lub wykonaniu przez
okres jednego roku* od daty zakupu (jako dowód zakupu wymagany jest paragon
opatrzony data). Zależnie od decyzji Spółki Little Tikes, roszczenie gwarancyjne zostanie
zaspokojone albo poprzez wymianę wadliwego elementu albo poprzez wymianę
całego produktu. Niniejsza gwarancja ma zastosowanie wyłącznie, jeśli produkt został
zmontowany i jest konserwowany zgodnie z instrukcją. Gwarancja ta nie obejmuje
przypadków niewłaściwego uzycia, nieszczesliwych wypadków, kwestii kosmetycznych
takich jak utrata intensywności koloru czy zadrapania powstałe w wyniku normalnego
uzytkowania, ani tez jakichkolwiek innych powodów nie wynikajacych z wad w
materiałach lub wykonaniu.
U.S.A i Kanada: Aby uzyskac pomoc w sprawie gwarancji, odwiedz strone
internetową www.littletikes.com, zadzwoń pod numer 1-800-321-0183 lub napisz
na adres: Consumer Service, The Little Tikes Company, 2180 Barlow Road, Hudson
OH 44236, U.S.A. Niektóre czesci wymienne sa dostepne równiez po upłynięciu
gwarancji; w tej sprawie prosimy o kontakt z nami.
Poza granicami U.S.A i Kanady: Aby uzyskac pomoc w sprawie gwarancji, nalezy
skontaktowac sie ze sprzedawca. Gwarancja ta przyznaje konsumentowi okreslone
prawa, lecz nie ogranicza innych praw wynikajacych z obowiązujących przepisów
prawnych, jakie mogą mu przysługiwać. W niektórych przypadkach niemożliwe
będzie wyłącznie odpowiedzialności za uszkodzenia przypadkowe, a więc
powyższe ograniczenia nie będą miały zastosowania.
4-in-1 Driewieler
Leeftijd: 9-36 maanden
Bewaar a.u.b. uw kassabon als bewijs van aankoop.
WAARSCHUWING:
IN ELKAAR TE ZETTEN DOOR EEN
VOLWASSENE.
Lees de instructies aandachtig door voordat u dit product
in elkaar zet.
WAARSCHUWING: MONTAGE
• Bewaar deze instructies, zodat u ze in de toekomst kunt
raadplegen.
• De verpakking bevat kleine onderdelen, die
verstikkingsgevaar kunnen opleveren of scherpe randen
Proszę zachować niniejszą instrukcję, ponieważ zawiera istotne informacje.
Bewaar deze handleiding goed, er staat belangrijke informatie in.
of punten hebben. Houd deze onderdelen uit de buurt van
kinderen tot het product in elkaar is gezet.
• Zorg ervoor dat de plek waar u het product in elkaar zet vrij
van gevaren is en gooi verpakkingsmateriaal op een
verantwoorde manier weg. Plastic zakjes kunnen gevaarlijk
zijn. Houd plastic zakjes uit de buurt van baby's en kinderen
om verstikking te vermijden.
• Voorkom ernstige verwondingen en laat kinderen dit
product pas gebruiken nadat het helemaal in elkaar is gezet.
• Uitsluitend bedoeld voor gebruik buitenshuis in
gezinsverband.
• Dit product is bedoeld voor particulier gebruik in een
huiselijke omgeving (niet voor commerciële of openbare
doeleinden).
• In elkaar te zetten door een volwassene. Inslikkingsgevaar
voor kinderen jonger dan 3 jaar. De verpakking bevat kleine
onderdelen.
MONTAGETIP
BELANGRIJK: monteer eerst alle onderdelen zonder de moeren
en schroeven aan te draaien, zodat u kunt controleren of alles
klopt. Draai daarna pas de moeren en schroeven aan.
BELANGRIJK - AANDACHTIG DOORLEZEN
LET OP: HET GEBRUIK
VOORKOM ERNSTIG LETSEL: voortdurende toezicht van een
volwassene is vereist. Gebruik een driewieler nooit in
de buurt van auto's, straten, zwembaden, heuvels, trappen
of hellende opritten. Laat een kind altijd schoenen dragen
als het op de driewieler rijdt. Laat nooit meer dan 1 kind op
de driewieler etsen.
• Zet eerst het product op de juiste manier in elkaar en vertel
kinderen aansluitend op welke manier het gebruikt moet
worden en voor welk doeleinde het is bedoeld.
• Het wordt aanbevolen een kind altijd een goed passende
helm te laten dragen tijdens het etsen.
• Gebruik zitwagentjes verstandig. Een kind dient over
bepaalde vaardigheden te beschikken om een val of botsing
met mogelijk letsel voor de gebruiker of derden te vermijden.
• LET OP: niet te gebruiken voor kinderen van ouder dan
36 maanden wegens lengtebeperkingen.
• Maximumgewicht kind: 23 kg.
• De maximale toegestane last voor de mand: 2,27 kg. Een
zwaardere last kan ervoor zorgen dat de driewieler gevaarlijk
of instabiel wordt.
• Zorg ervoor dat de driewieler niet kan wegrollen als u hem
ergens parkeert.
ONDERHOUD & SCHOONMAKEN
• Controleer alle schroeven, moeren en bouten voor gebruik
en draai ze indien nodig aan. Het is vooral belangrijk om dit
te doen aan het begin van het buitenseizoen. Als deze
controles niet worden uitgevoerd, kan het product omvallen
of op een andere manier gevaar opleveren. Vervanging van
onderdelen uitsluitend volgens de instructies van de
fabrikant.
• Probeer dit product niet te wijzigen of repareren. Neem
contact op met de klantenservice van Little Tikes in geval van
vragen.
• Maak de driewieler schoon met een licht vochtige doek
(koud water) en een mild sopje. Gebruik nooit
schuurmiddelen of agressieve schoonmaakmiddelen om het
product schoon te maken.
WEGGOOIEN
• Haal de onderdelen uit elkaar en gooi ze weg op een manier
die geen gevaar oplevert voor anderen. Voorkom
bijvoorbeeld kleine delen of scherpe randen.
CONSUMENTEN SERVICE
www.littletikes.nl
Little Tikes
MGA Entertainment Netherlands BV/ Belgium BVBA
Sloterweg 303A, 1171 VC Badhoevedorp, NL
31 (0) 20 354 80 34
Fax : +31 (0) 20 659 8034
klantenservice@mgae.com
Gedrukt in China.
© The Little Tikes Company, onderdeel van MGA Entertainment. LITTLE TIKES® is een
handelsmerk van Little Tikes in de V.S. en andere landen. Alle logo’s, namen, symbolen,
gelijkenissen, afbeeldingen, slogans en verpakkingsvormen zijn het eigendom van
Little Tikes. Het adres en de verpakking bevatten belangrijke informatie, bewaar beide
dus goed. Verwijder al het verpakkingsmateriaal, inclusief labels, touwtjes en nietjes
voordat u dit product aan een kind geeft. De inhoud, met inbegrip van de specicaties
en kleuren, kan afwijken van de foto’s die op de verpakking zijn afgebeeld. Inclusief
gebruiksaanwijzing.
GARANTIE
The Little Tikes Company vervaardigt leuk speelgoed van hoge kwaliteit. Wij
garanderen de oorspronkelijke koper dat dit product gedurende één jaar* vanaf de
datum van aankoop vrij zal zijn van materiaal- en productiefouten (gedateerde
verkoopbon is vereist als bewijs van aankoop). Onder deze garantie valt enkel de
vervanging van het defecte onderdeel van het product of een vervanging van het
product, dit naar eigen inzicht te bepalen door The Little Tikes Company. Deze garantie
is alleen geldig als het product is gemonteerd en onderhouden volgens de instructies.
Deze garantie omvat geen misbruik, ongevallen, cosmetische kwesties zoals
verkleuring of krassen als gevolg van normale slijtage, of enige andere oorzaak dan
materiaal- en productiefouten. *De garantieperiode bedraagt drie (3) maanden voor
kinderdagverblijven of zakelijke klanten.
Buiten de Verenigde Staten en Canada: Neem contact op met uw verkoper voor
meer informatie over de garantieservice. Deze garantie biedt u specieke wettelijke
rechten. Bovendien hebt u mogelijk nog andere rechten. Deze kunnen echter van land
tot land of van staat tot staat verschillen. In sommige landen en staten is uitsluiting of
beperking van incidentele of gevolgschade niet toegestaan, dus is de bovenstaande
beperking of uitsluiting mogelijk niet op u van toepassing.
Patent nr 8.313.117
Patentnr. 8.313.117
Patentnr. 8.313.117
8
L
Reminder - Safety bar is compatible in seat position #1 only.
Rappel : la barre de sécurité est uniquement compatible à la position
1 du siège.
Recordatorio - La barra de seguridad solo es compatible con la
posición #1 del sillín.
Erinnerung - Der Sicherheitsbügel lässt sich nur in Sitzposition Nr. 1
bringen.
Niet vergeten: de zijarmen kunnen alleen worden
geplaatst als het zitje in stand 1 staat.
Uwaga - barierka bezpieczeństwa pełni swoją
funkcję tylko wtedy, gdy siodełko znajduje sie w
pozycji 1.
99
Press
Appuyer
Presionar
Drücken
Drukken
Wcisnąć
Press
Appuyer
Presionar
Drücken
Drukken
Wcisnąć
Press
Appuyer
Presionar
Drücken
Drukken
Wcisnąć
Press
Appuyer
Presionar
Drücken
Drukken
Wcisnąć
22
11
1
1
22
K
1
3
2
5
M6
D
E
F
X
A
1010
1717
X
A
1111
X
A
1212
X
X
1313
P
A
X
1414
A
1515
A
1616
1
M2 x 4
T1
R1
S
H
S1
T
R
Axle • Essieu • Eje
Achse • As • Oś
IMPORTANT: Line up peg on S1 Part with slot on H Part.
IMPORTANT : alignez la cheville de la pièce S1 sur la fente de la pièce H.
IMPORTANTE: Alinee el reborde de la pieza S1 con la hendidura de la pieza H.
WICHTIG: Den Stift an Teil S1 mit dem Schlitz in Teil H zur Deckung bringen.
BELANGRIJK: zorg dat de pin van onderdeel S1 samenvalt met de inkeping van
onderdeel H.
WAŻNE: Ustaw kołek ustalający na elemencie S1 naprzeciw szczeliny w elemencie H.
T1
Short Piece
Un court morceau
Pieza corta
kurzes Stück
korte stuk
Krótki kawałek
PEG • CHEVILLE • RESALTE
STIFT • PINNETJE • KOŁEK
PEG • CHEVILLE • RESALTE
STIFT • PINNETJE • KOŁEK
SLOT
FENTE
RANURA
SCHLITZ
GLEUF
SZCZELINA
IMPORTANT: Line up peg on S Part with slot on H Part.
IMPORTANT : alignez la cheville de la pièce S sur la fente de la pièce H.
IMPORTANTE: Alinee el reborde de la pieza S con la hendidura de la pieza H.
WICHTIG: Den Stift an Teil S mit dem Schlitz in Teil H zur Deckung bringen.
BELANGRIJK: zorg dat de pin van onderdeel S samenvalt met de inkeping van
onderdeel H.
WAŻNE: Ustaw kołek ustalający na elemencie S naprzeciw szczeliny w elemencie H.
T
Long Piece
longue pièce
pedazo largo
langes Stück
lang stuk
długi kawałek
This side faces inward.
Ce côté vers l'intérieur.
Este lado mira hacia dentro
Diese Seite zeigt nach innen.
Deze kant wijst naar binnen.
Tą stroną do środka.
SLOT
FENTE
RANURA
SCHLITZ
GLEUF
SZCZELINA
7
I
A
CLICK! • CLIC ! • KLICK!
H
A
2
M5 X 2
N1 X 2

For independent steering and pedaling at stage 4, make sure hub is pushed in to engage pedals.
Pour une promenade avec pédalage au stade 4, le moyeu doit être enfoncé pour activer les pédales.
Para que el niño pueda pedalear y guiar el triciclo por su cuenta tras haber completado el montaje indicado
en el paso 4, asegúrese de empujar hacia dentro el cubo de rueda para volver a acoplar los pedales.
Für selbständiges Steuern und Treten bei Stufe 4 darauf achten, dass die Radnabe hineingedrückt ist, damit
die Pedale eingerastet sind.
Zorg ervoor dat de naaf is ingeduwd om de pedalen vast te koppelen voor fase 4: het kind etst zelfstandig.
Aby niezależnie kierować i pedałować w ustawieniu 4, upewnij się, że piasta jest dociśnięta i pedały są
podłączone.
Remove Footrest and re-insert screw and
nut.
Retirez le repose-pied et replacez la vis et
lécrou.
Retire los Estribos y vuelva a colocar en su
sitio el tornillo y la tuerca.
Die Fußraste entfernen und Schraube und
Mutter wieder einsetzen.
Verwijder voetsteun en plaats de schroef
en moer opnieuw.
Usuń podnóżek i z powrotem zamontuj
śruby i nakrętki.
Reattach backrest (optional).
Replacez le dossier (facultatif).
Vuelva a montar el respaldo (opcional).
Die Rückenlehne wieder anbringen
(wahlweise).
Bevestig de ruggensteun opnieuw
(optioneel).
Montaż oparcia nie jest obowiązkowy.
Push hub in to engage pedals.
Enfoncez le moyeu pour activer les pédales.
Empuje el buje hacia dentro para acoplar los
pedales.
Die Nabe hineindrücken, damit die Pedale
eingerastet sind.
Duw naaf IN om trappers en wiel te koppelen.
WCISNĄĆ piastę, aby aktywować pedały.
STAGES • STADES • ETAPAS • STUFEN • FASES • USTAWIENIA
Pull hub out to disengage pedals.
Tirez le moyeu vers lextérieur pour désactiver les pédales.
Tire del cubo de rueda hacia afuera para desacoplar los pedales.
Die Radnabe herausziehen, um die Pedale zu lösen.
Trek de wielnaaf naar buiten om de pedalen te ontkoppelen.
Odciągnij piastę by odłączyć pedały.
Age: 9 Months
Âge : 9 mois
Edad: 9 meses
Alter: 9 Monate
Leeftijd: 9 maanden
Wiek 9 miesiecy
STAGE
STADE
ETAPA
STUFE
FASE
USTAWIENIE
1
Turn to "Unlock" position.
Tournez pour « déverrouiller ».
Gire hasta la posición de “Desbloqueo”
In die „Entsichern“ -Position drehen.
In de ontgrendelstand zetten.
Obróć do pozycji „Unlock”
Protective safety bar and backrest are attached. See
earlier step for backrest installation.
La barre de sécurité protectrice et le dossier sont fixés.
Voyez les étapes précédentes pour l‛installation du dossier.
La barra protectora de seguridad y el respaldo están
instalados. Vea el paso anterior para la instalación del
respaldo.
Sicherheitsbügel und Rückenlehne sind angebracht. Siehe
Schritt weiter oben zur Befestigung der Rückenlehne.
De veiligheidsarmen en ruggensteun zijn bevestigd. Het
plaatsen van de ruggensteun wordt in een eerdere stap
uitgelegd.
Barierka zabezpieczająca i oparcie są zamocowane. Sposób
montażu pokazano wcześniej.
Harness • Sangle • Arnés
Geschirr • Tuigje • Szelki
UNLOCK • DÉVERROUILLER
DESBLOQUEO • ENTSICHERN
ONTGRENDELEN
C
Backrest MUST be re-attached before allowing child to ride Trike.
Le dossier DOIT être replacé avant de permettre à lenfant dutiliser le tricycle.
DEBERÁ reinstalarse el respaldo antes de permitir que el niño se monte en el triciclo.
Die RückenlehneMUSS wieder angebracht werden, bevor ein Kind auf dem Dreirad fährt.
Ruggensteun moet weer worden geplaatst voordat een kind op de driewieler rijdt.
Przed pozwoleniem dziecku na jazdę Oparcie MUSI zostać z powrotem zamontowane.
Push hub in to engage pedals.
Enfoncez le moyeu pour activer les pédales.
Empuje el buje hacia dentro para acoplar los pedales.
Die Nabe hineindrücken, damit die Pedale eingerastet sind.
Duw naaf IN om trappers en wiel te koppelen.
WCISNĄĆ piastę, aby aktywować pedały.
Backrest must be detached to remove safety bar.
Le dossier doit être détaché pour retirer la barre de
sécurité.
El respaldo debe ser desmontado para poder quitar la barra
de seguridad.
Die Rückenlehne muss abgenommen werden, damit der
Sicherheitsbügel entfernt werden kann.
Maak eerst de ruggensteun los voordat u de zijarmen
verwijdert.
Aby zdjąć szelki należy zdemontować oparcie.
Age: 18 Months
Âge : 18 mois
Edad: 18 meses
Alter: 18 Monate
Leeftijd: 18 maanden
Wiek 18 miesiecy
Turn to "Lock" position.
Tournez pour « verrouiller ».
Gire hasta la posición de “Bloqueo”.
In die „Sichern“ -Position drehen.
In de vergrendelstand zetten.
Obróć do pozycji „Lock”
STAGE
STADE
ETAPA
STUFE
FASE
USTAWIENIE
3
LOCK • VERROUILLER
BLOQUEO • SICHERN
VERGRENDELEN
C
Seat should be in Position #3. NOTE: SAFETY BAR CAN BE INSTALLED WHEN SEAT IS IN
POSITION #1 ONLY. Harness should be attached.
Le siège devrait être en position 3. REMARQUE : LA BARRE DE SÉCURITÉ PEUT UNIQUEMENT
ÊTRE INSTALLÉE LORSQUE LE SIÈGE EST À LA POSITION 1. La sangle doit être attachée.
El asiento debe estar en la posición #3. NOTA: LA BARRA DE SEGURIDAD SOLO SE PUEDE
INSTALAR CUANDO EL SILLÍN ESTÁN EN LA POSICIÓN #1. El arnés debe estar instalado.
Der Sitz sollte sich in Position 3 befinden. BITTE BEACHTEN: DER SICHERHEITSBÜGEL KANN
NUR ANGEBRACHT WERDEN, WENN DER SITZ SICH IN POSITION NR. 1 BEFINDET. Das
Geschirr sollte angebracht sein.
Het zadel moet in stand 3 staan. OPMERKING: DE ZIJARMEN KUNNEN ALLEEN WORDEN
GEPLAATST ALS HET ZITJE IN STAND 1 STAAT. De veiligheidsgordel moet worden
vastgemaakt.
Siedzenie powinno znajdować sie w Pozycji 3. UWAGA: BARIERKĘ BEZPIECZEŃSTWA MOŻNA
ZAINSTALOWAĆ WYŁĄCZNIE GDY SIODEŁKO JEST W POZYCJI 1. Szelki powinny być
zamocowane.
1
3
2
1. Press • Appuyer
Presionar • Drücken
Duwen • Wcisnąć
1. Press • Appuyer
Presionar • Drücken
Duwen • Wcisnąć
2. Fold • Plier
Plegar • Klappen
Vouwen • Zagnij
1919
1
3
2
a
b
Adjustable Push Handle and Bottle Holder
Poignée réglable et porte-bouteille
Manillar de Empuje Regulable y Soporte de la
Botella
Verstellbare Schiebestange mit Flaschenhalte
Verstelbare duwstang en essenhouder
Regulowana rączka do popychania i uchwyt na
2020
Adjustable Sun Shade
Pare-soleil réglable
Parasol Regulable
Verstellbarer Sonnenschutz
Verstelbaar zonnescherm
Regulowana osłona przed
słońcem.
2
1
1818
Part (O) must be assembled to Push Handle (P)
before attaching part (Q).
La pièce (O) doit être assemblée à la poignée (P)
avant d’être xée à la pièce (Q).
La pieza (O) debe ser montada en el Manillar de
Empuje (P) antes de colocar la pieza (Q).
Teil (O) muss an der Schiebestange (P) befestigt
werden, bevor Teil (Q) angebracht wird.
Deel (O) moet gemonteerd zijn aan de duwstang
(P) voordat deel (Q) kan worden bevestigd.
Przed przyczepieniem elementu (Q) należy
zamontować Element (O) do rączki do popychania
(P).
2
M1
M4
V
Q
W
O
P
M4x2
Backrest MUST be re-attached before allowing child to
ride Trike.
Le dossier DOIT être replacé avant de permettre à
lenfant dutiliser le tricycle.
DEBERÁ reinstalarse el respaldo antes de permitir que el
niño se monte en el triciclo.
Die Rückenlehne MUSS wieder angebracht werden,
bevor ein Kind auf dem Dreirad fährt.
Ruggensteun moet weer worden geplaatst voordat een
kind op de driewieler rijdt.
Przed pozwoleniem dziecku na jazdę Oparcie MUSI
zostać z powrotem zamontowane.
Leave Hub out to disengage pedals.
Gardez le moyeu retiré pour désactiver les pédales.
Deje el buje fuera para desacoplar los pedales.
Die Nabe herausgezogen lassen, damit die Pedale gelöst sind.
Laat naaf UITGETROKKEN, zodat de trappers losgekoppeld zijn.
Odciągnąć piastę, aby deaktywować pedały.
Backrest must be detached to remove safety bar.
Le dossier doit être détaché pour retirer la barre de
sécurité.
El respaldo debe ser desmontado para poder quitar la
barra de seguridad.
Die Rückenlehne muss abgenommen werden, damit
der Sicherheitsbügel entfernt werden kann.
Maak eerst de ruggensteun los voordat u de zijarmen
verwijdert.
Aby zdjąć szelki należy zdemontować oparcie.
Parent can use the push handle to control tricycle steering at stage 1 & 2. To prevent entrapment of child's feet, make sure the wheel hub is pulled out to disengage pedals.
Le parent peut utiliser la poignée pour contrôler la promenade aux stades 1 et 2. Pour empêcher que lenfant ne se coince les pieds, le moyeu de roue doit être tiré vers lextérieur pour désactiver les pédales.
El adulto podrá utilizar la empuñadura de empuje para controlar la dirección del triciclo tras completar los pasos de montaje 1 y 2. Para evitar que los pies del niño puedan quedar atrapados en los pedales, asegúrese de tirar del cubo rueda hacia fuera para desacoplar los pedales.
Eltern können die Schiebestange bei den Stufen 1 und 2 dazu verwenden, die Steuerung des Dreirads zu kontrollieren. Damit sich die Füße des Kindes nicht in den Pedalen verfangen können, bitte darauf achten, dass die Radnabe herausgezogen ist, um die Pedale zu lösen.
Voor fases 1 en 2 kan een ouder de driewieler sturen met behulp van de duwstang. Controleer of de wielnaaf is uitgetrokken, zodat de pedalen ontkoppeld zijn en de voeten van een kind er niet in verstrikt kunnen raken.
Rodzic może używać rączki do popychania aby sterować trójkołowcem w ustawieniach 1 i 2. Aby uchronić przed zaciśnięciem stopy dziecka upewnij się, że piasta jest odciągnięta w celu odłączenia pedałów.
Harness • Sangle • Arnés
Geschirr • Tuigje • Szelki
Age: 12 Months
Âge : 12 mois
Edad: 12 meses
Alter: 12 Monate
Leeftijd: 12 maanden
Wiek 12 miesiecy
Turn to "Unlock" position.
Tournez pour « déverrouiller ».
Gire hasta la posición de “Desbloqueo”
In die „Entsichern“ -Position drehen.
In de ontgrendelstand zetten.
Obróć do pozycji „Unlock”
STAGE
STADE
ETAPA
STUFE
FASE
USTAWIENIE
2
How to remove seatbelt from seat (optional Stage 3) • Comment retirer la ceinture de sécurité du siège (facultatif, stade 3)
Cómo retirar el cinturón de seguridad del asiento (opcional en la etapa 3) • Entfernen des Sicherheitsgurts vom Sitz (wahlweise in Stufe 3)
De veiligheidsriem losmaken van de zitting (optioneel fase 3) • Jak usunąć pasy bezpieczeństwa z siedzenia (opcja ustawienia 3)
From the inside, pull strap through opening in seat. Remove strap completely.
À partir de lintérieur, insérez la courroie dans louverture du siège. Retirez complètement la courroie.
Tire de la correa a través de la abertura situada en la parte interior del sillín. Retire totalmente la correa.
Den Gurt von innen durch die Önung im Sitz ziehen. Den Gurt ganz entfernen.
Trek vanaf de binnenkant de riem door de opening in de zitting. Trek de riem er helemaal uit.
Od wewnątrz pociągnij przez otwór w siedzeniu. Usuń całkowicie pasek.
Un-thread strap from buckle starting with inner loop as shown. Remove buckle completely.
Retirez la courroie de la boucle en commençant par la boucle interne tel que montré. Retirez complètement la boucle.
Retire la correa de la hebilla empezando por el bucle interior; como se muestra en la ilustración. Retire totalmente la hebilla.
Den Gurt aus der Schnalle ziehen, indem wie dargestellt mit der inneren Schlaufe begonnen wird. Die Schnalle ganz entfernen.
Trek de riem uit de gesp. Begin met de binnenste lus, zoals wordt getoond. Maak de riem helemaal los.
Wyciągnij pasek ze sprzączki zaczynając od wewnętrznej pętli tak jak pokazano na rysunku. Usuń całkowicie sprzączkę.
Seat straps • Courroies du siège
Correas del asiento • Sicherheitsgurt
Veiligheidsriem • Paski siedzenia
Seat straps • Courroies du siège
Correas del asiento • Sicherheitsgurt
Veiligheidsriem • Paski siedzenia
Age: 30-36 Months
Âge : 30-36 mois
Edad: 30-36 meses
Alter: 30-36 Monate
Leeftijd: 30-36 maanden
Wiek 30-36 miesiecy
Turn to "Lock" position.
Tournez pour « verrouiller ».
Gire hasta la posición de “Bloqueo”.
In die „Sichern“ -Position drehen.
In de vergrendelstand zetten.
Obróć do pozycji „Lock”
STAGE
STADE
ETAPA
STUFE
FASE
USTAWIENIE
4
LOCK • VERROUILLER
BLOQUEO • SICHERN
VERGRENDELEN
UNLOCK • DÉVERROUILLER
DESBLOQUEO • ENTSICHERN
ONTGRENDELEN
C
Seat should be in Position 1. Harness should be attached. NOTE: SAFETY BAR CAN BE INSTALLED
WHEN SEAT IS IN POSITION #1 ONLY.
Le siège doit être en position 1. La sangle doit être attachée. REMARQUE : LA BARRE DE SÉCURITÉ
PEUT UNIQUEMENT ÊTRE INSTALLÉE LORSQUE LE SIÈGE EST À LA POSITION 1.
El sillín deberá colocarse en la posición 1. Fije el arnés en su sitio. NOTA: LA BARRA DE SEGURIDAD
SOLO SE PUEDE INSTALAR CUANDO EL SILLÍN ESTÁN EN LA POSICIÓN #1.
Der Sitz sollte sich in Position 1 befinden. Das Geschirr sollte befestigt sein. BITTE BEACHTEN: DER
SICHERHEITSBÜGEL KANN NUR ANGEBRACHT WERDEN, WENN DER SITZ SICH IN POSITION
NR. 1 BEFINDET.
Zitting moet in stand 1 staan. Tuigje moet zijn vastgemaakt OPMERKING: DE ZIJARMEN KUNNEN
ALLEEN WORDEN GEPLAATST ALS HET ZITJE IN STAND 1 STAAT..
Siedzenie musi być w pozycji 1. Szelki muszą być zamocowane. UWAGA: BARIERKĘ BEZPIECZEŃSTWA
MOŻNA ZAINSTALOWAĆ WYŁĄCZNIE GDY SIODEŁKO JEST W POZYCJI 1.
Select Seat Position #1 or #2.
NOTE: SAFETY BAR CAN BE
INSTALLED WHEN SEAT IS IN
POSITION #1 ONLY. Harness should
be attached.
Sélectionnez la position 1 ou 2 du siège.
REMARQUE : LA BARRE DE SÉCURITÉ
PEUT UNIQUEMENT ÊTRE
INSTALLÉE LORSQUE LE SIÈGE EST
À LA POSITION 1. La sangle doit être
attachée.
Seleccione la posición #1 o #2 del sillín.
NOTA: LA BARRA DE SEGURIDAD
SOLO SE PUEDE INSTALAR CUANDO
EL SILLÍN ESTÁN EN LA POSICIÓN
#1. El arnés debe estar instalado.
Position Nr. 1 oder Nr. 2 auswählen.
BITTE BEACHTEN: DER
SICHERHEITSBÜGEL KANN NUR
ANGEBRACHT WERDEN, WENN DER
SITZ SICH IN POSITION NR. 1
BEFINDET. Das Geschirr sollte
angebracht sein.
Kies stand 1 of 2 voor het zitje.
OPMERKING: DE ZIJARMEN KUNNEN
ALLEEN WORDEN GEPLAATST ALS
HET ZITJE IN STAND 1 STAAT. De
veiligheidsgordel moet worden
vastgemaakt.
Wybrać pozycję 1 albo 2.
UWAGA: BARIERKĘ
BEZPIECZEŃSTWA MOŻNA
ZAINSTALOWAĆ WYŁĄCZNIE GDY
SIODEŁKO JEST W POZYCJI 1. Szelki
powinny być zamocowane.
Seat should be in Position #3. Remove Harness and Footrest. NOTE: SAFETY BAR CAN BE INSTALLED WHEN SEAT IS IN POSITION #1
ONLY.
Le siège devrait être en position 3. Retirez la sangle et le repose-pied. REMARQUE : LA BARRE DE SÉCURITÉ PEUT UNIQUEMENT ÊTRE
INSTALLÉE LORSQUE LE SIÈGE EST À LA POSITION 1.
El asiento debe estar en la posición #3. Retire el Arnés y los Estribos. NOTA: LA BARRA DE SEGURIDAD SOLO SE PUEDE INSTALAR
CUANDO EL SILLÍN ESTÁN EN LA POSICIÓN #1.
Der Sitz sollte sich in Position 3 befinden. Geschirr und Fußraste entfernen. BITTE BEACHTEN: DER SICHERHEITSBÜGEL KANN NUR
ANGEBRACHT WERDEN, WENN DER SITZ SICH IN POSITION NR. 1 BEFINDET.
Het zadel moet in stand 3 staan. Verwijder tuigje en verwijder voetsteun. OPMERKING: DE ZIJARMEN KUNNEN ALLEEN WORDEN
GEPLAATST ALS HET ZITJE IN STAND 1 STAAT.
Siedzenie powinno znajdować sie w Pozycji 3. Usuń szelki i podnóżek. UWAGA: BARIERKĘ BEZPIECZEŃSTWA MOŻNA ZAINSTALOWAĆ
WYŁĄCZNIE GDY SIODEŁKO JEST W POZYCJI 1.
X
A
1. Lift and Unhook
• Soulevez et décrochez
• Levantar y desenganchar
• Anheben und aushaken
• Optillen en loshaken
• Przesunąć do góry i
wyczepić z trzpienia
1. Lift and Unhook
• Soulevez et décrochez
• Levantar y desenganchar
• Anheben und aushaken
• Optillen en loshaken
• Przesunąć do góry i
wyczepić z trzpienia
2. Push and Remove
• Poussez et retirez
• Empujar y retirar
• Drücken und entfernen
• Duwen en verwijderen
• Pchnąć i wyjąć trzpień
2. Push and Remove
• Poussez et retirez
• Empujar y retirar
• Drücken und entfernen
• Duwen en verwijderen
• Pchnąć i wyjąć trzpień
P
11
2
Remove push handle.
Retirez la poignée de poussée.
Desmonte la empuñadura de empuje.
Die Schiebestange abnehmen.
Verwijder de duwstang.
Wyjąć rączkę do popychania.
1
3
2
1
3
2
E
1. Press • Appuyer
Presionar • Drücken
Duwen • Wcisnąć
1. Press • Appuyer
Presionar • Drücken
Duwen • Wcisnąć
2. Fold • Plier
Plegar • Klappen
Vouwen • Zagnij
1
3
2

DiscoverSounds
®
Dash
1. Using a Phillips screwdriver (not included) remove the
screw and battery compartment
cover from the underside of the Dashboard.
2. Install three (3) fresh AAA alkaline batteries (not
included) making sure the (+) and (-)
ends face the proper direction as indicated inside the
battery compartment.
3. Replace the compartment cover and tighten the screw.
NOTE: Before storing the Dashboard, remove the batteries to
prevent leakage and possible damage to the unit.
DASHBOARD BATTERY INSTALLATION
1.5V AAA/LR03
1.5V AAA/LR03
1.5V AAA/LR03
OFF/ON
SWITCH
1 Discover Sounds® Dash
1 Dash Clamp
Once assembled, turn the steering wheel left or right to engage the turn signals, press the horn to honk, or press the remaining buttons for cool sound eects or a jaunty tune.
INSTALLING DASHBOARD ONTO TRIKE
1. Place Dashboard over Trike handlebar assembly, making sure U-Shaped Brackets are positioned over the Protective Safety Bar on both sides. (Fig. 1)
2. Press down on Dashboard until it snaps into place onto top of handlebar assembly and Protective Safety Bar. (Fig. 2)
3. Position the Dashboard Clamp around the Handlebar Tube. (Fig. 3)
4. Squeeze the tabs on the Dashboard Clamp together to snap them into the openings on the underside of the Dashboard. (Fig. 3)
NOTE: To remove the Dashboard, squeeze the tabs on the Dashboard Clamp together, remove the Clamp, then remove the Dashboard by lifting it upward. The Dashboard can be attached to
the Trike only when the Protective Safety Bar is in place.
Fig. 3Fig. 3
Fig. 1Fig. 1
SPEAKER
PRESS DOWN
Fig. 2 Fig. 2
HORN
CAR ENGINE SOUNDS
MEDIC SIREN SOUNDS
LIGHTS
SONGS
WARNING
SOUND AND
LIGHTS
LEFT
TURN
SIGNAL
RIGHT
TURN
SIGNAL
DASHBOARD FEATURES
ACTIVATES LEFT
TURN SIGNAL
LIGHTS & SOUND
ACTIVATES RIGHT
TURN SIGNAL
LIGHTS & SOUND
POLICE
SIREN
SOUNDS
• Use alkaline batteries for best performance and longer life.
• Use only the type battery recommended for the unit.
• Batteries should be replaced only by an adult.
• Insert batteries with the correct polarity ( + and – ).
• Do not mix old and new batteries.
• Do not mix alkaline, standard (carbon-zinc), or rechargeable (nickel-cadmium) batteries.
• Do not short-circuit batteries.
• When not used for an extended time, remove batteries to prevent possible leakageand damage to the unit.
• Do not mix rechargeable and non-rechargeable batteries.
• Rechargeable batteries are to be removed from the toy before charging.
• Rechargeable batteries are to be recharged only under adult supervision.
• Do not recharge non-rechargeable batteries.
• Exhausted batteries are to be removed from the toy.
• Do not dispose of batteries in re as they may leak or explode.
NOTE: This equipment has been tested and found to comply with the limits for a Class B digital device, pursuant to Part 15 of the FCC Rules. These limits are designed to provide reasonable protection against harmful
interference in a residential installation. This equipment generates, uses and can radiate radio frequency energy and, if not installed and used in accordance with the instructions, may cause harmful interference to radio
communications. However, there is no guarantee that interference will not occur in a particular installation. If this equipment does cause harmful interference to radio or television reception, which can be determined by
turning the equipment o and on, the user is encouraged to try to correct the interference by one or more of the following measures:
• Reorient or relocate the receiving antenna.
• Increase the separation between the equipment and receiver.
• Connect the equipment into an outlet on a circuit dierent from that to which the receiver is connected.
• Consult the dealer or an experienced radio/TV technician for help.
This device complies with Part 15 of the FCC Rules. Operation is subject to the following two conditions: (1) This device may not cause harmful interference, and (2) this device must accept any interference received, including
interference that may cause undesired operation.
Caution: Modications not authorized by the manufacturer may void users authority to operate this device.
CAN ICES-3 (B)/NMB-3(B)
‘Let’s care for the environment!’
The wheelie bin symbol indicates that the product must not be disposed of with other household waste. Please use designated collection points or recycling facilities when disposing of the item.
Do not treat old batteries as household waste. Take them to a designated recycling facility.
SAFE BATTERY USAGE
FCC COMPLIANCE
U-SHAPED
BRACKET
PROTECTIVE
SAFETY BAR
DiscoverSounds
®
Dash CONTINUED
Place child in the Seat. Snap the Seat Belt Buckles together as shown.
Mettez l’enfant sur le siège. Attachez les boucles de la ceinture de sécurité, tel que montré.
Coloque al niño en el sillín. Abroche las hebillas del arnés como se muestra en la imagen.
Das Kind in den Sitz setzen. Die Schnallen des Sicherheitsgurtes wie dargestellt zusammenstecken.
Laat uw kind plaatsnemen op het zadel. Bevestig de gespen van de veiligheidsriemen zoals weergegeven.
Umieść dziecko w siedzisku. Zatrzaśnij razem sprzączki pasów jak pokazano na rysunku.
SEAT BELT • CEINTURE DE SÉCURITÉ • HEBILLAS DEL ARNÉS
SICHERHEITSGURTES • VEILIGHEIDSRIEMEN • PASÓW
Wrap the two Velcro® Straps on the upper portion of the Travel Pack around the Push Handle of the Trike. Close the singular Velcro® Strap around the telescopic bar.
Enroulez les deux courroies en Velcro
®/MD
sur la partie supérieure du sac de voyage autour de la poignée du tricycle. Enroulez la bande de Velcro
®/MD
simple autour
de la barre télescopique.
Pase las dos tiras de Velcro® en la parte superior de la mochila de viaje alrededor del mango de empuje del triciclo. Cierre la única correa de Velcro® alrededor de la
barra telescópica.
Die beiden Klettverschlussbänder oben an der Stautasche um den Schiebegri des Dreirads wickeln. Das einzelne Klettband um die Teleskopstange schließen.
Wikkel de twee klittenbanden aan de bovenkant van de reistas om de duwsteun van de driewieler. Maak het klittenband aan de onderkant vast aan de verstelbare
stang.
Owiń dwa paski Velcro® na górnej części torby podróżnej wokół rączki do popychania trójkołowca. Zamknij pojedynczo pasek Velcro® wokół teleskopowej rurki.
NOTE: Travel Pack can be attached to the front or back of the Push Handle! The Travel Pack may obstruct the Bottle Holder when the Trike is in Stage 1, 2 & 3.
REMARQUE : le sac de voyage peut gêner le porte-bouteille lorsque le tricycle est au stade 1, 2 & 3.
NOTA: La mochila de viaje puede obstruir el portabotella cuando el triciclo está en la etapa 1, 2 & 3.
BITTE BEACHTEN: Die Stautasche könnte die Flaschenhalterung behindern, wenn das Dreirad der Stufe 1 , 2 & 3 entsprechend eingestellt ist.
OPMERKING: de reistas kan de essenhouder in de weg zitten als de driewieler zich in fase 1, 2 & 3 bevindt.
UWAGA: Torba podróżna może blokować uchwyt na butelkę gdy pojazd jest zmontowany w ustawieniu 1, 2 & 3.
TRAVEL PACK • SAC DE VOYAGE • MOCHILA DE VIAJE
STAUTASCHE • REISTAS • TORBA PODRÓŻNA
ENG
IMPORTANT NOTE: PROTECTIVE SAFETY BAR CAN BE INSTALLED WHEN SEAT IS IN POSITION #1 ONLY.

Tableau de bord DiscoverSounds
®/MD
1. À l’aide d’un tournevis cruciforme (non inclus), retirez la vis et le
couvercle du compartiment à piles du dessous du tableau de
bord.
2. Insérez trois (3) piles alcalines AAA (non incluses) en respectant
la polarité (+) et (-) des bornes, tel qu’indiqué dans le
compartiment à piles.
3. Remettez le couvercle du compartiment et serrez la vis.
REMARQUE : avant de ranger le tableau de bord, enlevezles piles
pour prévenir toute fuite et tout endommagement possibles de
l’appareil.
INSERTION DES PILES DU TABLEAU DE BORD
1,5V AAA/LR03
1,5V AAA/LR03
1,5V AAA/LR03
INTERRUPTEUR
1 Tableau de bord DiscoverSounds
®/MD
1 pince de
tableau de
bordz
INSTALLATION DU TABLEAU DE BORD SUR LE TRICYCLE
Fig. 3Fig. 3
Fig. 1Fig. 1
HAUT-PARLEUR
APPUYEZ
Fig. 2 Fig. 2
KLAXON
SONS DE MOTEUR
D’AUTO
SONS DE SIRÈNE D’AMBULANCE
LUMIÈRES
CHANSONS
SON
D’ALERTE ET
LUMIÈRES
FEU DE
DIRECTION
GAUCHE
FEU DE
DIRECTION
DROIT
TABLEAU DE BORD CARACTÉRISTIQUES
ACTIVE LES LUMIÈRES ET
LES SONS DU FEU DE
DIRECTION GAUCHE
ACTIVE LES LUMIÈRES ET
LES SONS DU FEU DE
DIRECTION DROIT
SONS DE
SIRÈNE DE
POLICE
Une fois assemblé, tournez le volant vers la gauche ou la droite pour engager les feux de direction, appuyez sur le klaxon pour klaxonner ou appuyez sur les autres boutons pour activer des
bruitages cool ou un air enjoué.
1. Mettez le tableau de bord sur l’ensemble de guidon du tricycle, en vous assurant que les supports en « U » sont positionnés sur la barre de sécurité protectrice des
deux côtés (g. 1).
2. Appuyez sur le tableau de bord jusqu’à ce qu’il s’enclenche sur l’ensemble de guidon et de barre de sécurité protectrice (g. 2).
3. Posez la pince du tableau de bord sur le tube du guidon (g. 3).
4. Comprimez les pattes de la pince du tableau de bord pour les enclencher dans les ouvertures sous le tableau de bord (g. 3).
REMARQUE : pour enlever le tableau de bord, comprimez les pattes de la pince du tableau de bord, enlevez la pince, puis retirez le tableau de bord en le soulevant. Le tableau de bord peut être
xé au tricycle seulement lorsque la barre de sécurité protectrice est en place.
• Utilisez des piles alcalines pour une meilleure performance.
• Utilisez seulement le type de piles recommandé pour l’appareil.
• Les piles doivent être remplacées seulement par un adulte.
• Les piles doivent être insérées en respectant la polarité (+ et -).
• Ne combinez pas des piles neuves et usagées.
• Ne combinez pas des piles alcalines, standard (sèches) ou rechargeables (nickel-cadmium).
• Ne court-circuitez pas les piles.
• Si le jouet n’est pas utilisé pendant de longues périodes, retirez les piles pour prévenir toute fuite et tout endommagement possibles du jouet.
• Ne combinez pas des piles rechargeables et non rechargeables.
• Les piles rechargeables doivent être retirées du jouet avant la charge.
• Les piles rechargeables doivent seulement être chargées sous la surveillance d’un adulte.
• Ne rechargez pas des piles non rechargeables.
• Les piles usagées doivent être retirées du jouet.
• Ne jetez pas les piles au feu ; les piles pourraient couler ou exploser.
REMARQUE : Cet appareil a été testé et est jugé conforme aux limites des appareils numériques de classe B, conformément à la partie 15 des règles de la FCC. Ces limites sont conçues pour fournir
une protection raisonnable contre le brouillage préjudiciable dans une installation résidentielle. Cet appareil produit, utilise et peut émettre une énergie de radiofréquence et, s’il n’est pas installé et
utilisé conformément aux directives, peut causer un brouillage préjudiciable aux radiocommunications. Toutefois, il n’y a aucune garantie que le brouillage ne surviendra pas dans une installation particulière. Si cet appareil
cause un brouillage préjudiciable à la réception de la radio ou de la télévision ; ce qui peut être déterminé en éteignant l’appareil et en le rallumant,
l’utilisateur devra essayer de corriger le brouillage par l’une ou l’autre des mesures suivantes :
• Réorienter ou resituer l’antenne de réception.
• Accroître la distance entre le matériel et le récepteur.
• Brancher l’appareil dans une prise sur un circuit autre que celui auquel le récepteur est branché.
• Consulter le détaillant ou un technicien de radio/télévision expérimenté pour obtenir de l’aide.
Cet appareil est conforme à la partie 15 des règles de la FCC. Le fonctionnement est sujet aux deux conditions suivantes : (1) cet appareil ne doit pas causer de brouillage préjudiciable et (2) cet
appareil doit accepter tout brouillage reçu, incluant les brouillages qui peuvent causer un mauvais fonctionnement.
Attention : les modications non autorisées par le fabricant pourraient annuler l’autorité de l’utilisateur à faire fonctionner cet appareil.
CAN ICES-3 (B)/NMB-3(B)
« Protégeons notre environnement ! »
Le symbole de poubelle indique que le produit ne doit pas être jeté avec les déchets domestiques. Utilisez les lieux de collecte ou les établissements de recyclage désignés pour mettre cet article au rebut.
Ne traitez pas les piles usagées comme un déchet domestique. Apportez-les à un établissement de recyclage désigné.
USAGE SANS DANGER DES PILES
CONFORMITÉ À LA FCC
SUPPORT
EN « U »
BARRE DE
SÉCURITÉ
PROTECTRICE
FR
REMARQUE IMPORTANTE : LA BARRE DE SÉCURITÉ PROTECTRICE PEUT ÊTRE POSÉE UNIQUEMENT LORSQUE LE SIÈGE EST À
LA POSITION N° 1.

Panel de Mandos DiscoverSounds®
1. Utilice un destornillador de estrella tipo Phillips (no
incluido) para retirar el tornillo que sujeta la tapa del
compartimento de las pilas situado en la parte posterior
del panel de mandos.
2. Instale tres (3) pilas alcalinas nuevas de tipo AAA (no
incluidas), asegurándose de que los polos (+) y (-) de
estas coincidan con los símbolos de polaridad indicados
en el interior del compartimento.
3. Vuelva a colocar la tapa y fíjela en su sitio con su
correspondiente tornillo.
NOTA: Antes de guardar el panel de mandos, retire las pilas de su
interior para evitar posibles ltraciones de ácido que podrían llegar
a dañarlo.
INSTALACIÓN DE LAS PILAS DEL PANEL DE MANDOS
1.5V AAA/LR03
1.5V AAA/LR03
1.5V AAA/LR03
INTERRUPTOR
OFF/ON
1 panel de mandos DiscoverSounds®
1 abrazadera
del panel de
mandos
INSTALACIÓN DEL PANEL DE MANDOS EN EL TRICICLO
1. Coloque el panel de mandos en el manillar del triciclo, asegurándose de que las sujeciones en forma de "U" están situadas por encima de la barra protectora de seguridad por ambos lados.
(Fig. 1)
2. Empuje el panel hacia dentro hasta que quede encajado a la parte superior del manillar y por encima la barra protectora de seguridad. (Fig. 2)
3. Fije la abrazadera del panel de mandos al tubo del manillar. (Fig. 3)
4. Apriete juntas las pestañas de la abrazadera para encajarlas en las aberturas de la parte inferior del panel de mandos. (Fig. 3)
NOTA: Para quitar el panel, apriete juntas las pestañas de la abrazadera del panel, quite la abrazadera y retire el panel tirando hacia arriba. El panel se puede unir al triciclo sólo cuando la barra
protectora de seguridad está instalada en su lugar.
Una vez montado, gire el volante hacia la izquierda o la derecha para activar los indicadores de dirección, presione la bocina para emitir sonidos de bocina, o pulse los otros botones para
escuchar los increíbles efectos de sonido o las melodías garbosas.
Fig. 3Fig. 3
Fig. 1Fig. 1
ALTAVOZ
EMPUJE
HACIA DENTRO
Fig. 2 Fig. 2
BOCINA
SONIDO DE MOTOR
SONIDOS DE SIRENA DE AMBULANCIA
LUCES
CANCIONES
LUCES Y
SONIDOS DE
ADVERTENCIA
INDICADOR DE
DIRECCIÓN A LA
IZQUIERDA
INDICADOR DE
DIRECCIÓN A LA
DERECHA
PANEL DE MANDOS CARACTERÍSTICAS
ACTIVA LAS LUCES
Y SONIDOS DEL
INDICADOR DE
DIRECCIÓN A LA
IZQUIERDA
ACTIVA LAS
LUCES Y
SONIDOS DEL
INDICADOR DE
DIRECCIÓN A LA
DERECHA
SONIDOS DE
SIRENA DE
POLICÍA
• Utilice pilas alcalinas para mejor rendimiento mejor y mayor durabilidad.
• Utilice únicamente el tipo de pilas recomendado para el aparato.
• La instalación de las pilas deberá efectuarla únicamente un adulto.
• Inserte las pilas observando el sentido correcta la polaridad (+ y –).
• No mezcle pilas usadas con otras nuevas.
• No mezcle pilas alcalinas con otras normales (de carbono-zinc) o recargables (de níquel-cadmio).
• No cortocircuite los terminales de las pilas.
• Cuando no vaya a utilizar el juguete durante períodos prolongados, retire las pilas para así evitar posibles fugas de ácido que pudieran dañarlo.
• No combine pilas recargables y no recargables.
• Retire las pilas recargables del juguete mientras las carga.
• Las pilas recargables sólo deberán recargarse bajo la supervisión de un adulto.
• No intente recargar pilas que no sean recargables.
• Las pilas deberán retirarse del juguete una vez agotadas.
• No deseche las pilas arrojándolas al fuego, ya que podrían explotar o producirse fugas de ácido en las mismas.
NOTA: Este equipo ha sido probado y se encontró que cumple con los límites para la Clase B del dispositivo digital, de conformidad con el Apartado 15 del Reglamento FCC. Estos límites son designados para proporcionar una
protección razonable contra interferencia dañina en una instalación residencial. Este equipo genera, usa y puede radiar energía de radio frecuencia y, de no ser instalado y empleado de acuerdo a las instrucciones, puede
causar interferencia dañina para las comunicaciones de radio. De cualquier forma, no hay garantía de que la interferencia no ocurra en
una instalación en particular. Si este equipo causa interferencia dañina a la recepción de radio o televisión, lo cual puede ser determinado apagando y encendiendo el equipo, el usuario es alentado
a tratar de corregir la interferencia a través de una o más de las siguientes medidas:
• Reoriente o reubique la antena receptora.
• Aumente la separación entre el equipo y el receptor.
• Conecte el equipo a una salida de circuito diferente a aquella en la que el receptor se encuentre conectado.
• Consulte al vendedor o a un técnico experimentado en radio/televisión para ayuda.
Este dispositivo cumple con el Apartado 15 del Reglamento FCC. La operación está sujeta a las siguientes dos condiciones: (1) Este dispositivo puede no causar interferencia dañina, y (2) este
dispositivo debe aceptar cualquier interferencia recibida, incluyendo interferencia que pueda causar un funcionamiento no deseado.
Precaución: Las modicaciones no autorizadas por el fabricante pueden anular la autoridad del usuario para operar este dispositivo.
CAN ICES-3 (B)/NMB-3(B)
¡Cuidemos el medio ambiente!
El símbolo de cubo de basura en ruedas, indica que el producto no debe ser desechado con otros desperdicios domésticos. Por favor use puntos de recolección designados o instalaciones de reciclaje al desechar el
artículo.
No maneje las pilas usadas como desperdicio doméstico. Llévelas a las instalaciones de reciclaje designadas.
CÓMO UTILIZAR LAS PILAS DE MANERA SEGURA
CONFORMIDAD CON LOS REQUISITOS DE LA FCC
SUJECIÓN EN
FORMA DE "U"
BARRA
PROTECTORA DE
SEGURIDAD
ES
NOTA IMPORTANTE: LA BARRA DE SEGURIDAD SOLO PUEDE INSTALARSE CUANDO LA SILLA ESTÁN EN LA POSICIÓN #1.

DiscoverSounds® Armaturenbrett
1. Mit einem Kreuzschlitzschraubenzieher (nicht enthalten)
die Schraube und die Batteriefachabdeckung von der
Unterseite des Armaturenbretts entfernen.
2. Drei (3) neue Alkali-Microzellen AAA (nicht enthalten) in
der im Batteriefach angegebenen Polrichtung (+/-)
einlegen.
3. Die Batteriefachabdeckung wieder einsetzen, und die
Schraube festziehen.
BITTE BEACHTEN: Bevor das Armaturenbrett verstaut wird, bitte die
Batterien herausnehmen, um ein Auslaufen
der Batterien und mögliche Schäden am Produkt zu vermeiden.
EINLEGEN DER BATTERIEN IN DAS ARMATURENBRETT
1.5V AAA/LR03
1.5V AAA/LR03
1.5V AAA/LR03
INTERRUPTEUR
1 DiscoverSounds® Armaturenbrett
1 Armaturenbrett-Schelle
ANBRINGEN DES ARMATURENBRETTS AM DREIRAD
1. Das Armaturenbrett so auf den zusammengebauten Lenker setzen, dass die U-förmigen Klammern auf beiden Seiten auf dem Sicherheitsbügel sitzen. (Siehe Abb. 1)
2. Auf das Armaturenbrett herunterdrücken, bis es auf dem Lenker und dem Sicherheitsbügel einrastet. (Siehe Abb. 2)
3. Die Armaturenbrett-Schelle um die Lenkerstütze herum anbringen. (Siehe Abb. 3)
4. Die Laschen an der Armaturenbrett-Schelle zusammendrücken, um sie in den Önungen in der Unterseite des Armaturenbretts einrasten zu lassen. (Siehe Abb. 3)
BITTE BEACHTEN: Um das Armaturenbrett wieder abzubauen, die Laschen an der Armaturenbrett-Schelle zusammendrücken, die Schelle entfernen und dann das Armaturenbrett abnehmen,
indem es nach oben gezogen wird. Das Armaturenbrett kann nur am Dreirad angebracht werden, wenn der Sicherheitsbügel in Position ist.
Sobald das Armaturenbrett angebracht wurde, kann das Lenkrad nach links oder rechts gedreht werden, damit die Blinker sich einschalten, die Hupe kann betätigt oder einer der übrigen
Knöpfe gedrückt werden, um coole Geräuscheekte oder eine lustige Melodie erklingen zu lassen.
Abb. 3Abb. 3
Abb. 1Abb. 1
LAUTSPRECHER
HERUNTERDRÜCKEN
Abb. 2 Abb. 2
HUPE
AUTOMOTORGERÄUSCHE
KRANKENWAGENSIRENE
LICHTER
LIEDER
WARNSIGNAL
UND LICHTER
LINKES
BLINKERSIGNAL
RECHTES
BLINKERSIGNAL
ARMATURENBRETT FEATURES
AKTIVIERT LINKES
BLINKERLICHT UND
GERÄUSCH
AKTIVIERT RECHTES
BLINKERLICHT UND
GERÄUSCH
POLIZEISIRENENGERÄUSCHE
• Für optimale Leistung und längere Lebensdauer werden Alkali-Batterien empfohlen.
• Nur Batterien desselben oder eines entsprechenden Batterietyps wie empfohlen verwenden.
• Das Auswechseln der Batterien sollte von einem Erwachsenen vorgenommen werden.
• Darauf achten, dass die Batterien in der angegebenen Polrichtung (+/-) eingelegt sind.
• Niemals alte und neue Batterien zusammen einlegen. (Immer alle Batterien zur gleichen Zeit auswechseln.)
• Niemals Alkali-Batterien, Standardbatterien (Zink-Kohle) oder wiederauadbare Nickel-Cadmium-Zellen miteinander kombinieren.
• Die Anschlussklemmen dürfen nicht kurzgeschlossen werden.
• Um ein Auslaufen der Batterien und Schäden am Produkt zu vermeiden, die Batterien immer aus dem Spielzeug herausnehmen, wenn es längere Zeit nicht benutzt wird.
• Keine wiederauadbaren Batterien mit nicht-wiederauadbaren Batterien kombinieren.
• Wiederauadbare Batterien vor dem Auaden immer aus dem Produkt herausnehmen.
• Das Auaden wiederauadbarer Batterien sollte nur unter Aufsicht eines Erwachsenen durchgeführt werden.
• Nicht-wiederauadbare Batterien dürfen nicht aufgeladen werden.
• Alte oder verbrauchte Batterien immer aus dem Spielzeug entfernen.
• Batterien sicher und vorschriftsgemäß entsorgen.
Achtung: Veränderungen an diesem Produkt dürfen nur mit ausdrücklicher Genehmigung des Herstellers vorgenommen werden.
CAN ICES-3 (B)/NMB-3(B)
„Umweltschutz ist Ehrensache!“
Hinweis zur Entsorgung:
Dieses Produkt ist mit dem Symbol für die selektive Entsorgung von elektrischer Ausrüstung versehen (WEEE). Das heißt, dass dieses Produkt der EU Direktive 2002/96/EC entsprechend entsorgt werden muss, um die
entstehenden Umweltschäden zu minimieren. Weitere Informationen erhalten Sie bei Ihrer lokalen oder regionalen Behörde. Aus diesem selektiven Entsorgungsprozess ausgeschlossene elektronische Produkte stellen
wegen der Präsenz gefährlicher Substanzen eine Gefahr für die Umwelt und die Gesundheit dar.
Alte und verbrauchte Batterien gehören nicht in den Hausmüll. Bitte am Wertstohof oder der dafür vorgesehenen Recyclingstelle abgeben.
SICHERHEITSHINWEISE ZU BATTERIEN
WICHTIGER HINWEIS
U-FÖRMIGE
KLAMMER
SICHERHEITSBÜGEL
DE
WICHTIGER HINWEIS: DER SICHERHEITSBÜGEL KANN NUR IN SITZPOSITION NR. 1 ANGEBRACHT WERDEN.

DiscoverSounds® Dashboard
1. Draai met een kruiskopschroevendraaier (niet inbegrepen)
de schroef op de onderkant van het dashboard los om de
deksel van het batterijvak te openen.
2. Plaats drie (3) AAA-alkalinebatterijen (niet inbegrepen)
en zorg ervoor dat (+) en (-) in de juiste richting wijzen,
zoals wordt vermeld binnenin het batterijvak.
3. Doe de deksel er weer op en draai de schroef vast.
OPMERKING: verwijder de batterijen als het dashboard langere tijd
niet wordt gebruikt, om lekkende batterijen en mogelijke schade
aan het speelgoed te voorkomen.
DE BATTERIJEN PLAATSEN IN HET DASHBOARD
1.5V AAA/LR03
1.5V AAA/LR03
1.5V AAA/LR03
UIT/AAN-SCHAKELAAR
1 Discover Sounds® Dashboard
1 dashboardklem
HET DASHBOARD OP DE DRIEWIELER PLAATSEN
1. Zet het dashboard op het stuur van de driewieler. De U-vormige klem moet aan weerszijden van de beschermende zijarm worden geplaatst (Afb. 1).
2. Duw het dashboard omlaag tot het boven op het stuur en de beschermende zijarmen vastklikt (Afb. 2).
3. Klik de dashboardklem rond de stuurstang (Afb. 3).
4. Knijp de geribbelde delen van de dashboardklem samen om ze in de openingen aan de onderkant van het dashboard te kunnen klikken (Afb. 3).
OPMERKING: om het dashboard te verwijderen, knijpt u de geribbelde delen van de dashboardklem samen, verwijdert u de klem en tilt u het dashboard omhoog en van het stuur af. Het
dashboard past alleen op de driewieler als de beschermde zijarmen zijn geplaatst.
Draai het stuurwiel naar links of rechts om de richtingaanwijzer in te schakelen, druk op de claxon om te toeteren of op de overige knoppen voor coole geluidseecten of een vrolijke melodie.
Afb. 3Afb. 3
Afb. 1Afb. 1
SPEAKER
APPUYEZ
Afb. 2 Afb. 2
CLAXON
AUTOMOTOR
AMBULANCE
LAMPJES
SONGS
WAARSCHUWINGSGELUIDEN
EN LAMPJES
LINKER RICHTINGAANWIJZER
LINKER
RICHTINGAANWIJZER
DASHBOARD FUNCTIES
ACTIVEERT LAMPJES &
GELUID
VAN LINKER
RICHTINGAANWIJZER
ACTIVEERT LAMPJES &
GELUID
VAN RECHTER
RICHTINGAANWIJZER
POLITIESIRENE
• Gebruik alkalinebatterijen voor betere prestaties en een langere levensduur.
• Gebruik uitsluitend batterijen van het aanbevolen type.
• Batterijen dienen te worden vervangen door een volwassene.
• Let op de polariteit bij het plaatsen van batterijen (+ en -).
• Gebruik geen nieuwe en oude batterijen samen.
• Gebruik geen gewone (koolstof-zink), alkaline of oplaadbare (nikkel-cadmium) batterijen samen.
• Pas op voor kortsluiting, maak geen contact tussen beide polen.
• Verwijder batterijen als het speelgoed langere tijd niet wordt gebruikt. Dit voorkomt lekken en beschadigingen.
• Gebruik geen oplaadbare en niet-oplaadbare batterijen samen.
• Verwijder oplaadbare batterijen uit het speelgoed voordat ze worden opgeladen.
• Oplaadbare batterijen mogen enkel worden opgeladen onder toezicht van een volwassene.
• Laad niet-oplaadbare batterijen niet weer op.
• Verwijder lege batterijen uit het speelgoed.
• Gooi batterijen niet in het vuur, batterijen kunnen lekken of exploderen.
OPMERKING: dit product is getest en voldoet aan de voorschriften voor een digitaal apparaat van klasse B, overeenkomstig Deel 15 van de FCC-regels. Deze voorschriften zijn opgesteld om een
redelijke bescherming te bieden tegen schadelijke storing bij gebruik binnenshuis. Dit product genereert en gebruikt radiofrequentie-energie, of kan deze uitstralen. Als het product niet volgens de
instructies wordt geïnstalleerd en gebruikt, kan het schadelijke storingen voor radiocommunicaties veroorzaken. Er kan echter geen garantie worden gegeven dat bepaalde installaties storingsvrij
zullen functioneren. Als het product wel storing veroorzaakt in radio- of televisieontvangst (wat u kunt vaststellen door het apparaat uit en aan te zetten) raden wij de gebruiker aan de storing
proberen op te heen door een of meer van de onderstaande maatregelen:
• Richt de ontvangstantenne op een andere manier of plaats deze ergens anders.
• Vergroot de afstand tussen het product en de radio of televisie.
• Sluit het apparaat aan op een stopcontact van een andere groep dan de groep waarop de radio of televisie is aangesloten.
• Vraag advies aan de verkoper of aan een ervaren radio-/televisietechnicus.
Dit apparaat is in overeenstemming met Deel 15 van de FCC-regels. Voor het gebruik moet worden voldaan aan twee voorwaarden: (1) dit product mag geen schadelijke interferentie veroorzaken, en
(2) dit product moet elke ontvangen interferentie aanvaarden, met inbegrip van interferentie die de werking negatief zou kunnen beïnvloeden.
LET OP: wijzigingen die niet zijn goedgekeurd door de fabrikant kunnen ertoe leiden dat de gebruiker het recht verspeelt om dit product te mogen gebruiken.
CAN ICES-3 (B)/NMB-3(B)
Zorg voor het milieu!
Het kliko-pictogram betekent dat dit product niet bij het gewone huis-, tuin- en keukenafval mag worden gezet. Geef het product af bij een chemokar of breng het naar een
KCA-inzamelpunt.
Gooi lege batterijen niet weg samen met het gewone huis-, tuin- en keukenafval. Breng ze naar een chemokar of een inzamelpunt voor klein chemisch afval.
VEILIG GEBRUIK VAN BATTERIJEN
FCC-VERKLARING
U-VORMIGE
KLEM
ZIJARMEN
NL
BELANGRIJKE OPMERKING: DE BESCHERMENDE ZIJARMEN KUNNEN ALLEEN GEPLAATST WORDEN ALS DE ZITTING IN
STAND 1 STAAT.

Deska rozdzielcza DiscoverSounds®
1. Używając wkrętaka krzyżowego (nie dołączono) usuń śrubki i
pokrywkę pojemnika na baterie znajdującą się na spodzie deski
rozdzielczej.
2. Włóż trzy (3) nowe baterie alkaliczne AAA (nie dołączono)
upewniając się, że (+) i (-) ustawione są w prawidłowej pozycji
jak pokazano na rysunku w pojemniku na baterie.
3. Zamknij pokrywę pojemnika na baterie i zakręć śrubki.
UWAGA: Przed przechowaniem pulpitu usuń baterie aby uniknąć
wycieków i możliwości uszkodzenia jednostki.
INSTALACJA BATERII DESKI ROZDZIELCZEJ
1.5V AAA/LR03
1.5V AAA/LR03
1.5V AAA/LR03
WŁĄCZNIK/WYŁĄCZNIK
1 Deska rozdzielcza Discover Sounds®
1 Mocowanie
deski
rozdzielczej
MONTAŻ DESKI ROZDZIELCZEJ NA TRÓJKOŁOWCU
1. Umieść deskę rozdzielczą nad kierownicą trójkołowca, upewniając się, że mocowanie w kształcie litery U znajdują się nad barierką ochronną po obu stronach (Rys. 1)
2. Dociśnij deskę rozdzielczą aż się zatrzaśnie u góry kierownicy i na barierce ochronnej (Rys. 2)
3. Obejmij uszami mocowania deski rozdzielczej rurę kierownicy (Rys. 3)
4. Ściśnij uszy mocowania aż się zatrzasną w otworach pod spodem deski rozdzielczej (Rys. 3)
UWAGA: Aby usunąć deskę rozdzielczą, ściśnij uszy mocowania deski rozdzielczej, usuń mocowanie, a następnie usuń deskę rozdzielczą podnosząc ją do góry. Deskę rozdzielczą można
zamocować do trójkołowca tylko wtedy gdy jest zamocowana barierka ochronna.
Po zmontowaniu obróć kierownicą w lewo lub w prawo by włączyć kierunkowskaz, wciśnij klakson aby zatrąbić lub wciśnij pozostałe przyciski aby uzyskać ciekawe efekty dźwiękowe lub
żwawą melodię.
Rys. 3Rys. 3
Rys. 1Rys. 1
GŁOŚNIK
WCISNĄĆ
Rys. 2 Rys. 2
KLAKSON
DŹWIĘK SILNIKA
SAMOCHODU
DŹWIĘK SYRENY KARETKI POGOTOWIA
ŚWIATŁA
PIOSENKI
SYGNAŁ
OSTRZEGAWCZY
I ŚWIATŁA
LEWY KI
ERUNKOWSKAZ
PRAWY
KIERUNKOWSKAZ
DESKA ROZDZIELCZA CECHY
WŁĄCZA LEWY
KIERUNKOWSKAZ I
DŹWIĘK
WŁĄCZA PRAWY
KIERUNKOWSKAZ I
DŹWIĘK
DŹWIĘK
SYRENY
POLICYJNEJ
• Najlepszą jakość i czas pracy uzyskasz używając baterii alkalicznych.
• Używaj wyłącznie zalecanych do tego urządzenia typów baterii.
• Baterie może wymieniać tylko osoba dorosła.
• Włóż baterie z prawidłową polaryzacją (+ i -).
• Nie mieszaj starych i nowych baterii.
• Nie mieszaj baterii alkalicznych ze zwykłymi (węglowo-cynkowe) lub z akumulatorkami (niklowokadmowe).
• Nie zwieraj styków
• Jeżeli nie używasz urządzenia przez dłuższy okres, usuń baterie aby uniknąć szkód spowodowanych wyciekiem.
• Nie mieszaj baterii z akumulatorkami.
• Przed ładowaniem akumulatorków należy je usunąć z zabawki.
• Akumulatorki mogą być ładowane tylko pod nadzorem osoby dorosłej.
• Nie ładuj baterii, które nie są akumulatorkami.
• Zużyte baterie należy usunąć z zabawki.
• Nie wrzucaj baterii do ognia gdyż mogą wyciec lub eksplodować.
UWAGA: Wyposażenie zostało przetestowane i spełnia ograniczenia Klasy B dla urządzeń cyfrowych zgodnie z punktem 15 przepisów FCC. Ograniczenia te mają na celu ochronę przed zakłóceniami w instalacjach domowych.
To urządzenie generuje, używa i może emitować częstotliwości radiowe i jeśli nie jest zmontowane i używane zgodnie z instrukcją to może niekorzystnie wpływać na komunikację radiową. Jednakże nie ma gwarancji, że
zakłócenia nie wystąpią w przypadkach szczególnych. Jeżeli to urządzenie powoduje zakłócenia w odbiorze radia lub telewizji, które można zdiagnozować przez włączenie i wyłączenie urządzenia to zachęcamy użytkownika
aby spróbował zmniejszyć zakłócenia w jeden z poniższych sposobów:
• Zmień kierunek lub przenieś antenę odbiorczą.
• Zwiększ odległość między urządzeniem a odbiornikiem.
• Podłącz urządzenie do innego gniazdka lub obwodu niż to do którego podłączony jest odbiornik.
• Poproś o pomoc sprzedawcę lub technika RTV.
Urządzenie spełnia punkt 15 przepisów FCC. Praca zależy od dwóch warunków: (1) urządzenie nie może powodować zakłóceń i (2) urządzenie musi akceptować wszelkie odbierane zakłócenia,
włącznie z zakłóceniami mogącymi powodować niepożądaną pracę.
Uwaga: Modykacje nieautoryzowane przez producenta mogą uniemożliwić użytkownikowi używanie urządzenia
CAN ICES-3 (B)/NMB-3(B)
Chrońmy środowisko!
Symbol kosza na śmieci oznacza, że produktu nie można wyrzucać z innymi śmieciami domowymi. Gdy chcesz się go pozbyć prosimy korzystać z wyznaczonych punktów odbioru lub punktów recyklingu. Nie traktuj
starych baterii jak domowe śmieci. Zanieś je do wyznaczonych punktów recyklingu
BEZPIECZNE UŻYWANIE BATERII
ZGODNOŚĆ FCC
MOCOWANIE W
KSZTAŁCIE LITERY U
BARIERKA
OCHRONNA
PL
WAŻNE: BARIERKĘ ZABEZPIECZAJĄCĄ MOŻNA ZAMOCOWAĆ WYŁĄCZNIE GDY SIODEŁKO ZNAJDUJE SIE W POZYCJI 1.
1/9