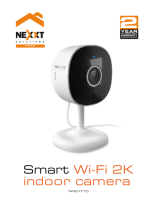
Nexxt Solutions NHC-D100 Guía del usuario

Tipo
Guía del usuario

El Nexxt Solutions NHC-D100 es un timbre con video Wi-Fi inteligente que combina una cámara de alta definición, tecnología infrarroja con audio bidireccional y alarma para ofrecer una solución de monitoreo inalámbrica versátil para cualquier hogar, con o sin instalación de timbre existente.

El Nexxt Solutions NHC-D100 es un timbre con video Wi-Fi inteligente que combina una cámara de alta definición, tecnología infrarroja con audio bidireccional y alarma para ofrecer una solución de monitoreo inalámbrica versátil para cualquier hogar, con o sin instalación de timbre existente.

FULL
1080p
Smart Wi-Fi video doorbell
with chime
NHC-D100
Contents
What is in the box
Product overview
Preliminary steps
Installing the Nexxt Home App
English
4
5
7
11
Smart Wi-Fi video doorbell with chime | NHC-D100
1. Introduction
Thank you for purchasing the Smart video doorbell with chime from Nexxt
Solutions. The combination of a high-denition camera, infrared technology
with two-way audio and alarm offers a versatile wireless monitoring solution
that works in any home with or without an existing doorbell installation. Video
can be stored directly to a SD memory card, providing users with both viewing
and recording capabilities. Its compact and attractive enclosure with an IP65
rating is designed to withstand tampering and the exposure to the elements
in harsh outdoor environments. Please read this guide thoroughly to ensure
proper installation and operation of this innovative and feature-rich smart
video doorbell with Bluetooth® chime.
What is in the box
RESET ON/0FF
3. Product overview
Open the box and make sure all items listed below are included:
Smart doorbell
3M self-adhesive
with template
USB
cable
Screw
5 pcs
Security screw
wrench
Pluggable chime Tamper-proof plate Doorbell angled bracket
Camera lens
Plastic anchor
2 pcs
Plastic electrical
wire nut 2 pcs
Electrical installation
wire 2 pcs
User guide
Night vision IR
Microphone
Doorbell
Side view
Side view
Rear view
Rear view
Front view
Front view
Chime
On/Off button
MicroSD card slot
Micro-USB port
Reset button
BT pairing and
volume button
Terminal screws
for wired installation
Passive Infrared
(PIR) sensors
Doorbell button
with LED indicator light
Speaker
Ringtone
selector
LED
melody indicator
Plug
English
4 5
4. Preliminary steps
4.1 Installation of the mounting bracket to a wall or door frame
Optional
installation
Wall
RESET ON/0FF
Method 1: 3M self-adhesive mount
1. Carefully remove the existing doorbell
before proceeding, if any.
2. Determine the location of the doorbell,
preferably one that offers the best viewing
angle and Wi-Fi reception.
3. If you need to aim the doorbell to the left or
right of the wall where it is mounted, you will
have to also install the angled bracket that
comes with the doorbell.
4. To do so, attach the angled bracket to the
tamper-proof plate using the supplied
screws.
5. Next, remove the adhesive lm protecting
the double-faced sticker. Carefully press it
against the mounting plate or angled bracket.
6. Finished by xing the plate or bracket to a
smooth surface or to the wall.
Optional
installation
Wall
RESET ON/0FF
Method 2: Screw mount
1. Carefully remove the existing doorbell
before proceeding, if any.
2. Determine the location of the doorbell,
preferably one that offers the best viewing
angle and Wi-Fi reception.
3. If you need to aim the doorbell to the left or
right of the wall where it is mounted, you will
have to also install the angled bracket that
comes with the doorbell.
4. To do so, attach the angled bracket to the
tamper-proof plate using the supplied
screws.
5. Proceed to mark the two mounting holes
with a pencil and drill the pilot holes. Then
insert the anchors until ush with the surface.
7. Drive the screws into the anchors you
already installed and tighten them to secure
the mounting plate or angled bracket in place,
making sure that it is also at against the wall.
English
6 7
4.2 Powering your doorbell
Important:
The doorbell allows two dierent power congurations:
1. It can run independently on DC power from its built-in rechargeable battery.
2. It can be hardwired to an existing low-voltage doorbell connection in your home, operating between 12 to 24
volts.
1. Before using the doorbell for the rst time, it is
recommended to fully charge the battery.
2. Gently lift the rubber cover protecting the compart-
ment on the side of the doorbell. Insert the USB cable to
the micro-USB port of the doorbell and the other end, to
a compatible 5V USB outlet.
3. In order to view the charging status of the doorbell,
you must open the application rst. The LED on the
doorbell initially blinks blue for 10 seconds when
connected to a power source. After that, it will turn off
completely. For continued monitoring of the charging
status of the battery, you must keep the doorbell on and
the application open on your mobile device. A solid blue
LED on the device is an indication that the battery is
fully charged. A ashing LED means that the battery is
still being charged. The battery percentage can be
viewed through the application by accessing the Power
management interface.
For details, go to Installing the Nexxt Home App on
page 11 of this guide.
4. When the battery doorbell is removed from the
tamper-proof plate, the tampering alarm will be
triggered. To silence this alarm, the doorbell must be
Option 1.
Wire-free, battery operated (recommended)
Use this option if you are using the battery to power the doorbell, for exible and easy deployment.
turned off by pressing the on/off button for 3
seconds and then turned it on again to initiate
charging. These same steps should be followed
every time you need to recharge the doorbell
battery.
5. Remove the USB cable and then press down the
rubber cover protecting the DC input and SD card
slot.
6. Turn on the doorbell by holding the power button
for 3 seconds, located on the back of the unit.
7. Slide the doorbell into the tamper-proof plate
and nish by installing the security screw at the
base with the supplied tool.
8. Battery life dwindles over time due to usage and
other external factors, like the environment or
user preferences.
9. The duration of each charge also depends for
instance on the activity, number of triggering
events, lighting conditions, power and video
settings.
10. The performance of this long-lasting battery
can be extended if you select the settings that
demand the lowest amount of energy to operate
the doorbell.
Electrical shock hazard
Turn the power o at the breaker
Disconnect power to installation area at your circuit breaker or
fuse box before beginning installation. Always use caution when
handling electrical wiring.
1. Verify that the power to your current doorbell has
been shut off and that no voltage is present.
2. If you haven´t done so, uninstall any existing
chime or doorbell.
3. Loosen the screws of the terminals. Then, insert
the end with the ring in each terminal on the back
of the doorbell. Re-tighten the screws to secure
the connection.
Note: since doorbell buttons are not polarity
specic, either wire can connect to either terminal.
4. Match the wires coming out of the wall with the
terminals on the back of the unit.
5. Tie the ends of each pair with a wire nut, twist
each nut until the connection is secured, and no
wire is exposed.
6. Feed the wires back into the wall.
7. Turn power on at the breaker to nish the
process.
8. Turn on the doorbell by holding the power
button for 3 seconds, which is located on the
back of the unit.
9. Slide the doorbell into position and guide the
cables through the rear opening of the
tamper-proof plate.
10. Finish by installing the security screw at the
base of the bracket with the supplied tool.
Option 2.
Hardwired to a conventional AC connection
This doorbell supports an AC connection of 12V to 24V. Test your wiring to make sure your current installation
does not exceed the maximum rating specied.
Installation by a qualied electrician may be required in your area. Refer to your local laws and
building codes before performing electrical work; permits plus professional installation may be
required by law. If you're not sure which breaker controls your doorbell chime, turn o the
master breaker for your home or contact an electrician.
English
8 9
4.3 How to insert the microSD™ card
Step 1: Prior to inserting the doorbell in the
plate as described in the sections above, gently
lift the rubber cover protecting the compart-
ment on the side of the unit.
Step 2: Insert the microSD™ card. Make sure it
is placed in the correct direction inside the slot.
Step 3: Put the cover back by pushing it down
with your thumb until it tightly closes the
compartment.
Note: failure to complete step 3 can lead to
water damage on the device.
The Wi-Fi doorbell comes with a built-in card slot located on the side of the unit, which supports a
microSD™ card of up to 128GB.
Once you insert the storage card, the camera will automatically start recording and storing videos
on that memory. This type of card will normally store about one month of continuous video footage.
English
4.4 Pairing your doorbell to the chime
4.4.1 Ringtone selection
You can customize the chime melody and
volume or turn it off completely if you don’t
want to be disturbed.
1. Briey press the ringtone selector to circle
through all the available chimes for the
doorbell. There are 55 different ringtones
available.
2. When you have selected the desired melody,
wait until the melody stops playing. Press the
BT pairing/Volume button for 5 seconds until
the orange melody LED indicator blinks once.
3. Within 5 seconds, you must press the
doorbell button to set up the selected tone.
4. The doorbell and the chime are now linked
with the selected tone enabled.
5. Repeat the same instructions at any time
when you want to choose a different chime
melody.
Note: the doorbell has only one tone, and it
remains the same whereas the chime can
always be changed.
The chime alerts you when the doorbell button is pressed. Both devices must be rst linked through
their Bluetooth® connection.
Make sure the doorbell is turned on, and that the chime is plugged into a power outlet.
4.4.2 Volume adjustment
Briey press the BT pairing /Volume button to adjust the volume of the chime. You can toggle
through the 4 different settings available, from low, medium, high and maximum levels.
Installing the Nexxt Home App
Download Nexxt Home app on Google Play or Apple App Store.
User guide
Thank you for purchasing the Smart Wi-Fi LED amber
from Nexxt Solutions. We are excited to be
part of making your life easier, safer and bringing peace of
mind into your homes.
Product overview
1.
your preferred settings through the application.
2. Screw base
Package content
English
1
2
Installing the Nexxt Solutions
Home App
60 %
9:41 AM
Nexxt Home
Nexxt Solutions Home App
Cancel
GET
Accvent LLC
Log in with existing account
Create New Account
SOLUTIONS
Iniciar sesión con cuenta existente
Crear Cuenta Nueva
SOLUTIONS
60 %
Nexxt Home
Nexxt Solutions Home App
Cancel
INSTALL
Accvent LLC
Smart Wi-Fi
tunable bulb
User guide
Thank you for purchasing the Smart Wi-Fi LED amber
from Nexxt Solutions. We are excited to be
part of making your life easier, safer and bringing peace of
mind into your homes.
Product overview
1.
your preferred settings through the application.
2. Screw base
Package content
English
1
2
Installing the Nexxt Solutions
Home App
60 %
Nexxt Home
Nexxt Solutions Home App
Cancel
GET
Accvent LLC
Log in with existing account
Create New Account
SOLUTIONS
Iniciar sesión con cuenta existente
Crear Cuenta Nueva
SOLUTIONS
60 %
9:41 AM
Nexxt Home
Nexxt Solutions Home App
Cancel
INSTALL
Accvent LLC
Smart Wi-Fi
tunable bulb
10 11
Quick start guide
Apple App Store.
Quick start guide
Apple App Store.
English
12 13
Step 2
Step 1
Register by email. Fill in the required elds. Enter the verication code you received.
60 %
9:41 AM
60 %
9:41 AM
Register by email
United States of America
Email
Get authentication code
English
14 15
Step 4
Step 3
Create a new password and then select Completed. The Nexxt Home App has been successfully installed.
60 %
9:41 AM
Set Password
Completed
6-20 characters, including letters and numbers
Initial setup and manual reset
• Make sure the device is powered on. If you haven't done so, turn on the doorbell by holding the
power button for 3 seconds, located on the back of the unit.
• If the red LED indicator does not start blinking or if no audible notication is heard, press the reset
button of the doorbell for 2 seconds or until you hear a tone indicating that a reset has occurred.
• Once the button is released, the red LED on the front will start blinking.
• Follow the app's instructions to complete the network conguration process.
• The LED changes to solid blue when the device is successfully connected to your Wi-Fi network.
Step 1
Step 2 Step 3
You must connect to a 2.4GHz Wi-Fi
network. Enter your network password.
Make sure the correct code is entered,
otherwise the device will not be able
to connect.
Add device
English
16 17
60 %
9:41 AM
60 %
9:41 AM
60 %
9:41 AM
60 %
9:41 AM
Select the + icon to add the device, followed by the smart doorbell.
When the LED starts blinking, tap on
next step followed by the Next button
to continue.
Scan the QR code from your mobile device with the smart doorbell. Once you hear the tone, click
on the I Heard a Prompt button.
If you experience any issues, reset the doorbell. If a Registered Account added the doorbell
through the app, then another user will be prevented from setting up that doorbell in a different
account, unless permission is granted through the Share access option.
When the pairing process is completed, the notication Device added successfully will be
displayed on the screen.
Click on the pencil icon to rename the doorbell, if you prefer to change the default identier.
Select Save to store your settings, followed by Done to nish.
English
18
Step 4
60 %
9:41 AM
60 %
9:41 AM
Step 5
60 %
9:41 AM
60 %
9:41 AM
19
Doorbell main interface
English
Settings: tap on the pencil icon to access the conguration menus
Signal: shows the Wi-Fi signal strength.
Full screen: toggles between half and full screen modes.
/SD: switches between High Denition and the Standard
Denition video resolution.
Mute: disables the microphone on the doorbell.
Battery: when operated with DC power, the screen provides a
visual indication of the battery charge in real time.
Hardwired: when operated with AC power, the screen
provides a visual indication of a 100% charge. If utility power
goes off or the voltage is too low, then the doorbell will
automatically switch to DC input.
Screenshot: takes a snapshot of what the camera is viewing in
real time.
Speak: allows two-way communications through the
microphone.
Record: allows the recording of live video on your mobile
device. The user must start and end the recording manually.
Playback: if a microSD™ is installed, you can use the playback
function to watch the 10-second footage of a motion detection
event. Still images and video can be also saved directly in your
mobile device for future use by tapping on the camera or
recorder icons available in that interface.
Cloud storage: users can upload digital data to the cloud through
a subscription service.
Buzzer: tap this button to generate a sound that will send
unwanted visitors away.
Photo album: provides access to images and videos captured
by the camera.
Charging
80%
Accept the incoming call and speak to your visitor:
• To talk to the visitor, speak into your phone as you
normally do.
The camera will capture real-time images of the
people standing outside your front door.
• Should the Nexxt Home app be closed or running in
the background, you will receive a push notication,
ringing up to 7 times for about 10 seconds.
Decline the call:
• If a visitor presses the doorbell, the smartphone will
ring 20 times for about 25 seconds, only if the app
is open.
• However, if the app is closed or running in the
background, the smartphone will ring 7 times for
about 10 seconds.
• If you don´t answer within that time, a log is created in
your Profile with the string of events and the time each
one took place.
Answer your doorbell from your smartphone
When a visitor rings the video doorbell, your mobile device receives a voice over IP (VoIP) call
through an internet connection. The Nexxt Home app will be activated, allowing you to:
60 %
9:41 AM
20 21
English
Event log
Tap on the Prole icon, followed by Message center. This will open the
interface to view all the activity and images captured by the doorbell.
22 23
How to answer a doorbell call
In the table below you will nd the different scenarios and how to pick up a call based on the
platform you are using.
iOSOperating status
Nexxt Home app open
(while the doorbell is
video streaming)
Nexxt Home app open
Nexxt Home app in background
Nexxt Home app closed
Android
Click the answer button
(green) once to pick up the
doorbell call
Click the answer button
(green) once to pick up the
doorbell call
Click the answer button
(green) once to pick up the
doorbell call
Click the answer button
(green) once to pick up the
doorbell call
Click the Nexxt Home app
push notication once to
open the video streaming,
and then press the mic
button to answer the
doorbell call
Click the answer button
(green) once to pick up the
doorbell call
Click the Nexxt Home app
push notication once,
and then press the answer
button (green) to pick up
the doorbell call
Click the Nexxt Home app
push notication once to
open the video streaming,
and then press the mic
button to answer the
doorbell call
English
The main functionalities of each option are described below.
Conguration menus
Click on the pencil icon located on the top right corner of the screen to access the conguration
menus and their corresponding parameters. Battery doorbell
Changes the icon and the default name of the device.
Device location: tap on this option to assign the area where the doorbell is installed.
60 %
9:41 AM
60 %
9:41 AM
60 %
9:41 AM
60 %
9:41 AM
24 25
English
this option displays a submenu
containing the information related to
the doorbell.
Tap-To-Run and Automation:
this option links the Wi-Fi doorbell
with other smart products to
automatically control them through
a customized command.
Device information:
This submenu contains the following options.
Status indicator: enables and disables the LED on the doorbell
button.
Flip screen: ips the image 180 degrees when the doorbell is
mounted upside down.
Talk method: the user can select between One-way or
Two-way communication.
Sound: this sliding bar adjusts the volume level of the
doorbell, on a scale from 1 to 10.
Basic settings
Basic function settings
Motion detection settings:
use this option to enable the
Human body ltering feature.
It is designed to prevent false
alarms by identifying more
accurately when there is a
person approaching the door.
PIR:
enables or disables the
thermal-based Passive
Infrared sensors. When
activated, three sensitivity
levels become available:
low, medium and high.
This setting will determine
at what point notications
will be triggered when
activity is detected in the
monitored area.
Power management
settings:
this menu displays the
remaining charge of the
battery, the power source
being use, and the threshold
for warning the user when
the charge is running below
the specied levels to be
able to continue powering
the device properly.
Advanced settings:
26 27
English
Memory card settings:
Total capacity: shows the capacity of the microSD™ card.
Used: shows how much memory has been used.
Remaining capacity: shows how much space is left on the
microSD™ card.
Format: this will format the microSD™ card to be used on the
doorbell.
Oine notication
Oine notication: after 30 minutes of inactivity, the device will trigger a notication.
You can enable or disable this feature.
Others
Feedback: let us know if you have any issues setting up the product.
Share device: allows sharing the Wi-Fi doorbell with family and friends.
Device update: we will sometimes add new features or provide updates with a new
rmware upgrade.
Remove device: allows you to unbind the device from the Nexxt Home Account.
Click on Share devices then tap Add sharing. Enter
the e-mail address of the person you want to grant
access to the device. Tap on Done. The newly
congured users will now have access to your
smart doorbell.
Note: family or friends will need their own Nexxt
Solutions Home Account to access the device.
Value-added services (VAS
Cloud storage: access photos and videos at any time and from
anywhere with an optional subscription plan.
Share device
28 29
Storage
English
Delete user
To remove a user on iOS, slide the name to the left. On Android, press and hold the name of the
person you wish to eliminate. When the pop-up box comes up, select Delete. A Notication
conrming that you no longer want to share the device with the selected user will be displayed.
Tap on Conrm to permanently remove the user.
FCC ID: X4YHACD100
Nexxt Solutions® is a registered trademark. All rights reserved. Amazon, Alexa and all related
logos are trademarks of Amazon.com, Inc. or its aliates. Google, Android and Google Play are
trademarks of Google Inc. SD™ and microSD™ are trademarks owned by SD-3C, LLC. All other
brand names and trademarks are the property of their respective owners. Made in China.
30 31
Contenido
Contenido del empaque
Descripción del producto
Pasos preliminares
Instalación de la aplicación Nexxt Home
31
32
33
38
Timbre inteligente con cámara y conexión Wi-Fi | NHC-D100
1. Introducción
Gracias por adquirir el Timbre inteligente con cámara y campanilla de Nexxt
Solutions. Al combinar una cámara de alta denición y la detección automática
de movimiento con la comunicación bidireccional, este dispositivo emerge
como un versátil sistema de vigilancia inalámabrica ya que permite integrarlo en
cualquier hogar con o sin una instalación para campanilla existente. La
posibilidad de almacenar directamente vídeos en una tarjeta SD permite a los
usuarios visualizar así como grabar las imágenes que deseen en la memoria. Su
cubierta compacta y estilizada con calicación IP65 es resistente a la
manipulación y los elementos en ambientes exteriores adversos. Haga el favor
de leer detenidamente esta guía para garantizar la debida instalación y
operación de este novedoso y sosticado timbre inteligente con cámara de
video integrada y campanilla Bluetooth® .
Español
32 33
Contenido del empaque
RESET ON/0FF
3.Descripción del producto
Apenas abra la caja, verique que hayan sido incluidos los artículos
mencionados en la lista a continuación:
Timbre inteligente
Autoadhesivo 3M
con plantilla
de montaje
Cable
USB
Tornillo
5 unidades
Herramienta para
tornillo de seguridad
Campanilla enchufable Placa resistente a la manipulación Soporte en ángulo para timbre
Lente de la cámara
Tarugo de plástico
2 unidades
Conector de rosca
para cable
2 unidades
Alambre para conexión
eléctrica
2 unidades
Luces infarrojas
para visión nocturna
Micrófono
Timbre
Vista lateral
Vista lateral
Vista posterior
Vista posterior
Vista frontal
Vista frontal
Campanilla
Botón de
encendido/apagado
Ranura para
tarjeta microSD
Puerto micro-USB
Botón de reposición
BT emparejamiento
y botón de volumen
Terminales de tornillo
para la instalación
con cable
Sensores Infrarrojos
Pasivos (PIR)
Botón del timbre con
indicador luminoso LED
Parlante
Selector
de melodía
Indicador de
melodía LED
Enchufe
Español
34 35
Guía del usuario
4. Pasos preliminares
4.1 Instalación del soporte de montaje a la pared o marco de una puerta
Instalación
optativa
Pared
RESET ON/0FF
Método 1: Montaje con la lámina autoadhesiva 3M
1. Antes de proceder, debe retirar cualquier
timbre, de haber instalado uno de estos dispositi-
vos con anterioridad.
2. Determine la ubicación para montar el timbre
nuevo, preferentemente una que ofrezca el mejor
ángulo de visión y recepción inalámbrica.
3. Si requiere orientar el timbre hacia la izquierda
o a la derecha para que coincida con la supercie
adonde va a ir instalado, deberá utilizar también el
soporte angular que viene incluido con el
dispositivo.
4. En tal caso, proceda a jar el soporte en
ángulo a la placa resistente a la manipulación
con los tornillos respectivos.
5. Retire a continuación la película adhesiva
que protege la lámina de doble faz. Presióne-
la con cuidado contra la placa de montaje o el
soporte en ángulo, según el accesorio de
montaje seleccionado.
6. Y por último, adose la placa o el soporte
rmemente a la pared o al marco de la puerta
de entrada.
Instalación
optativa
Pared
RESET ON/0FF
Método 2: Montaje con tornillos
1. Antes de proceder, debe retirar cualquier
timbre, de haber instalado uno de estos
dispositivos con anterioridad.
2. Determine la ubicación para montar el
timbre nuevo, preferentemente una que
ofrezca el mejor ángulo de visión y recepción
inalámbrica.
3. Si requiere orientar el timbre hacia la
izquierda o a la derecha para que coincida
con la supercie adonde va a ir instalado,
deberá utilizar también el soporte angular
que viene incluido con el dispositivo.
4. En tal caso, proceda a jar el soporte en ángulo
a la placa resistente a la manipulación con los
tornillos respectivos.
5. A continuación, proceda a marcar los dos
oricios de montaje con un lápiz utilizando la
lámina autoadhesiva de doble cara como plantilla.
6. Perfore los agujeros piloto e inserte los tarugos
hasta que queden al ras de la supercie.
7. Introduzca los tornillos en los tarugos que acaba
de instalar y apriételos con el n de asegurar la
placa de montaje o el soporte en ángulo en su
lugar, cerciorándose además de que quede
alineado contra la pared.
36 37
Español
4.2 Conexión del timbre
Importante:
El timbre admite dos conguraciones distintas:
1. Puede funcionar independientemente con CC suministrada por su batería interna recargable
2. Se puede integrar al cableado de baja tensión para timbre en su hogar, entre 12 y 24V.
Español
1. Se recomienda cargar la batería por completo antes de
utilizar el timbre por primera vez.
2. Levante suavemente el sello de goma que protege el
compartimiento lateral del timbre. Inserte el cable USB
en el puerto micro-USB del timbre y el otro extremo, en
un conector USB compatible de 5V.
3. Para visualizar el estado de carga del timbre, debe
abrir primero la aplicación. El LED del timbre parpadea
inicialmente en color azul durante 10 segundos al
momento de conectarlo a una fuente de alimentación.
Después, la luz se extinguirá por completo. Si desea
continuar monitoreando el estado de carga de la batería,
debe mantener el timbre encendido y la aplicación
abierta en su dispositivo móvil. Un LED jo de color azul
en el dispositivo es indicación de que la batería está
completamente cargada. Un LED intermitente signica
que la batería aún está en proceso de carga. Es posible
ver el porcentaje de carga de la batería en la interfaz
correspondiente a la Administración de energía incluida
en la aplicación.
Para detalles, reérase a la sección Instalación de la
aplicación Nexxt Home en la página 11.
4. Al retirar el timbre de la placa antimanipulación, se activa
la alarma correspondiente. Con el n de silenciar dicha
alerta, debe apagar el timbre pulsando el botón de
Opción 1.
Funcionamiento sin cables, con energía de la batería (recomendado)
Utilice esta opción si va a utilizar la batería como fuente de alimentación, la cual facilita el despliegue al igual que
su instalación.
encendido/apagado durante 3 segundos y volver a
prenderlo con el n de iniciar la carga. Debe seguir los
mismos pasos cada vez que necesite recargar el timbre.
5. Retire el cable USB y, a continuación, ejerza presión
sobre el sello de goma diseñado para proteger el
conector de CC y la ranura para tarjeta SD.
6. Mantenga presionado el botón de conexión, el cual
está ubicado en la sección posterior, por unos 3
segundos con el n de encender el timbre.
7. Deslice el timbre al interior de la placa resistente a la
manipulación e inserte el tornillo de seguridad en la
base utilizando la herramienta que se incluye con la
unidad.
8. La vida útil de la batería se degrada a través del
tiempo por el uso u otros factores externos, como el
medio ambiente o las preferencias del usuario.
9. La duración de cada carga depende principalmente
de la actividad, el número de eventos de activación, las
condiciones de iluminación y de consumo, así como de
la resolución de vídeo utilizada.
10. La selección de los parámetros que demandan el
mínimo de energía para mantener el funcionamiento
del timbre contribuye a prolongar el rendimiento de
esta batería de larga duración.
Riesgo de electrochoques
Corte el suministro de corriente desde el interruptor de
cortacircuito
Corte el ujo eléctrico hacia el punto de instalación apagando el disyuntor o caja de
fusibles antes de comenzar la instalación. Siempre debe proceder con suma cautela al
manipular los cables.
1. Compruebe que se ha cortado la corriente hacia la
actual conexión de timbre y que no hay tensión
presente en la línea.
2. Desinstale el timbre o campanilla existente, de no
haberlo hecho todavía.
3. Suelte los tornillos de los terminales.
Posteriormente inserte el extremo con el anillo en los
terminales que se encuentran en la sección posterior
del timbre. Vuelva a apretar los tornillos con el n
asegurar debidamente la conexión. Puesto que los
botones de un timbre no tienen una polaridad
especíca, es posible conectar cualquier cable con
cualquiera de los dos terminales.
4. Haga coincidir los cables provenientes de la pared
con los terminales de la sección posterior de la
unidad.
5. Acople los extremos de cada par con un conector de
rosca, y gírelos hasta asegurar rmemente cada punto de
unión, sin dejar expuesto ningún alambre.
6. Vuelva a introducir los cables en la pared.
7. Restablezca la corriente en el interruptor de
cortacircuito para nalizar el proceso.
8. Para encender el timbre, mantenga presionado el botón
de conexión ubicado en la sección posterior durante 3
segundos aproximadamente.
9. Deslice el timbre al interior de la placa resistente a la
manipulación y guíe los cables a través de la abertura en la
parte posterior.
10. Y por último, instale el tornillo de seguridad en la base
de la placa utilizando la herramienta que se incluye con la
unidad.
Opción 2:
Conexión cableada a la red eléctrica convencional
Este timbre admite una conexión de CA de 12V a 24V. Compruebe la tensión del cableado para cerciorarse de que su
actual instalación no excede los valores máximos especicados.
Es posible que en el lugar donde usted reside, la instalación deba a estar a cargo de un electricista calicado. Reérase a las
regulaciones y a los códigos de construcción vigentes en su localidad antes de realizar cualquier instalación eléctrica; puede
que la obtención de permisos así como una instalación certicada sean requeridos por ley.
De no estar seguro cuál es el circuito que controla el timbre de su puerta, desconecte el disyuntor principal de su casa o en su
defecto, hágase asesorar por un electricista.
38 39
4.3 Cómo instalar la tarjeta de memoria
Paso 1: Antes de colocar el timbre en la placa como se
describió en las secciones anteriores del manual, levante
suavemente el sello de goma que protege el comparti-
mento lateral de la unidad.
Paso 2: Inserte la tarjeta microSD™. Ponga especial atención
para colocarla en la orientación correcta dentro de la ranura.
Paso 3: Vuelva a colocar el sello de goma
presionándolo hacia abajo con el pulgar, hasta
cerrar herméticamente el compartimiento.
Nota: si no ejecuta correctamente el paso 3,
cualquier ltración de agua puede dañar
el dispositivo.
El timbre Wi-Fi cuenta con una ranura integrada en el costado de la unidad, la cual admite tarjetas microSD
™ de hasta 128GB.
Una vez que inserte la tarjeta, la cámara comenzará a grabar y almacenar en forma automática imágenes y
videos en esa memoria. Una vez que alcance el límite de su capacidad, las imágenes más antiguas van a
ser reemplazadas por las más recientes, lo cual garantiza el registro continuo cada vez que se produzca un
evento por detección de movimiento.
4.4 Cómo vincular el timbre con la campanilla
1. Pulse brevemente el Selector de tono de la
campanilla para recorrer todas las melodías
disponibles en el timbre. El dispositivo ofrece
una selección de 55 tonos pregrabados.
2. Tras haber escogido la melodía de su
preferencia, espere hasta que dicho tono
termine de tocar. Pulse el botón de
Emparejamiento BT/Volumen durante 5
segundos hasta que el indicador luminoso
naranja parpadee una vez.
3. Dentro de los 5 primeros segundos, presione el botón
de la campanilla para registrar el tono seleccionado.
4. A contar de ese momento, el timbre tocará el tono de
llamada programado a través de la campanilla.
5. Repita estas mismas instrucciones cuando desee escoger
una melodía distinta para la campanilla.
Nota: el timbre de la puerta posee un sonido de alerta único, el
cual no es susceptible; mientras que se puede cambiar la
melodía de la campanilla las veces que quiera.
La campanilla es un componente de alerta inalámbrico que sirve para noticar cada vez que es
presionado el botón del timbre.
Es necesario vincular primero ambos dispositivos a través de una conexión Bluetooth®.
Cerciórese de que el timbre esté encendido y que la campanilla haya sido conectada a un tomacorriente
de la pared.
4.4.1 Selección del tono de la campanilla
El usuario puede escoger la melodía y regular el volumen de la campanilla, o desactivarla cuando no
desee distracciones derivadas de tales alertas.
4.4.2 Regulación del volumen
Pulse brevemente el botón de Emparejamiento BT/Volumen con el n de regular la intensidad de
audio de la campanilla. Es posible alternar entre 4 niveles, desde bajo, medio, alto hasta su
máxima regulación.
Instalación de la aplicación Nexxt Home
Descargue la aplicación Nexxt Home en Google Play o de Apple App Store.
User guide
Thank you for purchasing the Smart Wi-Fi LED amber
from Nexxt Solutions. We are excited to be
part of making your life easier, safer and bringing peace of
mind into your homes.
Product overview
1.
your preferred settings through the application.
2. Screw base
Package content
English
1
2
Installing the Nexxt Solutions
Home App
60 %
9:41 AM
Nexxt Home
Nexxt Solutions Home App
Cancel
GET
Accvent LLC
Log in with existing account
Create New Account
SOLUTIONS
Iniciar sesión con cuenta existente
Crear Cuenta Nueva
SOLUTIONS
60 %
Nexxt Home
Nexxt Solutions Home App
Cancel
INSTALL
Accvent LLC
Smart Wi-Fi
tunable bulb
User guide
Thank you for purchasing the Smart Wi-Fi LED amber
from Nexxt Solutions. We are excited to be
part of making your life easier, safer and bringing peace of
mind into your homes.
Product overview
1.
your preferred settings through the application.
2. Screw base
Package content
English
1
2
Installing the Nexxt Solutions
Home App
60 %
Nexxt Home
Nexxt Solutions Home App
Cancel
GET
Accvent LLC
Log in with existing account
Create New Account
SOLUTIONS
Iniciar sesión con cuenta existente
Crear Cuenta Nueva
SOLUTIONS
60 %
9:41 AM
Nexxt Home
Nexxt Solutions Home App
Cancel
INSTALL
Accvent LLC
Smart Wi-Fi
tunable bulb
40 41
Español
42 43
Quick start guide
Download the Nexxt Home app on Google Play Store or
Apple App Store.
Quick start guide
Download the Nexxt Home app on Google Play Store or
Apple App Store.
Paso 2
Paso 1
Registro por email. Complete los campos requeridos. Ingrese el código de vericación que recibió.
60 %
9:41 AM
60 %
9:41 AM
Register by email
United States of America
Email
Get authentication code
Español
44 45
Paso 4
Paso 3
Cree una contraseña nueva y seleccione Completo a continuación. La aplicación Nexxt Home ha sido instalada satisfactoriamente en su dispositivo.
60 %
9:41 AM
Set Password
Completed
6-20 characters, including letters and numbers
Español
Conguración inicial y reposición manual
Asegúrese de que el dispositivo esté encendido. De no haberlo hecho aún, proceda a encender el
timbre manteniendo presionado el botón de conexión, ubicado en la sección posterior, durante
3 sgundos.
Si el indicador LED rojo no parpadea o si no se escucha ninguna noticación audible, presione el
botón de reposición del timbre por 2 segundos o hasta que escuche un tono para indicarle que ha
concluido satisfactoriamente el proceso de reposición.
Una vez que suelte el botón, el LED rojo comenzará a parpadear.
Ejecute las instrucciones de la aplicación para completar el proceso de emparejamiento.
El LED se ilumina de color azul una vez que el dispositivo establece la conexión inalámbrica con
su red Wi-Fi.
Paso 1
Paso 2 Paso 3
Debe conectarse a una red Wi-Fi de
2.4GHz. Ingrese la contraseña de la red.
Cerciórese de escribir la secuencia
correcta, de lo contrario no se podrá
conectar el dispositivo.
Agregar dispositivo
46 47
60 %
9:41 AM
60 %
9:41 AM
60 %
9:41 AM
60 %
9:41 AM
Seleccione el ícono + para agregar el dispositivo, seguido del timbre inteligente
que desea instalar.
Cuando el LED comience a parpadear,
seleccione paso siguiente y pulse el
botón Siguiente para continuar.
Español
Escanee con el timbre inteligente el código QR desplegado en su dispositivo móvil. Una vez que
la cámara emita la señal audible, haga clic en el botón Escuché el tono de aviso.
De experimentar algún problema, vuelva a iniciar el timbre. Si una Cuenta registrada agrega la
cámara a través de la aplicación, ningún otro usuario podrá incluir esa cámara en una cuenta
distinta, a menos que se le otorgue expresa autorización a través de la opción Compartir acceso.
Cuando concluye el proceso de emparejamiento, aparece desplegada la noticación
Dispositivo incorporado exitosamente en la pantalla del dispositivo.
Pulse el ícono del lápiz con el n de modicar la denominación del timbre. Seleccione Guardar
a continuación para grabar su conguración, seguido de Terminar al nal.
48
Paso 4
60 %
9:41 AM
60 %
9:41 AM
Paso 5
60 %
9:41 AM
60 %
9:41 AM
49
Español
Interfaz principal del timbre
Conguración: pulse el ícono del lápiz con el n de acceder a los menús de
conguración.
Señal: exhibe la intensidad de la señal W-Fi.
Pantalla completa: alterna entre los modos de visualización con media
pantalla y pantalla completa.
/SD: alterna entre los modos de Alta denición y Denición estándar.
Enmudecimiento: desactiva el micrófono del timbre.
Batería: cuando funciona con corriente continua, la pantalla proporciona
una indicación visual de la carga de la batería en tiempo real.
Conexión a la red: cuando funciona con corriente alterna, la pantalla
proporciona una indicación visual con el 100% de carga. Si se corta el
suministro de corriente o cuando la tensión es muy baja, el timbre se
cambiará automáticamente al modo de CC.
Captura de pantalla: toma una foto de la imagen capturada por la
cámara.
Hablar: permite la comunicación bidireccional a través del micrófono.
Grabar: activa la grabación de vídeos en tiempo real en su dispositivo
móvil. El usuario debe iniciar y detener la grabación en forma manual.
Reproducir: cuando se instala una tarjeta microSD™, puede utilizar la
función de reproducción para ver los 10 segundos de grabación cuando
se activan los sensores de detección de movimiento. También tiene la
posibilidad de almacenar imágenes estáticas y videos directamente en
su dispositivo móvil para uso futuro si accede a la cámara o a la
grabadora seleccionando los íconos que aparecen en dicha interfaz.
Almacenamiento en la nube: los usuarios pueden subir archivos
digitales a la nube cuando se suscriben a dicho servicio.
Señal de alarma: pulse este botón para generar un sonido intenso
perfecto para disuadir a visitantes no deseados.
Álbum de fotos: permite visualizar fotos y videos capturados por la
cámara.
Charging
80%
Aceptar la comunicación entrante y hablar con
el visitante:
• Para comunicarse con el visitante, hable por el
teléfono como loharia normalmente con cualquier
llamada. La cámara capturará imágenes en tiempo real
de las personas que se encuentren en la puerta de su
casa.
• En caso de que la aplicación Nexxt Home esté cerrada
o abierta en segundo plano, recibirá una noticación
instantánea, acompañada con hasta 7 tonos de
llamada por un lapso de 10 segundos.
Rechazar una llamada:
• Cuando un visitante toca el timbre, el teléfono
inteligente emitirá 20 tonos de llamada por un lapso
de 25 segundos, siempre y cuando la aplicación
esté abierta.
•Sin embargo, si la aplicación estuviera cerrada o
activada en segundo plano, el teléfono inteligente
sonará 7 veces durante 10 segundos aproximadamente.
• De no contestar durante ese lapso, se creará un
registro en su Perl con la lista de eventos y la hora en
que ocurrió cada uno.
Atender el timbre desde su teléfono inteligente
Cuando una visita toca el timbre con videocámara a, su dispositivo móvil recibe una llamada a
través de una conexión a internet basada en el protocolo IP (VoIP). La aplicación Nexxt Home se
activará, permitiendo ejecutar las acciones indicadas a continuación:
50 51
Español
60 %
9:41 AM
Registro de eventos
Tras pulsar el ícono del Perl, seleccione Centro de mensajes. Lo anterior abrirá la
interfaz para visualizar toda la actividad e imágenes que han sido capturadas por el
timbre.
52 53
Español
Cómo atender una llamada a través del timbre
En la tabla siguiente se detallan los diferentes escenarios y cómo responder una llamada en función
de la plataforma que esté utilizando.
iOSEstado funcional Android
Pulse el botón del teléfono
(verde) una vez para responder
la llamada a través del timbre
Aplicación Nexxt Home activa
(teniendo la reproducción
imágenes de video habilitada)
Pulse el botón del teléfono
(verde) una vez para responder
la llamada a través del timbre
Pulse el botón del teléfono
(verde) una vez para responder
la llamada a través del timbre
Aplicación Nexxt Home activa Pulse el botón del teléfono
(verde) una vez para responder
la llamada a través del timbre
Haga clic una vez en la
noticación instantánea de la
aplicación Nexxt Home y, a
continuación, pulse el botón
del teléfono (verde) para
responder la llamada a través
del del timbre
Aplicación Nexxt Home en
segundo plano
Pulse el botón del teléfono
(verde) una vez para responder
la llamada a través del timbre
Haga clic una vez en la
noticación instantánea de la
aplicación Nexxt Home para
habilitar la reproducción de
video y, a continuación, pulse
el botón del micrófono para
responder la llamada a través
del timbre
Aplicación Nexxt Home
cerrada
Haga clic una vez en la
noticación instantánea de la
aplicación Nexxt Home para
habilitar la reproducción de
video y, a continuación, pulse
el botón del micrófono para
responder la llamada a través
del timbre
Las principales funcionalidades de cada opción se describen a continuación en el manual.
Conguración del menú
Pulse el ícono del lápiz que aparece en la esquina superior derecha de la pantalla para acceder a los
menús de conguración y a los parámetros respectivos.
Timbre a batería
Le permite al usuario modicar el ícono y el nombre originalmente asignados al dispositivo
Ubicación del dispositivo: Pulse esta opción para identicar el área donde se ha instalado
el timbre.
60 %
9:41 AM
60 %
9:41 AM
60 %
9:41 AM
60 %
9:41 AM
54 55
Español
Esta opción exhibe un menú
secundario con la información
relativa al producto.
Activación rápida y automatización:
esta opción enlaza el timbre Wi-Fi
con otros productos inteligentes
para controlarlos en forma
automática mediante un comando
especial
Información del dispositivo:
El actual submenú incluye las opciones a continuación.
Indicador de estado: activa y desactiva el LED perteneciente al
botón del timbre.
Invertir pantalla: gira la imagen 180 grados cuando se invierte el
timbre para montarlo en sentido contrario.
Método de comunicación: el usuario puede escoger entre la
comunicación Unidireccional o Bidireccional.
Sonido: La barra deslizable permite regular, en una escala del 1 al
10, la intensidad del volumen del timbre.
Conguraciones básicas
Programación de funciones básicas
Programación del detector de
movimiento: utilice esta opción
para habilitar la Detección del
cuerpo humano. Evita la
generación de falsas alarmas al
identicar con mayor precisión
cuando es una persona quien se
encuentra en las inmediaciones
de la entrada.
PIR: habilita o inhabilita los
sensores térmicos pasivos de
luz infrarroja. Son tres los
niveles de sensibilidad
disponibles cuando se activa
esta función: bajo, medio y alto.
El actual parámetro determina
en qué punto se activarán las
noticaciones cada vez que se
detecte actividad en la zona
monitoreada.
Administración de energía: este
menú muestra la carga restante
de la batería, la fuente de
alimentación utilizada y el umbral
de advertencia, destinado a
noticar cuándo el voltaje
disminuye por debajo de los
niveles especicados para
garantizar el funcionamiento
apropiado del dispositivo.
Conguraciones avanzadas
56 57
Español
Conguración de la tarjeta de memoria:
Capacidad total: exhibe el tamaño de la tarjeta microSD™.
Utilizado: exhibe el espacio ocupado en la memoria.
Capacidad restante: exhibe el espacio disponible en la
tarjeta microSD™.
Formato: permite formatear la tarjeta microSD™ antes de
ser utilizada con el timbre.
Noticación de desconexión:
Noticación de desconexión: tras 30 minutos de inactividad, el dispositivo activará una
noticación. Es posible activar o desactivar esta función.
Otros
Comentario: comuníquese con nosotros si ha tenido alguna dicultad al instalar el producto.
Compartir dispositivo: permite compartir el acceso al timbre con familiares y amigos
Actualización del dispositivo: cada cierto tiempo se integran nuevas funciones o actual-
izaciones mediante versiones mejoradas del rmware.
Eliminar dispositivo: le permite desvincular el dispositivo de la cuenta Nexxt Home.
Seleccione Compartir dispositivos seguido de
Agregar acceso compartido. Ingrese el correo
electrónico de la persona a quien desea otorgarle
acceso al dispositivo. Pulse Terminar. Los
usuarios que acaba de congurar de ahora en
adelante van a tener acceso al timbre inteligente.
Nota: familiares o amigos necesitan establecer su
propia cuenta de Nexxt Solutions Home para
obtener acceso al dispositivo.
Servicios de valor agregado (VAS)
Almacenamiento en la nube: mantenga fotos y vídeos
siempre a su alcance en cualquier momento y desde cualquier
lugar si opta por suscribirse al plan.
Compartir dispositivo
58 59
Almacenamiento
Español
Borrar usuario
Con el n de eliminar un usuario en iOS, deslice el nombre hacia la izquierda. En Android,
mantenga presionado el nombre de la persona que desea eliminar. Cuando se active el
recuadro emergente, seleccione Borrar. Una Noticación aparece en pantalla para conrmar
que usted ya no desea compartir el dispositivo con el usuario seleccionado. Pulse Confirmar
para eliminar permanentemente el nombre de usuario de la lista.
FCC ID: X4YHACD100
Nexxt Solutions® es marca registrada. Todos los derechos reservados. Amazon, Alexa y todos
los logos relacionados son marcas registradas de Amazon.com, Inc. o sus aliados Google,
Android y Google Play son marcas registradas de Google LLC. SD™ y microSD™ son marcas
comerciales propiedad de SD-3C, LLC. Todas las demás marcas y nombres comerciales son
propiedad de sus respectivos dueños. Hecho en China.
60 61
Español
Smart Wi-Fi video doorbell
with chime
  • Page 1 1
  • Page 2 2
  • Page 3 3
  • Page 4 4
  • Page 5 5
  • Page 6 6
  • Page 7 7
  • Page 8 8
  • Page 9 9
  • Page 10 10
  • Page 11 11
  • Page 12 12
  • Page 13 13
  • Page 14 14
  • Page 15 15
  • Page 16 16
  • Page 17 17
  • Page 18 18
  • Page 19 19
  • Page 20 20
  • Page 21 21
  • Page 22 22
  • Page 23 23
  • Page 24 24
  • Page 25 25
  • Page 26 26
  • Page 27 27
  • Page 28 28
  • Page 29 29
  • Page 30 30
  • Page 31 31
  • Page 32 32

Nexxt Solutions NHC-D100 Guía del usuario

Tipo
Guía del usuario

El Nexxt Solutions NHC-D100 es un timbre con video Wi-Fi inteligente que combina una cámara de alta definición, tecnología infrarroja con audio bidireccional y alarma para ofrecer una solución de monitoreo inalámbrica versátil para cualquier hogar, con o sin instalación de timbre existente.

En otros idiomas