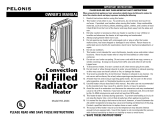
Pelonis HO-0280 Manual de usuario

Categoría
Calentadores espaciales
Tipo
Manual de usuario

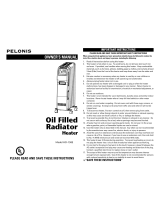
El Pelonis HO-0280 es un calentador de aceite digital con una potencia de 1500 vatios y una frecuencia de 60 hertz, ideal para calentar habitaciones de tamaño mediano a grande. Cuenta con cuatro configuraciones de calor para personalizar el nivel de calor deseado y un termostato ajustable para mantener una temperatura constante. También incluye un temporizador de 24 horas para programar el encendido y apagado automático, así como una función de bloqueo para niños para evitar cambios accidentales en la configuración. Además, es portátil y fácil de mover gracias a sus cuatro ruedas giratorias.

El Pelonis HO-0280 es un calentador de aceite digital con una potencia de 1500 vatios y una frecuencia de 60 hertz, ideal para calentar habitaciones de tamaño mediano a grande. Cuenta con cuatro configuraciones de calor para personalizar el nivel de calor deseado y un termostato ajustable para mantener una temperatura constante. También incluye un temporizador de 24 horas para programar el encendido y apagado automático, así como una función de bloqueo para niños para evitar cambios accidentales en la configuración. Además, es portátil y fácil de mover gracias a sus cuatro ruedas giratorias.

Digital Oil-Filled
Radiator Heater
HO-0280
version A - 09 - 2021
HO-0280
midea.com
USER MANUAL
en
sp
Warning Notice: Before using
this product, please read this
manual carefully and keep it for
future reference. For additional
support, please call customer
service at 1-866-646-4332.
The design and specifications are
subject to change without prior
notice for product improvement.
Consult with your dealer or
the manufacturer for details.
Rated voltage: 120V
Rated power: 1500W
Frequency: 60Hz
When using electrical appliances, basic precautions should always be followed to reduce
the risk of fire, electric shock, and injury to persons, including the following:
1. Read all instructions before using this heater.
2. This heater is hot when in use. To avoid burns, do not let bare skin touch hot
surfaces. If provided, use handles when moving this heater. Keep combustible
materials, such as furniture, pillows, bedding, papers, clothes, and curtains at
least 3 feet (0.9m) from the front of the heater and keep them away from the
sides and rear.
3. Extreme caution is necessary when any heater is used by or near children or
invalids and whenever the heater is left operating and unattended.
4. Always unplug heater when not in use.
5. Do not operate any heater with a damaged cord or plug or after the heater
malfunctions, has been dropped or damaged in any manner. Discard heater or
return heater to authorized service facility for examination, electrical or
mechanical adjustment, or repair.
6. Do not use outdoors.
7. This heater is not intended for use in bathrooms, laundry areas and similar indoor
locations. Never locate heater where it may fall into bathtub or other water
container.
8. Do not run cord under carpeting. Do not cover cord with throw rugs, runners, or
similar coverings. Do not route cord under furniture or appliances. Arrange cord
away from traffic area and where it will not be tripped over.
9. To disconnect heater, first turn controls to off, then remove plug from outlet.
10. Do not insert or allow foreign objects to enter any ventilation or exhaust opening
as this may cause an electric shock or fire, or damage the heater.
11. To prevent a possible fire, do not block air intakes or exhaust in any manner. Do
not use on soft surfaces, like a bed, where openings may become blocked.
12. A heater has hot and arcing or sparking parts inside. Do not use it in the areas
where gasoline, paint, or flammable liquids are used or stored.
13. Use this heater only as described in this manual. Any other use not
recommended by the manufacturer may cause fire, electric shock, or injury to
persons.
14. Always plug heaters directly into a wall outlet/receptacle. Never use
with an extension cord or relocatable power tap (outlet/power strip).
1
PLEASE READ AND SAVE THESE IMPORTANT SAFETY INSTRUCTIONS
Risk of fire. Do not operate heater without wheel assemblies
attached. Operate heater in upright position only (wheels on bottom,
controls on top). Any other position could create a hazardous situation.
Ensure that the surface beneath the heater is clean and free of any
obstructions. It is not recommended that this heater be placed on
high-pile carpeting or any other surface that impedes the flow of air
underneath the heater.
ASSEMBLY INSTRUCTIONS
Unpack your heater and find the wheel-holding plate and butterfly nuts between
the fins assemblies .
1. Make sure the heater is unplugged and in the "OFF" position.
2. TURN THE HEATER UPSIDE DOWN.
3. Attach the wheel-holding plates onto the heater as Fig.1 shows . The plate is
fixed between the last two fins and the other one is fixed under metal control box,
Fix the castors to the vertical axis of both
the wheel holding plates.
4. Insert the butterfly nuts and tighten them
securely .
5. TURN THE HEATER UPRIGHT.
Your heater is now ready to use .
15. This heater draws 12.5 amps during operation. To prevent overloading a circuit,
do not plug the heater into a circuit that already has other appliances working.
16. It is normal for the plug to feel warm to the touch; however, a loose fit between
the AC outlet (receptacle) and plug may cause overheating and distortion of the
plug. Contact a qualified electrician to replace loose or worn outlet.
17. The output of this heater may vary and its temperature may become intense
enough to burn exposed skin. Use of this heater is not recommended for
persons with reduced sensitivity to heat or an inability to react to avoid burns.
18. Don't leave the heater on unattended.
19.
2
This heater includes an Overheat Protection System that
shuts the unit off if it overheats due to abnormal conditions.
If this occurs turn the heater “OFF”, unplug it, and inspect and remove
any objects on or adjacent to the heater. Allow it to cool for a few
minutes, plug it back in, and resume normal operation.
Fig.1
3
OPERATING INSTRUCTION
How to use
[Inspection before startup]
1. Check the power cord for any damage;
2. Prior to use, please confirm that the power socket has acceptable rated current,
and if not, please replace it.
[Operation instructions]
<on/off >: By power on, the buzzer will give a long sound of “beep”. Press the
on-off key to start up and enter the high-grade heating, and then press the
on-off key to shut down.
<Gear selection >: Gently press the gear selection key “MODE” under the working
state to select any one of high-grade, middle-grade, low-grade and energy-saving
work modes.
<Temperature setting >: Under the working state, press and hold the “” key or
“” key to set the temperature, with the temperature setting step of 1; long press
the “” key or “” key to set the temperature quickly. After temperature setting,
exit the temperature setting interface in case of no operation for 5 seconds. In the
event of first use or self-inspection for memory information clearing, the machine
will operate after start according to the factory settings, and the high temperature
setting default is 95°F.
<Power-on by alarm>: Press the timing key “” in standby mode to enter the start
setting interface. Press the “” key or “” key to set time for startup. Long press
“” key or “” key to quickly set time for startup. Upon the time set, the machine
will start and the buzzer will make a long sound.
<Power-off by alarm>: Press the timing key “” in startup mode to enter the
shutdown setting interface. Press the “” key or “” key to set time for shutdown.
Long press “” key or “” key to quickly set time for shutdown. Upon the time set,
the machine will shut down.
A: Timing range between 0 and 24 hours. Increase or decrease for 1 hour by
pressing the “” key or “” key each time. When the setting value is 0H, press the
“” key to change the setting time to 24H. When the setting value is 24H, press
the “” key to change the setting time to 0H. When the setting value is 0H, cancel
the timing; when the setting value is not 0H, start the timing. After the time is set,
press the “” key or “MODE” key, or in case of no operation for 5 seconds, exit
the timing MODE.
B: If the time is set, press the “ ” key to shut down and cancel the timing.
C: After timing, press the “” key to check the remaining time and reset the time
at any time.
During the timing period, the machine can be stopped or restarted under the
temperature control state, and the timing will be kept normally, and not affected by
such stop and restart. In case of closedown or power off during the timing period,
the timer will reset to zero.
<Child lock function>: Under no child lock state during startup and standby, press
and hold the “” key and the “MODE” key for 3 seconds at the same time to start
the child lock function. Under child lock state during startup and standby, press and
hold the “” key and the “MODE” key for 3 seconds to turn off the child lock
function.
4
: Temperature decrease / Time decrease
: ON/OFF button
: Temperature increase / Time increase
: Timer button
: Mode button
Note:
1. When the child lock is in effect during startup, all operations other than shutdown
invalid (except release of the child lock); the child lock is canceled after shutdown.
2. When the child lock is in effect during standby, all operations are invalid (except
release of the child lock).
<Memory function>: If the machine is restarted after normal shutdown, it will run at
the latest state before shutdown. If the machine is powered on again after power
off, it will also run at the latest state before power off.
Note: The memory function is not applicable to child lock after power off.
<Safety protection function>: If the indoor environment temperature Th exceeds
122°F during standby or startup time, please close all output, the buzzer will give
ten acute sounds, and the digital display will show “FF” and flash for 75 seconds
with the frequency of 1HZ. If the protection function works, the machine cannot
resume running or operation, though the environment temperature is less than
122°F. In this case, it is necessary to power off and then power on the machine for
operation.
<Shutdown>: When the machine is turned on, press the “ ” key on the control
panel to enter the standby state. Unplug the power cord, and then place the electric
heater well after the machine is cooled.
[Electric heater movement]
To move the electric heater, please turn it off, unplug the power cord, and then
push the heater body to make the following four universal casters to scroll.
Note: In the event of first use or re-inserting the power plug into socket, please
check the compatibility of the plug and socket.
Inspection method: Insert the power plug into socket and turn the machine on.
About half an hour later, shut the machine down and disconnect plug to check
whether the plug pin is hot. If the pin is hot (about more than 122°F), the socket
must be replaced to avoid socket overheating and even fire caused by poor
contact.
5
SAFTEY FEATURES
The heater is equipped with an over-heat device which cause the unit to stop
operating in the event that the internal temperature exceeds the normal operating
temperature.
If the heater shuts down,
1. Turn off and unplug the heater.
2. Wait for at least 10 minutes until the heater cools.
3. Plug the heater into the power outlet and then turn it on.
Note: This heater includes a safety tip-over protection feature which will shut the
heater off in case it is tipped over. If, at any time, the heater does tip over, please
put the heater back in the upright position (wheels on bottom, controls on top).
The heater will resume its normal operation.
1. Press down on the battery compartment cover
and slide it out.
2. Use 1 "CR2032" lithium battery (included)
3. Insert the batteries, making sure that the positive
terminals are facing the proper way.
4. Replace the cover.
BATTERIES INSTRUCTIONS (included)
1. Do not dispose of batteries in fire, batteries may
explode or leak.
2. Do not mix old and new batteries.
3. Do not mix alkaline, standard (carbon-zinc) or
rechargeable (nickel-cadmium) batteries.
4. Non-rechargeable batteries are not to be recharged.
5. Batteries are to be inserted with the correct polarity.
6. Exhausted batteries are to be removed from the product.
7. The batteries must be removed from the remote controller before it is scrapped
and that they are disposed of safely.
BATTERY WARNING
INSTRUCTIONS TO REMOTE CONTROLLER
Timer key
Mode key
ON/Standby key
Temperature/Time increase
Temperature/Time decrease
6
TROUBLESHOOTING
Problem Reason Solution
1. There is no power. Be sure it is plugged in and that the electrical outlet is working.
2. The set temperature is lower than
the current room temperature.
Set the desired temperature higher than the current temperature to
restart the heater.
3. The room temperature has reached
the temperature set at the thermostat.
1. This is normal. The heater will restart once room
temperature is lower than set temperature.
2. Adjust the thermostat setting if it's not set to your desired
temperature.
4. One of the safety protection devices
had been activated to prevent
overheating.
1. Place the heater in upright position.
2. Check for any obstructions. If you find an obstruction, turn the
heater off.
3. Unplug the heater and wait at least 10 minutes for it to cool down.
4. Carefully remove the obstruction. Plug the heater in and restart it
as described in the OPERATION section.
5. If you still notice the same problem, remove the plug from the
outlet and have the appliance checked by an authorized service
person.
The room is not hot enough.
1. The room is too large.
3. The set temperature is too low.
4. The power setting is too low.
4. Increase the temperature setting.
5. Select the higher power setting.
2. The window is open.
1. Turn on the main heat source of the room.
2. Use more portable heaters.
3. Close the window.
Your heater shuts off
unexpectedly or fails to operate.
Please do not attempt to open or repair the heater by yourself.
Doing so may void the warranty and could cause damage or personal
injury.
SPECIFICATIONS
This heater is designed for finite space heating or as a supplementary heating source.
It can not replace the main heat source during the winter.
Voltage Frequency Wattage Max. Current BTU Output
120 V AC 60 Hz 1500 W 12.5 A 5120
CARE AND CLEANING
1. Always remove the plug from the power socket and allow heater to cool. Wipe
heater with a soft, damp cloth. Do not use detergents and abrasives.
2. If the heater is not in use over a certain length of time, wind the cable around the
holder and store it in a dry place.
3. In case of malfunction, do not try to repair the heater by yourself. It may result in
fire hazard or electric shock.
In the event of a warranty claim or if service is required for this heater, please contact us at the
following:
Toll Free: 866 646 4332
Email us at: [email protected]
For questions or comments, please write to:
Midea America Corp
Customer Care Center
5 Sylvan Way, Suite 100
Parsippany, NJ 07054
For your records, staple your sales receipt to this manual and record the following:
________________________________
________________________________
7
SERVICE & SUPPORT
DATE OF PURCHASE:
PLACE OF PURCHASE:
(STAPLE SALES RECEIPT HERE)
NOTE: PROOF OF PURCHASE IS REQUIRED FOR ALL
WARRANTY CLAIMS
PRINTED IN CHINA
Please read all instructions before attempting to use this product.
PELONIS
PELONIS.PELONIS
warrants as limited herein to the original purchaser of retail that each new Pelonis
Product, shall be free of defects in material and workmanship for a period of one (1) year from
the date of original purchase. This one (1) year warranty is limited to the heating elements,
motor, and electric control circuit board.
In the event of malfunctions or failure of your Pelonis Product, simply deliver or send the heater,
postage prepaid along with PROOF OF PURCHASE , within the warranty period of one (1) year, to
reserves the right to inspect the claimed defective part or parts to determine
if the defect or malfunction complaint is covered by this warranty. shall, within sixty
(60) days after receipt of the product, at its option,repair and/or replace the defective part or parts
free of charge. This warranty shall only cover defects arising from normal usage.
assumes no responsibility whatsoever if Product should fail during the warranty period by
reason of:
Misuse, negligence, physical damage or accidents.
Lack of maintenance (see instructions for proper maintenance).
Repair by any unauthorized party during the warranty period.
Damage caused by connection to an improper input voltage (see specification label on
your heater).
makes no further warranties or representations, express or implied except those
contained herein. No representative or dealer is authorized to assume any other liability
regarding the Product. The duration of the implied warranty granted under State law, including
warranties of merchantability and fitness for particular purpose are limited in duration should
the duration of the express warranty grant it hereunder. shall in no event be liable for
direct, indirect, special or consequential damages.
Some states do not allow limitations on how long an implied warranty lasts, and/or the above
limitations or exclusion may not apply to you. This warranty gives you specific legal rights and
you may have other rights which vary from state to state.
8
ONE (1) YEAR LIMITED WARRANTY
PELONIS
PELONIS
PELONIS
PELONIS
Free 3 months
extension* of the
original limited warranty
period! Simply text a
picture of your proof of
purchase to:
1-844-224-1614
*The warranty extension is for the
three months immediately following
the completion of the product's
original warranty period.
Calentador Digital
Tipo Radiador Con Aceite
HO-0280
version A - 09 - 2021
HO-0280
midea.com
MANUAL DEL USUARIO
en
sp
Aviso de advertencia: antes de usar
este producto, lea atentamente este
manual y consérvelo para futuras
referencias. Para soporte adicional,
llame al servicio al cliente en el
número de teléfono 1-866-646-4332.
El diseño y las especificaciones
están sujetos a cambios sin previo
aviso para la mejora del producto.
Consulte con su distribuidor o el
fabricante para obtener más detalles.
Voltaje nominal: 120V
Potencia nominal: 1500W
Frecuencia: 60Hz
POR FAVOR, LEA Y GUARDE ESTAS IMPORTANTES INSTRUCCIONES DE SEGURIDAD
Al utilizar los aparatos eléctricos, siempre se deben seguir las precauciones básicas para
reducir el riesgo de incendios, descargas eléctricas y lesiones a las personas, incluyendo lo
siguiente:
1. Lea todas las instrucciones antes de utilizar el calentador.
2. Este calentador es caliente cuando lo utilice. Para evitar quemaduras, no deje
que la piel entre en contacto con las superficies calientes. Si existe la posibilidad,
utilice las agarraderas al mover este calentador. Mantenga los materiales
combustibles como muebles, almohadas, ropa de cama, papeles, telas y cortinas
al menos 3 pies (0.9m) desde la parte superior del calentador y manténgalos
alejados de los lados y la parte trasera.
3. Es necesario ejercer una precaución extrema cuando se utilice cualquier
calentador por o cerca de los niños o enfermos y cuando se deje el calentador en
funcionamiento sin atención.
4. Siempre desenchufe el calentador cuando no lo utilice.
5. No opere ningún calentador con un cable o enchufe dañado o después de que el
calentador funcione con fallos, se haya caído o dañado de cualquier forma.
Deseche el calentador o devuélvalo al servicio técnico autorizado para la revisión,
ajuste eléctrico o mecánico, o reparación.
6. No lo utilice en exteriores.
7. Este calentador no está diseñado para su uso en los baños, áreas de lavandería
y sitios interiores similares. Nunca colóquelo donde se podría caer en una bañera
u otros recipientes con agua.
8. No meta el cable por debajo de las alfombras. No lo cubra con los tapetes, o
coberturas similares. No haga pasarlo bajo los muebles o aparatos. Arréglelo
alejado del área de tráfico y donde no se podría tropezar.
9. Para desconectar el calentador, primero apague los controles, luego retire el
enchufe desde el tomacorriente.
10. No inserte o permita entrar los objetos extraños en ninguna abertura de
ventilación o de escape, ya que esto podría causar descargas eléctricas o
incendios, o dañar el calentador.
11. Para prevenir un posible incendio, no bloquee las entradas o salidas de aire de
ninguna forma. No lo utilice sobre las superficies blandas como una cama, donde
se podrían volver bloqueadas las aberturas.
12. Un calentador tiene partes calientes, arcos o chispas en el interior. No lo utilice en
las áreas donde se utilice o almacene la gasolina, pintura o líquidos inflamables.
10
13. Utilice este calentador sólo según lo descrito en este manual. Cualquier otro uso
no recomendado por el fabricante podría causar incendios, descargas eléctricas
o lesiones a las personas.
14. Siempre enchufe los calentadores directamente en un
tomacorriente/ receptáculo de pared. Nunca lo utilice un cable de extensión o
conexión eléctrica reubicable (tomacorriente/enchufe múltiple)
15. Este calentador consume 12.5 amperios durante la operación. Para prevenir
sobrecargar un circuito, no enchufe el calentador en un circuito con otros
aparatos en funcionamiento.
16. Es normal que el enchufe se sienta caliente a tocar; pero un ajuste suelto entre
el tomacorriente (receptáculo) AC y el enchufe podría causar el
sobrecalentamiento y distorsión del enchufe. Contacte a un electricista calificado
para reemplazar el tomacorriente suelto o desgastado.
17. El tomacorriente de este calentador podría variar y su temperatura podría
volverse lo suficiente intensa como para quemar la piel expuesta. No se
recomienda utilizar este calentador para las personas con sensibilidad reducida al
calor o incapacidad para reaccionar para evitar quemaduras.
18. No deje el calentador sin atención.
19. "GUARDE ESTAS INSTRUCCIONES"
INSTRUCCIONES DE MONTAJE
Desempaque su calentador y busque la placa de soporte de rueda y las tuercas de
mariposa entre los conjuntos de aletas.
1. Asegure que el calentador esté desenchufado y en la posición "APAGADO"
2. GIRE EL CALENTADOR AL REVÉS.
3. Sujete las placas de soporte de rueda al calentador como se muestra en la
Figura 1. La placa se fija entre las aletas de remolque finales y la otra se fija
por debajo de la caja de control metálica, fije las
ruedecillas al eje vertical de ambas placas
de soporte de rueda.
4. Inserte las tuercas de mariposa y apriételas
con firmeza.
5. GIRE EL CALENTADOR EN LA
POSICIÓN VERTICAL.
Su calentador ya está listo para su uso.
11
Fig.1
Riesgo de incendios. No opere el calentador sin
conjuntos de ruedas sujetos. Opérelo en la posición vertical, solamente
(las ruedas en la parte inferior, y los controles en la parte superior).
Cualquier otra posición podría crear una situación peligrosa. Asegure
que la superficie debajo del calentador esté limpia, sin obstrucciones.
No se recomienda que este calentador se coloque en las alfombras
llenas de pelo o cualquier otra superficie que impida el flujo de aire
bajo el calentador.
Este calentador incluye un Sistema de Protección
Térmica que apaga la unidad si se sobrecalienta debido a condiciones
anormales. Si esto ocurre, coloque el calentador en la posición “OFF”,
desenchufelo inspeccione y retire cualquier objeto en o adyacente al
calentador. Déjelo enjelo enfriar por unos minutos, vuelva a enchufarlo
y vuelva a hacerlo funcionar de forma normal.
12
INSTRUCCIONES DE FUNCIONAMIENTO
[Inspección antes del funcionamiento]
1. El cable de poder no debe presentar daños.
2. Antes de usar el dispositivo, verifique que la potencia nominal del tomacorriente coincida
con los requerimientos de la tabla de arriba y que esté equipado con un dispositivo de
conexión a tierra seguro. De lo contrario, reemplace el tomacorriente por uno adecuado.
[Instrucciones de funcionamiento]
<Encendido/Apagado>: Conecte el dispositivo a la toma de corriente y escuchará un
pitido (“bip”), presione el botón de encendido/apagado “ ” para ingresar a la modali-
dad de calefacción rápida. Para apagar, vuelva a presionar “ ”.
<Selección de velocidad de calefacción>: Presione el botón “MODE para seleccionar una de las
modalidades de funcionamiento disponibles: velocidad alta, media, baja o ahorro de energía.
<Ajuste de la temperatura>: Para ajustar la temperatura de las modalidades de
funcionamiento, presione “ ” o “ ”. Para realizar el ajuste, presione de manera
prolongada “ ”o “ ”para ajustar de manera rápida. Si no realiza una operación
dentro de 5s, la interfaz de ajuste de temperatura se cerrará. El calefactor funciona en
base a los ajustes de fábrica cuando la información de la memoria sea eliminada para
su primer uso o autoinspección del dispositivo completo. En los ajustes de fábrica, la
temperatura de calefacción rápida es de 95°F.
<Encender el dispositivo a una hora determinada>: Presione una vez el botón “ ”
durante la modalidad de espera para ingresar a la interfaz de ajuste de hora de
encendido. Presione el botón “ ” o “ ” para ajustar la hora de encendido. Presione
de manera prolongada el botón “ ”o“ ”para ajustar de manera rápida la hora de
encendido. Una vez que el tiempo se haya cumplido, la unidad emitirá un sonido largo.
<Apagar el dispositivo a una hora determinada>: Presione una vez el botón “ ”
durante la modalidad de espera para ingresar a la interfaz de ajuste de hora de
apagado. Presione el botón“ ” o“ ”para ajustar la hora de apagado. Presione de
manera prolongada el botón“ ”o “ ” para ajustar de manera rápida la hora de
apagado. Una vez que el tiempo se haya cumplido, la unidad se cerrará.
13
2. Si la función de bloqueo para niños está funcionando en la modalidad de
espera, todas las otras operaciones serán inválidas.
(con excepción de la operación para desbloquear la unidad).
<Función de memoria>: Cuando el dispositivo sea apagado de manera normal,
volverá a funcionar con la última modalidad programada antes de apagarlo una
vez que lo vuelva a encender. Cuando el aparato sea apagado y cerrado, también
volverá a funcionar en base a la última modalidad programada antes de ser
apagado.
Observación: Después de un apagón, la función de bloqueo para niños no es
memorizada.
<Función de seguridad>: Si la temperatura interior (Th) excede los 122°F, todos
los comandos de salida serán finalizados, el dispositivo emitirá un sonido de
urgencia 10 veces y la pantalla digital visualizará “FF” con 75s por 1Hz, ya sea se
esté en la modalidad de espera o encendido. Incluso si la temperatura ambiental
es inferior a 122°F, la ejecución u operación no puede ser recuperada mientras
exista esta protección. La única manera de hacerlo es desconectando el cable de
poder y luego volver a encender la unidad.
[Detener]
Apague el calefactor y desconéctelo del tomacorriente.
[Movimiento del calefactor]
Para mover el calefactor, apáguelo y desconéctelo del tomacorriente, luego
empuje la unidad para hacer que las ruedas giren.
14
: Disminución de temperature / tiempo
: Botón ON/OFF
: Aumento de temperature / tiempo
: Botón temporizador
: Botón de modalidad
[Observación]
Para usar la unidad por primera vez o para reinsertar el enchufe, preste atención y
revise si este último y el tomacorriente encajan bien.
<Método de inspección>
Inserte el enchufe en el tomacorriente e inicie el uso de la unidad, después de
media hora apague y desconecte. Revise si las clavijas del enchufe están calien-
tes, remplace el tomacorriente si esto es así (más de 122 ), de esa manera
evitará quemar el enchufe o incluso incendios debido al sobrecalentamiento del
tomacorriente debido al mal contacto.
USO DEL CONTROL REMOTO
INSTRUCCIONES DE LAS BATERÍAS (incluidas)
Las instrucciones de uso del control remoto son básicamente las mismas que para el panel
de control de la unidad. El control remoto no puede controlar la clave de combinación.
Botón Encendido/Espera
Botón de modalidad
Aumento de temperature/tiempo
Disminución de temperature/tiempo
Botón de tiempo
1. Deslice la cubierta del compartimiento de
baterías hacia abajo y retírela.
2. Utilice 1 batería de litio “CR2032” (incluida)
3. Inserte las baterías, asegúrese de que los
terminales positivos estén apuntando en la
dirección correcta.
4. Vuelva a colocar la cubierta del compartimiento.
CARACTERÍSTICAS DE SEGURIDAD
El calentador está equipado con un dispositivo de protección contra
sobrecalentamiento, lo que hace que la unidad deje de funcionar en caso de que
la temperatura interna exceda la temperatura operativa normal.
Si se apaga el calentador,
1. Apague y desenchufe el calentador.
2. Espere durante al menos 10 minutos hasta que se refrigere el calentador.
3. Enchufe el calentador en el tomacorriente y luego enciéndalo.
Nota: Este calentador incluye una característica de protección contra vuelco, lo
que apaga el calentador en caso de que se vuelque. Si el calentador se vuelca en
cualquier momento, recoloque el calentador en la posición vertical (las ruedas en
la parte inferior, y los controles en la parte superior). El calentador rearrancará
para seguir su funcionamiento normal.
CUIDADO Y LIMPIEZA
1. Siempre retire el enchufe desde el tomacorriente y permita refrigerar el
calentador. Limpie el calentador con un paño suave y húmedo. No utilice los
detergentes ni abrasivos.
2. Si no utiliza el calentador durante un periodo de tiempo determinado, enrosque
el cable alrededor del soporte y guárdelo en un lugar seco.
3. En caso de mal funcionamiento, no intente reparar el calentador por si mismo.
Podría resultar en peligros de incendios o descargas eléctricas.
15
ESPECIFICACIONES
Este calentador está diseñado para el calentamiento de espacios finitos o como
una fuente de calor complementaria. No puede reemplazar la fuente de calor
principal en el invierno.
Tensión Frecuencia Corriente
máx.
Salida BTU
120 V AC 60 Hz 1500 W 12.5 A 5120
Potencia en
vatios
ADVERTENCIA SOBRE LAS BATERÍAS
1. No arroje las baterías al fuego, pues podrían estallar o
filtrar líquidos.
2. No mezcle baterías antiguas con baterías nuevas.
3. No mezcle baterías alcalinas, estándar (carbono-cinc),
o recargables (ni-cad)
4. Las baterías no recargables no deben ser recargadas.
5. Las baterías deben ser insertadas según la polaridad.
6. Las baterías agotadas deben ser retiradas del producto.
7. Las baterías deben ser retiradas del control remoto antes de ser desechado y
deben ser eliminadas de manera segura.
SOLUCIÓN DE PROBLEMAS
Problemaroblem Causa Solution
1. No hay alimentación.
2. La temperatura configurada es
inferior a la temperatura ambiente
actual.
Ajuste la temperatura deseada superior a la temperatura actual
para rearrancar el calentador.
3. La temperatura ambiente ha
alcanzado la temperatura
configurada en el termostato.
La habitación no es lo
suficientemente caliente.T 3. La temperatura configurada es
demasiado baja.
4. El ajuste de potencia es demasiado
bajo.
Su calentador se apaga de
repente o no puede funcionar.
Por favor, no intente abrir o reparar el calentador por si
mismo. Si lo hace, podría anular la garantía y causar daños o lesiones
personales.
4. Uno de los dispositivos de
protección de seguridad se ha
activado para prevenir el
sobrecalentamiento.
Asegure que esté enchufado y el tomacorriente eléctrico esté
funcionando.
1. Esto es normal. El calentador rearrancará una vez que la
temperatura ambiente sea inferior a la temperatura configurada.
2. Ajuste el termostato si no es configurado a la temperatura
deseada.
1. Coloque el calentador en la posición vertical.
2. Verifique si hay alguna obstrucción. Si la encuentra, apague el
calentador.
3. Desenchufe el calentador y espere durante al menos 10 minutos
para que se refrigere.
4. Retire la obstrucción cuidadosamente. Enchufe el calentador y
rearránquelo según lo descrito en la sección OPERACIÓN.
5. Si sigue observando el mismo problema, retire el enchufe desde
el tomacorriente y tenga el aparato verificado por un técnico de
servicio autorizado.
1. La habitación es demasiado grande.
2. La ventana está abierta.
1. Encienda la fuente de calor principal de la habitación.
2. Utilice más calentadores portátiles.
3. Cierre la ventana.
4. Aumente el ajuste de temperatura.
5. Elija el ajuste de potencia superior.
16
SERVICIO Y APOYO
En caso de un reclamo de garantía o requerir el servicio para este calentador, contáctenos de la
siguiente forma:
Número Gratuito: 866 646 4332
Envíanos un email a: [email protected]
Si tiene preguntas o comentarios, escriba a:
Centro de Atención al Cliente de Midea America Corp
Para su registro, grape su recibo de venta en este manual y registre lo siguiente:
FECHA DE COMPRA:
________________________________
LUGAR DE COMPRA:
________
________________________
(GRAPE EL RECIBO DE VENTA AQUÍ)
17
5 Sylvan Way, Suite 100
Parsippany, NJ 07054
NOTA: SE REQUIERE LA PRUEBA DE COMPRA PARA
TODOS LOS RECLAMOS DE GARANTÍA
IMPRESO EN CHINA
GARANTÍA LIMITADA DE UN (1) AÑO
Por favor, lea todas las instrucciones antes de intentar utilizar este producto.
Mal uso, negligencia, daños físicos o accidentes.
Falta de mantenimiento (vea las instrucciones de mantenimiento adecuado).
Reparación por alguna parte no autorizada durante el período de garantía.
Daños causados por la conexión a una tensión de entrada inadecuada (vea la
etiqueta de especificación en su calentador).
PELONIS garantiza, como se limita en este documento, al comprador original que cada nuevo
Producto PELONIS no presentará ningún defecto en cuanto a materiales y mano de obra durante
un período de un (1) año a partir de la fecha de compra original. Esta garantía de un (1) año se
limita a los componentes de calentamiento, motor y placa de circuitos de control eléctrico.
En caso de mal funcionamiento o fallo de su Producto PELONIS, simplemente
entregue o envíe el calentador a PELONIS, con el franqueo previamente pagado junto
con la PRUEBA DE COMPRA, dentro del período de garantía de un (1) año. PELONIS
se reserva el derecho a inspeccionar la parte o partes reclamadas defectuosas para
determinar si la queja de defecto o de mal funcionamiento está cubierta por esta
garantía. PELONIS deberá, dentro de los sesenta (60) días tras recibir el producto, a
su opción, reparar y/o reemplazar la parte o partes defectuosas, sin gasto alguno. Esta
garantía sólo cubrirá los defectos derivados del uso normal. PELONIS no asume
ninguna responsabilidad si se falla el producto durante el período de garantía por
motivos de:
PELONIS no ofrece ninguna garantía o representación, ya sea expresa o implícita,
excepto las contempladas en este documento. Ningún representante o distribuidor
está autorizado a asumir ninguna otra responsabilidad en cuanto al Producto. La
garantía implícita otorgada en virtud de las leyes estatales, incluyendo garantías
de comerciabilidad e idoneidad para un fin determinado, estárán limitadas a la
duración si la duración de la garantía expresa lo otorga como sigue. PELONIS no
será responsable bajo ningún caso de los daños directos, indirectos, especiales o
consecuentes.
Algunos estados no permiten limitaciones sobre la duración de una garantía implícita,
y/o las limitaciones o exclusiones mencionadas podrían no aplicarse a usted. Esta
garantía le confiere derechos legales específicos, y es posible que usted goce de
otros derechos, los cuales pueden variar de estado a estado.
18
  • Page 1 1
  • Page 2 2
  • Page 3 3
  • Page 4 4
  • Page 5 5
  • Page 6 6
  • Page 7 7
  • Page 8 8
  • Page 9 9
  • Page 10 10
  • Page 11 11
  • Page 12 12
  • Page 13 13
  • Page 14 14
  • Page 15 15
  • Page 16 16
  • Page 17 17
  • Page 18 18
  • Page 19 19
  • Page 20 20

Pelonis HO-0280 Manual de usuario

Categoría
Calentadores espaciales
Tipo
Manual de usuario

El Pelonis HO-0280 es un calentador de aceite digital con una potencia de 1500 vatios y una frecuencia de 60 hertz, ideal para calentar habitaciones de tamaño mediano a grande. Cuenta con cuatro configuraciones de calor para personalizar el nivel de calor deseado y un termostato ajustable para mantener una temperatura constante. También incluye un temporizador de 24 horas para programar el encendido y apagado automático, así como una función de bloqueo para niños para evitar cambios accidentales en la configuración. Además, es portátil y fácil de mover gracias a sus cuatro ruedas giratorias.

en otros idiomas