La página se está cargando...

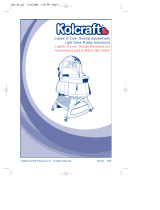
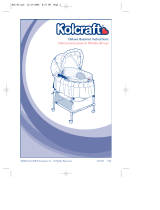
LIGHT VIBES™ ROCKING BASSINET INSTRUCTIONS
INSTRUCCIONES PARA EL MOISÉS MECEDOR LIGHT VIBES™
!
!
!
!
READ ALL INSTRUCTIONS BEFORE ASSEMBLY AND USE OF PRODUCT.
Failure to follow warnings and instructions could result in injury or death to your child.
Make sure bassinet is fully assembled and secure before use.
Keep these instructions for future reference.
LEA TODAS LAS INSTRUCCIONES ANTES DE ENSAMBLAR Y USAR ESTE PRODUCTO.
El no cumplir con las instrucciones y las advertencias podria causar lesiones graves
y hasta la muerte. Asegúrese de que el moisés está completamente ensamblado y
asegurado antes de usar. Guarde estas instrucciones para referencia futura.
-1-
B10-R3 1/01
WARNING
ADVERTENCIA
• Stop using bassinet when your infant is 3 months old or weighs 15 lbs. (6.8 kg.)
• To prevent injury from falls, DO NOT use bassinet when child can roll over or push up on
hands and knees.
• Accidents can happen quickly, so check your child frequently.
• AVOID SUFFOCATION HAZARDS: Use only bassinet pad and sheet provided by Kolcraft.
Make sure the fitted sheet securely tucks at least 2” (5 cm.) under the bassinet pad on all sides
to avoid entanglement. Never use additional mattresses, padding, or sheets.
• AVOID STRANGULATION HAZARDS: DO NOT place items with a string around child’s
neck (pacifier cords, hood strings, etc.). DO NOT allow strings to hang into bassinet, including
blind cords or suspended toys other than what is provided with this product.
• DO NOT place more than one infant in bassinet.
• DO NOT carry or move bassinet with child in it.
• DO NOT use around pets or other children without wheel locks on.
• DO NOT use in a motor vehicle.
• NEVER use near stairs or steps.
• El moisés debe dejar de usarse cuando el bebé cumpla los tres meses de edad o sobrepase
15 lbs. (6.8 kg.) de peso.
• Para evitar lesiones causadas por caídas, NO UTILIZE el moisés una vez que el bebé pueda
darse vuelta o apoyarse de manos y rodillas.
• Los accidentes pueden suceder en un instante. Vigile a su bebé con frecuencia.
• EVITE PELIGROS DE ASFIXIA: Use únicamente el colchón y la sábana provista por
Kolcraft. Asegúrese de que la sábana ceñida se encuentre bien ajustada por lo menos
2” (5 cm.) por debajo del colchón a todo su alrededor para evitar que el bebé quede enredado
accidentalmente. Nunca use colchones, colchonetas o sábanas extras.
• EVITE PELIGROS DE ESTRANGULACIÓN: NO COLOQUE objetos con cordones o
cintas alrededor del cuello del bebé (chupetas, gorros, capuchas, sonajas, etc. con cintas).
NO PERMITA que cuelguen objetos sobre o cerca del moisés, como los cordones de las
persianas o los juguetes suspendidos, solamente lo que es incluido con el producto.
• NO coloque más de un bebé en el moisés.
• NO transporte o mueva el moisés con el bebé adentro.
• NO use el moisés cerca de animales domésticos o de otros niños sin asegurar los frenos.
• NO use el moisés dentro de un vehículo de motor.
• NUNCA use el moisés cerca de escaleras o escalones.
B10-R3
© 2000 Kolcraft
®
Enterprises, Inc. All rights reserved.

D.
1. Place mesh basket onto frame.
2.Tie ribbons as shown to secure
basket.
3. Snap each of the four basket
straps around upper crossbars.
4. Fasten the lower rows of snaps
around lower crossbars.
TO ASSEMBLE BASSINET STAND:
A. Insert long straight tubes into
plastic sleeves on rocker base
until they “click” into place.
PARA ENSAMBLAR LA BASE DEL MOISÉS:
A. Inserte los tubos largos y
derechos en las mangas plásticas
de la base mecedora hasta que se
oiga que hayan entrado en su
lugar.
C. Insert bassinet supports into
frame base until they “click”
into place.
D.
1. Coloque la canasta en el marco.
2.Amarre los listones como se
muestra para asegurar la
canasta.
3.Asegure cada una de las cuatro
correas elásticas de la canasta
alrededor de la barra superior.
4.Asegure la línea de broches
inferiores alrededor de la barra
inferior.
C. Inserte los soportes del moisés
en el marco de la base hasta
que se oiga que hayan entrado
en su lugar.
-2-
TO ASSEMBLE BASSINET:
A. Remove pad from bassinet.
B. Clip both supports into the
hooks on the floorboard.
C. Slide canopy brackets through
bassinet cover slits.
D. Fasten all the snaps on bassinet
cover to floorboard.
Caution: Do not use this product
if all snaps cannot be completely
fasten!
E. Replace mattress pad in basket,
making sure mattress is flat and
firmly in place.
rocker base
base mecedora
PARA ENSAMBLAR EL MOISÉS:
A. Quite el colchoncito del
moisés.
B. Asegure los dos soportes a los
ganchos de la tabla de la base.
C. Pase los soportes del toldo por
los cortes de la cubierta del
moisés.
D. Asegure todos los broches de
la cubierta del moisés a la tabla
de la base.
Precaución:
No use este producto
si los broches no estan
completamente asegurados.
E. Ponga el colchoncito dentro de
la canasta. Presione el colchoncito
asegurándose que esté plano y se
encuentre fijo en su sitio.
1
2
E. Insert the two curved
support wires onto the bassinet
frame until they “click” into
place.
Important: Curved supports
must face outward.
Note: Do not use without
curved supports attached to
base.
E. Inserte los dos soportes curvos
de en el marco del moisés hasta
que se oiga que hayan entrado
en su sitio.
Importante: Los soportes
curvos deben estar orientados
hacia afuera.
Nota: No se use sin antes
tener los soportes curvos bien
afianzados en la base.
hooks
ganchos
canopy brackets
soportes del toldo
B10-R3 1/01
A
D
C
E
B.
1.Arrange Straight Tube and Curve
Supports as show.
2. Snap Curve Supports into Straight
Tube to create Bassinet Support.
Repeat for other Bassinet Support.
B.
1.Arme el tubo recto y los apoyos
curvados según se muestra.
2. Introduzca a presión los apoyos
curvados dentro del tubo recto
para crear el apoyo del moisés.
Repita para el otro apoyo del
moisés.
B

TO ATTACH
VIBRATING
MECHANISM:
(SELECTED MODELS ONLY
)
P
ARA SUJETAR EL MECANISMO VIBRANTE:
(M
ODELOS SELECTOS)
3
A. Para insertar las pilas, use un
destornillador con punta de cruz
para quitar la tapa del
compartimiento de pilas.
Reemplace las pilas como se ve
en el dibujo. Requiere 4 “AA”
pilas (No Incluidas) Vuelva
asegurar la tapa.
B. Deslice el mecanismo vibrante
por las guías del soporte del
moisés hasta que entre en su
sitio, como se ve en el dibujo.
C. Para quitarlo, deslice el
mecanismo vibrante hacia arriba
y sepárelo del moisés.
A. To insert batteries, use a phillips
head screwdriver to unfasten
battery cover. Replace batteries
as shown. Requires 4 “AA”
batteries (Not Included). Secure
battery cover.
B. Slide vibrating mechanism over
bassinet bracket guides as shown
until it snaps in place.
C. To remove, slide vibrating
mechanism up and off of bassinet.
F. Place bassinet into curve
support units on bassinet stand.
G. Secure the bassinet by
snapping each of the four straps
around the bassinet base.
F. Coloque la canasta en los
soportes curvos del marco.
G. Asegure el moisés
abrochando cada una de
las cuatro correas alrededor de
la base del marco.
curve support units
soportes curvos
B10-R3 1/01
-3-
TO ATTACH CANOPY:
A. Attach canopy as shown.
B. Pull back canopy fabric over
bassinet frame.
C. Mobile included (no assembly
required) on selected models
only.
PARA SUJETAR EL TOLDO:
A. Sujete el toldo como se
muestra.
B. Jale la tela del toldo sobre el
marco del moisés.
C. Se incluye mobil (no se necesita
ensamblaje) en ciertos modelos.
4
d new batteries should not
ed. Different type batteries
not be mixed. Remove bat-
before storing the bassinet.
CAUTION
!
No mezcle pilas nuevas y
usadas. No mezcle pilas de
tipo diferente. Saque las pilas
antes de guardar el moisés.
PRECAUCIÓN
! !
AA
BB
C
BC
A
This mobile is intended for visual
stimulation and is not intended to
be grasped by the child. Do not
add additional strings or strap to
attach to the bassinet.
CAUTION
! !
El propósito de este móvil es
proprcionar un estímulo visual.
No debe estar al alcance del niño.
No añada ataduras o cintas
extras al moisés.
PRECAUCIÓN
!
!
Caution: Fitted bassinet sheet
should securely wrap at least 2"
beneath entire pad to reduce
chance of entanglement.
Precaución: La sábana ceñida del
moisés debe quedar bien sujeta 5
cm. (2 pulgadas) por debajo y
alrededor del colchón para
disminuir el riesgo de que el bebé
quede enredado.

While pressing tab in with
thumb, rotate tab until
wheel is down and “clicks”
into place.
A. Alinee las ruedas con la base,
como se muestra.
B. Empuje doblando las ruedas
hacia arriba hasta que se oiga
que hayan entrado en su sitio.
Nota: Las ruedas deben estar
alineadas con el marco, como se
muestra. Cuando las ruedas
están completamente
retractadas no son visibles
desde los lados.
-4-
Mientras oprime la tabilla con el
pulgar, gire la tabilla hasta que la
rueda esté hacia abajo y encaje
en su lugar con un "clic".
B10-R3 1/01
A. Push levers on wheels down to
lock.
B. Pull levers up to unlock.
A. Oprima las palancas en las
ruedas, hacia abajo para
asegurarlas.
B. Jale las palancas hacia arriba
para soltarlas.
TO USE THE BASSINET WITH WHEELS:
P
ARA UTILIZAR EL MOISÉS CON LAS
RUEDAS
:
P
ARA USAR LOS FRENOS
:
T
O USE BRAKES:
T
O USE THE ROCKING BASE:
P
ARA USAR LA
BASE M
ECEDORA:
WARNING
AVOID ACCIDENTS.D
O NOT USE THE
BASSINET WITH THE WHEELS UNLOCKED
AROUND STAIRS OR OTHER CHILDREN.
AVERTENCIA
EVITE ACCIDENTES
.NO USE EL MOISÉS
CERCA DE ESCALERAS O DE OTROS
NIÑOS SIN PONER LOS FRENOS
.
!
!
7
6
5
TO USE VIBRATING MECHANISM
WITH
CHECKLIGHT:
P
ARA USAR EL MECANISMO VIBRANTE
CON LA LUZ DE VERIFICACIÓN
:
8
A. Align wheels with rocker base
as shown.
B. Fold wheels up until they “click”
into place.
Note: The wheel must be
aligned with frame, as shown,
before folding them into the
frame. When the wheels are
fully retracted, they will not be
visible from the side.
A. Press “ON” button to activate
vibrating motion.
B. Press “OFF” button to turn off
vibrating motion.
C. Press “light bulb” button to turn
on light while checking on child.
Note: Checklight only remains
on while button is held down.
A. Oprima el botón “ON” para
activar el movimiento de
vibración.
B. Oprima el botón “OFF” para
detener el movimiento de
vibración.
C. Oprima el botón con el
símbolo de una “bombilla” para
prender la luz cuando se quiere
averiguar como está el niño.
Nota: La luz de verificación se
mantiene prendida sólo mientras
uno sigue oprimiendo el botón.
A
C
B

A. Unsnap the bassinet fabric cover side straps from the
bassinet stand.
B. Unsnap bassinet cover from bassinet floorboard.
C. Hand wash bassinet cover with water and mild soap.
D. Line Dry. Do not dry this bassinet cover in clothes
dryer! This may shrink the cover!
Caution: For the safety of your child, it is vital that the
bassinet cover is re-mounted completely and correctly.To
properly re-mount the bassinet cover, follow the instructions
located in the "T
O ASSEMBLE B
ASSINET” section.
A. Desabroche las correas laterales de la cubierta de tela
de la base del moisés.
B. Desabroche la cubierta del moisés de la tabla de la
base.
C. Lave de mano la cubierta del moisés con agua y jabón
suave.
D. Tiéndala a secar. No ponga a secar la cubierta del
moisés en la secudora. Esto puede encoger la
cubierta.
Precaución: Para la seguridad de sus niños, es de vital
importancia que la cubierta del moisés sea vuelta a instalar
completamente y en la forma correcta. Para volver ainstalar la
cubierta del moisés, siga las instrucciones quese encuentran en la
sección “Para Ensamblar el Moisés”.
-5-
M
ODEL
N
UMBER
:
N
ÚMERO DE
M
ODELO
:
D
ATE OF
M
ANUFACTURER
:
F
ECHA DE FABRICACIÓN
:
D
ATE OF
P
URCHASE
:
F
ECHA DE COMPRA
:
© 2000 Kolcraft
®
Enterprises, Inc. All rights reserved.
Derechos Reservados.
Once in while, we are less than perfect and one of our products reaches a
customer with a problem. In most cases, we can solve your problem with
replacement parts. Please contact us before you return one of our products
to the store. Once a product is returned, it cannot be resold. The materials
and the energy used to make it are wasted.
Please fill in the information in the space provided and attach a copy of your
purchase receipt.You will need this information to obtain warranty service.
You can find Model Number and Date of Manufacture on a sticker located
on the Bassinet leg.
Ocasionalmente, no logramos la perfección y uno de nuestros productos presenta
algún problema al llegar al cliente. En la mayor parte de los casos, podemos resolver
el problema con piezas de reemplazo. Sírvase contactarnos antes de devolver uno
de nuestros productos a la tienda. Una vez que se devuelve un
producto, no se puede volver a vender. Se desperdician los materiales y la energía
que se usó en su fabricación.
Por favor escriba la información en el espacio provisto y adjunte una copia de su
recibo de compra. Usted necesitará esta información para obtener los servicios
incluidos en la garantía.
Usted encontrará el Número de Modelo y la Fecha de Fabricación en una etiqueta
situada en la pata del moisés.
Garant
í
a Limitada :
Kolcraft
®
warrants this product to be free of defects in materials and
workmanship, as follows: For a period of ONE YEAR from the date of
purchase, Kolcraft will repair or replace, at its option, the defective product.
If you have a problem or are not satisfied with this product, please contact
the Consumer Service Department at Kolcraft.
REPAIR OR REPLACEMENT AS PROVIDED UNDER THIS WARRANTY IS
THE EXCLUSIVE REMEDY OF THE CONSUMER. KOLCRAFT SHALL NOT
BE LIABLE FOR ANY INCIDENTAL OR CONSEQUENTIAL DAMAGES FOR
BREACH OF ANY EXPRESS OR IMPLIED WARRANTY ON THIS PRODUCT,
EXCEPT TO THE EXTENT REQUIRED BY APPLICABLE LAW. ANY IMPLIED
WARRANTY OF MERCHANTABILITY OR FITNESS FOR A PARTICULAR
PURPOSE ON THIS PRODUCT IS LIMITED TO THE DURATION OF THIS
WARRANTY.
Some states do not allow the exclusion or limitation of warranties
set forth above, so the above exclusions may not apply to you. This
warranty gives you specific legal rights, and you may also have other rights
which vary from state to state.We sincerely thank you for your purchase of
this Kolcraft product.
To obtain warranty service, please call Kolcraft’s Consumer Service
Department at 1-800-453-7673 in US, 1-910-944-9345 outside US.
If the product is returned to Kolcraft’s Consumer Service Department for
repair or replacement, it must be shipped prepaid and adequately insured.
For further information visit www.kolcraft.com
Kolcraft
®
garantiza que este producto estará libre de defectos en
materiales y fabricación de la siguiente manera: Por un período de UN
AÑO después de la fecha de compra, Kolcraft reparará o reemplazará, a
su opción, el producto defectuoso. Si usted tiene un problema o no está
satisfecho con este producto, por favor diríjase al Departamento de
Servicio al Consumidor de Kolcraft.
LA REPARACIÓN O EL REEMPLAZO SEGÚN SE DISPONE EN ESTA
GARANTÍA ES EL REMEDIO EXCLUSIVO DE CONSUMIDOR. KOLCRAFT
NO SE HARÁ RESPONSABLE DE NINGÚN DAÑO INCIDENTAL O
EMERGENTE POR VIOLACIÓN DE CUALQUIER GARANTÍA EXPRESA O
IMPLÍCITA DE ESTE PRODUCTO, SALVO EN LA MEDIDA REQUERIDA
POR LA LEY APLICABLE. CUALQUIER GARANTÍA IMPLÍCITA DE
COMERCIABILIDAD O IDONEIDAD PARA UN FIN EN PARTICULAR DE
ESTE PRODUCTO ESTÁ LIMITADA EN DURACIÓN AL TÉRMINO DE
ESTA GARANTÍA.
Algunos estados no permiten la exclusión o limitación de garantías según
se dispone anteriormente, de manera que es posible que las antedichas
exclusiones no sean aplicables a usted. Esta garantía le otorga derechos
legales específicos y es posible que también disponga de otros derechos,
los cuales pueden variar de un estado a otro. Le agradecemos
sinceramente por haber comprado este producto Kolcraft.
Para obtener servicio de garantía, llame al Departamento de Servicio al
Consumidor de Kolcraft al 1-800-453-7673 en Estados Unidos; fuera de
Estados Unidos: 1-910-944-9345.
Si el producto se devuelve al Departamento de Servicio al Consumidor de
Kolcraft para ser arreglado o reemplazado, debe mandarse con el flete
pagado y debidamente asegurado.
Para mayor información visítenos en www.kolcraft.com
Personal Record Card
Tarjeta de Registro Personal
Limited Warranty:
Care and Cleaning: Limpieza y Cuidado:
11
10
9
Please direct any comments or questions to:
Favor de remitir cualquier comentario o pregunta a:
Kolcraft
®
Enterprises, Inc. Consumer Service Department
10832 NC Highway 211East
Aberdeen, NC 28315
1-800-453-7673 in US, 1-910-944-9345 outside US
Eastern Standard Time, 8 am-5 pm // Hora del Este, de 8 am a 5 pm
B10-R3 1/01
/