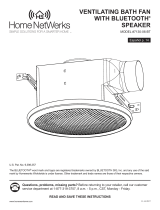
1) Si el ventilador está instalado, retire la rejilla apretando los resortes de
montaje y tirando de la rejilla hacia abajo de la caja del ventilador.
Desconecte los conectores para quitar la rejilla de la caja del
ventilador, como se muestra en la Figura 1.
2) Tenga en cuenta la posición del altavoz y cómo están instalados los
cables. Desea que su instalación se vea exactamente igual cuando
se complete.
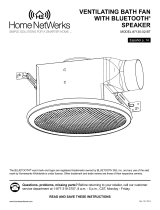
3) Usando un destornillador, retire los 8 tornillos que sujetan el altavoz en
su lugar, como muestra en la gura 2. Conserve los tornillos.
4) Desatornille los dos tornillos del soporte a lo largo del enrutamiento de
los cables. Quitar este soporte permitirá quitar los cables de la rejilla.
Conserve los tornillos y el soporte para reinstalarlos más tarde.
5) Deslice suavemente el altavoz y el cableado adjunto fuera de
la rejilla.
6) Inserte el nuevo altavoz en la rejilla. Asegúrese de que el cable del
altavoz esté alineado con el soporte para que el cable pueda
colocarse debajo.
7) Alinee los oricios de los tornillos. Vuelva a instalar los tornillos que
quitó en el paso 3.
8) Empuje el cable del altavoz debajo del soporte y vuelva a colocar los
dos tornillos restantes.
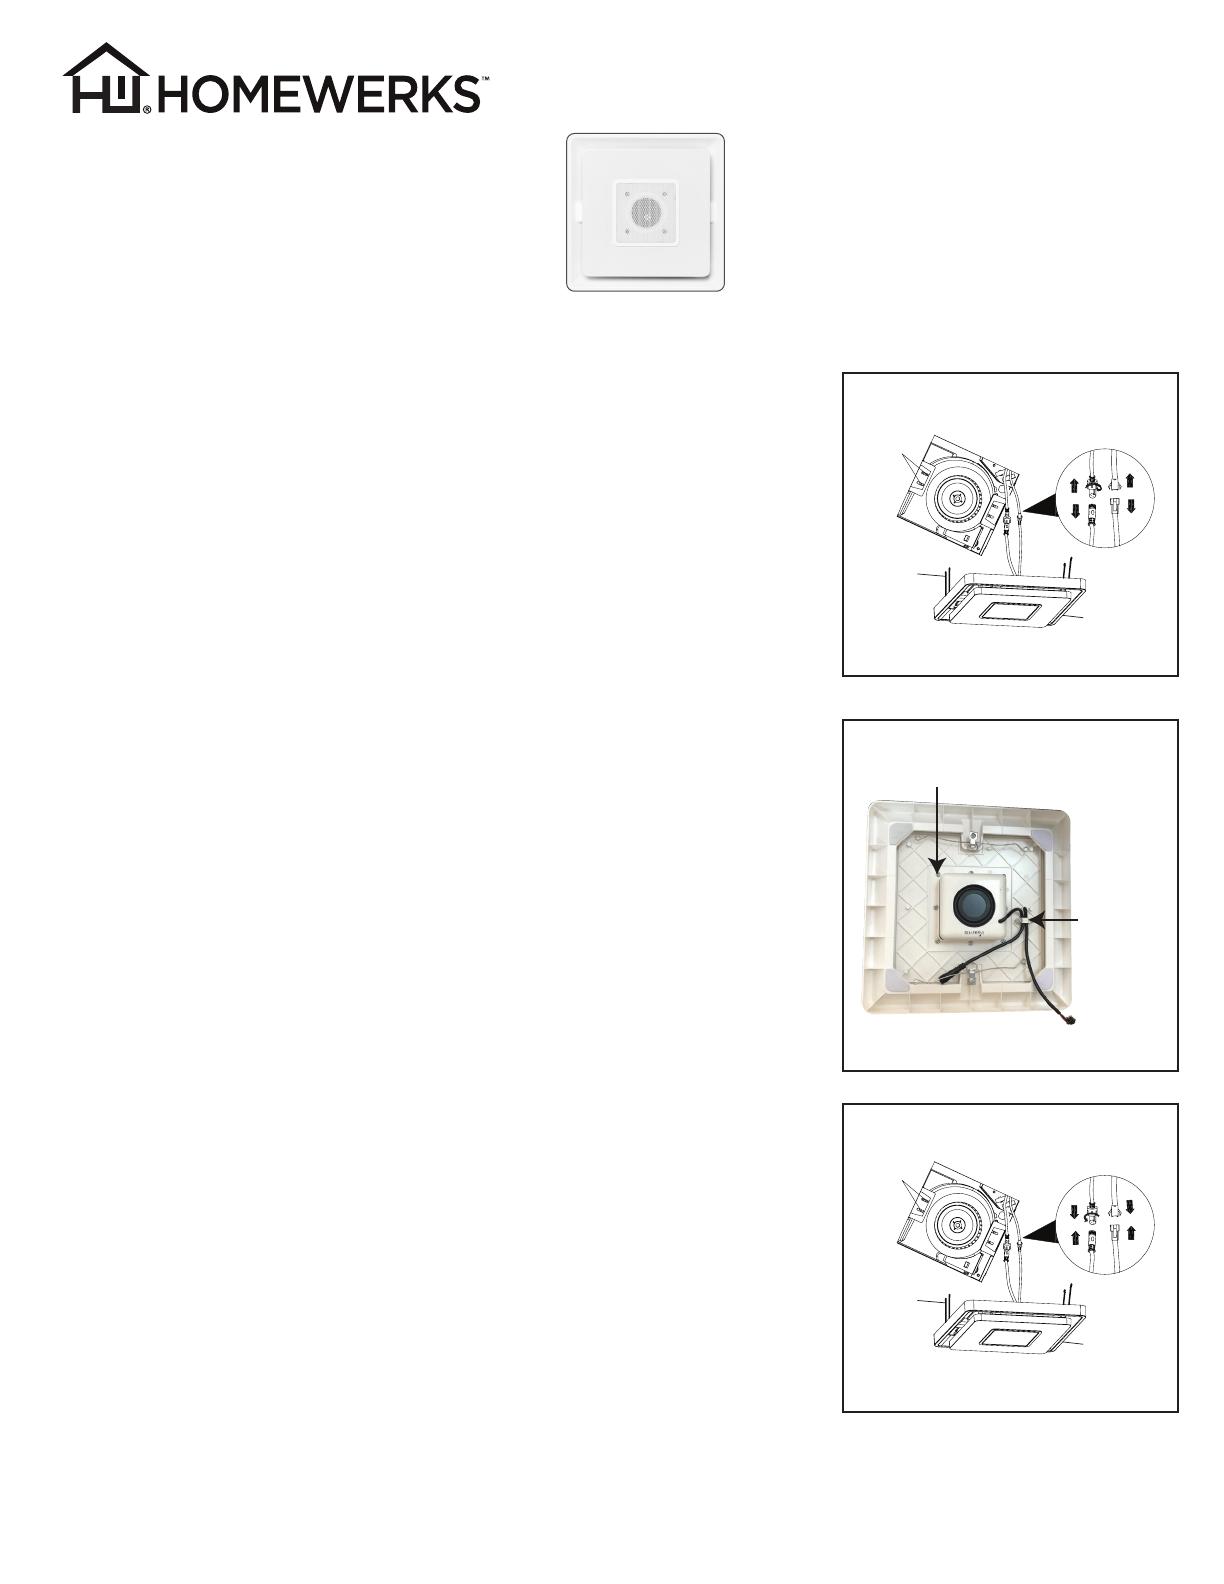
9) Una los conectores para el altavoz Bluetooth® y la luz LED de la caja
del ventilador a la rejilla, como se muestra en la Figura 3. Sujete la
rejilla presionando los resortes de montaje e insértelos en las ranuras
rectangulares estrechas en la caja del ventilador.
10) Apague la fuente de alimentación. Pruebe la unidad.
Si no funciona correctamente, comuníquese con el servicio de
atención al cliente al 1-877-319-3757 o envíe un mensaje de correo
Rejilla 7130-33-BT
Altavoz modelo BFP-272-V5.0
para ventilador de baño modelo 7130-33-BT
Homewerks.com © 2021 Homewerks Worldwide, LLC REV.: 9/1/21
Tornillos de altavoz
Figura 2
Soporte
de
cableado
Desconectar el cableado
Figura 1
Ranuras
de la caja
Rejilla
Conectores
Resortes
de montaje
Vuelva a conectar el cableado
Figura 3
Ranuras
de la caja
Rejilla
Conectores
Resortes
de montaje
Kit de Altavoz Bluetooth
®
de Repuesto
Instrucciones de Instalación
Herramientas necesarias: Destornillador de estrella (+)