La página se está cargando...

73502_V1_04/12/2020
FR
EN
ES
IT
02-15
16-28
29-41
42-55
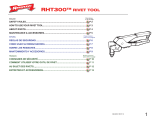
ADAPTATEUR RIVETS AVEUGLES 50kN POUR RIVETEUSE 10T
50KN BLIND RIVET ADAPTER FOR 10T RIVETER
ADAPTADOR REMACHES CIEGOS 50KN PARA REMACHADORA 10T
ADATTATORE RIVETTI CIECHI 50KN PER RIVETTATRICE 10T
Notice Originale

2
ADAPTATEUR RIVETS AVEUGLES 50KN POUR RIVETEUSE 10T
FR
Notice Originale
DESCRIPTION
L’adaptateur pour rivets aveugles est compatible avec les riveteuses GYSPRESS 8T/10T et GYSPRESS 8T PUSH PULL. Sa force de
rivetage est de 50 kN. Il permet de poser des rivets aveugles de diamètre 4.0 à 7.8 mm pour l’aluminium et de 4.0 à 6.4 mm pour
l’acier ainsi que des écrous et goujons a sertir.
CONSIGNES DE SÉCURITÉ
• L’adaptateur 50KN ne doit pas servir à faire autre chose que poser des rivets aveugles ainsi que des écrous et
goujons a sertir.
• Port obligatoire : lunettes de protection, protection anti-bruit, gants de sécurité.Ne jamais diriger le nez de l’outil
vers soi ou vers quelqu’un d’autre.
• Utiliser obligatoirement des rivets de pose aveugle suivant les spécications.
• Monter l’embout en fonction de la taille du rivet. Ne jamais forcer pour placer la queue de rivet dans l’embout.
Ne jamais utiliser un embout plus large que la queue de rivet.
• Vérier que le bridage de la pièce à riveter soit correct.
• Maintenir fermement la riveteuse jusqu’à ce que la coupure de la queue de rivet soit achevée et éjectée. Dans le
cas contraire relâcher la gâchette puis reprendre la traction en appuyant de nouveau sur la gâchette,
• Débrancher systématiquement la machine après chaque utilisation et changement d’embout de rivetage.
• Conserver précieusement ce manuel d’utilisation. En cas de perte, contactez-nous.
ENVIRONNEMENT
Ce matériel doit être utilisé uniquement pour faire des opérations de rivetage dans les limites indiquées par la plaque signalétique
et/ou le manuel. Il faut respecter les directives relatives à la sécurité. En cas d’utilisation inadéquate ou dangereuse, le fabricant ne
pourra être tenu responsable.
L’installation doit être utilisée dans un local sans poussière, ni acide, ni gaz inammable ou autres substances corrosives de même
pour son stockage. S’assurer d’une circulation d’air lors de l’utilisation.
Plages de température :
Utilisation entre -10 et +40°C (+14 et +104°F).
Stockage entre -20 et +55°C (-4 et 131°F).
Humidité de l’air :
Inférieur ou égal à 50% à 40°C (104°F).
Inférieur ou égal à 90% à 20°C (68°F).
Altitude :
Jusqu’à 1000 m au-dessus du niveau de la mer (3280 pieds).
EN CAS DE PANNE
L’opération de rivetage ne s’effectue pas :
• Vérier si l’écrou de réglage de course est bien réglé à la bonne valeur.
• Vérier si la riveteuse utilisée fonctionne correctement.
• Vérier si il n’y a pas de fuites d’huiles ou d’air comprimé.
CONSIGNES DE MAINTENANCE
• Conserver l’outil en bon état de propreté. Vérier périodiquement le bon état des raccordements d’air comprimé, le
bon fonctionnement de l’adaptateur 50 kN (le jeu naturel entre la queue de rivet et l’embout).
• En cas de fuite d’huile, enlever de la riveteuse et retourner l’appareil.
• Remplacement des mors (voir p.6)
RÉCAPITULATIF
Riveteuses Puissance
GYSPRESS 8T 40 kN
GYSPRESS 8T PP 40 kN
GYSPRESS 10T 50 kN
GYSPRESS 10T PP 50 kN
GYSPRESS 10T Connect 50 kN

3
ADAPTATEUR RIVETS AVEUGLES 50KN POUR RIVETEUSE 10T
FR
Notice Originale
MONTAGE SUR GYSPRESS
GYSPRESS 8T :
Matrice D17
GYSPRESS 8T PP :
GYSPRESS 10T :
GYSPRESS 10T Connect :
Jack

4
ADAPTATEUR RIVETS AVEUGLES 50KN POUR RIVETEUSE 10T
FR
Notice Originale
REGLAGES DE L’EFFORT DE L’ADAPTATEUR
L’effort de traction de l’adaptateur dépend de l’effort émis par la riveteuse :
Tableau de correspondance avec l’effort fournit par la riveteuse et de la pression d’air en entrée de la riveteuse.
Pression d’air 2 bar / 39 Psi 3 bar / 44 Psi 4 bar / 58 Psi 5 bar / 58 Psi 6 bar / 87 Psi 6,5 bar / 94 Psi 7 bar / 101 Psi 8 bar / 116 Psi
Effort
Riveteuse Adaptateur Riveteuse Adaptateur Riveteuse Adaptateur Riveteuse Adaptateur Riveteuse Adaptateur Riveteuse Adaptateur Riveteuse Adaptateur Riveteuse Adaptateur
GYSPRESS 8T 20 kN 10 kN 30 kN 15 kN 40 kN 20 kN 50 kN 25 kN 60 kN 30 kN 65 kN 32,5 kN 70 kN 35 kN 80 kN 40 kN
GYSPRESS 8T PP 20 kN 10 kN 30 kN 15 kN 40 kN 20 kN 50 kN 25 kN 60 kN 30 kN 65 kN 32,5 kN 70 kN 35 kN 80 kN 40 kN
GYSPRESS 10T 39 kN 19,5 kN 44 kN 22 kN 58 kN 29 kN 72 kN 36 kN 87 kN 43,5 kN 100 kN 50 kN 100 kN 50 kN 100 kN 50 kN
GYSPRESS 10T PP 39 kN 19,5 kN 44 kN 22 kN 58 kN 29 kN 72 kN 36 kN 87 kN 43,5 kN 100 kN 50 kN 100 kN 50 kN 100 kN 50 kN
GYSPRESS 10T Connect 39 kN 19,5 kN 44 kN 22 kN 58 kN 29 kN 72 kN 36 kN 87 kN 43,5 kN 100 kN 50 kN 100 kN 50 kN 100 kN 50 kN
REGLAGES DE LA COURSE
La course de l’adaptateur est réglable de 0 à 25 mm.
Elle se fait par l’intermédiaire de la molette A.
Visser à fond pour avoir 0 de course.
Dévisser à fond pour avoir 25 mm de course.
0
25
A
DIFFÉRENTS KITS SUR ADAPTATEUR
Kit 1 :
Pose de rivets aveugles pour diamètre de tige
jusqu’à 5 mm + extraction de rivet auto-poinçonneur.
Kit 2 :
Pose d’écrous et de goujons à sertir M5 à M14.
Kit 3 :
Rallonge pour pose de rivets aveugles pour diamètre
de tige jusqu’à 5mm + extraction de rivet auto-poinçonneur.
Kit 4 :
Pose de rivets aveugles ø 9.8 mm.

5
ADAPTATEUR RIVETS AVEUGLES 50KN POUR RIVETEUSE 10T
Notice Originale
KIT 1
POSE DE RIVETS AVEUGLES POUR DIAMETRE DE TIGE JUSQU’À 5MM + EXTRACTION DE
RIVET AUTO-POINÇONNEUR.
Ordre de montage du kit 1 :
4
3
2
1
5
Clic
1- Mettre la tuyère 1
2- Visser le support de mors 2 avec les 2 clés de serrage (bien serrer)
3- Visser le support de buse 3 avec les 2 clés de serrage
4- Visser l’une de buse adaptée au rivet à poser :
Ø3.2 ref : 065994
Ø3.5 ref : 066007
Ø4.0 ref : 066014
Ø4.5 ref : 066021
Ø5.0 ref : 066038
Pour faciliter la mise en place des buses :
• 1- Positionner un rivet dans la buse.
• 2- Insérer le rivet avec la buse dans le support monté.
• 3- Serrer la buse avec clé de serrage.
1-
2- 3-
Clé de serrage
5- Enler le bol de récupération
Pose d’un rivet aveugle :
Après avoir monté la buse adéquate, placer le rivet jusqu’en butée de la buse
Placer le rivet à travers le trou des tôles à riveter et appuyer sur la gâchette de la riveteuse suivant le modèle ci-dessous :
GYSPRESS 8T GYSPRESS 8T PP GYSPRESS 10T GYSPRESS 10T PP GYSPRESS 10T Connect
Une fois le rivet claqué posé, lâchez la gâchette . Pour les riveteuses 8T et 10 T appuyer sur la gâchette ci-dessous.
GYSPRESS 8T GYSPRESS 10T

6
ADAPTATEUR RIVETS AVEUGLES 50KN POUR RIVETEUSE 10T
FR
Notice Originale
En penchant l’adaptateur en arrière, les tiges des rivets tombent
dans le bol de récupération.
En penchant vers l’avant, les tiges sortent par la buse.
Récupération des tiges :
Pour récupérer les tiges, tirez sur
le couvercle du bol.
Une fois les tiges récupérées re-
mettre le couvercle jusqu’au clic.
1- Bol M0077
2- Couvercle M0078
3- Joint torique 55262
4- Joint torique 55121
4
1
3
2
Remplacement des mors :
Dévisser a l’aide des clés de
serrage.
Remplacer les mors 2 puis,
les positionner dans 3 à 120°.
Placer 4 puis 5 et ensuite visser
1 a l’aide des clés (bien serrer).
Clé de serrage
1- Liaison cône mors M0042
2- Mors (réf. 058446) 51522
3- Cône mors M0043
4- Écarteur M0044
5- Ressort 55189
1
5
4
2
3
Extraction de rivets auto poinçonneur :
Le kit peut recevoir une buse spéciale pour l’extraction des rivets auto-poinçonneur via la soudure d’une tige sur le rivet (ref. 066151).
Montage de la buse :
Monter la buse d’extraction 066151 sur le support de buse. Régler l’écrou de réglage de course sur 15 mm.
0
15
Étapes d’extraction :
1- Soudure de la tige d’extraction :
Matériel : ARC PULL 350 062191 + ARC PULL RIVET BOX 064584

7
ADAPTATEUR RIVETS AVEUGLES 50KN POUR RIVETEUSE 10T
Notice Originale
2- Insérer la tige d’extraction du rivet jusqu’au bout dans le pistolet, la buse en contact avec la tôle :
3- Actionner l’adaptateur suivant les modèles ci-dessous :
GYSPRESS 8T GYSPRESS 8T PP GYSPRESS 10T GYSPRESS 10T PP GYSPRESS 10T Connect
Une fois le rivet extrait de la tôle, relâcher la gâchette. Pour les riveteuses 8T et 10T, appuyez sur la gâchette ci-dessous :
GYSPRESS 8T GYSPRESS 10T
Le rivet et la tige ressortent sur l’avant :

8
ADAPTATEUR RIVETS AVEUGLES 50KN POUR RIVETEUSE 10T
FR
Notice Originale
KIT 2
POSE D’ÉCROUS ET DE GOUJONS A SERTIR M5 À M14.
6-4
6-5
6-6
6-2
6-3
6-1
6-4
54 32
6
1
M14
M12
M10
M8
M6
M5
7
Ordre de montage du kit 2 :
1- Mettre l’entraineur 1
2- Positionner la vis adaptée à l’écrou ou au goujon à sertir (M5, M6, M8, M10, M12, M14)
3- Visser l’écrou de blocage 3 avec les 2 clés de serrage (bien serrer)
4- Visser le support de buse 4
5- Visser la buse 5 adaptée à l’écrou ou au goujon à sertir (M5, M6, M8, M10, M12, M14)
6- Positionner la molette d’entrainement 6 (poussez le bouton 7 pour l’inserer)
Pour enlever la molette, pousser le bouton 7 et tirer sur la molette
7
Couple vis et buse en fonction de l’insert à poser :
Ecrou à sertir M14 Buse M14 Tige M14
Ecrou à sertir M12
Buse M12 Tige M12
Ecrou à sertir M10
Buse M10 Tige M10

9
ADAPTATEUR RIVETS AVEUGLES 50KN POUR RIVETEUSE 10T
Notice Originale
Ecrou à sertir M8 Buse M8
Tige M8
Vis M8
Ecrou à sertir M6
Buse M6
Tige M6
Vis M6
Ecrou à sertir M5
Buse M5
Tige M5
Vis M5
Goujon à sertir M8
Buse M8 Tige M8
Goujon à sertir M6
Buse M6 Tige M6
Goujon à sertir M5
Buse M5 Tige M5
Pose d’un écrou à sertir :
Il y a deux méthodes pour poser les écrous à sertir :
1.
2. Visser l’écrou
à sertir au moins
jusqu’au bout de
la tige.
3. Dévisser la
buse contre
l’insert et serrer
le contre écrou.
4. Réglage pour pose des écrous à sertir.
1 / Pose à la pression
Suivant la taille de l’écrou a sertir, l’effort nécessaire à la pose varie.
Règles indicatives de la pose d’écrous à sertir (varie suivant les constructeurs).
Effort de pose recommandé par taille
Ø Matière Effort kN
Correspondance riveteuse 8T Correspondance riveteuse 10T
Effort kN Pression bar Effort kN Pression bar
M5 acier 8 16 1.6 16 1.1
M6 acier 12 24 2.4 24 1.6
M8 acier 18 36 3.6 36 2.5
M10 acier 21 42 4.2 42 3
M12 acier 23 46 4.6 46 3.2
M14 acier 50 - - 100 6.5
M5 alu 3,8 7.6 0.8 7.6 0.5
M6 alu 5,5 11 1.1 11 0.75
M8 alu 10 20 2.0 20 1.5
M10 alu 12 24 2.4 24 1.6
M12 alu 15 30 3.0 30 2.0
Pour la pose à la pression, la course de l’adaptateur peut-être règlée à 25 mm (maxi).
Le réglage de l’effort se fait avec la riveteuse. (réglage avec le bouton et lecture de la pression).

10
ADAPTATEUR RIVETS AVEUGLES 50KN POUR RIVETEUSE 10T
FR
Notice Originale
1.1 / Options
Lecture du manomètre.
Réglage de la pression
Lecture de la pression
Lecture sur le capteur d’effort
(plus précis) solution à privilegier
Réglage
de la pression
Lecture de l’effort
Capteur 062115
1.2 / Exemple
Écrou a sertir M10 acier à poser avec une riveteuse 10T.
Réglage de la course sur 25 mm. Réglage de la riveteuse avec capteur sur 210 bars qui correspond à 42 kN.
210
ou
Réglage de la riveteuse avec manomètre 3 bars
correspond à 42 kN.
• Appuyer sur la commande de la riveteuse, et attendre qu’elle cale.
• Relâcher la gâchette et vérier que l’insert est bien posé.
• Si l’écrou à sertir ne semble pas assez sertit, augmenter un peu l’effort de la
riveteuse.
• Pour retirer la tige de traction de l’écrou à sertir, dévisser à l’aide de la molette
arrière.

11
ADAPTATEUR RIVETS AVEUGLES 50KN POUR RIVETEUSE 10T
Notice Originale
2/ Pose à la course
1. Mesurer la cote intérieure de l’écrou à sertir (A)
2. Mesurer la cote de l’épaisseur de la collerette (B)
3. Mesurer l’épaisseur de la tôle qui doit recevoir
l’écrou à sertir (C)
4. Régler sur l’adaptateur le résultat obtenu (D)
avec la formule :
D = A – B – C
A
B
C
2.1 / Exemple :
Ecrou à sertir M12 / Tôle épaisseur 2mm
1. Mesurer la cote intérieur de l’écrou à sertir (A) = 10.5mm
2. Mesurer la cote de l’épaisseur de la collerette (B) = 2mm
3. Mesurer l’épaisseur de la tôle qui doit recevoir l’insert (C) = 2mm
4. Régler sur l’adaptateur le résultat obtenu
D = 10.5 – 2 – 2 = 6.5 mm
Une rainure
=
0.1 mm
D = 10.5 – 2 – 2 = 6.5 mm
Pour un réglage le plus précis, s’aider de la graduation (en mm) et des rainures
sur la molette.
Un tour de molette correspond à 1.5mm de course et il y a 15 rainures sur l’écrou.
5. appuyer sur la commande de la riveteuse, et attendre qu’elle cale.
6. Relâcher la gâchette et vérier que l’écrou à sertir est bien posé.
7. Pour retirer la tige de traction de l’écrou à sertir, dévisser à l’aide de la molette
arrière.
Le réglage incorrect de la course de l’outil, peut provoquer le mauvais serrage des écrous à sertir et la casse du tirant.
Le réglage de la course est essentiel pour la xation de l’écrou à sertir.
Il faut considérer qu’une course excessive peut provoquer la casse du tirant, tandis qu’une course insufsante ne garantit pas la
stabilité de l’écrou à sertir.
Il est préférable d’y aller par étape en augmentant la course au fur et à mesure.
3 / Pose des gougeons à sertir :
Pour la pose des gougeons à sertir, une mesure de cote pour déformation n’est pas possible.
Il est préférable d’y aller par étape en augmentant la course au fur et à mesure.

12
ADAPTATEUR RIVETS AVEUGLES 50KN POUR RIVETEUSE 10T
FR
Notice Originale
KIT 3
RALLONGE POUR POSE DE RIVETS AVEUGLES POUR DIAMETRE DE TIGE JUSQU’À 5MM
+ EXTRACTION DE RIVET AUTO-POINÇONNEUR
Ordre de montage du kit 3 :
1
2
3
Pour utiliser le kit d’extension il n’est pas nécessaire d’utiliser le bol de récupération des tiges.
Les tiges, une fois cassées sortent sur l’avant.
1. Visser le support de mors 3 avec les 2clés de serrage (bien serrer)
2. Visser le support de buse 2 avec les 2clés de serrage
3. Visser l’une de buse adaptée au rivet à poser (inclus dans kit de base)
Ø3.2 ref : 065994
Ø3.5 ref : 066007
Ø4.0 ref : 066014
Ø4.5 ref : 066021
Ø5.0 ref : 066038
Pour faciliter la mise en place des buses :
• 1- Positionner un rivet dans la buse.
• 2- Insérer le rivet avec la buse dans le support monté.
• 3- Serrer la buse avec clé de serrage.
1-
2- 3-
Clé de serrage
Pose d’un rivet aveugle :
Après avoir monté la buse adéquate, placer le rivet jusqu’en butée de la buse
Placer le rivet à travers le trou des tôles à riveter et appuyer sur la gâchette de la riveteuse suivant le modèle ci-dessous :
GYSPRESS 8T GYSPRESS 8T PP GYSPRESS 10T GYSPRESS 10T PP GYSPRESS 10T Connect
Une fois le rivet claqué, lâchez la gâchette . Pour les riveteuses 8T et 10 T appuyer sur la gâchette ci-dessous.
GYSPRESS 8T GYSPRESS 10T

13
ADAPTATEUR RIVETS AVEUGLES 50KN POUR RIVETEUSE 10T
Notice Originale
En penchant l’adaptateur sur l’avant, les tiges des rivets sortes par la buse.
Remplacement des mors :
1- Liaison cône mors M0042
2- Cone mors M0043
3- Mors 058446
4- Écarteur M0044
5- Ressort 55189
6- Rallonge M0041
7- Poussoir 93058
8- Ressort 55223
9- Joint 55133
1
6
8
7
5
4
3
2
1
Dévisser 2 à l’aide des clés de serrage
Remplacer les mors 3 puis, les positionner dans 3 à 120°.
Placer successivement 4, 5, 7 et 8 .Ensuite visser 6 a l’aide des clés (bien serrer).
Extraction de rivets auto poinçonneur : (voir chapitre précédent)

14
ADAPTATEUR RIVETS AVEUGLES 50KN POUR RIVETEUSE 10T
FR
Notice Originale
KIT 4
POSE DE RIVETS AVEUGLES Ø 9.8
Ordre de montage du kit 4 :
4
3
2
1
5
1- Mettre la tuyère 1.
2- Visser le support de mors 2 avec les 2 clés
de serrage (bien serrer).
3- Visser le support de buse 3 avec les 2 clés
de serrage.
4- Visser la buse Ø6 ref : 066052.
5- Enler le bol de récupération 5.
Clé de serrage
Pour faciliter la mise en place des buses :
• 1- Positionner un rivet dans la buse.
• 2- Insérer le rivet avec la buse dans le support monté.
• 3- Serrer la buse avec clé de serrage.
1-
2- 3-
Pose d’un rivet aveugle :
Après avoir monté la buse adéquate, placer le rivet jusqu’en butée de la buse
Placer le rivet à travers le trou des tôles à riveter et appuyer sur la gâchette de la riveteuse suivant le modèle ci-dessous :
GYSPRESS 8T GYSPRESS 8T PP GYSPRESS 10T GYSPRESS 10T PP GYSPRESS 10T Connect
Une fois le rivet claqué, lachez la gachette . Pour les riveteuses 8T et 10 T appuyer sur la gachette ci-dessous.
GYSPRESS 8T GYSPRESS 10T

15
ADAPTATEUR RIVETS AVEUGLES 50KN POUR RIVETEUSE 10T
Notice Originale
En penchant l’adaptateur en arrière, les tiges des rivets tombent
dans le bol de récupération.
En penchant vers l’avant, les tiges sortent par la buse.
Récupération des tiges :
Pour récupérer les tiges, tirez sur
le couvercle du bol.
Une fois les tiges récupérées re-
mettre le couvercle jusqu’au clic.
1- Bol M0077
2- Couvercle M0078
3- Joint torique 55262
4- Joint torique 55121
4
1
3
2
Remplacement des mors :
Dévisser a l’aide des clés de
serrage.
Remplacer les mors 2 puis,
les positionner dans 3 à 120°.
Placer 4 puis 5 et ensuite visser
1 a l’aide des clés (bien serrer).
Clé de serrage
1- Liaison cône mors M0042
2- Mors 51522
3- Cône mors M0043
4- Écarteur M0044
5- Ressort 55189
1
5
4
2
3

50KN BLIND RIVET ADAPTER FOR 10T RIVETER
EN
Translation of
the original
notice
DESCRIPTION
The blind rivet adapter is compatible with the GYSPRESS 8T/10T and GYSPRESS 8T/10T PUSH PULL riveters. ]Its tensile force is 50
kN. It allows the setting of blind rivets with diameters from 4.0 to 7.8 mm for aluminium and 4.0 to 6.4 mm for steel.
SAFETY INSTRUCTIONS
• The 50KN adapter must not be used for anything other than setting blind rivets and blind rivet nuts and bolts.
• Mandatory wearing: safety glasses, anti-noise protection, safety gloves. Never point the nose of the tool towards
yourself or anyone else.
• Never exceed the maximum allowable pressure of 7 bar.
• Blind rivets must be used according to the specications..
• Fit the end cap according to the size of the rivet. Never force the rivet tail into the nozzle. Never use a nozzle
wider than the rivet tail.
• Check that the clamping of the part to be riveted is correct.
• Hold the riveter rmly until the rivet tail cut is completed and ejected. Otherwise, release the trigger and then
resume pulling by pressing the trigger again,
• Always unplug the machine after each use and after changing the riveting head.
• Keep this user manual in a safe place. In case of loss, please contact us.
ENVIRONMENT
This equipment must only be used for riveting operations in accordance with the limits indicated on the descriptive panel and/or in
the user manual. Safety instructions must be followed. In case of improper or unsafe use, the manufacturer cannot be held liable.
This equipment must be used and stored in a room free from dust, acid, ammable gas or any other corrosive agent. Operate the
machine in an open, or well-ventilated area.
Operating temperature:
Use between -10 and +40°C (+14 and +104°F).
Storage between -20 and +55°C (-4 and 131°F).
Air humidity:
Lower or equal to 50% at 40°C (104°F).
Lower or equal to 90% at 20°C (68°F).
Altitude:
Up to 1000 meters above sea level (3280 feet).
IN CASE OF A BREAKDOWN
The riveting operation is not performed:
• Check that the stroke adjusting nut is set to the correct value.
• Check that the riveter being used is working properly.
• Check for oil or compressed air leaks.
MAINTENANCE INSTRUCTIONS
• Keep the tool in a good state of cleanliness. Periodically check that the compressed air connections are in good
condition and that the 50 kN adapter (the natural play between the rivet shank and the bit) is working properly.
• In case of oil leakage, remove from the riveting machine and turn the tool over.
• Replacing the jaws (see p.6)
SUMMARY
Riveting Machines Power
GYSPRESS 8T 40 kN
GYSPRESS 8T PP 40 kN
GYSPRESS 10T 50 kN
GYSPRESS 10T PP 50 kN
GYSPRESS 10T Connect 50 kN

50KN BLIND RIVET ADAPTER FOR 10T RIVETER
EN
Translation of
the original
notice
INSTALLATION ON GYSPRESS
GYSPRESS 8T :
Die D17
GYSPRESS 8T PP :
GYSPRESS 10T :
GYSPRESS 10T Connect :
Jack

50KN BLIND RIVET ADAPTER FOR 10T RIVETER
EN
Translation of
the original
notice
ADAPTER FORCE SETTINGS
The pulling strength is based on the effort supplied by the riveter:
Correspondence table with the pulling strengh provided by the riveting machine and the air pressure at the riveter
inlet.
Air pressure 2 bar / 39 Psi 3 bar / 44 Psi 4 bar / 58 Psi 5 bar / 58 Psi 6 bar / 87 Psi 6,5 bar / 94 Psi 7 bar / 101 Psi 8 bar / 116 Psi
Effort
Riveting
Machine
Adapter
Riveting
Machine
Adapter
Riveting
Machine
Adapter
Riveting
Machine
Adapter
Riveting
Machine
Adapter
Riveting
Machine
Adapter
Riveting
Machine
Adapter
Riveting
Machine
Adapter
GYSPRESS 8T 20 kN 10 kN 30 kN 15 kN 40 kN 20 kN 50 kN 25 kN 60 kN 30 kN 65 kN 32,5 kN 70 kN 35 kN 80 kN 40 kN
GYSPRESS 8T PP 20 kN 10 kN 30 kN 15 kN 40 kN 20 kN 50 kN 25 kN 60 kN 30 kN 65 kN 32,5 kN 70 kN 35 kN 80 kN 40 kN
GYSPRESS 10T 39 kN 19,5 kN 44 kN 22 kN 58 kN 29 kN 72 kN 36 kN 87 kN 43,5 kN 100 kN 50 kN 100 kN 50 kN 100 kN 50 kN
GYSPRESS 10T PP 39 kN 19,5 kN 44 kN 22 kN 58 kN 29 kN 72 kN 36 kN 87 kN 43,5 kN 100 kN 50 kN 100 kN 50 kN 100 kN 50 kN
GYSPRESS 10T Connect 39 kN 19,5 kN 44 kN 22 kN 58 kN 29 kN 72 kN 36 kN 87 kN 43,5 kN 100 kN 50 kN 100 kN 50 kN 100 kN 50 kN
STROKE SETTINGS
The adapter stroke is adjustable from 0 to 25 mm.
This is done by using the A knob.
Screw it in tightly to get 0 stroke.
Unscrew all the way down to have 25 mm of travel.
0
25
A
DIFFERENT KITS ON ADAPTER
Kit 1 :
Blind rivet installation for shank diameter up to 5 mm + self-pierce rivet extraction.
Kit 2 :
Installation of blind rivet nuts and bolts M5 to M14.
Kit 3 :
Extension for Blind rivet installation for shank diameter up to 5 mm + self-pierce rivet
extraction.
Kit 4 :
Installation of blind rivets ø 9.8 mm.

50KN BLIND RIVET ADAPTER FOR 10T RIVETER
EN
Translation of
the original
notice
KIT 1
BLIND RIVET INSTALLATION FOR SHANK DIAMETER UP TO 5 MM + SELF-PIERCE RIVET
EXTRACTION.
Assembly order of kit 1:
4
3
2
1
5
Clic
1- Insert nozzle 1
2- Screw the jaw support 2 with the 2 spanners (tighten well)
3- Screw the nozzle holder 3 with the 2 spanners
4- Screw one of the nozzles adapted to the rivet to be set:
Ø3.2 ref : 065994
Ø3.5 ref : 066007
Ø4.0 ref : 066014
Ø4.5 ref : 066021
Ø5.0 ref : 066038
To facilitate the installation of the nozzles:
• 1- Position a rivet into the nozzle.
• 2- Insert the rivet with the nozzle into the assembled support.
• 3- Tighten the nozzle with a spanner.
1-
2- 3-
Tightening spanner
5- Thread the recovery bowl
Blind rivet setting:
After tting the appropriate nozzle, place the rivet as far as the nozzle end stop
Place the rivet through the hole in the sheets to be riveted and press the riveter trigger according to the model below:
GYSPRESS 8T GYSPRESS 8T PP GYSPRESS 10T GYSPRESS 10T PP GYSPRESS 10T Connect
Once the rivet has been set, release the trigger. For 8T and 10T riveters press the trigger below.
GYSPRESS 8T GYSPRESS 10T

50KN BLIND RIVET ADAPTER FOR 10T RIVETER
EN
Translation of
the original
notice
By tilting the adapter backwards, the rivet pins fall into the collecting bowl.
By leaning forward, the pins come out through the nozzle.
Pin collection:
To collect the pins, pull the lid off
the bowl.
Once the pins have been collec-
ted, put the lid back on until it
clicks.
1- Bowl M0077
2- Lid M0078
3- O-ring 55262
4- O-ring 551211
4
1
3
2
Clamping jaws change:
Unscrew the nozzle with a span-
ner.
Replace the jaws 2 then,
position them in 3 to 120°.
Place 4 then 5 and then screw 1
with the keys (tighten well).
Tightening
spanner
1- Connection cone jaws M0042
2- Jaws (ref. 058446) 51522
3- M0043 jaw cone
4- Spreader M0044
5- Spring 55189
1
5
4
2
3
Self-piercing rivet extraction:
The kit can be tted with a special nozzle for extracting self-piercing rivets by welding a pin to the rivet (ref. 066151).
Nozzle assembling:
Install the extraction nozzle 066151 on the nozzle holder. Set the stroke adjusting nut to 15mm
0
15
Extraction stages:
1- Welding of the extraction pin:
Material: ARC PULL 350 062191 + ARC PULL RIVET BOX 064584

50KN BLIND RIVET ADAPTER FOR 10T RIVETER
EN
Translation of
the original
notice
2- Insert the rivet extraction pin all the way into the gun, with the nozzle in contact with the sheet metal:
3- Operate the adapter according to the models below:
GYSPRESS 8T GYSPRESS 8T PP GYSPRESS 10T GYSPRESS 10T PP GYSPRESS 10T Connect
Once the rivet has been pulled out of the sheet, release the trigger. For 8T and 10T riveters press the trigger below.
GYSPRESS 8T GYSPRESS 10T
Rivet and pin pop out at the front:

50KN BLIND RIVET ADAPTER FOR 10T RIVETER
EN
Translation of
the original
notice
KIT 2
INSTALLATION OF BLIND RIVET NUTS AND BOLTS M5 TO M14.
6-4
6-5
6-6
6-2
6-3
6-1
6-4
54 32
6
1
M14
M12
M10
M8
M6
M5
7
Assembly order of kit 2:
1- Put on the driver 1
2- Position the screw adapted to the blind rivet nut or bolt (M5, M6, M8, M10, M12, M14).
3- Screw on the locking nut 3 with the 2 spanners (tighten well)
4- Screw the nozzle holder 4
5- Screw the nozzle 5 adapted to the blind rivet nut or bolt (M5, M6, M8, M10, M12, M14)
6- Position drive wheel 6 (push button 7 to insert it)
To remove the knob, push button 7 and pull the knob.
7
Pair of screws and nozzle depending on the insert to be installed:
Blind rivet nuts M14 Nozzle M14 Rod M14
Blind rivet nuts M12
Nozzle M12 Rod M12
Blind rivet nuts M10
Nozzle M10 Rod M10
Blind rivet nuts M8
Nozzle M8
Rod M8
Screw M8

50KN BLIND RIVET ADAPTER FOR 10T RIVETER
EN
Translation of
the original
notice
Blind rivet nuts M6 Nozzle M6
Rod M6
Screw M6
Blind rivet nuts M5
Nozzle M5
Rod M5
Screw M5
Blind rivet bolts M8
Nozzle M8 Rod M8
Blind rivet bolts M6
Nozzle M6 Rod M6
Blind rivet bolts M5
Nozzle M5 Rod M5
Blind rivet nut installation:
There are two ways to install blind rivet nuts:
1.
2. Screw on the
blind rivet nut at
least to the end
of the pin.
3. Unscrew the
nozzle against
the insert and
tighten the lock
nut.
4. Adjustment for the installation of blind rivet nuts.
1 / Pressure installation
Depending on the size of the blind rivet nut, the effort required for installation varies.
Indicative rules for the installation of blind rivet nuts (varies according to the manufacturer).
Recommended installation effort per size
Ø Material Effort kN
Riveting machine 8T correlation Riveting machine 10T correlation
Effort kN Bar pressure Effort kN Bar pressure
M5 steel 8 16 1.6 16 1.1
M6 steel 12 24 2.4 24 1.6
M8 steel 18 36 3.6 36 2.5
M10 steel 21 42 4.2 42 3
M12 steel 23 46 4.6 46 3.2
M14 steel 50 - - 100 6.5
M5 alu 3,8 7.6 0.8 7.6 0.5
M6 alu 5,5 11 1.1 11 0.75
M8 alu 10 20 2.0 20 1.5
M10 alu 12 24 2.4 24 1.6
M12 alu 15 30 3.0 30 2.0
For pressure installation, the adapter stroke can be set to 25 mm (max.).
The force is adjusted with the riveting machine. (adjustment with the button and pressure reading).

50KN BLIND RIVET ADAPTER FOR 10T RIVETER
EN
Translation of
the original
notice
1.1 / Options
Pressure gauge reading.
Pressure adjustment
Pressure reading
Reading on the effort sensor
(more accurate) solution to be favoured
Pressure
adjustment
Effort reading
Sensor 062115
1.2 / Example
Blind rivet nut M10 steel to be set with a 10T riveting machine.
Stroke adjustment on 25 mm. Adjustment of the riveting machine with sensor to 210 bar which corres-
ponds to 42 kN.
210
ou
Adjustment of the riveting machine with manome-
ter to 3 bar which corresponds to 42 kN.
• Press the riveter control and wait for the riveter to wedge.
• Release the trigger and check that the insert is correctly in place.
• If the blind rivet nut does not seem to be crimped enough, increase the riveter’s
effort a little more.
• To remove the pull pin from the blind rivet nut, unscrew with the rear knob.

50KN BLIND RIVET ADAPTER FOR 10T RIVETER
EN
Translation of
the original
notice
2/ Installation with the stroke
1. Measure the inside dimension of the blind rivet nut (A)
2. Measure the dimension of the ange thickness (B)
3. Measure the thickness of the sheet metal that is to receive
the blind rivet nut (C).
4. Adjust the result (D) with the formula on the adapter:
D = A – B – C
A
B
C
2.1 / Example :
Blind rivet nut M12 / Sheet metal thickness 2mm
1. Measure the inside dimension of the blind rivet nut (A) = 10.5mm
2. Measure the dimension of the ange thickness (B) = 2mm
3. Measure the thickness of the sheet metal that is to receive the insert (C) =
2mm
4. Adjust the result on the adapter
D = 10.5 - 2 - 2 = 6.5 mm
A groove
=
0.1 mm
D = 10.5 – 2 – 2 = 6.5 mm
For a more precise adjustment, use the scale (in mm) and the grooves on the
wrench adjuster.
One turn of the wrench adjuster corresponds to 1.5mm of travel and there are
15 grooves on the nut.
5. Press the riveter control and wait for the riveter to wedge.
6. Release the trigger and check that the insert is correctly in place.
7. To remove the pull pin from the blind rivet nut, unscrew with the rear wrench
adjuster.
Incorrect adjustment of the tool stroke can lead to incorrect tightening of the blind rivet nuts and breakage of the tie rod.
The adjustment of the stroke is essential for the xing of the blind rivet nut.
It must be considered that an excessive stroke can cause the breakage of the tie rod, while an insufcient stroke does not guarantee
the stability of the blind rivet nut.
It is advisable to go in stages, increasing the stroke as you go along.
3 / Blind rivet bolts installation:
A dimensional measurement for deformation is not possible when installing blind rivet bolts.
It is advisable to go in stages, increasing the stroke as you go along.
KIT 3
EXTENSION FOR BLIND RIVET INSTALLATION FOR SHANK DIAMETER UP TO 5 MM +
SELF-PIERCE RIVET EXTRACTION.
Assembly order of kit 3:
1
2
3

50KN BLIND RIVET ADAPTER FOR 10T RIVETER
EN
Translation of
the original
notice
To use the extension kit it is not necessary to use the pin collecting bowl.
The pins, once broken, come out at the front.
1. Screw on the jaw support 3 with the 2 spanners (tighten well)
2. Screw on nozzle holder 2 with the 2 spanners.
3. Screw on one of the nozzles adapted to the rivet to be set (included in the standard kit)
Ø3.2 ref : 065994
Ø3.5 ref : 066007
Ø4.0 ref : 066014
Ø4.5 ref : 066021
Ø5.0 ref : 066038
To facilitate the installation of the nozzles:
• 1- Position a rivet into the nozzle.
• 2- Insert the rivet with the nozzle into the assembled support.
• 3- Tighten the nozzle with a spanner.
1-
2- 3-
Clé de serrage
Blind rivet setting:
After tting the appropriate nozzle, place the rivet as far as the nozzle end stop.
Place the rivet through the hole in the sheets to be riveted and press the riveter trigger according to the model below:
GYSPRESS 8T GYSPRESS 8T PP GYSPRESS 10T GYSPRESS 10T PP GYSPRESS 10T Connect
Once the rivet has been set, release the trigger. For 8T and 10T riveters press the trigger below.
GYSPRESS 8T GYSPRESS 10T
By leaning forward, the rivet’s pins come out through the nozzle.

50KN BLIND RIVET ADAPTER FOR 10T RIVETER
EN
Translation of
the original
notice
Clamping jaws change:
1- Connection cone jaws M0042
2- Cone jaws M0043
3- Jaws 058446
4- Spreader M0044
5- Spring 55189
6- Extension M0041
7- Pusher 93058
8- Spring 55223
9- Joint 55133
1
6
8
7
5
4
3
2
1
Unscrew 2 with the spanners
Replace the jaws 3 and then position them in 3 at 120°.
Place 4, 5, 7 and 8 in succession. Then screw in 6 with the spanners (tighten well).
Extraction of self-piercing rivets: (see previous chapter)
KIT 4
ASSEMBLY ORDER OF KIT 4:
Assembly order of kit 4:
4
3
2
1
5
1- Set the Tailpipe 1.
2- Screw on the jaw support 2 with the 2
spanners (tighten well)
3- Screw on nozzle holder 3 with the 2 span-
ners.
4- Screw the nozzle Ø6 ref: 066052.
5- Thread the recovery bowl 5.
Clé de serrage
To facilitate the installation of the nozzles:
• 1- Position a rivet into the nozzle.
• 2- Insert the rivet with the nozzle into the assembled sup-
port.
• 3- Tighten the nozzle with a spanner.
1-
2- 3-
Blind rivet setting:
After tting the appropriate nozzle, place the rivet as far as the nozzle end stop
Place the rivet through the hole in the sheets to be riveted and press the riveter trigger according to the model below:

50KN BLIND RIVET ADAPTER FOR 10T RIVETER
EN
Translation of
the original
notice
GYSPRESS 8T GYSPRESS 8T PP GYSPRESS 10T GYSPRESS 10T PP GYSPRESS 10T Connect
Once the rivet has been set, release the trigger. For 8T and 10T riveters press the trigger below.
GYSPRESS 8T GYSPRESS 10T
By tilting the adapter backwards, the rivet pins fall into the collecting bowl.
By leaning forward, the pins come out through the nozzle.
Pin collection:
To collect the pins, pull the lid off
the bowl.
Once the pins have been collec-
ted, put the lid back on until it
clicks.
1- Bowl M0077
2- Lid M0078
3- O-ring 55262
4- O-ring 551211
4
1
3
2
Clamping jaws change:
Unscrew the nozzle with a span-
ner.
Replace the jaws 2 then,
position them in 3 to 120°.
Place 4 then 5 and then screw 1
with the keys (tighten well).
Tightening
spanner
1- Connection cone jaws M0042
2- Jaws 51522
3- M0043 jaw cone
4- Spreader M0044
5- Spring 55189
1
5
4
2
3

ADAPTADOR REMACHES CIEGOS 50KN
PARA REMACHADORA 10T
ES
Traducción de
la noticación
original
DESCRIPCIÓN
El adaptador para remaches ciegos es compatible con las remachadoras GYSPRESS 8T/10T y GYSPRESS 8T PUSH PULL. Su fuerza
de remachado es de 24 kN. Permite colocar remaches ciegos de diámetro 4.0 a 7.8 mm para aluminio y de 4.0 a 6.4 mm para acero,
así como tuercas y espárragos remachables.
CONSIGNAS DE SEGURIDAD
• El adaptador de 50KN no debe usarse para nada más que para colocar remaches ciegos, tuercas y espárragos
remachables.
• Uso obligatorio: gafas de seguridad, protección contra el ruido, guantes de seguridad. Nunca apunte la punta de
la herramienta hacia usted o hacia nadie más.
• Nunca supere la presión máxima permitida de 7 bares.
• Utilice obligatoriamente remaches ciegos según las especicaciones.
• Instale la contera de acuerdo con el tamaño del remache. Nunca fuerce para colocar la varilla del remache en la
contera. Nunca utilice una contera más ancha que la varilla del remache.
• Compruebe que la sujeción de la pieza a remachar sea correcta..
• Sostenga la remachadora rmemente hasta que el corte de la varilla del remache esté completo y que la varilla
sea expulsada. En caso contrario, suelte el gatillo y vuelva a apretar el gatillo de nuevo,
• Desenchufe siempre la máquina después de cada uso y al cambiar la contera de remachado..
• Guarde este manual en un lugar seguro. En caso de pérdida, por favor contáctenos.
ENTORNO
Este material se debe utilizar solamente para realizar operaciones de remachado dentro de los límites indicados en el aparato y el
manual. Se deben respetar las instrucciones relativas a la seguridad. En caso de uso inadecuado o peligroso, el fabricante no podrá
considerarse responsable.
La instalación se debe hacer en un local sin polvo, ni ácido, ni gas inamable u otras sustancias corrosivas incluso donde se
almacene el producto. Hay que asegurarse de que haya una buena circulación de aire cuando se esté utilizando.
Zona de temperatura :
Uso entre -10 y +40°C (+14 y +104°F).
Almacenado entre -20 y +55°C (-4 y 131°F).
Humedad del aire :
Inferior o igual a 50% a 40°C (104°F).
Inferior o igual a 90% a 20°C (68°F).
Altitud:
Hasta 1000m por encima del nivel del mar (3280 pies).
EN CASO DE AVERÍA
La operación de remachado no se realiza:
• Compruebe que la tuerca de ajuste de la carrera está ajustada al valor correcto.
• Compruebe que la remachadora que se está usando funciona correctamente..
• Compruebe si hay fugas de aceite o aire comprimido.
INSTRUCCIONES DE MANTENIMIENTO
• Mantén la herramienta en un estado limpio. Compruebe periódicamente el buen estado de las conexiones de aire
comprimido, el correcto funcionamiento del adaptador de 50 kN (el juego natural entre el vástago del remache y la
broca).
• En caso de fuga de aceite, retire del remachador y déle la vuelta a la herramienta.
• Reemplazar las mandíbulas (ver p.6)
RESUMEN
Remachadoras Potencia
GYSPRESS 8T 40 kN
GYSPRESS 8T PP 40 kN
GYSPRESS 10T 50 kN
GYSPRESS 10T PP 50 kN
GYSPRESS 10T Connect 50 kN

ADAPTADOR REMACHES CIEGOS 50KN
PARA REMACHADORA 10T
ES
Traducción de
la noticación
original
INSTALACIÓN SOBRE GYSPRESS
GYSPRESS 8T :
Matriz D17
GYSPRESS 8T PP :
GYSPRESS 10T :
GYSPRESS 10T Connect :
Jack

ADAPTADOR REMACHES CIEGOS 50KN
PARA REMACHADORA 10T
ES
Traducción de
la noticación
original
AJUSTES DEL ESFUERZO DEL ADAPTADOR
La fuerza de tracción del adaptador depende de la fuerza emitida por la remachadora:
Tabla de correspondencia con la fuerza proporcionada por la remachadora y la presión de aire en la entrada de la
remachadora.
Presión de aire 2 bar / 39 Psi 3 bar / 44 Psi 4 bar / 58 Psi 5 bar / 58 Psi 6 bar / 87 Psi 6,5 bar / 94 Psi 7 bar / 101 Psi 8 bar / 116 Psi
Esfuerzo
Remachadora Adaptador Remachadora Adaptador Remachadora Adaptador Remachadora Adaptador Remachadora Adaptador Remachadora Adaptador Remachadora Adaptador Remachadora Adaptador
GYSPRESS 8T 20 kN 10 kN 30 kN 15 kN 40 kN 20 kN 50 kN 25 kN 60 kN 30 kN 65 kN 32,5 kN 70 kN 35 kN 80 kN 40 kN
GYSPRESS 8T PP 20 kN 10 kN 30 kN 15 kN 40 kN 20 kN 50 kN 25 kN 60 kN 30 kN 65 kN 32,5 kN 70 kN 35 kN 80 kN 40 kN
GYSPRESS 10T 39 kN 19,5 kN 44 kN 22 kN 58 kN 29 kN 72 kN 36 kN 87 kN 43,5 kN 100 kN 50 kN 100 kN 50 kN 100 kN 50 kN
GYSPRESS 10T PP 39 kN 19,5 kN 44 kN 22 kN 58 kN 29 kN 72 kN 36 kN 87 kN 43,5 kN 100 kN 50 kN 100 kN 50 kN 100 kN 50 kN
GYSPRESS 10T Connect 39 kN 19,5 kN 44 kN 22 kN 58 kN 29 kN 72 kN 36 kN 87 kN 43,5 kN 100 kN 50 kN 100 kN 50 kN 100 kN 50 kN
AJUSTES DE LA CARRERA
La carrera del adaptador es ajustable de 0 a 25 mm.
Se hace a través de la ruedecilla A.
Atornillela completamente para obtener 0 de carrera
Desatornillela completamente para obtener 25 mm de carrera
0
25
A
DIFERENTES KITS EN EL ADAPTADOR
Kit 1 :
Fijación de remaches ciegos para el diámetro de la varilla
hasta 5 mm + extracción de remaches auto-perforantes.
Kit 2 :
Fijación de tuercas y espárragos remachables M5 a M14.
Kit 3 :
Extensión para jar remaches ciegos para el diámetro de la varilla
hasta 5 mm + extracción de remaches auto-perforantes.
Kit 4 :
Fijación de remaches ciegos de Ø 9.8 mm.

ADAPTADOR REMACHES CIEGOS 50KN
PARA REMACHADORA 10T
ES
Traducción de
la noticación
original
KIT 1
FIJACIÓN DE REMACHES CIEGOS PARA EL DIÁMETRO DE LA VARILLA HASTA 5 MM +
EXTRACCIÓN DE REMACHES AUTO-PERFORANTES.
Orden de montaje del kit 1 :
4
3
2
1
5
Clic
1- Inserte la tobera 1
2- Atornille el soporte de mordazas 2 con las 2 llaves (apriete bien)
3- Atornille el soporte de la boquilla 3 con las 2 llaves
4- Enrosque una de las boquillas adaptadas al remache que se va a jar:
Ø3.2 ref : 065994
Ø3.5 ref : 066007
Ø4.0 ref : 066014
Ø4.5 ref : 066021
Ø5.0 ref : 066038
Para facilitar la instalación de las boquillas :
• 1- Coloque un remache en la boquilla.
• 2- Inserte el remache con la boquilla en el soporte montado.
• 3- Apriete la boquilla con una llave de jación.
1-
2- 3-
Llave de jación
Fijación de un remache ciego :
Fijación de un remache ciego :
Después de colocar la boquilla apropiada, coloque el remache hasta el tope de la boquilla
Coloque el remache a través del agujero en las chapas que se van a remachar y presione el gatillo de la remachadora como se
muestra a continuación:
GYSPRESS 8T GYSPRESS 8T PP GYSPRESS 10T GYSPRESS 10T PP GYSPRESS 10T Connect
Una vez que el remache esté puesto, suelte el gatillo. Para las remachadoras 8T y 10 T, presione el gatillo abajo.
GYSPRESS 8T GYSPRESS 10T

ADAPTADOR REMACHES CIEGOS 50KN
PARA REMACHADORA 10T
ES
Traducción de
la noticación
original
Al inclinar el adaptador hacia atrás, las varillas de remache caen
en el tazón de recuperación.
Al inclinarse hacia adelante, las varillas salen por la boquilla.
Recuperación de las varillas:
Para recuperar las varillas, quite
la tapa del tazón.
Una vez que se recuperen las
varillas, vuelve a poner la tapa
hasta que haga clic.
1- Tazón M0077
2- Tapa M0078
3- Junta tórica 55262
4- Junta tórica 55121
4
1
3
2
Reemplazo de las mordazas:
Desenrosque usando las llaves
de jación.
Vuelva a colocar las mordazas 2
y luego, colóquelas en 3 a 120°.
Coloque el 4, luego el 5 y lue-
go enrosque el 1 con las llaves
(apriete bien).
Llave de jación
1- Conexión cono mordazas M0042
2- Mordazas (ref. 058446) 51522
3- Cono mordazas M0043
4- Separador M0044
5- Resorte 55189
1
5
4
2
3
Extracción de remaches auto-perforantes (RAP)
El kit puede equiparse con una boquilla especial para la extracción de remaches autoperforantes mediante la soldadura de una varilla
al remache (ref. 066151).
Montaje de la boquilla :
Instale la boquilla de extracción 066151 en el soporte de la
boquilla.
Ponga la tuerca de ajuste de la carrera a 15 mm.
0
15
Pasos de la extracción :
1- Soldadura de la varilla de extracción :
Material: ARCPULL 350 062191 + ARC PULL RIVET BOX 064584

ADAPTADOR REMACHES CIEGOS 50KN
PARA REMACHADORA 10T
ES
Traducción de
la noticación
original
2- Inserte la varilla de extracción del remache hasta el nal en la pistola, con la boquilla en contacto con la chapa:
3- Active el adaptador de acuerdo con los modelos de abajo:
GYSPRESS 8T GYSPRESS 8T PP GYSPRESS 10T GYSPRESS 10T PP GYSPRESS 10T Connect
Una vez que se extrae el remache de la chapa, suelte el gatillo. Para las remachadoras de 8T y 10T, presione el gatillo de abajo:
GYSPRESS 8T GYSPRESS 10T
El remache y la varilla salen en la parte delantera:

ADAPTADOR REMACHES CIEGOS 50KN
PARA REMACHADORA 10T
ES
Traducción de
la noticación
original
KIT 2
INSTALACIÓN DE TUERCAS Y ESPÁRRAGOS REMACHABLES M5 A M14..
6-4
6-5
6-6
6-2
6-3
6-1
6-4
54 32
6
1
M14
M12
M10
M8
M6
M5
7
Orden de montaje del kit 2 :
1- Ponga el conductor 1
2- Posicione el tornillo adaptado a la tuerca o al espárrago remachable (M5, M6, M8, M10, M12, M14)
3- Enrosque la tuerca de seguridad 3 con las 2 llaves de jación (apriete bien)
4. Atornille el soporte de boquilla 4
5- Atornille la boquilla 5 adaptada a la tuerca o al espárrago remachable (M5, M6, M8, M10, M12, M14)
6- Posicione la ruedecilla motriz 6 (pulse el botón 7 para insertarla)
Para quitar la ruedecilla, presione el botón 7 y tire de la ruedecilla.
7
Par tornillo y boquilla según el inserto que se instale:
Tuerca de engaste
M14
Boquilla M14 Varilla M14
Tuerca de engaste
M12
Boquilla M12 Varilla M12
Tuerca de engaste
M10
Boquilla M10 Varilla M10
Tuerca de engaste
M8
Boquilla M8
Varilla M8
Tornillo M8

ADAPTADOR REMACHES CIEGOS 50KN
PARA REMACHADORA 10T
ES
Traducción de
la noticación
original
Tuerca de engaste
M6
Boquilla M6
Varilla M6
Tornillo M6
Tuerca de engaste
M5
Boquilla M5
Varilla M5
Tornillo M5
Espárragos rema-
chables M8
Boquilla M8 Varilla M8
Espárragos rema-
chables M6
Boquilla M6 Varilla M6
Espárragos rema-
chables M5
Boquilla M5 Varilla M5
Colocación de tuercas de engaste.
:
Hay dos métodos para instalar las tuercas de engaste:
1.
2. Atornille la
tuerca de en-
gaste al menos
hasta el nal de
la varilla.
3. Desenrosque
la boquilla contra
el inserto y
apriete la contra-
tuerca.
4. Ajuste para colocar las tuercas de engaste.
1 / Instalación a la presión
Dependiendo del tamaño de la tuerca de engaste, el esfuerzo requerido para la instalación varía.
Reglas indicativas para la instalación de las tuercas de engaste (varía según el fabricante).
Esfuerzo de instalación recomendado por tamaño
Ø Materia
Esfuerzo
kN
Correspondencia remachadora 8T Correspondencia remachadora 10T
Esfuerzo kN Presión bar Esfuerzo kN Presión bar
M5 acier 8 16 1.6 16 1.1
M6 acier 12 24 2.4 24 1.6
M8 acier 18 36 3.6 36 2.5
M10 acier 21 42 4.2 42 3
M12 acier 23 46 4.6 46 3.2
M14 acier 50 - - 100 6.5
M5 alu 3,8 7.6 0.8 7.6 0.5
M6 alu 5,5 11 1.1 11 0.75
M8 alu 10 20 2.0 20 1.5
M10 alu 12 24 2.4 24 1.6
M12 alu 15 30 3.0 30 2.0
Para la instalación a la presión, la carrera del adaptador puede ajustarse a 25 mm (máximo).
El ajuste del esfuerzo se hace con la remachadora. (ajuste con el botón y lectura de la presión).

ADAPTADOR REMACHES CIEGOS 50KN
PARA REMACHADORA 10T
ES
Traducción de
la noticación
original
1.1 / Opciones :
Lectura del manómetro.
Ajuste de la presión
Lectura de la presión
Lectura sobre el sensor de esfuerzo
(más preciso) solución a favorecer
Ajuste de la
presión
Lectura del esfuerzo
Sensor 062115
1.2 / Ejemplo
Tuerca de engaste M10 de acero para colocar con la remachadora 10T.
Ajuste de la carrera a 25 mm.
Ajuste de la remachadora con el sensor a 210 bares
que corresponden a 42 kN
210
ou
Ajuste de la remachadora con el manómetro a 3
bares que corresponden a 42 kN.

ADAPTADOR REMACHES CIEGOS 50KN
PARA REMACHADORA 10T
ES
Traducción de
la noticación
original
• Presione el control de la remachadora, y espere a que la remachadora se
detenga.
• Suelte el gatillo y compruebe que el inserto está bien colocado.
• Si la tuerca de engaste no parece estar lo sucientemente engastada, aumente
un poco el esfuerzo de la remachadora.
• Para quitar la varilla de tracción de la tuerca de engaste, desenrosque la rue-
decilla trasera.
2/ Instalación a la carrera
1. Mida la dimensión interior de la tuerca de engaste (A)
2. Mida la dimensión del grosor de la brida (B)
3. Mida el grosor de la chapa que se utilizará para la tuerca de
engaste (C).
4. Ajuste el resultado (D) en el adaptador con la fórmula:
D = A – B – C
A
B
C
2.1 / Ejemplo :
Tuerca de engaste M12 / Chapa de grosor 2mm
1. Mida la dimensión interior de la tuerca de engaste (A) = 10.5mm
2. Mida la dimensión del grosor de la brida (B) = 2mm
3. MIda el grosor de la chapa que debe recibir el inserto (C) = 2mm
4. Ajuste el resutado en el adaptador
D = 10.5 – 2 – 2 = 6.5 mm
Una ranura
=
0.1 mm
D = 10.5 – 2 – 2 = 6.5 mm
Para un ajuste más preciso, use la escala (en mm) y las ranuras en la ruedecilla.
Una vuelta de la ruedecilla corresponde a 1,5 mm de carrera y hay 15 ranuras
en la tuerca.
5. presione el control de la remachadora, y espere a que la remachadora se
detenga.
6. Suelte el gatillo y compruebe que la tuerca de engaste está bien colocada.
7. Para quitar la varilla de tracción de la tuerca de engaste, desenrosque la rue-
decilla trasera.
El ajuste incorrecto de la carrera de la herramienta puede llevar a un apriete incorrecto de las tuercas de engaste y a una rotura del
tirante.
El ajuste de la carrera es esencial para jar la tuerca de engarce.
Hay que tener en cuenta que una carrera excesiva puede provocar la rotura del tirante, mientras que una carrera insuciente no
garantiza la estabilidad de la tuerca de engaste.
Es preferible ir por etapas, aumentando la carrera a medida que se avanza.
3 / Colocación de espárragos remachables :
Para la colocación de espárragos remachables, no es posible una medición dimensional para la deformación.
Es preferible ir por etapas, aumentando la carrera a medida que se avanza.

ADAPTADOR REMACHES CIEGOS 50KN
PARA REMACHADORA 10T
ES
Traducción de
la noticación
original
KIT 3
EXTENSIÓN PARA FIJAR REMACHES CIEGOS PARA EL DIÁMETRO DE LA VARILLA HAS-
TA 5 MM + EXTRACCIÓN DE REMACHES AUTO-PERFORANTES.
Orden de montaje del kit 3 :
1
2
3
Para usar el kit de extensión no es necesario usar el tazon de recuperación de las varillas.
Las varillas, una vez rotas, salen por el frente.
1. Atornille el soporte de mordazas 3 con 2 llaves de jación (apriete bien)
2. Atornille el soporte de boquilla 2 con 2 llaves de jación
3. Atornille una de las boquillas adaptadas al remache que se va a colocar (incluidas en el kit de base)
Ø3.2 ref : 065994
Ø3.5 ref : 066007
Ø4.0 ref : 066014
Ø4.5 ref : 066021
Ø5.0 ref : 066038
Para facilitar la instalación de las boquillas :
• 1- Coloque un remache en la boquilla.
• 2- Inserte el remache con la boquilla en el soporte montado.
• 3- Apriete la boquilla con una llave de jación.
1-
2- 3-
Llave de jación
Fijación de un remache ciego :
Después de colocar la boquilla apropiada, coloque el remache hasta el tope de la boquilla
Coloque el remache a través del agujero en las chapas que se van a remachar y presione el gatillo de la remachadora como se
muestra a continuación:
GYSPRESS 8T GYSPRESS 8T PP GYSPRESS 10T GYSPRESS 10T PP GYSPRESS 10T Connect
Una vez que el remache esté puesto, suelte el gatillo. Para las remachadoras 8T y 10 T, presione el gatillo abajo.
GYSPRESS 8T GYSPRESS 10T

ADAPTADOR REMACHES CIEGOS 50KN
PARA REMACHADORA 10T
ES
Traducción de
la noticación
original
Al inclinar el adaptador hacia adelante, las varillas de remache salen de la boquilla.
Reemplazo de las mordazas:
1- Conexión cono mordazas M0042
2- Cono mordazas M0043
3- Mordazas 058446
4- Separador M0044
5- Resorte 55189
6- Extensión M0041
7- Empujador 93058
8- Resorte 55223
9- Junta 55133
1
6
8
7
5
4
3
2
1
Desenrosque 2 usando las llaves de jación
Vuelva a colocar las mordazas 3 y luego colóquelas en 3 a 120°.
Coloque sucesivamente el 4, 5, 7 y 8. Luego enrosque el 6 con las llaves (apriete bien).
Extracción de remaches autoperforantes : (ver el capítulo anterior)
KIT 4
FIJACIÓN DE REMACHES CIEGOS DE Ø 9.8
Orden de montaje del kit 4 :
4
3
2
1
5

ADAPTADOR REMACHES CIEGOS 50KN
PARA REMACHADORA 10T
ES
Traducción de
la noticación
original
1- Coloque la tobera 1.
2 - Atornille el soporte de mordazas 2 con 2
llaves de jación (apriete bien)
3- Atornille el soporte de boquilla 3 con 2
llaves de jación
4- Atornille la boquilla de Ø6 ref : 066052.
5- Enhebre el tazón de recuperación 5
Llave de jación
Para facilitar la instalación de las boquillas :
• 1- Coloque un remache en la boquilla.
• 2- Inserte el remache con la boquilla en el soporte mon-
tado.
• 3- Apriete la boquilla con una llave de jación.
1-
2- 3-
Fijación de un remache ciego :
Después de colocar la boquilla apropiada, coloque el remache hasta el tope de la boquilla
Coloque el remache a través del agujero en las chapas que se van a remachar y presione el gatillo de la remachadora como se
muestra a continuación:
GYSPRESS 8T GYSPRESS 8T PP GYSPRESS 10T GYSPRESS 10T PP GYSPRESS 10T Connect
Una vez que el remache esté puesto, suelte el gatillo. Para las remachadoras 8T y 10 T, presione el gatillo abajo.
GYSPRESS 8T GYSPRESS 10T
Al inclinar el adaptador hacia atrás, las varillas de remache caen
en el tazón de recuperación.
Al inclinarse hacia adelante, las varillas salen por la boquilla.
Recuperación de las varillas :
Para recuperar las varillas, quite
la tapa del tazón.
Una vez que se recuperen las
varillas, vuelve a poner la tapa
hasta que haga clic.
1- Tazón M0077
2- Tapa M0078
3- Junta tórica 55262
4- Junta tórica 55121
4
1
3
2
Reemplazo de las mordazas:
Desenrosque usando las llaves
de jación.
Vuelva a colocar las mordazas 2
y luego, colóquelas en 3 a 120°.
Coloque el 4, luego el 5 y lue-
go enrosque el 1 con las llaves
(apriete bien).
Llave de jación
1- Conexión cono mordazas M0042
2- Mordazas (ref. 058446) 51522
3- Cono mordazas M0043
4- Separador M0044
5- Resorte 55189
1
5
4
2
3

ADATTATORE RIVETTI CIECHI 50KN
PER RIVETTATRICE 10T
IT
Traduzione
dell’avviso
originale
DESCRIZIONE
L’adattatore per rivetti ciechi è compatibile con le rivettatrici GYSPRESS 8T/10T e GYSPRESS 8T PUSH PULL. La sua forza di rivettatura
è di 24 kN. Permette di posare dei rivetti ciechi di diametro da 4.0 a 7.8 mm per l’alluminio e da 4.0 a 6.4 mm per l’acciaio e per dadi
e perni.
ISTRUZIONI DI SICUREZZA
• L’adattatore 50KN deve servire solamente per posare rivetti angolari ma anche dadi e perni.
• Equipaggiamento obbligatorio: occhiali di protezione, protezione acustica, guanti di sicurezza. Non puntare mai
la punta dello strumento verso se stessi o qualcun altro.
• Non superare la pressione massima autorizzata di 7 bars.
• Utilizzare obbligatoriamente dei rivetti da posa angolari che seguino le speciche
• Montare la punta in base alla dimensione del rivetto. Non usare mai la forza per posizionare il gambo del rivetto
nella punta. Non utilizzare mai una punta più larga del gambo del rivetto.
• Vericare che il serraggio della parte da rivettare sia corretto.
• Tenere saldamente la rivettatrice nché il taglio nel gambo del rivetto non è completo e fuoriesce. Altrimenti,
rilasciare il grilletto, quindi riprendere la trazione premendo di nuovo il grilletto,
• Scollegare sempre la macchina dopo ogni utilizzo e cambio della punta di rivettatura.
• Conservare questo manuale utente in un luogo sicuro. In caso di smarrimento, contattaci.
AMBIENTE
Questo dispositivo deve essere utilizzato solamente per fare delle operazioni di rivettatura nei limiti indicati sulla targhetta indicativa
e/o sul manuale. Bisogna rispettare le direttive relative alla sicurezza. In caso di uso inadeguato o pericoloso, il fabbricante non
potrà essere ritenuto responsabile.
Il dispositivo deve essere utilizzato in un locale senza polvere, né acido, né gas inammabili o altre sostanze corrosive, e lo stesso
vale per il suo stoccaggio. Assicurarsi che durante l’utilizzo ci sia una buona circolazione d’aria.
Intervallo di temperatura :
Utilizzo tra -10 e +40°C (+14 e +104°F).
Stoccaggio fra -20 e +55°C (-4 e 131°F).
Umidità dell’aria:
Inferiore o uguale a 50% a 40°C (104°F).
Inferiore o uguale a 90% a 20°C (68°F).
Altitudine :
Fino a 1000 m sopra il livello del mare (3280 piedi).
IN CASO DI GUASTO
L’operazione di rivettatura viene effettuata solo se si:
• Verica che il dado di regolazione della corsa sia regolato al valore giusto.
• Verica che la rivettatrice utilizzata funziona correttamente.
• Verica che non ci siano delle perdite d’olio o di aria compressa.
ISTRUZIONI PER LA MANUTENZIONE
• Mantenere l’utensile in condizioni di pulizia. Controllare periodicamente il buono stato dei collegamenti dell’aria
compressa, il corretto funzionamento dell’adattatore da 50 kN (il gioco naturale tra il gambo del rivetto e il bit).
• In caso di perdita d’olio, rimuovere il rivettatore e capovolgere l’utensile.
• Sostituzione delle ganasce (vedi pag. 6)
RICAPITOLATIVO
Rivettatrici Potenza
GYSPRESS 8T 40 kN
GYSPRESS 8T PP 40 kN
GYSPRESS 10T 50 kN
GYSPRESS 10T PP 50 kN
GYSPRESS 10T Connect 50 kN

ADATTATORE RIVETTI CIECHI 50KN
PER RIVETTATRICE 10T
IT
Traduzione
dell’avviso
originale
MONTAGGIO SU GYSPRESS
GYSPRESS 8T :
Matrice D17
GYSPRESS 8T PP :
GYSPRESS 10T :
GYSPRESS 10T Connect :
Jack

ADATTATORE RIVETTI CIECHI 50KN
PER RIVETTATRICE 10T
IT
Traduzione
dell’avviso
originale
REGOLAZIONI DELLO SFORZO DELL’ADATTATORE
Lo sforzo di trazione dell’adattatore dipende dallo sforzo emesso dalla rivettatrice:
Tabella di corrispondenza con lo sforzo fornito dalla rivettatrice e della pressione dell’aria in entrata della rivettatrice.
Pressione d’aria 2 bar / 39 Psi 3 bar / 44 Psi 4 bar / 58 Psi 5 bar / 58 Psi 6 bar / 87 Psi 6,5 bar / 94 Psi 7 bar / 101 Psi 8 bar / 116 Psi
Sforzo
Rivettatrice Adattatore Rivettatrice Adattatore Rivettatrice Adattatore Rivettatrice Adattatore Rivettatrice Adattatore Rivettatrice Adattatore Rivettatrice Adattatore Rivettatrice Adattatore
GYSPRESS 8T 20 kN 10 kN 30 kN 15 kN 40 kN 20 kN 50 kN 25 kN 60 kN 30 kN 65 kN 32,5 kN 70 kN 35 kN 80 kN 40 kN
GYSPRESS 8T PP 20 kN 10 kN 30 kN 15 kN 40 kN 20 kN 50 kN 25 kN 60 kN 30 kN 65 kN 32,5 kN 70 kN 35 kN 80 kN 40 kN
GYSPRESS 10T 39 kN 19,5 kN 44 kN 22 kN 58 kN 29 kN 72 kN 36 kN 87 kN 43,5 kN 100 kN 50 kN 100 kN 50 kN 100 kN 50 kN
GYSPRESS 10T PP 39 kN 19,5 kN 44 kN 22 kN 58 kN 29 kN 72 kN 36 kN 87 kN 43,5 kN 100 kN 50 kN 100 kN 50 kN 100 kN 50 kN
GYSPRESS 10T Connect 39 kN 19,5 kN 44 kN 22 kN 58 kN 29 kN 72 kN 36 kN 87 kN 43,5 kN 100 kN 50 kN 100 kN 50 kN 100 kN 50 kN
REGOLAZIONI DELLA CORSA
La corsa dell’adattatore è regolabile da 0 a 25 mm.
Si fa tramite la manopola A.
Stringere completamente per avere 0 di corsa.
Svitare completamente per avere 25 mm di corsa.
0
25
A
DIVERSI KIT SULL’ADATTATORE
Kit 1 :
Posa di rivetti angolari a seconda del diametro dell’asta no a 5 mm + estrazione del rivetto
auto-perforante.
Kit 2 :
Posa di dadi e di perni M5 a M14.
Kit 3 :
Prolunga per la posa di rivetti angolari a seconda del diametro dell’asta no a 5mm
+ estrazione del rivetto auto-perforante.
Kit 4 :
Posa di rivetti angolari ø 9.8 mm.

ADATTATORE RIVETTI CIECHI 50KN
PER RIVETTATRICE 10T
IT
Traduzione
dell’avviso
originale
KIT 1
POSA DI RIVETTI ANGOLARI A SECONDA DEL DIAMETRO DELL’ASTA FINO A 5 MM +
ESTRAZIONE DEL RIVETTO AUTO-PERFORANTE.
Ordine del montaggio del kit 1 :
4
3
2
1
5
Clic
1- Mettere l’ugello 1
2- Avvitare il supporto morsi 2 con le 2 chiavi di serraggio (stringere bene)
3- Avvitare il supporto ugello 3 con le 2 chiavi di serraggio
4- Avvitare un ugello adatto al rivetto da posizionare:
Ø3.2 ref : 065994
Ø3.5 ref : 066007
Ø4.0 ref : 066014
Ø4.5 ref : 066021
Ø5.0 ref : 066038
Per facilitare il posizionamento degli ugelli:
• 1- Posizionare un rivetto nell’ugello.
• 2- Inserire il rivetto con l’ugello nel supporto montato.
• 3- Stringere l’ugello con una chiave di serraggio.
1-
2- 3-
Chiave di serraggio
5- Inilare il recipiente di recupero
Posa di un rivetto angolare:
Dopo aver montato l’ugello corretto, posizionare il rivetto no all’arresto dell’ugello
Posizionare il rivetto attraverso il foro delle lamiere da rivettare e premere il grilletto della rivettatrice secondo il modello sottostante :
GYSPRESS 8T GYSPRESS 8T PP GYSPRESS 10T GYSPRESS 10T PP GYSPRESS 10T Connect
Una volta che il rivetto è scattato, rilascia il grilletto. Per rivettatrici 8T e 10T premere il grilletto sotto.
GYSPRESS 8T GYSPRESS 10T

ADATTATORE RIVETTI CIECHI 50KN
PER RIVETTATRICE 10T
IT
Traduzione
dell’avviso
originale
Quando si inclina l’adattatore all’indietro, i gambi dei rivetti cadono
nel recipiente di raccolta.
Sporgendosi in avanti, le aste escono dall’ugello.
Recupero delle aste:
Per raccogliere le aste, tirare
verso l’alto il coperchio del reci-
piente.
Una volta raccolte le aste, ripo-
sizionare il coperchio nché non
scatta.
1- Recipiente M0077
2- Coperchio M0078
3- Anello toroidale 55262
4- Anello toroidale 55121
4
1
3
2
Sostituzione dei morsi:
Svitare utilizzando le chiavi di
serraggio.
Sostituire i morsi 2 e poi,
posizionarli da 3 a 120 °.
Posizionare 4 poi 5 e poi avvi-
tare 1 usando le chiavi (stringere
bene).
Chiave di ser-
raggio
1- Collegamento cono morsi M0042
2- Morsi (rif. 058446) 51522
3- Cono morsi M0043
4- Distanziatore M0044
5- Molla 55189
1
5
4
2
3
Estrazione di un rivetto auto-perforante:
Il kit può essere dotato di un ugello speciale per l’estrazione dei rivetti auto-perforanti mediante saldatura di un’asta al rivetto (rif.
066151).
Montaggio dell’ugello:
Montare l’ugello di estrazione 066151 sul supporto dell’ugello. Regolare il dado di regolazione con corsa su 15 mm.
0
15
Tappe di estrazione:
1- Saldatura dell’asta di estrazione:
Materiale: ARC PULL 350 062191 + ARC PULL RIVET BOX 064584

ADATTATORE RIVETTI CIECHI 50KN
PER RIVETTATRICE 10T
IT
Traduzione
dell’avviso
originale
2- Inserire l’asta di estrazione del rivetto no in fondo nella pistola, l’ugello a contatto con la lamiera:
3- Azionare l’adattatore secondo il seguente modello:
GYSPRESS 8T GYSPRESS 8T PP GYSPRESS 10T GYSPRESS 10T PP GYSPRESS 10T Connect
Una volta che il rivetto è estratto nella lamiera, rilasciare il grilletto. Pe rle rivettatrici 8T e 10T, premere sul grilletto come qui di
seguito:
GYSPRESS 8T GYSPRESS 10T
Il rivetto e l’asta escono dal davanti:

ADATTATORE RIVETTI CIECHI 50KN
PER RIVETTATRICE 10T
IT
Traduzione
dell’avviso
originale
KIT 2
POSA DI DADI E DI PERNI M5 A M14.
6-4
6-5
6-6
6-2
6-3
6-1
6-4
54 32
6
1
M14
M12
M10
M8
M6
M5
7
Ordine del montaggio del kit 2:
1- Mettere il porta-utensili 1
2- Posizionare la vite adatta al dado o al perno di crimpatura (M5, M6, M8, M10, M12, M14)
3- Avvitare il dado di bloccaggio 3 con le 2 chiavi di serraggio (stringere bene)
4- Avvitare il supporto dell’ugello 4
5- Avvitare l’ugello 5 adatto al dado o al perno di crimpatura (M5, M6, M8, M10, M12, M14)
6- Posizionare la manopola di trascinamento 6 (premere il pulsante 7 per inserirla)
Per rimuovere la manopola, premere il pulsante 7 e tirare la manopola
7
Coppia di viti e ugelli a seconda dell’inserto da montare:
Dado M14 Ugello M14 Asta M14
Dado M12
Ugello M12 Asta M12
Dado M10
Ugello M10 Asta M10
Dado M8
Ugello M8
Asta M8
Vite M8

ADATTATORE RIVETTI CIECHI 50KN
PER RIVETTATRICE 10T
IT
Traduzione
dell’avviso
originale
Dado M6 Ugello M6
Asta M6
Vite M6
Dado M5
Ugello M5
Asta M5
Vite M5
Perno M8
Ugello M8 Asta M8
Perno M6
Ugello M6 Asta M6
Perno M5
Ugello M5 Asta M5
Posa di un dado:
Ci sono due metodi per posare i dadi di crimpatura:
1.
2. Avvitare il
dado almeno
no all’estremità
dell’asta.
3. Svitare l’ugello
contro l’inserto e
serrare il dado.
4. Regolazione per la posa dei dadi.
1 / Posa alla pressione
A seconda delle dimensioni del dado per rivetti ciechi, la forza richiesta per l’installazione varia.
Regole indicative per il montaggio dei dadi (varia a seconda del costruttore).
Sforzo di installazione raccomandata a seconda della dimensione
Ø Materiale
Sforzo
kN
Corrispondenza rivettatrice 8T Corrispondenza rivettatrice 10T
Sforzo kN Pressione bar Sforzo kN Pressione bar
M5 acier 8 16 1.6 16 1.1
M6 acier 12 24 2.4 24 1.6
M8 acier 18 36 3.6 36 2.5
M10 acier 21 42 4.2 42 3
M12 acier 23 46 4.6 46 3.2
M14 acier 50 - - 100 6.5
M5 alu 3,8 7.6 0.8 7.6 0.5
M6 alu 5,5 11 1.1 11 0.75
M8 alu 10 20 2.0 20 1.5
M10 alu 12 24 2.4 24 1.6
M12 alu 15 30 3.0 30 2.0
Per la posa a pressione, la corsa dell’adattatore può essere regolata a 25 mm (max).
Lo sforzo viene regolato con la rivettatrice. (regolazione con il pulsante e lettura della pressione).

ADATTATORE RIVETTI CIECHI 50KN
PER RIVETTATRICE 10T
IT
Traduzione
dell’avviso
originale
1.1 / Opzioni
Lettura del manometro.
Regolazione della pressione
Lettura della pressione
Lettura sul sensore di sforzo
(più precisa) soluzione da prediligere
Regolazione
della
pressione
Lettura di sforzo
Sensore 062115
1.2 / Esempio
Dado M10 acciaio da posare con una rivettatrice 10T.
Regolazione della corsa su 25 mm. Regolazione della rivettatrice con sensore su 210 bars
che corrisponde a 42 kN.
210
ou
Regolazione della rivettatrice con manometro 3
bars che corrisponde a 42 kN.
• Premere il comando della rivettatrice e attendere che si fermi.
• Rilasciare il grilletto e vericare che l’inserto sia posizionato correttamente.
• Se il dado del rivetto non sembra essere abbastanza stretto, aumentare legger-
mente la forza della rivettatrice.
• Per rimuovere l’asta dal dado del rivetto, svitarlo utilizzando la manopola pos-
teriore.

ADATTATORE RIVETTI CIECHI 50KN
PER RIVETTATRICE 10T
IT
Traduzione
dell’avviso
originale
2/ Posa alla corsa
1. Misurare la dimensione interna del dado(A)
2. Misurare la dimensione dello spessore della angia(B)
3. Misurare lo spessore della lamiera che deve ricevere il dado (C)
4. Regolare sull’adattatore il risultato ottenuto (D) con la formula:
D = A – B – C
A
B
C
2.1 / Esempio :
Dado M12 / Spessore lamiera 2mm
1. Misurare la dimensione interna del dado(A) = 10.5 mm
2. Misurare la dimensione dello spessore della angia(B) = 2 mm
3. Misurare lo spessore della lamiera che deve ricevere il dado (C) = 2 mm
4. Regolare sull’adattatore il risultato ottenuto (D) con la formula:
D = 10.5 – 2 – 2 = 6.5 mm
Una scanalatura
=
0.1 mm
D = 10.5 – 2 – 2 = 6.5 mm
Per una regolazione più precisa, utilizzare la graduazione (in mm) e le scanalature
sulla manopola.
Un giro del quadrante ha una corsa di 1,5 mm e sul dado sono presenti 15 sca-
nalature.
5. premere il comando della rivettatrice e attendere che si fermi.
6. Rilasciare il grilletto e controllare che il dado del sia posizionato correttamente.
7. Per rimuovere l’asta di trazione dal dado, svitare con l’aiuto della manopola
posteriore.
Una regolazione errata della corsa dell’utensile, può portare a un serraggio improprio dei dadi e alla rottura del tirante.
La regolazione della corsa è essenziale per ssare il dado.
Va considerato che una corsa eccessiva può causare la rottura del tirante, mentre una corsa insufciente non garantisce la stabilità
del dado.
È meglio farlo passo dopo passo, aumentando la corsa poco a poco.
3 / Posa dei perni:
Per l’installazione dei perni non è possibile una misurazione dimensionale della deformazione.
È meglio andare passo dopo passo, aumentando la corsa man mano.

ADATTATORE RIVETTI CIECHI 50KN
PER RIVETTATRICE 10T
IT
Traduzione
dell’avviso
originale
KIT 3
PROLUNGA PER LA POSA DI RIVETTI ANGOLARI A SECONDA DEL DIAMETRO DELL’ASTA
FINO A 5MM + ESTRAZIONE DEL RIVETTO AUTO-PERFORANTE
Ordine del montaggio del kit 3:
1
2
3
Per utilizzare il kit prolunga non è necessario utilizzare il recipiente per la craccolta delle aste.
Le aste, quando rotte, fuoriescono sul davanti.
1. Avvitare il supporto dei morsi 3 con le 2 chiavi di serraggio (stringere bene)
2. Avvitare il supporto ugello 2 con le 2 chiavi di serraggio
3. Avvitare un ugello adatto al rivetto da posizionare (compreso nel kit base)
Ø3.2 ref : 065994
Ø3.5 ref : 066007
Ø4.0 ref : 066014
Ø4.5 ref : 066021
Ø5.0 ref : 066038
Per facilitare il posizionamento degli ugelli:
• 1- Posizionare un rivetto nell’ugello.
• 2- Inserire il rivetto con l’ugello nel supporto montato.
• 3- Stringere l’ugello con una chiave di serraggio.
1-
2- 3-
Chiave di serraggio
Posa di un rivetto angolare:
Dopo aver montato l’ugello corretto, posizionare il rivetto no all’arresto dell’ugello
Posizionare il rivetto attraverso il foro delle lamiere da rivettare e premere il grilletto della rivettatrice secondo il modello sottostante :
GYSPRESS 8T GYSPRESS 8T PP GYSPRESS 10T GYSPRESS 10T PP GYSPRESS 10T Connect
Una volta che il rivetto è scattato, rilascia il grilletto. Per rivettatrici 8T e 10T premere il grilletto come in seguito.
GYSPRESS 8T GYSPRESS 10T

ADATTATORE RIVETTI CIECHI 50KN
PER RIVETTATRICE 10T
IT
Traduzione
dell’avviso
originale
Inclinando in avanti l’adattatore, i gambi dei rivetti fuoriescono dall’ugello.
Sostituzione dei morsi:
1-Collegamento cono morsi M0042
2- Cono morsi M0043
3- Morsi 058446
4- Distanziatore M0044
5- Molla 55189
6- Prolunga M0041
7- Pistone 93058
8- Molla 55223
9- Guarnizione 55133
1
6
8
7
5
4
3
2
1
Svitare 2 utilizzando le chiavi di serraggio.
Sostituire i morsi 3 e poi, posizionarli da 3 a 120 °.
Posizionare successivamente 4,5,7 e 8. Poi avvitare 6 usando le chiavi (stringere bene).
Estrazione di un rivetto auto-perforante: (vedi capitolo precedente)
KIT 4
POSA DI RIVETTO ANGOLARE Ø 9.8
Ordine del montaggio del kit 4:
4
3
2
1
5

ADATTATORE RIVETTI CIECHI 50KN
PER RIVETTATRICE 10T
IT
Traduzione
dell’avviso
originale
1- Mettere l’ugello 1
2- Avvitare il supporto morsi 2 con le 2 chiavi
di serraggio (stringere bene)
3- Avvitare il supporto ugello 3 con le 2 chiavi
di serraggio
4- Avvitare l’ugello Ø6 rif : 066052.
5- Inlare il recipiente di recupero 5.
Chiave di serraggio
Per facilitare il posizionamento degli ugelli:
• 1- Posizionare un rivetto nell’ugello.
• 2- Inserire il rivetto con l’ugello nel supporto montato.
• 3- Stringere l’ugello con una chiave di serraggio.
1-
2- 3-
Posa di un rivetto angolare:
Dopo aver montato l’ugello corretto, posizionare il rivetto no all’arresto dell’ugello
Posizionare il rivetto attraverso il foro delle lamiere da rivettare e premere il grilletto della rivettatrice secondo il modello sottostante :
GYSPRESS 8T GYSPRESS 8T PP GYSPRESS 10T GYSPRESS 10T PP GYSPRESS 10T Connect
Una volta che il rivetto è scattato, rilascia il grilletto. Per rivettatrici 8T e 10T premere il grilletto come in seguito.
GYSPRESS 8T GYSPRESS 10T
Quando si inclina l’adattatore all’indietro, i gambi dei rivetti cadono
nel recipiente di raccolta.
Sporgendosi in avanti, le aste escono dall’ugello.
Recupero delle aste:
Per raccogliere le aste, tirare
verso l’alto il coperchio del reci-
piente.
Una volta raccolte le aste, ripo-
sizionare il coperchio nché non
scatta.
1- Recipiente M0077
2- Coperchio M0078
3- Anello toroidale 55262
4- Anello toroidale 55121
4
1
3
2
Sostituzione dei morsi:
Svitare utilizzando le chiavi di
serraggio.
Sostituire i morsi 2 e poi,
posizionarli da 3 a 120 °.
Posizionare 4 poi 5 e poi avvi-
tare 1 usando le chiavi (stringere
bene).
Chiave di ser-
raggio
1- Collement cono morsi M0042
2- Morsi 51522
3- Cono morsi M0043
4- Distanziatore M0044
5- Molla 55189
1
5
4
2
3

55
ADAPTATEUR RIVETS AVEUGLES 50KN POUR RIVETEUSE 10T
Notice Originale
ICÔNES / SYMBOLS / ZEICHENERKLÄRUNG / SÍMBOLOS / SYMBOLEN /
- Attention ! Risque d’écrasement des mains.
- Warning ! Danger of crushing hands.
- Achtung! Handverletzungen möglich.
- ¡ATENCIÓN! Riesgo de aplastamiento de manos.
- Внимание! Опасность прищемить руку.
- Waarschuwing ! Gevaar van beknelling van handen.
- Attenzione! Rischio di schiacciamento delle mani.
- Attention ! Risque d’écrasement des doigts.
- Warning ! Danger of crushing ngers.
- Achtung! Quetschgefahr.
- ¡ATENCIÓN! Riesgo de aplastamiento de dedos.
- Внимание! Опасность прищемить пальцы.
- Waarschuwing ! Gevaar van beknelling van vingers.
- Attenzione! Rischio di schiacciamento delle dita.
- Respecter les consignes générales.
- Respect general rules.
- Allgemeine Hinweise beachten.
- Sigas las indicaciones generales.
- Соблюдайте общие указания.
- Respecteer algemene veiligheidsregels.
- Rispettare le istruzioni generali.
- Porter des gants.
- Wear gloves.
- Handschutz benutzen.
- Lleve guantes.
- Носите перчатки.
- Draag beschermende werkhandschoenen.
- Indossare dei guanti.
- Porter un masque facial.
- Wear a face mask.
- Gesichtsschutz benutzen.
- Lleve una máscara protectora.
- Носите лицевую защитную маску.
- Draag een veiligheidsmasker.
- Indossare una maschera facciale.
- Respecter le mode d’emploi.
- Follow the user manual.
- Betriebsanleitung beachten.
- Siga el manual de instrucciones.
- Соблюдайте инструкцию по эксплуатации.
- Lees en volg de gebruiksaanwijzing op.
- Rispettare le modalità di utilizzo.
- Matériel conforme aux Directives européennes. La déclaration UE de conformité est disponible sur notre site (voir à la page de couverture).
- Device complies with europeans directives, The EU declaration of conformity is available on our website (see cover page).
- Gerät entspricht europäischen Richtlinien. Die Konformitätserklärung nden Sie auf unsere Webseite.
- Aparato conforme a las directivas europeas. La declaración de conformidad UE está disponible en nuestra página web (dirección en la por-
tada).
- Устройство соответствует директивам Евросоюза. Декларация о соответствии доступна для просмотра на нашем сайте (ссылка на
обложке).
- Apparaat in overeenstemming met de Europese richtlijnen. De verklaring van overeenstemming is te downloaden op onze website (adres
vermeld op de omslag).
- Materiale in conformità alle Direttive europee. La dichiarazione di conformità è disponibile sul nostro sito (vedere sulla copertina).

56
SAS JBDC
1, rue de la Croix des Landes
CS 54159
53941 SAINT-BERTHEVIN
Cedex France
/