Tascam CD-GT1 El manual del propietario
- Categoría
- Equipo de música suplementario
- Tipo
- El manual del propietario

»
CD-GT1
Portable CD Guitar
Trainer
OWNERʼS MANUAL (EN / F / D / I / E)
is appliance has a serial number located
on the rear panel lease record the model
number and serial number and retain them
for your records
odel number
_____________
erial number
_____________
EnglishFrançais
Deutsch
Español
Italiano
D00728500B

2
— TASCAM CD-GT1
Important safety precautions
Y
CAUTION: TO REDUCE THE RISK OF ELECTRIC
SHOCK, DO NOT REMOVE COVER (OR BACK).
NO USER-SERVICABLE PARTS INSIDE. REFER
SERVICING TO QUALIFIED SERVICE PERSON-
NEL.
E
The lightning ash with arrowhead symbol,
within an equilateral trinagle, is intended to
alert the user to the presence of uninsulated
“dangerous voltage” within the product’s en-
closure that may be of suf cient magnitude to
constitute a risk of electric shock to persons.
R
WARNING: TO PREVENT FIRE OR SHOCK
HAZARD, DO NOT EXPOSE THIS APPLIANCE TO
RAIN OR MOISTURE.
FOR U.S.A.
TO THE USER
This equipment has been tested and found to
comply with the limits for a Class B digital de-
vice, pursuant to Part 15 of the FCC Rules. These
limits are designed to provide reasonable pro-
tection against harmful interference when the
equipment is operated in a commercial environ-
ment. This equipment generates, uses, and can
radiate radio frequency energy and, if not in-
stalled and used in accordance with the instruc-
tion manual, may cause harmful interference to
radio communications.. However, there is no
guarantee that interference will not occur in a
particular installation. If this equipment does
cause harmful interference to radio or television
reception, which can be determined by turning
the equipment off and on, the user is encour-
aged to try to correct the interference by one or
more of the following countermeasures.
a)
Reorient or relocate the receiving antenna
b)
Increase the separation between the
equipment and receiver.
c)
Connect the equipment into an outlet on a
circuit other from that to which the receiver
is connected.
d)
Consult the dealer or an experienced radio/
TV technician for help.
CAUTION
Changes or modi cations to this equipment not
expressly approved by TEAC CORPORATION for
compliance could void the user’s authority to
operate this equipment.

TASCAM CD-GT1 —
3
Important Safety Instructions
1
Read these instructions.
2
Keep these instructions.
3
Heed all warnings.
4
Follow all instructions.
5
Do not use this apparatus near water.
6
Clean only with dry cloth.
7
Do not block any ventilation openings. Install
in accordance with the manufacturer’s instructions.
8
Do not install near any heat sources such as
radiators, heat registers, stoves, or other apparatus
(including ampli ers) that produce heat.
9
Do not defeat the safety purpose of the po-
larized or grounding-type plug. A polarized plug
has two blades with one wider than the other. A
grounding type plug has two blades and a third
grounding prong. The wide blade or the third prong
are provided for your safety. If the provided plug
does not t into your outlet, consult an electrician
for replacement of the obsolete outlet.
10
Protect the power cord from being walked on
or pinched particularly at plugs, convenience recep-
tacles, and the point where they exit from the ap-
paratus.
11
Only use attachments/accessories speci ed by
the manufacturer.
12
Use only with the cart, stand, tripod, bracket,
or table speci ed by the manufacturer, or sold with
the apparatus. When a cart is used, use caution
when moving the cart/apparatus combination to
avoid injury from tip-over.
13
Unplug this apparatus during lightning storms
or when unused for long periods of time.
14
Refer all servicing to quali ed service person-
nel. Servicing is required when the apparatus has
been damaged in any way, such as power-supply
cord or plug is damaged, liquid has been spilled or
objects have fallen into the apparatus, the appara-
tus has been exposed to rain or moisture, does not
operate normally, or has been dropped.
•
Do not expose this apparatus to drips or
splashes.
•
Do not place any objects lled with liquids,
such as vases, on the apparatus.
•
Do not install this apparatus in a con ned
space such as a book case or similar unit.
•
The apparatus draws nominal non-operating
power from the AC outlet with its POWER switch in
the off position.
NOTES
The CD-GT1 cannot play un nalized CD-
R/RW discs. In addition, some nalized
CD-R/RW discs may be unplayable on
the CD-GT-1.
To avoid the possibility of slight noise
when you use the unit with the AC
adapter, remove the batteries before con-
necting the AC adapter. If any batteries
are accidentally left in the unit, you should
always switch the unit off when changing
between AC adapter and battery power.
The microphone input is unbalanced. Use
an unbalanced microphone cable tted
with a 1/4” plug.
Ni-MH batteries may exhibit reduced per-
formance in an environment under 10ºC
(50F). Also, if these batteries are not used
for some time after charging, they may
also exhibit reduced performance.
The performance of alkaline batteries also
depends on temperature and time since
manufacture (low temperatures and lon-
ger periods mean shorter battery life, re-
gardless of the battery indicator as shown
on the display).
Bear this in mind when operating the unit,
and use freshly recharged Ni-MH batter-
ies, new alkaline batteries or use an AC
adapter if battery life seems inadequate.

4
— TASCAM CD-GT1
Safety Information
This product has been designed and manu-
factured according to FDA regulations “title
21, CFR, chapter1, subchapter J, based on the
Radiation Control for Health and Safety Act
of 1968”, and is classi ed as a class 1 laser
product. There is no hazardous invisible laser
radiation during operation because invisible
laser radiation emitted inside of this product is
completely con ned in the protective housings.
The label required in this regulation is shown
here.
CAUTION
•
DO NOT REMOVE THE PROTECTIVE HOUSING
USING A SCREWDRIVER.
•
USE OF CONTROLS OR ADJUSTMENTS OR
PERFORMANCE OF PROCEDURES OTHER
THAN THOSE SPECIFIED HEREIN MAY RESULT
IN HAZARDOUS RADIATION EXPOSURE.
•
IF THIS PRODUCT DEVELOPS TROUBLE, CON-
TACT YOUR NEAREST QUALIFIED SERVICE
PERSONNEL, AND DO NOT USE THE PROD-
UCT IN ITS DAMAGED STATE.
Optical pickup: Type KSM-900AAA
Manufacturer: SONY CORPORATION
Laser output: <1 mW play on the objec-
tive lens
Wavelength: 775—816 nm
Important Safety Instructions

TASCAM CD-GT1 —
5
English
Table of contents
.............................................................
5
First steps with your CD-GT1
..........................................
6
Making connections
........................................................
7
Adjusting the balance
.....................................................
8
Using the menu system
...................................................
9
Using the CD player
.........................................................
10
Pitch and tempo changes
................................................
11
Using effects
...............................................................
.....
12
Effect presets and parameters
........................................
13
Using the tuner
...............................................................
.
14
Facts and gures (speci cations)
....................................
15
Table of contents

6
— TASCAM CD-GT1
6 — TASCAM CD-GT16
English
English
First steps with your CD-GT1
About this manual
About this manual
hen we refer to a key or connector
hen we refer to a key or connector
or control on the we write it
or control on the we write it
like this
like this
PLAY
hen we refer to an item shown on
the display we write it like this
MENU
Inserting batteries
e uses four
batteries not supplied e recom
mend the use of rechargeable i
batteries alkaline batteries may also
be used
lways use batteries of the same
type
lways replace all batteries to
gether
f you are not going to use the
for some time remove
the batteries
lace the batteries following the
+
and
–
markings inside the battery
–
markings inside the battery
–
compartment
aximize battery life by using
the unit in the following tempera
ture range ° to ° ° to
°
lways dispose of used batteries
as recommended by your local
authorities
hen the battery level drops the unit
automatically shuts down and must be
restarted with the
POWER
switch after
the batteries have been replaced
ote that the battery indicator on the
display only provides a rough estimate
of remaining battery life and under
some circumstances there may not be
enough power in the batteries to power
the despite the battery
power indication on the display
Using an AC adapter
nly use a adapter
not supplied sing another type of
adapter may damage your
lways make sure that the voltage
matches the voltage written on the
adapter
Switching on the unit
e has two power switches
se the rst
POWER
switch sliding
switch to turn the power to the whole
unit on and o
e second switch
GUITAR
controls
the power to the
GUITAR/INPUT
jack
and e ect unit f this section is o you
cannot use this jack or use any of the
guitarmicrelated menu systems e ect
and tuner
lso note the
HOLD
switch that locks
the s controls and keys when
it is in the
ON
position
Auto power-save
f the unit is powered using batteries
for more than minutes in stop mode
or with no disc loaded or opened the
player shuts down the part of
the display goes blank but you can
still use the guitar section
estart the player alone by using
the
PLAY
key or use the
PLAY
key or use the
PLAY
POWER
switch if both the and guitar sec
tions are turned o

English
TASCAM CD-GT1 —
7
English
Making connections
Inputs
Connecting a guitar
o connect a guitar or bass guitar to
the unit simply connect one end of the
guitar cord to the guitar and connect
the other to the
GUITAR/MIC IN
jack
of the
f you use e ects pedals or stomp
boxes you can connect the output of
these to the remember that
the has its own e ects
et the
GUITAR/MIC
switch to
GUITAR
ake sure the
GUITAR
power button
is pushed in
WARNING
NEVER connect a guitar ampli er to the
CD-GT1’s
GUITAR/MIC
input, as you will
damage your equipment if you do this.
Connecting a microphone
onnect a suitable microphone ask
your dealer if you are not
sure to the
GUITAR/MIC IN
jack of
the
et the
GUITAR/MIC
switch to
MIC
Connecting a stereo line source
ou can also connect a stereo line
source such as the outputs from a syn
thesizer a guitar preampli er or rack
mount e ects unit or a cassette deck
etc to the se the
LINE
IN
minijack beside the
GUITAR/MIC
IN
jack
WARNING
You should NEVER connect the speaker out-
puts of a guitar ampli er to anything except
speakers. If you are in any doubt at all about
what you can connect to your CD-GT1, ask
someone who knows.
Connecting a footswitch
ou can connect a footswitch to the
ou can connect a footswitch to the
to step through the e ect
to step through the e ect
slot settings or to cue the player
slot settings or to cue the player
handso see later in this manual
for details
o avoid problems with your
use only a
footswitch or similar nonlatching
pushtomake footswitch connected
to the
FOOT
jack
Outputs
onnect the unit to a stereo systems
input or mixer input etc using
a suitable stereo cable not supplied
connected to the s
LINE
OUT
stereo minijack
onnect a pair of headphones not
supplied to the
PHONES
stereo mini
jack for private listening

8
— TASCAM CD-GT1
8 — TASCAM CD-GT18
English
English
Adjusting the balance
Inputs
Inputs
e has three input sources
e has three input sources
the being played
the guitar or microphone connect
ed to the
GUITAR/MIC IN
jack
any stereo input connected to the
LINE IN
jack
e rst and last of these cannot have
their input levels changed by the
but see below for details of how
to balance the with the input
se the level control of the device
connected to
LINE IN
to adjust the
level of this source remember that
this source cannot be e ected by
the s e ects
se the s
INPUT
control
to adjust the level of the guitar or
mic before it is sent to the e ect
hen a menu is not selected you
can use the
5
and
b
keys to set
the relative balance of the guitar
or microphone but not the
LINE
IN
source compared to the output
from the player is
MIX
value
can be set to between
–5
and
+5
emember that this is only pos
sible when not in menu mode
se the s menu system
to adjust the output level of the
e ect
Outputs
ere are two outputs the line and the
headphones ese cannot have their
levels set seperately—use the
OUTPUT
control to set the overall output level
Use the INPUT control to
adjust the GUITAR/MIC IN
level
You can't adjust the
input level of LINE IN
with the CD-GT1
Use the CD-GT1's menu
system to set the output
level of the internal effect
Use the OUTPUT
control to adjust
the overall level
to the LINE OUT
and headphones
The MIX feature (5 and b
keys outside menu mode)
adjusts the balance betwen
input and CD

English
TASCAM CD-GT1 —
9
English
Using the menu system
ee the table on this page for details of
the di erent menus and their settings
o enter the menu system press the
LCD MENU
key until the menu you
want appears shown in a ashing re
versed box and the rst menu item is
shown on the main part of the screen
se the up or down keys
5
and
b
to set the value of the rst menu
item
ote that you do not need to press
ENTER
to set the values e settings
change as soon as the key is pressed
ress
ENTER
to move to the next
menu item in the list
ress
MENU
to move to the next menu
and its rst menu item
xit the menu system using the
DISPLAY/ESC
key
NOTE
The
TUNER
menu requires you to press
ENTER
after the
TUNER
menu is shown on
screen (as the effect sound is cut when the
tuner is operational).
Menu Menu item Values Notes
EFFECT
EFF
ON/OFF
turns effect on or off
LIB
00 to 42
preset number
Parameter
—
depends on effect type
LVL
0 to 64
effect output level
PITCH
PIT
0 to –50% (pitch) or
0, –8, –16, –32 and
–50 (SSA)
sets pitch shift or slow speed
audition values
SSA
SSA ON/OFF
Sets slow speed audition on or off
KEY
KEY
O
6 to
I
6 (or SSA)
Sets pitch shift in semitones
FINE
–50 to +50 (or SSA)
sets pitch shift in cents
MENU
PLAY
ALL/SGL
all or single play
CUE
CUE/FLS
cue or “ ash play” operation
FOOT
EFF/CUE
sets footswitch mode: either step
through the effect slots, or cueing
TUNER
AT/MT
E2 to E5 (when tuning)
MODE
AT/MT
automatic or manual tuning
CAL
435 to 445
calibration in Hz

10
— TASCAM CD-GT1
English
English
Using the CD player
e s player works
e s player works
in much the same way as other
in much the same way as other
players with a few minor di erences
players with a few minor di erences
and special features as explained on
and special features as explained on
this page
oad s label side up shiny side
down in the pen and
close the player door by hand
Playback
ress the playpause key
y
J
key to
start playback and to pause playback
ress the stop key
H
to stop play
back
hen you use the player with batter
ies starting and stopping playback take
longer than under power this saves
battery power
Display
se the
DISPLAY/ESC
key to change
the display between track elapsed
time track remaining time and total
remaining time you cannot do this in
menu mode
Skipping between tracks
se the two skipsearch keys marked
as
m
/
.
and
/
/
,
to move
back and forward a track at a time by
pressing and releasing the appropri
ate key
Searching within tracks
se the skipsearch keys to search
within the disc by pressing and holding
the appropriate key
The CUE key
e
CUE
key is a special feature of the
hen you press this key
the playback position returns to the last
point where playback started
hat happens next depends on the
CUE
menu item setting in the
MENU
menu
f this is set to
CUE
playback is paused
at the cue point but if it is set to
FLS
playback restarts from the cue point if
CUE
is pressed from play or pause
TIP
With a footswitch connected, you can use
this instead of the
CUE
key for hands-free
operation (set the
FOOT
menu item to
CUE
).
CUE).CUE
Looping (track)
sing the
PLAY
menu item set
SGL
sin
gle play ress the
LOOP
key so that
you see
LOOP 1
on the display bottom
left e current track will repeat
Looping (disc)
sing the
PLAY
menu item set
ALL
play
all the disc ress the
LOOP
key so
that you see
LOOP
alone on the display
bottom left e whole disc will
repeat
Looping (I/O points)
se the
I/O
key to set the start in
point of the loop then use the key to
set the out point e section between
the points will repeat seamlessly
ressing the
I/O
key again clears the
loop points and cancels loop mode
ith these points set
I-O
shown on the
display you can restart the loop
mode if it has been canceled using the
LOOP
key
Canceling looping
ress the
LOOP
key so that
LOOP
does
not show on the display bottom left

English
TASCAM CD-GT1 —
11
English
Pitch and tempo changes
ere are three modes for changing the
way a is played back
NOTE
Only one of these modes can be active at
a time.
ese modes help you to play along
at a di erent key or a di erent tempo
so that you can learn your favorite ri s
and licks
TIP
Use these together with the looping function
to help your practice.
KEY mode
e key mode changes the key of the
music by six semitones up or down
e tempo does not change
e value is set in semitones and cents
ths of a semitone shown as
I
6
to
O
6
hen both semitones and cents
are the
KEY
mode is o if is on
this is also o
hen this mode is on the display
shows
KEY
se this mode when you nd the key
of the track di cult to play or
sing in
SSA mode
e low peed udition mode
slows down the tempo without chang
ing the key e settings are o –
– – and – all percent
hen this mode is active the display
left side shows
SSA
se this mode to
practice di cult fast licks
PITCH mode
e pitch mode changes both pitch and
tempo in steps down to –
is the o setting
hen this mode is active the display
shows
PITCH
Making settings
se the menu system to turn on
or o
PITCH
menu and then set the
value for the pitch or settings
PITCH
menu again
or
with o
choose
KEY
from the next
KEY
menu
and make the
KEY
semitone and
FINE
settings
Remember!
hift pitch alone=
KEY
low down and keep pitch =
SSA
low down and drop pitch =
PITCH

12
— TASCAM CD-GT1
English
English
Using effects
How effects work
ere are two e ect banks
ere are two e ect banks
A
and
B
each with ve slots numbered from
each with ve slots numbered from
1
through
5
where you can store your
own e ect settings
E ects are created from the preset
e ects available guitar and vo
cal hen a bank and slot are selected
if a preset e ect is recalled and edited
that bank slot is automatically lled
with the edited e ect
Storing your own effect settings
in a bank slot
ress the
BANK
key to select either the
A
or
B
bank as shown on the display
ress the
No.
key to select the bank slot
1
through
5
as shown on the display
ress the
LCD MENU
key until
EFFECT
appears on the display
se the
5
key to turn the e ect
ON
ress
ENTER
and then select the
preset e ect
00
through
42
with the
5
and
b
keys
NOTE
If there were any settings in the selected
bank slot to start with, they will be overwrit-
ten when you recall a library entry.
ress
ENTER
once more to start edit
ing the parameters with the
5
and
b
keys see the table later for details of
these parameters
e last parameter is always
LVL
the
output level from the e ect unit
0
to
64
is is only available when the ef
fect is active and is bypassed with the
e ect o
et the level and then press the
DISPLAY/ESC
key to exit the e ect
settings e e ect settings you have
made are automatically stored in the
bank slot you rst chose
Recalling an effect with your
settings
hen you have stored the e ect set
tings in a bank slot as described above
you can recall them simply pressing
the
BANK
and
No.
keys to select the
appropriate bank slot you should also
make sure that the e ect is switched
on
TIP
If you have a footswitch connected and
the
FOOT
menu item is set to
EFF
, you can
step through the bank slots by pressing the
footswitch.

English
TASCAM CD-GT1 —
13
English
Effect presets and parameters
e preset e ects can be divided into
three categories
Distortion Clean sound Vocal
00 DIST-TONE-FLA-REV
15 COMP-TONE-FLA-REV
30 De-esser
01 DIST-TONE-FLA-DLY
16 COMP-TONE-FLA-DLY
31 Chorister
02 DIST-TONE-PHA-REV
17 COMP-TONE-PHA-REV
32 Emphasis
03 DIST-TONE-PHA-DLY
18 COMP-TONE-PHA-DLY
33 Shout
04 DIST-TONE-EXC-REV
19 COMP-TONE-EXC-REV
34 Mood Vocal
05 DIST-TONE-EXC-DLY
20 COMP-TONE-EXC-DLY
35 Response
06 DIST-TONE-CHO-REV
21 COMP-TONE-CHO-REV
36 Proclaim
07 DIST-TONE-CHO-DLY
22 COMP-TONE-CHO-DLY
37 Quivering Voice
08 DIST-TONE-TRM-REV
23 COMP-TONE-TRM-REV
38 Duet
09 DIST-TONE-TRM-DLY
24 COMP-TONE-TRM-DLY
39 Lo-Fi Vocal
10 DIST-TONE-VIB-REV
25 COMP-TONE-VIB-REV
40 Megaphone
11 DIST-TONE-VIB-DLY
26 COMP-TONE-VIB-DLY
41 Screaming
12 DIST-TONE-WAH-REV
27 COMP-TONE-WAH-REV
42 Panning Vocal
13 DIST-TONE-WAH-DLY
28 COMP-TONE-WAH-DLY
—
14 DIST-TONE-PIT-DLY
29 COMP-TONE-PIT-DLY
—
s this shows each of the guitar
distortion and clean presets has four
components each of which can be
adjusted individually and are shown on
the display as listed in the table here
The parameters
DIST
istortion gain
COMP
ompressor gain
TONE
one control
FLA
langer setting
REV
everb setting
DLY
elay setting
PHA
haser setting
EXC
xciter setting
PIT
itch shifter setting
CHO
horus setting
TRM
remolo setting
VIB
ibrato setting
WAH
utowah setting
ll presets also have a
LVL
level setting
from
0
to
64
e vocal presets have one parameter
each shown on the display as
PAR

14
— TASCAM CD-GT1
English
English
Using the tuner
e s builtin guitar tuner
e s builtin guitar tuner
has two modes an automatic mode
has two modes an automatic mode
where the pitch of the incoming signal
where the pitch of the incoming signal
is detected and displayed automati
is detected and displayed automati
cally and a manual mode where you
set the target and tune to it
ress the
MENU
key until the display
shows
TUNER,
and then press
ENTER
Flat
Sharp
On-key
hen you enter the tuner mode any
e ect is automatically turned o
f the tuner is in automatic mode
shown as
AT
on the display just play a
note on your guitar e tuner guesses
the closest note and shows it on the
display une the string roughly so that
the right note appears and then adjust
the tuning until the display shows a
large center blob
f the tuner is in manual mode shown
as
MT
on the display use the
5
and
b
keys to set the note on the display and
then tune as above
Calibrating the tuner.
sually the above iddle is tuned
to z in most estern music
ere may be times when you need to
tune to a di erent standard you are
playing with another instrument or to
a which does not use the z
tuning se the tuners
CAL
calibration
menu to set the reference to a tun
ing between z and z
NOTE
Although you do not need to play a CD
when you are tuning, the CD-GT1 must be
switched on, and the
GUITAR
button must
be pressed in to allow tuning of the guitar
plugged into the CD-GT1.

English
TASCAM CD-GT1 —
15
English
Facts and gures (speci cations)
Disc types
8 cm single, 12 cm
CD
AD/DA
16-bit
Digital signal
processing
32-bit
Nominal output level
(LINE OUT)
–10 dBV
Maximum output level
(LINE OUT)
0 dBV (1 Vrms)
Output impedance
1 k
Ω
Maximum output level
(PHONES)
> 18 mW (into 32
Ω
Nominal input levels
LINE IN
MIC IN
GUITAR IN
–10 dBV
–40 dBV
–15 dBV
CD playback characteristics
Frequency response
20 Hz to 20 kHz
±1.0 dB
Dynamic range
> 88 dB
S/N ratio
> 88 dB
THD
< 0.01%
Voltage requirements
DC 9V (PS-PS5 AC
adapter)
AA batteries x 4
(NiMH or alkaline)
Power consumption
4 W (PS-PS5 AC
adapter)
Dimensions (w x d x h)
including feet
232 x 138 x 40
(mm) / 9.1 x 5.4 x
1.6 (in)
Weight (excluding
batteries)
620 g / 1 lb, 6 oz

16
— TASCAM CD-GT1
16 — TASCAM CD-GT116
Français
Français
CONSIGNES DE SÉCURITÉ IMPORTANTES
1
Lisez ces instructions.
2
Gardez ces instructions en lieu sûr, pour
référence ultérieure.
3
Tenez compte de tous les avertissements.
4
Suivez toutes les instructions.
5
N’utilisez pas cet appareil près de l’eau.
6) Ne nettoyez l’appareil qu’avec un chiffon
sec.
7
N’obstruez pas les ouïes de ventilation. Ins-
tallez l’appareil conformément aux instructions
du constructeur.
8
N’installez pas l’appareil à proximité de
sources de chaleur, telles que radiateur, four
ou tout autre appareil dissipant des calories
(ampli cateur de puissance, par exemple).
9
Ne désactivez pas les dispositifs de
sécurité (détrompeurs) des prises polarisées
ou avec mise à la terre. Une prise polarisée
possède un contact plus grand que l’autre ; une
prise avec mise à la terre possède une troisième
broche, prévue pour votre sécurité. Si la prise se
trouvant à l’extrémité du cordon secteur fourni
avec votre appareil ne correspond pas à votre
prise murale, consultez un électricien pour son
remplacement.
10
Évitez de marcher sur le cordon secteur, de
le coincer ou de le pincer, ainsi que de couder
le cordon au niveau de l’appareil ou de la prise
secteur.
11
N’utilisez que les dispositifs optionnels ou
les accessoires recommandés par le construc-
teur.
12
N’utilisez l’appareil qu’avec des
supports ou dispositifs de xation four-
nis ou recommandés par le constructeur.
13
Débranchez le cordon d’alimentation de
l’appareil en cas d’orage ou s’il doit rester
inutilisé pendant une longue période.
14
)
Pour toute maintenance, adressez-vous à
des techniciens professionnels quali és. Un re-
tour en SAV est indispensable dès que l’appareil
a été endommagé d’une façon ou d’une autre
: cordon secteur ou alimentation défaillante,
pénétration de liquide ou introduction d’objets
dans l’appareil, exposition à la pluie ou à l’hu-
midité, et bien sûr dès qu’il ne fonctionne pas
normalement, suite à une chute ou à un choc
par exemple.
•
N’exposez pas l’appareil à des éclaboussu-
res ou à des gouttes d’eau.
•
Ne posez pas d’objets contenant du liquide
(vase, tasse, cannette...) sur l’appareil.
•
N’installez pas cet appareil dans un espace
con né, dépourvu de ventilation , comme par
exemple une bibliothèque.
•
Même si son interrupteur se trouve en
position OFF, l’appareil consomme du courant
électrique, par l’intermédiaire de son adapta-
teur secteur.
AVERTISSEMENT
Le CD-GT1 ne peut pas lire les disques CD-
R/RW non nalisés. Il se peut que certains
CD-R/RW nalisés ne puissent être lus par
le CD-GT1.

Français
TASCAM CD-GT1 —
17
Français
Sommaire
CONSIGNES DE SÉCURITÉ IMPORTANTES
........................
16
Sommaire
...............................................................
.........
17
Prise en main du CD-GT1
.................................................
18
Branchements
...............................................................
...
19
Réglage de la balance
.....................................................
20
Le système de menus
......................................................
21
Utilisation du lecteur CD
.................................................
22
Modi cations de hauteur et de tempo
...........................
23
Effets (types et paramètres)
............................................
24
Eftfets (types et paramètres)
..........................................
25
Utilisation de l’accordeur
................................................
26
Caractéristiques
..............................................................
27

18
— TASCAM CD-GT1
18 — TASCAM CD-GT118
Français
Français
Prise en main du CD-GT1
À propos de ce manuel
es touches et contrôles du
sont indiqués dans le manuel dans cette
typographie
PLAY
et les textes apa
raissant à lécran ainsi
MENU
Mise en place des piles
e utilise quatre piles
non fournies ous conseillons
lutilisation de piles rechargeables i
mais vous pouvez aussi utiliser
des piles alcalines
utilisez que des piles dun même
type
emplacezles simultanément
n cas dinutilisation prolongée
de lappareil retirez les piles de
leur logement
nsérezles en tenant compte de
la polarité
+
et
–
indiquée dans le
–
indiquée dans le
–
fond du compartiment
e rendement maximum des piles
sera obtenu pour une température
ambiante de ° à °
ecyclez vos piles en suivant la
lière prévue dans votre région
uand le niveau de charge devient
insu sant lappareil séteint automa
tiquement et devra être rallumé avec
linterrupteur
POWER
après rem
placement par des piles neuves ou
rechargées
a chage du niveau des piles à lécran
ne donne quune estimation glo
bale ans certaines circonstances leur
charge réelle peut se révéler insu sante
à la mise sous tension du en
dépit des indications de lécran
Utilisation d’un adaptateur secteur
tilisez exclusivement un adaptateur
non fourni dispo
nible chez les revendeurs
out autre modèle pourait endomma
ger le
éri ez avant tout branchement que la
tension secteur correspond aux indica
tions portées sur ladaptateur
Mise sous tension de l’appareil
e dispose de deux inter
rupteurs tilisez le premier
POWER
interrupteur à glissière pour mettre
globalement lappareil soushors
tension
e second
GUITAR
contrôle lacti
vation du jack
GUITAR/INPUT
et de
lunité de et n position o vous
ne pouvez pas utiliser cette entrée ni
aucun des menus systèmes qui lui sont
liés e ets et accordeur
otez également la présence du bou
ton
HOLD
destiné à verrouiller tous
les contrôles et boutons du
quand il est en position
ON
Mise en veille automatique
uand lappareil fonctionne sur piles
sil reste plus de minutes allumé en
mode stop ou sans disque chargé ou
encore ouvert le lecteur séteint
la partie correspondante disparaît de
lécran mais la section guitare reste
opérationnelle
a réactivation du lecteur se fait
par la touche
PLAY
ou par linter
PLAY
ou par linter
PLAY
rupteur
POWER
si les sections et
guitare sont toutes deux éteintes

Français
TASCAM CD-GT1 —
19
Français
Branchements
Entrées
Branchement d’une guitare
ne guitare ou une basse se branchent sur
lappareil simplement en reliant leur jack à
lentrée
GUITAR/MIC IN
du
i vous utilisez des pédales de ets vous
pouvez aussi les brancher sur cette entrée
en tenant compte du fait que le
dispose de ses propres e ets
ettez le sélecteur
GUITAR/MIC
en posi
tion
GUITAR
éri ez que le bouton
GUITAR
est bien
enfoncé
AVERTISSEMENT
NE branchez en AUCUN CAS la sortie d’un ampli
guitare sur l’entrée
GUITAR/MIC
du CD-GT1
sous peine de l’endommager gravement.
Branchement d’un micro
ranchez un micro du modèle adapté
en cas de doute adressezvous à vo
tre revendeur sur lentrée
GUITAR/MIC IN
du
ettez le sélecteur
GUITAR/MIC
en
position
MIC
Branchement d’une source à
niveau ligne
ous pouvez aussi brancher un synthé
un préampli guitare un magnétocas
sette ou toute autre source à niveau
ligne sur le mini jack
LINE IN
situé à
côté du jack
GUITAR/MIC IN
AVERTISSEMENT
Ne branchez JAMAIS les sorties haut-parleur
d’un ampli guitare sur quoi que ce soit
d’autre que des enceintes de diffusion. En
cas de doute sur le type de signal susceptible
d’être reçu par le CD-GT1, adressez-vous à
une personne compétente.
Branchement d’une pédale
ous pouvez brancher une pédale sur
le soit pour appeler les pro
grammes de ets soit pour commander
le lecteur au pied voir plus loin
our éviter tout problème utilisez ex
clusivement une pédale de type
ou équivalente de type non
verrouillable à action de fermeture et
branchezla dans le connecteur
FOOT
Sorties
eliez lappareil aux entrées
dun système de di usion ou dune
console de mixage à laide dun câble
stéréo adapté non fourni branché sur
le minijack stéréo
LINE OUT
otre casque découte non fourni
peut également se brancher sur le
minijack
PHONES
pour une écoute
discrète

20
— TASCAM CD-GT1
Français
Français
Réglage de la balance
Entrées
e peut gérer simultanément
trois types de sources
le en lecture
la guitare ou le micro branchés sur
lentrée
GUITAR/MIC IN.
une source stéréo branchée sur lentrée
LINE IN
e niveau du premier et de la dernière
nest pas modi able sur le mais
la balance de la source avec lentrée
guitarmic se fait comme suit
églez le niveau de lappareil branché en
LINE IN
par son contrôle de volume ce
signal ne peut être traité par les e ets du
tilisez le contrôle
INPUT
du
pour régler le niveau de la guitare
ou du micro avant envoi vers le et
i un menu nest pas sélectionné les
touches
5
et
b
permettent de régler
la balance entre la source guitare
micro mais pas
LINE IN
et le lecteur
ette valeur de
MIX
se règle de
–5
à
+5
ela nest possible que si vous
nêtes pas en mode menu
tilisez le système de menus du
pour régler le niveau de
sortie nal de le et
Sorties
appareil dispose de deux sorties prise
casque et sortie ligne eurs niveaux
ne peuvent pas être réglés séparément
— tilisez le contrôle
OUTPUT
pour
ajuster globalement ce niveau
5b

Français
TASCAM CD-GT1 —
21
Français
Le système de menus
e tableau cicontre donne le détail des
di érents menus et leurs paramétrages
our accéder au système de menus ap
puyez sur
LCD MENU
jusquà ce que celui
que vous désirez soit contrasté et que son
premier élément apparaisse dans la partie
principale de lécran
tilisez les touches échées
5
et
b
pour
modi er sa valeur
otez quil ny a pas besoin dappuyer sur
ENTER
pour valider ce paramétrage il est
actif dès que la touche est enfoncée
ppuyez sur
ENTER
pour passer à lélé
ment de menu suivant
ppuyez sur
MENU
pour accéder au menu
suivant et à son premier élément
a sortie du système de menus se fait à
laide de la touche
DISPLAY/ESC
REMARQUE
L’accès à l’accordage nécessite d’appuyer sur
ENTER
après l’apparition du menu
TUNER
à
l'écran (l’effet est coupé pendant l’accordage).
Menu Élément Valeurs Commentaires
EFFECT
EFF
ON/OFF
activation/désactivation de l’effet
LIB
00 à 42
numéro de mémoire
Parameter
—
dépend du type d’effet
LVL
0 à 64
niveau de sortie de l’effet
PITCH
PIT
0 à –50% (pitch) ou 0,
–8, –16, –32 et –50
(SSA)
règle la transposition ou les valeurs
d’écoute à vitesse réduite (SSA)
SSA
SSA ON/OFF
écoute à vitesse réduite on/off
KEY
KEY
O
6 à
I
6 (ou SSA)
transposition par demi-tons
FINE
–50 à +50 (ou SSA)
accordage en centièmes de tons
MENU
PLAY
ALL/SGL
mode de lecture all/single
CUE
CUE/FLS
option cue ou « ash play»
FOOT
EFF/CUE
affectation de la pédale : appel
d’effets ou avance rapide
TUNER
AT/MT
E2 à E5 (en accordage)
MODE
AT/MT
accordage manuel ou automatique
CAL
435 à 445
étalonnage en Hz

22
— TASCAM CD-GT1
Français
Français
Utilisation du lecteur CD
e lecteur du fonctionne
de manière tout à fait standard à quel
ques détails près répertoriés ciaprès
e chargement des s dans lappa
reil se fait étiquette vers le haut face
brillante vers le bas ouverture et la
fermeture de la trappe sont manuelles
Lecture
ppuyez sur la touche lecturepause
y
J
pour lancer ou suspendre la
lecture
ppuyez sur stop
H
pour larrêter
n utilisation sur piles la mise en
lecture et larrêt sont plus longs quavec
lalimentation secteur pour économi
ser les piles
Af chage des durées
a touche
DISPLAY/ESC
permet
dalterner la chage des durées entre
temps écoulé pour la piste temps
restant pour la piste et temps restant
pour le disque non accessible en mode
menu
Passage d’une piste à l’autre
es deux touches de recherche et de
changement de piste
m
/
.
et
/
/
,
permettent de passer dune
piste à lautre par pressions successives
Recherche dans une piste
es mêmes touches permettent la
recherche au sein dun disque en les
maintenant enfoncées
La touche CUE
a touche
CUE
est spéci que au
lle permet de revenir à la posi
tion du début de la dernière lecture
action qui suit dépend du paramé
trage du menu
CUE
élément du menu
MENU
il est réglé sur
CUE
la lecture est
mise en pause à ce point il est réglé
sur
FLS
elle reprend immédiatement à
condition que
CUE
ait été enfoncé en
lecture ou en pause
ASTUCE
Cette opération peut être commandée au
pied à la place de la touche
CUE
(réglez
l’élément de menu
FOOT
sur
CUE
).
CUE).CUE
Bouclage (piste)
églez lélément de menu
PLAY
sur
SGL
single ppuyez sur
LOOP
pour a
cher
LOOP 1
dans la partie inférieure gauche
de lécran a piste sera lue en boucle
Bouclage (disque)
églez
PLAY
sur
ALL
toutes les pistes
ppuyez sur
LOOP
pour a cher
LOOP
à
la partie inférieure gauche de lécran e
disque est lu en boucle
Bouclage (points d’entrée/sortie)
tilisez la touche
I/O
pour dé nir le
point de départ in puis le point de
sortie out de la boucle
a section comprise entre les points est
lue en boucle sans n
ne nouvelle pression annule ces points
et la lecture en boucle
uand les points sont en place
I-O
af
ché vous pouvez relancer le bouclage
sil il a été annulé voir cidessous en
appuyant sur
LOOP
Annulation du bouclage
ppuyez sur
LOOP
pour faire dis
paraître la mention
LOOP
de la partie
inférieure gauche de lécran

Français
TASCAM CD-GT1 —
23
Français
Modi cations de hauteur et de tempo
rois modes spéci ques permettent de
modi er la lecture du
REMARQUE
Un seul mode peut être actif à la fois.
es modes vous permettent de vous
accompagner dans di érentes tonalités
ou en modi ant le tempo pour étudier
en détail vos passages favoris
ASTUCE
Associez ces modes à la fonction de bouclage
(loop) pour vous entraîner.
Mode KEY (transposition)
ermet de modi er la tonalité du
morceau sans changement de tempo
jusquà six demitons vers le haut ou
vers le bas
a valeur se règle en demitons et en
cents centièmes de demiton de
I
6
à
O
6
uand les valeurs de demitons et
de cents sont à le mode
KEY
est désac
tivé également si le est activé
uand le mode est activé lécran
a che
KEY
tilisez ce mode si vous avez des
di cultés à jouer dans la tonalité du
disque
Mode SSA (vitesse réduite)
e mode découte à vitesse réduite
permet de réduire le tempo sans chan
ger la tonalité es valeurs sont o
– – – et – en pourcentages
uand il est actif la partie gauche de
lécran indique
SSA
tilisez ce mode
pour étudier des passages trop rapides
Mode PITCH (variation de vitesse)
e mode modi e à la fois la hauteur
et le tempo par pas de et jusquà
– est la valeur par défaut
uand il est actif lécran indique
PITCH
Paramétrages
tilisez le système de menus pour ac
tiver ou désactiver le menu
PITCH
puis réglez les valeurs de hauteur ou de
ralentissement menu
PITCH
encore
ou
si est désactivé choisissez
KEY
dans
le menu suivant
KEY
et modi ez les
paramètres
KEY
demiton et
FINE
Souvenez-vous !
ransposition seule =
KEY
alentissement sans changement
de hauteur =
SSA
alentissement avec changement
de hauteur =
PITCH

24
— TASCAM CD-GT1
Français
Français
Effets (types et paramètres)
Fonctionnement des effets
ous disposez de deux banks def
fets
A
et
B
contenant chacune
slots numérotés de
1
à
5
et destinés à
mémoriser vos paramètres
Vous créez vos e ets à partir des pre
sets disponibles pour la guitare et
vocaux uand une bank et un slot
sont sélectionnés si un preset est appelé
et modi é il sera automatiquement
sauvegardé dans cet emplacement
Sauvegarde de vos paramétrages
d’effets dans un “slot” de “bank”
ppuyez sur la touche
BANK
pour sé
lectionner une des deux banks
A
ou
B
ppuyez sur
No.
pour sélectionner le
slot
1
à
5
qui sa che à lécran
ppuyez sur
LCD MENU
pour faire
apparaître
EFFECT
à lécran
tilisez la touche
5
pour activer le et
ON)
ppuyez sur
ENTER
et sélectionnez le
preset
00
42
avec les touches
5
et
b
REMARQUE
Si des données sont présentes dans le slot
dont vous partez, elles seront effacées par le
rappel du preset.
ppuyez à nouveau sur
ENTER
pour
éditer vos paramètres à laide des tou
ches
5
et
b
voir le tableau page sui
vante pour leur description détaillée
e dernier paramètre est toujours
LVL
niveau de sortie de le et
0
à
64
l
nest accessible que si le et est actif et
est ignoré sil est inactif
églez le niveau puis appuyez sur la
touche
DISPLAY/ESC
pour sortir du
paramétrage de ets os modi cations
sont enregistrées automatiquement
dans le slot choisi au début
Rappel d’un effet avec vos para-
mètres personnalisés
uand des paramètres de ets per
sonnalisés ont été sauvegardés selon la
procédure cidessus vous pouvez les
rappeler en appuyant simplement sur
les touches
BANK
et
No.
pour accéder
au slot approprié véri ez toutefois que
le et est bien activé
ASTUCE
Si une pédale est branchée sur le connecteur
approprié et que le paramètre
FOOT
est ré-
glé sur
EFF
dans le système de menus, vous
pouvez faire dé ler les slots les uns après les
autres au pied.

Français
TASCAM CD-GT1 —
25
Français
Effets (types et paramètres)
es presets de ets peuvent être répartis
en trois catégories
Distortion Son clair Vocal
00 DIST-TONE-FLA-REV
15 COMP-TONE-FLA-REV
30 De-esser
01 DIST-TONE-FLA-DLY
16 COMP-TONE-FLA-DLY
31 Chorister
02 DIST-TONE-PHA-REV
17 COMP-TONE-PHA-REV
32 Emphasis
03 DIST-TONE-PHA-DLY
18 COMP-TONE-PHA-DLY
33 Shout
04 DIST-TONE-EXC-REV
19 COMP-TONE-EXC-REV
34 Mood Vocal
05 DIST-TONE-EXC-DLY
20 COMP-TONE-EXC-DLY
35 Response
06 DIST-TONE-CHO-REV
21 COMP-TONE-CHO-REV
36 Proclaim
07 DIST-TONE-CHO-DLY
22 COMP-TONE-CHO-DLY
37 Quivering Voice
08 DIST-TONE-TRM-REV
23 COMP-TONE-TRM-REV
38 Duet
09 DIST-TONE-TRM-DLY
24 COMP-TONE-TRM-DLY
39 Lo-Fi Vocal
10 DIST-TONE-VIB-REV
25 COMP-TONE-VIB-REV
40 Megaphone
11 DIST-TONE-VIB-DLY
26 COMP-TONE-VIB-DLY
41 Screaming
12 DIST-TONE-WAH-REV
27 COMP-TONE-WAH-REV
42 Panning Vocal
13 DIST-TONE-WAH-DLY
28 COMP-TONE-WAH-DLY
—
14 DIST-TONE-PIT-DLY
29 COMP-TONE-PIT-DLY
—
omme vous le constatez tous les
e ets guitare distorsion et son clair
comportent quatre éléments ajustables
individuellement selon le descriptif
cicontre
Les paramètres
DIST
istortion gain
COMP
ompresseur gain
TONE
onalité
FLA
langer paramétrage
REV
everb paramétrage
DLY
elay paramétrage
PHA
haser paramétrage
EXC
xciter paramétrage
PIT
ransposition paramétrage
CHO
horus paramétrage
TRM
remolo paramétrage
VIB
ibrato paramétrage
WAH
utowah paramétrage
ous les presets disposent également
dun paramètre
LVL
levelniveau régla
ble de
0
à
64
es presets vocaux nont quun seul
paramètre noté
PAR
à lécran

26
— TASCAM CD-GT1
26 — TASCAM CD-GT126
Français
Français
Utilisation de l’accordeur
accordeur chromatique pour guitare
incorporé au dispose de deux
modes un mode automatique dans
lequel la hauteur du signal source est
détectée et a chée automatiquement
et un mode manuel dans lequel vous
dé nissez la cible et vous vous accor
dez dessus
ppuyez sur la touche
MENU
jusquà
ce que lécran a che
TUNER,
puis ap
puyez sur
ENTER
Flat
Sharp
On-key
lactivation de laccordeur mode
uner tous les e ets sont automati
quement désactivés
i le mode automatique est activé af
chage
AT
sur lécran vous navez quà
jouer une note sur la guitare accor
deur repère la note réelle la plus proche
et la che ous pouvez commencer
par un accordage grossier pour faire
apparaître la bonne note puis passer à
un accordage n jusquà ce que lécran
se stabilise sur le rond central
i le mode manuel est activé a chage
MT
sur lécran utilisez les touches
5
et
b
pour dé nir la note à accorder
puis procédez comme cidessus pour
laccordage n
Choix du diapason.
abituellement le
la
au dessus
la au dessus la
du
do
médian du piano est réglé sur
z pour la plupart des musiques
occidentales
l est toutefois des cas où vous pouvez
avoir besoin de vous ajuster sur un
standard di érent pour correspondre à
un enregistrement ou à un instrument
qui nest pas accordé à par exem
ple tilisez alors le menu
CAL
de lac
cordeur pour choisir une autre valeur
entre z et z
REMARQUE
Bien que vous n’ayez pas besoin de lire un
CD pour vous accorder, le CD-GT1 doit être
allumé et le bouton
GUITAR
enfoncé pour
permettre l’accordage d’une guitare bran-
chée sur le CD-GT1.

Français
TASCAM CD-GT1 —
27
Français
Caractéristiques
Disques
CD 8 cm (mini),
12 cm
AN/NA
24-bit
Traitement numérique
32-bit
Niveau de sortie
nominal (LINE OUT)
–10 dBV
Niveau de sortie
maximum (LINE OUT)
0 dBV (1 Vrms)
Impédance de sortie
1 k
Ω
Niveau de sortie
maximum (casque)
> 18 mW (32
Ω
)
Niveaux d’entrée nominaux
LINE IN
MIC IN
GUITAR IN
– 10 dBV
– 40 dBV
– 15 dBV
Lecteur CD
Bande passante
20 Hz à 20 kHz
±1,0 dB
Amplitude dynamique
> 88 dB
Rapport signal/bruit
> 88 dB
Distorsion harmonique
< 0,01 %
Alimentation
9V continu
(adaptateur PS-PS5)
piles LR6 (AA) x 4
Consommation
4 W (adaptateur
PS-PS5)
Dimensions (w x d x h)
avec pieds
232 x 138 x 40 mm
Poids (sans les piles)
620g

28
— TASCAM CD-GT1
28 — TASCAM CD-GT128
Deutsch
Deutsch
Wichtige Sicherheitshinweise
Bitte lesen Sie die Folgenden Sicher-
heitshinweise sorgfältig durch!
Bitte lesen Sie die Folgenden Sicher-
heitshinweise sorgfältig durch!
Bitte lesen Sie die Folgenden Sicher-
1
Bedienungsanleitung sorgfältig
durch lesen
– Bitte lesen Sie vor Inbetriebnah-
me alle Sicherheits- und Bedienungsanweisun-
gen durch.
2
Bedienungsanleitung aufbewahren
– So können Sie bei später auftretenden Fragen
nachschlagen.
3
Alle Warnhinweise beachten
– Dies
gilt sowohl für alle Angaben am Gerät als auch
in dieser Bedienungsanleitung.
4
Bestimmungsgemäßer Gebrauch
– Benutzen Sie das Gerät nur zu dem Zweck
und auf die Weise, wie in dieser Bedienungsan-
leitung beschrieben. Geben Sie das Gerät nie-
mals ohne diese Bedienungsanleitung weiter.
5
Reinigung
– Vor der Reinigung das Netz-
kabel abziehen. Keine Nass- oder Sprühreiniger
verwenden. Mit einem trockenen Tuch reinigen.
6
Zusatzgeräte
– Zusatzgeräte, die nicht
mit den Herstellerempfehlungen übereinstim-
men, können Schäden verursachen.
7
Aufstellung
a. Untersatz
– Niemals einen instabilen
Untersatz (fahrbares oder stationäres Gestell,
Regal, Halterung, Tisch) verwenden. Andernfalls
kann das Gerät herabfallen und hierdurch
ernsthaft beschädigt werden sowie ernsthafte
Verletzungen hervorrufen. Ausschließlich
einen geeigneten und stabilen Untersatz
(mitgeliefert oder vom Hersteller empfohlen)
benutzen. Zur Befestigung unbedingt die
Herstellerangaben beachten und ausschließ-
lich empfohlenes Zubehör verwenden.
b. Fahrbare Gestelle
– Plötzliche Rich-
tungswechsel und zu rasches Beschleunigen/
Bremsen sowie unebenen Untergrund vermei-
den, da andernfalls Gestell und/oder Gerät
umfallen können.
c. Hitzeeinwirkung
– Das Gerät in aus-
reichender Entfernung zu Hitze abstrahlenden
Vorrichtungen (Heizung, Ofen etc.) und anderen
Geräten (Verstärker etc.) aufstellen.
d. Belüftung
– Die Belüftungsöffnungen
des Geräts dürfen niemals blockiert werden.
Andernfalls können Überhitzung und Betriebs-
störungen auftreten. Das Gerät daher niemals
auf einer weichen Unterlage (Kissen, Sofa, Tep-
pich etc.) aufstellen. Bei Einbau in einem Regal,
Gestell- oder Einbauschrank unbedingt auf
einwandfreien Temperaturausgleich achten. Die
diesbezüglichen Herstellerangaben beachten.
e. Nässe und Feuchtigkeit
– Gerät
nicht in unmittelbarer Nähe zu Wasserbehältern
(Badewanne, Küchenspüle, Schwimmbecken
etc.) oder in Räumen betreiben, in denen hohe
Luftfeuchtigkeit auftreten kann.
f. Wand- und Deckenbefestigung
– Hierzu unbedingt die Vorschriften und Emp-
fehlungen des Herstellers beachten.
g. Außenantennen
– Beim Montieren ei-
ner Außenantenne besteht Lebensgefahr, wenn
Netz- und Starkstromleitungen berührt werden.
Außenantenne und zugehörige Kabel stets in
ausreichendem Abstand zu Hochspannungs-,
Licht- und anderen Stromleitungen montieren,
so dass kein Kontakt möglich ist.
8
Spannungsversorgung
– Sicherstellen,
dass die örtliche Netzspannung mit der auf
dem Gerät angegebenen Netzspannung über-
einstimmt (Aufkleber auf der Unterseite des
Geräts) Im Zweifelsfall den Fachhändler oder
den verantwortlichen Energieversorger vor Ort
befragen. Bei Geräten, die für Batteriebetrieb
oder eine andere Spannungsquelle geeignet
sind, die zugehörigen Bedienungshinweise

Deutsch
TASCAM CD-GT1 —
29
Deutsch
beachten.
9
Netzkabel
– Das Netzkabel so verlegen,
dass es nicht gedehnt, gequetscht oder geknickt
werden kann. Insbesonders darauf achten, dass
keine Schäden am Stecker, an der Steckdose
ode am Netzkabelausgang des Geräts auftreten
können. Netzkabel niemals eigenmächtig um-
bauen, insbesondere die Schutzkontakte des
Netzsteckers niemals abkleben.
10
Netzüberlastung
– Netzsteckdosen,
Verlängerungskabel oder Steckdosenverteiler
niemals überlasten, da andernfalls Stromschlag-
und Brandgefahr besteht.
11
Gewitter und Nichtgebrauch
– Bei
Gewittern und längerem Nichtgebrauch des
Geräts den Netzstecker und das Antennenkabel
herausziehen, um Schäden durch Blitzschlag
und/oder Spannungsstöße zu vermeiden.
12
Eindringen von Fremdkörpern und
Flüssigkeit
– Niemals Gegenstände in
die Geräteöffnungen einführen, es besteht
Stromschlag- und Brandgefahr. Niemals offene
Behälter mit Flüssigkeit auf das Gerät stellen,
und sicherstellen, dass keine Flüssigkeit in das
Geräteinnere eindringen kann.
13
Kundendienst
– Niemals selbst War-
tungsarbeiten vornehmen. Bei geöffnetem Ge-
häuse besteht Stromschlag- und Verletzungs-
Wichtige Sicherheitshinweise
gefahr. Wartungsarbeiten stets quali ziertem
Fachpersonal überlassen.
14
Schadensbehebung in Fachwerkstät-
ten
– In den folgenden Fällen müssen Prüf-
und/oder Wartungsarbeiten von quali ziertem
Fachpersonal durchgeführt werden:
a.
Bei beschädigtem Netzkabel oder Netz-
stecker.
b.
Wenn sich Flüssigkeit oder Fremdkörper
im Geräteinneren be nden.
c.
Wenn das Gerät Nässe oder Feuchtigkeit
ausgesetzt war.
d.
Wenn bei vorschriftsgemäßer Hand-
habung Betriebsstörungen auftreten. Bei
Störungen nur Gegenmaßnahmen ergreifen, die
in der Bedienungsanleitung beschrieben sind.
Andernfalls keine weiteren Schritte vornehmen,
da hierdurch Schäden verursacht werden kön-
nen, die Reparaturarbeiten durch Fachpersonal
erfordern.
e.
Wenn das Gerät einer heftigen Er-
schütterung ausgesetzt war oder anderweitig
beschädigt wurde.
f.
Bei Leistungsbeeinträchtigungen jeder
Art.
15
Teiletausch
– Wenn ein Teiletausch erfor-
derlich wird, die Einhaltung der vom Hersteller
vorgeschriebenen Ausführungen und techni-
schen Kenndaten beachten. Nicht zulässige
Teile können Brand, Stromschlag sowie andere
ernsthafte Störungen verursachen.
16. Sicherheitsüberprüfung
– Nach Kun-
dendienst- und Reparaturarbeiten stets eine
Sicherheitsüberprüfung vom Fachpersonal
vornehmen lassen, um einwandfreien Betrieb
zu gewährleisten.

30
— TASCAM CD-GT1
Deutsch
Deutsch
Wichtige Sicherheitshinweise
.........................................
28
Inhaltsverzeichnis
............................................................
30
Erste Schritte mit Ihrem CD-GT1
.....................................
31
Verbindungen herstellen
.................................................
33
Die Balance einstellen
.....................................................
35
Das Menü nutzen
.............................................................
36
Den CD-Player nutzen
......................................................
37
Tonhöhe oder Tempo der CD-Wiedergabe ändern
..........
39
Effekte verwenden
..........................................................
40
Das Stimmgerät nutzen
...................................................
42
Fakten und Zahlen (Technische Daten)
............................
43
Inhaltsverzeichnis

Deutsch
TASCAM CD-GT1 —
31
Deutsch
Was Sie über dieses Hand-
buch wissen sollten
enn wir uns auf eine aste einen
nschluss oder einen egler am
beziehen verwenden wir dieses
chriftbild
PLAY
enn wir uns auf ein enü oder eine
eldung auf dem isplay beziehen
verwenden wir dieses chriftbild
MENU
Batterien einlegen
er
benötigt vier atterien der
röße die nicht im iefe
rumfang enthalten sind ir empfehlen
hnen sich wieder au adbare i
kkus und ein adegerät zu bescha en
ie können aber auch lkalineatterien
verwenden
erwenden ie nur atterienkkus
des gleichen yps
auschen ie immer alle atterien
kkus gemeinsam aus
enn ie den
längere eit
nicht verwenden nehmen ie die
atterienkkus heraus
chten ie beim inlegen der atte
rienkkus auf die richtige olari
tät er luspol muss auf die jewei
lige lusmarkierung im atteriefach
+
+
ausgerichtet sein
atterien halten länger wenn ie
das erät bei emperaturen zwi
schen ° und ° benutzen
erfen ie niemals alte atterien
kkus in den ausmüll n eutsch
land ist der andel verp ichtet alte
atterien zur ntsorgung kostenlos
zurückzunehmen udem können
alte atterien meist beim örtlichen
ertsto hof abgegeben werden
enn die atteriespannung nachlässt
schaltet sich der
automatisch
aus achdem ie neue atterien
kkus eingelegt haben müssen ie
ihn mit dem
POWER
chalter wieder
einschalten
eachten ie dass die atterieanzeige
auf dem isplay nur eine grobe chät
zung der verbleibenden atteriele
bensdauer erlaubt nter bestimmten
oraussetzungen kann es deshalb sein
dass der atteriestrom trotz angezeigter
estkapazität nicht mehr ausreicht um
den zu betreiben
Einen Wechselstromadapter
verwenden
erwenden ie keinen anderen ech
selstromadapter als einen
wird nicht mitgeliefert erhältlich
bei hrem ascamachhändler enn
ie einen anderen dapter verwenden
kann hr
chaden nehmen
chten ie darauf dass die auf dem
dapter angegebene pannung mit
hrer örtlichen etzspannung überein
stimmt
Einschalten
er
hat zwei inusschalter
it dem
POWER
chiebeschalter schal
ten ie die tromversorgung für das
gesamte erät ein oder aus
er
GUITAR
ruckschalter beein usst
die tromversorgung für den
GUITAR/
INPUT
nschluss und das ektgerät
enn dieser eil ausgeschaltet ist
können ie weder die nschlussbuchse
noch eines der itarreningangs
Erste Schritte mit Ihrem CD-GT1

32
— TASCAM CD-GT1
Deutsch
Deutsch
enüs für ekte und timmgerät
verwenden
eachten ie auch den
HOLD
chalter
n tellung
ON
blockiert er die asten
und egler des
Automatisches Stromsparen
enn der im atteriebetrieb
eingeschaltet ist und länger als inu
ten das aufwerk gestoppt oder geö net
oder keine eingelegt ist schaltet
sich der layer aus der eil
des isplays erlischt
m den layer wieder zu starten
drücken ie
PLAY
wenn der und
der itarrenteil ausgeschaltet sind betä
tigen ie den
POWER
chalter
Erste Schritte mit Ihrem CD-GT1

Deutsch
TASCAM CD-GT1 —
33
Deutsch
Verbindungen herstellen
Eingänge
Eine Gitarre anschließen
m eine itarre oder einen ass
anzuschließen verbinden ie einfach
das eine nde des itarrenkabels mit
der itarre und das andere nde mit
dem
GUITAR/MIC IN
nschluss des
enn ie oden ektgeräte
benutzen können ie deren usgang
mit dem
verbinden bedenke
der
hat eigene ekte
tellen ie den
GUITAR/MIC
chalter
auf
GUITAR
ergewissern ie sich dass der
GUITAR
chalter gedrückt ist
VORSICHT
Verbinden Sie NIEMALS einen Gitarrenver-
stärker mit dem Eingang des CD-GT1. Sie
beschädigen sonst mit ziemlicher Sicherheit
Ihre Geräte.
Ein Mikrofon anschließen
erbinden ie ein geeignetes ikrofon
fragen ie hren ascamachhänd
ler wenn ie unsicher sind mit dem
GUITAR/MIC IN
nschluss des
tellen ie den
GUITAR/MIC
chalter
auf
MIC
Eine Stereo-Signalquelle mit
Line-Pegel anschließen
ie können auch eine ignalquelle wie
einen ynthesizer eine itarrenor
verstärker ein oll ektgerät oder
einen assettenrecorder mit dem
verbinden
enutzen ie in diesem all die mit
LINE
IN
bezeichnete inilinkenbuchse
neben dem
GUITAR/MIC IN
nschluss
VORSICHT
Verbinden Sie NIEMALS den Lautsprecher-
ausgang eines Gitarrenverstärkers mit etwas
anderem als einem Lautsprecher. Wenn Sie
auch nur die geringsten Zweifel haben, was
Sie an den CD-GT1 anschließen dürfen, fra-
gen Sie Ihren Tascam-Fachhändler.
Einen Fußschalter anschließen
ie können einen ußschalter an den
anschließen um schrittweise
durch die ekteinstellungen zu blät
tern oder um den layer freihändig
zu bedienen mehr dazu später in die
sem andbuch
m robleme mit hrem zu
vermeiden verbinden ie möglichst
einen ascamußschalter
oder einen ähnlichen nichtrastenden
chalter mit dem
FOOT
nschluss
linkenbuchse

34
— TASCAM CD-GT1
Deutsch
Deutsch
Ausgänge
ie können das usgangssignal des
über eine tereoanlage oder
ein ischpult abhören erbinden ie
dazu den
LINE OUT
nschluss tereo
iniklinke des
mithilfe eines
geeigneten tereokabels nicht im ie
ferumfang enthalten mit dem ingang
ux oder ine des anderen eräts
enn ie hre usik lieber für sich
allein genießen möchten verbinden ie
einen tereoopfhörer nicht im iefer
umfang enthalten mit dem
PHONES
nschluss tereoiniklinke
Verbindungen herstellen

Deutsch
TASCAM CD-GT1 —
35
Deutsch
Eingänge
er
hat drei ingangsquellen
die spielende
die itarre oder das ikrofon am
GUITAR/MIC IN
nschluss
die tereoquelle am
LINE IN
n
schluss
en ingangspegel der erst und letzt
genannten uellen können ie mit
dem
nicht ändern aber lesen
ie weiter um zu erfahren wie man die
alance zwischen dem und dem
ingangssignal ändert
m den egel der tereoquelle
am nschluss
LINE IN
zu ändern
verwenden ie den egelregler des
anderen eräts falls vorhanden
edenken ie zudem dass diese
ignalquelle nicht mit ekten des
versehen werden kann
it dem
INPUT
egler des
bestimmen ie den egel des itar
ren oder ikrofonsignals bevor es
zum internen ektmodul weiterge
leitet wird
enn kein enüpunkt gewählt ist
können ie die asten
5
und
b
ver
wenden um die alance zwischen
dem itarrenikrofonsignal
aber nicht der
LINE IN
uelle
und dem ignal des layers
einzustellen ieser ert ist
einstellbar zwischen
–5
und
+5
nur
wenn kein enü geö net ist
ber das enü des
be
stimmen ie den endgültigen us
gangspegel des ekts
Ausgänge
s gibt zwei usgänge ine und opf
hörer er egel an diesen usgängen
lässt sich nur gemeinsam ändern und
zwar mit dem
OUTPUT
egler
Die Balance einstellen
Mit dem INPUT-
Regler stellen Sie
den Pegel am
Eingang
GUITAR/MIC IN
ein
Der Pegel am Eingang
LINE IN lässt sich mit dem
CD-GT1 nicht beeinflussen
Den Pegel des
internen Effekts
stellen Sie über
das Menü ein
Mit dem OUTPUT-
Regler stellen Sie
den Gesamtpegel
für den Ausgang
LINE OUT und den
Kopfhörer ein
Die CD wird mit festem
Pegel wiedergegegeben,
aber mit der MIX-Funktion
(5 und b-Tasten
außerhalb des Menüs)
bestimmen Sie die Balance
zwischen Gitarre/
Mikrofon und CD

36
— TASCAM CD-GT1
36 — TASCAM CD-GT136
Deutsch
Deutsch
ie abelle auf dieser eite gibt einen
berblick über die verschiedenen
enüs und instellungen
m ein enü zu ö nen drücken ie
die
LCD MENU
aste so oft bis das
gewünschte enü blinkt und der erste
intrag im auptteil des isplays ange
zeigt wird
it den uf und basten
5
und
b
ändern ie den ert des angezeigten
enüeintrags
ie brauchen nicht
ENTER
zu drücken
um eine nderung zu bestätigen ie
instellung ändert sich sofort beim
rücken der asten
m zum nächsten intrag im gleichen
enü zu gelangen drücken ie
ENTER
m zum nächsten enü und seinem
ersten intrag zu gelangen drücken
ie
MENU
m das enüsystem zu verlassen drü
cken ie
DISPLAY/ESC
WICHTIG
Um das
TUNER
-Menü zu öffnen, müssen
Sie
ENTER
drücken, sobald
TUNER
auf dem
Das Menü nutzen
Menü
Eintrag
Werte Bemerkungen
EFFECT
EFF
ON/OFF
schaltet den Effekt ein oder aus
LIB
00 bis 42
Nummer der Voreinstellung
Parameter
—
abhängig vom Effekttyp
LVL
0 bis 64
Ausgangspegel des Effekts
PITCH
PIT
0 bis –50% (Pitch)
oder 0, –8, –16, –32
und –50 (SSA)
ändert die Tonhöhe oder den Wert für
langsame Wiedergabe
SSA
SSA ON/OFF
schaltet langsame Wiedergabe ein/aus
KEY
KEY
O
6 bis
I
6 (oder SSA)
Tonhöhe in Halbtonschritten
FINE
–50 bis +50 (od. SSA)
Tonhöhe in Prozent
MENU
PLAY
ALL/SGL
Wiedergabe alle Titel/ein Titel
CUE
CUE/FLS
Cue- oder Blitzstartmodus
FOOT
EFF/CUE
Fußschalter wechselt zwischen Effekt-
einstellungen oder steuert Cue-Funktion
TUNER
AT/MT
E2 bis E5
beim Stimmen
MODE
AT/MT
automatisches oder manuelles Stimmen
CAL
435 bis 445
Kammerton A in Hz (Grundeinstellung)
Display angezeigt wird (dient zur Sicherheit,
weil das Effektsignal ausgeschaltet wird,
wenn das Stimmgerät aktiv ist).

Deutsch
TASCAM CD-GT1 —
37
Deutsch
Den CD-Player nutzen
er layer des
funktio
niert praktisch genauso wie jeder andere
layer bis auf ein paar kleine
nterschiede und spezielle unktionen
die wir hier erklären egen ie s
immer mit der beschrifteten eite nach
oben glänzende eite nach unten in
den
ein nen und schließen
ie die lappe von and
er kann generell nur
abgeschlossene nalisierte s
s abspielen ennoch lassen
sich möglicherweise auch manche abge
schlossenen s auf dem
nicht abspielen
Wiedergabe
m die iedergabe zu starten oder vor
übergehend anzuhalten drücken ie die
iedergabeauseaste
y
J
m die iedergabe zu beenden drü
cken ie die topptaste
H
enn ie den
mit atterien
kkus anstatt mit dem echselstro
madapter betreiben dauert das
tarten und toppen der iedergabe
länger um trom zu sparen
Display
it der
DISPLAY/ESC
aste schalten
ie zwischen verschiedenen nzeigen
um verstrichene eit des itels ver
bleibende eit des itels und gesamte
verbleibende eit im enümodus ist
diese ahl nicht möglich
Zum nächsten/vorherigen Titel
springen
m zum nächsten oder zum vorhe
rigen itel zu springen drücken ie
einmal kurz die aste
m
.
oder
/
,
Suchen innerhalb eines Titels
m eine bestimmte telle innerhalb der
aufzusuchen halten ie eine der
asten
m
oder
,
länger gedrückt
Die CUE-Taste nutzen
ie
CUE
aste ist eine esonderheit des
enn ie sie drücken gelangen ie
zurück an die telle an der die ieder
gabe zuletzt gestartet wurde
as anschließend geschieht ist abhän
gig von der
CUE
instellung im enü
MENU
enn dort
CUE
gewählt ist wird die
iedergabe am ueunkt angehalten
ause enn
FLS
gewählt ist beginnt
die iedergabe am ueunkt sofern
ie
CUE
während der iedergabe oder
ause gedrückt haben
TIPP
Wenn Sie einen Fußschalter anschließen,
können Sie diesen anstelle der
CUE
-Taste
nutzen und haben so die Hände frei (wählen
Sie im Menüeintrag
FOOT
die Einstellung
CUE
).
CUE).CUE
Gesamten Titel wiederholen
ählen ie im enüeintrag
PLAY
die
instellung
SGL
einzelner itel
rücken ie die
LOOP
aste so dass
LOOP 1
unten links auf dem isplay
angezeigt wird er aktuelle itel wird
wiederholt abgespielt
Gesamte CD wiederholen
ählen ie für den enüeintrag
PLAY
im
MENU
enü die instellung
ALL
alle itel
rücken ie
LOOP
so dass nur

38
— TASCAM CD-GT1
38 — TASCAM CD-GT138
Deutsch
Deutsch
LOOP
unten links auf dem isplay
angezeigt wird ie gesamte wird
wiederholt abgespielt
Abschnitt wiederholt abspielen
rücken ie die
I/O
aste um den
nfang der iedergabeschleife festzu
legen rücken ie aste noch einmal
um das nde festzulegen er bschnitt
zwischen den unkten wird nahtlos
wiederholt
urch nochmaliges rücken der
LOOP
aste werden die nfangsndpunkte
gelöscht und der iederholmodus wird
abgebrochen
olange diese unkte festgelegt sind
auf dem isplay wird
I-O
angezeigt
können ie die iederholung mithilfe
der
LOOP
aste erneut starten
Wiederholte Wiedergabe
abbrechen
rücken ie noch einmal die
LOOP
aste so dass
LOOP
nicht mehr angezeigt
wird
Den CD-Player nutzen

Deutsch
TASCAM CD-GT1 —
39
Deutsch
Tonhöhe oder Tempo der CD-Wiedergabe ändern
ine lässt sich auf drei verschiedene
eisen wiedergeben um hnen das
ben zu erleichtern
WICHTIG
Sie können nur eine dieser drei Funktionen
zur gleichen Zeit nutzen.
iese unktionen ermöglichen hnen
in einer anderen onart oder in einem
anderen empo zu spielen so dass ie
hre ieblingsi s und icks leichter
lernen
TIPP
Nutzen Sie beim Üben diese Möglichkeit
zusammen mit der LOOP-Funktion (wieder-
holte Wiedergabe).
Tonart ändern (Key-Funktion)
ie können die onart der usik
um sechs albtöne nach oben oder
nach unten verschieben – bei konstan
tem empo
er ert wird in albtönen und
undertsteln eingestellt und als
I
bis
O
auf dem isplay angezeigt enn
beide erte gleich ull sind albton
und undertstel ist die
KEY
unktion
ausgeschaltet
enn ein anderer ert als ull einge
stellt ist wird
KEY
angezeigt
utzen ie diese unktion wenn hnen
ein itel im riginal zu schwer zu spie
len oder zu singen ist
Langsame Wiedergabe
(SSA-Funktion)
ie unktion low peed udi
tion erlaubt es einen itel langsamer
abzuspielen ohne die onart zu ändern
olgende instellung sind möglich
aus – – – und – rozent
enn die unktion aktiv ist wird
SSA
links auf dem isplay angezeigt utzen
ie diese unktion um schnelle icks
besser üben zu können
Tonhöhe und Tempo ändern
(Pitch-Funktion)
ie itchunktion erlaubt es on
höhe und empo in chritten um
bis zu zu verringern ei ist die
unktion ausgeschaltet
enn die unktion aktiv ist wird
PITCH
auf dem isplay angezeigt
Einstellungen vornehmen
m
PITCH
enü lässt sich die unk
tion ein oder ausschalten m gleichen
enü wählen ie mit
PIT
den etrag um
den die onhöhe verringert =aus
beziehungsweise die iedergabe verlang
samt =ein werden soll enn
ausgeschaltet ist können ie
alternativ
im
KEY
enü mit dem ert
KEY
die
onartänderung und mit
FINE
die ein
einstellung vornehmen
Zur Erinnerung:
ur onart ändern=
KEY
angsam abspielen und onhöhe
beibehalten =
SSA
angsam abspielen und onhöhe
verringern =
PITCH

40
— TASCAM CD-GT1
Deutsch
Effekte verwenden
Wie Effekte funktionieren
s gibt zwei ektbänke im
A
und
B
mit jeweils fünf peicherplätzen
1
bis
5
auf denen ie hre eigenen
ekteinstellungen ablegen können
ls asis für hre ekteinstellungen
dienen die mitgelieferten orein
stellungen für itarre und für
esangprache
unächst wählen ie einen der pei
cherplätze für hre eigene instellung
nschließend rufen ie eine orein
stellung ab und ändern sie nach hren
ünschen iese geänderte instellung
wird auf dem gewählten peicherplatz
automatisch gespeichert
Eine eigene Effekteinstellung
speichern
rücken ie die
BANK
aste um ent
weder ank
A
oder
B
zu wählen wie auf
dem isplay angezeigt
rücken ie die
NO.
aste um den
peicherplatz
1
bis
5
zu wählen wie
an inzelheiten zu den arametern
siehe abelle unten
er letzte arameter ist immer
LVL
us
gangspegel des ektgeräts
0
bis
64
iese instellungen sind nur verfügbar
wenn der ekt eingeschaltet ist
tellen ie den egel ein und drücken
ie
DISPLAY/ESC
um die ekteinstel
lungen zu verlassen ie neue ek
einstellung wird automatisch auf dem
peicherplatz gespeichert den ie zuvor
gewählt haben
Eine eigene Effekteinstellung
abrufen
ine ekteinstellung die ie wie oben
beschrieben gespeichert haben können
ie ganz einfach mithilfe der asten
BANK
und
NO.
wieder abrufen verge
wissern ie sich dass das ektgerät
auch eingeschaltet ist
auf dem isplay angezeigt
rücken ie die
LCD MENU
aste bis
EFFECT
angezeigt wird
rücken ie die aste
5
um das
interne ektgerät einzuschalten
ON
rücken ie erneut
ENTER
und wählen
ie mit den asten
5
und
b
eine
ektvoreinstellung
00
bis
42
WICHTIG
Wenn der gewählte Speicherplatz bereits
Daten enthalten hat, werden diese über-
schrieben, sobald Sie eine Voreinstellung
abrufen.
rücken ie nochmals
ENTER
und pas
sen ie den ekt mithilfe der asten
5
und
b
hren ünschen entsprechend
Deutsch

TASCAM CD-GT1 —
41
Deutsch
TIPP
Schließen Sie einen Fußschalter an und
wählen Sie im
FOOT
-Menü die Einstellung
EFF
. Jetzt können Sie mit dem Fußschalter die
jeweils nächste Effekteinstellung abrufen.
Effektvoreinstellungen und
Parameter
ie oreinstellungen lassen sich in
drei ategorien einteilen ie ie hier
sehen besteht jede der oreinstellungen
für itarre istortion und lean aus
vier omponenten die sich einzeln
verändern lassen und hier aufgeführt
sind wie sie auf dem isplay angezeigt
werden
ie oreinstellungen für esang haben
je einen arameter der auf dem isplay
als
PAR
angezeigt wird
Distortion Clean sound Vocal
00 DIST-TONE-FLA-REV
15 COMP-TONE-FLA-REV
30 De-esser
01 DIST-TONE-FLA-DLY
16 COMP-TONE-FLA-DLY
31 Chorister
02 DIST-TONE-PHA-REV
17 COMP-TONE-PHA-REV
32 Emphasis
03 DIST-TONE-PHA-DLY
18 COMP-TONE-PHA-DLY
33 Shout
04 DIST-TONE-EXC-REV
19 COMP-TONE-EXC-REV
34 Mood Vocal
05 DIST-TONE-EXC-DLY
20 COMP-TONE-EXC-DLY
35 Response
06 DIST-TONE-CHO-REV
21 COMP-TONE-CHO-REV
36 Proclaim
07 DIST-TONE-CHO-DLY
22 COMP-TONE-CHO-DLY
37 Quivering Voice
08 DIST-TONE-TRM-REV
23 COMP-TONE-TRM-REV
38 Duet
09 DIST-TONE-TRM-DLY
24 COMP-TONE-TRM-DLY
39 Lo-Fi Vocal
10 DIST-TONE-VIB-REV
25 COMP-TONE-VIB-REV
40 Megaphone
11 DIST-TONE-VIB-DLY
26 COMP-TONE-VIB-DLY
41 Screaming
12 DIST-TONE-WAH-REV
27 COMP-TONE-WAH-REV
42 Panning Vocal
13 DIST-TONE-WAH-DLY
28 COMP-TONE-WAH-DLY
—
14 DIST-TONE-PIT-DLY
29 COMP-TONE-PIT-DLY
—
Die Parameter
DIST
rad der erzerrung
COMP
rad der ompression
TONE
langregelung
FLA
langerinstellung
REV
allinstellung
DLY
elayinstellung cho
PHA
haserinstellung
EXC
xciterinstellung
PIT
itchhifterinstellung
CHO
horusinstellung
TRM
remoloinstellung
Effekte verwenden
VIB
ibratoinstellung
WAH
utowahinstellung
ür jede oreinstellung gibt
es zudem den arameter
LVL
egel
0
bis
64

42
— TASCAM CD-GT1
Deutsch
Deutsch
Das Stimmgerät nutzen
as im
eingebaute itar
renstimmgerät hat zwei etriebsarten
automatisch die onhöhe des ein
gehenden ignals wird automatisch
erkannt und angezeigt und manuell
ie legen den ielton selbst fest und
stimmen danach
rücken ie die
MENU
aste bis
TUNER
angezeigt wird und bestätigen ie mit
ENTER
vermindert erhöht
in Stimmung
obald das timmgerät aktiviert ist
wird das ektgerät automatisch aus
geschaltet
enn automatisches timmen gewählt
ist auf dem isplay wird
AT
angezeigt
spielen ie jetzt einfach eine ote auf
der itarre as timmgerät versucht
die nächstgelegene ote zu ermitteln
und zeigt sie auf dem isplay an
timmen ie die aite grob so dass
die richtige ote angezeigt wird und
nehmen ie dann die einstimmung
vor bis auf dem isplay das größere
egment in der itte erscheint
enn manuelles timmen gewählt ist
auf dem isplay wird
MT
angezeigt
können ie die ote mit den asten
5
und
b
vorgeben und dann wie oben
beschrieben stimmen
Das Stimmgerät kalibrieren
as über dem mittleren hat in der
westlichen usik normalerweise eine
requenz von z ammerton
ielleicht möchten ie aber einmal
nach einem anderen tandard stimmen
z wenn ie zu einem nicht stimm
baren nstrument spielen wollen oder
die usik auf der sich nicht auf
z bezieht
ählen ie dazu im
TUNER
enü den
intrag
CAL
alibrierung und stellen
ie das eferenz auf einen ert zwi
schen z und z ein
WICHTIG
Beim Stimmen ist es zwar nicht erforderlich,
eine CD abzuspielen, der CD-GT1 muss je-
doch eingeschaltet und der
GUITAR
-Schalter
gedrückt sein, um die Gitarre stimmen zu
können, die an den CD-GT1 angeschlos-
sen ist.

Deutsch
TASCAM CD-GT1 —
43
Deutsch
Fakten und Zahlen (Technische Daten)
nutzbare CD-Typen
8-cm-Single-CD,
12-cm-CD
AD/DA
16 Bit
Signalverarbeitung
32 Bit
nominaler Ausgangs -
pegel (Lineausgang)
–16 dBV
max. Ausgangspegel
ohne Verzerrung
(Lineausgang)
0 dBV (1 Vrms)
Ausgangsimpedanz
1 K
Ω
max. Ausgangsleistung
(Kopfhörerausgang)
> 18 mW (32
Ω)
nominale
Eingangspegel
Lineeingang
Mikrofoneingang
Gitarreneingang
–10 dBV
–40 dBV
–15 dBV
CD-Wiedergabe
Frequenzbereich
20 Hz bis 20 kHz,
±1,0 dB
Dynamik
>88 dB
Rauschabstand
>88 dB
Verzerrung (THD)
<0,01%
Spannungsversorgung
9 V DC
(über Wechselstrom-
adapter PS-PS5)
4 Batterien/Akkus
(AA, Mignon)
Leistungsaufnahme
4 W (über
Wechselstrom-
adapter PS-PS5)
Abmessungen
(B x H x T,
einschließlich Füße)
232 mm x 138 mm
x 40 mm
Gewicht (ohne
Batterien/Akkus)
620 g

44
— TASCAM CD-GT1
Italiano
Italiano
Importanti Istruzioni di Sicurezza
1
Leggere le istruzioni
— Prima di mettere in funzio-
ne l’apparecchio, leggere tutte le istruzioni di sicurezza ed
azionamento.
2
Conservare le istruzioni
— Conservare in luogo si-
curo le istruzioni di sicurezza ed azionamento, per agevolare
future consultazioni.
3
Avvertenze precauzionali
— Attenersi a tutte le
avvertenze, sia contrassegnate sull’apparecchio che conte-
nute nel manuale d’istruzioni.
4
Seguire le istruzioni
— Seguire tutte le istruzioni
d’azionamento ed utilizzo.
5
Acqua ed umidità
— Non utilizzare l’apparecchio in
vicinanza dell’acqua: per esempio, vicino a vasche da bagno,
lavabi, lavelli da cucina, lavabiancheria, in scantinati umidi,
ai bordi di una piscina, eccetera.
6
Pulizia
— Prima di pulire l’apparecchio togliere
sempre l’alimentazione, staccando la spina. Non utilizzare
prodotti speci ci liquidi o aerosol: basta un semplice panno
inumidito
7
Ventilazione
— Per garantire un funzionamento
af dabile e per proteggere contro il riscaldamento eccessivo,
sul mobile sono praticate apposite fessure ed aperture di
ventilazione che non devono assolutamente essere otturate
o coperte appoggiando l’apparecchio, per esempio, su un
letto, un divano, un tappeto o super ci analoghe.
8
Calore
— L’apparecchio non deve essere collocato
vicino a sorgenti di calore, come stufe, radiatori, aerotermi
o altre apparecchiature che producono calore, ampli catori
compresi.
9
Accessori
— Per non correre inutili rischi, non uti-
lizzare accessori diversi da quelli consigliati dal fabbricante
dell’apparecchio.
10
Installazione
— Non installare quest’apparecchio su
un qualsiasi appoggio instabile: potrebbe cadere, riportando
gravi danni o coinvolgendo anche eventuali persone vicine.
11Messa a terra o polarizzazione
— Quest’apparecchio
potrebbe essere munito di una spina di linea polarizzata a
corrente alternata (che ha una lama più larga dell’altra). Tale
spina entra nella presa di rete soltanto in una direzione: si
tratta di una misura di sicurezza. Se risultasse impossibile
inserire la spina a fondo, provare a voltarla nell’altra dire-
zione. Se anche così la spina si ri uta di entrare, chiamare
un elettricista e far sostituire la presa, evidentemente di tipo
sorpassato: meglio una piccola spesa, che rinunciare alla
sicurezza offerta dalla spina polarizzata.
12
Protezione del cavo di rete
— Stendere i cavi
d’alimentazione dove abbiano scarse probabilità di essere
calpestati o pinzati da oggetti posti sopra o vicino ad essi; at-
tenzione soprattutto alle sezioni di cavo vicino ai connettori
(prese o spine), agli appositi contenitori, nonché al punto in
cui il cavo esce dall’apparecchio.
13
Accessori
— Usare solo gli accesssori forniti in
dotazione e/o quelli consigliati dal costruttore.
14
Spostamenti
— Quando l’apparecchio è
appoggiato su un carrello, spostare il tutto con pre-
cauzione: brusche fermate, spinte eccessive e super ci
accidentate possono infatti provocare il ribaltamento.
Non bisogna nemmeno inserire l’apparecchio nel vano
di un mobile, come una libreria o un armadietto, a meno
che sia stato previsto un adatto sistema di ventilazione.
15
Fulmini
— Per proteggere ulteriormente l’apparec-
chio nel corso di un temporale, oppure quando rimane senza
sorveglianza e non viene utilizzato per un periodo prolunga-
to, staccarlo dalla presa di rete e scollegare l’antenna o il si-
stema via cavo. Questa precauzione eviterà che l’apparecchio
venga danneggiato da un fulmine o da un picco transitorio di
tensione.
16
Assistenza
— Non tentare mai di riparare l’apparec-
chio da soli: smontando il coperchio o il pannello posteriore
si può rimanere esposti a tensioni pericolose o correre altri
rischi. Ogni intervento d’assistenza dovrà essere effettuato
da personale tecnico quali cato, in special modo se si veri -
cano danni come: Il cavo o la spina di alimentazione risultano
danneggiati, o sono caduti oggetti o sono colati liquidi all’in-
terno dell’apparecchio, se l’apparecchio è rimasto esposto
alla pioggia o si è comunque bagnato, se l’apparecchio non
si comporta correttamente seguendo le normali istruzioni.
Effettuare soltanto le regolazioni contemplate nel manuale
d’utente; modi care altri comandi potrebbe comportare un
ulteriore danno e richiedere poi un lavoro supplementare da
parte del tecnico per ripristinare le condizioni originali, se
l’apparecchio è caduto oppure l’involucro ha subito danni, e
se si nota un notevole calo nelle prestazioni
• Utilizzare soltanto un elemento (carrello, piano d’appog-
gio, treppiede, staffa, tavolo) consigliato dal fabbricante o
venduto insieme all’apparecchio stesso. Per qualsiasi tipo
d’installazione, seguire le istruzioni del fabbricante ed usare
accessori consigliati dallo stesso.
• Non piazzare oggetti contenenti liquidi, come vasi,
bicchieri, bottiglie o altro, nelle immediate vicinanze
dell’apparecchio
• Non installare l’apparecchio in spazi angusti e non ventila-
ti, come librerie o altro.
• Questo apparecchio assorbe un limitato quantitativo di
corrente dall’impianto elettrico anche se spento.
NOTA
Il CD-GT1 non può riprodurre CD-R
e CD-RW non nalizzati. Inoltre,
potrebbe incontrare problemi nella
riproduzione di alcuni dischi CD-R e
RW, anche se nalizzati.

Italiano
TASCAM CD-GT1 —
45
Italiano
Importanti Istruzioni di Sicurezza
...................................
44
Indice
...............................................................
................
45
Preliminari all’azionamento del CD-GT1
.........................
46
Collegamenti
...............................................................
....
47
Regolazione del bilanciamento
.......................................
48
Funzionamento tramite menu
.........................................
49
Funzionamento del lettore
..............................................
50
Modi ca della tonalità e del ritmo
.................................
51
Effetti prede niti e parametri regolabili
........................
53
Utilizzo del menu tuner
...................................................
54
Caratteristiche tecniche
..................................................
55
Indice

46
— TASCAM CD-GT1
46 — TASCAM CD-GT146
Italiano
Italiano
Preliminari all’azionamento del
CD-GT1
Convenzioni tipogra che
n questo manuale il nome di tasti con
nettori o controlli montati sul
è scritto in carattere grassetto come ad
esempio
PLAY
ualsiasi voce visualizzata sul display è
invece scritta in un particolare carattere
esempio
MENU
Inserimento delle batteria
l è alimentato da quattro
pile non comprese nella
fornitura onsigliamo di scegliere pile
ricaricabili al i ma sono indicate
anche le normali pile alcaline
tilizzare sempre pile dello stesso
tipo
ostituire sempre tutte le pile con
temporaneamente
uando si prevede di non usare
il per un certo periodo
estrarre le pile
nserire le pile in modo che i poli po
sitivo
+
e negativo
-
e negativo
-
e negativo
corrisponda
no ai rispettivi contrassegni riportati
nel vano batteria
er prolungare la vita utile della bat
teria utilizzare sempre lapparecchio
ad una temperatura ambiente com
presa fra ° e °
uando si sostituisce la batteria ri
cordarsi di depositare le pile scariche
negli appositi contenitori
uando la batteria è esaurita il
si spegne automaticamente per riaccen
derlo premere linterruttore
POWER
dopo aver sostituito le pile
otare che lindicatore della batteria sul
display fornisce solo unindicazione ap
prossimativa della carica residua e quindi
in certe situazioni potrebbe non esserci
abbastanza carica residua nelle batterie
per alimentare il nonostante
lindicazione sul display
Utilizzo di un adattatore di rete
on il usare soltanto ladattato
re non compreso nella
fornitura disponibile presso labituale
rivenditore n adattatore
di tipo diverso potrebbe danneggiare
lapparecchio erificare sempre che la lo
cale tensione di rete corrisponda a quella
indicata sulladattatore
Accensione dell’apparecchio
ul ci sono due interruttori
daccensionel primo
POWER
è del
tipo a slitta e permette di accendere e
spegnere lapparecchio
l secondo
GUITAR
controlla lalimen
tazione del connettore
GUITAR/INPUT
e
dellunità deffetti e questultima è spen
ta non è possibile usare
GUITAR/INPUT
e
nemmeno i menu
EFFECT
e
TUNER
otare inoltre la presenza dellinterrutto
re
HOLD
che quando è spostato su
ON
blocca lazionamento di tasti e controlli
del
Funzione automatica
di risparmio energetico
uando lapparecchio rimane acceso
nel modo top se lunità è alimentata a
batterie peroltre minuti oppure nessun
disco viene caricato od aperto per lo
stesso periodo il lettore si spegne la
sezione scompare dal display ma si
può continuare ad usare la sezione uitar
uando si vuole riavviare soltanto il let
tore premere il tasto
PLAY
quando
invece sono spente entrambe le sezioni
e uitar per riavviarle bisogna
premere
POWER

Italiano
TASCAM CD-GT1 —
47
Italiano
Collegamenti
Ingressi
Collegamento di una chitarra
er collegare allapparecchio una chitarra
o un basso basta inserire unestremità
del suo cavo nella chitarra stessa e lal
tra nel connettore
GUITAR/MIC IN
del
uando si usano pedali deffetto si può
collegare la loro uscita al tenere
presente che lapparecchio dispone di una
propria unità deffetti
postare linterruttore
GUITAR/MIC
su
GUITAR
ccertarsi che sia premuto il tasto dali
mentazione
GUITAR
AVVERTENZA
NON collegare MAI un ampli catore per
chitarra all’ingresso
GUITAR/MIC
del CD-
GT1 perché potrebbe provocare gravi danni
all’apparecchio.
Collegamento di un microfono
nserire nel connettore
GUITAR/MIC
del la spina di un microfono
adatto in caso di dubbi sul microfono
da scegliere chiedere consiglio al riven
ditore postare linterruttore
GUITAR/MIC
su
MIC
Collegamento di una sorgente
stereo di linea
possibile collegare al anche
una sorgente stereo di linea come luscita
di un sintetizzatore un preamplificatore
per chitarra ununità deffetti montata su
rack un registratore a cassetta eccetera
tilizzare a tale scopo il minijack
LINE
IN
vicino al connettore
GUITAR/MIC IN
AVVERTENZA
NON collegare MAI le uscite Speaker di
un ampli catore da chitarra a qualcosa di
diverso da un altoparlante. In caso di dubbi
su quali dispositivi possono essere collegati
al CD-GT1, chiedere consiglio a chi se ne
intende.
Collegamento di un interruttore
a pedale
possibile collegare al un in
terruttore a pedale per poter richiamare
in sequenza le regolazioni contenute nelle
locazioni di memoria o per pilotare il
lettore a mani libere i particolari
di queste operazioni sono descritti più
avanti
er evitare problemi con il usa
te solo un interruttore a pedale
o similare nonlatching
collegandolo alla presa
FOOT
Uscite
er collegarsi allingresso di un siste
ma stereo oppure allingresso ixer ec
cetera inserirle nel minijack stereo
LINE
OUT
del un adatto cavo stereo
non compreso nella fornitura
uando si preferisce lascolto individuale
inserire la spina di una cuffia non com
presa in dotazione nel minijack stereo
PHONES

48
— TASCAM CD-GT1
48 — TASCAM CD-GT148
Italiano
Italiano
Regolazione del bilanciamento
Ingressi
e sorgenti dingresso per il
sono tre e precisamente
il in corso di lettura
la chitarra o il microfono collegata
al jack
GUITAR/MIC IN
lingresso stereo di un dispositivo
collegato al jack
LINE IN
er la prima e lultima di queste sorgenti
dingresso il livello non può essere modi
ficato dal vedremo ora in parti
colare come ottenere il bilanciamento tra
il segnale del e quello dingresso
on il controllo evel del disposi
tivo collegato a
LINE IN
regolare il
livello di questa sorgente tenendo
presente che alla stessa non si posso
no applicare gli e etti
on il controllo
INPUT
del
regolare il livello della chitarra
o del microfono prima che il segnale
venga inviato alle etto
uando non è selezionato un menu
si possono usare i tasti
5
e
b
per
regolare il relativo bilanciamento
della chitarra o del microfono ma
non quello della sorgente
LINE
IN
rispetto alluscita proveniente
dal lettore uesto valore
MIX
è regolabile fra e + icordare
che tale operazione è possibile solo
quando non è attivo il funzionamen
to tramite menu
l sistema di menu del per
mette di regolare il livello duscita
nale delle etto
Outputs
e uscite disponibili sono due quella di
linea e quella in cuffia loro livelli non
sono regolabili separatamente
l controllo
OUTPUT
permette di regolare
il livello duscita complessivo

Italiano
TASCAM CD-GT1 —
49
Italiano
Funzionamento tramite menu
ella tabella qui pubblicata sono elencati
i diversi menu disponibili con le rispetti
ve regolazioni
er impostare questo modo di funziona
mento premere il tasto
LCD MENU
finché
compare il menu desiderato che lam
peggia in un riquadro a colori invertiti
sulla parte principale dello schermo viene
allora visualizzata la prima voce del menu
stesso il cui valore è regolabile con i tasti
direzionali e b
a notare che non è necessario premere
ENTER
per predisporre il nuovo valore la
regolazione cambia appena il tasto viene
premuto
er spostarsi sulla voce successiva del
menu visualizzato premere
ENTER
remere invece
MENU
per passare al
menu successivo di cui comparirà la
prima voce
er uscire dal modo di funzionamento
tramite menu premere il tasto
DISPLAY/
ESC
NOTA
Solo quando compare sullo schermo il menu
TUNER
è necessario premere
ENTER
, in
quanto l’audio degli effetti viene escluso
quando è operativo questo menu.
Menu Voci Menu Valori Osservazoni
EFFECT
EFF
ON/OFF
attiva o disattiva l’effetto
LIB
00 to 42
numero dell’effetto prede nito
Parametri
—
dipende dal tipo dell’effetto
LVL
0 to 64
livello d’uscita dell’effetto
PITCH
PIT
0 to –50% (pitch)
o 0, –8, –16, –32 e
–50 (SSA)
de nisce il valore del cambio di tonalità,
o della diminuzione della velocità
d’ascolto
SSA
SSA ON/OFF
attiva/disattiva l’ascolto a velocità ridotta
KEY
KEY
da
O
6 a
I
6 (o SSA)
valore in semitoni del cambio di tonalità
FINE
da –50 a +50 (o SSA)
valore in centesimi del cambio di tonalità
MENU
PLAY
ALL/SGL
lettura disco / singolo brano
CUE
CUE/FLS
funzionamento cue o “ ash play”
FOOT
EFF/CUE
De nisce la funzione dell’interruttore
a pedale: richiamo in sequenza
regolazioni memorizzate oppure
pilotaggio lettore CD
TUNER
AT/MT
E2 to E5 (durante
l’accordatura)
MODE
AT/MT
Accordatura automatica o manuale
CAL
435 to 445
Calibrazione in Hz

50
— TASCAM CD-GT1
Italiano
Italiano
Funzionamento del lettore
l lettore del funziona pra
ticamente come un normale lettore
in questo paragrafo sono descritte solo le
piccole differenze e le funzioni speciali
aricare i ompact isc nel
con letichetta rivolta verso lalto aprendo
e richiudendo a mano lo sportello del
lettore
Riproduzione
remere il tasto
y
J
per avviare la riproduzione e per inter
romperla momentaneamente inserendo
una pausaremere il tasto
H
per
fermare la riproduzione
uando il lettore è alimentato a batteria
avvio ed arresto della riproduzione avven
gono più lentamente rispetto allalimen
tazione in rete questaccorgimento evita
di sovraccaricare la batteria prolungando
la sua durata
Display
l tasto
DISPLAY/ESC
fa comparire in se
quenza sul display le seguenti informazioni
tempo trascorso del brano tempo restante
del brano e tempo restante totale del disco
impossibile visualizzare tali dati quando il
funzionamento è tramite menu
Salto di brani
remendo e rilasciando uno dei due tasti
kipearch
m
/
.
e
/
/
,
è
possibile spostarsi in entrambe le direzio
ni saltando un brano alla volta
Ricerca all’interno delle tracce
sate i tasti skipsearch per ricercare un
punto del disco premendo e mantenedo
premuto il tasto apposito
Il tasto CUE
l tasto
CUE
del ha una funzio
ne speciale quando viene premuto la po
sizione di lettura ritorna allultimo punto
dal quale era iniziata la riproduzione
l comportamento successivo dellappa
recchio dipende dalla regolazione della
voce
CUE
di
MENU
se tale voce è regola
ta su
CUE
la riproduzione entra in ausa
in corrispondenza al punto localizzato se
invece è regolata su
FLS
la riproduzione
riprende dal punto localizzato se il tasto
CUE
è stato premuto partendo dal modo
lay o ause
CONSIGLIO
Quando è collegato un interruttore a pedale,
si può usare quest’ultimo invece del tasto
CUE per lavorare a mani libere (basta regola-
re su CUE la voce FOOT di MENU).
Ripetizione ciclica (di un brano)
redisporre su
SGL
riproduzione di un
singolo brano la voce
PLAY
di
MENU
remere il tasto
LOOP
finché sul display
in basso a sinistra si legge
LOOP 1
il brano
corrente verrà così letto in ripetizione
Ripetizione ciclica (del disco)
redisporre su
ALL
riproduzione dellinte
ro disco la voce
PLAY
di
MENU
remere
il tasto
LOOP
finché sul display in basso
a sinistra si legge
LOOP ALL
lintero disco
verrà così letto in ripetizione
Ripetizione ciclica (della sezione I/O)
sando il tasto
I/O
impostare dapprima
il punto iniziale della sezione da
ripetere e poi il punto finale a
selezione tra i punti di ingresso e di uscita
viene ripetuta in un loop
remendo nuovamente il tasto
I/O
si
cancellano i punti di loop e si esce dal
modo loop
e i punti sono ancora impostati l di
splay mostra la dicitura si può riat
tivare il modo loop nel caso fossa stato
cancellato usando il tasto
LOOP
Per cancellare il modo di ripetizione
remere il tasto
LOOP
finché lindicazio
ne
LOOP
scompare dal display in basso a
sinistra

Italiano
TASCAM CD-GT1 —
51
Italiano
Modi ca della tonalità e del ritmo
a riproduzione di un può essere va
riata in tre modi e
NOTA
Questi modi non si possono attivare contem-
poraneamente, ma soltanto uno alla volta.
iventa così possibile ascoltare i brani
con tonalità o ritmo diversi allo scopo
dimparare a suonare i riffs and licks
preferiti
CONSIGLIO
Per esercitarsi con maggior pro tto, abbinare
queste possibilità di modi ca con la funzione
di riproduzione ciclica.
Modo KEY
posta la tonalità del brano di sei semitoni
verso lalto o verso il basso senza alterare
il ritmo
l valore viene regolato in semitoni e cen
tesimi centesimo di semitono e indica
to da
I
6
a
O
6
uando semitoni e centesi
mi hanno entrambi valore il modo
KEY
risulta disattivato se fosse attivo viene
disattivato anche il modo
attivazione di questo modo è segnalata
dalla scritta
KEY
sul display
cegliere questo modo quando sincon
trano difficoltà a suonare o cantare nella
tonalità con la quale il brano è stato regi
strato sul
Modo SSA
l modo low peed udition
permette di ascoltare un brano con la
stessa tonalità ma con il ritmo rallenta
to e regolazioni possibili espresse in
valori percentuali sono off
e
attivazione di questo modo è segnalata
dalla scritta
SSA
sul lato sinistro del
display
cegliere questo modo per esercitarsi a
suonare passaggi difficili particolarmente
veloci
Modo PITCH
l modo itch permette di modificare sia
la tonalità che il ritmo con variazioni
dell riducendo i valori fino a
a regolazione off è
attivazione di questo modo è segnalata
dalla scritta
PITCH
sul display
Come effettuare le regolazioni
ramite il menu
PITCH
attivare o disatti
vare il modo e poi predisporre il valo
re desiderato per la tonalità o la velocità di
ascolto sempre tramite il menu
PITCH
oppure quando il modo
SSA
non è
attivo selezionare la voce
KEY
nel suc
cessivo omonimo menu ed effettuare le
regolazioni
KEY
in semitoni e
FINE
in
centesimii
Riassumendo:
er modi care solo la tonalità =
KEY
er ridurre la velocità dascolto sen
za cambiare tonalità =
SSA
er cambiare sia la velocità che la
tonalità =
PITCH

52
— TASCAM CD-GT1
Italiano
Italiano
Funzionamento dell’unità effetti
Utilizzo degli effetti
el sono presenti due banchi di
effetti e ciascuno di essi ha cinque
locazioni di memoria numerate da a
nelle quali si possono conservare le regola
zioni personalizzate
ali regolazioni si effettuano sui effetti
predefiniti per chitarra e per le par
ti cantate contenuti nel opo
aver selezionato un banco e una locazione
di memoria se un effetto predefinito
viene richiamato e modificato la nuova
regolazione andrà automaticamente ad
occupare quella locazione
Memorizzazione di un effetto perso-
nalizzato in una locazione
remere il tasto
BANK
per selezionare il
banco o come indicato sul display
remere il tasto
No.
per selezionare una
delle locazioni di memoria come
indicato sul display
remere il tasto
LCD MENU
finché viene
visualizzata il menu
EFFECT
remere il tasto
5
per attivare leffetto
remere
ENTER
e poi selezionare leffetto
predefinito da
00
a
42
con i tasti direzio
nali
5
e
b
NOTA
Se la locazione di memoria selezionata con-
tenesse già altre regolazioni, le stesse ven-
gono sovrascritte quando ne viene salvata
una nuova.
remere
ENTER
ancora una volta per
poter iniziare la modifica dei parametri
con i tasti
5
e
b
i particolari su questi
parametri sono contenuti nella tabella
che segue
ultimo parametro è sempre
LVL
il livel
lo duscita del processore deffetti da a
uesto parametro è disponibile solo
quando il generatore è attivo quando il
generatore non è attivo il parametro non
viene considerato
egolare il livello e poi premere il tasto
DISPLAY/ESC
per uscire da modo di
regolazione degli effetti
e regolazioni effettuate vengono auto
maticamente salvate nella locazione di
memoria selezionata in precedenza
Richiamo di un effetto persona-
lizzato
uando le regolazioni di un effetto sono
state salvate in una locazione di memoria
come appena descritto per richiamarle
basta selezionare la locazione appropriata
con i tasti
BANK
e
No.
dopo aver verifi
cato che leffetto sia attivo
CONSIGLIO
Quando è stato collegato un interruttore a
pedale e la voce
FOOT
di MENU è regolata
su
EFF
, si possono richiamare in sequenza le
EFF, si possono richiamare in sequenza le EFF
locazioni di memoria di un banco premendo
il pedale.

Italiano
TASCAM CD-GT1 —
53
Italiano
Effetti prede niti e parametri regolabili
li effetti predefiniti possono essere sud
divisi in tre categorie
Distortion Clean sound Vocal
00 DIST-TONE-FLA-REV
15 COMP-TONE-FLA-REV
30 De-esser
01 DIST-TONE-FLA-DLY
16 COMP-TONE-FLA-DLY
31 Chorister
02 DIST-TONE-PHA-REV
17 COMP-TONE-PHA-REV
32 Emphasis
03 DIST-TONE-PHA-DLY
18 COMP-TONE-PHA-DLY
33 Shout
04 DIST-TONE-EXC-REV
19 COMP-TONE-EXC-REV
34 Mood Vocal
05 DIST-TONE-EXC-DLY
20 COMP-TONE-EXC-DLY
35 Response
06 DIST-TONE-CHO-REV
21 COMP-TONE-CHO-REV
36 Proclaim
07 DIST-TONE-CHO-DLY
22 COMP-TONE-CHO-DLY
37 Quivering Voice
08 DIST-TONE-TRM-REV
23 COMP-TONE-TRM-REV
38 Duet
09 DIST-TONE-TRM-DLY
24 COMP-TONE-TRM-DLY
39 Lo-Fi Vocal
10 DIST-TONE-VIB-REV
25 COMP-TONE-VIB-REV
40 Megaphone
11 DIST-TONE-VIB-DLY
26 COMP-TONE-VIB-DLY
41 Screaming
12 DIST-TONE-WAH-REV
27 COMP-TONE-WAH-REV
42 Panning Vocal
13 DIST-TONE-WAH-DLY
28 COMP-TONE-WAH-DLY
—
14 DIST-TONE-PIT-DLY
29 COMP-TONE-PIT-DLY
—
ome risulta dalla tabella tutti gli effetti
predefiniti per chitarra distortion e clean
hanno quattro componenti ciascuno dei
quali può essere regolato singolarmente
e vengono visualizzati nellordine in cui
sono elencati nella tabella
Parametri
DIST
uadagno istortion
COMP
uadagno ompressor
TONE
ontrollo di tono
FLA
egolazione langer
REV
egolazione everb
DLY
egolazione elay
PHA
egolazione haser
EXC
egolazione xciter
PIT
egolazione itch
CHO
egolazione horus
TRM
egolazione remolo
VIB
egolazione ibrato
WAH
egolazione utowah
utti gli effetti predefiniti dispongono
inoltre della regolazione livello
da a
li effetti per le parti cantate hanno
ciascuno un solo parametro che viene
visualizzato come
PAR

54
— TASCAM CD-GT1
Italiano
Italiano
Utilizzo del menu tuner
accordatore per chitarra integrato nel
può funzionare in due modi
diversi
el modo automatico lintonazione del
segnale in arrivo viene rilevata e visualiz
zata automaticamente
el modo manuale si predispone una
nota di riferimento sulla quale accordare
una corda della chitarra
remere il tasto
MENU
finché viene visua
lizzato
TUNER
poi premere
ENTER
uando simposta il menu uner
qualsiasi effetto viene automaticamente
disattivato
e laccordatore funziona in modo auto
matico indicato sul display con la sigla
basta suonare una nota sulla chitarra
l sistema determina la nota più vicina e la
mostra sul display egolare la corda gros
solanamente fino a far comparire la nota
corretta e poi accordare con precisione
finché compare al centro del display un
simbolo circolare
e laccordatore funziona in modo ma
nuale indicato sul display con la sigla
predisporre la nota sul display con i
tasti
5
e
b
e poi accordare lo strumento
come prima descritto
Taratura dell’accordatore
i solito il a che precede il o centrale
è accordato a z in quasi tutta la
musica occidentale
alvolta però può essere necessario ac
cordarsi su uno standard diverso quando
si sta suonando con un altro strumento
oppure quando un non utilizza la fre
quenza di z sando la voce
del menu tarare il a su una
frequenza compresa fra e z
NOTA
Anche se non è necessario riprodurre un CD
mentre si esegue l’accordatura, il CD-GT1
deve essere comunque acceso ed il tasto
GUITAR
deve essere premuto perché sia
possibile accordare la chitarra inserita nel
CD-GT1.
Flat
Sharp
On-key

Italiano
TASCAM CD-GT1 —
55
Italiano
Caratteristiche tecniche
Tipo del disco
CD singolo da
8 /12 cm
Convertitore AD/DA
16-bit
Elaborazione
segnale digitale
32-bit
Livello uscita nominale
(LINE OUT)
–10 dBV
Livello uscita massimo
(LINE OUT)
0 dBV (1 Vrms)
Impedenza uscita
1 k
Ω
Livello uscita massimo
(PHONES)
> 18 mW (32
Ω
)
Livello ingresso
nominale
LINE IN
MIC IN
GUITAR IN
–10 dBV
–40 dBV
–15 dBV
Caratteristiche della sezione lettore CD
Risposta in frequenza
da 20 Hz a 20 kHz
±1.0 dB
Gamma dinamica
> 88 dB
Rapporto
segnale/rumore
> 88 dB
THD
<0.01%
Voltage requirements
DC 9V (adattatore
c.a. PS-PS5)
AA batterie x 4
Tensione
alimentazione
4 W (adattatore c.a.
PS-PS5)
Dimensione (L x A x P),
piedini compresi
232 x 138 x 40
(mm)
Peso (esclusa la
batteria)
620 g
a

56
— TASCAM CD-GT1
56 — TASCAM CD-GT156
Español
Español
INSTRUCCIONES IMPORTANTES DE SEGURIDAD
1
Lea estas instrucciones.
2
No tire este manual de instrucciones.
3
Preste atención a todas las advertencias y
avisos.
4
Cumpla con lo indicado en las instruccio-
nes.
5
No utilice este aparato cerca del agua.
6
Limpie la unidad solo con un trapo seco.
7
No tape ninguna de las aberturas de
ventilación. Instale el aparato de acuerdo a las
instrucciones del fabricante.
8
Nunca instale esta unidad cerca de nin-
guna fuente de calor como radiadores, hornos,
calentadores u otros aparatos (incluyendo
ampli cadores) que produzcan calor.
9
No elimine el sistema de seguridad del
enchufe polarizado o con toma de tierra. Un
enchufe polarizado tiene dos bornes, uno más
ancho que el otro. Un enchufe con toma de
tierra tiene dos bornes y una lámina para la
conexión a tierra. El borne ancho o la lámina
se incluyen para su seguridad. Si el enchufe que
venga con su aparato no encaja en su salida de
corriente, contacte con un electricista para que
cambie ese enchufe o la instalación.
10
Evite que el cable de corriente quede en
una posición en la que pueda ser pisado o que-
dar aplastado, especialmente donde estén los
enchufes, receptáculos de entrada y en el punto
en que estos cables salen del aparato.
11
Utilice solo los accesorios / elementos
especi cados por el fabricante.
12
Utilice esta unidad solo con un soporte,
carro, trípode o bastidor especi cado por el
fabricante o que se venda con el propio apa-
rato. Cuando utilice un soporte, tenga cuidado
al desplazar la combinación aparato / soporte
para evitar posibles daños en caso de vuelco.
13
Desenchufe este aparato de la corriente
durante las tormentas eléctricas o cuando no
lo vaya a usar durante un periodo de tiempo
largo.
14
Consulte cualquier posible reparación
únicamente con el servicio técnico o cial. Será
necesario reparar este aparato cuando se haya
dañado en alguna forma, como por ejemplo
cuando el cable de alimentación o el enchufe
se hayan roto, se hayan derramado líquidos o se
haya introducido algún objeto dentro del apara-
to, cuando la unidad haya quedado expuesta a
la lluvia o la húmeda, cuando no funcione con
normalidad o si ha caído al suelo.
•
No permita que este aparato quede ex-
puesto a goteras o salpicaduras de líquidos.
•
No coloque sobre el aparato ningún objeto
que contenga líquidos como jarras o vasos.
•
No instale este aparato con nado en un
espacio reducido como encastrado en una
estantería o ubicación similar.
•
Este aparato sigue recibiendo una corrien-
te nominal nooperativa de la salida de corriente
alterna aunque su interruptor POWER esté
colocado en la posición off.
ATENCION
El CD-GT1 no puede reproducir discos CD-
R/RW no nalizados. Además, es posible que
no pueda reproducir con el CD-GT1 tampoco
algunos discos CD-R/RW nalizados.

Español
TASCAM CD-GT1 —
57
Español
INSTRUCCIONES IMPORTANTES DE SEGURIDAD
.............
55
Indice
...............................................................
................
56
Sus primeros pasos con el CD-GT1
..................................
57
Conexiones
...............................................................
.......
58
Ajuste del balance
...........................................................
59
Manejo del sistema de menús
.........................................
60
Manejo del reproductor de CD
........................................
61
Cambios de tono y tempo
...............................................
62
Uso de los efectos
...........................................................
63
Presets y parámetros de efectos
.....................................
64
Manejo del a nador
........................................................
65
Datos y números (especi caciones)
................................
66
Indice

Sus primeros pasos con el CD-GT1
Acerca de este manual
uando nos re ramos a una tecla control
o conector del lo marcaremos
así
PLAY
uando hagamos referencia a un ele
mento que vea en la pantalla lo indica
remos así
MENU
Colocación de las pilas
l usa cuatro pilas
no incluidas e recomendamos que use
pilas i recargables también puede
usar pilas alcalinas
tilice siempre pilas del mismo
tipo
ambie siempre todas las pilas a la
vez
i no va a usar el en un
tiempo sáquele las pilas
oloque las pilas de acuerdo a las
marcas
+
y
–
que verá en el compar
–
que verá en el compar
–
timento
aque el máximo rendimiento a las
pilas usando esta unidad en el rango
de temperaturas ° a ° ° a
°
eshágase de las pilas usadas de
acuerdo a las normativas de su o
munidad
uando las pilas gasten la unidad se
apagará automáticamente y deberá
encenderla de nuevo con el interruptor
POWER
una vez las haya cambiado
enga en cuenta que el indicador de
pila de la pantalla solo le ofrece una
estimación aproximada de la carga que
queda en la pila y bajo determinadas
circunstancias puede que no quede su
ciente carga en las pilas como para que
el pueda funcionar sea cual
sea la indicación de pila de la pantalla
Uso de un adaptador de CA
se solo un adaptador
no incluido—cómprelo en su co
mercio l uso de otro tipo
de adaptador puede producir daños en
su
segúrese siempre de que el voltaje de
alterna sea el mismo que el marcado en
el adaptador
Encendido de la unidad
l tiene dos interruptores de
encendido se el primero
POWER
deslizante para encenderapagar toda
la unidad
l segundo interruptor
GUITAR
controla la corriente que va al conector
GUITAR/INPUT
y a la unidad de efectos
i esta seccón está apagada no podrá usar
este conector ni ninguno de los sistemas
de menús relacionados con el micro
guitarra efectos y a nador
bserve también el interruptor
HOLD
que bloquea los controles y teclas del
cuando está en la posición
ON
Sistema de ahorro de energía
i es aparato está funcionando con pilas
y se mantiene duran te más de minu
tos en el modo de parada o sin ningún
disco cargado o abierta el reproductor
de se apaga la parte de de la
pantalla queda en blanco pero puede
seguir usando la sección de guitarra
einicie el reproductor de solo
usando la tecla
PLAY
o use el interrup
PLAY
o use el interrup
PLAY
tor
POWER
si tanto la sección de
como la de guitarra están apagadas
58
— TASCAM CD-GT1
58 — TASCAM CD-GT158
Español

Entradas
Conexión de una guitarra
ara conectar una guitarra o bajo a
esta unidad simplemente conecte un
extremo del cable de guitarra a esta y
el otro a la toma
GUITAR/MIC IN
del
i usa pedales o unidades de efectos
puede conectar la salida de estos al
recuerde que el
también tiene sus propios efectos
oloque el interruptor
GUITAR/MIC
en la posición
GUITAR
segúrese que el interruptor de encen
dido
GUITAR
está pulsado
ATENCION
No conecte NUNCA un ampli cador de
guitarra a la entrada
GUITAR/MIC
del CD-
GT1; el hacer esto dañaría su equipo.
Conexión de un micrófono
onecte un micro adecuado si no sabe
cual usar pregúntele a su distribuidor
a la clavija
GUITAR/MIC IN
del
oloque el interruptor
GUITAR/MIC
en la posición
MIC
Conexión de fuente de línea stereo
ambién puede conectar una línea ste
reo como las salidas de un sintetizador
un previo de guitarra un rack de efec
tos o una pletina etc al se
la miniclavija
LINE IN
que está al lado
de la toma
GUITAR/MIC IN
ATENCION
No conecte NUNCA las salidas de altavoz de
un ampli cador de guitarra a nada que no
sean unos altavoces. Si no está seguro de lo
que puede conectar a su CD-GT1, pregúntele
a alguien que lo conozca con seguridad.
Conexión de un pedal de disparo
uede conectar un pedal al
para ir pasando por los distintos ajustes
de efectos o usar el reproductor de
manos libres vea los detalles más
adelante
ara evitar problemas con su
utilice solo un pedal de disparo
u otro pedal de disparo
sin bloqueo de tipo pulseparahacer
similar conectado a la entrada
FOOT
Salidas
onecte la unidad a la entrada
de un sistema stereo o a una entrada
de mezclador etc usando un cable
stereo adecuado no incluido desde
la miniclavija stereo
LINE OUT
del
ambién puede conectar unos auricu
lares no incluidos a la miniclavija
stereo
PHONES
para hacer ensayos
en privado
Conexiones
TASCAM CD-GT1 —
59
Español

60
— TASCAM CD-GT1
Español
Entradas
l tiene tres fuentes de
entrada
el reproducido
la guitarra o el micro conectado a la
toma
GUITAR/MIC IN
cualquier entrada stereo conectada a
la toma
LINE IN
n la primera y la última el
no puede modi car sus niveles de en
trada vea luego cómo nivelar el
con la entrada
se el control de nivel de la unidad
conectada a
LINE IN
para ajustar su
nivel recuerde que esa fuente no se
verá afectada por los efectos del
se el control
INPUT
del
para ajustar el nivel de la guitarra o
micro antes de que sea enviado al
efecto
uando no ha elegido un menú
puede usar las teclas
5
y
b
para
ajustar el balance relativo de la gui
tarra o micro pero no de la fuente
LINE IN
en relación con la salida
del uede ajustar este valor
MIX
entre
–5
y
+5
ecuerde que esto solo es posible
cuando no está en el modo de
menú
se el sistema de menús del
para ajustar el nivel de salida
nal del efecto
Salidas
ay dos salidas la de línea y los auricu
lares o es posible ajustar sus niveles
por separado—use el control
OUTPUT
para ajustar el nivel global de salida
Use el control INPUT para
ajustar el nivel
GUITAR/MIC IN
Con el CD-GT1 no
puede ajustar el nivel
de entrada de LINE IN
Use el sistema de menús
del CD-GT1 para ajustar el
nivel de salida del efecto
interno
Use el control
OUTPUT para
ajustar el nivel
global enviado a
la salida LINE OUT
y los auriculares
El CD se reproduce a un
nivel fijo, pero la función
MIX (teclas 5 y b fuera
del modo de menú)
ajustan el balance entre la
entrada y el CD
Ajuste del balance

Español
TASCAM CD-GT1 —
61
Manejo del sistema de menús
n la tabla verá los detalles de los dis
tintos menús y sus ajustes
ara acceder a los menús pulse
LCD
MENU
hasta que aparezca el menú que
quiera en un recuadro parpadeante
con su primer elemento en la parte
principal de la pantalla
se las teclas arriba o abajo
5
y
b
para ajustar el valor del primer
elemento del menú
o hace falta que pulse
ENTER
para
registrar los valores stos cambian tan
pronto como pulse la tecla
ulse
ENTER
para pasar al siguiente
elemento de menú de la lista
ulse
MENU
para pasar al siguiente
menú y a su primer elemento
ara salir del sistema de menús pulse la
tecla
DISPLAY/ESC
NOTA
El menú
TUNER
(a nador) obliga a que pulse
ENTER
una vez que el menú
TUNER
aparez-
ca en pantalla (ya que el sonido con efectos
se corta cuando activa el a nador).
Menú Elemento Valores Notas
EFFECT
EFF
ON/OFF
activa o desactiva el efecto
LIB
00 a 42
número de preset
Parameter
—
depende del tipo de efecto
LVL
0 a 64
nivel de salida del efecto
PITCH
PIT
0 a –50% (tono ) o 0,
–8, –16, –32 y –50
(SSA)
ajusta el cambio de tono o los
valores de escucha a baja velocidad
SSA
SSA ON/OFF
On/off de escucha a baja velocidad
KEY
KEY
O
6 a
I
6 (o SSA)
Ajusta cambio de tono en semitonos
FINE
–50 a +50 (o SSA)
Ajusta cambio de tono en
centésimas
MENU
PLAY
ALL/SGL
reproducción única o total
CUE
CUE/FLS
escucha o “reproducción ash”
FOOT
EFF/CUE
ja el modo del pedal de disparo:
avanzar por los tipos de efectos o
escucha
TUNER
AT/MT
E2 a E5 (en a nación)
MODE
AT/MT
a nación automática o manual
CAL
435 a 445
calibración en Hz
Español

62
— TASCAM CD-GT1
Español
Español
Manejo del reproductor de CD
l reproductor de del fun
ciona casi igual que otros reproductores
con algunas pequeñas diferencias y fun
ciones especiales que le explicamos aquí
oloque los con la etiqueta hacia
arriba lado brillante abajo bra y
cierre la bandeja a mano
Reproducción
ulse la tecla reproducciónpausa
y
J
para dar comienzo a la reproducción
o colocarla en pausa
ulse la tecla stop
H
para detener la
reproducción
uando use la unidad con pilas el ini
cio y parada de la reproducción cuesta
algo más de tiempo que cuando se usa
con electricidad esto ahorra carga de
las pilas
Pantalla
se la tecla
DISPLAY/ESC
para cambiar
la indicación en pantalla entre tiempo de
pista transcurrido tiempo restante de pis
ta y tiempo restante total no puede hacer
esto en el modo de menú
Saltos entre pistas
se las teclas de búsquedasalto
m
/
.
/
/
,
para avanzar o retro
ceder una pista con cada pulsación de la
tecla adecuada
Búsqueda dentro de las pistas
ara realizar una búsqueda o escucha
dentro del disco mantenga pulsada
la tecla de saltobúsqueda correspon
diente
La tecla CUE
sta tecla es una función especial del
uando la pulsa la posición
de reproducción vuelve al último punto
en el que comenzó la reproducción
o que pasa después depende del ajuste el
elemento de menú
CUE
menú
MENU
i
está ajustado a
CUE
la reproducción queda
en pausa en el punto de escucha pero si
el valor es
FLS
la reproducción se reinicia
desde ese punto si pulsó
CUE
desde
reproducción o pausa
CONSEJO
Si tiene un pedal conectado, puede usarlo en
lugar de la tecla
CUE
para un manejo “ma-
nos libres” (ajuste el elemento
FOOT
a
CUE
).
CUE).CUE
Bucle
(de pista)
sando el elemento
PLAY
ajústelo a
SGL
reproducción única ulse la tecla
LOOP
hasta que vea
LOOP 1
en pantalla
izquierda abajo a pista activa se repe
tirá en un bucle
Bucle (de disco)
sando el elemento
PLAY
ajústelo a
ALL
reproducción de todo el disco ulse
LOOP
hasta que en pantalla vea
LOOP
solo
izquierda abajo hora el bucle se reali
zará sobre todo el dicos completo
Bucle (puntos de E/S)
se la tecla
I/O
para ajustar el punto de
initcio entrada del bucle y la misma
tecla para ajustar el de salida a sección
que esté entre ambos puntos se repetirá
sin saltos
l pulsar de nuevo la tecla
I/O
hace que se
borren los puntos de bucle y que el modo
quede cancelado
on estos puntos ajustados en la pantalla
aparece
I-O
puede reiniciar el modo de
bucle si es que había sido cancelado
usando la tecla
LOOP
Para cancelar cualquier bucle
ulse la
tecla
LOOP
hasta que no aparezca
LOOP
en
pantalla abajo izquierda

Español
TASCAM CD-GT1 —
63
Español
Cambios de tono y tempo
xisten tres formas de modi car la for
ma en que es reproducido un
NOTA
Solo una de estas formas puede estar activa
a la vez.
stos modos le ayudan a tocar en una
clave o tono distinto o con otro tempo
para que pueda aprender a tocar sus
canciones o solos preferidos
CONSEJO
Use estos modos junto con la función de bu-
cle para ayudarle en los ensayos.
Modo KEY
l modo key modi ca el tono de la
música en hasta seis semitonos arriba o
abajo n este caso el tempo no varía
uede ajustar el valor en semitonos y
centésimas de semitono que
aparecerán en pantalla como
I
6
a
O
6
uando tanto los semitonos como las
centesimas estén en el modo
KEY
esta
rá desactivado si está activado el
este modo también estará en o
uando este modo esté activado en la
pantalla aparecerá
KEY
se este modo cuando el tono de la
música de su le resulte difícil para
ensayar o cantar con él
Modo SSA
l modo escucha a baja veloci
dad reduce el tempo de la música sin
cambiar su tono os valores posibles
son o – – – y – todos
los valores son porcentajes con respecto
a la velocidad normal
uando este modo está activo en la
parte izquierda de la pantalla verá
SSA
se este modo para ensayar solos o
secciones muy rápidas
Modo PITCH
ste modo modi ca tanto el tono
como el tempo en pasos de hasta
llegar al – es el valor de des
conexión
uando este modo esté activo en la
pantalla verá
PITCH
Ajustes
se el sistema de menús para activar o
desactivar el meú
PITCH
y ajuste
después el valor para el tono o el
menú
PITCH
de nuevo
o cuando tenga
el
desactivado escoja
el desactivado escoja el
KEY
en el
siguiente menú
KEY
y ajuste los valores
KEY
semitono y
FINE
¡Recuerde!
olo cambio de tono=
KEY
enor velocidad y mantener el tono
=
SSA
enor velocidad y bajada en el tono
=
PITCH

64
— TASCAM CD-GT1
Español
Español
Uso de los efectos
Cómo funcionan los efectos
ay dos bancos de efectos
A
y
B
con
cinco espacios cada uno
1
al
5)
en los
que puede guardar sus propios ajustes
de efectos
Puede crear efectos a partir de los 43
presets disponibles para guitarra y
para voz uando elige un banco y
un espacio si carga y edita un preset de
efectos el efecto editado es registrado
automáticamente en ese espacio
Almacenamiento de sus propios
ajustes de efectos en un espacio
ulse
BANK
para elegir entre el banco
A
o el
B
ulse la tecla
No.
para elegir el
espacio de banco
1
a
5
como podrá ver
en pantalla
ulse la tecla
LCD MENU
hasta que en
pantalla vea
EFFECT
se la tecla
5
para activar el efecto
ulse
ENTER
y elija después el efecto
pre jado
00
a
42
con las teclas
5
y
b
NOTA
Si hubiese algún valor en el espacio del ban-
co elegido sobre el que va a trabajar, serán
sobregrabados cuando cargue una entrada
de la biblioteca.
ulse
ENTER
de nuevo para empezar a
editar los parámetros con las teclas
5
y
b
vea los detalles de los parámetros en
la tabla siguiente
l último parámetro siempre es
LVL
nivel de salida de la unidad de efectos
0
a
64
ólo está disponible con el
efecto activo y anulado con el efecto
en o
juste el nivel y pulse la tecla
DISPLAY/ESC
para salir de los ajustes
de efectos os ajustes que acaba de
hacer son grabados automáticamente
en el espacio que escogió antes
Carga de un efecto con sus ajustes
uando haya guardado unos ajustes
en un espacio de banco como hemos
descrito antes podrá cargarlo con
solo pulsar las teclas
BANK
y
No.
para
elegir el espacio adecuado también
debería asegurarse de que el efecto esté
activado
CONSEJO
Si tiene un pedal de disparo conectado y ha
ajustado el elemento de menú
FOOT
a
EFF
, po-
drá ir pasando por los distintos espacios de
efectos con cada pulsación del pedal.

Español
TASCAM CD-GT1 —
65
Español
Presets y parámetros de efectos
odemos dividir los presets de efectos
en tres categorías
Distorsión Sonido limpio Vocal
00 DIST-TONE-FLA-REV
15 COMP-TONE-FLA-REV
30 De-esser
01 DIST-TONE-FLA-DLY
16 COMP-TONE-FLA-DLY
31 Chorister
02 DIST-TONE-PHA-REV
17 COMP-TONE-PHA-REV
32 Emphasis
03 DIST-TONE-PHA-DLY
18 COMP-TONE-PHA-DLY
33 Shout
04 DIST-TONE-EXC-REV
19 COMP-TONE-EXC-REV
34 Mood Vocal
05 DIST-TONE-EXC-DLY
20 COMP-TONE-EXC-DLY
35 Response
06 DIST-TONE-CHO-REV
21 COMP-TONE-CHO-REV
36 Proclaim
07 DIST-TONE-CHO-DLY
22 COMP-TONE-CHO-DLY
37 Quivering Voice
08 DIST-TONE-TRM-REV
23 COMP-TONE-TRM-REV
38 Duet
09 DIST-TONE-TRM-DLY
24 COMP-TONE-TRM-DLY
39 Lo-Fi Vocal
10 DIST-TONE-VIB-REV
25 COMP-TONE-VIB-REV
40 Megaphone
11 DIST-TONE-VIB-DLY
26 COMP-TONE-VIB-DLY
41 Screaming
12 DIST-TONE-WAH-REV
27 COMP-TONE-WAH-REV
42 Panning Vocal
13 DIST-TONE-WAH-DLY
28 COMP-TONE-WAH-DLY
—
14 DIST-TONE-PIT-DLY
29 COMP-TONE-PIT-DLY
—
omo puede ver cada uno de los
presets de guitarra distorsión y limpio
tiene cuatro componentes pudiendo
ajustar cada uno por separado y siendo
mostrados en pantalla como en la lista
Los parámetros
DIST
anancia de distorsión
COMP
anancia de compresor
TONE
ontrol de tono
FLA
juste del anger
REV
juste de la reverb
DLY
juste del retardo
PHA
juste del modulador de fase
EXC
juste del excitador
PIT
juste del cambio de tono
CHO
juste del chorus
TRM
juste del tremolo
VIB
juste del vibrato
WAH
juste del autowah
odos los presets tienen también un
ajuste
LVL
nivel que va de
0
a
64
anterior
os presets vocales tienen un solo pará
metro cada uno mostrado en pantalla
como
PAR

66
— TASCAM CD-GT1
66 — TASCAM CD-GT166
Español
Manejo del a nador
l a nador de guitarra interno del
tiene dos modos uno auto
mático en el que el tono de la señal
entrante es detectado y visualizado de
forma automática y un modo manual
en el que ja un objetivo y realiza la
a nación hacia él
ulse la tecla
MENU
hasta que vea
TUNER
en pantalla y pulse entonces
ENTER
Flat
Sharp
On-key
uando entre en el a nador cualquier
efecto que hubiese será desactivado
automáticamente
i el a nador está en el modo automá
tico que aparece como
AT
en pantalla
no tendrá mas que tocar una nota en su
guitarra l a nador busca la nota más
cercana y la muestra en pantalla ne
la cuerda rápidamente hasta que apa
rezca la nota correcta y después ajuste
la a nación suavemente hasta que la
pantalla le muestre una gran marca
central
i el a nador está en el modo manual
visualizado como
MT
en la pantalla
use las teclas
5
y
b
para jar la nota
que quiera en la pantalla y después
prosiga el proceso de a nación como
antes
Calibración del a nador.
abitualmente la nota a por
encima del do central está a nada a
z en la mayor parte de la música
occidental
abrá ocasiones en las que puede
que necesite realizar la a nación a un
standard distinto cuando esté tocando
con otro instrumento o con un en
el que no se use la a nación a z
tilice entonces el
CAL
menú de cali
bración del a nador para ajustar la
referencia a otra a nación entre los
y z
NOTA
Aunque no es necesario que reproduzca un
CD cuando realice la a nación, el CD-GT1
deberá estar encendido, y el botón
GUITAR
pulsado para que pueda a nar la guitarra
que tenga conectada al CD-GT1.
Español

TASCAM CD-GT1 —
67
Español
Datos y números (especi caciones)
Tipos de discos
CDs de 8 cm para
single, 12 cm
AD/DA
16 bits
Proceso digital de señal
32 bits
Nivel salida nominal
(LINE OUT)
–10 dBV
Nivel salida máxima
(LINE OUT) sin
distorsión
0 dBV, (1 Vrms)
Impedancia salida
1 k
Ω
Nivel salida máxima
(PHONES)
> 18 mW (32
Ω)
Niv. entrada nominal
LINE IN
MIC IN
GUITAR IN
–10 dBV
–40 dBV
–15 dBV
Características de reproducción de CD
Respuesta de
frecuencia
20 Hz a 20 kHz
±1.0 dB
Rango dinámico
> 88 dB
Relación S/R
> 88 dB
THD
<0.01%
Alimentación
DC 9V (adaptador
de CA PS-PS5)
Pilas AA x 4
Consumo
4 W (adaptador de
CA PS-PS5)
Dimensiones (l x p x a)
incluyendo patas
232 x 138 x 40
(mm)
Peso (sin contar las
pilas)
620 g

»
CD-GT1
TEAC CORPORATION
3-7-3 Nakacho Musashino-shi Tokyo 180-8550 JAPAN
+81-422-52-5082
www.tascam.com
TEAC AMERICA, INC
7733 Telegraph Road Montebello CA 90640 USA
+1-323-726-0303
www.tascam.com
TEAC CANADA LTD.
5939 Wallace Street Mississauga Ontario L4Z 1Z8 CANADA
+1-905-890-8008
www.tascam.com
TEAC MEXICO, S.A de C.V
Campesinos No. 184 Colonia Granjas Esmeralda Delegacion Iztapalapa CP 09810 Mexico DF MEXICO
+52-555-581-5500
www.tascam.com
TEAC UK LIMITED
5 Marlin House, Croxley Business Park Watford Hertfordshire WD18 8TE UNITED KINGDOM
+44-1923-438880
www.tascam.co.uk
TEAC DEUTSCHLAND GmbH
Bahnstrasse 12 65205 Wiesbaden-Erbenheim GERMANY
+49-611-71580
www.tascam.de
TEAC FRANCE SA
17 Rue Alexis-de-Tocqueville CE 005 92182 Antony Cedex FRANCE
+33-1-42-37-01-02
www.tascam-europe.com
TEAC ITALIANA S.p.A.
Via C Cantu 11 20092 Cinisello Balsamo Milano ITALY
+39-02-66010500
www.teac.it
TEAC AUSTRALIA PTY., LTD.
280 William St Melbourne Victoria 3000 AUSTRALIA
+61-3-9672-2400
www.teac.com.au
EspañolEnglish Français
Deutsch
Italiano
Printed in China
M-0777
Transcripción de documentos
D00728500B English » CD-GT1 OWNERʼS MANUAL (EN / F / D / I / E) Español is appliance has a serial number located on the rear panel lease record the model number and serial number and retain them for your records odel number _____________ erial number _____________ Italiano Deutsch Français Portable CD Guitar Trainer Important safety precautions Y CAUTION: TO REDUCE THE RISK OF ELECTRIC SHOCK, DO NOT REMOVE COVER (OR BACK). NO USER-SERVICABLE PARTS INSIDE. REFER SERVICING TO QUALIFIED SERVICE PERSONNEL. E The lightning flash with arrowhead symbol, within an equilateral trinagle, is intended to alert the user to the presence of uninsulated “dangerous voltage” within the product’s enclosure that may be of sufficient magnitude to constitute a risk of electric shock to persons. R WARNING: TO PREVENT FIRE OR SHOCK HAZARD, DO NOT EXPOSE THIS APPLIANCE TO RAIN OR MOISTURE. FOR U.S.A. TO THE USER This equipment has been tested and found to comply with the limits for a Class B digital device, pursuant to Part 15 of the FCC Rules. These limits are designed to provide reasonable protection against harmful interference when the equipment is operated in a commercial environment. This equipment generates, uses, and can radiate radio frequency energy and, if not installed and used in accordance with the instruction manual, may cause harmful interference to radio communications.. However, there is no guarantee that interference will not occur in a particular installation. If this equipment does cause harmful interference to radio or television reception, which can be determined by turning the equipment off and on, the user is encouraged to try to correct the interference by one or more of the following countermeasures. a) Reorient or relocate the receiving antenna b) Increase the separation between the equipment and receiver. c) Connect the equipment into an outlet on a circuit other from that to which the receiver is connected. d) Consult the dealer or an experienced radio/ TV technician for help. CAUTION Changes or modifications to this equipment not expressly approved by TEAC CORPORATION for compliance could void the user’s authority to operate this equipment. 2 — TASCAM CD-GT1 Important Safety Instructions 1 Read these instructions. 2 Keep these instructions. 3 Heed all warnings. 4 Follow all instructions. 5 Do not use this apparatus near water. 6 Clean only with dry cloth. 7 Do not block any ventilation openings. Install in accordance with the manufacturer’s instructions. 8 Do not install near any heat sources such as radiators, heat registers, stoves, or other apparatus (including amplifiers) that produce heat. 9 Do not defeat the safety purpose of the polarized or grounding-type plug. A polarized plug has two blades with one wider than the other. A grounding type plug has two blades and a third grounding prong. The wide blade or the third prong are provided for your safety. If the provided plug does not fit into your outlet, consult an electrician for replacement of the obsolete outlet. 10 Protect the power cord from being walked on or pinched particularly at plugs, convenience receptacles, and the point where they exit from the apparatus. 11 Only use attachments/accessories specified by the manufacturer. 12 Use only with the cart, stand, tripod, bracket, or table specified by the manufacturer, or sold with the apparatus. When a cart is used, use caution when moving the cart/apparatus combination to avoid injury from tip-over. 13 Unplug this apparatus during lightning storms or when unused for long periods of time. 14 Refer all servicing to qualified service personnel. Servicing is required when the apparatus has been damaged in any way, such as power-supply cord or plug is damaged, liquid has been spilled or objects have fallen into the apparatus, the apparatus has been exposed to rain or moisture, does not operate normally, or has been dropped. • Do not expose this apparatus to drips or splashes. • Do not place any objects filled with liquids, such as vases, on the apparatus. • Do not install this apparatus in a confined space such as a book case or similar unit. • The apparatus draws nominal non-operating power from the AC outlet with its POWER switch in the off position. The microphone input is unbalanced. Use an unbalanced microphone cable fitted with a 1/4” plug. NOTES The CD-GT1 cannot play unfinalized CDR/RW discs. In addition, some finalized CD-R/RW discs may be unplayable on the CD-GT-1. Bear this in mind when operating the unit, and use freshly recharged Ni-MH batteries, new alkaline batteries or use an AC adapter if battery life seems inadequate. Ni-MH batteries may exhibit reduced performance in an environment under 10ºC (50F). Also, if these batteries are not used for some time after charging, they may also exhibit reduced performance. The performance of alkaline batteries also depends on temperature and time since manufacture (low temperatures and longer periods mean shorter battery life, regardless of the battery indicator as shown on the display). To avoid the possibility of slight noise when you use the unit with the AC adapter, remove the batteries before connecting the AC adapter. If any batteries are accidentally left in the unit, you should always switch the unit off when changing between AC adapter and battery power. TASCAM CD-GT1 — 3 Important Safety Instructions Safety Information This product has been designed and manufactured according to FDA regulations “title 21, CFR, chapter1, subchapter J, based on the Radiation Control for Health and Safety Act of 1968”, and is classified as a class 1 laser product. There is no hazardous invisible laser radiation during operation because invisible laser radiation emitted inside of this product is completely confined in the protective housings. The label required in this regulation is shown here. CAUTION • DO NOT REMOVE THE PROTECTIVE HOUSING USING A SCREWDRIVER. • USE OF CONTROLS OR ADJUSTMENTS OR PERFORMANCE OF PROCEDURES OTHER THAN THOSE SPECIFIED HEREIN MAY RESULT IN HAZARDOUS RADIATION EXPOSURE. • IF THIS PRODUCT DEVELOPS TROUBLE, CONTACT YOUR NEAREST QUALIFIED SERVICE PERSONNEL, AND DO NOT USE THE PRODUCT IN ITS DAMAGED STATE. Optical pickup: Type KSM-900AAA Manufacturer: SONY CORPORATION Laser output: <1 mW play on the objective lens Wavelength: 775—816 nm 4 — TASCAM CD-GT1 Table of contents English Table of contents............................................................. 5 First steps with your CD-GT1 .......................................... 6 Making connections ........................................................ 7 Adjusting the balance ..................................................... 8 Using the menu system ................................................... 9 Using the CD player......................................................... 10 Pitch and tempo changes ................................................ 11 Using effects.................................................................... 12 Effect presets and parameters ........................................ 13 Using the tuner................................................................ 14 Facts and figures (specifications) .................................... 15 TASCAM CD-GT1 — 5 First steps with your CD-GT1 English About this manual hen we refer to a key or connector or control on the we write it like this PLAY hen we refer to an item shown on the display we write it like this MENU Inserting batteries e uses four batteries not supplied e recom mend the use of rechargeable i batteries alkaline batteries may also be used lways use batteries of the same type lways replace all batteries to gether f you are not going to use the for some time remove the batteries lace the batteries following the + and – markings inside the battery compartment aximize battery life by using the unit in the following tempera 6 — TASCAM CD-GT1 ture range ° to ° ° to ° lways dispose of used batteries as recommended by your local authorities hen the battery level drops the unit automatically shuts down and must be restarted with the POWER switch after the batteries have been replaced ote that the battery indicator on the display only provides a rough estimate of remaining battery life and under some circumstances there may not be enough power in the batteries to power the despite the battery power indication on the display Using an AC adapter nly use a adapter not supplied sing another type of adapter may damage your lways make sure that the voltage matches the voltage written on the adapter Switching on the unit e has two power switches se the first POWER switch sliding switch to turn the power to the whole unit on and off e second switch GUITAR controls the power to the GUITAR/INPUT jack and effect unit f this section is off you cannot use this jack or use any of the guitarmicrelated menu systems effect and tuner lso note the HOLD switch that locks the s controls and keys when it is in the ON position Auto power-save f the unit is powered using batteries for more than minutes in stop mode or with no disc loaded or opened the player shuts down the part of the display goes blank but you can still use the guitar section estart the player alone by using the PLAY key or use the POWER switch if both the and guitar sec tions are turned off Inputs Connecting a guitar o connect a guitar or bass guitar to the unit simply connect one end of the guitar cord to the guitar and connect the other to the GUITAR/MIC IN jack of the f you use effects pedals or stomp boxes you can connect the output of these to the remember that the has its own effects et the GUITAR/MIC switch to GUITAR ake sure the GUITAR power button is pushed in Connecting a microphone Connecting a footswitch onnect a suitable microphone ask your dealer if you are not sure to the GUITAR/MIC IN jack of the et the GUITAR/MIC switch to MIC ou can connect a footswitch to the to step through the effect slot settings or to cue the player handsoff see later in this manual for details o avoid problems with your use only a footswitch or similar nonlatching pushtomake footswitch connected to the FOOT jack Connecting a stereo line source ou can also connect a stereo line source such as the outputs from a syn thesizer a guitar preamplifier or rack mount effects unit or a cassette deck etc to the se the LINE IN minijack beside the GUITAR/MIC IN jack WARNING WARNING NEVER connect a guitar amplifier to the CD-GT1’s GUITAR/MIC input, as you will damage your equipment if you do this. You should NEVER connect the speaker outputs of a guitar amplifier to anything except speakers. If you are in any doubt at all about what you can connect to your CD-GT1, ask someone who knows. Outputs onnect the unit to a stereo systems input or mixer input etc using a suitable stereo cable not supplied connected to the s LINE OUT stereo minijack onnect a pair of headphones not supplied to the PHONES stereo mini jack for private listening TASCAM CD-GT1 — 7 English Making connections Adjusting the balance English Inputs e has three input sources the being played the guitar or microphone connect ed to the GUITAR/MIC IN jack any stereo input connected to the LINE IN jack e first and last of these cannot have their input levels changed by the but see below for details of how to balance the with the input se the level control of the device connected to LINE IN to adjust the level of this source remember that this source cannot be effected by the s effects se the s INPUT control to adjust the level of the guitar or mic before it is sent to the effect hen a menu is not selected you can use the 5 and b keys to set the relative balance of the guitar or microphone but not the LINE IN source compared to the output from the player is MIX value 8 — TASCAM CD-GT1 The MIX feature (5 and b keys outside menu mode) adjusts the balance betwen input and CD Use the INPUT control to adjust the GUITAR/MIC IN level Use the OUTPUT control to adjust the overall level to the LINE OUT and headphones can be set to between –5 and +5 emember that this is only pos sible when not in menu mode se the s menu system to adjust the output level of the effect Use the CD-GT1's menu system to set the output level of the internal effect You can't adjust the input level of LINE IN with the CD-GT1 Outputs ere are two outputs the line and the headphones ese cannot have their levels set seperately—use the OUTPUT control to set the overall output level Using the menu system NOTE The TUNER menu requires you to press ENTER after the TUNER menu is shown on screen (as the effect sound is cut when the tuner is operational). Menu EFFECT Menu item MENU TUNER Notes EFF LIB Parameter LVL ON/OFF 00 to 42 — 0 to 64 turns effect on or off preset number depends on effect type effect output level PIT 0 to –50% (pitch) or 0, –8, –16, –32 and –50 (SSA) sets pitch shift or slow speed audition values SSA KEY FINE PLAY CUE SSA ON/OFF O6 to I6 (or SSA) –50 to +50 (or SSA) ALL/SGL CUE/FLS FOOT EFF/CUE AT/MT MODE CAL E2 to E5 (when tuning) AT/MT automatic or manual tuning 435 to 445 calibration in Hz PITCH KEY Values English ee the table on this page for details of the different menus and their settings o enter the menu system press the LCD MENU key until the menu you want appears shown in a flashing re versed box and the first menu item is shown on the main part of the screen se the up or down keys 5 and b to set the value of the first menu item ote that you do not need to press ENTER to set the values e settings change as soon as the key is pressed ress ENTER to move to the next menu item in the list ress MENU to move to the next menu and its first menu item xit the menu system using the DISPLAY/ESC key Sets slow speed audition on or off Sets pitch shift in semitones sets pitch shift in cents all or single play cue or “flash play” operation sets footswitch mode: either step through the effect slots, or cueing TASCAM CD-GT1 — 9 Using the CD player English e s player works in much the same way as other players with a few minor differences and special features as explained on this page oad s label side up shiny side down in the pen and close the player door by hand Playback ress the playpause key yJ key to start playback and to pause playback ress the stop key H to stop play back hen you use the player with batter ies starting and stopping playback take longer than under power this saves battery power Display se the DISPLAY/ESC key to change the display between track elapsed time track remaining time and total remaining time you cannot do this in menu mode 10 — TASCAM CD-GT1 Skipping between tracks Looping (track) se the two skipsearch keys marked as m/. and //, to move back and forward a track at a time by pressing and releasing the appropri ate key sing the PLAY menu item set SGL sin gle play ress the LOOP key so that you see LOOP 1 on the display bottom left e current track will repeat Searching within tracks sing the PLAY menu item set ALL play all the disc ress the LOOP key so that you see LOOP alone on the display bottom left e whole disc will repeat se the skipsearch keys to search within the disc by pressing and holding the appropriate key The CUE key e CUE key is a special feature of the hen you press this key the playback position returns to the last point where playback started hat happens next depends on the CUE menu item setting in the MENU menu f this is set to CUE playback is paused at the cue point but if it is set to FLS playback restarts from the cue point if CUE is pressed from play or pause TIP With a footswitch connected, you can use this instead of the CUE key for hands-free operation (set the FOOT menu item to CUE). CUE Looping (disc) Looping (I/O points) se the I/O key to set the start in point of the loop then use the key to set the out point e section between the points will repeat seamlessly ressing the I/O key again clears the loop points and cancels loop mode ith these points set I-O shown on the display you can restart the loop mode if it has been canceled using the LOOP key Canceling looping ress the LOOP key so that LOOP does not show on the display bottom left ere are three modes for changing the way a is played back NOTE Only one of these modes can be active at a time. ese modes help you to play along at a different key or a different tempo so that you can learn your favorite riffs and licks TIP Use these together with the looping function to help your practice. KEY mode e key mode changes the key of the music by six semitones up or down e tempo does not change e value is set in semitones and cents ths of a semitone shown as I6 to O6 hen both semitones and cents are the KEY mode is off if is on this is also off hen this mode is on the display shows KEY se this mode when you find the key of the track difficult to play or sing in SSA mode e low peed udition mode slows down the tempo without chang ing the key e settings are off – – – and – all percent hen this mode is active the display left side shows SSA se this mode to practice difficult fast licks PITCH mode e pitch mode changes both pitch and tempo in steps down to – is the off setting hen this mode is active the display shows PITCH Remember! hift pitch alone= KEY low down and keep pitch = SSA low down and drop pitch = PITCH Making settings se the menu system to turn on or off PITCH menu and then set the value for the pitch or settings PITCH menu again or with off choose KEY from the next KEY menu and make the KEY semitone and FINE settings TASCAM CD-GT1 — 11 English Pitch and tempo changes Using effects English How effects work ere are two effect banks A and B each with five slots numbered from 1 through 5 where you can store your own effect settings Effects are created from the preset effects available guitar and vo cal hen a bank and slot are selected if a preset effect is recalled and edited that bank slot is automatically filled with the edited effect Storing your own effect settings in a bank slot ress the BANK key to select either the A or B bank as shown on the display ress the No. key to select the bank slot 1 through 5 as shown on the display ress the LCD MENU key until EFFECT appears on the display 12 — TASCAM CD-GT1 se the 5 key to turn the effect ON ress ENTER and then select the preset effect 00 through 42 with the 5 and b keys NOTE If there were any settings in the selected bank slot to start with, they will be overwritten when you recall a library entry. ress ENTER once more to start edit ing the parameters with the 5 and b keys see the table later for details of these parameters e last parameter is always LVL the output level from the effect unit 0 to 64 is is only available when the ef fect is active and is bypassed with the effect off et the level and then press the DISPLAY/ESC key to exit the effect settings e effect settings you have made are automatically stored in the bank slot you first chose Recalling an effect with your settings hen you have stored the effect set tings in a bank slot as described above you can recall them simply pressing the BANK and No. keys to select the appropriate bank slot you should also make sure that the effect is switched on TIP If you have a footswitch connected and the FOOT menu item is set to EFF, you can step through the bank slots by pressing the footswitch. Effect presets and parameters English The parameters e preset effects can be divided into three categories DIST istortion gain Distortion 00 DIST-TONE-FLA-REV Clean sound 15 COMP-TONE-FLA-REV Vocal 30 De-esser COMP ompressor gain 01 DIST-TONE-FLA-DLY 16 COMP-TONE-FLA-DLY 31 Chorister 02 DIST-TONE-PHA-REV 17 COMP-TONE-PHA-REV 32 Emphasis FLA langer setting 03 DIST-TONE-PHA-DLY 18 COMP-TONE-PHA-DLY 33 Shout 04 DIST-TONE-EXC-REV 19 COMP-TONE-EXC-REV 34 Mood Vocal 05 DIST-TONE-EXC-DLY 20 COMP-TONE-EXC-DLY 35 Response 06 DIST-TONE-CHO-REV 21 COMP-TONE-CHO-REV 36 Proclaim 07 DIST-TONE-CHO-DLY 22 COMP-TONE-CHO-DLY 37 Quivering Voice 08 DIST-TONE-TRM-REV 23 COMP-TONE-TRM-REV 38 Duet CHO horus setting 09 DIST-TONE-TRM-DLY 24 COMP-TONE-TRM-DLY 39 Lo-Fi Vocal TRM remolo setting 10 DIST-TONE-VIB-REV 25 COMP-TONE-VIB-REV 40 Megaphone VIB ibrato setting 11 DIST-TONE-VIB-DLY 26 COMP-TONE-VIB-DLY 41 Screaming WAH utowah setting 12 DIST-TONE-WAH-REV 27 COMP-TONE-WAH-REV 42 Panning Vocal 13 DIST-TONE-WAH-DLY 28 COMP-TONE-WAH-DLY — ll presets also have a LVL level setting from 0 to 64 14 DIST-TONE-PIT-DLY 29 COMP-TONE-PIT-DLY — s this shows each of the guitar distortion and clean presets has four components each of which can be adjusted individually and are shown on the display as listed in the table here TONE one control REV everb setting DLY elay setting PHA haser setting EXC xciter setting PIT itch shifter setting e vocal presets have one parameter each shown on the display as PAR TASCAM CD-GT1 — 13 Using the tuner English e s builtin guitar tuner has two modes an automatic mode where the pitch of the incoming signal is detected and displayed automati cally and a manual mode where you set the target and tune to it ress the MENU key until the display shows TUNER, and then press ENTER Flat � On-key Sharp � hen you enter the tuner mode any effect is automatically turned off f the tuner is in automatic mode shown as AT on the display just play a note on your guitar e tuner guesses the closest note and shows it on the display une the string roughly so that the right note appears and then adjust the tuning until the display shows a large center blob f the tuner is in manual mode shown as MT on the display use the 5 and b keys to set the note on the display and 14 — TASCAM CD-GT1 then tune as above Calibrating the tuner. sually the above iddle is tuned to z in most estern music ere may be times when you need to tune to a different standard you are playing with another instrument or to a which does not use the z tuning se the tuners CAL calibration menu to set the reference to a tun ing between z and z NOTE Although you do not need to play a CD when you are tuning, the CD-GT1 must be switched on, and the GUITAR button must be pressed in to allow tuning of the guitar plugged into the CD-GT1. Facts and figures (specifications) 8 cm single, 12 cm CD 16-bit 32-bit AD/DA Digital signal processing Nominal output level –10 dBV (LINE OUT) Maximum output level 0 dBV (1 Vrms) (LINE OUT) Output impedance 1 kΩ Maximum output level > 18 mW (into 32 Ω (PHONES) Nominal input levels LINE IN –10 dBV MIC IN –40 dBV GUITAR IN –15 dBV CD playback characteristics Frequency response 20 Hz to 20 kHz ±1.0 dB Dynamic range > 88 dB S/N ratio > 88 dB THD < 0.01% Voltage requirements DC 9V (PS-PS5 AC adapter) AA batteries x 4 (NiMH or alkaline) Power consumption 4 W (PS-PS5 AC adapter) Dimensions (w x d x h) 232 x 138 x 40 including feet (mm) / 9.1 x 5.4 x 1.6 (in) Weight (excluding batteries) English Disc types 620 g / 1 lb, 6 oz TASCAM CD-GT1 — 15 CONSIGNES DE SÉCURITÉ IMPORTANTES Français 1 Lisez ces instructions. 2 Gardez ces instructions en lieu sûr, pour référence ultérieure. 3 Tenez compte de tous les avertissements. 4 Suivez toutes les instructions. 5 N’utilisez pas cet appareil près de l’eau. 6) Ne nettoyez l’appareil qu’avec un chiffon sec. 7 N’obstruez pas les ouïes de ventilation. Installez l’appareil conformément aux instructions du constructeur. 8 N’installez pas l’appareil à proximité de sources de chaleur, telles que radiateur, four ou tout autre appareil dissipant des calories (amplificateur de puissance, par exemple). 9 Ne désactivez pas les dispositifs de sécurité (détrompeurs) des prises polarisées ou avec mise à la terre. Une prise polarisée possède un contact plus grand que l’autre ; une prise avec mise à la terre possède une troisième broche, prévue pour votre sécurité. Si la prise se trouvant à l’extrémité du cordon secteur fourni avec votre appareil ne correspond pas à votre prise murale, consultez un électricien pour son remplacement. 10 Évitez de marcher sur le cordon secteur, de le coincer ou de le pincer, ainsi que de couder le cordon au niveau de l’appareil ou de la prise secteur. 16 — TASCAM CD-GT1 11 N’utilisez que les dispositifs optionnels ou les accessoires recommandés par le constructeur. 12 N’utilisez l’appareil qu’avec des supports ou dispositifs de fixation fournis ou recommandés par le constructeur. confiné, dépourvu de ventilation , comme par exemple une bibliothèque. • Même si son interrupteur se trouve en position OFF, l’appareil consomme du courant électrique, par l’intermédiaire de son adaptateur secteur. AVERTISSEMENT 13 Débranchez le cordon d’alimentation de l’appareil en cas d’orage ou s’il doit rester inutilisé pendant une longue période. 14) Pour toute maintenance, adressez-vous à des techniciens professionnels qualifiés. Un retour en SAV est indispensable dès que l’appareil a été endommagé d’une façon ou d’une autre : cordon secteur ou alimentation défaillante, pénétration de liquide ou introduction d’objets dans l’appareil, exposition à la pluie ou à l’humidité, et bien sûr dès qu’il ne fonctionne pas normalement, suite à une chute ou à un choc par exemple. • N’exposez pas l’appareil à des éclaboussures ou à des gouttes d’eau. • Ne posez pas d’objets contenant du liquide (vase, tasse, cannette...) sur l’appareil. • N’installez pas cet appareil dans un espace Le CD-GT1 ne peut pas lire les disques CDR/RW non finalisés. Il se peut que certains CD-R/RW finalisés ne puissent être lus par le CD-GT1. Sommaire Français CONSIGNES DE SÉCURITÉ IMPORTANTES ........................ 16 Sommaire ........................................................................ 17 Prise en main du CD-GT1................................................. 18 Branchements.................................................................. 19 Réglage de la balance ..................................................... 20 Le système de menus ...................................................... 21 Utilisation du lecteur CD ................................................. 22 Modifications de hauteur et de tempo ........................... 23 Effets (types et paramètres)............................................ 24 Eftfets (types et paramètres) .......................................... 25 Utilisation de l’accordeur ................................................ 26 Caractéristiques .............................................................. 27 TASCAM CD-GT1 — 17 Prise en main du CD-GT1 À propos de ce manuel Français es touches et contrôles du sont indiqués dans le manuel dans cette typographie PLAY et les textes apa raissant à lécran ainsi MENU Mise en place des piles e utilise quatre piles non fournies ous conseillons lutilisation de piles rechargeables i mais vous pouvez aussi utiliser des piles alcalines utilisez que des piles dun même type emplacezles simultanément n cas dinutilisation prolongée de lappareil retirez les piles de leur logement nsérezles en tenant compte de la polarité + et – indiquée dans le fond du compartiment e rendement maximum des piles sera obtenu pour une température ambiante de ° à ° ecyclez vos piles en suivant la 18 — TASCAM CD-GT1 fi lière prévue dans votre région uand le niveau de charge devient insuffisant lappareil séteint automa tiquement et devra être rallumé avec linterrupteur POWER après rem placement par des piles neuves ou rechargées affichage du niveau des piles à lécran ne donne quune estimation glo bale ans certaines circonstances leur charge réelle peut se révéler insuffisante à la mise sous tension du en dépit des indications de lécran Utilisation d’un adaptateur secteur tilisez exclusivement un adaptateur non fourni dispo nible chez les revendeurs out autre modèle pourait endomma ger le érifiez avant tout branchement que la tension secteur correspond aux indica tions portées sur ladaptateur Mise sous tension de l’appareil e dispose de deux inter rupteurs tilisez le premier POWER interrupteur à glissière pour mettre globalement lappareil soushors tension e second GUITAR contrôle lacti vation du jack GUITAR/INPUT et de lunité deffet n position off vous ne pouvez pas utiliser cette entrée ni aucun des menus systèmes qui lui sont liés effets et accordeur otez également la présence du bou ton HOLD destiné à verrouiller tous les contrôles et boutons du quand il est en position ON Mise en veille automatique uand lappareil fonctionne sur piles sil reste plus de minutes allumé en mode stop ou sans disque chargé ou encore ouvert le lecteur séteint la partie correspondante disparaît de lécran mais la section guitare reste opérationnelle a réactivation du lecteur se fait par la touche PLAY ou par linter rupteur POWER si les sections et guitare sont toutes deux éteintes Entrées Branchement d’une guitare ne guitare ou une basse se branchent sur lappareil simplement en reliant leur jack à lentrée GUITAR/MIC IN du i vous utilisez des pédales deffets vous pouvez aussi les brancher sur cette entrée en tenant compte du fait que le dispose de ses propres effets ettez le sélecteur GUITAR/MIC en posi tion GUITAR érifiez que le bouton GUITAR est bien enfoncé AVERTISSEMENT NE branchez en AUCUN CAS la sortie d’un ampli guitare sur l’entrée GUITAR/MIC du CD-GT1 sous peine de l’endommager gravement. Branchement d’un micro Branchement d’une pédale ranchez un micro du modèle adapté en cas de doute adressezvous à vo tre revendeur sur lentrée GUITAR/MIC IN du ettez le sélecteur GUITAR/MIC en position MIC ous pouvez brancher une pédale sur le soit pour appeler les pro grammes deffets soit pour commander le lecteur au pied voir plus loin our éviter tout problème utilisez ex clusivement une pédale de type ou équivalente de type non verrouillable à action de fermeture et branchezla dans le connecteur FOOT Branchement niveau ligne d’une source à ous pouvez aussi brancher un synthé un préampli guitare un magnétocas sette ou toute autre source à niveau ligne sur le mini jack LINE IN situé à côté du jack GUITAR/MIC IN AVERTISSEMENT Ne branchez JAMAIS les sorties haut-parleur d’un ampli guitare sur quoi que ce soit d’autre que des enceintes de diffusion. En cas de doute sur le type de signal susceptible d’être reçu par le CD-GT1, adressez-vous à une personne compétente. Sorties eliez lappareil aux entrées dun système de diffusion ou dune console de mixage à laide dun câble stéréo adapté non fourni branché sur le minijack stéréo LINE OUT otre casque découte non fourni peut également se brancher sur le minijack PHONES pour une écoute discrète TASCAM CD-GT1 — 19 Français Branchements Réglage de la balance Entrées Français e peut gérer simultanément trois types de sources le en lecture la guitare ou le micro branchés sur lentrée GUITAR/MIC IN. une source stéréo branchée sur lentrée LINE IN e niveau du premier et de la dernière nest pas modifiable sur le mais la balance de la source avec lentrée guitarmic se fait comme suit églez le niveau de lappareil branché en LINE IN par son contrôle de volume ce signal ne peut être traité par les effets du tilisez le contrôle INPUT du pour régler le niveau de la guitare ou du micro avant envoi vers leffet i un menu nest pas sélectionné les touches 5 et b permettent de régler la balance entre la source guitare micro mais pas LINE IN et le lecteur ette valeur de MIX se règle de –5 à +5 20 — TASCAM CD-GT1 ������������������������������ ������������������������������� ��������������������������� ��������5���b������������� ����������������������� ����������������������� ������������� ����������������������� ��������������������� ������������������������� ��������������������������� ������������������������ ����������� ��������������������� ������������ ��������������� ������������������ ����������������� ���������� ela nest possible que si vous nêtes pas en mode menu tilisez le système de menus du pour régler le niveau de sortie final de leffet ������������������������� ������������������������� ���������������������� Sorties appareil dispose de deux sorties prise casque et sortie ligne eurs niveaux ne peuvent pas être réglés séparément — tilisez le contrôle OUTPUT pour ajuster globalement ce niveau Le système de menus REMARQUE L’accès à l’accordage nécessite d’appuyer sur ENTER après l’apparition du menu TUNER à l'écran (l’effet est coupé pendant l’accordage). Menu EFFECT Élément MENU TUNER Commentaires EFF LIB Parameter LVL ON/OFF 00 à 42 — 0 à 64 PIT 0 à –50% (pitch) ou 0, règle la transposition ou les valeurs –8, –16, –32 et –50 d’écoute à vitesse réduite (SSA) (SSA) SSA KEY FINE PLAY CUE SSA ON/OFF O6 à I6 (ou SSA) –50 à +50 (ou SSA) ALL/SGL CUE/FLS FOOT EFF/CUE AT/MT MODE CAL E2 à E5 (en accordage) AT/MT accordage manuel ou automatique 435 à 445 étalonnage en Hz PITCH KEY Valeurs Français e tableau cicontre donne le détail des différents menus et leurs paramétrages our accéder au système de menus ap puyez sur LCD MENU jusquà ce que celui que vous désirez soit contrasté et que son premier élément apparaisse dans la partie principale de lécran tilisez les touches fléchées 5 et b pour modifier sa valeur otez quil ny a pas besoin dappuyer sur ENTER pour valider ce paramétrage il est actif dès que la touche est enfoncée ppuyez sur ENTER pour passer à lélé ment de menu suivant ppuyez sur MENU pour accéder au menu suivant et à son premier élément a sortie du système de menus se fait à laide de la touche DISPLAY/ESC activation/désactivation de l’effet numéro de mémoire dépend du type d’effet niveau de sortie de l’effet écoute à vitesse réduite on/off transposition par demi-tons accordage en centièmes de tons mode de lecture all/single option cue ou «flash play» affectation de la pédale : appel d’effets ou avance rapide TASCAM CD-GT1 — 21 Utilisation du lecteur CD Français e lecteur du fonctionne de manière tout à fait standard à quel ques détails près répertoriés ciaprès e chargement des s dans lappa reil se fait étiquette vers le haut face brillante vers le bas ouverture et la fermeture de la trappe sont manuelles Lecture ppuyez sur la touche lecturepause yJ pour lancer ou suspendre la lecture ppuyez sur stop H pour larrêter n utilisation sur piles la mise en lecture et larrêt sont plus longs quavec lalimentation secteur pour économi ser les piles Affichage des durées a touche DISPLAY/ESC permet dalterner laffichage des durées entre temps écoulé pour la piste temps restant pour la piste et temps restant pour le disque non accessible en mode menu 22 — TASCAM CD-GT1 Passage d’une piste à l’autre Bouclage (piste) es deux touches de recherche et de changement de piste m/. et //, permettent de passer dune piste à lautre par pressions successives églez lélément de menu PLAY sur SGL single ppuyez sur LOOP pour affi cher LOOP 1 dans la partie inférieure gauche de lécran a piste sera lue en boucle Recherche dans une piste Bouclage (disque) es mêmes touches permettent la recherche au sein dun disque en les maintenant enfoncées églez PLAY sur ALL toutes les pistes ppuyez sur LOOP pour afficher LOOP à la partie inférieure gauche de lécran e disque est lu en boucle La touche CUE a touche CUE est spécifique au lle permet de revenir à la posi tion du début de la dernière lecture action qui suit dépend du paramé trage du menu CUE élément du menu MENU il est réglé sur CUE la lecture est mise en pause à ce point il est réglé sur FLS elle reprend immédiatement à condition que CUE ait été enfoncé en lecture ou en pause ASTUCE Cette opération peut être commandée au pied à la place de la touche CUE (réglez l’élément de menu FOOT sur CUE). CUE Bouclage (points d’entrée/sortie) tilisez la touche I/O pour définir le point de départ in puis le point de sortie out de la boucle a section comprise entre les points est lue en boucle sans fin ne nouvelle pression annule ces points et la lecture en boucle uand les points sont en place I-O af fiché vous pouvez relancer le bouclage sil il a été annulé voir cidessous en appuyant sur LOOP Annulation du bouclage ppuyez sur LOOP pour faire dis paraître la mention LOOP de la partie inférieure gauche de lécran Modifications de hauteur et de tempo REMARQUE Un seul mode peut être actif à la fois. es modes vous permettent de vous accompagner dans différentes tonalités ou en modifiant le tempo pour étudier en détail vos passages favoris ASTUCE Associez ces modes à la fonction de bouclage (loop) pour vous entraîner. Mode KEY (transposition) ermet de modifier la tonalité du morceau sans changement de tempo jusquà six demitons vers le haut ou vers le bas a valeur se règle en demitons et en cents centièmes de demiton de I6 à O6 uand les valeurs de demitons et de cents sont à le mode KEY est désac tivé également si le est activé uand le mode est activé lécran affiche KEY tilisez ce mode si vous avez des difficultés à jouer dans la tonalité du disque Mode SSA (vitesse réduite) e mode découte à vitesse réduite permet de réduire le tempo sans chan ger la tonalité es valeurs sont off – – – et – en pourcentages uand il est actif la partie gauche de lécran indique SSA tilisez ce mode pour étudier des passages trop rapides Mode PITCH (variation de vitesse) e mode modifie à la fois la hauteur et le tempo par pas de et jusquà – est la valeur par défaut uand il est actif lécran indique PITCH Souvenez-vous ! ransposition seule = KEY alentissement sans changement de hauteur = SSA alentissement avec changement de hauteur = PITCH Paramétrages tilisez le système de menus pour ac tiver ou désactiver le menu PITCH puis réglez les valeurs de hauteur ou de ralentissement menu PITCH encore ou si est désactivé choisissez KEY dans le menu suivant KEY et modifiez les paramètres KEY demiton et FINE TASCAM CD-GT1 — 23 Français rois modes spécifiques permettent de modifier la lecture du Effets (types et paramètres) Fonctionnement des effets Français ous disposez de deux banks def fets A et B contenant chacune slots numérotés de 1 à 5 et destinés à mémoriser vos paramètres Vous créez vos effets à partir des pre sets disponibles pour la guitare et vocaux uand une bank et un slot sont sélectionnés si un preset est appelé et modifié il sera automatiquement sauvegardé dans cet emplacement Sauvegarde de vos paramétrages d’effets dans un “slot” de “bank” ppuyez sur la touche BANK pour sé lectionner une des deux banks A ou B ppuyez sur No. pour sélectionner le slot 1 à 5 qui saffiche à lécran ppuyez sur LCD MENU pour faire apparaître EFFECT à lécran 24 — TASCAM CD-GT1 tilisez la touche 5 pour activer leffet ON) ppuyez sur ENTER et sélectionnez le preset 0042 avec les touches 5 et b REMARQUE Si des données sont présentes dans le slot dont vous partez, elles seront effacées par le rappel du preset. ppuyez à nouveau sur ENTER pour éditer vos paramètres à laide des tou ches 5 et b voir le tableau page sui vante pour leur description détaillée e dernier paramètre est toujours LVL niveau de sortie de leffet 0 à 64 l nest accessible que si leffet est actif et est ignoré sil est inactif églez le niveau puis appuyez sur la touche DISPLAY/ESC pour sortir du paramétrage deffets os modifications sont enregistrées automatiquement dans le slot choisi au début Rappel d’un effet avec vos paramètres personnalisés uand des paramètres deffets per sonnalisés ont été sauvegardés selon la procédure cidessus vous pouvez les rappeler en appuyant simplement sur les touches BANK et No. pour accéder au slot approprié vérifiez toutefois que leffet est bien activé ASTUCE Si une pédale est branchée sur le connecteur approprié et que le paramètre FOOT est réglé sur EFF dans le système de menus, vous pouvez faire défiler les slots les uns après les autres au pied. Effets (types et paramètres) Les paramètres es presets deffets peuvent être répartis en trois catégories DIST istortion gain Distortion 00 DIST-TONE-FLA-REV Son clair 15 COMP-TONE-FLA-REV Vocal 30 De-esser COMP ompresseur gain 01 DIST-TONE-FLA-DLY 16 COMP-TONE-FLA-DLY 31 Chorister 02 DIST-TONE-PHA-REV 17 COMP-TONE-PHA-REV 32 Emphasis FLA langer paramétrage 03 DIST-TONE-PHA-DLY 18 COMP-TONE-PHA-DLY 33 Shout 04 DIST-TONE-EXC-REV 19 COMP-TONE-EXC-REV 34 Mood Vocal 05 DIST-TONE-EXC-DLY 20 COMP-TONE-EXC-DLY 35 Response 06 DIST-TONE-CHO-REV 21 COMP-TONE-CHO-REV 36 Proclaim 07 DIST-TONE-CHO-DLY 22 COMP-TONE-CHO-DLY 37 Quivering Voice 08 DIST-TONE-TRM-REV 23 COMP-TONE-TRM-REV 38 Duet CHO horus paramétrage 09 DIST-TONE-TRM-DLY 24 COMP-TONE-TRM-DLY 39 Lo-Fi Vocal TRM remolo paramétrage 10 DIST-TONE-VIB-REV 25 COMP-TONE-VIB-REV 40 Megaphone VIB ibrato paramétrage 11 DIST-TONE-VIB-DLY 26 COMP-TONE-VIB-DLY 41 Screaming WAH utowah paramétrage 12 DIST-TONE-WAH-REV 27 COMP-TONE-WAH-REV 42 Panning Vocal 13 DIST-TONE-WAH-DLY 28 COMP-TONE-WAH-DLY — 14 DIST-TONE-PIT-DLY 29 COMP-TONE-PIT-DLY — ous les presets disposent également dun paramètre LVL levelniveau régla ble de 0 à 64 omme vous le constatez tous les effets guitare distorsion et son clair comportent quatre éléments ajustables individuellement selon le descriptif cicontre Français TONE onalité REV everb paramétrage DLY elay paramétrage PHA haser paramétrage EXC xciter paramétrage PIT ransposition paramétrage es presets vocaux nont quun seul paramètre noté PAR à lécran TASCAM CD-GT1 — 25 Utilisation de l’accordeur Français accordeur chromatique pour guitare incorporé au dispose de deux modes un mode automatique dans lequel la hauteur du signal source est détectée et affichée automatiquement et un mode manuel dans lequel vous définissez la cible et vous vous accor dez dessus ppuyez sur la touche MENU jusquà ce que lécran affiche TUNER, puis ap puyez sur ENTER Flat � On-key Sharp � lactivation de laccordeur mode uner tous les effets sont automati quement désactivés i le mode automatique est activé af fichage AT sur lécran vous navez quà jouer une note sur la guitare accor deur repère la note réelle la plus proche et laffiche ous pouvez commencer par un accordage grossier pour faire apparaître la bonne note puis passer à un accordage fin jusquà ce que lécran 26 — TASCAM CD-GT1 se stabilise sur le rond central i le mode manuel est activé affichage MT sur lécran utilisez les touches 5 et b pour définir la note à accorder puis procédez comme cidessus pour laccordage fin Choix du diapason. abituellement le la au dessus du do médian du piano est réglé sur z pour la plupart des musiques occidentales l est toutefois des cas où vous pouvez avoir besoin de vous ajuster sur un standard différent pour correspondre à un enregistrement ou à un instrument qui nest pas accordé à par exem ple tilisez alors le menu CAL de lac cordeur pour choisir une autre valeur entre z et z REMARQUE Bien que vous n’ayez pas besoin de lire un CD pour vous accorder, le CD-GT1 doit être allumé et le bouton GUITAR enfoncé pour permettre l’accordage d’une guitare branchée sur le CD-GT1. Caractéristiques Alimentation AN/NA CD 8 cm (mini), 12 cm 24-bit Traitement numérique 32-bit Consommation Niveau de sortie nominal (LINE OUT) Niveau de sortie maximum (LINE OUT) Impédance de sortie Niveau de sortie maximum (casque) Niveaux d’entrée nominaux LINE IN MIC IN GUITAR IN Lecteur CD Bande passante –10 dBV Amplitude dynamique > 88 dB Rapport signal/bruit > 88 dB Distorsion harmonique < 0,01 % 0 dBV (1 Vrms) 9V continu (adaptateur PS-PS5) piles LR6 (AA) x 4 4 W (adaptateur PS-PS5) Dimensions (w x d x h) 232 x 138 x 40 mm avec pieds Poids (sans les piles) 620g Français Disques 1 kΩ > 18 mW (32 Ω) – 10 dBV – 40 dBV – 15 dBV 20 Hz à 20 kHz ±1,0 dB TASCAM CD-GT1 — 27 Wichtige Sicherheitshinweise Bitte lesen Sie die Folgenden Sicherheitshinweise sorgfältig durch! Deutsch 1 Bedienungsanleitung sorgfältig durchlesen – Bitte lesen Sie vor Inbetriebnahme alle Sicherheits- und Bedienungsanweisungen durch. 2 Bedienungsanleitung aufbewahren – So können Sie bei später auftretenden Fragen nachschlagen. 3 Alle Warnhinweise beachten – Dies gilt sowohl für alle Angaben am Gerät als auch in dieser Bedienungsanleitung. 4 Bestimmungsgemäßer Gebrauch – Benutzen Sie das Gerät nur zu dem Zweck und auf die Weise, wie in dieser Bedienungsanleitung beschrieben. Geben Sie das Gerät niemals ohne diese Bedienungsanleitung weiter. 5 Reinigung – Vor der Reinigung das Netzkabel abziehen. Keine Nass- oder Sprühreiniger verwenden. Mit einem trockenen Tuch reinigen. 6 Zusatzgeräte – Zusatzgeräte, die nicht mit den Herstellerempfehlungen übereinstimmen, können Schäden verursachen. 7 Aufstellung a. Untersatz – Niemals einen instabilen Untersatz (fahrbares oder stationäres Gestell, Regal, Halterung, Tisch) verwenden. Andernfalls 28 — TASCAM CD-GT1 kann das Gerät herabfallen und hierdurch ernsthaft beschädigt werden sowie ernsthafte Verletzungen hervorrufen. Ausschließlich einen geeigneten und stabilen Untersatz (mitgeliefert oder vom Hersteller empfohlen) benutzen. Zur Befestigung unbedingt die Herstellerangaben beachten und ausschließlich empfohlenes Zubehör verwenden. b. Fahrbare Gestelle – Plötzliche Richtungswechsel und zu rasches Beschleunigen/ Bremsen sowie unebenen Untergrund vermeiden, da andernfalls Gestell und/oder Gerät umfallen können. c. Hitzeeinwirkung – Das Gerät in ausreichender Entfernung zu Hitze abstrahlenden Vorrichtungen (Heizung, Ofen etc.) und anderen Geräten (Verstärker etc.) aufstellen. d. Belüftung – Die Belüftungsöffnungen des Geräts dürfen niemals blockiert werden. Andernfalls können Überhitzung und Betriebsstörungen auftreten. Das Gerät daher niemals auf einer weichen Unterlage (Kissen, Sofa, Teppich etc.) aufstellen. Bei Einbau in einem Regal, Gestell- oder Einbauschrank unbedingt auf einwandfreien Temperaturausgleich achten. Die diesbezüglichen Herstellerangaben beachten. e. Nässe und Feuchtigkeit – Gerät nicht in unmittelbarer Nähe zu Wasserbehältern (Badewanne, Küchenspüle, Schwimmbecken etc.) oder in Räumen betreiben, in denen hohe Luftfeuchtigkeit auftreten kann. f. Wand- und Deckenbefestigung – Hierzu unbedingt die Vorschriften und Empfehlungen des Herstellers beachten. g. Außenantennen – Beim Montieren einer Außenantenne besteht Lebensgefahr, wenn Netz- und Starkstromleitungen berührt werden. Außenantenne und zugehörige Kabel stets in ausreichendem Abstand zu Hochspannungs-, Licht- und anderen Stromleitungen montieren, so dass kein Kontakt möglich ist. 8 Spannungsversorgung – Sicherstellen, dass die örtliche Netzspannung mit der auf dem Gerät angegebenen Netzspannung übereinstimmt (Aufkleber auf der Unterseite des Geräts) Im Zweifelsfall den Fachhändler oder den verantwortlichen Energieversorger vor Ort befragen. Bei Geräten, die für Batteriebetrieb oder eine andere Spannungsquelle geeignet sind, die zugehörigen Bedienungshinweise Wichtige Sicherheitshinweise gefahr. Wartungsarbeiten stets qualifiziertem Fachpersonal überlassen. 14 Schadensbehebung in Fachwerkstätten – In den folgenden Fällen müssen Prüfund/oder Wartungsarbeiten von qualifiziertem Fachpersonal durchgeführt werden: a. Bei beschädigtem Netzkabel oder Netzstecker. b. Wenn sich Flüssigkeit oder Fremdkörper im Geräteinneren befinden. c. Wenn das Gerät Nässe oder Feuchtigkeit ausgesetzt war. d. Wenn bei vorschriftsgemäßer Handhabung Betriebsstörungen auftreten. Bei Störungen nur Gegenmaßnahmen ergreifen, die in der Bedienungsanleitung beschrieben sind. Andernfalls keine weiteren Schritte vornehmen, da hierdurch Schäden verursacht werden können, die Reparaturarbeiten durch Fachpersonal erfordern. e. Wenn das Gerät einer heftigen Erschütterung ausgesetzt war oder anderweitig beschädigt wurde. f. Bei Leistungsbeeinträchtigungen jeder Art. 15 Teiletausch – Wenn ein Teiletausch erforderlich wird, die Einhaltung der vom Hersteller vorgeschriebenen Ausführungen und techni- schen Kenndaten beachten. Nicht zulässige Teile können Brand, Stromschlag sowie andere ernsthafte Störungen verursachen. 16. Sicherheitsüberprüfung – Nach Kundendienst- und Reparaturarbeiten stets eine Sicherheitsüberprüfung vom Fachpersonal vornehmen lassen, um einwandfreien Betrieb zu gewährleisten. Deutsch beachten. 9 Netzkabel – Das Netzkabel so verlegen, dass es nicht gedehnt, gequetscht oder geknickt werden kann. Insbesonders darauf achten, dass keine Schäden am Stecker, an der Steckdose ode am Netzkabelausgang des Geräts auftreten können. Netzkabel niemals eigenmächtig umbauen, insbesondere die Schutzkontakte des Netzsteckers niemals abkleben. 10 Netzüberlastung – Netzsteckdosen, Verlängerungskabel oder Steckdosenverteiler niemals überlasten, da andernfalls Stromschlagund Brandgefahr besteht. 11 Gewitter und Nichtgebrauch – Bei Gewittern und längerem Nichtgebrauch des Geräts den Netzstecker und das Antennenkabel herausziehen, um Schäden durch Blitzschlag und/oder Spannungsstöße zu vermeiden. 12 Eindringen von Fremdkörpern und Flüssigkeit – Niemals Gegenstände in die Geräteöffnungen einführen, es besteht Stromschlag- und Brandgefahr. Niemals offene Behälter mit Flüssigkeit auf das Gerät stellen, und sicherstellen, dass keine Flüssigkeit in das Geräteinnere eindringen kann. 13 Kundendienst – Niemals selbst Wartungsarbeiten vornehmen. Bei geöffnetem Gehäuse besteht Stromschlag- und Verletzungs- TASCAM CD-GT1 — 29 Inhaltsverzeichnis Deutsch Wichtige Sicherheitshinweise ......................................... 28 Inhaltsverzeichnis............................................................ 30 Erste Schritte mit Ihrem CD-GT1 ..................................... 31 Verbindungen herstellen ................................................. 33 Die Balance einstellen ..................................................... 35 Das Menü nutzen............................................................. 36 Den CD-Player nutzen...................................................... 37 Tonhöhe oder Tempo der CD-Wiedergabe ändern .......... 39 Effekte verwenden .......................................................... 40 Das Stimmgerät nutzen................................................... 42 Fakten und Zahlen (Technische Daten) ............................ 43 30 — TASCAM CD-GT1 Erste Schritte mit Ihrem CD-GT1 enn wir uns auf eine aste einen nschluss oder einen egler am beziehen verwenden wir dieses chriftbild PLAY enn wir uns auf ein enü oder eine eldung auf dem isplay beziehen verwenden wir dieses chriftbild MENU Batterien einlegen er benötigt vier atterien der röße die nicht im iefe rumfang enthalten sind ir empfehlen hnen sich wieder aufladbare i kkus und ein adegerät zu beschaffen ie können aber auch lkalineatterien verwenden erwenden ie nur atterienkkus des gleichen yps auschen ie immer alle atterien kkus gemeinsam aus enn ie den längere eit nicht verwenden nehmen ie die atterienkkus heraus chten ie beim inlegen der atte rienkkus auf die richtige olari tät er luspol muss auf die jewei lige lusmarkierung im atteriefach + ausgerichtet sein atterien halten länger wenn ie das erät bei emperaturen zwi schen ° und ° benutzen erfen ie niemals alte atterien kkus in den ausmüll n eutsch land ist der andel verpflichtet alte atterien zur ntsorgung kostenlos zurückzunehmen udem können alte atterien meist beim örtlichen ertstoff hof abgegeben werden enn die atteriespannung nachlässt schaltet sich der automatisch aus achdem ie neue atterien kkus eingelegt haben müssen ie ihn mit dem POWERchalter wieder einschalten eachten ie dass die atterieanzeige auf dem isplay nur eine grobe chät zung der verbleibenden atteriele bensdauer erlaubt nter bestimmten oraussetzungen kann es deshalb sein dass der atteriestrom trotz angezeigter estkapazität nicht mehr ausreicht um den zu betreiben Einen Wechselstromadapter verwenden erwenden ie keinen anderen ech selstromadapter als einen wird nicht mitgeliefert erhältlich bei hrem ascamachhändler enn ie einen anderen dapter verwenden kann hr chaden nehmen chten ie darauf dass die auf dem dapter angegebene pannung mit hrer örtlichen etzspannung überein stimmt Einschalten er hat zwei inusschalter it dem POWERchiebeschalter schal ten ie die tromversorgung für das gesamte erät ein oder aus er GUITARruckschalter beeinflusst die tromversorgung für den GUITAR/ INPUTnschluss und das ffektgerät enn dieser eil ausgeschaltet ist können ie weder die nschlussbuchse noch eines der itarreningangs TASCAM CD-GT1 — 31 Deutsch Was Sie über dieses Handbuch wissen sollten Erste Schritte mit Ihrem CD-GT1 enüs für ffekte und timmgerät verwenden eachten ie auch den HOLDchalter n tellung ON blockiert er die asten und egler des Deutsch Automatisches Stromsparen enn der im atteriebetrieb eingeschaltet ist und länger als inu ten das aufwerk gestoppt oder geöffnet oder keine eingelegt ist schaltet sich der layer aus der eil des isplays erlischt m den layer wieder zu starten drücken ie PLAY wenn der und der itarrenteil ausgeschaltet sind betä tigen ie den POWERchalter 32 — TASCAM CD-GT1 Verbindungen herstellen Eine Gitarre anschließen m eine itarre oder einen ass anzuschließen verbinden ie einfach das eine nde des itarrenkabels mit der itarre und das andere nde mit dem GUITAR/MIC INnschluss des enn ie odenffektgeräte benutzen können ie deren usgang mit dem verbinden bedenke der hat eigene ffekte tellen ie den GUITAR/MICchalter auf GUITAR ergewissern ie sich dass der GUITAR chalter gedrückt ist VORSICHT Verbinden Sie NIEMALS einen Gitarrenverstärker mit dem Eingang des CD-GT1. Sie beschädigen sonst mit ziemlicher Sicherheit Ihre Geräte. Ein Mikrofon anschließen erbinden ie ein geeignetes ikrofon fragen ie hren ascamachhänd ler wenn ie unsicher sind mit dem GUITAR/MIC INnschluss des tellen ie den GUITAR/MICchalter auf MIC Eine Stereo-Signalquelle mit Line-Pegel anschließen ie können auch eine ignalquelle wie einen ynthesizer eine itarrenor verstärker ein ollffektgerät oder einen assettenrecorder mit dem verbinden enutzen ie in diesem all die mit LINE IN bezeichnete inilinkenbuchse neben dem GUITAR/MIC INnschluss VORSICHT Verbinden Sie NIEMALS den Lautsprecherausgang eines Gitarrenverstärkers mit etwas anderem als einem Lautsprecher. Wenn Sie auch nur die geringsten Zweifel haben, was Sie an den CD-GT1 anschließen dürfen, fragen Sie Ihren Tascam-Fachhändler. Einen Fußschalter anschließen ie können einen ußschalter an den anschließen um schrittweise durch die ffekteinstellungen zu blät tern oder um den layer freihändig zu bedienen mehr dazu später in die sem andbuch m robleme mit hrem zu vermeiden verbinden ie möglichst einen ascamußschalter oder einen ähnlichen nichtrastenden chalter mit dem FOOTnschluss linkenbuchse TASCAM CD-GT1 — 33 Deutsch Eingänge Verbindungen herstellen Ausgänge Deutsch ie können das usgangssignal des über eine tereoanlage oder ein ischpult abhören erbinden ie dazu den LINE OUTnschluss tereo iniklinke des mithilfe eines geeigneten tereokabels nicht im ie ferumfang enthalten mit dem ingang ux oder ine des anderen eräts enn ie hre usik lieber für sich allein genießen möchten verbinden ie einen tereoopfhörer nicht im iefer umfang enthalten mit dem PHONES nschluss tereoiniklinke 34 — TASCAM CD-GT1 Die Balance einstellen er hat drei ingangsquellen die spielende die itarre oder das ikrofon am GUITAR/MIC IN nschluss die tereoquelle am LINE IN n schluss en ingangspegel der erst und letzt genannten uellen können ie mit dem nicht ändern aber lesen ie weiter um zu erfahren wie man die alance zwischen dem und dem ingangssignal ändert m den egel der tereoquelle am nschluss LINE IN zu ändern verwenden ie den egelregler des anderen eräts falls vorhanden edenken ie zudem dass diese ignalquelle nicht mit ffekten des versehen werden kann it dem INPUTegler des bestimmen ie den egel des itar ren oder ikrofonsignals bevor es zum internen ffektmodul weiterge leitet wird Die CD wird mit festem Pegel wiedergegegeben, aber mit der MIX-Funktion (5 und b-Tasten außerhalb des Menüs) bestimmen Sie die Balance zwischen Gitarre/ Mikrofon und CD Mit dem INPUTRegler stellen Sie den Pegel am Eingang GUITAR/MIC IN ein Den Pegel des internen Effekts stellen Sie über das Menü ein Mit dem OUTPUTRegler stellen Sie den Gesamtpegel für den Ausgang LINE OUT und den Kopfhörer ein enn kein enüpunkt gewählt ist können ie die asten 5 und b ver wenden um die alance zwischen dem itarrenikrofonsignal aber nicht der LINE IN uelle und dem ignal des layers einzustellen ieser ert ist einstellbar zwischen –5 und +5 nur wenn kein enü geöffnet ist Deutsch Eingänge Der Pegel am Eingang LINE IN lässt sich mit dem CD-GT1 nicht beeinflussen ber das enü des be stimmen ie den endgültigen us gangspegel des ffekts Ausgänge s gibt zwei usgänge ine und opf hörer er egel an diesen usgängen lässt sich nur gemeinsam ändern und zwar mit dem OUTPUTegler TASCAM CD-GT1 — 35 Das Menü nutzen Deutsch ie abelle auf dieser eite gibt einen berblick über die verschiedenen enüs und instellungen m ein enü zu öffnen drücken ie die LCD MENUaste so oft bis das gewünschte enü blinkt und der erste intrag im auptteil des isplays ange zeigt wird it den uf und basten 5 und b ändern ie den ert des angezeigten enüeintrags ie brauchen nicht ENTER zu drücken um eine nderung zu bestätigen ie instellung ändert sich sofort beim rücken der asten m zum nächsten intrag im gleichen enü zu gelangen drücken ie ENTER m zum nächsten enü und seinem ersten intrag zu gelangen drücken ie MENU m das enüsystem zu verlassen drü cken ie DISPLAY/ESC WICHTIG Um das TUNER-Menü zu öffnen, müssen Sie ENTER drücken, sobald TUNER auf dem Menü EFFECT KEY MENU Werte Bemerkungen EFF LIB Parameter LVL ON/OFF 00 bis 42 — 0 bis 64 schaltet den Effekt ein oder aus Nummer der Voreinstellung abhängig vom Effekttyp Ausgangspegel des Effekts PIT 0 bis –50% (Pitch) oder 0, –8, –16, –32 und –50 (SSA) ändert die Tonhöhe oder den Wert für langsame Wiedergabe SSA KEY FINE PLAY CUE SSA ON/OFF O6 bis I6 (oder SSA) –50 bis +50 (od. SSA) ALL/SGL CUE/FLS FOOT EFF/CUE AT/MT MODE CAL E2 bis E5 AT/MT 435 bis 445 PITCH TUNER 36 — TASCAM CD-GT1 Eintrag Display angezeigt wird (dient zur Sicherheit, weil das Effektsignal ausgeschaltet wird, wenn das Stimmgerät aktiv ist). schaltet langsame Wiedergabe ein/aus Tonhöhe in Halbtonschritten Tonhöhe in Prozent Wiedergabe alle Titel/ein Titel Cue- oder Blitzstartmodus Fußschalter wechselt zwischen Effekteinstellungen oder steuert Cue-Funktion beim Stimmen automatisches oder manuelles Stimmen Kammerton A in Hz (Grundeinstellung) Den CD-Player nutzen Wiedergabe m die iedergabe zu starten oder vor übergehend anzuhalten drücken ie die iedergabeauseaste yJ m die iedergabe zu beenden drü cken ie die topptaste H enn ie den mit atterien kkus anstatt mit dem echselstro madapter betreiben dauert das tarten und toppen der iedergabe länger um trom zu sparen Display MENU it der DISPLAY/ESCaste schalten ie zwischen verschiedenen nzeigen um verstrichene eit des itels ver bleibende eit des itels und gesamte verbleibende eit im enümodus ist diese ahl nicht möglich enn dort CUE gewählt ist wird die iedergabe am ueunkt angehalten ause enn FLS gewählt ist beginnt die iedergabe am ueunkt sofern ie CUE während der iedergabe oder ause gedrückt haben Zum nächsten/vorherigen Titel springen m zum nächsten oder zum vorhe rigen itel zu springen drücken ie einmal kurz die aste m. oder /, Suchen innerhalb eines Titels m eine bestimmte telle innerhalb der aufzusuchen halten ie eine der asten m oder , länger gedrückt Die CUE-Taste nutzen ie CUEaste ist eine esonderheit des enn ie sie drücken gelangen ie zurück an die telle an der die ieder gabe zuletzt gestartet wurde as anschließend geschieht ist abhän gig von der CUEinstellung im enü TIPP Wenn Sie einen Fußschalter anschließen, können Sie diesen anstelle der CUE-Taste nutzen und haben so die Hände frei (wählen Sie im Menüeintrag FOOT die Einstellung CUE CUE). Gesamten Titel wiederholen ählen ie im enüeintrag PLAY die instellung SGL einzelner itel rücken ie die LOOPaste so dass LOOP 1 unten links auf dem isplay angezeigt wird er aktuelle itel wird wiederholt abgespielt Gesamte CD wiederholen ählen ie für den enüeintrag PLAY im MENUenü die instellung ALL alle itel rücken ie LOOP so dass nur TASCAM CD-GT1 — 37 Deutsch er layer des funktio niert praktisch genauso wie jeder andere layer bis auf ein paar kleine nterschiede und spezielle unktionen die wir hier erklären egen ie s immer mit der beschrifteten eite nach oben glänzende eite nach unten in den ein ffnen und schließen ie die lappe von and er kann generell nur abgeschlossene finalisierte s s abspielen ennoch lassen sich möglicherweise auch manche abge schlossenen s auf dem nicht abspielen Den CD-Player nutzen LOOP unten links auf dem isplay angezeigt wird ie gesamte wird wiederholt abgespielt Abschnitt wiederholt abspielen Deutsch rücken ie die I/Oaste um den nfang der iedergabeschleife festzu legen rücken ie aste noch einmal um das nde festzulegen er bschnitt zwischen den unkten wird nahtlos wiederholt urch nochmaliges rücken der LOOP aste werden die nfangsndpunkte gelöscht und der iederholmodus wird abgebrochen olange diese unkte festgelegt sind auf dem isplay wird I-O angezeigt können ie die iederholung mithilfe der LOOPaste erneut starten Wiederholte Wiedergabe abbrechen rücken ie noch einmal die LOOP aste so dass LOOP nicht mehr angezeigt wird 38 — TASCAM CD-GT1 Tonhöhe oder Tempo der CD-Wiedergabe ändern WICHTIG Sie können nur eine dieser drei Funktionen zur gleichen Zeit nutzen. iese unktionen ermöglichen hnen in einer anderen onart oder in einem anderen empo zu spielen so dass ie hre ieblingsiffs und icks leichter lernen TIPP Nutzen Sie beim Üben diese Möglichkeit zusammen mit der LOOP-Funktion (wiederholte Wiedergabe). Tonart ändern (Key-Funktion) ie können die onart der usik um sechs albtöne nach oben oder nach unten verschieben – bei konstan tem empo er ert wird in albtönen und undertsteln eingestellt und als I bis O auf dem isplay angezeigt enn beide erte gleich ull sind albton und undertstel ist die KEYunktion ausgeschaltet enn ein anderer ert als ull einge stellt ist wird KEY angezeigt utzen ie diese unktion wenn hnen ein itel im riginal zu schwer zu spie len oder zu singen ist Langsame Wiedergabe (SSA-Funktion) ie unktion low peed udi tion erlaubt es einen itel langsamer abzuspielen ohne die onart zu ändern olgende instellung sind möglich aus – – – und – rozent enn die unktion aktiv ist wird SSA links auf dem isplay angezeigt utzen ie diese unktion um schnelle icks besser üben zu können Tonhöhe und Tempo ändern (Pitch-Funktion) enn die unktion aktiv ist wird PITCH auf dem isplay angezeigt Einstellungen vornehmen m PITCHenü lässt sich die unk tion ein oder ausschalten m gleichen enü wählen ie mit PIT den etrag um den die onhöhe verringert =aus beziehungsweise die iedergabe verlang samt =ein werden soll enn ausgeschaltet ist können ie alternativ im KEYenü mit dem ert KEY die onartänderung und mit FINE die ein einstellung vornehmen Zur Erinnerung: ur onart ändern= KEY angsam abspielen und onhöhe beibehalten = SSA angsam abspielen und onhöhe verringern = PITCH ie itchunktion erlaubt es on höhe und empo in chritten um bis zu zu verringern ei ist die unktion ausgeschaltet TASCAM CD-GT1 — 39 Deutsch ine lässt sich auf drei verschiedene eisen wiedergeben um hnen das ben zu erleichtern Effekte verwenden Wie Effekte funktionieren Deutsch s gibt zwei ffektbänke im A und B mit jeweils fünf peicherplätzen 1 bis 5 auf denen ie hre eigenen ffekteinstellungen ablegen können ls asis für hre ffekteinstellungen dienen die mitgelieferten orein stellungen für itarre und für esangprache unächst wählen ie einen der pei cherplätze für hre eigene instellung nschließend rufen ie eine orein stellung ab und ändern sie nach hren ünschen iese geänderte instellung wird auf dem gewählten peicherplatz automatisch gespeichert Eine eigene Effekteinstellung speichern rücken ie die BANKaste um ent weder ank A oder B zu wählen wie auf dem isplay angezeigt rücken ie die NO.aste um den peicherplatz 1 bis 5 zu wählen wie 40 — TASCAM CD-GT1 auf dem isplay angezeigt rücken ie die LCD MENUaste bis EFFECT angezeigt wird rücken ie die aste 5 um das interne ffektgerät einzuschalten ON rücken ie erneut ENTER und wählen ie mit den asten 5 und b eine ffektvoreinstellung 00 bis 42 WICHTIG Wenn der gewählte Speicherplatz bereits Daten enthalten hat, werden diese überschrieben, sobald Sie eine Voreinstellung abrufen. rücken ie nochmals ENTER und pas sen ie den ffekt mithilfe der asten 5 und b hren ünschen entsprechend an inzelheiten zu den arametern siehe abelle unten er letzte arameter ist immer LVL us gangspegel des ffektgeräts 0 bis 64 iese instellungen sind nur verfügbar wenn der ffekt eingeschaltet ist tellen ie den egel ein und drücken ie DISPLAY/ESC um die ffekteinstel lungen zu verlassen ie neue ffek einstellung wird automatisch auf dem peicherplatz gespeichert den ie zuvor gewählt haben Eine eigene Effekteinstellung abrufen ine ffekteinstellung die ie wie oben beschrieben gespeichert haben können ie ganz einfach mithilfe der asten BANK und NO. wieder abrufen verge wissern ie sich dass das ffektgerät auch eingeschaltet ist TIPP Schließen Sie einen Fußschalter an und wählen Sie im FOOT-Menü die Einstellung EFF. Jetzt können Sie mit dem Fußschalter die jeweils nächste Effekteinstellung abrufen. Distortion 00 DIST-TONE-FLA-REV Clean sound 15 COMP-TONE-FLA-REV Vocal 30 De-esser 01 DIST-TONE-FLA-DLY 16 COMP-TONE-FLA-DLY 31 Chorister Effektvoreinstellungen und Parameter 02 DIST-TONE-PHA-REV 17 COMP-TONE-PHA-REV 32 Emphasis 03 DIST-TONE-PHA-DLY 18 COMP-TONE-PHA-DLY 33 Shout 04 DIST-TONE-EXC-REV 19 COMP-TONE-EXC-REV 34 Mood Vocal 05 DIST-TONE-EXC-DLY 20 COMP-TONE-EXC-DLY 35 Response 06 DIST-TONE-CHO-REV 21 COMP-TONE-CHO-REV 36 Proclaim 07 DIST-TONE-CHO-DLY 22 COMP-TONE-CHO-DLY 37 Quivering Voice 08 DIST-TONE-TRM-REV 23 COMP-TONE-TRM-REV 38 Duet 09 DIST-TONE-TRM-DLY 24 COMP-TONE-TRM-DLY 39 Lo-Fi Vocal 10 DIST-TONE-VIB-REV 25 COMP-TONE-VIB-REV 40 Megaphone 11 DIST-TONE-VIB-DLY 26 COMP-TONE-VIB-DLY 41 Screaming 12 DIST-TONE-WAH-REV 27 COMP-TONE-WAH-REV 42 Panning Vocal 13 DIST-TONE-WAH-DLY 28 COMP-TONE-WAH-DLY — 14 DIST-TONE-PIT-DLY 29 COMP-TONE-PIT-DLY — ie oreinstellungen lassen sich in drei ategorien einteilen ie ie hier sehen besteht jede der oreinstellungen für itarre istortion und lean aus vier omponenten die sich einzeln verändern lassen und hier aufgeführt sind wie sie auf dem isplay angezeigt werden ie oreinstellungen für esang haben je einen arameter der auf dem isplay als PAR angezeigt wird Die Parameter DIST rad der erzerrung COMP rad der ompression TONE langregelung FLA langerinstellung REV allinstellung DLY elayinstellung cho PHA haserinstellung EXC xciterinstellung PIT itchhifterinstellung CHO horusinstellung TRM remoloinstellung Deutsch Effekte verwenden VIB ibratoinstellung WAH utowahinstellung ür jede oreinstellung gibt es zudem den arameter LVL egel 0 bis 64 TASCAM CD-GT1 — 41 Das Stimmgerät nutzen Deutsch as im eingebaute itar renstimmgerät hat zwei etriebsarten automatisch die onhöhe des ein gehenden ignals wird automatisch erkannt und angezeigt und manuell ie legen den ielton selbst fest und stimmen danach rücken ie die MENUaste bis TUNER angezeigt wird und bestätigen ie mit ENTER vermindert in Stimmung erhöht obald das timmgerät aktiviert ist wird das ffektgerät automatisch aus geschaltet enn automatisches timmen gewählt ist auf dem isplay wird AT angezeigt spielen ie jetzt einfach eine ote auf der itarre as timmgerät versucht die nächstgelegene ote zu ermitteln und zeigt sie auf dem isplay an timmen ie die aite grob so dass die richtige ote angezeigt wird und nehmen ie dann die einstimmung 42 — TASCAM CD-GT1 vor bis auf dem isplay das größere egment in der itte erscheint enn manuelles timmen gewählt ist auf dem isplay wird MT angezeigt können ie die ote mit den asten 5 und b vorgeben und dann wie oben beschrieben stimmen Das Stimmgerät kalibrieren as über dem mittleren hat in der westlichen usik normalerweise eine requenz von z ammerton ielleicht möchten ie aber einmal nach einem anderen tandard stimmen z wenn ie zu einem nicht stimm baren nstrument spielen wollen oder die usik auf der sich nicht auf z bezieht ählen ie dazu im TUNERenü den intrag CAL alibrierung und stellen ie das eferenz auf einen ert zwi schen z und z ein WICHTIG Beim Stimmen ist es zwar nicht erforderlich, eine CD abzuspielen, der CD-GT1 muss jedoch eingeschaltet und der GUITAR-Schalter gedrückt sein, um die Gitarre stimmen zu können, die an den CD-GT1 angeschlossen ist. Fakten und Zahlen (Technische Daten) AD/DA 8-cm-Single-CD, 12-cm-CD 16 Bit Signalverarbeitung 32 Bit nominaler Ausgangspegel (Lineausgang) max. Ausgangspegel ohne Verzerrung (Lineausgang) Ausgangsimpedanz max. Ausgangsleistung (Kopfhörerausgang) nominale Eingangspegel Lineeingang Mikrofoneingang Gitarreneingang CD-Wiedergabe Frequenzbereich –16 dBV Dynamik >88 dB Rauschabstand >88 dB Verzerrung (THD) <0,01% 0 dBV (1 Vrms) 1 KΩ > 18 mW (32 Ω) Spannungsversorgung 9 V DC (über Wechselstromadapter PS-PS5) 4 Batterien/Akkus (AA, Mignon) Leistungsaufnahme 4 W (über Wechselstromadapter PS-PS5) Abmessungen 232 mm x 138 mm (B x H x T, x 40 mm einschließlich Füße) Gewicht (ohne Batterien/Akkus) Deutsch nutzbare CD-Typen 620 g –10 dBV –40 dBV –15 dBV 20 Hz bis 20 kHz, ±1,0 dB TASCAM CD-GT1 — 43 Importanti Istruzioni di Sicurezza Italiano 1 Leggere le istruzioni — Prima di mettere in funzione l’apparecchio, leggere tutte le istruzioni di sicurezza ed azionamento. 2 Conservare le istruzioni — Conservare in luogo sicuro le istruzioni di sicurezza ed azionamento, per agevolare future consultazioni. 3 Avvertenze precauzionali — Attenersi a tutte le avvertenze, sia contrassegnate sull’apparecchio che contenute nel manuale d’istruzioni. 4 Seguire le istruzioni — Seguire tutte le istruzioni d’azionamento ed utilizzo. 5 Acqua ed umidità — Non utilizzare l’apparecchio in vicinanza dell’acqua: per esempio, vicino a vasche da bagno, lavabi, lavelli da cucina, lavabiancheria, in scantinati umidi, ai bordi di una piscina, eccetera. 6 Pulizia — Prima di pulire l’apparecchio togliere sempre l’alimentazione, staccando la spina. Non utilizzare prodotti specifici liquidi o aerosol: basta un semplice panno inumidito 7 Ventilazione — Per garantire un funzionamento affidabile e per proteggere contro il riscaldamento eccessivo, sul mobile sono praticate apposite fessure ed aperture di ventilazione che non devono assolutamente essere otturate o coperte appoggiando l’apparecchio, per esempio, su un letto, un divano, un tappeto o superfici analoghe. 8 Calore — L’apparecchio non deve essere collocato vicino a sorgenti di calore, come stufe, radiatori, aerotermi o altre apparecchiature che producono calore, amplificatori compresi. 9 Accessori — Per non correre inutili rischi, non utilizzare accessori diversi da quelli consigliati dal fabbricante dell’apparecchio. 10 Installazione — Non installare quest’apparecchio su un qualsiasi appoggio instabile: potrebbe cadere, riportando gravi danni o coinvolgendo anche eventuali persone vicine. 11Messa a terra o polarizzazione — Quest’apparecchio potrebbe essere munito di una spina di linea polarizzata a 44 — TASCAM CD-GT1 corrente alternata (che ha una lama più larga dell’altra). Tale spina entra nella presa di rete soltanto in una direzione: si tratta di una misura di sicurezza. Se risultasse impossibile inserire la spina a fondo, provare a voltarla nell’altra direzione. Se anche così la spina si rifiuta di entrare, chiamare un elettricista e far sostituire la presa, evidentemente di tipo sorpassato: meglio una piccola spesa, che rinunciare alla sicurezza offerta dalla spina polarizzata. 12 Protezione del cavo di rete — Stendere i cavi d’alimentazione dove abbiano scarse probabilità di essere calpestati o pinzati da oggetti posti sopra o vicino ad essi; attenzione soprattutto alle sezioni di cavo vicino ai connettori (prese o spine), agli appositi contenitori, nonché al punto in cui il cavo esce dall’apparecchio. 13 Accessori — Usare solo gli accesssori forniti in dotazione e/o quelli consigliati dal costruttore. 14 Spostamenti — Quando l’apparecchio è appoggiato su un carrello, spostare il tutto con precauzione: brusche fermate, spinte eccessive e superfici accidentate possono infatti provocare il ribaltamento. Non bisogna nemmeno inserire l’apparecchio nel vano di un mobile, come una libreria o un armadietto, a meno che sia stato previsto un adatto sistema di ventilazione. 15 Fulmini — Per proteggere ulteriormente l’apparecchio nel corso di un temporale, oppure quando rimane senza sorveglianza e non viene utilizzato per un periodo prolungato, staccarlo dalla presa di rete e scollegare l’antenna o il sistema via cavo. Questa precauzione eviterà che l’apparecchio venga danneggiato da un fulmine o da un picco transitorio di tensione. 16 Assistenza — Non tentare mai di riparare l’apparec- chio da soli: smontando il coperchio o il pannello posteriore si può rimanere esposti a tensioni pericolose o correre altri rischi. Ogni intervento d’assistenza dovrà essere effettuato da personale tecnico qualificato, in special modo se si verificano danni come: Il cavo o la spina di alimentazione risultano danneggiati, o sono caduti oggetti o sono colati liquidi all’interno dell’apparecchio, se l’apparecchio è rimasto esposto alla pioggia o si è comunque bagnato, se l’apparecchio non si comporta correttamente seguendo le normali istruzioni. Effettuare soltanto le regolazioni contemplate nel manuale d’utente; modificare altri comandi potrebbe comportare un ulteriore danno e richiedere poi un lavoro supplementare da parte del tecnico per ripristinare le condizioni originali, se l’apparecchio è caduto oppure l’involucro ha subito danni, e se si nota un notevole calo nelle prestazioni • Utilizzare soltanto un elemento (carrello, piano d’appoggio, treppiede, staffa, tavolo) consigliato dal fabbricante o venduto insieme all’apparecchio stesso. Per qualsiasi tipo d’installazione, seguire le istruzioni del fabbricante ed usare accessori consigliati dallo stesso. • Non piazzare oggetti contenenti liquidi, come vasi, bicchieri, bottiglie o altro, nelle immediate vicinanze dell’apparecchio • Non installare l’apparecchio in spazi angusti e non ventilati, come librerie o altro. • Questo apparecchio assorbe un limitato quantitativo di corrente dall’impianto elettrico anche se spento. NOTA Il CD-GT1 non può riprodurre CD-R e CD-RW non finalizzati. Inoltre, potrebbe incontrare problemi nella riproduzione di alcuni dischi CD-R e RW, anche se finalizzati. Indice Italiano Importanti Istruzioni di Sicurezza ................................... 44 Indice............................................................................... 45 Preliminari all’azionamento del CD-GT1 ......................... 46 Collegamenti ................................................................... 47 Regolazione del bilanciamento ....................................... 48 Funzionamento tramite menu ......................................... 49 Funzionamento del lettore .............................................. 50 Modifica della tonalità e del ritmo ................................. 51 Effetti predefiniti e parametri regolabili ........................ 53 Utilizzo del menu tuner ................................................... 54 Caratteristiche tecniche .................................................. 55 TASCAM CD-GT1 — 45 Preliminari all’azionamento del CD-GT1 Convenzioni tipografiche n questo manuale il nome di tasti con nettori o controlli montati sul è scritto in carattere grassetto come ad esempio PLAY ualsiasi voce visualizzata sul display è invece scritta in un particolare carattere esempio MENU Inserimento delle batteria Italiano l è alimentato da quattro pile non comprese nella fornitura onsigliamo di scegliere pile ricaricabili al i ma sono indicate anche le normali pile alcaline tilizzare sempre pile dello stesso tipo ostituire sempre tutte le pile con temporaneamente uando si prevede di non usare il per un certo periodo estrarre le pile nserire le pile in modo che i poli po sitivo + e negativo - corrisponda no ai rispettivi contrassegni riportati nel vano batteria er prolungare la vita utile della bat 46 — TASCAM CD-GT1 teria utilizzare sempre lapparecchio ad una temperatura ambiente com presa fra ° e ° uando si sostituisce la batteria ri cordarsi di depositare le pile scariche negli appositi contenitori uando la batteria è esaurita il si spegne automaticamente per riaccen derlo premere linterruttore POWER dopo aver sostituito le pile otare che lindicatore della batteria sul display fornisce solo unindicazione ap prossimativa della carica residua e quindi in certe situazioni potrebbe non esserci abbastanza carica residua nelle batterie per alimentare il nonostante lindicazione sul display Utilizzo di un adattatore di rete on il usare soltanto ladattato re non compreso nella fornitura disponibile presso labituale rivenditore n adattatore di tipo diverso potrebbe danneggiare lapparecchio erificare sempre che la lo cale tensione di rete corrisponda a quella indicata sulladattatore Accensione dell’apparecchio ul ci sono due interruttori daccensionel primo POWER è del tipo a slitta e permette di accendere e spegnere lapparecchio l secondo GUITAR controlla lalimen tazione del connettore GUITAR/INPUT e dellunità deffetti e questultima è spen ta non è possibile usare GUITAR/INPUT e nemmeno i menu EFFECT e TUNER otare inoltre la presenza dellinterrutto re HOLD che quando è spostato su ON blocca lazionamento di tasti e controlli del Funzione automatica di risparmio energetico uando lapparecchio rimane acceso nel modo top se lunità è alimentata a batterie peroltre minuti oppure nessun disco viene caricato od aperto per lo stesso periodo il lettore si spegne la sezione scompare dal display ma si può continuare ad usare la sezione uitar uando si vuole riavviare soltanto il let tore premere il tasto PLAY quando invece sono spente entrambe le sezioni e uitar per riavviarle bisogna premere POWER Collegamenti Collegamento di una chitarra er collegare allapparecchio una chitarra o un basso basta inserire unestremità del suo cavo nella chitarra stessa e lal tra nel connettore GUITAR/MIC IN del uando si usano pedali deffetto si può collegare la loro uscita al tenere presente che lapparecchio dispone di una propria unità deffetti postare linterruttore GUITAR/MIC su GUITAR ccertarsi che sia premuto il tasto dali mentazione GUITAR AVVERTENZA NON collegare MAI un amplificatore per chitarra all’ingresso GUITAR/MIC del CDGT1 perché potrebbe provocare gravi danni all’apparecchio. Collegamento di un microfono nserire nel connettore GUITAR/MIC del la spina di un microfono adatto in caso di dubbi sul microfono da scegliere chiedere consiglio al riven ditore postare linterruttore GUITAR/MIC su MIC Collegamento di una sorgente stereo di linea possibile collegare al anche una sorgente stereo di linea come luscita di un sintetizzatore un preamplificatore per chitarra ununità deffetti montata su rack un registratore a cassetta eccetera tilizzare a tale scopo il minijack LINE IN vicino al connettore GUITAR/MIC IN AVVERTENZA NON collegare MAI le uscite Speaker di un amplificatore da chitarra a qualcosa di diverso da un altoparlante. In caso di dubbi su quali dispositivi possono essere collegati al CD-GT1, chiedere consiglio a chi se ne intende. Collegamento di un interruttore a pedale possibile collegare al un in terruttore a pedale per poter richiamare in sequenza le regolazioni contenute nelle locazioni di memoria o per pilotare il lettore a mani libere i particolari di queste operazioni sono descritti più avanti er evitare problemi con il usa te solo un interruttore a pedale o similare nonlatching collegandolo alla presa FOOT Uscite er collegarsi allingresso di un siste ma stereo oppure allingresso ixer ec cetera inserirle nel minijack stereo LINE OUT del un adatto cavo stereo non compreso nella fornitura uando si preferisce lascolto individuale inserire la spina di una cuffia non com presa in dotazione nel minijack stereo PHONES TASCAM CD-GT1 — 47 Italiano Ingressi Regolazione del bilanciamento Ingressi Italiano e sorgenti dingresso per il sono tre e precisamente il in corso di lettura la chitarra o il microfono collegata al jack GUITAR/MIC IN lingresso stereo di un dispositivo collegato al jack LINE IN er la prima e lultima di queste sorgenti dingresso il livello non può essere modi ficato dal vedremo ora in parti colare come ottenere il bilanciamento tra il segnale del e quello dingresso on il controllo evel del disposi tivo collegato a LINE IN regolare il livello di questa sorgente tenendo presente che alla stessa non si posso no applicare gli effetti on il controllo INPUT del regolare il livello della chitarra o del microfono prima che il segnale venga inviato alleffetto uando non è selezionato un menu si possono usare i tasti 5 e b per regolare il relativo bilanciamento della chitarra o del microfono ma non quello della sorgente LINE 48 — TASCAM CD-GT1 ������������������� ���������������������� ��������������������������� ��������������������� �������������������������� ��������������������������� ������������������������������ �������������� ������������������� ����������� �������������������� �������������� ������������� IN rispetto alluscita proveniente dal lettore uesto valore MIX è regolabile fra e + icordare che tale operazione è possibile solo quando non è attivo il funzionamen to tramite menu l sistema di menu del per mette di regolare il livello duscita finale delleffetto ������������������������� ������������������������ ������������������������������� ������� ����������������� ���������������������� ����������������������� ������� Outputs e uscite disponibili sono due quella di linea e quella in cuffia loro livelli non sono regolabili separatamente l controllo OUTPUT permette di regolare il livello duscita complessivo Funzionamento tramite menu Solo quando compare sullo schermo il menu TUNER è necessario premere ENTER, in quanto l’audio degli effetti viene escluso quando è operativo questo menu. Menu EFFECT Voci Menu MENU TUNER Osservazoni EFF LIB Parametri LVL ON/OFF 00 to 42 — 0 to 64 attiva o disattiva l’effetto numero dell’effetto predefinito dipende dal tipo dell’effetto livello d’uscita dell’effetto PIT 0 to –50% (pitch) o 0, –8, –16, –32 e –50 (SSA) definisce il valore del cambio di tonalità, o della diminuzione della velocità d’ascolto SSA KEY FINE PLAY CUE SSA ON/OFF da O6 a I6 (o SSA) da –50 a +50 (o SSA) ALL/SGL CUE/FLS FOOT EFF/CUE attiva/disattiva l’ascolto a velocità ridotta valore in semitoni del cambio di tonalità valore in centesimi del cambio di tonalità lettura disco / singolo brano funzionamento cue o “flash play” Definisce la funzione dell’interruttore a pedale: richiamo in sequenza regolazioni memorizzate oppure pilotaggio lettore CD PITCH KEY Valori AT/MT MODE CAL E2 to E5 (durante l’accordatura) AT/MT 435 to 445 Accordatura automatica o manuale Calibrazione in Hz TASCAM CD-GT1 — 49 Italiano ella tabella qui pubblicata sono elencati i diversi menu disponibili con le rispetti ve regolazioni er impostare questo modo di funziona mento premere il tasto LCD MENU finché compare il menu desiderato che lam peggia in un riquadro a colori invertiti sulla parte principale dello schermo viene allora visualizzata la prima voce del menu stesso il cui valore è regolabile con i tasti direzionali e b a notare che non è necessario premere ENTER per predisporre il nuovo valore la regolazione cambia appena il tasto viene premuto er spostarsi sulla voce successiva del menu visualizzato premere ENTER remere invece MENU per passare al menu successivo di cui comparirà la prima voce er uscire dal modo di funzionamento tramite menu premere il tasto DISPLAY/ ESC NOTA Funzionamento del lettore l lettore del funziona pra ticamente come un normale lettore in questo paragrafo sono descritte solo le piccole differenze e le funzioni speciali aricare i ompact isc nel con letichetta rivolta verso lalto aprendo e richiudendo a mano lo sportello del lettore Riproduzione Italiano remere il tasto yJ per avviare la riproduzione e per inter romperla momentaneamente inserendo una pausaremere il tasto H per fermare la riproduzione uando il lettore è alimentato a batteria avvio ed arresto della riproduzione avven gono più lentamente rispetto allalimen tazione in rete questaccorgimento evita di sovraccaricare la batteria prolungando la sua durata Display l tasto DISPLAY/ESC fa comparire in se quenza sul display le seguenti informazioni tempo trascorso del brano tempo restante del brano e tempo restante totale del disco impossibile visualizzare tali dati quando il funzionamento è tramite menu 50 — TASCAM CD-GT1 Salto di brani Ripetizione ciclica (di un brano) remendo e rilasciando uno dei due tasti kipearch m/. e //, è possibile spostarsi in entrambe le direzio ni saltando un brano alla volta redisporre su SGL riproduzione di un singolo brano la voce PLAY di MENU remere il tasto LOOP finché sul display in basso a sinistra si legge LOOP 1 il brano corrente verrà così letto in ripetizione Ricerca all’interno delle tracce sate i tasti skipsearch per ricercare un punto del disco premendo e mantenedo premuto il tasto apposito Il tasto CUE l tasto CUE del ha una funzio ne speciale quando viene premuto la po sizione di lettura ritorna allultimo punto dal quale era iniziata la riproduzione l comportamento successivo dellappa recchio dipende dalla regolazione della voce CUE di MENU se tale voce è regola ta su CUE la riproduzione entra in ausa in corrispondenza al punto localizzato se invece è regolata su FLS la riproduzione riprende dal punto localizzato se il tasto CUE è stato premuto partendo dal modo lay o ause CONSIGLIO Quando è collegato un interruttore a pedale, si può usare quest’ultimo invece del tasto CUE per lavorare a mani libere (basta regolare su CUE la voce FOOT di MENU). Ripetizione ciclica (del disco) redisporre su ALL riproduzione dellinte ro disco la voce PLAY di MENU remere il tasto LOOP finché sul display in basso a sinistra si legge LOOP ALL lintero disco verrà così letto in ripetizione Ripetizione ciclica (della sezione I/O) sando il tasto I/O impostare dapprima il punto iniziale della sezione da ripetere e poi il punto finale a selezione tra i punti di ingresso e di uscita viene ripetuta in un loop remendo nuovamente il tasto I/O si cancellano i punti di loop e si esce dal modo loop e i punti sono ancora impostati l di splay mostra la dicitura si può riat tivare il modo loop nel caso fossa stato cancellato usando il tasto LOOP Per cancellare il modo di ripetizione remere il tasto LOOP finché lindicazio ne LOOP scompare dal display in basso a sinistra Modifica della tonalità e del ritmo Questi modi non si possono attivare contemporaneamente, ma soltanto uno alla volta. iventa così possibile ascoltare i brani con tonalità o ritmo diversi allo scopo dimparare a suonare i riffs and licks preferiti CONSIGLIO Per esercitarsi con maggior profitto, abbinare queste possibilità di modifica con la funzione di riproduzione ciclica. Modo KEY posta la tonalità del brano di sei semitoni verso lalto o verso il basso senza alterare il ritmo l valore viene regolato in semitoni e cen tesimi centesimo di semitono e indica to da I6 a O6 uando semitoni e centesi mi hanno entrambi valore il modo KEY risulta disattivato se fosse attivo viene disattivato anche il modo attivazione di questo modo è segnalata dalla scritta KEY sul display cegliere questo modo quando sincon trano difficoltà a suonare o cantare nella tonalità con la quale il brano è stato regi strato sul Modo SSA l modo low peed udition permette di ascoltare un brano con la stessa tonalità ma con il ritmo rallenta to e regolazioni possibili espresse in valori percentuali sono off e attivazione di questo modo è segnalata dalla scritta SSA sul lato sinistro del display cegliere questo modo per esercitarsi a suonare passaggi difficili particolarmente veloci oppure quando il modo SSA non è attivo selezionare la voce KEY nel suc cessivo omonimo menu ed effettuare le regolazioni KEY in semitoni e FINE in centesimii Riassumendo: er modificare solo la tonalità = KEY er ridurre la velocità dascolto sen za cambiare tonalità = SSA er cambiare sia la velocità che la tonalità = PITCH Italiano a riproduzione di un può essere va riata in tre modi e NOTA Modo PITCH l modo itch permette di modificare sia la tonalità che il ritmo con variazioni dell riducendo i valori fino a a regolazione off è attivazione di questo modo è segnalata dalla scritta PITCH sul display Come effettuare le regolazioni ramite il menu PITCH attivare o disatti vare il modo e poi predisporre il valo re desiderato per la tonalità o la velocità di ascolto sempre tramite il menu PITCH TASCAM CD-GT1 — 51 Funzionamento dell’unità effetti Utilizzo degli effetti el sono presenti due banchi di effetti e ciascuno di essi ha cinque locazioni di memoria numerate da a nelle quali si possono conservare le regola zioni personalizzate ali regolazioni si effettuano sui effetti predefiniti per chitarra e per le par ti cantate contenuti nel opo aver selezionato un banco e una locazione di memoria se un effetto predefinito viene richiamato e modificato la nuova regolazione andrà automaticamente ad occupare quella locazione Italiano Memorizzazione di un effetto personalizzato in una locazione remere il tasto BANK per selezionare il banco o come indicato sul display remere il tasto No. per selezionare una delle locazioni di memoria come indicato sul display 52 — TASCAM CD-GT1 remere il tasto LCD MENU finché viene visualizzata il menu EFFECT remere il tasto 5 per attivare leffetto remere ENTER e poi selezionare leffetto predefinito da 00 a 42 con i tasti direzio nali 5 e b NOTA Se la locazione di memoria selezionata contenesse già altre regolazioni, le stesse vengono sovrascritte quando ne viene salvata una nuova. remere ENTER ancora una volta per poter iniziare la modifica dei parametri con i tasti 5 e b i particolari su questi parametri sono contenuti nella tabella che segue ultimo parametro è sempre LVL il livel lo duscita del processore deffetti da a uesto parametro è disponibile solo quando il generatore è attivo quando il generatore non è attivo il parametro non viene considerato egolare il livello e poi premere il tasto DISPLAY/ESC per uscire da modo di regolazione degli effetti e regolazioni effettuate vengono auto maticamente salvate nella locazione di memoria selezionata in precedenza Richiamo di un effetto personalizzato uando le regolazioni di un effetto sono state salvate in una locazione di memoria come appena descritto per richiamarle basta selezionare la locazione appropriata con i tasti BANK e No. dopo aver verifi cato che leffetto sia attivo CONSIGLIO Quando è stato collegato un interruttore a pedale e la voce FOOT di MENU è regolata su EFF EFF, si possono richiamare in sequenza le locazioni di memoria di un banco premendo il pedale. Effetti predefiniti e parametri regolabili li effetti predefiniti possono essere sud divisi in tre categorie Distortion 00 DIST-TONE-FLA-REV Clean sound 15 COMP-TONE-FLA-REV Vocal 30 De-esser 01 DIST-TONE-FLA-DLY 16 COMP-TONE-FLA-DLY 31 Chorister 02 DIST-TONE-PHA-REV 17 COMP-TONE-PHA-REV 32 Emphasis 03 DIST-TONE-PHA-DLY 18 COMP-TONE-PHA-DLY 33 Shout 04 DIST-TONE-EXC-REV 19 COMP-TONE-EXC-REV 34 Mood Vocal 05 DIST-TONE-EXC-DLY 20 COMP-TONE-EXC-DLY 35 Response 06 DIST-TONE-CHO-REV 21 COMP-TONE-CHO-REV 36 Proclaim 07 DIST-TONE-CHO-DLY 22 COMP-TONE-CHO-DLY 37 Quivering Voice 08 DIST-TONE-TRM-REV 23 COMP-TONE-TRM-REV 38 Duet 09 DIST-TONE-TRM-DLY 24 COMP-TONE-TRM-DLY 39 Lo-Fi Vocal 10 DIST-TONE-VIB-REV 25 COMP-TONE-VIB-REV 40 Megaphone 11 DIST-TONE-VIB-DLY 26 COMP-TONE-VIB-DLY 41 Screaming 12 DIST-TONE-WAH-REV 27 COMP-TONE-WAH-REV 42 Panning Vocal 13 DIST-TONE-WAH-DLY 28 COMP-TONE-WAH-DLY — 14 DIST-TONE-PIT-DLY 29 COMP-TONE-PIT-DLY — ome risulta dalla tabella tutti gli effetti predefiniti per chitarra distortion e clean hanno quattro componenti ciascuno dei quali può essere regolato singolarmente e vengono visualizzati nellordine in cui sono elencati nella tabella DIST uadagno istortion COMP uadagno ompressor TONE ontrollo di tono FLA egolazione langer REV egolazione everb DLY egolazione elay PHA egolazione haser EXC egolazione xciter PIT egolazione itch CHO egolazione horus TRM egolazione remolo VIB egolazione ibrato WAH egolazione utowah utti gli effetti predefiniti dispongono inoltre della regolazione livello da a li effetti per le parti cantate hanno ciascuno un solo parametro che viene visualizzato come PAR TASCAM CD-GT1 — 53 Italiano Parametri Utilizzo del menu tuner accordatore per chitarra integrato nel può funzionare in due modi diversi el modo automatico lintonazione del segnale in arrivo viene rilevata e visualiz zata automaticamente el modo manuale si predispone una nota di riferimento sulla quale accordare una corda della chitarra remere il tasto MENU finché viene visua lizzato TUNER poi premere ENTER Flat � On-key Sharp � Italiano uando simposta il menu uner qualsiasi effetto viene automaticamente disattivato e laccordatore funziona in modo auto matico indicato sul display con la sigla basta suonare una nota sulla chitarra l sistema determina la nota più vicina e la mostra sul display egolare la corda gros solanamente fino a far comparire la nota corretta e poi accordare con precisione finché compare al centro del display un simbolo circolare 54 — TASCAM CD-GT1 e laccordatore funziona in modo ma nuale indicato sul display con la sigla predisporre la nota sul display con i tasti 5 e b e poi accordare lo strumento come prima descritto Taratura dell’accordatore i solito il a che precede il o centrale è accordato a z in quasi tutta la musica occidentale alvolta però può essere necessario ac cordarsi su uno standard diverso quando si sta suonando con un altro strumento oppure quando un non utilizza la fre quenza di z sando la voce del menu tarare il a su una frequenza compresa fra e z NOTA Anche se non è necessario riprodurre un CD mentre si esegue l’accordatura, il CD-GT1 deve essere comunque acceso ed il tasto GUITAR deve essere premuto perché sia possibile accordare la chitarra inserita nel CD-GT1. Caratteristiche tecniche Convertitore AD/DA Elaborazione segnale digitale CD singolo da 8 /12 cm 16-bit Voltage requirements DC 9V (adattatore c.a. PS-PS5) AA batterie x 4 32-bit Tensione alimentazione Dimensione (L x A x P), piedini compresi 4 W (adattatore c.a. PS-PS5) 232 x 138 x 40 (mm) Peso (esclusa la batteria) 620 g Livello uscita nominale –10 dBV (LINE OUT) Livello uscita massimo 0 dBV (1 Vrms) (LINE OUT) Impedenza uscita 1 kΩ Livello uscita massimo > 18 mW (32Ω) (PHONES) Livello ingresso nominale –10 dBV LINE IN –40 dBV MIC IN –15 dBV GUITAR IN Caratteristiche della sezione lettore CD Risposta in frequenza da 20 Hz a 20 kHz ±1.0 dB Gamma dinamica > 88 dB Rapporto segnale/rumore > 88 dB THD <0.01% a Italiano Tipo del disco TASCAM CD-GT1 — 55 INSTRUCCIONES IMPORTANTES DE SEGURIDAD Español 1 Lea estas instrucciones. 2 No tire este manual de instrucciones. 3 Preste atención a todas las advertencias y avisos. 4 Cumpla con lo indicado en las instrucciones. 5 No utilice este aparato cerca del agua. 6 Limpie la unidad solo con un trapo seco. 7 No tape ninguna de las aberturas de ventilación. Instale el aparato de acuerdo a las instrucciones del fabricante. 8 Nunca instale esta unidad cerca de ninguna fuente de calor como radiadores, hornos, calentadores u otros aparatos (incluyendo amplificadores) que produzcan calor. 9 No elimine el sistema de seguridad del enchufe polarizado o con toma de tierra. Un enchufe polarizado tiene dos bornes, uno más ancho que el otro. Un enchufe con toma de tierra tiene dos bornes y una lámina para la conexión a tierra. El borne ancho o la lámina se incluyen para su seguridad. Si el enchufe que venga con su aparato no encaja en su salida de corriente, contacte con un electricista para que cambie ese enchufe o la instalación. 10 Evite que el cable de corriente quede en una posición en la que pueda ser pisado o quedar aplastado, especialmente donde estén los enchufes, receptáculos de entrada y en el punto 56 — TASCAM CD-GT1 en que estos cables salen del aparato. 11 Utilice solo los accesorios / elementos especificados por el fabricante. 12 Utilice esta unidad solo con un soporte, carro, trípode o bastidor especificado por el fabricante o que se venda con el propio aparato. Cuando utilice un soporte, tenga cuidado al desplazar la combinación aparato / soporte para evitar posibles daños en caso de vuelco. puesto a goteras o salpicaduras de líquidos. • No coloque sobre el aparato ningún objeto que contenga líquidos como jarras o vasos. • No instale este aparato confinado en un espacio reducido como encastrado en una estantería o ubicación similar. • Este aparato sigue recibiendo una corriente nominal nooperativa de la salida de corriente alterna aunque su interruptor POWER esté colocado en la posición off. ATENCION 13 Desenchufe este aparato de la corriente durante las tormentas eléctricas o cuando no lo vaya a usar durante un periodo de tiempo largo. 14 Consulte cualquier posible reparación únicamente con el servicio técnico oficial. Será necesario reparar este aparato cuando se haya dañado en alguna forma, como por ejemplo cuando el cable de alimentación o el enchufe se hayan roto, se hayan derramado líquidos o se haya introducido algún objeto dentro del aparato, cuando la unidad haya quedado expuesta a la lluvia o la húmeda, cuando no funcione con normalidad o si ha caído al suelo. • No permita que este aparato quede ex- El CD-GT1 no puede reproducir discos CDR/RW no finalizados. Además, es posible que no pueda reproducir con el CD-GT1 tampoco algunos discos CD-R/RW finalizados. Indice Español INSTRUCCIONES IMPORTANTES DE SEGURIDAD ............. 55 Indice............................................................................... 56 Sus primeros pasos con el CD-GT1.................................. 57 Conexiones ...................................................................... 58 Ajuste del balance........................................................... 59 Manejo del sistema de menús......................................... 60 Manejo del reproductor de CD........................................ 61 Cambios de tono y tempo ............................................... 62 Uso de los efectos ........................................................... 63 Presets y parámetros de efectos..................................... 64 Manejo del afinador ........................................................ 65 Datos y números (especificaciones) ................................ 66 TASCAM CD-GT1 — 57 Sus primeros pasos con el CD-GT1 Acerca de este manual acuerdo a las normativas de su o munidad Colocación de las pilas uando las pilas gasten la unidad se apagará automáticamente y deberá encenderla de nuevo con el interruptor POWER una vez las haya cambiado enga en cuenta que el indicador de pila de la pantalla solo le ofrece una estimación aproximada de la carga que queda en la pila y bajo determinadas circunstancias puede que no quede su ficiente carga en las pilas como para que el pueda funcionar sea cual sea la indicación de pila de la pantalla uando nos refiramos a una tecla control o conector del lo marcaremos así PLAY uando hagamos referencia a un ele mento que vea en la pantalla lo indica remos así MENU Español l usa cuatro pilas no incluidas e recomendamos que use pilas i recargables también puede usar pilas alcalinas tilice siempre pilas del mismo tipo ambie siempre todas las pilas a la vez i no va a usar el en un tiempo sáquele las pilas oloque las pilas de acuerdo a las marcas + y – que verá en el compar timento aque el máximo rendimiento a las pilas usando esta unidad en el rango de temperaturas ° a ° ° a ° eshágase de las pilas usadas de 58 — TASCAM CD-GT1 Uso de un adaptador de CA se solo un adaptador no incluido—cómprelo en su co mercio l uso de otro tipo de adaptador puede producir daños en su segúrese siempre de que el voltaje de alterna sea el mismo que el marcado en el adaptador Encendido de la unidad l tiene dos interruptores de encendido se el primero POWER deslizante para encenderapagar toda la unidad l segundo interruptor GUITAR controla la corriente que va al conector GUITAR/INPUT y a la unidad de efectos i esta seccón está apagada no podrá usar este conector ni ninguno de los sistemas de menús relacionados con el micro guitarra efectos y afinador bserve también el interruptor HOLD que bloquea los controles y teclas del cuando está en la posición ON Sistema de ahorro de energía i es aparato está funcionando con pilas y se mantiene duran te más de minu tos en el modo de parada o sin ningún disco cargado o abierta el reproductor de se apaga la parte de de la pantalla queda en blanco pero puede seguir usando la sección de guitarra einicie el reproductor de solo usando la tecla PLAY o use el interrup tor POWER si tanto la sección de como la de guitarra están apagadas Entradas Conexión de una guitarra ara conectar una guitarra o bajo a esta unidad simplemente conecte un extremo del cable de guitarra a esta y el otro a la toma GUITAR/MIC IN del i usa pedales o unidades de efectos puede conectar la salida de estos al recuerde que el también tiene sus propios efectos oloque el interruptor GUITAR/MIC en la posición GUITAR segúrese que el interruptor de encen dido GUITAR está pulsado Conexión de un micrófono Conexión de un pedal de disparo onecte un micro adecuado si no sabe cual usar pregúntele a su distribuidor a la clavija GUITAR/MIC IN del oloque el interruptor GUITAR/MIC en la posición MIC uede conectar un pedal al para ir pasando por los distintos ajustes de efectos o usar el reproductor de manos libres vea los detalles más adelante ara evitar problemas con su utilice solo un pedal de disparo u otro pedal de disparo sin bloqueo de tipo pulseparahacer similar conectado a la entrada FOOT Conexión de fuente de línea stereo Salidas ambién puede conectar una línea ste reo como las salidas de un sintetizador un previo de guitarra un rack de efec tos o una pletina etc al se la miniclavija LINE IN que está al lado de la toma GUITAR/MIC IN onecte la unidad a la entrada de un sistema stereo o a una entrada de mezclador etc usando un cable stereo adecuado no incluido desde la miniclavija stereo LINE OUT del ambién puede conectar unos auricu lares no incluidos a la miniclavija stereo PHONES para hacer ensayos en privado ATENCION ATENCION No conecte NUNCA un amplificador de guitarra a la entrada GUITAR/MIC del CDGT1; el hacer esto dañaría su equipo. No conecte NUNCA las salidas de altavoz de un amplificador de guitarra a nada que no sean unos altavoces. Si no está seguro de lo que puede conectar a su CD-GT1, pregúntele a alguien que lo conozca con seguridad. TASCAM CD-GT1 — 59 Español Conexiones Ajuste del balance Entradas Español l tiene tres fuentes de entrada el reproducido la guitarra o el micro conectado a la toma GUITAR/MIC IN cualquier entrada stereo conectada a la toma LINE IN n la primera y la última el no puede modificar sus niveles de en trada vea luego cómo nivelar el con la entrada se el control de nivel de la unidad conectada a LINE IN para ajustar su nivel recuerde que esa fuente no se verá afectada por los efectos del se el control INPUT del para ajustar el nivel de la guitarra o micro antes de que sea enviado al efecto uando no ha elegido un menú puede usar las teclas 5 y b para ajustar el balance relativo de la gui tarra o micro pero no de la fuente LINE IN en relación con la salida del uede ajustar este valor MIX 60 — TASCAM CD-GT1 El CD se reproduce a un nivel fijo, pero la función MIX (teclas 5 y b fuera del modo de menú) ajustan el balance entre la entrada y el CD Use el control INPUT para ajustar el nivel GUITAR/MIC IN Use el control OUTPUT para ajustar el nivel global enviado a la salida LINE OUT y los auriculares entre –5 y +5 ecuerde que esto solo es posible cuando no está en el modo de menú se el sistema de menús del para ajustar el nivel de salida fi nal del efecto Use el sistema de menús del CD-GT1 para ajustar el nivel de salida del efecto interno Con el CD-GT1 no puede ajustar el nivel de entrada de LINE IN Salidas ay dos salidas la de línea y los auricu lares o es posible ajustar sus niveles por separado—use el control OUTPUT para ajustar el nivel global de salida Manejo del sistema de menús Menú EFFECT KEY MENU TUNER Valores Notas EFF LIB Parameter LVL ON/OFF 00 a 42 — 0 a 64 activa o desactiva el efecto número de preset depende del tipo de efecto nivel de salida del efecto PIT 0 a –50% (tono ) o 0, –8, –16, –32 y –50 (SSA) ajusta el cambio de tono o los valores de escucha a baja velocidad SSA KEY SSA ON/OFF O6 a I6 (o SSA) FINE –50 a +50 (o SSA) PLAY CUE ALL/SGL CUE/FLS FOOT EFF/CUE AT/MT MODE CAL E2 a E5 (en afinación) AT/MT 435 a 445 PITCH NOTA El menú TUNER (afinador) obliga a que pulse ENTER una vez que el menú TUNER aparezca en pantalla (ya que el sonido con efectos se corta cuando activa el afinador). Elemento On/off de escucha a baja velocidad Ajusta cambio de tono en semitonos Ajusta cambio de tono en centésimas reproducción única o total escucha o “reproducción flash” fija el modo del pedal de disparo: avanzar por los tipos de efectos o escucha afinación automática o manual calibración en Hz TASCAM CD-GT1 — 61 Español n la tabla verá los detalles de los dis tintos menús y sus ajustes ara acceder a los menús pulse LCD MENU hasta que aparezca el menú que quiera en un recuadro parpadeante con su primer elemento en la parte principal de la pantalla se las teclas arriba o abajo 5 y b para ajustar el valor del primer elemento del menú o hace falta que pulse ENTER para registrar los valores stos cambian tan pronto como pulse la tecla ulse ENTER para pasar al siguiente elemento de menú de la lista ulse MENU para pasar al siguiente menú y a su primer elemento ara salir del sistema de menús pulse la tecla DISPLAY/ESC Manejo del reproductor de CD l reproductor de del fun ciona casi igual que otros reproductores con algunas pequeñas diferencias y fun ciones especiales que le explicamos aquí oloque los con la etiqueta hacia arriba lado brillante abajo bra y cierre la bandeja a mano Reproducción ulse la tecla reproducciónpausa y J para dar comienzo a la reproducción o colocarla en pausa ulse la tecla stop H para detener la reproducción uando use la unidad con pilas el ini cio y parada de la reproducción cuesta algo más de tiempo que cuando se usa con electricidad esto ahorra carga de las pilas Español Pantalla se la tecla DISPLAY/ESC para cambiar la indicación en pantalla entre tiempo de pista transcurrido tiempo restante de pis ta y tiempo restante total no puede hacer esto en el modo de menú 62 — TASCAM CD-GT1 Saltos entre pistas Bucle (de pista) se las teclas de búsquedasalto m/ .//, para avanzar o retro ceder una pista con cada pulsación de la tecla adecuada sando el elemento PLAY ajústelo a SGL reproducción única ulse la tecla LOOP hasta que vea LOOP 1 en pantalla izquierda abajo a pista activa se repe tirá en un bucle Búsqueda dentro de las pistas ara realizar una búsqueda o escucha dentro del disco mantenga pulsada la tecla de saltobúsqueda correspon diente La tecla CUE sta tecla es una función especial del uando la pulsa la posición de reproducción vuelve al último punto en el que comenzó la reproducción o que pasa después depende del ajuste el elemento de menú CUE menú MENU i está ajustado a CUE la reproducción queda en pausa en el punto de escucha pero si el valor es FLS la reproducción se reinicia desde ese punto si pulsó CUE desde reproducción o pausa CONSEJO Si tiene un pedal conectado, puede usarlo en lugar de la tecla CUE para un manejo “manos libres” (ajuste el elemento FOOT a CUE). CUE Bucle (de disco) sando el elemento PLAY ajústelo a ALL reproducción de todo el disco ulse LOOP hasta que en pantalla vea LOOP solo izquierda abajo hora el bucle se reali zará sobre todo el dicos completo Bucle (puntos de E/S) se la tecla I/O para ajustar el punto de initcio entrada del bucle y la misma tecla para ajustar el de salida a sección que esté entre ambos puntos se repetirá sin saltos l pulsar de nuevo la tecla I/O hace que se borren los puntos de bucle y que el modo quede cancelado on estos puntos ajustados en la pantalla aparece I-O puede reiniciar el modo de bucle si es que había sido cancelado usando la tecla LOOP Para cancelar cualquier bucle ulse la tecla LOOP hasta que no aparezca LOOP en pantalla abajo izquierda Cambios de tono y tempo NOTA Solo una de estas formas puede estar activa a la vez. stos modos le ayudan a tocar en una clave o tono distinto o con otro tempo para que pueda aprender a tocar sus canciones o solos preferidos CONSEJO Use estos modos junto con la función de bucle para ayudarle en los ensayos. Modo KEY l modo key modifica el tono de la música en hasta seis semitonos arriba o abajo n este caso el tempo no varía uede ajustar el valor en semitonos y centésimas de semitono que aparecerán en pantalla como I6 a O6 uando tanto los semitonos como las centesimas estén en el modo KEY esta rá desactivado si está activado el este modo también estará en off uando este modo esté activado en la pantalla aparecerá KEY se este modo cuando el tono de la música de su le resulte difícil para ensayar o cantar con él Modo SSA l modo escucha a baja veloci dad reduce el tempo de la música sin cambiar su tono os valores posibles son off – – – y – todos los valores son porcentajes con respecto a la velocidad normal uando este modo está activo en la parte izquierda de la pantalla verá SSA se este modo para ensayar solos o secciones muy rápidas Modo PITCH ste modo modifica tanto el tono como el tempo en pasos de hasta llegar al – es el valor de des conexión uando este modo esté activo en la pantalla verá PITCH el desactivado escoja KEY en el siguiente menú KEYy ajuste los valores KEY semitono y FINE ¡Recuerde! olo cambio de tono= KEY enor velocidad y mantener el tono = SSA enor velocidad y bajada en el tono = PITCH Español xisten tres formas de modificar la for ma en que es reproducido un Ajustes se el sistema de menús para activar o desactivar el meú PITCH y ajuste después el valor para el tono o el menú PITCH de nuevo o cuando tenga TASCAM CD-GT1 — 63 Uso de los efectos Cómo funcionan los efectos ay dos bancos de efectos A y B con cinco espacios cada uno 1 al 5) en los que puede guardar sus propios ajustes de efectos Puede crear efectos a partir de los 43 presets disponibles para guitarra y para voz uando elige un banco y un espacio si carga y edita un preset de efectos el efecto editado es registrado automáticamente en ese espacio Almacenamiento de sus propios ajustes de efectos en un espacio Español ulse BANK para elegir entre el banco A o el B ulse la tecla No. para elegir el espacio de banco 1 a 5 como podrá ver en pantalla ulse la tecla LCD MENU hasta que en pantalla vea EFFECT 64 — TASCAM CD-GT1 se la tecla 5 para activar el efecto ulse ENTER y elija después el efecto prefijado 00 a 42 con las teclas 5 y b NOTA Si hubiese algún valor en el espacio del banco elegido sobre el que va a trabajar, serán sobregrabados cuando cargue una entrada de la biblioteca. ulse ENTER de nuevo para empezar a editar los parámetros con las teclas 5 y b vea los detalles de los parámetros en la tabla siguiente l último parámetro siempre es LVL nivel de salida de la unidad de efectos 0 a 64 ólo está disponible con el efecto activo y anulado con el efecto en off juste el nivel y pulse la tecla DISPLAY/ESC para salir de los ajustes de efectos os ajustes que acaba de hacer son grabados automáticamente en el espacio que escogió antes Carga de un efecto con sus ajustes uando haya guardado unos ajustes en un espacio de banco como hemos descrito antes podrá cargarlo con solo pulsar las teclas BANK y No. para elegir el espacio adecuado también debería asegurarse de que el efecto esté activado CONSEJO Si tiene un pedal de disparo conectado y ha ajustado el elemento de menú FOOT a EFF, podrá ir pasando por los distintos espacios de efectos con cada pulsación del pedal. Presets y parámetros de efectos Los parámetros odemos dividir los presets de efectos en tres categorías DIST anancia de distorsión Distorsión 00 DIST-TONE-FLA-REV Sonido limpio 15 COMP-TONE-FLA-REV Vocal 30 De-esser COMP anancia de compresor 01 DIST-TONE-FLA-DLY 16 COMP-TONE-FLA-DLY 31 Chorister 02 DIST-TONE-PHA-REV 17 COMP-TONE-PHA-REV 32 Emphasis FLA juste del flanger 03 DIST-TONE-PHA-DLY 18 COMP-TONE-PHA-DLY 33 Shout 04 DIST-TONE-EXC-REV 19 COMP-TONE-EXC-REV 34 Mood Vocal 05 DIST-TONE-EXC-DLY 20 COMP-TONE-EXC-DLY 35 Response 06 DIST-TONE-CHO-REV 21 COMP-TONE-CHO-REV 36 Proclaim 07 DIST-TONE-CHO-DLY 22 COMP-TONE-CHO-DLY 37 Quivering Voice 08 DIST-TONE-TRM-REV 23 COMP-TONE-TRM-REV 38 Duet CHO juste del chorus 09 DIST-TONE-TRM-DLY 24 COMP-TONE-TRM-DLY 39 Lo-Fi Vocal TRM juste del tremolo 10 DIST-TONE-VIB-REV 25 COMP-TONE-VIB-REV 40 Megaphone VIB juste del vibrato 11 DIST-TONE-VIB-DLY 26 COMP-TONE-VIB-DLY 41 Screaming WAH juste del autowah 12 DIST-TONE-WAH-REV 27 COMP-TONE-WAH-REV 42 Panning Vocal 13 DIST-TONE-WAH-DLY 28 COMP-TONE-WAH-DLY — odos los presets tienen también un ajuste LVL nivel que va de 0 a 64 14 DIST-TONE-PIT-DLY 29 COMP-TONE-PIT-DLY — REV juste de la reverb DLY juste del retardo PHA juste del modulador de fase EXC juste del excitador PIT juste del cambio de tono anterior os presets vocales tienen un solo pará metro cada uno mostrado en pantalla como PAR TASCAM CD-GT1 — 65 Español omo puede ver cada uno de los presets de guitarra distorsión y limpio tiene cuatro componentes pudiendo ajustar cada uno por separado y siendo mostrados en pantalla como en la lista TONE ontrol de tono Manejo del afinador l afinador de guitarra interno del tiene dos modos uno auto mático en el que el tono de la señal entrante es detectado y visualizado de forma automática y un modo manual en el que fija un objetivo y realiza la afinación hacia él ulse la tecla MENU hasta que vea TUNER en pantalla y pulse entonces ENTER Flat � On-key Sharp � Español uando entre en el afinador cualquier efecto que hubiese será desactivado automáticamente i el afinador está en el modo automá tico que aparece como AT en pantalla no tendrá mas que tocar una nota en su guitarra l afinador busca la nota más cercana y la muestra en pantalla fine la cuerda rápidamente hasta que apa rezca la nota correcta y después ajuste la afinación suavemente hasta que la pantalla le muestre una gran marca 66 — TASCAM CD-GT1 central i el afinador está en el modo manual visualizado como MT en la pantalla use las teclas 5 y b para fijar la nota que quiera en la pantalla y después prosiga el proceso de afinación como antes Calibración del afinador. abitualmente la nota a por encima del do central está afinada a z en la mayor parte de la música occidental abrá ocasiones en las que puede que necesite realizar la afinación a un standard distinto cuando esté tocando con otro instrumento o con un en el que no se use la afinación a z tilice entonces el CAL menú de cali bración del afinador para ajustar la referencia a otra afinación entre los y z NOTA Aunque no es necesario que reproduzca un CD cuando realice la afinación, el CD-GT1 deberá estar encendido, y el botón GUITAR pulsado para que pueda afinar la guitarra que tenga conectada al CD-GT1. Datos y números (especificaciones) Tipos de discos Alimentación AD/DA CDs de 8 cm para single, 12 cm 16 bits Proceso digital de señal 32 bits Consumo Nivel salida nominal (LINE OUT) Nivel salida máxima (LINE OUT) sin distorsión Impedancia salida Nivel salida máxima (PHONES) Niv. entrada nominal LINE IN MIC IN GUITAR IN –10 dBV Rango dinámico > 88 dB Relación S/R > 88 dB THD <0.01% DC 9V (adaptador de CA PS-PS5) Pilas AA x 4 0 dBV, (1 Vrms) 4 W (adaptador de CA PS-PS5) Dimensiones (l x p x a) 232 x 138 x 40 incluyendo patas (mm) 1 kΩ > 18 mW (32Ω) Peso (sin contar las pilas) 620 g Español –10 dBV –40 dBV –15 dBV Características de reproducción de CD Respuesta de 20 Hz a 20 kHz frecuencia ±1.0 dB TASCAM CD-GT1 — 67 » CD-GT1 English Français TEAC CORPORATION 3-7-3 Nakacho Musashino-shi Tokyo 180-8550 JAPAN +81-422-52-5082 www.tascam.com TEAC AMERICA, INC 7733 Telegraph Road Montebello CA 90640 USA +1-323-726-0303 www.tascam.com TEAC CANADA LTD. 5939 Wallace Street Mississauga Ontario L4Z 1Z8 CANADA +1-905-890-8008 www.tascam.com Deutsch TEAC MEXICO, S.A de C.V Campesinos No. 184 Colonia Granjas Esmeralda Delegacion Iztapalapa CP 09810 Mexico DF MEXICO +52-555-581-5500 www.tascam.com Italiano Español TEAC UK LIMITED 5 Marlin House, Croxley Business Park Watford Hertfordshire WD18 8TE UNITED KINGDOM +44-1923-438880 www.tascam.co.uk TEAC DEUTSCHLAND GmbH Bahnstrasse 12 65205 Wiesbaden-Erbenheim GERMANY +49-611-71580 www.tascam.de TEAC FRANCE SA 17 Rue Alexis-de-Tocqueville CE 005 92182 Antony Cedex FRANCE +33-1-42-37-01-02 www.tascam-europe.com TEAC ITALIANA S.p.A. Via C Cantu 11 20092 Cinisello Balsamo Milano ITALY +39-02-66010500 www.teac.it TEAC AUSTRALIA PTY., LTD. 280 William St Melbourne Victoria 3000 AUSTRALIA +61-3-9672-2400 www.teac.com.au Printed in China M-0777-
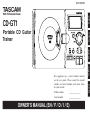 1
1
-
 2
2
-
 3
3
-
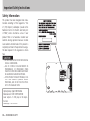 4
4
-
 5
5
-
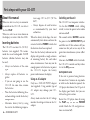 6
6
-
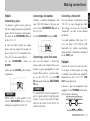 7
7
-
 8
8
-
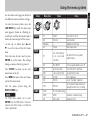 9
9
-
 10
10
-
 11
11
-
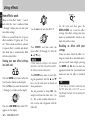 12
12
-
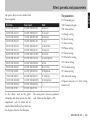 13
13
-
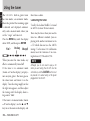 14
14
-
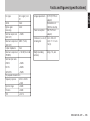 15
15
-
 16
16
-
 17
17
-
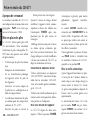 18
18
-
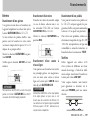 19
19
-
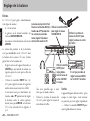 20
20
-
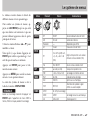 21
21
-
 22
22
-
 23
23
-
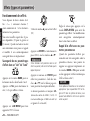 24
24
-
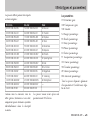 25
25
-
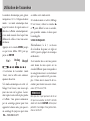 26
26
-
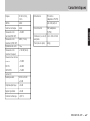 27
27
-
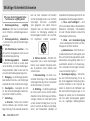 28
28
-
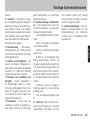 29
29
-
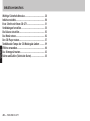 30
30
-
 31
31
-
 32
32
-
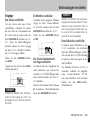 33
33
-
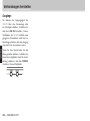 34
34
-
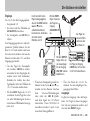 35
35
-
 36
36
-
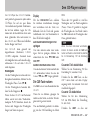 37
37
-
 38
38
-
 39
39
-
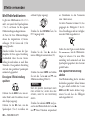 40
40
-
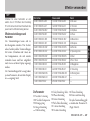 41
41
-
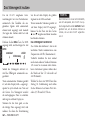 42
42
-
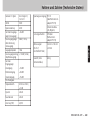 43
43
-
 44
44
-
 45
45
-
 46
46
-
 47
47
-
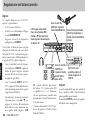 48
48
-
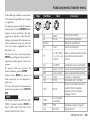 49
49
-
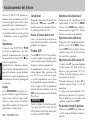 50
50
-
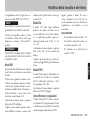 51
51
-
 52
52
-
 53
53
-
 54
54
-
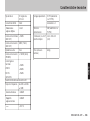 55
55
-
 56
56
-
 57
57
-
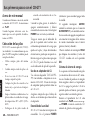 58
58
-
 59
59
-
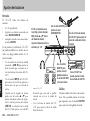 60
60
-
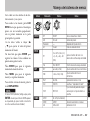 61
61
-
 62
62
-
 63
63
-
 64
64
-
 65
65
-
 66
66
-
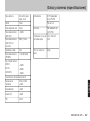 67
67
-
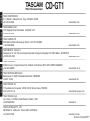 68
68


Tascam CD-GT1 El manual del propietario
- Categoría
- Equipo de música suplementario
- Tipo
- El manual del propietario
En otros idiomas
- français: Tascam CD-GT1 Le manuel du propriétaire
- italiano: Tascam CD-GT1 Manuale del proprietario
- English: Tascam CD-GT1 Owner's manual
- Deutsch: Tascam CD-GT1 Bedienungsanleitung