Roche Diabetes Care, Inc.
9115 Hague Road
Indianapolis, IN 46256
www.accu-chek.com
ACCU-CHEK, ACCU-CHEK GUIDE y FASTCLIX son marcas
registradas de Roche.
La palabra de la marca Bluetooth® así como sus logotipos son
marcas registradas propiedad de Bluetooth SIG, Inc. y todo uso
de los mismos por Roche se ha realizado bajo licencia.
MiniMed es una marca registrada de Medtronic, Inc.
© 2021 Roche Diabetes Care
08163022002-0721
Lávese bien las manos y
séqueselas antes y después
de realizar una medición de
glucemia.
Compruebe la fecha de
caducidad (UseBy) del tubo de
tiras reactivas. Nouse las tiras
reactivas pasada su fecha de
caducidad (UseBy).
Retire una tira reactiva del tubo
de tiras reactivas. Cierre el tubo
herméticamente con la tapa.
El medidor se enciende. Aparece
Preparando lamedición.
Realizar una medición de glucemia
Coloque el dispositivo de
punción presionando firmemente
contra el lateral de la yema del
dedo y pulse el botón disparador
hasta el tope para efectuar una
punción.
Roce el borde amarillo de la tira reactiva con la gota de
sangre. Noaplique sangre encima de la tira reactiva. Retire el
dedo de la tira reactiva cuando aparezca Analizando. Si no
retira el dedo de la tira reactiva, esto podría causar resultados
de medición incorrectos.
El resultado de medición aparece en
la pantalla en menos de 4segundos.
Pulse para enviar el resultado
automáticamente a una bomba
sincronizada. Si no se pulsa ,
el resultado de glucemia se
visualizará con retardo en la bomba
sincronizada.
Prepare el dispositivo de
punción para la siguiente
medición. Para avanzar hasta la
siguiente lanceta, deslice la
palanquita hacia delante y hacia
atrás una vez. La ventana
muestra el número de lancetas
restantes.
12 43
5 6 Antes de terminar…
Empiece aquí
Guía rápida de
instrucciones
ESPAÑOL
Ajustar el idioma del medidor Sincronizar el medidor y la
bomba de insulina
Encienda el medidor pulsando
brevemente . Aparece el menú
Language (Idioma).
Pulse o para resaltar el
idioma deseado.
1
2
Pulse para guardar el idioma y
volver al Menúprincipal.
Ajustar el dispositivo de punción
Vista general del medidor
1 Pantalla
2 Botón Atrás
3 Botones flecha arriba y flecha abajo
4 Botón Power/Set/OK
5 Ranura de la tira reactiva con luz
6 Tapa del compartimento de las pilas
7 Puerto micro USB*
8 Eyector de tiras reactivas
* La funcionalidad USB no está
disponible para este medidor.
2 8
7
6
1
4
5
3
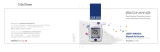
El medidor Accu-Chek Guide Link
puede enviar automáticamente los
resultados de glucemia a los
sistemas MiniMedTM 770G y
MiniMedTM 780G con tecnología
inalámbrica Bluetooth®.
Esta función elimina la necesidad de
introducir manualmente el resultado
de glucemia en la bomba de insulina.
Consulte las instrucciones de
sincronización en la guía del usuario
de los sistemas MiniMedTM 770G y
MiniMedTM 780G.
ADVERTENCIA
Nodebe insertar el cartucho
de lancetas en el dispositivo
de punción y pulsar al mismo
tiempo el botón disparador,
o sujetar el dispositivo
de punción con el botón
disparador posando sobre
una superficie tal como lo
puede ser una mesa. Si lo
hiciera, posiblemente se
dispararía una lanceta y
podría pincharse de forma
involuntaria.
Familiarícese con el dispositivo
de punción y el cartucho de
lancetas Accu-Chek FastClix.
1
Saque el cartucho de lancetas
del bolsillo del estuche.
2
NOTA
Cada cartucho de lancetas
contiene 6lancetas estériles.
Puede realizar 6mediciones
antes de cambiar el cartucho de
lancetas.
Retire el capuchón tirando de
él directamente hacia fuera. El
capuchón no es de rosca.
3
Inserte el cartucho de lancetas,
con el extremo blanco por
delante, en el dispositivo de
punción. Empuje el cartucho de
lancetas hasta el tope, hasta
que encaje perceptiblemente en
su sitio.
6
4 5 6
NOTA
Noretire el cartucho de lancetas
hasta que haya usado las
6lancetas, ya que el cartucho de
lancetas no se puede volver a usar
una vez retirado del dispositivo de
punción.
Vuelva a poner el capuchón
en el dispositivo de punción.
Asegúrese de que la muesca
del capuchón esté alineada con
la muesca del dispositivo de
punción.
Ajuste la profundidad de punción
a un nivel confortable. Empiece
con la profundidad2. Si su piel
es callosa o gruesa, empiece
con un ajuste mayor.
Usar el dispositivo de punción:
Alpulsar el botón disparador
hasta el tope, el dispositivo de
punción se tensa y pincha con
1clic.
Profundidad de
punción
Botón disparador
Capuchón Número de
lancetas
restantes
Palanquita para
avanzar hasta la
siguiente lanceta
1cartucho de lancetas = 6lancetas
Cuando esté listo
para la medición...
Sólo para diagnóstico in vitro
Para el uso con los sistemas
MiniMedTM 770G y MiniMedTM 780G
con tecnología inalámbrica
Bluetooth®
ADVERTENCIA
Mantenga las pilas nuevas y usadas fuera
del alcance de los niños. Consulte las
instrucciones de uso para obtener
información adicional.
• Esta guía rápida de instrucciones no reemplaza a
las instrucciones de uso del medidor de glucemia
Accu‑Chek GuideLink. Las instrucciones de uso
contienen instrucciones importantes de limpieza y
desinfección así como información adicional.
• El medidor y el dispositivo de punción están
previstos únicamente para uso de un paciente
individual. ¡Nolos comparta con nadie, ni siquiera
con miembros de su familia! ¡Nousar en varios
pacientes!
• Todas las piezas del kit representan un peligro
biológico y pueden transmitir enfermedades
infecciosas a causa de patógenos nacidos de la
sangre, incluso después de limpiarlas y
desinfectarlas.
Sistema de monitorización de glucemia
Inserte el extremo metálico de la
tira reactiva en el medidor.
NOTA
• Tenga siempre a mano un juego de pilas de reserva.
• La duración de la pila puede variar a causa de
distintos factores, tales como la temperatura y el
fabricante de la pila.
83958_08163022002_EN_ES.indd 283958_08163022002_EN_ES.indd 2 7/28/2021 11:15:38 AM7/28/2021 11:15:38 AM