Maytag CES3760AAA Manual de usuario
- Categoría
- Cocinas
- Tipo
- Manual de usuario
Este manual también es adecuado para

!!!!!!!!!!!!!!!!!!!!!!!!!!!!!!i!i!i!ii!ii!i!!ii!iiiiiiiiii!i_ii_iii_
iii i i
Electric S|ide-|. Smoo_h_op -
Sasy Touch Co._ro| 500
Table of Contents
important Safety instructions ................. 1=3
Care & Cleaning ......................................... 4-7
Self-Clean Oven
Cleaning Procedures
Maintenance ............................................... 7=8
Oven Window
Oven Light
Troubleshooting ...................................... 9-10
Surface Cooking ................................... 11-13
Surface Controls
Smoothtop Surface
Oven Cooking ........................................ 14-20
Baking Broiling
Cook & Hold Sabbath Mode
Delay Cook & Hold Oven Racks
Keep Warm
Warranty & Service ..................................... 21
Guide d'utUisation et d'entretien ............. 22
Guia de uso y cuidado ............................... 46
Form No. A/01/06 Part No. 8113P610-60 @2006 Maytag Appliances Sales Co. Litho U.S.A.

replace any part of your appliance unless it is specifically
recommended in this guide. All other servicing should be
referred to a qualified servicer.
Always disconnect power to appliance before servicing.
por a l$afe
Warning and Important Safety Instructions appearing in
this guide are not meant to cover all possible conditions
and situations that may occur. Common sense, caution,
and care must be exercised when installing, maintaining,
or operating the appliance.
Always contact the manufacturer about problems or
conditions you do not understand.
Recognize Safety Symbols, Words, Labels
Read and follow all instructions before using this
appliance to prevent the potential risk of fire, electric
shock, personal injury or damage to the appliance as a
result of improper usage of the appliance. Use appliance
only for its intended purpose as described in this guide.
To ensure proper and safe operation: Appliance must
be properly installed and grounded by a qualified
technician. Do not attempt to adjust, repair, service, or
To check if device is properly installed, look underneath
range with a flashlight to make sure one of the rear
leveling legs is properly engaged in the bracket slot. The
anti-tip device secures the rear leveling leg to the floor
when properly engaged. You should check this anytime
the range has been moved.
To Prevent Fire or
Smoke Damage
Be sure all packing materials are removed from the
appliance before operating it.
Keep area around appliance clear and free from
combustible materials. Flammable materials should not
be stored in an oven.
Many plastics are vulnerable to heat. Keep plastics away
from parts of the appliance that may become warm or
hot.
To prevent grease fires, do not let cooking grease or
other flammable materials accumulate in or near the
appliance.
|n Case of Fire
Use dry chemical or foam-type extinguisher or baking
soda to smother fire or flame. Never use water on a
grease fire.
1. Turn off appliance to avoid spreading the flame.
2. NEVER pick up or move a flaming pan.
3. Smother fire or flame by closing the oven door.
Turn off ventilating hood to avoid spreading the flame.
Extinguish flame then turn on hood to remove smoke
and odor.

Child Safety
Do not use the cooktop or oven as a storage area for food
or cooking utensils.
NEVER leave children alone or unsupervised near the
appliance when it is in use or isstill hot. Children should
never be allowed to sit or stand on any part of the
appliance as they could be injured or burned.
Children must be taught that the appliance and utensils in
it can be hot. Let hot utensils cool in a safe place, out of
reach of small children. Children should be taught that an
appliance is not a toy. Children should not be allowed to
play with controls or other parts of the appliance.
About Your Appliance
To prevent potential hazard to the user and damage to the
appliance, do not use appliance as a space heater to heat
or warm a room. Also, do not use the oven as a storage
area for food or cooking utensils.
Do not obstruct the flow of air by blocking the oven vent.
the oven vent is located at the rear of the cooking surface.
DO NOT TOUCH HEATING ELEMENTS OR INTERIOR
SURFACES OF OVEN. Heating elements may be hot even
though they are dark in color. Interior surfaces of any oven
become hot enough to cause burns. During and after use,
do not touch, or let clothing or other flammable materials
contact heating elements or interior surfaces of oven until
they have had sufficient time to cool. Other surfaces of the
appliance may become hot enough to cause burns -
among these surfaces are: oven vent opening and surface
near this opening, oven door, window of oven door.
Do not touch a hot oven light bulb with a damp cloth as
the bulb could break. Should the bulb break, disconnect
power to the appliance before removing bulb to avoid
electrical shock.
NEVER use aluminum foil to cover an oven rack or oven
bottom. Misuse could result in risk of electric shock, fire, or
damage to the appliance. Use foil only as directed in this
guide.
2
Cooking Safety
NEVER heat an unopened food container in the oven.
Pressure build-up may cause container to burst resulting
in serious personal injury or damage to the appliance.
Use dry, sturdy potholders. Damp potholders may cause
burns from steam. Dish towels or other substitutes should
never be used as potholders because they can trail across
hot elements and ignite or get caught on appliance parts.
Wear proper apparel. Loose fitting or long hanging-
sleeved apparel should not be worn while cooking.
Clothing may ignite and cause burns if garment comes in
contact with heating elements.
Always place oven racks in the desired positions while
oven iscool. Slide oven rack out to add or remove food,
using dry, sturdy potholders. Always avoid reaching into
the oven to add or remove food. If a rack must be moved
while hot, use a dry potholder. Do not let potholder
contact hot element in oven.
Use racks only in the oven in which they were shipped/
purchased.
Use care when opening the oven door. Let hot air or steam
escape before removing or replacing food.
PREPARED FOOD WARNING: Follow food
manufacturer's instructions. If a plastic frozen food con-
tainer and/or its cover distorts, warps, or is otherwise
damaged during cooking, immediately discard the food
and its container. The food could be contaminated.
Do not allow aluminum foil or meat probe to contact
heating element.
Always turn off all controls when cooking is completed.
Utensil Safety
Follow the manufacturer's directions when using oven
cooking bags.
This appliance has been tested for safe performance
using conventional cookware. Do not use any devices or
accessories that are not specifically recommended in this
guide. Do not use add-on oven convection systems. The
use of devices or accessories that are not expressly
recommended in this guide can create serious safety
hazards, result in performance problems, and reduce the
life of the components of the appliance.
If pan is smaller than element, a portion of the element
will be exposed to direct contact and could ignite clothing
or potholder.
Cont.

ImportentSefetv
Only certain types of glass, glass/ceramic, ceramic,
earthenware, or other glazed utensils are suitable for
cooktop or oven service without breaking due to the
sudden change in temperature. Follow utensil
manufacturer's instructions when using glass.
Turn pan handle toward center of cooktop, not out into
the room or over another surface element. This reduces
the risk of burns, ignition of flammable materials, or
spillage if pan is accidently bumped or reached by small
children.
Cooktop
NEVER leave surface units unattended, especially when
using high heat. An unattended boilover could cause
smoking and a greasy spillover can cause a fire.
This appliance is equipped with different sized surface
elements. Select pans with flat bottoms large enough to
cover element. Fitting pan size to element will improve
cooking efficiency.
GLASS=CEPJtMIC SURFACE: NEVER cook on a broken
cooktop. If cooktop should break, cleaning solutions and
spillovers may penetrate the broken cooktop and create a
risk of electric shock. Contact a qualified technician
immediately.
Deep Fat Fryers
Use extreme caution when moving the grease pan or
disposing of hot grease. Allow grease to cool before
attempting to move pan.
Ventilating Hoods
Clean range hood and filters frequently to prevent grease
or other flammable materials from accumulating on hood
or filter and to avoid grease fires.
When flaming foods under the hood, turn the fan on.
Cleaning Safety
Clean cooktop with caution. Turn off all controls and wait
for appliance parts to cool before touching or cleaning.
Clean with caution. Use care to avoid steam burns if a wet
sponge or cloth is used to wipe spills on a hot surface.
Some cleaners can produce noxious fumes if applied to a
hot surface.
Clean only parts listed in this guide.
Self-Clean Oven
Do not clean door gasket. The door gasket isessential
for a good seal. Care should be taken not to rub, damage,
or move the gasket.
Do not use oven cleaners or oven liners of any kind in or
around any part of the self-clean oven.
Important Safety Notice
and Warning
The California Safe Drinking Water and Toxic
Enforcement Act of 1986 (Proposition 65) requires the
Governor of California to publish a list of substances
known to the State of California to cause cancer or
reproductive harm, and requires businesses to warn
customers of potential exposures to such substances.
Users of this appliance are hereby warned that when
the oven is engaged in the self-clean cycle, there may
be some low-level exposure to some of the listed
substances, including carbon monoxide. Exposure to
these substances can be minimized by properly venting
the oven to the outdoors by opening the windows and/or
door in the room where the appliance is located during
the self-clean cycle.
IMPORTANT NOTICE REGARDING PET BIRDS:
Never keep pet birds in the kitchen or in rooms where
the fumes from the kitchen could reach. Birds have a very
sensitive respiratory system. Fumes released during an
oven self-cleaning cycle may be harmful or fatal to birds.
Fumes released due to overheated cooking oil, fat,
margarine and overheated non-stick cookware may be
equally harmful.
Save These Instructions for Future Reference
3

Cleanln
Self-Clean Oven
To set Self=Clean:
Important: Oven temperature must be below 400° Fto
program a clean cycle.
1. Close the oven door.
2. Move door lock lever right to the locked position.
The self-clean cycle uses above-normal cooking temperatures
to automatically clean the oven interior.
The oven should be cleaned regularly by wiping up spillovers
to prevent excessive smoke and flare-ups. Do not allow a
heavy build-up of soil to accumulate in the oven.
During the cleaning process, the kitchen should be well
ventilated to get rid of normal odors associated with cleaning.
Before Self=Cleaning
1. Turn off the oven light before cleaning. The light may burn
out during the clean cycle.
2.
.
Remove all pans and oven racks from the oven. The oven
racks will discolor and may not slide easily after a self-
clean cycle ifthey are not removed.
Clean oven frame, door frame, area
outside of gasket, and around the
opening in the door gasket with a
nonabrasive cleaner such as Bon
Ami* or detergent and water. The
self-cleaning process does not
clean these areas. They should be
cleaned to prevent soil from baking on during the clean
cycle. (The gasket isthe seal around the oven door and
window).
4. To prevent damage, do not clean or rub the gasket around
the oven door. The gasket isdesigned to seal in heat
during the clean cycle.
5. Wipe up excess grease or spillovers from the oven bottom.
This prevents excessive smoking, flare-ups or flaming
during the clean cycle.
6. Wipe up sugary and acidic spillovers such as sweet
potatoes, tomato, or milk-based sauces. Porcelain enamel
isacid-resistant, not acid-proof. The porcelain finish may
discolor if acidic spills are not wiped up before a self-clean
cycle.
3. Pressthe CLEAN pad. CLEAN
, CLEAN flashes in the display.
4. Pressthe A or V pad.
, CUM (Clean - Medium Soil) is displayed.
If the door isnot closed, beeps will sound and \ _,
"door" will display. If the door is not closed
within 45 seconds, the self-cleaning operation will be
canceled and the display will return to the time of day.
5.
Pressthe A or Y pad to scroll through the
self-cleaning settings.
CUH (Clean - Heavy Soil, 4 hours)
CUM (Clean - Medium Soil, 3 hours)
, CUL (Clean - Light Soil, 2 hours)
Choosing the soil level of the oven automatically programs
the self-cleaning time.
6. After four seconds, the oven will start cleaning.
The cleaning time will start counting down in the display.
LOCKwill appear in the display.
CLEAN will appear in the display.
To Delay a Self=Clean Cycle:
1. Pressthe DELAY pad.
, DELAY flashes.
2.
, 00:00 will appear in the display.
Pressthe A or V pad to set the amount of time
you want to delay the cycle. Delay time can be
set from ten minutes (00:10) to 11 hours, 59
minutes (11:59).
3. While DELAY is flashing, press the CLEAN pad.
, CLEAN will flash.
4. Pressthe A or V pad.
, CUM (Clean - Medium Soil) is displayed.
DELAY
CLEAN
Cont.
* Brand names for cleaning products are registered trademarks of the respective manufacturers.
4

¢leanin
5. Press the A or V pad to scroll through the self-cleaning
settings.
, CUH (Clean - Heavy Soil, 4 hours:)
CUM (Clean - Medium Soil, 3 hours:)
CUL (Clean - Light Soil, 2 hours:)
Choosing the soil level of the oven automatically programs
the self-cleaning time.
6. After four seconds, CLEAN, DELAY and LOCKwill appear
in the display to show that the oven is set for a delayed
clean operation. The delay time is displayed.
DELAY
if the oven has already been set for a clean
cycle and you wish to set a delay:
1. Press the DELAY pad.
, DELAY flashes.
, 00:00 will appear in the display.
2. Press the A or V pad to set the amount of time
you want to delay the cycle.
After four seconds, CLEAN, DELAY and LOCK
will appear in the display to show that the oven \,_,_"
is set for a delayed clean operation.
The delay time is displayed.
When the Self-Clean cycle starts:
, DELAY will turn off.
The clean time will appear in the display.
To cancel the Self-Clean cycle:
Press the CANCEL pad.
, All words disappear from the display.
, All functions are canceled.
The time of day appears in the display.
CANCEL
During the Self=Clean Cycle
When LOCK shows in the display, the door cannot be opened.
To prevent damage to the door, do not force the door open
when LOCK isdisplayed.
Smoke and Smells
You may see some smoke and smell an odor the first few
times the oven is cleaned. This is normal and will lessen in
time.
Smoke may also occur if the oven is heavily soiled or if a
broiler pan was left in the oven.
Sounds
As the oven heats, you may hear sounds of metal parts
expanding and contracting. This is normal and will not
damage the oven.
After Self=Cleaning
About one hour after the end of the self-clean cycle, LOCK
will turn off. The door can then be opened. Move door lock
lever to the left to unlock.
Some soil may leave a light gray, powdery ash. Remove
itwith a damp cloth. If soil remains after wiping, that means
the clean cycle was not long enough. The soil will be re-
moved during the next clean cycle.
If oven racks were left in the oven and do not slide
smoothly after a clean cycle, wipe racks and rack supports
with a small amount of vegetable oil to make them easier to
move.
Fine lines may appear in the porcelain because it went
through heating and cooling. This isnormal and will not
affect performance.
A white discoloration may appear after cleaning if acidic
or sugary foods were not wiped up before the self=clean
cycle. This discoloration is normal and will not affect perfor-
mance.
Notes:
, If the oven door isleft open, "door" will flash in the
display and a signal will beep until the door is closed
and the CLEAN pad is pressed again.
, If more than five seconds elapse between pressing the
CLEAN pad and the A or Y pad, the program will
automatically return to the previous display.
, The oven door will be damaged if the oven door is
forced to open when LOCK is still displayed.

Cleaning Procedures
* Brand names are registered trademarks of the
respective manufacturers.
** To order call 1-877-232-6771 U.S.A.and
1-800-688-8408 Canada.
Cooktop -
Porcelain Enamel
Clock and
Control Pad
Area
Control Knobs
Cooktop -
Glass=Ceramic
Oven Window
and Door = Glass
Porcelain enamel is glass fused on metal and may crack or chip with misuse. It isacid-resistant, not acid-
proof. All spillovers, especially acidic or sugary spillovers, should bewiped up immediatelywith adry cloth.
* When cool, wash with soapy water, rinse and dry.
* Never wipe off a warm or hot surface with a damp cloth. This may cause cracking or chipping.
* Never use oven cleaners, abrasive or caustic cleaning agents on exterior finish of range.
* To activate control lock for cleaning, see Locking the Controls, page 15.
* Wipe with a damp cloth and dry. Do not use abrasive cleaning agents as they may scratch the surface.
* Glass cleaners may be used if sprayed on a cloth first. DO NOTspray directly on centre/pad and
display area.
* Remove knobs in the OFF position by pulling forward.
* Wash, rinse and dry. Do not use abrasive cleaning agents as they may scratch the finish.
* Turn on each element to be sure the knobs have been correctly replaced.
Never use oven cleaners, chlorine bleach, ammonia or glass cleaners with ammonia.
important: Call an authorized servicer if the glass=ceramic top should crack, break or if metal or
aluminum foil should melt on the cooktop.
* Allow the cooktop to cool before cleaning.
* General ==Cleancooktop after each use,orwhen needed, with adamp paper towel and Cooktop Cleaning
Creme* (Part No. 20000001:)**.Then, buff with a clean dry cloth.
Important: Permanent stains will develop ff softis allowed to cook on by repeatedly using the cooktop
when soiled.
* Heavy Soils or Metal Marks -- Dampen a "scratchless" or "never scratch" scrubber sponge. Apply
Cooktop Cleaning Creme* (Part No. 20000001:)**and scrub to remove as much soil as possible. Apply a
thin layer of the creme over the soil, cover with a damp paper towel and let stand 30 to 45 minutes (2-3
hours for very heavy soil:).Keep moist by covering the paper towel with plastic wrap. Scrub again, then
buff with a clean, dry cloth.
important: Onlyuse a CLEAN,DAMP "scratchless"pad that is safe for non-stick cookware. Thepattern and
glass will be damaged if the pad is not damp, if thepad is soiled, orif another type of pad is used.
* Burned-on or Crusty Soils ==Scrub with a "scratchiess" or "never scratch" scouring pad and Cooktop
Cleaning Creme*.
Important: Hold a razor blade scraper at 30° angle and scrape any remaining soil. Then clean as
described above. Do not use the razor blade for daily cleaning as it may wear the pattern on _ _
the glass. _ _9_
, Melted Sugar or Plastic ==Immediately turn element to LOW and scrape sugar or !A_
p astcfromhotsurface to acoo area ThenturneementOFFanda owtocoo Cean _
residue with razorblade scraper and Cooktop Cleaning Creme* (PartNo. 20000001:)**. d
* Avoid using excessive amounts of water which may seep under or behind glass, causing staining.
* Wash with soap and water. Rinse with clear water and dry. Glass cleaner can be used if sprayed on a
cloth first.
* Do not use abrasive materials such as scouring pads, steel wool or powdered cleaners as they will
scratch glass.
Cont.
6

Cleanin9
Oven Interior . Follow instructions on page 4-5 to set a self-clean cycle.
Oven Racks * Clean with soapy water.
Remove stubborn soil with cleansing powder or soap-filled scouring pad. Rinse and dry.
Rackswill permanently discolor and may not slide smoothly if left inthe oven during aself-clean operation.
If this occurs, wipe the rack edge and rack support with a small amount of vegetable oil to restore ease
of movement, then wipe off excess oil.
Stainless Steel * DO NOT USEANY CLEANING PRODUCT CONTAINING CHLORINE BLEACH.
(select models) * DO NOT USEABRASIVE OR ORANGE CLEANERS.
• ALWAYS WIPE WITH THE GRAIN WHEN CLEANING.
• Daily Cleaning/Light Soil ==Wipe with one ofthe following - soapywater, white vinegar/water solution,
Formula 409 Glass and Surface Cleaner* or a similar glass cleaner - using a sponge or soft cloth. Rinse
and dry. To polish and help prevent fingerprints, follow with Stainless Steel Magic Spray* (Part No.
20000008)**.
• Moderate/Heavy Soil == Wipe with one of the following - Don Ami*, Smart Cleanser*, or Soft Scrub* -
using a damp sponge or soft cloth. Rinse and dry. Stubborn soils may be removed with a damp multi-
purpose Scotch-Brite* pad; rub evenly with the grain. Rinseand dry. Torestore luster and remove streaks,
follow with Stainless Steel Magic Spray*.
• Discoloration == Using a damp sponge or soft cloth, wipe with Cameo Stainless Steel Cleaner*. Rinse
immediatelyand dry. To remove streaks and restore luster, follow with Stainless Steel Magic Spray*.
Storage Drawer, * When cool, wash with warm, soapy water, rinse and dry. Never wipe a warm or hot surface with a damp
Door Handle = cloth as this may damage the surface and may cause a steam burn.
Painted Enamel * F_rstubb_rns_i__usemi_d_yabrasivec_eaningagentssuchasbakings_dapaste_rB_nAmi.*D_n_tuse
abrasive, caustic or harsh cleaning agents such as steel wool pads or oven cleaners. These products will
scratch or permanently damage the surface.
Important: Use a dry towel or cloth to wipe up spills, especially acidic or sugary spills. Surface
may discolor or dull if soil is not immediately removed. Thisis especially important for
white surfaces.
• Brand names for cleaning products are registered trademarks of the respective manufacturers.
•* To order direct, call 1-877-232-6771 U.S.A. and 1-800-688-8408 Canada.
Meintenence
Oven Window
To protect the oven door window:
1. Do not use abrasive cleaning agents such as steel wool
scouring pads or powdered cleansers as they may scratch
the glass.
2. Do not hit the glass with pots, pans, furniture, toys, or
other objects.
3. Do not close the oven door until the oven racks are in
place.
Scratching, hitting, jarring or stressing the glass may weaken
itsstructure causing an increased risk of breakage at a later
date.
Cont.
7

Oven Door
4. Replace bulb cover and secure with wire retainer.
5. Reconnect power to range. Reset clock.
OR
1.
2.
.
4.
Use a dry potholder and very carefully unscrew bulb cover
and bulb.
Replace with a 40-watt, oven-rated appliance bulb. Bulb
with a brass base is recommended to prevent fusing of
bulb into socket.
Replace bulb cover and reconnect power to oven.
Resetclock.
To remove:
1. When cool, open the oven door to the
first stop position (about four inches).
2. Grasp door at each side. De net use
the door handle to lift door.
3. Lift up evenly until door clears hinge arms.
To replace:
1. Grasp door at each side.
2. Align slots in the door with the hinge arms on the range.
3. Slide the door down onto the hinge arms until the door is
completely seated on the hinges. Push down on the top
corners of the door to completely seat door on hinges.
Door sheuld net appear crooked.
Important: The oven door on a new range may feel "spongy"
when it isclosed. This isnormal and will decrease with use.
Leveling Legs
Be sure the range isleveled when installed.
ifthe range is not level, turn the leveling legs,
located at each corner of the range, until
range is level.
Storage Drawer
ANTI-TIP BRACKET
LEVELING LEG
Oven Light (style varies by model)
To replace oven light bulb:
1. When oven is cool, hold bulb cover
inplace, then slide wire retainer
off cover. Important: Bulb
cover will fall if not held in
place while removing wire
retainer.
2. Remove bulb cover and light
bulb.
3. Replace with a 40-watt appliance bulb.
BULBCOVER
RETAINER
The storage drawer can be removed to allow you to clean
under the range.
To remove:
1. Empty drawer and pull out to the first stop position.
2. Lift up the front of the drawer.
3. Pull out to the second stop position.
4. Grasp sides and lift drawer up and out.
To replace:
1. Fit the ends of the drawer glides into the rails in the range.
2. Lift up the front of the drawer and gently push in to the
first stop position.
3. Lift drawer up again and push until drawer is closed.
8

Troubleshoodn9
For most concerns, try these first.
Part or all of appliance does
not work.
Clock, indicator words, and/or
lights operate but oven does
not heat.
Baking results are not as
expected or differ from
previous oven.
Food is not broiling properly or
smokes excessively.
Oven will not self=clean.
Oven did not clean properly.
Oven door will not unlock after
self=clean cycle.
e
e
e
e
Check
Check
Check
Check
if oven controls have been properly set.
to be sure plug is securely inserted into receptacle.
or re-set circuit breaker. Check or replace fuse.
power supply.
e
e
e
e
e
Check
Check
Check
Check
Check
if surface and/or oven controls have been properly set. See pages 11 & 15.
if oven door is unlocked after self-clean cycle. See page 5.
if oven is set for a delayed cook or clean program. See pages 16,4 & 5.
if Control Lock is activated. See page 15.
if control is in Sabbath Mode. See page 19.
, Oven may be set for a Cook & Hold or Delay function.
, The Control Lock may have been set.See page 15.
e
e
e
Make sure the oven vent has not been blocked. See page 20 for location.
Check to make sure range is level.
Temperatures often vary between a new oven and an old one.As ovens age,the oven
temperature often "drifts" and may become hotter or cooler. See page 19 for
instructionson adjusting the oven temperature. Important: It is not recommended
to adjust the temperature if only one or two recipes are in question.
, Check oven rack positions. Food may be too close to element.
, Broil element was not preheated.
, Aluminum foil was incorrectly used. Never line the broiler insertwith foil.
, Oven doorwas closed during broiling. Leavethe door open to the first stop position
(about 4 inches_).
, Trim excess fat from meat before broiling.
, A soiled broiler pan was used.
, Voltage in house may be low.
, Check to make sure the cycle is not set for a delayed start. See pages 4-5.
Check if door isclosed.
Check if control is inSabbath Mode. See page 19.
Oven may be over 400° F. Oven temperature must be below 400° Fto program a
clean cycle.
, Longer cleaning time may be needed.
, Excessive spillovers, especially sugary and/or acidic foods, were not removed prior
to the self-clean cycle.
, Oven interior is still hot. Allow about one hour for the oven to cool after the
completion of a self-clean cycle. The door can be opened when the LOCK indicator
word is not displayed.
, The control and door may be locked. See page 5.
9

Smoothtop surface
shows wear.
Moisture collects on oven
window or steam comes from
oven vent.
There is a strong odor or light
smoke when oven is turned on.
Fault Codes
Noises may be heard.
There are no beeps and
no display.
SAb flashing and then
displayed continuously.
* Tinyscratches or abrasions.
- Make sure cooktop and pan bottom are clean. Do not slide glass or metal pans
across top. Make sure pan bottom isnot rough. Use the recommended
cleaning agents. See page 6.
* Metal marks.
- Do not slide metal pans across top. When cool, clean with Cooktop
Cleaning Creme (Part No. 20000001)*. See page 6.
* Brown streaks and specks.
- Remove spills promptly. Never wipe with a soiled cloth or sponge. Make sure
cooktop and pan bottom are clean.
* Areas with a metallic sheen.
- Mineral deposits from water and food. Use recommended cleaning agents.
See page 6.
* Pitting or flaking.
- Remove sugary boilovers promptly. See page 6.
* This is normal when cooking foods high in moisture.
* Excessivemoisture was used when cleaning the window.
* This isnormal for a new range and will disappear after a few uses. Initiating a clean
cycle will "burn off" the odors more quickly.
* Turning on aventilation fan will help remove the smoke and/or odor.
* Excessivefood soils on the oven bottom. Use a self-clean cycle.
* BAKE or LOCK may flash rapidly in the display to alert you if there is an error
or a problem. If BAKE or LOCK appear in the display, press CANCEL pad.
If BAKE or LOCKcontinue to flash, disconnect power to the appliance.
Wait a few minutes, and then reconnect power. If the flashing still continues,
disconnect power to the appliance and call an authorized servicer.
* If the oven is heavily soiled, excessive fiareups may result in a fault code during
cleaning. Press the CANCEL pad and allow the oven to cool completely, wipe out
excess soil, then reset the clean cycle. If the fault code reappears, contact an
authorized servicer.
* The oven makes several low-level noises.You may hear the oven relays asthey go on
and off. This isnormal.
* As the oven heats and cools, you may hear sounds of metal parts expanding and
contracting. This isnormal and will not damage your appliance.
* A fan sound can be heard. This isthe cooling fan and isnormal. The fan will
continue to run after use until the oven cools.
* Oven may be in Sabbath Mode. Seepage 19.
* Control may be locked. See page 15.
* Oven is in Sabbath Mode. To cancel, press and hold the CLOCK pad for
five seconds.
To order direct, call 1-877-232-6771 U.S.A. and 1-800-688-8408 Canada.
10

SurfeceCookin9
Surface Controls
Use to turn on the surface elements. An infinitechoice of
heat settings isavailable from Low to High. The knobs can
be set on or between any of the settings.
Setting the Controls
1. Place pan on surface element.
2. Push in and turn the knob in either direction to the desired
heat setting.
The control panel is marked to identify which
element the knob controls. Forexample, the
graphic at right indicates left front element.
O0
®0
3. There isan element indicator light on the control panel.
When any surface control knob isturned on, the light will
turn on.The light will turn off when all the surface
elements are turned off.
When a control isturned on, a glow can be seen through
the smoothtop surface. The element will cycle on and off
to maintain the preset heat setting, even on High.
4. After cooking, turn knob to OFF. Remove pan.
Suggested Heat Settings
The size and type of cookware, type and amount of food
being heated, and wattage of individual elements will
determine where to set the knob for cooking operations.
Some elements have a predetermined simmer and melt
setting that will require only minor adjustment up or down
depending on the food being prepared. The other elements
have settings printed around the knobs that are also unique
to those elements. Adjust the heat settings to the numbers
that give the desired cooking results. The following
descriptions will aid in choosing the settings that will give
optimum results.
Hold or Warm: Food maintains a temperature above 140° F
without continuing to cook. Food isinitially hot and then heat
isreduced. Never use a hold or warm setting to reheat cold
food.
Simmer: Food forms bubbles that barely break the
surface. Foods are between 185° Fand 200° F.A simmer
setting can also be used to steam or poach foods or continue
cooking covered foods.
Slow Boil: Food forms bubbles at a moderate pace. A slow
boil setting can also be used for most frying and for
maintaining the cooking of large amounts of liquids.
Boil: Liquid forms bubbles at a rapid pace.A fast boil setting
can also be used to brown meat, stir fry, saute, and heat oil
for frying before turning to a lower setting. The highest 3 or 4
settings on the knob are used for these cooking
operations. The highest setting isalways used to bring water
to a boil. Some elements offer an even higher speed for
boiling liquids.
11

Srnoothtop Surface
Notes:
Cooktop may emit light smoke and odor the first few
times the cooktop is used. This isnormal.
, Smoothtop cooktops retain heat for a period of time
after the element is turned off. Turn the elements off
a few minutes before food iscompletely cooked and use
the retained heat to complete cooking. When the hot
surface light turns off, the cooking area will be cool
enough to touch. Because of the way they retain heat, the
smoothtop elements will not respond to changes in
settings as quickly as coil elements.
, In the event of a potential boilover, remove the pan from
the cooking surface.
, Never attempt to lift the cooktop.
The smoothtop surface may appear discolored when it is
hot. This isnormal and will disappear when the surface
cools.
Cooking Areas
The cooking areas on your range are identified by permanent
circles on the smoothtop surface. For most efficient cooking,
fit the pan size to the element size.
Pans should not extend more than !/2 to 1=inch beyond
the cooking area.
When a control isturned on, a glow can be seen through the
smoothtop surface. The element will cycle on and off to
maintain the preset heat setting, even on High.
For more informationon cookware, refer to Cookware
Recommendations on page 13.
9" SINGLE
6" SINGLE
ELEMENT 6" SINGLE ELEMENT
9" SINGLE
ELEMENT
Hot Surface Light
The Hot Surface indicator light islocated at the front of the
cooking surface. The light illuminateswhen any cooking area
is hot. It will remain on, even after the control isturned off,
until the surface has cooled.
Tips to Protect the
Srnoothtop Surface
Cleaning ([seepage 6 for more information,)
, Before first use, clean the cooktop.
, Clean your cooktop daily or after each use. This will keep
your cooktop looking good and can prevent damage.
, If a spillover occurs while cooking, immediatelyclean the
spill from the cooking area while it ishot to prevent a tough
cleaning chore later. Using extreme care, wipe spill with a
clean, dry towel.
, Do not allow spills to remain on the cooking area or the
cooktop trim for a long period of time.
, Never use abrasive cleansing powders or scouring pads
which will scratch the cooktop.
, Never use chlorine bleach, ammonia or other cleansers not
specifically recommended for use on glass-ceramic.
To Prevent Marks & Scratches
* Do not use glass pans. They may scratch the surface.
, Never place a trivet or wok ring between the surface and
pan. These itemscan mark or etch the top.
, Do not slide aluminum pans across a hot surface. The pans
may leave marks which need to be removed promptly. ([See
Cleaning, page 6._)
, Make sure the surface and the pan bottom are clean before
turning on to prevent scratches.
, To prevent scratching or damage to the glass-ceramic top,
do not leave sugar, salt or fats on the cooking area.Wipe
the cooktop surface with a clean cloth or paper towel
before using.
Never slide heavy metal pans across the surface since
these may scratch.
To Prevent Stains
• Never use a soiled dish cloth or sponge to clean the
cooktop surface. A film will remain which may cause stains
on the cooking surface after the area is heated.
Continuously cooking on a soiled surface may/will result in
a permanent stain.
Cont.
12

$urfuceCookin
To Prevent Other Damage
* Do not allow plastic, sugar or foods with high sugar
content to melt onto the hot cooktop. Should this happen,
clean immediately.([SeeCleaning, page 6._)
* Never let a pan boil dry as this will damage the surface and
pan.
* Never use cooktop as a work surface or cutting board.
* Never cook food directly on the surface.
* Do not use a small pan on a large element. Not only does
this waste energy, but it can also result in spillovers burning
onto the cooking area which requires extra cleaning.
* Do not use non-flat specialty itemsthat are oversized or
uneven such as round-bottom woks, rippled bottom and/or
oversized canners and griddles.
* Do not use foil or foil-type containers. Foil may melt onto
the glass. If metal melts on the cooktop, do not use. Call an
authorized servicer.
Cookware Recommendations
Using the right cookware can prevent many problems, such
as food taking longer to cook or achieving inconsistent
results. Proper pans will reduce cooking times, use less
energy, and cook food more evenly.
Flat Pan Tests
To determine whether your pans are flat.
The Ruler Test:
1. Place a ruler across the bottom of the pan.
2. Hold it up to the light.
3. Little or no light should be visible under the ruler.
The Bubble Test:
1. Put 1 inch of water in the pan. Place on cooktop and turn
control to High.
2. Watch the formation of the bubbles asthe water heats.
Uniform bubbles mean good performance, and uneven
bubbles indicate hot spots and uneven cooking.
_,,_,_,_,_t_,,,,_,:,,_;_,_,__;_;;;_;_;;_;_;;_;_;;_;_ _!!__ i,_ ! _!,_ ii_!i_ _i i__ _i;_',_________________, ______,_,,_,,_,_,_,_........
Flat,smooth-bottom Panswith grooved or warped bottoms.
pans. Panswith uneven bottoms do not cook
efficiently and sometimes may not
boil liquid.
Heavy-gauge pans. Very thin-gauge metal or glass pans.
Pansthat arethe Panssmaller or larger than the
same size as the element by 1 inch.
element.
Secure handles. Cookware with loose or broken handles.
Heavyhandles that tilt the pan.
Tight-fitting lids. Loose-fitting lids.
Flat-bottom woks. Woks with a ring-stand bottom.
Canning and Oversize
Cookware
All canners and large pots must have flat bottoms and
must be made from heavy=gauge materials. Thisiscritical
on smoothtop surfaces. The base must not be more than
1 inch larger than the element.
When canners and pots do not meet these standards, cooking
times may be longer,and cooktops may be damaged.
Some canners are designed with smaller bases for use on
smoothtop surfaces.
When canning, use the High heat setting only until the
water comes to a boil or pressure isreached in the canner.
Reduce to the lowest heat setting that maintains the boil or
pressure. Ifthe heat isnot turned down, the cooktop may be
damaged.
13

Control Panel
A B
BROIL _,
E
CLEAN DELAY CLOCK
F G H
C
I
|
D
2,
TIMER
CANCEL
Thecontrol panelisdesigned for easeinprogramming. Thedisplaywindow on thecontrol shows time ofday,timer and ovenfunctions.
Control panel shown includesmodel specific features. (Styling may vary depending on model.)
iiiiiiiiiiiiiiiiiii_i
BROIL
BAKE
More (A) or
Less (V)
TIMER
COOK& HOLD
CLEAN (select
models)
DELAY
CLOCK
KEEP WARM
CANCEL
Use for broiling and top browning.
Use for baking and roasting.
Enters or changes time, oven
temperature. Sets HI or LObroil.
Sets Timer.
Bakes for a preset time, then holds food
warm for 1 hour.
Use to set self-clean cycle.
Programs the oven to start baking at
a later time.
Use to set time-of-day clock.
Use to keep cooked food warm in oven.
Cancels all operations except Timer
and Clock.
Using the Touchpads
. Pressthe desired pad.
* PressA or Y to enter time or temperature.
. A beep will sound when any pad is touched.
. A double beep will sound if a programming error occurs.
Important: Four seconds after pressing the A or Y pad,
the time or temperature will automatically be entered. If
more than 30 seconds elapse between touching a function
pad and the A or V pad, the function will be canceled and
the display will return to the previous display.
Clock
The clock can be set to display time in a 12-hour or 24-hour
format. The clock is set at the factory for the 12-hour format.
To change the clock to
24=hour format:
1. Press and hold the CANCEL and
BELAY pads for three seconds.
2. Press A or V pad to select 12 or
24 hour.
3. Set the time of day following the
directions below.
-- CANCEL
-- DELAY
To set the Clock:
1. Press the CLOCK pad.
. Colon flashes in the display.
2. Press A or V pad to set the time of day.
. Colon continues flashing.
3. Press the CLOCK pad again or wait four
seconds. The colon stops flashing.
When electrical power is supplied or after a power
CLOCK
interruption,the last clock time before power was interrupted
will flash.
To recall the time of day when another time function is
showing, press the Clock pad.
Clock time cannot be changed when the oven has been
programmed for Delay Cook, Delay Clean or Cook & Hold.
To cancel the Clock display:
If you do not want the time of day to display:
Press and hold the CANCEL and CLOCK pads for three
seconds. The time of day will disappear from the display.
Cont.
14

Whentheclockdisplayiscanceled, press the CLOCK pad to
briefly display the time of day.
To restore the Clock display:
Press and hold the CANCEL and CLOCK
pads for three seconds. The time of day
will reappear in the display.
-- CANCEL
--CLOCK
]rimer
The timer can be set from one minute (0:01) up to 99 hours
and 59 minutes (99:59).
The timer can be used independentlyof any other oven
activity. It can also be set while another oven function is
operating.
The timer does not control the oven. It only controls a beeper.
To set the Timer: _,
1. Pressthe TIMER pad. TIMER
,0:00 lights in the display.
The colon will flash.
2. Pressthe A or Y pad until the
correct time appears in the display.
The colon will continue to flash.
3. PressTIMER pad again or wait four seconds.
The colon continues flashing and the time begins
counting down.
The last minute of the timer countdown will be displayed
as seconds.
4. At the end of the set time, one long beep will sound.
To cancel the Timer:
1. Press and hold the TIMER pad for three seconds.
OR
2. Pressthe TIMER pad and set the time to 0:00.
Locking the Controls
The touchpad controls can be lockedfor safety, cleaning, or
to prevent unwanted use. They will not function when locked.
If the oven is currently in use, the controls cannot be locked.
The current time of day will remain in the display when the
controls are locked.
To lock:
Press and hold the CANCEL and COOK &
HOLD pads for three seconds. (Press the
CANCEL pad first.)
To unlock:
Press and hold the CANCEL and COOK &
HOLD pads for three seconds. (Press the CANCEL pad first.)
-- CANCEL
Fault Codes
BAKE or LOCK may flash rapidly in the display to alert you if
there isan error or a problem. If BAKE or LOCK flash in the
display, press the CANCEL pad. If BAKE or LOCK continue to
flash, disconnect power to the appliance. Wait a few minutes,
and then reconnect power. If the flashing still continues,
disconnect power to the appliance and call an authorized
servicer.
Bake
To set Bake:
1. Press the BAKE pad.
BAKEwill flash.
000 will light in the display.
2. Select the oven temperature. The oven
temperature can be set from 170° to 550°.
Press or press and hold the A or Y pad.
350°will light when either pad isfirst pressed.
Pressthe A pad to increase the temperature.
Pressthe V pad to decrease the temperature.
3. Press BAKE pad again or wait four seconds.
BAKE
BAKEwill stop flashing and light in the display.
100° or the actual oven temperature will display. It will
rise in 5 degree increments until the preset temperature
is reached.
4. Allow the oven to preheat for 8-15 minutes.
When the set oven temperature is reached, one long
beep will sound.
To recall the set temperature during preheat, press the
BAKE pad.
5. Placefood in the oven.
6. Check cooking progress at the minimum cooking time.
Cook longer if needed.
7. When cooking is finished, press CANCEL. CANCEL
8. Remove food from the oven. _,_,/
15

Notes:
, Tochange the oven temperature during cooking, press the
Bake pad, then the A or V pad until the desired tem-
perature is displayed.
Tochange the oven temperature during preheat, press the
Bake pad twice, then press the A or V pad until the
desired temperature is displayed.
If you forget to turn off the oven, it will automatically turn
off at the end of 12 hours. If you wish to deactivate this
feature, see page 19.
After one hour in HOLD WARM:
"End" will display.
, The time of day will reappear in the display.
To cancel Cook & Hold at any time:
Press the CANCEL pad. Remove food from oven.
Delay Cook & Hold
CANCEL
Baking Differences Between Your Old
and New Oven
It isnormal to notice some baking time differences between a
new oven and an old one. See Adjusting the Oven Temperature
on page 19.
Cook & Hold
Cook & Hold allows you to bake for a preset amount of time,
followed by a one-hour Keep Warm cycle.
To set Cook & Hold:
1. Press the COOK & HOLD pad.
BAKE and HOLD flash.
999 lights in the display.
2. Select the oven temperature. The oven
temperature can be set from 170° to 559°.
Press or press and hold the A or V pad. \_
Press the A pad to increase the temperature.
Press the V pad to decrease the temperature.
3. Press COOK & HOLD again ORwait four seconds.
HOLD flashes.
99:99flashes in the display.
4. Enter the amount of time you want to bake by pressing the
A or Y pad. Bake time can be set from ten minutes
(99:19) to 11 hours, 59 minutes (11:59).
BAKE and HOLD light in the display.
The baking time will light in the display.
The baking time will start counting down.
When the cooking time has elapsed:
, Four beeps will sound.
, BAKEwill turn off.
, HOLD and WARM will light.
, 179°will display.
16
When using Delay, the oven begins to cook later inthe day.
Set the amount of time that you want to delay before the oven
turns on and how long you want to cook. The oven begins to
heat at the selected time and cooks for the specified length of
time.
Delay time can be set from 19 minutes (99:19) to 11 hours, 59
minutes (11:59).
To set a Delayed Cook & Hold cycle:
1. Pressthe DELAY pad.
DELAY flashes.
99:99 flashes in the display.
2. Pressthe A or V pad to set the delay time.
While DELAY is still flashing:
3. Pressthe COOK & HOLD pad.
999 lights in the display.
BAKE and HOLD flash.
4. Press A to set the baking temperature.
99:99 and HOLD flash.
DELAY
5.
" BAKEstays lit.
Press A to set the baking time.
, The Delay time, DELAY, BAKE and HOLD light in
the display.
When the Delay time has expired:
, DELAYwill turn off.
Baking time is displayed.
BAKE and HOLD are displayed.
To set a Delay when Cook & Hold has already
been programmed: _,
1. Press the DELAY pad. DELAY
* DELAY flashes.
00:00 appears in the display.
Cont.

2. Press the A or V pad to set the delay time.
, After four seconds, DELAY will
stay lit to remind you that a delayed
cooking cycle has been set.
When the Delay time has expired
and the oven starts:
, The baking time will be displayed.
, DELAYwill turn off.
, BAKE and HOLD will remain lit.
To cancel:
Press the CANCEL pad.
, All timed and untimed cooking functions
will be canceled.
CANCEL
, The time of day will reappear in the display.
Important:
, DO NOT use delayed baking for itemsthat require a
preheated oven, such as cakes, cookies, and breads.
, Do not use delayed baking if oven isalready hot.
Notes:
, Foroptimal food quality, oven cooked foods should be kept
warm for no longer than 1 to 2 hours.
, To keep foods from drying, cover loosely with foil or a lid.
, To warm dinner rolls:
- cover rolls loosely with foil and place in oven.
- press KEEPWARM and A pads to set 170° F.
- warm for 12-15 minutes.
To warm plates:
- place 2 stacks of up to four plates each in the oven.
- press KEEPWARM and A pads to set 170° F.
- warm for five minutes, turn off the oven and leave plates
in the oven for 15 minutes more.
- use only oven-safe plates, check with the manufacturer.
- do not set warm dishes on a cold surface as rapid
temperature changes could cause crazing.
Keep Warm
For safely keeping foods warm or for warming breads
and plates.
To set Keep Warm:
1. Press the KEEPWARM pad.
2.
, WARM flashes.
000 appears in the display.
Select the Keep Warm temperature. The Keep
Warm temperature can be set from 145° to 190°.
Press or press and hold the A or Y pads.
170° will light when either pad isfirst pressed.
Press the A pad to increase the temperature.
Press the Y pad to decrease the temperature.
WARM and the temperature will be displayed while Keep
Warm isactive.
To cancel Keep Warm:
1. Press the CANCEL pad.
2. Remove food from the oven.
CANCEL
Changing Temp °F/°C
1. The factory default setting for temperature is Fahrenheit.
2. To change the setting, press and hold the CANCEL and
BAKE pads at the same time for three seconds.
3. A single beep will sound and the current setting will be
displayed (°F or °C). (if no change is made, the range will
return to the existing setting after 30 seconds.)
4. To change the setting, press the A or T pad. Pressagain to
return to existing setting. Wait five seconds and the setting
will be complete.
17

To set Broil:
1. Press the BROIL pad. BROIL
* BROIL flashes.
, SEt isdisplayed.
2. Press the A pad to set HI Broil or press the V pad to set
LO Broil.
, HI or LO will be displayed.
, Select HI Broil (550° F) for normal broiling. Select
LO Broil (450° F)for low-temperature broiling of longer
cooking foods such as poultry.
3. After four seconds, the oven will start.
, BROIL will remain lit.
4,
5,
,
7.
For optimum browning, preheat broil element for 3-4
minutes before adding food.
Place food in the oven. Leave oven door open about four
inches(the first stop).
Turn meat once about halfway through cooking.
When food iscooked, press the CANCEL pad.
Removefood and broiler pan from the oven. CANCEL
The time of day will reappear in the display.
Notes:
For best results when broiling, use a pan designed for
broiling.
Expect broil times to increaseand browning to be
slightly lighter if appliance is installedon a 208-volt
circuit.
, HI is used for most broiling. Use LO Broil when broiling
longer cooking foods. The lower temperature allows
food to cook to the well done stage without excessive
browning.
, Tochange the oven temperature during broiling, press the
BROIL pad and then press the A or V pad to switch
between LO and HI Broil.
Broil times may be longer when the lower broiling
temperature isselected.
Most foods should be turned halfway through broiling
time.
Broiling Chart
Beef
Steak, 1" thick
Hamburgers, 3/4" thick
Pork
Bacon
Chops, 1"
Ham - precooked slice, 1/2" thick
Poultry
Chicken Pieces
Seafood
Fish Steaks, buttered, 1" thick
Fillets
The top rack position is#5.
4
4
4
4
4
4
3or4
4
4
Medium
Well Done
Well Done
Well Done
Well Done
Warm
Well Done
Flaky
Flaky
15- 18 minutes
19 - 23 minutes
15- 18 minutes
6 - 10 minutes
22 - 26 minutes
8 - 12 minutes
LO Broil
28 - 38 minutes
10 - 15 minutes
8 - 12 minutes
Note: This chart isa suggested guide. The times may vary with the food being cooked.
18

Automatic Shut-Off/
Sabbath Mode
The oven will automatically turn off after 12 hours ifyou
accidentally leave it on. This safety feature can be turned off.
To cancel the 12-hour shut=off and run the
oven continuously for 72 hours:
1. Set the oven to BAKE (see page 15).
CLOCK
2. Pressand holdtheCLOCK pad forfiveseconds.
SAb will be displayed and flash for five seconds.
SAb will then be displayed continuously until turned
off or until the 72-hour time limit is reached.
BAKE will also be displayed if a bake cycle is in use
while the oven is in Sabbath Mode.
. BAKE is the only function that operates during the
Sabbath Mode. Aft other functions (Timer, Keep Warm,
Clean, etc.) are locked out during the Sabbath Mode.
To cancel Bake when in Sabbath Mode:
Press CANCEL pad.
BAKEwill turn off in the display.
No beeps will sound.
To cancel the Sabbath Mode:
1. Pressthe CLOCK pad for five seconds.
OR
2. After 72 hours, the Sabbath Mode will end.
SAb will flash for five seconds.
CANCEL
CLOCK
The time of day will return to the display.
Adjusting the Oven Temperature
Oven temperatures are carefully tested for accuracy at the
factory. It is normal to notice some baking or browning
differences between a new oven and an old one. As ranges
get older, the oven temperature can shift.
You may adjust the oven temperature if you think the oven is
not baking or browning correctly. To decide how much to
change the temperature, set the temperature 25 degrees
higher or lower than your recipe recommends, then bake.
The results of the "test" should give you an idea of how much
to adjust the temperature.
To adjust the oven temperature:
1. Press BAKE.
2. Enter 550° by pressing the A pad.
3. Press and hold the BAKE pad for several
seconds or until 0° appears in the display.
BAKE
If the oven temperature was previously adjusted,
the change will be displayed. For example, if the oven
temperature was reduced by 15 degrees the display
will show-15 °.
4. Press the A or V pad to adjust the temperature.
Eachtime a pad is pressed, the temperature changes by 5
degrees. The oven temperature can be increased or
decreased by 5 to 35 degrees.
5. The time of day will automatically reappear in the display
You do not need to readjust the oven temperature if there
is a power failure or interruption. Broiling, Keep Warm and
Cleaning temperatures cannot be adjusted.
Notes:
Sabbath Mode can be turned on at any time with or
without the oven on.
Sabbath Mode cannot be turned on if the touchpads are
locked out or when the door is locked.
If the oven is baking when Sabbath Mode is set, BAKE
will go out at the end of the baking cycle. There will be
no audible beeps.
If the oven light is desired while in Sabbath Mode, it
must be turned on before the Sabbath Mode is started.
When the Sabbath Mode is started, no preheat beep will
sound.
All prompts, messages and beeps are deactivated when
Sabbath Mode is active.
The automatic door lock does not operate during the
Sabbath Mode.
Pressing CANCEL will cancel a Bake cycle, however the
control will stay in the Sabbath Mode.
If power fails, the oven will power up in Sabbath Mode with
72 hours remaining and no cycle active.
19

Oven Fan
A cooling fan will automatically turn on during all broiling and
some baking operations. It is used to keep internalparts on
the control panel cool, The fan will automatically turn off
when parts have cooled. The fan may continue to operate
after the oven has been turned off. This is normal.
Oven Vent
When the oven is in use the area near the vent may become
hot enough to cause burns. Never block the vent opening.
The oven vent is located at the rear of the cooking
surface.
0 VEN VENT L OCA TION
Do not place
plastics near the
vent opening as
heat from the
vent could distort
or melt the
plastic.
Oven Light
Press the Oven Light switch on the control panel to
turn the oven light on and off. The oven light is only
activated by this switch.
Oven Bottom
Protect oven bottom against spillovers, especially acidic or
sugary spills, as they may discolor the porcelain enamel. Use
the correct pan size to avoid spillovers and boilovers. Be not
place utensils or aluminum foil directly on the oven
bottom.
Oven Racks
To remove:
1. Pull rack straight out until it
stops at the lock-stop position.
2. Lift up on the front of the rack
and pull out.
To replace:
1. Place rack on the rack supports in the oven.
2. Tilt the front end up slightly. Slide rack back until it clears
the lock-stop position.
3. Lower front and slide back into the oven.
Never cover an entire rack with aluminum foil or place
foil on the oven bottom. Baking results will be affected
and damage may occur to the oven bottom.
Rack Positions
RACK 5: Used for toasting
bread or broiling thin, non-
fatty foods. ........
RACK 4: Used for most
broiling. 3
..............2
RACK 3: Used for most .........
baked goods on a cookie
. J
sheet or jelly roll pan, layer
cakes, or frozen convenience foods and general single-rack
baking.
RACK 2: Used for pound cakes, Bundt cakes, pies, casseroles
and roasting small cuts of meat.
RACK 1: Used for pound cakes, 9 x 13 cakes, pies and
roasting large cuts of meat and poultry.
MULTIPLE RACK COOKING:
Two rack: Use rack positions 2 and 5, or 1 and 4.
Important: Never place pans directly on the oven bottom.
Baking Layer Cakes on Two Racks
Forbest results when
baking cakes on two
racks, use racks 2
and 5.
Placethe cakes on
the rack as shown.
The oven has two racks. All racks are designed with a
lock-stop edge.
2O

Warranty&Servic
CUSTOMER'SSOLEAND EXCLUSIVE
REMEDY UNDERTHIS LIMITED
WARRANTY SHALL BE PRODUCTREPAIR
AS PROVIDED HEREIN. IMPLIED
WARRANTIES,INCLUDING WARRANTIES
OFMERCHANTABILITY OR FITNESSFORA
PARTICULAR PURPOSE,ARE LIMITED TO
ONEYEAR ORTHE SHORTESTPERIOD
ALLOWED BY LAW. MAYTAG
CORPORATIONSHALL NOT BE LIABLE
FORINCIDENTAL ORCONSEQUENTIAL
DAMAGES. SOME STATESAND
PROVINCESDO NOTALLOW THE
EXCLUSION ORLIMITATION OF
INCIDENTAL OR CONSEQUENTIAL
DAMAGES, OR LIMITATIONS ON THE
DURATION OFIMPLIED WARRANTIES OF
MERCHANTABILITY OR FITNESS,SO
THESEEXCLUSIONSOR LIMITATIONS
MAY NOT APPLY TOYOU. THIS
WARRANTY GIVESYOU SPECIFICLEGAL
RIGHTSAND YOU MAY ALSO HAVE
OTHERRIGHTS,WHICH VARY STATETO
STATEOR PROVINCETO PROVINCE.
What is Not Covered By These Warranties
1. Conditions and damages resulting from any of the following:
a. Improper installation, delivery, or maintenance.
b. Any repair, modification, alteration, or adjustment not authorized by the
manufacturer or an authorized servicer.
c. Misuse, abuse, accidents, or unreasonable use, or acts of God.
d. Incorrect electric current, voltage, electrical and/or gas supply.
e. Improper setting of any control.
2 Warranties are void if the original serial numbers have been removed, altered,
or cannot be readily determined.
3. Light bulbs, water filters and air filters.
4. Products purchased for commercial or industrial use.
5. The cost of service or service call to:
a. Correct installationerrors. For products requiring ventilation, rigid metal
ducting must be used.
b. Instruct the user on the proper use of the product.
c. Transport the appliance to and from the servicer.
6. Any food loss due to refrigerator or freezer product failures.
7. Expensesfor travel and transportation for product service in remote locations.
8. Outside of the United States and Canada this warranty does not apply.
Contact your dealer to determine if another warranty applies.
9. Consequential or incidental damages sustained by any person as a result of
any breach of these warranties. Some states do not allow the exclusion or
limitation of consequential or incidental damages, so the above exclusion may
not apply.
if You Need Service
First see the Troubleshooting section in your Use and Care Guide or call the
dealer from whom your appliance was purchased or call Maytag Services, LLC,
Customer Assistance at 1-800-688-9900 USA and 1-800-688-2002 Canada to
locate an authorized servicer.
* Be sure to retain proof of purchase to verify warranty status. Refer to
WARRANTY for further information on owner's responsibilities for warranty
service.
If the dealer or service company cannot resolve the problem, write to Maytag
Services, LLC,Attn: CAIR:"Center, P.O.Box 2370,Cleveland, TN 37320-2370, or
call 1-800=688=9900 LISA and 1=800=688=2002 Canada. U.S.customers
using TTY for deaf, hearing impaired or speech impaired, call 1-800-688-2080.
User's guides, service manuals and parts information are available from Maytag
Services, LLC, Customer Assistance.
Notes: When writing or calling about a service problem, please include:
a.Your name, address and telephone number;
b. Model number and serial number;
c. Name and address of your dealer or servicer;
d. A clear description of the problem you are having;
e. Proof of purchase (sales receipt).
21

iiiiiiiiiiiiiiiiiiiiiiiiiiiiiiiiiii_
_!i!i!i!i!i!i!i!i!i!i!i!i!i!i!i!i!i!i!i!i!i!i!i!i!i!i!i!i!i!i!i!i!i'!i_i
Cuisi.i_re e|ectrique e.castrab|e
Easy Touch 500 = dessus |isse
Table des mati_res
instructions de s_curit_ importantes ......................23-26
Nettoyage ...................................................................... 26=29
Four autonettoyant
Methodes de nettoyage
Entretien ......................................................................... 30-31
Lampe du four
Hublot du four
Recherche des pannes ................................................32=33
Cuisson sur la su_ace ................................................ 34=36
Commandes de la surface de cuisson
Surface b dessus lisse
Cuisson dans le four ................................................... 37=44
Cuisson courante Cuisson au gril
Cuisson et maintien Arr_te automatique/Mode sabbat
Cuisson et maintien differes Grilles du four
Maintien au chaud
Garantie et service apr_s=vente .......................................45
Guia de uso y cuidado ........................................................46

que pourrait susciter une utilisation incorrecte de I'appareik
Utiliser I'appareil uniquement pour lesfonctions pr6vues,
d6crites dans ce guide.
Pour une utJlisation adequate et en s_curit_, il faut que
I'appareil soit convenablement install6 par un technicien
qualifi& et reli6 _ la terre. Ne pas r6gler, r@arer ni remplacer
un composant, _ moins que cela ne soit sp6cifiquement
recommand6 dans ce guide. Toute autre r@aration doit 6tre
effectu6e par un technicien qualifi&
Toujours d6brancher I'appareil avant d'y fake de I'entretien.
Instructionsde
s6curlteimportentes
Les instructions de s6curit6 importantes et los paragraphes
_avertissement )_de ce guide ne sont pas destin6s _ couvrir
toutes lesconditions et situations qui pourraient se pr6senter.
II faut fake preuve de bon sens,de prudence et de soin Iors de
I'installation, de I'entretien ou du fonctionnement de I'appareik
Toujours prendre contact avec le fabficant dans le cas de
probl_mes ou de conditions qui ne seraient pas comprises.
Reconnaitre los _tiquettes, paragraphes et
syrnbolessur la s_curit_
Life routes los instructions avant d'utiliser cot appareil ;
observer toutes les instructions pour 61iminerles risques
d'incendie, choc 61ectrique,dommages mat6riels et corporels
Utiliser une lampe torche pour d6terminer si la bride
antibasculement est convenablement install6e sous la
cuisiniSre Fun des pieds arriSre de r6glage de I'aplomb doit
6tre convenablement engag6 dans la fente de la bride.
Lorsque la cuisiniSre est convenablement cal6e, la bride
antibasculement immobilise le pied artiste contre le sol.
V6rifier la parfake immobilisation de la cuisini_re par la bride
aprSschaque d@lacement de la cuisiniSre.
Pour viter un incendie ou des
dommages par la furn e
S'assurer que tousies mat6riaux de conditionnement sont
retir6s de I'appareil avant de le mettre en marche.
Garder les mat6riaux combustibles bien 61oign6sde I'appareil.
Ne pas ranger de mat6riaux inflammables dans un four.
De nombreux types de plastique sont affect6s par la chaleur.
Garder les plastiques 61oign6sdes pi_ces de I'appareil pouvant
devenir chaudes.
Pour emp6cher qu'un feu de graisse nese d6clare, 6viter
route accumulation de graisse ou autres matieres
inflammables dans I'appareil ou au voisinage.
23

En cas d'incendie
Utiliser du bicarbonate de soude ou un extincteur _ poudre
chimique ou _ mousse pour 6touffer les flammes. Ne jamais
utiliser d'eau pour 6teindre de la graisse enflamm6e.
1.Interrompre ralimentation 61ectriquede I'appareil pour
minimiser la propagation des flammes.
2. NEJAMAIS saisir ou d6placer un ustensile de cuisine
enflamm&
3. Fermer la porte du four pour 6touffer les flammes.
Arr6ter la hotte pour 6viter la propagation des flammes.
I_teindre les flammes, puis mettre la hotte en marche pour
6vacuer la fum6e et les odeurs.
S curit6 pour les enfants
N[ JAMAIS laisser des enfants seuls ou sans supervision
Iorsque I'appareil est en service ou encore chaud. Ne jamais
laisser un enfant s'asseoir ou se tenir sur une partie
quelconque de I'appareil. II pourrait se blesser ou se br01er.
II est important d'enseigner aux enfants que rappareil et les
ustensiles plac6s dedans peuvent 6tre chauds. Laisser refroidir
les ustensiles en un lieu s0r, hors d'atteinte des enfants. II est
important d'enseigner aux enfants qu'un appareil m6nager
n'est pas un jouet, et qu'ils ne doivent toucher aucune
commande ou autre composant de rappareil.
Familiarisation avec I'appareil
Ne pas utiliser cet appareil pour chauffer ou pour garder
chaude une piece, sinon des dommages _ I'appareil pourraient
s'ensuivre et cela pourrait etre dangereux pour I'utilisateur.
Aussi, ne pas utiliser le four pour ranger des aliments ou des
ustensiles de cuisine.
Ne pas bloquer ou obstruer revent du four. L'event de four est
situe _ I'arriere de la surface de cuisson.
24
NE JAIVlAISTOUCHERLESleLleMENTSCHAUFFANTSNI LES
PAROISINTleRIEURESDU FOUR.Les elements chauffants
peuvent 6tre brOlants meme s'ils ne sont plus rouges. Les
surfaces interieures du four peuvent atteindre une
temperature suffisamment elevee pour infliger des brOlures.
Pendant et apres usage, ne pas toucher leselements
chauffants ni les parois interieures du four et eviter leur
contact avec des v6tements ou autres materiaux inflammables
avant qu'ils n'aient eu le temps de refroidir suffisamment.
D'autres surfaces peuvent egalement atteindre une
temperature suffisamment elevee pour br01er: le ouverture
d'event et le surface avoisinante, ainsi que le porte et le hublot
de four.
Ne pas toucher rampoule du four br01anteavec un chiffon
humide car elle pourrait se briser. Si tel est le cas, debrancher
rappareil avant de retirer I'ampoule pour eviter une decharge
electrique.
NE JAMAIS garnir la sole du four ou une grille du four avec
de la feuille d'aluminium. Ceci pourrait susciter un risque de
decharge electrique ou d'incendie, ou une deterioration de
rappareil. Utiliser de la feuille d'aluminium uniquement selon
les instructions de ce guide.
Ne pas remiser des aliments ou ustensiles de cuisine sur la
table de cuisson ou dans le four.
Cuisson et s6curit6
NE JAMAIS faire chauffer un recipient non ouvert dans le
four. L'accumulation de pression dans le recipient pourrait
provoquer son eclatement et de graves dommages materiels
ou corporels.
Utiliser des maniques robustes et seches. Des maniques
humides peuvent provoquer la formation de vapeur br01ante.
Ne jamais utiliser un torchon _ vaisselle ou autre article
textile _ la place de maniques ; un tel article pourrait trainer
sur un element et s'enflammer, ou accrocher un ustensile ou
un composant de I'appareil.
Porter un vetement appropri& I_viterde porter des v6tements
amples ou _ Iongues manches pendant rutilisation de
rappareil. IIspeuvent prendre feu si le v6tement entre en
contact avec un 616mentde cuisson br01ant.
Placer toujours les grilles _ la position appropri6e dans le four
Iorsque le four est froid. Faire coulisser la grille vers rext6rieur
avant d'ajouter ou enlever un plat ; utiliser pour cela une
manique robuste et seche. I_viterd'introduire la main dans le
four poury placer ou retirer un plat. S'il est n6cessaire de
d6placer une grille Iorsqu'elle est chaude, utiliser une manique
sSche.Ne pas toucher un 616mentchaud avec une manique.
N'utiliser les grilles que dans le four dans lequel elles ont 6t6
achet6es/exp6di6es.
Suite

Inslrucilonsdesecurilelmporlenles
Ouvfir toujours la porte du four tres prudemment. Laisser rair
chaud ou la vapeur s'echapper avant de retirer ou d'introduire
un plat.
AVERTISSEMENT = METS PRI::PARI::S: Respecter les
instructions du fabricant. Si le contenant ou lecouvercle en
plastique d'un mets surgele se deforme ou est endommage
durant la cuisson, jeter immediatement le recipient et son
contenu. Les aliments pourraient etre contamines.
Ne pas permettre le contact de papier d'aluminium ou de la
sonde _ viande avec leselements chauffants.
Toujours eteindre routes lescommandes une fois lacuisson
terminee.
Ustensiles et s6curit6
Appliquer les instructionsdu fabricant lots de I'emploi d'un
sachet pour cuisson au four.
La securite de fonctionnement de cet appareil a ete testee
raide d'ustensiles de cuisine traditionnels. Ne pas utiHser un
ustensile ou accessoire qui n'est pas specifiquement
recommande dans ce guide. Ne pas utiHserde systeme de
convection additionnel. L'utilisation d'un dispositif ou
accessoire qui n'est pas expressement recommande dans
ce guide peut degrader la securite de I'appareil ou sa
performance, ou reduire la Iongevit6 des composants.
Si un ustensile est plus petit que relement utiHse,une pattie
de I'element chauffant est exposee et peut provoquer
rinflammation d'un vetement ou des maniques.
Seuls certains materiaux en verre, vitroceramique, ceramique,
gres, ou certains ustensiles vitrifies/emailles peuvent etre
utilis6s sur la table de cuisson ou dans le four sans risque de
bris sous reffet du choc thermique. Observer les instructions
du fabricant Iors de I'utiHsation d'un ustensile en verre.
Orienter la poignee de chaque ustensile vers le centre de la
table de cuisson et non vers rexterieur ou vers un autre
element ; ceci reduira le risque de br01ure,inflammationde
matiere inflammableou renversement I:unjeune enfant
pourrait saisir et renverser un ustensile dont le manche est
oriente vers I'exterieur).
Table de cuisson
NE JAMAIS laisser un element de surface allume sans
surveillance, particuHerement avec chauffage eleve. Le
debordement du contenu de rustensile pourrait provoquer la
generation de fumee abondante et I'inflammation de la
graisse.
Cet appareil comporte des elements chauffants de differentes
tallies. Utiliser toujours un ustensile _ fond plat, de taille
suffisante pour qu'il puisse recouvrir completement relement.
Pour optimiser refficacite, choisir un ustensile de m6me taille
que relement.
SURFACE ENVITROCI'-:RANIIQUE: NEJANIAIS utiliser une
table de cuisson cassee ou f61ee:les solutions de nettoyage et
renversements pourraient penetrer dans la table de cuisson en
entrai'nant un risque de decharge electrique. Prendre
immediatement contact avec un technicien quaHfie.
Friteuses
Exercer une prudence extreme Iors du deplacement du
recipient de graisse ou Iors de I'eHmination de graisse chaude.
Laisser la graisse refroidir avant de deplacer I'ustensile.
Hottes d'extraction
Nettoyer frequemment lesflltres et la hotte de la cuisiniere
pour emp6cher la graisse ou d'autres produits inflammables
de s'accumuler sur lesflltres ou lahotte en provoquant des
feux de graisse.
Pour flamber des aliments sous la hotte, mettre le ventilateur
en marche.
Nettoyage et s6curit6
Nettoyer prudemment la table de cuisson. Arreter toutes les
commandes et attendre ie refroidissement de tousies
composants avant de ies toucher ou d'entreprendre ie
nettoyage. Nettoyer i'appareil avec precaution. Travailler
prudemment pour eviter des brOlures par ia vapeur en cas
d'utilisation d'un chiffon ou d'une eponge humide iors de
relimination d'un produit renverse sur une surface chaude.
Certains produits de nettoyage peuvent generer des vapeurs
nocives iorsqu'on ies applique sur une surface chaude.
Nettoyer uniquement les pieces mentionnees dans ce guide.
Four autonettoyant
25

Ne pas nettoyer le joint de porte; le joint joue un rOleessentiel
quant _ 1'OtanchOit&Ne pasfrotter, endommager ou d@lacer
le joint.
Ne pas utiliser de produits de nettoyage pour four ou enduits
de four, dans le four autonettoyant ou sur les zones voisines.
Avertissement et avis
important pour la s curit
La Ioi californienne {<Safe Drinking Water and Toxic
Enforcement Act )_de 1986 (proposition 65) stipule la publica-
tion par le gouverneur de la Califomie d'une liste de sub-
stances que 1'Otatde Californie considOre comme
cancOrigenes ou dangereuses pour le systSmereproducteur,
et impose aux entreprises commerciales I'obligation de
signaler _ leurs clients les risques d'exposition _ de relies
substances.
Nous informons les utilisateurs de cet appareil que lots d'une
opOration d'autonettoyage, ils peuvent 6tre exposOs_ une
faible concentration de certaines substances figurant dans la
liste mentionnOe ci-dessus, dont le monoxyde de carbone.
Pour minimiser I'exposition, veiller _ ce que la piSceo0 se
trouve le four soit convenablement aOrOedurant une opOration
d'autonettoyage par I'ouverture d'une fenOtre ou d'une porte.
AVIS IMPORTANT =OISEAUX FAMILIERS : Les oiseaux ont
un systSme respiratoire trSs sensible. Ne pas garder un oiseau
familier dans la cuisine ou dans une piSceo_ il pourrait 6tre
expos6 aux fumOes.Les fumOes6raises durant une opOration
d'autonettoyage peuvent 6tre dangereuses ou mortelles pour
un oiseau, de mOme que les fumOes6raises Iors du chauffage
excessif de graisse, huile, margarine, et du chauffage excessif
dans un ustensile _ revOtement antiadhOsif.
Conserver ces instructions pour consultation ult rieure
llettovege
Four autonettoyant
Le cycled'autonettoyageutilisedestemperaturessuperieures_la
normalepourassurerle nettoyageautomatiquede latotalite du four.
Lefour doit etre nettoyeregulierement.Leseclaboussuresdoivent
etreessuyeespour eviterune productionexcessivedefumee ou
I'apparitiondeflammes.Nelaissezpasde residuss'accumulerdans
le four.
Durant le processusd'autonettoyage,il convientde bien aererla
cuisinepour eliminerlesodeursnormalementCruisesdurantle
nettoyage.
Avant I'autonettoyage
1. I_teindrela lampedufour avant lenettoyage.Ellerisqueraitsinon,
degriller.
2. Enlevertousles platset lesgrillesdu four. Lesgrillesrisquentde
sedecoloreret de ne plusglisseraussibienapresun cycle
d'autonettoyagesi on ne lesenlevepas.
3. Nettoyerle cadredu four, le cadredela porte,la zone
rexterieurdujoint etautourde I'ouverturedanslejoint de la
porte,_ I'aided'un produitde nettoyagenonabrasifcommeBon
Ami_ou d'eauadditionneededetergent.Leprocessus
d'autonettoyagenenettoie pasceszones.Ellesdoiventetre
nettoyeespour empecherla saletedes'incrusterpendantle cycle
de nettoyage.(Lejoint assureI'etancheiteautourde la porteet
du hublotdu four.)
4. Pourempechertout dommage,ne pas
nettoyerni frotter lejoint qui setrouve \ .
autourde la portedufour. Cejoint est
congupour eviterlespertesde chaleur
pendantle cycled'autonettoyage.
5. (--liminerlesresidusde graisseou de
produitsrenversessur lasoleavantle
nettoyage.Ceciempechela formationdeflammesou defumee
durantle nettoyage.
6. Essuyerlesresidussucreset acides,commelespatatesdouces,
latomateou lessauces_basede lait.La porcelainevitrifiee
Suite
*Lesnomsde marquedesproduitsde nettoyagesont desmarquesd@oseesdesdifferentsfabricants.
26

possedeunecertaineresistanceauxcomposesacides,maisqui
n'estpaslimitee.Ellepoutsedecolorersilosresidusacidesou
sucresnesontpasenlevesavantdecommencerI'autonettoyage.
Programmation de Fautonettoyage :
Important : Latemperaturedufour dolt etresitueeen dessousde
205°C(400°E)pour programmerun cycled'autonettoyage.
1. Eermerlaportedufour.
2. Placerlamanettede verrouillage9la positiondeverrouillage.
CLEAN
3. Appuyersurla toucheCLEAN(Nettoyage).
* Lemot CLEANclignote_ I'afficheur.
/4. Appuyersurla toucheA ou T.
. CL-M (Nettoyage- salete moyenne)est affich&
Si la porten'est pasfermee,desbipsretentissentet
le mot{<door >>(porte)parait_ I'afficheur.Si la porte _m'_
n'estpasfermeedartslos/45secondes,I'operation
d'autonettoyageestannuleeetI'afficheurrevient_ I'heure
du jour.
5. Appuyersurla toucheA ou T pourvoir defilerlosdifferents
reglagesdeI'autonettoyage.
• CL-H(Nettoyage- salete@aisse,/4heures)
• CL-M (Nettoyage- salete moyenne,3 heures)
• CL-L(Nettoyage- salete legere,2 heures)
Lechoix du niveaudesaletedu four programme
automatiquementladuroc du cycled'autonettoyage.
6. Apresquatresecondes,le four commencele nettoyage.
• Ladurocde nettoyagecommencele decompte_I'afficheur.
• Lemot LOCK(Verrouillage)parait_ I'afficheur.
• Lemot CLEANparait_ I'afficheur.
Demurrage differe d'un cycle d'autonettoyage :
1. Appuyersurla toucheDELAY (Differe).
* Lemot DELAYclignote.
• 00:00parait_ I'afficheur.
2. Appuyersurla toucheA ou T pour programmerla
duroc d'attenteavantque ne commencelecycle.La
duroc d'attentepoutetre reglee,de 10minutes
(00:10)_11 heures,59minutes(11:59).
3. Alors quele mot DELAY(Differee)clignote,
appuyersur la toucheClean (Nettoyage).
• Lemot CLEANvaclignoter.
/4. Appuyersurla toucheA ou T.
• CL-M (Nettoyage- salete moyenne)est affich&
DELAY
CLEAN
5.
Appuyersur latouche A ou T pourvoir defilerlesdifferents
reglagesdeI'autonettoyage.
• CL-H(Nettoyage- salete@aisse,/4heures)
• CL-M (Nettoyage- saletemoyenne,3heures)
• CL-L (Nettoyage-saletelegere,2 heures)
Lechoixdu niveaudesaletedu four programme
automatiquementla dureedu cycled'autonettoyage.
6. Apresquatresecondes,losrootsCLEAN,DELAYet LOCK
(Verrouillage)paraissent9 I'afficheurpour indiquerque lefour
est programmepour une operationde nettoyagediffer& Le
tempsd'attenteparait9 I'afficheur.
Si le four a dej_ ete programme pour an cycle de
nettoyage et que I'on desire etablir an delai :
1. Appuyersur latouche DELAY.
• Lemot DELAYclignote.
• 00:00parait9 I'afficheur.
DELAY
2. Appuyersur latouche A ou T pour programmerla
duroc desireedeI'attenteavantque nedebutele
cycle.
Apr6squatresecondes,losrootsCLEAN,DELAYet
LOCKparaissent_ I'afficheurpour indiquerque le fourest
programmepour uneoperationdenettoyagediffer&Letemps
d'attenteparait_ rafficheur.
Lorsque le cycle d'autonettoyage debate :
• Lemot DELAYs'eteint.
* Ladureede nettoyageparait9 I'afficheur.
Annulation du cycle d'autonettoyage :
Appuyersur latouche CANCEL(Annuler).
. Touslosrootsdisparaissentde rafficheur.
. Touteslosfonctionssontannulees.
. L'heuredujour parait_ I'afficheur.
CANCEL
Pendant le cycle d'autonettoyage
Lorsquele mot LOCKparait_ rafficheur, la portene peutetre
ouverte.Poureviterd'endommagerla porte,ne pas laforcer pour
I'ouvrirIorsquele mot LOCKest affich&
Fumee et odeurs
La premierefoisoQlefour est nettoy&il peuty avoirproduction
d'odeuret defumee.Ceciest normaletdisparaitra_ I'usage.
Sile four esttres saleousi une ustensileau gril a etelaisseedansle
four, il peuty avoirproductiondefumee.
27

Bruits
Pendantquele four chauffe,il peutse produiredesbruitsde metal
en dilatationou en contraction.Ceciest normalet n'indiquepasque
le fours'abime.
Aprbs le cycle
d'autonettoyage
Environune heureapreslafin du cycle,le motLOCKs'eteint.Ace
moment,laporte poutetreouverte.Pousserla manettede la porte
versla gauchepourdeverrouiller.
La salet_ poutavoir laiss6un r6sidugris poudreux.L'enlever
avecun lingo humide.S'il restede lasalete,colaindiqueque le cycle
de nettoyagen'apaseteassezlong.Cettesaleterestantesera
enleveeauprochaincycled'autonettoyage.
Si losgrillesont 6t6 laiss_es _ I'int_rieurdu four pendant le
cycled'autonettoyageet qu'elles glissent real surleurssup-
ports,losenduire,ainsique lessupports,d'unefine couched'huile
vegetale.
De fines lignespeuventapparaitre dartslaporcelaine parce
qu'elle a subi chaleur et refroidissement.Ceciest normalet
n'affecterapaslaperformance.
Une d6colorationblanche poutapparaitre apres le nettoyage
si desaliments acides ou sucres Wont pas6t6 enleves avant
que ne commence I'autonettoyage.Ladecolorationest normale
et n'affecterapasla performancedufour.
Remarques -
• Si la portedu four n'estpasfermee,lemot<_door>>(porte)
clignote_ I'afficheuret lefour emetdesbipsjusqu'_ ceque la
portesoitfermeeet que ron appuie _ nouveausur CLEAN.
• S'il s'ecouleplusdecinq secondesentrele momento_ ron
appuiesurCLEANet celuio_ ron appuiesur latouche
A ou T, I'afficheurretourneautomatiquement_ I'affichage
precedent.
• Laporte dufour setrouveraendommageesi I'onforce son
ouverturealorsque le mot LOCKestencoreaffiche.
IVl thodes de nettoyage
*Les nomsde marquesont desmarques
deposeesdesdifferentsfabricants.
** Pourcommanderdirectement,
composerle 1-877-232-6771I_.-U.ou
1-800-688-8408Canada.
Table de
cuisson =
6mail vitrifi6
Zonede la
consolede
commando/
horloge
Tiroirde
remisage,
poign6ede
porte=
6mail peinte
L'emailvitrifieestduverrelieau metalparfusion.II peutsefissurerous'ecaillerencasdemauvaiseutilisation.IIest
resistantauxacides,maispastotalementinattaquableparlosacides.Touslosproduitsrenverses,en particulieracidesou
sucres,doiventetreessuyesimmediatementavecun lingosec.
• Unefois refroidi,laveravecde reausavonneuse,rinceretsecher.
•Nejamais essuyerunesurfacetiedeouchaudeavecunlingohumide.Cecipourraitlafissurerourecailler.
•Nejamais utiliserdenettoyantspourfour,d'agentsdenettoyagecaustiquesou abrasifssurlefiniexterieurde la
cuisiniere.
•PourutiliserlafonctionVerrouillagedescommandos,voir page38.
•Essuyeravecunlingohumide,puisfairesecher.Nepasutiliserun agentdenettoyageabrasifsusceptiblede rayerla
surface.
•Onpoututiliserun produitdenettoyageduverre,pulverised'abordsurunchiffon.NEPASprejeterle preduit
directementsur lostouchesde commandoeu sur rafficheur.
•Placerchaquebouton_ la positiond'ARRET,et retirerchaqueboutonen letirant.
•Laver,rinceretfairesecher.Nepasutiliserun agentdenettoyageabrasifsusceptiblede rayerlafinition.
•Fairefonctionnerbrievementchaqueelementpourverifierqueleboutonaetecorrectementreinstalle.
• Unefois lespiecesrefroidies,laver9 reausavonneusetiede,rinceretsecher.Nejamaisessuyerunesurfacetiedeou
chaudeavecunlingohumide,cecipouvantendommagerlasurfaceetentrainerunebrOlureparlavapeur.
• Pourlostachesrebelles,utiliserdesagentsdenettoyagelegerementabrasifscommelapateaubicarbonatedesoudeou
BonAmi*.Nepasutiliserd'agentsde nettoyageabrasifs,caustiquesou energiquescommelosnettoyantspourfourou los
tamponsenlained'acier.Cosproduitsraieraientouendommageraientde fagonpermanentelasurface.
Important: Utiliserunlingoeu un terchensecpour essuyerlospreduits renvers6s,surtout s'ils sent acides eu
sucres.La surfacepourrait se d_co/orer ou se ternir si la salet6 n'6taitpasimm6diatement enlev6e. Ceciest
pan_culi_rementimportant dans/e cas de surfaces blanches.
Suite
28

Tablede Nejamais utilizer deproduits denettoyagedu four,javellisant, ammoniaqueou produits denettoyagedu verre
cuissoneu contenant deI'ammoniaque.Important: Prendrecontactavec un rGparateuragr66si lasurface en vitrocGramique
vitrocGramique sefendille,se casseou si deI'aluminiumou dum_talfondsur lasurface.
• Laisserlatabledecuissonrefroidiravantdela nettoyer.
•GGnGralitGs=Nettoyerlatabledecuissonapreschaqueemploiouaubesoin,avecdu papieressuie-touthumidifieetla
CooktopCleaningCreme*(pieceno20000001)**.Puis,essuyeravecun lingesecetpropre.
Important: Desmarquespermanentesvontseproduiresilasalet#restesurlasurfacede cuissonetestcuitedefaGonr#p#t#e.
•Salet66paisse ou marques m_talliques - Humidifieruneeponge9 rGcurer{{ne rayantpas>>.AppliquerdelaCooktop
CleaningCreme*(pieceno20000001)**etfrotterpourretirerautantdesalet6quepossible.Appliquerunemincecouchede
cremesurlasalet&recouvriravecdu papieressuie-touthumidifi6et laisserpendant309 45minutes(2 ou3 heurespourla
salet6tres importante).Garderhumideenrecouvrantressuie-toutd'unepelliculeplastique.Frotter9nouveau,puisessuyer
avecun lingepropreetsec.
important:N'utiliserqu'untamponDr_curer<<nerayantpas_,PROPREETHUMIDE,sansdangerpourlesustensilesde cuisine
Drev#tementantiadh#sif.Le verreet/e motifserontendommag#ssi/e tamponn'estpashumide,sT/estsoui//#ousiunautretype
detamponestutilize.
•SaletGscuites ou dessGchGes=Frotteravecuntampon9 rGcurer{<nerayantpast>et unecremede nettoyage
pourtabledecuisson.
Important: TenirunelamederasoirDunanglede30°etgratterpourenlevertoutesalet#restante.Puis,nettoyercomme_
il estd_critci-dessus.Nepas seservirdelalamederasoirtouslesjours,celapourraituserle motifdu verre. _ __
•Plastiqueou sucre fondu =RGglerimmGdiatementrGIGmentsurLOWetgratterlesucreetle plastiquedela/_z
surfacechaudepourlespousserversunezonemoinschaude.PuisCTEINDRE1'616mentetle laisser :_
refroidir.Nettoyerle rGsiduavecungrattoir_lamederasoiretdelaCooktopCleaningCreme (piece _,_
no2oooooo, **
Hublot et porte •I_viterd'utilisertropd'eau,quirisqueraitdes'infiltrersousouderriereleverreetdetacher.
du four en verre • Laver_ reauetausavon.Rinceravecde reaupropreetsGcher.Unproduitdenettoyagedu verrepeut6treutilis6en le
vaporisantd'abordsurun linge.
•Nepas utilizerde produitsabrasifscommetampons_ rGcurer,lained'acierouproduitdenettoyageenpoudrequi
risqueraientde rayerleverre.
Interieur du four °ExGcuterlesinstructionsprGsentGesauxpages26-28pour I'autonettoyagedu four.
Grilles du four •Nettoyeravecdereausavonneuse.
•Eliminerlessouillurestenacesavecunepoudrede nettoyageou untampon_ rGcurersavonneux.RinceretfakesGcher.
•SilesgrillessontlaissGesdanslefourpendantlecycled'autonettoyage,ellessedecolorentetpeuventneplustres bien
glisser.Sicelaseproduit,enduireleborddesgrillesetlesupportdesgrillesd'unefinecouched'huilevGgGtale,puisessuyer
rexc(!dent.
Acier inoxydable •NEPASUT/LISERBEPROBUITSBENETTOYAGECONTENANTBUJAVELL/SANT.
(certainsmodeles) •/tie PASUTILISERBENETTOYANTS<<ORANGE_OUABRASIFS.
•TOUJOURSESSUYERBANSLESENSDELA TEXTUREDEL'AClERLORSBU NETTOYAGE.
•Nettoyagejoumalier/salet6 16gOre=Essuyeravecrun desproduitssuivants:eausavonneuse,vinaigreblanc/eau,produit
de nettoyagepourverreetsurfaceFormula409*ou un produitsemblablepourverre- avecunlingesoupleet une@onge.
RinceretsGcher.Pourpolketenleverlesmarquesdedoigts,fakesuivreparunevaporizationdeStainlessSteelMagicSpray*
(pieceno20000008)**.
•SaletemodGrGe/Gpaisse=Essuyeravecrun desproduitssuivants:BonAmP,SmartCleanse€ou SoftScrub*- _ raided'un
lingesoupleou d'une@ongehumide.RinceretsGcher.Lestachesrebellespeuvent6treenlevGesavecuntamponmulti-
usagesScotch-Brite*humidifi&Frotteruniformementdanslesensdumetal.Rinceretsecher.Pourredonnerdu lustreet
retirerlesrayures,fakesuivreparunevaporizationdeStainlessSteelMagicSpray*(pieceno20000008)**.
•g_coloration - A raided'uneepongehumidifiGeoud'un Iingesouple,essuyer_ raidedunettoyantCameopouracier
inoxydable*.RincerimmediatementetsGcher.Pourenleverlosmarquesetredonnerdu lustre,fakesuivreparunevaporization
deStainlessSteelMagicSpray*(pieceno20000008)**.
• Lesnomsde marquesontdesmarquesd@os6esdesdiff6rentsfabricants.
•* Pourcommanderdirectement,composerle 1-877-232-6771I_.-U.ou 1-800-688-8408Canada.
29

[ntretlen
Porte du four
Lampe du four
_Lestyle peut varier selon le mod61d)
D_pose de la porte :
1. Apresle refroidissementdu four, ouvrirla
porte- positionde cuissonau gril (porte
entrouverted'environ10cm [4 pouces]).
2. Saisirla portedechaquecote.Ne pas
utiliserla poigneede portepour la
soulever.
3. Souleveruniformementpourdegagerla portedescharnieres.
R_installation :
1. Saisirla portedechaquecote.
2. Aligner lesfentesaveclesbrasde charnieresurla cuisiniere.
3. Fairedescendrelaporte pourla positionnercorrectementsur les
charnieres.Poussersurlesanglessuperieursdela portepour
I'enfoncercompletementsur lescharnieres.IIfaut que laporte
suit parfaitementd'aplomb.
important: On peutpercevoirunecertaine{_elasticite_Iorsde la
fermeturede la portedu four d'unecuisiniereneuve;ceci est normal
; ceteffet disparaitprogressivement.
Pour rempiacer rampoule du four :
1. Apres le refroidissementdu four,
maintenirle cabochontout en CABOCHON
enlevantla piecemetalliquequi la
maintienten place,important:
Lecabochontombera sion ne
le maintientpasenplace.
2. Enleverlecabochonet RESSORTDERETENUE
I'ampoule. (film_tallique)
3. Installerune ampoulede40watts pour appareilmenager.
4. Reinstallerlecabochonet le fil metalliquede retenue.
5. RetablirI'alimentationde la cuisiniere.Reglerde nouveau
I'horloge.
OU
.
4.
Porterune maniquesecheetdevissertressoigneusementle
cabochonet I'ampoule.
RemplacerI'ampoulepar uneampoulepour four, de40-watts.II
est recommanded'utiliser uneampouleavecun culot en laiton
pour eviterlafusion du culotdansla douille.
Remettre en place le cabochon et rebrancher le four.
RemettreI'horloge9 I'heure.
3O

[ntretlen
Pieds de r glage de I'aplomb
Tiroir de rernisage
S'assurerque la cuisiniereestd'aplombunefois
installee.Sielle ne rest pas,tourner lespiedsde
reglagede I'aplomb,9chacundesanglesde la
cuisiniere,jusqu'9ceque celle-ci soit d'aplomb.
Hublot du four
BRIDE
ANTIBASCULEMENT
PIED DE REGLAGE
DE L 'APL OMB
Pour prot_ger le hublot de la porte du four :
1. Ne pas utiliser de produitsnettoyantsabrasifscommedes
tampons9 recureren lained'acierou desproduitsde nettoyage
en poudrequi risqueraientde rayerleverre.
2. Ne pas heurterle hubloten verreavecun ustensile,un article de
mobilier,unjouet, etc.
3. Ne pas fermer la portedu four avantque lesgrillesnesoient en
placedansle four.
Toutedegradationduhublotde verre- rayure,choc,tension,etc.-
peutaffaiblirsastructureet augmenterle risquedebris9 une date
ult(!rieure.
Letiroir de remisagepeut¢treenlevepour vouspermettrede
nettoyersousla cuisiniere.
D_pose :
1. Viderle tiroir et letirerjusqu'_ la positionde la premierebut(!e.
2. SouleverI'avant.
3. Tirerjusqu'9 lapositionde la secondebut(!e.
4. Saisirletiroir par lescotesetsoulever/tirerpour rextraire.
R_installation :
1. InsUrerlesextremit(!sdesglissieresdutiroir danslesrailsdela
cuisiniere.
2. SouleverI'avantdutiroir etpousserdoucementjusqu'9la
positionde la premierebut(!e.
3. Souleverdenouveauletiroir et le pousserpour le fermer.
31

Recherchedespennes
Pourla piupartdesprobibmes
observes,essayerd'abord les
solutionspossibles,tt droite.
Non=fonctionnementde
I'appareil =total ou partiel.
L'horiogeou les lampes
fouctionnent, les rootsparaissent
tt I'afficheur,maisle four ne
chauffe pas.
R6suitatsde cuissonau four
diff6rentsdesattentes ou de ceux
produitspar le fourant_rieur.
R6suitatsincorrectsIorsde la
cuissonau gril,ou _mission
excessivede fum6e.
Impossibiiit_ d'autonettoyage
du four.
Lefour ne se nettoie pas
correctement.
• Verifierque lescommandesdu foursont correctementreglees.
• Verifiersi lefour est bien raccordeau circuitelectrique.
• Inspecter/rearmerle disjoncteur.Inspecter/remplacerlesfusibles.
• Contr01erla sourced'alimentationelectrique.
• Determinersi lescommandesdeselementsdesurfaceet/ou du foursont convenablement
reglees.Voir pages34et38.
• Determinersi la portedu fours'estdeverrouilleeapresuneoperationd'autonettoyage.Voir
page27.
• Determinersi le fourest regle pour unecuissondiffereeou un nettoyagediffer& Voir pages
39 et 26-28.
• Verifiersi leverrouillagedescommandesest en marche.Voir page38.
• Verifiersi lacommandeesten modesabbat.Voirpage43.
• Lescommandessont peut-etre programmeespour unefonction de cuissonet maintienou
de demarragediffer&
• Lafonctionde verrouillagedescommandesestpeut-etreactivee.Voir page38.
o
o
Determinersi I'eventdufourest obstru&Voir sonemplacementpage44.
S'assurerque la cuisiniereestd'aplomb.
Lesreglagesdetemperaturevarientsouvententreun four neufet lefour qu'il remplace.On
observesouventunederivedu reglagede temperatured'unfour 9 mesurequ'ilvieillit ;il peut
devenirpluschaudoumoinschaud.Voirpage43 lesinstructionsd'ajustementdelatemperature
du four. Important : II n'estpasutilede modifierle reglagedetemperaturesi lavariation
n'affectequ'une ou deuxrecettes.
• Determinerla positiondesgrilles.Lesalimentspeuventetretrop presde I'elementdugril.
• I_lementdu gril pasprechauff&
• Utilisation incorrectedefeuille d'aluminium.Ne jaaais garnir la grille de lechefriteavecde
lafeuille d'aluminium.
• Portedu fourfermeedurant lacuissonaugril. Laisserla portedu four entrouverted'environ
10cm (4 pouces)- premierebutee.
• EnleverI'excesde graissesur la piecedeviandeavantla cuissonau gril.
• Utilisation d'unelechefritesouillee.
• Latensionelectriquede la maisonest peut-etre basse.
• DeterminerqueI'appareiln'apaseteprogrammepourunautonettoyagediffer&Voir page26-28.
• Verifierque la porteestfermee.
• Verifiersi lacommandeesten modesabbat.Voirpage43.
• Lefour estpeutetre_ unetemperaturesuperieure_ 205°C(400°F).Latemperaturedufourdoit
etreinferieure_ 205°C(400° F)pour pouvoirprogrammerun cycled'autonettoyage.
• Untempsde nettoyagepluslong peutetre necessaire.
• Onn'a paselimineavantI'operationd'autonettoyagelesaccumulationsexcessivesde residus,
particulierementlesresidusd'alimentsacidesou sucres.
Suite
32

Recherchedespennes
Laportedu four ne se d6verrouille
pasapr_s I'autonettoyage.
Lasurface_ dessuslisse montre
dessignesd'usure.
Accumulationd'humidit6 snr le
hublotou vapeursortantde 1'6vent.
l[missiond'uneforte odeur ou de
fum6e Iorsde la raise en marche
du four.
Codesd'anomalie.
Desbruits se font entendre.
II n'y a ni bip ni affichage.
ii!!!!i! i !i iiiiiiiiiiiliiiiiiiiiiiiiiiiiiiiiiiiiiiiiiiiiiiiiiliiiiiiiiiiiiiiiiiiiiiiiii!!!!iiiiiiiiiiiiiiiiiiiiiiill!!iiiiiiili!ii ii!!! iiiiiiii i!ii!!i!i!ii!!iliiiiii!!!!!!!!iiiiiiiiii!!!!!!!iiiiii!¸
_!!_i_i ;i;i ;i ;i ;i ;i ;i i i i i i i; __i_;;__;i _ _;i i i _i_ _; _ _i_;_; __ _;;i i __ _ _i i i i i __; _i;_i ;;i i __;;i i !
• L'int(!rieurdu four estencorechaud.Attendreenvironune heureapresI'achevementde la
perioded'autonettoyage.II est possibled'ouvrirla porteapresladisparitiondu message
LOCK(Verrouillage)sur I'afficheur.
• Lescommandeset la portesont peut-etreverrouillees.Voir page27.
• Finesrayuresou abrasions.
- S'assurerque la surfacede cuissonet lefond desustensilessont propres.Ne pas faire
glisserd'ustensilesenverreou en metalsur la surface.S'assurerque le fonddes
ustensilesn'estpasrugueux.Utiliserlesagentsde nettoyagerecommandes.Voir page29.
• Marquesde metal.
- Ne pas faire glisserd'ustensilesmetalliquessur la surface.Unelois lasurfacerefroidie,la
nettoyeravecla cremede nettoyagepourtablede cuisson.Voir page29.
• Marquesettachesbrunes.
- Enleverrapidementlesproduitsrenverses.Ne jamais essuyerla surfaceavecune
@ongeou un lingesali.S'assurerque latable de cuissonet quele fond desustensiles
sont propres.
• Zonesavecreflet metallique.
- D@6tsminerauxen provenancede I'eauet dela nourriture.Utiliserlesagentsde
nettoyagerecommand(!s.Voir page29.
• Piq_resou ecaillements
- Enleverrapidementlesproduitssucresquiont deborde.Voirpage29.
• Ceciest normaldurant lacuissond'alimentscontenantbeaucoupd'eau.
• Utilisationexcessived'humidit(!lots du nettoyagedu hublot.
• Ceciest normalpour unfour neufet disparaitapresquelquesutilisations.
Un cycled'autonettoyage<<brOlera_>plusrapidementlesodeurs.
• Lamiseen marched'un ventilateuraide _ retirerfumeeet odeurs.
• Presencede salet(!ssur la sole.Proceder9 unautonettoyage.
• LesrootsBAKE(Cuissoncourante)ou LOCKpeuventclignoterrapidement9 I'afficheurpour
pr(!venird'une erreurou d'un probleme.Si le mot BAKEou LOCKparait9 rafficheur,
appuyersur latouche CANCEL(Annulet).Si le mot BAKEou LOCKcontinue9 clignoter,
d(!brancherrappareil.Attendre quelquesminutes,puis rebrancherI'appareil.Sile mot
continue 9clignoter,debrancherI'appareilet prendrecontactavecun r@arateurautorise.
• Silefour esttres sale,lesflammechespeuventproduire un coded'anomalieau coursdu
cycled'autonettoyage.Appuyersur latouche CANCELet laisserle four refroidir
completement,essuyerlasaleteen excespuisreprogrammerI'autonettoyage.Si le code
d'anomaliereapparait,prendrecontactavecun r@arateurautoris(_.
• Lefourfait plusieursbruitsfaibles.II est possibled'entendrelesrelaisdu four qui se
mettent en marcheet s'arretent.Ceciest normal.
• Alorsque le fourse rechauffeetserefroidit,il est possibled'entendredesbruits
correspondant9 ladilatation et9 la contractiondespiecesmetalliques.Ceciest normalet
n'endommagepasrappareil.
• Lebruit d'unventilateurpeutetreentendu.C'estleventilateurde refroidissementet ceci
est normal. Leventilateurcontinue9fonctionnertant que le four n'a pasrefroidi.
• Lefour estpeut-etre en modesabbat.Voir page43.
• Lescommandespeuventetreverrouillees.Voir page 38.
SAb clignote puis • Lefour esten modesabbat.Pourannulet,appuyersurla touche CLOCK(Horloge)et
resteallure& maintener-laenfonceependantcinqsecondes.
33

Cuissonsurlesurfece
Boutons de cornrnande
PermettentI'utilisationdes_lementschauffantsdesurface,avecune
progressioncontinuede lapuissanceentrelesreglagesextremesLow
(Basse)et High([_levee).Onpeutregleron bouton_toute position
entrecesdeuxextremes.
R glage des cornrnandes
1. Placerrustensilesur relement.
Enfonceretfairetournerle boutonjusqu'_la positiondesiree
(rotationdartsun sensou dartsI'autre).
• Desmarquessurle tableaudecommandeidentifient O O
I'elementcommandeparchaquebouton.Par
exemple,legraphique_ droite indiqueI'element O O
avant!gauche.
3. IIy atemoin lumineuxpour leselementssur letableaude
commande.Lorsquerun desboutonsde commanded'un element
desurfaceestalimente,letemoin s'illumine.Letemoins'eteint des
qu'oninterromptralimentationde I'element.L'element
fonctionnerapar intermittencepour maintenirle reglagepreetabli
dechaleur,memeau niveauHigh.
/4. Apresune cuisson,ramenerle bouton_ la positionOFF(Arret).
RetirerI'ustensile.
Suggestions de r6glage
La dimensionet letype d'ustensile,letype et laquantite d'aliments
cuire,et la puissancedeselementsdeterminerontcommentreglerles
boutonspour lesoperationsde cuisson.Certainselementsont un
reglagepreetablipour le mijotageet la fusionqui ne necessiteque
desajustementsmineursdartsunsensou dartsI'autreselonraliment
preparer.Lesautreselementsontdes reglagesimprimesautour
desboutonsqui sont specifiquesde ceselements.Ajusterles
reglagesselonleschiffresqui donnentlesresultatsde cuisson
desires.Lesdescriptionssuivantesaideront_ choisir lesreglages
donnantlesmeilleursresultats.
Maintien au chaud : Lesalimentsrestent_ unetemperature
superieure_ 60°C (1400F)sanscontinuer_ cuire. L'alimentest au
depart_ unetemperatureelevee,puissachaleurest reduite.Ne
jamaisutiliser le reglageMaintien au chaudpour rechaufferdes
alimentsfroids.
Mijotage : Desbullesseformenttout juste _ la surface.Lesaliments
sont _ unetemperaturesitueeentre85et 93° C(185et2000F).Ce
reglagepeut aussiservirpour etuverdesalimentsoulespocherou
encorepour continuerla cuissond'alimentssouscouvercle.
l]bullitionlente : Desbullesseforment_ un rythmemodere.Ce
reglagepeut aussiservirpour frire la majoritedesalimentsetpour
maintenirrebullition degrandesquantitesde liquide.
l]bullition: Desbullesseformentdartsle liquide_ un rythmerapide.
Cereglagepeutaussiservirpourfaire brunir laviande,la fairesauter
et chaufferrhuile pourfairefrire avantde passer_ un reglage
inferieur.Les3 ou/4reglageslespluselevessur le boutonsen/ent
cesoperationsdecuisson.Lereglagele pluseleveserttoujours
porterI'eau_ ebullition.Certainselementsont memeunevitesseplus
eleveepour I'ebullitiondesliquides.
34

Caissonsurlesurfece
Surface dessus lisse
Remarques -
• Lotsdespremieresutilisationsde latablede cuisson,celle=ci
peat6mettre un pea de fum6e et desodeurs.Ceciest
normal.
• Lessurfaces_ dessuslisseconservent la chaleur pendant
uncertain temps apr_s I'extinctionde 1'616merit.I_teindre
leselementsquelquesminutesavantque la nourriturenesoit
tout _fait cuite etutiliser la chaleurrestantepourterminer la
cuisson.Lorsquelevoyantdesurfacechaudes'eteint,on peut
toucher la surfacede cuissonsansdanger.Enraisondela fa_on
dontleselementsd'une surface_ dessuslisseretiennentla
chaleur,ceux-cine r@ondrontpasauxchangementsde reglage
aussirapidementque deselementsenspirale.
• Au cas o_ le contenud'un ustensilerisquede deborder,retirer
rustensilede la surfacedecuisson.
• Nejamais essayerde soulever la surface de caisson.
• Lasurface_dessuslissepeutsemblerdecoloreeIorsqu'elleest
tres chaude.Ceciest normalet disparaitunelois que la surface
refroidit.
Conseils de protection de la
surface dessus lisse
Nettoyage (plusd'informations_ la page29)
• Avant des'ensen/itla premierelois, nettoyerlatable decuisson.
• Nettoyerla tablede cuissonchaquejour ou apreschaque
utilisation.Cesmesurespreserverontrapparencedelatable de
cuissoneteviterontqu'elle nes'abime.
• Encasde renversementlots de cuisson,nettoyerimmediatement
le produitrenversesur la surfacedecuissonpendantqu'elle est
encorechaudeafind'eviter unplusgrand nettoyagepar la suite.
Userde prudence,essuyerlesrenversementsavecun linge propre
et sec.
• Ne puslaisserlesproduits renversessur lasurfacede cuissonou
sur la garniturede la tablede cuissonpendantune Iongueduree.
• Ne jamais utiliserde poudrede nettoyageabrasiveou detampons
recurerqui raieraientlasurface.
• Ne jamais utiliserdejavellisant,ammoniaqueou autresproduits
de nettoyagenonspecifiquementrecommandespour la
vitroceramique.
Zones de caisson
Leszonesde caissonde la cuisinieresont representeespar des
cerclespermanentssur la surface_ dessuslisse.Pourune efficacite
maximum,utiliserunezonede cuissondontle diametreconvient
I'ustensile.
Le r#cipient ne doit pas d#passer la zone de cuisson de plus de
12 _ 25 mm (1/2 _ I po).
Lorsqu'unecommandeest raiseenmarche,on peutvoir un
rougeoiement_traversla surface_dessuslisse.L'element
fonctionnera en intermittencepour maintenir le r6glage
pr66tablide chaleur, m_me au niveau High (l_lev_e).
Pourobtenirplus informationssurlesustensilesde cuisine,se
reporter_ la page36au paragrapheRecommandationssur/es
ustensi/esdecuisine.
ELEMENT
SIMPLE DE 6 pc
\
ELEMENT
SIMPLE DE 9 pc
ELEMENT
SIMPLE DE 6 pc
Pour eviter les marqaes et les rayares
• Ne pasutiliserde casserolesenverre.Ellespourraientrayerla
surface.
• Ne jamais utiliserdesupport metalliqueou anneaudewok entre
un recipientet lasurfacedecuisson.Cesobjetspeuventmarquer
ou rayerlasurface.
• Ne pusfaireglisserde recipientsmetalliquessur lasurfacede
cuissonbr01ante.IIspourraientlaisserdesmarquesqui devront
etre nettoyeesimmediatement.(VoirNettoyage,page29.)
• Veiller_ ce quele fond desrecipientsetla zonede cuissonsoient
propresavantd'allumerI'element,afin d'eviterlesrayures.
• Pouremp_,cherque la surfacedecuissonenvitroceramiquenese
trouve rayeeouabimee,ne pas y laisserde sucre,desel ou de
graisse.PrendreI'habituded'essuyerlasurfacedecuissonavecun
lingepropre ou un essuie-toutavantde rutiliser.
• Ne jamais faireglisserde recipientsmetalliques@aissur la
surfaceau risquede la rayer.
ELEMENT
SIMPLE DE 9 pc
Voyant de surface chaade
Le voyant de surface chaude est situ_ _ I'avant de la surface
de cuisson. IIs'allumeraIorsqu'unesurfacede cuisson,quelle
qu'ellesoit,serachaude.II resteraallume,memeapresextinctionde
la commande,jusqu'_ceque la zoneait refroidi.
Pour viter les taches
• Ne jamais utiliserde lingeou d'@onge salepournettoyerla
surfacedecuisson.IIslaisseraientun film,ce qui pourraitdecolorer
lasurfacedecuissonIorsqu'elleestutilisee.
• L'utilisationcontinued'unesurfacede cuissonsaliepeutentrainer
I'apparitiondetachespermanentes.
35

Pour eviter d'autres dornmages
• Ne paslaisserfondre deplastique,de sucreni d'aliments riches
ensucre surlatablede cuisson.Sicelaseproduisaitacciden-
tellement,nettoyerimm6diatement.(VoirNettoyage,page29.)
• Nejamais laisserlecontenud'une casserolebouillirjusqu'_ce
qu'ellesoitvide carcolapourraitabimerlasurfacede cuissonet la
casserole.
• Nejamais utiliserla tablede cuissoncommesurfacedetravail ou
commeplanche_d6couper.
• Nejamais cuired'alimentsdirectementsur latablede cuisson,
sansrecipient.
• Nejamais utiliserun petit recipientsur un grand element.Non
seulementily a g_chisd'6nergiemaisil peuten r6sulterdes
projectionsqui vont br01ersur la surfacedecuissonetdevront6tre
nettoy6es.
• Ne pusutiliser desrecipientssp6ciauxnon platsqui seraienttrop
grandsou _ fond in6galcommeleswoks_ fond fond, lesplaques
chauffantesou recipientsdegrandetaille _ fondondul6.
• Ne pusutiliser de recipientsen aluminium.L'aluminiumrisquede
fondresurle verre.Sile metalfondsur latable de cuisson,ne pus
rutiliser.Appelerun r@arateuragree.
Recommandations sur
los ustensiles
L'utilisationdu bon ustensilepeut emp6cherde nombreux
problemescommela n6cessit6de cuireplusIonguementla
nourritureet la difficult6 _ obtenirdesr6sultatsuniformes.Debons
ustensilesr6duisentlesdur6esdecuisson,utilisent moinsd'6nergie
et cuisentde fagonplusuniforme.
Tests pour verifier si los
ustensiles ont un fond plat
Verifierquelosustensilessont plats.
Test de la r_gle :
1. Placeruneregleen traversdufond de I'ustensile.
2. Latenirface _ la lumiere.
3. Aucune lumiereoutres peune doit 6trevisiblesous la regle.
Test de la hullo :
1. Mettre2,5cm (1po) d'eaudunsrustensile.PlacerI'ustensilesur
lasurfacede cuissonettoumer lacommandosur High (¢lev6e).
2. Observerla formationde bullesIorsqueI'eauchauffe.Desbulles
uniformessignifientde bonnesperformanceset desbulles
in6galesindiquentla presencede zonespluschaudesdormant
unecuissonin6gale.
_i_ii!!!!!!!i!!i!!i!_i_iiiii!_iiiiii_!_i_i_!i_!i!i!ii!_i!iiii_!_i_i_!ii_!_ii!i_!_i_!_!_i_!i!_!_i_i_i!i_!i!i!i!i!i!i!i!i!i!i!i!i!i!i!i!i!i!_!_!_!_i_ii_ii!_ii_iiii!iii_!________________________________________________________________________________________________________________________________________________________________________________________________________________________________________________________________________________________________________________________________________________________________________________________________________i!'_
Desustensiles_ fond Desustensiles_ fondrainur6ou gondol6.
lisse,plat Desustensiles_ fondin6gal necuisentpus
efficacementet peuventparfoisnepas
fairebouillir lesliquides.
Desustensilesen Desustensilesenverreou en metalpeu
mat6riaux@ais @ais.
Desustensilesde la Desustensilespluspetitsou plusgrands
m6medimensionde (de 2,5cm[1 po]) que 1'616mont.
1'616ment
Despoign6esqui Desustensilesavecdes poign6escass6es
tiennent bien ou qui netiennent pus.Despoign6es
Iourdesqui font serenverserrustensile.
Descouverclesqui Descouverclesqui fermentreal.
fermentbien
Deswoks_ fond plat Deswoksavecun fondsur anneau.
Ustensiles de grande taille et
pour los conserves
Touteslosmarmites pourlos conserves et losgrandes
casseroles doivent avoir un fond plat et doiventetre
fabriquees en materiau epais. Ceciesttres importantpour les
surfaces_ dessuslisse.La basene doitpusd@asserde 1'616merit
de plusde2,5cm (1 po).
Si losmarmites_ conserveset lescasserolesnesont pusconformes
cos normes,losdur6esdecuissonserontplus Iongueset los
surfacesdecuissonpourront6treendommag6es.
Certainesmarmitespourlosconservessont conguesavecdesbases
pluspetitespour 6treutilis6essurdessurfaces_ dessuslisse.
Pourla preparationde conserves,ne choisir que le r6glage
Highjusqu'_ce que I'eau commence _ bouillir ou que la
pressionsuffisantesoit atteintedunsla marmite.R6duireaur6glage
le plusfaible,maintenant1'6bullitionou la pression.Silachaleur
n'estpusdiminu6e,lasurfacede cuissonpourrait6treendommag6e.
36

Cuissondenslefour
Tableau de commande
A B
BROIL _,
E
CLEAN DELAY CLOCK
F G H
C
I
i
D
TIMER
CANCEL
Letableaudecommandeestcongupourfaciliter la programmation.La fenetred'affichageindique I'heure,lesfonctions avecminuterieet
fonctions du four. Letableaude commanderepresentecomprendla convectionet d'autrescaracteristiquesspecifiquesau modele.(Lestyle
peutvarierscion le modeled
:i!iB!i_i!_i!_i!_i!i!i!i!!
iilDiiTi_ii_!i!
iiEi:ii:ii:ii:ii:ii:ii:ii:ii:il
7!Gii_iTiiiii!i
((((((((((((((((((i
((((((((((((((((((i
((((((((((((((((((i
i!iii:H!iiiiii!iiii
iii!!i!!!!i!i!i!_!i_!_!!iii_!
BROIL(Gril)
BAKE(Cuisson
courante)
Plus(A) ou
Moins [T)
TIMER
(Minuterie)
COOK& HOLD
(Cuissonet
maintien)
CLEAN
(Nettoyage)
DELAY
(Demarrage
differe)
CLOCK
(Horloge)
KEEPWARM
(Maintien au
chaud)
CANCEL
(Annuler)
S'utilisepour lacuissonau gril et le rissolage
sur partiesuperieure.
S'utilisepour lacuissoncouranteet le
r0tissage.
S'utilisepourentrerou changerla duree,la
temperaturedu four. I_tablitlegril
temperatureI_LEVI_Eou BASSE.
Programmela minuterie.
Pourcuirependantune dureepreetablie,
avecmaintienau chaudpendantuneheure.
S'utilisepour programmerle cycle
d'autonettoyage(certainsmodeles).
Programmelefour pour debuterune
cuissondiffer6 plustard.
S'utilisepour programmerI'heuredujour.
S'utilisepour maintenirau chauddansle
four lesalimentscuits.
Annuletoutes lesoperationssaufminuterie
et horloge.
IJtilisation des touches
• Appuyersur latouche desiree.
• Appuyersur A ou T pourentrer ladureeou latemperature.
• Un bipretentitIorsqueron appuiesur unetouche.
• Undouble bip retentiten casd'erreurde programmation.
Important : Quatresecondesapresavoirappuy6sur lestouchesA
ou T, ladureeou latemperatureseraautomatiquemententree.Si
plusde 30secondess'ecoulententrela pressionsur unetouche de
fonctionsur lestouchesA ouT, lafonctionseraannuleeet
I'afficheurreviendra9 I'affichageprecedent.
t!orloge
L'horlogepeut6tre programmeepour afficherla dureedansun
formatde 12 ou 24heures.L'horlogeestprogrammeeen usinepour
unformatde 12heures.
Changement de rhorloge _ un format de 24 heures :
1.
2.
.
Appuyersur lestouchesCANCEL
(Annuler)et BELAY (Differedetmaintenirla
pressionpendanttrois secondes.
Appuyersur latouche A ou T pour
programmerun formatde 12ou
2/4heures.
Programmerrheure en suivantlesinstructions
donneesci-dessous.
-- CANCEL
-- DELAY
R_glage de I'horloge:
1. Appuyersur latouche CLOCK(Horloge).
• Ladeuxpointsclignotent_ I'afficheur.
2. Appuyersur A ouT pour programmer
I'heuredujour.
CLOCK
_J
• Deuxpointscontinuent_ clignoter.
3. Appuyer_ nouveausur latouche CLOCK ou attendre
quatresecondes.Ledeuxpointscessentleclignotent.
Lorsquelecourant 61ectriquearriveou apresuneinterruptionde
courant,laderniereheureavantI'interruption de courantva
clignoter.
37

PourrappelerI'heuredu jour Iorsqu'uneautrefonction deduree
s'affiche,appuyersur latouche CLOCK.
L'heurede rhorloge ne peutetrechangeeIorsquelefour a ete
programmepour unecuissondiffer& un nettoyagediffere ou pour la
fonction decuissonetmaintien.
Annalation de raffichage de rheare :
Si ron ne desirepasI'affichagede I'heuredu jour :
Appuyersur lestouchesCANCEL(Annuler)et CLOCK(Horloge)et
lesmaintenirainsipendanttrois secondes.L'heuredujour disparait
de rafficheur.
LorsqueI'affichagede I'heureest annul& appuyersur latouche
CLOCKpour afficherbrievementI'heuredujour.
R_affichage de I'heare :
Appuyersur lestouchesCANCELetCLOCK et
lesmaintenirainsipendanttrois secondes.
L'heuredujour reapparait_ rafficheur.
Nlinaterie
La minuteriepeutetreprogrammeede uneminute (0:01)jusqu'_
99 heureset 59minutes(99:59).
-- CANCEL
--CLOCK
La minuteriepeut¢treutiliseeind@endammentdetoute autre
activitedu four. Ellepeut¢treaussiprogrammeealorsqu'uneautre
fonctiondu four esten coursd'utilisation.
La minuterienecommandepaslefour. Ellenesert qu'9 emettre
desbips.
Programmation de ia minaterie :
1.Appuyersur latoucheTIMER (Minuterie).
• 0:00s'allume_ I'afficheur.
• Lesdeuxpoints clignotent.
2.Appuyersur latouche A ou V jusqu'_ ceque
I'heurejuste paraisse_ rafficheur.
• Lesdeuxpoints continuent_ clignoter.
3.Appuyer9 nouveausurla toucheTIMER ou attendrequatre
secondes.
TIMER
• Lesdeuxpoints continuent_ clignoter et ledecomptedela
dureecommence.
• Laderniereminutedu decompteseraafficheesousforme de
secondes.
/4.A la fin de la duree programmee,un bip long retentit.
Annalation de la minaterie :
1.Appuyersur latoucheTIMER et la maintenirainsipendanttrois
secondes.
OU
2.Appuyersur latoucheTIMER et regler rheure _0:00.
Verroaillage des commandes
Lestouches peuventetreverrouilleespourdesraisonsdesecurit&
nettoyageou pour empechertoute utilisationnonsouhaitee.Ellesne
pourront¢treutiliseessi ellessont verrouillees.
38
Si lefour est encours d'utilisation,lescommandesnepeuvent¢tre
verrouillees.
L'heureactuelledujour restera9 I'afficheur
Iorsquelescommandesserontverrouillees.
Verroaillage :
Appuyersur lestouchesCANCELet COOK&
HOLD(Cuissonet maintien)et lesmaintenir
ainsipendanttrois secondes.(Appuyerd'abord
sur latoucheCancel.)
D_verroaillage :
Appuyersur lestouchesCANCELet COOK& HOLDet les
maintenirainsipendanttrois secondes.(Appuyerd'abordsurla
toucheCANCEL.)
-- CANCEL
Codes d'anomalie
LesrootsBAKE(Cuissoncourante)ou LOCK(Verrouillage)peuvent
clignoter rapidement9 I'afficheurpour prevenirencas d'erreurou de
probleme.Sitel est lecas,appuyersur latouche CANCEL.Si les
rootsBAKEou LOCKcontinuent9 clignoter,debrancherI'appareil.
Attendrequelquesminutes,puisrebrancherrappareil.Sirun des
motscontinue9 clignoter,debrancherI'appareilet prendrecontact
avecun r@arateurautorise.
Caisson coarante
Programmation de la caisson coarante :
1.
2.
Appuyersur latouche BAKE.
• Lemot BAKEclignote.
• 000clignote 9 rafficheur.
Selectionnerlatemperaturedufour. Latemperature
peutetreprogrammeede 75 9 290° C(1709 550° F).
BAKE
Appuyerunefois sur latouche A ou V, ou appuyer
sur latouche A ou Vet lamaintenirainsi. _"j
• 175° (350°) s'allumeIorsqueI'onappuiela premierefoissur
I'unedestouches.
.
• Appuyersurla touche A pour augmenterlatemperature.
• Appuyersurla toucheY pour diminuerlatemperature.
Appuyer9 nouveausur latouche BAKEou attendre quatre
secondes.
4.
• Lemot BAKEs'arretede clignoteret s'allume9 I'afficheur.
• 38°(100°)ou latemperaturereelledu fourseraaffichee.La
temperatureaugmenterapar intervallede 3°C (5° F)jusqu'9 ce
que la temperaturepreprogrammeesoit atteinte.
Laisserlefour prechaufferpendant89 15minutes.
• Lorsquelatemperatureprogrammeepourlefour est
atteinte,un bip long retentit.
• Pourrappelerla temperatureprogrammeependantle
prechauffage,appuyersurla toucheBAKE.
Suite

Culssondenslefour
5.
6.
Placerlanourrituredansle four.
VerifierI'avancementde la cuisson9 la dureeminimalede
cuisson.Cuireplus Iongtempsau besoin.
7. Lorsquela cuissonestterminee,appuyersur
latouche Cancel(Annuler). CANCEL
8. Retirerla nourrituredu four.
Remarques •
• Pourchangerla temp#raturedu fourpendantla cuisson,appuyer
sur latouche BAKE,puissur latouche A ou V jusqu'9ce que
ron obtiennelatemperaturedesiree.
• Pourchangerla temp#raturedu four/ors dupr#chauffage,
appuyerdeuxfoissur la touche BAKE,puissur latouche A ou
V jusqu'9 ce que latemperaturedesireesoit affichee.
• Si ron oublied'arreterle four,il s'arreteraautomatiquement
apres12heures.Si I'ondesiredesactivercettefonction,voir
page/43.
Diff6rences de caisson entre I'ancien
four et le nouveau
II estnormalde remarquerquelquesdifferencesdansladuroc de
cuissonentreun four neufet un four ancien.VoirAjustementde la
temp#raturedufour_ la page/43.
Caisson et maintien
Lafonction caissonet maintienpermetde cuirependantuneduree
predeterminee,suiviepar un cyclede maintienauchaudd'une
heure.
Programmation de la fonction caisson et maintien :
Appuyersurla toucheCOOK& BOLD (Cuisson
etmaintien).
•Les rootsBAKEet HOLD(Maintien) clignotent.
• 000s'allume_ I'afficheur.
Selectionnerla temperaturedu four. Latemperature
pout¢treprogrammeede75 9 290° C(1709 550° F).
Appuyerunefois sur latouche A ou V ou appuyer
sur latouche A ou Vet la maintenirainsi.
.
• Appuyersurla toucheA pouraugmenterla
temperature.
• Appuyersurla toucheV pour diminuerlatemperature.
Appuyer9 nouveausur latouche COOK& BOLD
OU
attendrequatresecondes.
• Lemot HOLDclignote.
• 00:00clignote _ rafficheur.
39
4. Entrerla dureependantlaquelleI'ondesirequela cuissonait lieu
en appuyantsurlestouchesA ou V. Laduree decuissonpeut
¢treprogrammeede dixminutes(00:10)_ 11heures,59minutes
(11:59).
•Les motsBAKEet HOLDs'allument_ I'afficheur.
• Ladureede cuissons'allume_ I'afficheur.
• Ladureede cuissoncommencelecompte_ rebours.
Lorsque la duroc de caisson s'est _coul_e :
• Quatrebipsretentissent.
• Lemot BAKEs'eteint.
•Les rootsHOLDetWARM(Chaud)s'allument.
• 75°(170°) parait_rafficheur.
Apr_s une heure de MAINTIEN AU CHAUD :
• Lemot<_End_s'affiche.
• L'heuredujour reapparait9rafficheur.
Annulation de la fonction caisson et maintien
tout moment :
Appuyersur latouche CANCEL(Annuler).Retirerla CANCEL
nourrituredu four.
Caisson et maintien diff r e
Avecla fonctiondifferee,lefour semet _ cuireplustard dansla
journee.Programmerla durocd'attentedesireeavantquele four ne
semottoen marcheet la durocde cuissondesiree.Lefour com-
mence_ chauffer_ I'heureselectionneeetcult pour laduroc
specifiee.
Ladurocd'attentepoutetreprogrammeede 10minutes(00:10)
11heures,59minutes(11:59).
Programmation d'un cycle de caisson et
maintien diff_r_e :
1. Appuyersur latouche DELAY(Differe).
• Lemot DELAYclignote.
• 00:00clignote _ rafficheur.
2. Appuyersur latouche A ou V pour
programmer/adur#ed'attente.
DELAY

Alorsque le mot DELAYclignotetoujours
3. Appuyersurla toucheCOOK& HOLD(Cuisson
etmaintien).
• 000s'allume_ I'afficheur.
• LosrootsBAKEet HOLD(Maintien) clignotent.
Appuyersur A pourprogrammerb temp#raturede cuisson.
• 00:00et le mot HOLDclignotent.
• Lemot BAKEresteallume.
Appuyersur A pourprogrammerla dur#edecuisson.
• Ladureed'attente,losrootsDELAY,BAKEet HOLDs'allument
rafficheur.
Lorsque la dur_e d'attente s'est _coul_e :
• Lemot DELAYs'eteint.
• Ladureede cuissonestaffichee.
• LosmotsBAKEetHOLDsontaffiches.
Pour progra[n[ner an temps d'attente Iorsque
la fonction cuisson et [naintien a d_j_ _t_
progra[n[n_e :
1. Appuyersurla toucheDELAY(Differee).
• Lemot DELAYclignote.
• 00:00parait_ I'afficheur.
2. Appuyersurla toucheA ou V pour
programmerla dureed'attente.
• Apresquatresecondes,le mot DELAYreste \_"
allumepour rappelerqu'un cycledecuisson
differee a eteprogramme.
Lorsque la dur6e d'attente s'est _coul_e et que le
four se [net en [narche :
DELAY
• Ladureede cuissonseraaffichee.
• Lemot DELAYs'eteint.
• Lemot BAKEetHOLDresteallume.
Annulation :
Appuyersur latouche CANCEL(Annuler}.
• Touteslesfonctionsde cuissonminuteeet non
minuteeseront annulees.
CANCEL
• L'heuredu jour reapparait_ rafficheur.
Important :
, NEPASutiliser la cuissondiffereepour desarticlesqui
necessitentquele four soit prechauffe,commelesggteaux,les
petitsbiscuitsetlespains.
, Nepas utiliser lecyclede cuissonet maintiendifferessi le
four est dej9chaud.
Nlaintien au chaud
Pourmaintenirau chauddanslefour desalimentscuitset chauds
ou pour rechaufferpainsetassiettes.
Program[nation du [naintien au chaud :
1. Appuyersurlatouche KEEPWARM
(Maintienau chaud).
2.
• Lemot WARM(Chaud)clignote.
• 000 parait_I'afficheur. _ _,_
Selectionnerlatemperaturedemaintienau
chaud.Celle-ci poutetreregleede 63_ 90°C (145_ \ _.._
190° F).Appuyerunefois sur latouche A ou V ou
appuyersur latouche A ouT et la maintenirainsi.
• 75° (170°)s'allumeIorsqueI'on appuiela premierefoissur
I'unedestouches.
• Appuyersurla toucheA pour augmenterla temperature.
• Appuyersurla toucheT pour diminuerlatemperature.
LemotWARMet latemperatureseront affichespendantque la
fonction maintienauchaudest active.
Annulation du [naintien au chaud :
1. Appuyersurlatouche CANCEL.
2. Retirerla nourrituredu four.
CANCEL
Suite
4O

Culssondenslefour
Remarques •
• Pourobtenirdesqualitesalimentaireset nutritivesoptimales,
lesalimentscuitsau four ne doiventpas6tregard6sauchaud
plusde I_2 heures.
• Pourempecherlesalimentsdedess6cher,lesrecouvrirde
papieraluminium,sansserrer,ou d'un couvercle.
• Pourr6chaufferdes petitspains:
- recouvrirlespetitspainsdepapier aluminiumsansserreret
lesplaceraufour.
- appuyersurlestouchesKEEPWARM et A pour
programmer75° C(170° F).
- r6chaufferpendant12_ 15minutes.
• Pourr6chaufferdesassiettes :
- placerdeuxpilesde quatreassiettesmaximumdanslefour.
- appuyersurlestouchesKEEPWARM et A pour
programmer75° C(170° F).
- r6chaufferpendant5 minutes,arreterlefour et laisserles
assiettesaufour pendantencore15minutes.
- n'utiliserque desassiettespouvantallerau four,_ verifier
aveclefabricant.
- ne pusposerdesassiettestiedessur unesurfacefroide,les
changementsrapidesdetemperaturepouvantcasser
I'assietteoula fendiller.
Changement de la
temperature °F/°C
1. Ler6glagepar ddaut de I'usinepour latemperatureesten
Fahrenheit.
2. Pourmodifier cer6glage,appuyersur lestouchesCANCEL
(Annule0 etBAKE (Cuissoncourante)simultan6mentet
maintener-lesenfonc6espendanttrois secondes.
3. Unbip retentitet le r6glagecourant(°Fou °C)parait_ I'afficheur.
(Sivous nefaites pasdechangement,la cuisiniereretoumeau
r6glageexistantapres30secondes.)
4. Pourmodifier le r6glage,appuyersur latouche A ou Y.
Appuyer_ nouveausur latouche pour retournerau r6glage
existant.Attender cinqsecondesetle r6glagesera6ffectu6.
41

Caisson au gril
Programmation de la caisson au gril :
1. Pourcommencer,appuyersurla touche
BROIL (Gril).
2.
• Lemot BROILclignote.
• Lemot SEt(ValideOest affiche.
BROIL
Appuyersurlatouche A pour programmerun gril _ temperature
eleveeou surlatouche T pour programmerun gril
temperaturebasso.
•Les motsHI (I--levee)ou LO (Basso)serontaffiches.
SelectionnerH!Broil (Gril9temperatureelevee)(290° C
[550° F])pour ungril normal.SelectionnerLO Broil (Gril
temperaturebasse)(230°C [450° F])pour un gril
temperatureinferieured'aliments9 cuissonplusIongue
commelavolaille.
.
Apresquatresecondes,le foursemet en marche.
• Lemot BROILresteallume.
/4. Pourun rissolagemaximum,prechaufferI'elementdegril
pendant3 ou/4minutesavantd'ajouterla nourriture.
5. Placerlanourrituredanslefour. Laisserla portedu four ouverte
d'environ10cm (4 po) (premierebutee).
6. Retournerla viandeunefois _ la moitiede la dureede cuisson.
7. LorsqueI'alimentestcult,appuyersurla touche
CANCEL(Annuler).Retirerla nourritureet la CANCEL
lechefritedu four.
• L'heuredujour reapparait9I'afficheur.
Remarques •
= Pourde meilleursresultatsIorsdu gril, seservir d'un ustensile
prevupour cetype decuisson.
• Prevoirdesdureesdecuissonaugril plusIongueset un
rissolagelegerementmoinsdore si rappareilfonctionnesurun
circuit de 208volts.
• Legril au reglageHI est utilisepour la majoritedesoperations
de cuissonau gril.Utiliserle gril au reglageLO pour lacuisson
de metsdevantcuireplusIongtemps,afinde leur permettre
d'etrebien cultssansrissolageexcessif.
• Pourchangerb temp#raturedufourpendantb cuissonau gril,
appuyersur latouche BROIL,puissur latouche A ou T pour
changerentrela cuissonaugril 9 temperatureelevee(HI) et la
cuissonaugril 9temperaturebasso(LO).
Lesdureesdecuissonaugril peuventetreplusIonguesavec
unetemperaturedegril inferieure.
Retournerla plupartdesalimentsIorsquela moitiede la duree
prevuepour la cuissonau gril s'estecoulee.
Tableau de caisson au gril
Boeuf
Pore
Bifteck,2,5cm(1 po)d'@aisseur
Hamburgers,2 cm (3//4po) d'@aisseur
Bacon
C0telettes,2,5cm (1 po)
Jambon- prO-culttranche de 1,3cm(1/2 po)
4
4
4
4
4
4
Cuissonmoyenne
Biencult
Biencult
Bien cult
Bien cult
Tiede
15 - 18 minutes
19 - 23 minutes
15 - 18 minutes
6 - 10 minutes
22 - 26 minutes
8 - 12 minutes
Voiaiiie Pouleten morceaux 3 ou/4 Biencult Gril_ temperaturebasso
28- 38 minutes
Fruitsde met 10- 15minutes
Damesde poisson,beurrees,
2,5cm (1 po) d'@aisseur
Filetes,1,3cm (1/2po) d'@aisseur
4
4
Lachairsedetache
Lachairsedetache
* Grillesuperieure_la positionn°5.
important: Cetableaun'est qu'unguide de suggestions.LesdureespeuventvariersolonI'aliment_ cuire.
8 - 12minutes
42

Cuissondenslefour
Arr6t automatique/
Mode sabbat
Lefour s'arreteautomatiquementapres12heuress'il a ete
accidentellementlaisseen marche.Cettecaracteristiquede securite
poutetrearretee.
Pour annulet I'arr6t 12 heures et faire fonctionner le
four en continu pendant 72 heures :
1. Programmerlefour pourune BAKE(Cuissoncourante)
(voirpage38). /_
2. Appuyersurla toucheCLOCK (Horloge)et la CLOCK
maintenirainsipendantcinqsecondes.
• SAbseraafficheetclignotera pendantcinqsecondes.
• SAbseraensuiteafficheencontinujusqu'_ cequ'on I'arrete
oujusqu'_ ceque la dureelimite de72 heuressoitatteinte.
• Lemot BAKE(Cuissoncourante)seraaussiaffichesi un
cyclede cuissoncouranteesten coursalorsque lefour est en
modesabbat.
• LaCUISSONAUFOURest/aseu/efonctionquiest
op6rationne//eenmodesabbat.Toutes/esautresfonctions
(Minuterie,Maintienauchaud,Nettoyage,etc.)sontverrouill#es
pendant/e modesabbat.
Annulation de la cuisson courante alors
que le four est en mode sabbat :
Appuyersur latouche CANCEL(Annuler).
• Lemot BAKEs'eteint_ I'afficheur.
• Aucun bipsonoreneretentit.
Annulation du mode sabbat :
1. Appuyersurla toucheCLOCK pendant
cinq secondes.
OU
CANCEL
CLOCK
Apres72 heures,le modesabbatsetermine.
• SAbclignotependantcinqsecondes.
• L'heuredu jour revient_ I'afficheur.
Ajustement de la temp6rature
du four
La precisiondestemperaturesdu four aetesoigneusementverifiee
I'usine.IIest normalderemarquerquelquesdifferencesdansla
cuissonentreun four neufet un fourancien.Au fur et 9 mesureque
loscuisinieressont moinsneuves,la temperaturedu four poutvarier.
II est possibled'ajusterla temperaturedu four siI'on penseque le
four necuit pasoune rissolepascorrectement.Pourdeciderde
I'ajustement_apporter,reglerlefour _ unetemperaturede 15° C
(25° F)pluseleveeou plusbassoque la temperatureindiqueedans
la recette,puisfaire cuirela preparation.Lesresultatsdu <{test >>de
cuissondoiventdonner uneideedu nombrede degresduquel la
temperaturedoitetreajustee.
Ajustement de la temp6rature du four :
1. Appuyersur latouche BAKE.
2. Entrer285° C(550° F)enappuyantsurla touche A.
3.
BAKE
Appuyersurlatouche BAKE et la maintenirainsi
pendantplusieurssecondesoujusqu'_ceque 0°
paraisse_ I'afficheur.
Si latemperaturedufour a eteprecedemmentajustee,le
changementseraaffich6.Parexemple,si latemperaturedufour
aete reduitede8°C(15° F),I'afficheurindiquera-8° (-15°).
4.
Appuyersurlatouche A ou T pourajusterla temperature.
A chaquefois que I'onappuiesur unetouche,latemperature
changede3° C(5° F).Latemperaturedufour poutetre
augmenteeou diminueede3 _ 20° C(5 _ 35° F).
5. L'heuredu jour reapparaitautomatiquement_ I'afficheur.
II n'estpasnecessairede reajusterlatemperaturedufour en cas
de panneou d'interruption decourant.Lostemperaturesde
cuissonaugril, maintienau chaudetde nettoyagenepeuvent
etreajustees.
Remarques •
• Lemodesabbatpeutetremisen marche_tout moment,que
lefour soit en marcheou non.
• Lemodesabbatnepout pasetre misen marchesi los
commandossontverrouilleesou la porteverrouillee.
• Sile four esten modecuissonIorsquele modesabbatest
programme,lemotBAKEs'eteint_ lafin du cyclede cuisson.II
n'yauraaucunsignalsonoreaudible.
• SiI'eclairagedu four est souhaitependantle modesabbat,la
lampedevraetreallumeeavantque le modesabbat nedebute.
Lorsquele modesabbata demarre,aucunbip de prechauffage
ne retentit.
Touslosmessageset losbipssont desactivesIorsquelemode
sabbatest actif.
• Leverrouillageautomatiquede la portenefonctionnepas
pendantle modesabbat.
• Si I'onappuiesur latouche CANCEL,un cycledecuisson
couranteau four seraannule.Cependant,le programmateur
resteraen modesabbat.
Apresune pannede courant,le four revienten modesabbat
avec72 heuresrestantesetaucuncycleactif.
43

Ventilateur du four
Unventilateurde refroidissementsemet en marche
automatiquementIorscuissonaugril etde certainesoperationsde
cuisson.IIest utilisepour que lospiecesinternesdu tableaude
commandorestentfraiches.Leventilateurs'arreteautomatiquement
Iorsquelospiecesont refroidi.II poutcontinuer_ fonctionnerune
fois que le fours'estarrGte.Ceciest normal.
u
Event du four
Lorsquele four fonctionne,lessurfacesvoisinesdereventpeuvent
devenirassezchaudespour entrainerdesbrCJlures.Ne jaaais
bloquer 1'6vent.
L'Gventdn four est sitn6 _ I'arri_rede la surfacede cuisson.
E'VENT DU FOUR
Ne pasmettrede
plastiquesprosde
I'event,la chaleur
pouvantles
deformerou los
fairefondre.
Eclairage du four
Appuyersur le commutateurdeOven Light ([_clairage
du four) situesur letableaude commandopourallumer
ou eteindrela lampe.La lampedefour estactiv6epar
rinterrupteurseulement. Oven
Light
Sole du four
Protegerlasoledes produitsrenvers6s,en particulieracidesou
sucres,ceux-ci pouvantd6colorer1'6mailvitrifi6. Utiliserdes
ustensilesde la bonnedimensionpour 6viterquelosproduits nese
renversentou passentpar-dessusrustensileen bouillant.Ne pas
placer d'ustensilesoude feuille d'alnmininmdirectement surla
sole dn four.
Grilles du four
Extraction :
1. Tirerla grille en ligne droite
jusqu'_cequ'elles'arrGte_ la
positionde calage.
2. Souleverlagrille _ ravantpour
pouvoirrextraire.
R_installation :
1. Placerlagrille sur lossupportsdanslefour.
2. Soulever16gerementI'avant.Faireglisserla grillevers I'arriere
au-del_de la positionde calage.
3. Abaisserla grille etla faire glisserdansle four.
Ne jamais convrir la totalite d'unegrille de papierd'aluminium
ni mettre d'aluminiumsat la sole du four. Cola ne donnerait
pasde borisr_sultats dartslacuisson de g_tean× et la sole
ponrrait se tronver abim6e.
Positions de grille
GRILLE5 : Pourgriller du pain
ou passerau gril des aliments
peu6palset nongras.
GRILLE4 : Pourla majorit6
desoperationsde cuissonau
gril.
GRILLE3 : Pourla majorit6
desproduits de boulangerie "
sur une plaque_ biscuitsou
un moule_ g_teauroul6,g_teaux_6tages,alimentssurgel6stout
prGtset lacuissong6n6ralesur uneseulegrille.
GRILLE2 : Pourquatre-quarts,g_teauxBundt,tartes,plats mijot6s
et r0tissagedepetits morceauxdeviande.
GRILLE1 : Pourquatre-quarts,g_teauxde 9 x 13,tarteset rOtissage
de grosmorceauxde viandeetdevolaille.
CUISSONSUR PLUSIEURSGRILLES:
.............5
4
...... 3
2
.............1
Deux grilles : Utiliserlospositions2et 5,ou 1 et/4.
Important : Ne jaaais placerlosustensilesdirectementsurla sole
du four.
Caisson de g_teaux _ _tages sur deux grilles
Pourde meilleursr6sultatspour
la cuissonde g_teauxsur deux
grilles,utiliser lespositions2
et 5.
Placerlosg_teauxsur la
grille,commeil est indiqu6.
Lefour comportedeuxgrillesavec,pourchacune,undispositifde
calage.
44

LE SEUL ETUNIQUE RECOURSDU CLIENT EN
VERTU DE CETTEGARANTIE LIMITI_EESTLA
RI_PARATIONDU PRODUITCOMME DI_CRITE
PRI_CI_DEMMENT.LES GARANTIESIMPLICITES,
Y COMPRIS LESGARANTIES DE QUALm_
MARCHANDE OU D'ADAPTATION A UN USAGE
PARTICULIER,SONT LIMm_ES A UN AN OU A
LA PI_RIODELA PLUSCOURTE PERMISEPARLA
LOI. MAYTAG CORPORATION NE SERA PAS
TENUE RESPONSABLEDES DOMMAGES
DIRECTSOU INDIRECTS.CERTAINSI_TATSET
CERTAINESPROVINCESINTERDISENT
L'EXCLUSION ET LA LIMiTATiON DES
DOMMAGES DIRECTSOU INDIRECTSAINSI
QUELES LIMiTATiONS SUR LA DUREEDES
GARANTIES IMPLICITES DE QUALITE
MARCHANDE OU D'ADAPTATION A UN USAGE
PARTICULIER.IL ESTDONC POSSIBLEQUECES
LIMiTATiONS NE S'APPLIQUENT PASA VOUS.
CETTEGARANTIE VOUS CONFI_REDES DROITS
JURIDIQUESSPI_CIFIQUESET IL SEPEUT QUE
VOUSAYIEZ D'AUTRES DROITS,QUI VARIENT
D'UN I_TATA L'AUTRE OU D'UNE PROVINCEA
L'AUTRE.
Ne sont pas couverts par ces garanties
1. Lesproblemeset dommagesresultantdessituationssuivantes:
a.Mise enservice,livraisonou entretieneffectuesincorrectement.
b.Toute reparation,modification,alterationettout reglagenonautorisesparle
fabricantou par un prestatairede serviceapres-venteagree.
c. Mauvaisemploi,emploiabusif,accidents,usagenon raisonnable,ou catastrophe
naturelle.
d.Courantelectrique,tension,alimentationelectriqueou engazincorrects.
e.Reglageincorrectd'unecommande.
2. Lesgarantiesne peuvent¢trehonoreessi lesnumerosde seried'origineont ete
enleves,modifiesou nesont pasfacilementlisibles.
3. Ampoules, filtres 9 eau et filtres 9 air.
4. Lesproduitsachetes9 desfins commercialesou industrielles.
5.
Lesfrais de depannageou devisitepour :
a.Correctiond'erreursde miseen service.Pourlesproduitsnecessitantune
ventilation,un conduit metalliquerigidedoit ¢treutilis&
b.initiation de I'utilisateur9 I'emploide rappareil.
c.TransportdeI'appareilchezle reparateuret retourde I'appareilchezI'utilisateur.
6. Tout alimentperdu en raisondepannesdurdrigerateur ou du congelateur.
7. Depensesdedeplacementetde transportpour la reparationdu produitdansdes
endroitseloignes.
8. Cettegarantien'estpasvalide9 I'exterieurdesI_tats-Uniset du Canada.Communiquez
avecvotre detaillantpoursavoirsi uneautregaranties'applique.
.
Dommagesindirectsou accessoiressubispartoute personne9 lasuite d'une
quelconqueviolation desgaranties.CertainsI_tatsou provincesne permettentpas
I'exclusionou la limitationde responsabiliteen cequi concernelesdommagesdirects
ou indirects.L'exclusionci-dessuspeuten consequencenepass'appliquer9 votre cas.
Si vousavez besoin d'aide
Consultezd'abordla sectionsur ledepannagedansle manueld'utilisation et d'entretien,
puisappelezledetaillantde qui vousavezachetevotreappareilou le service9la clientele
de MaytagServices,LLCau 1-800-688-9900auxI_tats-Uniset au 1-800-688-2002au
Canadapoursavoiro_ trouverun reparateurautoris&
• Veillez9 conserverlafactured'achatpourjustifier de lavalidite de la garantie.Pour
d'autresrenseignementsconcernantlesresponsabilitesdu proprietaire9 regard du
servicesousgarantie,voirle textede la GARANTIE.
• Sile detaillantou I'agencedeserviceapres-ventene peutresoudrele probleme,ecrivez
MaytagServices,LLC9 I'adressesuivante: CAIR Center,P.O.Box2370,Cleveland,TN
37320-2370I_tats-Unis,ou appelezau1=800=688=9900aux l_tats=Unisou au
1=800=688=2002au Canada.
• Lesguidesd'utilisation,lesmanuelsde serviceet lesrenseignementssurlespiecessont
disponiblesaupresdu service9 laclientele de MaytagServices,LLC.
RelTlarl:l[leS • Veillez9fournir I'informationsuivanteIorsquevouscommuniquez
avecnousausujetd'un probleme:
a.Vosnom,adresseetnumerodetelephone;
b.Numerode modeleet numerodeseriedeI'appareil;
c.Noraetadressedevotre detaillantou de votreagencede service;
d.Descriptiondetailleedu problemeobserve;
e.Preuved'achat (facturede vente).
45

_iii!!!iii,f¸....
e|ec_L_ica _es|izan_Le co. co._L_o|
"Sasy Touch" 500 = CuDie_a |isa
Tab_a de nea_er_as
Instrucciones importantes sobre seguridad .......... 47=50
Cuidado y limpieza ......................................................50=53
Homo autolimpiante
Procedimientos de limpieza
Mantenimiento ............................................................. 53-54
Luz del homo
Ventana del homo
Localizaci_n y soluci_n de averias ..........................55=56
Cocinando en la estufa ...............................................57=59
Controles superiores
Cubiertas lisas
Cocinando en el homo ...............................................60=66
Horneado Asar a la parrilla
'Cook & Hold' Cierre autom_tico/Modo sab_tico
'Cook & Hold' diferido Parrillas del homo
Mantener caliente
Garantia y servicio .......................................I:lltima p;igina

Para asegurar funcionamiento correcto y seguro: El
electrodomOstico debe ser instaladodebidamente y puesto a
tierra por un tOcnico calificado. No intente ajustar, reparar,
prestar servicio o reemplazar ninguna pieza de este producto
a menos que sea espec[ficamente recomendado en esta gu[a.
Todas las reparaciones deben ser realizadas por un tOcnico
calificado.
Siempre desenchufe el electrodomOstico antes de efectuar
alguna reparaci0n.
Las advertencias e instruccionesimportantessobre seguridad
que aparecen en esta gu[a no est_n destinadas a cubrir todas
las posibles circunstancias y situaciones que puedan ocurrir.
Se debe ejercer sentido comOn,precauci0n y cuidado cuando
instale, realice mantenimiento o haga funcionar el artefacto.
Siempre p0ngase el fabricante si surgen problemas o
situaciones que usted no comprenda.
Reconozca los sirnbolos, advertencias,
etiquetas de seguridad
Lea y siga todas ias instrucciones antes de usar este
electrodom_stico para evitar el riesgo potencial de incendio,
choque elOctrico, lesion personal o da_o al electrodomOstico
como resultado de su uso inapropiado. Utilice este
electrodomestico solamente para el prop0sito que ha sido
destinado seg0n se describe en esta gu[a.
Para vefificar si el dispositivo est,1debidamente instalado, mire
debajo de la estufa con una linterna para asegurarse de que uno
de los tornillos niveladores traseros est6 debidamente
enganchado en la ranura del soporte. El dispositivo antivuelco
asegura el tornillo nivelador trasero al piso cuando est_
debidamente enganchado. Esto debe verificarse cada vez que
la estufa sea movida.
Para evitar un incendio o da o
causado pot el humo
Aseg_rese de que se hayan retirado todos los materiales de
empaque del electrodom6stico antes de su uso.
No coloque materiales combustibles cerca del electrodom6stico.
No se deben guardar en el homo materiales inflamables.
Muchos pkisticos son afectados por el calor. Mantenga los
pl_sticos alejados de las piezas del electrodom6stico que se
pueden entibiar o calentar.
Para evitar incendios de grasa, no permita acumulaci0n de grasa
de cocinar o de otros materiales inflamables en el homo o en su
cercan[a.
En caso de incendio
Use un extinguidor con producto qu[mico seco o del tipo espuma
o bicarbonato para apagar el incendio o las llamas. Nunca use
agua en un incendio de grasa.
47

1.Apagueelhomoparaevitarquelallamasedisperse.
2. NUNOAlevanteomuevaunasart6nenllamas.
3. Apagueelfuegoolallamacerrandolapuertadelhorno.
ApaguelacampanadeventilaciOnparaevitarquelasllamas
sedispersen.Apaguelasllamasyluegoenciendalacampana
paraexpulsarelhumoyelolor.
Seguridad para los ni os
hasta que no se hayan enfriado. Otras superficies que pueden
estar calientes incluyen la cubierta, la superficie que est_n
dirigidas hacia la cubierta, el respiradero del homo, la
superficie cercana a la abertura del respiradero, la puerta del
homo y las _reas que las rodean, y la ventanilla del horno.
No toque un foco caliente del homo con un paso hOmedo
pues se puede quebrar. Si el foco se quiebra, desenchufe el
electrodom6stico antes de sacar el foco para evitar sufrir un
choque el6ctrico.
NUNCA use papel de aluminio para cubrir las parrillas del
homo ni el panel inferior del homo. El uso incorrecto puede
resultar en un riesgo de choque el6ctrico, incendio o da_o al
electrodom6stico. Use papel de aluminio solamente como se
indica en esta gu[a.
No use la cubierta o el homo como una _rea para almacenar
alimentos o utensilios de cocina.
NUNCA deje a los ni_os solos o sin supervisi6n cuando el
homo est6 en uso o cuando est6 caliente. No se debe nunca
permitir que los ni_os se sienten o se paten en ninguna pieza
del electrodom6stico pues se pueden lesionar o quemar.
Se les debe ense_ar a los ni_os que el electrodom6stico y los
utensilios que est_inen 61pueden estar calientes. Deje enfriar
los utensilios calientes en un lugar seguro, fuera del alcance
de los niNos. Se lesdebe ense_ar a los ni_os que un
electrodom6stico no es un juguete y que no deben jugar con
los controles u otras piezas del artefacto.
instrucciones generales
Para evitar posibles riesgos para el usuario y da_o al
electrodomestico, no use este producto como una estufa para
calentar o entibiar una habitaci6n. Adem_is no use el homo
como un lugar para guardar alimentos o utensilios de cocina.
No obstruya la circulaciOn del aire bloqueando el respiradero
del homo. El respiradero del homo se encuentra en laparte
traserade lasuperficiedecocci6n.
NO TOQUELOS ELEMENTOSCALEFACTORESNI LAS
SUPERFICIESINTERIORESDEL HORNO. Los elementos
calefactores pueden estar calientes a0n cuando su color sea
obscuro. Las superficies interiores de cualquier homo se
calientan Io suficiente como para causar quemaduras.
Durante y despu6s del uso, no toque ni permita que las ropas
u otros materiales inflamables entren en contacto con los
elementos calefactores o las superficies interiores del homo
48
Seguridad al cocinar
NUNCA caliente un contenedor de alimento cerrado en el
horno. La acumulaci6n de presi6n puede reventar el
contenedor causando una lesi6n personal grave o da_o al
electrodom6stico.
Use tomaollas secos y gruesos. Los tomaollas h0medos
pueden causar quemaduras por vapor. No se deben usar
toallas de secar los platos ni otros sustitutos en vez de los
tomaollas porque ellos pueden pasar sobre los elementos
calientes y prenderse fuego o pueden quedar atrapados en las
piezas del electrodom6stico.
Use vestimentas apropiadas. Las ropas sueltas o ropas con
mangas largas sueltas no se deben usar cuando se est_
cocinando. La ropa se puede prender fuego y causar
quemaduras si entra en contacto con los elementos
calefactores.
Siempre coloque las parrillas del homo en las posiciones
deseadas cuando el homo est6 fr[o. Deslice la parrilla del
homo hacia afuera para agregar o retirar alimento usando
tomaollas secosy gruesos. Siempre evite colocar o retirar
alimento del homo sin sacar la parrilla hacia afuera. Si una
parrilla debe ser movida cuando est6 caliente, use un
tomaollas seco. No deje que el tomaolla entre en contacto
con el elemento caliente del homo.
Use las parrillas solamente en el homo en que fueron
enviadas/com pradas.
Tenga cuidado cuando abra la puerta del horno. Primero deje
que salga el aire o vapor caliente antes de sacar o volver a
colocar el alimento en el homo.
ADVERTENCIA SOBRE ALIMENTOS PREPARADGS: Siga
las instrucciones del fabricante del alimento. Si un contenedor
de alimento congelado de pl_stico y/o su tapa se deforma,
comba o de otra manera se da_a durante la cocci6n,
inmediatamente descarte el alimento y su contenedor. El
alimento puede estar contaminado.
Cont,

Instrucdoneslmportentes segurlded
No permita que el papel de aluminio o la sonda de la came
toque el elemento calefactor.
Siempre apague todos los controles cuando haya terminado
de cocinar.
Ollas freidoras
Use extremo cuidado cuando mueva la olla con aceite o
descarte la grasa caliente. Deje que la grasa se enfr[e antes
de intentar mover la olla.
Seguridad sobre el uso
de utensilios
Siga las instrucciones del fabricante cuando use bolsas para
cocinar en el homo.
El rendimiento y funcionamiento seguro de este
electrodomestico ha sido comprobado usando utensilios de
cocina tradicionales. No use ning0n dispositivo o accesofio
que no haya sido espec[ficamente recomendado en esta gu[a.
No use sistemas de convecci6n agregables a hornos. El uso
de dispositivos o accesorios que no sean expresamente
recomendados en esta gu[a puede crear peligros graves de
segufidad, afectar el rendimiento y reducir la vida 0til de los
componentes de este electrodom6stico.
Si el utensilio es m_ispeque_o que el elemento, una porci6n
del elemento quedar_ expuesta y puede encender la ropa o un
tomaollas.
Solamente ciertos tipos de utensilios de vidrio, vidrio cer_mico,
cer_mica, gres u otros utensilios vidfiados son convenientes
para cocinar en la superficie o en el homo sin quebrarse
debido al repentino cambio de temperatura. Siga las
instrucciones del fabricante del utensilio cuando use vidrio.
Gire los mangos de los utensilios hacia el centro de la
cubierta, no hacia la habitaci6n ni sobre otto elemento
superior. Esto reduce el riesgo de quemaduras, encendido de
matefiales inflamables o derrames si el utensilio estocado
accidentalmente o alcanzado pot ni_os pequeNos.
Cubierta
NUNCA deje los elementos superiores sin supervision,
especialmente cuando est,1usando los ajustes de calor altos.
Un derrame sin recibir la debida atenci6n puede causar humo
y un derrame de grasa puede causar un incendio.
Este electrodom6stico tiene diferentes tama_os de elementos
supefiores. Seleccione utensilios que tengan bases planas Io
suficientemente grandes para cubfir el elemento. La relaci6n
adecuada entre el utensilio y el elemento mejorar_ la
eficiencia al cocinar.
CUBIERTA DE VIDRIO CERAMICO: NUNCA cocine sobre
una cubierta quebrada. Si lacubierta de laestufa se quiebra,
los agentes de limpieza y losderrames pueden penetrar y
crear un riesgo de choque el6ctrico. P6ngase en contacto con
un t6cnico calificado inmediatamente.
49
Carnpanas de ventilaci6n
Limpie con frecuencia la campana y los filtros a fin de evitar
que se acumule en ellos grasa u otros materiales inflamables y
para evitar incendios de grasa.
Cuando prepare alimentos flameados debajo de la campana,
encienda el ventilador.
Seguridad en la limpieza
Limpie con cuidado la cubierta. Apague todos los controles y
espere que se enfr[en las piezas del electrodom6stico antes de
tocarlas o limpiarlas. Limpie con cuidado. Tenga cuidado
para evitar quemaduras de vapor si usa una esponja o un
paso mojado para limpiar los derrames en una superficie
caliente. Algunos limpiadores pueden producir vapores
nocivos cuando se aplican en una superficie caliente.
Limpie solamente las piezas indicadas en esta gu[a.
Homo autolimpiante
No limpie lajunta de la puerta. Lajunta de la puerta es
esencial para obtener un buen sello. Se debe tenet cuidado
de no frotar, dafiar ni mover la junta.
No use limpiadores de homo ni forros de homo de ning0n
tipo alrededor ni en ninguna parte del homo autolimpiante.
Aviso y advertencia
importante sobre seguridad
La Propuesta 65 de la Ley de 1986 del California Safe Drinking
Water and Toxic Enforcement Act of 1986 (Estado de Califor-
nia Sobre Segufidad y Contaminaci6n del Agua Potable) exige
que el Gobernador de California publique una lista de las
sustancias que seg0n el estado de California causan c_ncer o

da_oalsistemareproductivoyexigequelasempresas
adviertanasusclientessobrelaexposiciOnpotencialatales
sustancias.
Seadviertealosusuariosdeesteelectrodom6sticoque
cuandoelhomoest,1funcionandoenelciclodeautolimpieza,
puedehaberexposiciOndebajonivelaalgunasdelas
sustanciasindicadasenlalist&incluyendomon0xidode
carbono.Laexposici0naestassustanciaspuedeserreducida
aunmfnimoventilandoelhomoalexteriorenforma
adecuada,abriendolasventanasy/olapuertaenlahabitaciOn
endondeest,1ubicadoelelectrodom6sticoduranteelciclode
autolimpieza.
AVISO IMPORTANTE RESPECTOA LOS PAJAROS
DOMESTICO$: Nunca mantenga losp_jaros en la cocina o
en las habitaciones donde puedan Ilegar los humos de la
cocina. Los p_ijarostienen un sistema respiratorio muy
sensitivo. Los humos producidos durante el ciclo de
autolimpieza del homo pueden ser perjudiciales o mortales
para los p_ijaros. Los humos que despide el aceite de cocina
recalentado, la grasa, margarina y los utensilios
antiadherentes recalentados pueden tambi6n ser perjudiciales.
Conserve estas instrucciones para referencia futura
l::uldadoIlmplm
Homo autolimpiante
Elciclo de autolimpiezausatemperaturasde cocci0nsuperioresa las
norrnalesparalirnpiarautorn_ticarnentetodo el interiordel horno.
Lirnpieel homoconfrecuenciarernoviendolosderrarnespara evitar
hurnoexcesivoy Ilarnaradas.No perrnitaqueseacurnuledernasiado
sucioen el horno.
Duranteel procesode lirnpieza,la cocinadebeestarbienventilada
paraelirninarlosoloresnorrnalesasociadosconla lirnpieza.
4.
5.
.
lirnpiaestas_reas.Eliasdebenser
lirnpiadasparaevitarque la suciedad
se horneeduranteel ciclo de
autolirnpieza.(Lajunta eselsello
alrededorde la puertayventanadel
homo.)
Paraevitarda_ono lirnpie nifrote la
junta situadaalrededorde la puertadel horno.Lajunta est_
dise_adaparasellarherrneticarnenteel calorduranteel ciclo de
lirnpieza.
Lirnpieel excesodegrasao derrarnesde la parteinferior del
horno. Estoevitahurnoexcesivoo Ilarnaradasduranteelciclo de
lirnpieza.
Lirnpielosderrarnesazucaradoso _cidostales cornopapadulce
(carnote),tornateso salsasa basede leche.La porcelana
esrnaltadaesresistenteal _cidopero no a pruebade _cidos. El
acabadodeporcelanapuededescolorarsesi losderrarnes_cidos
o azucaradosno sonlirnpiadosantesde un ciclo de autolirnpieza.
Para programar 'Self-Clean' (Autolimpieza):
Importante: Latemperaturadelhornodebeserinferiora 205°C
(400° F)paraprograrnarun ciclo de lirnpieza.
1. Cierrela puertadelhorno.
2.
Antes de la autolirnpieza
1. Apague la luzdel hornoantesde la limpieza.La luzdel horno
puedefundirse duranteel ciclode lirnpieza.
2. Retiretodos losutensiliosy lasparrillasdel horno.Lasparrillas
del hornosedescolorar_ny nose deslizar_nf_cilrnentedespues 3.
de un ciclode autolirnpiezasi noson retiradasdel horno.
3. Lirnpieel marcodel homo, el marcode la puerta,el _reafuerade
lajunta de la puertay alrededorde laaberturaen lajunta de la
puerta,con un agentede lirnpiezano abrasivotal corno'Bon
Arni'*o con detergentey agua.Elprocesode autolirnpiezano
*Losnornbresdelosproductosson rnarcasregistradasdesus respectivosfabricantes.
Muevala palancadebloqueode lapuertaa la derechaa la
posici0nbloqueada.
Oprimalatecla 'CLEAN' (Limpieza).
* 'CLEAN'destellaen el indicadorvisual.
CLEAN
Cont.
5O

Culdedolimpieze
3. Cuandolatecla DELAYdestellar_n,optima la
tecla 'CLEAN'.
• 'CLEAN'destellar&
/4. Optimalatecla A o V.
• 'CL-M' (Limpieza- SuciedadMediana)se
CLEAN
despliegaenel indicador.
Optimalatecla A o V paradesplazarlosajustesde
autolimpieza.
• 'CL-H'(Limpieza- SuciedadIntensa,/4horas)
• 'CL-M' (Limpieza- SuciedadMediana,3 horas)
• 'CL-L' (Limpieza- SuciedadLove,2 horas)
AI seleccionarelniveldesuciedaddel homose programa
autom_ticamenteel tiempo de limpieza.
Despu(!sde cuatrosegundos,'CLEAN'(Limpieza),'DELAY'
(Diferido)y'LOCK'(Bloqueado)sedesplegar_nenel indicador
visual paraindicarque el hornoest_programadoparaun ciclo
de limpiezadiferido.Eltiempodiferidotambiensedespliegaen
el indicadorvisual.
Si el home ya ha side pregramado para un ciclo de
limpieza y usted desea programar un tiempo
diferido:
1. 0prima latecla 'DELAY'. DELAY
• 'DELAY'destella.
• '00:00'se desplegar_en el indicadorvisual.
Optimalatecla A o Y paraprogramarla cantidadde
tiempo que usteddeseadiferirel ciclo.
Despuesdecuatrosegundos,'CLEAN','DELAY'y
'LOCK'sedesplegar_nenel indicadorvisualparaindicarque el
hornoest_programadoparaun ciclo de limpiezadiferido.El
tiempo diferidotambien sedespliegaenel indicadorvisual.
Cuando cemienza el ciclo de autelimpieza:
• 'DELAY'seapagar&
• Eltiempode limpiezasedesplegar_enel indicadorvisual.
Para cancelar el ciclo de autelimpieza:
Optimala tecla 'CANCEL' (Cancelar).
• Elindicadorvisualquedaen blanco.
• Todaslasfuncionessoncanceladas.
CANCEL
• Lahera del dfasedespliegaen el indicadorvisual.
Durante el ciclo de autolimpieza
Cuandoaparece'LOCK'en el indicador,la puertano sepuedeabrir.
Paraevitarda_o a la puerta,no fuerce la puertaparaabrirlacuando
la palabra'LOCK'est_desplegadaen el indicadorvisual.
Humo y olores
Ustedpuedever humoysentir olor lasprimerasvecesqueel horno
eslimpiado. Estoesnormaly disminuir_conel tiempo.
Tambi(!npuedeocurrir humosi el hornoest_demasiadosucioo si
seha dejadounaasaderaen el horno.
Sonidos
A medidaqueel hornosecalienta,ustedpuedeoir sonidosde
piezasmet_licasque seexpandenycontraen. Estoesnormaly no
da_ar_el horno.
Despu_s del ciclo de autolimpieza
Aproximadamenteunahera despu(!sdel fin del ciclo de limpieza,
'LOCK'desaparecer& La puertaahora puedeserabierta.Muevala
palancade bloqueode la puertaa la izquierdaparadesbloquearla.
Alguna suciedad puedequedar come una levecenizagristipo
polvo. Retfrelaconun pa_oh_medo. Si la suciedadpermanece
despu(!sdelimpiarla,significaque el ciclo de limpiezano fue Io
suficientementelargo. Lasuciedadser_eliminadaduranteel
proximociclo de limpieza.
Silas parrillasdel homo fueron dejadasen el homo y no se
deslizansuavemente despu6sde un title de limpieza, limpie
lasparrillasy lossoportesde lasparrillasconuna peque_acantidad
de aceitevegetalpara hacerdeslizarlasconm_sfacilidad.
Puedenaparecer lineasdelgadas en la porcelanaal pasarper
cities decalentamiento y enfriamiento. Estoesnormaly no
afectar_el rendimiento.
Una descoloraci6nblanca puedeaparecer despuesdel ciclo
de limpieza si los alimentos ;icidoso azucarados no fueron
limpiados antes del ciclo de autolimpieza. Estadescoloraci0nes
normaly no afectar_elrendimiento.
NOtaS."
• Si sedejaabiertala puertadel homo,la palabra'door'
destellar_en el indicadorvisualy seescuchar_unaseSal
sonorahastaque la puertaseacerraday la tecla'CLEAN' sea
oprimidanuevamente.
• Si transcurrenm_sde cincosegundosdespu(!sde oprimir la
tecla 'CLEAN'y antesde oprimirlasteclasA o Y, el
programavolver_autom_ticamenteal despliegueprevio.
• Lapuertadel homose da_ar_sisefuerzaparaabrirla cuando
la palabra'LOCK'continOadesplegadaen el indicador.
51

Procedirnientos de lirnpieza
Losnombresde losproductosson marcasregistradas
desus respect/yesfabricantes.
** Parahacerpod/dos,Ilameal 1-877-232-6771EE.UU.o
1-800-688-8408Canad&
Cnbierta-
porcelana
esmaltada
Areadel Relojy
de lasTeclas
de Control
Perillasde
Control
Cubierta=
Vidrio
Cer_mico
Ventanay Pnerta
del Homo- Vidrio
Laporcelanaesmaltadaesvidriofund/doenmetaly puedeagrietarseo picarsesi noseusacorrectamente.Esresistentea
los9c/dos,noapruebade9cidos.Todoslosderrames,especialmentelosderramesazucaradosoacid/cosdebenserlimpiados
inmediatamenteconunpa_oseco.
• Cuandoseenfrie,laveconaguajabonosa,enjuagueyseque.
° Nunca limpieunasuperficietibiao calienteconun pa_oh0medo.Estopuedecausaragrietamientoo picaduras.
° Nunca uselimp/adoresde homo,agentesdelimpiezaabrasiveso cdusticosenel acabadoexteriorde laestufa.
• Parabloquearde loscontrolespara la limpieza,ver BloqueodelosControlesen pdgina61.
• Limpieconunpa_oh0medoysecar.No useagentesdelimpiezaabrasivespuespuedenrayarla superficie.
• Sepuedeusarlimpiavidriossiseredanen el pa_oprimero.NOrocie directamenteen elpanel.
• Retirelasperillascuandoest_nenla posici0n'OFF'(Apagado)tir_ndolashaciaadelante.
° Lave,enjuaguey seque.No useagentesde limpiezaabrasivespuespuedenrayarel acabado.
° Enciendacadaquemadorparaasegurarsedequelasperillasbansidecorrectamentereinstaladas.
Nuncause/imp/adoresdehomo,b/anqueadorcon c/ore, amoniacoo/imp/adores de vidrio quecontenga
amoniaco.Importante:Llameaun repamdorautorizado si lacubierta de vidrio cer#mico seagrieta,quiebmo el
papel dealum/hiesederritesobre la cubierta.
° Dejequelacubiertaseenfrieantesde limp/aria.
• Generalidades- Limpielacubiertadespuesdecadauseo cuandoseanecesarioconunatoalladepapelh0meday con
'CooktopCleaningCreme'_(CremadeLimpiezaparaCubiertas)(PiezaNo.20000001)_*.Lustreconunpa_olimpioyseco.
Importante:Sedesarrollarbnmanchaspermanentessila suciedadsedejaquesecocineunay otravezusandolacubierta
cuandoest#sucia.
• Manchas Rebeldeso Marcas de Metal - Humedezcaunaesponjadegomaquenodejemarcaso queno raye.Aplique
'CooktopCleaningCream_(Piezano.20000001)_*yfrote parasacartantasuciedadcomeseaposible.Apliqueunacapa
delgadadecremasobrelasuciedad,cubraconunatoalladepapelh0medayd_jelareposardurante30a45 minutes(2-
3 betasparamuchasuciedad).Mantengah0medocubriendolatoallade papelconenvolturadepl_stico.Restriegue
nuevamente,luegolimpieconunpa_osecoy limpio.
Importante:SolamenteuseesponjasLIMPIAS,HUMEDASy quenorayony queseansegurasparautensiliosconacabado
antiadherente,e dafiarbeldisefioy el vidriosi/aesponjanoestbmojada,si/aesponjaestbsuciaoseusaotto t/pcdeesponja.
• SuciedadesQuemadasoPegadas- Restriegueconunaesponjaquenodejemarcasy'CooktopCleaningCreme'_
(PiezaNo.20000001)_*.
Importante: Sostengaunrestregadorconhojadeale/taraun bngulode30°y restrieguecualquiersuciedadquepermanezca.
Luego/impiecomesedescribi5anteriormente.No use/ahojadeale/tarpara/impiezad/ariapuespuededesgastar
el disefiode/vidrio. / z .__.
• Pl_stico o Az_car Berretida - InmediatamenteenciendaelelementoatemperaturaBAJAyrestriegue _
y raspeelaz0caro el pl_sticode lasuperficiecalientehaciaun_reafria. LuegoAPAGUEel S/_
eementoy dejequeseenfre Lmpe e resduo conunraspadorconhojade aletary 'Cooktop
CeanngCreme'_(PezaNo 20000001)_
_ii q,
• Eviteusarcantidadesexcesivasdeaguapuespuedeescurrirsedebajoodetr_sdelvidriocausandomanchas.
• Laveconaguayjabdn. Enjuagueconagualimpiayseque. Ellimpiadordevidriopuedeusarsesiserociaenun pa_o
primero.
• No usemater/alesabrasivestalescomeesponjasderestregar,limp/adoresenpolvoo esponjasdelanade aceropues
puedenrayarelvidrio.
Cont.
52

piem
Parrillasdel • Limpiarconaguaconjab6n.
Homo • Sacarlasmanchasdificilesconpolvode limpiezaouna esponjaIlenaconjab6n. Enjuagueyseque.
• Lasparrillassedescolorar_npermanentementey puedenno deslizarseconsuavidadsisondejadasenel homoduranteun
ciclodeautolimpieza.Siestosucede,limpielaparrillay lossoportesenrelieveconunapeque_acantidaddeaceitevegetal
pararestaurarlafacilidadde movimiento,luegolimpieel excesode aceite.
AceroInoxidable • NO USENINGUNPRODUCTODELIMPIEZAQUECONTENGABLANQUEADORA BASEDECLORO.
(modelosselectos) • NO USELIMPIADORES"ORANGE"M LIMPIADORESABRASIVOS.
• SIEMPRELIMPIELASSUPERFICIESDEACEROA FAVORDELGRANO.
• LimpiezaDiaria/SuciedadLove=Limpieconunode lossiguientes- aguaconjab6n,unasoluci6ndevinagreblanco
conagua,limpiadorparasuperficiesyvidrio'Formula409"oun limpiavidriossimilar- usandounaesponjaoun paso
suave.Enjuaguey seque.Parapuliry evitarmarcasde losdodos,useel producto'StainlessSteelMagicSpray"(Pieza
No.20000008)".
• Suciedad Moderada/Intensa =Limpieconuricdelossiguientes- 'BonAmP,'SmartCleanser"o 'SoftScrub"- usando
unaesponjahQmedao un pasosuave.Enjuagueyseque. Lasmanchasdificilespuedenserquitadasconunaesponja
multi-uso'Scotch-Brite'"hQmeda;froteafavordel grano.Enjuaguey seque. Pararestaurarel lustreysacarlasvetas,
aplique'StainlessSteelMagicSpray"(PiezaNo.20000008)".
• gescoloraci6n = Useunaesponjamojadaoun pasosuave,limpieconlimpiadorde acero'CameoStainlessSteel
Cleaner".Enjuagueinmediatamentey seque.Paraeliminarlasestriasyrestaurarel lustre,usedespu(!srociadorparaacero
inoxidable'StainlessSteelMagicSpray"(PiezaNo.20000008)".
Interior del Homo • Sigalasinstruccionesen lasp_ginas50-51paraprogramarun ciclode autolimpieza.
Gavetade • Cuandoest_fria,laveconaguatibiajabonosa,enjuaguey seque.Nunca limpieunasuperficietibiao calienteconunpaso
Almacenamiento, hQmedopuesestopuededa_arlasuperficiey causarunaquemaduraa causadelvapor.
Manija de la • Paramanchasrebeldes,useagentesdelimpiezalevementeabrasivostalcomopastadebicarbonatoo 'BonAmP. No use
Puerta = agentesde limpiezaabrasivos,c_usticoso_sperostal comoesponjasde lanade aceroo limpiadoresdehornos.Estos
Esmalte Pintado productospuedenrayaro da_arpermanentementelasuperficie.
Importante:Useuna toallaoun pa#o secopara limpiarlosderrames,especialmente losderramesacidicos o
azucarados.Lasuperficie sepuede descolorar operder elbrillo si e/ derramenose /impiainmediatamente.
Estoesespecia/menteimportante en /assuperficies blancas.
•Losnombresde los 3roductosson marcasregistradasdesus respectivosfabricantes.
•" Parahacerpedidos,Ilameal 1-877-232-6771EE.UU.o 1-800-688-8408Canad&
Mantenlmlem
Luz del homo
(Elestilo var[a seg n el modelo)
Para reemplazar el foco del homo:
1. Cuandoel homoest_frio,sujetelatapadelabombillaensulugar,
luegodesliceelret(!nde alambrefuerade lacubierta,lmportante:
Lacubiertadelabombillasecaer_sinoessujetaensulugarcuando
est_sacandoel ret(!nde alambre.
CUBIERTA DEL
2. Saque la cubierta del foco y el FOCO
foco.
3. Coloqueun foco de 40 watts
paraelectrodom(!sticos.
4. Vuelvaacolocarlacubiertade
la bombillay asegOrelacon el
ret(!nde alambre.
53
RETENDE ALAMBRE
Cont.

5. Vuelvaaenchufar laestufa.Vuelvaacolocar la horacorrecta.
O
1. Useuntomaollassecoy conmuchocuidadodestornillela
cubiertadel focoy el foco.
Reemplacecon unfoco parahomode electrodom6sticode 40
wats. Serecomiendanlosfocos conbasede lat6nparaevitar
fusi6ndel foco en el casquillo.
Reemplacela cubiertadel focoy vuelvaa conectarlacorriente
el6ctricaal homo.
4. Vuelvaa programarel reloj.
Ventana del homo
Para proteger la ventana de la puerta del homo:
1. No useagentesde limpiezaabrasivostalescomo esponjasde
restregarde lanade aceroo limpiadoresen polvopuesellos
puedenrayarelvidrio.
2. No golpeeel vidrioconollas,sartenes,muebles,juguetesu otros
objetos.
3. No cierrela puertadel homohastaque lasparrillasdel homo no
est6nensu lugar.
AI golpear,rayar,hacervibraro esforzarelvidrio puededebilitarsu
estructuracausandoun mayorriesgode roturaenuna fecha
posterior.
Puerta del homo
2.Alinee lasranurasdela puertacon losbrazosde articulaci6ndela
estufa.
3. Deslicela puertahacialosbrazosde articulaci6nhastaque est6
completamenteasentadaenlasbisagras.Empujehaciaabajolas
esquinassuperioresde la puertaparaasentarlacompletamenteen
lasbisagras. La puertano debequedartorcida.
Importante: Lapuertadel homoen unaestufanuevapuede
sentirse"esponjosa"cuandosecierra. Estoesnormalydisminuird
conel uso.
Gaveta de almacenamiento
Lagavetadealmacenamientopuedeset retiradaparaque usted
puedalimpiardebajode la estufa.
Par8 S808r :
1. Vacfela gavetay deslfcelahaciaafuerahastala primeraposici6n
tope.
2. Levantela partedelanterade la gaveta.
3. Tfrelahastala segundaposici6ndetope.
4. Sujetelosladosy levantelagavetapararetirarla.
Para volver a colocar:
1. Insertelosextremosde lascorrederasde la gavetaen losdeles
de la estufa.
2. Levantela partedelanterade la gavetaysuavementeemp_jelaa
la primeraposici6nde tope.
3. Levantela gavetanuevamentey emp_jelahastaquequede
completamentecerrada.
Tornillos niveladores
PsF8 SSOar:
1.Cuandoest6frfa,abrala puertadelhomo hastala posici6ntope
de asara la parrilla [abiertaaproximadamente10cm (cuatro
pulgadas)].
2.Sujetela puertadecadalado. No usela
manijade la puertaparalevantarla.
3.Levanteuniformementehastaque la puerta
sesalgade losbrazosde articulaci6n.
Para volver a colocar:
1.Sujetela puertadecadalado.
Aseg_resede que la estufaestdniveladacuandose
instala. Si la estufano estdnivelada,gire los
tornillos niveladoresubicadosen cadaesquinadela
estufahastaque quedenivelada. , ,_-,_
_ _ DISPOSITIVO
_j _w_o
...... \ TORNILLO NIVELADOR
54

[ocalimci6nsoludbndeeveries
Parala mayodadelos probiemas,
verifiqueprimeroIosiguiente.
Todala estufao partede ella
no funciona.
Elreloj,laspalabrasen el indicador
visualy/o las lucesfuncionan pero
elhomo no se calienta.
Losresultadosdel homeado no
soncomose esperabanoson
diferentesa losdel homoanterior.
Losalimentos no se asan a la
parrillaenforma debidao salen
demasiadohumo.
Elhomono se autolimpia.
Elhomono se limpi6en forma
debida.
Lapueftadel homono se
desbloqueadespu6sdel ciclo
deautolimpieza.
• Revisesiloscontrolesdelhomoest_ndebidamenteajustados.
• Verifiquesiel enchufeest_firmementeinsertadoen eltomacorriente.
• Verifiqueovuelvaa reponerel disyuntor.Verifiqueo reemplaceelfusible.
• Verifiqueelsuministrode energfaelectrica.
• Revisesilasuperficiey/o loscontrolesdelhornoest_ndebidamenteajustados.Ver p_ginas
57y61.
• Verifiquesila puertadelhornoseha desbloqueadodespuesdel ciclode autolimpieza.Ver
p_gina51.
• Revisesiel homoest_ajustadoparahorneadodiferidoo programadelimpieza.Ver p_ginas62
y50-51.
• Verifiquesi'ControlLock'(Bloqueode loscontroles)est_activado.Ver p_g.61.
• Verifiquesiel controlest_en ModoSab_tico.Ver p_g.65.
• Elhornopuedeestarprogramadoparaunafunci0nde'Cook&Hold'(Cocci0nymantenercaliente)
o unafunci0n diferida.
• Puedeestaractivadalacaracterfsticadebloqueode loscontrolesdel horno.(Verp_g.61.)
o
o
o
Aseg0resedeque el respiraderodel homonoest(!bloqueado.Verp_gina66parala ubicaci0n.
Verifiqueparaasegurarsedeque laestufaest_nivelada.
Lastemperaturasa menudovarfanentreun homonuevoy unoantiguo. A medidaque pasa
eltiempo,latemperaturadelhornocambiay puedehacersem_scalienteo m_sfrfa. Ver
pdgina65 paralasinstruccionescomoajustarlatemperaturadelhomo. lmportante: Nose
recomiendaajustarlatemperaturasihatenidoproblemasconsolounao dosrecetas.
• Verifiquelasposicionesde lasparrillasdel horno.Elalimentopuedeestarmuycercadel
elemento.
• Elelementode asarnofue precalentado.
• Elpapelde aluminioseus0de maneraincorrecta.Nunca forreel insertodelasadorconpapel
dealuminio.
• Lapuertadel hornoestabacerradamientrasseasabaala parrilla. Dejela puertaabiertaen la
primeraposici0n(alrededorde 10cm [4 pulgadas]).
• Recorteel excesodegrasade lacameantesdeponerlaa asara la parrilla.
• Seus0unaasaderasucia.
• Elvoltaje del hogarpuedeserbajo.
• Verifiqueparaasegurarsedeque elciclo noest(!ajustadoparauncomienzodiferido.Ver
p_ginas50-51.
• Verifiquesila puertaest_cerrada.
• Verifiquesiel controlest_en ModoSab_tico.Ver p_g.65.
• Elhomopuedeestara m_sde205°C(/400° F). Latemperaturadel homodebeserinferiora
205°C(/400° F)paraprogramarunciclode limpieza.
• Puedequeseanecesarioun tiempode limpiezam_slargo.
• Losderramesexcesivos,especialmentedealimentosazucaradosy/o _cidosnofueronlimpiados
antesdelciclo deautolimpieza.
• Elinteriordelhomotodavfaest_caliente.Dejequepaseaproximadamenteuna horaparaque
elhomoseenfrfeantesdequesecompleteunciclo deautolimpieza.Lapuertapuedeser
abiertacuandodesaparezcala palabra'LOCK'del indicadorvisual.
• Elcontroly lapuertapuedeestarbloqueada.Verp_g.61.
55

Lasuperficiesuavemuestra
desgaste.
Sejunta humedaden laventana
del homo osale vaporpor
el respiraderodel homo.
Hayun clot fuerte o humoleve
cuandose enciende el homo.
C6digosde Errores
Se escuchan ruidos.
No se escuchan sefialessonoras
y el indicadorvisualno se activa.
'SAb' destellay luego se
despliegacontinuamente.
Abrasioneso rayaduraspequefias.
- Aseg0resedeque lacubiertay laparteinferiordelutensilioestelimpia.No desliceutensilios
devidrioodemetalatrav(!sde lacubierta.Aseg0resedequelaparteinferiordelutensiliono
sea_spera.Uselosagentesdelimpiezarecomendados.Vet p_g.52.
Marcasde metal.
- Nodesliceutensiliosde metalatravesdelacubierta.Cuandoest(!frfa,limpiela cubiertacon
CooktopCleaningCreme.Verp_g.52.
Manchasy estrfasmarrones.
- Retirelosderramesrdpidamente.Nunca limpieconun pasooesponjasucia.Aseg0resede
que lacubiertay la parteinferiordel utensilioest6limpia.
Areasconun brillomet_lico.
- DepOsitosmineralesdelaguayde losalimentos.Uselosagentesdelimpiezarecomendados.
Vetp_g.52.
Picaduraso descascarillado
- Limpielosderramesazucaradosinmediatamente.Vetp_g.52.
. Estoesnormalcuandose cocinanalimentoscon altocontenidode humedad.
. Seus6humedadexcesivacuandolimpi6laventana.
Estoesnormalen una estufanuevaydesaparecer_desp@sde unospocosusos.
AIiniciar un ciclo de autolimpiezase "quemardn"losoloresm_srdpidamente.
• Siseenciendeelventiladorayudardaeliminarel humoy/o el clot.
• Suciedadexcesivade alimentosenel panel inferiordel homo. Useun ciclode autolimpieza.
. 'BAKE'(Horneado)o 'LOCK'(Bloqueado)puedendestellarrdpidamenteenel indicadorpara
avisarleque hayun erroroun problema.Si 'BAKE'o'LOCK'aparecenen el indicadorvisual,
oprimalatecla'CANCEL' (Cancelar).Si'BAKE'o'LOCK'contin0andestellando,desconecte
la energiael@tricaal electrodomestico.Espereunospocosminutosy vuelvaa reconectarla
energfaelectric&Sicontin0andestellando,desconectelaenergiaelectricadelelectrodomestico
y Ilameal t@nicode servicioautorizado.
• Siel homoest_demasiadosucio,puedenocurrirdemasiadasIlamaradasIocualresultar_en
unc6digodeerrordurantelalimpieza.Optimalatecla'CANCEL'ydejequeelhomoseenf@
completamente,limpieel excesodesuciedadyluegovuelvaa programarel ciclode limpieza.
Si elc6digode error reaparece,Ilamea unt@nicoautorizado.
. Elhomoemitevariossonidosbajos.Ustedpuedeoirlosrelesdelhomocuandoseencienden
yseapagan.Estoesnormal.
• A medidaqueel homosecalientayseenfrfa,ustedpuedeoirsonidosde piezasmet_licasque
seexpandeny contraen. Estoesnormaly no da_ardsuelectrodomestico.
• Seescuchaelsonidode un ventilador.Esteeselventiladorde enfriamientoy esnormal.
Elventiladorseguir9funcionandodespuesde apagarel homo hastaque el mismoseenfrie.
El homopuedeestaren ModoSab_tico. (Verp_g.65).
• Elcontrol puedeestarbloqueada.Vetp_g.61.
• Elhomoest_en modosab_tico.Paraanularel modosab_tico,oprimaymantengaoprimidala
tecla'CLOCK' (Reloj)durantecincosegundos.
56

Controles superiores
Useestoscontrolespara encenderloselementossuperiores. Sedis-
ponede una selecci6ninfinitadeajustesdel calordesde'Low' (Bajo)
hasta'High' (Alto). Lasperillaspuedencolocarseen cualquierade
estosajustesoentreellos.
Prograrnaci6n de los controles
1. Coloqueel utensiliosobreel elementosuperior.
2. Optimay gire la perilla encualquierdirecci6nhastael ajustede
calordeseado.
• Enel panelde controlseencuentramarcadocual O O
elementocontrolacadaperilla. Potejemplo,el dibujo
a laderechaindicael elementodelanteroizquierdo. _) O
3. Enel panelde control hayuna luzindicadorade loselementos.
Cuandoseenciendealgunade lasperillasdecontrol,la luzse
ilumina. La luzse apagardcuandotodosloselementossuperiores
seapaguen.
Cuandoseenciendeuncontrol,sepuedepercibirun brillo a Io
largode la superficielisa.Elelementopasardpot ciclosde
encendidoy apagadoparamantenerel ajustede calor
seleccionado,inclusiveen el ajuste'High'.
4. Despu6sdecocinarcoloquelaperilla en la posici6n'OFF'
(Apagado). Retireel utensilio.
Ajustes de calor sugeridos
Eltama_oy tipo de utensilio,eltipo y cantidadde alimentoqueest6
calentandoy la potenciadecarlaelementoindividualdeterminardn
la posici6nidealde la perilla parala cocci6n.Algunoselementos
tienenun ajustede cocci6nafuego lentoy paraderretirque
requerirdun ajustepeque_ode latemperaturadependiendodel
alimentoque est6preparando.Losotroselementosmuestranlos
ajustesexclusivosdedichos elementosimpresosalrededorde las
perillas.Ajuste latemperaturaalosn_merosqueofrecenlos
resultadosdecocci6ndeseados.Lassiguientesdescripcionesle
ayudardnaelegir el ajusteque le dardlosresultados6ptimos.
'Hold' (MantenerCaliente)o 'Warm' (Calentar):Losalimentos
mantienenunatemperaturasobrelos60° C(140° F}sinque sigan
cocindndose.Losalimentosestdncalientesen principioy luegose
reducelatemperatura.Nunca useestosajustespara recalentar
alimentosfrfos.
'Simmer' (Cocci6na FuegoLento):Losalimentosformanburbujas
que apenasIleganalasuperficie.Losalimentostienenuna
temperaturaentre85°C(185° F)y93°C(200°F).Elajustede
cocci6nafuego lentotambi6n puedeset usadopara herviro
escalfaralimentososeguircocinandoalimentoscubiertos.
'Slow Boil' (HervorLento):Losalimentosforman burbujas
moderadamente.Elajustede hervorlentotambi6npuedeset usado
para la mayorfadelasfriturasy paramantenerla cocci6nde
grandescantidadesdeIfquido.
'Boil'(Hervir):Losalimentosforman burbujasa granvelocidad.Este
ajustetambi6npuedeset usadoparadorarcame,parapreparar
alimentossalteados,parasofrefry paracalentaraceiteparafrefr
antesde reducirlatemperatura.Los3 o 4 ajustesrodsaltosde la
perillase usanparaestostipos de cocci6n.Elajusterodsalto
siemprese usapara hacerhervirel agua.Algunoselementos
ofrecenunavelocidadincluso mayorparahervirIfquidos.
57

Cubiertas lisas
Notas:
• Lacubiertade la estufapuedeemitir un pocode humoy
olor laprimeravezque seutiliza. Estoesnormal.
• Lascubiertas lisasretienen el calorpot uncierto periodo
despu6sque se haapagado la estufa. Apague loselementos
unospocosminutosantesde quelosalimentosest6n
completamentecocinadosy useelcalorrestanteparacompletar
lacocci0n.Cuandolaluzde superficiecalienteseapaga(vera
continuaci0n),el _readondesecocina estar_fria altacto.
Debidoa la maneraenque retienenelcalor,loselementoslisos
no responder_ntan r_pidamentea loscambiosen losajustes
comoloselementosespirales.
• Encasode un posiblederrame,retireel utensiliode la cubierta
de laestufa.
• Nuncatrate de levantarlacubierta.
• Lasuperficielisa puedeversedescoloridacuandoest_caliente.
Estoesnormaly desaparecer_cuandolasuperficieseenfrie.
Elementos superiores
Loselementossuperioresensuestufaest_nidentificadospor
circulospermanentesenlasuperficielisa. Paracocinarde manera
m_seficiente,useun utensilioqueseadel mismotama_oqueel
elemento.
Losutensi/iosno debenextenderse m#sall# de 12a 25 mm
(1/2 a I pu/gada) de/tamafio de/element&
Cuandoseenciendeuncontrol,se puedevet un resplandora tray,s
de la superficielisa.Elelemento pasar_ pot ciclos de encendido
y apagado para mantenerel ajuste de calor seleccionado, a_n
en el ajuste 'Hi' (Alto).
Paramayorinformaci0nsobrelosutensiliosconsultelasecci0n
Recomendaciones sobro los utend/ios en la p_gina 59.
9" ELEMENTO
6" ELEMENTO SENCILL O
SENCILLO _ 6" ELEMENTO
\
SENCILLO
9" ELEMENTO
SENCILLO
Luz indicadora de superficie caliente
La luzindicadorade superficiecalienteseencuentraen laparte
delanterade la superficiedecocci0n.Laluzseiluminar_cuando
cualquierade loselementossuperioresest(!caliente.Permanecer_
encendidaa_n despuesdeque el control seaapagado,hastaqueel
_reasehayaenfriado.
Consejos para proteger la
cubierta lisa
Limpieza (verp_gina52 paramayorinformaci0n)
• Antes de usarpor primeravez,limpiela cubierta.
• Limpielacubierta diariamenteo despu(!sdecarlauso.Estola
mantendr_con unabuenaaparienciay puedeevitarque sedaSe.
58
• Siseproduceun derramecuandoestecocinando,limpielo
inmediatamentede la cubiertacuando(!staestecaliente para
evitaruna limpiezam_sdificil despu(!s.Tengamuchocuidado,
limpieel derrameconunatoallasecay limpia.
• No dejeque losderramespermanezcansobrela cubiertao sobre
la moldurade la cubierta porun periododetiempo prolongado.
• Nunca usepolvosde limpiezaabrasivosniesponjasde restregar
que puedanrayarlacubierta.
• Nunca useblanqueadora basedecloro,amoniaconi otros
limpiadoresque no hayansido especificamenterecomendados
parausaren elvidrio cerdmico.
Para evitar marcas y rayaduras
=No useutensiliosdevidrio. Puedenrayarlasuperficie.
• Nunca coloqueun soporteo un aro dewok entre lacubiertay el
utensilio. Estosartfculospuedenmarcaro rayarlacubierta.
• No desliceutensiliosdealuminioatravesdeuna cubiertacaliente.
Losutensiliospuedendejarmarcasquedebenser limpiadas
inmediatamente.(VerLimpieza,p_gina52.)
• AsegOresede que la cubiertay la parteinferiordel utensilioest(!n
limpiasantesdeencenderlaestufaa fin de evitarrayaduras.
• Paraevitarlasrayaduraso da_oa la cubiertade vidriocer_mico,
no dejeazOcar,salo grasassobreloselementos. Limpiela
cubiertacon un pasolimpioo contoallasde papel antesde usarla.
• Nunca desliceutensiliosdemetalpesadosatravesde la cubierta
puespuedenrayarla.
Para evitar ias rnanchas
• Nuncauseun paso o unaesponjasuciaparalimpiarla cubierta
de laestufa. Estopuededejaruna peliculaque puedemancharla
cubiertadespuesque el_reasecalienta.
• SisecontinOacocinandosobreunasuperficiesuciasepuede/
podr_produciruna manchapermanente.
Para evitar otros da os
• No dejequeen la cubiertacalientesederritanpl_sticos,az_caro
alimentoscon altocontenidode azOcar.Si estosucede,limpie
inmediatamente.(VerLimpieza,p_gina52.)
• Nuncadeje queuna olla hiervahastaquedarsecapuesesto
daSar_lasuperficiey elutensilio.
Nunca use la cubierta como una superficie de trabajo ni
comounatabla de cortar.
• Nunca cocinealimentosdirectamentesobrela cubierta.
• No useun utensiliopeque_oen un elementogrande. Estono s01o
desperdiciaenergiasinoque tambi(!npuedenproducirsederrames
calientessobrela cubiertaloscualesrequierenlimpiezaadicional.
• No useutensiliosespecialesqueno seanpianos,detamaSomayor
o desniveladostal comola parteinferiorredondade loswoks,con
rondosacanaladosy/o parrillasy ollasde grantamaSopara
prepararconsewas.
• No usealuminioni contenedoresde papelde aluminio. El
aluminiosepuedederretiren la cubiertade vidriocer_mico.Siel
metalsederriteen la cubierta,no uselaestufa. Llamea un
t6cnico autorizad.

Codnendoenle
Recomendaciones sobre
los utensilios
Siseusanlosutensilioscorrectosse puedenahorrar muchos
problemas,tal come prolongaci6ndeltiempo de cocci6nde los
alimentosu obtenci0nde resultadosnoconsistentes.Losutensilios
correctosreduceneltiempo de cocci0n,usanmenosenergia
electricay cocinanlosalimentosdemanerarodsuniforme.
Prueba de las elias planas
Verifiquesisus eliasson planas.
La prueba de la regla:
1. Coloqueunareglaa tray,s del fondode la ella.
2. ColOquelaa la luz.
3. Pocao ningunaluzdebeversedebajode laregla.
La prueba de la burbuja:
1. Coloqueunapulgadade aguaen la ella.Coloquelaella en la
cubiertay gire el control a'High' (Alto).
2. Observela formaciOnde burbujasa medidaqueelagua se
calienta.Lasburbujasuniformessignificanbuen rendimientoy
lasburbujasno irregularesindicanpuntoscalientesy cocci0n
dispareja.
Utensiliosplanesy
suaves.
Losutensiliosconfondos acanalados
o arqueados.Losutensiliosconrondos
irregularesnococinan uniformemente
losalimentosy algunasvecesno
puedenhervirliquido.
Utensiliosde material Losutensiliosdemetalesdelgadoso de
grueso, vidrio.
Utensiliosquesean Losutensiliosrodspeque_oso rods
del mismotamale grandesqueel elementoen2,5cm
queel elemento. (1 pulgada).
Mangosseguros. Losutensilioscon mangossueltoso rotes.
Mangospesadosquepuedeninclinarel
utensilio.
Tapashermeticas. Lastapassueltas.
Woksconfondo Loswoksconfondo apoyadoenun are.
plane.
Utensilios para preparar
conservas y de tamales
grandes
Todaslas elias para prepararcenservasy laselias grandes
debentenet rondos pianosy debenset hechesde materiales
grueses. Estoesmuyimportanteparalascubiertaslisas.La base
no debesermdsde 2,5cm(1 pulgada)mdsgrandeque el elemento.
Cuandolaseliasde prepararconservasy laseliasdetamales
grandesno cumplenestosrequisites,la cocciOnpuedendemorar
rodstiempoy sepuedenda_arlascubiertasde lasestufas.
Algunaseliasde prepararconservastienen basespeque_aspara
usarlasen lassuperficieslisasde lasestufas.
Cuandoest_ preparandecenservas,useel ajuste de taler alto
hastaque el agua cemience a herviro se Iograla presi0nenel
ella.Reduzcael caloral ajuste rodsbajoque mantengael hervoro la
presiOn.Si nose reduceelcalor,sepuededaSarla cubiertade la
estufa.
59

¢odnundoend
Panel de Control
A B
BROIL
E
CLEAN DELAY CLOCK
F G H
C
I
|
D
TIMER
CANCEL
"-v"
J
Elpanelde control haside dise_adoparasufdcil programaci0n.Elindicadorvisualenel panelde controlmuestrala hera del dfa,el
temporizadory lasfuncionesdel horno.Elpanelde control mostradoarribaincluyelascaractedsticasespecificasdel modelo. (Elestilodel
panelde controlvadaseg0nel modelo.)
ii!!iiii_Diiiii:iiiii:i!i
'BROIL'(Asara
laParrilla)
'BAKE'(HorneaO
A (Mds)o
V (Menos)
'TIMER'(Temporizado0
'COOK& HOLD'
(Cocci0nymantener
caliente)
'CLEAN'(l_impieza)
(modelosselectos)
'DELAY'(Diferido)
'CLOCK'(Reloj)
'KEEPWARM'
(Mantenercaliente)
'CANCEL'(Cancela0
Seusaparaasaralaparrillaydorarlos
alimentos.
Seusaparahornearyasar.
Programaocambialahera,la
temperaturadelhomo.Programaasara
laparrilla'HI'o 'LO'.
Programaeitemporizador.
Seusaparahornearduranteuntiempo
seleccionado,luegomantieneelalimento
calienteduranteunahera.
Seusaparaprogramarunciclode
autolimpieza.
Programaelhornoparacomenzara
hornearo limpiarseaunaheraposterior.
Seusaparaprogramarlaheradeldia.
Seusaparamantenercalienteenel
homoelalimentococinado.
Cancelatodaslasfuncionesaexcepci0n
deltemporizadory elreloj.
Use de las Teclas
• Oprimala tecla deseada.
• OprirnaA o Y paraprogramareltiempo o la temperatura.
• Seescuchardunasepalsonoracadavezque oprimaunatecla.
• Seescuchardndosse_alessonorassi ocurreun error en la
programaci0n.
6O
Importante: Cuatrosegundosdespu(!sde haberoprimidola tecla
,_ o Y, seprogramardautomdticamenteel tiempo o la
ternperatura.Sitranscurrenrodsde30 segundosdespu6sde haber
oprimidounatecla defunci0n y antesde oprimir latecla ,i, o Y, la
funci0nserdcanceladay el indicadorvisualvolverdal despliegue
anterior.
'Clock' (Reloj)
Elreloj puedeserajustadoparadesplegarla herayaseaenformate
de 12horaso24 horas.El relojha sideprogramadoen lafdbrica
parael formatede 12betas.
Para cambiar el relej a formate de 24 heras:
1. Optimay mantengaoprimidaslasteclas'CANCEL'
y'DELAY' durantetressegundos.
OprimaA o V paraseleccionarelformato
de 12 horaso 24 horas.
Programelaheradel dfasiguiendolas
instruccionesindicadasabajo.
-- CANCEL
-- DELAY
Programaci6n del Reloj:
1. Optimala tecla 'CLOCK'.
• Losdospuntosdestellanen el indicador.
2. OprimaA o V paraprogramarla horadel dfa.
• Losdospuntoscontin0andestellando.
3. Oprimala tecla 'CLOCK' nuevamenteo espere
cuatrosegundos.Losdospuntos paranel
destellar.
CLOCK
Cuandoseconectaenergiael(!ctricaal hornoo despu6sde una
interrupci0nde la energiael(!ctrica,la01timahera del reloj previaa
la interrupci0ndestellarden el indicador.
Paradesplegarla heradel dia cuandoel indicadorest(!mostrando
otrafunci0n detiempo,optima latecla'CLOCK'.
Cont.

La horadel reloj no puedeset cambiadacuandoel homoha sido
programadopara'DelayCook'or 'DelayClean'(Horneadoo
LimpiezaDiferido) o 'Cook& Hold'(Cocci6ny MantenerCaliente).
Para cancelar el despliegue del reloj:
Si nodeseaqueel indicadorvisualmuestrelahora del dfa:
Optimay mantengaoprimidalasteclas
'CANCEL' (Cancelar)y 'CLOCK' durantetres
segundos.Lahoradel dfadesaparecer_del
indicador.
Cuandosecancelael desplieguedelreloj,
oprimalatecla 'CLOCK' paradesplegar
brevementelahoradel dfa.
-- CANCEL
--CLOCK
Para restaurar ei despiiegue dei reioj:
Oprimay mantengaoprimidalasteclas'CANCEL'y 'CLOCK'
durantetres segundos.La horadel dfareaparecer_enel indicador.
'Timer' [Temporizador)
Eltemporizadorpuedeset programaticdeun minuto (0:01)hasta99
horasy 59 minutos(99:59).
Eltemporizadorpuedeset usadoindependientementedecualquier
otraactividaddelhomo.Adem_spuedeset programaticcuandootra
funci6n del homoesteen funcionamiento.
Eltemporizadornocontrola el homo.SolamentecontrolaunaseSal
sonora.
Para programar el temporizador:
1. Oprimalatecla 'TIMER'.
• '0:00'destellaen el indicadorvisual.
TIMER
• Losdospuntos destellar_n.
2. Optimalatecla A o V hastaque el tiempocorrecto
aparezcaen el indicadorvisual.
• Losdospuntos contin0andestellando.
3. Optimanuevamentelatecla 'TIMER' o esperecuatrosegundos.
• Losdospuntos contin0andestellandoy comienzalacuenta
regresivadel tiempo.
• El01timominutode la cuenta regresivadel temporizadorse
desplegar_ensegundos.
4. AI finaldel tiempo programatic,seescuchar_una sepalsonora
larga.
Para cancelar el temporizador:
1. Optimay mantengaoprimidala tecla'TIMER' durantetres
segundos.
2. Optimalatecla 'TIMER' y coloquelahora a0:00.
61
Bloqueo de los controies
Elteclado puedeset bloqueadoparaseguridad,limpiezao evitarel
usono autorizado.Nofuncionar_ncuandoest(!nbloqueados.
Si el homoest_en uso,loscontrolespuedebloquearse.
Lahoraactual del dfapermanecer_enel indicadorcuandolos
controlesest(!nbloqueados.
Para bloquear:
Optimay mantengaoprimidaslasteclas
'CANCEL' y'COOK & HOLD'durantetres
segundos.(Oprimaprimerola tecla
'CANCEL'.)
Para desbloquear:
-- CANCEL
Optimay mantengaoprimidaslasteclas'CANCEL'y 'COOK &
HOLD'durantetressegundos.(Oprimaprimerola tecla'CANCEL'.)
C6digos de errores
'BAKE'(Horneado)o 'LOCK'(Bloqueado)puedendestellar
r@idamenteparaadvertirleque hayun erroroun problema.Si
'BAKE'o 'LOCK'destellanen el indicadorvisual,oprimale tecla
'CANCEL'. Si 'BAKE'o 'LOCK'contin_andestellando,desconectela
corrienteel(!ctricahaciael artefacto.Espereunospocosminutosy
vuelvaa conectarla corrienteel(ictrica.Silaspalabrasa_n contin_an
destellando,desconectela corrienteel(!ctricahaciael artefactoy
Ilamea un t(!cnicodeservicioautorizado.
'Bake' [Horneado]
Para programar 'Bake':
1. Optimalatecla 'BAKE'. BAKE
• 'BAKE'destellar& _'_'J
2.
.
• '000'destellarden el indicadorvisual.
Seleccionelatemperaturadelhomo. Latemperatura
delhomo puedeset programadade75° a285° C
(170° a550° F).Optima u oprimay mantenga
oprimidalatecla A o V.
• Cuandocualquierade estasdosteclasseoprime
pot primeravez,'175°, ('350°')seiluminard.
• Oprimalatecla A paraaumentarlatemperatura.
• Oprimalatecla V paradisminuirla temperatura.
Optimalatecla 'BAKE' nuevamenteo esperecuatrosegundos.
• 'BAKE'dejardde destellaryse iluminarden el indicadorvisual.
• '38° C'('100° F')o latemperaturaactualdel homose
desplegard.Latemperaturase elevarden incrementosde
'3°C' ('5° F')hastaquese alcancela temperaturaprogramada.

5.
6.
Espereaque el homose precalientedurante8-15minutes.
• Cuandoel homoIlegaa latemperaturaprogramadase
escuchardunasepalsonoralarga.
• Paraverificar latemperaturaprogramadaduranteel
precalentamientodel homo,oprimalatecla 'BAKE' (Horneado).
Coloqueelalimentoen el homo.
Verifiqueel progresode lacocci6ncuandohayatranscurridoel
tiempo minimorecomendado.ContinUela cocci6nsiesnecesario.
7. AI t_rminode la cocci0n,optimala tecla'CANCEL'
(Cancela0. CANCEL
8. Retireel alimentodel homo.
Diferencias dei horneado entre su homo
antiguo y su homo nuevo
Esnormalobservaralgunasdiferenciasen el tiempode horneadode
su homoantiguoy su homonuevo.VeaAjuste dela temperaturade/
homoen la p_gina65.
Notas:
• Paracambiar/atemperaturadel homoduranteelhomeado,
optimala tecla 'Bake', luegooprimalatecla A o V hastaque
Ileguea latemperaturadeseada.
• Paracambiar/atemperaturade/homo durante'Preheat',
oprimadosvecesla tecla'Bake', luegooptima latecla A o
V hastaquesedesplieguelatemperaturadeseada.
• Si olvidaapagarel homo,seapagar_autom_ticamentedespu(!s
de transcurrir12 horas.Si deseadesactivarestacaracterfstica,
veala p_gina65.
4.Programela cantidaddetiempo durantela cualusteddesea
hornearoprimiendolatecla A o V. Eltiempo de horneado
puedeprogramarsedesdediezminutes(00:10)hasta11horas,
59 minutes(11:59).
• 'BAKE'y 'HOLD'seiluminanen el indicadorvisual.
• Eltiempo de horneadose iluminar_enel indicadorvisual.
• Comenzardlacuentaregresivadeltiempo de horneado.
Cuande haya expirade el tiempe de cecci6n:
• Seescuchar_ncuatroso,ales sonoras.
• 'BAKE'se apagard.
• 'HOLD'y 'WARM'(Caliente)seiluminardn.
• Enel indicadorsedesplegar_'75°' ('170°').
Despu_s de una hera en 'Hold Warm'
(Mantener caliente):
• 'End'sedesplegard.
• Laheradel dfavolverda desplegarseen el indicadorvisual.
Para cancelar 'Cook & Hold' en cualquier memento:
Oprimalatecla 'CANCEL'.Retireel _'_
del homo. CANCEL
'Delay Cook & Hold' (Cocci6ny
mantener caliente diferido)
'Cook & Hold' (Cocci6ny mantener
caliente)
'Cook& Hold' le permitehornearduranteunacantidad determinada
detiempo,seguidode un ciclo 'KeepWarm' (MantenerCaliente)de
una hera.
Para programar 'Cook & Hold':
1.Oprimalatecla'COOK& HOLD'.
• 'BAKE'y 'HOLD'(Mantener)
destellan.
• '000'se iluminaen el indicadorvisual.
2.Seleccionela temperaturadelhomo.Latemperatura
del homo puedeset programadade75°a 285°C (170° _ _,_,,
a 550°F).Optimau optimay mantengaoprimidala
tecla ,& o V.
• Oprimala tecla A paraaumentarla
temperatura.
• Optimala tecla V paradisminuir latemperatura.
3.Oprimalatecla'COOK& HOLD' nuevamenteo esperecuatro
segundos.
• 'HOLD'destella.
• '00:00'destellaen el indicadorvisual.
62
Cuandousa'Delay'(Diferido),elhomocomienzaacocinarm_s
tardeen el dfa.Programelacantidaddetiempo que usteddesea
diferir antesde queseenciendaelhomoy cuantotiempo desea
cocinar elalimento.Elhomocomienzaa calentaren la hera
seleccionaday cocina duranteel tiempoespecificado.
Eltiempo diferidopuedeprogramarsede 10minutes(00:10)hasta
11horns,59 minutes(11:59).
Para programar an ciclo de horneado diferido:
1. Optimalatecla 'DELAY' (Diferido).
• 'DELAY'destella.
• '00:00'destellaenel indicadorvisual.
2. Optimalatecla A o V paraprogramarel
tiempodiferido.
Cuando'DELAY'est(!todavfadestellando:
3. Oprimalatecla 'COOK& HOLD'.
• '000'se iluminaen el indicadorvisual.
• 'BAKE'y 'HOLD'(Mantener)destellan.
DELAY
Cont.

4. OprimaA paraprogramarla temperaturadehomeado.
* '00:00'y 'HOLD'destellan.
* 'BAKE'permaneceiluminado.
5. OprimaA paraprogramarel tiempode horneado.
* Enel indicadorvisualseiluminan'DELAY','BAKE',y 'HOLD'.
Cuando el tiempo diferido ha expirado:
* 'DELAY'seapagar&
. Sedespliegaeltiempode horneado.
* Sedespliega'BAKE'y 'HOLD'.
Para programar un tiempo diferido cuando ya se ha
programado 'Cook & Hold':
1. Oprimalatecla 'DELAY'.
* 'DELAY'destella.
* '00:00'se despliegaen el indicadorvisual.
2. Oprimalatecla A o V paraprogramarel
tiempo diferido.
Despu(!sde cuatrosegundos,'DELAY'
o
permanecer_iluminadopararecordarlequese
ha programadounciclo de horneadodiferido.
Cuando ha expirado el tiempo diferido y el homo
comienza a funcionar:
. Sedesplegar_el tiempo de horneado.
* 'DELAY'seapagard.
* 'BAKE'y'HOLD'permanecer_niluminados.
Para cancelar:
Optimala tecla 'CANCEL'.
* Todaslasfuncionesde horneadocontroladaso no por el
temporizadorser_ncanceladas.
* Lahora del dfavolver_adesplegarseen el indicadorvisual.
Importante:
* NO usehorneadodiferido paralosartfculosque necesitan
precalentamientodel homo,tal comopasteles,galletasy panes.
* No usehorneadodiferidodiferidosi el hornoyaest_caliente.
DELAY
CANCEL
'Keep Warm' (Mantener caliente)
Paramantenercalientesenforma seguraalimentoscalienteso para
calentarpanesy platos.
Para programar 'Keep Warm':
1. 0prima latecla 'KEEPWARM'. ,W_
* 'WARM' (Caliente)destella.
2.
* '000'sedespliegaen el indicadorvisual.
Seleccionelatemperaturade'KeepWarm'.La
temperaturapara'KeepWarm'puedeser programada
de63°a 90°C (145° a 190° F).Oprimau oprimay
mantengaoprimidalatecla A o V.
Cuandocualquieradeestasdosteclasseoprimepor primera
vez,'75°,('170°')seiluminard.
* Optima latecla A paraaumentarlatemperatura.
* Optima latecla Y paradisminuirla temperatura.
'WARM'y latemperaturasedesplegar_nen el indicadorcuando
elciclo 'KeepWarm' est(!activo.
Para cancelar 'Keep Warm':
1. 0prima latecla 'CANCEL'(Cancelar).
2. Retireel alimentodel horno.
CANCEL
Notas."
• Paramantenerla calidadOptimade losalimentos,los
alimentoscocinadosenel homodebensermantenidos
calientespor no m_sde 1 a 2 horas.
• Paraevitarque losalimentossesequen,c_braloslevemente
con papelde aluminioo unatapa.
• Para calentar panecillos:
cubra levementelospanecillosconpapelde aluminioy
col0quelosen el horno.
optima 'KEEPWARM' y latecla A para programar
75° C(170°F].
calientedurante12a 15minutos.
• Para calentar platos:
coloque2 pilasdecuatro platoscadaunaen el horno.
oprima'KEEPWARM' y latecla A para programar
75° C(170°F).
calientelosplatosdurantecinco minutos,apagueel homoy
deje losplatosen el homodurante15 minutosm_s.
usesolamenteplatosresistentesal homo.Verifiqueconel
fabricante.
no coloquelosplatoscalientessobreunasuperficiefrfa
puesel cambior_pidode temperaturapuedecausarfisuras
superficiales.
63

'Broil' (Asar a la parrilla)
Para programar 'Broil':
1. Paracomenzar,optima la tecla'BROIL'.
• 'BROIL'destella.
2.
BROIL
• "SEt'(Establacer)sedespliegaenel indicador.
Oprimala tecla A para programarasara la parrilla'HI' (Alto)
oprimalatecla V paraprogramarasarla parrilla"LO'(Bajo).
• Enel indicadorvisualsedesplegar_"HI'o "LO'.
• Selecciones'HI Broil' (290°C [550°F]) paraasadoa la parrilla
normal.Seleccione'LO Broil' (230°C [450°F])para asarala
parrilla contemperaturabajaalimentosquedebenser
cocinadospor m_stiempo,tal comola camede ave.
3. Despuesdecuatrosegundos,el homocomenzardafuncionar.
• 'BROIL'continuardiluminado.
4.
5.
6.
7.
Paraun doradoOptimo,precalienteel elementode asara la
parrilladurante3 a 4 minutosantesde colocarel alimento.
Coloqueel alimentoenel homo. Dejela puertaabierta
aproximadamente10cm (cuatropulgadas)(el primertope).
Devueltaa la came unavezaproximadamentea mitadde la
cocciOn.
Cuandoel alimentoestecocinado,oprimalatecla
'CANCEL' (Cancelar).Retireel alimentoy la
asaderadelhomo.
• Lahoradel diavolver_a desplegarseenel
indicadorvisual.
CANCEL
Notas:
• Paramejoresresultadoscuandoaseala parrilla,useuna asadera
dise_adaparaasara la parrilla.
• Lostiemposde asarala parrilla aumentar_ny el doradoser_
m_sclarosi elelectrodomesticoesinstaladoen un circuitode
208voltios.
• 'HI'seusapara la mayoriade losasadosa la parrilla. Use'LO
Broil' cuandoasea la parrillaalimentosque necesitancocciOn
prolongada. Latemperaturainferiorpermiteque el alimentose
cocinehastaquedarbien asadosindorarsedemasiado.
• Paracambiarlatemperaturade/homo duranteb asaralaparrilla,
optima latecla 'BROIL', luego oprimalatecla A o V para
cambiarel ajustedeasadoentre 'LO'y 'HI'.
• Lostiemposde asadoala parrillapuedenserm_slargoscuando
seseleccionala temperaturam_sbajade asarala parrilla.
• Lamayoriade losalimentosdebenser dadovuelta cuandoest_a
mitad deltiempo de asar.
Tabla de asar a la parrilla
Came de res
Came de cerdo
Biftec,2,5cm(1")
Hamburguesas,1,9cm (3/4")de grosor
Tocino
Chuletas,2,5cm (1")
JamOn- Rebanadasprecocidas,
1,3cm (1/2") de grosor
4
4
4
4
4
4
A medioasar
Bienasado
Bienasado
Bienasado
Bienasado
Tibio
15 - 18 minutos
19 - 23 minutos
15- 18 minutos
6 - 10 minutos
22 - 26 minutos
8 - 12 minutos
Came de ave Presasde polio 3 o/4 Bienasado 'LO Broil'
28- 38 minutos
Mariscos 10- 15 minutos
Bistecsde pescado,con mantequilla,
2,5cm (1") de grosor
Filetesdepescado,1,3cm (1/2")de grosor
Desmenuzado
Desmenuzado
4
4
La posiciOnde la parrillasuperiores#5.
Importante: EstatablaessOIouna guia. Lostiempospuedenvariarconel tipo de alimentoqueseest_cocinando.
8 - 12 minutos
64

Cierre Autom tico/
Mode Sab tico
Elhomoseapagar_autom_ticamentedespu(!sHe12horassi usted
Iodejaaccidentalmenteencendido. EstacaracteristicaHeseguridad
puedeserdesactivada.
Para cancelar el cierre autom_tico de 12 horas y
dejar que el homo funcione continuamente durante
72 horas:
].
2.
Programeelhornopara hornear(verpdgina61).
Optimay mantengaoprimidalatecla 'CLOCK' CLOCK
(Reloj)durantecincosegundos.
• 'SAb'sedesplegar_y destellar_durantecinco segundos.
• 'SAb'sedesplegar_continuamentehastaquese desactiveo
hastaquetranscurrael limite de 72horas.
• 'BAKE'(Horneado)tambiensedesplegar_si seest_usandoun
ciclode homeadocuandoel homo est_en modesab_tico.
* Lafuncidn'BAKE'esla Onicaque sepuedeutilizarconel mode
sabbtico.Lasdembsfunciones(temporizador,mantenercaliente,
autolimpieza,etc.)sebloquearbnduranteel modesabbtico.
Para cancelar 'Bake' cuando el mode sab_tico
est_i active:
Oprimala tecla'CANCEL'(Cancelar).
• 'BAKE'seapagar_en el indicadorvisual.
• Noseoir_ ningunasepalsonora.
Para cancelar el mode sab_tico:
1. Oprimalatecla 'CLOCK' durantecincosegundos.
O
CANCEL
CLOCK
2.
Despuesde72 horas,el modesab_ticoterminar&
• 'SAb'destellar_durantecincosegundos.
• Lahera deldia reaparecer_en el indicadorvisual.
Ajuste de la temperatura
del homo
Laexactitudde lastemperaturasdel homoescuidadosamente
probadaen laf_brica. Esnormalnotaralgunadiferenciaentrela
temperaturade homeadoentreun homo nuevoy un homo antiguo.
Conel cotterdel tiempo,latemperaturadel homo puedecambiar.
Ustedpuedeajustar latemperaturadelhomosi consideraquesu
homo noest_ homeandoodorandoenforma correcta. Paradecidir
cuantodebecambiarla temperatura,programelatemperaturadel
hornoa 15° C(25° F)m_salta o m_sbajaque latemperatura
indicadaen sus recetas,luego hornee. Losresultadosdela
"prueba"puedendarleuna ideade cuantoajustarla temperatura.
Ajuste de la temperatura del homo:
1. Oprimalatecla 'BAKE'.
2. Programe285° C(550° F)oprimiendolatecla A.
3. Optimay mantengaoprimidala tecla'BAKE' durante
variessegundoso hastaque 0° aparezcaen el
indicadorvisual.
4.
5.
Si latemperaturadelhomo haside previamente
ajustada,elcambioaparecer_enel indicadorvisual.
Perejemplo,si la temperaturadel homorue reducida
en8°C (15°F)el indicadormostrar_'- 8°,('-15°').
BAKE
Oprimalatecla A o V paraajustarlatemperatura.
Cadavezquese oprimeunatecla,latemperaturacambiaen
3° C(5° F). Latemperaturadelhomo puedeseraumentadao
disminuidaen 3°a 20° C(5° a 35° F).
Lahera deldia reaparecer_autom_ticamenteen el indicador
visual.
Nonecesitareajustarla temperaturadelhomosi hayunafallao
interrupci0nde energiael(!ctrica. Lastemperaturasdeasarala
parrilla,mantenercalientey limpiezano puedenset ajustadas.
Notas:
• Elmodesab_ticopuedeseractivadoen cualquiermemento,
est(!o no el homo encendido.
• Elmodesab_ticonopuedeseractivadosi lasteclasest_n
bloqueadaso cuandola puertaest_bloqueada.
• Siel homoest_horneandocuandose programaemode
sab_tico, 'BAKE'seapagar_al finaldel ciclo de horneado. No
seemitir_nse_alessonoras.
• Sisedeseamantenerla luzdel homoencendidaduranteel
modesab_tico,(!stadebeser activadaantesde que comience
el modesab_tico.
• Cuandocomienceel modesabdticonoseemitird la sepal
sonorade precalentamiento.
• Cuandoel modesab_ticoest_active,todos losavisos,mensajes
yse_alessonorasest_ndesactivadas.
Elbloqueoautom_ticode la puertanofuncionaduranteel mode
sab_tico.
• Sioprimela tecla'CANCEL'secancelardun ciclo 'Bake',sin
embargoel control permanecerden modesab_tico.
• Sifalla lacorrienteel(!ctrica,cuandovuelvalaenergiael homo
seactivarden modesab_ticocon72 horasrestantesy ningOn
ciclo active.
65

Cambio de la temperatura
de °F/°C
1. Elajustedef_brica de la medidadetemperaturaesFahrenheit.
2. Paracambiarel ajuste,oprimay mantengaoprimidaslasteclas
'CANCEL' y'BAKE' (Horneado)al mismotiempo durantetres
segundos.
3. Escuchar_una sepalsonorayel ajusteactual (°Fo °C)se
desplegar_enla pantalla.(Sino serealizaningOncambio,la
estufaregresar_al ajusteactual despuesde 30segundos).
/4. Paracambiarel ajuste,oprimala tecla Ai,o Y. Oprfmala
nuevamentepararegresaral ajusteanterior.Esperecinco
segundosy el ajusteseguardar&
Ventilador del homo
Elventiladorde enfriamientoseencender_autom_ticamentedurante
las asadosa la parrillayalgunasfuncionesde horneado.Seusa
paramantenerfrfaslaspiezasinternasdel panelde control. El
ventiladorseapagar_autom_ticamentecuandolaspiezasse hayan
enfriado.Elventilador puedecontinuaroperandoalandespuesque
se hayaapagadoel horno. Estoesnormal.
Respiradero del homo
Cuandoel hornoest_en uso,el _reacercadel respiraderopuede
calentarseIosuficientecomoparacausarquemaduras.Nunea
bloqueelaaberturadel respiradero.
El respiraderodel homo est_ ubieado en la parte trasera de
la superficie de cocci6n.
RESPIRADERO DEL HORNO
No coloquepl_sticos
cercade la abertura
del respiraderopues
el calorquesale
puededeformaro
derretirel pl_stico.
'Oven Light' (Luz del homo) __)
Oprimael interruptorde la 'Oven Light' en el panel
decontrol paraencendery apagarla luzdel homo.La
luzdel homos01osepuedeencenderusandoel
interruptor. Oven
Light
Panel inferior del homo
Protejael panelinferiordel hornocontra derrames,especialmente
azucaradoso acidicos,puespuedendescolorarla porcelana
esmaltada.Useel utensiliode tama_ocorrectoafin deevitar
derrames.No eoloque utensiliosni papelde aluminio
directamente en la parte inferiordel homo.
66
Parrillas del homo
Elhomotienedosparrillas. Todaslasparrillastienenun bordecon
topede enganche.
Para retirar la parrilla:
1. Tirede la parrilla derechohacia
afuerahastaque sedetengaen
la posici0ndeltope deenganche.
2. Levanteel frentede la parrillay
tire de la parrilla haciaafuera.
Para reinstalar la parrilla:
1. Coloquelaparrillaen lossoportesdelaparrilla en el homo.
2. Inclinelevementehaciaarribael extremodelantero;deslicela
parrillahaciaatr_shastaque pasesobrelostopesde enganche.
3. Bajeelfrente de la parrillay deslfcelahaciaadentrodelhorno.
No cubra una parrillacompleta con papelde aluminio ni
coloque papelde aluminio en el panel inferiordel homo. Se
afectar_n los resultadosdel horneadoy se puededa_ar el
panel inferiordel homo.
Posiciones de la parrilla
PARRILLA5: Usepara
tostarpan,asaralimentos
delgadosno grasos.
PARRILLA4: Useparala
mayorfadelosasados.
PARRILLA3: Useparala
mayoriade losalimentos
horneadosenbandejaspara
galletaso parapanecillos,tortasde capas,alimentosde
convenienciacongelados,homeadoen generalconuna parrilla.
.............5
4
....... 3
2
1
PARRILLA2: Useparatortas,pastelitos,pasteles,cacerolas,asados
peque_osde came.
PARRILLA1: Useparapastelitos,tortasde 9" x 13"(22,86cmx
33,02cm),pastelesy asadodecortesgrandesdecamey polio.
HORNEADOCON PARRILLASMULTIPLES:
Dos parrillas:Usela posici0n2y 5,o 1y 4.
Importante:Nunea coloqueutensiliosdirectamenteen el fondo
del horno.
Horneado de
pasteles de capas
en [los parrillas
Paraobtenermejoresresultados
cuandohorneapastelesen dos
parrillas,uselaposici0n2y 5.
Coloquelospastelesen las
parrillascomosemuestra.

Ga tiaf se lci
LA0NICA Y EXCLUSIVASOLUCIONPARAEL
CLIENTEBAJOESTAGARANTiALIMITADAES
LA REPARACIONDELPRODUCTOSEGONSE
INDICAAQUi.LASGARANTiASIMPLiCITAS,
INCLUYENDOLASGARANTiASDE
COMERCIALIZACION0 DEAPTITUDPAPAUN
PROPOSITOENPARTICULAREST,_N
LIMITADASA UN ANO0 AL PERiODODE
TIEMPOMiNIMOPERMITIDOPORLA LEY.
MAYTAGCORPORATIONNOSERA
RESPONSABLEDEDANOSINCIDENTALES0
CONSECUENTES.ALGUNOSESTADOSY
PROVlNCIASNOPERMITENLA EXCLUSION0
LIMITACIONDEDAle,lOSINCIDENTALES0
CONSECUENTES0 LALIMITACIONDELA
DUPACIONDELASGARANTiASIMPLiCITASDE
COMERCIALIZACION0 APTITUD,PORLOQUE
ESTASEXCLUSIONES0 LIMITACIONES
PUEDENNOAPLICARSEENSUCASO.ESTA
GARANTiALEOTORGADERECHOSLEGALES
ESPECiFICOS.USTEDTAMBII_NPUEDETENER
OTROSDERECHOSQUEVARiANDEUN
ESTADOAOTRO0 DEUNAPROVINCIAA
OTPA.
Lo que no cubren estas garant as
1. Situacionesy da_osresultantesde cualquieradelassiguientessituaciones:
a.Instalaci0n,entregao mantenimientoinapropiados.
b.Cualquierreparaci0n,modificaci0n,alteraci0no ajusteno autorizadospor el
fabricanteo taller deservicioautorizado.
c. Mal uso,abuso,accidentes,usono razonableohechosfortuitos.
d.Corriente,voltaje,suministroelectricoosuministrode gasincorrectos.
e.Ajuste inadecuadode cualquiercontrol.
2. Lasgarantiasquedannulassi losn0merosdeserieoriginaleshansido retirados,
alteradoso nosepuedendeterminarfdcilmente.
3. Bombillas,filtros deaguay filtrosde aire.
4. Losproductoscompradosparausocomercialoindustrial.
5. Elcostodel servicioo Ilamadade serviciopara:
a.Corregirerroresde instalaci0n.Paralosproductosque requieranventilaci0n,se
deben usarconductosde metalrigido.
b.Instruiral usuarioenel usoadecuadodelproducto.
c. Transportedelelectrodomesticoal establecimientodeservicioy de regreso.
6. Cualquierperdidade alimentosdebidoa fallasdel refrigeradoro congelador.
7. Costosdeviajeytransportedeservicioen_reasremotas.
8. Estagarantfanose aplicafuerade losEstadosUnidosy Canad&P0ngaseencontacto
consu distribuidorparadeterminarsiseaplicacualquierotra garantia.
.
Losda_osconsecuenteso incidentalessufridospor cualquierpersonacomo resultado
del incumplimientodeestagarantia.Enalgunosestadosnose permitelaexclusiono
limitaci0nde da_osconsecuenteso incidentales,por Iotanto la limitaci0no exclusion
anteriorpuedeno aplicarseen sucaso.
Si necesita servicio
Primeroreviselasecci0nde Iocalizaci0ny soluci0nde averfasen sugufade usoy cuidado
o Ilameal distribuidor dondeadquiri0el electrodomestico.Tambie!npuede Ilamara Maytag
Services,LLC,Atenci0n alcliente,al 1-800-688-9900en EE.UU.y al 1-800-688-2002en
Canad_paraubicara unagentedeserviciocalificado.
• Aseg0resede conservarel comprobantede compraparaverificarel estadode la
garantia.Consultelasecci0nsobrela GARANTiAparamayorinformaci0nsobrelas
responsabilidadesdel propietarioparaobtenerserviciobajola garantfa.
• Si el distribuidoro lacompa_fadeserviciono puedenresolverel problema,escribaa
MaytagServices,LLC, Attn: CAIR:_Center,P.O.Box2370,Cleveland,TN 37320-2370o
Ilameal 1=800=688=9900en EE.UU.y al 1=800=688=2002en Canad&
• Lasguiasdel propietario,manualesdeservicioe informaci0nsobrelaspiezaspueden
solicitarsea MaytagServices,LLC,Atenci0nal cliente.
Notas." CuandoIlameo escribaacercade un problemadeservicio,porfavor
incluyalasiguiente informaci0n:
a.Su nombre,direcci0ny n0merodetele!fono;
b.N0merode modeloy n0merodeserie;
c.Nombrey direcci0ndesu distribuidoro tecnicode servicio;
d.Unadescripci0nclaradel problemaque est_experimentando;
e.Comprobantede compra(recibode compra).
Form No. A/01/06 Part No. 8113P610-60 @2006 Maytag Appliances Sales Co. Litho U.S.A.
Transcripción de documentos
!!!!!!!!!!!!!!!!!!!!!!!!!!!!!!i!i!i!ii!ii!i!!ii!iiiiiiiiii _iiii _ iii !i_ii i Electric S|ide-|. Smoo_h_op Sasy Touch Co._ro| 500 Table of Contents important Safety instructions ................. 1=3 Care & Cleaning ......................................... 4-7 Self-Clean Oven Cleaning Procedures Maintenance ............................................... 7=8 Oven Window Oven Light Troubleshooting ...................................... Surface Cooking Surface Controls ................................... 9-10 11-13 Smoothtop Surface Oven Cooking ........................................ Baking Cook & Hold Broiling Sabbath Mode Delay Cook & Hold Keep Warm Oven Racks Warranty 14-20 & Service ..................................... Guide d'utUisation et d'entretien 21 ............. 22 Guia de uso y cuidado ............................... 46 Form No. A/01/06 Part No. 8113P610-60 @2006 Maytag Appliances Sales Co. Litho U.S.A. replace any part of your appliance unless it is specifically recommended in this guide. All other servicing should be referred to a qualified servicer. Always disconnect power to appliance before servicing. por a l $afe To check if device is properly installed, look underneath range with a flashlight to make sure one of the rear leveling legs is properly engaged in the bracket slot. The anti-tip device secures the rear leveling leg to the floor when properly engaged. You should check this anytime the range has been moved. Warning and Important Safety Instructions appearing in this guide are not meant to cover all possible conditions and situations that may occur. Common sense, caution, and care must be exercised when installing, maintaining, or operating the appliance. Always contact the manufacturer about problems or conditions you do not understand. Recognize Safety Symbols, Words, Labels To Prevent Fire or Smoke Damage Be sure all packing materials are removed from the appliance before operating it. Keep area around appliance clear and free from combustible materials. Flammable materials should be stored in an oven. not Many plastics are vulnerable to heat. Keep plastics away from parts of the appliance that may become warm or hot. To prevent grease fires, do not let cooking grease or other flammable materials accumulate in or near the appliance. |n Case of Fire Use dry chemical or foam-type extinguisher or baking soda to smother fire or flame. Never use water on a Read and follow all instructions before using this appliance to prevent the potential risk of fire, electric shock, personal injury or damage to the appliance as a result of improper usage of the appliance. Use appliance only for its intended purpose as described in this guide. To ensure proper and safe operation: Appliance must be properly installed and grounded by a qualified technician. Do not attempt to adjust, repair, service, or grease fire. 1. Turn off appliance to avoid spreading the flame. 2. NEVER pick up or move a flaming pan. 3. Smother fire or flame by closing the oven door. Turn off ventilating hood to avoid spreading the flame. Extinguish flame then turn on hood to remove smoke and odor. Child Safety Do not use the cooktop or oven as a storage area for food or cooking utensils. Cooking Safety NEVER heat an unopened food container in the oven. Pressure build-up may cause container to burst resulting in serious personal injury or damage to the appliance. Use dry, sturdy potholders. Damp potholders may cause burns from steam. Dish towels or other substitutes should NEVER leave children alone or unsupervised near the appliance when it is in use or is still hot. Children should never be allowed to sit or stand on any part of the appliance as they could be injured or burned. never be used as potholders because they can trail across hot elements and ignite or get caught on appliance parts. Wear proper apparel. Loose fitting or long hangingsleeved apparel should not be worn while cooking. Clothing may ignite and cause burns if garment comes in contact with heating elements. Children must be taught that the appliance and utensils in it can be hot. Let hot utensils cool in a safe place, out of reach of small children. Children should be taught that an appliance is not a toy. Children should not be allowed to play with controls or other parts of the appliance. Always place oven racks in the desired positions while oven is cool. Slide oven rack out to add or remove food, using dry, sturdy potholders. Always avoid reaching into the oven to add or remove food. If a rack must be moved About Your Appliance while hot, use a dry potholder. Do not let potholder contact hot element in oven. Use racks only in the oven in which they were shipped/ purchased. Use care when opening the oven door. Let hot air or steam escape before removing or replacing food. PREPARED FOOD WARNING: Follow food manufacturer's instructions. If a plastic frozen food container and/or its cover distorts, warps, or is otherwise damaged during cooking, immediately discard the food and its container. The food could be contaminated. To prevent potential hazard to the user and damage to the appliance, do not use appliance as a space heater to heat or warm a room. Also, do not use the oven as a storage area for food or cooking utensils. Do not allow aluminum foil or meat probe to contact heating element. Do not obstruct the flow of air by blocking the oven vent. the oven vent is located at the rear of the cooking surface. Always turn off all controls when cooking is completed. DO NOT TOUCH HEATING ELEMENTS OR INTERIOR SURFACES OF OVEN. Heating elements may be hot even though they are dark in color. Interior surfaces of any oven become hot enough to cause burns. During and after use, do not touch, or let clothing or other flammable materials contact heating elements or interior surfaces of oven until they have had sufficient time to cool. Other surfaces of the appliance may become hot enough to cause burns among these surfaces are: oven vent opening and surface near this opening, oven door, window of oven door. Utensil Safety Follow the manufacturer's cooking bags. directions when using oven This appliance has been tested for safe performance using conventional cookware. Do not use any devices or accessories that are not specifically recommended in this guide. Do not use add-on oven convection systems. The use of devices or accessories that are not expressly recommended in this guide can create serious safety hazards, result in performance problems, and reduce the life of the components of the appliance. Do not touch a hot oven light bulb with a damp cloth as the bulb could break. Should the bulb break, disconnect power to the appliance before removing bulb to avoid electrical shock. If pan is smaller than element, a portion of the element will be exposed to direct contact and could ignite clothing or potholder. Cont. NEVER use aluminum foil to cover an oven rack or oven bottom. Misuse could result in risk of electric shock, fire, or damage to the appliance. Use foil only as directed in this guide. 2 Importent Sefetv Self-Clean Oven Only certain types of glass, glass/ceramic, ceramic, earthenware, or other glazed utensils are suitable for cooktop or oven service without breaking due to the sudden change in temperature. Follow utensil manufacturer's instructions when using glass. Turn pan handle toward center of cooktop, not out into the room or over another surface element. This reduces the risk of burns, ignition of flammable materials, or spillage if pan is accidently bumped or reached by small children. Do not clean door gasket. The door gasket is essential for a good seal. Care should be taken not to rub, damage, or move the gasket. Cooktop Do not use oven cleaners or oven liners of any kind in or around any part of the self-clean oven. NEVER leave surface units unattended, especially when using high heat. An unattended boilover could cause smoking and a greasy spillover can cause a fire. Important and Warning This appliance is equipped with different sized surface elements. Select pans with flat bottoms large enough to cover element. Fitting pan size to element will improve cooking efficiency. GLASS=CEPJtMIC The California Safe Drinking Water and Toxic Enforcement Act of 1986 (Proposition 65) requires the Governor of California to publish a list of substances known to the State of California to cause cancer or SURFACE: NEVER cook on a broken reproductive cooktop. If cooktop should break, cleaning solutions and spillovers may penetrate the broken cooktop and create a risk of electric shock. Contact a qualified technician immediately. Users of this appliance are hereby warned that when the oven is engaged in the self-clean cycle, there may be some low-level exposure to some of the listed substances, including carbon monoxide. Exposure to these substances can be minimized by properly venting Use extreme caution when moving the grease pan or disposing of hot grease. Allow grease to cool before attempting to move pan. the oven to the outdoors by opening the windows and/or door in the room where the appliance is located during the self-clean cycle. IMPORTANT Hoods NOTICE REGARDING PET BIRDS: Never keep pet birds in the kitchen or in rooms where the fumes from the kitchen could reach. Birds have a very Clean range hood and filters frequently to prevent grease or other flammable materials from accumulating on hood or filter and to avoid grease fires. sensitive respiratory system. Fumes released during an oven self-cleaning cycle may be harmful or fatal to birds. Fumes released due to overheated cooking oil, fat, margarine and overheated non-stick cookware may be equally harmful. When flaming foods under the hood, turn the fan on. Cleaning harm, and requires businesses to warn customers of potential exposures to such substances. Deep Fat Fryers Ventilating Safety Notice Safety Clean cooktop with caution. Turn off all controls and wait for appliance parts to cool before touching or cleaning. Clean with caution. Use care to avoid steam burns if a wet sponge or cloth is used to wipe spills on a hot surface. Some cleaners can produce noxious fumes if applied to a hot surface. Clean only parts listed in this guide. Save These Instructions for Future Reference 3 Cleanln Self-Clean Oven To set Self=Clean: Important: Oven temperature must be below 400° F to program a clean cycle. 1. Close the oven door. 2. Move door lock lever right to the locked position. CLEAN 3. Press the CLEAN pad. , CLEAN flashes in the display. 4. Press the A or V pad. , CUM (Clean - Medium Soil) is displayed. The self-clean cycle uses above-normal cooking temperatures to automatically clean the oven interior. If the door is not closed, beeps will sound and \ _, "door" will display. If the door is not closed within 45 seconds, the self-cleaning operation will be canceled and the display will return to the time of day. The oven should be cleaned regularly by wiping up spillovers to prevent excessive smoke and flare-ups. Do not allow a heavy build-up of soil to accumulate in the oven. 5. During the cleaning process, the kitchen should be well ventilated to get rid of normal odors associated with cleaning. Press the A or Y pad to scroll through the self-cleaning settings. CUH (Clean - Heavy Soil, 4 hours) CUM (Clean - Medium Soil, 3 hours) Before Self=Cleaning , CUL (Clean - Light Soil, 2 hours) 1. Turn off the oven light before cleaning. The light may burn out during the clean cycle. Choosing the soil level of the oven automatically programs the self-cleaning time. Remove all pans and oven racks from the oven. The oven racks will discolor and may not slide easily after a selfclean cycle if they are not removed. 2. . 6. After four seconds, the oven will start cleaning. The cleaning time will start counting down in the display. Clean oven frame, door frame, area outside of gasket, and around the opening in the door gasket with a nonabrasive cleaner such as Bon Ami* or detergent and water. The self-cleaning process does not clean these areas. They should be cleaned to prevent soil from baking on during the clean cycle. (The gasket is the seal around the oven door and w ind ow). LOCK will appear in the display. CLEAN will appear in the display. To Delay a Self=Clean Cycle: 1. Press the DELAY pad. , DELAY flashes. DELAY , 00:00 will appear in the display. 2. 4. To prevent damage, do not clean or rub the gasket around the oven door. The gasket is designed to seal in heat during the clean cycle. Press the A or V pad to set the amount of time you want to delay the cycle. Delay time can be set from ten minutes (00:10) to 11 hours, 59 minutes (11:59). 3. While DELAY is flashing, press the CLEAN pad. 5. Wipe up excess grease or spillovers from the oven bottom. This prevents excessive smoking, flare-ups or flaming during the clean cycle. , CLEAN will flash. CLEAN 4. Press the A or V pad. 6. Wipe up sugary and acidic spillovers such as sweet potatoes, tomato, or milk-based sauces. Porcelain enamel is acid-resistant, not acid-proof. The porcelain finish may discolor if acidic spills are not wiped up before a self-clean cycle. , CUM (Clean - Medium Soil) is displayed. Cont. * Brand names for cleaning products are registered trademarks of the respective manufacturers. 4 ¢leanin 5. Press the A or V pad to scroll through the self-cleaning settings. , CUH (Clean - Heavy Soil, 4 hours:) CUM (Clean - Medium Soil, 3 hours:) During the Self=Clean Cycle When LOCK shows in the display, the door cannot be opened. To prevent damage to the door, do not force the door open when LOCK is displayed. Smoke and Smells CUL (Clean - Light Soil, 2 hours:) Choosing the soil level of the oven automatically programs the self-cleaning time. 6. After four seconds, CLEAN, DELAY and LOCK will appear in the display to show that the oven is set for a delayed clean operation. The delay time is displayed. You may see some smoke and smell an odor the first few times the oven is cleaned. This is normal and will lessen in time. Smoke may also occur if the oven is heavily soiled or if a broiler pan was left in the oven. Sounds As the oven heats, you may hear sounds of metal parts expanding and contracting. This is normal and will not damage the oven. if the oven has already been set for a clean cycle and you wish to set a delay: 1. Press the DELAY pad. DELAY , DELAY flashes. 2. Press the A or V pad to set the amount of time you want to delay the cycle. After four seconds, CLEAN, DELAY and LOCK will appear in the display to show that the oven \,_,_" is set for a delayed clean operation. The delay time is displayed. cycle starts: The clean time will appear in the display. cycle: Press the CANCEL pad. , All words disappear from the display. , All functions are canceled. The time of day appears in the display. If oven racks were left in the oven and do not slide smoothly after a clean cycle, wipe racks and rack supports with a small amount of vegetable oil to make them easier to move. Fine lines may appear in the porcelain because it went through heating and cooling. This is normal and will not affect performance. , DELAY will turn off. To cancel the Self-Clean About one hour after the end of the self-clean cycle, LOCK will turn off. The door can then be opened. Move door lock lever to the left to unlock. Some soil may leave a light gray, powdery ash. Remove it with a damp cloth. If soil remains after wiping, that means the clean cycle was not long enough. The soil will be removed during the next clean cycle. , 00:00 will appear in the display. When the Self-Clean After Self=Cleaning CANCEL A white discoloration may appear after cleaning if acidic or sugary foods were not wiped up before the self=clean cycle. This discoloration is normal and will not affect performance. Notes: , If the oven door is left open, "door" will flash in the display and a signal will beep until the door is closed and the CLEAN pad is pressed again. , If more than five seconds elapse between pressing the CLEAN pad and the A or Y pad, the program will automatically return to the previous display. , The oven door will be damaged if the oven door is forced to open when LOCK is still displayed. Cleaning Procedures * Brand names are registered trademarks of the respective manufacturers. ** To order call 1-877-232-6771 U.S.A. and 1-800-688-8408 Canada. Cooktop Porcelain Enamel Porcelain enamel is glass fused on metal and may crack or chip with misuse. It is acid-resistant, not acidproof. All spillovers, especially acidic or sugary spillovers, should be wiped up immediatelywith a dry cloth. * When cool, wash with soapy water, rinse and dry. * Never wipe off a warm or hot surface with a damp cloth. This may cause cracking or chipping. * Never use oven cleaners, abrasive or caustic cleaning agents on exterior finish of range. Clock and Control Pad Area * To activate control lock for cleaning, see Locking the Controls, page 15. * Wipe with a damp cloth and dry. Do not use abrasive cleaning agents as they may scratch the surface. * Glass cleaners may be used if sprayed on a cloth first. DO NOTspray directly on centre/pad and display area. Control Knobs * Remove knobs in the OFF position by pulling forward. * Wash, rinse and dry. Do not use abrasive cleaning agents as they may scratch the finish. * Turn on each element to be sure the knobs have been correctly replaced. Cooktop Glass=Ceramic Never use oven cleaners, chlorine bleach, ammonia or glass cleaners with ammonia. important: Call an authorized servicer if the glass=ceramic top should crack, break or if metal or aluminum foil should melt on the cooktop. * Allow the cooktop to cool before cleaning. * General ==Cleancooktop after each use, orwhen needed, with a damp paper towel and Cooktop Cleaning Creme* (Part No. 20000001:)**.Then, buff with a clean dry cloth. Important: Permanent stains will develop ff soft is allowed to cook on by repeatedly using the cooktop when soiled. * Heavy Soils or Metal Marks -- Dampen a "scratchless" or "never scratch" scrubber sponge. Apply Cooktop Cleaning Creme* (Part No. 20000001:)**and scrub to remove as much soil as possible. Apply a thin layer of the creme over the soil, cover with a damp paper towel and let stand 30 to 45 minutes (2-3 hours for very heavy soil:).Keep moist by covering the paper towel with plastic wrap. Scrub again, then buff with a clean, dry cloth. important: Only use a CLEAN, DAMP "scratchless"pad that is safe for non-stick cookware. Thepattern and glass will be damaged if the pad is not damp, if the pad is soiled, or if another type of pad is used. * Burned-on or Crusty Soils ==Scrub with a "scratchiess" or "never scratch" scouring pad and Cooktop Cleaning Creme*. Important: Hold a razor blade scraper at 30° angle and scrape any remaining soil. Then clean as described above. Do not use the razor blade for daily cleaning as it may wear the pattern on _ _ the glass. _ _9_ , Melted Sugar or Plastic ==Immediately turn element to LOW and scrape sugar or !A_ p astcfromhotsurface to acoo area ThenturneementOFFanda owtocoo Cean _ residue with razor blade scraper and Cooktop Cleaning Creme* (Part No. 20000001:)**. d Oven Window and Door = Glass * Avoid using excessive amounts of water which may seep under or behind glass, causing staining. * Wash with soap and water. Rinse with clear water and dry. Glass cleaner can be used if sprayed on a cloth first. * Do not use abrasive materials such as scouring pads, steel wool or powdered cleaners as they will scratch glass. Cont. 6 Cleanin9 Oven Interior . Follow instructions on page 4-5 to set a self-clean cycle. Oven Racks * Clean with soapy water. Remove stubborn soil with cleansing powder or soap-filled scouring pad. Rinse and dry. Rackswill permanently discolor and may not slide smoothly if left in the oven during a self-clean operation. If this occurs, wipe the rack edge and rack support with a small amount of vegetable oil to restore ease of movement, then wipe off excess oil. Stainless Steel (select models) * * • • Storage Drawer, Door Handle = Painted Enamel * When cool, wash with warm, soapy water, rinse and dry. Never wipe a warm or hot surface with a damp cloth as this may damage the surface and may cause a steam burn. * F_rstubb_rns_i__usemi_d_yabrasivec_eaningagentssuchasbakings_dapaste_rB_nAmi.*D_n_tuse abrasive, caustic or harsh cleaning agents such as steel wool pads or oven cleaners. These products will scratch or permanently damage the surface. Important: Use a dry towel or cloth to wipe up spills, especially acidic or sugary spills. Surface may discolor or dull if soil is not immediately removed. This is especially important for white surfaces. DO NOT USE ANY CLEANING PRODUCT CONTAINING CHLORINE BLEACH. DO NOT USE ABRASIVE OR ORANGE CLEANERS. ALWAYS WIPE WITH THE GRAIN WHEN CLEANING. Daily Cleaning/Light Soil == Wipe with one of the following - soapywater, white vinegar/water solution, Formula 409 Glass and Surface Cleaner* or a similar glass cleaner - using a sponge or soft cloth. Rinse and dry. To polish and help prevent fingerprints, follow with Stainless Steel Magic Spray* (Part No. 20000008)**. • Moderate/Heavy Soil == Wipe with one of the following - Don Ami*, Smart Cleanser*, or Soft Scrub* using a damp sponge or soft cloth. Rinse and dry. Stubborn soils may be removed with a damp multipurpose Scotch-Brite* pad; rub evenly with the grain. Rinse and dry. To restore luster and remove streaks, follow with Stainless Steel Magic Spray*. • Discoloration == Using a damp sponge or soft cloth, wipe with Cameo Stainless Steel Cleaner*. Rinse immediately and dry. To remove streaks and restore luster, follow with Stainless Steel Magic Spray*. • Brand names for cleaning products are registered trademarks of the respective manufacturers. •* To order direct, call 1-877-232-6771 U.S.A. and 1-800-688-8408 Canada. Meintenence Oven Window 2. Do not hit the glass with pots, pans, furniture, toys, or other objects. To protect the oven door window: 3. Do not close the oven door until the oven racks are in place. 1. Do not use abrasive cleaning agents such as steel wool scouring pads or powdered cleansers as they may scratch the glass. Scratching, hitting, jarring or stressing the glass may weaken its structure causing an increased risk of breakage at a later date. Cont. 7 Oven 4. Replace bulb cover and secure with wire retainer. Door 5. Reconnect power to range. Reset clock. OR Use a dry potholder and very carefully unscrew bulb cover and bulb. 1. Replace with a 40-watt, oven-rated appliance bulb. Bulb with a brass base is recommended to prevent fusing of bulb into socket. 2. . Replace bulb cover and reconnect power to oven. 4. Reset clock. Leveling Legs To remove: 1. When cool, open the oven door to the first stop position (about four inches). 2. Grasp door at each side. De net use the door handle to lift door. 3. Lift up evenly until door clears hinge arms. Be sure the range is leveled when installed. if the range is not level, turn the leveling legs, located at each corner of the range, until range is level. To replace: 1. Grasp door at each side. 2. Align slots in the door with the hinge arms on the range. 3. Slide the door down onto the hinge arms until the door is completely seated on the hinges. Push down on the top corners of the door to completely seat door on hinges. Door sheuld net appear crooked. ANTI-TIP LEVELING Storage Important: The oven door on a new range may feel "spongy" when it is closed. This is normal and will decrease with use. Oven Light BRACKET LEG Drawer (style varies by model) The storage drawer can be removed to allow you to clean under the range. To remove: 1. Empty drawer and pull out to the first stop position. To replace oven light bulb: 1. When oven is cool, hold bulb cover in place, then slide wire retainer off cover. Important: Bulb cover will fall if not held in place while removing wire retainer. 2. Lift up the front of the drawer. BULBCOVER 3. Pull out to the second stop position. 4. Grasp sides and lift drawer up and out. To replace: 1. Fit the ends of the drawer glides into the rails in the range. 2. Lift up the front of the drawer and gently push in to the first stop position. RETAINER 2. Remove bulb cover and light bulb. 3. Lift drawer up again and push until drawer is closed. 3. Replace with a 40-watt appliance bulb. 8 Troubleshoodn9 For most concerns, try these first. e e e e Part or all of appliance not work. does e e e e e Check Check Check Check if oven controls have been properly set. to be sure plug is securely inserted into receptacle. or re-set circuit breaker. Check or replace fuse. power supply. Check Check Check Check Check if if if if if surface and/or oven controls have been properly set. See pages 11 & 15. oven door is unlocked after self-clean cycle. See page 5. oven is set for a delayed cook or clean program. See pages 16, 4 & 5. Control Lock is activated. See page 15. control is in Sabbath Mode. See page 19. Clock, indicator words, and/or lights operate but oven does not heat. , Oven may be set for a Cook & Hold or Delay function. , The Control Lock may have been set. See page 15. Baking results are not as expected or differ from previous oven. e Food is not broiling properly or smokes excessively. , , , , Oven will not self=clean. , Check to make sure the cycle is not set for a delayed start. See pages 4-5. Check if door is closed. Check if control is in Sabbath Mode. See page 19. Oven may be over 400° F. Oven temperature must be below 400 ° F to program a clean cycle. Oven did not clean properly. , Longer cleaning time may be needed. , Excessive spillovers, especially sugary and/or acidic foods, were not removed prior to the self-clean cycle. Oven door will not unlock after self=clean cycle. , Oven interior is still hot. Allow about one hour for the oven to cool after the completion of a self-clean cycle. The door can be opened when the LOCK indicator word is not displayed. , The control and door may be locked. See page 5. e e Make sure the oven vent has not been blocked. See page 20 for location. Check to make sure range is level. Temperatures often vary between a new oven and an old one. As ovens age, the oven temperature often "drifts" and may become hotter or cooler. See page 19 for instructionson adjusting the oven temperature. Important: It is not recommended to adjust the temperature if only one or two recipes are in question. Check oven rack positions. Food may be too close to element. Broil element was not preheated. Aluminum foil was incorrectly used. Never line the broiler insert with foil. Oven doorwas closed during broiling. Leave the door open to the first stop position (about 4 inches_). , Trim excess fat from meat before broiling. , A soiled broiler pan was used. , Voltage in house may be low. 9 Smoothtop surface shows wear. * Tiny scratches or abrasions. - Make sure cooktop and pan bottom are clean. Do not slide glass or metal pans across top. Make sure pan bottom is not rough. Use the recommended cleaning agents. See page 6. * Metal marks. - Do not slide metal pans across top. When cool, clean with Cooktop Cleaning Creme (Part No. 20000001)*. See page 6. * Brown streaks and specks. - Remove spills promptly. Never wipe with a soiled cloth or sponge. Make sure cooktop and pan bottom are clean. * Areas with a metallic sheen. - Mineral deposits from water and food. Use recommended cleaning agents. See page 6. * Pitting or flaking. - Remove sugary boilovers promptly. See page 6. Moisture collects on oven window or steam comes from * This is normal when cooking foods high in moisture. * Excessive moisture was used when cleaning the window. oven vent. There is a strong odor or light smoke when oven is turned on. * This is normal for a new range and will disappear after a few uses. Initiating a clean cycle will "burn off" the odors more quickly. * Turning on a ventilation fan will help remove the smoke and/or odor. * Excessive food soils on the oven bottom. Use a self-clean cycle. Fault Codes * BAKE or LOCK may flash rapidly in the display to alert you if there is an error or a problem. If BAKE or LOCK appear in the display, press CANCEL pad. If BAKE or LOCK continue to flash, disconnect power to the appliance. Wait a few minutes, and then reconnect power. If the flashing still continues, disconnect power to the appliance and call an authorized servicer. * If the oven is heavily soiled, excessive fiareups may result in a fault code during cleaning. Press the CANCEL pad and allow the oven to cool completely, wipe out excess soil, then reset the clean cycle. If the fault code reappears, contact an authorized servicer. Noises may be heard. * The oven makes several low-level noises. You may hear the oven relays as they go on and off. This is normal. * As the oven heats and cools, you may hear sounds of metal parts expanding and contracting. This is normal and will not damage your appliance. * A fan sound can be heard. This is the cooling fan and is normal. The fan will continue to run after use until the oven cools. There are no beeps and no display. * Oven may be in Sabbath Mode. See page 19. * Control may be locked. See page 15. SAb flashing and then displayed continuously. * Oven is in Sabbath Mode. To cancel, press and hold the CLOCK pad for five seconds. To order direct, call 1-877-232-6771 U.S.A. and 1-800-688-8408 Canada. 10 Surfece Cookin9 Surface Controls setting that will require only minor adjustment up or down depending on the food being prepared. The other elements have settings printed around the knobs that are also unique to those elements. Adjust the heat settings to the numbers that give the desired cooking results. The following descriptions will aid in choosing the settings that will give optimum results. Use to turn on the surface elements. An infinite choice of heat settings is available from Low to High. The knobs can be set on or between any of the settings. Setting the Controls 1. Place pan on surface element. Hold or Warm: Food maintains a temperature above 140° F without continuing to cook. Food is initially hot and then heat is reduced. Never use a hold or warm setting to reheat cold food. 2. Push in and turn the knob in either direction to the desired heat setting. The control panel is marked to identify which element the knob controls. For example, the graphic at right indicates left front element. O0 ®0 Simmer: Food forms bubbles that barely break the surface. Foods are between 185° F and 200 ° F. A simmer setting can also be used to steam or poach foods or continue cooking covered foods. 3. There is an element indicator light on the control panel. When any surface control knob is turned on, the light will turn on. The light will turn off when all the surface elements are turned off. Slow Boil: Food forms bubbles at a moderate pace. A slow boil setting can also be used for most frying and for maintaining the cooking of large amounts of liquids. When a control is turned on, a glow can be seen through the smoothtop surface. The element will cycle on and off to maintain the preset heat setting, even on High. Boil: Liquid forms bubbles at a rapid pace. A fast boil setting can also be used to brown meat, stir fry, saute, and heat oil for frying before turning to a lower setting. The highest 3 or 4 settings on the knob are used for these cooking operations. The highest setting is always used to bring water to a boil. Some elements offer an even higher speed for boiling liquids. 4. After cooking, turn knob to OFF. Remove pan. Suggested Heat Settings The size and type of cookware, type and amount of food being heated, and wattage of individual elements will determine where to set the knob for cooking operations. Some elements have a predetermined simmer and melt 11 Srnoothtop Tips to Protect the Srnoothtop Surface Surface Notes: Cleaning ([seepage 6 for more information,) , Before first use, clean the cooktop. Cooktop may emit light smoke and odor the first few times the cooktop is used. This is normal. , Clean your cooktop daily or after each use. This will keep your cooktop looking good and can prevent damage. , Smoothtop cooktops retain heat for a period of time after the element is turned off. Turn the elements off , If a spillover occurs while cooking, immediately clean the spill from the cooking area while it is hot to prevent a tough cleaning chore later. Using extreme care, wipe spill with a clean, dry towel. a few minutes before food is completely cooked and use the retained heat to complete cooking. When the hot surface light turns off, the cooking area will be cool enough to touch. Because of the way they retain heat, the smoothtop elements will not respond to changes in settings as quickly as coil elements. , Do not allow spills to remain on the cooking area or the cooktop trim for a long period of time. , In the event of a potential boilover, remove the pan from the cooking surface. , Never use abrasive cleansing powders or scouring pads which will scratch the cooktop. , Never attempt to lift the cooktop. , Never use chlorine bleach, ammonia or other cleansers not specifically recommended for use on glass-ceramic. The smoothtop surface may appear discolored when it is hot. This is normal and will disappear when the surface cools. To Prevent Marks & Scratches * Do not use glass pans. They may scratch the surface. , Never place a trivet or wok ring between the surface and pan. These items can mark or etch the top. Cooking Areas The cooking areas on your range are identified by permanent circles on the smoothtop surface. For most efficient cooking, fit the pan size to the element size. , Do not slide aluminum pans across a hot surface. The pans may leave marks which need to be removed promptly. ([See Cleaning, page 6._) Pans should not extend more than !/2 to 1=inch beyond the cooking area. , Make sure the surface and the pan bottom are clean before turning on to prevent scratches. When a control is turned on, a glow can be seen through the smoothtop surface. The element will cycle on and off to maintain the preset heat setting, even on High. , To prevent scratching or damage to the glass-ceramic top, do not leave sugar, salt or fats on the cooking area. Wipe the cooktop surface with a clean cloth or paper towel before using. For more informationon cookware, refer to Cookware Recommendations on page 13. Never slide heavy metal pans across the surface since these may scratch. 9" SINGLE 6" SINGLE ELEMENT 6" SINGLE ELEMENT To Prevent Stains • Never use a soiled dish cloth or sponge to clean the cooktop surface. A film will remain which may cause stains on the cooking surface after the area is heated. 9" SINGLE ELEMENT Hot Surface Light Continuously cooking on a soiled surface may/will result in a permanent stain. Cont. The Hot Surface indicator light is located at the front of the cooking surface. The light illuminateswhen any cooking area is hot. It will remain on, even after the control is turned off, until the surface has cooled. 12 $urfuce Cookin To Prevent Other Damage _,,_,_, _,_t_,,,,_,:,,_;_,_,_ _;_;;;_;_;;_;_;;_;_;;_;_ * Do not allow plastic, sugar or foods with high sugar content to melt onto the hot cooktop. Should this happen, clean immediately.([SeeCleaning, page 6._) _ !!__ i,_ ! _!,_ ii_!i_ _i i_ _ _i;_',_ _ _______________, ______,_,,_,, _,_,_,_ ........ Flat, smooth-bottom pans. Panswith grooved or warped bottoms. Panswith uneven bottoms do not cook efficiently and sometimes may not boil liquid. Heavy-gauge pans. Very thin-gauge metal or glass pans. Pans that are the same size as the element. Pans smaller or larger than the element by 1 inch. Secure handles. Cookware with loose or broken handles. Heavy handles that tilt the pan. * Do not use non-flat specialty itemsthat are oversized or uneven such as round-bottom woks, rippled bottom and/or oversized canners and griddles. Tight-fitting lids. Loose-fitting lids. Flat-bottom woks. Woks with a ring-stand bottom. * Do not use foil or foil-type containers. Foil may melt onto the glass. If metal melts on the cooktop, do not use. Call an authorized servicer. Canning and Oversize Cookware * Never let a pan boil dry as this will damage the surface and pan. * Never use cooktop as a work surface or cutting board. * Never cook food directly on the surface. * Do not use a small pan on a large element. Not only does this waste energy, but it can also result in spillovers burning onto the cooking area which requires extra cleaning. Cookware All canners and large pots must have flat bottoms and must be made from heavy=gauge materials. This is critical on smoothtop surfaces. The base must not be more than 1 inch larger than the element. Recommendations Using the right cookware can prevent many problems, such as food taking longer to cook or achieving inconsistent results. Proper pans will reduce cooking times, use less energy, and cook food more evenly. When canners and pots do not meet these standards, cooking times may be longer, and cooktops may be damaged. Some canners are designed with smaller bases for use on smoothtop surfaces. Flat Pan Tests When canning, use the High heat setting only until the water comes to a boil or pressure is reached in the canner. Reduce to the lowest heat setting that maintains the boil or pressure. If the heat is not turned down, the cooktop may be damaged. To determine whether your pans are flat. The Ruler Test: 1. Place a ruler across the bottom of the pan. 2. Hold it up to the light. 3. Little or no light should be visible under the ruler. The Bubble Test: 1. Put 1 inch of water in the pan. Place on cooktop and turn control to High. 2. Watch the formation of the bubbles as the water heats. Uniform bubbles mean good performance, and uneven bubbles indicate hot spots and uneven cooking. 13 Control Panel A B C D 2, I TIMER BROIL CANCEL _, CLEAN DELAY CLOCK F G H E | The control panel isdesigned for ease in programming. The displaywindow on the control shows time of day, timer and oven functions. Control panel shown includesmodel specific features. (Styling may vary depending on model.) iiiiiiiiiiiiiiiiiii_i BROIL Use for broiling and top browning. BAKE Use for baking and roasting. More (A) or Less (V) Enters or changes time, oven temperature. Sets HI or LO broil. Sets Timer. TIMER Clock The clock can be set to display time in a 12-hour or 24-hour format. The clock is set at the factory for the 12-hour format. To change the clock to 24=hour format: COOK & HOLD Bakes for a preset time, then holds food warm for 1 hour. 1. Press and hold the CANCEL and BELAY pads for three seconds. CLEAN (select models) Use to set self-clean cycle. 2. Press A or V pad to select 12 or 24 hour. DELAY Programs the oven to start baking at a later time. 3. Set the time of day following the directions below. CLOCK Use to set time-of-day clock. To set the Clock: KEEP WARM Use to keep cooked food warm in oven. 1. Press the CLOCK pad. CANCEL Cancels all operations except Timer and Clock. -- CANCEL -- DELAY CLOCK . Colon flashes in the display. 2. Press A or V pad to set the time of day. . Colon continues flashing. Using the Touchpads . 3. Press the CLOCK pad again or wait four seconds. The colon stops flashing. Press the desired pad. When electrical power is supplied or after a power interruption, the last clock time before power was interrupted will flash. * Press A or Y to enter time or temperature. . A beep will sound when any pad is touched. . A double beep will sound if a programming error occurs. To recall the time of day when another time function is showing, press the Clock pad. Important: Four seconds after pressing the A or Y pad, the time or temperature will automatically be entered. If more than 30 seconds elapse between touching a function pad and the A or V pad, the function will be canceled and the display will return to the previous display. Clock time cannot be changed when the oven has been programmed for Delay Cook, Delay Clean or Cook & Hold. To cancel the Clock display: If you do not want the time of day to display: Press and hold the CANCEL and CLOCK pads for three seconds. The time of day will disappear from the display. Cont. 14 Whentheclockdisplayis canceled, Fault Codes press the CLOCK pad to briefly display the time of day. To restore the Clock display: Press and hold the CANCEL and CLOCK pads for three seconds. The time of day will reappear in the display. -- BAKE or LOCK may flash rapidly in the display to alert you if there is an error or a problem. If BAKE or LOCK flash in the display, press the CANCEL pad. If BAKE or LOCK continue to flash, disconnect power to the appliance. Wait a few minutes, and then reconnect power. If the flashing still continues, disconnect power to the appliance and call an authorized servicer. CANCEL --CLOCK ]rimer The timer can be set from one minute (0:01) up to 99 hours and 59 minutes (99:59). Bake To set Bake: The timer can be used independently of any other oven activity. It can also be set while another oven function is operating. BAKE 1. Press the BAKE pad. BAKE will flash. The timer does not control the oven. It only controls a beeper. To set the Timer: 000 will light in the display. _, TIMER 1. Press the TIMER pad. 2. Select the oven temperature. The oven temperature can be set from 170° to 550°. Press or press and hold the A or Y pad. ,0:00 lights in the display. 350 ° will light when either pad is first pressed. The colon will flash. Press the A pad to increase the temperature. 2. Press the A or Y pad until the correct time appears in the display. Press the V pad to decrease the temperature. The colon will continue to flash. 3. Press BAKE pad again or wait four seconds. 3. Press TIMER pad again or wait four seconds. BAKE will stop flashing and light in the display. The colon continues flashing and the time begins counting down. The last minute of the timer countdown will be displayed as seconds. 4. At the end of the set time, one long beep will sound. To cancel 100° or the actual oven temperature will display. It will rise in 5 degree increments until the preset temperature is reached. the Timer: 1. Press and hold the TIMER pad for three seconds. OR 4. Allow the oven to preheat for 8-15 minutes. 2. Press the TIMER pad and set the time to 0:00. When the set oven temperature is reached, one long beep will sound. Locking the Controls To recall the set temperature during preheat, press the BAKE pad. The touchpad controls can be locked for safety, cleaning, or to prevent unwanted use. They will not function when locked. 5. Place food in the oven. If the oven is currently in use, the controls cannot be locked. 6. Check cooking progress at the minimum cooking time. Cook longer if needed. The current time of day will remain in the display when the controls are locked. 7. When cooking is finished, press CANCEL. CANCEL To lock: 8. Remove food from the oven. _,_,/ Press and hold the CANCEL and COOK & HOLD pads for three seconds. (Press the CANCEL pad first.) -- CANCEL To unlock: Press and hold the CANCEL and COOK & HOLD pads for three seconds. (Press the CANCEL pad first.) 15 After one hour in HOLD WARM: Notes: "End" will display. , Tochange the oven temperature during cooking, press the Bake pad, then the A or V pad until the desired temperature is displayed. , The time of day will reappear in the display. To cancel Tochange the oven temperature during preheat, press the Bake pad twice, then press the A or V pad until the desired temperature is displayed. CANCEL Delay Cook & Hold If you forget to turn off the oven, it will automatically turn off at the end of 12 hours. If you wish to deactivate this feature, see page 19. Baking Differences and New Oven Cook & Hold at any time: Press the CANCEL pad. Remove food from oven. Between Your Old When using Delay, the oven begins to cook later in the day. Set the amount of time that you want to delay before the oven turns on and how long you want to cook. The oven begins to heat at the selected time and cooks for the specified length of time. It is normal to notice some baking time differences between a new oven and an old one. See Adjusting the Oven Temperature on page 19. Cook & Hold Delay time can be set from 19 minutes (99:19) to 11 hours, 59 minutes (11:59). Cook & Hold allows you to bake for a preset amount of time, followed by a one-hour Keep Warm cycle. To set a Delayed Cook & Hold cycle: To set Cook & Hold: 1. Press the DELAY pad. 1. Press the COOK & HOLD pad. DELAY DELAY flashes. BAKE and HOLD flash. 99:99 flashes in the display. 999 lights in the display. 2. Press the A or V pad to set the delay time. 2. Select the oven temperature. The oven temperature can be set from 170° to 559°. Press or press and hold the A or V pad. While DELAY is still flashing: 3. Press the COOK & HOLD pad. \_ Press the A pad to increase the temperature. 999 lights in the display. Press the V pad to decrease the temperature. BAKE and HOLD flash. 4. Press A to set the baking temperature. 3. Press COOK & HOLD again OR wait four seconds. 99:99 and HOLD flash. HOLD flashes. " BAKE stays lit. 99:99 flashes in the display. 5. 4. Enter the amount of time you want to bake by pressing the A or Y pad. Bake time can be set from ten minutes (99:19) to 11 hours, 59 minutes (11:59). Press A to set the baking time. , The Delay time, DELAY, BAKE and HOLD light in the display. BAKE and HOLD light in the display. The baking time will light in the display. The baking time will start counting down. When the cooking time has elapsed: When the Delay time , Four beeps will sound. has expired: , DELAY will turn off. , BAKE will turn off. , HOLD and WARM will light. Baking time is displayed. , 179°will display. BAKE and HOLD are displayed. To set a Delay when Cook & Hold has already been programmed: 1. Press the DELAY pad. * DELAY flashes. _, DELAY 00:00 appears in the display. Cont. 16 2. Press the A or V pad to set the delay time. Notes: , After four seconds, DELAY will stay lit to remind you that a delayed cooking cycle has been set. When the Delay time , For optimal food quality, oven cooked foods should be kept warm for no longer than 1 to 2 hours. has expired , To keep foods from drying, cover loosely with foil or a lid. and the oven starts: , To warm dinner rolls: , The baking time will be displayed. - cover rolls loosely with foil and place in oven. , DELAY will turn off. - press KEEPWARM and A pads to set 170° F. , BAKE and HOLD will remain lit. To cancel: - warm for 12-15 minutes. CANCEL To warm plates: Press the CANCEL pad. - place 2 stacks of up to four plates each in the oven. , All timed and untimed cooking functions will be canceled. - press KEEPWARM and A pads to set 170° F. - warm for five minutes, turn off the oven and leave plates in the oven for 15 minutes more. , The time of day will reappear in the display. Important: , , - use only oven-safe plates, check with the manufacturer. DO NOT use delayed baking for items that require a preheated oven, such as cakes, cookies, and breads. - do not set warm dishes on a cold surface as rapid temperature changes could cause crazing. Do not use delayed baking if oven is already hot. Keep Warm Changing Temp °F/°C For safely keeping foods warm or for warming breads and plates. 1. The factory default setting for temperature is Fahrenheit. 2. To change the setting, press and hold the CANCEL and BAKE pads at the same time for three seconds. To set Keep Warm: 1. Press the KEEPWARM pad. 3. A single beep will sound and the current setting will be displayed (°F or °C). (if no change is made, the range will return to the existing setting after 30 seconds.) , WARM flashes. 000 appears in the display. 2. 4. To change the setting, press the A or T pad. Press again to return to existing setting. Wait five seconds and the setting will be complete. Select the Keep Warm temperature. The Keep Warm temperature can be set from 145° to 190°. Press or press and hold the A or Y pads. 170° will light when either pad is first pressed. Press the A pad to increase the temperature. Press the Y pad to decrease the temperature. WARM and the temperature will be displayed while Keep Warm is active. To cancel Keep Warm: 1. Press the CANCEL pad. CANCEL 2. Remove food from the oven. 17 For optimum browning, preheat broil element for 3-4 minutes before adding food. 4, Place food in the oven. Leave oven door open about four inches (the first stop). 5, , Turn meat once about halfway through cooking. 7. When food is cooked, press the CANCEL pad. Remove food and broiler pan from the oven. CANCEL The time of day will reappear in the display. To set Broil: Notes: 1. Press the BROIL pad. BROIL For best results when broiling, use a pan designed for broiling. * BROIL flashes. , SEt is displayed. Expect broil times to increaseand browning to be slightly lighter if appliance is installedon a 208-volt ci rcuit. 2. Press the A pad to set HI Broil or press the V pad to set LO Broil. , HI or LO will be displayed. , HI is used for most broiling. Use LO Broil when broiling longer cooking foods. The lower temperature allows food to cook to the well done stage without excessive browning. , Select HI Broil (550° F) for normal broiling. Select LO Broil (450° F) for low-temperature broiling of longer cooking foods such as poultry. , To change the oven temperature during broiling, press the BROIL pad and then press the A or V pad to switch between LO and HI Broil. 3. After four seconds, the oven will start. , BROIL will remain lit. Broil times may be longer when the lower broiling temperature is selected. Most foods should be turned halfway through broiling time. Broiling Chart Beef Steak, 1" thick Hamburgers, 3/4" thick 4 4 4 Medium Well Done Well Done 15- 18 minutes 19 - 23 minutes 15- 18 minutes Pork Bacon Chops, 1" Ham - precooked slice, 1/2" thick 4 4 4 Well Done Well Done Warm 6 - 10 minutes 22 - 26 minutes 8 - 12 minutes 3or4 Well Done LO Broil 28 - 38 minutes Flaky Flaky 10 - 15 minutes 8 - 12 minutes Poultry Chicken Pieces Seafood Fish Steaks, buttered, 1" thick Fillets 4 4 The top rack position is #5. Note: This chart is a suggested guide. The times may vary with the food being cooked. 18 Automatic Shut-Off/ Sabbath Mode Adjusting the Oven Temperature Oven temperatures are carefully tested for accuracy at the factory. It is normal to notice some baking or browning differences between a new oven and an old one. As ranges get older, the oven temperature can shift. The oven will automatically turn off after 12 hours if you accidentally leave it on. This safety feature can be turned off. To cancel the 12-hour shut=off and run the oven continuously for 72 hours: You may adjust the oven temperature if you think the oven is not baking or browning correctly. To decide how much to change the temperature, set the temperature 25 degrees higher or lower than your recipe recommends, then bake. The results of the "test" should give you an idea of how much to adjust the temperature. 1. Set the oven to BAKE (see page 15). CLOCK 2. Pressand holdtheCLOCK pad forfive seconds. SAb will be displayed and flash for five seconds. SAb will then be displayed continuously until turned off or until the 72-hour time limit is reached. To adjust the oven temperature: BAKE will also be displayed if a bake cycle is in use while the oven is in Sabbath Mode. 2. Enter 550° by pressing the A pad. 1. Press BAKE. 3. Press and hold the BAKE pad for several seconds or until 0° appears in the display. . BAKE is the only function that operates during the Sabbath Mode. Aft other functions (Timer, Keep Warm, Clean, etc.) are locked out during the Sabbath Mode. To cancel Bake when in Sabbath If the oven temperature was previously adjusted, the change will be displayed. For example, if the oven temperature was reduced by 15 degrees the display will show-15 °. Mode: Press CANCEL pad. BAKE will turn off in the display. CANCEL 4. Press the A or V pad to adjust the temperature. Each time a pad is pressed, the temperature changes by 5 degrees. The oven temperature can be increased or decreased by 5 to 35 degrees. No beeps will sound. To cancel the Sabbath Mode: 1. Press the CLOCK pad for five seconds. BAKE CLOCK 5. The time of day will automatically reappear in the display OR You do not need to readjust the oven temperature if there is a power failure or interruption. Broiling, Keep Warm and Cleaning temperatures cannot be adjusted. 2. After 72 hours, the Sabbath Mode will end. SAb will flash for five seconds. The time of day will return to the display. Notes: Sabbath Mode can be turned on at any time with or without the oven on. When the Sabbath Mode is started, no preheat beep will sound. Sabbath Mode cannot be turned on if the touchpads are locked out or when the door is locked. All prompts, messages and beeps are deactivated when Sabbath Mode is active. If the oven is baking when Sabbath Mode is set, BAKE will go out at the end of the baking cycle. There will be no audible beeps. The automatic door lock does not operate during the Sabbath Mode. Pressing CANCEL will cancel a Bake cycle, however the control will stay in the Sabbath Mode. If the oven light is desired while in Sabbath Mode, it must be turned on before the Sabbath Mode is started. If power fails, the oven will power up in Sabbath Mode with 72 hours remaining and no cycle active. 19 Oven Fan To remove: A cooling fan will automatically turn on during all broiling and some baking operations. It is used to keep internal parts on the control panel cool, The fan will automatically turn off when parts have cooled. The fan may continue to operate after the oven has been turned off. This is normal. 1. Pull rack straight out until it stops at the lock-stop position. 2. Lift up on the front of the rack and pull out. To replace: 1. Place rack on the rack supports in the oven. Oven Vent 2. Tilt the front end up slightly. Slide rack back until it clears the lock-stop position. When the oven is in use the area near the vent may become hot enough to cause burns. Never block the vent opening. 3. Lower front and slide back into the oven. The oven vent is located at the rear of the cooking Never cover an entire rack with aluminum foil or place foil on the oven bottom. Baking results will be affected and damage may occur to the oven bottom. surface. 0 VEN VENT L OCA TION Do not place plastics near the vent opening as heat from the vent could distort or melt the plastic. Rack Positions RACK 5: Used for toasting bread or broiling thin, nonfatty foods. RACK 4: Used for most broiling. ........ 3 .............. 2 RACK 3: Used for most ......... baked goods on a cookie . J sheet or jelly roll pan, layer cakes, or frozen convenience foods and general single-rack baking. Oven Light Press the Oven Light switch on the control panel to turn the oven light on and off. The oven light is only activated by this switch. RACK 2: Used for pound cakes, Bundt cakes, pies, casseroles and roasting small cuts of meat. RACK 1: Used for pound cakes, 9 x 13 cakes, pies and roasting large cuts of meat and poultry. Oven Bottom MULTIPLE RACK COOKING: Two rack: Use rack positions 2 and 5, or 1 and 4. Protect oven bottom against spillovers, especially acidic or sugary spills, as they may discolor the porcelain enamel. Use the correct pan size to avoid spillovers and boilovers. Be not place utensils or aluminum foil directly on the oven bottom. Important: Baking Never place pans directly on the oven bottom. Layer Cakes on Two Racks For best results when baking cakes on two racks, use racks 2 and 5. Oven Racks Place the cakes on the rack as shown. The oven has two racks. All racks are designed with a lock-stop edge. 2O Warranty Servic & What is Not Covered By These Warranties 1. Conditions and damages resulting from any of the following: a. Improper installation, delivery, or maintenance. b. Any repair, modification, alteration, or adjustment not authorized by the manufacturer or an authorized servicer. c. Misuse, abuse, accidents, or unreasonable use, or acts of God. d. Incorrect electric current, voltage, electrical and/or gas supply. e. Improper setting of any control. 2 Warranties are void if the original serial numbers have been removed, altered, or cannot be readily determined. 3. Light bulbs, water filters and air filters. 4. Products purchased for commercial or industrial use. 5. The cost of service or service call to: a. Correct installationerrors. For products requiring ventilation, rigid metal ducting must be used. b. Instruct the user on the proper use of the product. c. Transport the appliance to and from the servicer. 6. Any food loss due to refrigerator or freezer product failures. 7. Expenses for travel and transportation for product service in remote locations. 8. Outside of the United States and Canada this warranty does not apply. Contact your dealer to determine if another warranty applies. CUSTOMER'SSOLE AND EXCLUSIVE REMEDY UNDER THIS LIMITED WARRANTY SHALL BE PRODUCT REPAIR AS PROVIDED HEREIN. IMPLIED WARRANTIES, INCLUDING WARRANTIES OF MERCHANTABILITY OR FITNESSFORA PARTICULAR PURPOSE,ARE LIMITED TO ONE YEAR OR THE SHORTESTPERIOD ALLOWED BY LAW. MAYTAG CORPORATIONSHALL NOT BE LIABLE FOR INCIDENTAL OR CONSEQUENTIAL DAMAGES. SOME STATESAND PROVINCESDO NOT ALLOW THE EXCLUSION OR LIMITATION OF INCIDENTAL OR CONSEQUENTIAL DAMAGES, OR LIMITATIONS ON THE DURATION OF IMPLIED WARRANTIES OF MERCHANTABILITY OR FITNESS,SO THESE EXCLUSIONS OR LIMITATIONS MAY NOT APPLY TO YOU. THIS WARRANTY GIVESYOU SPECIFICLEGAL RIGHTSAND YOU MAY ALSO HAVE OTHERRIGHTS,WHICH VARY STATE TO STATE OR PROVINCETO PROVINCE. 9. Consequential or incidental damages sustained by any person as a result of any breach of these warranties. Some states do not allow the exclusion or limitation of consequential or incidental damages, so the above exclusion may not apply. if You Need Service First see the Troubleshooting section in your Use and Care Guide or call the dealer from whom your appliance was purchased or call Maytag Services, LLC, Customer Assistance at 1-800-688-9900 USA and 1-800-688-2002 Canada to locate an authorized servicer. * Be sure to retain proof of purchase to verify warranty status. Refer to WARRANTY for further information on owner's responsibilities for warranty service. If the dealer or service company cannot resolve the problem, write to Maytag Services, LLC, Attn: CAIR:"Center, P.O. Box 2370, Cleveland, TN 37320-2370, or call 1-800=688=9900 LISA and 1=800=688=2002 Canada. U.S. customers using TTY for deaf, hearing impaired or speech impaired, call 1-800-688-2080. User's guides, service manuals and parts information are available from Maytag Services, LLC, Customer Assistance. Notes: When writing or calling about a service problem, please include: a. Your name, address and telephone number; b. Model number and serial number; c. Name and address of your dealer or servicer; d. A clear description of the problem you are having; e. Proof of purchase (sales receipt). 21 iiiiiiiiiiiiiiiiiiiiiiiiiiiiiiiiiii _ _!i!i!i!i!i!i!i!i!i!i!i!i!i!i!i!i!i!i!i!i!i!i!i!i!i!i!i!i!i!i!i!i!i'!i_i Cuisi.i_re e|ectrique Easy Touch 500 e.castrab|e = dessus |isse Table des mati_res instructions de s_curit_ importantes ...................... 23-26 Nettoyage ...................................................................... Four autonettoyant Methodes de nettoyage 26=29 Entretien ......................................................................... 30-31 Lampe du four Hublot du four Recherche des pannes ................................................32=33 Cuisson sur la su_ace ................................................ 34=36 Commandes de la surface de cuisson Surface b dessus lisse Cuisson dans le four ................................................... Cuisson courante Cuisson et maintien Cuisson et maintien differes Maintien au chaud 37=44 Cuisson au gril Arr_te automatique/Mode sabbat Grilles du four Garantie et service apr_s=vente .......................................45 Guia de uso y cuidado ........................................................46 que pourrait susciter une utilisation incorrecte de I'appareik Utiliser I'appareil uniquement pour les fonctions pr6vues, d6crites dans ce guide. Pour une utJlisation adequate et en s_curit_, il faut que I'appareil soit convenablement install6 par un technicien qualifi& et reli6 _ la terre. Ne pas r6gler, r@arer ni remplacer un composant, _ moins que cela ne soit sp6cifiquement recommand6 dans ce guide. Toute autre r@aration doit 6tre effectu6e par un technicien qualifi& Toujours d6brancher I'appareil avant d'y fake de I'entretien. Instructionsde s6curlte importentes Utiliser une lampe torche pour d6terminer si la bride antibasculement est convenablement install6e sous la Les instructions de s6curit6 importantes et los paragraphes _ avertissement )_de ce guide ne sont pas destin6s _ couvrir toutes les conditions et situations qui pourraient se pr6senter. II faut fake preuve de bon sens, de prudence et de soin Iors de I'installation, de I'entretien ou du fonctionnement de I'appareik cuisiniSre Fun des pieds arriSre de r6glage de I'aplomb doit 6tre convenablement engag6 dans la fente de la bride. Lorsque la cuisiniSre est convenablement cal6e, la bride antibasculement immobilise le pied artiste contre le sol. V6rifier la parfake immobilisation de la cuisini_re par la bride aprSs chaque d@lacement de la cuisiniSre. Toujours prendre contact avec le fabficant dans le cas de probl_mes ou de conditions qui ne seraient pas comprises. Pour viter Reconnaitre los _tiquettes, paragraphes et syrnboles sur la s_curit_ un incendie ou des dommages par la furn e S'assurer que tousies mat6riaux de conditionnement sont retir6s de I'appareil avant de le mettre en marche. Garder les mat6riaux combustibles bien 61oign6sde I'appareil. Ne pas ranger de mat6riaux inflammables dans un four. De nombreux types de plastique sont affect6s par la chaleur. Garder les plastiques 61oign6sdes pi_ces de I'appareil pouvant devenir chaudes. Pour emp6cher qu'un feu de graisse nese d6clare, 6viter route accumulation de graisse ou autres matieres inflammables dans I'appareil ou au voisinage. Life routes los instructions avant d'utiliser cot appareil ; observer toutes les instructions pour 61iminer les risques d'incendie, choc 61ectrique, dommages mat6riels et corporels 23 En cas d'incendie NE JAIVlAIS TOUCHER LES leLleMENTSCHAUFFANTS NI LES PAROIS INTleRIEURESDU FOUR.Les elements chauffants Utiliser du bicarbonate de soude ou un extincteur _ poudre chimique ou _ mousse pour 6touffer les flammes. Ne jamais utiliser d'eau pour 6teindre de la graisse enflamm6e. peuvent 6tre brOlants meme s'ils ne sont plus rouges. Les surfaces interieures du four peuvent atteindre une temperature suffisamment elevee pour infliger des brOlures. Pendant et apres usage, ne pas toucher les elements chauffants ni les parois interieures du four et eviter leur contact avec des v6tements ou autres materiaux inflammables 1. Interrompre ralimentation 61ectrique de I'appareil pour minimiser la propagation des flammes. 2. NE JAMAIS saisir ou d6placer un ustensile de cuisine enflamm& avant qu'ils n'aient eu le temps de refroidir suffisamment. D'autres surfaces peuvent egalement atteindre une temperature suffisamment elevee pour br01er : le ouverture d'event et le surface avoisinante, ainsi que le porte et le hublot de four. 3. Fermer la porte du four pour 6touffer les flammes. Arr6ter la hotte pour 6viter la propagation des flammes. I_teindre les flammes, puis mettre la hotte en marche pour 6vacuer la fum6e et les odeurs. S curit6 Ne pas toucher rampoule du four br01ante avec un chiffon humide car elle pourrait se briser. Si tel est le cas, debrancher rappareil avant de retirer I'ampoule pour eviter une decharge electrique. pour les enfants NE JAMAIS garnir la sole du four ou une grille du four avec de la feuille d'aluminium. Ceci pourrait susciter un risque de decharge electrique ou d'incendie, ou une deterioration de rappareil. Utiliser de la feuille d'aluminium uniquement selon les instructions de ce guide. Ne pas remiser des aliments ou ustensiles de cuisine sur la table de cuisson ou dans le four. N[ JAMAIS laisser des enfants seuls ou sans supervision Iorsque I'appareil est en service ou encore chaud. Ne jamais Cuisson et s6curit6 laisser un enfant s'asseoir ou se tenir sur une partie quelconque de I'appareil. II pourrait se blesser ou se br01er. NE JAMAIS faire chauffer un recipient non ouvert dans le four. L'accumulation de pression dans le recipient pourrait provoquer son eclatement et de graves dommages materiels ou corporels. II est important d'enseigner aux enfants que rappareil et les ustensiles plac6s dedans peuvent 6tre chauds. Laisser refroidir les ustensiles en un lieu s0r, hors d'atteinte des enfants. II est important d'enseigner aux enfants qu'un appareil m6nager n'est pas un jouet, et qu'ils ne doivent toucher aucune commande ou autre composant de rappareil. Familiarisation Utiliser des maniques robustes et seches. Des maniques humides peuvent provoquer la formation de vapeur br01ante. Ne jamais utiliser un torchon _ vaisselle ou autre article textile _ la place de maniques ; un tel article pourrait trainer sur un element et s'enflammer, ou accrocher un ustensile ou un composant de I'appareil. avec I'appareil Porter un vetement appropri& I_viterde porter des v6tements amples ou _ Iongues manches pendant rutilisation de rappareil. IIs peuvent prendre feu si le v6tement entre en contact avec un 616mentde cuisson br01ant. Placer toujours les grilles _ la position appropri6e dans le four Iorsque le four est froid. Faire coulisser la grille vers rext6rieur avant d'ajouter ou enlever un plat ; utiliser pour cela une manique robuste et seche. I_viterd'introduire la main dans le four poury placer ou retirer un plat. S'il est n6cessaire de d6placer une grille Iorsqu'elle est chaude, utiliser une manique sSche. Ne pas toucher un 616ment chaud avec une manique. Ne pas utiliser cet appareil pour chauffer ou pour garder chaude une piece, sinon des dommages _ I'appareil pourraient s'ensuivre et cela pourrait etre dangereux pour I'utilisateur. Aussi, ne pas utiliser le four pour ranger des aliments ou des ustensiles de cuisine. N'utiliser les grilles que dans le four dans lequel elles ont 6t6 achet6es/exp6di6es. Suite Ne pas bloquer ou obstruer revent du four. L'event de four est situe _ I'arriere de la surface de cuisson. 24 Inslrucilonsdesecurilelmporlenles Ouvfir toujours la porte du four tres prudemment. Laisser rair chaud ou la vapeur s'echapper avant de retirer ou d'introduire un plat. Cet appareil comporte des elements chauffants de differentes tallies. Utiliser toujours un ustensile _ fond plat, de taille suffisante pour qu'il puisse recouvrir completement relement. Pour optimiser refficacite, choisir un ustensile de m6me taille que relement. AVERTISSEMENT = METS PRI::PARI::S: Respecter les instructions du fabricant. Si le contenant ou le couvercle en SURFACE EN VITROCI'-:RANIIQUE : NE JANIAIS utiliser une plastique d'un mets surgele se deforme ou est endommage durant la cuisson, jeter immediatement le recipient et son contenu. Les aliments pourraient etre contamines. Ne pas permettre le contact de papier d'aluminium ou de la sonde _ viande avec les elements chauffants. table de cuisson cassee ou f61ee:les solutions de nettoyage et renversements pourraient penetrer dans la table de cuisson en entrai'nant un risque de decharge electrique. Prendre immediatement contact avec un technicien quaHfie. Toujours eteindre routes les commandes une fois la cuisson terminee. Friteuses Ustensiles Exercer une prudence extreme Iors du deplacement du recipient de graisse ou Iors de I'eHmination de graisse chaude. Laisser la graisse refroidir avant de deplacer I'ustensile. et s6curit6 Appliquer les instructionsdu fabricant lots de I'emploi d'un sachet pour cuisson au four. Hottes d'extraction La securite de fonctionnement de cet appareil a ete testee raide d'ustensiles de cuisine traditionnels. Ne pas utiHser un ustensile ou accessoire qui n'est pas specifiquement recommande dans ce guide. Ne pas utiHser de systeme de convection additionnel. L'utilisation d'un dispositif ou accessoire qui n'est pas expressement recommande dans ce guide peut degrader la securite de I'appareil ou sa performance, ou reduire la Iongevit6 des composants. Nettoyer frequemment les flltres et la hotte de la cuisiniere pour emp6cher la graisse ou d'autres produits inflammables de s'accumuler sur les flltres ou la hotte en provoquant des feux de graisse. Pour flamber des aliments sous la hotte, mettre le ventilateur en marche. Si un ustensile est plus petit que relement utiHse, une pattie de I'element chauffant est exposee et peut provoquer rinflammation d'un vetement ou des maniques. Nettoyage et s6curit6 Nettoyer prudemment la table de cuisson. Arreter toutes les commandes et attendre ie refroidissement de tousies Seuls certains materiaux en verre, vitroceramique, ceramique, gres, ou certains ustensiles vitrifies/emailles peuvent etre utilis6s sur la table de cuisson ou dans le four sans risque de bris sous reffet du choc thermique. Observer les instructions du fabricant Iors de I'utiHsation d'un ustensile en verre. composants avant de ies toucher ou d'entreprendre ie nettoyage. Nettoyer i'appareil avec precaution. Travailler prudemment pour eviter des brOlures par ia vapeur en cas d'utilisation d'un chiffon ou d'une eponge humide iors de relimination d'un produit renverse sur une surface chaude. Certains produits de nettoyage peuvent generer des vapeurs nocives iorsqu'on ies applique sur une surface chaude. Orienter la poignee de chaque ustensile vers le centre de la table de cuisson et non vers rexterieur ou vers un autre element ; ceci reduira le risque de br01ure,inflammation de matiere inflammableou renversement I:un jeune enfant pourrait saisir et renverser un ustensile dont le manche est oriente vers I'exterieur). Nettoyer uniquement les pieces mentionnees dans ce guide. Four autonettoyant Table de cuisson NE JAMAIS laisser un element de surface allume sans surveillance, particuHerement avec chauffage eleve. Le debordement du contenu de rustensile pourrait provoquer la generation de fumee abondante et I'inflammation de la graisse. 25 Nous informons les utilisateurs de cet appareil que lots d'une opOration d'autonettoyage, ils peuvent 6tre exposOs_ une faible concentration de certaines substances figurant dans la liste mentionnOe ci-dessus, dont le monoxyde de carbone. Pour minimiser I'exposition, veiller _ ce que la piSce o0 se trouve le four soit convenablement aOrOedurant une opOration d'autonettoyage par I'ouverture d'une fenOtre ou d'une porte. Ne pas nettoyer le joint de porte; le joint joue un rOle essentiel quant _ 1'OtanchOit&Ne pas frotter, endommager ou d@lacer le joint. Ne pas utiliser de produits de nettoyage pour four ou enduits de four, dans le four autonettoyant ou sur les zones voisines. Avertissement et avis AVIS IMPORTANT = OISEAUX FAMILIERS : Les oiseaux ont important pour la s curit un systSme respiratoire trSs sensible. Ne pas garder un oiseau familier dans la cuisine ou dans une piSce o_ il pourrait 6tre La Ioi californienne {<Safe Drinking Water and Toxic Enforcement Act )_de 1986 (proposition 65) stipule la publication par le gouverneur de la Califomie d'une liste de substances que 1'Otatde Californie considOre comme cancOrigenes ou dangereuses pour le systSme reproducteur, et impose aux entreprises commerciales I'obligation de signaler _ leurs clients les risques d'exposition _ de relies substances. Conserver ces instructions expos6 aux fumOes. Les fumOes 6raises durant une opOration d'autonettoyage peuvent 6tre dangereuses ou mortelles pour un oiseau, de mOme que les fumOes 6raises Iors du chauffage excessif de graisse, huile, margarine, et du chauffage excessif dans un ustensile _ revOtement antiadhOsif. pour consultation ult rieure llettovege Avant I'autonettoyage Four autonettoyant 1. I_teindrela lampedu four avant le nettoyage.Elle risqueraitsinon, de griller. 2. Enlevertousles plats et les grilles du four. Lesgrilles risquent de se decoloreret de ne plus glisser aussi bien apres un cycle d'autonettoyagesi on ne les enlevepas. 3. Nettoyerle cadre du four, le cadrede la porte, la zone rexterieur du joint et autour de I'ouverturedansle joint de la porte, _ I'aided'un produit de nettoyagenon abrasif comme Bon Ami_ ou d'eau additionneede detergent.Le processus d'autonettoyagene nettoie pasces zones.Ellesdoivent etre nettoyeespour empecherla salete de s'incruster pendant le cycle de nettoyage.(Le joint assure I'etancheiteautour de la porte et du hublot du four.) 4. Pourempechertout dommage,ne pas nettoyerni frotter le joint qui se trouve autourde la portedu four. Cejoint est congupour eviter les pertes de chaleur pendantle cycle d'autonettoyage. Le cycled'autonettoyageutilise destemperaturessuperieures_ la normale pour assurer le nettoyageautomatiquede la totalite du four. Le four doit etre nettoyeregulierement.Les eclaboussuresdoivent etre essuyeespour eviter une production excessivede fumee ou I'apparition de flammes.Ne laissezpas de residuss'accumulerdans le four. \ . 5. (--liminerles residus de graisseou de produits renversessur la sole avant le nettoyage.Ceci empechela formation de flammes ou de fumee durant le nettoyage. Durant le processusd'autonettoyage,il convientde bien aerer la cuisine pour eliminer les odeursnormalementCruisesdurant le nettoyage. 6. Essuyerles residussucreset acides,comme les patatesdouces, la tomate ou les sauces_ base de lait. La porcelainevitrifiee Suite *Les noms de marquedes produits de nettoyagesont des marquesd@oseesdes differents fabricants. 26 possede unecertaine resistance auxcomposes acides, maisqui n'estpaslimitee. Ellepoutsedecolorer si losresidus acides ou sucres nesontpasenleves avant decommencer I'autonettoyage. 5. Programmation de Fautonettoyage • CL-H (Nettoyage- salete @aisse,/4heures) • CL-M (Nettoyage- salete moyenne,3 heures) : • CL-L (Nettoyage- salete legere,2 heures) Important : La temperaturedu four dolt etre situee en dessousde 205° C (400° E) pour programmerun cycle d'autonettoyage. Le choix du niveaude salete du four programme automatiquementla duree du cycled'autonettoyage. 1. Eermerla porte du four. 6. Apres quatresecondes,los rootsCLEAN,DELAYet LOCK (Verrouillage)paraissent9 I'afficheurpour indiquer que le four est programmepour une operationde nettoyagediffer& Le temps d'attente parait9 I'afficheur. 2. Placerla manettede verrouillage9 la position de verrouillage. 3. Appuyer sur la touche CLEAN (Nettoyage). Appuyersur la touche A ou T pour voir defiler les differents reglagesde I'autonettoyage. CLEAN * Le mot CLEANclignote _ I'afficheur. /4. Appuyer sur la touche A ou T. Si le four a dej_ ete programme pour an cycle de nettoyage et que I'on desire etablir an delai : . CL-M (Nettoyage- salete moyenne)est affich& 1. Appuyersur la touche DELAY. Si la porte n'est pasfermee,des bips retentissentet le mot {<door >> (porte) parait _ I'afficheur.Si la porte _m'_ n'est pasfermee darts los/45secondes,I'operation d'autonettoyageest annulee et I'afficheur revient _ I'heure du jour. • 00:00parait 9 I'afficheur. 2. Appuyersur la touche A ou T pour programmer la duroc desireede I'attente avant que ne debute le cycle. 5. Appuyer sur la touche A ou T pourvoir defiler los differents reglagesde I'autonettoyage. Apr6s quatresecondes,los rootsCLEAN,DELAYet LOCKparaissent_ I'afficheur pour indiquer que le four est programmepour une operationde nettoyagediffer& Le temps d'attente parait _ rafficheur. • CL-H (Nettoyage- salete @aisse,/4heures) • CL-M (Nettoyage- salete moyenne,3 heures) • CL-L (Nettoyage- salete legere,2 heures) Lorsque le cycle d'autonettoyage Le choix du niveaude salete du four programme automatiquementla duroc du cycled'autonettoyage. * La duree de nettoyageparait 9 I'afficheur. • La duroc de nettoyagecommencele decompte_ I'afficheur. Annulation • Le mot LOCK(Verrouillage)parait_ I'afficheur. Appuyer sur la touche CANCEL (Annuler). • Le mot CLEANparait _ I'afficheur. du cycle d'autonettoyage : CANCEL . Tous los rootsdisparaissentde rafficheur. Demurrage differe d'un cycle d'autonettoyage : . Touteslos fonctions sont annulees. 1. Appuyer sur la touche DELAY (Differe). . L'heuredu jour parait_ I'afficheur. DELAY • 00:00parait _ I'afficheur. Pendant le cycle d'autonettoyage Lorsquele mot LOCKparait _ rafficheur, la porte ne peut etre ouverte.Poureviter d'endommagerla porte, ne pas la forcer pour I'ouvrir Iorsquele mot LOCKest affich& 2. Appuyer sur la touche A ou T pour programmer la duroc d'attenteavant que ne commencele cycle. La duroc d'attentepout etre reglee,de 10 minutes (00:10)_ 11 heures,59 minutes (11:59). 3. Alors que le mot DELAY(Differee)clignote, appuyersur la touche Clean (Nettoyage). debate : • Le mot DELAYs'eteint. 6. Apres quatre secondes,le four commencele nettoyage. * Le mot DELAYclignote. DELAY • Le mot DELAYclignote. Fumee et odeurs La premierefois oQ le four est nettoy& il peut y avoir production d'odeur et de fumee.Ceci est normal et disparaitra_ I'usage. CLEAN • Le mot CLEANva clignoter. Sile four est tres saleou si une ustensileau gril a ete laisseedansle four, il peut y avoir production de fumee. /4. Appuyer sur la touche A ou T. • CL-M (Nettoyage- salete moyenne)est affich& 27 Bruits De fines lignes peuventapparaitre darts la porcelaine parce qu'elle a subi chaleur et refroidissement.Ceciest normal et n'affectera pasla performance. Pendantque le four chauffe, il peut se produire des bruits de metal en dilatation ou en contraction.Ceci est normalet n'indique pas que le four s'abime. Une d6coloration blanche poutapparaitre apres le nettoyage si des aliments acides ou sucres Wont pas 6t6 enleves avant que ne commence I'autonettoyage. La decolorationest normale et n'affecterapas la performancedu four. Aprbs le cycle d'autonettoyage Remarques Environune heure apresla fin du cycle,le mot LOCKs'eteint.Ace moment, la porte pout etre ouverte.Pousserla manettede la porte vers la gauchepour deverrouiller. • Si la porte du four n'est pas fermee,le mot <_door >>(porte) clignote _ I'afficheur et le four emet des bipsjusqu'_ ce que la porte soit fermee et que ron appuie _ nouveausur CLEAN. La salet_ pout avoir laiss6 un r6sidu gris poudreux.L'enlever avec un lingo humide.S'il reste de la salete,cola indique que le cycle de nettoyagen'a pas ete assezlong. Cettesalete restantesera enleveeau prochain cycled'autonettoyage. • S'il s'ecoule plus de cinq secondesentre le momento_ ron appuie sur CLEANet celui o_ ron appuie sur la touche A ou T, I'afficheur retourneautomatiquement_ I'affichage precedent. Si los grilles ont 6t6 laiss_es _ I'int_rieur du four pendant le cycle d'autonettoyageet qu'elles glissent real sur leurs supports, losenduire,ainsi que les supports,d'une fine couche d'huile vegetale. IVl thodes - • La porte du four se trouvera endommageesi I'on force son ouverturealors que le mot LOCKest encoreaffiche. de nettoyage *Les nomsde marquesont des marques deposeesdes differents fabricants. ** Pour commanderdirectement, composerle 1-877-232-6771I_.-U.ou 1-800-688-8408Canada. Table de cuisson = 6mail vitrifi6 L'emailvitrifieest du verrelie au metalpar fusion.II peutsefissurerou s'ecailleren casde mauvaiseutilisation.II est resistantauxacides,maispastotalementinattaquablepar losacides.Tous losproduitsrenverses,en particulieracidesou sucres,doiventetreessuyesimmediatementavecun lingosec. • Unefois refroidi,laveravecde reausavonneuse,rinceretsecher. • Ne jamais essuyerune surfacetiedeou chaudeavecun lingo humide.Cecipourraitla fissurerou recailler. • Ne jamais utiliserde nettoyantspourfour, d'agentsde nettoyagecaustiquesou abrasifssur le fini exterieurde la cuisiniere. Zone de la consolede commando/ horloge • Pourutiliserla fonction Verrouillage descommandos, voir page38. • Essuyeravecun lingo humide,puisfaire secher.Ne pas utiliserun agentde nettoyageabrasifsusceptiblede rayerla surface. • On poututiliserun produitde nettoyagedu verre,pulverised'abordsur un chiffon.NEPASprejeter le preduit directementsur los touchesde commandoeu sur rafficheur. • Placerchaquebouton_ la positiond'ARRET, et retirerchaqueboutonen le tirant. • Laver,rinceret faire secher.Ne pas utiliserun agentde nettoyageabrasifsusceptiblede rayerla finition. • Fairefonctionnerbrievementchaqueelementpourverifier que le boutona etecorrectementreinstalle. Tiroir de remisage, poign6ede porte= 6mail peinte • Unefois lespiecesrefroidies,laver9 reau savonneusetiede,rinceret secher.Ne jamais essuyerunesurfacetiede ou chaudeavecun lingo humide,ceci pouvantendommagerla surfaceet entrainerune brOlurepar la vapeur. • Pourlostachesrebelles,utiliserdesagentsde nettoyagelegerementabrasifscommela pateau bicarbonatede soudeou BonAmi*.Ne pas utiliserd'agentsde nettoyageabrasifs,caustiquesou energiquescommelosnettoyantspourfour ou los tamponsen lained'acier.Cosproduitsraieraientou endommageraient de fagonpermanentela surface. Important: Utiliserun lingoeu un terchensec pour essuyer lospreduits renvers6s, surtout s'ils sent acides eu sucres. La surface pourrait se d_co/orer ou se ternir si la salet6 n'6taitpas imm6diatement enlev6e. Ceciest pan_culi_rement important dans/e cas de surfaces blanches. Suite 28 Tablede cuissoneu vitrocGramique Nejamais utilizer de produits de nettoyagedu four,javellisant, ammoniaque ou produits de nettoyagedu verre contenant de I'ammoniaque.Important: Prendrecontactavec un rGparateuragr66 si la surface en vitrocGramique se fendille,se casse ou si de I'aluminiumou du m_tal fondsur la surface. • Laisserla tablede cuissonrefroidiravantde la nettoyer. • GGnGralitGs= Nettoyerla table de cuissonapreschaqueemploiou au besoin,avecdu papieressuie-touthumidifieet la CooktopCleaningCreme*(pieceno 20000001)**. Puis,essuyeravecun lingesec et propre. Important: Des marquespermanentesvontseproduiresila salet#restesurla surfacede cuissonet est cuite de faGonr#p#t#e. • Salet6 6paisse ou marques m_talliques - Humidifierune eponge9 rGcurer{{ne rayantpas>>. Appliquerde la Cooktop CleaningCreme*(pieceno20000001)**et frotterpour retirerautantde salet6que possible.Appliquer une mincecouchede cremesur la salet&recouvriravecdu papieressuie-touthumidifi6et laisserpendant30 9 45 minutes(2 ou 3 heurespour la salet6tres importante).Garderhumideen recouvrantressuie-toutd'une pelliculeplastique.Frotter9 nouveau,puisessuyer avecun linge propreetsec. important: N'utiliserqu'untamponDr_curer<< nerayantpas_,PROPRE ETHUMIDE,sansdangerpour lesustensilesde cuisine Drev#tementantiadh#sif.Le verreet/e motifserontendommag#s si/e tamponn'estpashumide,sT/estsoui//#ou si un autretype de tamponest utilize. •SaletGscuites ou dessGchGes=Frotteravecun tampon9 rGcurer{<nerayantpast>et une cremede nettoyage pour tablede cuisson. Important: TenirunelamederasoirDun anglede 30°et gratterpour enlevertoutesalet#restante.Puis,nettoyercomme_ il estd_crit ci-dessus. Ne pas seservirdela lamede rasoirtouslesjours, celapourraituserle motifdu verre. _ •Plastiqueou sucre fondu = RGglerimmGdiatement rGIGment sur LOWet gratter le sucreet le plastiquede la/_z surfacechaudepour les pousserversune zonemoinschaude.PuisCTEINDRE 1'616ment et le laisser :_ refroidir.Nettoyerle rGsiduavecun grattoir _ lamede rasoiret de la CooktopCleaningCreme (piece _,_ __ no 2oooooo, ** Hublot et porte du four en verre • I_viterd'utilisertrop d'eau,qui risqueraitde s'infiltrersousou derrierele verreet de tacher. • Laver_ reau et au savon.Rinceravecde reau propreet sGcher.Un produitde nettoyagedu verrepeut6treutilis6en le vaporisantd'abordsur un linge. • Ne pas utilizerde produitsabrasifscommetampons_ rGcurer,lained'acierou produitde nettoyageen poudrequi risqueraientde rayerle verre. Interieur du four ° ExGcuterles instructionsprGsentGes aux pages26-28 pour I'autonettoyagedu four. Grilles du four • Nettoyeravecde reau savonneuse. • Eliminerlessouillurestenacesavecune poudrede nettoyageou un tampon_ rGcurersavonneux.Rinceret fake sGcher. • Si lesgrillessont laissGes dansle four pendantle cycled'autonettoyage,ellesse decolorentet peuventne plustres bien glisser.Si celase produit,enduirele bord desgrilleset le supportdesgrillesd'unefine couched'huilevGgGtale, puisessuyer rexc(!dent. Acier inoxydable • NEPASUT/LISERBE PROBUITSBE NETTOYAGECONTENANTBU JAVELL/SANT. (certainsmodeles) •/tie PASUTILISERBENETTOYANTS<<ORANGE_ OUABRASIFS. • TOUJOURSESSUYERBANS LESENSDELA TEXTUREDEL'AClERLORSBU NETTOYAGE. • Nettoyage joumalier/salet6 16gOre=Essuyeravecrun desproduitssuivants: eausavonneuse,vinaigreblanc/eau,produit de nettoyagepourverreetsurfaceFormula409*ou un produitsemblablepourverre- avecun linge soupleet une@onge. RinceretsGcher.Pourpolk et enleverlesmarquesde doigts,fake suivrepar unevaporizationde StainlessSteelMagicSpray* (pieceno 20000008)**. • Salete modGrGe/Gpaisse=Essuyeravecrun des produitssuivants:BonAmP,SmartCleanse€ou SoftScrub*- _ raide d'un linge soupleou d'[email protected] sGcher.Lestachesrebellespeuvent6treenlevGesavecun tamponmultiusagesScotch-Brite*humidifi& Frotteruniformementdans le sensdu metal.Rinceret secher.Pourredonnerdu lustreet retirerles rayures,fake suivrepar unevaporizationde StainlessSteelMagicSpray*(pieceno 20000008)**. • g_coloration - A raide d'uneepongehumidifiGeou d'un Iingesouple,essuyer_ raide du nettoyantCameopour acier inoxydable*.RincerimmediatementetsGcher.Pourenleverlos marqueset redonnerdu lustre,fake suivrepar une vaporization de StainlessSteelMagic Spray*(pieceno20000008)**. • Les noms de marquesont des marquesd@os6esdesdiff6rents fabricants. •* Pour commanderdirectement,composerle 1-877-232-6771I_.-U.ou 1-800-688-8408Canada. 29 [ntretlen Porte du four Lampe du four _Lestyle peut varier selon le mod61d) Pour rempiacer rampoule du four : 1. Apres le refroidissementdu four, maintenir le cabochontout en enlevantla piecemetallique qui la maintient en place,important : Le cabochontombera si on ne le maintient pasen place. D_pose de la porte : 1. Apres le refroidissementdu four, ouvrir la porte - position de cuissonau gril (porte entrouverted'environ 10 cm [4 pouces]). 2. Enleverle cabochonet I'ampoule. 2. Saisir la porte de chaque cote.Ne pas utiliser la poignee de porte pour la soulever. RESSORTDERETENUE (film_tallique) 3. Installerune ampoulede 40 watts pour appareilmenager. 4. Reinstallerle cabochonet le fil metallique de retenue. 5. Retablir I'alimentationde la cuisiniere.Reglerde nouveau I'horloge. 3. Souleveruniformementpour degagerla portedes charnieres. R_installation CABOCHON : OU 1. Saisir la porte de chaque cote. 2. Aligner les fentes avec lesbras de charnieresur la cuisiniere. Porterune maniqueseche et devissertres soigneusementle cabochonet I'ampoule. 3. Fairedescendrela porte pour la positionner correctementsur les charnieres.Poussersur les anglessuperieursde la porte pour I'enfoncercompletementsur les charnieres.II faut que la porte suit parfaitementd'aplomb. RemplacerI'ampoulepar une ampoulepour four, de 40-watts.II est recommanded'utiliser une ampouleavec un culot en laiton pour eviter la fusion du culot dans la douille. . important : On peut percevoir une certaine {_elasticite_ Iors de la fermeturede la porte du four d'une cuisiniere neuve;ceci est normal ; cet effet disparait progressivement. Remettre en place le cabochon et rebrancher le four. 4. RemettreI'horloge9 I'heure. 3O [ntretlen Pieds de r glage de I'aplomb Tiroir de rernisage S'assurerque la cuisiniere est d'aplomb une fois installee.Si elle ne rest pas,tourner les piedsde reglagede I'aplomb,9 chacun des anglesde la cuisiniere,jusqu'9 ce que celle-ci soit d'aplomb. Le tiroir de remisagepeut ¢tre enlevepour vous permettrede nettoyersous la cuisiniere. D_pose : 1. Vider le tiroir et le tirerjusqu'_ la position de la premierebut(!e. 2. SouleverI'avant. BRIDE 3. Tirerjusqu'9 la position de la secondebut(!e. ANTIBASCULEMENT 4. Saisirle tiroir par lescotes et soulever/tirer pour rextraire. PIED DE REGLAGE R_installation : DE L 'APL OMB Hublot du four 1. InsUrerles extremit(!sdesglissieresdu tiroir dans les railsde la cuisiniere. Pour prot_ger le hublot de la porte du four : 2. SouleverI'avantdu tiroir et pousser doucementjusqu'9 la position de la premierebut(!e. 1. Ne pas utiliser de produits nettoyantsabrasifscommedes tampons 9 recureren laine d'acierou des produits de nettoyage en poudre qui risqueraientde rayerle verre. 3. Souleverde nouveaule tiroir et le pousserpour le fermer. 2. Ne pas heurter le hublot en verre avecun ustensile,un article de mobilier, un jouet, etc. 3. Ne pas fermer la portedu four avant que les grilles ne soient en place dansle four. Toute degradationdu hublot de verre - rayure,choc,tension,etc. peut affaiblir sa structure et augmenter le risquede bris 9 une date ult(!rieure. 31 Recherche despennes Pour la piupart des probibmes observes,essayerd'abord les solutionspossibles,tt droite. • • • • Non=fonctionnementde I'appareil =total ou partiel. • Determinersi les commandesdes elementsde surfaceet/ou du four sont convenablement reglees.Voir pages34 et 38. • Determinersi la porte du four s'est deverrouilleeapres une operationd'autonettoyage.Voir page 27. • Determinersi le four est regle pour une cuissondifferee ou un nettoyagediffer& Voir pages 39 et 26-28. • Verifier si le verrouillagedes commandesest en marche.Voir page38. • Verifier si la commandeest en mode sabbat.Voir page 43. L'horiogeou les lampes fouctionnent, les rootsparaissent tt I'afficheur,mais le four ne chauffe pas. • Lescommandessont peut-etre programmeespour une fonction de cuissonet maintien ou de demarragediffer& • La fonction de verrouillagedescommandesest peut-etre activee.Voir page 38. R6suitatsde cuissonau four diff6rents des attentes ou de ceux produits par le four ant_rieur. o R6suitatsincorrects Iors de la • Determinerla position desgrilles. Les alimentspeuventetre trop pres de I'elementdu gril. • I_lementdu gril pas prechauff& • Utilisation incorrectede feuille d'aluminium.Ne jaaais garnir la grille de lechefriteavec de la feuille d'aluminium. • Portedu four fermee durant la cuisson au gril. Laisserla porte du four entrouverted'environ 10 cm (4 pouces)- premierebutee. • EnleverI'excesde graissesur la piecede viande avant la cuissonau gril. • Utilisation d'une lechefritesouillee. • La tension electrique de la maisonest peut-etre basse. cuissonau gril, ou _mission excessivede fum6e. o Verifier que les commandesdu four sont correctementreglees. Verifier si le four est bien raccordeau circuit electrique. Inspecter/rearmerle disjoncteur.Inspecter/remplacerles fusibles. Contr01erla source d'alimentationelectrique. Determinersi I'eventdu four est obstru& Voir son emplacementpage 44. S'assurerque la cuisiniere est d'aplomb. Lesreglagesde temperaturevarient souvententre un four neuf et le four qu'il remplace.On observesouvent une derivedu reglagede temperatured'un four 9 mesure qu'il vieillit ;il peut devenirplus chaudou moinschaud.Voir page43 lesinstructionsd'ajustementde la temperature du four. Important : II n'est pas utile de modifier le reglage de temperaturesi la variation n'affectequ'une ou deux recettes. Impossibiiit_ d'autonettoyage du four. • • • • Determinerque I'appareiln'a paseteprogrammepour un autonettoyagediffer& Voir page26-28. Verifier que la porte est fermee. Verifier si la commandeest en mode sabbat.Voir page 43. Lefour est peut etre_ une temperaturesuperieure_ 205° C (400° F).La temperaturedu four doit etre inferieure_ 205° C (400° F)pour pouvoir programmerun cycled'autonettoyage. Le four ne se nettoie pas correctement. • Untemps de nettoyageplus long peut etre necessaire. • On n'a paselimine avant I'operationd'autonettoyagelesaccumulationsexcessivesde residus, particulierementles residusd'alimentsacidesou sucres. Suite 32 Recherche despennes ii!!!!i! _!!_ i_i ;i ;i ;i ;i ;i ;i i !iiiiliiiiiiii iiiiiiiiii iiiiiiiiiii iiiiii iiiiiiiiiiil iiiiiiiiiiiii iiiiiiiiiiii!!!!iiiiiiiiiiiiii iiiiiiiiill !!iiiiiiili! ii ii!!! iiiiii ii i!ii!!i!i!ii!!iliiiiii!! iiiiiiiiii!!!!! iiiiii! ¸ ;i i i i i i i; __i_ ;;__;i _ _;i i i _i_ _; _ _i_;_; __ _;;i i __ _ _i i i i i __; _i;_i ;;i i __;;i i ! La porte du four ne se d6verrouille pasapr_s I'autonettoyage. • L'int(!rieur du four est encorechaud. Attendre environ une heure apresI'achevementde la periode d'autonettoyage.II est possibled'ouvrir la porte apresla disparition du message LOCK(Verrouillage)sur I'afficheur. • Les commandeset la porte sont peut-etre verrouillees.Voir page 27. La surface _ dessus lisse montre des signes d'usure. • Fines rayuresou abrasions. - S'assurerque la surfacede cuissonet le fond des ustensilessont propres.Ne pas faire glisser d'ustensilesen verre ou en metalsur la surface.S'assurerque le fond des ustensilesn'est pas rugueux.Utiliser les agents de nettoyagerecommandes.Voir page 29. • Marques de metal. - Ne pas faire glisser d'ustensilesmetalliquessur la surface.Une lois la surface refroidie,la nettoyeravec la creme de nettoyagepour table de cuisson.Voir page 29. • Marques et taches brunes. - Enleverrapidement les produits renverses.Ne jamais essuyerla surface avec une @ongeou un linge sali. S'assurerque la table de cuissonet que le fond des ustensiles sont propres. • Zones avec reflet metallique. - D@6ts minerauxen provenancede I'eauet de la nourriture.Utiliser les agents de nettoyagerecommand(!s.Voir page 29. • Piq_resou ecaillements - Enleverrapidement les produits sucresqui ont deborde.Voir page 29. Accumulationd'humidit6 snr le hublotou vapeur sortant de 1'6vent. • Ceci est normaldurant la cuisson d'alimentscontenant beaucoupd'eau. • Utilisation excessived'humidit(! lots du nettoyagedu hublot. l[missiond'une forte odeur ou de fum6e Iors de la raise en marche du four. • Ceci est normal pour un four neuf et disparait apresquelquesutilisations. Un cycled'autonettoyage<< brOlera_>plus rapidement les odeurs. • La mise en marched'un ventilateuraide _ retirer fumee et odeurs. • Presencede salet(!ssur la sole.Proceder9 un autonettoyage. Codesd'anomalie. • Les roots BAKE(Cuissoncourante) ou LOCKpeuvent clignoter rapidement9 I'afficheurpour pr(!venird'une erreur ou d'un probleme.Si le mot BAKEou LOCKparait 9 rafficheur, appuyersur la touche CANCEL(Annulet). Si le mot BAKEou LOCKcontinue 9 clignoter, d(!brancherrappareil.Attendre quelquesminutes,puis rebrancherI'appareil.Si le mot continue 9 clignoter, debrancherI'appareilet prendre contact avec un r@arateur autorise. • Si le four est tres sale, lesflammechespeuventproduire un coded'anomalieau cours du cycle d'autonettoyage.Appuyer sur la touche CANCELet laisserle four refroidir completement,essuyerla salete en excespuis reprogrammerI'autonettoyage.Si le code d'anomaliereapparait,prendre contact avec un r@arateur autoris(_. Des bruits se font entendre. • Le four fait plusieurs bruits faibles.II est possibled'entendreles relaisdu four qui se mettent en marcheet s'arretent.Ceci est normal. • Alors que le four se rechauffeet se refroidit, il est possibled'entendredes bruits correspondant9 la dilatation et 9 la contraction des pieces metalliques.Ceci est normalet n'endommagepasrappareil. • Le bruit d'un ventilateur peut etre entendu. C'estle ventilateur de refroidissementet ceci est normal. Le ventilateurcontinue 9 fonctionner tant que le four n'a pasrefroidi. II n'y a ni bip ni affichage. • Le four est peut-etre en modesabbat.Voir page 43. • Les commandespeuvent etre verrouillees.Voir page 38. SAb clignote puis reste allure& • Le four est en modesabbat.Pour annulet, appuyersur la touche CLOCK(Horloge)et maintener-la enfonceependant cinq secondes. 33 Cuisson surlesurfece Boutons de cornrnande PermettentI'utilisation des _lementschauffantsde surface, avec une progressioncontinue de la puissanceentre lesreglagesextremesLow (Basse)et High ([_levee).On peut regler on bouton_ toute position entre ces deux extremes. R glage des cornrnandes Maintien au chaud : Lesaliments restent_ une temperature superieure_ 60° C (1400F)sans continuer _ cuire. L'alimentest au depart _ une temperatureelevee,puis sa chaleurest reduite. Ne jamais utiliser le reglageMaintien au chaud pour rechaufferdes alimentsfroids. 1. Placerrustensilesur relement. Enfonceret faire tourner le boutonjusqu'_ la position desiree (rotation darts un sens ou dartsI'autre). • Des marquessur le tableaude commandeidentifient O I'elementcommandepar chaque bouton. Par exemple,le graphique _ droite indique I'element O O O avant!gauche. 3. II y a temoin lumineux pour les elementssur le tableau de commande.Lorsquerun des boutons de commanded'un element de surface est alimente,le temoin s'illumine.Le temoin s'eteint des qu'on interrompt ralimentation de I'element.L'element fonctionnera par intermittencepour maintenir le reglagepreetabli de chaleur, meme au niveauHigh. /4. Apres une cuisson,ramenerle bouton _ la position OFF (Arret). RetirerI'ustensile. Suggestions reglagepreetabli pour le mijotageet la fusion qui ne necessiteque des ajustementsmineurs darts un sens ou darts I'autre selon raliment preparer.Lesautres elementsont des reglagesimprimesautour des boutons qui sont specifiquesde ces elements.Ajuster les reglagesselon leschiffres qui donnent les resultatsde cuisson desires.Lesdescriptionssuivantesaideront_ choisir les reglages donnant les meilleurs resultats. de r6glage La dimensionet le type d'ustensile,le type et la quantite d'aliments cuire, et la puissancedes elementsdeterminerontcomment regler les boutons pour les operationsde cuisson.Certainselementsont un 34 Mijotage : Des bullesse forment tout juste _ la surface.Les aliments sont _ une temperaturesituee entre 85 et 93° C (185 et 2000F).Ce reglagepeut aussiservir pour etuver des alimentsou les pocherou encore pour continuer la cuissond'alimentssous couvercle. l]bullitionlente : Des bullesse forment _ un rythmemodere.Ce reglagepeut aussiservir pour frire la majorite desaliments et pour maintenir rebullition de grandesquantites de liquide. l]bullition: Des bullesse forment darts le liquide _ un rythmerapide. Ce reglage peut aussi servir pour faire brunir la viande, la faire sauter et chauffer rhuile pour faire frire avant de passer_ un reglage inferieur.Les3 ou/4 reglagesles plus elevessur le boutonsen/ent ces operations de cuisson. Le reglage le plus elevesert toujours porter I'eau_ ebullition. Certainselementsont memeune vitesse plus eleveepour I'ebullition des liquides. Caisson surlesurfece Surface dessus lisse Remarques Conseils de protection de la surface dessus lisse - • Lotsdes premieresutilisations de latable de cuisson,celle=ci peat 6mettre un pea de fum6e et des odeurs.Ceci est normal. Nettoyage (plus d'informations_ la page 29) • Avant de s'en sen/it la premierelois, nettoyerla table de cuisson. • Nettoyerla table de cuissonchaquejour ou apres chaque utilisation.Ces mesurespreserverontrapparencede la table de cuisson et eviterontqu'elle ne s'abime. • Lessurfaces _ dessus lisse conservent la chaleur pendant un certain temps apr_s I'extinctionde 1'616merit.I_teindre leselementsquelquesminutesavant que la nourriture ne soit tout _ fait cuite et utiliser la chaleur restantepour terminer la cuisson.Lorsquele voyant de surface chaudes'eteint,on peut toucher la surfacede cuissonsansdanger. En raisonde la fa_on dont les elementsd'une surface_ dessuslisse retiennentla chaleur,ceux-ci ne r@ondront pas aux changementsde reglage aussirapidementque des elementsen spirale. • Encas de renversementlots de cuisson,nettoyer immediatement le produit renversesur la surfacede cuissonpendantqu'elle est encore chaudeafin d'eviter un plus grand nettoyagepar la suite. User de prudence,essuyerles renversementsavec un linge propre et sec. • Ne pus laisserles produits renversessur la surfacede cuissonou sur la garniturede la table de cuissonpendant une Iongueduree. • Au cas o_ le contenu d'un ustensilerisquede deborder,retirer rustensilede la surfacede cuisson. • Ne jamais essayer de soulever la surface de caisson. • Ne jamais utiliser de poudre de nettoyageabrasiveou de tampons recurerqui raieraientla surface. • La surface_ dessuslisse peut semblerdecoloreeIorsqu'elleest tres chaude.Ceci est normalet disparait une lois que la surface refroidit. • Ne jamais utiliser de javellisant,ammoniaqueou autres produits de nettoyagenon specifiquementrecommandespour la vitroceramique. Pour eviter les marqaes Zones de caisson Les zonesde caissonde la cuisinieresont representeespar des cercles permanentssur la surface_ dessuslisse.Pour une efficacite maximum,utiliser une zone de cuissondont le diametre convient I'ustensile. • Ne jamais utiliser de support metallique ou anneaude wok entre un recipient et la surface de cuisson.Ces objets peuvent marquer ou rayerla surface. Le r#cipient ne doit pas d#passer la zone de cuisson de plus de 12 _ 25 mm (1/2 _ I po). • Ne pus faire glisser de recipientsmetalliquessur la surface de cuisson br01ante.IIs pourraientlaisser des marquesqui devront etre nettoyeesimmediatement.(Voir Nettoyage,page29.) Lorsqu'unecommandeest raiseen marche,on peutvoir un rougeoiement_ travers la surface_ dessuslisse.L'element fonctionnera en intermittence pour maintenir le r6glage pr66tabli de chaleur, m_me au niveau High (l_lev_e). • Veiller _ ce que le fond des recipientset la zonede cuissonsoient propresavant d'allumerI'element,afin d'eviter les rayures. Pour obtenir plus informationssur les ustensilesde cuisine,se reporter _ la page 36 au paragrapheRecommandationssur/es ustensi/esde cuisine. • Pouremp_,cherque la surfacede cuissonen vitroceramiquene se trouve rayeeou abimee,ne pas y laisserde sucre,de sel ou de graisse.PrendreI'habituded'essuyerla surfacede cuissonavec un linge propre ou un essuie-toutavant de rutiliser. ELEMENT SIMPLE ELEMENT SIMPLE DE 6 pc DE 9 pc et les rayares • Ne pas utiliser de casserolesen verre. Ellespourraientrayer la surface. ELEMENT SIMPLE • Ne jamais faire glisser de recipientsmetalliques@ais sur la surface au risquede la rayer. DE 6 pc \ Pour viter les taches ELEMENT • Ne jamais utiliser de linge ou d'@onge salepour nettoyer la surface de cuisson. IIslaisseraientun film, ce qui pourrait decolorer la surfacede cuisson Iorsqu'elleest utilisee. SIMPLE DE 9 pc Voyant de surface chaade Le voyant de surface chaude est situ_ _ I'avant de la surface de cuisson. II s'allumera Iorsqu'unesurfacede cuisson,quelle qu'elle soit, serachaude. II resteraallume, memeapresextinction de la commande,jusqu'_ ce que la zoneait refroidi. • L'utilisationcontinue d'une surface de cuissonsalie peut entrainer I'apparitionde taches permanentes. 35 Pour eviter d'autres dornmages _i_ii!!!!!!!i!!i!!i!_i_iiiii!_iiiiii_!_i_i_!i_!i!i!ii!_i!iiii_!_i_i_!ii_!_ii!i_!_i_!_!_i_!i! _____________________________________ i!'_ • Ne pas laisserfondre de plastique,de sucre ni d'aliments riches en sucre sur la table de cuisson.Si cela se produisait accidentellement, nettoyerimm6diatement.(Voir Nettoyage,page 29.) Des ustensiles_ fond Des ustensiles_ fond rainur6 ou gondol6. lisse,plat Des ustensiles_ fond in6gal ne cuisent pus efficacementet peuvent parfois ne pas faire bouillir les liquides. • Ne jamais laisser le contenu d'une casserolebouillir jusqu'_ ce qu'elle soit vide car cola pourrait abimer la surfacede cuissonet la casserole. • Ne jamais utiliser la table de cuissoncommesurface de travail ou commeplanche_ d6couper. • Ne jamais cuire d'alimentsdirectementsur la table de cuisson, sans recipient. • Ne jamais utiliser un petit recipientsur un grand element.Non seulementil y a g_chis d'6nergie mais il peut en r6sulterdes projectionsqui vont br01ersur la surfacede cuissonet devront 6tre nettoy6es. • Ne pus utiliser des recipientssp6ciauxnon plats qui seraient trop grandsou _ fond in6gal comme leswoks _ fond fond, les plaques chauffantesou recipientsde grandetaille _ fond ondul6. Des ustensilesen mat6riaux@ais Des ustensilesen verre ou en metal peu @ais. Des ustensilesde la m6me dimensionde 1'616ment Des ustensilesplus petits ou plus grands (de 2,5cm [1 po]) que 1'616mont. Des poign6esqui tiennent bien Des ustensilesavecdes poign6escass6es ou qui ne tiennent pus.Des poign6es Iourdesqui font se renverserrustensile. Des couverclesqui ferment bien Des couverclesqui ferment real. Des woks _ fond plat Des woks avec un fond sur anneau. • Ne pus utiliser de recipientsen aluminium.L'aluminiumrisque de fondre sur le verre.Sile metal fond sur la table de cuisson,ne pus rutiliser. Appeler un r@arateuragree. Ustensiles de grande taille et pour los conserves Recommandations los ustensiles Toutes los marmites pour los conserves et los grandes casseroles doivent avoir un fond plat et doivent etre fabriquees en materiau epais. Ceci est tres importantpour les surfaces _ dessuslisse.La basene doit pus d@asserde 1'616merit de plus de 2,5 cm (1 po). sur L'utilisationdu bon ustensilepeut emp6cherde nombreux problemescommela n6cessit6de cuire plus Ionguementla nourriture et la difficult6 _ obtenir des r6sultatsuniformes.De bons ustensilesr6duisent lesdur6es de cuisson,utilisent moins d'6nergie et cuisentde fagon plus uniforme. Si los marmites_ conserveset les casserolesne sont pus conformes cos normes,los dur6esde cuissonseront plus Iongueset los surfaces de cuisson pourront 6tre endommag6es. Tests pour verifier si los ustensiles ont un fond plat Pourla preparation de conserves,ne choisir que le r6glage High jusqu'_ce que I'eau commence _ bouillir ou que la pressionsuffisante soit atteinteduns la marmite.R6duireau r6glage le plus faible, maintenant1'6bullitionou la pression.Si la chaleur n'est pusdiminu6e, la surface de cuissonpourrait 6tre endommag6e. Certainesmarmitespour los conservessont conguesavec des bases plus petitespour 6tre utilis6essur des surfaces_ dessuslisse. Verifier que los ustensilessont plats. Test de la r_gle : 1. Placerune regle en traversdu fond de I'ustensile. 2. La tenir face _ la lumiere. 3. Aucune lumiereou tres peu ne doit 6trevisible sous la regle. Test de la hullo : 1. Mettre 2,5cm (1 po) d'eau duns rustensile. PlacerI'ustensilesur la surface de cuissonet toumer la commandosur High (¢lev6e). 2. Observerla formation de bullesIorsque I'eauchauffe. Des bulles uniformessignifient de bonnesperformanceset des bulles in6galesindiquent la presencede zones plus chaudesdormant une cuisson in6gale. 36 Cuisson denslefour Tableau de commande A B C D I TIMER BROIL CANCEL _, CLEAN E DELAY F G CLOCK H i Le tableau de commandeest congu pour faciliter la programmation.La fenetre d'affichageindique I'heure,lesfonctions avec minuterieet fonctions du four. Letableau de commanderepresentecomprend la convectionet d'autres caracteristiquesspecifiques au modele.(Le style peutvarier scion le modeled BROIL(Gril) Important : Quatresecondesapres avoirappuy6sur lestouches A ou T, la duree ou la temperaturesera automatiquemententree.Si plus de 30 secondess'ecoulententre la pressionsur une touche de fonction sur lestouches A ou T, la fonction sera annulee et I'afficheur reviendra9 I'affichageprecedent. S'utilise pour la cuissonau gril et le rissolage sur partiesuperieure. :i!iB!i_i!_i!_i!_i!i!i!i!! BAKE(Cuisson S'utilise pour la cuisson couranteet le courante) r0tissage. Plus (A) ou Moins [T) iilDiiTi_ii_!i! TIMER (Minuterie) S'utilise pour entrer ou changer la duree,la temperaturedu four. I_tablitle gril temperatureI_LEVI_E ou BASSE. t!orloge L'horlogepeut 6tre programmeepour afficher la duree dans un format de 12 ou 24 heures.L'horloge est programmeeen usine pour un format de 12 heures. Programmela minuterie. iiEi:ii:ii:ii:ii:ii:ii:ii:ii:il COOK& HOLD Pour cuire pendant une duree preetablie, (Cuissonet maintien) CLEAN (Nettoyage) DELAY 7!Gii_iTiiiii!i ((((((((((((((((((i ((((((((((((((((((i ((((((((((((((((((i (Demarrage differe) Changement de rhorloge _ un format de 24 heures : avec maintien au chaud pendantune heure. S'utilise pour programmerle cycle d'autonettoyage(certainsmodeles). IJtilisation Appuyer sur la touche A ou T pour programmerun format de 12 ou 2/4heures. 2. Programmele four pour debuter une cuissondiffer6 plus tard. i!iii:H!iiiiii!iiii CLOCK S'utilise pour programmerI'heuredu jour. (Horloge) iii!!i!!!!i!i!i!_!i_!_!!iii_! KEEPWARM S'utilise pour maintenirau chaud dans le four les alimentscuits. (Maintien au chaud) CANCEL (Annuler) Appuyer sur lestouches CANCEL (Annuler) et BELAY (Differedet maintenir la -pressionpendanttrois secondes. 1. . CANCEL -- DELAY Programmerrheure en suivantles instructions donneesci-dessous. R_glage de I'horloge: 1. Appuyer sur la touche CLOCK (Horloge). • La deux points clignotent _ I'afficheur. Annule toutes lesoperationssauf minuterie et horloge. CLOCK _J 2. Appuyer sur A ou T pour programmer I'heuredu jour. des touches • Deux points continuent _ clignoter. 3. Appuyer _ nouveausur la touche CLOCK ou attendre quatresecondes.Le deux points cessent le clignotent. • Appuyer sur la touche desiree. • Appuyer sur A ou T pour entrer la duree ou la temperature. Lorsquele courant 61ectriquearrive ou apresune interruption de courant, la derniere heure avant I'interruption de courantva clignoter. • Un bip retentit Iorsqueron appuie sur une touche. • Un double bip retentit en cas d'erreur de programmation. 37 Pourrappeler I'heuredu jour Iorsqu'uneautre fonction de duree s'affiche,appuyersur la touche CLOCK. Si le four est en cours d'utilisation,les commandesne peuvent ¢tre verrouillees. L'heurede rhorloge ne peut etre changeeIorsque le four a ete programmepour une cuissondiffer& un nettoyagediffere ou pour la fonction de cuisson et maintien. L'heure actuelle du jour restera9 I'afficheur Iorsque lescommandesserontverrouillees. Annalation de raffichage Appuyersur lestouches CANCELet COOK& HOLD (Cuissonet maintien) et les maintenir ainsi pendanttrois secondes.(Appuyerd'abord sur la touche Cancel.) Si ron ne desire pasI'affichagede I'heuredu jour : Appuyersur lestouches CANCEL(Annuler) et CLOCK (Horloge)et les maintenir ainsi pendanttrois secondes.L'heure du jour disparait de rafficheur. D_verroaillage : Appuyersur lestouches CANCELet COOK& HOLD et les maintenir ainsi pendanttrois secondes.(Appuyer d'abord sur la touche CANCEL.) LorsqueI'affichagede I'heureest annul& appuyersur la touche CLOCK pour afficher brievementI'heuredu jour. R_affichage de I'heare : -- CANCEL Verroaillage : de rheare : Appuyersur lestouches CANCELet CLOCK et les maintenir ainsi pendanttrois secondes. L'heure du jour reapparait_ rafficheur. -- CANCEL Codes d'anomalie Les roots BAKE(Cuissoncourante) ou LOCK(Verrouillage)peuvent clignoter rapidement9 I'afficheur pour preveniren cas d'erreur ou de probleme.Si tel est le cas,appuyersur la touche CANCEL.Si les roots BAKEou LOCKcontinuent 9 clignoter,debrancherI'appareil. Attendre quelquesminutes, puis rebrancherrappareil.Si run des mots continue 9 clignoter,debrancherI'appareilet prendre contact avec un r@arateur autorise. --CLOCK Nlinaterie La minuterie peut etre programmeede une minute (0:01)jusqu'_ 99 heureset 59 minutes(99:59). La minuterie peut ¢tre utilisee ind@endammentde toute autre activite du four. Elle peut ¢tre aussi programmeealors qu'une autre fonction du four est en cours d'utilisation. Caisson coarante Programmation de la caisson coarante : La minuterie ne commandepas le four. Elle ne sert qu'9 emettre des bips. 1. Appuyersur la touche BAKE. Programmation de ia minaterie : 1.Appuyer sur la touche TIMER (Minuterie). • Le mot BAKEclignote. TIMER BAKE • 000 clignote 9 rafficheur. • 0:00s'allume_ I'afficheur. Selectionnerla temperaturedu four. La temperature peut etre programmeede 75 9 290° C (170 9 550° F). Appuyer une fois sur la touche A ou V, ou appuyer sur la touche A ou Vet la maintenir ainsi. _"j 2. • Lesdeux points clignotent. 2.Appuyer sur la touche A ou V jusqu'_ ce que I'heurejuste paraisse_ rafficheur. • 175° (350°) s'allumeIorsque I'on appuie la premierefois sur I'unedestouches. • Lesdeux points continuent_ clignoter. 3.Appuyer 9 nouveausur la touche TIMER ou attendre quatre secondes. • Appuyer sur la touche A pour augmenterla temperature. • Appuyer sur la touche Y pour diminuer la temperature. • Lesdeux points continuent_ clignoter et le decomptede la duree commence. . • La derniere minute du decompteseraafficheesous forme de secondes. Appuyer 9 nouveausur la touche BAKE ou attendre quatre secondes. • Le mot BAKEs'arretede clignoter et s'allume9 I'afficheur. /4.A la fin de la duree programmee,un bip long retentit. Annalation de la minaterie : 1.Appuyer sur la touche TIMER et la maintenir ainsi pendanttrois secondes. • 38° (100°) ou la temperaturereelle du four sera affichee.La temperatureaugmenterapar intervallede 3° C (5° F)jusqu'9 ce que la temperaturepreprogrammeesoit atteinte. OU 2.Appuyer sur la touche TIMER et regler rheure _ 0:00. 4. Verroaillage des commandes Laisserle four prechauffer pendant8 9 15 minutes. • Lorsquela temperatureprogrammeepour le four est atteinte, un bip long retentit. Lestouches peuventetreverrouillees pour des raisons de securit& nettoyageou pour empechertoute utilisation non souhaitee.Ellesne pourront ¢tre utiliseessi ellessont verrouillees. • Pour rappelerla temperatureprogrammeependant le prechauffage,appuyersur la touche BAKE. Suite 38 Culsson denslefour Placerla nourriture dans le four. 5. 4. Entrerla duree pendantlaquelle I'on desireque la cuissonait lieu en appuyant sur lestouches A ou V. La duree de cuisson peut ¢tre programmeede dix minutes (00:10)_ 11 heures,59 minutes (11:59). 6. Verifier I'avancementde la cuisson9 la duree minimale de cuisson.Cuireplus Iongtempsau besoin. 7. Lorsquela cuissonest terminee,appuyersur la touche Cancel (Annuler). CANCEL •Les mots BAKEet HOLDs'allument _ I'afficheur. • La duree de cuissons'allume _ I'afficheur. 8. Retirerla nourriture du four. • La duree de cuissoncommencele compte _ rebours. Remarques • Lorsque la duroc de caisson s'est _coul_e • Pourchangerla temp#raturedu fourpendant la cuisson,appuyer sur la touche BAKE, puissur la touche A ou V jusqu'9 ce que ron obtiennela temperature desiree. • Pourchangerla temp#raturedu four/ors du pr#chauffage, appuyerdeuxfoissur la touche BAKE,puis sur la touche A ou V jusqu'9 ce que la temperaturedesireesoit affichee. : • Quatre bips retentissent. • Le mot BAKEs'eteint. •Les roots HOLDet WARM (Chaud)s'allument. • 75° (170°) parait_ rafficheur. • Si ron oublie d'arreter le four, il s'arretera automatiquement apres 12 heures.Si I'ondesire desactivercette fonction, voir page/43. Diff6rences de caisson four et le nouveau entre I'ancien Apr_s une heure de MAINTIEN AU CHAUD : • Le mot <_End _ s'affiche. II est normal de remarquerquelquesdifferences dans la duroc de cuissonentre un four neuf et un four ancien.Voir Ajustementde la temp#raturedu four_ la page/43. • L'heure du jour reapparait9 rafficheur. Annulation de la fonction caisson et maintien tout moment : Appuyersur la touche CANCEL(Annuler).Retirer la Caisson et maintien CANCEL nourrituredu four. La fonction caissonet maintien permet de cuire pendantune duree predeterminee,suivie par un cycle de maintien au chaud d'une heure. Caisson et maintien diff r e Programmation de la fonction caisson et maintien : Appuyer sur la touche COOK & BOLD (Cuisson et maintien). •Les roots BAKEet HOLD(Maintien) clignotent. • 000s'allume _ I'afficheur. Selectionnerla temperaturedu four. La temperature pout ¢tre programmeede 75 9 290° C (170 9 550° F). Appuyer une fois sur la touche A ou V ou appuyer sur la touche A ou Vet la maintenirainsi. Avec la fonction differee, le four se met _ cuire plustard dans la journee.Programmerla duroc d'attente desireeavant que le four ne se motto en marcheet la duroc de cuissondesiree.Le four commence_ chauffer _ I'heureselectionneeet cult pour la duroc specifiee. • Appuyer sur la touche A pour augmenter la temperature. La duroc d'attente pout etre programmeede 10 minutes(00:10) 11 heures,59 minutes (11:59). • Appuyer sur la touche V pour diminuer la temperature. . Programmation d'un cycle de caisson et maintien diff_r_e : Appuyer 9 nouveausur la touche COOK& BOLD OU 1. Appuyer sur la touche DELAY (Differe). attendre quatresecondes. • Le mot DELAYclignote. • Le mot HOLD clignote. • 00:00clignote _ rafficheur. • 00:00clignote _ rafficheur. 2. Appuyer sur la touche A ou V pour programmer/adur#e d'attente. 39 DELAY Alors que le mot DELAYclignote toujours Important 3. Appuyer sur la touche COOK & HOLD (Cuisson et maintien). , NEPAS utiliser la cuissondifferee pour des articlesqui necessitentque le four soit prechauffe,commeles ggteaux,les petits biscuits et les pains. , Ne pas utiliser le cycle de cuissonet maintiendifferes si le four est dej9 chaud. • 000s'allume _ I'afficheur. • Losroots BAKEet HOLD(Maintien) clignotent. : Appuyer sur A pour programmerb temp#raturede cuisson. • 00:00et le mot HOLDclignotent. Nlaintien • Le mot BAKEreste allume. au chaud Pour maintenir au chaud dans lefour des alimentscuits et chauds ou pour rechaufferpains et assiettes. Appuyer sur A pour programmerla dur#e de cuisson. • La duree d'attente, los roots DELAY,BAKEet HOLDs'allument rafficheur. Program[nation du [naintien au chaud : 1. Appuyer sur la touche KEEPWARM (Maintien au chaud). • Le mot WARM (Chaud)clignote. • 000 parait_ I'afficheur. 2. Lorsque la dur_e d'attente s'est _coul_e : • Le mot DELAYs'eteint. • La duree de cuissonest affichee. Selectionnerla temperaturede maintien au chaud.Celle-ci pout etre reglee de 63 _ 90°C (145 _ \ 190° F).Appuyer une fois sur la touche A ou V ou appuyersur la touche A ou T et la maintenir ainsi. _.._ • 75° (170°) s'allume IorsqueI'on appuie la premierefois sur I'unedestouches. • Losmots BAKEet HOLD sont affiches. Pour progra[n[ner an temps d'attente Iorsque la fonction cuisson et [naintien a d_j_ _t_ progra[n[n_e : 1. Appuyer sur la touche DELAY (Differee). _ _,_ • Appuyer sur la touche A pour augmenterla temperature. • Appuyer sur la touche T pour diminuer la temperature. Le mot WARM et la temperatureseront affichespendant que la fonction maintien au chaud est active. DELAY • Le mot DELAYclignote. • 00:00parait _ I'afficheur. 2. Appuyersurla touche A ou V pour programmerla duree d'attente. • Apres quatre secondes,le mot DELAYreste allume pour rappeler qu'un cyclede cuisson differee a ete programme. Lorsque la dur6e d'attente four se [net en [narche : s'est _coul_e \_" Annulation du [naintien au chaud : 1. Appuyer sur la touche CANCEL. et que le 2. Retirerla nourriture du four. Suite • La duree de cuissonsera affichee. • Le mot DELAYs'eteint. • Le mot BAKEet HOLD reste allume. Annulation : Appuyersur la touche CANCEL(Annuler}. CANCEL CANCEL • Toutesles fonctions de cuissonminutee et non minuteeseront annulees. • L'heuredu jour reapparait_ rafficheur. 4O Culsson denslefour Changement de la temperature °F/°C Remarques • • Pour obtenir des qualites alimentaireset nutritivesoptimales, lesalimentscuits au four ne doivent pas6tre gard6sau chaud plus de I_ 2 heures. 1. Le r6glage par ddaut de I'usine pour la temperatureest en Fahrenheit. 2. Pourmodifier ce r6glage,appuyersur lestouches CANCEL (Annule0 et BAKE (Cuissoncourante)simultan6mentet maintener-lesenfonc6espendanttrois secondes. • Pour empecherles alimentsde dess6cher,les recouvrir de papier aluminium,sans serrer,ou d'un couvercle. • Pour r6chauffer des petits pains : 3. Un bip retentit et le r6glage courant (°F ou °C) parait _ I'afficheur. (Sivous ne faites pasde changement,la cuisiniere retoume au r6glageexistant apres30 secondes.) - recouvrir lespetits painsde papier aluminiumsans serrer et lesplacer au four. - appuyersur les touches KEEPWARM et A pour programmer75° C (170° F). 4. Pourmodifier le r6glage,appuyersur la touche A ou Y. Appuyer _ nouveausur la touche pour retournerau r6glage existant.Attender cinq secondeset le r6glagesera6ffectu6. - r6chaufferpendant 12 _ 15 minutes. • Pour r6chauffer des assiettes : - placer deuxpiles de quatre assiettesmaximumdans le four. - appuyersur les touches KEEPWARM et A pour programmer75° C (170° F). - r6chaufferpendant 5 minutes,arreter le four et laisser les assiettesau four pendantencore 15 minutes. - n'utiliser que des assiettespouvant aller au four, _ verifier avec le fabricant. - ne pus poserdes assiettestiedes sur une surfacefroide, les changementsrapidesde temperaturepouvant casser I'assietteou la fendiller. 41 Caisson au gril /4. Pourun rissolagemaximum,prechauffer I'elementde gril pendant3 ou/4 minutesavant d'ajouter la nourriture. 5. Placerla nourriture dans le four. Laisserla porte du four ouverte d'environ 10 cm (4 po) (premierebutee). 6. Retournerla viande une fois _ la moitie de la duree de cuisson. 7. LorsqueI'alimentest cult, appuyersur la touche CANCEL (Annuler).Retirer la nourritureet la CANCEL lechefritedu four. • L'heure du jour reapparait9 I'afficheur. Programmation de la caisson au gril : 1. Pourcommencer,appuyersur la touche BROIL (Gril). Remarques • BROIL = Pourde meilleurs resultatsIors du gril, seservir d'un ustensile prevupour ce type de cuisson. • Le mot BROILclignote. • Le mot SEt(ValideOest affiche. • Prevoirdes dureesde cuissonau gril plus Iongueset un rissolagelegerementmoinsdore si rappareil fonctionne sur un circuit de 208volts. Appuyer sur la touche A pour programmerun gril _ temperature eleveeou sur la touche T pour programmerun gril temperaturebasso. 2. • Le gril au reglageHI est utilise pour la majorite des operations de cuissonau gril. Utiliser le gril au reglageLO pour la cuisson de mets devant cuire plus Iongtemps,afin de leur permettre d'etre bien cults sans rissolageexcessif. •Les mots HI (I--levee)ou LO (Basso)seront affiches. SelectionnerH! Broil (Gril 9 temperatureelevee)(290° C [550° F]) pour un gril normal.SelectionnerLO Broil (Gril temperaturebasse)(230° C [450° F]) pour un gril temperatureinferieured'aliments9 cuisson plus Iongue comme la volaille. . • Pour changerb temp#raturedu four pendantb cuissonau gril, appuyersur la touche BROIL, puissur la touche A ou T pour changer entre la cuissonau gril 9 temperatureelevee(HI) et la cuisson au gril 9 temperaturebasso (LO). Apres quatre secondes,le four se met en marche. Lesdureesde cuissonau gril peuvent etre plus Ionguesavec une temperaturede gril inferieure. • Le mot BROILresteallume. Retournerla plupart desaliments Iorsquela moitie de la duree prevuepour la cuissonau gril s'estecoulee. Tableau de caisson au gril Boeuf Bifteck,2,5 cm (1 po) d'@aisseur 4 Hamburgers,2 cm (3//4po) d'@aisseur Cuissonmoyenne Bien cult Bien cult 15 - 18 minutes 4 4 Pore Bacon C0telettes,2,5cm (1 po) Jambon - prO-culttranche de 1,3cm (1/2 po) 4 4 4 Bien cult Bien cult Tiede 6 - 10 minutes 22 - 26 minutes 8 - 12 minutes Voiaiiie Pouleten morceaux 3 ou/4 Bien cult Gril _ temperaturebasso 28 - 38 minutes Fruitsde met Damesde poisson,beurrees, 2,5 cm (1 po) d'@aisseur Filetes,1,3cm (1/2 po) d'@aisseur 4 La chair se detache 10 - 15 minutes 4 La chair se detache 8 - 12 minutes * Grille superieure_ la position n° 5. important : Cetableau n'est qu'un guide de suggestions.Lesdureespeuventvarier solon I'aliment_ cuire. 42 19 - 23 minutes 15 - 18 minutes Cuisson denslefour Arr6t automatique/ Ajustement Mode sabbat du four Lefour s'arrete automatiquementapres 12 heuress'il a ete accidentellementlaisseen marche.Cettecaracteristiquede securite pout etre arretee. La precisiondes temperaturesdu four a ete soigneusementverifiee I'usine.II est normalde remarquerquelquesdifferencesdans la cuissonentre un four neuf et un four ancien. Au fur et 9 mesureque los cuisinieressont moins neuves,la temperaturedu four poutvarier. Pour annulet I'arr6t 12 heures et faire fonctionner four en continu pendant 72 heures : le II est possibled'ajusterla temperaturedu four si I'on penseque le four ne cuit pas oune rissolepas correctement.Pour deciderde I'ajustement_ apporter, regler le four _ une temperaturede 15° C (25° F)plus eleveeou plus bassoque la temperatureindiquee dans la recette, puisfaire cuire la preparation.Les resultatsdu <{test >> de cuissondoivent donner une idee du nombrede degresduquel la temperaturedoit etre ajustee. 1. Programmerle four pour une BAKE (Cuissoncourante) (voir page 38). 2. Appuyer sur la touche CLOCK (Horloge)et la maintenir ainsi pendantcinq secondes. de la temp6rature /_ CLOCK • SAb sera affiche et clignotera pendantcinq secondes. • SAb sera ensuite affiche en continu jusqu'_ ce qu'on I'arrete ou jusqu'_ ce que la duree limite de 72 heuressoit atteinte. Ajustement • Le mot BAKE(Cuissoncourante) seraaussi affiche si un cyclede cuissoncourante est en cours alors que le four est en modesabbat. 2. Entrer285° C (550° F) en appuyant sur la touche A. Si la temperaturedu four a ete precedemmentajustee,le changementseraaffich6. Par exemple,si la temperaturedu four a ete reduitede 8° C (15° F), I'afficheur indiquera-8° (-15°). 4. que le four est en mode sabbat : Appuyer sur la touche A ou T pour ajuster la temperature. A chaquefois que I'onappuie sur une touche, la temperature changede 3° C (5° F). La temperaturedu four pout etre augmenteeou diminuee de 3 _ 20° C (5 _ 35° F). CANCEL • Le mot BAKEs'eteint _ I'afficheur. • Aucun bip sonorene retentit. 5. L'heuredu jour reapparaitautomatiquement_ I'afficheur. du mode sabbat : 1. Appuyer sur la touche CLOCK pendant cinq secondes. BAKE 3. Appuyer sur la touche BAKE et la maintenir ainsi pendantplusieurssecondesou jusqu'_ ceque 0° paraisse_ I'afficheur. Annulation de la cuisson courante alors Annulation du four : 1. Appuyersur la touche BAKE. • La CUISSONAUFOURest/a seu/e fonctionqui est op6rationne//een mode sabbat.Toutes/es autresfonctions (Minuterie,Maintien au chaud,Nettoyage,etc.) sont verrouill#es pendant/e modesabbat. Appuyersur la touche CANCEL(Annuler). de la temp6rature II n'est pas necessairede reajusterla temperature du four en cas de panneou d'interruption de courant.Lostemperaturesde cuissonau gril, maintien au chaud et de nettoyagene peuvent etre ajustees. CLOCK OU Apres 72 heures,le modesabbat setermine. • SAb clignote pendant cinq secondes. • L'heuredu jour revient_ I'afficheur. Remarques • Tous los messageset losbips sont desactivesIorsquele mode sabbat est actif. • Le modesabbat peut etre misen marche_ tout moment, que le four soit en marcheou non. • Le modesabbat ne pout pasetre mis en marchesi los commandossont verrouilleesou la porte verrouillee. • Le verrouillageautomatiquede la porte ne fonctionne pas pendantle modesabbat. • Sile four est en mode cuissonIorsquele modesabbat est programme,le mot BAKEs'eteint _ la fin du cyclede cuisson.II n'y aura aucun signalsonore audible. • Si I'on appuie sur la touche CANCEL,un cycle de cuisson couranteau four seraannule.Cependant,le programmateur resteraen modesabbat. • Si I'eclairagedu four est souhaitependant le modesabbat,la lampedevraetre allumeeavant que le modesabbat ne debute. Apres une panne de courant,le four revient en modesabbat avec72 heuresrestanteset aucun cycle actif. Lorsquele modesabbat a demarre,aucun bip de prechauffage ne retentit. 43 Ventilateur du four Extraction Un ventilateur de refroidissementse met en marche automatiquementIorscuisson au gril et de certainesoperationsde cuisson. II est utilise pour que los pieces internesdu tableau de commandorestentfraiches. Le ventilateurs'arrete automatiquement Iorsquelos piecesont refroidi. II pout continuer _ fonctionner une fois que le four s'est arrGte.Ceci est normal. : 1. Tirer la grille en ligne droite jusqu'_ ce qu'elle s'arrGte_ la position de calage. 2. Souleverla grille _ ravant pour pouvoir rextraire. R_installation : u Event du four 1. Placerla grille sur lossupports dans le four. Lorsquele four fonctionne,les surfacesvoisinesde revent peuvent devenirassezchaudes pour entrainerdes brCJlures. Ne jaaais bloquer 1'6vent. 2. Soulever16gerementI'avant.Faireglisser la grille vers I'arriere au-del_ de la position de calage. 3. Abaisser la grille et la faire glisserdans le four. L'Gvent dn four est sitn6 _ I'arri_re de la surface de cuisson. Ne jamais convrir la totalite d'une grille de papier d'aluminium ni mettre d'aluminium sat la sole du four. Cola ne donnerait pas de boris r_sultats darts la cuisson de g_tean× et la sole ponrrait se tronver abim6e. E'VENT DU FOUR Ne pas mettre de plastiquespros de I'event,la chaleur pouvant les deformer ou los faire fondre. Positions de grille GRILLE 5 : Pourgriller du pain ou passer au gril des aliments peu 6palset non gras. ............. 5 GRILLE4 : Pour la majorit6 des operationsde cuissonau gril. Eclairage du four Appuyersur le commutateurde Oven Light ([_clairage du four) situe sur le tableau de commandopour allumer ou eteindre la lampe.La lampede four est activ6epar rinterrupteur seulement. 4 ...... 3 2 ............. 1 GRILLE3 : Pour la majorit6 des produits de boulangerie " sur une plaque_ biscuits ou un moule_ g_teau roul6,g_teaux_ 6tages,alimentssurgel6stout prGtset la cuissong6n6ralesur une seule grille. Oven Light GRILLE2 : Pour quatre-quarts,g_teaux Bundt,tartes, plats mijot6s et r0tissagede petits morceauxde viande. Sole du four Protegerla soledes produits renvers6s,en particulier acides ou sucres,ceux-ci pouvantd6colorer1'6mailvitrifi6. Utiliser des ustensilesde la bonne dimension pour 6viter que los produits nese renversentou passentpar-dessusrustensileen bouillant. Ne pas placer d'ustensilesou de feuille d'alnmininm directement sur la sole dn four. GRILLE1 : Pour quatre-quarts,g_teauxde 9 x 13,tartes et rOtissage de gros morceauxde viande et de volaille. CUISSON SUR PLUSIEURSGRILLES: Deux grilles : Utiliser los positions2 et 5, ou 1 et/4. Important : Ne jaaais placerlos ustensilesdirectementsur la sole du four. Caisson de g_teaux _ _tages sur deux grilles Grilles du four Pour de meilleurs r6sultatspour la cuissonde g_teauxsur deux grilles, utiliser les positions2 et 5. Placerlos g_teauxsur la grille, commeil est indiqu6. Le four comportedeux grilles avec,pour chacune,un dispositif de calage. 44 Ne sont pas couverts par ces garanties 1. Les problemeset dommagesresultant dessituations suivantes: a. Mise en service,livraison ou entretien effectuesincorrectement. b.Toute reparation,modification,alteration et tout reglage non autorisespar le fabricant ou par un prestatairede serviceapres-venteagree. c. Mauvaisemploi, emploiabusif, accidents,usagenon raisonnable,ou catastrophe naturelle. d. Courantelectrique,tension, alimentationelectrique ou en gaz incorrects. e. Reglageincorrect d'une commande. 2. Lesgaranties ne peuvent¢tre honoreessi les numerosde serie d'origine ont ete enleves,modifiesou ne sont pas facilement lisibles. 3. Ampoules, filtres 9 eau et filtres 9 air. 4. Les produits achetes9 des fins commercialesou industrielles. Lesfrais de depannageou de visite pour : a. Correctiond'erreursde miseen service.Pour les produits necessitantune ventilation, un conduit metallique rigide doit ¢tre utilis& b. initiation de I'utilisateur9 I'emploi de rappareil. c. Transportde I'appareilchez le reparateuret retour de I'appareilchez I'utilisateur. 5. 6. Tout aliment perdu en raisonde pannesdu rdrigerateur ou du congelateur. 7. Depensesde deplacementet de transport pour la reparationdu produit dans des endroits eloignes. LE SEUL ETUNIQUE RECOURS DU CLIENT EN VERTU DE CETTEGARANTIE LIMITI_EEST LA RI_PARATIONDU PRODUIT COMME DI_CRITE PRI_CI_DEMMENT.LES GARANTIES IMPLICITES, Y COMPRIS LES GARANTIES DE QUALm_ MARCHANDE OU D'ADAPTATION A UN USAGE PARTICULIER, SONT LIMm_ES A UN AN OU A LA PI_RIODELA PLUS COURTE PERMISE PAR LA LOI. MAYTAG CORPORATION NE SERA PAS TENUE RESPONSABLEDES DOMMAGES DIRECTS OU INDIRECTS.CERTAINS I_TATSET CERTAINES PROVINCES INTERDISENT L'EXCLUSION ET LA LIMiTATiON DES DOMMAGES DIRECTS OU INDIRECTS AINSI QUE LES LIMiTATiONS SUR LA DUREE DES GARANTIES IMPLICITES DE QUALITE MARCHANDE OU D'ADAPTATION A UN USAGE PARTICULIER. IL ESTDONC POSSIBLEQUE CES LIMiTATiONS NE S'APPLIQUENT PAS A VOUS. CETTEGARANTIE VOUS CONFI_REDES DROITS JURIDIQUES SPI_CIFIQUESET IL SE PEUT QUE VOUS AYIEZ D'AUTRES DROITS,QUI VARIENT D'UN I_TATA L'AUTRE OU D'UNE PROVINCEA L'AUTRE. 8. Cettegarantie n'est pasvalide 9 I'exterieurdes I_tats-Uniset du Canada.Communiquez avecvotre detaillant pour savoir si une autre garanties'applique. . Dommagesindirectsou accessoiressubis par toute personne9 la suite d'une quelconqueviolation desgaranties.CertainsI_tatsou provincesne permettentpas I'exclusionou la limitation de responsabiliteen ce qui concerneles dommagesdirects ou indirects. L'exclusionci-dessuspeut en consequencene pass'appliquer9 votre cas. Si vous avez besoin d'aide Consultezd'abord la sectionsur le depannagedans le manueld'utilisation et d'entretien, puisappelezle detaillant de qui vous avezachete votre appareil ou le service9 la clientele de Maytag Services,LLC au 1-800-688-9900aux I_tats-Uniset au 1-800-688-2002au Canadapour savoir o_ trouver un reparateurautoris& • Veillez9 conserverla facture d'achat pour justifier de la validite de la garantie.Pour d'autres renseignementsconcernantles responsabilitesdu proprietaire9 regard du servicesous garantie,voir le texte de la GARANTIE. • Si le detaillant ou I'agencede serviceapres-ventene peut resoudrele probleme,ecrivez MaytagServices,LLC9 I'adressesuivante: CAIR Center,P.O.Box 2370,Cleveland,TN 37320-2370I_tats-Unis,ou appelezau 1=800=688=9900aux l_tats=Unisou au 1=800=688=2002au Canada. • Lesguides d'utilisation,les manuelsde serviceet lesrenseignementssur les piecessont disponiblesaupres du service9 la clientele de MaytagServices,LLC. RelTlarl:l[leS • Veillez9 fournir I'informationsuivanteIorsquevous communiquez avec nousau sujet d'un probleme: a.Vos nom, adresseet numero de telephone; b. Numero de modeleet numerode seriede I'appareil; c. Nora et adressede votre detaillant ou de votre agencede service; d. Descriptiondetaillee du problemeobserve; e. Preuved'achat (facturede vente). 45 _iii!!!iii,f¸.... e|ec_L_ica _es|izan_Le co. co._L_o| "Sasy Touch" 500 = CuDie_a |isa Tab_a de nea_er_as Instrucciones importantes sobre seguridad .......... 47=50 Cuidado y limpieza ......................................................50=53 Homo autolimpiante Procedimientos de limpieza Mantenimiento ............................................................. Luz del homo Ventana del homo 53-54 Localizaci_n y soluci_n de averias ..........................55=56 Cocinando en la estufa ...............................................57=59 Controles superiores Cubiertas lisas Cocinando en el homo ...............................................60=66 Horneado 'Cook & Hold' 'Cook & Hold' diferido Mantener caliente Asar a la parrilla Cierre autom_tico/Modo sab_tico Parrillas del homo Garantia y servicio .......................................I:lltima p;igina Para asegurar funcionamiento correcto y seguro: El electrodomOstico debe ser instaladodebidamente y puesto a tierra por un tOcnico calificado. No intente ajustar, reparar, prestar servicio o reemplazar ninguna pieza de este producto a menos que sea espec[ficamente recomendado en esta gu[a. Todas las reparaciones deben ser realizadas por un tOcnico calificado. Siempre desenchufe el electrodomOstico antes de efectuar alguna reparaci0n. Para vefificar si el dispositivo est,1debidamente instalado, mire debajo de la estufa con una linterna para asegurarse de que uno de los tornillos niveladores traseros est6 debidamente Las advertencias e instruccionesimportantessobre seguridad que aparecen en esta gu[a no est_n destinadas a cubrir todas las posibles circunstancias y situaciones que puedan ocurrir. Se debe ejercer sentido comOn, precauci0n y cuidado cuando instale, realice mantenimiento o haga funcionar el artefacto. enganchado en la ranura del soporte. El dispositivo antivuelco asegura el tornillo nivelador trasero al piso cuando est_ debidamente enganchado. Esto debe verificarse cada vez que la estufa sea movida. Siempre p0ngase el fabricante si surgen problemas o situaciones que usted no comprenda. Para evitar Reconozca los sirnbolos, advertencias, etiquetas de seguridad un incendio o da o causado pot el humo Aseg_rese de que se hayan retirado todos los materiales de empaque del electrodom6stico antes de su uso. No coloque materiales combustibles cerca del electrodom6stico. No se deben guardar en el homo materiales inflamables. Muchos pkisticos son afectados por el calor. Mantenga los pl_sticos alejados de las piezas del electrodom6stico que se pueden entibiar o calentar. Para evitar incendios de grasa, no permita acumulaci0n de grasa de cocinar o de otros materiales inflamables en el homo o en su cercan[a. Lea y siga todas ias instrucciones antes de usar este electrodom_stico para evitar el riesgo potencial de incendio, choque elOctrico, lesion personal o da_o al electrodomOstico como resultado de su uso inapropiado. Utilice este electrodomestico solamente para el prop0sito que ha sido destinado seg0n se describe en esta gu[a. En caso de incendio Use un extinguidor con producto qu[mico seco o del tipo espuma o bicarbonato para apagar el incendio o las llamas. Nunca use agua en un incendio de grasa. 47 1. Apagueelhomoparaevitarquelallamasedisperse. 2. NUNOAlevante o mueva unasart6nenllamas. 3. Apagueelfuegoo lallamacerrando lapuertadelhorno. Apague lacampana deventilaciOn paraevitarquelasllamas sedispersen. Apaguelasllamas y luegoencienda lacampana paraexpulsar elhumoyelolor. Seguridad para los ni os hasta que no se hayan enfriado. Otras superficies que pueden estar calientes incluyen la cubierta, la superficie que est_n dirigidas hacia la cubierta, el respiradero del homo, la superficie cercana a la abertura del respiradero, la puerta del homo y las _reas que las rodean, y la ventanilla del horno. No toque un foco caliente del homo con un paso hOmedo pues se puede quebrar. Si el foco se quiebra, desenchufe el electrodom6stico antes de sacar el foco para evitar sufrir un choque el6ctrico. NUNCA use papel de aluminio para cubrir las parrillas del homo ni el panel inferior del homo. El uso incorrecto puede resultar en un riesgo de choque el6ctrico, incendio o da_o al electrodom6stico. Use papel de aluminio solamente como se indica en esta gu[a. No use la cubierta o el homo como una _rea para almacenar alimentos o utensilios de cocina. NUNCA deje a los ni_os solos o sin supervisi6n cuando el homo est6 en uso o cuando est6 caliente. No se debe nunca Seguridad al cocinar permitir que los ni_os se sienten o se paten en ninguna pieza del electrodom6stico pues se pueden lesionar o quemar. NUNCA caliente un contenedor de alimento cerrado en el horno. La acumulaci6n de presi6n puede reventar el contenedor causando una lesi6n personal grave o da_o al electrodom6stico. Se les debe ense_ar a los ni_os que el electrodom6stico y los utensilios que est_in en 61pueden estar calientes. Deje enfriar los utensilios calientes en un lugar seguro, fuera del alcance de los niNos. Se les debe ense_ar a los ni_os que un electrodom6stico no es un juguete y que no deben jugar con los controles u otras piezas del artefacto. Use tomaollas secos y gruesos. Los tomaollas h0medos pueden causar quemaduras por vapor. No se deben usar toallas de secar los platos ni otros sustitutos en vez de los tomaollas porque ellos pueden pasar sobre los elementos calientes y prenderse fuego o pueden quedar atrapados en las piezas del electrodom6stico. instrucciones generales Use vestimentas apropiadas. Las ropas sueltas o ropas con mangas largas sueltas no se deben usar cuando se est_ cocinando. La ropa se puede prender fuego y causar quemaduras si entra en contacto con los elementos calefactores. Siempre coloque las parrillas del homo en las posiciones deseadas cuando el homo est6 fr[o. Deslice la parrilla del homo hacia afuera para agregar o retirar alimento usando tomaollas secos y gruesos. Siempre evite colocar o retirar alimento del homo sin sacar la parrilla hacia afuera. Si una parrilla debe ser movida cuando est6 caliente, use un tomaollas seco. No deje que el tomaolla entre en contacto con el elemento caliente del homo. Para evitar posibles riesgos para el usuario y da_o al electrodomestico, no use este producto como una estufa para calentar o entibiar una habitaci6n. Adem_is no use el homo como un lugar para guardar alimentos o utensilios de cocina. Use las parrillas solamente en el homo en que fueron enviadas/com pradas. No obstruya la circulaciOn del aire bloqueando el respiradero del homo. El respiradero del homo se encuentra en la parte trasera de la superficie de cocci6n. Tenga cuidado cuando abra la puerta del horno. Primero deje que salga el aire o vapor caliente antes de sacar o volver a colocar el alimento en el homo. NO TOQUE LOS ELEMENTOSCALEFACTORESNI LAS SUPERFICIESINTERIORESDEL HORNO. Los elementos ADVERTENCIA SOBRE ALIMENTOS PREPARADGS: Siga las instrucciones del fabricante del alimento. Si un contenedor calefactores pueden estar calientes a0n cuando su color sea obscuro. Las superficies interiores de cualquier homo se calientan Io suficiente como para causar quemaduras. Durante y despu6s del uso, no toque ni permita que las ropas u otros materiales inflamables entren en contacto con los elementos calefactores o las superficies interiores del homo de alimento congelado de pl_stico y/o su tapa se deforma, comba o de otra manera se da_a durante la cocci6n, inmediatamente descarte el alimento y su contenedor. El alimento puede estar contaminado. 48 Cont, Instrucdones lmportentes segurlded Ollas freidoras No permita que el papel de aluminio o la sonda de la came toque el elemento calefactor. Use extremo cuidado cuando mueva la olla con aceite o Siempre apague todos los controles cuando haya terminado de cocinar. descarte la grasa caliente. Deje que la grasa se enfr[e antes de intentar mover la olla. Seguridad sobre el uso de utensilios Carnpanas de ventilaci6n Limpie con frecuencia la campana y los filtros a fin de evitar que se acumule en ellos grasa u otros materiales inflamables y para evitar incendios de grasa. Siga las instrucciones del fabricante cuando use bolsas para cocinar en el homo. El rendimiento y funcionamiento seguro de este electrodomestico ha sido comprobado usando utensilios de cocina tradicionales. No use ning0n dispositivo o accesofio que no haya sido espec[ficamente recomendado en esta gu[a. No use sistemas de convecci6n agregables a hornos. El uso de dispositivos o accesorios que no sean expresamente recomendados en esta gu[a puede crear peligros graves de segufidad, afectar el rendimiento y reducir la vida 0til de los componentes de este electrodom6stico. Cuando prepare alimentos flameados debajo de la campana, encienda el ventilador. Seguridad en la limpieza Limpie con cuidado la cubierta. Apague todos los controles y espere que se enfr[en las piezas del electrodom6stico antes de tocarlas o limpiarlas. Limpie con cuidado. Tenga cuidado para evitar quemaduras de vapor si usa una esponja o un paso mojado para limpiar los derrames en una superficie caliente. Algunos limpiadores pueden producir vapores nocivos cuando se aplican en una superficie caliente. Si el utensilio es m_is peque_o que el elemento, una porci6n del elemento quedar_ expuesta y puede encender la ropa o un tomaollas. Limpie solamente las piezas indicadas en esta gu[a. Solamente ciertos tipos de utensilios de vidrio, vidrio cer_mico, cer_mica, gres u otros utensilios vidfiados son convenientes para cocinar en la superficie o en el homo sin quebrarse debido al repentino cambio de temperatura. Siga las instrucciones del fabricante del utensilio cuando use vidrio. Homo autolimpiante Gire los mangos de los utensilios hacia el centro de la cubierta, no hacia la habitaci6n ni sobre otto elemento superior. Esto reduce el riesgo de quemaduras, encendido de matefiales inflamables o derrames si el utensilio es tocado accidentalmente o alcanzado pot ni_os pequeNos. Cubierta No limpie lajunta de la puerta. Lajunta de la puerta es esencial para obtener un buen sello. Se debe tenet cuidado de no frotar, dafiar ni mover la junta. NUNCA deje los elementos superiores sin supervision, especialmente cuando est,1usando los ajustes de calor altos. Un derrame sin recibir la debida atenci6n puede causar humo y un derrame de grasa puede causar un incendio. No use limpiadores de homo ni forros de homo de ning0n tipo alrededor ni en ninguna parte del homo autolimpiante. Este electrodom6stico tiene diferentes tama_os de elementos Aviso y advertencia importante sobre seguridad supefiores. Seleccione utensilios que tengan bases planas Io suficientemente grandes para cubfir el elemento. La relaci6n adecuada entre el utensilio y el elemento mejorar_ la eficiencia al cocinar. La Propuesta 65 de la Ley de 1986 del California Safe Drinking Water and Toxic Enforcement Act of 1986 (Estado de California Sobre Segufidad y Contaminaci6n del Agua Potable) exige que el Gobernador de California publique una lista de las sustancias que seg0n el estado de California causan c_ncer o CUBIERTA DE VIDRIO CERAMICO: NUNCA cocine sobre una cubierta quebrada. Si la cubierta de la estufa se quiebra, los agentes de limpieza y los derrames pueden penetrar y crear un riesgo de choque el6ctrico. P6ngase en contacto con un t6cnico calificado inmediatamente. 49 endondeest,1 ubicado elelectrodom6stico duranteelciclode da_oalsistema reproductivo y exigequelasempresas adviertan a susclientessobrelaexposiciOn potencial atales autolimpieza. sustancias. AVISO IMPORTANTE RESPECTO A LOS PAJAROS Seadvierte a losusuarios deesteelectrodom6stico que DOMESTICO$: Nunca mantenga los p_jaros en la cocina o cuandoelhomoest,1 funcionando enelciclodeautolimpieza, en las habitaciones donde puedan Ilegar los humos de la puedehaberexposiciOn debajonivela algunas delas cocina. Los p_ijarostienen un sistema respiratorio muy sustancias indicadas enlalist&incluyendo mon0xido de sensitivo. Los humos producidos durante el ciclo de carbono.Laexposici0n aestassustancias puedeserreducida autolimpieza del homo pueden ser perjudiciales o mortales a unmfnimo ventilando elhomoalexterior enforma para los p_ijaros. Los humos que despide el aceite de cocina adecuada, abriendo lasventanas y/olapuertaenlahabitaciOn recalentado, la grasa, margarina y los utensilios antiadherentes recalentados pueden tambi6n ser perjudiciales. Conserve estas instrucciones para referencia futura l::uldadoIlmplm Homo autolimpiante lirnpia estas_reas. Eliasdeben ser lirnpiadaspara evitar que la suciedad se horneedurante el ciclo de autolirnpieza.(La junta es el sello alrededorde la puertay ventana del homo.) Paraevitar da_o no lirnpie ni frote la junta situada alrededorde la puerta del horno.La junta est_ dise_adapara sellar herrneticarnenteel calor durante el ciclo de lirnpieza. 4. Lirnpieel excesode grasa o derrarnesde la parteinferior del horno. Estoevita hurno excesivoo Ilarnaradasduranteel ciclo de lirnpieza. 5. . El ciclo de autolimpiezausatemperaturasde cocci0n superioresa las norrnalespara lirnpiarautorn_ticarnentetodo el interior del horno. Lirnpie el homo con frecuencia rernoviendolos derrarnespara evitar hurno excesivoy Ilarnaradas.No perrnitaque se acurnuledernasiado sucio en el horno. Lirnpielos derrarnesazucaradoso _cidostales cornopapa dulce (carnote),tornateso salsasa base de leche.La porcelana esrnaltadaes resistenteal _cido pero no a prueba de _cidos. El acabadode porcelanapuede descolorarsesi los derrarnes_cidos o azucaradosno son lirnpiadosantesde un ciclo de autolirnpieza. Para programar 'Self-Clean' (Autolimpieza): Importante: La temperaturadel horno debe ser inferior a 205° C (400° F) para prograrnarun ciclo de lirnpieza. Durante el procesode lirnpieza,la cocina debe estar bien ventilada para elirninar los olores norrnalesasociadoscon la lirnpieza. 1. Cierrela puertadel horno. 2. Antes de la autolirnpieza Mueva la palancade bloqueo de la puerta a la derechaa la posici0n bloqueada. 1. Apague la luz del horno antes de la limpieza.La luz del horno puedefundirse durante el ciclo de lirnpieza. 2. Retiretodos los utensiliosy las parrillasdel horno. Lasparrillas del horno se descolorar_ny no se deslizar_nf_cilrnentedespues de un ciclo de autolirnpiezasi no son retiradasdel horno. 3. Oprimala tecla 'CLEAN' (Limpieza). CLEAN * 'CLEAN'destellaen el indicadorvisual. 3. Lirnpieel marcodel homo, el marco de la puerta,el _rea fuera de la junta de la puertay alrededorde la abertura en la junta de la puerta,con un agentede lirnpiezano abrasivotal corno'Bon Arni'* o con detergentey agua.El procesode autolirnpiezano Cont. *Los nornbresde los productosson rnarcasregistradasde sus respectivosfabricantes. 5O Culdedolimpieze 3. Cuandola tecla DELAYdestellar_n,optima la tecla 'CLEAN'. Durante el ciclo de autolimpieza CLEAN Cuandoaparece'LOCK' en el indicador,la puerta no se puede abrir. Paraevitar da_o a la puerta,no fuerce la puertapara abrirla cuando la palabra 'LOCK'est_ desplegadaen el indicadorvisual. • 'CLEAN'destellar& /4. Optima la tecla A o V. Humo y olores • 'CL-M' (Limpieza- SuciedadMediana)se despliegaen el indicador. Usted puedever humoy sentir olor las primerasvecesque el horno es limpiado. Estoes normaly disminuir_ con el tiempo. Optima la tecla A o V para desplazarlosajustesde autolimpieza. • 'CL-H' (Limpieza- SuciedadIntensa,/4horas) Tambi(!npuede ocurrir humosi el horno est_ demasiadosucio o si se ha dejado una asaderaen el horno. • 'CL-M' (Limpieza- SuciedadMediana,3 horas) Sonidos A medidaque el horno se calienta,usted puede oir sonidosde piezasmet_licasque se expandeny contraen. Estoes normaly no da_ar_ el horno. • 'CL-L' (Limpieza- SuciedadLove,2 horas) AI seleccionarel nivel de suciedad del homo se programa autom_ticamenteel tiempo de limpieza. Despu(!sde cuatro segundos,'CLEAN'(Limpieza),'DELAY' (Diferido) y 'LOCK' (Bloqueado)se desplegar_nen el indicador visual para indicar que el horno est_ programadopara un ciclo de limpiezadiferido. El tiempo diferido tambien se despliegaen el indicadorvisual. Despu_s del ciclo de autolimpieza Aproximadamenteuna hera despu(!sdel fin del ciclo de limpieza, 'LOCK'desaparecer& La puertaahora puedeser abierta. Mueva la palancade bloqueo de la puertaa la izquierdapara desbloquearla. Alguna suciedad puede quedar come una leve ceniza gris tipo polvo. Retfrelacon un pa_o h_medo. Si la suciedadpermanece despu(!sde limpiarla,significa que el ciclo de limpiezano fue Io suficientementelargo. La suciedadser_ eliminadaduranteel proximo ciclo de limpieza. Si las parrillas del homo fueron dejadas en el homo y no se deslizan suavemente despu6sde un title de limpieza, limpie las parrillasy los soportesde las parrillas con una peque_acantidad de aceitevegetal para hacerdeslizarlascon m_s facilidad. Si el home ya ha side pregramado para un ciclo de limpieza y usted desea programar un tiempo diferido: DELAY 1. 0prima la tecla 'DELAY'. • 'DELAY'destella. Pueden aparecer lineasdelgadas en la porcelanaal pasar per cities de calentamiento y enfriamiento. Estoes normaly no afectar_el rendimiento. • '00:00'se desplegar_en el indicadorvisual. Una descoloraci6n blanca puede aparecer despues del ciclo de limpieza si los alimentos ;icidos o azucarados no fueron limpiados antes del ciclo de autolimpieza. Estadescoloraci0nes normaly no afectar_el rendimiento. Optima la tecla A o Y para programarla cantidad de tiempo que usted deseadiferir el ciclo. Despuesde cuatro segundos,'CLEAN','DELAY'y 'LOCK'se desplegar_nen el indicadorvisual para indicar que el horno est_ programadopara un ciclo de limpiezadiferido. El tiempo diferidotambien se despliegaen el indicadorvisual. NOtaS." • Si se deja abierta la puerta del homo, la palabra 'door' destellar_en el indicadorvisualy se escuchar_una seSal sonora hasta que la puertasea cerraday la tecla 'CLEAN' sea oprimidanuevamente. Cuando cemienza el ciclo de autelimpieza: • 'DELAY'se apagar& • Eltiempo de limpiezase desplegar_en el indicadorvisual. • Si transcurrenm_s de cinco segundos despu(!sde oprimir la tecla 'CLEAN' y antes de oprimir las teclasA o Y, el programavolver_ autom_ticamenteal despliegueprevio. Para cancelar el ciclo de autelimpieza: Optima la tecla 'CANCEL' (Cancelar). CANCEL • La puerta del homo se da_ar_si se fuerza para abrirla cuando la palabra 'LOCK'continOadesplegadaen el indicador. • El indicadorvisual queda en blanco. • Todas lasfuncionesson canceladas. • La hera del dfase despliegaen el indicadorvisual. 51 Procedirnientos de lirnpieza Los nombresde los productosson marcasregistradas de sus respect/yesfabricantes. ** Para hacerpod/dos,Ilame al 1-877-232-6771EE.UU.o 1-800-688-8408Canad& Cnbiertaporcelana esmaltada La porcelanaesmaltadaesvidrio fund/doen metaly puedeagrietarseo picarsesi no seusacorrectamente.Esresistentea los9c/dos,noa pruebade 9cidos.Todoslosderrames,especialmentelosderramesazucaradoso acid/cosdebenserlimpiados inmediatamentecon un pa_oseco. • Cuandose enfrie,lavecon aguajabonosa,enjuaguey seque. ° Nunca limpieuna superficietibia o calientecon un pa_oh0medo.Estopuedecausaragrietamientoo picaduras. ° Nunca use limp/adoresde homo,agentesde limpiezaabrasiveso cdusticosen el acabadoexteriorde la estufa. Area del Relojy de las Teclas de Control • Parabloquear de los controlespara la limpieza,ver Bloqueode los Controlesen pdgina 61. • Limpieconun pa_oh0medoy secar.No useagentesde limpiezaabrasivespuespuedenrayarla superficie. • Sepuedeusarlimpiavidriossi se redan en el pa_oprimero. NO rocie directamenteen elpanel. Perillasde Control • Retirelasperillascuandoest_nen la posici0n'OFF'(Apagado)tir_ndolashaciaadelante. ° Lave,enjuaguey seque. No useagentesde limpiezaabrasivespuespuedenrayarel acabado. ° Enciendacadaquemadorpara asegurarsede que las perillasbanside correctamentereinstaladas. Cubierta= Vidrio Cer_mico Nuncause/imp/adoresde homo, b/anqueador con c/ore, amoniacoo/imp/adores de vidrio que contenga amoniaco.Importante:Llameaun repamdorautorizado si la cubierta de vidrio cer#mico se agrieta,quiebm o el papel de alum/hie se derritesobre la cubierta. ° Dejeque la cubiertaseenfrieantesde limp/aria. • Generalidades - Limpiela cubiertadespuesde cadauseo cuandoseanecesariocon unatoallade papelh0meday con 'CooktopCleaningCreme'_(Cremade LimpiezaparaCubiertas)(PiezaNo. 20000001) _*. Lustreconun pa_o limpioy seco. Importante:Sedesarrollarbn manchaspermanentes sila suciedadsedejaquese cocineunay otra vezusandola cubierta cuandoest#sucia. • Manchas Rebeldeso Marcas de Metal - Humedezcaunaesponjade gomaque no deje marcaso que no raye.Aplique 'CooktopCleaningCream_ (Piezano.20000001)_* y frote parasacartanta suciedadcomeseaposible. Aplique unacapa delgadade cremasobrela suciedad,cubraconuna toallade papel h0meday d_jelareposardurante30 a 45 minutes(2 3 betaspara muchasuciedad).Mantengah0medocubriendola toallade papelconenvolturade pl_stico.Restriegue nuevamente,luegolimpiecon un pa_osecoy limpio. Importante:SolamenteuseesponjasLIMPIAS,HUMEDASy queno rayony queseansegurasparautensiliosconacabado antiadherente,e dafiarbel disefioy el vidriosi /aesponjano estbmojada,si /aesponjaestbsuciao se usaotto t/pcde esponja. • Suciedades Quemadaso Pegadas- Restrieguecon unaesponjaque no deje marcasy 'CooktopCleaningCreme'_ (PiezaNo. 20000001) _*. Importante: Sostengaunrestregadorconhoja de ale/taraun bngulode 30°y restrieguecualquiersuciedadquepermanezca. Luego/impiecomesedescribi5anteriormente. No use/ahoja de ale/tarpara/impiezad/ariapuespuededesgastar el disefiode/vidrio. / • Pl_stico o Az_car Berretida - Inmediatamente enciendael elementoa temperaturaBAJAy restriegue _ y raspeel az0caro el pl_sticode la superficiecalientehaciaun _reafria. LuegoAPAGUEel S/_ e ementoy dejeque se enfre L mpe e resduo conun raspadorcon hojade aletar y 'Cooktop Cean ng Creme'_(P ezaNo 20000001) _ _ii z .__. q, Ventanay Pnerta • Eviteusarcantidadesexcesivasde agua puespuedeescurrirsedebajoo detr_sdel vidriocausandomanchas. del Homo - Vidrio • Lavecon aguayjabdn. Enjuagueconagua limpiay seque. Ellimpiador de vidrio puedeusarsesi se rociaen un pa_o primero. • No usemater/alesabrasivestalescome esponjasde restregar,limp/adoresen polvoo esponjasde lanade aceropues puedenrayarel vidrio. Cont. 52 piem Parrillasdel Homo • Limpiarcon aguaconjab6n. • Sacarlasmanchasdificilescon polvode limpiezaouna esponjaIlenaconjab6n. Enjuaguey seque. • Lasparrillasse descolorar_npermanentemente y puedenno deslizarsecon suavidadsi sondejadasen el homoduranteun ciclo de autolimpieza.Si esto sucede,limpiela parrillay lossoportesen relievecon una peque_acantidadde aceitevegetal pararestaurarla facilidadde movimiento,luego limpieel excesode aceite. AceroInoxidable • NO USENINGUNPRODUCTODELIMPIEZA QUECONTENGABLANQUEADORA BASEDE CLORO. (modelosselectos) • NO USELIMPIADORES"ORANGE"M LIMPIADORESABRASIVOS. • SIEMPRELIMPIE LASSUPERFICIES DEACEROA FAVORDELGRANO. • LimpiezaDiaria/SuciedadLove=Limpieconuno de lossiguientes- agua conjab6n,unasoluci6nde vinagreblanco conagua,limpiadorparasuperficiesy vidrio 'Formula409" oun limpiavidriossimilar- usandouna esponjaoun paso suave.Enjuaguey seque. Parapulir y evitarmarcasde losdodos,useel producto'StainlessSteelMagicSpray" (Pieza No.20000008)". • Suciedad Moderada/Intensa = Limpiecon uricde lossiguientes- 'BonAmP, 'SmartCleanser"o 'SoftScrub" - usando una esponjahQmedao un pasosuave.Enjuaguey seque. Lasmanchasdificilespuedenserquitadasconuna esponja multi-uso'Scotch-Brite'"hQmeda;frote a favordel grano. Enjuaguey seque. Pararestaurarel lustrey sacarlasvetas, aplique'StainlessSteelMagicSpray" (PiezaNo.20000008)". • gescoloraci6n = Useuna esponjamojadaoun pasosuave,limpieconlimpiadorde acero'CameoStainlessSteel Cleaner".Enjuagueinmediatamente y seque.Paraeliminarlasestriasy restaurarel lustre,usedespu(!srociadorpara acero inoxidable'StainlessSteelMagicSpray" (PiezaNo. 20000008)". Interior del Homo • Siga las instruccionesen las p_ginas50-51 para programarun ciclo de autolimpieza. Gaveta de • Cuandoest_fria, laveconaguatibiajabonosa,enjuaguey seque.Nunca limpieunasuperficietibia o calientecon un paso Almacenamiento, hQmedopuesestopuededa_arla superficiey causaruna quemaduraa causadel vapor. Manija de la • Paramanchasrebeldes,useagentesde limpiezalevementeabrasivostal como pastade bicarbonatoo 'BonAmP. No use Puerta = agentesde limpiezaabrasivos,c_usticoso _sperostal comoesponjasde lanade aceroo limpiadores de hornos.Estos Esmalte Pintado productospuedenrayaro da_ar permanentemente la superficie. Importante:Use una toallaoun pa#o seco para limpiarlos derrames,especialmente losderramesacidicos o azucarados.La superficie se puede descolorar o perder el brillo si e/ derrame no se /impiainmediatamente. Estoes especia/mente importante en /assuperficies blancas. •Los nombresde los 3roductosson marcasregistradasde sus respectivosfabricantes. •" Parahacer pedidos,Ilameal 1-877-232-6771EE.UU.o 1-800-688-8408Canad& Mantenlmlem Luz del homo Para reemplazar el foco del homo: (El estilo var[a seg n el modelo) 1. Cuandoel homo est_ frio, sujete latapa de la bombillaen su lugar, luego desliceel ret(!nde alambrefuerade la cubierta,lmportante: Lacubiertade la bombillasecaer_si noessujetaensu lugarcuando est_ sacandoel ret(!n de alambre. CUBIERTA DEL 2. Saque la cubierta del foco y el foco. 3. Coloque un foco de 40 watts para electrodom(!sticos. 4. Vuelvaa colocar la cubierta de la bombillay asegOrelacon el ret(!n de alambre. 53 FOCO RETEN DE ALAMBRE Cont. 5. Vuelva a enchufar la estufa.Vuelvaa colocar la hora correcta. O 2. Alinee las ranurasde la puertacon los brazosde articulaci6nde la estufa. 1. Use un tomaollasseco y con mucho cuidado destornille la cubierta del foco y el foco. 3. Deslicela puertahacia los brazosde articulaci6nhasta que est6 completamenteasentadaen las bisagras. Empujehaciaabajo las esquinassuperioresde la puerta para asentarlacompletamenteen lasbisagras. La puertano debe quedar torcida. Reemplacecon un foco para homo de electrodom6sticode 40 wats. Se recomiendanlosfocos con basede lat6n para evitar fusi6n del foco en el casquillo. Importante: La puerta del homo en una estufa nuevapuede sentirse"esponjosa"cuandose cierra. Esto es normaly disminuird con el uso. Reemplacela cubierta del foco y vuelva a conectarla corriente el6ctricaal homo. 4. Vuelva a programarel reloj. Gaveta de almacenamiento Ventana del homo Para proteger la ventana de la puerta del homo: 1. No use agentesde limpiezaabrasivostales como esponjasde restregarde lana de acero o limpiadoresen polvo puesellos pueden rayarel vidrio. 2. No golpee el vidrio con ollas, sartenes,muebles,juguetes u otros objetos. La gaveta de almacenamientopuede set retirada para que usted pueda limpiar debajo de la estufa. 3. No cierre la puerta del homo hasta que las parrillasdel homo no est6n en su lugar. Par8 S808r : AI golpear,rayar,hacervibraro esforzarel vidrio puede debilitar su estructura causandoun mayor riesgo de roturaen una fecha posterior. 1. Vacfela gavetay deslfcelahacia afuera hastala primera posici6n tope. 2. Levantela parte delanterade la gaveta. Puerta del homo 3. Tfrelahasta la segundaposici6n de tope. 4. Sujetelos ladosy levante la gaveta para retirarla. Para volver a colocar: 1. Insertelos extremosde las correderasde la gaveta en los deles de la estufa. 2. Levantela parte delanterade la gavetay suavementeemp_jelaa la primera posici6nde tope. 3. Levantela gaveta nuevamentey emp_jelahastaque quede completamentecerrada. Tornillos niveladores PsF8 SSOar: 1. Cuandoest6 frfa,abra la puertadel homo hasta la posici6ntope de asara la parrilla [abierta aproximadamente10 cm (cuatro pulgadas)]. Aseg_resede que la estufaestd niveladacuando se instala. Si la estufano estd nivelada,gire los tornillos niveladoresubicadosen cada esquinade la estufa hastaque quede nivelada. 2. Sujetela puerta de cada lado. No use la manijade la puertapara levantarla. 3. Levanteuniformementehasta que la puerta sesalga de los brazosde articulaci6n. , ,_-,_ Para volver a colocar: 1. Sujetela puerta de cada lado. _ _j _ DISPOSITIVO _w_o ...... \ TORNILLO 54 NIVELADOR [ocalimci6nsoludbn deeveries Para la mayoda de los probiemas, verifique primeroIo siguiente. • • • • Toda la estufao parte de ella no funciona. • Revisesi la superficiey/o loscontrolesdel horno est_n debidamenteajustados.Ver p_ginas 57 y61. • Verifiquesi la puertadel hornose ha desbloqueadodespuesdel ciclo de autolimpieza.Ver p_gina51. • Revisesi el homo est_ajustadopara horneadodiferido o programade limpieza.Ver p_ginas62 y50-51. • Verifiquesi 'ControlLock' (Bloqueode loscontroles)est_activado. Ver p_g.61. • Verifiquesi el control est_en Modo Sab_tico.Ver p_g.65. Elreloj, las palabrasen el indicador visualy/o las lucesfuncionan pero el homo no se calienta. • Elhornopuedeestarprogramadoparaunafunci0n de'Cook& Hold'(Cocci0ny mantenercaliente) o unafunci0n diferida. • Puedeestaractivadala caracterfsticade bloqueode loscontrolesdel horno.(Ver p_g.61.) Losresultadosdel homeado no son como se esperabano son diferentesa los del homo anterior. o Losalimentos no se asan a la parrilla en forma debida o salen demasiadohumo. • Verifiquelas posicionesde lasparrillasdel horno.El alimentopuedeestar muy cercadel elemento. • El elementode asarno fue precalentado. • El papelde aluminiose us0 de maneraincorrecta. Nunca forreel insertodel asadorcon papel de aluminio. • La puerta del horno estabacerradamientrasse asabaa la parrilla. Deje la puertaabierta en la primeraposici0n (alrededorde 10 cm [4 pulgadas]). • Recorteel excesode grasade la came antes de ponerlaa asara la parrilla. • Se us0 una asaderasucia. • Elvoltaje del hogar puede ser bajo. Elhomo no se autolimpia. • Verifiquepara asegurarsede que el ciclo no est(!ajustadopara un comienzodiferido.Ver p_ginas50-51. • Verifiquesi la puertaest_cerrada. • Verifiquesi el control est_en Modo Sab_tico.Ver p_g.65. • El homo puedeestara m_sde 205° C (/400 ° F). La temperaturadel homodebe ser inferiora 205° C (/400 ° F)para programarun ciclo de limpieza. Elhomo no se limpi6 en forma debida. • Puedeque sea necesarioun tiempo de limpiezam_s largo. • Losderramesexcesivos,especialmentede alimentosazucaradosy/o _cidos no fueron limpiados antesdel ciclo de autolimpieza. La puefta del homo no se desbloqueadespu6sdel ciclo de autolimpieza. • El interiordel homo todavfaest_ caliente. Dejeque paseaproximadamenteuna hora paraque el homo se enfrfeantes de que se completeun ciclo de autolimpieza. La puertapuedeser abiertacuandodesaparezcala palabra'LOCK'del indicadorvisual. • Elcontrol y la puerta puedeestar bloqueada.Ver p_g.61. o o Revisesi los controlesdel homoest_n debidamenteajustados. Verifiquesi el enchufeest_firmementeinsertadoen el tomacorriente. Verifiqueo vuelvaa reponerel disyuntor. Verifiqueo reemplaceel fusible. Verifiqueel suministrode energfaelectrica. Aseg0resede que el respiraderodel homo no est(!bloqueado.Ver p_gina 66 para la ubicaci0n. Verifiquepara asegurarsede que la estufaest_ nivelada. Lastemperaturasa menudovarfanentre un homo nuevoy uno antiguo. A medidaque pasa el tiempo,la temperaturadel hornocambiay puede hacersem_scalienteo m_sfrfa. Ver pdgina65 para lasinstruccionescomo ajustar la temperaturadel homo. lmportante: No se recomiendaajustar la temperaturasi ha tenido problemascon solo una o dos recetas. 55 La superficiesuave muestra desgaste. Abrasioneso rayaduraspequefias. - Aseg0resede que la cubiertay la parteinferiordel utensilioeste limpia.No desliceutensilios de vidrioo de metala trav(!sde la cubierta.Aseg0resede que la parteinferiordel utensiliono sea_spera.Use losagentesde limpiezarecomendados.Vet p_g.52. Marcasde metal. - No desliceutensiliosde metala travesde la cubierta.Cuandoest(!frfa,limpiela cubiertacon CooktopCleaningCreme.Ver p_g.52. Manchasy estrfasmarrones. - Retirelos derramesrdpidamente.Nunca limpiecon un paso o esponjasucia.Aseg0resede que la cubiertay la parteinferiordel utensilioest6 limpia. Areascon un brillo met_lico. - DepOsitosmineralesdel aguay de losalimentos.Uselosagentesde limpiezarecomendados. Vet p_g.52. Picaduraso descascarillado - Limpielos derramesazucaradosinmediatamente.Vet p_g.52. Se junta humedad en la ventana del homo o sale vapor por el respiraderodel homo. . Estoes normal cuandose cocinanalimentoscon alto contenido de humedad. . Se us6 humedadexcesivacuando limpi6 la ventana. Hay un clot fuerte o humo leve cuando se enciende el homo. Estoes normal en una estufanuevay desaparecer_desp@sde unos pocos usos. AI iniciar un ciclo de autolimpiezase "quemardn"los olores m_s rdpidamente. • Si se enciendeel ventilador ayudarda eliminar el humoy/o el clot. • Suciedadexcesivade alimentosen el panel inferiordel homo. Use un ciclo de autolimpieza. C6digosde Errores . 'BAKE'(Horneado)o 'LOCK'(Bloqueado)puedendestellar rdpidamenteen el indicador para avisarleque hayun error oun problema. Si 'BAKE'o 'LOCK'aparecenen el indicadorvisual, oprima la tecla 'CANCEL' (Cancelar).Si 'BAKE'o 'LOCK'contin0an destellando,desconecte la energia el@tricaal electrodomestico.Espereunos pocos minutosy vuelvaa reconectarla energfaelectric&Si contin0andestellando,desconectelaenergiaelectricadel electrodomestico y Ilameal t@nico de servicioautorizado. • Si el homo est_ demasiadosucio,pueden ocurrir demasiadasIlamaradasIo cual resultar_en un c6digo de error durantela limpieza.Optima latecla 'CANCEL' y deje que el homo seenf@ completamente,limpieel excesode suciedady luego vuelvaa programarel ciclo de limpieza. Si el c6digo de error reaparece,Ilamea un t@nico autorizado. Se escuchan ruidos. . El homo emitevariossonidos bajos. Ustedpuedeoir los relesdel homo cuandoseencienden y se apagan.Estoes normal. • A medidaque el homose calientay se enfrfa,usted puedeoir sonidosde piezasmet_licasque se expandeny contraen. Estoes normaly no da_ard su electrodomestico. • Se escuchael sonido de un ventilador.Estees el ventilador de enfriamientoy es normal. El ventiladorseguir9 funcionando despuesde apagar el homo hastaque el mismose enfrie. No se escuchan sefiales sonoras y el indicadorvisual no se activa. El homo puede estar en Modo Sab_tico. (Ver p_g.65). • El control puede estar bloqueada.Vet p_g. 61. 'SAb' destella y luego se despliega continuamente. • El homo est_en modosab_tico.Paraanularel modosab_tico,oprimay mantengaoprimidala tecla 'CLOCK' (Reloj)durante cinco segundos. 56 Controles superiores Use estoscontrolespara encenderlos elementossuperiores. Se dispone de una selecci6ninfinita de ajustesdel calor desde'Low' (Bajo) hasta 'High' (Alto). Las perillaspueden colocarseen cualquierade estosajusteso entre ellos. Prograrnaci6n de los controles tienen un ajuste de cocci6n a fuego lentoy para derretir que requerird un ajuste peque_o de la temperaturadependiendodel alimento que est6 preparando.Los otros elementosmuestranlos ajustesexclusivosde dichos elementosimpresosalrededor de las perillas.Ajuste la temperaturaa los n_meros que ofrecen los resultadosde cocci6n deseados.Lassiguientes descripcionesle ayudardna elegir el ajuste que le dard los resultados6ptimos. 'Hold' (MantenerCaliente) o 'Warm' (Calentar):Los alimentos mantienen una temperaturasobrelos 60° C (140° F} sin que sigan cocindndose.Los alimentosestdncalientesen principio y luego se reduce la temperatura.Nunca useestosajustespara recalentar alimentosfrfos. 1. Coloqueel utensiliosobre el elementosuperior. 2. Optimay gire la perilla en cualquier direcci6n hasta el ajuste de calor deseado. • En el panel de control se encuentra marcadocual O O elementocontrola cada perilla. Pot ejemplo,el dibujo a la derecha indica el elementodelanteroizquierdo. _) O 3. En el panel de control hayuna luz indicadorade los elementos. Cuandose enciendealguna de las perillas de control, la luz se ilumina. La luzse apagardcuandotodos los elementossuperiores se apaguen. Cuandose enciende un control, se puede percibir un brillo a Io largo de la superficielisa. El elemento pasardpot ciclos de encendidoy apagadopara mantenerel ajuste de calor seleccionado,inclusiveen el ajuste 'High'. 'Simmer' (Cocci6na FuegoLento): Los alimentosforman burbujas que apenasIlegana la superficie. Los alimentostienen una temperaturaentre 85° C (185° F)y 93° C (200° F). El ajuste de cocci6n a fuego lentotambi6n puede set usadopara herviro escalfaralimentoso seguir cocinandoalimentoscubiertos. 'Slow Boil' (Hervor Lento): Los alimentosforman burbujas moderadamente.El ajuste de hervor lentotambi6n puedeset usado para la mayorfade lasfrituras y para mantener la cocci6nde grandescantidadesde Ifquido. 'Boil' (Hervir): Losalimentosforman burbujasa gran velocidad.Este ajuste tambi6n puede set usadopara dorar came, para preparar alimentossalteados,para sofrefry para calentar aceite para frefr antes de reducir la temperatura.Los 3 o 4 ajustesrodsaltos de la perilla se usanpara estostipos de cocci6n. El ajuste rodsalto siemprese usapara hacerhervir el agua.Algunos elementos ofrecen una velocidad incluso mayorpara hervir Ifquidos. 4. Despu6sde cocinar coloque la perilla en la posici6n'OFF' (Apagado). Retireel utensilio. Ajustes de calor sugeridos El tama_oy tipo de utensilio,el tipo y cantidad de alimento que est6 calentandoy la potencia de carla elementoindividual determinardn la posici6n ideal de la perilla para la cocci6n.Algunos elementos 57 Cubiertas lisas • Si se produce un derramecuandoeste cocinando,limpielo inmediatamentede la cubierta cuando(!staeste caliente para evitar una limpiezam_s dificil despu(!s. Tenga mucho cuidado, limpie el derramecon una toalla seca y limpia. Notas: • La cubierta de la estufa puede emitir un poco de humoy olor la primeravez que se utiliza. Estoes normal. • No deje que los derramespermanezcansobre la cubierta o sobre la moldurade la cubierta por un periodo de tiempo prolongado. • Lascubiertas lisas retienen el calor pot un cierto periodo despu6sque se ha apagado la estufa. Apague loselementos unospocos minutos antes de que losalimentosest6n completamentecocinadosy useel calor restantepara completar lacocci0n. Cuandola luzde superficiecaliente se apaga (vera continuaci0n),el _rea dondese cocina estar_fria al tacto. Debidoa la maneraen que retienenel calor, los elementoslisos no responder_ntan r_pidamentea los cambiosen los ajustes como los elementosespirales. • Nunca use polvos de limpiezaabrasivosni esponjasde restregar que puedan rayarla cubierta. • Nunca use blanqueadora basede cloro, amoniaconi otros limpiadoresque no hayansido especificamenterecomendados para usar en el vidrio cerdmico. Para evitar marcas y rayaduras = No use utensiliosde vidrio. Puedenrayar la superficie. • En casode un posible derrame,retire el utensilio de la cubierta de la estufa. • Nunca coloque un soporteo un aro de wok entre la cubierta y el utensilio. Estosartfculospueden marcar o rayarla cubierta. • Nuncatrate de levantar la cubierta. • No deslice utensiliosde aluminioa travesde una cubierta caliente. Los utensiliospueden dejar marcasque deben ser limpiadas inmediatamente.(Ver Limpieza,p_gina 52.) • La superficielisa puedeverse descoloridacuandoest_ caliente. Estoes normaly desaparecer_cuando la superficie se enfrie. • AsegOresede que la cubiertay la parte inferior del utensilioest(!n limpias antes de encender la estufa a fin de evitar rayaduras. Elementos superiores Los elementossuperioresen su estufa est_n identificadospor circulos permanentesen la superficie lisa. Paracocinar de manera m_s eficiente, use un utensilio que sea del mismotama_o que el elemento. • Paraevitar las rayaduraso da_o a la cubierta de vidrio cer_mico, no deje azOcar,sal o grasassobre los elementos. Limpie la cubierta con un paso limpio o con toallas de papel antesde usarla. • Nunca deslice utensiliosde metal pesadosa traves de la cubierta pues pueden rayarla. Los utensi/iosno deben extenderse m#s all# de 12 a 25 mm (1/2 a I pu/gada) de/tamafio de/element& Cuandose enciendeun control,se puedevet un resplandora tray, s de la superficielisa. El elemento pasar_ pot ciclos de encendido y apagado para mantener el ajuste de calor seleccionado, a_n en el ajuste 'Hi' (Alto). Para evitar ias rnanchas • Nunca use un paso o una esponjasucia para limpiar la cubierta de la estufa. Esto puede dejar una peliculaque puedemanchar la cubierta despuesque el _rea se calienta. Para mayor informaci0nsobre los utensiliosconsulte la secci0n Recomendaciones sobro los utend/ios en la p_gina 59. • Si se continOacocinando sobre una superficiesucia se puede/ podr_ producir una mancha permanente. 9" ELEMENTO 6" ELEMENTO SENCILLO SENCILL O _ \ 6" ELEMENTO SENCILLO Para evitar otros da os • No deje queen la cubierta caliente se derritan pl_sticos,az_caro alimentoscon alto contenido de azOcar.Si esto sucede,limpie inmediatamente.(Ver Limpieza,p_gina 52.) 9" ELEMENTO SENCILLO • Nunca deje que una olla hiervahasta quedar seca puesesto daSar_la superficiey el utensilio. Luz indicadora de superficie caliente La luz indicadorade superficiecaliente se encuentraen la parte delanterade la superficiede cocci0n. La luz se iluminar_ cuando cualquierade los elementossuperioresest(!caliente.Permanecer_ encendidaa_n despuesde que el control seaapagado,hastaque el _rea se hayaenfriado. Nunca use la cubierta como una superficie de trabajo ni como una tabla de cortar. • Nunca cocine alimentosdirectamentesobre la cubierta. • No use un utensilio peque_o en un elementogrande. Estono s01o desperdiciaenergiasino que tambi(!npueden producirse derrames calientessobre la cubierta los cuales requieren limpiezaadicional. Consejos para proteger la cubierta lisa • No use utensiliosespecialesque no sean pianos,de tamaSomayor o desniveladostal como la parte inferior redonda de loswoks, con rondosacanaladosy/o parrillasy ollas de gran tamaSopara prepararconsewas. Limpieza (ver p_gina 52 para mayorinformaci0n) • Antes de usar por primeravez, limpie la cubierta. • Limpie la cubierta diariamenteo despu(!sde carlauso. Esto la mantendr_con una buena aparienciay puede evitar que se daSe. 58 • No use aluminio ni contenedoresde papel de aluminio. El aluminiose puede derretir en la cubierta de vidrio cer_mico.Si el metal se derrite en la cubierta,no use la estufa. Llame a un t6cnico autorizad. Codnendo enle Recomendaciones sobre los utensilios Utensiliosplanesy suaves. Si se usan losutensilioscorrectosse puedenahorrar muchos problemas,tal come prolongaci6ndel tiempo de cocci6nde los alimentosu obtenci0n de resultadosno consistentes.Losutensilios correctos reducenel tiempo de cocci0n, usanmenos energia electricay cocinan los alimentosde manerarodsuniforme. Los utensilioscon fondos acanalados o arqueados.Los utensilioscon rondos irregularesno cocinan uniformemente los alimentosy algunasvecesno pueden hervir liquido. Utensiliosde material Los utensiliosde metalesdelgadoso de grueso, vidrio. Prueba de las elias planas Verifiquesi sus eliasson planas. La prueba de la regla: Utensiliosque sean del mismotamale que el elemento. Los utensiliosrodspeque_oso rods grandesque el elemento en 2,5 cm (1 pulgada). Mangos seguros. Los utensilioscon mangossueltoso rotes. Mangos pesadosque pueden inclinar el utensilio. Tapas hermeticas. Lastapas sueltas. Woks con fondo plane. Loswoks con fondo apoyadoen un are. 1. Coloqueuna regla a tray,s del fondo de la ella. 2. ColOquelaa la luz. 3. Pocao ninguna luz debe verse debajode la regla. La prueba de la burbuja: 1. Coloqueuna pulgada de agua en la ella.Coloque la ella en la cubiertay gire el control a 'High' (Alto). Utensilios conservas grandes 2. Observela formaciOnde burbujas a medidaque el agua se calienta.Lasburbujas uniformessignifican buen rendimientoy las burbujasno irregularesindican puntos calientesy cocci0n dispareja. para preparar y de tamales Todaslas elias para preparar censervas y las elias grandes deben tenet rondos pianos y deben set heches de materiales grueses. Esto es muy importantepara las cubiertas lisas.La base no debe ser mds de 2,5cm (1 pulgada) mds grande que el elemento. Cuandolas elias de prepararconservasy las eliasde tamales grandesno cumplen estos requisites,la cocciOnpueden demorar rodstiempo y se pueden da_ar las cubiertasde las estufas. Algunaselias de preparar conservastienen basespeque_aspara usarlasen las superficies lisasde las estufas. Cuandoest_ preparande censervas, use el ajuste de taler alto hasta que el agua cemience a hervir o se Iograla presi0nen el ella. Reduzcael calor al ajuste rodsbajo que mantengael hervoro la presiOn.Si no se reduceel calor, se puede daSarla cubierta de la estufa. 59 ¢odnundo end Panel de Control A B C D I TIMER CANCEL BROIL E CLEAN DELAY CLOCK F G H "-v" | J El panel de control ha side dise_adopara su fdcil programaci0n.El indicadorvisual en el panel de control muestrala hera del dfa,el temporizadory lasfunciones del horno.El panel de control mostradoarriba incluye las caractedsticasespecificasdel modelo. (El estilo del panel de control vada seg0n el modelo.) 'BROIL'(Asara la Parrilla) Seusaparaasara laparrillay dorarlos alimentos. 'BAKE'(HorneaO Seusaparahorneary asar. A (Mds)o V (Menos) Programao cambiala hera,la temperaturadel homo.Programa asara la parrilla'HI'o 'LO'. ii!!iiii_Diiiii:iiiii:i!i 'TIMER'(Temporizado0 Programa ei temporizador. 'COOK& HOLD' Seusaparahornearduranteun tiempo (Cocci0ny mantener seleccionado, luegomantieneel alimento calienteduranteunahera. caliente) Importante: Cuatrosegundosdespu(!sde haber oprimido la tecla ,_ o Y, se programardautomdticamenteel tiempo o la ternperatura.Si transcurren rodsde 30 segundosdespu6sde haber oprimido una tecla de funci0n y antesde oprimir la tecla ,i, o Y, la funci0n serd canceladay el indicadorvisual volverd al despliegue anterior. 'Clock' (Reloj) El reloj puedeser ajustado para desplegarla hera ya sea en formate de 12 horaso 24 horas.El reloj ha side programadoen la fdbrica para el formate de 12 betas. Para cambiar el relej a formate de 24 heras: 'CLEAN'(l_impieza) (modelosselectos) Seusaparaprogramarun ciclode autolimpieza. 'DELAY'(Diferido) Programael hornoparacomenzara hornearo limpiarsea unaheraposterior. 'CLOCK'(Reloj) 'KEEP WARM' (Mantenercaliente) Seusaparaprogramarla heradel dia. Oprima A o V para seleccionarel formato de 12 horaso 24 horas. Seusaparamantenercalienteen el homoel alimentococinado. Programela hera del dfa siguiendo las instruccionesindicadasabajo. 'CANCEL' (Cancela0 Cancelatodaslasfuncionesa excepci0n deltemporizador y el reloj. Use de las Teclas • Oprimala tecla deseada. • Oprirna A o Y para programarel tiempo o la temperatura. • Se escucharduna sepal sonoracadavez que oprima una tecla. • Se escuchardndos se_alessonorassi ocurre un error en la programaci0n. 1. Optima y mantengaoprimidas lasteclas 'CANCEL' y 'DELAY' durantetres segundos. -CANCEL -- DELAY Programaci6n del Reloj: 1. Optima la tecla 'CLOCK'. CLOCK • Los dos puntos destellanen el indicador. 2. Oprima A o V para programarla hora del dfa. • Los dos puntos contin0an destellando. 3. Oprimala tecla 'CLOCK' nuevamenteo espere cuatro segundos.Los dos puntos paranel destellar. Cuandose conecta energiael(!ctrica al horno o despu6sde una interrupci0n de la energiael(!ctrica,la 01timahera del reloj previaa la interrupci0n destellarden el indicador. Paradesplegarla hera del dia cuandoel indicadorest(!mostrando otra funci0n de tiempo, optima la tecla 'CLOCK'. Cont. 6O Bloqueo de los controies La hora del reloj no puede set cambiadacuando el homo ha sido programadopara 'Delay Cook'or 'Delay Clean'(Horneadoo LimpiezaDiferido) o 'Cook& Hold' (Cocci6ny Mantener Caliente). Para cancelar el despliegue Elteclado puede set bloqueadopara seguridad, limpiezao evitar el usono autorizado.No funcionar_n cuando est(!nbloqueados. del reloj: Si el homo est_ en uso, los controlespuede bloquearse. Si no deseaque el indicadorvisual muestre la hora del dfa: Optima y mantengaoprimida lasteclas 'CANCEL' (Cancelar)y 'CLOCK' durantetres segundos.La hora del dfa desaparecer_del indicador. Cuandose cancelael desplieguedel reloj, oprima la tecla 'CLOCK' para desplegar brevementela hora del dfa. -- La hora actual del dfa permanecer_en el indicadorcuando los controlesest(!n bloqueados. CANCEL Para bloquear: Optima y mantengaoprimidas lasteclas 'CANCEL' y 'COOK & HOLD' durantetres segundos.(Oprimaprimero la tecla 'CANCEL'.) --CLOCK Optima y mantengaoprimidas lasteclas 'CANCEL' y 'COOK & HOLD' durante tres segundos.(Oprimaprimerola tecla 'CANCEL'.) Oprimay mantengaoprimida lasteclas 'CANCEL' y 'CLOCK' durantetres segundos.La hora del dfa reaparecer_en el indicador. C6digos de errores [Temporizador) 'BAKE'(Horneado)o 'LOCK' (Bloqueado)puedendestellar r@idamentepara advertirle que hay un error oun problema.Si 'BAKE'o 'LOCK'destellanen el indicadorvisual,oprimale tecla 'CANCEL'. Si 'BAKE'o 'LOCK'contin_an destellando,desconectela corriente el(!ctrica haciael artefacto.Espereunos pocos minutosy vuelvaa conectar la corriente el(ictrica.Si las palabrasa_n contin_an destellando,desconectela corriente el(!ctricahacia el artefactoy Ilamea un t(!cnico de servicio autorizado. El temporizadorpuedeset programaticde un minuto (0:01)hasta99 horasy 59 minutos(99:59). El temporizadorpuedeset usadoindependientementede cualquier otra actividad del homo. Adem_s puede set programatic cuandootra funci6n del homo este en funcionamiento. El temporizadorno controla el homo. Solamentecontrola una seSal sonora. Para programar el temporizador: 1. Oprimala tecla 'TIMER'. CANCEL Para desbloquear: Para restaurar ei despiiegue dei reioj: 'Timer' -- 'Bake' TIMER [Horneado] • '0:00'destella en el indicadorvisual. Para programar 'Bake': • Losdos puntos destellar_n. 1. Optima la tecla 'BAKE'. • 'BAKE'destellar& 2. Optima la tecla A o V hastaque el tiempo correcto aparezcaen el indicadorvisual. • '000' destellarden el indicadorvisual. Seleccionela temperaturadel homo. Latemperatura del homo puede set programadade 75° a 285° C (170° a 550° F).Optima u oprimay mantenga oprimidala tecla A o V. 2. • Losdos puntos contin0an destellando. BAKE _'_'J 3. Optima nuevamentela tecla 'TIMER' o esperecuatro segundos. • Losdos puntos contin0an destellandoy comienzala cuenta regresivadel tiempo. • Cuandocualquierade estasdos teclasse oprime pot primeravez,'175°, ('350°') se iluminard. • El 01timominuto de la cuenta regresivadel temporizadorse desplegar_en segundos. • Oprima la tecla A para aumentar la temperatura. 4. AI final del tiempo programatic,se escuchar_una sepalsonora larga. • Oprima la tecla V para disminuir la temperatura. . Para cancelar el temporizador: Optima la tecla 'BAKE' nuevamenteo esperecuatro segundos. • 'BAKE'dejard de destellary se iluminarden el indicadorvisual. 1. Optimay mantengaoprimida la tecla 'TIMER' durantetres segundos. 2. Optima la tecla 'TIMER' y coloquela hora a 0:00. 61 • '38° C' ('100° F') o la temperaturaactual del homo se desplegard.La temperaturase elevarden incrementosde '3° C' ('5° F')hasta que se alcancela temperaturaprogramada. Esperea que el homo se precalientedurante 8-15 minutes. 4. Programela cantidad de tiempo durante la cual usted desea hornear oprimiendola tecla A o V. Eltiempo de horneado puede programarsedesdediez minutes(00:10)hasta 11 horas, 59 minutes(11:59). • Cuandoel homo Ilegaa la temperaturaprogramadase escucharduna sepalsonora larga. • Paraverificar la temperaturaprogramadadurante el precalentamientodel homo, oprima la tecla 'BAKE' (Horneado). 5. • 'BAKE'y 'HOLD'se iluminan en el indicadorvisual. • El tiempo de horneadose iluminar_en el indicadorvisual. Coloqueel alimento en el homo. 6. Verifique el progresode la cocci6n cuando hayatranscurridoel tiempo minimo recomendado.ContinUela cocci6n si es necesario. 7. AI t_rmino de la cocci0n, optima la tecla 'CANCEL' (Cancela0. • Comenzardla cuenta regresivadel tiempo de horneado. Cuande haya expirade el tiempe de cecci6n: • Se escuchar_ncuatro so,ales sonoras. CANCEL • 'BAKE'se apagard. 8. Retireel alimento del homo. • 'HOLD'y 'WARM' (Caliente)se iluminardn. • En el indicadorse desplegar_'75°' ('170°'). Diferencias dei horneado entre su homo antiguo y su homo nuevo Esnormal observaralgunasdiferenciasen el tiempo de horneado de su homo antiguoy su homo nuevo.VeaAjuste de la temperaturade/ homo en la p_gina 65. Despu_s de una hera en 'Hold Warm' (Mantener caliente): Notas: • 'End' se desplegard. • Paracambiar/atemperaturadel homo duranteel homeado, optima la tecla 'Bake', luego oprima la tecla A o V hasta que Ileguea la temperaturadeseada. • La hera del dfa volverda desplegarseen el indicadorvisual. Para cancelar 'Cook & Hold' en cualquier memento: • Paracambiar/atemperaturade/homo durante'Preheat', oprimados vecesla tecla 'Bake', luego optima la tecla A o V hasta que se desplieguela temperaturadeseada. Oprima la tecla 'CANCEL'. Retire el del homo. • Si olvida apagarel homo, se apagar_ autom_ticamentedespu(!s de transcurrir 12 horas.Si deseadesactivaresta caracterfstica, vea la p_gina 65. 'Delay Cook & Hold' (Cocci6ny 'Cook & Hold' (Cocci6ny _'_ CANCEL mantener caliente diferido) mantener caliente) 'Cook & Hold' le permite hornear durante una cantidad determinada de tiempo, seguidode un ciclo 'KeepWarm' (MantenerCaliente) de una hera. Cuando usa'Delay' (Diferido),el homo comienzaa cocinar m_s tarde en el dfa. Programela cantidad de tiempo que usted desea diferir antes de que se enciendael homo y cuanto tiempo desea cocinar el alimento.El homo comienzaa calentar en la hera seleccionaday cocina duranteel tiempo especificado. Para programar 'Cook & Hold': 1. Oprimala tecla 'COOK & HOLD'. • 'BAKE'y 'HOLD'(Mantener) destellan. Eltiempo diferido puede programarsede 10 minutes (00:10)hasta 11 horns,59 minutes(11:59). • '000'se iluminaen el indicadorvisual. Para programar an ciclo de horneado diferido: 2. Seleccionela temperaturadel homo. La temperatura del homo puedeset programadade 75° a 285° C (170° _ _,_,, a 550° F). Optima u optima y mantengaoprimidala tecla ,& o V. 1. Optima la tecla 'DELAY' (Diferido). DELAY • 'DELAY'destella. • '00:00'destella en el indicadorvisual. • Oprimala tecla A para aumentar la temperatura. 2. Optima la tecla A o V para programarel tiempo diferido. • Optima la tecla V para disminuir la temperatura. Cuando'DELAY'est(!todavfadestellando: 3. Oprimala tecla 'COOK & HOLD' nuevamenteo esperecuatro segundos. 3. Oprimala tecla 'COOK & HOLD'. • '000'se iluminaen el indicadorvisual. • 'HOLD'destella. • 'BAKE'y 'HOLD'(Mantener) destellan. • '00:00'destella en el indicadorvisual. Cont. 62 * 'WARM' (Caliente)destella. 4. OprimaA paraprogramarla temperaturade homeado. * '00:00'y 'HOLD'destellan. * '000' se despliegaen el indicadorvisual. * 'BAKE'permaneceiluminado. 2. 5. OprimaA paraprogramarel tiempode horneado. * En el indicadorvisual se iluminan 'DELAY','BAKE',y 'HOLD'. Seleccionela temperaturade 'KeepWarm'.La temperaturapara 'Keep Warm' puedeser programada de 63°a 90°C (145° a 190° F).Oprima u oprimay mantengaoprimida la tecla A o V. Cuandocualquierade estasdos teclasse oprime por primera vez,'75°,('170°') se iluminard. * Optima la tecla A para aumentar la temperatura. * Optima la tecla Y para disminuir la temperatura. Cuando el tiempo diferido ha expirado: 'WARM'y la temperaturase desplegar_nen el indicador cuando el ciclo 'KeepWarm' est(!activo. * 'DELAY'se apagar& Para cancelar 'Keep Warm': . Se despliegael tiempo de horneado. * Se despliega'BAKE'y 'HOLD'. Para programar un tiempo diferido cuando ya se ha programado 'Cook & Hold': 1. Oprimala tecla 'DELAY'. DELAY 1. 0prima la tecla 'CANCEL'(Cancelar). * 'DELAY'destella. 2. Retireel alimento del horno. CANCEL * '00:00'se despliegaen el indicadorvisual. 2. Oprimala tecla A o V para programarel tiempo diferido. o Notas." • Paramantenerla calidad Optimade los alimentos,los alimentoscocinadosen el homo deben ser mantenidos calientespor no m_s de 1 a 2 horas. Despu(!sde cuatro segundos, 'DELAY' permanecer_iluminado para recordarleque se ha programadoun ciclo de horneadodiferido. • Paraevitar que losalimentosse sequen,c_bralos levemente con papel de aluminioo una tapa. Cuando ha expirado el tiempo diferido y el homo comienza a funcionar: • Para calentar panecillos: . Se desplegar_el tiempo de horneado. cubra levementelos panecilloscon papel de aluminio y col0quelosen el horno. * 'DELAY'se apagard. * 'BAKE'y 'HOLD' permanecer_niluminados. Para cancelar: optima 'KEEPWARM' y la tecla A para programar 75° C (170° F]. CANCEL Optima la tecla 'CANCEL'. caliente durante 12 a 15 minutos. * Todas lasfunciones de horneadocontroladaso no por el temporizadorser_n canceladas. • Para calentar platos: coloque 2 pilas de cuatro platos cada una en el horno. * La hora del dfavolver_a desplegarseen el indicadorvisual. oprima 'KEEPWARM' y la tecla A para programar 75° C (170° F). Importante: * NO usehorneadodiferido para los artfculosque necesitan precalentamientodel homo, tal como pasteles,galletasy panes. caliente los platos durante cinco minutos,apague el homo y deje los platos en el homo durante 15 minutosm_s. * No use horneadodiferido diferido si el horno ya est_ caliente. 'Keep Warm' (Mantener usesolamenteplatos resistentesal homo.Verifique con el fabricante. caliente) no coloque los platos calientessobre una superficiefrfa puesel cambio r_pido de temperaturapuede causarfisuras superficiales. Paramantener calientesen forma seguraalimentoscalienteso para calentar panesy platos. Para programar 'Keep Warm': 1. 0prima la tecla 'KEEPWARM'. ,W_ 63 'Broil' (Asar a la parrilla) Paraun dorado Optimo,precalienteel elementode asara la parrilla durante 3 a 4 minutosantes de colocar el alimento. 4. 5. Coloqueel alimento en el homo. Deje la puerta abierta aproximadamente10 cm (cuatro pulgadas)(el primertope). 6. De vuelta a la came una vez aproximadamentea mitad de la cocciOn. 7. Cuandoel alimento este cocinado,oprima la tecla 'CANCEL' (Cancelar). Retireel alimento y la asaderadel homo. • La hora del dia volver_ a desplegarseen el indicadorvisual. Para programar 'Broil': 1. Paracomenzar,optima la tecla 'BROIL'. BROIL Notas: • 'BROIL'destella. • Paramejores resultadoscuando asea la parrilla, useuna asadera dise_adapara asara la parrilla. • "SEt'(Establacer)se despliegaen el indicador. 2. CANCEL Oprimala tecla A para programarasar a la parrilla 'HI' (Alto) oprima la tecla V para programarasarla parrilla "LO'(Bajo). • En el indicadorvisual se desplegar_"HI'o "LO'. • Lostiempos de asara la parrilla aumentar_ny el dorado ser_ m_s claro si el electrodomesticoes instalado en un circuito de 208voltios. • Selecciones'HI Broil' (290 °C [550°F]) paraasadoa la parrilla normal.Seleccione'LO Broil' (230 °C [450°F]) para asara la parrilla contemperatura baja alimentosque deben ser cocinadospor m_stiempo,tal como la came de ave. • 'HI' se usa para la mayoriade losasados a la parrilla. Use 'LO Broil' cuandoasea la parrilla alimentosque necesitancocciOn prolongada. La temperaturainferior permite que el alimento se cocine hasta quedar bien asadosin dorarsedemasiado. • Paracambiarla temperaturade/homo duranteb asara la parrilla, optima la tecla 'BROIL', luego oprima la tecla A o V para cambiar el ajuste de asadoentre 'LO'y 'HI'. 3. Despuesde cuatro segundos,el homo comenzarda funcionar. • 'BROIL'continuard iluminado. • Lostiempos de asadoa la parrilla pueden ser m_s largoscuando se seleccionala temperaturam_s baja de asara la parrilla. • La mayoriade los alimentosdebenser dadovuelta cuandoest_ a mitad del tiempo de asar. Tabla de asar a la parrilla Came de res Biftec, 2,5cm (1") 4 Hamburguesas,1,9cm (3/4") de grosor A medioasar Bien asado Bien asado 15 - 18 minutos 4 4 4 4 4 Bien asado Bien asado Tibio 6 - 10 minutos 22 - 26 minutos 8 - 12 minutos 3 o/4 Bien asado 'LO Broil' 28 - 38 minutos 4 Desmenuzado 10 - 15 minutos 4 Desmenuzado 8 - 12 minutos Came de cerdo Tocino Chuletas,2,5cm (1") JamOn- Rebanadasprecocidas, 1,3cm (1/2") de grosor Came de ave Presasde polio Mariscos Bistecsde pescado,con mantequilla, 2,5cm (1") de grosor Filetesde pescado,1,3cm (1/2") de grosor La posiciOnde la parrilla superiores #5. Importante: Estatabla es sOIouna guia. Lostiempos puedenvariar con el tipo de alimento que se est_ cocinando. 64 19 - 23 minutos 15- 18 minutos Cierre Autom tico/ Ajuste Mode Sab tico del homo El homo se apagar_ autom_ticamentedespu(!sHe12 horassi usted Io deja accidentalmenteencendido. EstacaracteristicaHeseguridad puede ser desactivada. La exactitud de las temperaturasdel homo es cuidadosamente probada en la f_brica. Esnormal notar alguna diferencia entre la temperaturade homeadoentre un homo nuevoy un homo antiguo. Conel cotter del tiempo, la temperaturadel homo puede cambiar. Para cancelar el cierre autom_tico de 12 horas y dejar que el homo funcione continuamente durante Usted puedeajustar la temperaturadel homo si consideraque su homo no est_ homeandoo dorando en forma correcta. Paradecidir cuanto debe cambiar la temperatura,programela temperaturadel horno a 15° C (25° F) m_salta o m_s baja que la temperatura indicadaen sus recetas,luego hornee. Los resultadosde la "prueba" pueden darle una idea de cuanto ajustar la temperatura. 72 horas: ]. Programeel horno para hornear (verpdgina 61). 2. Optima y mantengaoprimida la tecla 'CLOCK' (Reloj)durantecinco segundos. CLOCK • 'SAb'se desplegar_y destellar_durante cinco segundos. Ajuste de la temperatura • 'SAb'se desplegar_continuamentehasta que se desactiveo hastaque transcurra el limite de 72 horas. 1. Oprimala tecla 'BAKE'. * La funcidn 'BAKE'esla Onicaque sepuede utilizarcon el mode sabbtico.Lasdembsfunciones(temporizador,mantenercaliente, autolimpieza,etc.) se bloquearbnduranteel mode sabbtico. 3. Optimay mantengaoprimida la tecla 'BAKE' durante varies segundoso hasta que 0° aparezcaen el indicadorvisual. est_i active: CANCEL 4. • 'BAKE'se apagar_en el indicadorvisual. el mode sab_tico: 5. 1. Oprima la tecla 'CLOCK' durante cinco segundos. Oprimala tecla A o V para ajustar la temperatura. Cadavez que se oprimeuna tecla, la temperaturacambia en 3° C (5° F). La temperaturadel homo puedeser aumentadao disminuidaen 3° a 20° C (5° a 35° F). • No se oir_ ninguna sepalsonora. Para cancelar BAKE Si la temperaturadel homo ha side previamente ajustada,el cambio aparecer_en el indicadorvisual. Perejemplo,si la temperaturadel homo rue reducida en 8° C (15° F) el indicador mostrar_'- 8°,('-15°'). Para cancelar 'Bake' cuando el mode sab_tico Oprimala tecla 'CANCEL' (Cancelar). del homo: 2. Programe285° C (550° F)oprimiendo la tecla A. • 'BAKE'(Horneado)tambien se desplegar_si se est_ usandoun ciclo de homeado cuandoel homo est_ en modesab_tico. CLOCK O 2. de la temperatura La hera del dia reaparecer_autom_ticamenteen el indicador visual. No necesitareajustarla temperaturadel homo si hay una falla o interrupci0n de energiael(!ctrica. Lastemperaturasde asara la parrilla,mantenercaliente y limpiezano pueden set ajustadas. Despuesde 72 horas,el modesab_ticoterminar& • 'SAb' destellar_durante cinco segundos. • La hera del dia reaparecer_en el indicadorvisual. Notas: • El mode sab_ticopuede ser activadoen cualquiermemento, est(!o no el homo encendido. • Cuandocomienceel modesabdtico no se emitird la sepal sonorade precalentamiento. • El mode sab_ticono puede ser activadosi lasteclas est_n bloqueadaso cuando la puerta est_ bloqueada. • Cuandoel mode sab_ticoest_ active,todos los avisos,mensajes y se_alessonorasest_n desactivadas. • Si el homo est_ horneandocuandose programae mode sab_tico, 'BAKE'se apagar_al final del ciclo de horneado. No se emitir_n se_alessonoras. El bloqueo autom_tico de la puertano funciona durante el mode sab_tico. • Si oprime la tecla 'CANCEL'se cancelardun ciclo 'Bake',sin embargoel control permanecerden modesab_tico. • Si se deseamantener la luzdel homo encendidaduranteel mode sab_tico,(!stadebeser activadaantes de que comience el modesab_tico. • Si falla la corriente el(!ctrica,cuandovuelva la energia el homo se activarden modesab_ticocon 72 horas restantesy ningOn ciclo active. 65 Parrillas del homo Cambio de la temperatura de °F/°C 1. El ajuste de f_brica de la medidade temperaturaes Fahrenheit. 2. Paracambiar el ajuste,oprimay mantengaoprimidas lasteclas 'CANCEL' y 'BAKE' (Horneado)al mismotiempo durantetres segundos. 3. Escuchar_una sepalsonoray el ajusteactual (°F o °C) se desplegar_en la pantalla.(Si no se realizaningOncambio,la estufaregresar_al ajuste actual despuesde 30 segundos). El homo tiene dos parrillas. Todas las parrillastienen un borde con tope de enganche. /4. Paracambiar el ajuste,oprimala tecla Ai,o Y. Oprfmala nuevamentepara regresaral ajuste anterior. Esperecinco segundosy el ajuste se guardar& Para retirar la parrilla: 1. Tire de la parrilla derechohacia afuerahasta que se detengaen la posici0n del tope de enganche. Ventilador del homo Elventilador de enfriamientose encender_autom_ticamentedurante las asadosa la parrilla y algunasfunciones de horneado. Se usa para mantenerfrfas las piezasinternas del panel de control. El ventilador se apagar_autom_ticamentecuando las piezasse hayan enfriado. Elventilador puede continuar operandoalandespuesque se hayaapagado el horno. Estoes normal. 2. Levanteel frente de la parrilla y tire de la parrilla haciaafuera. Para reinstalar la parrilla: 1. Coloquela parrilla en los soportesde la parrilla en el homo. 2. Incline levementehacia arriba el extremodelantero;deslice la parrilla hacia atr_s hasta que pasesobrelos topes de enganche. 3. Baje el frente de la parrilla y deslfcelahacia adentrodel horno. Respiradero del homo Cuandoel horno est_ en uso, el _rea cerca del respiraderopuede calentarseIo suficiente como para causar quemaduras.Nunea bloquee la abertura del respiradero. No cubra una parrilla completa con papel de aluminio ni coloque papel de aluminio en el panel inferior del homo. Se afectar_n los resultadosdel horneado y se puede da_ar el panel inferior del homo. El respiraderodel homo est_ ubieado en la parte trasera de la superficie de cocci6n. Posiciones de la parrilla RESPIRADERO PARRILLA5: Use para tostar pan, asaralimentos delgadosno grasos. DEL HORNO No coloque pl_sticos cerca de la abertura del respiraderopues el calor que sale puede deformar o derretir el pl_stico. Oprimael interruptor de la 'Oven Light' en el panel del homo) de control para encendery (Luz apagar la luz del homo. La luz del homo s01ose puede encenderusandoel 'Oven Light' interruptor. Panel inferior del homo PARRILLA4: Use para la mayorfade losasados. ............. 5 4 ....... 3 2 PARRILLA3: Use para la mayoriade losalimentos horneadosen bandejaspara galletas o para panecillos,tortas de capas,alimentosde convenienciacongelados,homeadoen general con una parrilla. 1 PARRILLA2: Use para tortas, pastelitos,pasteles,cacerolas,asados peque_osde came. __) Oven PARRILLA1: Use para pastelitos,tortas de 9" x 13"(22,86cm x 33,02cm), pastelesy asadode cortesgrandes de came y polio. Light HORNEADOCON PARRILLASMULTIPLES: Dos parrillas: Use la posici0n 2 y 5, o 1 y 4. Protejael panel inferior del horno contra derrames,especialmente azucaradoso acidicos,pues pueden descolorarla porcelana esmaltada.Use el utensiliode tama_o correcto a fin de evitar derrames.No eoloque utensilios ni papel de aluminio directamente en la parte inferior del homo. Importante:Nunea coloqueutensiliosdirectamenteen el fondo del horno. Horneado de pasteles de capas en [los parrillas Para obtenermejores resultados cuando hornea pastelesen dos parrillas, use la posici0n 2 y 5. Coloquelos pastelesen las parrillas como se muestra. 66 Ga tia f se lci Lo que no cubren estas garant as 1. Situacionesy da_os resultantesde cualquierade lassiguientessituaciones: a. Instalaci0n,entregao mantenimientoinapropiados. b. Cualquierreparaci0n,modificaci0n,alteraci0n o ajuste no autorizadospor el fabricanteo taller de servicioautorizado. c. Mal uso,abuso, accidentes,uso no razonableo hechosfortuitos. d. Corriente,voltaje,suministro electricoo suministro de gas incorrectos. e.Ajuste inadecuadode cualquiercontrol. 2. Las garantiasquedan nulassi los n0meros de serie originaleshan sido retirados, alteradoso no se pueden determinar fdcilmente. 3. Bombillas,filtros de agua y filtros de aire. 4. Los productoscompradospara uso comercialo industrial. 5. El costo del servicioo Ilamadade serviciopara: a. Corregirerroresde instalaci0n.Para los productosque requieranventilaci0n,se deben usarconductos de metal rigido. b. Instruir al usuarioen el usoadecuadodel producto. c. Transportedel electrodomesticoal establecimientode servicioy de regreso. 6. Cualquierperdida de alimentosdebido a fallas del refrigeradoro congelador. 7. Costosde viaje y transporte de servicio en _reasremotas. 8. Estagarantfa no se aplicafuera de los EstadosUnidosy Canad&P0ngaseen contacto con su distribuidor para determinar si se aplica cualquierotra garantia. . LA 0NICA Y EXCLUSIVASOLUCIONPARAEL CLIENTEBAJOESTAGARANTiALIMITADAES LA REPARACION DELPRODUCTOSEGONSE INDICAAQUi. LAS GARANTiASIMPLiCITAS, INCLUYENDOLAS GARANTiASDE COMERCIALIZACION 0 DEAPTITUDPAPAUN PROPOSITO ENPARTICULAREST,_N LIMITADASA UN ANO 0 AL PERiODODE TIEMPOMiNIMO PERMITIDOPORLA LEY. MAYTAGCORPORATION NO SERA RESPONSABLE DEDANOSINCIDENTALES 0 CONSECUENTES. ALGUNOSESTADOSY PROVlNCIASNO PERMITENLA EXCLUSION0 LIMITACIONDEDAle, lOSINCIDENTALES 0 CONSECUENTES 0 LA LIMITACIONDE LA DUPACIONDE LASGARANTiASIMPLiCITASDE COMERCIALIZACION 0 APTITUD,PORLO QUE ESTASEXCLUSIONES 0 LIMITACIONES PUEDENNOAPLICARSEEN SUCASO.ESTA GARANTiALE OTORGADERECHOS LEGALES ESPECiFICOS. USTEDTAMBII_NPUEDETENER OTROSDERECHOS QUEVARiAN DEUN ESTADOA OTRO0 DEUNA PROVINCIAA OTPA. Form No. A/01/06 Part No. 8113P610-60 Los da_osconsecuenteso incidentalessufridos por cualquierpersonacomo resultado del incumplimiento de esta garantia. En algunosestadosno se permite la exclusiono limitaci0n de da_osconsecuenteso incidentales,por Io tanto la limitaci0n o exclusion anterior puede no aplicarseen su caso. Si necesita servicio Primerorevise la secci0n de Iocalizaci0ny soluci0n de averfasen su gufa de usoy cuidado o Ilameal distribuidor donde adquiri0 el electrodomestico.Tambie!npuede Ilamara Maytag Services,LLC,Atenci0n al cliente, al 1-800-688-9900en EE.UU.y al 1-800-688-2002en Canad_para ubicar a un agente de serviciocalificado. • Aseg0resede conservarel comprobantede compra para verificar el estado de la garantia.Consultela secci0nsobre la GARANTiApara mayor informaci0nsobrelas responsabilidadesdel propietario para obtenerserviciobajo la garantfa. • Si el distribuidor o la compa_fade servicio no pueden resolverel problema,escribaa MaytagServices,LLC, Attn: CAIR:_Center,P.O.Box2370,Cleveland,TN 37320-2370o Ilameal 1=800=688=9900en EE.UU.y al 1=800=688=2002en Canad& • Lasguias del propietario,manualesde servicioe informaci0nsobre las piezaspueden solicitarse a MaytagServices,LLC,Atenci0n al cliente. Notas." CuandoIlameo escribaacerca de un problemade servicio, por favor incluya la siguiente informaci0n: a.Su nombre,direcci0n y n0merode tele!fono; b. N0mero de modeloy n0merode serie; c. Nombre y direcci0n de su distribuidor o tecnico de servicio; d. Una descripci0nclaradel problemaque est_ experimentando; e.Comprobantede compra (recibo de compra). @2006 Maytag Appliances Sales Co. Litho U.S.A.-
 1
1
-
 2
2
-
 3
3
-
 4
4
-
 5
5
-
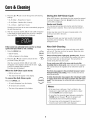 6
6
-
 7
7
-
 8
8
-
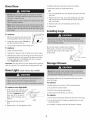 9
9
-
 10
10
-
 11
11
-
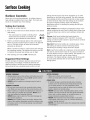 12
12
-
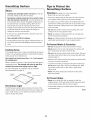 13
13
-
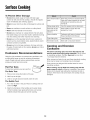 14
14
-
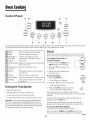 15
15
-
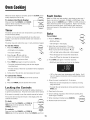 16
16
-
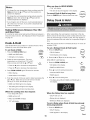 17
17
-
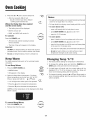 18
18
-
 19
19
-
 20
20
-
 21
21
-
 22
22
-
 23
23
-
 24
24
-
 25
25
-
 26
26
-
 27
27
-
 28
28
-
 29
29
-
 30
30
-
 31
31
-
 32
32
-
 33
33
-
 34
34
-
 35
35
-
 36
36
-
 37
37
-
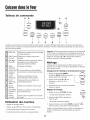 38
38
-
 39
39
-
 40
40
-
 41
41
-
 42
42
-
 43
43
-
 44
44
-
 45
45
-
 46
46
-
 47
47
-
 48
48
-
 49
49
-
 50
50
-
 51
51
-
 52
52
-
 53
53
-
 54
54
-
 55
55
-
 56
56
-
 57
57
-
 58
58
-
 59
59
-
 60
60
-
 61
61
-
 62
62
-
 63
63
-
 64
64
-
 65
65
-
 66
66
-
 67
67
-
 68
68


Maytag CES3760AAA Manual de usuario
- Categoría
- Cocinas
- Tipo
- Manual de usuario
- Este manual también es adecuado para
en otros idiomas
- français: Maytag CES3760AAA Manuel utilisateur
- English: Maytag CES3760AAA User manual