Home Decorators Collection 28025-HBOS Instrucciones de operación
- Tipo
- Instrucciones de operación

THANK YOU
USE AND CARE GUIDE
1-800-986-3460
WWW.HOMEDEPOT.COM/HOMEDECORATORS
Item #1006 355 017
Model #28025-HBOS
Questions, problems, missing parts? Before returning to the store,
call Home Decorators Collection Customer Service
8 a.m. - 7 p.m., EST, Monday - Friday, 9 a.m. - 6 p.m., EST, Saturday
We appreciate the trust and confidence you have placed in Home Decorators Collection through the purchase of this 4-light LED vanity light. We
strive to continually create quality products designed to enhance your home. Visit us online to see our full line of products available for your
home improvement needs. Thank you for choosing Home Decorators Collection!
4-LIGHT LED VANITY LIGHT

Care and Cleaning.......................................................................7
Troubleshooting...........................................................................7
FCC Statement............................................................................7
This warranty shall not apply to any product that is found to have been improperly installed, set up, or used in any way not in accordance
with the instructions supplied with the product. This warranty shall not apply to a failure of the product as a result of an accident, misuse,
abuse, negligence, alteration, faulty installation, or any other failure not relating to faulty material or workmanship. This warranty shall
not apply to the nish on any portion of the product, such as surface and/or weathering, as this is considered normal wear and tear. The
manufacturer does not warrant and specically disclaims any warranty, whether express or implied, of tness for a particular purpose,
other than the warranty contained herein. The manufacturer specically disclaims any liability and shall not be liable for any consequential
or incidental loss or damage, including but not limited to any labor/expense costs involved in the replacement or repair of said product.
2
Table of Contents
Safety Information
CAUTION:
Before starting installation of this xture or
removal of a previous xture, disconnect the power by turning
off the circuit breaker or by removing the fuse at the fuse box.
Warranty
WHAT IS COVERED
WHAT IS NOT COVERED
Contact the Customer Service Team at 1-800-986-3460 or visit www.homedepot.com/homedecorators.
Table of Contents.........................................................................2
Safety Information.......................................................................2
Warranty......................................................................................2
Pre-Installation............................................................................3
Planning Installation..................................................................3
Tools Required...........................................................................3
Hardware Included....................................................................3
Package Contents......................................................................4
Installation...................................................................................5
IMPORTANT:
Inspect the wire insulation for any cuts,
abrasions, or exposed copper that have occurred during
shipping. If there is a defect in the wire, do not continue the
assembly process. Please call our Customer Service Team at
1-800-986-3460.
IMPORTANT:
Do not install this lighting system in a wet
locations.
□Consult a qualified electrician for installation of this xture.
□Please reference your Item #1006 355 017 or UPC 773546310055.
□Keep your receipt and these instructions for proof of purchase.
□If you have any non-electrical questions about this xture, please
contact our Customer Service Team at 1-800-986-3460 or visit
www.homedepot.com/homedecorators.
LIMITED WARRANTY
The manufacturer warrants this lighting xture to be free from defects in materials and workmanship for a period of three (3) years from
date of purchase. This warranty applies only to the original consumer purchaser and only to products used in normal use and service. If this
product is found to be defective, the manufacturer’s only obligation, and your exclusive remedy, is the repair or replacement of the product
at the manufacturer’s discretion, provided that the product has not been damaged through misuse, abuse, accident, modication, alteration,
neglect, or mishandling.
□Read all the instructions before assembling and installing.

3
Pre-Installation
PLANNING INSTALLATION
Read all instructions before assembly and installation. To avoid damaging this product, assemble it on a soft, non-abrasive surface, such as
carpet or cardboard. Inspect each part for defects that may have occurred during shipping. Keep your receipt and these instructions for
proof of purchase.
TOOLS REQUIRED
HARDWARE INCLUDED
NOTE: Hardware not shown to actual size.
Safety goggles
Wire strippers
Phillips screwdriver
LadderWire cutters
Flathead screwdriver
junction box screw
WWW.HOMEDEPOT.COM/HOMEDECORATORS
Please contact 1-800-986-3460 for further assistance.
DDCCAA BB
Part Description Quantity
AA Wire nut 3
BB 2
CC Ground screw 1
DD Mounting screw 4
EE Backplate 1
FF Tapping screw 2
GG Anchor 2
HH Fixing screw 8
II Hexagon screwdriver 1
EE
GGFF HH II

4
Pre-Installation (continued)
PACKAGE CONTENTS
Part Description Quantity
A Fixture body 1
B Bubble glass 4
A
B

5
Installation
WWW.HOMEDEPOT.COM/HOMEDECORATORS
Please contact 1-800-986-3460 for further assistance.
EE
GG
BB
FF
1Installing the bubble glass 2Installing the universal crossbar
WARNING: Turn off the power at the main fuse box.
A
B
II
Glass hole
HH
□
□
□
□Remove the backplate (EE) from the xture body (A). Using
the backplate (EE) as a guide, mark on the wall with the
junction box (not included) the locations for anchors (GG) with
a pencil (not included).
□Drill a 1/4 in. hole at marks, then insert anchors (GG). Secure
the backplate (EE) to the junction box with the junction box
screws (BB).
□Align the keyholes in the backplate (EE) with the anchors
(GG) and insert the tapping screws (FF).
Carefully unpack the xture. Lay out all the parts on a clean
surface.
Attach the bubble glass (B) to the xture body (A). Then tighten
the xing screw (HH) by using the hexagon screwdriver (II).
The glass hole must be installed facing the direction of the
xture body (A).

EE
DD
A
Installation (continued)
3
□Fasten the open end of the ground wire (bare copper or green
wire) to the ground wire from the junction box or the ground
screw (CC) on the backplate (EE).
□Connect the black wire of the power supply to the black
wire of the xture and connect the white wire of the power
supply to the white wire of the xture.
□
Making the electrical connections 4Installing the xture body
NOTE: Always use the wire nuts (AA) to connect wires and
push all excess wires and connections back into the junction
box (not included).
Connect the xture wires as follows:
Attach the xture body (A) to the backplate (EE). Then
tighten the mounting screws (DD) by using the Phillips
screwdriver (not included).
EE
CC
AA
WHITE WIRE WHITE WIRE
FROM FIXTURE
FROM FIXTURE
FROM FIXTURE
GROUND WIRE
BLACK WIRE BLACK WIRE
GROUND WIRE
FROM HOUSE
FROM HOUSE
FROM HOUSE
6
B

7
Care and Cleaning
□Clean the light xture carefully with a soft, dry cloth. Do not use any cleaners with chemicals, solvents, or harsh abrasives.
Troubleshooting
Problem SolutionPossible Cause
The product will not light.
The fuse blows or the circuit breaker trips
when the light is turned on.
The wires are connected mistakenly or
there is a bad connection.
□Check and reconnect the wires.
The power is off. □Ensure that the power supply is turned on.
The circuit breaker is off. □Ensure that the circuit breaker is set to the
ON position.
There are too many items on one circuit.
□Unplug the other items on the circuit.
□Contact a qualied electrician or call
the Customer Service Team at
1-800-986-3460.
WWW.HOMEDEPOT.COM/HOMEDECORATORS
Please contact 1-800-986-3460 for further assistance.
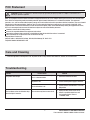
FCC Statement
Reorient or relocate the receiving antenna.
Increase the separation between the equipment and receiver.
Connect the equipment into an outlet on a circuit different from that to which the receiver is connected.
Consult the dealer or an experienced radio TV technician for help.
NOTE: This equipment has been tested and found to comply with the limits for a Class B digital device, pursuant to Part 15 of the FCC Rules.
These limits are designed to provide reasonable protection against harmful interference in a residential installation. This equipment
generates, uses, and can radiate radio frequency energy and, if not installed and used in accordance with the instructions, may cause harmful
interference to radio communications. However, there is no guarantee that interference will not occur in a particular installation. If this
equipment does cause harmful interference to radio or television reception, which can be determined by turning the equipment off and on,
the user is encouraged to try to correct the interference by one or more of the following measures:
Company Name: Eurofase Inc.
Company address: 60 Industrial Parkway, Unit 802, Cheektowaga, NY 14227-2713
Telephone Number: 905.695.2055 x 259
WARNING: Changes or modications to this unit not expressly approved by the party responsible for compliance could void the user's
authority to operate the equipment.

Questions, problems, missing parts? Before returning to the store,
call Home Decorators Collection Customer Service
8 a.m. - 7 p.m., EST, Monday - Friday, 9 a.m. - 6 p.m., EST, Saturday
1-800-986-3460
Retain this manual for future use.
WWW.HOMEDEPOT.COM/HOMEDECORATORS

GRACIAS POR TU COMPRA
GUÍA DE USO Y MANTENIMIENTO
Artículo núm. 1006 355 017
Modelo núm. 28025-HBOS
1-800-986-3460
WWW.HOMEDEPOT.COM/HOMEDECORATORS
¿Preguntas, problemas o piezas faltantes? Antes de regresar a la tienda,
llama al servicio al cliente de Home Decorators Collection
de lunes a viernes, de 8:00 a.m. a 7:00 p.m. (hora estándar del Este),
y los sábados de 9:00 a.m. a 6:00 p.m. (hora estándar del Este)
Apreciamos la confianza que has depositado en Home Decorators Collection al comprar esta instalación fija de lámpara de tocador con 4 luces
LED. Nos esforzamos para continuamente crear productos de calidad diseñados para mejorar tu hogar. Visítanos por Internet para ver nuestra
ínea completa de productos disponibles para las necesidades de mejoras de tu hogar. ¡Gracias por elegir Home Decorators Collection!
LÁMPARA DE TOCADOR CON 4 LUCES LED

2
Tabla de contenido
Información de seguridad
Garantía
QUÉ CUBRE LA GARANTÍA
QUÉ NO CUBRE LA GARANTÍA
Comuníquese con el equipo de servicio al cliente al 1-800-986-3460 o visite www.homedepot.com/homedecorators.
Tabla de contenido......................................................................2
Información de seguridad...........................................................2
Garantía.......................................................................................2
Pre-Instalación............................................................................3
Planicar la instalación.............................................................3
Herramientas necesarias..........................................................3
Herrajes incluidos......................................................................3
Contenido del paquete...............................................................4
Instalación...................................................................................5
□Contrata a un electricista calicado para instalar esta lámpara.
□Usa como referencia el núm. de SKU 1006 355 017
o UPC 773546310055.
□Conserva el recibo y estas instrucciones como comprobante
de compra.
□Si tienes alguna pregunta sobre esta lámpara, no relacionada
con la instalación eléctrica, por favor llama a nuestro equipo
de servicio al cliente al 1-800-986-3460 o visita
www.homedepot.com/homedecorators.
GARANTÍA LIMITADA
El fabricante garantiza que esta lámpara no presentará defectos materiales ni de fabricación por un período de tres (3) años a partir de la
fecha de compra. Esta garantía es válida sólo para el comprador original y cubre solamente los productos en uso y funciones normales. Si
se descubre algún defecto en este producto, la única obligación y solución exclusiva del fabricante, a criterio del mismo, será reparar o
reemplazar el producto siempre y cuando el defecto no sea resultado de un mal uso, abuso, accidente, modicaciones, alteraciones
negligencia o manejo indebido.
Esta garantía no cubre ningún producto instalado, congurado o usado incorrectamente sin seguir las instrucciones adjuntas al producto.
Esta garantía no cubre fallas del producto a consecuencia de un accidente, mal uso, abuso, negligencia, modicaciones o instalaciones
defectuosas, o cualquier otra falla no relacionada con defectos materiales o de fabricación. Esta garantía no se aplica al acabado de
ninguna parte del producto, como el de la supercie, ni al deterioro por condiciones ambientales, ya que eso se considera un desgaste
normal. El fabricante no garantiza y rechaza especialmente cualquier garantía, expresa o implícita, de idoneidad para un propósito en
particular, distinta de la garantía indicada aquí. El fabricante se exime especícamente de cualquier obligación y no es responsible de
daños o pérdida directa o indirecta, incluidos cualquier costo de mano de obra o gastos relacionados con el reemplazo o reparación de
dicho producto.
□Lee todas las instrucciones antes de ensamblar e instalar.
Antes de comenzar a instalar esta lámpara o
quitar la anterior, corta la electricidad apagando el cortacircuitos
o retirando el fusible correspondiente en la caja de fusibles.
PRECAUCIÓN:
Revisa que el aislamiento de los cables no
haya sufrido ningún corte, abrasión ni tenga lamentos de
cobre expuestos debido al envío. Si hay un defecto en el cable,
suspende el ensamblaje. Llama a nuestro equipo de servicio
al cliente al 1-800-986-3460.
IMPORTANTE:
No instales este sistema de iluminación
en lugares húmedos.
IMPORTANTE:
Declaración de FCC....................................................................7
Mantenimiento y limpieza...........................................................7
Solución de problemas................................................................7

3 WWW.HOMEDEPOT.COM/HOMEDECORATORS
Para obtener asistencia, llama al 1-800-986-3460.
Pre-Instalación
PLANIFICAR LA INSTALACIÓN
Lee todas las instrucciones antes de ensamblar e instalar. Para evitar daños al artículo, ensámblalo sobre una supercie suave, no abrasiva,
como una alfombra o cartón. Verica que ninguna de las partes haya sufrido daños durante el envío. Conserva el recibo y estas instrucciones
como comprobante de compra.
HERRAMIENTAS NECESARIAS
HERRAJES INCLUIDOS
NOTA: No se muestra el tamaño real de los herrajes.
Gafas de seguridad
Pelacables
Destornillador Phillips
EscaleraCortacables
Destornillador de cabeza plana
8HH Tornillo de jación
3
2
1
4
1
FF Tornillos autoenroscante 2
GG Anclaje 2
GGFF
AA Tuerca para cable
BB Tornillo de la caja eléctrica
CC Tornillo a tierra
DD Tornillo de montaje
EE Placa posterior
Partes Descripción Cantidad
II Destornillador hexagonal 1
DDCCAA BB EE
HH II

4
Pre-Instalación (continuación)
CONTENIDO DEL PAQUETE
A
B
B Pantalla de vidrio de burbujas 4
A Cuerpo de la instalación 1
Partes Descripción Cantidad

WWW.HOMEDEPOT.COM/HOMEDECORATORS
Para obtener asistencia, llama al 1-800-986-3460.
5
Instalación
Cómo ensamblar la placa posterior
Desconecta la electricidad en la caja
principal de fusibles.
ADVERTENCIA:
1 2
EE
GG
BB
FF
HH
A
B
II
Cómo instalar la pantalla de vidrio
de burbujas
□Fija la pantalla de vidrio de burbujas (B) al cuerpo de la
lámpara (A). Después aprieta el tornillo de jación (HH)
usando el destornillador hexagonal (II).
□Desempaca la lámpara con cuidado. Coloca todas las piezas
sobre una supercie limpia.
Oricio de la pantalla
de vidrio
□El oricio de la pantalla de vidrio debe estar de frente al
cuerpo de la lámpara (A).
□
□Taladra un oricio de 1/4 plg (6.4 mm) en las marcas e
inserta los anclajes (GG). Asegura la placa posterior (EE) a la
caja de conexiones con los tornillos de la caja eléctrica (BB).
□Alinea los oricios en la placa posterior (EE) con los anclajes
(GG) e inserta los tornillos autorroscantes (FF).
Retira la placa posterior (EE) del cuerpo de la lámpara (A).
Usando la placa posterior (EE) como guía, marca en la pared
con la caja de conexiones (no incluida) las ubicaciones de
los anclajes (GG) con un lápiz (no incluido).

6
EE
DD
A
B
Cómo montar el cuerpo de la instalación
Instalación (continuación)
Cómo hacer las conexiones eléctricas
34
EE
CC
AA
Conecta los cables de la lámpara de la manera siguiente:
CABLE BLANCO CABLE BLANCO
DE LA INSTALACIÓN
DE LA INSTALACIÓN
CABLE A TIERRA CABLE A TIERRA
CABLE NEGROCABLE NEGRO
DE LA CASA
DE LA CASA
DE LA CASA
□
□
Fija el cuerpo de la lámpara (A) en la placa posterior (EE).
Luego aprieta los tornillos de montaje (DD) con un
destornillador Phillips (no incluido).
Sujeta el extremo libre del cable a tierra (cable verde o de
cobre pelado) al cable a tierra de la caja de conexiones o al
tornillo a tierra (CC) de la placa posterior (EE).
Conecta el cable negro de la fuente de corriente al cable
negro de la lámpara y conecta el cable blanco de la fuente
de corriente al cable blanco de la lámpara.
Usa siempre tuercas para cable (AA) para conectar
los cables y mete todos los cables y las conexiones que
sobresalgan dentro de la caja de conexiones (no incluida).
NOTA: □

7
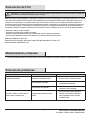
Mantenimiento y limpieza
□Limpia con cuidado la lámpara con un paño suave y seco. No uses limpiadores con químicos, solventes, o productos abrasivos.
Solución de problemas
Problema SoluciónCausa possible
El producto no iluminará.
El fusible se funde o el cortacircuitos se
activa cuando se enciende la luz.
Los cables están erróneamente
conectados o la conexión es mala.
□Revisar y volver a conectar los cables.
La electricidad está apagada. □Asegúrate de que el suministro de
electricidad esté encendido.
El cortacircuitos está apagado. □Verica que el cortacircuitos está en la
posición de “ON” (encendido).
Hay demasiados artículos en un solo
circuito.
□Desconecta otros artículos del circuito.
□Contacta a un electricista calicado o
llama al equipo de servicio al cliente
1-800-986-3460.
WWW.HOMEDEPOT.COM/HOMEDECORATORS
Para obtener asistencia, llama al 1-800-986-3460.
Declaración de FCC
NOTA: Este equipo ha sido comprobado y se determinó que cumple con los límites establecidos para un dispositivo digital Clase B, de acuerdo
con la Parte 15 de las Normas FCC. Estos límites fueron establecidos para dar protección razonable contra la interferencia dañina en uso
residencial. Este equipo genera, usa y puede irradiar energía en frecuencias de radio. De no ser instalado y utilizado de acuerdo con las
instrucciones, puede causar interferencia dañina a comunicaciones radiales. Sin embargo, no hay garantía de que no ocurrirá interferencia
en una instalación particular. Si este equipo causa interferencia perjudicial a la recepción de radio o televisión, que puede determinarse
encendiendo y apagando el equipo, se recomienda al usuario tratar de corregir la interferencia con una o más de las siguientes medidas:
- Reorientar o reubicar la antena receptora.
- Incrementar la distancia entre el equipo y el receptor.
- Conectar el equipo a un tomacorriente de un circuito distinto al que el receptor esté conectado.
- Consultar con un distribuidor o técnico con experiencia en instalaciones de radio/ TV para ayuda.
Nombre de la Compañía : Eurofase Inc.
Domicilio social de la compañía : 60 Industrial Parkway, Unit 802, Cheektowaga, NY 14227-2713
Número de teléfono : 905.695.2055 x 259
PRECAUCIÓN: Los cambios o modicaciones a esta unidad no aprobados expresamente por la parte responsable del cumplimiento
podrían anular la autoridad del usuario para operar el equipo.

1-800-986-3460
WWW.HOMEDEPOT.COM/HOMEDECORATORS
¿Preguntas, problemas o piezas faltantes? Antes de regresar a la tienda,
llama al servicio al cliente de Home Decorators Collection
de lunes a viernes, de 8:00 a.m. a 7:00 p.m. (hora estándar del Este),
y los sábados de 9:00 a.m. a 6:00 p.m. (hora estándar del Este)
Conserva este manual para uso en el futuro.
-
 1
1
-
 2
2
-
 3
3
-
 4
4
-
 5
5
-
 6
6
-
 7
7
-
 8
8
-
 9
9
-
 10
10
-
 11
11
-
 12
12
-
 13
13
-
 14
14
-
 15
15
-
 16
16


Home Decorators Collection 28025-HBOS Instrucciones de operación
- Tipo
- Instrucciones de operación
en otros idiomas
Artículos relacionados
-
Home Decorators Collection 201745A Instrucciones de operación
-
Home Decorators Collection 29436-HBU Instrucciones de operación
-
-
-
-
-
-
Home Decorators Collection HB48023PALED292 Guía de instalación
-
-