
www.dell.com | support.dell.com
Dell™ OptiPlex™ 330
Quick Reference Guide
Model DCSM and DCNE

Notes, Notices, and Cautions
NOTE: A NOTE indicates important information that helps you make better use of
your computer.
NOTICE: A NOTICE indicates either potential damage to hardware or loss of data
and tells you how to avoid the problem.
CAUTION: A CAUTION indicates a potential for property damage, personal injury,
or death.
____________________
Information in this document is subject to change without notice.
© 2007 Dell Inc. All rights reserved.
Reproduction in any manner whatsoever without the written permission of Dell Inc. is strictly
forbidden.
Trademarks used in this text: Dell, the DELL logo, Inspiron, Dell Precision, Dimension, OptiPlex,
Latitude, PowerEdge, PowerVault, PowerApp, and Dell OpenManage are trademarks of Dell Inc.;
Intel, Pentium, and Celeron are registered trademarks of Intel Corporation; Microsoft and Windows
are registered trademarks of Microsoft Corporation.
Other trademarks and trade names may be used in this document to refer to either the entities claiming
the marks and names or their products. Dell Inc. disclaims any proprietary interest in trademarks and
trade names other than its own.
Model DCSM and DCNE
September 2007 P/N DU086 Rev. A00

Contents 3
Contents
Finding Information . . . . . . . . . . . . . . . . . . . . 5
Before You Begin
. . . . . . . . . . . . . . . . . . . . 10
Before Working Inside Your Computer
. . . . . . . 10
Adding and Replacing Parts
. . . . . . . . . . . . . . 11
Setting Up Your Computer
. . . . . . . . . . . . . . . . 13
Installing Your Computer in an Enclosure
. . . . . 13
Setting Up a Home and Office Network
. . . . . . . . 15
Connecting to a Network Adapter
. . . . . . . . . 15
Network Setup
. . . . . . . . . . . . . . . . . . . 16
Connecting to the Internet
. . . . . . . . . . . . . . . 17
Moving Information to a New Computer
. . . . . . . . 19
Setting Up a Printer
. . . . . . . . . . . . . . . . . . . 23
Connecting Two Monitors
. . . . . . . . . . . . . . . . 24
Power Protection Devices
. . . . . . . . . . . . . . . 26
Desktop Computer
. . . . . . . . . . . . . . . . . . . . 28
Front View
. . . . . . . . . . . . . . . . . . . . . 28
Back View
. . . . . . . . . . . . . . . . . . . . . 30
Back Panel Connectors
. . . . . . . . . . . . . . 31
Removing the Computer Cover
. . . . . . . . . . . . . 33
Inside View of Your Computer
. . . . . . . . . . . . . 35

4 Contents
System Board Components . . . . . . . . . . . . . . . 36
Replacing the Computer Cover
. . . . . . . . . . . . . 37
Mini Tower Computer
. . . . . . . . . . . . . . . . . . 38
Front View
. . . . . . . . . . . . . . . . . . . . . 38
Back View
. . . . . . . . . . . . . . . . . . . . . 40
Back Panel Connectors
. . . . . . . . . . . . . . . . . 41
Removing the Computer Cover
. . . . . . . . . . . . . 43
Inside View of Your Computer
. . . . . . . . . . . . . . 45
System Board Components
. . . . . . . . . . . . . . . 46
Replacing the Computer Cover
. . . . . . . . . . . . . 47
Solving Problems
. . . . . . . . . . . . . . . . . . . . 47
Dell Diagnostics
. . . . . . . . . . . . . . . . . . . . . 48
Power Lights
. . . . . . . . . . . . . . . . . . . . . . . 51
Beep Codes
. . . . . . . . . . . . . . . . . . . . . . . 53
System Messages
. . . . . . . . . . . . . . . . . . . . 54
Diagnostic Lights
. . . . . . . . . . . . . . . . . . . . 56
Clearing Forgotten Passwords
. . . . . . . . . . . . . 60
Clearing CMOS Settings
. . . . . . . . . . . . . . . . . 62
Flashing the BIOS
. . . . . . . . . . . . . . . . . . . . 63
Index . . . . . . . . . . . . . . . . . . . . . . . . . . . . . . . 65

Quick Reference Guide 5
Finding Information
NOTE: Some features or media may be optional and may not ship with your
computer. Some features or media may not be available in certain countries.
NOTE: Additional information may ship with your computer.
What Are You Looking For? Find It Here
• A diagnostic program for my
computer
• Drivers for my computer
• Desktop System Software (DSS)
Drivers and Utilities Media
NOTE: The Drivers and Utilities media may be
optional and may not ship with your computer.
Drivers are already installed on your
computer. You can use the media to reinstall
drivers (see the online User’s Guide), to run
the Dell Diagnostics (see "Dell Diagnostics"
on page 48).
Readme files may be included on your media
to provide last-minute updates about
technical changes to your computer or
advanced technical-reference material for
technicians or experienced users.
NOTE: Drivers and documentation updates can
be found at support.dell.com.

6 Quick Reference Guide
• Basic troubleshooting information
• How to run the Dell Diagnostics
• Tools and utilities
• How to set up a printer
Quick Reference Guide
NOTE: This document may be optional and may
not ship with your computer.
NOTE: This document is available as a PDF at
support.dell.com.
• Warranty information
• Terms and Conditions (U.S. only)
• Safety instructions
• Regulatory information
• Ergonomics information
• End User License Agreement
Dell™ Product Information Guide
• How to remove and replace parts
• Specifications
• How to configure system settings
• How to troubleshoot and solve
problems
Dell OptiPlex™ 330 User’s Guide
Microsoft Windows Help and Support Center
1
Click the Windows Vista
Start button
→
Help and Support
→
Dell User and System
Guides
→
System Guides
.
2
Click the
User’s Guide
for your computer.
What Are You Looking For? Find It Here

Quick Reference Guide 7
• Service Tag and Express Service
Code
• Microsoft Windows License Label
Service Tag and Microsoft
®
Windows
®
License
These labels are located on your computer.
• Use the Service Tag to identify your
computer when you use
support.dell.com
or
contact support.
• Enter the Express Service Code to direct
your call when contacting support.
NOTE: As an increased security measure, the
newly designed Microsoft Windows license
label incorporates a missing portion or "hole" to
discourage removal of the label.
What Are You Looking For? Find It Here

8 Quick Reference Guide
• Solutions — Troubleshooting hints
and tips, articles from technicians,
and online courses, frequently
asked questions
• Community — Online discussion
with other Dell customers
• Upgrades — Upgrade information
for components, such as memory,
the hard drive, and the operating
system
• Customer Care — Contact
information, service call and order
status, warranty, and repair
information
• Service and support — Service call
status and support history, service
contract, online discussions with
technical support
• Dell Technical Update Service —
Proactive e-mail notification of
software and hardware updates for
your computer
• Reference — Computer
documentation, details on my
computer configuration, product
specifications, and white papers
• Downloads — Certified drivers,
patches, and software updates
Dell Support Website — support.dell.com
NOTE: Select your region or business segment
to view the appropriate support site.
What Are You Looking For? Find It Here

Quick Reference Guide 9
• Desktop System Software
(DSS) — If you reinstall the
operating system for your
computer, you should also reinstall
the DSS utility. DSS provides
critical updates for your operating
system and support for processors,
optical drives, USB devices, and so
on. DSS is necessary for correct
operation of your Dell computer.
The software automatically detects
your computer and operating
system and installs the updates
appropriate for your configuration.
To download Desktop System Software:
1
Go to
support.dell.com
, select your region
or business segment, and enter your Service
Tag.
2
Select
Drivers & Downloads
and click
Go
.
3
Click your operating system and search for
the keyword
Desktop System Software
.
NOTE: The support.dell.com user interface may
vary depending on your selections.
• How to use Windows
• How to work with programs and
files
• How to personalize my desktop
Windows Help and Support Center
1
To access Windows Help and Support:
• In Windows XP, click
Start
and click
Help
and Support
.
• In Windows Vista™, click the Windows
Vista
s
tart button
→
Help and
Support
.
2
Type a word or phrase that describes your
problem and click the arrow icon.
3
Click the topic that describes your problem.
4
Follow the instructions on the screen.
• How to reinstall my operating
system
Operating System Media
NOTE: The Operating System media may be
optional and may not ship with your computer.
What Are You Looking For? Find It Here

10 Quick Reference Guide
Before You Begin
Before Working Inside Your Computer
Use the following safety guidelines to help protect your computer from
potential damage and to help to ensure your own personal safety.
CAUTION: Before you begin any of the procedures in this section, follow the
safety instructions in the Product Information Guide.
NOTICE: Handle components and cards with care. Do not touch the components
or contacts on a card. Hold a card by its edges or by its metal mounting bracket.
Hold a component such as a processor by its edges, not by its pins.
The operating system is already installed on
your computer. To reinstall your operating
system, use the Operating System disc, and see
the online User’s Guide.
After you reinstall your operating system, use
the Drivers and Utilities disc to reinstall
drivers for the devices that came with your
computer.
Your operating system product key label is
located on your computer.
NOTE: The color of your disc varies based on
the operating system you ordered.
What Are You Looking For? Find It Here

Quick Reference Guide 11
NOTICE: Only a certified service technician should perform repairs on your
computer. Damage due to servicing that is not authorized by Dell is not covered by
your warranty.
NOTICE: When you disconnect a cable, pull on its connector or on its pull-tab, not
on the cable itself. Some cables have connectors with locking tabs; if you are
disconnecting this type of cable, press in on the locking tabs before you disconnect
the cable. As you pull connectors apart, keep them evenly aligned to avoid bending
any connector pins. Also, before you connect a cable, ensure that both connectors
are correctly oriented and aligned.
NOTICE: To avoid damaging the computer, perform the following steps before you
begin working inside the computer.
1
Turn off your computer (see "Turning Off Your Computer" on page 12).
CAUTION: Never apply power to the computer when the cover has been removed.
NOTICE: To disconnect a network cable, first unplug the cable from your computer
and then unplug the cable from the network device.
2
Disconnect all telephone or network cables from the computer.
3
Disconnect your computer and all attached devices from their electrical
outlets.
4
Press the power button to ground the system board.
NOTICE: Before touching anything inside your computer, ground yourself by
touching an unpainted metal surface, such as the metal at the back of the computer.
While you work, periodically touch an unpainted metal surface to dissipate static
electricity, which could harm internal components.
Adding and Replacing Parts
This section provides procedures for removing and installing the components
in your computer. Unless otherwise noted, each procedure assumes that the
following conditions exist:
• You have performed the steps in "Turning Off Your Computer" on page 12
and "Before Working Inside Your Computer" on page 10.
• You have read the safety information in the Dell™
Product Information
Guide
.
• A component can be replaced or—if purchased separately—installed by
performing the removal procedure in reverse order.

12 Quick Reference Guide
Recommended Tools
The procedures in this document may require the following tools:
• Small flat-blade screwdriver
• Small Phillips screwdriver
• Small plastic scribe
Turning Off Your Computer
NOTICE: To avoid losing data, save and close all open files and exit all open
programs before you turn off your computer.
1
Shut down the operating system:
a
Save and close all open files and exit all open programs.
b
In the Microsoft
®
Windows
®
XP operating system
, click
Start
→
Shut
Down
→
Shut down
.
In Microsoft
®
Windows Vista™
, click the Windows Vista Start button
, in the lower-left corner of the desktop, click the arrow in the
lower-right corner of the Start menu as shown below, and then click
Shut Down
.
The computer turns off after the operating system shutdown process is
complete.
2
Ensure that the computer and all attached devices are turned off. If your
computer and attached devices did not automatically turn off when you
shut down your operating system, press and hold the power button for
about 4 seconds to turn them off.

Quick Reference Guide 13
Setting Up Your Computer
Installing Your Computer in an Enclosure
Installing your computer in an enclosure can restrict the airflow and impact
your computer’s performance, possibly causing it to overheat. Follow the
guidelines below when installing your computer in an enclosure:
NOTICE: The operating temperature specifications indicated in this manual
reflects the maximum ambient operating temperature. The room ambient
temperature needs to be a consideration when installing your computer in an
enclosure. For example, if the ambient room temperature is at 25°C (77°F),
depending on your computer’s specifications, you only have 5° to 10°C (9° to 18°F)
temperature margin before you reach your computer’s maximum operating
temperature. For details about your computer’s specifications, see the online User’s
Guide.
• Leave a 10.2 cm (4 in) minimum clearance on all vented sides of the
computer to permit the airflow required for proper ventilation.
• If your enclosure has doors, they need to be of a type that allows at least
30 percent airflow through the enclosure (front and back).

14 Quick Reference Guide
• If your computer is installed in a corner on a desk or under a desk, leave at
least 5.1 cm (2 in) clearance from the back of the computer to the wall to
permit the airflow required for proper ventilation.
NOTICE: Do not install your computer in an enclosure that does not allow airflow.
Restricting the airflow impacts your computer’s performance, possibly causing it to
overheat.

Quick Reference Guide 15
Setting Up a Home and Office Network
Connecting to a Network Adapter
To connect a network cable:
NOTE: Plug the network cable into the network adapter connector on the
computer. Do not plug the network cable into the modem connector on the
computer. Do not plug a network cable into a telephone wall jack.
1
Connect the network cable to the network adapter connector on the back
of your computer.
Insert the cable until it clicks into place, and then gently pull it to ensure
that it is secure.
2
Connect the other end of the network cable to a network device.

16 Quick Reference Guide
Network Setup
Windows XP
The Microsoft
®
Windows
®
XP operating system provides a Network Setup
Wizard to guide you through the process of sharing files, printers, or an
Internet connection between computers in a home or small office.
1
Click the
Start
button, point to
All Programs
→
Accessories
→
Communications
, and then click
Network Setup Wizard
.
2
On the
Network Setup Wizard
welcome screen, click
Next
.
3
Click
Checklist for creating a network
.
NOTE: Selecting the connection method This computer connects directly to the
Internet enables the integrated firewall provided with Windows XP Service Pack 1
(SP1) or later.
4
Complete the checklist and required preparations.
5
Return to the Network Setup Wizard and follow the instructions on the
screen.
network
device
network adapter connector on computer
network cable
network
adapter
connector

Quick Reference Guide 17
Windows Vista
To make changes to your network setup in Microsoft
®
Windows Vista™:
1
Click the Windows Vista Start button, , and then click
Network
→
Network and Sharing Center
.
2
Click
Set up a connection or network
.
3
Select the type of network connection you want to make and follow the
instructions on the screen.
4
When finished, close the Network and Sharing Center.
Connecting to the Internet
NOTE: ISPs and ISP offerings vary by country.
To connect to the Internet, you need a modem or network connection and an
Internet service provider (ISP). Your ISP will offer one or more of the
following Internet connection options:
• DSL connections that provide high-speed Internet access through your
existing telephone line or cellular telephone service. With a DSL
connection, you can access the Internet and use your telephone on the
same line simultaneously.
• Cable modem connections that provide high-speed Internet access
through your local cable TV line.
• Satellite modem connections that provide high-speed Internet access
through a satellite television system.
• Dial-up connections that provide Internet access through a telephone line.
Dial-up connections are considerably slower than DSL and cable (or
satellite) modem connections.
• Wireless LAN connections that provide Internet access using Bluetooth
®
wireless technology.
If you are using a dial-up connection, connect a telephone line to the modem
connector on your computer and to the telephone wall jack before you set up
your Internet connection. If you are using a DSL or cable/satellite modem
connection, contact your ISP or cellular telephone service for setup
instructions.

18 Quick Reference Guide
Setting Up Your Internet Connection
To set up an Internet connection with a provided ISP desktop shortcut:
1
Save and close any open files, and exit any open programs.
2
Double-click the ISP
icon on the Microsoft
®
Windows
®
desktop.
3
Follow the instructions on the screen to complete the setup.
If you do not have an ISP icon on your desktop or if you want to set up an
Internet connection with a different ISP, perform the steps in the following
section that corresponds to the operating system your computer is using.
NOTE: If you are having problems connecting to the Internet, see "Setting Up a
Home and Office Network" on page 15. If you cannot connect to the Internet but
have successfully connected in the past, the ISP might have a service outage.
Contact your ISP to check the service status, or try connecting again later.
Windows XP
1
Save and close any open files, and exit any open programs.
2
Click
Start
→
Internet Explorer
.
The
New Connection Wizard
appears.
3
Click
Connect to the Internet
.
4
In the next window, click the appropriate option:
• If you do not have an ISP and want to select one, click
Choose from a
list of Internet service providers (ISPs)
.
• If you have already obtained setup information from your ISP but you
did not receive a setup CD, click
Set up my connection manually
.
• If you have a CD, click
Use the CD I got from an ISP
.
5
Click
Next
.
If you selected
Set up my connection manually
, continue to step 6.
Otherwise, follow the instructions on the screen to complete the setup.
NOTE: If you do not know which type of connection to select, contact your ISP.
6
Click the appropriate option under
How do you want to connect to the
Internet?
, and then click
Next
.
7
Use the setup information provided by your ISP to complete the setup.

Quick Reference Guide 19
Windows Vista™
NOTE: Have your ISP information ready. If you do not have an ISP, the Connect to
the Internet wizard can help you get one.
1
Save and close any open files, and exit any open programs.
2
Click the Windows Vista Start button , and click
Control Panel
.
3
Under
Network and Internet
, click
Connect to the Internet
.
The
Connect to the Internet
window appears.
4
Click either
Broadband (PPPoE)
or
Dial-up
, depending on how you want
to connect:
•Choose
Broadband
if you will use a DSL, satellite modem, cable TV
modem, or Bluetooth wireless technology connection.
• Chose
Dial-up
if you will use a dial-up modem or ISDN.
NOTE: If you do not know which type of connection to select, click Help me choose
or contact your ISP.
5
Follow the instructions on the screen and use the setup information
provided by your ISP to complete the setup.
Moving Information to a New Computer
You can use your operating system "wizards" to help you transfer files and
other data from one computer to another—for example, from an old
computer to a new computer. For instructions, see the following section that
corresponds to the operating system that your computer is running.
Microsoft
®
Windows
®
XP (Optional)
The Microsoft
Windows XP operating system provides the Files and Settings
Transfer Wizard to move data from a source computer to a new computer.
You can transfer data, such as:
• E-mail messages
• Toolbar settings
• Window sizes
• Internet bookmarks

20 Quick Reference Guide
You can transfer the data to the new computer over a network or serial
connection, or you can store it on removable media, such as a writable CD,
for transfer to the new computer.
NOTE: You can transfer information from an old computer to a new computer by
directly connecting a serial cable to the input/output (I/O) ports of the two
computers. To transfer data over a serial connection, you must access the Network
Connections utility from the Control Panel and perform additional configuration
steps, such as setting up an advanced connection and designating the host
computer and the guest computer.
For instructions on setting up a direct cable connection between two computers,
see Microsoft Knowledge Base Article #305621, titled How to Set Up a Direct Cable
Connection Between Two Computers in Windows XP. This information may not be
available in certain countries.
For transferring information to a new computer, you must run the Files and
Settings Transfer Wizard. You can use the optional Operating System media
for this process or you can create a wizard disk with the Files and Settings
Transfer Wizard.
Running the Files and Settings Transfer Wizard With the Operating System Media
NOTE: This procedure requires the Operating System media. This media is optional
and may not be included with certain computers.
To prepare a new computer for the file transfer:
1
Open the Files and Settings Transfer Wizard: click
Start
→
All Programs
→
Accessories
→
System Tools
→
Files and Settings Transfer Wizard
.
2
When the
Files and Settings Transfer Wizard
welcome screen appears,
click
Next
.
3
On the
Which computer is this?
screen, click
New Computer
→
Next
.
4
On the
Do you have a Windows XP CD?
screen, click
I will use the wizard
from the Windows XP CD
→
Next
.
5
When the
Now go to your old computer
screen appears, go to your old or
source computer. Do
not
click
Next
at this time.

Quick Reference Guide 21
To copy data from the old computer:
1
On the old computer, insert the Windows XP
Operating System
media.
2
On the
Welcome to Microsoft Windows XP
screen, click
Perform
additional tasks
.
3
Under
What do you want to do?
, click
Transfer files and settings
→
Next
.
4
On the
Which computer is this?
screen, click
Old Computer
→
Next
.
5
On the
Select a transfer method
screen, click the transfer method you
prefer.
6
On the
What do you want to transfer?
screen, select the items you want to
transfer and click
Next
.
After the information has been copied, the
Completing the Collection
Phase
screen appears.
7
Click
Finish
.
To transfer data to the new computer:
1
On the
Now go to your old computer
screen on the new computer, click
Next
.
2
On the
Where are the files and settings?
screen, select the method you
chose for transferring your settings and files and click
Next
.
The wizard reads the collected files and settings and applies them to your
new computer.
When all of the settings and files have been applied, the
Finished
screen
appears.
3
Click
Finished
and restart the new computer.
Running the Files and Settings Transfer Wizard Without the Operating System
Media
To run the Files and Settings Transfer Wizard without the Operating System
media, you must create a wizard disk that will allow you to create a backup
image file to removable media.
To create a wizard disk, use your new computer with Windows XP and
perform the following steps:
1
Open the Files and Settings Transfer Wizard: click
Start
→
All Programs
→
Accessories
→
System Tools
→
Files and Settings Transfer Wizard
.

22 Quick Reference Guide
2
When the
Files and Settings Transfer Wizard
welcome screen appears,
click
Next
.
3
On the
Which computer is this?
screen, click
New Computer
→
Next
.
4
On the
Do you have a Windows XP CD?
screen, click
I want to create a
Wizard Disk in the following drive
→
Next
.
5
Insert the removable media, such as a writable CD, and click
OK
.
6
When the disk creation completes and the
Now go to your old
computer
message appears,
do not
click
Next
.
7
Go to the old computer.
To copy data from the old computer:
1
On the old computer, insert the wizard disk.
2
Click
Start
→
Run
.
3
In the
Open
field on the
Run
window, browse to the path for
fastwiz
(on
the appropriate removable media) and click
OK
.
4
On the
Files and Settings Transfer Wizard
welcome screen, click
Next
.
5
On the
Which computer is this?
screen, click
Old Computer
→
Next
.
6
On the
Select a transfer method
screen, click the transfer method you
prefer.
7
On the
What do you want to transfer?
screen, select the items you want to
transfer and click
Next
.
After the information has been copied, the
Completing the Collection
Phase
screen appears.
8
Click
Finish
.
To transfer data to the new computer:
1
On the
Now go to your old computer
screen on the new computer, click
Next
.
2
On the
Where are the files and settings?
screen, select the method you
chose for transferring your settings and files and click
Next
. Follow the
instructions on the screen.
The wizard reads the collected files and settings and applies them to your
new computer.

Quick Reference Guide 23
When all of the settings and files have been applied, the
Finished
screen
appears.
3
Click
Finished
and restart the new computer.
NOTE: For more information about this procedure, search support.dell.com for
document #154781 (What Are The Different Methods To Transfer Files From My Old
Computer To My New Dell™ Computer Using the Microsoft
®
Windows
®
XP
Operating System?).
NOTE: Access to the Dell™ Knowledge Base document may not be available in
certain countries.
Microsoft Windows Vista™ (Optional)
1
Click the Windows Vista Start button , and then click
Transfer files
and settings
→
Start Windows Easy Transfer
.
2
In the
User Account Control
dialog box, click
Continue
.
3
Click
Start a new transfer
or
Continue a transfer in progress
.
Follow the instructions provided on the screen by the Windows Easy Transfer
wizard.
Setting Up a Printer
NOTICE: Complete the operating system setup before you connect a printer to the
computer.
See the documentation that came with the printer for setup information,
including how to:
• Obtain and install updated drivers.
• Connect the printer to the computer.
• Load paper and install the toner or ink cartridge.
For technical assistance, refer to the printer owner's manual or contact the
printer manufacturer.

24 Quick Reference Guide
Printer Cable
Your printer connects to your computer with either a USB cable or a parallel
cable. Your printer may not come with a printer cable, so if you purchase a
cable separately, ensure that it is compatible with your printer and computer.
If you purchased a printer cable at the same time you purchased your
computer, the cable may arrive in the computer’s shipping box.
Connecting Two Monitors
CAUTION: Before you begin any of the procedures in this section, follow the
safety instructions in the Product Information Guide.
If you purchased a graphics card that supports dual monitors, follow these
instructions to connect and enable your monitors. The instructions tell you
how to connect either two monitors (each with a VGA connector), one monitor
with a VGA connector and one monitor with a DVI connector, or a TV.
NOTICE: If you are connecting two monitors that have VGA connectors, you must
have the optional DVI adapter to connect the cable. If you are connecting two
flat-panel monitors, at least one of them must have a VGA connector. If you are
connecting a TV, you may connect only one monitor (VGA or DVI) in addition to the TV.
Connecting Two Monitors With VGA Connectors
1
Shutdown your system.
NOTE: If your computer has integrated video, do not connect either monitor to the
integrated video connector. If the integrated video connector is covered by a cap,
do not remove the cap to connect the monitor or the monitor will not function.
2
Connect one of the monitors to the VGA (blue) connector on the back of
the computer.
3
Connect the other monitor to the optional DVI adapter and connect the
DVI adapter to the DVI (white) connector on the back of the computer.
4
Restart your system.

Quick Reference Guide 25
Connecting One Monitor With a VGA Connector and One Monitor With a DVI
Connector
1
Shutdown your system.
2
Connect the VGA connector on the monitor to the VGA (blue) connector
on the back of the computer.
3
Connect the DVI connector on the other monitor to the DVI (white)
connector on the back of the computer.
4
Restart your system.
1 optional DVI adapter 2 DVI (white) connector
3 TV-OUT connector 4 VGA (blue) connector
1
23
4

26 Quick Reference Guide
Connecting a TV
NOTE: You must purchase an S-video cable, available at most consumer electronics
stores, to connect a TV to your computer. It is not included with your computer.
1
Shutdown your system.
2
Connect one end of the S-video cable to the optional TV-OUT connector
on the back of the computer.
3
Connect the other end of the S-video cable to the S-video input connector
on your TV.
4
Connect the VGA or DVI monitor.
5
Restart your system.
Changing the Display Settings
1
After you connect the monitor(s) or TV, turn on the computer.
The Microsoft
®
Windows
®
desktop displays on the primary monitor.
2
Enable extended desktop mode in the display settings. In extended
desktop mode, you can drag objects from one screen to the other,
effectively doubling the amount of viewable work space.
Power Protection Devices
Several devices are available to protect against power fluctuations and
failures:
• Surge protectors
• Line conditioners
• Uninterruptible power supplies (UPS)
Surge Protectors
Surge protectors and power strips equipped with surge protection help
prevent damage to your computer from voltage spikes that can occur during
electrical storms or after power interruptions. Some surge protector
manufacturers include warranty coverage for certain types of damage.
Carefully read the device warranty when choosing a surge protector. A device
with a higher joule rating offers more protection. Compare joule ratings to
determine the relative effectiveness of different devices.

Quick Reference Guide 27
NOTICE: Most surge protectors do not protect against power fluctuations or
power interruptions caused by nearby lightning strikes. When lightning occurs in
your area, disconnect the telephone line from the telephone wall jack and
disconnect your computer from the electrical outlet.
Many surge protectors have a telephone jack for modem protection. See the
surge protector documentation for modem connection instructions.
NOTICE: Not all surge protectors offer network adapter protection. Disconnect the
network cable from the network wall jack during electrical storms.
Line Conditioners
NOTICE: Line conditioners do not protect against power interruptions.
Line conditioners are designed to maintain AC voltage at a fairly constant
level.
Uninterruptible Power Supplies
NOTICE: Loss of power while data is being saved to the hard drive may result in
data loss or file damage.
NOTE: To ensure maximum battery operating time, connect only your computer to
a UPS. Connect other devices, such as a printer, to a separate power strip that
provides surge protection.
A UPS protects against power fluctuations and interruptions. UPS devices
contain a battery that provides temporary power to connected devices when
AC power is interrupted. The battery charges while AC power is available. See
the UPS manufacturer documentation for information on battery operating
time and to ensure that the device is approved by Underwriters Laboratories
(UL).

28 Quick Reference Guide
Desktop Computer
Front View
1 USB 2.0 connectors
(2)
Use the front USB connectors for devices that you connect
occasionally, such as joysticks or cameras, or for bootable
USB devices (see "System Setup Options in the online
User’s Guide for more information on booting to a
USB device). It is recommended that you use the back
USB connectors for devices that typically remain
connected, such as printers and keyboards.
2 drive activity light The drive activity light is on when the computer reads
data from or writes data to the hard drive. The light
might also be on when a device such as an optical drive
is operating.
3 power button,
power light
Press the power button to turn on the computer.
The light in the center of this button indicates
power state.
NOTICE: To avoid losing data, do not use the
power button to turn off the computer. Instead,
perform an operating system shutdown.
89
3
5
1
4610
2
11 7

Quick Reference Guide 29
4 Dell badge This badge can be rotated to match the orientation of
your computer. To rotate the badge, place your fingers
around the outside of the badge, press firmly, and turn
the badge. You can also rotate the badge using the slot
provided near the bottom of the badge.
5 power light The power light illuminates and blinks or remains solid
to indicate different operating states:
• No light — The computer is turned off.
• Steady green — The computer is in a normal
operating state.
• Blinking green — The computer is in a power-saving
mode.
• Blinking or solid amber — See "Power Problems" in
the online
User’s Guide
.
To exit from a power-saving mode, press the power
button or use the keyboard or the mouse if it is
configured as a wake device in the Windows Device
Manager. For more information about sleep modes and
exiting from a power-saving mode, see the online
User’s Guide.
See"Diagnostic Lights" on page 56" for a description of
light codes that can help you troubleshoot problems
with your computer.
6 diagnostic lights Use the lights to help you troubleshoot a computer
problem based on the diagnostic code. For more
information, see "Diagnostic Lights" on page 56.
7 LAN indicator light This light indicates that a LAN (local area network)
connection is established.
8 headphone and
microphone
connectors
Use the microphone connector to attach a personal
computer microphone. On computers with a sound
card, the microphone connector is on the card.
Use the headphone connector to attach headphones
and most kinds of speakers.
9 floppy drive Can contain an optional floppy drive.
10 optical drive Use the optical drive to play a CD/DVD.
11 Service Tag Use the Service Tag to identify your computer when you
access the Dell Support website or call Support.

30 Quick Reference Guide
Back View
CAUTION: Ensure that none of the system air vents are blocked. Blocking them
would cause serious thermal problems.
1 card slots Access connectors for any installed PCI and PCI Express cards.
2 back panel
connectors
Plug USB, audio, and other devices into the appropriate
connector (see "Back Panel Connectors" on page 31 for
more information).
3 power connector Insert the power cable.
4 voltage selector
switch
For selecting voltage rating.
5 padlock rings Padlock rings are for attaching a commercially available
antitheft device. The padlock rings allows you to secure the
computer cover to the chassis with a padlock to prevent
unauthorized access to the inside of the computer. To use
the padlock rings, insert a commercially available padlock
through the rings, and then lock the padlock.
6 cover release latch Use this latch to open the computer cover.
5
1
2 3 4 6

Quick Reference Guide 31
Back Panel Connectors
1 parallel
connector
Connect a parallel device, such as a printer, to the parallel
connector. If you have a USB printer, plug it into a USB
connector.
NOTE: The integrated parallel connector is automatically
disabled if the computer detects an installed card containing a
parallel connector configured to the same address. For more
information, see "System Setup Options" in the online User’s
Guide.
2 link integrity
light
• Green — A good connection exists between a 10-Mbps
network and the computer.
• Orange — A good connection exists between a 100-Mbps
network and the computer.
• Yellow — A good connection exists between a 1-Gbps
(1000-Mbps) network and the computer.
• Off — The computer is not detecting a physical
connection to the network.
13
98 7
5
6
24

32 Quick Reference Guide
3 network adapter
connector
To attach your computer to a network or broadband device,
connect one end of a network cable to either a network jack
or your network or broadband device. Connect the other
end of the network cable to the network adapter connector
on the back panel of your computer. A click indicates that
the network cable has been securely attached.
NOTE: Do not plug a telephone cable into the network
connector.
On computers with a network adapter card, use the
connector on the card.
It is recommended that you use at least Category 5 wiring
and connectors for your network. If you must use Category 3
wiring, force the network speed to 10 Mbps to ensure
reliable operation.
4 network activity
light
This light flashes yellow when the computer is transmitting
or receiving network data. A high volume of network traffic
may make this light appear to be in a steady "on" state.
5 line-out
connector
Use the green line-out connector to attach headphones and
most speakers with integrated amplifiers.
On computers with a sound card, use the connector on the
card.
6 microphone/line-
in connector
Use the blue line-in connector to attach a record/playback
device such as a cassette player, CD player, or VCR.
Use the pink microphone connector to attach a personal
computer microphone for voice or musical input into a
sound or telephony program.
On computers with a sound card, use the connector on the
card.
7 USB 2.0
connectors (6)
Use the back USB connectors for devices that typically
remain connected, such as printers and keyboards.
It is recommended that you use the front USB connectors
for devices that you connect occasionally, such as joysticks or
cameras.

Quick Reference Guide 33
Removing the Computer Cover
CAUTION: Before you begin any of the procedures in this section, follow the
safety instructions in the Product Information Guide.
CAUTION: To guard against electrical shock, always unplug your computer from
the electrical outlet before removing the cover.
1
Follow the procedures in "Before You Begin" on page 10.
NOTE: Ensure that sufficient space exists to support the removed cover.
NOTICE: Ensure that you are working on a level, protected surface to avoid
scratching either the computer or the surface on which it is resting.
2
If you have installed a padlock through the padlock ring on the back panel,
remove the padlock.
3
Slide the cover release latch back as you lift the cover.
8 VGA video
connector
Connect the monitor’s VGA cable to the VGA connector on
the computer.
On computers with a video card, use the connector on the
card.
9 serial connector Connect a serial device, such as a handheld device, to the
serial port. The default designation is COM1 for serial
connector 1.
For more information, see "System Setup Options" in the
online User’s Guide.

34 Quick Reference Guide
4
Pivot the cover up using the hinge tabs as leverage points.
5
Remove the cover from the hinge tabs and set it aside on a soft
nonabrasive surface.
1 security cable slot 2 cover release latch
3 padlock ring
2
1
3

Quick Reference Guide 35
Inside View of Your Computer
CAUTION: Before you begin any of the procedures in this section, follow the
safety instructions in the Product Information Guide.
CAUTION: To avoid electrical shock, always unplug your computer from the
electrical outlet before removing the computer cover.
NOTICE: Be careful when opening the computer cover to ensure that you do not
accidentally disconnect cables from the system board.
1 drives bay
(CD/DVD, floppy, and hard drive)
2 power supply
3 system board 4 card slots
5 heat sink assembly 6 front I/O panel
1
2
3
4
5
6

36 Quick Reference Guide
System Board Components
1 internal speaker connector
(INT_SPKR)
2 processor connector (CPU)
3 processor power connector
(12VPOWER)
4 memory module connectors
(DIMM_1, DIMM_2)
12
5
13
3
15
17
12
4
7
14
10
11 89
16
6

Quick Reference Guide 37
Replacing the Computer Cover
CAUTION: Before you begin any of the procedures in this section, follow the
safety instructions located in the Product Information Guide.
1
Ensure that all cables are connected, and fold cables out of the way.
2
Ensure that no tools or extra parts are left inside the computer.
3
To replace the cover:
a
Align the bottom of the cover with the hinge tabs located along the
bottom edge of the computer.
b
Using the hinge tabs as leverage, rotate the cover downward to close it.
c
Snap the cover into place by pulling back on the cover release latch
and then releasing the latch when the cover is properly seated.
d
Ensure that the cover is seated correctly before moving the computer.
5 SATA drive connectors
(SATA0, SATA1)
6 front-panel connector
(FRONTPANEL)
7 power connector
(POWER)
8 SATA drive connectors
(SATA2, SATA3)
9 RTC reset jumper (RTCRST) 10 password jumper (PSWD)
11 battery socket (BATTERY) 12 PCI Express x16 card connector
(SLOT1)
13 PCI card connectors
(SLOT2 and SLOT3)
14 internal buzzer (SPKR)
15 serial/ PS/2 connector (PS2/SER2) 16 fan connector (FAN_CPU)
17 floppy drive connector (FLOPPY)

38 Quick Reference Guide
Mini Tower Computer
Front View
1 Service Tag Use the Service Tag to identify your computer when you
access the Dell Support website or call Support.
2 optical drive Use the optical drive to play a CD/DVD.
4
8
7
3
2
6
5
1
10
9

Quick Reference Guide 39
3 floppy drive A floppy drive is optional.
4 drive activity light The drive activity light is on when the computer reads
data from or writes data to the hard drive. The light
might also be on when a device such as an optical drive
is operating.
5 USB 2.0 connectors
(2)
Use the front USB connectors for devices that you connect
occasionally, such as joysticks or cameras, or for bootable
USB devices (see "System Setup Options" in the online
User’s Guide for more information on booting to a
USB device). It is recommended that you use the back
USB connectors for devices that typically remain
connected, such as printers and keyboards.
6 diagnostic lights Use these lights to help you troubleshoot a computer
problem based on the diagnostic code. For more
information, see "Diagnostic Lights" on page 56.
7 power button,
power light
Press the power button to turn on the computer.
The light in the center of this button indicates
power state.
NOTICE: To avoid losing data, do not use the
power button to turn off the computer. Instead,
perform an operating system shutdown.
8 headphone connector Use the headphone connector to attach headphones
and most kinds of speakers.
9 microphone
connector
Use the microphone connector to attach a personal
computer microphone for voice or musical input into a
sound or telephony program.
On computers with a sound card, the microphone
connector is on the card.
10 LAN indicator light This light indicates that a LAN (local area network)
connection is established.

40 Quick Reference Guide
Back View
1 cover release latch This latch allows you to open the computer cover.
2 padlock rings Padlock rings are for attaching a commercially available
antitheft device. The padlock rings allows you to secure the
computer cover to the chassis with a padlock to prevent
unauthorized access to the inside of the computer. To use
the padlock rings, insert a commercially available padlock
through the rings, and then lock the padlock.
4
3
5
6
2
1

Quick Reference Guide 41
CAUTION: Ensure that none of the system air vents are blocked. Blocking them
would cause serious thermal problems.
Back Panel Connectors
3 power connector Insert the power cable.
4 voltage selector
switch
For selecting voltage rating.
5 back panel
connectors
Plug USB, audio, and other devices into the appropriate
connector (see "Back Panel Connectors" on page 31 for
more information.
6 card slots Access connectors for any installed PCI and PCI Express cards.
1 parallel
connector
Connect a parallel device, such as a printer, to the parallel
connector. If you have a USB printer, plug it into a USB
connector.
NOTE: The integrated parallel connector is automatically
disabled if the computer detects an installed card containing a
parallel connector configured to the same address. For more
information, see "System Setup Options" in the online User’s
Guide.
1
3
98 7
5
6
24

42 Quick Reference Guide
2 link integrity
light
• Green — A good connection exists between a 10-Mbps
network and the computer.
• Orange — A good connection exists between a 100-Mbps
network and the computer.
• Yellow — A good connection exists between a 1-Gbps
(1000-Mbps) network and the computer.
• Off — The computer is not detecting a physical
connection to the network.
3 network adapter
connector
To attach your computer to a network or broadband device,
connect one end of a network cable to either a network jack
or your network or broadband device. Connect the other
end of the network cable to the network adapter connector
on the back panel of your computer. A click indicates that
the network cable has been securely attached.
NOTE: Do not plug a telephone cable into the network
connector.
On computers with a network adapter card, use the
connector on the card.
It is recommended that you use at least Category 5 wiring
and connectors for your network. If you must use Category 3
wiring, force the network speed to 10 Mbps to ensure
reliable operation.
4 network activity
light
This light flashes yellow when the computer is transmitting
or receiving network data. A high volume of network traffic
may make this light appear to be in a steady "on" state.
5 line-out
connector
Use the green line-out connector to attach headphones and
most speakers with integrated amplifiers.
On computers with a sound card, use the connector on the
card.
6 microphone/line-
in connector
Use the blue and pink line-in connector to attach a
record/playback device such as a cassette player, CD player,
or VCR; or personal computer microphone.
7 USB 2.0
connectors (6)
Use the back USB connectors for devices that typically
remain connected, such as printers and keyboards.
It is recommended that you use the front USB connectors
for devices that you connect occasionally, such as joysticks or
cameras.

Quick Reference Guide 43
Removing the Computer Cover
CAUTION: Before you begin any of the procedures in this section, follow the
safety instructions in the Product Information Guide.
CAUTION: To guard against electrical shock, always unplug your computer from
the electrical outlet before removing the cover.
1
Follow the procedures in "Before You Begin" on page 10.
NOTE: Ensure that sufficient space exists to support the removed cover.
NOTICE: Ensure that you are working on a level, protected surface to avoid
scratching either the computer or the surface on which it is resting.
2
Lay your computer on its side with the computer cover facing up.
8 VGA video
connector
Connect the monitor’s VGA cable to the VGA connector on
the computer.
On computers with a video card, use the connector on the
card.
9 serial connector Connect a serial device, such as a handheld device, to the
serial port. The default designation is COM1 for serial
connector 1.
For more information, see "System Setup Options" in the
online User’s Guide.

44 Quick Reference Guide
3
Release the computer cover by pulling it away from the front of the
computer and lifting it up.
4
Set the cover aside in a secure location.
1 security cable slot 2 cover release latch
3 padlock ring
2
1
3

Quick Reference Guide 45
Inside View of Your Computer
1 floppy drive 2 optical drive
3 power supply 4 system board
5 heat sink assembly 6 hard drive
1
3
4
6
2
5

46 Quick Reference Guide
System Board Components
1 internal speaker connector
(INT_SPKR)
2 processor connector (CPU)
3 processor power connector
(12VPOWER)
4 memory module connectors
(DIMM_1, DIMM_2)
12
6
5
13
3
15
17
12
4
7
14
1011 89
16

Quick Reference Guide 47
Replacing the Computer Cover
CAUTION: Before you begin any of the procedures in this section, follow the
safety instructions located in the Product Information Guide.
1
Ensure that all cables are connected, and fold cables out of the way.
2
Ensure that no tools or extra parts are left inside the computer.
3
To replace the cover:
a
Align the bottom of the cover with the hinge tabs located along the
bottom edge of the computer.
b
Using the hinge tabs as leverage, rotate the cover downward to close it.
c
Snap the cover into place by pulling back on the cover release latch
and then releasing the latch when the cover is properly seated.
d
Ensure that the cover is seated correctly before moving the computer.
4
Move the computer to the upright position.
Solving Problems
Dell provides a number of tools to help you if your computer does not
perform as expected. For the latest troubleshooting information available for
your computer, see the Dell support website at support.dell.com.
5 SATA drive connectors
(SATA0, SATA1)
6 front-panel connector
(FRONTPANEL)
7 power connector
(POWER)
8 SATA drive connectors
(SATA2, SATA3)
9 RTC reset jumper (RTCRST) 10 password jumper (PSWD)
11 battery socket (BATTERY) 12 PCI Express x16 card connector
(SLOT1)
13 PCI card connectors
(SLOT2 and SLOT3)
14 internal buzzer (SPKR)
15 serial/ PS/2 connector (PS2/SER2) 16 fan connector (FAN_CPU)
17 floppy drive connector (FLOPPY)

48 Quick Reference Guide
If computer problems occur that require help from Dell, write a detailed
description of the error, beep codes, or diagnostic light patterns, record your
Express Service Code and Service Tag below, and then contact Dell from the
same location as your computer.
For an example of the Express Service Code and Service Tag, see "Finding
Information" in your computer User’s Guide.
Dell Diagnostics
CAUTION: Before you begin any of the procedures in this section, follow the
safety instructions in the Product Information Guide.
When to Use the Dell Diagnostics
If you experience a problem with your computer, perform the checks in
Lockups and Software Problems (see the online User’s Guide for details) and
run the Dell Diagnostics before you contact Dell for technical assistance.
It is recommended that you print these procedures before you begin.
NOTICE: The Dell Diagnostics works only on Dell™ computers.
NOTE: The Drivers and Utilities media is optional and may not ship with your
computer.
See "System Setup" in the online User’s Guide to review your computer’s
configuration information, and ensure that the device that you want to test
displays in the system setup program and is active.
Start the Dell Diagnostics from your hard drive or from the Drivers and
Utilities media.
Starting the Dell Diagnostics From Your Hard Drive
The Dell Diagnostics is located on a hidden diagnostic utility partition on
your hard drive.
NOTE: If your computer cannot display a screen image, contact Dell.
1
Ensure that the computer is connected to an electrical outlet that is
known to be working properly.
Express Service Code:
Service Tag:

Quick Reference Guide 49
2
Turn on (or restart) your computer.
3
When the DELL™ logo appears, press <F12> immediately. Select
Diagnostics
from the boot menu and press <Enter>.
NOTE: If you wait too long and the operating system logo appears, continue to
wait until you see the Microsoft
®
Windows
®
desktop; then, shut down your
computer and try again.
NOTE: If you see a message stating that no diagnostics utility partition has
been found, run the Dell Diagnostics from the Drivers and Utilities media.
4
Press any key to start the Dell Diagnostics from the diagnostics utility
partition on your hard drive.
Starting the Dell Diagnostics From the Drivers and Utilities Media
1
Insert the
Drivers and Utilities
media
.
2
Shut down and restart the computer.
When the DELL logo appears, press <F12> immediately.
NOTE: If you wait too long and the operating system logo appears, continue
to wait until you see the Microsoft
®
Windows
®
desktop; then, shut down your
computer and try again.
NOTE: The next steps change the boot sequence for one time only. On the
next start-up, the computer boots according to the devices specified in the
system setup program.
3
When the boot device list appears, highlight
CD/DVD/CD-RW
and press
<Enter>.
4
Select the
Boot from CD-ROM
option from the menu that appears and
press <Enter>.
5
Ty p e
1
to start the CD menu and press <Enter> to proceed.
6
Select
Run the 32 Bit Dell Diagnostics
from the numbered list. If
multiple versions are listed, select the version appropriate for your
computer.
7
When the Dell Diagnostics
Main Menu
appears, select the test you want
to run.

50 Quick Reference Guide
Dell Diagnostics Main Menu
1
After the Dell Diagnostics loads and the
Main
Menu
screen appears, click
the button for the option you want.
NOTE: It is recommended that you select Test System to run a complete test on
your computer.
2
After you have selected the
Test System
option from the main menu, the
following menu appears:
NOTE: It is recommended that you select Extended Test from the menu below to
run a more thorough check of devices in the computer.
3
If a problem is encountered during a test, a message appears with an error
code and a description of the problem. Write down the error code and
problem description and contact Dell.
NOTE: The Service Tag for your computer is located at the top of each test
screen. If you contact Dell, technical support will ask for your Service Tag.
4
If you run a test from the
Custom Test or Symptom Tree
option, click the
applicable tab described in the following table for more information.
Option Function
Test Memory Run the stand-alone memory test
Test System Run System Diagnostics
Exit Exit the Diagnostics
Option Function
Express Test Performs a quick test of devices in the system. This
typically can take 10 to 20 minutes.
Extended Test Performs a thorough check of devices in the system. This
typically can take an hour or more.
Custom Test Use to test a specific device or customize the tests to be
run.
Symptom Tree This option allows you to select tests based on a
symptom of the problem you are having. This option lists
the most common symptoms.

Quick Reference Guide 51
5
When the tests are complete, close the test screen to return to the
Main
Menu
screen. To exit the Dell Diagnostics and restart the computer, close
the
Main
Menu
screen.
6
Remove the Dell
Drivers and Utilities
media
(if applicable).
Power Lights
CAUTION: Before you begin any of the procedures in this section, follow the
safety instructions in the Product Information Guide.
The power button light (bi-color LED) located on the front of the computer
illuminates and blinks or remains solid to indicate different states:
• If the power light is off, the computer is either turned off or is not
receiving power.
– Reseat the power cable in the power connector on the back of the
computer and the electrical outlet.
Tab Function
Results Displays the results of the test and any error conditions
encountered.
Errors Displays error conditions encountered, error codes, and
the problem description.
Help Describes the test and may indicate requirements for
running the test.
Configuration Displays your hardware configuration for the selected
device.
The Dell Diagnostics obtains configuration information
for all devices from system setup, memory, and various
internal tests, and it displays the information in the
device list in the left pane of the screen. The device list
may not display the names of all the components
installed on your computer or all devices attached to your
computer.
Parameters Allows you to customize the test by changing the test
settings.

52 Quick Reference Guide
– If the computer is plugged into a power strip, ensure that the power
strip is plugged into an electrical outlet and that the power strip is
turned on. Also, bypass power protection devices, power strips, and
power extension cables to verify that the computer turns on properly.
– Ensure that the electrical outlet is working by testing it with another
device, such as a lamp.
• If the power light is steady green and the computer is not responding:
– Ensure that the display is connected and powered on.
– If the display is connected and powered on, see "Beep Codes" on
page 53.
• If the power light is blinking green, the computer is in standby mode. Press
a key on the keyboard, move the mouse, or press the power button to
resume normal operation.If the power light is green and the computer is
not responding:
– Ensure the display is connected and powered on.
– If the display is connected and powered on, see "Beep Codes" on
page 53.
• If the power light is steady amber, the computer is receiving electrical
power, but a device might be malfunctioning or incorrectly installed.
– Remove and then reinstall the memory modules.
– Remove and then reinstall any cards.
– Remove and then reinstall the graphics card, if applicable.
• If the power light is blinking amber, there may be a power problem or an
internal device malfunction.
– Ensure that all power cables are securely connected to the system
board (see "System Board Components" on page 36).
– Ensure that the main power cable and front panel cable are securely
connected to the system board (see "System Board Components" on
page 36).

Quick Reference Guide 53
Beep Codes
Your computer might emit a series of beeps during start-up if the monitor
cannot display errors or problems. This series of beeps, called a beep code,
identifies a problem. For example, beep code 1-3-1 (one possible beep code)
consists of one beep, a burst of three beeps, and then one beep. This beep
code tells you that the computer encountered a memory problem.
Reseating the memory modules may correct the following beep code errors. If
the problem persists, contact Dell (see "Contacting Dell"
in the
User’s Guide
)
for instructions on obtaining technical assistance.
If you experience any of the following beep code errors, see "Contacting Dell"
in the
User’s Guide
for instructions on obtaining technical assistance.
Code Cause
1-3-1 through
2-4-4
Memory not being properly identified or used
4-3-1 Memory failure above address 0FFFFh
Code Cause
1-1-2 Microprocessor register failure
1-1-3 NVRAM read/write failure
1-1-4 ROM BIOS checksum failure
1-2-1 Programmable interval timer failure
1-2-2 DMA initialization failure
1-2-3 DMA page register read/write failure
1-3 Video Memory Test failure
1-3-1 through
2-4-4
Memory not being properly identified or used
3-1-1 Slave DMA register failure
3-1-2 Master DMA register failure
3-1-3 Master interrupt mask register failure
3-1-4 Slave interrupt mask register failure

54 Quick Reference Guide
System Messages
NOTE: If the message you received is not listed in the table, see the documentation
for either the operating system or the program that was running when the message
appeared.
3-2-2 Interrupt vector loading failure
3-2-4 Keyboard Controller Test failure
3-3-1 NVRAM power loss
3-3-2 Invalid NVRAM configuration
3-3-4 Video Memory Test failure
3-4-1 Screen initialization failure
3-4-2 Screen retrace failure
3-4-3 Search for video ROM failure
4-2-1 No timer tick
4-2-2 Shutdown failure
4-2-3 Gate A20 failure
4-2-4 Unexpected interrupt in protected mode
4-3-1 Memory failure above address 0FFFFh
4-3-3 Timer-chip counter 2 failure
4-3-4 Time-of-day clock stopped
4-4-1 Serial or parallel port test failure
4-4-2 Failure to decompress code to shadowed memory
4-4-3 Math-coprocessor test failure
4-4-4 Cache test failure
ALERT! PREVIOUS ATTEMPTS AT BOOTING THIS SYSTEM HAVE FAILED AT
CHECKPOINT [NNNN]. FOR HELP IN RESOLVING THIS PROBLEM, PLEASE NOTE
THIS CHECKPOINT AND CONTACT DELL TECHNICAL SUPPORT — The computer
failed to complete the boot routine three consecutive times for the same error.
Code Cause

Quick Reference Guide 55
CMOS CHECKSUM ERROR — Possible motherboard failure or RTC battery low.
Replace battery.
CPU FAN FAILURE — CPU fan failure. Replace the CPU fan.
DISKETTE DRIVE 0 SEEK FAILURE — A cable may be loose, or the computer
configuration information may not match the hardware configuration. Check cable
connections.
DISKETTE READ FAILURE — The floppy disk may be defective or a cable may be
loose. Replace the floppy disk/check for a loose cable connection.
HARD-DISK DRIVE FAILURE — Possible hard disk drive failure during HDD
POST. Check cables /swap hard disks.
HARD-DISK DRIVE READ FAILURE — Possible HDD failure during HDD boot test.
KEYBOARD FAILURE — Keyboard failure or keyboard cable loose.
NO BOOT DEVICE AVAILABLE — The system cannot detect a bootable device or
partition.
• If the floppy drive is your boot device, ensure that the cables are connected and
that a bootable floppy disk is in the drive.
• If the hard drive is your boot device, ensure that the cables are connected and
that the drive is installed properly and partitioned as a boot device.
• Enter system setup and ensure that the boot sequence information is correct.
NO TIMER TICK INTERRUPT — A chip on the system board might be
malfunctioning or motherboard failure.
NON-SYSTEM DISK OR DISK ERROR — Replace the floppy disk with one that has
a bootable operating system or remove the floppy disk from drive A and restart the
computer.

56 Quick Reference Guide
Diagnostic Lights
CAUTION: Before you begin any of the procedures in this section, follow the
safety instructions located in the Product Information Guide.
To help you troubleshoot a problem, your computer has four lights labeled 1,
2, 3, and 4 on the front or back panel. The lights can be off or green. When
the computer starts normally, the patterns or codes on the lights change as
the boot process completes. When the computer starts normally, the patterns
or codes on the lights change as the boot process completes. If the POST
portion of system boot completes successfully, all four lights display solid
green. If the computer malfunctions during the POST process, the pattern
displayed on the LEDs may help identify where in the process the computer
halted.
NOTE: The orientation of the diagnostic lights may vary depending on the system
type. The diagnostic lights can appear either vertical or horizontal.
NOT A BOOT DISKETTE — Insert a bootable floppy disk and restart your
computer.
USB OVER CURRENT ERROR — Disconnect the USB device. Use an external
power source for the USB device.
NOTICE - HARD DRIVE SELF MONITORING SYSTEM HAS REPORTED THAT A
PARAMETER HAS EXCEEDED ITS NORMAL OPERATING RANGE. DELL
RECOMMENDS THAT YOU BACK UP YOUR DATA REGULARLY. A PARAMETER OUT
OF RANGE MAY OR MAY NOT INDICATE A POTENTIAL HARD DRIVE PROBLEM —
S.M.A.R.T error, possible HDD failure. This feature can be enabled or disabled in
BIOS setup.

Quick Reference Guide 57
Light Pattern Problem Description Suggested Resolution
The computer is in a normal
"off" condition, or a possible
pre-BIOS failure has occurred.
The diagnostic lights are not lit
after the computer successfully
boots to the operating system.
Plug the computer into a
working electrical outlet and
press the power button.
A possible BIOS failure has
occurred; the computer is in
the recovery mode.
Run the BIOS Recovery utility,
wait for recovery completion,
and then restart the computer.
A possible processor failure has
occurred.
Reinstall the processor and
restart the computer.
Memory modules are detected,
but a memory failure has
occurred.
• If you have one memory
module installed, reinstall it
and restart the computer.
(see the online
User’s Guide
for instructions on how to
remove and install memory
modules.)
• If you have two or more
memory modules installed,
remove the modules,
reinstall one module, and
then restart the computer. If
the computer starts
normally, reinstall an
additional module.
Continue until you have
identified a faulty module or
reinstalled all modules
without error.
• If available, install properly
working memory of the same
type into your computer.
• If the problem persists,
contact Dell
.

58 Quick Reference Guide
A possible graphics card failure
has occurred.
• If the computer has a
graphics card, remove the
card, reinstall it, and then
restart the computer.
• If the problem still exists,
install a graphics card that
you know works and restart
the computer.
• If the problem persists or the
computer has integrated
graphics,
contact Dell
.
A possible floppy or hard drive
failure has occurred.
Reseat all power and data
cables and restart the
computer.
A possible USB failure has
occurred.
Reinstall all USB devices,
check cable connections, and
then restart the computer.
Light Pattern Problem Description Suggested Resolution

Quick Reference Guide 59
No memory modules are
detected.
• If you have one memory
module installed, reinstall it
and restart the computer.
See the online
User’s Guide
for instructions on how to
remove and install memory
modules.
• If you have two or more
memory modules installed,
remove the modules,
reinstall one module, and
then restart the computer. If
the computer starts
normally, reinstall an
additional module.
Continue until you have
identified a faulty module or
reinstalled all modules
without error.
• If available, install properly
working memory of the same
type into your computer.
• If the problem persists,
contact Dell
.
Memory modules are detected,
but a memory configuration or
compatibility error exists.
• Ensure that no
special
memory module/memory
connector placement
requirements
exist.
• Verify that the
memory
modules
that you are
installing are compatible
with your computer.
• If the problem persists,
Contact Dell.
Light Pattern Problem Description Suggested Resolution

60 Quick Reference Guide
Clearing Forgotten Passwords
CAUTION: Before you begin any of the procedures in this section, follow the
safety instructions located in the Product Information Guide.
1
Follow the procedures in "Before You Begin" on page 10.
2
Remove the computer cover (see "Removing the Computer Cover" on
page 43).
3
Locate the 2-pin password jumper (PSWD) on the system board. By
default, Pin1 and Pin2 should be connected. You will need to remove the
jumper and boot the system, as follows.
4
Remove the jumper.
A failure has occurred.
This pattern also displays when
you enter system setup and
may not indicate a problem.
• Ensure that the cables are
properly connected to the
system board from the hard
drive and the optical drive.
• Check the computer
message that appears on
your monitor screen.
• If the problem persists,
Contact Dell.
After POST is complete, all
four diagnostic lights turn
green briefly before turning off
to indicate normal operating
condition.
None.
Light Pattern Problem Description Suggested Resolution

Quick Reference Guide 61
5
Replace the computer cover (see "Replacing the Computer Cover" on
page 37).
NOTICE: To connect a network cable, first plug the cable into the network device
and then plug it into the computer.
6
Connect your computer and devices to electrical outlets, and turn
them on.
7
After the Microsoft
®
Windows
®
desktop appears on your computer, shut
down your computer (see "Turning Off Your Computer" on page 12).
8
Turn off the monitor and disconnect it from the electrical outlet.
9
Disconnect the computer power cable from the electrical outlet, and press
the power button to ground the system board.
10
Open the computer cover.
11
Locate the 2-pin password jumper (PSWD) on the system board and
attach the jumper to reenable the password feature.
12
Replace the computer cover (see "Replacing the Computer Cover" on
page 37).

62 Quick Reference Guide
NOTICE: To connect a network cable, first plug the cable into the network wall jack
and then plug it into the computer.
13
Connect your computer and devices to electrical outlets, and turn
them on.
NOTE: This procedure enables the password feature. When you
enter system
setup (see "Entering System Setup" in your User’s Guide), both system and
administrator password options appear as Not Set—meaning that the password
feature is enabled but no password is assigned.
14
Assign a new system and/or administrator password.
Clearing CMOS Settings
CAUTION: Before you begin any of the procedures in this section, follow the
safety instructions located in the Product Information Guide.
1
Follow the procedures in "Before You Begin" on page 10.
NOTE: The computer must be disconnected from the electrical outlet to clear
the CMOS setting.
2
Remove the computer cover (see "Removing the Computer Cover" on
page 43).
3
Remove the computer cover.
4
Reset the current CMOS settings:
a
Locate the password (PSWD) and CMOS (RTCRST) jumpers on the
system board (see "Clearing Forgotten Passwords" on page 60).
b
Remove the password jumper plug from its pins.
c
Place the password jumper plug on the RTCRST pins and wait
approximately 5 seconds.
d
Remove the jumper plug from the RTCRST pins and place it back on
the password pins.
5
Replace the computer cover (see "Replacing the Computer Cover" on
page 37).
NOTICE: To connect a network cable, first plug the cable into the network port or
device and then plug it into the computer.
6
Connect your computer and devices to electrical outlets, and turn
them on.

Quick Reference Guide 63
Flashing the BIOS
The BIOS may require flashing when an update is available or when replacing
the system board.
1
Turn on the computer.
2
Locate the BIOS update file for your computer at the Dell Support
website at
support.dell.com
.
3
Click
Download Now
to download the file.
4
If the
Export Compliance Disclaimer
window appears, click
Yes, I Accept
this Agreement
.
The
File Download
window appears.
5
Click
Save this program to disk
, and then click
OK
.
The
Save In
window appears.
6
Click the down arrow to view the
Save In
menu, select
Desktop
, and then
click
Save
.
The file downloads to your desktop.
7
Click Close when the
Download Complete
window appears.
The file icon appears on your desktop and is titled the same as the
downloaded BIOS update file.
8
Double-click the file icon on the desktop and follow the on-screen
instructions.

64 Quick Reference Guide

Index 65
Index
B
beep codes, 53
C
CDs
operating system, 9
CMOS settings
clearing, 62
computer
beep codes, 53
components inside, 35, 45
inside view, 35, 45
cover
removing, 33, 43
replacing, 37, 47
D
Dell Diagnostics, 48
Dell support site, 8
diagnostics
beep codes, 53
Dell, 48
documentation
End User License Agreement, 6
ergonomics, 6
online, 8
Product Information Guide, 6
Quick Reference, 6
regulatory, 6
safety, 6
User’s Guide, 6
warranty, 6
E
End User License Agreement, 6
ergonomics information, 6
error messages
beep codes, 53
H
hardware
beep codes, 53
Dell Diagnostics, 48
Help and Support Center, 9
help file
Windows Help and Support
Center, 9
I
installing parts
before you begin, 11
recommended tools, 12

66 Index
turning off your computer, 12
Internet connection
about, 17
options, 17
setting up, 18
L
labels
Microsoft Windows, 7
Service Tag, 7, 29, 38
lights
power, 29
M
monitor
clone mode, 26
connect DVI, 24-25
connect TV, 24, 26
connect two, 24-25
connect VGA, 24-25
display settings, 26
extended desktop mode, 26
motherboard. See system board
N
network
Network Setup Wizard, 16
Network Setup Wizard, 16
O
operating system
reinstalling, 9
Operating System CD, 9
P
password
clearing, 60
jumper, 60
power
button, 28, 39
light, 29
line conditioners
protection devices
surge protectors
UPS
printer
cable, 24
connecting, 15, 23
setting up, 15, 23
problems
beep codes, 53
Dell Diagnostics, 48
Product Information Guide, 6
R
regulatory information, 6
ResourceCD
Dell Diagnostics, 48

Index 67
S
S.M.A.R.T, 56
safety instructions, 6
Service Tag, 7, 29, 38
Starting the Dell Diagnostics
From the Drivers and
Utilities CD, 49
Starting the Dell Diagnostics
From Your Hard Drive, 48
support website, 8
system board, 36, 46
T
troubleshooting
Dell Diagnostics, 48
Help and Support Center, 9
TV
connect to computer, 24, 26
U
uninterruptible power supply.
See UPS
UPS
User’s Guide, 6
W
warranty information, 6
Windows XP
Help and Support Center, 9
Network Setup Wizard, 16
reinstalling, 9
wizards
Network Setup Wizard, 16

68 Index

www.dell.com | support.dell.com
Dell™ OptiPlex™ 330
Guide de référence rapide
Modèles DCSM et DCNE

Remarques, avis et précautions
REMARQUE : Une REMARQUE indique des informations importantes qui peuvent
vous aider à mieux utiliser votre ordinateur.
AVIS : Un AVIS vous avertit d’un risque de dommage matériel ou de perte de
données et vous indique comment éviter le problème.
PRÉCAUTION : Une PRÉCAUTION indique un risque potentiel d'endommagement
du matériel, de blessure corporelle ou de mort.
____________________
Les informations contenues dans ce document sont sujettes à modification sans préavis.
© 2007 Dell Inc. Tous droits réservés.
La reproduction de ce document, de quelque manière que ce soit, sans l'autorisation écrite de Dell Inc.
est strictement interdite.
Marques utilisées dans ce document : Dell, le logo DELL, Inspiron, Dell Precision, Dimension,
OptiPlex, Latitude, PowerEdge, PowerVault, PowerApp et Dell OpenManage sont des marques de
Dell Inc. ; Intel, Pentium, et Celeron sont des marques déposées d'Intel Corporation ; Microsoft et
Windows sont des marques déposées de Microsoft Corporation.
D'autres marques et noms commerciaux peuvent être utilisés dans ce document pour faire référence
aux entités se réclamant de ces marques et de ces noms ou à leurs produits. Dell Inc. rejette tout intérêt
propriétaire dans les marques et les noms commerciaux autres que les siens.
Modèles DCSM et DCNE
Septembre 2007 Réf. DU086 Rév. A00

Table des matières 71
Table des matières
Recherche d'informations . . . . . . . . . . . . . . . 73
Avant de commencer
. . . . . . . . . . . . . . . . . . 78
Avant d'intervenir à l'intérieur de votre
ordinateur
. . . . . . . . . . . . . . . . . . . . . 78
Ajout et remplacement de pièces
. . . . . . . . . . . . 79
Configuration de votre ordinateur
. . . . . . . . . . . 81
Installation de votre ordinateur dans une
enceinte
. . . . . . . . . . . . . . . . . . . . . . 81
Configuration d'un réseau domestique et d'un
réseau d'entreprise
. . . . . . . . . . . . . . . . . . . 83
Connexion à une carte réseau
. . . . . . . . . . . 83
Configuration réseau
. . . . . . . . . . . . . . . . 84
Connexion à Internet
. . . . . . . . . . . . . . . . . . 85
Transfert d'informations vers un nouvel
ordinateur
. . . . . . . . . . . . . . . . . . . . . . . . 88
Configuration d'une imprimante
. . . . . . . . . . . . 92
Raccordement de deux moniteurs
. . . . . . . . . . . 93
Périphériques de protection contre les surtensions
électriques
. . . . . . . . . . . . . . . . . . . . . . . 95
Ordinateur de bureau
. . . . . . . . . . . . . . . . . . 97
Vue frontale
. . . . . . . . . . . . . . . . . . . . 97
Vue arrière
. . . . . . . . . . . . . . . . . . . . . 99
Connecteurs du panneau arrière
. . . . . . . . . 100

72 Table des matières
Retrait du capot de l'ordinateur . . . . . . . . . . . . . 102
Vue intérieure de votre ordinateur
. . . . . . . . . . . 104
Composants de la carte système
. . . . . . . . . . . . 105
Remplacement du capot de l'ordinateur
. . . . . . . . 106
Ordinateur mini-tour
. . . . . . . . . . . . . . . . . . . 107
Vue frontale
. . . . . . . . . . . . . . . . . . . . . 107
Vue arrière
. . . . . . . . . . . . . . . . . . . . . 109
Connecteurs du panneau arrière
. . . . . . . . . . . . 110
Retrait du capot de l'ordinateur
. . . . . . . . . . . . . 112
Vue intérieure de l'ordinateur
. . . . . . . . . . . . . . 114
Composants de la carte système
. . . . . . . . . . . . 115
Remplacement du capot de l'ordinateur
. . . . . . . . 116
Résolution des problèmes
. . . . . . . . . . . . . . . . 117
Dell Diagnostics
. . . . . . . . . . . . . . . . . . . . 117
Voyants d'alimentation
. . . . . . . . . . . . . . . . . 121
Codes sonores
. . . . . . . . . . . . . . . . . . . . . . 122
Messages système
. . . . . . . . . . . . . . . . . . . 124
Voyants de diagnostic
. . . . . . . . . . . . . . . . . . 126
Effacement des mots de passe oubliés
. . . . . . . . . 129
Effacement des paramètres CMOS
. . . . . . . . . . . 131
Clignotement du BIOS
. . . . . . . . . . . . . . . . . . 132
Index . . . . . . . . . . . . . . . . . . . . . . . . . . . . . . 133

Guide de référence rapide 73
Recherche d'informations
REMARQUE : Il se peut que certaines fonctionnalités et certains supports soient
en option et ne soient pas livrés avec votre ordinateur. Certaines fonctionnalités ne
sont pas nécessairement disponibles dans tous les pays.
REMARQUE : Il est possible que des informations supplémentaires soient fournies
avec votre ordinateur.
Que recherchez-vous ? Cherchez ici
• Programme de diagnostic pour
mon ordinateur
• Pilotes pour mon ordinateur
• Logiciel DSS (Desktop System
Software)
Support Drivers and Utilities
REMARQUE : Il se peut que le support Drivers
and Utilities soit en option et qu'il ne soit pas
livré avec tous les ordinateurs.
Les pilotes sont déjà installés sur votre
ordinateur. Vous pouvez utiliser ce support
pour réinstaller les pilotes (reportez-vous au
Guide d'utilisation en ligne) et pour exécuter
Dell Diagnostics (reportez-vous à la section
« Dell Diagnostics » à la page 117).
Des fichiers « Lisez-moi » peuvent être inclus
sur votre support ; ces fichiers fournissent des
informations sur les modifications techniques
de dernière minute apportées à votre système
ou des informations de référence destinées aux
techniciens ou aux utilisateurs expérimentés.
REMARQUE : Les dernières mises à jour des
pilotes et de la documentation se trouvent à
l'adresse support.dell.com.

74 Guide de référence rapide
• Informations de dépannage de
base
• Comment exécuter Dell
Diagnostics
• Outils et utilitaires
• Comment installer une
imprimante
Guide de référence rapide
REMARQUE : Ce document peut être en option
et n'est pas obligatoirement expédié avec votre
ordinateur.
REMARQUE : Ce document est disponible au
format PDF à l'adresse support.dell.com.
• Informations sur les garanties
• Termes et Conditions
(États-Unis uniquement)
• Consignes de sécurité
• Informations sur les
réglementations
• Informations relatives à
l'ergonomie
• Contrat de licence pour utilisateur
final
Guide d'information sur le produit Dell™
• Comment retirer et remplacer des
pièces
• Caractéristiques
• Comment configurer les
paramètres du système
• Comment déterminer et résoudre
des problèmes
Guide d'utilisation du Dell OptiPlex™ 330
Centre d'aide et de support Microsoft Windows
1
Cliquez sur le bouton
Démarrer
de Windows
Vista, puis sur
Aide et support
→
User and
system guides
(Guides d'utilisation du
système)
→
System Guides
(Guides de
système).
2
Cliquez sur le
Guide d'utilisation
de votre
ordinateur.
Que recherchez-vous ? Cherchez ici

Guide de référence rapide 75
• Numéro de service et code de
service express
• Étiquette de licence Microsoft
Windows
Numéro de service et licence Microsoft
®
Windows
®
Ces étiquettes sont apposées à l'ordinateur.
• Utilisez le numéro de service pour identifier
votre ordinateur lorsque vous accédez au site
Web
support.dell.com
ou lorsque vous
contactez le service de support.
• Entrez le code de service express pour
orienter votre appel lorsque vous contactez le
service de support.
REMARQUE : Par mesure de sécurité, la
nouvelle étiquette de licence de Microsoft
Windows intègre une partie manquante afin
d'éviter qu'elle ne soit enlevée.
Que recherchez-vous ? Cherchez ici

76 Guide de référence rapide
• Solutions — Conseils et astuces de
dépannage, articles de techniciens,
cours en ligne et questions
fréquemment posées
• Forum clients — Discussion en
ligne avec d'autres clients Dell
• Mises à niveau — Informations sur
les mises à niveau des composants,
comme la mémoire, l'unité de
disque dur et le système
d'exploitation
• Service clientèle — Coordonnées,
appels de service et état des
commandes, garantie et
informations sur les réparations
• Service et support — État des
appels de service et historique du
support, contrat de service,
discussions en ligne avec le support
technique
• Service Dell Technical Update —
Notification proactive par e-mail
des mises à jour logicielles et
matérielles de votre ordinateur
• Référence — Documentation de
l'ordinateur, détails sur la
configuration de l'ordinateur,
caractéristiques de produit et livres
blancs
• Téléchargements — Pilotes,
correctifs et mises à jour logicielles
agréés
Site Web de support de Dell —
support.dell.com
REMARQUE : Sélectionnez votre région ou
votre secteur d'activité pour afficher le site de
support qui vous concerne.
Que recherchez-vous ? Cherchez ici

Guide de référence rapide 77
• DSS (Desktop System Software -
Logiciel système de bureau) —
Si vous réinstallez le système
d'exploitation de votre ordinateur,
vous devez également réinstaller
l'utilitaire DSS. DSS fournit des
mises à jour essentielles pour le
système d'exploitation et la prise
en charge des processeurs, des
lecteurs optiques, des
périphériques USB, etc. DSS est
requis pour le bon fonctionnement
de votre ordinateur Dell. Ce
logiciel détecte automatiquement
votre ordinateur et son système
d'exploitation, et installe les mises
à jour appropriées à votre
configuration.
Pour télécharger DSS (Desktop System
Software) :
1
Rendez-vous sur le site
support.dell.com
,
sélectionnez votre région ou secteur
d'activité, puis saisissez votre numéro de
service.
2
Sélectionnez
Drivers & Downloads
(Pilotes
et téléchargements) et cliquez sur
OK
.
3
Cliquez sur votre système d'exploitation et
recherchez le mot-clé
Desktop System
Software
.
REMARQUE : L'interface utilisateur
support.dell.com peut varier selon vos
sélections.
• Comment utiliser Windows
• Comment utiliser des programmes
et des fichiers
• Comment personnaliser mon
bureau
Centre d'aide et de support de Windows
1
Pour accéder à l'aide et au support de
Windows :
• Sous Windows XP, cliquez sur
Démarrer
et
sur
Aide et support
.
• Sous Windows Vista™, cliquez sur le
bouton
D
émarrer de Windows Vista et sur
Aide et support
.
2
Tapez un mot ou une expression qui décrit
votre problème, puis cliquez sur l'icône en
forme de flèche.
3
Cliquez sur la rubrique qui décrit votre
problème.
4
Suivez les instructions qui s'affichent à
l'écran.
• Comment réinstaller mon système
d'exploitation
Support Operating System
REMARQUE : Il se peut que le support
Operating System soit en option et qu'il ne soit
pas livré avec certains ordinateurs.
Que recherchez-vous ? Cherchez ici

78 Guide de référence rapide
Avant de commencer
Avant d'intervenir à l'intérieur de votre ordinateur
Respectez les consignes de sécurité suivantes pour vous aider à protéger votre
ordinateur contre les dommages éventuels et pour garantir votre sécurité
personnelle.
PRÉCAUTION : Avant de commencer toute procédure de cette section, consultez
et respectez les consignes de sécurité du Guide d'information sur le produit.
AVIS : Manipulez les composants et les cartes avec précaution. Ne touchez pas
les pièces ou les contacts d'une carte. Tenez une carte par les bords ou par la
languette de montage métallique. Tenez les pièces, telles qu'un processeur, par les
bords et non par les broches.
Le système d'exploitation est déjà installé sur
votre ordinateur. Pour réinstaller votre système
d'exploitation, utilisez le disque Operating
System et reportez-vous au Guide d'utilisation
en ligne.
Après la réinstallation de votre système
d'exploitation, utilisez le disque Drivers and
Utilities pour réinstaller les pilotes des
périphériques fournis avec l'ordinateur.
L'étiquette de la Clé de produit du système
d'exploitation est apposée sur l'ordinateur.
REMARQUE : La couleur du disque varie selon
le système d'exploitation que vous avez
commandé.
Que recherchez-vous ? Cherchez ici

Guide de référence rapide 79
AVIS : Seul un technicien d'entretien qualifié doit effectuer les réparations sur
votre ordinateur. Les dommages causés par une personne non agréée par Dell ne
sont pas couverts par votre garantie.
AVIS : Lorsque vous débranchez un câble, tirez sur le connecteur ou sur la
languette de retrait, mais jamais sur le câble lui-même. Certains câbles sont munis
de connecteurs à languettes de verrouillage ; si vous déconnectez ce type de
câble, appuyez sur les languettes de verrouillage vers l'intérieur avant de
déconnecter le câble. Quand vous séparez les connecteurs en tirant dessus, veillez
à les maintenir alignés pour ne pas plier de broches de connecteur. De même,
lorsque vous connectez un câble, assurez-vous que les deux connecteurs sont bien
orientés et alignés.
AVIS : Avant de commencer à travailler sur l'ordinateur, suivez les étapes
suivantes pour éviter de l'endommager.
1
Mettez votre ordinateur hors tension (reportez-vous à la section « Mise
hors tension de l'ordinateur » à la page 80).
PRÉCAUTION : Ne mettez jamais l'ordinateur sous tension si le capot est retiré.
AVIS : Pour déconnecter un câble réseau, débranchez d'abord le câble de votre
ordinateur, puis du périphérique réseau.
2
Débranchez tous les câbles de téléphone ou réseau de l'ordinateur.
3
Déconnectez l'ordinateur et tous les périphériques qui y sont reliés de leur
prise secteur.
4
Appuyez sur le bouton d'alimentation pour mettre à la terre la carte système.
AVIS : Avant de toucher quoi que ce soit à l'intérieur de l'ordinateur, raccordez-
vous à la masse en touchant une surface métallique non peinte, par exemple la
partie métallique à l'arrière de l'ordinateur. Pendant votre intervention, touchez
périodiquement une surface métallique non peinte de l'ordinateur pour dissiper
toute électricité statique qui pourrait endommager les composants internes.
Ajout et remplacement de pièces
Cette section fournit des procédures pour le retrait et l'installation des
composants dans votre ordinateur. À moins d'indication contraire, les
conditions suivantes doivent exister préalablement à chaque procédure :
• Vous avez suivi les étapes décrites dans les sections « Mise hors tension de
l'ordinateur » à la page 80 et « Avant d'intervenir à l'intérieur de votre
ordinateur » à la page 78.

80 Guide de référence rapide
• Vous avez lu les consignes de sécurité qui figurent dans le
Guide
d'information sur le produit
de Dell™.
• Pour remplacer un composant ou pour l'installer, s'il a été acheté
séparément, effectuez la procédure de retrait en ordre inverse.
Outils recommandés
Les procédures mentionnées dans ce document exigent les outils suivants :
• un petit tournevis à lame plate
• un petit tournevis cruciforme
• une petite pointe en plastique
Mise hors tension de l'ordinateur
AVIS : Pour éviter de perdre des données, enregistrez tous les fichiers ouverts,
fermez-les et quittez toutes les applications avant de procéder à l'arrêt du système.
1
Arrêtez le système d'exploitation :
a
Enregistrez et fermez tout fichier ouvert et quittez tous les
programmes d'application en cours d'utilisation.
b
Sous le système d'exploitation Microsoft
®
Windows
®
XP
, cliquez sur
Démarrer
→
Arrêter
→
Arrêter
.
Sous Microsoft
®
Windows Vista™
, cliquez sur le bouton Démarrer de
Windows Vista , dans le coin inférieur gauche du bureau, cliquez
sur la flèche dans le coin inférieur droit du menu Démarrer comme
illustré ci-dessous, puis cliquez sur
Arrêter
.
L'ordinateur s'éteint automatiquement une fois le processus d'arrêt du
système d'exploitation terminé.
2
Vérifiez que l'ordinateur et les périphériques reliés sont éteints. Si votre
ordinateur et les périphériques reliés ne s'éteignent pas automatiquement
lorsque vous arrêtez le système d'exploitation, appuyez sur le bouton
d'alimentation et maintenez-le enfoncé pendant environ 4 secondes pour
les éteindre.

Guide de référence rapide 81
Configuration de votre ordinateur
Installation de votre ordinateur dans une enceinte
L'installation de votre ordinateur dans une enceinte peut restreindre la
circulation de l'air et ainsi affecter la performance de votre ordinateur et peut-
être même le faire surchauffer. Suivez les consignes ci-dessous lorsque vous
installez votre ordinateur dans une enceinte :
AVIS : Les spécifications de la température de fonctionnement indiquées dans ce
manuel reflètent la température ambiante maximale de fonctionnement. La
température ambiante doit être prise en compte lorsque vous installez votre
ordinateur dans une enceinte. Par exemple, si la température ambiante est de 25 °C
(77 °F), selon les spécifications de votre ordinateur, vous n'avez qu'une marge de
température de 5° à 10 °C (de 9° à 18 °F) avant d'atteindre la température maximale
de fonctionnement de votre ordinateur. Pour en savoir plus sur les spécifications de
votre ordinateur, reportez-vous au Guide d'utilisation en ligne.
• Laissez un dégagement d'au moins 10,2 cm (4 po) au niveau des entrées
d'air de l'ordinateur afin de permettre la circulation de l'air nécessaire à une
bonne ventilation.
• Si l'enceinte est équipée de portes, celles-ci doivent être du type qui
permet une circulation d'air de 30 pour cent à l'intérieur de l'enceinte
(avant et arrière).

82 Guide de référence rapide
• Si votre ordinateur est installé dans un coin sur un bureau ou en-dessous
d'un bureau, prévoyez une ouverture d'au moins 5,1 cm (2 po.) entre
l'arrière de l'ordinateur et le mur afin d'assurer la circulation d'air
nécessaire à une ventilation appropriée.
AVIS : N'installez pas votre ordinateur dans une enceinte qui ne permet pas un
écoulement d'air. Une restriction de circulation d'air affecte les performances de
votre ordinateur et peut même le faire surchauffer.

Guide de référence rapide 83
Configuration d'un réseau domestique et d'un
réseau d'entreprise
Connexion à une carte réseau
Pour connecter un câble de réseau :
REMARQUE : Raccordez le câble de réseau au connecteur réseau de votre
ordinateur. Ne le raccordez pas au connecteur modem de votre ordinateur. Ne
raccordez pas non plus de câble de réseau à une prise téléphonique murale.
1
Raccordez le câble de réseau au connecteur de carte réseau à l'arrière de
l'ordinateur.
Insérez le câble jusqu'à ce qu'il s'enclenche et tirez dessus doucement pour
vous assurer qu'il est correctement fixé.
2
Connectez l'autre extrémité du câble de réseau à un périphérique réseau.

84 Guide de référence rapide
Configuration réseau
Windows XP
L'Assistant Configuration réseau du système d'exploitation Microsoft
®
Windows
®
XP vous guide dans la procédure de partage des fichiers, des
imprimantes ou d'une connexion Internet entre ordinateurs présents au sein
d'un réseau domestique ou d'une petite entreprise.
1
Cliquez sur le bouton
Démarrer
, pointez sur
Tous les programmes
→
Accessoires
→
Communications
, puis cliquez sur
Assistant Configuration
réseau
.
2
Sur l'écran de bienvenue de l'
Assistant Configuration réseau
, cliquez sur
Suivant
.
3
Cliquez sur
Liste de vérification pour la création d'un réseau
.
REMARQUE : La sélection de la méthode de connexion This computer connects
directly to the Internet (Cet ordinateur se connecte directement à Internet) entraîne
l'activation du pare-feu intégré fourni avec Windows XP Service Pack 1 (SP1).
4
Terminez la liste de vérifications et les préparations requises.
5
Revenez à l'Assistant Configuration réseau et suivez les instructions qui
s'affichent.
périphérique
réseau
connecteur de carte
réseau de l'ordinateur
câble de réseau
connecteur
de carte
réseau

Guide de référence rapide 85
Windows Vista
Pour modifier votre configuration réseau dans Microsoft
®
Windows Vista™ :
1
Cliquez sur le bouton Démarrer de Windows Vista , puis sur
Réseau
→
Centre de réseau et de partage
.
2
Cliquez sur
Configurer une connexion ou un réseau
.
3
Sélectionnez le type de connexion réseau souhaité et suivez les
instructions à l'écran.
4
Lorsque vous avez terminé, fermez le Centre de réseau et de partage.
Connexion à Internet
REMARQUE : Les fournisseurs d'accès Internet (FAI) et leurs offres varient selon
les pays.
Pour vous connecter à Internet, vous devez disposer d'un modem ou d'une
connexion réseau et d'un fournisseur d'accès Internet (FAI). Votre fournisseur
d'accès Internet vous proposera une ou plusieurs des options de connexion
Internet suivantes :
• Connexions ADSL qui offrent un accès à Internet à haute vitesse par
l'intermédiaire de votre ligne téléphonique existante ou un service de
téléphone cellulaire. Avec une connexion ADSL, vous pouvez accéder à
Internet et utiliser votre téléphone sur la même ligne simultanément.
• Connexions modem par câble qui offrent un accès à Internet à haute
vitesse par l'intermédiaire de la ligne TV câblée locale.
• Connexions modem par satellite qui offrent un accès à Internet à haute
vitesse par l'intermédiaire d'un système de télévision par satellite.
• Connexions d'accès à distance qui offrent un accès à Internet par
l'intermédiaire d'une ligne téléphonique. Ces connexions sont beaucoup
plus lentes que les connexions ADSL et de modem par câble (ou satellite).
• Connexions LAN sans fil qui offrent un accès à Internet par l'intermédiaire
de la technologie sans fil Bluetooth
®
.
Si vous utilisez une connexion d'accès à distance, connectez une ligne
téléphonique au connecteur du modem sur votre ordinateur et à la prise
téléphonique murale avant de configurer la connexion Internet. Si vous
utilisez une connexion ADSL ou modem par câble/satellite, contactez votre
fournisseur d'accès Internet (FAI) ou votre fournisseur de service de
téléphone cellulaire pour obtenir des informations sur la configuration.

86 Guide de référence rapide
Configuration de votre connexion Internet
Pour configurer une connexion Internet à l'aide du raccourci de bureau d'un
fournisseur d'accès Internet fourni :
1
Enregistrez et fermez tous les fichiers et quittez tous les programmes.
2
Double-cliquez sur l'icône
d'un fournisseur d'accès Internet sur le bureau
Microsoft
®
Windows
®
.
3
Pour effectuer la configuration, suivez les instructions qui s'affichent à
l'écran.
Si vous ne voyez pas l'icône d'un fournisseur d'accès Internet sur votre bureau
ou que vous souhaitez configurer une connexion Internet avec un autre FAI,
suivez la procédure décrite ci-dessous et appropriée au système d'exploitation
que vous utilisez.
REMARQUE : Si vous rencontrez des problèmes de connexion à Internet,
reportez-vous à la section « Configuration d'un réseau domestique et d'un réseau
d'entreprise » à la page 83. Si vous ne pouvez pas vous connecter à Internet alors
que vous l'avez fait auparavant, il est possible que le fournisseur d'accès Internet
subisse une interruption de services. Contactez-le pour vérifier l'état des services
ou essayez de vous connecter ultérieurement.
Windows XP
1
Enregistrez et fermez tous les fichiers et quittez tous les programmes.
2
Cliquez sur
Démarrer
→
Internet Explorer
.
L'
Assistant Nouvelle connexion
s'affiche.
3
Cliquez sur
Connecter à Internet
.
4
Dans la fenêtre suivante, cliquez sur l'option appropriée :
• Si vous ne disposez pas de fournisseur d'accès Internet et souhaitez en
sélectionner un, cliquez sur
Choisir dans une liste de fournisseurs de
services Internet
.
• Si vous avez déjà reçu les informations de configuration de votre
fournisseur de services Internet, mais pas le CD de configuration,
cliquez sur
Configurer ma connexion manuellement
.
• Si vous disposez d'un CD, cliquez sur
Utiliser le CD fourni par mon
fournisseur de services Internet
.
5
Cliquez sur
Suivant
.

Guide de référence rapide 87
Si vous sélectionnez
Configurer ma connexion manuellement
, passez à
l'étape 6. Sinon, suivez les instructions qui s'affichent à l'écran pour
terminer la configuration.
REMARQUE : Si vous ne savez pas quel type de connexion sélectionner, contactez
votre fournisseur d'accès Internet.
6
Cliquez sur l'option appropriée sous
Comment souhaitez-vous vous
connecter à Internet ?
, puis cliquez sur
Suivant
.
7
Utilisez les informations fournies par votre fournisseur d'accès Internet
pour terminer la configuration.
Windows Vista™
REMARQUE : Veillez à avoir à portée de main les informations concernant votre
FAI. Si vous n'avez pas de FAI, l'Assistant Connexion à Internet vous aide à en
trouver un.
1
Enregistrez et fermez tous les fichiers et quittez tous les programmes.
2
Cliquez sur le bouton Démarrer de Windows Vista , puis sur
Panneau
de configuration
.
3
Sous
Réseau et Internet
, cliquez sur
Connexion à Internet
.
La fenêtre
Connexion à Internet
s'affiche.
4
Cliquez sur
Large bande (PPPoE)
ou
Accès à distance
, selon la façon dont
vous souhaitez vous connecter :
• Choisissez
Large bande
si vous comptez utiliser une connexion ADSL,
un modem par satellite, un modem par câble ou la technologie sans fil
Bluetooth.
• Choisissez
Accès à distance
si vous comptez utiliser un modem
d'accès à distance ou le RNIS.
REMARQUE : Si vous ne savez pas quel type de connexion sélectionner, cliquez
sur Aidez-moi à choisir ou contactez votre FAI.
5
Suivez les instructions qui s'affichent à l'écran et utilisez les informations
de configuration fournies par votre FAI pour terminer la procédure de
configuration.

88 Guide de référence rapide
Transfert d'informations vers un nouvel ordinateur
Vous pouvez utiliser les « Assistants » de votre système d'exploitation pour
transférer des fichiers et toute autre donnée d'un ordinateur à l'autre, par
exemple d'un ancien ordinateur vers un nouvel ordinateur. Pour plus
d'informations, reportez-vous à la section correspondant au système
d'exploitation que vous utilisez.
Microsoft
®
Windows
®
XP (optionnel)
Le système d'exploitation Microsoft
Windows XP fournit l'Assistant Transfert
de fichiers et de paramètres pour déplacer les données de l'ordinateur source
vers un nouvel ordinateur. Vous pouvez transférer des données telles que :
• messages e-mail
• paramètres de la barre d'outils
• tailles de fenêtre
• signets Internet
Vous pouvez transférer les données vers un nouvel ordinateur en utilisant une
connexion réseau ou série, ou les stocker sur un support amovible, comme un
CD inscriptible.
REMARQUE : Vous pouvez transférer les informations d'un ancien ordinateur vers
un nouveau en connectant directement un câble série aux ports d'entrée/sortie
(E/S) des deux ordinateurs. Pour le transfert de données par connexion série, vous
devez accéder à l'utilitaire Connexions réseau depuis le Panneau de configuration
et passer par des étapes de configuration supplémentaires, comme le paramétrage
d'une connexion avancée et la désignation de l'ordinateur hôte et invité.
Pour des instructions sur la configuration d'une connexion à câble directe entre
deux ordinateurs, reportez-vous à la base de connaissances de Microsoft Article
nº 305621, intitulé How to Set Up a Direct Cable Connection Between Two
Computers in Windows XP (Comment configurer une connexion à câble directe
entre deux ordinateurs sous Windows XP). Il se peut que ces informations ne soient
pas disponibles dans certains pays.
Pour transférer des informations vers un nouvel ordinateur, vous devez lancer
l'Assistant Transfert de fichiers et de paramètres. Pour ce faire, vous pouvez
utiliser le support Operating System en option ou créer un disque Assistant à
l'aide de l'Assistant Transfert de fichiers et de paramètres.

Guide de référence rapide 89
Exécution de l'Assistant Transfert de fichiers et de paramètres avec le support
Operating System
REMARQUE : Le support Operating system est requis. Toutefois, ce support est en
option et n'est pas obligatoirement expédié avec certains ordinateurs.
Pour préparer un nouvel ordinateur au transfert de fichiers :
1
Ouvrez l'Assistant Transfert de fichiers et de paramètres : cliquez sur
Démarrer
→
Tous les programmes
→
Accessoires
→
Outils système
→
Assistant Transfert de fichiers et de paramètres
.
2
Lorsque l'écran de bienvenue de l'
Assistant Transfert de fichiers et de
paramètres
s'affiche, cliquez sur
Suivant
.
3
Dans l'écran
De quel ordinateur s'agit-il ?
, cliquez sur
Nouvel ordinateur
,
puis sur
Suivant
.
4
Dans l'écran
Avez-vous un CD-ROM de Windows XP ?
, cliquez sur
J'utiliserai l'Assistant du CD-ROM de Windows XP
→
Suivant
.
5
Lorsque l'écran
Allez maintenant à votre ancien ordinateur
s'affiche, allez
à l'ancien ordinateur ou ordinateur source.
Ne cliquez pas
sur
Suivant
à ce
moment.
Pour copier les données à partir de l'ancien ordinateur :
1
Sur l'ancien ordinateur, insérez le support
Operating System
pour
Windows XP.
2
Dans l'écran
Bienvenue dans Microsoft Windows XP
, cliquez sur
Effectuer des tâches supplémentaires
.
3
Sous
Que voulez-vous faire ?
, cliquez sur
Transférer des fichiers et des
paramètres
→
Suivant
.
4
Dans l'écran
De quel ordinateur s'agit-il ?
, cliquez sur
Ancien
ordinateur
→
Suivant
.
5
Dans l'écran
Sélectionnez une méthode de transfert
, cliquez sur la
méthode de transfert de votre choix.
6
Dans l'écran
Que voulez-vous transférer ?
, sélectionnez les éléments à
transférer, puis cliquez sur
Suivant
.
Une fois les informations copiées, l'écran
Fin de la phase de collecte des
données
apparaît.
7
Cliquez sur
Terminer
.

90 Guide de référence rapide
Pour transférer les données vers le nouvel ordinateur :
1
Dans l'écran
Allez maintenant à votre ancien ordinateur
sur le nouvel
ordinateur, cliquez sur
Suivant
.
2
Dans l'écran
Où sont les fichiers et les paramètres ?
, sélectionnez la
méthode de transfert de vos paramètres et fichiers, puis cliquez sur
Suivant
.
L'Assistant lit les paramètres et fichiers recueillis, puis les applique à votre
nouvel ordinateur.
Lorsque tous les paramètres et fichiers ont été appliqués, l'écran
Terminé
s'affiche.
3
Cliquez sur
Terminé
et redémarrez le nouvel ordinateur.
Exécution de l'Assistant Transfert de fichiers et de paramètres sans le support
Operating System
Pour exécuter l'Assistant Transfert de fichiers et de paramètres sans le support
Operating System, il faut créer un disque Assistant qui va permettre la
création d'un fichier d'image de sauvegarde pour support amovible.
Pour créer un disque Assistant, servez-vous de votre nouvel ordinateur doté de
Windows XP et suivez les étapes ci-dessous :
1
Ouvrez l'Assistant Transfert de fichiers et de paramètres : cliquez sur
Démarrer
→
Tous les programmes
→
Accessoires
→
Outils système
→
Assistant Transfert de fichiers et de paramètres
.
2
Lorsque l'écran de bienvenue de l'
Assistant Transfert de fichiers et de
paramètres
s'affiche, cliquez sur
Suivant
.
3
Dans l'écran
De quel ordinateur s'agit-il ?
, cliquez sur
Nouvel ordinateur
,
puis sur
Suivant
.
4
Dans l'écran
Avez-vous un CD-ROM de Windows XP ?
, cliquez sur
Je
désire créer un disque Assistant dans le lecteur suivant
→
Suivant
.
5
Insérez le support amovible, tel qu'un CD inscriptible, puis cliquez sur
OK
.
6
Lorsque la création du disque est terminée et que le message
Now go to
your old computer
(Allez maintenant à votre ancien ordinateur)
apparaît,
ne cliquez pas
sur
Suivant
.
7
Allez à votre ancien ordinateur.

Guide de référence rapide 91
Pour copier les données à partir de l'ancien ordinateur :
1
Insérez le disque Assistant sur l'ancien ordinateur.
2
Cliquez sur
Démarrer
→
Exécuter
.
3
Dans le champ
Ouvrir
de la fenêtre
Exécuter
, recherchez le chemin
fastwiz
(pour le support amovible approprié) et cliquez sur
OK
.
4
Dans l'écran de bienvenue de l'
Assistant Transfert de fichiers et de
paramètres
, cliquez sur
Suivant
.
5
Dans l'écran
De quel ordinateur s'agit-il ?
, cliquez sur
Ancien
ordinateur
→
Suivant
.
6
Dans l'écran
Sélectionnez une méthode de transfert
, cliquez sur la
méthode de transfert de votre choix.
7
Dans l'écran
Que voulez-vous transférer ?
, sélectionnez les éléments à
transférer, puis cliquez sur
Suivant
.
Une fois les informations copiées, l'écran
Fin de la phase de collecte des
données
apparaît.
8
Cliquez sur
Terminer
.
Pour transférer les données vers le nouvel ordinateur :
1
Dans l'écran
Allez maintenant à votre ancien ordinateur
sur le nouvel
ordinateur, cliquez sur
Suivant
.
2
Dans l'écran
Où sont les fichiers et les paramètres ?
, sélectionnez la
méthode de transfert de vos paramètres et fichiers, puis cliquez sur
Suivant
. Suivez les instructions qui s'affichent à l'écran.
L'Assistant lit les paramètres et fichiers recueillis, puis les applique à votre
nouvel ordinateur.
Lorsque tous les paramètres et fichiers ont été appliqués, l'écran
Terminé
s'affiche.
3
Cliquez sur
Terminé
et redémarrez le nouvel ordinateur.
REMARQUE : Pour plus d'informations sur cette procédure, rendez-vous sur le
site Web support.dell.com pour accéder au document nº 154781 (What Are The
Different Methods To Transfer Files From My Old Computer To My New Dell™
Computer Using the Microsoft
®
Windows
®
XP Operating System? [Quelles sont les
différentes méthodes pour transférer des fichiers à partir de mon ancien ordinateur
vers mon nouvel ordinateur Dell™ à l'aide du système d'exploitation Microsoft®
Windows® XP ?]).

92 Guide de référence rapide
REMARQUE : Certains pays peuvent ne pas avoir accès au document de la base
de connaissances Dell™.
Microsoft Windows Vista™ (optionnel)
1
Cliquez sur le bouton Démarrer de Windows Vista , puis sur
Transférer
des fichiers et des paramètres
→
Start Windows Easy Transfer
(Lancer le
transfert de fichiers et de paramètres Windows).
2
Dans la boîte de dialogue
Contrôle de compte d'utilisateur
, cliquez sur
Continuer
.
3
Cliquez sur
Lancer un nouveau transfert
ou
Continuer un transfert en
cours
.
Suivez les instructions affichées à l'écran par l'Assistant Transfert de fichiers
et de paramètres Windows.
Configuration d'une imprimante
AVIS : Effectuez la configuration du système d'exploitation avant de connecter une
imprimante à l'ordinateur.
Reportez-vous à la documentation fournie avec l'imprimante pour obtenir des
informations sur la configuration, notamment :
• Obtenir et installer les pilotes mis à jour.
• Connecter l'imprimante à l'ordinateur.
• Charger le papier et installer la cartouche de toner ou d'encre.
Consultez le Manuel du propriétaire de l'imprimante pour obtenir une
assistance technique ou contactez le fabricant de l'imprimante.
Câble de l'imprimante
L'imprimante se connecte à l'ordinateur avec un câble USB ou un câble
parallèle. Il est possible que l'imprimante soit livrée sans câble. Par
conséquent, si vous achetez un câble séparément, assurez-vous qu'il est
compatible avec votre imprimante et votre ordinateur. Si vous avez acheté un
câble d'imprimante en même temps que l'ordinateur, il est possible qu'il vous
soit livré avec ce dernier.

Guide de référence rapide 93
Raccordement de deux moniteurs
PRÉCAUTION : Avant de commencer toute procédure de cette section, consultez
et respectez les consignes de sécurité du Guide d'information sur le produit.
Si vous avez acheté une carte graphique prenant en charge deux moniteurs,
suivez les instructions ci-dessous pour connecter et activer vos moniteurs. Les
instructions vous indiquent la façon de raccorder deux moniteurs (chacun
disposant d'un connecteur VGA), l'un disposant d'un connecteur VGA et
l'autre disposant d'un connecteur DVI ou un téléviseur.
AVIS : Si vous raccordez deux moniteurs ayant des connecteurs VGA, vous devez
disposer de l'adaptateur DVI en option pour pouvoir connecter le câble. Si vous
raccordez deux moniteurs à écran plat, au moins un des moniteurs doit être équipé
d'un connecteur VGA. Si vous connectez un téléviseur, vous ne pouvez raccorder
qu'un moniteur (VGA ou DVI) en plus du téléviseur.
Raccordement de deux moniteurs ayant des connecteurs VGA
1
Mettez votre système hors tension.
REMARQUE : Si votre ordinateur dispose de la vidéo intégrée, ne connectez
aucun moniteur au connecteur vidéo intégré. Si le connecteur vidéo intégré est
couvert d'un capot, ne retirez pas le capot pour connecter le moniteur, sinon le
moniteur ne fonctionnera pas.
2
Connectez l'un des moniteurs au connecteur VGA (bleu) situé à l'arrière
de l'ordinateur.
3
Connectez l'autre moniteur à l'adaptateur DVI en option, puis connectez
l'adaptateur DVI au connecteur DVI (blanc) situé à l'arrière de l'ordinateur.
4
Redémarrez votre système.

94 Guide de référence rapide
Raccordement d'un moniteur disposant d'un connecteur VGA et d'un autre
disposant d'un connecteur DVI
1
Mettez votre système hors tension.
2
Connectez le connecteur VGA sur le moniteur au connecteur VGA (bleu)
situé à l'arrière de l'ordinateur.
3
Connectez le connecteur DVI de l'autre moniteur au connecteur DVI
(blanc) situé à l'arrière de l'ordinateur.
4
Redémarrez votre système.
Connexion d'un téléviseur
REMARQUE : Pour connecter un téléviseur à votre ordinateur, vous devez acheter
un câble S-vidéo, disponible chez la plupart des revendeurs de composants
électroniques. Ce câble n'est pas inclus avec votre ordinateur.
1
Mettez votre système hors tension.
2
Branchez une extrémité du câble S-vidéo dans le connecteur de sortie
TV en option situé à l'arrière de l'ordinateur.
1 adaptateur DVI en option 2 connecteur DVI (blanc)
3 connecteur sortie TV 4 connecteur VGA (bleu)
1
23
4

Guide de référence rapide 95
3
Branchez l'autre extrémité du câble S-vidéo au connecteur d'entrée
TV S-vidéo.
4
Connectez le moniteur VGA ou DVI.
5
Redémarrez votre système.
Modification des paramètres d'affichage
1
Après avoir connecté le(s) moniteur(s) ou le téléviseur, allumez l'ordinateur.
Le bureau Microsoft
®
Windows
®
s'affiche sur le moniteur principal.
2
Activez le mode Bureau étendu dans les paramètres d'affichage. En mode
Bureau étendu, vous pouvez faire glisser des objets d'un écran à l'autre, ce
qui a pour effet de doubler l'espace de travail d'affichage.
Périphériques de protection contre les
surtensions électriques
Plusieurs périphériques peuvent vous protéger contre les fluctuations de la
tension et les pannes d'alimentation :
• Parasurtenseurs
• Filtres de ligne
• Onduleurs
Parasurtenseurs
Les parasurtenseurs et les rampes d'alimentation équipées d'une protection
contre la surtension réduisent les risques d'endommagement de votre
ordinateur provoqués par les pointes de tension pouvant survenir au cours
d'un orage électrique ou suite à une coupure de courant. Certains fabricants
offrent également une garantie contre certains types de dégâts. Lisez
attentivement la garantie du parasurtenseur que vous achetez. Un protecteur
doté d'une valeur nominale en joules plus élevée offre une meilleure
protection. Comparez les valeurs nominales, en joules, afin de déterminer
l'efficacité relative des différents dispositifs.
AVIS : La plupart des parasurtenseurs ne protègent pas contre les fluctuations de
tension ou les coupures de courant. Lorsqu'un orage est proche, débranchez la
ligne téléphonique de la prise murale et déconnectez votre ordinateur de la prise de
courant.

96 Guide de référence rapide
De nombreux parasurtenseurs sont équipés d'une prise téléphonique pour
assurer la protection du modem. Consultez la documentation du
parasurtenseur pour obtenir des instructions sur la connexion du modem.
AVIS : Certains parasurtenseurs n'offrent pas de protection pour les cartes réseau.
Déconnectez le câble de réseau de la prise réseau murale pendant les orages.
Filtres de ligne
AVIS : Les filtres de ligne n'offrent pas de protection contre les coupures de
courant.
Ils sont conçus pour maintenir la tension CA à un niveau relativement
constant.
Onduleurs
AVIS : Une baisse de tension pendant l'enregistrement des données sur le disque
dur peut provoquer une perte de données ou la corruption du fichier.
REMARQUE : Pour optimiser le temps de fonctionnement de la batterie, connectez
uniquement votre ordinateur à un onduleur. Connectez les autres périphériques,
tels que l'imprimante, à une rampe d'alimentation différente équipée d'un
parasurtenseur.
Les onduleurs protègent contre les fluctuations de tension et les coupures de
courant. Ils incluent une batterie qui alimente temporairement les
périphériques connectés lorsque l'alimentation secteur est coupée. La
batterie se charge lorsque l'alimentation secteur est disponible. Consultez la
documentation fournie par le fabricant de l'onduleur afin d'obtenir des
informations sur la durée de fonctionnement de la batterie et vous assurer
que le dispositif est approuvé par Underwriters Laboratories (UL).

Guide de référence rapide 97
Ordinateur de bureau
Vue frontale
1 connecteurs
USB 2.0 (2)
Utilisez les connecteurs USB frontaux pour connecter les
périphériques dont vous ne vous servez qu'occasionnellement, tels
qu'une manette de jeu ou une caméra, ou des périphériques USB
amorçables (reportez-vous à la section « Options de
configuration du système » dans le Guide d'utilisation en ligne
pour de plus amples informations sur l'amorçage à partir d'un
périphérique USB). Il est recommandé d'utiliser les connecteurs
USB situés à l'arrière pour les périphériques qui restent
connectés, comme une imprimante ou un clavier.
2 voyant d'activité
du lecteur
Le voyant d'activité du lecteur s'allume lorsque l'ordinateur lit ou
écrit des données sur l'unité de disque dur. Le voyant peut
également être allumé lorsqu'un périphérique, comme un
lecteur optique, fonctionne.
3 bouton
d'alimentation,
voyant
d'alimentation
Appuyez sur le bouton d'alimentation pour allumer l'ordinateur.
Le voyant qui se trouve au centre de ce bouton indique l'état de
l'alimentation.
AVIS : Pour éviter de perdre des données, n'utilisez pas le
bouton d'alimentation pour éteindre l'ordinateur. Procédez
plutôt à un arrêt du système d'exploitation.
89
3
5
1
4610
2
11 7

98 Guide de référence rapide
4 badge Dell Vous pouvez faire pivoter ce badge pour l'aligner sur l'orientation
de votre ordinateur. Pour le faire pivoter, placez vos doigts sur le
pourtour du badge, appuyez fermement dessus, puis tournez-le.
Vous pouvez également le faire pivoter à l'aide de l'encoche
située vers le bas du badge.
5 voyant
d'alimentation
Le voyant d'alimentation s'allume et clignote ou reste fixe, selon
l'état de fonctionnement :
• Éteint — L'ordinateur est éteint.
• Vert fixe — L'ordinateur fonctionne normalement.
• Vert clignotant — L'ordinateur est en mode d'économie
d'énergie.
• Orange clignotant ou fixe — Reportez-vous à la section
« Problèmes d'alimentation » du
Guide d'utilisation
en ligne.
Pour quitter le mode d'économie d'énergie, appuyez sur le
bouton d'alimentation ou utilisez le clavier ou la souris si ce
périphérique est configuré comme un périphérique de réveil
dans le Gestionnaire de périphériques Windows. Pour plus
d'informations sur les modes de mise en veille et sur la façon de
quitter le mode d'économie d'énergie, reportez-vous au Guide
d'utilisation en ligne.
Reportez-vous à la section « Voyants de diagnostic » à la page 126
pour obtenir la description des codes lumineux qui pourront vous
aider à résoudre les problèmes rencontrés avec votre ordinateur.
6 voyants de
diagnostic
Ces voyants vous aident à résoudre les problèmes informatiques
d'après le code de diagnostic. Pour plus d'informations, reportez-
vous à la section « Voyants de diagnostic » à la page 126.
7 voyant LAN Ce voyant indique qu'une connexion LAN (réseau local) est
établie.
8 casque et
connecteurs
microphone
Permet de connecter un microphone d'ordinateur personnel. Sur
les ordinateurs équipés d'une carte son, le connecteur de
microphone est situé sur la carte.
Permet de connecter le casque et la plupart des haut-parleurs.
9 lecteur de
disquette
Peut contenir un lecteur de disquette optionnel.
10 lecteur optique Permet de jouer un CD/DVD.
11 numéro de
service
Utilisez le numéro de service pour identifier votre ordinateur
lorsque vous accédez au site Web de support de Dell ou que vous
contactez le support technique.

Guide de référence rapide 99
Vue arrière
PRÉCAUTION : Assurez-vous qu'aucune entrée d'air du système n’est bloquée.
Cela peut produire des problèmes thermiques graves.
1 logements de carte Permettent d'accéder aux connecteurs de toutes les cartes PCI
et PCI Express installées.
2 connecteurs du
panneau arrière
Branchez les périphériques USB, audio et autres dans le
connecteur approprié (reportez-vous à la section
« Connecteurs du panneau arrière » à la page 100 pour
obtenir plus d'informations).
3 connecteur
d'alimentation
Insérez le câble d'alimentation.
4 sélecteur de tension Permet de sélectionner la capacité en tension.
5 anneaux pour
cadenas
Les anneaux pour cadenas permettent de connecter un
dispositif antivol offert sur le marché. Ils permettent
également de fixer le capot de l'ordinateur au châssis à
l'aide d'un cadenas afin d'empêcher un accès non autorisé à
l'intérieur de l'ordinateur. Pour utiliser les anneaux pour
cadenas, insérez un cadenas offert sur le marché à travers
les anneaux, puis verrouillez le cadenas.
6 loquet de fermeture
du capot
Ce loquet permet d'ouvrir le capot de l'ordinateur.
5
1
2 3 4 6

100 Guide de référence rapide
Connecteurs du panneau arrière
1 connecteur
parallèle
Permet de connecter un périphérique parallèle, tel qu'une
imprimante. Si vous avez une imprimante USB, raccordez-la à
un connecteur USB.
REMARQUE : Le connecteur parallèle intégré est
automatiquement désactivé si l'ordinateur détecte une carte
installée contenant un connecteur parallèle configuré sur la
même adresse. Pour plus d'informations, reportez-vous à la
section « Options du programme de configuration » du Guide
d'utilisation en ligne.
2 voyant d'intégrité
de la liaison
• Vert — Une bonne connexion est établie entre un réseau à 10
Mb/s et l'ordinateur.
• Orange — Une bonne connexion est établie entre un réseau à
100 Mb/s et l'ordinateur.
• Jaune — Une bonne connexion est établie entre un réseau à 1
Gb/s (ou 1000 Mb/s) et l'ordinateur.
• Éteint — L'ordinateur ne détecte pas de connexion physique
au réseau.
13
98 7
5
6
24

Guide de référence rapide 101
3 connecteur de
carte réseau
Pour connecter l'ordinateur à un périphérique réseau ou large
bande, branchez l'une des extrémités d'un câble réseau à une
prise réseau, un périphérique réseau ou un périphérique large
bande. Connectez l'autre extrémité du câble au connecteur de
carte réseau situé sur le panneau arrière de votre ordinateur. Un
déclic indique que le câble de réseau a été correctement
installé.
REMARQUE : Ne branchez pas un câble téléphonique au
connecteur réseau.
Sur les ordinateurs disposant d'une carte d'adaptateur réseau,
utilisez le connecteur situé sur cette carte.
Il est recommandé d'utiliser au moins un câblage et des
connecteurs de catégorie 5 pour le réseau. Si vous devez utiliser
un câblage de catégorie 3, forcez la vitesse réseau à 10 Mb/s
pour garantir un fonctionnement fiable.
4 voyant d'activité
réseau
Ce voyant est jaune clignotant lorsque l'ordinateur transmet ou
reçoit des données réseau. Un trafic réseau important peut
donner l'impression que ce voyant est fixe.
5 connecteur ligne
de sortie
Utilisez le connecteur ligne de sortie vert pour raccorder le
casque et la plupart des haut-parleurs dotés d'amplificateurs
intégrés.
Sur les ordinateurs équipés d'une carte son, utilisez le
connecteur qui se trouve sur cette carte.
6 connecteur
microphone/
ligne d'entrée
Utilisez le connecteur ligne d'entrée bleu pour raccorder un
appareil d'enregistrement/de lecture, tel qu'un lecteur de
cassette, un lecteur de CD ou un magnétoscope.
Utilisez le connecteur de microphone rose pour raccorder un
microphone d'ordinateur personnel destiné à une entrée vocale
ou musicale dans un programme sonore ou de téléphonie.
Sur les ordinateurs équipés d'une carte son, utilisez le
connecteur qui se trouve sur cette carte.
7 connecteurs
USB 2.0 (6)
Utilisez les connecteurs USB situés à l'arrière pour les
périphériques connectés en permanence, comme l'imprimante
et le clavier.
Il est recommandé d'utiliser les connecteurs USB frontaux pour
les périphériques connectés occasionnellement, comme les
manettes de jeu ou les appareils photo.

102 Guide de référence rapide
Retrait du capot de l'ordinateur
PRÉCAUTION : Avant de commencer toute procédure de cette section, consultez
et respectez les consignes de sécurité du Guide d'information sur le produit.
PRÉCAUTION : Pour prévenir tout risque de choc électrique, débranchez
toujours votre ordinateur de la prise électrique avant de retirer le capot.
1
Suivez les procédures décrites dans la section « Avant de commencer » à la
page 78.
REMARQUE :
Assurez-vous qu'il y a assez d'espace pour supporter le capot retiré.
AVIS : Assurez-vous de travailler sur une surface de niveau et protégée afin
d'éviter des égratignures sur l'ordinateur ou la surface sur laquelle il repose.
2
Si vous avez installé un cadenas dans l'anneau prévu à cet effet sur le
panneau arrière, retirez-le.
3
Faites glisser le loquet de fermeture du capot vers l'arrière tout en
soulevant le capot.
8 connecteur vidéo
VGA
Connectez le câble VGA du moniteur au connecteur VGA sur
l'ordinateur.
Sur les ordinateurs équipés d'une carte vidéo, utilisez le
connecteur qui se trouve sur cette carte.
9 connecteur série Connectez un périphérique série, tel qu'un PDA, au port série.
La désignation par défaut est COM1 pour le connecteur série 1.
Pour plus d'informations, reportez-vous à la section « Options
du programme de configuration » du Guide d'utilisation en
ligne.

Guide de référence rapide 103
4
Faites pivoter le capot de l'ordinateur vers le haut en utilisant les
languettes des charnières comme leviers.
5
Retirez le capot des languettes de charnière et mettez-le de côté sur une
surface douce non abrasive.
1 emplacement pour câble de
sécurité
2 loquet de fermeture du capot
3 anneau pour cadenas
2
1
3

104 Guide de référence rapide
Vue intérieure de votre ordinateur
PRÉCAUTION : Avant de commencer toute procédure de cette section, consultez
et respectez les consignes de sécurité du Guide d'information sur le produit.
PRÉCAUTION : Pour éviter tout choc électrique, débranchez toujours la prise
secteur de votre ordinateur avant d'ouvrir le capot de l'ordinateur.
AVIS : Lorsque vous ouvrez le capot de l'ordinateur, prenez soin de ne pas
déconnecter de câbles de la carte système accidentellement.
1 baie de lecteurs
(CD/DVD, disquette et disque dur)
2 bloc d'alimentation
3 carte système 4 logements de carte
5 assemblage du dissipateur de
chaleur
6 panneau d'E/S avant
1
2
3
4
5
6

Guide de référence rapide 105
Composants de la carte système
1 connecteur de haut-parleur interne
(INT_SPKR)
2 connecteur du processeur (UC)
3 connecteur d'alimentation du
processeur (12VPOWER)
4 connecteurs de module de mémoire
(DIMM_1, DIMM_2)
12
5
13
3
15
17
12
4
7
14
10
11 89
16
6

106 Guide de référence rapide
Remplacement du capot de l'ordinateur
PRÉCAUTION : Avant de commencer toute procédure de cette section, consultez
et respectez les consignes de sécurité du Guide d'information sur le produit.
1
Vérifiez que tous les câbles sont connectés et pliez-les de sorte qu'ils ne
gênent pas.
2
Vérifiez que vous n'avez rien oublié à l'intérieur de l'ordinateur.
3
Pour remettre en place le capot :
a
Alignez le bas du capot sur les languettes de charnière situées le long
du bord inférieur de l'ordinateur.
b
Faites pivoter le capot vers le bas en utilisant les languettes de
charnière comme leviers et fermez-le.
c
Enclenchez le capot en place en tirant vers l'arrière le loquet de
fermeture du capot, puis en le relâchant, une fois le capot
correctement installé.
d
Vérifiez que le capot est correctement installé avant de déplacer
l'ordinateur.
5 connecteurs de disque SATA
(SATA0, SATA1)
6 connecteur du panneau avant
(FRONTPANEL)
7 connecteur d'alimentation
(POWER)
8 connecteurs de disque SATA
(SATA2, SATA3)
9 cavalier de réinitialisation RTC
(RTCRST)
10 cavalier du mot de passe (PSWD)
11 support de pile (BATTERY) 12 connecteur de carte PCI Express
x16 (SLOT1)
13 connecteurs de carte PCI
(SLOT2 et SLOT3)
14 avertisseur interne (SPKR)
15 connecteur série/ PS/2 (PS2/SER2) 16 connecteur du ventilateur
(FAN_CPU)
17 connecteur pour lecteur de
disquette (FLOPPY)

Guide de référence rapide 107
Ordinateur mini-tour
Vue frontale
1 numéro de service Utilisez le numéro de service pour identifier votre
ordinateur lorsque vous accédez au site Web de support
de Dell ou que vous contactez le support technique.
2 lecteur optique Permet de jouer un CD/DVD.
4
8
7
3
2
6
5
1
10
9

108 Guide de référence rapide
3 lecteur de disquette Un lecteur de disquette est optionnel.
4 voyant d'activité du
lecteur
Le voyant d'activité du lecteur s'allume lorsque
l'ordinateur lit ou écrit des données sur l'unité de
disque dur. Le voyant peut également être allumé
lorsqu'un périphérique, comme un lecteur optique,
fonctionne.
5 connecteurs
USB 2.0 (2)
Utilisez les connecteurs USB frontaux pour connecter les
périphériques dont vous ne vous servez
qu'occasionnellement, tels qu'une manette de jeu ou une
caméra, ou des périphériques USB amorçables (reportez-
vous à la section « Options de configuration du
système » dans le Guide d'utilisation en ligne pour de
plus amples informations sur l'amorçage à partir d'un
périphérique USB). Il est recommandé d'utiliser les
connecteurs USB situés à l'arrière pour les
périphériques qui restent connectés, comme une
imprimante ou un clavier.
6 voyants de diagnostic Utilisez ces voyants pour vous aider à résoudre les
problèmes grâce au code de diagnostic. Pour plus
d'informations, reportez-vous à la section «Voyants de
diagnostic » à la page 126.
7 bouton
d'alimentation
voyant d'alimentation
Appuyez sur le bouton d'alimentation pour allumer
l'ordinateur. Le voyant qui se trouve au centre de ce
bouton indique l'état de l'alimentation.
AVIS : Pour éviter de perdre des données,
n'utilisez pas le bouton d'alimentation pour
éteindre l'ordinateur. Procédez plutôt à un arrêt du
système d'exploitation.
8 connecteur de casque Permet de connecter le casque et la plupart des haut-
parleurs.
9 connecteur de
microphone
Utilisez le connecteur de microphone pour raccorder
un microphone d'ordinateur personnel destiné à une
entrée vocale ou musicale dans un programme sonore
ou de téléphonie.
Sur les ordinateurs équipés d'une carte son, le
connecteur de microphone est situé sur la carte.
10 voyant LAN Ce voyant indique qu'une connexion LAN (réseau
local) est établie.

Guide de référence rapide 109
Vue arrière
1 loquet de fermeture
du capot
Ce loquet permet d'ouvrir le capot de l'ordinateur.
2 anneaux pour
cadenas
Les anneaux pour cadenas permettent de connecter un
dispositif antivol offert sur le marché. Ils permettent également
de fixer le capot de l'ordinateur au châssis à l'aide d'un cadenas
afin d'empêcher un accès non autorisé à l'intérieur de
l'ordinateur. Pour utiliser les anneaux pour cadenas, insérez un
cadenas offert sur le marché à travers les anneaux, puis
verrouillez le cadenas.
4
3
5
6
2
1

110 Guide de référence rapide
PRÉCAUTION : Assurez-vous qu'aucune entrée d'air de système est bloquée.
Cela peut produire des problèmes thermiques graves.
Connecteurs du panneau arrière
3 connecteur
d'alimentation
Insérez le câble d'alimentation.
4 sélecteur de tension Permet de sélectionner la capacité en tension.
5 connecteurs du
panneau arrière
Branchez les périphériques USB, audio et autres dans le
connecteur approprié (reportez-vous à la section « Connecteurs
du panneau arrière » à la page 100 pour obtenir plus
d'informations).
6 logements de carte Permettent d'accéder aux connecteurs de toutes les cartes PCI et
PCI Express installées.
1 connecteur
parallèle
Permet de connecter un périphérique parallèle, tel qu'une
imprimante. Si vous avez une imprimante USB, raccordez-la
à un connecteur USB.
REMARQUE : Le connecteur parallèle intégré est
automatiquement désactivé si l'ordinateur détecte une carte
installée contenant un connecteur parallèle configuré sur la
même adresse. Pour plus d'informations, reportez-vous à la
section « Options de configuration du système » du Guide
d'utilisation en ligne.
1
3
98 7
5
6
24

Guide de référence rapide 111
2 voyant d'intégrité
de la liaison
• Vert — Une bonne connexion est établie entre un réseau à
10 Mb/s et l'ordinateur.
• Orange — Une bonne connexion est établie entre un
réseau à 100 Mb/s et l'ordinateur.
• Jaune — Une bonne connexion est établie entre un réseau
à 1 Gb/s (ou 1000 Mb/s) et l'ordinateur.
• Éteint — L'ordinateur ne détecte pas de connexion
physique au réseau.
3 connecteur de
carte réseau
Pour connecter l'ordinateur à un périphérique réseau ou
large bande, branchez l'une des extrémités d'un câble réseau
à une prise réseau, un périphérique réseau ou un
périphérique large bande. Connectez l'autre extrémité du
câble au connecteur de carte réseau situé sur le panneau
arrière de votre ordinateur. Un déclic indique que le câble
réseau a été correctement installé.
REMARQUE : Ne branchez pas un câble téléphonique au
connecteur réseau.
Sur les ordinateurs disposant d'une carte d'adaptateur
réseau, utilisez le connecteur situé sur cette carte.
Il est recommandé d'utiliser au moins un câblage et des
connecteurs de catégorie 5 pour le réseau. Si vous devez
utiliser un câblage de catégorie 3, forcez la vitesse réseau à
10 Mb/s pour garantir un fonctionnement fiable.
4 voyant d'activité
réseau
Ce voyant est jaune clignotant lorsque l'ordinateur transmet
ou reçoit des données réseau. Un trafic réseau important
peut donner l'impression que ce voyant est fixe.
5 connecteur ligne
de sortie
Utilisez le connecteur ligne de sortie vert pour raccorder le
casque et la plupart des haut-parleurs dotés d'amplificateurs
intégrés.
Sur les ordinateurs équipés d'une carte son, utilisez le
connecteur qui se trouve sur cette carte.
6 connecteur
microphone/
ligne d'entrée
Utilisez le connecteur ligne d'entrée de couleurs bleue et
rose pour connecter des périphériques d'enregistrement ou
de lecture (magnétophones, lecteurs de CD, magnétoscopes
ou microphones d'ordinateur personnel).

112 Guide de référence rapide
Retrait du capot de l'ordinateur
PRÉCAUTION : Avant de commencer toute procédure de cette section, consultez
et respectez les consignes de sécurité du Guide d'information sur le produit.
PRÉCAUTION : Pour prévenir tout risque de choc électrique, débranchez
toujours votre ordinateur de la prise électrique avant de retirer le capot.
1
Suivez les procédures décrites dans la section « Avant de commencer » à la
page 78.
REMARQUE :
Assurez-vous qu'il y a assez d'espace pour supporter le capot retiré.
AVIS : Assurez-vous de travailler sur une surface de niveau et protégée afin
d'éviter des égratignures sur l'ordinateur ou la surface sur laquelle il repose.
2
Posez votre ordinateur sur son côté avec le capot de l'ordinateur pointant
vers le haut.
7 connecteurs
USB 2.0 (6)
Utilisez les connecteurs USB situés à l'arrière pour les
périphériques connectés en permanence, comme
l'imprimante et le clavier.
Il est recommandé d'utiliser les connecteurs USB frontaux
pour les périphériques connectés occasionnellement,
comme les manettes de jeu ou les appareils photo.
8 connecteur vidéo
VGA
Connectez le câble VGA du moniteur au connecteur VGA
sur l'ordinateur.
Sur les ordinateurs équipés d'une carte vidéo, utilisez le
connecteur qui se trouve sur cette carte.
9 connecteur série Connectez un périphérique série, tel qu'un PDA, au port
série. La désignation par défaut est COM1 pour le
connecteur série 1.
Pour plus d'informations, reportez-vous à la section
« Options du programme de configuration » du Guide
d'utilisation en ligne.

Guide de référence rapide 113
3
Relâchez le capot de l'ordinateur en le tirant vers l'extérieur de l'avant de
l'ordinateur, puis en levant vers le haut.
4
Mettez le capot de côté dans un endroit sûr.
1
emplacement pour câble de sécurité
2 loquet de fermeture du capot
3 anneau pour cadenas
2
1
3

114 Guide de référence rapide
Vue intérieure de l'ordinateur
1 lecteur de disquette 2 lecteur optique
3 bloc d'alimentation 4 carte système
5 assemblage du dissipateur de
chaleur
6 disque dur
1
3
4
6
2
5

Guide de référence rapide 115
Composants de la carte système
1 connecteur de haut-parleur interne
(INT_SPKR)
2 connecteur du processeur (UC)
3 connecteur d'alimentation du
processeur (12VPOWER)
4 connecteurs de module de
mémoire (DIMM_1, DIMM_2)
12
6
5
13
3
15
17
12
4
7
14
1011 89
16

116 Guide de référence rapide
Remplacement du capot de l'ordinateur
PRÉCAUTION : Avant de commencer toute procédure de cette section, consultez
et respectez les consignes de sécurité du Guide d'information sur le produit.
1
Vérifiez que tous les câbles sont connectés et pliez-les de sorte qu'ils ne
gênent pas.
2
Vérifiez que vous n'avez rien oublié à l'intérieur de l'ordinateur.
3
Pour remettre en place le capot :
a
Alignez le bas du capot sur les languettes de charnière situées le long
du bord inférieur de l'ordinateur.
b
Faites pivoter le capot vers le bas en utilisant les languettes de
charnière comme leviers et fermez-le.
c
Enclenchez le capot en place en tirant vers l'arrière le loquet de
fermeture du capot, puis en le relâchant, une fois le capot
correctement installé.
d
Vérifiez que le capot est correctement installé avant de déplacer
l'ordinateur.
4
Placez l'ordinateur en position verticale.
5 connecteurs de disque SATA
(SATA0, SATA1)
6 connecteur du panneau avant
(FRONTPANEL)
7 connecteur d'alimentation
(POWER)
8 connecteurs de disque SATA
(SATA2, SATA3)
9 cavalier de réinitialisation RTC
(RTCRST)
10 cavalier du mot de passe (PSWD)
11 support de pile (BATTERY) 12 connecteur de carte PCI Express
x16 (SLOT1)
13 connecteurs de carte PCI
(SLOT2 et SLOT3)
14 avertisseur interne (SPKR)
15 connecteur série/ PS/2 (PS2/SER2) 16 connecteur du ventilateur
(FAN_CPU)
17 connecteur pour lecteur de
disquette (FLOPPY)

Guide de référence rapide 117
Résolution des problèmes
Dell fournit un certain nombre d'outils qui vous aideront si votre ordinateur
ne fonctionne pas de la manière escomptée. Pour obtenir les dernières
informations sur le dépannage disponibles pour votre ordinateur, consultez le
site Web du service de support de Dell à l'adresse support.dell.com.
Si des problèmes nécessitant l'aide de Dell surviennent, rédigez une
description détaillée de l'erreur, des codes sonores ou des voyants de
diagnostic, notez votre code de service express et votre numéro de service ci-
dessous, puis contactez Dell depuis l'endroit où se trouve votre ordinateur.
Pour obtenir un exemple de code de service express et de numéro de service,
reportez-vous à la section « Recherche d'informations » du Guide d'utilisation
de votre ordinateur.
Dell Diagnostics
PRÉCAUTION : Avant de commencer toute procédure de cette section, consultez
et respectez les consignes de sécurité du Guide d'information sur le produit.
Quand utiliser Dell Diagnostics
Si vous rencontrez un problème avec l'ordinateur, effectuez les vérifications
indiquées dans la section « Blocages et problèmes logiciels » (reportez-vous au
Guide d'utilisation en ligne pour en savoir plus) et exécutez Dell Diagnostics
avant de contacter Dell pour obtenir une assistance technique.
Nous vous recommandons d'imprimer ces procédures avant de commencer.
AVIS : Dell Diagnostics ne fonctionne que sur les ordinateurs Dell™.
REMARQUE : Il se peut que le CD Drivers and Utilities soit en option et qu'il ne soit
pas livré avec tous les ordinateurs.
Reportez-vous à la section « Configuration du système » du Guide d'utilisation en
ligne pour étudier les informations de configuration de votre ordinateur et
vérifiez que le périphérique à tester apparaît dans le programme de
configuration du système et qu'il est actif.
Lancez Dell Diagnostics à partir de votre disque dur ou à partir du support
Drivers and Utilities.
Code de service express :
Numéro de service :

118 Guide de référence rapide
Démarrage de Dell Diagnostics à partir du disque dur
Dell Diagnostics se trouve dans une partition cachée (utilitaire de
diagnostics) de votre disque dur.
REMARQUE : Si aucune image ne s'affiche, contactez Dell.
1
Assurez-vous que l'ordinateur est connecté à une prise électrique qui
fonctionne correctement.
2
Mettez votre ordinateur sous tension (ou redémarrez-le).
3
Lorsque le logo DELL™ apparaît, appuyez immédiatement sur <F12>.
Sélectionnez
Diagnostics
à partir du menu de démarrage et appuyez sur
<Entrée>.
REMARQUE : Si vous avez attendu trop longtemps et que le logo du système
d'exploitation s'affiche, attendez que le bureau de Microsoft
®
Windows
®
s'affiche, puis arrêtez votre ordinateur et essayez à nouveau.
REMARQUE : Si un message indique qu'aucune partition de diagnostic n'a
été trouvée, exécutez Dell Diagnostics à partir du CD Drivers and Utilities.
4
Appuyez sur une touche pour démarrer Dell Diagnostics à partir de la
partition de diagnostics du disque dur.
Démarrage de Dell Diagnostics à partir du support Drivers and Utilities
1
Insérez le disque
Drivers and Utilities
.
2
Arrêtez, puis redémarrez l'ordinateur.
Lorsque le logo DELL apparaît, appuyez immédiatement sur <F12>.
REMARQUE : Si vous avez attendu trop longtemps et que le logo du système
d'exploitation s'affiche, attendez que le bureau de Microsoft
®
Windows
®
s'affiche, puis arrêtez votre ordinateur et essayez à nouveau.
REMARQUE : Les étapes suivantes modifient la séquence d'amorçage pour
une seule exécution. Au démarrage suivant, l'ordinateur démarre en fonction
des périphériques définis dans le programme de configuration du système.
3
Lorsque la liste des périphériques d'amorçage s'affiche, mettez en
surbrillance
CD/DVD/CD-RW
et appuyez sur <Entrée>.
4
Sélectionnez l'option
Boot from CD-ROM
(Amorcer à partir du
CD-ROM) dans le menu qui s'affiche, puis appuyez sur <Entrée>.
5
Ta p ez
1
pour démarrer le menu du CD, puis appuyez sur <Entrée> pour
continuer.

Guide de référence rapide 119
6
Sélectionnez
Exécuter Dell Diagnostics 32 bits
dans la liste numérotée. Si
plusieurs versions sont répertoriées, sélectionnez la version appropriée à
votre ordinateur.
7
Lorsque le
menu principal
de Dell Diagnostics s'affiche, sélectionnez le
test à effectuer.
Menu principal de Dell Diagnostics
1
Une fois Dell Diagnostics chargé et lorsque l'écran
Menu
principal
s'affiche, cliquez sur le bouton de l'option de votre choix.
REMARQUE : Il vous est recommandé de sélectionner Test System (Test système)
pour exécuter un test complet sur votre ordinateur.
2
Après que vous sélectionnez l'option
Test System
(Test système) dans le
menu principal, le menu suivant s'affiche.
REMARQUE : Il vous est recommandé de sélectionner Extended Test (Test
approfondi) dans le menu ci-dessous pour exécuter un test plus approfondi des
périphériques de l'ordinateur.
Option Fonction
Test Memory
(Test mémoire)
Permet d'exécuter le test de mémoire autonome.
Test System
(Test système)
Permet d'exécuter les diagnostics système.
Exit (Quitter) Permet de quitter les diagnostics.
Option Fonction
Express Test
(Test rapide)
Exécute un test rapide des périphériques du système.
Typiquement, cela peut prendre de 10 à 20 minutes.
Extended Test
(Test approfondi)
Exécute un test approfondi des périphériques du système.
Typiquement, cela peut prendre une heure ou plus.
Custom Test
(Test personnalisé)
Permet de tester un périphérique spécifique ou de
personnaliser les tests à exécuter.
Symptom Tree
(Arborescence des
symptômes)
Cette option permet de sélectionner les tests selon un
symptôme du problème que vous rencontrez. Elle répertorie
les symptômes les plus communs.

120 Guide de référence rapide
3
Si un problème survient pendant un test, un message indiquant le code
d'erreur et une description du problème s'affiche. Prenez note du code
d'erreur et de la description du problème, puis contactez Dell.
REMARQUE : Le numéro de service de votre ordinateur est situé en haut de
chaque écran de test. Lorsque vous contacterez le support technique de Dell,
ce numéro de service vous sera demandé.
4
Si vous exécutez un test à partir de l'option
Custom Test
(Test
personnalisé)
ou Symptom Tree
(Arborescence des symptômes), cliquez
sur l'onglet approprié décrit dans le tableau suivant pour obtenir plus
d'informations.
5
Une fois les tests effectués, fermez l'écran de test pour revenir à l'écran du
menu
principal
. Pour quitter Dell Diagnostics et redémarrer l'ordinateur,
fermez l'écran
Menu
principal
.
6
Retirez le support
Drivers and Utilities
de Dell
(le cas échéant).
Onglet Fonction
Results
(Résultats)
Affiche les résultats du test et les conditions d'erreur
rencontrées.
Errors
(Erreurs)
Affiche les conditions d'erreur rencontrées, les codes d'erreur
et la description du problème.
Help
(Aide)
Décrit le test et peut indiquer les conditions requises pour
exécuter le test.
Configuration
(Configuration)
Affiche la configuration matérielle du périphérique
sélectionné.
Dell Diagnostics obtient des informations de configuration
sur tous les périphériques à partir du programme de
configuration du système, de la mémoire et de divers tests
internes. Ces résultats sont ensuite affichés dans la liste des
périphériques située dans la partie gauche de l'écran. La liste
des périphériques risque de ne pas afficher les noms de tous
les composants installés sur votre ordinateur ou de tous les
périphériques reliés à celui-ci.
Parameters
(Paramètres)
Vous permet de personnaliser le test en modifiant ses
paramètres.

Guide de référence rapide 121
Voyants d'alimentation
PRÉCAUTION : Avant de commencer toute procédure de cette section, consultez
et respectez les consignes de sécurité du Guide d'information sur le produit.
Le voyant de bouton d'alimentation (DEL bicolore) qui se trouve à l'avant de
l'ordinateur s'allume et clignote ou bien demeure allumé pour indiquer
différents états :
• Si le voyant d'alimentation est éteint, l'ordinateur n'est pas allumé ou n'est
pas branché à une source d'alimentation.
– Rebranchez le câble d'alimentation dans le connecteur d'alimentation
situé à l'arrière de l'ordinateur et dans la prise secteur.
– Si l'ordinateur est connecté à une multiprise, vérifiez qu'elle est
branchée à une prise secteur et qu'elle est allumée. Contournez
également les périphériques de protection contre les surtensions
électriques, les barrettes d'alimentation et les rallonges d'alimentation
pour vérifier que l'ordinateur est sous tension.
– Assurez-vous que la prise secteur fonctionne en la testant à l'aide d'un
autre appareil, une lampe par exemple.
• Si le voyant d'alimentation est vert statique et que l'ordinateur ne répond
plus :
– Vérifiez si l'écran est connecté et sous tension.
– Si l'écran est connecté et sous tension, reportez-vous à la section
« Codes sonores » à la page 122.
• Si le voyant d'alimentation est vert clignotant, l'ordinateur est en mode
Veille. Appuyez sur une touche sur le clavier, déplacez la souris ou appuyez
sur le bouton d'alimentation pour reprendre l'opération normale. Si le
voyant d'alimentation est vert et que l'ordinateur ne répond pas :
– Vérifiez si l'écran est connecté et sous tension.
– Si l'écran est connecté et sous tension, reportez-vous à la section
« Codes sonores » à la page 122.
• Si le voyant d'alimentation est orange statique, l'ordinateur reçoit
l'alimentation électrique, mais il se peut qu'un périphérique soit
défectueux ou incorrectement installé.
– Retirez, puis réinstallez les modules de mémoire.
– Retirez, puis réinstallez la ou les carte(s).
– Retirez, puis réinstallez la carte graphique, le cas échéant.

122 Guide de référence rapide
• Si le voyant d'alimentation est orange clignotant, il existe peut-être un
problème d'alimentation ou une défaillance de périphérique interne.
– Vérifiez si tous les câbles d'alimentation sont branchés à la carte
système de façon sûre (reportez-vous à la section « Composants de la
carte système » à la page 105).
– Vérifiez que le câble d'alimentation principal et le câble du panneau
avant sont bien connectés à la carte système (reportez-vous à la
section « Composants de la carte système » à la page 105).
Codes sonores
Il se peut que votre ordinateur émette une série de bips lors du démarrage si
le moniteur ne peut pas afficher des erreurs ou des problèmes. Cette série de
signaux, appelés « codes sonores », permet d'identifier les problèmes de
fonctionnement de l'ordinateur. Par exemple, le code sonore 1-3-1 (un code
sonore possible) est composé d'un signal, d'une série de trois signaux, puis
d'un autre signal. Ce code sonore vous indique que l'ordinateur a rencontré
un problème de mémoire.
La réinstallation des modules de mémoire peut permettre de corriger les
erreurs signalées par les codes sonores suivants. Si le problème persiste,
contactez Dell (reportez-vous à la section « Contacter Dell »
du
Guide
d'utilisation
) pour savoir comment obtenir une assistance technique.
Si vous rencontrez les erreurs signalées par les codes sonores suivants,
reportez-vous à la section « Contacter Dell »
du
Guide d'utilisation
pour savoir
comment obtenir une assistance technique.
Code Cause
1-3-1 à
2-4-4
La mémoire n'est pas correctement identifiée ou utilisée
4-3-1 Échec de mémoire au-dessus de l'adresse 0FFFFh
Code Cause
1-1-2 Panne de registre du microprocesseur
1-1-3 Erreur de lecture/écriture en NVRAM
1-1-4 Échec du total des vérifications BIOS ROM

Guide de référence rapide 123
1-2-1 Erreur du temporisateur d'intervalles programmable
1-2-2 Échec d'initialisation du DMA (accès direct à la mémoire)
1-2-3 Échec de lecture/écriture du registre des pages de DMA
1-3 Échec du test de la mémoire vidéo
1-3-1 à
2-4-4
La mémoire n'est pas correctement identifiée ou utilisée
3-1-1 Échec de registre DMA esclave
3-1-2 Échec de registre DMA maître
3-1-3 Échec de registre de masque d'interruption maître
3-1-4 Échec de registre de masque d'interruption esclave
3-2-2 Échec de chargement du vecteur d'interruption
3-2-4 Échec du test de contrôleur de clavier
3-3-1 Perte d'alimentation de NVRAM
3-3-2 Configuration incorrecte de la NVRAM
3-3-4 Échec du test de la mémoire vidéo
3-4-1 Échec d'initialisation de l'écran
3-4-2 Échec de retraçage de l'écran
3-4-3 Échec de recherche de ROM vidéo
4-2-1 Aucune impulsion d'horloge
4-2-2 Échec de l'arrêt
4-2-3 Échec de la porte A20
4-2-4 Interruption inattendue en mode protégé
4-3-1 Échec de mémoire au-dessus de l'adresse 0FFFFh
4-3-3 Panne du compteur 2 de puce de l'horloge
4-3-4 Arrêt de l'horloge machine
4-4-1 Échec du test de port parallèle ou série
4-4-2 Échec de décompression de code dans la mémoire en double
4-4-3 Échec du test de coprocesseur mathématique
4-4-4 Échec du test de mémoire cache
Code Cause

124 Guide de référence rapide
Messages système
REMARQUE : Si le message affiché n'est pas répertorié dans le tableau, consultez
la documentation du système d'exploitation ou du programme en cours d'utilisation
au moment où le message est apparu.
ALERT! PREVIOUS ATTEMPTS AT BOOTING THIS SYSTEM HAVE FAILED AT
CHECKPOINT [NNNN]. FOR HELP IN RESOLVING THIS PROBLEM, PLEASE NOTE
THIS CHECKPOINT AND CONTACT DELL TECHNICAL SUPPORT (ALERTE ! LES
TENTATIVES PRÉCÉDENTES DE DÉMARRAGE DE CE SYSTÈME ONT ÉCHOUÉ AU
POINT DE CONTRÔLE [NNNN]. POUR RÉSOUDRE CE PROBLÈME, VEUILLEZ
PRENDRE NOTE DE CE POINT DE CONTRÔLE ET CONTACTER LE SUPPORT
TECHNIQUE DE DELL)—L'ordinateur n'a pas terminé la procédure d'amorçage
trois fois consécutives pour la même erreur.
CMOS CHECKSUM ERROR (ERREUR DE SOMME DE CONTRÔLE DU CMOS) —
Échec possible de la carte mère ou décharge de la batterie RTC. Remplacez la
batterie.
CPU FAN FAILURE (ÉCHEC DU VENTILATEUR UC) — Échec du ventilateur UC.
Remplacez le ventilateur UC.
DISKETTE DRIVE 0 SEEK FAILURE (ÉCHEC DE RECHERCHE DU LECTEUR DE
DISQUETTE 0) — Il se peut qu'un câble soit desserré ou que les informations de
configuration de l'ordinateur ne correspondent pas à la configuration matérielle.
Vérifiez les raccordements de câble.
DISKETTE READ FAILURE (ÉCHEC DE LECTURE DE DISQUETTE)—Il se peut que
la disquette soit défectueuse ou qu'un câble soit desserré. Remplacez la disquette
ou vérifiez s'il existe un raccordement de câble desserré.
HARD-DISK DRIVE FAILURE (ÉCHEC DE L'UNITÉ DE DISQUE DUR)—Échec
possible de l'unité de disque lors de HDD POST. Vérifiez les câbles ou échangez le
disque dur.
HARD-DISK DRIVE READ FAILURE (ÉCHEC DE LECTURE DE L 'UNITÉ DE DISQUE
DUR)—Échec de lecture possible de l'unité de disque dur lors du test d'amorçage
du disque dur.
KEYBOARD FAILURE (PANNE DU CLAVIER)—Panne du clavier ou câble de
clavier desserré.

Guide de référence rapide 125
NO BOOT DEVICE AVAILABLE (AUCUN PÉRIPHÉRIQUE D'AMORÇAGE N'EST
DISPONIBLE)—Le système ne peut pas détecter un périphérique ou une partition
amorçable.
• Si le lecteur de disquette est votre périphérique d'amorçage, assurez-vous que les
câbles sont bien raccordés et qu'une disquette se trouve dans le lecteur.
• Si le disque dur est votre périphérique d'amorçage, assurez-vous que les câbles
sont bien raccordés, que le lecteur est installé, bien en place et partitionné
comme périphérique d'amorçage.
• Ouvrez le programme de configuration du système et assurez-vous que les
informations de la séquence d'amorçage sont correctes.
NO TIMER TICK INTERRUPT (AUCUNE INTERRUPTION DE TIC D'HORLOGE)—
ll se peut qu'une puce sur la carte système soit défectueuse ou qu'il y ait un échec
de la carte mère.
NON-SYSTEM DISK OR DISK ERROR (ERREUR DISQUE OU DISQUE NON-SYSTÈME)—
Remplacez la disquette par une disquette avec un système d'exploitation
amorçable ou retirez la disquette du lecteur A et redémarrez l'ordinateur.
NOT A BOOT DISKETTE (DISQUETTE NON AMORÇABLE)— Insérez une disquette
d'amorçage et redémarrez votre ordinateur.
USB OVER CURRENT ERROR (ERREUR DE SURINTENSITÉ USB) — Débranchez le
périphérique USB. Utilisez une source d'alimentation électrique externe pour le
périphérique USB.
NOTICE - HARD DRIVE SELF MONITORING SYSTEM HAS REPORTED THAT A
PARAMETER HAS EXCEEDED ITS NORMAL OPERATING RANGE. DELL
RECOMMENDS THAT YOU BACK UP YOUR DATA REGULARLY. A PARAMETER OUT
OF RANGE MAY OR MAY NOT INDICATE A POTENTIAL HARD DRIVE PROBLEM —
(Avis - Le système d’auto-surveillance du disque dur a déclaré qu'un paramètre a
dépassé la plage de fonctionnement normale. Dell vous recommande de
sauvegarder vos données périodiquement. Un paramètre hors limites peut ou non
indiquer un problème de disque dur éventuel)
Erreur S.M.A.R.T, échec possible du disque dur. Vous pouvez activer ou désactiver
cette fonctionnalité dans la configuration du BIOS.

126 Guide de référence rapide
Voyants de diagnostic
PRÉCAUTION : Avant de commencer toute procédure de cette section, consultez
et respectez les consignes de sécurité du Guide d'information sur le produit.
Afin de vous aider à résoudre les problèmes, l'ordinateur est équipé de quatre
voyants situés sur le panneau avant ou arrière : 1, 2, 3 et 4. Ces voyants
peuvent être éteints ou verts. Lorsque l'ordinateur démarre normalement, le
comportement ou les codes des voyants changent au fur et à mesure de
l'avancement du processus de démarrage. Lorsque l'ordinateur démarre
normalement, le comportement ou les codes des voyants changent au fur et à
mesure de l'avancement du processus de démarrage. Si la partie POST
(autotest à la mise sous tension) du démarrage du système s'effectue
correctement, les quatre voyants sont verts fixes. Si l'ordinateur ne fonctionne
pas correctement lors du processus POST, le comportement des voyants peut
vous aider à identifier l'origine du problème.
REMARQUE : L'orientation des voyants de diagnostic peut varier selon le type de
système. Les voyants de diagnostic peuvent apparaître soit verticalement, soit
horizontalement.
Comportement des
voyants
Description du problème Solution proposée
L'ordinateur est en condition
d'arrêt normale ou une panne
est survenue avant le BIOS.
Les voyants de diagnostic ne
sont pas allumés alors que le
système d'exploitation de
l'ordinateur s'est lancé
correctement.
Raccordez l'ordinateur à une prise
secteur qui fonctionne et appuyez
sur le bouton d'alimentation.
Échec éventuel du BIOS ;
l'ordinateur est en mode
Restauration.
Exécutez l'utilitaire de sauvegarde
du BIOS, attendez que la
restauration soit terminée et
redémarrez l'ordinateur.
Une défaillance du
processeur semble s'être
produite.
Réinstallez le processeur et
redémarrez l'ordinateur.

Guide de référence rapide 127
Les modules de mémoire
sont détectés, mais une
panne de mémoire est
survenue.
• Si un module de mémoire est
installé, réinstallez-le et
redémarrez l'ordinateur.
(Reportez-vous au
Guide
d'utilisation
en ligne pour obtenir
des instructions sur la façon de
retirer et d'installer les modules
de mémoire.)
• Si au moins deux modules de
mémoire sont installés,
supprimez-les, réinstallez un
module, puis redémarrez
l'ordinateur. Si l'ordinateur
redémarre normalement,
réinstallez un autre module.
Répétez cette procédure jusqu'à
identification du module
défectueux ou réinstallation de
tous les modules sans erreur.
• Installez sur votre ordinateur la
mémoire du même type
fonctionnant correctement, le
cas échéant.
• Si le problème persiste,
contactez Dell
.
Une défaillance de la carte
graphique semble s'être
produite.
• Si l'ordinateur possède une carte
graphique, retirez-la, réinstallez-
la, puis redémarrez l'ordinateur.
• Si le problème persiste, installez
une carte graphique qui
fonctionne et redémarrez
l'ordinateur.
• Si le problème persiste ou que
votre ordinateur dispose de
fonctions vidéo intégrées,
contactez Dell
.
Comportement des
voyants
Description du problème Solution proposée

128 Guide de référence rapide
Panne possible de lecteur de
disquette ou de disque dur.
Réinstallez tous les câbles de
données et d'alimentation, puis
redémarrez l'ordinateur.
Panne USB possible. Réinstallez tous les périphériques
USB, vérifiez la connexion des
câbles, puis redémarrez
l'ordinateur.
Aucun module de mémoire
n'a été détecté.
• Si un module de mémoire est
installé, réinstallez-le et
redémarrez l'ordinateur.
Reportez-vous au
Guide
d'utilisation
en ligne pour obtenir
des instructions sur la façon de
retirer et d'installer les modules
de mémoire.
• Si au moins deux modules de
mémoire sont installés,
supprimez-les, réinstallez un
module, puis redémarrez
l'ordinateur. Si l'ordinateur
redémarre normalement,
réinstallez un autre module.
Répétez cette procédure jusqu'à
identification du module
défectueux ou réinstallation de
tous les modules sans erreur.
• Installez sur votre ordinateur la
mémoire du même type
fonctionnant correctement, le
cas échéant.
• Si le problème persiste,
contactez Dell
.
Comportement des
voyants
Description du problème Solution proposée

Guide de référence rapide 129
Effacement des mots de passe oubliés
PRÉCAUTION : Avant de commencer toute procédure de cette section, consultez
et respectez les consignes de sécurité du Guide d'information sur le produit.
1
Suivez les procédures décrites dans la section « Avant de commencer » à la
page 78.
2
Retirez le capot de l'ordinateur (reportez-vous à la section « Retrait du
capot de l'ordinateur » à la page 112).
Les modules de mémoire
sont détectés, mais une
erreur de configuration de
mémoire ou de compatibilité
est survenue.
• Vérifiez qu'aucune
contrainte
particulière
ne doit être
respectée pour l'installation des
modules dans les connecteurs de
mémoire.
• Vérifiez que les
modules de
mémoire
que vous installez sont
compatibles avec votre
ordinateur.
• Si le problème persiste, contactez
Dell.
Une erreur est survenue.
Cette séquence s'affiche
également lorsque vous
ouvrez le programme de
configuration du système et
n'est pas forcément
significative d'un problème.
• Vérifiez que les câbles sont
correctement connectés entre le
disque dur, le lecteur optique et
la carte mère.
• Lisez le message qui s'affiche sur
l'écran du moniteur.
• Si le problème persiste, contactez
Dell.
Une fois le POST terminé,
les quatre voyants de
diagnostic deviennent
brièvement verts avant de
s'éteindre pour indiquer une
condition de fonctionnement
normale.
Aucune.
Comportement des
voyants
Description du problème Solution proposée

130 Guide de référence rapide
3
Repérez le cavalier de mot de passe (PSWD, 2 broches) sur la carte système.
Par défaut, Pin1 et Pin2 (Broche1 et Broche2) devraient être connectées.
Vous devez retirer le cavalier et amorcer le système, comme suit :
4
Retirez le cavalier.
5
Remettez le capot de l'ordinateur en place (reportez-vous à la section
« Remplacement du capot de l'ordinateur » à la page 106).
AVIS : Pour connecter un câble de réseau, branchez-le d'abord au périphérique
réseau, puis à l'ordinateur.
6
Rebranchez l'ordinateur et ses périphériques à leurs prises électriques, puis
allumez-les.
7
Après l'affichage du bureau Microsoft
®
Windows
®
sur votre ordinateur,
arrêtez celui-ci (reportez-vous à la section « Mise hors tension de
l'ordinateur » à la page 80).
8
Éteignez le moniteur et débranchez-le de la prise secteur.
9
Débranchez l'ordinateur de la prise secteur, puis appuyez sur le bouton
d'alimentation pour mettre la carte système à la terre.
10
Ouvrez le capot de l'ordinateur.
11
Repérez le cavalier de mot de passe (PSWD, 2 broches) sur la carte
système, et remettez-le en place pour réactiver la fonction de mot de passe.

Guide de référence rapide 131
12
Remettez le capot de l'ordinateur en place (reportez-vous à la section
« Remplacement du capot de l'ordinateur » à la page 106).
AVIS : Pour connecter un câble de réseau, branchez le câble d'abord sur la prise
réseau murale, puis sur l'ordinateur.
13
Rebranchez l'ordinateur et ses périphériques à leurs prises électriques, puis
allumez-les.
REMARQUE : Cette opération réactive la fonctionnalité de mot de passe. Lorsque
vous
ouvrez le programme de configuration du système (reportez-vous à la section
« Ouverture du programme de configuration du système » du Guide d'utilisation), les
deux options de mot de passe (système et administrateur) ont pour valeur Not Set
(Non défini) — Cela signifie que la fonctionnalité est activée mais qu'aucun mot de
passe n'est attribué.
14
Affectez un nouveau mot de passe système et/ou administrateur.
Effacement des paramètres CMOS
PRÉCAUTION : Avant de commencer toute procédure de cette section, consultez
et respectez les consignes de sécurité du Guide d'information sur le produit.
1
Suivez les procédures décrites dans la section « Avant de commencer » à la
page 78.
REMARQUE : L'ordinateur doit être débranché de la prise secteur pour
effacer le paramètre CMOS.
2
Retirez le capot de l'ordinateur (reportez-vous à la section « Retrait du
capot de l'ordinateur » à la page 112).
3
Retirez le capot de l'ordinateur.
4
Réinitialisez les paramètres CMOS :
a
Repérez les cavaliers de mot de passe (PSWD) et CMOS (RTCRST)
sur la carte système (reportez-vous à la section « Effacement des mots
de passe oubliés » à la page 129).
b
Retirez la fiche du cavalier PSWD de ses broches.
c
Placez la fiche sur les broches du cavalier RTCRST et attendez
environ cinq secondes.
d
Retirez la fiche des broches RTCRST et remettez-la sur les broches du
cavalier PWSD.

132 Guide de référence rapide
5
Remettez le capot de l'ordinateur en place (reportez-vous à la section
« Remplacement du capot de l'ordinateur » à la page 106).
AVIS : Pour connecter un câble de réseau, branchez-le d'abord au port réseau ou
au périphérique, puis à l'ordinateur.
6
Rebranchez l'ordinateur et ses périphériques à leurs prises électriques, puis
allumez-les.
Clignotement du BIOS
Il se peut que le BIOS nécessite le clignotement lorsqu'une mise à jour est
disponible ou lorsque vous remplacez la carte système.
1
Allumez l'ordinateur.
2
Recherchez le fichier de mise à jour BIOS pour votre ordinateur sur le site
Web du service de support de Dell à l'adresse
support.dell.com
.
3
Cliquez sur
Download Now
(Télécharger maintenant) pour télécharger le
fichier.
4
Si la fenêtre
Export Compliance Disclaimer
(Renonciation à la
conformité aux normes d’exportation) s'affiche, cliquez sur
Yes, I Accept
this Agreement
(Oui, j'accepte cet accord).
La fenêtre
File Download
(Téléchargement du fichier) apparaît.
5
Cliquez sur
Save this program to disk
(Enregistrer ce programme sur un
disque), puis cliquez sur
OK
.
La fenêtre
Save In
(Enregistrer dans) apparaît.
6
Cliquez sur la flèche vers le bas pour afficher le menu
Enregistrer dans
,
sélectionnez
Desktop
(Bureau)
, puis cliquez sur
Save
(Enregistrer).
Le fichier est téléchargé sur votre bureau.
7
Cliquez sur Fermer lorsque la fenêtre
Download Complete
(Téléchargement terminé) apparaît.
L'icône de fichier apparaît sur votre bureau et porte le même nom que le
fichier de mise à jour BIOS.
8
Double-cliquez sur l'icône de fichier sur le bureau et suivez les instructions
apparaissant à l'écran.

Index 133
Index
A
alimentation
bouton, 97, 108
filtres de ligne
parasurtenseurs
périphériques de protection
UPS
voyant, 98
alimentation sans interruption.
Voir UPS
Assistant Configuration
réseau, 84
assistants
Assistant Configuration
réseau, 84
C
capot
remplacement, 106, 116
retrait, 102, 112
carte mère. Voi r carte système
carte système, 105, 115
CD
système d'exploitation, 77
CD Operating System, 77
CD ResourceCD
Dell Diagnostics, 117
Centre d'aide et de support, 77
codes sonores, 122
codes sonores d'ordinateur
codes sonores, 122
composants
avant de commencer, 79
connexion Internet
à propos de, 85
configuration, 86
options, 85
consignes de sécurité, 74
contrat de licence pour
utilisateur final, 74
D
Dell Diagnostics, 117
Démarrage de Dell Diagnostics à
partir du CD Drivers and
Utilities, 118
Démarrage de Dell Diagnostics à
partir du disque dur, 118
dépannage
Centre d'aide et de support, 77
Dell Diagnostics, 117
diagnostics
codes sonores, 122
Dell, 117

134 Index
documentation
contrat de licence pour utilisateur
final, 74
en ligne, 76
ergonomie, 74
garantie, 74
Guide d'information sur le
produit, 74
Guide d'utilisation, 74
Référence rapide, 74
réglementation, 74
sécurité, 74
E
étiquettes
Microsoft Windows, 75
numéro de service, 75, 98, 107
F
fichier d'aide
Centre d'aide et de support de
Windows, 77
G
Guide d'information sur le
produit, 74
Guide d'utilisation, 74
I
imprimante
câble, 92
configuration, 83, 92
connexion, 83, 92
informations relatives à
l'ergonomie, 74
informations relatives à la
garantie, 74
informations sur les
réglementations, 74
installation de pièces
mise hors tension de
l'ordinateur, 80
installer des composants
outils recommandés, 80
M
matériel
codes sonores, 122
Dell Diagnostics, 117
messages d'erreur
codes sonores, 122
moniteur
connecter le DVI, 93-94
connecter le VGA, 93-94
connecter un téléviseur, 93-94
connecter VGA, 93
en raccorder deux, 93-94
mode bureau étendu, 95
mode de clonage, 95

Index 135
paramètres d'affichage, 95
raccorder deux, 93
mot de passe
cavalier, 129
effacement, 129
N
numéro de service, 75, 98, 107
O
ordinateur
codes sonores, 122
composants à l'intérieur, 104, 114
vue intérieure, 104, 114
P
paramètres CMOS
effacement, 131
problèmes
codes sonores, 122
Dell Diagnostics, 117
R
réseau
Assistant Configuration
réseau, 84
S
S.M.A.R.T, 125
site de support de Dell, 76
site Web de support, 76
système d'exploitation
réinstallation, 77
T
téléviseur
connecter à l'ordinateur, 93-94
U
UPS
V
voyants
alimentation, 98
W
Windows XP
Assistant Configuration
réseau, 84
Centre d'aide et de support, 77
réinstallation, 77

136 Index

www.dell.com | support.dell.com
Dell™ OptiPlex™ 330
Schnellreferenzhandbuch
Modell DCSM und DCNE

Anmerkungen, Hinweise und Vorsichtshinweise
ANMERKUNG: Eine ANMERKUNG macht auf wichtige Informationen aufmerk-
sam, mit denen Sie den Computer besser einsetzen können.
HINWEIS: Ein HINWEIS warnt vor möglichen Beschädigungen der Hardware oder
vor Datenverlust und erläutert, wie das vermieden werden kann.
VORSICHT: Durch VORSICHT werden Sie auf Gefahrenquellen hingewiesen, die
materielle Schäden, Verletzungen oder sogar den Tod von Personen zur Folge
haben können.
____________________
Die in diesem Dokument enthaltenen Informationen können sich ohne vorherige Ankündigung
ändern.
© 2007 Dell Inc. Alle Rechte vorbehalten.
Die Vervielfältigung oder Wiedergabe in jeglicher Weise ist ohne schriftliche Genehmigung von
Dell Inc. strengstens untersagt.
In diesem Text verwendete Marken: Dell, das DELL Logo, Inspiron, Dell Precision, Dimension,
OptiPlex, Latitude, PowerEdge, PowerVault, PowerApp und Dell OpenManage sind Marken von
Dell Inc.; Intel, Pentium und Celeron sind eingeragene Marken der Intel Corporation; Microsoft und
Windows sind eingetragene Marken der Microsoft Corporation.
Alle anderen in dieser Dokumentation genannten Marken- und Handelsbezeichnungen sind Eigentum
der entsprechenden Hersteller und Firmen. Dell Inc. verzichtet auf alle Besitzrechte an Marken und
Handelsbezeichnungen, die nicht Eigentum von Dell sind.
Modell DCSM und DCNE
September 2007 Teilenr. DU086 Rev. A00

Inhalt 139
Inhalt
Informationsquellen . . . . . . . . . . . . . . . . . . . 141
Vorbereitung
. . . . . . . . . . . . . . . . . . . . . . . 146
Vor der Arbeit im Innern des Computers
. . . . . . 146
Hinzufügen und Austauschen von Komponenten
. . . . 147
Einrichten des Computers
. . . . . . . . . . . . . . . . 149
Aufstellen des Computers in einem
geschlossenen Schrank
. . . . . . . . . . . . . . 149
Einrichten eines Heim- und Firmennetzwerks
. . . . . 151
Anschließen an einen Netzwerkadapter
. . . . . 151
Netzwerkinstallation
. . . . . . . . . . . . . . . . 152
Aufbauen einer Verbindung mit dem Internet
. . . . . 153
Verschieben von Daten auf einen neuen Computer
. . 156
Einrichten eines Druckers
. . . . . . . . . . . . . . . 160
Anschließen von zwei Monitoren
. . . . . . . . . . . 161
Überspannungsschutzgeräte
. . . . . . . . . . . . . . 163
Desktop-Computer
. . . . . . . . . . . . . . . . . . . 165
Vorderseite
. . . . . . . . . . . . . . . . . . . . . 165
Rückansicht
. . . . . . . . . . . . . . . . . . . . 168
Anschlüsse an der Rückseite
. . . . . . . . . . . 169
Entfernen der Computerabdeckung . . . . . . . . . . . 171
Innenansicht des Computers
. . . . . . . . . . . . . . 173

140 Inhalt
Komponenten der Systemplatine . . . . . . . . . . . . 174
Anbringen der Computerabdeckung
. . . . . . . . . . 175
Mini-Tower-Computer
. . . . . . . . . . . . . . . . . . 176
Vorderansicht
. . . . . . . . . . . . . . . . . . . . 176
Rückansicht
. . . . . . . . . . . . . . . . . . . . 178
Anschlüsse an der Rückseite
. . . . . . . . . . . . . . 179
Entfernen der Computerabdeckung
. . . . . . . . . . . 181
Innenansicht des Computers
. . . . . . . . . . . . . . 183
Komponenten der Systemplatine
. . . . . . . . . . . . 184
Anbringen der Computerabdeckung
. . . . . . . . . . 185
Beheben von Störungen
. . . . . . . . . . . . . . . . . 186
Dell Diagnostics
. . . . . . . . . . . . . . . . . . . . . 186
Betriebsanzeigen
. . . . . . . . . . . . . . . . . . . . 190
Signaltoncodes
. . . . . . . . . . . . . . . . . . . . . 192
Systemmeldungen
. . . . . . . . . . . . . . . . . . . . 193
Diagnoseanzeigen
. . . . . . . . . . . . . . . . . . . . 196
Löschen von vergessenen Kennwörtern
. . . . . . . . 201
Löschen der CMOS-Einstellungen
. . . . . . . . . . . 202
Überschreiben des BIOS
. . . . . . . . . . . . . . . . 203
Stichwortverzeichnis . . . . . . . . . . . . . . . . . 205

Schnellreferenzhandbuch 141
Informationsquellen
ANMERKUNG: Einige Funktionen oder Datenträger sind möglicherweise optional
und werden nicht mit Ihrem Computer geliefert. Einige Funktionen oder Datenträger
sind möglicherweise in bestimmten Ländern nicht verfügbar.
ANMERKUNG: Zusätzliche Informationen werden eventuell mit dem Computer
geliefert.
Welche Informationen benötigen Sie? Hier finden Sie das Gesuchte:
• Ein Diagnoseprogramm für den
Computer
• Treiber für den Computer
• Desktop-System-Software (DSS)
Drivers and Utilities Datenträger
ANMERKUNG: Der Drivers and Utilities-
Datenträger ist optional und möglicherweise
nicht im Lieferumfang Ihres Computers ent-
halten.
Treiber sind bereits auf dem Computer
installiert. Sie können den Datenträger dazu
verwenden, Treiber neu zu installieren (siehe
Online-Benutzerhandbuch), oder um Dell
Diagnostics auszuführen (siehe „Dell
Diagnostics“ auf seite 186).
Möglicherweise finden Sie auf dem Daten-
träger Readme-Dateien. Diese Dateien ent-
halten Angaben zu den neuesten technischen
Änderungen bzw. Detailinformationen zu
technischen Fragen für erfahrene Benutzer
oder Techniker.
ANMERKUNG: Treiber und Dokumentations-
aktualisierungen finden Sie unter
support.dell.com.

142 Schnellreferenzhandbuch
• Grundlegende Informationen zur
Behebung von Störungen
• So führen Sie das Programm „Dell
Diagnostics“ aus
• Tools und Dienstprogramme
• Einrichten eines Druckers
Schnellreferenzhandbuch
ANMERKUNG: Dieses Dokument ist optional
und im Lieferumfang Ihres Computers mög-
licherweise nicht enthalten.
ANMERKUNG: Sie finden dieses Dokument im
PDF-Format unter support.dell.com.
• Garantieinformationen
• Verkaufs- und Lieferbedingungen
(nur für die USA)
• Sicherheitshinweise
• Zulassungsinformationen
• Informationen zur Ergonomie
• Endbenutzer-Lizenzvereinbarung
Dell™ Produktinformationshandbuch
• Anleitungen zum Entfernen und
wieder Einsetzen von Teilen
• Technische Daten
• Anleitungen zum Konfigurieren
der Systemeinstellungen
• Fehlerbehebung und Beheben von
Störungen
Dell™ OptiPlex™ 330 Benutzerhandbuch
Microsoft Windows Hilfe und Supportcenter
1
Klicken Sie in Windows Vista auf
Start
→
Hilfe und Support
→
Dell Benutzer- und
Systemhandbücher
→
Systemhandbücher
.
2
Klicken Sie auf das
Benutzerhandbuch
für
Ihren Computer.
Welche Informationen benötigen Sie? Hier finden Sie das Gesuchte:

Schnellreferenzhandbuch 143
• Service-Tag-Nummer und
Express-Servicecode
• Microsoft Windows-
Lizenzaufkleber
Service-Tag-Nummer und Microsoft
®
Windows
®
Lizenz
Die Aufkleber befinden sich an der Seite Ihres
Computers.
• Geben Sie die Service-Tag-Nummer auf der
Website
support.dell.com
oder beim Anruf
beim Support an, um den Computer zu
identifizieren.
• Geben Sie beim Anruf beim Technischen
Support den Express-Servicecode an, um
zum geeigneten Ansprechpartner weiter-
geleitet zu werden.
ANMERKUNG: Um die Sicherheit zu erhöhen,
enthält das neue Microsoft Windows-Lizenz-
etikett einen fehlenden Teil eines Etiketts oder
ein so genanntes „hole“ (Loch), um das Ent-
fernen des Etiketts zu verhindern.
Welche Informationen benötigen Sie? Hier finden Sie das Gesuchte:

144 Schnellreferenzhandbuch
• Lösungen – Hinweise zum Be-
heben von Störungen, Veröffent-
lichungen von Technikern, Online-
Schulungen, häufig gestellte
Fragen (FAQs)
• Community – Online-
Diskussionen mit anderen Dell-
Kunden
• Aufrüstungen – Informationen zu
Aufrüstungen von Komponenten,
wie z. B. Speicher, Festplatten und
Betriebssysteme
• Kundenbetreuung – Kontaktinfor-
mationen, Serviceanfrage und
Bestellstatus, Garantie und
Reparaturinformationen
• Service und Support – Status von
Serviceanfragen und Support-
Verlauf, Servicekontakt, Online-
Diskussionen mit dem technischen
Support
• Technischer Update Service von
Dell – Stellt proaktive E-Mail-
Benachrichtigungen über
Software- und Hardware-
Aktualisierungen für Ihren
Computer bereit.
• Referenz – Computerdokumen-
tation, Einzelheiten über die
Computerkonfiguration, Produkt-
angaben und Whitepaper
• Downloads – Zugelassene Treiber,
Patches und Software-
Aktualisierungen
Dell Support-Website – euro.dell.com
ANMERKUNG: Wählen Sie Ihre Region oder
Ihren Geschäftsbereich aus, um die ent-
sprechende Support-Site angezeigt zu
bekommen.
Welche Informationen benötigen Sie? Hier finden Sie das Gesuchte:

Schnellreferenzhandbuch 145
• Desktop System Software (DSS)
Emdash Wenn Sie das Betriebs-
system für Ihren Computer neu
installieren, sollten Sie auch das
DSS-Programm neu installieren.
DSS sorgt dafür, dass wichtige
Aktualisierungen für Ihr Betriebs-
system durchgeführt werden und
bietet Support für Prozessoren,
optische Laufwerke, USB-Geräte
usw. DSS ist für den ordnungs-
mäßigen Betrieb des Dell
Computers notwendig. Die
Software erkennt automatisch
Ihren Computertyp und das
Betriebssystem und installiert die
für Ihre Konfiguration geeigneten
Aktualisierungen.
So laden Sie die Desktop-System-Software
herunter:
1
Wählen Sie auf der Website
euro.dell.com
Ihre Region oder Ihren Geschäftsbereich,
und geben Sie Ihre Service-Tag-Nummer
ein.
2
Wählen Sie
Treiber & Downloads
, und
klicken Sie auf
Los
.
3
Klicken Sie auf den Namen Ihres
Betriebssystems, und suchen Sie nach dem
Stichwort
Desktop-System-Software
.
ANMERKUNG: Die support.dell.com
Benutzeroberfläche ist je nach Ihrer Auswahl
verschieden.
• Anleitungen zum Arbeiten unter
Windows
• So arbeiten Sie mit Programmen
und Dateien
• So können Sie Ihren Desktop
individuell gestalten
Windows Hilfe- und Supportcenter
1
So öffnen Sie Windows Hilfe und Support:
• Klicken Sie in Windows XP auf
Start
und
dann auf
Hilfe und Support
.
• Klicken Sie in Windows Vista™ auf die
Windows Vista-Schaltfläche
„Start“
→
Hilfe und Support
.
2
Geben Sie ein Wort oder einen Ausdruck
ein, das bzw. der Ihr Problem beschreibt,
und klicken Sie anschließend auf das Pfeil-
symbol.
3
Klicken Sie auf das Thema, das Ihr Problem
beschreibt.
4
Befolgen Sie die Anleitungen auf dem
Bildschirm.
• Anleitungen zur Neuinstallation
des Betriebssystems
Betriebssystem-Datenträger
ANMERKUNG: Der Betriebssystem-Daten-
träger ist optional und ist möglicherweise nicht
im Lieferumfang Ihres Computers enthalten.
Welche Informationen benötigen Sie? Hier finden Sie das Gesuchte:

146 Schnellreferenzhandbuch
Vorbereitung
Vor der Arbeit im Innern des Computers
Die folgenden Sicherheitshinweise schützen den Computer vor möglichen
Schäden und dienen der persönlichen Sicherheit des Benutzers.
VORSICHT:
Bevor Sie Arbeiten an den in diesem Abschnitt beschriebenen
Komponenten ausführen, lesen Sie erst die Sicherheitshinweise im
Produktinformationshandbuch.
HINWEIS:
Gehen Sie mit Komponenten und Karten vorsichtig um. Berühren Sie
keine Komponenten oder Kontakte auf einer Karte. Fassen Sie die Karte an ihren
Kanten oder an der metallenen Montagehalterung an. Fassen Sie Komponenten wie
Prozessoren grundsätzlich an den Kanten und niemals an den Kontaktstiften an.
Das Betriebssystem ist bereits auf dem
Computer installiert. Verwenden Sie zum
Neuinstallieren des Betriebssystems die CD
Betriebssystem und lesen Sie das Online-
Benutzerhandbuch.
Nach der Neuinstallation Ihres Betriebssystems
können Sie die
Drivers and Utilities
-Disc
verwenden, um Treiber für die Geräte zu
installieren, die im Lieferumfang Ihres Com-
puters enthalten waren.
Das Etikett mit dem Product Key des
Betriebssystems finden Sie am Computer.
ANMERKUNG:
Die Farbe der Disc hängt von
dem von Ihnen bestellten Betriebssystem ab.
Welche Informationen benötigen Sie? Hier finden Sie das Gesuchte:

Schnellreferenzhandbuch 147
HINWEIS:
Reparaturen an Ihrem Computer sollten nur von einem zertifizierten
Service-Techniker ausgeführt werden. Schäden durch nicht von Dell genehmigte
Wartungsversuche werden nicht durch die Garantie abgedeckt.
HINWEIS:
Ziehen Sie beim Trennen von Kabeln nur am Stecker oder an der
Zuglasche, nie am Kabel selbst. Manche Kabel besitzen einen Stecker mit
Sicherungsklammern. Wenn Sie ein solches Kabel abziehen, drücken Sie vor dem
Herausziehen des Steckers die Sicherungsklammern nach innen. Halten Sie beim
Trennen von Steckverbindungen die Anschlüsse gerade, um keine Stifte zu verbiegen.
Achten Sie vor dem Anschließen eines Kabels darauf, dass die Stecker korrekt
ausgerichtet und nicht verkantet aufgesetzt werden.
HINWEIS:
Um Schäden am Computer zu vermeiden, führen Sie folgende Schritte
aus, bevor die Arbeiten im Innern des Computers begonnen werden.
1
Schalten Sie den Computer aus (siehe „Computer ausschalten“ auf
seite 148).
VORSICHT:
Schließen Sie den Computer niemals ans Stromnetz an, wenn das
Gehäuse geöffnet ist.
HINWEIS:
Wenn Sie ein Netzwerkkabel lösen, ziehen Sie es erst vom Computer und
dann vom Netzwerkgerät ab.
2
Trennen Sie alle Telefon- und Netzwerkleitungen vom Computer.
3
Trennen Sie den Computer und alle zugehörigen Geräte vom Stromnetz.
4
Drücken Sie den Netzschalter, um die Systemplatine an Masse zu legen (zu
„erden“).
HINWEIS:
Vor dem Berühren einer Komponente im Innern des Computers müssen
Sie erst eine nicht lackierte Metallfläche, wie z. B. das Metall auf der Rückseite des
Computers berühren, um sich zu erden. Wiederholen Sie diese Erdung während der
Arbeit am System regelmäßig, um statische Elektrizität abzuleiten, die interne Bauteile
beschädigen könnte.
Hinzufügen und Austauschen von Komponenten
In diesem Abschnitt werden Vorgehensweisen zum Entfernen und Installieren
von Komponenten Ihres Computers beschrieben. Sofern nicht anders vermerkt,
wird bei den Anweisungen davon ausgegangen, dass folgende Bedingungen
erfüllt sind:
• Sie haben die Schritte unter „Computer ausschalten“ auf seite 148 und „Vor
der Arbeit im Innern des Computers“ auf seite 146 ausgeführt.
• Sie haben die Sicherheitsinformationen im Dell™
Produktinformationshandbuch
gelesen.

148 Schnellreferenzhandbuch
• Das Ersetzen von Komponenten oder – falls sie separat erworben wurden –
das Installieren erfolgen durch Ausführen der Entfernungsprozedur in
umgekehrter Reihenfolge.
Empfohlene Werkzeuge
Für die in diesem Dokument aufgeführten Arbeitsschritte werden die
folgenden Werkzeuge benötigt:
• Kleiner Schraubendreher mit flacher Klinge
• Kleiner Kreuzschlitzschraubendreher
• Kleiner Stift aus Kunststoff
Computer ausschalten
HINWEIS: Um Datenverluste zu vermeiden, speichern und schließen Sie alle
geöffneten Dateien, und beenden Sie alle aktiven Programme, bevor Sie den
Computer herunterfahren.
1
Starten Sie das Betriebssystem.
a
Speichern und schließen Sie alle geöffneten Dateien, und beenden Sie
alle aktiven Programme.
b
Klicken Sie im
Microsoft
®
Windows
®
XP-Betriebssystem
auf
Start
→
Herunterfahren
→
Herunterfahren
.
Klicken Sie in
Microsoft
®
Windows Vista™
auf die Windows Vista-
Schaltfläche „Start“, , anschließend in der unteren linken Ecke
des Desktops, klicken Sie auf den Pfeil in der unteren rechten Ecke
des Startmenüs und anschließend auf
Herunterfahren
.
Der Computer schaltet sich aus, wenn das Herunterfahren des Betriebs-
systems abgeschlossen ist.
2
Stellen Sie sicher, dass der Computer und alle angeschlossenen Geräte
ausgeschaltet sind. Wenn der Computer und die angeschlossenen Geräte
nicht automatisch beim Herunterfahren des Betriebssystems ausgeschaltet
werden, halten Sie den Netzschalter ungefähr 4 Sekunden lang gedrückt,
bis der Computer und die Geräte ausgeschaltet sind.

Schnellreferenzhandbuch 149
Einrichten des Computers
Aufstellen des Computers in einem geschlossenen Schrank
Wenn Sie Ihren Computer in einem geschlossenen Schrank aufstellen, kann
dies negative Auswirkungen auf die Luftzirkulation haben und somit auf-
grund von Überhitzung zu Leistungseinbußen führen. Befolgen Sie daher die
nachfolgenden Richtlinien, wenn Sie Ihren Computer in einem
geschlossenen Schrank aufstellen:
HINWEIS: Die in diesem Handbuch angegebenen Betriebstemperaturangaben
weisen die maximale Umgebungsbetriebstemperatur aus. Die Raumumgebungs-
temperatur muss beim Aufstellen des Computers in einem geschlossenen Schrank
berücksichtigt werden. Liegt die Raumumgebungstemperatur beispielsweise bei
25°C, verbleibt je nach den technischen Voraussetzungen des Computers nur eine
Marge von 5° bis 10°C, bis die maximale Betriebstemperatur des Computers er-
reicht ist. Nähere Informationen über die technischen Daten Ihres Computers
finden Sie im Online-Benutzerhandbuch.
• Lassen Sie einen Abstand von mindestens 10,2 cm zu allen belüfteten
Seiten des Computers, um die erforderliche Luftzirkulation für die
Lüftung zu gewährleisten.
• Wenn der geschlossene Schrank über Türen verfügt, müssen diese so
gestaltet sein, dass sie eine Luftzirkulation von mindestens 30 % durch den
geschlossenen Schrank ermöglichen (Vorder- und Rückseite).

150 Schnellreferenzhandbuch
• Wenn Sie Ihren Computer in einer Ecke eines Schreibtischs oder unter
einem Schreibtisch aufstellen, achten Sie darauf, dass die Computer-
Rückseite einen Abstand von mindestens 5,1cm zur Wand aufweist, um
eine ausreichende Luftzirkulation für die Kühlung des Computers zu
gewährleisten.

Schnellreferenzhandbuch 151
HINWEIS: Stellen Sie den Computer niemals in einem Schrank ohne Luftzirku-
lation auf. Wenn Sie die erforderliche Luftzirkulation einschränken, kann es auf-
grund von Überhitzung zu Leistungseinbußen Ihres Computers kommen.
Einrichten eines Heim- und Firmennetzwerks
Anschließen an einen Netzwerkadapter
So schließen Sie ein Netzwerkkabel an:
ANMERKUNG: Stecken Sie das Netzwerkkabel in die Buchse des Netzwerk-
adapters des Computers ein. Verbinden Sie das Netzwerkkabel nicht mit dem
Modemanschluss des Computers. Stecken Sie keinesfalls ein Netzwerkkabel in
eine Telefonsteckdose.
1
Stecken Sie das Netzwerkkabel in den Anschluss des Netzwerkadapters an
der Rückseite des Computers.
Schieben Sie das Kabel ein, bis es mit einem Klicken einrastet, und ziehen
Sie dann sanft daran, um zu überprüfen, ob es fest eingesteckt ist.
2
Verbinden Sie das andere Ende des Netzwerkkabels mit einem Netz-
werkgerät.

152 Schnellreferenzhandbuch
Netzwerkinstallation
Windows XP
Microsoft
®
Windows
®
XP verfügt über einen Netzwerkinstallations-
Assistenten, der Ihnen bei der Einrichtung eines Netzwerks hilft, damit Sie
Dateien, Drucker oder Internetverbindungen zuhause und in kleinen Büros
gemeinsam nutzen können.
1
Klicken Sie auf
Start
, klicken Sie dann auf
Programme
→
Zubehör
→
Kommunikation
und klicken Sie dort auf
Netzwerkinstallations-Assistent
.
2
Klicken Sie auf der Begrüßungsseite des
Netzwerkinstallations-
Assistenten
auf
Weiter
.
3
Klicken Sie auf
Prüfliste zum Erstellen eines Netzwerks
.
ANMERKUNG: Die Auswahl der Verbindungsmethode „Dieser Computer verfügt
über eine direkte Verbindung mit dem Internet“ aktiviert die integrierte Firewall, die
im Service-Pack 1 (SP1) (oder höher) von Windows XP zur Verfügung steht.
4
Füllen Sie die Prüfliste aus, und führen Sie die erforderlichen Vorarbeiten
durch.
5
Kehren Sie zum Netzwerkinstallations-Assistenten zurück und befolgen
Sie die Anweisungen auf dem Bildschirm.
Netzwerkgerät
Anschluss des
Netzwerkadapters am Computer
Netzwerkkabel
Netzwerkadapteranschluss

Schnellreferenzhandbuch 153
Windows Vista
Gehen Sie wie folgt vor, um Änderungen an der Netzwerkeinrichtung in
Microsoft
®
Windows® Vista™ vorzunehmen:
1
Klicken Sie auf die Windows Vista-Schaltfläche „Start“, , und klicken
Sie anschließend auf
Netzwerk
→
Netzwerk- und Freigabecenter
.
2
Klicken Sie auf
Verbindung oder Netzwerk einrichten
.
3
Wählen Sie den Typ der zu erstellenden Netzwerkverbindung aus, und
folgen Sie anschließend den Anweisungen auf dem Bildschirm.
4
Schließen Sie nach Abschluss dieser Schritte das Netzwerk- und
Freigabecenter.
Aufbauen einer Verbindung mit dem Internet
ANMERKUNG:
Das Spektrum an Internetdienstanbietern
(Internet Service Provider = ISP) und Internetdienstleistungen ist abhängig vom
jeweiligen Land.
Für die Verbindung mit dem Internet benötigen Sie ein Modem oder eine
Netzwerkverbindung und einen Internetdienstanbieter. Der Anbieter stellt
Ihnen eine oder mehrere der folgenden Möglichkeiten zur Verbindung mit dem
Internet zur Verfügung:
• DSL-Verbindungen für einen Hochgeschwindigkeitsinternetzugriff über
Ihre vorhandene Telefonleitung oder Ihren Mobilfunkdienst. Bei einer
DSL-Verbindung können Sie gleichzeitig über dieselbe Leitung auf das
Internet zugreifen und Ihr Telefon verwenden.
• Kabelmodemverbindung für den Hochgeschwindigkeitszugang zum
Internet über das lokale Kabelfernsehnetz.
• Satellitenmodemverbindungen für einen Hochgeschwindigkeitsinternet-
zugriff über ein Satellitenfernsehsystem.
• DFÜ-Verbindungen für die Internetverbindung über eine Telefonleitung.
DFÜ-Verbindungen sind erheblich langsamer als DSL- und Kabelmodem-
verbindungen, bzw. Satellitenmodemverbindungen.
• WLAN-Verbindungen für einen Internetzugriff mit Bluetooth
®
Wireless-Technologie.
Bei einer DFÜ-Verbindung müssen Sie zuerst ein Telefonkabel zwischen dem
Modemanschluss am Computer und der Telefonwandbuchse anschließen, bevor
Sie die Internetverbindung einrichten können. Wenn Sie eine DSL- oder eine
Kabel-/Satellitenmodemverbindung verwenden möchten, wenden Sie sich an
Ihren Internetdienstanbieter oder Mobilfunkanbieter, um Informationen zum
Einrichten der Verbindung zu erhalten.

154 Schnellreferenzhandbuch
Einrichten der Internetverbindung
So richten Sie eine Internetverbindung mit einer Desktop-Verknüpfung Ihres
ISP ein:
1
Speichern und schließen Sie alle geöffneten Dateien, und beenden Sie alle
geöffneten Programme.
2
Doppelklicken Sie auf das ISP-Symbol auf dem Desktop von Microsoft
®
Windows
®
.
3
Folgen Sie den Anweisungen auf dem Bildschirm, um das Setup
abzuschließen.
Falls Ihr Desktop nicht über das ISP-Symbol verfügt, oder wenn Sie eine
Internetverbindung über einen anderen Internetdienstanbieter einrichten
möchten, führen Sie die Schritte des nachfolgenden Abschnitts, für das für
Ihren Computer zutreffende Betriebssystem, aus.
ANMERKUNG: Falls Probleme beim Verbinden mit dem Internet auftreten, lesen
Sie bitte den Abschnitt „Einrichten eines Heim- und Firmennetzwerks“ auf seite 151.
Wenn Sie keine Internetverbindung herstellen können, obwohl dies früher schon
möglich war, liegt das Problem möglicherweise auf Seiten des Internet-Anbieters.
Fragen Sie diesbezüglich beim Internetdienstanbieter nach, oder versuchen Sie zu
einem späteren Zeitpunkt erneut, die Verbindung herzustellen.
Windows XP
1
Speichern und schließen Sie alle geöffneten Dateien, und beenden Sie alle
geöffneten Programme.
2
Klicken Sie auf
Start
→
Internet Explorer
.
Der Verbindungsassistent
Assistent für neue Verbindungen
wird
angezeigt.
3
Klicken Sie auf
Mit dem Internet verbinden
.
4
Klicken Sie im nächsten Fenster auf die gewünschte Option:
• Falls Sie noch keinen Internetdienstanbieter haben und einen aus-
wählen möchten, klicken Sie auf
Einen Internetdienstanbieter aus
einer Liste auswählen
.
• Falls Sie bereits Einrichtungsdaten von Ihrem Internetdienstanbieter
erhalten haben, jedoch noch nicht über eine Setup-CD verfügen,
klicken Sie auf
Meine Verbindung manuell einrichten
.
• Falls Sie über eine CD verfügen, klicken Sie auf
CD eines Internet-
dienstanbieters verwenden
.

Schnellreferenzhandbuch 155
5
Klicken Sie auf
Weiter
.
Falls Sie die Option
Meine Verbindung manuell einrichten
ausgewählt
haben, fahren Sie fort mit Schritt 6. Folgen Sie ansonsten den An-
weisungen im Bildschirm, um die Installation abzuschließen.
ANMERKUNG: Falls Sie sich bei der Verbindungsauswahl unschlüssig sind,
kontaktieren Sie Ihren Internetdienstanbieter.
6
Klicken Sie auf die gewünschte Option unter
Wie soll die Internet-
verbindung hergestellt werden?
und klicken Sie anschließend auf
Weiter
.
7
Verwenden Sie die von Ihrem Internetdienstanbieter zur Verfügung
gestellten Einrichtungsdaten, um die Einrichtung abzuschließen.
Windows Vista™
ANMERKUNG: Halten Sie die Daten Ihres Internetdienstanbieters bereit. Falls Sie
noch keinen Internetdienstanbieter haben, können Sie im Assistenten über die
Option Mit dem Internet verbinden einen Internetdienstanbieter auswählen.
1
Speichern und schließen Sie alle geöffneten Dateien, und beenden Sie alle
geöffneten Programme.
2
Klicken Sie auf die Windows Vista-Startschaltfläche und anschließend
auf
Systemsteuerung
.
3
Klicken Sie unter
Netzwerk und Internet
auf die Option
Mit dem
Internet verbinden
.
Das Fenster
Mit dem Internet verbinden
wird angezeigt.
4
Klicken Sie entweder auf
Breitband PPPoE
oder
DFÜ
, je nachdem,
welche Verbindungsart Sie bevorzugen:
• Wählen Sie
Breitband
, wenn Sie eine DSL-, Satellitenmodem-,
Kabelfernsehmodem-, oder Bluetooth Wireless-Technologie-
Verbindung verwenden möchten.
• Wählen Sie
DFÜ
, wenn Sie ein DFÜ-Modem oder ISDN verwenden
möchten.
ANMERKUNG: Wenn Sie sich bei der Auswahl des Verbindungstyps unschlüssig
sind, klicken Sie auf Bei der Auswahl beraten, oder kontaktieren Sie Ihren
Internetdienstanbieter.
5
Folgen Sie den Anweisungen im Bildschirm und verwenden Sie die von
Ihrem Internetdienstleister zur Verfügung gestellten Daten, um das Setup
abzuschließen.

156 Schnellreferenzhandbuch
Verschieben von Daten auf einen neuen
Computer
Über Assistenten in Ihrem Betriebssystem können Sie Dateien und andere
Daten von einem Computer auf einen anderen übertragen – beispielsweise
von einem alten Quellcomputer auf einen neuen Zielcomputer. Weitere
Anweisungen finden Sie im folgenden Abschnitt, der dem auf Ihrem
Computer installierten Betriebssystem entspricht.
Microsoft
®
Windows
®
XP (optional)
Das Betriebssystem Microsoft
Windows XP verfügt über einen Assistenten
zum Übertragen von Dateien und Einstellungen, mit dem Daten vom Quell-
computer auf einen Zielcomputer übertragen werden können. Es können
folgende Daten übertragen werden:
•E-Mails
• Einstellungen für Symbolleisten
• Fenstergrößen
• Internet-Lesezeichen
Sie können die Daten über ein Netzwerk oder einen seriellen Anschluss auf
den neuen Computer übertragen oder Sie können sie auf Wechselmedien,
wie z.B. CD-R (CD-Recordable), zur Übertragung auf den neuen Computer
speichern.
ANMERKUNG: Sie können Daten eines Quellcomputers auf einen neuen
Computer übertragen, indem Sie an beiden Computern ein serielles Kabel direkt an
den jeweiligen E/A-Anschluss (Eingabe/Ausgabe) anschließen. Um Daten über eine
serielle Verbindung zu übertragen, müssen Sie das Dienstprogramm Netzwerk-
anschlüsse in der Systemsteuerung öffnen und zusätzliche Konfigurationsschritte
ausführen, wie z. B. Einrichten einer erweiterten Verbindung und Zuweisen von
Host- und Gast-Computer.
Anweisungen zum Einrichten einer direkten Kabelverbindung zwischen zwei
Computern finden Sie im Microsoft Knowledge Base-Artikel #305621 mit dem Titel
How to Set Up a Direct Cable Connection Between Two Computers in Windows XP
(in englischer Sprache). Diese Software ist möglicherweise in bestimmten Ländern
nicht verfügbar.

Schnellreferenzhandbuch 157
Um Daten auf einen neuen Computer zu übertragen, müssen Sie den
Assistenten zum Übertragen von Dateien und Einstellungen ausführen. Für
diesen Vorgang können Sie den optionalen Betriebssystem-Datenträger ver-
wenden oder eine Assistent-Diskette mit dem Assistent zum Übertragen von
Dateien und Einstellungen erstellen.
Ausführen des Assistenten zum Übertragen von Dateien und Einstellungen
mithilfe des Betriebssystemdatenträgers
ANMERKUNG: Für diesen Vorgang benötigen Sie den Betriebssystem-
Datenträger. Dieser Datenträger ist optional und deshalb möglicherweise bei
bestimmten Computern nicht im Lieferumfang enthalten.
So bereiten Sie einen Zielcomputer auf die Dateiübertragung vor:
1
Öffnen Sie den Assistent zum Übertragen von Dateien und Einstellungen:
Klicken Sie auf
Start
→
Alle Programme
→
Zubehör
→
Systemprogramme
→
Assistent zum Übertragen von Dateien und
Einstellungen
.
2
Wenn der Begrüßungsbildschirm
Assistent zum Übertragen von Dateien
und Einstellungen
erscheint, klicken Sie auf
Weiter
.
3
In der Anzeige
Um welchen Computer handelt es sich?
auf
Neuer
Computer
→
Weiter
.
4
In der Anzeige
Verfügen Sie über eine Windows XP-CD?
auf
Ich werde
den Assistenten der CD Windows XP verwenden
→
Weiter
.
5
Wenn der Bildschirm
Wechseln Sie jetzt zum Quellcomputer
angezeigt
wird, wechseln Sie zu Ihrem alten oder Quellcomputer. Klicken Sie zu
diesem Zeitpunkt
nicht
auf
Weiter
.
So kopieren Sie Daten vom Quellcomputer:
1
Legen Sie den Windows XP
Betriebssystem
-Datenträger in den alten
Quellcomputer ein.
2
Klicken Sie auf dem Bildschirm
Willkommen
auf
Zusätzliche Aufgaben
durchführen
.
3
Bei
Wie möchten Sie vorgehen?
auf
Übertragen von Dateien und
Einstellungen
→
Weiter
.
4
In der Anzeige
Um welchen Computer handelt es sich?
auf
Alter
Computer
→
Weiter
.

158 Schnellreferenzhandbuch
5
Klicken Sie in der Anzeige
Übertragungsmethode auswählen
auf die von
Ihnen bevorzugte Übertragungsmethode.
6
Wählen Sie in der Anzeige
Was soll übertragen werden?
die Elemente aus,
die Sie übertragen möchten, und klicken Sie auf
Weiter
.
Nachdem alle Daten kopiert wurden, erscheint das Fenster
Fertig stellen
des Sammlungsvorgangs
.
7
Klicken Sie auf
Fertig stellen
.
So übertragen Sie die Daten auf den Zielcomputer:
1
Klicken Sie auf dem neuen Computer im Fenster
Wechseln Sie jetzt zum
Quellcomputer
auf
Weiter
.
2
Wählen Sie in der Anzeige
Wo befinden sich die Dateien und
Einstellungen?
die von Ihnen für die Übertragung Ihrer Einstellungen und
Dateien bevorzugte Methode aus und klicken Sie auf
Weiter
.
Der Assistent liest die gesammelten Dateien und Einstellungen und
überträgt sie auf den Zielcomputer.
Nachdem alle Einstellungen und Dateien übernommen wurden, erscheint
das Fenster
Beendet
.
3
Klicken Sie auf
Fertig stellen
und starten Sie den neuen Computer neu.
Ausführen des Assistenten zum Übertragen von Dateien und Einstellungen ohne
Betriebssystemdatenträger
Um den Assistenten zum Übertragen von Dateien und Einstellungen ohne
den Betriebssystem-Datenträger auszuführen, müssen Sie eine Assistent-
Diskette erstellen, mit der Sie eine Speicher-Abbilddatei auf einem Wechsel-
medium erstellen können.
Um eine Assistent-Diskette zu erstellen, verwenden Sie Ihren neuen
Computer, auf dem Windows XP läuft, und führen Sie die folgenden
Schritte aus:
1
Öffnen Sie den Assistent zum Übertragen von Dateien und Einstellungen:
Klicken Sie auf
Start
→
Alle Programme
→
Zubehör
→
Systemprogramme
→
Assistent zum Übertragen von Dateien und
Einstellungen
.
2
Wenn der Begrüßungsbildschirm
Assistent zum Übertragen von Dateien
und Einstellungen
erscheint, klicken Sie auf
Weiter
.

Schnellreferenzhandbuch 159
3
In der Anzeige
Um welchen Computer handelt es sich?
auf
Neuer
Computer
→
Weiter
.
4
In der Anzeige
Verfügen Sie über eine Windows XP-CD?
auf
Assistent-
Diskette auf dem folgenden Laufwerk erstellen
→
Weiter.
5
Legen Sie ein Wechselmedium ein, z. B. eine beschreibbare CD, und
klicken Sie auf
OK
.
6
Wenn der Erstellungsvorgang abgeschlossen ist und die Meldung
Wechseln Sie jetzt zum Quellcomputer
angezeigt wird,
klicken Sie
nicht
auf
Weiter
.
7
Wechseln Sie zum alten Quellcomputer.
So kopieren Sie Daten vom Quellcomputer:
1
Legen Sie die Assistent-Diskette in den alten Quellcomputer ein.
2
Klicken Sie auf
Start
→
Ausführen
.
3
Gehen Sie im Fenster
Ausführen
im Feld
Öffnen
zum Speicherort von
fastwiz
(auf dem entsprechenden Wechselmedium) und klicken Sie auf
OK
.
4
Klicken Sie im Begrüßungsbildschirm von
Assistent zum Übertragen von
Dateien und Einstellungen
auf
Weiter
.
5
In der Anzeige
Um welchen Computer handelt es sich?
auf
Alter
Computer
→
Weiter
.
6
Klicken Sie in der Anzeige
Übertragungsmethode auswählen
auf die von
Ihnen bevorzugte Übertragungsmethode.
7
Wählen Sie in der Anzeige
Was soll übertragen werden?
die Elemente aus,
die Sie übertragen möchten, und klicken Sie auf
Weiter
.
Nachdem alle Daten kopiert wurden, erscheint das Fenster
Fertig stellen
des Sammlungsvorgangs
.
8
Klicken Sie auf
Fertig stellen
.
So übertragen Sie die Daten auf den Zielcomputer:
1
Klicken Sie auf dem neuen Computer im Fenster
Wechseln Sie jetzt zum
Quellcomputer
auf
Weiter
.
2
Wählen Sie in der Anzeige
Wo befinden sich die Dateien und
Einstellungen?
die von Ihnen für die Übertragung Ihrer Einstellungen und
Dateien bevorzugte Methode aus und klicken Sie auf
Weiter
. Befolgen Sie
die Anleitungen auf dem Bildschirm.

160 Schnellreferenzhandbuch
Der Assistent liest die gesammelten Dateien und Einstellungen und
überträgt sie auf den Zielcomputer.
Nachdem alle Einstellungen und Dateien übernommen wurden, erscheint
das Fenster
Beendet
.
3
Klicken Sie auf
Fertig stellen
und starten Sie den neuen Computer neu.
ANMERKUNG: Weitere Informationen zu dieser Vorgehensweise finden Sie unter
support.dell.com im Dokument mit der Nummer 154781 (What Are The Different
Methods To Transfer Files From My Old Computer To My New Dell™ Computer
Using the Microsoft
®
Windows
®
XP Operating System? (Welche Verfahren gibt es
zum Übertragen von Dateien von meinem alten Computer auf den neuen Dell™
Computer mithilfe des Microsoft).
ANMERKUNG: Möglicherweise können Sie in einigen Ländern nicht auf das
Dell™ Wissensdatenbankdokument zugreifen.
Microsoft Windows Vista™ (optional)
1
Klicken Sie auf die Windows Vista Start-Taste und dann auf
Übertragen von Dateien und Einstellungen
→
Windows einfache
Übertragung starten
.
2
Klicken Sie im Dialogfeld
Benutzerkontenschutz
auf
Weiter
.
3
Klicken Sie auf
Neue Übertragung starten
oder
Aktive Übertragung
fortsetzen
.
Folgen Sie den Anweisungen des Windows Easy Transfer-Assistenten auf
dem Bildschirm.
Einrichten eines Druckers
HINWEIS: Vor dem Anschließen eines Druckers an den Computer muss das
Betriebssystem vollständig installiert sein.
Informationen zum Einrichten eines Druckers finden Sie in der beiliegenden
Dokumentation, unter anderem zu folgenden Themen:
• Aktualisierte Treiber beschaffen und installieren.
• Drucker an den Computer anschließen.
• Papier einlegen und die Tonerkassette bzw. die Tintenpatrone einsetzen.
Technische Unterstützung finden Sie im Benutzerhandbuch Ihres Druckers,
oder wenden Sie sich an den Hersteller.

Schnellreferenzhandbuch 161
Druckerkabel
Sie können den Drucker entweder mit einem USB-Kabel, oder einem Parallel-
kabel an Ihren Computer anschließen. Möglicherweise wurde Ihr Drucker
ohne Kabel geliefert; wenn Sie also ein Kabel einzeln kaufen, stellen Sie
sicher, dass es mit dem Drucker und dem Computer kompatibel ist. Wenn
Sie ein Druckerkabel zusammen mit dem Computer erworben haben, be-
findet sich das Kabel möglicherweise in der Verpackung des Computers.
Anschließen von zwei Monitoren
VORSICHT: Bevor Sie Arbeiten an den in diesem Abschnitt beschriebenen
Komponenten ausführen, lesen Sie erst die Sicherheitshinweise im
Produktinformationshandbuch.
Wenn Sie eine Grafikkarte erworben haben, die Dualmonitore unterstützt,
folgen Sie diesen Anweisungen, um Ihre Monitore anzuschließen und zu
aktivieren. In diesen Anweisungen erfahren Sie, wie Sie entweder zwei
Monitore (jeweils mit einem VGA-Anschluss), einen Monitor mit einem
VGA-Anschluss und einen Monitor mit einem DVI-Anschlusss, oder aber ein
Fernsehgerät anschließen können.
HINWEIS: Wenn Sie zwei Monitore mit VGA-Anschluss anschließen möchten,
müssen Sie für die Kabelverbindung über den optionalen DVI-Adapter verfügen.
Wenn Sie zwei Flachbildmonitore anschließen möchten, muss mindestens eines der
Geräte über einen VGA-Anschluss verfügen. Wenn Sie ein Fernsehgerät anschließen
möchten, können Sie zusätzlich zum Fernsehgerät nur einen Monitor (VGA oder DVI)
anschließen.
Anschließen von zwei Monitoren mit VGA-Anschluss
1
Fahren Sie Ihr System herunter.
ANMERKUNG: Falls Ihr Computer über eine integrierte Videokarte verfügt,
schließen Sie keinen der Monitore an den Anschluss für die integrierte Videokarte
an. Falls der Anschluss für die integrierte Videokarte mit einer Kappe verdeckt ist,
entfernen Sie diese nicht um den Monitor anzuschließen. Dieser würde nicht
funktionieren.
2
Schließen Sie einen der Monitore am VGA-Anschluss (blau) an der
Rückseite des Computers an.
3
Schließen Sie den anderen Monitor an den optionalen DVI-Adapter an
und verbinden Sie diesen mit dem DVI-Anschluss (weiß) an der Rückseite
des Computers.
4
Führen Sie einen Neustart des Systems durch.

162 Schnellreferenzhandbuch
Anschließen eines Monitors mit VGA-Anschluss und eines Monitors mit DVI-
Anschluss
1
Fahren Sie Ihr System herunter.
2
Schließen Sie den VGA-Anschluss am Monitor an den VGA-Anschluss
(blau) an der Rückseite des Computers an.
3
Schließen Sie den DVI-Anschluss des anderen Monitors an den DVI-
Anschluss (weiß) an der Rückseite des Computers an.
4
Führen Sie einen Neustart des Systems durch.
1 Optionaler DVI-Adapter 2 Weißer DVI-Anschluss
3 Fernsehausgangsanschluss TV-OUT 4 Blauer VGA-Anschluss
1
23
4

Schnellreferenzhandbuch 163
Anschließen eines Fernsehgeräts
ANMERKUNG: Damit Sie ein Fernsehgerät an Ihren Computer anschließen können,
müssen Sie ein S-Video-Kabel erwerben, das in den meisten Geschäften für
Verbraucherelektronik erhältlich ist. Das Kabel ist nicht im Lieferumfang Ihres
Computers enthalten.
1
Fahren Sie Ihr System herunter.
2
Verbinden Sie ein Ende des S-Video-Kabels mit dem optionalen Fernseh-
ausgangsanschluss TV-OUT an der Rückseite des Computers.
3
Verbinden Sie das andere Ende des S-Video-Kabels mit dem S-Video-
Eingangsanschluss an Ihrem Fernsehgerät.
4
Schließen Sie den VGA- oder DVI-Monitor an.
5
Führen Sie einen Neustart des Systems durch.
Ändern der Anzeigeeinstellungen
1
Nachdem Sie den Monitor (die Monitore) oder das Fernsehgerät ange-
schlossen haben, schalten Sie Ihren Computer ein.
Auf dem Hauptmonitor wird der Desktop von Microsoft
®
Windows
®
angezeigt.
2
Aktivieren Sie den erweiterten Desktop-Modus in den Anzeigeein-
stellungen. Im erweiterten Desktop-Modus können Sie Objekte von einem
Bildschirm zum anderen verschieben und somit die sichtbare Arbeits-
fläche deutlich erweitern.
Überspannungsschutzgeräte
Es sind verschiedene Geräte erhältlich, die vor Schwankungen und Ausfällen
der Stromversorgung schützen:
• Überspannungsschutz
• Leitungsfilter
• Unterbrechungsfreie Stromversorgungen (USV)

164 Schnellreferenzhandbuch
Überspannungsschutz
Überspannungsschutzgeräte sowie Steckerleisten mit Überspannungsschutz
schützen den Computer vor Schäden durch Spannungsspitzen, die während
Gewittern oder als Folge von Stromausfällen auftreten können. Einige Hersteller
von Überspannungsschutzgeräten gewähren darüber hinaus Garantien für be-
stimmte Schäden. Lesen Sie deshalb die Garantiebestimmungen aufmerksam
durch, bevor Sie sich für einen Überspannungsschutz entscheiden. Je höher der
Joule-Wert eines Geräts, desto mehr Schutz bietet es. Vergleichen Sie deshalb
die Joule-Werte aufmerksam, um einen Eindruck von der relativen Effektivität
der einzelnen Modelle zu erhalten.
HINWEIS:
Die meisten Überspannungsschutzgeräte bieten keinen Schutz vor
Spannungsschwankungen oder Stromausfällen infolge von Blitzeinschlägen. Ziehen
Sie bei einem Gewitter das Telefonkabel aus der Telefonwandbuchse und ziehen Sie
das Netzkabel des Computers aus der Steckdose.
Viele Überspannungsschutzgeräte verfügen über eine Telefonbuchse zum
Schutz des Modems. Anweisungen für die Modemverbindung finden Sie in der
Dokumentation des Überspannungsschutzgeräts.
HINWEIS:
Nicht alle Überspannungsschutzgeräte bieten einen Netzwerkadapter-
schutz. Trennen Sie daher bei einem Gewitter stets das Netzwerkkabel von der
Netzwerkwandsteckerbuchse.
Leitungsfilter
HINWEIS:
Leitungsfilter bieten keinen Schutz vor Stromunterbrechungen.
Leitungsfilter halten die Spannung auf einem relativ konstanten Wert.
Unterbrechungsfreie Stromversorgung
HINWEIS:
Eine Unterbrechung der Stromversorgung, während Daten auf der Fest-
platte gespeichert werden, kann zu Datenverlust oder Schäden an Dateien führen.
ANMERKUNG:
Um eine maximale Betriebsdauer zu gewährleisten, sollten Sie nur
den Computer an die USV anschließen. Schließen Sie andere Geräte wie Drucker an
eine getrennte Steckerleiste mit Überspannungsschutz an.
Eine USV bietet Schutz vor Schwankungen und Unterbrechungen der Strom-
versorgung. USV-Geräte enthalten einen Akku, der vorübergehend die Ver-
sorgung der angeschlossenen Geräte übernimmt, wenn die Netzstromver-
sorgung unterbrochen wird. Wenn Netzstrom verfügbar ist, wird der Akku
aufgeladen. Informationen zur Akkubetriebsdauer und zur Zulassung des
Geräts durch die Underwriters Laboratories (UL) finden Sie in der Hersteller-
dokumentation zur USV.

Schnellreferenzhandbuch 165
Desktop-Computer
Vorderseite
1 USB 2.0-Anschlüsse (2) Schließen Sie Geräte, die Sie nur gelegentlich nutzen,
beispielsweise einen Joystick, eine Kamera oder start-
fähige USB-Geräte, an den USB-Anschlüssen vorne
am Computer an (weitere Informationen zum
Starten von einem USB-Gerät aus finden Sie im
Abschnitt „System-Setup-Optionen“ im Online-
Benutzerhandbuch). Es wird empfohlen, die
hinteren USB-Anschlüsse für Geräte zu verwenden,
die normalerweise angeschlossen bleiben, wie z. B.
Drucker und Tastaturen.
2 Laufwerkaktivitätsleuchte Die Laufwerkaktivitätsleuchte ist eingeschaltet,
wenn der Computer zum Lesen oder Schreiben von
Daten auf die Festplatte zugreift. Sie leuchtet ggf.
auch dann, wenn gerade ein Gerät, wie beispiels-
weise ein optisches Laufwerk, aktiv ist.
89
3
5
1
4610
2
11 7

166 Schnellreferenzhandbuch
3 Netzschalter,
Stromversorgungslicht
Drücken Sie den Netzschalter, um den Computer
anzuschalten. Die Anzeigeleuchte in der Mitte
dieser Taste zeigt den Stromversorgungsstatus an.
HINWEIS: Schalten Sie den Computer nicht
über den Netzschalter aus, damit der Verlust
von Daten vermieden wird. Fahren Sie statt-
dessen das Betriebssystem herunter.
4 Dell Emblem Dieses Emblem lässt sich drehen, um der
Orientierung Ihres Computers zu entsprechen.
Legen Sie zum Drehen Ihre Finger außen um das
Emblem, drücken Sie fest und drehen Sie das
Emblem. Sie können das Emblem auch drehen,
indem Sie den Schlitz nahe der Emblemunterseite
verwenden.
5 Stromversorgungsanzeige Die Stromversorgungsanzeige leuchtet und blinkt
oder leuchtet stetig, um verschiedene Betriebsmodi
anzuzeigen.
• Leuchtet nicht – der Computer ist ausgeschaltet.
• Stetig grün – der Computer befindet sich in
einem normalen Betriebsmodus.
• Blinkt grün – Der Computer befindet sich in
einem Energiesparmodus.
• Blinkt oder stetig gelb – Weitere Informationen
finden Sie unter „Probleme mit der
Stromversorgung“ im Online-
Benutzerhandbuch
.
Zum Beenden des Energiesparmodus drücken Sie
den Betriebsschalter, oder verwenden Sie die
Tastatur oder die Maus, sofern diese im Geräte-
Manager unter Windows als Aufweckgerät
konfiguriert wurde. Weitere Informationen über die
Ruhemodi und das Beenden des Energiesparmodus
finden Sie im Online-Benutzerhandbuch.
Unter„Diagnoseanzeigen“ auf seite 196 finden Sie
eine Beschreibung der Codes, die Ihnen die Fehler-
suche im Computer erleichtern.

Schnellreferenzhandbuch 167
6 Diagnoseanzeigen Verwenden Sie die Anzeigen für eine leichtere
Behebung von Störungen bei Computerproblemen
auf der Grundlage des Diagnosecodes. Weitere
Informationen finden Sie unter
„Diagnoseanzeigen“ auf seite 196.
7 LAN-Anzeige Diese Anzeige zeigt an, dass eine LAN (Local Area
Network)-Verbindung hergestellt ist.
8 Kopfhörer- und
Mikrofonanschlüsse
Mithilfe des Mikrofonanschlusses können Sie ein
PC-Mikrofon anschließen. Bei Computern mit
einer Sound-Karte befindet sich der Mikrofon-
anschluss auf der Karte.
Sie können den Kopfhöreranschluss zum An-
schließen von Kopfhörern und den meisten Arten
von Lautsprechern verwenden.
9 Diskettenlaufwerk Hier kann ein optionales Diskettenlaufwerk unter-
gebracht werden.
10 Optisches Laufwerk Mithilfe des optischen Laufwerks können
CDs/DVDs wiedergegeben werden.
11 Service-Tag-Nummer Die Service-Tag-Nummer wird zur Identifizierung des
Computers beim Zugriff auf die Support-Website von
Dell, oder bei Anrufen beim Support verwendet.

168 Schnellreferenzhandbuch
Rückansicht
VORSICHT: Stellen Sie sicher, dass die Lüftungsschlitze des Systems nicht ver-
deckt sind. Nicht frei liegende Lüftungsschlitze können zu schwerwiegenden
Hitzeschäden führen.
1 Kartensteckplätze Anschlüsse für installierte PCI- oder PCI-Express-Karten.
2 Anschlüsse an der
Rückseite
Verbinden Sie USB-, Audio- oder sonstige Geräte mit
dem jeweiligen Anschluss (weitere Informationen
finden Sie unter „Anschlüsse an der Rückseite“ auf
seite 169).
3 Stromanschluss Stecken Sie das Stromversorgungskabel ein.
4 Spannungswahlschalter Zur Auswahl des Spannungswerts.
5 Vorhängeschlossösen Mithilfe der Vorhängeschlossösen kann ein handels-
üblicher Diebstahlschutz befestigt werden. Die Vor-
hängeschlossösen ermöglichen es, die Computer-
abdeckung anhand eines Vorhängeschlosses am Ge-
häuse zu befestigen, um einen unbefugten Zugriff auf
das Innere des Computers zu verhindern. Wenn Sie
die Vorhängeschlossösen verwenden möchten,
schieben Sie ein handelsübliches Vorhängeschloss
durch die Ösen hindurch und schließen Sie an-
schließend das Vorhängeschloss.
6 Abdeckungsfreigabevor
richtung
Mithilfe dieses Riegels können Sie die Computer-
abdeckung öffnen.
5
1
2 3 4 6

Schnellreferenzhandbuch 169
Anschlüsse an der Rückseite
1 Paralleler
Anschluss
Schließen Sie ein paralleles Gerät, wie z. B. einen Drucker,
an den parallelen Anschluss an. Wenn Sie über einen USB-
Drucker verfügen, schließen Sie ihn an einen USB-An-
schluss an.
ANMERKUNG: Der integrierte parallele Anschluss wird
automatisch deaktiviert, wenn der Computer eine installierte
Karte mit einem parallelen Anschluss ermittelt, der für die
gleiche Adresse konfiguriert wurde. Weitere Informationen
finden Sie unter „System-Setup-Optionen“ im Online-
Benutzerhandbuch.
2 Verbindungsinteg
ritätsanzeige
• Grün – Es besteht eine gute Verbindung zwischen einem
10-Mbit/s-Netzwerk und dem Computer.
• Orange – Es besteht eine gute Verbindung zwischen
einem 100-Mbit/s-Netzwerk und dem Computer.
• Gelb – Es besteht eine gute Verbindung zwischen einem
1.000-MBit/s- (1-GBit/s-)Netzwerk und dem Computer.
• Off (Deaktiviert) – Der Computer ermittelt keine
physische Verbindung zum Netzwerk.
13
98 7
5
6
24

170 Schnellreferenzhandbuch
3 Netzwerkadaptera
nschluss
Um den Computer an ein Netzwerk oder Breitbandgerät
anzuschließen, stecken Sie ein Ende eines Netzwerkkabels
in eine Netzwerkbuchse oder in das Netzwerk- oder Breit-
bandgerät. Verbinden Sie das andere Ende des Netzwerk-
kabels mit dem Netzwerkadapteranschluss an der Rückseite
Ihres Computers. Rastet das Netzwerkkabel mit einem
Klicken ein, ist es sicher angeschlossen.
ANMERKUNG: Schließen Sie kein Telefonkabel an den
Netzwerkanschluss an.
Bei Computern mit einer Netzwerkadapter-Karte ver-
wenden Sie den Anschluss auf der Karte.
Es wird empfohlen, dass Sie mindestens Verkabelungen
und Anschlüsse der Kategorie 5 für Ihr Netzwerk ver-
wenden. Wenn Kabel der Kategorie 3 verwendet werden
müssen, erzwingen Sie eine Netzwerkgeschwindigkeit von
10 Mbit/s, um zuverlässigen Betrieb zu gewährleisten.
4 Netzwerkaktivität
-Anzeigeleuchte
Die Anzeige blinkt gelb, wenn der Computer Netzwerk-
daten sendet oder empfängt. Hohe Netzwerkbelastung hat
möglicherweise zur Folge, dass diese Anzeige stetig
leuchtet.
5 Leitungsausgangs
anschluss
Verwenden Sie den grünen Leitungsausgangsanschluss, um
Kopfhörer und die meisten der Lautsprechertypen mit
integrierten Verstärkern anzuschließen.
Bei Computern mit einer Soundkarte muss der Anschluss
auf der Karte verwendet werden.
6 Mikrofon- /
Leitungseingangs
anschluss
Verwenden Sie den blauen Leitungseingangsanschluss, um
ein Aufnahme-/Wiedergabegerät, wie z. B. ein Kassetten-
gerät, einen CD-Player oder einen Videorekorder anzu-
schließen.
Verwenden Sie den rosafarbenen Mikrofonanschluss, um
ein Personalcomputermikrofon für Stimm- oder Musikein-
gabe an ein Sound- oder Telefonieprogramm anzu-
schließen.
Bei Computern mit einer Soundkarte muss der Anschluss
auf der Karte verwendet werden.

Schnellreferenzhandbuch 171
Entfernen der Computerabdeckung
VORSICHT: Bevor Sie Arbeiten an den in diesem Abschnitt beschriebenen
Komponenten ausführen, lesen Sie erst die Sicherheitshinweise im
Produktinformationshandbuch.
VORSICHT: Um Stromschläge zu vermeiden, trennen Sie vor dem Entfernen der
Abdeckung den Computer immer von der Steckdose.
1
Befolgen Sie die Anweisungen unter „Vorbereitung“ auf seite 146.
ANMERKUNG: Stellen Sie sicher, dass die Ablagefläche für die entfernte
Abdeckung groß genug ist.
HINWEIS: Stellen Sie sicher, dass die Arbeitsfläche eben und entsprechend
geschützt ist, um Kratzer sowohl auf dem Computer, als auch auf der Arbeitsfläche,
zu vermeiden.
2
Wenn an der Rückseite ein Vorhängeschloss durch den Ring geschoben
wurde, entfernen Sie das Vorhängeschloss.
3
Drücken Sie die Freigabevorrichtung für die Abdeckung nach hinten und
nehmen Sie dabei die Abdeckung ab.
7 USB 2.0-
Anschlüsse (6)
Verwenden Sie die hinteren USB-Anschlüsse für Geräte, die
normalerweise angeschlossen bleiben, wie z. B. Drucker und
Tastaturen.
Es wird empfohlen, die vorderen USB-Anschlüsse für
Geräte zu verwenden, die Sie gelegentlich anschließen, wie
Joysticks oder Kameras.
8 VGA-
Monitoranschluss
Schließen Sie das VGA-Kabel des Monitors an den VGA-
Anschluss des Computers an.
Bei Computern mit einer Videokarte muss der Anschluss
auf der Karte verwendet werden.
9 Serieller
Anschluss
Schließen Sie ein serielles Gerät, wie z. B. ein Handheld, an
den seriellen Anschluss an. Die Standardbezeichnung ist
COM 1 für den seriellen Anschluss 1.
Weitere Informationen finden Sie unter „System-Setup-
Optionen“ im Online-Benutzerhandbuch.

172 Schnellreferenzhandbuch
4
Rotieren Sie die Abdeckung mithilfe der Scharnierhalterung als Hebel-
vorrichtung nach oben.
5
Entfernen Sie die Abdeckung aus den Scharnierhalterungen und legen Sie
sie auf einer weichen, glatten Oberfläche ab.
1 Sicherheitskabeleinschub 2 Abdeckungsfreigabevorrichtung
3 Halbringförmiger Bügel für ein
Vorhängeschloss
2
1
3

Schnellreferenzhandbuch 173
Innenansicht des Computers
VORSICHT: Bevor Sie Arbeiten an den in diesem Abschnitt beschriebenen
Komponenten ausführen, lesen Sie erst die Sicherheitshinweise im
Produktinformationshandbuch.
VORSICHT: Um elektrische Schläge zu vermeiden, trennen Sie vor dem Entfernen
der Abdeckung den Computer immer von der Steckdose.
HINWEIS: Gehen Sie beim Öffnen der Computerabdeckung sehr vorsichtig vor, um
nicht versehentlich Kabelverbindungen der Systemplatine zu trennen.
1 Laufwerkschacht
(CD/DVD, Diskette und Festplatte)
2 Netzteil
3 Systemplatine 4 Kartensteckplätze
5 Kühlkörperbaugruppe 6 Vordere E/A-Leiste
1
2
3
4
5
6

174 Schnellreferenzhandbuch
Komponenten der Systemplatine
1 Anschluss für internen Lautsprecher
(INT_SPKR)
2 Mikroprozessoranschluss
(CPU)
3 Netzanschluss des Prozessors (12V
POWER)
4 Speichermodulanschlüsse
(DIMM_1, DIMM_2)
12
5
13
3
15
17
12
4
7
14
10
11 89
16
6

Schnellreferenzhandbuch 175
Anbringen der Computerabdeckung
VORSICHT: Bevor Sie irgendwelche in diesem Abschnitt beschriebenen
Verfahren ausführen, lesen Sie erst die Sicherheitshinweise im
Produktinformationshandbuch.
1
Stellen Sie sicher, dass alle Kabel angeschlossen sind und diese nicht das
Schließen der Abdeckung behindern.
2
Achten Sie darauf, dass keine Werkzeuge oder andere Teile im Computer
zurückbleiben.
3
So bringen Sie die Computerabdeckung wieder an:
a
Richten Sie die Unterseite der Abdeckung an den Scharnier-
halterungen aus, die sich an der Kantenunterseite des Computers
befinden.
b
Drehen Sie die Abdeckung nach unten, indem Sie die Scharnier-
halterungen als Hebel verwenden, und schließen Sie sie.
c
Rasten Sie die Abdeckung ein, indem Sie die Freigabevorrichtung der
Abdeckung nach hinten ziehen und sie wieder loslassen, sobald die
Abdeckung ordnungsgemäß angebracht ist.
d
Stellen Sie sicher, dass die Abdeckung ordnungsgemäß angebracht ist,
bevor Sie den Computer von der Stelle bewegen.
5 Anschlüsse für serielles SATA-Laufwerk
(SATA0, SATA1)
6 Frontseitiger Anschluss
(FRONTPANEL)
7 Netzanschluss
(POWER)
8 Anschlüsse für SATA-Laufwerk
(SATA2, SATA3)
9 Jumper für Echtzeituhr-Reset
(RTCRST)
10 Kennwort-Jumper (PSWD)
11 Batteriesockel (BATT) 12 PCI-Express x16-
Kartenanschluss (SLOT1)
13 PCI-Kartenanschlüsse
(SLOT2 und SLOT3)
14 Interner Summer (SPKR)
15 serieller/ PS/2-Anschluss (PS2/SER2) 16 Anschluss des Prozessorlüfters
(FAN_CPU)
17 Diskettenlaufwerkanschluss (FLOPPY)

176 Schnellreferenzhandbuch
Mini-Tower-Computer
Vorderansicht
4
8
7
3
2
6
5
1
10
9

Schnellreferenzhandbuch 177
1 Service-Tag-Nummer Die Service-Tag-Nummer wird zur Identifizierung des
Computers beim Zugriff auf die Support-Website von
Dell, oder bei Anrufen beim Support verwendet.
2 Optisches Laufwerk Mithilfe des optischen Laufwerks können
CDs/DVDs wiedergegeben werden.
3 Diskettenlaufwerk Das Diskettenlaufwerk ist optional.
4 Laufwerkaktivitätsleuchte Die Laufwerkaktivitätsleuchte ist eingeschaltet,
wenn der Computer zum Lesen oder Schreiben von
Daten auf die Festplatte zugreift. Sie leuchtet ggf.
auch dann, wenn gerade ein Gerät, wie beispiels-
weise ein optisches Laufwerk, aktiv ist.
5 USB 2.0-Anschlüsse (2) Schließen Sie Geräte, die Sie nur gelegentlich nutzen,
beispielsweise einen Joystick, eine Kamera oder start-
fähige USB-Geräte, an den USB-Anschlüssen vorne
am Computer an (weitere Informationen zum
Starten von einem USB-Gerät aus finden Sie im
Abschnitt „System-Setup-Optionen“ im Online-
Benutzerhandbuch). Es wird empfohlen, die
hinteren USB-Anschlüsse für Geräte zu verwenden,
die normalerweise angeschlossen bleiben, wie z. B.
Drucker und Tastaturen.
6 Diagnoseanzeigen Bei Computerproblemen verwenden Sie diese
Anzeigen auf der Grundlage des Diagnosecodes für
eine leichtere Behebung von Störungen. Weitere
Informationen finden Sie unter
„Diagnoseanzeigen“ auf seite 196.
7 Netzschalter,
Stromversorgungslicht
Drücken Sie den Netzschalter, um den Computer
anzuschalten. Die Anzeigeleuchte in der Mitte
dieser Taste zeigt den Stromversorgungsstatus an.
HINWEIS: Schalten Sie den Computer nicht
über den Netzschalter aus, damit der Verlust
von Daten vermieden wird. Fahren Sie
stattdessen das Betriebssystem herunter.
8 Kopfhöreranschluss Sie können den Kopfhöreranschluss zum
Anschließen von Kopfhörern und den meisten
Arten von Lautsprechern verwenden.

178 Schnellreferenzhandbuch
Rückansicht
9 Mikrofonanschluss
Verwenden Sie den Mikrofonanschluss, um ein
Personalcomputermikrofon für Stimm- oder Musik-
eingabe an ein Sound- oder Telefonieprogramm
anzuschließen.
Bei Computern mit einer Sound-Karte befindet sich
der Mikrofonanschluss auf der Karte.
10 LAN-Anzeige
Diese Anzeige zeigt an, dass eine LAN (Local Area
Network)-Verbindung hergestellt ist.
4
3
5
6
2
1

Schnellreferenzhandbuch 179
VORSICHT: Stellen Sie sicher, dass die Lüftungsschlitze des Systems nicht
verdeckt sind. Nicht frei liegende Lüftungsschlitze können zu schwerwiegenden
Hitzeschäden führen.
Anschlüsse an der Rückseite
1 Abdeckungsfreigabevor
richtung
Mithilfe dieser Vorrichtung können Sie die Computer-
abdeckung öffnen.
2 Vorhängeschlossösen Mithilfe der Vorhängeschlossösen kann ein handels-
üblicher Diebstahlschutz befestigt werden. Die
Vorhängeschlossösen ermöglichen es, die Computer-
abdeckung anhand eines Vorhängeschlosses am
Gehäuse zu befestigen, um einen unbefugten Zugriff
auf das Innere des Computers zu verhindern. Wenn
Sie die Vorhängeschlossösen verwenden möchten,
schieben Sie ein handelsübliches Vorhängeschloss
durch die Ösen hindurch und schließen Sie an-
schließend das Vorhängeschloss.
3 Stromanschluss Stecken Sie das Stromversorgungskabel ein.
4 Spannungswahlschalter Zur Auswahl des Spannungswerts.
5 Anschlüsse an der
Rückseite
Schließen Sie USB-, Audio- und andere Komponenten
an die geeigneten Anschlüsse an (weitere
Informationen finden Sie unter „Anschlüsse an der
Rückseite“ auf seite 169).
6 Kartensteckplätze Anschlüsse für installierte PCI- oder PCI-Express-Karten.
1
3
98 7
5
6
24

180 Schnellreferenzhandbuch
1 Paralleler
Anschluss
Schließen Sie ein paralleles Gerät, wie z. B. einen Drucker,
an den parallelen Anschluss an. Wenn Sie über einen USB-
Drucker verfügen, schließen Sie ihn an einen USB-An-
schluss an.
ANMERKUNG: Der integrierte parallele Anschluss wird
automatisch deaktiviert, wenn der Computer eine installierte
Karte mit einem parallelen Anschluss ermittelt, der für die
gleiche Adresse konfiguriert wurde. Weitere Informationen
hierzu finden Sie unter „System-Setup-Optionen“ im Online-
Benutzerhandbuch.
2 Verbindungsinteg
ritätsanzeige
• Grün – Es besteht eine gute Verbindung zwischen einem
10-Mbit/s-Netzwerk und dem Computer.
• Orange – Es besteht eine gute Verbindung zwischen einem
100-Mbit/s-Netzwerk und dem Computer.
• Gelb — Es besteht eine gute Verbindung zwischen einem
1.000-MBit/s- (1-GBit/s-)Netzwerk und dem Computer.
• Off (Deaktiviert) – Der Computer ermittelt keine
physische Verbindung zum Netzwerk.
3 Netzwerkadaptera
nschluss
Um den Computer an ein Netzwerk oder Breitbandgerät
anzuschließen, stecken Sie ein Ende eines Netzwerkkabels
in eine Netzwerkbuchse oder in das Netzwerk- oder Breit-
bandgerät. Verbinden Sie das andere Ende des Netzwerk-
kabels mit dem Netzwerkadapteranschluss an der Rückseite
Ihres Computers. Rastet das Netzwerkkabel mit einem
Klicken ein, ist es sicher angeschlossen.
ANMERKUNG: Schließen Sie kein Telefonkabel an den
Netzwerkanschluss an.
Bei Computern mit einer Netzwerkadapter-Karte
verwenden Sie den Anschluss auf der Karte.
Es wird empfohlen, dass Sie mindestens Verkabelungen und
Anschlüsse der Kategorie 5 für Ihr Netzwerk verwenden.
Wenn Kabel der Kategorie 3 verwendet werden müssen,
erzwingen Sie eine Netzwerkgeschwindigkeit von 10 Mbit/s,
um zuverlässigen Betrieb zu gewährleisten.
4 Netzwerkaktivität
-Anzeigeleuchte
Die Anzeige blinkt gelb, wenn der Computer Netzwerk-
daten sendet oder empfängt. Hohe Netzwerkbelastung hat
möglicherweise zur Folge, dass diese Anzeige stetig leuchtet.

Schnellreferenzhandbuch 181
Entfernen der Computerabdeckung
VORSICHT: Bevor Sie Arbeiten an den in diesem Abschnitt beschriebenen
Komponenten ausführen, lesen Sie erst die Sicherheitshinweise im
Produktinformationshandbuch.
VORSICHT: Um Stromschläge zu vermeiden, trennen Sie vor dem Entfernen der
Abdeckung den Computer immer von der Steckdose.
1
Befolgen Sie die Anweisungen unter „Vorbereitung“ auf seite 146.
ANMERKUNG: Stellen Sie sicher, dass die Ablagefläche für die entfernte
Abdeckung groß genug ist.
5 Leitungsausgangs
anschluss
Verwenden Sie den grünen Leitungsausgangsanschluss, um
Kopfhörer und die meisten der Lautsprechertypen mit
integrierten Verstärkern anzuschließen.
Bei Computern mit einer Soundkarte muss der Anschluss
auf der Karte verwendet werden.
6 Mikrofon - /
Leitungseingangs
anschluss
An den blauen und rosafarbenen Eingangsbuchsen können
Sie ein Aufnahme-/Wiedergabegerät, wie z. B. einen
Kassettenspieler, CD-Player oder Videorecorder, oder ein
Computermikrofon anschließen.
7 USB 2.0-
Anschlüsse (6)
Verwenden Sie die hinteren USB-Anschlüsse für Geräte, die
normalerweise angeschlossen bleiben, wie z. B. Drucker und
Tastaturen.
Es wird empfohlen, die vorderen USB-Anschlüsse für Geräte
zu verwenden, die Sie gelegentlich anschließen, wie
Joysticks oder Kameras.
8 VGA-
Monitoranschluss
Schließen Sie das VGA-Kabel des Monitors an den VGA-
Anschluss des Computers an.
Bei Computern mit einer Videokarte muss der Anschluss
auf der Karte verwendet werden.
9 Serieller
Anschluss
Schließen Sie ein serielles Gerät, wie z. B. ein Handheld, an
den seriellen Anschluss an. Die Standardbezeichnung ist
COM 1 für den seriellen Anschluss 1.
Weitere Informationen finden Sie unter „System-Setup-
Optionen“ im Online-Benutzerhandbuch.

182 Schnellreferenzhandbuch
HINWEIS: Stellen Sie sicher, dass die Arbeitsfläche eben und entsprechend
geschützt ist, um Kratzer sowohl auf dem Computer, als auch auf der Arbeitsfläche,
zu vermeiden.
2
Legen Sie den Computer auf die Seite, sodass die Computerabdeckung
nach oben zeigt.
1 Sicherheitskabeleinschub 2 Abdeckungsfreigabevorrichtung
3 Halbringförmiger Bügel für ein
Vorhängeschloss
2
1
3

Schnellreferenzhandbuch 183
3
Lösen Sie die Computerabdeckung, indem Sie sie von der Vorderseite des
Computers wegziehen und nach oben abheben.
4
Legen Sie die Abdeckung an einem sicheren Ort ab.
Innenansicht des Computers
1 Diskettenlaufwerk 2 Optisches Laufwerk
3 Netzteil 4 Systemplatine
5 Kühlkörperbaugruppe 6 Festplatte
1
3
4
6
2
5

184 Schnellreferenzhandbuch
Komponenten der Systemplatine
1 Anschluss für internen Lautsprecher
(INT_SPKR)
2 Mikroprozessoranschluss (CPU)
3 Netzanschluss des Prozessors
(12V POWER)
4 Speichermodulanschlüsse
(DIMM_1, DIMM_2)
12
6
5
13
3
15
17
12
4
7
14
1011 89
16

Schnellreferenzhandbuch 185
Anbringen der Computerabdeckung
VORSICHT: Bevor Sie irgendwelche in diesem Abschnitt beschriebenen
Verfahren ausführen, lesen Sie erst die Sicherheitshinweise im
Produktinformationshandbuch.
1
Stellen Sie sicher, dass alle Kabel angeschlossen sind und diese nicht das
Schließen der Abdeckung behindern.
2
Achten Sie darauf, dass keine Werkzeuge oder andere Teile im Computer
zurückbleiben.
3
So bringen Sie die Computerabdeckung wieder an:
a
Richten Sie die Unterseite der Abdeckung an den Scharnier-
halterungen aus, die sich an der Kantenunterseite des Computers
befinden.
b
Drehen Sie die Abdeckung nach unten, indem Sie die Scharnier-
halterungen als Hebel verwenden, und schließen Sie sie.
c
Rasten Sie die Abdeckung ein, indem Sie die Freigabevorrichtung der
Abdeckung nach hinten ziehen und sie wieder loslassen, sobald die
Abdeckung ordnungsgemäß angebracht ist.
d
Stellen Sie sicher, dass die Abdeckung ordnungsgemäß angebracht ist,
bevor Sie den Computer von der Stelle bewegen.
4
Drehen Sie den Computer wieder in die Ausgangsposition.
5 Anschlüsse für serielles SATA-
Laufwerk
(SATA0, SATA1)
6 Frontseitiger Anschluss
(FRONTPANEL)
7 Netzanschluss
(POWER)
8 Anschlüsse für SATA-Laufwerk
(SATA2, SATA3)
9 Jumper für Echtzeituhr-Reset
(RTCRST)
10 Kennwort-Jumper (PSWD)
11 Batteriesockel (BATT) 12 PCI-Express x16-
Kartenanschluss (SLOT1)
13 PCI-Kartenanschlüsse
(SLOT2 und SLOT3)
14 Interner Summer (SPKR)
15 serieller/ PS/2-Anschluss (PS2/SER2) 16 Anschluss des Prozessorlüfters
(FAN_CPU)
17 Diskettenlaufwerkanschluss
(FLOPPY)

186 Schnellreferenzhandbuch
Beheben von Störungen
Dell stellt eine Reihe von Hilfewerkzeugen zur Verfügung, die Ihnen bei
Problemen mit dem Computer weiterhelfen. Neueste Informationen zur
Fehlerbehebung an Ihrem Computer finden Sie auf der Support-Website von
Dell unter support.euro.dell.com.
Wenn Probleme mit dem Computer auftreten, für deren Lösung Sie die Hilfe
von Dell benötigen, erstellen Sie eine detaillierte Beschreibung des Fehlers,
des Signaltoncodes oder der Diagnoseanzeige. Tragen Sie unten den Express-
Servicecode und die Service-Tag-Nummer ein, und rufen Sie Dell von der
Nähe Ihres Computers aus an.
Beispiele für den Express-Servicecode und die Service-Tag-Nummer finden
Sie unter „Informationsquellen“ im Benutzerhandbuch zu Ihrem Computer.
Dell Diagnostics
VORSICHT: Bevor Sie Arbeiten an den in diesem Abschnitt beschriebenen
Komponenten ausführen, lesen Sie erst die Sicherheitshinweise im
Produktinformationshandbuch.
Wann „Dell Diagnostics“ eingesetzt wird
Wenn Probleme mit dem Computer auftreten, führen Sie die unter
„Abstürze und Probleme mit der Software“ aufgeführten Maßnahmen durch
(weitere Informationen im Online-Benutzerhandbuch) und führen Sie Dell
Diagnostics aus, bevor Sie technische Unterstützung von Dell anfordern.
Wir empfehlen Ihnen, diese Anweisungen vor Beginn der Arbeiten
auszudrucken.
HINWEIS: Dell Diagnostics läuft nur auf Dell™-Computern.
ANMERKUNG: Der Drivers and Utilities-Datenträger ist optional und ist
möglicherweise nicht bei allen Computern im Lieferumfang enthalten.
Lesen Sie den Abschnitt „System-Setup“ im Online-Benutzerhandbuch,
überprüfen Sie die Konfigurationsdaten Ihres Computers und stellen Sie
sicher, dass das zu testende Gerät im System-Setup-Programm angezeigt wird
und aktiv ist.
Starten Sie Dell Diagnostics über die Festplatte oder über den Datenträger
Treiber und Dienstprogramme.
Express-Servicecode:
Service-Tag-Nummer:

Schnellreferenzhandbuch 187
Dell Diagnostics von Ihrer Festplatte starten
Das Programm „Dell Diagnostics“ befindet sich auf der Festplatte auf einer
verborgenen Partition.
ANMERKUNG: Wenn auf dem Bildschirm nichts angezeigt werden kann, nehmen
Sie Kontakt mit Dell auf.
1
Stellen Sie sicher, dass der Computer ordnungsgemäß an eine betriebs-
bereite Steckdose angeschlossen ist.
2
Schalten Sie den Computer ein bzw. führen Sie einen Neustart durch.
3
Wenn das DELL™-Logo angezeigt wird, drücken Sie sofort <F12>.
Wählen Sie
Diagnostics
vom Startmenü und drücken Sie die
<Eingabetaste>.
ANMERKUNG: Wenn Sie zu lange warten und das Betriebssystem-Logo
erscheint, warten Sie, bis der Microsoft
®
Windows
®
-Desktop angezeigt wird.
Fahren Sie Ihren Computer herunter und versuchen Sie es erneut.
ANMERKUNG: Wenn eine Meldung erscheint, dass keine Diagnostics-
Dienstprogrammpartition gefunden wurde, führen Sie das Programm Dell
Diagnostics über den Drivers and Utilities-Datenträger aus.
4
Drücken Sie eine beliebige Taste, um Dell Diagnostics von der
Diagnostics-Dienstprogrammpartition auf der Festplatte zu starten.
Starten von Dell Diagnostics über den Datenträger „Treiber und Dienstprogramme“
1
Legen Sie den
Drivers and Utilities
-Datenträger
ein.
2
Fahren Sie den Computer herunter und starten Sie ihn erneut.
Wenn das Dell Logo angezeigt wird, drücken Sie sofort <F12>.
ANMERKUNG: Wenn Sie zu lange warten und das Betriebssystem-Logo
erscheint, warten Sie, bis der Microsoft
®
Windows
®
-Desktop angezeigt wird.
Fahren Sie Ihren Computer herunter und versuchen Sie es erneut.
ANMERKUNG: Durch die nächsten Schritte wird die Startreihenfolge
einmalig geändert. Beim nächsten Systemstart startet der Computer
entsprechend den im System-Setup-Programm angegebenen Geräten.
3
Wenn die Liste der Startgeräte angezeigt wird, markieren Sie
CD/DVD/CD-RW
, und drücken Sie die <Eingabetaste>.
4
Wählen Sie aus dem Menü die Option
Von CD-ROM starten
und
drücken Sie die <Eingabetaste>.

188 Schnellreferenzhandbuch
5
Geben Sie
1
ein, um die CD zu starten und drücken Sie zum Fortsetzen
die <Eingabetaste>.
6
Wählen Sie
Run Dell 32-bit Diagnostics
(Dell 32-Bit-Diagnose
ausführen) aus der nummerierten Liste aus. Wählen Sie die für Ihren
Computer zutreffende Version aus, wenn mehrere Versionen aufgelistet
werden.
7
Wenn das
Hauptmenü
des Programms Dell Diagnostics erscheint, wählen
Sie den gewünschten Test aus.
Dell Diagnostics-Hauptmenü
1
Klicken Sie nach dem Laden der Dell Diagnostics und nachdem das
Hauptmenü
angezeigt wird auf die Schaltfläche für die von Ihnen
gewünschte Option.
ANMERKUNG: Wir empfehlen, Test System (Testsystem) auszuwählen, um Ihren
Computer einem vollständigen Test zu unterziehen.
2
Nach der Auswahl der Option
Test System
(Systemtest) aus dem
Hauptmenü wird das folgende Menü angezeigt:
ANMERKUNG: Wir empfehlen, die Option Extended Test (Erweiterter Test) aus
dem unten angezeigten Menü auszuwählen, um die im Computer installierten
Geräte einem gründlicheren Test zu unterziehen.
Option Funktion
Test Memory
(Speicher testen)
Es wird nur der Speicher überprüft
Test System
(System testen)
Es wird eine umfassende Systemdiagnose durchgeführt
Exit (Beenden) Exit the Diagnostics (Diagnose beenden)
Option Funktion
Express Test
(Schnelltest)
Führt einen Schnelltest der Systemkomponenten
durch. Dieser Test dauert gewöhnlich 10 bis
20 Minuten.
Extended Test
(Erweiterter Test)
Führt einen gründlichen Test der Systemkomponenten
durch. Dieser Test kann mehr als 1 Stunde dauern.

Schnellreferenzhandbuch 189
3
Wenn beim Test eine Störung gefunden wird, wird eine Meldung mit dem
Fehlercode und eine Beschreibung der Störung angezeigt. Notieren Sie
den Fehler-Code und eine Beschreibung des Problems, und setzen Sie sich
anschließend mit Dell in Verbindung.
ANMERKUNG: Die Service-Tag-Nummer des Computers finden Sie im
oberen Bereich der einzelnen Testanzeigen. Wenn Sie bei Dell anrufen, fragt
Sie der Technische Support nach der Service-Tag-Nummer.
4
Falls Sie einen Test der Option
Custom Test
(Benutzerdefinierter Test)
,
oder der Option Symptom Tree
(Problemübersicht) ausführen, klicken Sie
auf die zutreffende Registerkarte, die in der folgenden Tabelle näher
beschrieben wird, um weitere Informationen zu erhalten.
Custom Test
(Benutzerdefinierter Test)
Dient zum Testen bestimmter Komponenten oder
Anpassen der durchzuführenden Tests.
Symptom Tree
(Problemübersicht)
Diese Option dient zum Auswählen von Tests anhand
der Merkmale des aufgetretenen Problems. Diese
Option listet die häufigsten Symptome auf.
Registerkarte Funktion
Results
(Ergebnisse)
Es werden die Testergebnisse und möglicherweise
gefundene Probleme angezeigt.
Errors
(Fehler)
Es werden die gefundenen Fehler, die Fehlercodes und eine
Beschreibung des Problems angezeigt.
Help
(Hilfe)
Beschreibt den Test und verweist auf mögliche
Voraussetzungen für die Durchführung des Tests.
Configuration
(Konfiguration)
Die Hardware-Konfiguration der ausgewählten Geräte wird
angezeigt.
Dell Diagnostics sammelt über das System-Setup-
Programm, den Speicher und verschiedene interne Tests
Konfigurationsinformationen für alle Geräte. Diese werden
in der Geräteliste auf der linken Seite angezeigt. In der
Geräteliste werden möglicherweise nicht die Namen aller
Geräte angezeigt, die im Computer installiert oder daran
angeschlossen sind.
Parameters
(Parameter)
Der Test kann durch Änderungen an den Einstellungen an
Ihre Bedürfnisse angepasst werden.
Option Funktion (fortgesetzt)

190 Schnellreferenzhandbuch
5
Schließen Sie nach dem Beenden der Tests das Testfenster, um zum
Hauptmenü
zurückzugelangen. Schließen Sie zum Beenden von Dell
Diagnostics und zum Neustart des Computers das
Hauptmenü
.
6
Entfernen Sie den Dell
Drivers and Utilities
-Datenträger
(falls
vorhanden).
Betriebsanzeigen
VORSICHT: Bevor Sie Arbeiten an den in diesem Abschnitt beschriebenen
Komponenten ausführen, lesen Sie erst die Sicherheitshinweise im
Produktinformationshandbuch.
Die Betriebsanzeige (zweifarbige Leuchtdiode) befindet sich auf der Vorder-
seite des Computers und leuchtet auf, blinkt oder leuchtet stetig und zeigt
damit verschiedene Betriebszustände an:
• Wenn die Betriebsanzeige nicht leuchtet, ist der Computer entweder
ausgeschaltet oder wird nicht mit Strom versorgt.
– Verbinden Sie das Netzkabel erneut mit dem Netzanschluss auf der
Rückseite des Computers und der Steckdose.
– Wenn der Computer an eine Steckerleiste angeschlossen ist, stellen
Sie sicher, dass das Steckerleistenkabel in einer Netzsteckdose steckt
und die Steckerleiste eingeschaltet ist. Verzichten Sie außerdem auf
Überspannungsschutz-Zwischenstecker, Steckerleisten und Ver-
längerungskabel, um festzustellen, ob sich der Computer ordnungs-
gemäß einschalten lässt.
– Stellen Sie sicher, dass die Steckdose Strom liefert, indem Sie probe-
weise ein anderes Gerät, beispielsweise eine Lampe, anschließen.
• Gehen Sie wie folgt vor, wenn die Betriebsanzeige stetig grün leuchtet, der
Computer jedoch nicht reagiert:
– Stellen Sie sicher, dass der Monitor angeschlossen und eingeschaltet
ist.
– Wenn der Monitor angeschlossen und eingeschaltet ist, siehe
„Signaltoncodes“ auf seite 192.

Schnellreferenzhandbuch 191
• Wenn die Betriebsanzeige grün blinkt, befindet sich der Computer im
Standby-Modus. Drücken Sie auf eine Taste auf der Tastatur, bewegen Sie
die Maus, oder betätigen Sie den Netzschalter, um den Normalbetrieb
wieder aufzunehmen. Gehen Sie wie folgt vor, wenn das Strom-
versorgungslicht grün leuchtet und der Computer dennoch nicht reagiert:
– Stellen Sie sicher, dass der Monitor angeschlossen und eingeschaltet
ist.
– Wenn der Monitor angeschlossen und eingeschaltet ist, siehe
„Signaltoncodes“ auf seite 192.
• Wenn die Betriebsanzeige stetig gelb leuchtet, ist die Stromversorgung
des Computers aktiv, aber möglicherweise weist eine Komponente eine
Fehlfunktion auf bzw. ist nicht korrekt installiert.
– Entfernen Sie die Speichermodule, und installieren Sie sie neu.
– Entfernen Sie die Karten, und installieren Sie sie neu.
– Entfernen Sie gegebenenfalls die Grafikkarte, und installieren Sie sie
neu.
• Wenn die Betriebsanzeige gelb blinkt, liegt möglicherweise ein Problem
mit der Stromversorgung oder eine Fehlfunktion einer internen Kom-
ponente vor.
– Stellen Sie sicher, dass alle Stromversorgungskabel korrekt und sicher
an die Systemplatine angeschlossen sind (siehe „Komponenten der
Systemplatine“ auf seite 174).
– Vergewissern Sie sich, dass das Hauptnetzkabel und das Kabel der
Frontblende fest mit der Systemplatine verbunden sind (siehe
„Komponenten der Systemplatine“ auf seite 174).

192 Schnellreferenzhandbuch
Signaltoncodes
Ihr Computer gibt während des Startvorgangs möglicherweise eine Reihe von
Signaltoncodes aus, solange der Monitor keine Fehler oder Probleme anzeigen
kann. Anhand dieser Reihe vo
n Signaltönen, die auch als Signaltoncode bezeichnet werden, lässt sich ein
Problem identifizieren. Signaltoncode „1-3-1“ (ein möglicher Signaltoncode)
besteht beispielsweise aus einem einzelnen Signalton, einer Folge von drei
Signaltönen und anschließend wieder einem Signalton. Dieser Signaltoncode
weist auf ein Speicherproblem beim Computer hin.
Durch das erneute Einsetzen der Speichermodule können die folgenden
Signaltonfehler möglicherweise korrigiert werden. Wenn das Problem fort-
besteht, nehmen Sie Kontakt mit Dell auf (siehe „Kontaktaufnahme mit
Dell“
im
Benutzerhandbuch
), um technische Unterstützung zu erhalten.
Wenn auf dem Computer einer der folgenden Signaltoncodefehler ertönt,
lesen Sie den Abschnitt „Kontaktaufnahme mit Dell“
im
Benutzerhandbuch
,
um technische Unterstützung zu erhalten.
Code Ursache
1-3-1 bis
2-4-4
Speicher wird nicht ordnungsgemäß erkannt oder verwendet
4-3-1 Speicherfehler oberhalb von Adresse 0FFFFh
Code Ursache
1-1-2 Registerfehler im Mikroprozessor
1-1-3 NVRAM Lese-/Schreibfehler
1-1-4 ROM-BIOS-Prüfsummenfehler
1-2-1 Programmierbarer Intervallzeitgeberfehler
1-2-2 DMA-Initialisierungsfehler
1-2-3 DMA-Seitenregister-Schreib-/Lese-Fehler
1-3 Fehler beim Testen des Videospeichers
1-3-1 bis
2-4-4
Speicher wird nicht ordnungsgemäß erkannt oder verwendet

Schnellreferenzhandbuch 193
Systemmeldungen
ANMERKUNG: Wenn eine angezeigte Meldung in dieser Tabelle nicht aufgeführt
ist, lesen Sie in der Dokumentation zu dem Betriebssystem oder Programm nach,
das beim Auftreten der Störung ausgeführt wurde.
3-1-1 Fehler beim Slave-DMA-Register
3-1-2 Fehler beim Master-DMA-Register
3-1-3 Fehler beim Master-Interruptmaskenregister
3-1-4 Fehler beim Slave-Interruptmaskenregister
3-2-2 Ladefehler des Interrupt-Vektors
3-2-4 Fehler beim Testen des Tastatur-Controllers
3-3-1 Unterbrechung der NVRAM-Stromversorgung
3-3-2 Unzulässige NVRAM-Konfiguration
3-3-4 Fehler beim Testen des Videospeichers
3-4-1 Bildschirminitialisierung versagt
3-4-2 Bildschirmneuzeichnung versagt
3-4-3 Fehler bei der Suche nach dem Video-ROM
4-2-1 Kein Zeitgeber-Tick
4-2-2 Fehler beim Herunterfahren
4-2-3 Gate A20 versagt
4-2-4 Unerwarteter Interrupt im geschützten Modus
4-3-1 Speicherfehler oberhalb von Adresse 0FFFFh
4-3-3 Zeitgeber-Chipzähler 2 ausgefallen
4-3-4 Tagesuhr angehalten
4-4-1 Fehler beim Testen der seriellen oder parallelen Ports
4-4-2 Fehler beim Dekomprimieren von Code im Shadow-RAM
4-4-3 Fehler beim Testen des mathematischen Coprozessors
4-4-4 Fehler beim Cache-Speichertest
Code Ursache

194 Schnellreferenzhandbuch
ACHTUNG! BEREITS UNTERNOMMENE VERSUCHE, DAS SYSTEM ZU STARTEN,
SIND AM PRÜFPUNKT [NNNN] FEHLGESCHLAGEN. WENN SIE BEIM LÖSEN
DIESES PROBLEMS HILFE BRAUCHEN, NOTIEREN SIE BITTE DIESEN PRÜFPUNKT
UND SETZEN SIE SICH MIT DEM TECHNISCHEN SUPPORT VON DELL IN VER-
BINDUNG — Der Computer hat die Startroutine dreimal hintereinander mit der
gleichen Fehlermeldung abgebrochen.
CMOS CHECKSUM ERROR (BIOS-PRÜFSUMMENFEHLER)— Mögliche
Fehlfunktion der Hauptplatine oder RTC-Batterie leer. Tauschen Sie den Akku
aus.
FEHLFUNKTION DES CPU-LÜFTERS — Fehlfunktion des CPU-Lüfters. Tauschen
Sie den CPU-Lüfter aus.
DISKETTENLAUFWERK 0 SUCHFEHLER — Möglicherweise hat sich ein Kabel
gelöst oder die Einstellungen der Computerkonfiguration stimmen nicht mit der
Hardware-Konfiguration überein. Überprüfen Sie die Kabelverbindungen.
FEHLER BEIM LESEN DER DISKETTE — Die Diskette ist möglicherweise defekt
oder es hat sich ein Kabel gelöst. Ersetzen Sie die Diskette und/oder prüfen Sie, ob
sich ein Kabel gelöst hat.
FESTPLATTENLAUFWERKFEHLER — Während des Einschalt-Selbsttests der
Festplatte ist möglicherweise ein Festplattenlaufwerkfehler aufgetreten.
Überprüfen Sie die Kabel, bzw. tauschen Sie die Festplatte aus.
FESTPLATTENLESEFEHLER — Während des Einschaltselbsttests der Festplatte
beim Systemstart ist möglicherweise ein Festplattenlaufwerkfehler aufgetreten.
KEYBOARD FAILURE — Tastaturfehler oder loses Tastaturkabel.

Schnellreferenzhandbuch 195
KEIN STARTGERÄT ZUR VERFÜGUNG — Das System kann kein startbares Gerät
oder Partition erkennen.
• Wenn Sie vom Diskettenlaufwerk aus starten, stellen Sie sicher, dass die Kabel
angeschlossen sind und dass sich eine startfähige Diskette im Laufwerk befindet.
• If the hard drive is your boot device, ensure that the cables are connected and
that the drive is installed properly and partitioned as a boot device.
• Rufen Sie das System-Setup-Programm auf, und prüfen Sie, ob die Angaben zur
Startreihenfolge stimmen.
KEIN ZEITTAKT-INTERRUPT — Möglicherweise liegt eine Fehlfunktion bei
einem Chip auf der Systemplatine vor, oder die Hauptplatine ist defekt.
KEINE SYS TE MD I S C ODER DISCFEHLER — Replace the floppy disk with one that
has a bootable operating system or remove the floppy disk from drive A and restart
the computer.
KEINE STARTDISC — Insert a bootable floppy disk and restart your computer.
USB-ÜBERSPANNUNGSFEHLER — Trennen Sie die Verbindung zum USB-Gerät.
Verwenden Sie eine externe Stromquelle für das USB-Gerät.
HINWEIS: DAS SELBSTÜBERWACHUNGSSYSTEM DER FESTPLATTE HAT
GEMELDET, DASS SICH EIN PARAMETER AUßERHALB DES NORMBEREICHS
BEFUNDEN HAT. DELL EMPFIEHLT IHNEN, REGELMÄßIGE SICHERUNGSKOPIEN
I
HRER DATEN ANZULEGEN. WENN EIN PARAMETER AUßERHALB DES NORM-
BEREICHS LIEGT, KANN DIES MÖGLICHERWEISE AUF EIN FESTPLATTENPROBLEM
HINWEISEN — S.M.A.R.T.-Fehler, möglicher Festplattenfehler. Diese Funktion
kann im BIOS-Setup aktiviert oder deaktiviert werden.

196 Schnellreferenzhandbuch
Diagnoseanzeigen
VORSICHT: Bevor Sie irgendwelche in diesem Abschnitt beschriebenen
Verfahren ausführen, lesen Sie erst die Sicherheitshinweise im
Produktinformationshandbuch.
Um Ihnen die Behebung einer Störung zu erleichtern, verfügt Ihr Computer
an der Vorder- oder Rückseite über vier Anzeigen, die mit „1“, „2“, „3“, und
„4“ gekennzeichnet sind. Die Anzeigen können gelb, grün oder ganz aus-
geschaltet sein. Wenn der Computer normal startet, ändern sich die Muster
oder Codes der LEDs, sobald der Startvorgang abgeschlossen ist. Wenn der
Computer normal startet, ändern sich die Muster oder Codes der LEDs,
sobald der Startvorgang abgeschlossen ist. Wenn die POST-Routine beim
Systemstart erfolgreich durchlaufen wird, leuchten alle vier LEDs stetig grün.
Wenn beim Abarbeiten der POST-Routine ein Fehler auftritt, geben die von
den LEDs angezeigten Muster einen Hinweis auf den Vorgang, bei dem der
Fehler aufgetreten ist.
ANMERKUNG: Die Ausrichtung der Diagnoseanzeigen variiert möglicherweise in
Abhängigkeit vom Systemtyp. Die Diagnoseanzeigen können entweder vertikal oder
horizontal angezeigt werden.
Leuchtmuster Problembeschreibung Lösungsvorschlag
Der Computer ist entweder
abgeschaltet oder ein Pre-
BIOS-Fehler ist aufgetreten.
Die Diagnoseanzeigen
leuchten nicht, wenn der
Computer das Betriebssystem
ordnungsgemäß gestartet hat.
Schließen Sie den Computer
an eine funktionierende Steck-
dose an, und drücken Sie den
Netzschalter.
Es ist möglicherweise ein
BIOS-Fehler aufgetreten; der
Computer befindet sich im
Wiederherstellungsmodus.
Führen Sie das BIOS-Wieder-
herstellungsprogramm aus,
warten Sie, bis die Wiederher-
stellung abgeschlossen ist, und
starten Sie den Computer neu.
Möglicherweise ist ein Fehler
im Prozessor aufgetreten.
Installieren Sie den Prozessor
erneut und starten Sie den
Computer neu.

Schnellreferenzhandbuch 197
Die Speichermodule wurden
erkannt, es ist jedoch ein
Speicherfehler aufgetreten.
• Wenn ein Speichermodul
installiert ist, installieren Sie
dieses neu und starten dann
den Computer neu.
(Anweisungen zum
Entfernen und Installieren
von Speichermodulen
finden Sie im Online-
Benutzerhandbuch
.)
• Wenn zwei oder mehr
Speichermodule installiert
sind, entfernen Sie die
Module, installieren ein
Modul neu und starten dann
den Computer neu. Wenn
sich der Computer prob-
lemlos starten lässt,
installieren Sie ein zusätz-
liches Modul neu. Fahren
Sie fort, bis Sie ein fehler-
haftes Modul festgestellt
oder alle Module ohne
Fehler neu installiert haben.
• Installieren Sie gegebenen-
falls ordnungsgemäß funk-
tionierende Speichermodule
des gleichen Typs in Ihrem
Computer.
• Wenn das Problem fort-
besteht,
nehmen Sie
Kontakt mit Dell auf
.
Leuchtmuster Problembeschreibung Lösungsvorschlag

198 Schnellreferenzhandbuch
Möglicherweise ist ein Fehler
bei der Grafikkarte aufgetreten.
• Wenn der Computer mit
einer Grafikkarte aus-
gestattet ist, entfernen Sie
die Karte, installieren Sie sie
neu und starten Sie den
Computer neu.
• Wenn das Problem fort-
besteht, installieren Sie eine
Grafikkarte, die nachweis-
lich funktioniert, und
starten Sie den Computer
neu.
• Besteht das Problem weiter-
hin oder besitzt der Com-
puter eine integrierte Grafik-
karte,
nehmen Sie Kontakt
mit Dell auf
.
Ein möglicher Disketten- oder
Festplattenlaufwerkfehler ist
aufgetreten.
Schließen Sie alle Strom- und
Datenkabel erneut an und
starten Sie den Computer neu.
Ein möglicher USB-Fehler ist
aufgetreten.
Installieren Sie alle USB-
Komponenten neu, über-
prüfen Sie die Kabelver-
bindungen und starten Sie
anschließend den Computer
neu.
Leuchtmuster Problembeschreibung Lösungsvorschlag

Schnellreferenzhandbuch 199
Es wurden keine
Speichermodule erkannt.
• Wenn ein Speichermodul
installiert ist, installieren Sie
dieses neu und starten dann
den Computer neu.
(Anweisungen zum
Entfernen und Installieren
von Speichermodulen
finden Sie im Online-
Benutzerhandbuch
.)
• Wenn zwei oder mehr
Speichermodule installiert
sind, entfernen Sie die
Module, installieren ein
Modul neu und starten dann
den Computer neu. Wenn
sich der Computer problem-
los starten lässt, installieren
Sie ein zusätzliches Modul
neu. Fahren Sie fort, bis Sie
ein fehlerhaftes Modul
festgestellt oder alle Module
ohne Fehler neu installiert
haben.
• Installieren Sie gegebenen-
falls ordnungsgemäß funk-
tionierende Speichermodule
des gleichen Typs in Ihrem
Computer.
• Wenn das Problem fort-
besteht,
nehmen Sie
Kontakt mit Dell auf
.
Leuchtmuster Problembeschreibung Lösungsvorschlag

200 Schnellreferenzhandbuch
Die Speichermodule wurden
erkannt, es besteht jedoch ein
Speicherkonfigurations- oder
Kompatibilitätsfehler.
• Vergewissern Sie sich, dass
keine besonderen Anfor-
derungen
für die Anordnung
der Speicher-
module/Speicheranschlüsse
bestehen.
• Prüfen Sie, ob die von Ihnen
installierten
Speicher-
module
mit dem Computer
kompatibel sind.
• Wenn das Problem fort-
besteht, nehmen Sie
Kontakt mit Dell auf.
Ein Fehler ist aufgetreten.
Dieses Muster wird auch
angezeigt, wenn Sie das
System-Setup-Programm
aufrufen; es deutet daher nicht
notwendigerweise auf ein
Problem hin.
• Vergewissern Sie sich, dass
die Kabel vom Festplatten-
laufwerk und vom optischen
Laufwerk richtig an der
Systemplatine angeschlossen
sind.
• Überprüfen Sie die auf dem
Bildschirm angezeigte
Computermeldung.
• Wenn das Problem fort-
besteht, nehmen Sie
Kontakt mit Dell auf.
Nach Abschluss des Einschalt-
Selbstests leuchten alle vier
Diagnoseanzeigen kurz grün
auf, bevor sie ausgeschaltet
werden und damit einen
normalen Betriebszustand
anzeigen.
Keine.
Leuchtmuster Problembeschreibung Lösungsvorschlag

Schnellreferenzhandbuch 201
Löschen von vergessenen Kennwörtern
VORSICHT: Bevor Sie irgendwelche in diesem Abschnitt beschriebenen
Verfahren ausführen, lesen Sie erst die Sicherheitshinweise im
Produktinformationshandbuch.
1
Befolgen Sie die Anweisungen unter „Vorbereitung“ auf seite 146.
2
Entfernen Sie die Computerabdeckung (siehe „Entfernen der
Computerabdeckung“ auf seite 181.
3
Suchen Sie die 2-polige Kennwortsteckbrücke (PSWD) auf der System-
platine. Standardmäßig sind Stift 1 und Stift 2 verbunden. Entfernen Sie
die Steckbrücke und starten Sie das System wie folgt:
4
Entfernen Sie die Steckbrücke.
5
Bringen Sie die Computerabdeckung wieder an (siehe „Anbringen der
Computerabdeckung“ auf seite 175.
HINWEIS: Um ein Netzwerkkabel anzuschließen, schließen Sie das Kabel erst am
Netzwerkgerät und dann am Computer an.
6
Stecken Sie die Netzstecker des Computers und der zugehörigen Geräte
wieder in die Steckdosen, und schalten Sie den Computer und die
Peripheriegeräte ein.

202 Schnellreferenzhandbuch
7
Wenn der Microsoft
®
Windows
®
-Desktop auf Ihrem Computer angezeigt
wird, fahren Sie den Computer herunter (siehe „Computer ausschalten“
auf seite 148.
8
Schalten Sie den Monitor aus und trennen Sie ihn von der Strom-
versorgung.
9
Ziehen Sie das Netzkabel des Computers aus der Steckdose und drücken
Sie den Netzschalter, um die Systemplatine zu erden.
10
Öffnen Sie die Computerabdeckung.
11
Suchen Sie die beiden Stifte für die 2-polige Kennwortsteckbrücke
(PSWD) auf der Systemplatine, und setzen Sie die Steckbrücke wieder
ein, um die Kennwortoption wiederherzustellen.
12
Bringen Sie die Computerabdeckung wieder an (siehe „Anbringen der
Computerabdeckung“ auf seite 175).
HINWEIS: Wenn Sie ein Netzwerkkabel anschließen, stecken Sie das Kabel erst
an der Netzwerkwandsteckerbuchse und dann am Computer ein.
13
Stecken Sie die Netzstecker des Computers und der zugehörigen Geräte
wieder in die Steckdosen, und schalten Sie den Computer und die
Peripheriegeräte ein.
ANMERKUNG: Durch diesen Vorgang wird die Kennwortfunktion aktiviert. Wenn
Sie
das System-Setup aufrufen (siehe „Aufrufen des System-Setups“ in Ihrem
Benutzerhandbuch), sind die System- und Administrator-Optionen auf Nicht
festgelegt–. Dies bedeutet, dass die Kennwortfunktion zwar aktiviert ist, jedoch kein
Kennwort vergeben wurde.
14
Weisen Sie ein neues System- und/oder Administrator-Kennwort zu.
Löschen der CMOS-Einstellungen
VORSICHT: Bevor Sie irgendwelche in diesem Abschnitt beschriebenen
Verfahren ausführen, lesen Sie erst die Sicherheitshinweise im
Produktinformationshandbuch.
1
Befolgen Sie die Anweisungen unter „Vorbereitung“ auf seite 146.
ANMERKUNG: Der Computer muss von der Stromversorgung getrennt
werden, um die CMOS-Einstellung zu löschen.
2
Entfernen Sie die Computerabdeckung (siehe „Entfernen der
Computerabdeckung“ auf seite 181).

Schnellreferenzhandbuch 203
3
Entfernen Sie die Computerabdeckung.
4
Setzen Sie die CMOS-Einstellungen zurück:
a
Suchen Sie die Kennwort- und CMOS-Steckbrücken (PSWD und
RTCRST) auf der Systemplatine (siehe „Löschen von vergessenen
Kennwörtern“ auf seite 201).
b
Ziehen Sie die Kennwortsteckbrücke ab.
c
Stecken Sie die Kennwortsteckbrücke auf die RTCRST-Stifte, und
warten Sie ca. fünf Sekunden.
d
Ziehen Sie die Steckbrücke von den RTCRST-Stiften ab, und stecken
Sie sie wieder auf die Kennwortstifte.
5
Bringen Sie die Computerabdeckung wieder an (siehe „Anbringen der
Computerabdeckung“ auf seite 175).
HINWEIS: Um ein Netzwerkkabel anzuschließen, schließen Sie das Kabel erst am
Netzwerk-Port oder Netzwerkgerät und dann am Computer an.
6
Stecken Sie die Netzstecker des Computers und der zugehörigen Geräte
wieder in die Steckdosen, und schalten Sie den Computer und die
Peripheriegeräte ein.
Überschreiben des BIOS
Ein BIOS muss gegebenenfalls überschrieben werden, wenn eine
Aktualisierung verfügbar ist, oder wenn die Systemplatine ersetzt wird.
1
Schalten Sie den Computer ein.
2
Suchen Sie die BIOS-Aktualisierungsdatei auf der Dell Support-Website
unter
support.dell.com
.
3
Klicken Sie auf
Download Now
(Jetzt downloaden), um die Datei
herunterzuladen.
4
Wenn das Fenster
Export Compliance Disclaimer
(Haftungsausschluss
bezüglich der Einhaltung der Exportbestimmungen) klicken Sie auf
Yes, I
Accept this Agreement
(Ja, ich bin mit diesen Bestimmungen
einverstanden).
Das Fenster
Datei herunterladen
wird angezeigt.
5
Klicken Sie auf
Dieses Programm auf einem Datenträger speichern
und
klicken Sie anschließend auf
OK
.
Das Fenster
Speichern unter
wird angezeigt.

204 Schnellreferenzhandbuch
6
Klicken Sie auf den Nach-Unten-Pfeil im Menü
Speichern unter
, wählen
Sie
Desktop
und klicken Sie anschließend auf
Speichern
.
Die Datei wird auf Ihren Desktop heruntergeladen.
7
Klicken Sie auf „Schließen“, wenn das Fenster
Download beendet
angezeigt wird.
Auf dem Desktop wird jetzt das Dateisymbol angezeigt; es trägt dieselbe
Bezeichnung wie die heruntergeladene BIOS-Aktualisierungsdatei.
8
Doppelklicken Sie auf das Dateisymbol auf dem Desktop und folgen Sie
den Anweisungen auf dem Bildschirm.

Stichwortverzeichnis 205
Stichwortverzeichnis
A
Abdeckung
anbringen, 175, 185
entfernen, 171, 181
Anzeigen
Stromversorgung, 166
Assistenten
Netzwerkinstallations-Assistent, 1
52
Aufkleber
Service-Tag-Nummer, 167, 177
B
Beheben von Störungen
Dell Diagnostics, 186
Hilfe- und Supportcenter, 145
Benutzerhandbuch, 142
Betriebssystem
neu installieren, 145
Betriebssystem-CD, 145
C
CDs
Betriebssystem, 145
CMOS-Einstellungen
löschen, 202
Computer
Bauteile im Innern, 183
Innenansicht, 173, 183
Innenkomponenten, 173
Signaltoncodes, 192
D
Dell
Support-Website, 144
Dell Diagnostics, 186
Dell Diagnostics von Ihrer
Festplatte starten, 187
Diagnose
Dell Diagnostics, 186
Signaltoncodes, 192
Dokumentation
Benutzerhandbuch, 142
Endbenutzerlizenzvereinbarung,
142
Ergonomie, 142
Garantie, 142
Online, 144
Produktinformationshandbuch, 1
42
Schnellreferenz, 142
Sicherheit, 142
Zulassung, 142
Drucker
Anschließen, 160

206 Stichwortverzeichnis
anschließen, 151
Einrichten, 160
einrichten, 151
Kabel, 161
E
Endbenutzerlizenzvereinbarung,
142
Etikett
Microsoft Windows, 143
Service-Tag-Nummer, 143
F
Fehlermeldungen
Signaltoncodes, 192
Fernseher
an Computer anschließen, 161
G
Garantieinformationen, 142
H
Hardware
Dell Diagnostics, 186
Signaltoncodes, 192
Hauptplatine. Siehe
Systemplatine
Hauptplatine. Siehe
Systemplatine
Hilfe- und Supportcenter, 145
Hilfedatei
Windows Hilfe- und
Supportcenter, 145
I
Informationen zur
Ergonomie, 142
Installieren von Teilen
Vorbereitung, 147
Internetverbindung
einrichten, 154
Informationen, 153
Optionen, 153
K
Kennwort
Jumper, 201
Löschen, 201
Komponenteninstallation
empfohlene Werkzeuge, 148
M
Monitor
Anzeigeeinstellungen, 163
DVI anschließen, 161-162
erweiterter Desktop-Modus, 163
Fernseher anschließen, 161
Klonmodus, 163
TV anschließen, 163

Stichwortverzeichnis 207
VGA anschließen, 161-162
zwei anschließen, 161-162
N
Netzwerk
Netzwerkinstallations-Assistent,
152
Netzwerkinstallations-Assistent,
152
P
Probleme
Dell Diagnostics, 186
Signaltoncodes, 192
Produktinformationshandbuch,
142
R
ResourceCD
Dell Diagnostics, 186
S
S.M.A.R.T., 195
Service-Tag-Nummer, 143, 167,
177
Sicherheitshinweise, 142
Signaltoncodes, 192
Starten von Dell Diagnostics
über die Drivers and Utilities
CD, 187
Strom
Schalter, 166, 177
Stromversorgung
Anzeige, 166
Leitungsfilter
Schutzgeräte
Überspannungsschutz
USV
Support-Website, 144
Systemplatine, 174, 184
T
Teile installieren
Computer ausschalten, 148
TV
an den Computer
anschließen, 163
U
unterbrechungsfreie
Stromversorgung. Siehe USV
USV
W
Windows XP
Hilfe- und Supportcenter, 145


www.dell.com | support.dell.com
Dell™ OptiPlex™ 330
Guida di consultazione rapida
Modelli DCSM e DCNE

N.B., Avvisi e Attenzione
N.B. Un N.B. indica informazioni importanti che contribuiscono a migliorare
l'utilizzo del computer.
AVVISO: Un AVVISO indica un potenziale danno all'hardware o perdita di dati, e
suggerisce come evitare il problema.
ATTENZIONE: Un messaggio di ATTENZIONE indica una possibilità di danno a
beni materiali, a persone o addirittura pericolo di morte.
____________________
Le informazioni contenute in questo documento sono soggette a modifica senza preavviso.
© 2007 Dell Inc. Tutti i diritti riservati.
È severamente vietata la riproduzione, con qualsiasi strumento, senza l'autorizzazione scritta di
Dell Inc.
Marchi commerciali utilizzati in questo testo: Dell, il logo DELL, Inspiron, Dell Precision, Dimension,
OptiPlex, Latitude, PowerEdge, PowerVault, PowerApp e Dell OpenManage sono marchi commerciali
della Dell Inc.; Intel, Pentium e Celeron sono marchi depositati della Intel Corporation; Microsoft e
Windows sono marchi registrati della Microsoft Corporation.
Altri marchi e nomi commerciali possono essere utilizzati in questo documento sia in riferimento alle
aziende che rivendicano il marchio e i nomi che ai prodotti stessi. Dell Inc. nega qualsiasi
partecipazione di proprietà relativa a marchi e nomi commerciali diversi da quelli di sua proprietà.
Modelli DCSM e DCNE
Settembre 2007 N/P DU086 Rev. A00

Sommario 211
Sommario
Ricerca di informazioni . . . . . . . . . . . . . . . . . 213
Operazioni preliminari
. . . . . . . . . . . . . . . . . 218
Interventi preliminari sui componenti interni
del computer
. . . . . . . . . . . . . . . . . . . . 218
Aggiunta e sostituzione di componenti
. . . . . . . . . 220
Installazione del computer
. . . . . . . . . . . . . . . 221
Installazione del computer in un contenitore
. . . 221
Installazione di una rete domestica e per ufficio
. . . 224
Collegamento a una scheda di rete
. . . . . . . . 224
Installazione della rete
. . . . . . . . . . . . . . . 224
Connessione a Internet
. . . . . . . . . . . . . . . . . 225
Trasferimento delle informazioni a un nuovo
computer
. . . . . . . . . . . . . . . . . . . . . . . . . 228
Installazione di una stampante
. . . . . . . . . . . . . 232
Collegamento di due monitor
. . . . . . . . . . . . . . 233
Dispositivi di protezione elettrica
. . . . . . . . . . . 235
Computer desktop
. . . . . . . . . . . . . . . . . . . . 237
Vista anteriore
. . . . . . . . . . . . . . . . . . . 237
Vista posteriore
. . . . . . . . . . . . . . . . . . 239
Connettori del pannello posteriore
. . . . . . . . 240
Rimozione del coperchio del computer
. . . . . . . . 242

212 Sommario
Vista interna del computer . . . . . . . . . . . . . . . 244
Componenti della scheda di sistema
. . . . . . . . . . 245
Ricollocamento del coperchio del computer
. . . . . . 246
Computer minitorre
. . . . . . . . . . . . . . . . . . . 247
Vista anteriore
. . . . . . . . . . . . . . . . . . . 247
Vista posteriore
. . . . . . . . . . . . . . . . . . . 249
Connettori del pannello posteriore
. . . . . . . . . . . 250
Rimozione del coperchio del computer
. . . . . . . . . 252
Vista interna del computer
. . . . . . . . . . . . . . . 254
Componenti della scheda di sistema
. . . . . . . . . . 255
Ricollocamento del coperchio del computer
. . . . . . 256
Soluzione dei problemi
. . . . . . . . . . . . . . . . . 257
Diagnostica della Dell
. . . . . . . . . . . . . . . . . . 257
Indicatori di alimentazione
. . . . . . . . . . . . . . . 261
Codici bip
. . . . . . . . . . . . . . . . . . . . . . . . 262
Messaggi di sistema
. . . . . . . . . . . . . . . . . . 264
Indicatori della diagnostica
. . . . . . . . . . . . . . . 266
Cancellazione delle password dimenticate
. . . . . . 270
Cancellazione delle impostazioni CMOS
. . . . . . . . 272
Ripristino del BIOS
. . . . . . . . . . . . . . . . . . . 273
Indice analitico . . . . . . . . . . . . . . . . . . . . . . 275

Guida di consultazione rapida 213
Ricerca di informazioni
N.B. Alcune funzioni o applicazioni multimediali potrebbero essere opzionali e non
fornite con il computer. Alcune funzioni o applicazioni multimediali potrebbero non
essere disponibili in alcuni Paesi.
N.B. Informazioni supplementari potrebbero essere fornite assieme al computer.
Cosa si ricerca? Si trova qui
• Un programma diagnostico per il
computer
• Driver per il computer
• Desktop System Software (DSS)
Supporto Drivers and Utilities
N.B. Il supporto Drivers and Utilities può
essere opzionale e potrebbe non essere
spedito col computer.
I driver sono già installati nel computer. È
possibile utilizzare il supporto per
reinstallare i driver (consultare la Guida
dell'utente in linea), per eseguire il
programma Dell Diagnostics (consultare
"Diagnostica della Dell" a pagina 257).
I file Leggimi possono essere compresi nel
supporto per fornire gli aggiornamenti
dell'ultimo minuto a proposito di
modifiche tecniche operate nel computer o
materiale di riferimento tecnico avanzato
per tecnici o utenti esperti.
N.B. Aggiornamenti dei driver e della
documentazione sono disponibili all'indirizzo
support.dell.com.

214 Guida di consultazione rapida
• Informazioni di base sulla risoluzione
dei problemi
• Come eseguire il programma
Dell Diagnostics
• Strumenti e utilità
• Come installare una stampante
Guida di consultazione rapida
N.B. Questo documento potrebbe essere
opzionale e potrebbe non essere spedito con
il computer.
N.B. Questo documento è disponibile in
formato PDF all'indirizzo support.dell.com.
• Informazioni sulla garanzia
• Termini e condizioni (solo per gli Stati
Uniti)
• Istruzioni di sicurezza
• Informazioni sulle normative
• Informazioni sull'ergonomia
• Contratto di licenza con l'utente finale
Guida alle informazioni sul prodotto Dell™
Cosa si ricerca? Si trova qui

Guida di consultazione rapida 215
• Come rimuovere e sostituire
componenti
• Specifiche
• Come configurare le impostazioni del
sistema
• Come individuare e risolvere i
problemi
Guida dell'utente di Dell OptiPlex™ 330
Help and Support Center (Guida e supporto
tecnico) di Microsoft Windows
1
Fare clic sul
pulsante Start
di Windows
Vista
→
Help and Support
(Guida e
supporto tecnico)
→
Dell User and
System Guides
(Guide dell'utente e di
sistema)
→
System Guides
(Guide
dell'utente).
2
Fare clic sulla
Guida dell'utente
del
computer.
• Numero di servizio e codice di servizio
espresso
• Etichetta di licenza di Microsoft
Windows
Numero di servizio e Licenza di Microsoft
®
Windows
®
Queste etichette si trovano sul computer.
• Usare il Numero di servizio per
identificare il computer quando si utilizza
support.dell.com
o si contatta il supporto.
• Immettere il codice di servizio espresso
per smistare la telefonata quando ci si
rivolge al supporto.
N.B. Come misura protettiva aggiuntiva,
l'etichetta della licenza di Microsoft
Windows progettata recentemente
comprende una parte mancante o "foro" per
scoraggiare la rimozione dell'etichetta.
Cosa si ricerca? Si trova qui

216 Guida di consultazione rapida
• Soluzioni — suggerimenti per la
risoluzione dei problemi, articoli di
tecnici, corsi in linea, domande
frequenti
• Comunità — discussione in linea con
altri clienti Dell
• Aggiornamenti — informazioni di
aggiornamento per componenti, quali
ad esempio la memoria, il disco rigido
e il sistema operativo
• Servizio clienti — recapiti,
informazioni sullo stato dell'ordine e
della richiesta di servizio, sulla
garanzia e sulle riparazioni
• Servizio e supporto — stato della
richiesta di assistenza e cronologia del
supporto, contratto di assistenza,
discussioni in linea con il supporto
tecnico
• Servizio di aggiornamento tecnico
Dell — notifica preventiva per posta
elettronica degli aggiornamenti
software e hardware per il computer
• Riferimenti — documentazione per il
computer, dettagli sulla
configurazione del computer,
specifiche dei prodotti e white paper
• Download — aggiornamenti di driver,
patch e software certificati
Sito Web del supporto tecnico della Dell —
support.dell.com
N.B. Selezionare il Paese o il settore
commerciale per visualizzare il corretto sito
del supporto.
Cosa si ricerca? Si trova qui

Guida di consultazione rapida 217
• Desktop System Software (DSS) — Se
si reinstalla il sistema operativo per il
computer, va anche reinstallata l'utilità
DSS. DSS fornisce aggiornamenti
critici per il sistema operativo e
supporto per processori, unità ottiche,
dispositivi USB e così via. DSS è
necessario per il corretto
funzionamento del computer Dell. Il
software rileva automaticamente il
computer e il sistema operativo e
installa gli aggiornamenti adeguati alla
propria configurazione.
Per scaricare Desktop System Software:
1
Visitare
support.dell.com
, selezionare il
Paese o il settore commerciale, e
immettere il Numero di servizio.
2
Selezionare
Drivers & Downloads
e fare
clic su
Go
(Vai).
3
Fare clic sul sistema operativo e ricercare
la parola chiave
Desktop System Software
.
N.B. L'interfaccia dell'utente
support.dell.com potrebbe variare in base
alle selezioni.
• Come usare Windows
• Come gestire programmi e file
• Come personalizzare il desktop
Help and Support Center (Guida e supporto
tecnico) Windows
1
Per accedere a Help and Support (Guida e
supporto tecnico) di Windows:
• In Windows XP, fare clic su
Start
e fare
clic su
Guida in linea e supporto
tecnico
.
• In Windows Vista™, fare clic sul
pulsante
Start
di Windows Vista
→
Help and Support
(Guida e supporto
tecnico).
2
Digitare una parola o una frase che
descriva il problema e fare clic sull'icona a
forma di freccia.
3
Fare clic sull'argomento che descrive il
problema.
4
Seguire le istruzioni visualizzate.
Cosa si ricerca? Si trova qui

218 Guida di consultazione rapida
Operazioni preliminari
Interventi preliminari sui componenti interni del computer
Per proteggere il computer da eventuali danni e per garantire la sicurezza
personale, attenersi alle istruzioni di sicurezza riportate di seguito.
ATTENZIONE: Prima di eseguire le procedure descritte in questa sezione,
seguire le istruzioni di sicurezza riportate nella Guida alle informazioni sul
prodotto.
• Come reinstallare il sistema operativo
Supporto Sistema operativo
N.B. Il supporto Sistema operativo può
essere opzionale e potrebbe non essere
spedito col computer.
Il sistema operativo è già installato nel
computer. Per reinstallare il sistema
operativo, utilizzare il disco Sistema
operativo e consultare la Guida dell'utente
in linea.
Dopo aver reinstallato il sistema operativo,
utilizzare il disco Drivers and Utilities per
reinstallare i driver per i dispositivi forniti
insieme al computer.
L'etichetta del product key del sistema
operativo è ubicato sul computer.
N.B. Il colore del disco varia in base al
sistema operativo ordinato.
Cosa si ricerca? Si trova qui

Guida di consultazione rapida 219
AVVISO: Maneggiare con cura componenti e schede. Non toccare i componenti o
i contatti sulle schede. Mantenere una scheda dai bordi o dalla staffa metallica di
montaggio. Tenere un componente, ad esempio un processore, dai bordi, non dai
piedini.
AVVISO: Solo un tecnico di assistenza qualificato dovrebbe eseguire le riparazioni
del computer. Danni dovuti a riparazioni non autorizzate da Dell non sono coperti
dalla garanzia.
AVVISO: Per scollegare un cavo, tirare il connettore o la linguetta di tiramento, non
il cavo stesso. Alcuni cavi dispongono di connettori con linguette di blocco; se si
scollega questo tipo di cavo, premere verso l'interno le linguette di blocco prima di
scollegare il cavo. Nel separare i connettori, mantenerli allineati per evitare di
piegare un eventuale piedino. Inoltre, prima di collegare un cavo accertarsi che
entrambi i connettori siano allineati e orientati in modo corretto.
AVVISO: Per evitare di danneggiare il computer, eseguire la seguente procedura
prima di effettuare interventi sui componenti interni del computer.
1
Spegnere il computer (consultare "Spegnimento del computer" a
pagina 220).
ATTENZIONE: Non alimentare mai il computer quando il coperchio è stato
rimosso.
AVVISO: Per disconnettere un cavo di rete, prima scollegare il cavo dal computer,
poi dal dispositivo di rete.
2
Scollegare tutti i cavi telefonici o di rete dal computer.
3
Scollegare il computer e tutti i dispositivi collegati dalle rispettive prese
elettriche.
4
Premere il pulsante di alimentazione per mettere a terra la scheda di
sistema.
AVVISO: Prima di toccare un qualsiasi componente interno del computer,
scaricare a terra l'elettricità statica del corpo toccando una superficie metallica
non verniciata, quale ad esempio il metallo sul retro del computer. Mentre si lavora,
toccare periodicamente una superficie metallica non verniciata per dissipare
l'eventuale elettricità statica che potrebbe danneggiare i componenti interni.

220 Guida di consultazione rapida
Aggiunta e sostituzione di componenti
La presente sezione fornisce le procedure per la rimozione e l'installazione di
componenti nel computer. Salvo diversamente indicato, ogni procedura
presume che esistano le seguenti condizioni:
• L'utente ha eseguito la procedura in "Spegnimento del computer" a
pagina 220 e "Interventi preliminari sui componenti interni del computer"
a pagina 218.
• L'utente ha letto le informazioni sulla sicurezza nella
Guida alle
informazioni sul prodotto
di Dell™.
• Un componente può essere sostituito o, se acquistato separatamente,
installato eseguendo la procedura di rimozione in ordine inverso.
Strumenti consigliati
Le procedure in questo documento possono richiedere gli strumenti seguenti:
• Cacciavite a lama piatta piccolo
• Giravite a croce piccolo
• Graffietto piccolo in plastica
Spegnimento del computer
AVVISO: Per evitare la perdita di dati, salvare e chiudere tutti i file aperti, quindi
uscire da tutti i programmi aperti prima di spegnere il computer.
1
Arrestare il sistema operativo:
a
Salvare e chiudere tutti i file aperti e uscire da tutti i programmi aperti.
b
Nel sistema operativo Microsoft
®
Windows
®
XP
, fare clic su
Start
→
Spegni computer
→
Arresta il sistema
.
In Microsoft
®
Windows Vista™
, fare clic sul pulsante Start di
Windows Vista nell'angolo inferiore sinistro del desktop, fare clic
sulla freccia nell'angolo inferiore destro del menu Start come mostrato
nel seguito, quindi fare clic su
Shut Down
(Arresta il sistema).
Il computer si spegne al completamento del processo di arresto del sistema
operativo.

Guida di consultazione rapida 221
2
Accertarsi che il computer e tutti i dispositivi collegati siano spenti. Se il
computer e i dispositivi collegati non si sono spenti automaticamente
all'arresto del sistema operativo, tenere premuto il pulsante di
alimentazione per circa 4 secondi per spegnerli.
Installazione del computer
Installazione del computer in un contenitore
L'installazione del computer in un contenitore può limitare il flusso d'aria e
influenzare le prestazioni del computer, con la possibilità di causare un
surriscaldamento. Attenersi alle seguenti istruzioni per l'installazione del
computer in un contenitore.
AVVISO: Le specifiche della temperatura di esercizio indicate in questo manuale
rispecchiano la temperatura ambiente di esercizio massima. La temperatura
ambiente della stanza deve essere presa in considerazione quando si installa il
computer in un contenitore. Per esempio, se la temperatura ambiente della stanza è
di 25 °C, a seconda delle specifiche del computer si ha un margine di temperatura
solo da 5° a 10 °C prima di raggiungere la temperatura di esercizio massima del
computer. Per dettagli sulle specifiche del computer, consultare la Guida dell'utente
in linea.
• Lasciare uno spazio minimo di 10,2 cm su tutti i lati con aperture del
computer per permettere il flusso d'aria necessario per una corretta
ventilazione.
• Se il contenitore dispone di sportelli, questi devono essere di tipo tale da
consentire un flusso d'aria di almeno il 30% attraverso il contenitore (nella
parte anteriore e in quella posteriore).

222 Guida di consultazione rapida
• Se il computer è installato in un angolo su una scrivania o sotto una
scrivania, lasciare almeno 5,1 cm di spazio libero dal retro del computer
alla parete per consentire il flusso d'aria necessario per una corretta
ventilazione.

Guida di consultazione rapida 223
AVVISO: Non installare il computer in un contenitore che non consente un flusso
d'aria. La limitazione del flusso d'aria influenza le prestazioni del computer, e in
alcuni casi può causare un surriscaldamento.

224 Guida di consultazione rapida
Installazione di una rete domestica e per ufficio
Collegamento a una scheda di rete
Per collegare un cavo di rete:
N.B. Collegare il cavo di rete al connettore della scheda di rete sul computer. Non
collegare il cavo di rete al connettore del modem sul computer. Non collegare un
cavo di rete a una presa a muro del telefono.
1
Collegare il cavo di rete al connettore della scheda di rete nella parte
posteriore del computer.
Inserire il cavo fino a fissarlo al suo posto, poi tirarlo con delicatezza per
verificare che sia saldamente inserito.
2
Collegare l'altra estremità del cavo di rete ad un dispositivo di rete.
Installazione della rete
Windows XP
Il sistema operativo Microsoft
®
Windows
®
XP fornisce un'Installazione
guidata rete che guida l'utente attraverso il processo di condivisione di file e
stampanti o di una connessione Internet tra computer in un ufficio
domestico o in una piccola azienda.
dispositivo
di rete
connettore della scheda di rete sul computer
cavo di rete
connettore
della scheda
di rete

Guida di consultazione rapida 225
1
Fare clic sul pulsante
Start
, scegliere
Tutti i programmi
→
Accessori
→
Comunicazioni
e infine fare clic su
Installazione guidata rete
.
2
Nella schermata iniziale
Installazione guidata rete
, fare clic su
Avanti
.
3
Fare clic su
Elenco di controllo per la creazione di una rete
.
N.B. Selezione del metodo di connessione Il sistema è connesso direttamente a
Internet abilita il firewall integrato fornito con Windows XP Service Pack 1 (SP1) o
versioni successive.
4
Completare le operazioni descritte nell'elenco di controllo e le procedure
preliminari.
5
Ritornare all'Installazione guidata rete e seguire le istruzioni visualizzate.
Windows Vista
Per eseguire modifiche all'impostazione della rete in Microsoft
®
Windows
Vista™:
1
Fare clic sul pulsante Start di Windows Vista, , quindi fare clic su
Network
(Rete)
→
Network and Sharing Center
(Centro connessioni di
rete e condivisione).
2
Fare clic su
Set up a connection or network
(Configura connessione o
rete).
3
Selezionare il tipo di connessione di rete che si desidera creare e seguire le
istruzioni visualizzate.
4
Al termine, chiudere il Network and Sharing Center (Centro connessioni
di rete e condivisione).
Connessione a Internet
N.B. Il provider di servizi Internet (ISP) e le relative offerte variano da Paese a
Paese.
Per effettuare una connessione Internet, è necessaria una connessione
modem o di rete e un account presso un provider di servizi Internet (ISP).
Attraverso tale ISP saranno disponibili una o più delle opzioni di connessione
che seguono.
• Connessioni DSL che forniscono l'accesso ad Internet ad alta velocità
tramite la linea telefonica esistente o il servizio telefonico cellulare. Con
una connessione DSL, è possibile accedere a Internet e utilizzare
contemporaneamente il telefono sulla stessa linea.

226 Guida di consultazione rapida
• Connessioni tramite modem via cavo, che consentono l'accesso a Internet
ad alta velocità tramite la linea telefonica TV via cavo locale.
• Connessioni modem satellitari che forniscono l'accesso ad Internet ad alta
velocità tramite un sistema televisivo satellitare.
• Connessioni remote che forniscono l'accesso a Internet tramite una linea
telefonica. Le connessioni remote sono notevolmente più lente rispetto
alle connessioni via modem DSL e via cavo (o satellitare).
• Connessioni LAN wireless che forniscono l'accesso ad Internet utilizzando
la tecnologia wireless Bluetooth
®
.
Se si utilizza una connessione remota, collegare una linea telefonica al
connettore del modem sul computer e alla presa a muro del telefono prima di
impostare la connessione Internet. Se si utilizza una connessione via modem
DSL o via cavo/satellitare, rivolgersi all'ISP o al servizio telefonico cellulare
per le istruzioni di installazione.
Impostazione della connessione Internet
Per impostare una connessione Internet con un collegamento sul desktop
fornito dall'ISP:
1
Salvare e chiudere i file aperti e uscire da tutti i programmi aperti.
2
Fare doppio clic sull'icona
dell'ISP nel desktop di Microsoft
®
Windows
®
.
3
Seguire le istruzioni visualizzate per completare l'impostazione.
Se non è presente un'icona dell'ISP nel desktop o se si desidera impostare una
connessione Internet con un ISP diverso, eseguire la procedura nella sezione
seguente che corrisponde al sistema operativo in uso.
N.B. In caso di problemi relativi alla connessione Internet, consultare "Installazione
di una rete domestica e per ufficio" a pagina 224. Se non è possibile connettersi a
Internet mentre in precedenza la connessione era riuscita, la causa potrebbe
essere una sospensione temporanea del servizio da parte dell'ISP. Contattare l'ISP
per verificare lo stato del servizio o ripetere la connessione più tardi.
Windows XP
1
Salvare e chiudere i file aperti e uscire da tutti i programmi aperti.
2
Fare clic su
Start
→
Internet Explorer
.
Viene visualizzato
Creazione guidata nuova connessione
.
3
Fare clic su
Connessione a Internet
.

Guida di consultazione rapida 227
4
Scegliere l'opzione corretta nella finestra successiva.
• Se non si dispone di un ISP e se ne desidera selezionare uno, fare clic
su
Scegli da un elenco di provider di servizi Internet (ISP)
.
• Se sono state già ottenute informazioni sull'impostazione dall'ISP, ma
non è stato ricevuto un CD di installazione, fare clic su
Imposta la
connessione manualmente
.
• Se si dispone di un CD, fare clic su
Utilizza il CD fornito dall'ISP
.
5
Fare clic su
Avanti
.
Se si è selezionato
Imposta la connessione manualmente
, continuare col
Punto 6. In caso contrario, seguire le istruzioni visualizzate per completare
l'impostazione.
N.B. In caso di dubbi sul tipo di connessione da selezionare, contattare il proprio
ISP.
6
Fare clic sull'opzione appropriata sotto
Indicare la modalità di
connessione a Internet
, quindi fare clic su
Avanti
.
7
Utilizzare le informazioni di impostazione fornite dall'ISP per completare
l'impostazione.
Windows Vista™
N.B. Avere a portata di mano le informazioni sull'ISP. Se non si dispone di un ISP, la
procedura guidata Connect to the Internet (Connessione a Internet) assiste l'utente
ad ottenerne uno.
1
Salvare e chiudere i file aperti e uscire da tutti i programmi aperti.
2
Fare clic sul pulsante Start di Windows Vista, , e su
Control Panel
(Pannello di controllo).
3
In
Network and Internet
(Rete e Internet), fare clic su
Connect to the
Internet
(Connessione a Internet).
Viene visualizzata la finestra
Connect to the Internet
(Connessione a
Internet).
4
Fare clic su
Broadband (PPPoE)
(Banda larga (PPPoE)) o
Dial-up
(Remota), in base alle modalità di connessione desiderate:
• Scegliere
Broadband
(A banda larga) se si utilizzerà una connessione
DSL, via modem satellitare, via modem TV via cavo oppure con
tecnologia wireless Bluetooth.
• Scegliere
Dial-up
(Remota) se si utilizzerà un modem remoto o
l'ISDN.

228 Guida di consultazione rapida
N.B. Se non si conosce il tipo di connessione da selezionare, fare clic su Help me
choose (Suggerimenti per la scelta) o rivolgersi all'ISP.
5
Seguire le istruzioni visualizzate e utilizzare le informazioni
sull'impostazione fornite dall'ISP per completare l'impostazione.
Trasferimento delle informazioni a un nuovo
computer
È possibile utilizzare le "procedure guidate" del sistema operativo per
consentire il trasferimento di file e di altri dati da un computer ad un altro, ad
esempio da un vecchio computer ad un nuovo computer. Per istruzioni,
consultare la seguente sezione che corrisponde al sistema operativo che è in
esecuzione nel computer.
Microsoft
®
Windows
®
XP (opzionale)
Il sistema operativo Microsoft
Windows XP fornisce il Trasferimento guidato
file e impostazioni per trasferire i dati dal computer di origine al nuovo
computer, quali quelli seguenti.
• Messaggi di posta elettronica
• Impostazioni della barra degli strumenti
• Dimensioni delle finestre
• Segnalibri di pagine Internet
È possibile trasferire i dati al nuovo computer su una connessione di rete o
seriale, oppure archiviarli su un supporto rimovibile, quale un CD scrivibile,
per trasferirli al nuovo computer.
N.B. È possibile trasferire dati da un vecchio computer ad uno nuovo collegando
direttamente un cavo seriale alle porte di input/output (I/O) dei due computer. Per
trasferire dati su una connessione seriale, è necessario accedere all'utilità Network
Connections (Connessioni di rete) dal Control Panel (Pannello di controllo) ed
eseguire altri passaggi di configurazione, ad esempio la configurazione di una
connessione avanzata e l'assegnazione del computer host e del computer guest.
Per istruzioni sull'installazione di una connessione diretta via cavo tra due computer,
consultare la Microsoft Knowledge Base, Articolo n. 305621, dal titolo How to Set Up
a Direct Cable Connection Between Two Computers in Windows XP (Come
impostare una connessione diretta via cavo tra due computer in Windows XP).
Queste informazioni possono non essere disponibili in alcuni Paesi.

Guida di consultazione rapida 229
Per trasferire informazioni ad un nuovo computer, è necessario eseguire il
Trasferimento guidato file e impostazioni. È possibile utilizzare il supporto
Sistema operativo opzionale per questo procedimento o è possibile creare un
disco del Trasferimento guidato file e impostazioni con il Trasferimento
guidato file e impostazioni.
Esecuzione del Trasferimento guidato file e impostazioni col Supporto Sistema
operativo
N.B. Questa procedura richiede il supporto Sistema operativo. Questo supporto è
opzionale e potrebbe non essere incluso con alcuni computer.
Per preparare un nuovo computer al trasferimento dei file:
1
Aprire il Trasferimento guidato file e impostazioni: fare clic su
Start
→
Tutti i programmi
→
Accessori
→
Utilità di sistema
→
Trasferimento
guidato file e impostazioni
.
2
Quando viene visualizzata la schermata iniziale del
Trasferimento guidato
file e impostazioni
, fare clic su
Avanti
.
3
Nella schermata
Specificare il computer
, fare clic su
Nuovo computer
→
Avanti
.
4
Nella schermata
Si dispone di un CD di Windows XP?
, fare clic su
Si
utilizzerà la procedura guidata contenuta nel CD di Windows XP
→
Avanti
.
5
Quando viene visualizzata la schermata
Passare al vecchio computer
,
passare al computer vecchio o di origine.
Non
fare clic su
Avanti
in questo
momento.
Per copiare i dati dal vecchio computer:
1
Nel computer vecchio, inserire il supporto
Sistema operativo
di
Windows XP.
2
Nella schermata
Microsoft Windows XP
, fare clic su
Esegui altre
operazioni
.
3
Nella schermata
Scegliere un'opzione
, fare clic su
Trasferisci file e
impostazioni
→
Avanti
.
4
Nella schermata
Specificare il computer
, fare clic su
Vecchio computer
→
Avanti
.
5
Nella schermata
Selezionare la modalità di trasferimento
, fare clic sul
metodo di trasferimento preferito.

230 Guida di consultazione rapida
6
Nella schermata
Selezionare gli elementi da trasferire
, selezionare gli
elementi che si desidera trasferire e fare clic su
Avanti
.
Dopo la copia delle informazioni, viene visualizzata la schermata
Completamento fase di raccolta
.
7
Fare clic su
Fine
.
Per trasferire i dati al nuovo computer:
1
Nella schermata
Passare al vecchio computer
sul nuovo computer, fare clic
su
Avanti
.
2
Nella schermata
Specificare il percorso di file e cartelle
, selezionare il
metodo scelto per il trasferimento delle impostazioni e dei file e fare clic su
Avanti
.
I file e le impostazioni raccolte verranno lette e applicate al nuovo
computer.
Una volta applicate tutte le impostazioni e i file, viene visualizzata la
schermata
Operazione completata
.
3
Fare clic su
Operazione completata
e riavviare il nuovo sistema.
Esecuzione del Trasferimento guidato file e impostazioni senza il supporto
Sistema operativo
Per eseguire il Trasferimento guidato file e impostazioni senza il supporto
Sistema operativo, è necessario creare un disco del Trasferimento guidato file e
impostazioni che consenta di creare un file di immagine di backup su
supporti rimovibili.
Per creare un disco del Trasferimento guidato file e impostazioni, utilizzare il
nuovo computer con Windows XP ed eseguire la seguente procedura:
1
Aprire il Trasferimento guidato file e impostazioni: fare clic su
Start
→
Tutti i programmi
→
Accessori
→
Utilità di sistema
→
Trasferimento
guidato file e impostazioni
.
2
Quando viene visualizzata la schermata iniziale del
Trasferimento guidato
file e impostazioni
, fare clic su
Avanti
.
3
Nella schermata
Specificare il computer
, fare clic su
Nuovo computer
→
Avanti
.
4
Nella schermata
Si dispone di un CD di Windows XP?
, fare clic su
Crea il
disco nell'unità seguente
→
Avanti
.

Guida di consultazione rapida 231
5
Inserire il supporto rimovibile, ad esempio un CD scrivibile, e fare clic su
OK
.
6
Al termine della creazione del disco, viene visualizzato il messaggio
Passare al vecchio computer
,
non
fare clic su
Avanti
.
7
Passare al vecchio computer.
Per copiare i dati dal vecchio computer:
1
Sul vecchio computer, inserire il disco del Trasferimento guidato file e
impostazioni.
2
Fare clic su
Start
→
Esegui
.
3
Nel campo
Apri
della finestra
Esegui
, individuare
fastwiz
(sull'appropriato
supporto rimovibile) e fare clic su
OK
.
4
Nella schermata iniziale del
Trasferimento guidato file e impostazioni
,
fare clic su
Avanti
.
5
Nella schermata
Specificare il computer
, fare clic su
Vecchio computer
→
Avanti
.
6
Nella schermata
Selezionare la modalità di trasferimento
, fare clic sul
metodo di trasferimento preferito.
7
Nella schermata
Selezionare gli elementi da trasferire
, selezionare gli
elementi che si desidera trasferire e fare clic su
Avanti
.
Dopo la copia delle informazioni, viene visualizzata la schermata
Completamento fase di raccolta
.
8
Fare clic su
Fine
.
Per trasferire i dati al nuovo computer:
1
Nella schermata
Passare al vecchio computer
sul nuovo computer, fare clic
su
Avanti
.
2
Nella schermata
Specificare il percorso di file e cartelle
, selezionare il
metodo scelto per il trasferimento delle impostazioni e dei file e fare clic su
Avanti
. Seguire le istruzioni visualizzate.
I file e le impostazioni raccolte verranno lette e applicate al nuovo
computer.
Una volta applicate tutte le impostazioni e i file, viene visualizzata la
schermata
Operazione completata
.

232 Guida di consultazione rapida
3
Fare clic su
Operazione completata
e riavviare il nuovo sistema.
N.B. Per maggiori informazioni su questa procedura, ricercare in support.dell.com
il documento n. 154781 (What Are The Different Methods To Transfer Files From My
Old Computer To My New Dell™ Computer Using the Microsoft
®
Windows
®
XP
Operating System? - Quali sono i diversi metodi per trasferire file dal mio vecchio
computer al mio nuovo computer Dell™ utilizzando il sistema operativo Microsoft
®
Windows
®
XP?).
N.B. L'accesso al documento della Dell™ Knowledge Base può non essere
possibile in alcuni Paesi.
Microsoft Windows Vista™ (opzionale)
1
Fare clic sul pulsante Start di Windows Vista , e poi fare clic su
Transfer files and settings
(Trasferisci file e impostazioni)
→
Start
Windows Easy Transfer
(Avvia trasferimento dati Windows).
2
Nella finestra di dialogo
User Account Control
(Controllo account
utente), fare clic su
Continue
(Continua).
3
Fare clic su
Start a new transfer
(Avvia nuovo trasferimento) o
Continue a
transfer in progress
(Continua trasferimento in corso).
Seguire le istruzioni visualizzate mediante la procedura guidata Windows
Easy Transfer (Trasferimento dati Windows).
Installazione di una stampante
AVVISO: Completare la configurazione del sistema operativo prima di collegare
una stampante al computer.
Consultare la documentazione fornita con la stampante per le informazioni
sull'installazione, comprese quelle relative alle procedure che seguono:
• Recuperare e installare i driver aggiornati.
• Collegare la stampante al computer.
• Caricare la carta e installare il toner o la cartuccia a inchiostro.
Fare riferimento al Manuale del proprietario della stampante o rivolgersi al
costruttore della stampante per supporto tecnico.

Guida di consultazione rapida 233
Cavo della stampante
Il collegamento del computer alla stampante avviene tramite un cavo USB o
parallelo. Se la stampante non fosse dotata di apposito cavo stampante e fosse
quindi necessario acquistarlo separatamente, accertarne la compatibilità con
computer e stampante. Se si è acquistato un cavo della stampante insieme al
computer, il cavo potrebbe arrivare nella scatola di spedizione del computer.
Collegamento di due monitor
ATTENZIONE: Prima di eseguire le procedure descritte in questa sezione,
seguire le istruzioni di sicurezza riportate nella Guida alle informazioni sul
prodotto.
Se è stata acquistata una scheda grafica in grado di supportare due monitor,
seguire queste istruzioni per collegare e attivare i monitor. Le istruzioni
indicano come collegare due monitor (ciascuno con un connettore VGA), un
monitor con un connettore VGA e un monitor con un connettore DVI, o
una TV.
AVVISO: Se si collegano due monitor che hanno connettori VGA, è necessario avere
l'adattatore DVI opzionale per collegare il cavo. Se si collegano due monitor a
schermo piatto, almeno uno di essi deve avere un connettore VGA. Se si sta
collegando una TV, è possibile collegare solo un monitor (VGA o DVI) oltre alla TV.
Collegamento di due monitor con connettori VGA
1
Arrestare il sistema.
N.B. Se il computer ha video integrato, non collegare alcun monitor al connettore
video integrato. Se il connettore video integrato è coperto da un cappuccio, non
rimuovere il cappuccio per collegare il monitor, altrimenti il monitor non funziona.
2
Collegare uno dei monitor al connettore VGA (blu) sul retro del computer.
3
Collegare l'altro monitor all'adattatore opzionale DVI e collegare
l'adattatore DVI al connettore DVI (bianco) sul retro del computer.
4
Riavviare il sistema.

234 Guida di consultazione rapida
Collegamento di un monitor con un connettore VGA e di un monitor con un
connettore DVI
1
Arrestare il sistema.
2
Collegare il connettore VGA sul monitor al connettore VGA (blu) sul retro
del computer.
3
Collegare il connettore DVI sull'altro monitor al connettore DVI (bianco)
sul retro del computer.
4
Riavviare il sistema.
Collegamento di una TV
N.B. È necessario acquistare un cavo S-video, disponibile presso la maggior parte
dei negozi di componenti elettronici al dettaglio, per collegare una TV al computer. Il
cavo non viene fornito con il computer.
1
Arrestare il sistema.
2
Collegare un'estremità del cavo S-video al connettore di uscita TV
opzionale sul retro del computer.
1 adattatore DVI opzionale 2 connettore DVI (bianco)
3 connettore uscita TV 4 connettore VGA (blu)
1
23
4

Guida di consultazione rapida 235
3
Collegare l'altra estremità del cavo S-video al connettore S-video di
ingresso della TV.
4
Collegare il monitor VGA o DVI.
5
Riavviare il sistema.
Modifica delle impostazioni dello schermo
1
Dopo aver collegato i monitor o la TV, accendere il computer.
Il desktop di Microsoft
®
Windows
®
è visualizzato sul monitor primario.
2
Abilitare la modalità desktop esteso nelle impostazioni dello schermo. In
modalità desktop esteso, è possibile trascinare oggetti da una schermata
all'altra, raddoppiando effettivamente la quantità di spazio di lavoro
visualizzabile.
Dispositivi di protezione elettrica
Esistono diversi dispositivi per la protezione dalle interruzioni e fluttuazioni
di corrente:
• Limitatori di sovratensione
• Condizionatori di rete
• Gruppi di continuità (UPS)
Limitatori di sovratensione
I limitatori di sovratensione e le ciabatte provviste di una protezione da
sovratensione proteggono il computer da possibili danni provocati dai picchi
di tensione che si verificano durante i temporali o in seguito a interruzioni
dell'alimentazione. Alcuni costruttori di limitatori di sovratensione includono
una garanzia che offre copertura da determinati tipi di danno. Al momento di
scegliere un limitatore di sovratensione, leggere attentamente la garanzia
relativa. Un dispositivo con un valore nominale in Joule più alto offre
maggiore protezione. Per determinare l'efficacia dei diversi dispositivi
comparare il valore nominale in Joule.
AVVISO: La maggior parte dei limitatori di sovratensione non protegge da
fluttuazioni o interruzioni dell'alimentazione causate da fulmini nelle vicinanze.
Quando si verifica un temporale nelle vicinanze, scollegare la linea telefonica dalla
presa a muro del telefono e scollegare il computer dalla presa elettrica.

236 Guida di consultazione rapida
Molti limitatori di sovratensione sono dotati di una presa del telefono per la
protezione del modem. Per istruzioni sul collegamento del modem, consultare
la documentazione fornita con il limitatore di sovratensione.
AVVISO: Non tutti i limitatori di sovratensione proteggono le schede di rete.
Scollegare il cavo di rete dalla presa di rete a muro durante i temporali.
Condizionatori di rete
AVVISO: I condizionatori di rete non proteggono da interruzioni di alimentazione.
I condizionatori di rete sono progettati per mantenere pressoché costante la
tensione di alimentazione c.a.
Gruppi di continuità (UPS)
AVVISO: Un'interruzione di alimentazione durante il salvataggio di dati nel disco
rigido potrebbe comportare la perdita dei dati e danneggiare i file.
N.B. Per garantire la massima autonomia della batteria, collegare solo il computer
all'UPS. Collegare altri dispositivi, quali la stampante, a una ciabatta separata che
offra protezione da sovratensione.
Un gruppo di continuità protegge il computer da fluttuazioni e interruzioni
di alimentazione. I gruppi di continuità contengono una batteria che fornisce
alimentazione c.a. per un breve periodo ai dispositivi collegati durante
un'interruzione di alimentazione c.a. La batteria si ricarica quando
l'alimentazione c.a. è nuovamente disponibile. Per informazioni
sull'autonomia della batteria e per accertarsi che il dispositivo sia certificato
da Underwriters Laboratories (UL), consultare la documentazione del
costruttore del gruppo di continuità.

Guida di consultazione rapida 237
Computer desktop
Vista anteriore
1 connettori
USB 2.0 (2)
Usare i connettori USB anteriori per i dispositivi che si
collegano raramente, quali i joystick o le fotocamere, o per
dispositivi USB avviabili (consultare "Opzioni
dell'Installazione del sistema" nella Guida dell'utente in
linea per maggiori informazioni sull'avvio da un dispositivo
USB). Si consiglia di utilizzare i connettori USB posteriori
per dispositivi che di solito restano collegati, quali ad
esempio le stampanti e le tastiere.
2 spia di attività
dell'unità
La spia di attività dell'unità è accesa quando il computer
legge o scrive dati dal o sul disco rigido. L'indicatore può
anche essere acceso quando un dispositivo, come un'unità
ottica, è in funzione.
3 pulsante di
alimentazione,
indicatore di
alimentazione
Premere il pulsante di alimentazione per accendere il
computer. L'indicatore al centro di questo pulsante indica
lo stato dell'alimentazione.
AVVISO: Per evitare la perdita di dati, non utilizzare il
pulsante di alimentazione per spegnere il computer;
effettuare invece l'arresto del sistema operativo.
89
3
5
1
4610
2
11 7

238 Guida di consultazione rapida
4 marchio Dell Questo marchio può essere ruotato in modo da
corrispondere all'orientamento del computer. Per ruotare il
marchio, collocare le dita attorno alla parte esterna del
marchio, premere saldamente e ruotare il marchio. È anche
possibile ruotare il marchio utilizzando lo slot fornito in
prossimità della parte inferiore del marchio.
5 indicatore di
alimentazione
L'indicatore di alimentazione si accende e lampeggia
oppure rimane fisso ad indicare diversi stati operativi:
• Nessuna luce — Il computer è spento.
• Verde fisso — Il computer è in un normale stato operativo.
• Verde lampeggiante — Il computer si trova in modalità di
risparmio energia.
• Giallo lampeggiante o fisso — Consultare "Problemi
relativi all'alimentazione" nella
Guida dell'utente
in linea.
Per uscire da una modalità di risparmio energia, premere il
pulsante di alimentazione oppure usare la tastiera o il
mouse qualora siano configurati come dispositivi di
attivazione in Device Manager (Gestione dispositivi) di
Windows. Per maggiori informazioni sulle modalità di
sospensione e per uscire da una modalità di risparmio di
energia, consultare la Guida dell'utente in linea.
Consultare "Indicatori della diagnostica" a pagina 266 per
una descrizione dei codici luminosi che forniscono
informazioni utili per la risoluzione dei problemi relativi al
computer.
6 indicatori della
diagnostica
Utilizzare gli indicatori per contribuire a risolvere i
problemi relativi ad un computer in base al codice di
diagnostica. Per maggiori informazioni, consultare
"Indicatori della diagnostica" a pagina 266.
7 indicatore LAN Questo indicatore indica che è stabilita una connessione
LAN (rete locale).
8 connettori delle
cuffie e del
microfono
Utilizzare il connettore del microfono per collegare il
microfono di un personal computer. Su computer con una
scheda audio, il connettore del microfono si trova sulla
scheda.
Utilizzare il connettore della cuffia per collegare le cuffie e
la maggior parte dei tipi di altoparlanti.
9 unità floppy Può contenere un unità floppy opzionale.

Guida di consultazione rapida 239
Vista posteriore
ATTENZIONE: Accertarsi che nessuna presa d'aria del sistema sia bloccata. Il
suo blocco potrebbe causare seri problemi termici.
10 unità ottica Utilizzare l'unità ottica per riprodurre un CD/DVD.
11 Numero di servizio Utilizzare il Numero di servizio per identificare il computer
quando si accede al sito Web del supporto tecnico della Dell o
si chiama il supporto.
1 slot per schede Questi slot consentono di accedere ai connettori delle schede
PCI e PCI Express installate.
2 connettori del
pannello
posteriore
Collegare dispositivi USB, audio e di altro tipo al connettore
appropriato (consultare "Connettori del pannello
posteriore" a pagina 240 per maggiori informazioni).
3 connettore di
alimentazione
Inserire il cavo di alimentazione.
4 selettore di
tensione
Per selezionare la tensione nominale di esercizio.
5 anelli del
lucchetto
Gli anelli del lucchetto servono per fissare un dispositivo
antifurto disponibile in commercio. Gli anelli del lucchetto
permettono di fissare il coperchio del computer al telaio con
un lucchetto per impedire l'accesso non autorizzato ai
componenti interni del computer. Per utilizzare gli anelli
del lucchetto, inserire un lucchetto disponibile in
commercio attraverso gli anelli, quindi bloccare il lucchetto.
6 chiusura a scatto
del coperchio
Utilizzare questo dispositivo di chiusura per aprire il
coperchio del computer.
5
1
2 3 4 6

240 Guida di consultazione rapida
Connettori del pannello posteriore
1 connettore
parallelo
Collegare un dispositivo parallelo, quale ad esempio una
stampante, al connettore parallelo. Se si usa una stampante
USB, collegarla al connettore USB.
N.B. Il connettore parallelo integrato è disabilitato
automaticamente se il computer rileva una scheda installata
contenente un connettore parallelo configurato sullo stesso
indirizzo. Per maggiori informazioni, consultare le "Opzioni
dell'Installazione del sistema" nella Guida dell'utente in linea.
2 indicatore di
integrità del
collegamento
• Verde — È presente una connessione funzionante tra una
rete a 10 Mbps e il computer.
• Arancione — È presente una connessione funzionante tra
una rete a 100 Mbps e il computer.
• Giallo — Esiste una connessione funzionante tra una rete a
1 Gbps (1000 Mbps) e il computer.
• Spento — Il computer non rileva alcuna connessione fisica
alla rete.
13
98 7
5
6
24

Guida di consultazione rapida 241
3 connettore della
scheda di rete
Per collegare il computer a un dispositivo di rete o a banda
larga, collegare un'estremità del cavo di rete a uno spinotto
di rete o al dispositivo di rete o a banda larga. Collegare
l'altra estremità del cavo di rete al connettore della scheda di
rete sul pannello posteriore del computer. Uno scatto
indicherà che il cavo di rete è stato inserito saldamente nel
connettore.
N.B. Non collegare un cavo telefonico al connettore di rete.
Su computer con una scheda di rete, utilizzare il connettore
sulla scheda.
Si consiglia di utilizzare almeno cablaggio e connettori di
Categoria 5 per la rete. Se è necessario usare un cablaggio di
Categoria 3, forzare la velocità di rete a 10 Mbps per
garantire un funzionamento affidabile.
4 spia di attività
della rete
La spia lampeggia in giallo quando il computer trasmette o
riceve dati di rete. In presenza di un intenso traffico di rete, è
possibile che questa spia venga visualizzata costantemente
accesa.
5 connettore della
linea in uscita
Utilizzare il connettore verde della linea in uscita per
collegare le cuffie e la maggior parte degli altoparlanti con
amplificatori integrati.
Su computer dotati di una scheda audio, usare il connettore
sulla scheda.
6 connettore della
linea in
ingresso/del
microfono
Utilizzare il connettore blu della linea in ingresso per
collegare un dispositivo di registrazione/riproduzione, quale
ad esempio un lettore di cassette, un lettore CD o un
videoregistratore.
Utilizzare il connettore rosa del microfono per collegare un
microfono (da computer) per ingresso vocale o musicale in
un programma di audio o di telefonia.
Su computer dotati di una scheda audio, usare il connettore
sulla scheda.
7 connettori
USB 2.0 (6)
Utilizzare i connettori USB posteriori per dispositivi che di
solito restano collegati, quali ad esempio le stampanti e le
tastiere.
Si consiglia di utilizzare i connettori USB anteriori per
dispositivi che vengono collegati raramente, quali i joystick o
le fotocamere digitali.

242 Guida di consultazione rapida
Rimozione del coperchio del computer
ATTENZIONE: Prima di cominciare le procedure descritte in questa sezione,
seguire le istruzioni di sicurezza che si trovano nella Guida alle informazioni sul
prodotto.
ATTENZIONE: Per evitare scosse elettriche, scollegare sempre il computer dalla
presa elettrica prima di rimuovere il coperchio.
1
Seguire le procedure descritte in "Operazioni preliminari" a pagina 218.
N.B. Verificare che vi sia spazio sufficiente a sostenere il coperchio rimosso.
AVVISO: Assicurarsi di lavorare su una superficie piana protetta per evitare graffi
al computer o alla superficie sulla quale viene appoggiato.
2
Se si è installato un lucchetto attraverso l'anello del lucchetto sul pannello
posteriore, rimuovere il lucchetto.
3
Far scorrere la chiusura a scatto del coperchio all'indietro quando si solleva
il coperchio.
8 connettore video
VGA
Collegare il cavo VGA del monitor al connettore VGA sul
computer.
Su computer dotati di una scheda video, usare il connettore
sulla scheda.
9 connettore
seriale
Collegare un dispositivo seriale, quale ad esempio un
palmare, alla porta seriale. La designazione predefinita è
COM1 per il connettore seriale 1.
Per ulteriori informazioni, consultare le "Opzioni
dell'Installazione del sistema" nella Guida dell'utente in linea.

Guida di consultazione rapida 243
4
Ruotare il coperchio verso l'alto utilizzando le linguette dei cardini come
punti di leva.
5
Rimuovere il coperchio dalle linguette dei cardini e metterlo da parte su
una superficie morbida non abrasiva.
1 slot per cavo di sicurezza 2 chiusura a scatto del coperchio
3 anello del lucchetto
2
1
3

244 Guida di consultazione rapida
Vista interna del computer
ATTENZIONE: Prima di eseguire le procedure descritte in questa sezione,
seguire le istruzioni di sicurezza riportate nella Guida alle informazioni sul
prodotto.
ATTENZIONE: Per evitare il rischio di scosse elettriche, scollegare sempre il
computer dalla presa elettrica prima di rimuovere il coperchio del computer.
AVVISO: Quando si apre il coperchio del computer, fare attenzione a non
scollegare involontariamente i cavi dalla scheda di sistema.
1 alloggiamento delle unità
(CD/DVD, floppy e disco rigido)
2 alimentatore
3 scheda di sistema 4 slot per schede
5 gruppo del dissipatore di calore 6 pannello anteriore d'I/O
1
2
3
4
5
6

Guida di consultazione rapida 245
Componenti della scheda di sistema
1 connettore dell'altoparlante interno
(INT_SPKR)
2 connettore del processore (CPU)
3 connettore di alimentazione del
processore (12VPOWER)
4 connettori dei moduli di memoria
(DIMM_1, DIMM_2)
12
5
13
3
15
17
12
4
7
14
10
11 89
16
6

246 Guida di consultazione rapida
Ricollocamento del coperchio del computer
ATTENZIONE: Prima di eseguire le procedure descritte in questa sezione,
seguire le istruzioni di sicurezza riportate nella Guida alle informazioni sul
prodotto.
1
Accertarsi che tutti i cavi siano collegati e ripiegarli in modo che non siano
d'intralcio.
2
Accertarsi di non lasciare attrezzi o altri componenti all'interno del
computer.
3
Per ricollocare il coperchio:
a
Allineare la parte inferiore del coperchio con le linguette del cardine
ubicate lungo il bordo inferiore del computer.
b
Utilizzando le linguette del cardine come leva, ruotare il coperchio
verso il basso per chiuderlo.
c
Far scattare il coperchio in posizione tirando all'indietro la chiusura a
scatto del coperchio, quindi rilasciando il dispositivo di chiusura
quando il coperchio è correttamente posizionato.
d
Accertarsi che il coperchio sia alloggiato correttamente prima di
spostare il computer.
5 connettori dell'unità SATA
(SATA0, SATA1)
6 connettore del pannello anteriore
(FRONTPANEL)
7 connettore di alimentazione
(POWER)
8 connettori dell'unità SATA
(SATA2, SATA3)
9 ponticello di ripristino RTC
(RTCRST)
10 ponticello di ripristino password
(PSWD)
11 zoccolo della batteria (BATTERY) 12 connettore della scheda
PCI Express x16 (SLOT1)
13 connettori della scheda PCI
(SLOT2 e SLOT3)
14 cicalino interno (SPKR)
15 connettore PS/2/seriale (PS2/SER2) 16 connettore della ventola (FAN_CPU)
17 connettore dell'unità floppy
(FLOPPY)

Guida di consultazione rapida 247
Computer minitorre
Vista anteriore
1 Numero di servizio Utilizzare il Numero di servizio per identificare il
computer quando si accede al sito Web del supporto
tecnico della Dell o si chiama il supporto.
2 unità ottica Utilizzare l'unità ottica per riprodurre un CD/DVD.
4
8
7
3
2
6
5
1
10
9

248 Guida di consultazione rapida
3 unità floppy Un'unità floppy è opzionale.
4 spia di attività
dell'unità
La spia di attività dell'unità è accesa quando il
computer legge o scrive dati dal o sul disco rigido.
L'indicatore può anche essere acceso quando un
dispositivo, come un'unità ottica, è in funzione.
5 connettori
USB 2.0 (2)
Usare i connettori USB anteriori per i dispositivi che si
collegano raramente, quali i joystick o le fotocamere, o per
dispositivi USB avviabili (consultare "Opzioni
dell'Installazione del sistema" nella Guida dell'utente in
linea per maggiori informazioni sull'avvio da un
dispositivo USB). Si consiglia di utilizzare i connettori
USB posteriori per dispositivi che di solito restano
collegati, quali ad esempio le stampanti e le tastiere.
6 indicatori della
diagnostica
Utilizzare gli indicatori per contribuire a risolvere i
problemi di un computer in base al codice di
diagnostica. Per ulteriori informazioni, consultare
"Indicatori della diagnostica" a pagina 266.
7 pulsante di
alimentazione,
indicatore di
alimentazione
Premere il pulsante di alimentazione per accendere il
computer. L'indicatore al centro di questo pulsante
indica lo stato dell'alimentazione.
AVVISO: Per evitare la perdita di dati, non
utilizzare il pulsante di alimentazione per spegnere
il computer; effettuare invece l'arresto del sistema
operativo.
8 connettore della
cuffia
Utilizzare il connettore della cuffia per collegare le
cuffie e la maggior parte dei tipi di altoparlanti.
9 connettore del
microfono
Utilizzare il connettore del microfono per collegare un
microfono (da computer) per ingresso vocale o
musicale in un programma di audio o di telefonia.
Su computer con una scheda audio, il connettore del
microfono si trova sulla scheda.
10 indicatore LAN Questo indicatore indica che è stabilita una
connessione LAN (rete locale).

Guida di consultazione rapida 249
Vista posteriore
1 chiusura a scatto
del coperchio
Questo dispositivo di chiusura consente di aprire il
coperchio del computer.
2 anelli del
lucchetto
Gli anelli del lucchetto servono per attaccare un dispositivo
antifurto disponibile in commercio. Gli anelli del lucchetto
permettono di fissare il coperchio del computer al telaio
con un lucchetto per impedire l'accesso non autorizzato ai
componenti interni del computer. Per utilizzare gli anelli
del lucchetto, inserire un lucchetto disponibile in
commercio attraverso gli anelli, quindi bloccare il lucchetto.
4
3
5
6
2
1

250 Guida di consultazione rapida
ATTENZIONE: Accertarsi che nessuna presa d'aria del sistema sia bloccata. Il
suo blocco potrebbe causare seri problemi termici.
Connettori del pannello posteriore
3 connettore di
alimentazione
Inserire il cavo di alimentazione.
4 selettore di
tensione
Per selezionare la tensione nominale di esercizio.
5 connettori del
pannello
posteriore
Collegare dispositivi USB, audio e di altro tipo al
connettore appropriato (consultare "Connettori del
pannello posteriore" a pagina 240 per maggiori
informazioni).
6 slot per schede Questi slot consentono di accedere ai connettori delle schede
PCI e PCI Express installate.
1 connettore
parallelo
Collegare un dispositivo parallelo, quale ad esempio una
stampante, al connettore parallelo. Se si usa una stampante
USB, collegarla al connettore USB.
N.B. Il connettore parallelo integrato è disabilitato
automaticamente se il computer rileva una scheda installata
contenente un connettore parallelo configurato sullo stesso
indirizzo. Per maggiori informazioni, consultare "Opzioni
dell'Installazione del sistema" nella Guida dell'utente in linea.
1
3
98 7
5
6
24

Guida di consultazione rapida 251
2 indicatore di
integrità del
collegamento
• Verde — È presente una connessione funzionante tra una
rete a 10 Mbps e il computer.
• Arancione — È presente una connessione funzionante tra
una rete a 100 Mbps e il computer.
• Giallo — Esiste una connessione funzionante tra una rete a
1 Gbps (1000 Mbps) e il computer.
• Spento — Il computer non rileva alcuna connessione fisica
alla rete.
3 connettore della
scheda di rete
Per collegare il computer a un dispositivo di rete o di
connessione a banda larga, collegare un'estremità del cavo di
rete a uno spinotto di rete o al dispositivo di rete o di
collegamento a banda larga. Collegare l'altra estremità del
cavo di rete al connettore della scheda di rete sul pannello
posteriore del computer. Uno scatto indicherà che il cavo di
rete è stato inserito saldamente nel connettore.
N.B. Non collegare un cavo telefonico al connettore di rete.
Su computer con una scheda di rete, utilizzare il connettore
sulla scheda.
Si consiglia di utilizzare un cablaggio e connettori almeno di
Categoria 5 per la rete. Se è necessario usare un cablaggio di
Categoria 3, forzare la velocità di rete a 10 Mbps per
garantire un funzionamento affidabile.
4 spia di attività
della rete
La spia lampeggia in giallo quando il computer trasmette o
riceve dati di rete. In presenza di un intenso traffico di rete,
è possibile che questa spia venga visualizzata costantemente
accesa.
5 connettore della
linea in uscita
Utilizzare il connettore verde della linea in uscita per
collegare le cuffie e la maggior parte degli altoparlanti con
amplificatori integrati
Su computer dotati di una scheda audio, usare il connettore
sulla scheda.
6 connettore della
linea in
ingresso/del
microfono
Utilizzare il connettore blu e rosa della linea in ingresso per
collegare un dispositivo di registrazione/riproduzione quale
ad esempio un mangianastri, un lettore CD o un
videoregistratore; oppure il microfono di un personal
computer.

252 Guida di consultazione rapida
Rimozione del coperchio del computer
ATTENZIONE: Prima di cominciare le procedure descritte in questa sezione,
seguire le istruzioni di sicurezza che si trovano nella Guida alle informazioni sul
prodotto.
ATTENZIONE: Per evitare scosse elettriche, scollegare sempre il computer dalla
presa elettrica prima di rimuovere il coperchio.
1
Seguire le procedure descritte in "Operazioni preliminari" a pagina 218.
N.B. Verificare che vi sia spazio sufficiente a sostenere il coperchio rimosso.
AVVISO: Assicurarsi di lavorare su una superficie piana protetta per evitare graffi
al computer o alla superficie sulla quale viene appoggiato.
2
Appoggiare il computer sul lato con il coperchio del computer rivolto verso
l'alto.
7 connettori
USB 2.0 (6)
Utilizzare i connettori USB posteriori per dispositivi che di
solito restano collegati, quali ad esempio le stampanti e le
tastiere.
Si consiglia di utilizzare i connettori USB anteriori per
dispositivi che vengono collegati raramente, quali i joystick
o le fotocamere.
8 connettore video
VGA
Collegare il cavo VGA del monitor al connettore VGA sul
computer.
Su computer dotati di una scheda video, usare il connettore
sulla scheda.
9 connettore
seriale
Collegare un dispositivo seriale, quale ad esempio un
palmare, alla porta seriale. La designazione predefinita è
COM1 per il connettore seriale 1.
Per ulteriori informazioni, consultare le "Opzioni
dell'Installazione del sistema" nella Guida dell'utente in
linea.

Guida di consultazione rapida 253
3
Sbloccare il coperchio del computer estraendolo dalla parte anteriore del
computer e sollevandolo.
4
Mettere da parte il coperchio in un luogo sicuro.
1 slot per cavo di sicurezza 2 chiusura a scatto del coperchio
3 anello del lucchetto
2
1
3

254 Guida di consultazione rapida
Vista interna del computer
1 unità floppy 2 unità ottica
3 alimentatore 4 scheda di sistema
5 gruppo del dissipatore di calore 6 disco rigido
1
3
4
6
2
5

Guida di consultazione rapida 255
Componenti della scheda di sistema
1 connettore dell'altoparlante interno
(INT_SPKR)
2 connettore del processore (CPU)
3 connettore di alimentazione del
processore (12VPOWER)
4 connettori dei moduli di memoria
(DIMM_1, DIMM_2)
12
6
5
13
3
15
17
12
4
7
14
1011 89
16

256 Guida di consultazione rapida
Ricollocamento del coperchio del computer
ATTENZIONE: Prima di eseguire le procedure descritte in questa sezione,
seguire le istruzioni di sicurezza riportate nella Guida alle informazioni sul
prodotto.
1
Accertarsi che tutti i cavi siano collegati e ripiegarli in modo che non siano
d'intralcio.
2
Accertarsi di non lasciare attrezzi o altri componenti all'interno del
computer.
3
Per ricollocare il coperchio:
a
Allineare la parte inferiore del coperchio con le linguette del cardine
ubicate lungo il bordo inferiore del computer.
b
Utilizzando le linguette del cardine come leva, ruotare il coperchio
verso il basso per chiuderlo.
c
Far scattare il coperchio in posizione tirando all'indietro la chiusura a
scatto del coperchio, quindi rilasciando il dispositivo di chiusura
quando il coperchio è correttamente posizionato.
d
Accertarsi che il coperchio sia alloggiato correttamente prima di
spostare il computer.
4
Posizionare il computer in posizione perpendicolare.
5 connettori dell'unità SATA
(SATA0, SATA1)
6 connettore del pannello anteriore
(FRONTPANEL)
7 connettore di alimentazione
(POWER)
8 connettori dell'unità SATA
(SATA2, SATA3)
9 ponticello di ripristino RTC
(RTCRST)
10 ponticello di ripristino password
(PSWD)
11 zoccolo della batteria
(BATTERY)
12 connettore della scheda
PCI Express x16 (SLOT1)
13 connettori della scheda PCI
(SLOT2 e SLOT3)
14 cicalino interno (SPKR)
15 connettore PS/2/seriale
(PS2/SER2)
16 connettore della ventola
(FAN_CPU)
17 connettore dell'unità floppy
(FLOPPY)

Guida di consultazione rapida 257
Soluzione dei problemi
Dell fornisce una serie di strumenti per assistere l'utente se il computer non
funziona nel modo previsto. Per ottenere le informazioni più recenti
disponibili per la risoluzione dei problemi del computer, visitare il sito Web
del supporto tecnico della Dell all'indirizzo support.dell.com.
Se i problemi relativi al computer riscontrati richiedono l'intervento di Dell,
scrivere una descrizione dettagliata dell'errore, dei codici bip o delle
combinazioni degli indicatori della diagnostica, annotare di seguito il codice
di servizio espresso e il Numero di servizio, quindi contattare Dell dalla
postazione di lavoro del computer.
Per un esempio di codice di servizio espresso e di Numero di servizio,
consultare "Ricerca di informazioni" nella Guida dell'utente del computer.
Diagnostica della Dell
ATTENZIONE: Prima di eseguire le procedure descritte in questa sezione, seguire
le istruzioni di sicurezza riportate nella Guida alle informazioni sul prodotto.
Quando utilizzare il programma Dell Diagnostics
Se si verifica un problema relativo al computer, eseguire i controlli in Blocchi
e problemi relativi al software (consultare la Guida dell'utente per i dettagli)
ed eseguire il programma Dell Diagnostics prima di contattare la Dell per
supporto tecnico.
Si consiglia di stampare queste procedure prima di iniziare.
AVVISO: Il programma Dell Diagnostics funziona solo su computer Dell™.
N.B. Il supporto Drivers and Utilities è opzionale e potrebbe non essere spedito col
computer.
Consultare "Installazione del sistema" nella Guida dell'utente in linea per
leggere le informazioni sulla configurazione del computer ed assicurarsi che il
dispositivo che si desidera esaminare sia visualizzato nel programma di
installazione di sistema e sia attivo.
Avviare il programma Dell Diagnostics dal disco rigido o dal supporto
Drivers and Utilities.
Codice di servizio espresso:
Numero di servizio:

258 Guida di consultazione rapida
Avvio del programma Dell Diagnostics dal disco rigido
Il programma Dell Diagnostics è ubicato in una partizione dell'utilità di
diagnostica nascosta del disco rigido.
N.B. Se nello schermo del computer non viene visualizzata alcuna immagine,
contattare la Dell.
1
Accertarsi che il computer sia collegato ad una presa elettrica ben
funzionante.
2
Accendere il computer (o riavviare il sistema).
3
Quando viene visualizzato il logo della DELL™, premere immediatamente
<F12>. Selezionare
Diagnostics
dal menu di avvio e premere <Invio>.
N.B. Se si attende troppo a lungo e viene visualizzato il logo del sistema
operativo, continuare ad attendere fino a vedere il desktop di Microsoft
®
Windows
®
, quindi arrestare il sistema e riprovare.
N.B. Se viene visualizzato un messaggio che indica che la partizione
dell'utilità di diagnostica non è stata trovata, eseguire il programma Dell
Diagnostics dal supporto Drivers and Utilities.
4
Premere un tasto per avviare il programma Dell Diagnostics dalla
partizione dell'utilità di diagnostica nel disco rigido.
Avvio del programma Dell Diagnostics dal supporto Drivers and Utilities
1
Inserire il supporto
Drivers and Utilities
.
2
Arrestare e riavviare il sistema.
Quando viene visualizzato il logo DELL, premere immediatamente
<F12>.
N.B. Se si attende troppo a lungo e viene visualizzato il logo del sistema
operativo, continuare ad attendere fino a vedere il desktop di Microsoft
®
Windows
®
, quindi arrestare il sistema e riprovare.
N.B. I punti successivi cambiano la sequenza di avvio una sola volta. All'avvio
successivo, il computer si avvia in base ai dispositivi specificati nel
programma di installazione di sistema.
3
Quando viene visualizzato l'elenco dei dispositivi di avvio, evidenziare
CD/DVD/CD-RW
e premere <Invio>.
4
Selezionare l'opzione
Boot from CD-ROM
(Avvia da CD-ROM) dal
menu visualizzato e premere <Invio>.

Guida di consultazione rapida 259
5
Digitare
1
per avviare il menu del CD e premere <Invio> per procedere.
6
Selezionare
Run the 32 Bit Dell Diagnostics
(Esegui il programma Dell
Diagnostics a 32 bit) dall'elenco numerato. Se sono elencate più versioni,
selezionare la versione appropriata per il computer utilizzato.
7
Quando viene visualizzato il
Main Menu
(Menu principale) di Dell
Diagnostics, scegliere il tipo di prova da eseguire.
Main Menu (Menu principale) di Dell Diagnostics
1
Dopo il caricamento del programma Dell Diagnostics e la visualizzazione
della schermata
Main
Menu
(Menu principale), fare clic sul pulsante
relativo all'opzione desiderata.
N.B. Si consiglia di selezionare Test System (Esegui test sistema) per eseguire un
test completo nel computer.
2
Dopo aver selezionato l'opzione
Test System
(Esegui test sistema) dal
menu principale, viene visualizzato il seguente menu.
N.B. Si consiglia di selezionare Extended Test (Prova estesa) dal menu in basso per
eseguire un controllo approfondito dei dispositivi nel computer.
Opzione Funzione
Test Memory
(Esegui test memoria)
Eseguire il test di memoria autonomo
Test System
(Esegui test sistema)
Eseguire la diagnostica del sistema
Exit (Esci) Uscire dalla diagnostica
Opzione Funzione
Express Test
(Prova veloce)
Esegue un test rapido dei dispositivi nel sistema. Questa
operazione tipicamente può richiedere da 10 a 20 minuti.
Extended Test
(Prova estesa)
Esegue un controllo approfondito dei dispositivi nel
sistema. Questa operazione tipicamente può richiedere
almeno un'ora.
Custom Test
(Prova personalizzata)
Da utilizzare per eseguire il test di un dispositivo
specifico o per personalizzare i test da eseguire.
Symptom Tree
(Struttura dei sintomi)
Questa opzione consente di selezionare i test in base al
sintomo del problema riscontrato, scegliendo tra quelli
più comuni.

260 Guida di consultazione rapida
3
Se si riscontra un problema durante una prova, viene visualizzato un
messaggio che visualizza il codice di errore e la descrizione del problema.
Annotare il codice di errore e la descrizione del problema e rivolgersi alla
Dell.
N.B. Il Numero di servizio per il computer si trova nella parte superiore di
ciascuna schermata della prova. Se si contatta la Dell, il personale del
supporto tecnico richiederà all'utente il Numero di servizio.
4
Se si esegue una prova dalle opzioni
Custom Test
(Prova personalizzata) o
Symptom Tree
(Struttura dei sintomi), fare clic sulla scheda pertinente
descritta nella tabella seguente per maggiori informazioni.
5
Al termine delle prove, chiudere la schermata corrente per tornare alla
schermata
Main
Menu
(Menu principale). Per uscire dal programma Dell
Diagnostics e riavviare il sistema, chiudere la schermata
Main
Menu
(Menu principale).
6
Rimuovere il supporto
Drivers and Utilities
di Dell
(se presente).
Scheda Funzione
Results (Risultati) Visualizza i risultati della prova e le eventuali condizioni
di errore riscontrate.
Errors (Errori) Visualizza le condizioni di errore riscontrate, i codici di
errore e la descrizione del problema.
Help (Guida) Descrive la prova e può contenere informazioni sui
requisiti per l'esecuzione della prova.
Configuration
(Configurazione)
Visualizza la configurazione hardware del dispositivo
selezionato.
Le informazioni di configurazione di tutti i dispositivi
visualizzati nel programma Dell Diagnostics sono
derivate dall'Installazione del sistema, dalla memoria e
da varie prove interne e vengono visualizzate nell'elenco
dei dispositivi disponibile nel riquadro sinistro dello
schermo. Nell'elenco dei dispositivi potrebbero non
essere elencati i nomi di tutti i componenti installati nel
computer o di tutti i dispositivi collegati al computer.
Parameters
(Parametri)
Consente di personalizzare la prova modificandone le
impostazioni.

Guida di consultazione rapida 261
Indicatori di alimentazione
ATTENZIONE: Prima di eseguire le procedure descritte in questa sezione,
seguire le istruzioni di sicurezza riportate nella Guida alle informazioni sul
prodotto.
L'indicatore del pulsante di alimentazione (LED bicolore), che si trova sulla
parte anteriore del computer, si illumina e lampeggia, o resta fisso per indicare
stati diversi:
• Se l'indicatore di alimentazione è spento, il computer è spento o non riceve
alimentazione.
– Riposizionare il cavo di alimentazione nel connettore di alimentazione
posto sul retro del computer e nella presa elettrica.
– Se il computer è collegato ad una ciabatta, verificare che la ciabatta sia
collegata ad una presa elettrica e che la ciabatta sia accesa. Inoltre,
verificare se il computer si accende correttamente quando non si
usano dispositivi di protezione elettrica, ciabatte e cavi prolunga.
– Accertarsi che la presa elettrica funzioni collegandovi un altro
apparecchio, ad esempio una lampada.
• Se l'indicatore di alimentazione è verde fisso e il computer non risponde:
– Accertarsi che lo schermo sia collegato e acceso.
– Se lo schermo è collegato e acceso, consultare "Codici bip" a
pagina 262.
• Se l'indicatore di alimentazione è verde lampeggiante, il computer è in
modalità di standby. Premere un tasto sulla tastiera, muovere il mouse o
premere il pulsante di alimentazione per riprendere il funzionamento
normale. Se l'indicatore di alimentazione è verde e il computer non
risponde:
– Accertarsi che lo schermo sia collegato e acceso.
– Se lo schermo è collegato e acceso, consultare "Codici bip" a
pagina 262.
• Se l'indicatore di alimentazione è giallo fisso, il computer riceve
alimentazione, ma un dispositivo potrebbe essere difettoso o installato in
modo errato.
– Rimuovere e reinstallare i moduli di memoria.

262 Guida di consultazione rapida
– Rimuovere e reinstallare tutte le schede.
– Rimuovere e reinstallare la scheda grafica, se disponibile.
• Se l'indicatore di alimentazione è giallo lampeggiante, potrebbe esservi un
problema relativo all'alimentazione o un malfunzionamento dei dispositivi
interni.
– Verificare che tutti i cavi di alimentazione siano saldamente collegati
alla scheda di sistema (consultare "Componenti della scheda di
sistema" a pagina 245).
– Accertarsi che il cavo di alimentazione principale e il cavo del pannello
frontale siano saldamente collegati alla scheda di sistema (consultare
"Componenti della scheda di sistema" a pagina 245).
Codici bip
Se il sistema non è in grado di visualizzare errori o problemi nel monitor, è
possibile che all'avvio emetta una serie di bip. Questa serie, detta codice bip,
identifica il problema. Per esempio, il codice bip 1-3-1 (un possibile codice
bip) è costituito da un bip, una sequenza di tre bip e infine un altro bip, e
segnala che è stato riscontrato un problema di memoria.
Il riposizionamento dei moduli di memoria potrebbe correggere i seguenti
errori di codici bip. Se il problema persiste, rivolgersi alla Dell (consultare
"Come contattare la Dell"
nella
Guida dell'utente
) per istruzioni su come
ottenere supporto tecnico.
Se si verifica uno qualsiasi dei seguenti errori dei codici bip, consultare "Come
contattare la Dell" nella
Guida dell'utente
per istruzioni su come ottenere il
supporto tecnico.
Codice Causa
Da 1-3-1 a
2-4-4
Memoria non identificata o utilizzata correttamente
4-3-1 Errore di memoria a un indirizzo superiore a 0FFFFh
Codice Causa
1-1-2 Errore del registro del microprocessore
1-1-3 Errore di lettura/scrittura della NVRAM

Guida di consultazione rapida 263
1-1-4 Errore di checksum della memoria ROM del BIOS
1-2-1 Errore del timer di intervallo programmabile
1-2-2 Errore di inizializzazione DMA
1-2-3 Errore di lettura/scrittura dal o nel registro delle pagine DMA
1-3 Errore di prova della memoria video
Da 1-3-1 a
2-4-4
Memoria non identificata o utilizzata correttamente
3-1-1 Errore del registro DMA slave
3-1-2 Errore del registro DMA master
3-1-3 Errore del registro maschera d'interrupt master
3-1-4 Errore del registro maschera d'interrupt slave
3-2-2 Errore di caricamento del vettore di interrupt
3-2-4 Errore di verifica del controller della tastiera
3-3-1 Interruzione dell'alimentazione della NVRAM
3-3-2 Configurazione NVRAM non valida
3-3-4 Errore di verifica della memoria video
3-4-1 Errore di inizializzazione dello schermo
3-4-2 Errore di ritraccia dello schermo
3-4-3 Errore di ricerca della ROM video
4-2-1 Assenza di timer tick
4-2-2 Errore dell'arresto
4-2-3 Errore del Gate A20
4-2-4 Interrupt imprevisto in modalità protetta
4-3-1 Errore di memoria a un indirizzo superiore a 0FFFFh
4-3-3 Errore del contatore 2 del chip del timer
4-3-4 Orologio dell'ora del giorno interrotto
4-4-1 Errore di verifica porta seriale o parallela
4-4-2 Errore di decompressione del codice nella memoria nascosta
Codice Causa

264 Guida di consultazione rapida
Messaggi di sistema
N.B. Se il messaggio ricevuto non è elencato nella tabella, consultare la
documentazione del sistema operativo o del programma in esecuzione al momento
della visualizzazione del messaggio.
4-4-3 Errore di verifica del coprocessore matematico
4-4-4 Errore di verifica della memoria cache
ALERT! PREVIOUS ATTEMPTS AT BOOTING THIS SYSTEM HAVE FAILED AT
CHECKPOINT [NNNN]. FOR HELP IN RESOLVING THIS PROBLEM, PLEASE NOTE
THIS CHECKPOINT AND CONTACT DELL TECHNICAL SUPPORT (AVVISO!
T
ENTATIVI PRECEDENTI EFFETTUATI ALL'AVVIO DEL SISTEMA NON RIUSCITI IN
CORRISPONDENZA DEL PUNTO DI CONTROLLO [NNNN]. PER ASSISTENZA NEL
RISOLVERE QUESTO PROBLEMA, PRENDERE NOTA DI QUESTO PUNTO DI
CONTROLLO E CONTATTARE IL SUPPORTO TECNICO DI DELL)—Il computer non
ha completato la routine di avvio per tre volte consecutive per lo stesso errore.
CMOS CHECKSUM ERROR (ERRORE DEL CHECKSUM DEL CMOS) — Possibile
guasto alla scheda madre o batteria RTC scarica. Sostituire la batteria.
CPU FAN FAILURE (GUASTO ALLA VENTOLA DELLA CPU) — Guasto alla ventola
della CPU. Sostituire la ventola della CPU.
DISKETTE DRIVE 0 SEEK FAILURE (IMPOSSIBILE RICERCARE UNITÀ A
DISCHETTI 0) — Un cavo potrebbe essere allentato o le informazioni sulla
configurazione del computer potrebbero non corrispondere alla configurazione
dell'hardware. Controllare i collegamenti dei cavi
DISKETTE READ FAILURE (IMPOSSIBILE LEGGERE DISCHETTO)—Il disco floppy
potrebbe essere difettoso o un cavo potrebbe essere allentato. Sostituire il disco
floppy/controllare il collegamento di un cavo allentato.
HARD-DISK DRIVE FAILURE (ERRORE DEL DISCO RIGIDO)—Possibile errore del
disco rigido durante il POST HDD. Controllare i cavi/scambiare i dischi rigidi.
Codice Causa

Guida di consultazione rapida 265
HARD-DISK DRIVE READ FAILURE (ERRORE DI LETTURA DEL DISCO RIGIDO)—
Possibile errore dell'HDD durante il test di avvio dell'HDD.
KEYBOARD FAILURE (ERRORE DELLA TASTIERA)—Errore della tastiera o cavo
della tastiera allentato.
NO BOOT DEVICE AVAILABLE (NESSUN DISPOSITIVO DI AVVIO DISPONIBILE)—
Il sistema non può rilevare un dispositivo o una partizione avviabile.
• Se l'unità floppy è il dispositivo di avvio, accertarsi che i cavi siano collegati e che
il disco floppy avviabile sia nell'unità.
• Se il disco rigido è il dispositivo di avvio, accertarsi che i cavi siano collegati e che
l'unità sia installata correttamente e partizionata come dispositivo di avvio.
• Accedere all'Installazione del sistema e accertarsi che la sequenza di avvio
impostata sia corretta.
NO TIMER TICK INTERRUPT (NESSUN INTERRUPT DEL TIMER TICK)—Un chip
sulla scheda di sistema potrebbe essere difettoso o c'è un guasto alla scheda madre.
NON-SYSTEM DISK OR DISK ERROR (ERRORE DEL DISCO O DEL DISCO NON DEL
SISTEMA)—Sostituire il disco floppy con un altro che contenga un sistema
operativo avviabile oppure rimuovere il disco floppy dall'unità e riavviare il sistema.
NOT A BOOT DISKETTE (NON È UN DISCHETTO AVVIABILE)—Inserire un disco
floppy avviabile e riavviare il sistema.
USB OVER CURRENT ERROR (ERRORE DI SOVRACORRENTE ALL'USB) —
Scollegare il dispositivo USB. Utilizzare una fonte di alimentazione esterna per il
dispositivo USB.

266 Guida di consultazione rapida
Indicatori della diagnostica
ATTENZIONE: Prima di eseguire le procedure descritte in questa sezione,
seguire le istruzioni di sicurezza riportate nella Guida alle informazioni sul
prodotto.
Per fornire assistenza all'utente in merito alla risoluzione dei problemi sul
pannello anteriore o posteriore del computer sono situati quattro indicatori
luminosi contrassegnati dai numeri "1", "2", "3" e "4". Gli indicatori possono
essere spenti o verdi. Quando il computer si avvia normalmente, le
combinazioni o i codici luminosi cambiano durante la procedura di avvio.
Quando il computer si avvia normalmente, le combinazioni o i codici
luminosi cambiano durante la procedura di avvio. Se la verifica POST
eseguita durante l'avvio del sistema viene completata correttamente, i quattro
indicatori si diventano fissi di colore verde. Se durante il processo del POST,
invece, si verificano problemi di funzionamento del computer, è possibile fare
riferimento alla combinazione dei LED per identificare il punto della
procedura in cui il computer si è bloccato.
N.B. L'orientamento degli indicatori della diagnostica può variare a seconda del
tipo di sistema. Gli indicatori della diagnostica possono venire visualizzati verticali o
orizzontali.
NOTICE - HARD DRIVE SELF MONITORING SYSTEM HAS REPORTED THAT A
PARAMETER HAS EXCEEDED ITS NORMAL OPERATING RANGE. DELL
RECOMMENDS THAT YOU BACK UP YOUR DATA REGULARLY. A PARAMETER OUT
OF RANGE MAY OR MAY NOT INDICATE A POTENTIAL HARD DRIVE PROBLEM
(AVVISO - I
L SISTEMA DI AUTOMONITORAGGIO DEL DISCO RIGIDO
[
PRINCIPALE/SECONDARIO] IDE [PRINCIPALE/SECONDARIO/SERIALE
PRINCIPALE] HA RIPORTATO CHE UN PARAMETRO HA SUPERATO IL SUO
NORMALE INTERVALLO OPERATIVO. DELL CONSIGLIA DI ESEGUIRE IL BACKUP DEI
DATI REGOLARMENTE. UN PARAMETRO FUORI INTERVALLO POTREBBE INDICARE
O NON INDICARE UN POTENZIALE PROBLEMA RELATIVO AL DISCO RIGIDO)—
Errore S.M.A.R.T, possibile errore dell'HDD. Questa funzionalità può essere
abilitata o disabilitata durante l'impostazione del BIOS.

Guida di consultazione rapida 267
Combinazione di
indicatori
Descrizione del problema Soluzione consigliata
Il computer si trova in una
condizione di spegnimento
normale o in una possibile
anomalia pre-BIOS.
Gli indicatori della diagnostica
non sono accesi dopo il corretto
avvio del sistema operativo.
Collegare il computer ad una
presa elettrica funzionante e
premere il pulsante di
alimentazione.
Si è verificato un possibile
guasto al BIOS; il computer è
in modalità di ripristino.
Eseguire l'utilità di ripristino
del BIOS, attendere il
completamento
dell'operazione, quindi
riavviare il sistema.
Si è verificato un possibile
guasto al processore.
Reinstallare il processore e
riavviare il sistema.

268 Guida di consultazione rapida
I moduli di memoria vengono
rilevati, ma si è verificato un
guasto della memoria.
• Se è presente un solo
modulo di memoria,
reinstallarlo e riavviare il
sistema. (consultare la
Guida dell'utente
in linea per
istruzioni su come
rimuovere e installare i
moduli di memoria).
• Se sono presenti due o più
moduli di memoria,
rimuoverli, reinstallare un
solo modulo, quindi riavviare
il sistema. Se il sistema si
avvia normalmente,
reinstallare un modulo
aggiuntivo. Continuare fino
a individuare il modulo
difettoso o a reinstallare tutti
i moduli senza errori.
• Se disponibile, installare nel
computer memoria
correttamente funzionante
dello stesso tipo.
• Se il problema persiste,
contattare la Dell
.
Si è verificato un possibile
guasto della scheda grafica.
• Se il computer dispone di
una scheda grafica,
rimuoverla, reinstallarla,
quindi riavviare il sistema.
• Se il problema persiste,
installare una scheda grafica
funzionante e riavviare il
sistema.
• Se il problema persiste o il
computer dispone di grafica
integrata,
contattare la Dell
.
Combinazione di
indicatori
Descrizione del problema Soluzione consigliata

Guida di consultazione rapida 269
Si è verificato un possibile
guasto nell'unità floppy o disco
rigido.
Riposizionare tutti i cavi di
alimentazione e dati, e
riavviare il sistema.
Si è verificato un possibile
guasto alla USB.
Reinstallare tutti i dispositivi
USB, controllare i
collegamenti dei cavi, quindi
riavviare il sistema.
Non è stato rilevato alcun
modulo di memoria.
• Se è presente un solo
modulo di memoria,
reinstallarlo e riavviare il
sistema. Consultare la
Guida
dell'utente
in linea per
istruzioni su come rimuovere
e installare i moduli di
memoria.
• Se sono presenti due o più
moduli di memoria,
rimuoverli, reinstallare un
solo modulo, quindi riavviare
il sistema. Se il sistema si
avvia normalmente,
reinstallare un modulo
aggiuntivo. Continuare fino
a individuare il modulo
difettoso o a reinstallare tutti
i moduli senza errori.
• Se disponibile, installare nel
computer memoria
correttamente funzionante
dello stesso tipo.
• Se il problema persiste,
contattare la Dell
.
Combinazione di
indicatori
Descrizione del problema Soluzione consigliata

270 Guida di consultazione rapida
Cancellazione delle password dimenticate
ATTENZIONE: Prima di eseguire le procedure descritte in questa sezione,
seguire le istruzioni di sicurezza riportate nella Guida alle informazioni sul
prodotto.
1
Seguire le procedure descritte in "Operazioni preliminari" a pagina 218.
2
Rimuovere il coperchio del computer (consultare "Rimozione del
coperchio del computer" a pagina 252).
I moduli di memoria sono
rilevati, ma esiste un errore di
compatibilità o di
configurazione della memoria.
• Accertarsi che non esistano
requisiti speciali di
posizionamento dei
connettori o dei moduli di
memoria
.
• Verificare che i
moduli di
memoria
installati siano
compatibili con il computer.
• Se il problema persiste,
rivolgersi alla Dell.
Si è verificato un errore.
Questa combinazione viene
visualizzata anche quando si
accede all'Installazione del
sistema e non indica
necessariamente un problema.
• Accertarsi che i cavi del
disco rigido e dell'unità
ottica siano collegati
correttamente alla scheda di
sistema.
• Fare riferimento al
messaggio visualizzato nello
schermo.
• Se il problema persiste,
rivolgersi alla Dell.
Dopo il completamento del
POST, tutti i quattro indicatori
della diagnostica assumono
brevemente il colore verde
prima di spegnersi per indicare
la condizione operativa
normale.
Nessuno.
Combinazione di
indicatori
Descrizione del problema Soluzione consigliata

Guida di consultazione rapida 271
3
Individuare il ponticello di ripristino password (PSWD) a 2 piedini sulla
scheda di sistema. Per impostazione predefinita, Pin1 e Pin2 devono essere
collegati. Sarà necessario rimuovere il ponticello e avviare il sistema come
segue.
4
Rimuovere il ponticello.
5
Ricollocare il coperchio del computer (consultare "Ricollocamento del
coperchio del computer" a pagina 246).
AVVISO: Per connettere un cavo di rete, prima inserire il cavo nel dispositivo di
rete, poi collegarlo al computer.
6
Collegare il computer e i dispositivi alle prese elettriche e accenderli.
7
Dopo la visualizzazione del desktop di Microsoft
®
Windows
®
nel
computer, arrestare il sistema (consultare "Spegnimento del computer" a
pagina 220).
8
Spegnere il monitor e scollegarlo dalla presa elettrica.
9
Scollegare il cavo di alimentazione del computer dalla presa elettrica,
quindi premere il pulsante di alimentazione per mettere a terra la scheda
di sistema.
10
Aprire il coperchio del computer.

272 Guida di consultazione rapida
11
Individuare il ponticello di ripristino password (PSWD) a 2 piedini sulla
scheda di sistema e fissare il ponticello per riabilitare la funzionalità della
password.
12
Ricollocare il coperchio del computer (consultare "Ricollocamento del
coperchio del computer" a pagina 246).
AVVISO: Per collegare un cavo di rete, prima inserire il cavo nella presa di rete a
muro, poi collegarlo al computer.
13
Collegare il computer e i dispositivi alle prese elettriche e accenderli.
N.B. Questa procedura abilita nuovamente la funzionalità della password. Quando
si
accede all'Installazione del sistema (consultare "Accesso all'Installazione del
sistema" nella Guida dell'utente), entrambe le opzioni per le password
dell'amministratore e di sistema vengono visualizzate come Not Set (Non
impostata); ciò significa che la funzionalità delle password è abilitata, ma non è
stata assegnata alcuna password.
14
Assegnare una nuova password del sistema e/o dell'amministratore.
Cancellazione delle impostazioni CMOS
ATTENZIONE: Prima di eseguire le procedure descritte in questa sezione, seguire
le istruzioni di sicurezza riportate nella Guida alle informazioni sul prodotto.
1
Seguire le procedure descritte in "Operazioni preliminari" a pagina 218.
N.B. Il computer deve essere scollegato dalla presa elettrica per cancellare
l'impostazione CMOS.
2
Rimuovere il coperchio del computer (consultare "Rimozione del
coperchio del computer" a pagina 252).
3
Rimuovere il coperchio del computer.
4
Reimpostare le impostazioni CMOS correnti:
a
Individuare i ponticelli della password (PSWD) e del CMOS
(RTCRST) sulla scheda di sistema (consultare "Cancellazione delle
password dimenticate" a pagina 270).
b
Rimuovere la presa del ponticello di ripristino password dai piedini.
c
Inserire la spina del ponticello di ripristino password sui piedini
RTCRST e attendere circa 5 secondi.
d
Rimuovere la spina del ponticello dai piedini RTCRST e reinserirla sui
piedini della password.

Guida di consultazione rapida 273
5
Ricollocare il coperchio del computer (consultare "Ricollocamento del
coperchio del computer" a pagina 246).
AVVISO: Per collegare un cavo di rete, inserire prima il cavo nella porta o nel
dispositivo di rete, poi collegarlo al computer.
6
Collegare il computer e i dispositivi alle prese elettriche e accenderli.
Ripristino del BIOS
Il BIOS può richiedere il ripristino quando è disponibile un aggiornamento o
quando si sostituisce la scheda di sistema.
1
Accendere il computer.
2
Trovare il file di aggiornamento del BIOS per il computer nel sito Web del
supporto tecnico della Dell all'indirizzo
support.dell.com
.
3
Fare clic su
Download Now
(Download) per scaricare il file.
4
Se viene visualizzata la finestra
Export Compliance Disclaimer
(Dichiarazione di non responsabilità relativa alla conformità delle
esportazioni), fare clic su
Yes, I Accept this Agreement
(Sì, accetto il
contratto).
Viene visualizzata la finestra
File Download
(Download dei file).
5
Fare clic su
Save this program to disk
(Salva l'applicazione su disco),
quindi fare clic su
OK
.
Viene visualizzata la finestra
Save In
(Salva in).
6
Fare clic sulla freccia GIÙ per visualizzare il menu
Save In
(Salva in),
selezionare
Desktop
, quindi fare clic su
Save
(Salva).
Il file viene scaricato nel desktop.
7
Fare clic su Close (Chiudi) quando viene visualizzata la finestra
Download
Complete
(Download completato).
L'icona del file viene visualizzata sul desktop e ha lo stesso nome del file di
aggiornamento del BIOS scaricato.
8
Fare doppio clic sull'icona del file sul desktop e seguire le istruzioni
visualizzate.

274 Guida di consultazione rapida

Indice analitico 275
Indice analitico
A
alimentazione
condizionatori di rete
dispositivi di protezione
indicatore, 238
limitatori di sovratensione
pulsante, 237, 248
UPS
Avvio del programma Dell
Diagnostics dal CD Drivers
and Utilities, 258
Avvio del programma Dell
Diagnostics dal disco
rigido, 258
C
CD
sistema operativo, 218
CD Sistema operativo, 218
codici bip, 262
computer
codici bip, 262
componenti interni, 244, 254
vista interna, 244, 254
connessione Internet
impostazione, 226
informazioni su, 225
opzioni, 225
Contratto di licenza con l'utente
finale, 214
coperchio
rimozione, 242, 252
sostituzione, 246, 256
D
diagnostica
codici bip, 262
Dell, 257
Diagnostica della Dell, 257
documentazione
Consultazione rapida, 214
Contratto di licenza con l'utente
finale, 214
ergonomia, 214
garanzia, 214
Guida alle informazioni sul
prodotto, 214
Guida dell'utente, 215
in linea, 216
normative, 214
sicurezza, 214
E
etichette
Microsoft Windows, 215

276 Indice analitico
Numero di servizio, 215, 239,
247
F
file della guida
Help and Support Center (Guida
e supporto tecnico) di
Windows, 217
G
gruppo di continuità. Vedere
UPS
Guida alle informazioni sul
prodotto, 214
Guida dell'utente, 215
H
hardware
codici bip, 262
Diagnostica della Dell, 257
Help and Support Center (Guida
e supporto tecnico), 217
I
Impostazioni CMOS
cancellazione, 272
indicatori
alimentazione, 238
informazioni sull'ergonomia, 214
informazioni sulla garanzia, 214
informazioni sulle
normative, 214
installazione di componenti
operazioni preliminari, 220
spegnimento del computer, 220
strumenti consigliati, 220
istruzioni di sicurezza, 214
M
messaggi di errore
codici bip, 262
monitor
collegare due, 233-234
collegare DVI, 233-234
collegare TV, 233-234
collegare VGA, 233-234
impostazioni dello schermo, 235
modalità desktop esteso, 235
modalità Duplicazione, 235
N
Network Setup Wizard
(Installazione guidata
rete), 224
Numero di servizio, 215, 239,
247

Indice analitico 277
P
password
cancellazione, 270
ponticello, 270
problemi
codici bip, 262
Diagnostica della Dell, 257
procedure guidate
Network Setup Wizard
(Installazione guidata
rete), 224
R
ResourceCD
Diagnostica della Dell, 257
rete
Network Setup Wizard
(Installazione guidata
rete), 224
risoluzione dei problemi
Diagnostica della Dell, 257
Help and Support Center (Guida
e supporto tecnico), 217
S
S.M.A.R.T, 266
scheda di sistema, 245, 255
scheda madre. Vedere scheda di
sistema
sistema operativo
reinstallazione, 218
sito del supporto tecnico della
Dell, 216
sito Web del supporto
tecnico, 216
stampante
cavo, 233
collegamento, 224, 232
installazione, 224, 232
T
TV
collegare al computer, 233-234
U
UPS
W
Windows XP
Guida in linea e supporto
tecnico, 217
Installazione guidata rete, 224
reinstallazione, 218

278 Indice analitico

www.dell.com | support.dell.com
Dell™ OptiPlex™ 330
Guía de referencia rápida
Modelo DCSM y DCNE

Notas, avisos y precauciones
NOTA: una NOTA proporciona información importante que le ayuda a utilizar su
ordenador de la mejor manera posible.
AVISO: un AVISO indica la posibilidad de daños en el hardware o pérdida de datos
y le explica cómo evitar el problema.
PRECAUCIÓN: una PRECAUCIÓN indica un posible daño material, lesión
corporal o muerte.
____________________
La información contenida en este documento puede modificarse sin aviso previo.
© 2007 Dell Inc. Todos los derechos reservados.
Queda estrictamente prohibido realizar cualquier tipo de reproducción sin el consentimiento por escrito
de Dell Inc.
Marcas comerciales utilizadas en este texto: Dell, el logotipo de DELL, Inspiron, Dell Precision,
Dimension, OptiPlex, Latitude, PowerEdge, PowerVault, PowerApp y Dell OpenManage son marcas
comerciales de Dell Inc.; Intel, Pentium y Celeron son marcas comerciales registradas de Intel
Corporation; Microsoft y Windows son marcas comerciales registradas de Microsoft Corporation.
Este documento puede incluir otras marcas y nombres comerciales para referirse a las entidades que
son propietarias de los mismos o a sus productos. Dell Inc. renuncia a cualquier interés sobre la
propiedad de marcas y nombres comerciales que no sean los suyos.
Modelo DCSM y DCNE
Septiembre 2007 P/N DU086 Rev. A00

Contenido 281
Contenido
Búsqueda de información . . . . . . . . . . . . . . . . 283
Antes de comenzar
. . . . . . . . . . . . . . . . . . . 288
Antes de trabajar en el interior de su
ordenador
. . . . . . . . . . . . . . . . . . . . . 288
Adición y sustitución de piezas
. . . . . . . . . . . . . 289
Configuración del ordenador
. . . . . . . . . . . . . . 291
Instalación del ordenador en un gabinete
. . . . . 291
Configuración de una red doméstica y de oficina
. . . 293
Conexión a un adaptador de red
. . . . . . . . . . 293
Configuración de red
. . . . . . . . . . . . . . . . 294
Conexión a Internet
. . . . . . . . . . . . . . . . . . . 295
Transferencia de información a un ordenador
nuevo
. . . . . . . . . . . . . . . . . . . . . . . . . . 298
Configuración de una impresora
. . . . . . . . . . . . 302
Conexión de dos monitores
. . . . . . . . . . . . . . . 303
Dispositivos de protección de alimentación
. . . . . . 305
Ordenador de sobremesa
. . . . . . . . . . . . . . . . 307
Vista anterior
. . . . . . . . . . . . . . . . . . . . 307
Vista posterior
. . . . . . . . . . . . . . . . . . . 309
Conectores del panel posterior
. . . . . . . . . . 310
Extracción de la cubierta del ordenador
. . . . . . . . 312

282 Contenido
Vista interior del ordenador . . . . . . . . . . . . . . . 314
Componentes de la placa base
. . . . . . . . . . . . . 315
Cómo volver a colocar la cubierta del ordenador
. . . 316
Ordenador de minitorre
. . . . . . . . . . . . . . . . . 317
Vista anterior
. . . . . . . . . . . . . . . . . . . . 317
Vista posterior
. . . . . . . . . . . . . . . . . . . 319
Conectores del panel posterior
. . . . . . . . . . . . . 320
Cómo quitar la cubierta del ordenador
. . . . . . . . . 322
Vista interior del ordenador
. . . . . . . . . . . . . . . 324
Componentes de la placa base
. . . . . . . . . . . . . 325
Cómo volver a colocar la cubierta del ordenador
. . . 326
Solución de problemas
. . . . . . . . . . . . . . . . . 326
Dell Diagnostics
. . . . . . . . . . . . . . . . . . . . . 327
Indicadores de alimentación
. . . . . . . . . . . . . . 331
Códigos de sonido
. . . . . . . . . . . . . . . . . . . . 332
Mensajes del sistema
. . . . . . . . . . . . . . . . . . 334
Indicadores de diagnóstico
. . . . . . . . . . . . . . . 336
Cómo borrar contraseñas olvidadas
. . . . . . . . . . 340
Borrado de la configuración de CMOS
. . . . . . . . . 342
Actualización flash del BIOS
. . . . . . . . . . . . . . 343
Índice . . . . . . . . . . . . . . . . . . . . . . . . . . . . . 345

Guía de referencia rápida 283
Búsqueda de información
NOTA: Algunas funciones o medios son opcionales y pueden no incluirse en su
ordenador. Es posible que algunas funciones o medios no estén disponibles en
determinados países.
NOTA: Su ordenador puede incluir información adicional.
¿Qué busca? Aquí lo encontrará
• Un programa de diagnóstico para
mi ordenador
• Controladores para mi ordenador
• Software del sistema de escritorio
(DSS)
Soporte multimedia Drivers and Utilities
(Controladores y utilidades)
NOTA: El soporte multimedia Drivers and
Utilities (Controladores y utilidades) es opcional
y es posible que no se entregue con el
ordenador.
Los controladores ya están instalados en el
ordenador. Puede utilizar el soporte
multimedia para volver a instalar los
controladores (consulte la Guía del usuario en
línea), para ejecutar los Dell Diagnostics
(consulte el apartado “Dell Diagnostics” en la
página 327).
Los archivos “readme” (léame) pueden estar
incluidos en su CD para disponer de
actualizaciones de última hora sobre los
cambios técnicos del ordenador o material de
consulta destinado a los técnicos o usuarios
avanzados.
NOTA: Los controladores y las actualizaciones
de la documentación se pueden encontrar en
support.dell.com.

284 Guía de referencia rápida
• Información básica sobre la
solución de problemas
• Cómo ejecutar Dell Diagnostics
• Herramientas y utilidades
• Cómo configurar una impresora
Guía de referencia rápida
NOTA: Este documento puede ser opcional, por
lo que es posible que no se envíe con su
ordenador.
NOTA: Este documento está disponible en
formato PDF en support.dell.com.
• Información sobre la garantía
• Términos y condiciones (sólo en
EE.UU.)
• Instrucciones de seguridad
• Información reglamentaria
• Información ergonómica
• Contrato de licencia de usuario
final
Guía de información del producto de Dell™
• Cómo extraer y cambiar piezas
• Especificaciones
• Cómo configurar los parámetros
del sistema
• Cómo detectar y solucionar
problemas
Guía del usuario de Dell OptiPlex™ 330
Centro de ayuda y soporte técnico de Microsoft
Windows
1
Haga clic en el
botón Inicio
de Windows
Vista
→
Ayuda y soporte técnico
→
Guías del
usuario y del sistema de Dell
→
Guías del
sistema
.
2
Haga clic en la
Guía del usuario
de su
ordenador.
¿Qué busca? Aquí lo encontrará

Guía de referencia rápida 285
• Etiqueta de servicio y Express
Service Code (Código de servicio
rápido)
• Etiqueta de licencia de Microsoft
Windows
Etiqueta de servicio y licencia de Microsoft
®
Windows
®
Estas etiquetas se encuentran en su ordenador.
• Utilice la etiqueta de servicio para identificar
el ordenador cuando visite
support.dell.com
o se ponga en contacto con el servicio de
asistencia.
• Escriba el código de servicio urgente para
dirigir su llamada cuando se ponga en
contacto con el servicio de asistencia.
NOTA: Como una mayor medida de seguridad, a
las etiquetas de licencia de Microsoft Windows
diseñadas recientemente parece que les falta un
trozo de etiqueta o que tienen un “agujero”, para
disuadir a los delincuentes de retirar la etiqueta.
¿Qué busca? Aquí lo encontrará

286 Guía de referencia rápida
• Soluciones: consejos y orientación
para la solución de problemas,
artículos de técnicos y cursos en
línea, preguntas frecuentes.
• Comunidad: debates en línea con
otros clientes de Dell.
• Actualizaciones: información de
actualización para componentes
como, por ejemplo, la memoria, la
unidad de disco duro y el sistema
operativo.
• Atención al cliente: información de
contacto, llamada de servicio y
estado de los pedidos, garantía e
información de reparación.
• Servicio y asistencia: historial de
asistencia y estado de las llamadas
de servicio, contrato de servicio,
debates en línea con el personal de
asistencia técnica.
• El servicio Dell Technical Update:
notificación proactiva mediante
correo electrónico de
actualizaciones de software y
hardware para el ordenador.
• Referencia: documentación del
ordenador, detalles en la
configuración de mi ordenador,
especificaciones del producto y
documentación técnica.
• Descargas: controladores
certificados, revisiones y
actualizaciones de software.
Sitio web Dell Support: support.dell.com
NOTA: Seleccione su región o segmento de
negocios para ver el sitio de asistencia técnica
apropiado.
¿Qué busca? Aquí lo encontrará

Guía de referencia rápida 287
• Desktop System Software (DSS): si
vuelve a instalar el sistema
operativo del ordenador, también
debe volver a instalar la utilidad
DSS. DSS proporciona
actualizaciones importantes del
sistema operativo y asistencia para
procesadores, unidades ópticas,
dispositivos USB, etc. La utilidad
DSS es necesaria para el correcto
funcionamiento de su ordenador
Dell. El software detecta
automáticamente su ordenador y
sistema operativo e instala las
actualizaciones apropiadas a su
configuración.
Para descargar Desktop System Software:
1
Vaya a
support.dell.com
, seleccione su zona o
segmento empresarial e introduzca la
etiqueta de servicio.
2
Seleccione
Drivers & Downloads
(Controladores & Descargas) y haga clic en
Go
(Ir).
3
Haga clic en el sistema operativo y busque la
palabra clave
Desktop System Software
.
NOTA: La interfaz para el usuario
support.dell.com puede variar dependiendo de
las selecciones que efectúe.
• Cómo utilizar Windows
• Cómo trabajar con programas y
archivos
• Cómo personalizar mi escritorio
Centro de ayuda y soporte técnico de Windows
1
Para acceder a Ayuda y soporte técnico de
Windows:
• En Windows XP, haga clic en
Inicio
y en
Ayuda y soporte técnico
.
• En Windows Vista™, haga clic en el
botón
Inicio
de Windows Vista
→
Ayuda y
soporte técnico
.
2
Escriba una palabra o frase que describa el
problema y, a continuación, haga clic en el
icono de flecha.
3
Haga clic en el tema que describa el
problema.
4
Siga las instrucciones que aparecen en
pantalla.
• Cómo volver a instalar mi sistema
operativo
Soporte multimedia Operating System (Sistema
operativo)
NOTA: El soporte multimedia Operating System
(Sistema operativo) es opcional, por lo que es
posible que no se envíe con su ordenador.
¿Qué busca? Aquí lo encontrará

288 Guía de referencia rápida
Antes de comenzar
Antes de trabajar en el interior de su ordenador
Use las siguientes instrucciones de seguridad para proteger el equipo contra
posibles daños y garantizar su propia seguridad personal.
PRECAUCIÓN: Antes de comenzar cualquiera de los procedimientos de esta
sección, siga las instrucciones de seguridad que se encuentran en la Guía de
información del producto.
AVISO: Manipule los componentes y las tarjetas con precaución. No toque los
componentes o contactos ubicados en una tarjeta. Sostenga las tarjetas por sus
bordes o por su soporte metálico de montaje. Sujete un componente, como un
procesador, por sus bordes y no por sus patas.
El sistema operativo ya está instalado en el
ordenador. Para volver a instalar el sistema
operativo, utilice el disco Operating System
(Sistema operativo) y consulte la Guía del
usuario en línea.
Después de volver a instalar el sistema
operativo, utilice el disco Drivers and Utilities
(Controladores y utilidades) para volver a
instalar los controladores de los dispositivos
que se incluían con el ordenador.
La clave del producto del sistema operativo se
encuentra en el ordenador.
NOTA: El color del disco varía según el sistema
operativo que haya solicitado.
¿Qué busca? Aquí lo encontrará

Guía de referencia rápida 289
AVISO: Sólo un técnico certificado debe realizar reparaciones en el ordenador. La
garantía no cubre los daños por reparaciones no autorizadas por Dell.
AVISO: Cuando desconecte un cable, tire del conector o de la lengüeta de tiro, no
tire directamente del cable. Algunos cables tienen conectores con lengüetas de
bloqueo; si va a desconectar un cable de este tipo, antes pulse las lengüetas de
bloqueo. Cuando separe conectores, manténgalos alineados para evitar doblar las
patas de conexión. Además, antes de conectar un cable, asegúrese de que los dos
conectores estén orientados y alineados correctamente.
AVISO: Para evitar daños en el ordenador, realice los pasos siguientes antes de
comenzar a trabajar dentro del ordenador.
1
Apague el ordenador (consulte el apartado “Cómo apagar el ordenador” en
la página 290).
PRECAUCIÓN: Nunca suministre alimentación eléctrica al ordenador cuando se
haya extraído la cubierta.
AVISO: Para desconectar un cable de red, desconecte primero el cable del
ordenador y, a continuación, del dispositivo de red.
2
Desconecte todos los cables del teléfono o de la red del ordenador.
3
Desconecte el ordenador y todos los dispositivos conectados de sus tomas
de alimentación eléctrica.
4
Pulse el botón de alimentación para conectar a tierra la placa base.
AVISO: Antes de tocar algo en el interior del ordenador, conéctese a tierra
tocando una superficie metálica sin pintura como, por ejemplo, la parte posterior
del ordenador. Mientras trabaja, toque periódicamente una superficie metálica sin
pintar para disipar la electricidad estática, que podría dañar los componentes
internos.
Adición y sustitución de piezas
Esta sección le proporciona los procedimientos para quitar e instalar los
componentes en su ordenador.A menos que se especifique lo contrario, para
cada procedimiento se presupone que se cumplen las condiciones siguientes:
• Ha realizado los pasos que se indican en los apartados “Cómo apagar el
ordenador” en la página 290 y “Antes de trabajar en el interior de su
ordenador” en la página 288.
• Ha leído la información de seguridad de la
Guía de información del
producto
de Dell™.

290 Guía de referencia rápida
• Un componente se puede volver a colocar o—si se ha adquirido por
separado—instalar mediante el proceso de extracción realizado en orden
inverso.
Herramientas recomendadas
Es posible que necesite las herramientas siguientes para los procedimientos
descritos en este documento:
• Un destornillador pequeño de paletas planas
• Destornillador Phillips pequeño
• Punta trazadora pequeña de plástico
Cómo apagar el ordenador
AVISO: Para evitar la pérdida de datos, guarde y cierre todos los archivos abiertos
y salga de todos los programas abiertos antes de apagar el ordenador.
1
Apague el sistema operativo:
a
Guarde y cierre todos los archivos abiertos y salga de todos los
programas activos.
b
En el sistema operativo Microsoft
®
Windows
®
XP
, haga clic en
Inicio
→
Apagar
→
Apagar
.
En Microsoft
®
Windows Vista™,
haga clic en el botón Inicio de
Windows Vista , situado en la esquina inferior izquierda del
escritorio, haga clic en la flecha de la esquina inferior derecha del
menú Inicio tal como se muestra a continuación y después haga clic
en
Apagar
.
El equipo se apaga una vez finalizado el proceso de cierre del sistema
operativo.
2
Asegúrese de que el ordenador y todos los dispositivos conectados estén
apagados. Si el ordenador y los dispositivos conectados no se apagaron
automáticamente cuando apagó el sistema operativo, pulse el botón de
alimentación durante 4 segundos aproximadamente para apagarlos.

Guía de referencia rápida 291
Configuración del ordenador
Instalación del ordenador en un gabinete
La instalación del ordenador en un gabinete puede restringir el flujo de aire,
influir en el rendimiento del ordenador y hacer que posiblemente se caliente en
exceso. Siga las siguientes pautas cuando instale el ordenador en un gabinete:
AVISO: Las especificaciones de temperatura de funcionamiento que se indican en
este manual reflejan la temperatura ambiente de funcionamiento máxima. Se tiene
que tener en cuenta la temperatura ambiente de la sala cuando se instala el
ordenador en un gabinete. Por ejemplo, si la temperatura ambiente de la sala es de
25° C (77° F), en función de las especificaciones del ordenador, sólo tiene un
margen de temperatura de 5° a 10° C (de 9° a 18° F) antes de alcanzar la
temperatura de funcionamiento máxima del ordenador. Para obtener más detalles
sobre las especificaciones de su ordenador, consulte la Guía del usuario en línea.
• Deje que haya una distancia de separación de 10,2 cm (4 pulgadas) como
mínimo en todos los laterales del ordenador que facilitan la ventilación
para permitir que el aire que se necesita ofrezca la ventilación adecuada.
• Si el gabinete tiene tapas, tienen que ser de un tipo que permita que haya
como mínimo un flujo de aire del 30 por ciento a través del gabinete
(delante y detrás).

292 Guía de referencia rápida
• Si el ordenador está instalado en una esquina sobre un escritorio o debajo
de un escritorio, deje como mínimo 5,1 centímetros (2 pulgadas) de
distancia de separación entre la parte posterior del ordenador y la pared
para permitir que haya el flujo de aire necesario para una ventilación
adecuada.
AVISO: No instale el ordenador en un gabinete que no permita que haya flujo de
aire. Restringir el flujo de aire afecta negativamente al rendimiento del ordenador y
hace que posiblemente se caliente.

Guía de referencia rápida 293
Configuración de una red doméstica y de oficina
Conexión a un adaptador de red
Para conectar el cable de red:
NOTA: Enchufe el cable de red al conector del adaptador de red del ordenador. No
enchufe el cable de red al conector del módem del ordenador. No enchufe un cable
de red a una toma telefónica de la pared.
1
Conecte el cable de red al conector del adaptador de red, que está situado
en la parte posterior del ordenador.
Inserte el cable hasta que encaje en su posición y, a continuación, tire de él
suavemente para asegurarse de que está bien encajado.
2
Conecte el otro extremo del cable de red a un dispositivo de red.

294 Guía de referencia rápida
Configuración de red
Windows XP
El sistema operativo Microsoft
®
Windows
®
XP ofrece un Asistente para
configuración de redes que le guiará en el proceso de compartir archivos,
impresoras o una conexión a Internet entre ordenadores en un entorno
doméstico o de pequeña oficina.
1
Haga clic en el botón
Inicio
, seleccione
Todos los programas
→
Accesorios
→
Comunicaciones
y, a continuación, haga clic en
Asistente
para configuración de redes
.
2
En la pantalla de bienvenida
Asistente para configuración de red
, haga clic
en
Siguiente
.
3
Haga clic en
Lista de comprobación para crear una red
.
NOTA: Al seleccionar el método de conexión Este ordenador se conecta
directamente a Internet, se activa el servidor de seguridad integrado que se
proporciona con Windows XP Service Pack 1 (SP1) o posterior.
4
Haga las comprobaciones de la lista de verificación y los preparativos
necesarios.
5
Vuelva a Asistente para configuración de red y siga las instrucciones que
aparecen en pantalla.
Dispositivo
de red
Conector del adaptador
de red del ordenador
Cable de red
Conector del
adaptador de red

Guía de referencia rápida 295
Windows Vista
Para realizar cambios en la configuración de red en Microsoft
®
Windows
Vista™:
1
Haga clic en el botón Inicio de Windows Vista, y, a continuación, haga
clic en
Red
→
Centro de redes y recursos compartidos
.
2
Haga clic en
Set up a connection or network
(Establecer una conexión o
red).
3
Seleccione el tipo de conexión de red que desea hacer y siga las
instrucciones de la pantalla.
4
Cuando haya acabado, cierre el Centro de redes y recursos compartidos.
Conexión a Internet
NOTA: Los proveedores de servicios de internet y las ofertas de estos proveedores
pueden variar según el país.
Para conectarse a Internet, necesita una conexión por módem o de red y un
proveedor de servicios de internet (ISP). Su proveedor de servicios de internet
(ISP) le ofrecerá una o más de las siguientes opciones de conexión a Internet:
• Las conexiones ADSL, que ofrecen acceso a Internet de alta velocidad a
través de la línea de teléfono existente o del servicio de telefonía móvil.
Con una conexión ADSL, podrá acceder a Internet y utilizar su teléfono en
la misma línea simultáneamente.
• Las conexiones de módem por cable, que ofrecen acceso a Internet de alta
velocidad a través de su línea de TV por cable local.
• Las conexiones de módem por satélite, que ofrecen acceso a Internet de
alta velocidad a través del sistema de televisión por satélite.
• Las conexiones de acceso telefónico, que ofrecen acceso a Internet a través
de la línea telefónica. Las conexiones de acceso telefónico son
considerablemente más lentas que las de ADSL y conexiones de módem
por cable (o satélite).
• Las conexiones LAN (Red de área local) inalámbricas, que ofrecen acceso a
Internet utilizando tecnología inalámbrica Bluetooth
®
.
Si utiliza una conexión de acceso telefónico, conecte una línea telefónica al
conector del módem en el ordenador y a la roseta del teléfono antes de
configurar la conexión a Internet. Si utiliza una conexión ADSL o de módem
por cable/satélite, póngase en contacto con su proveedor de servicios de
internet o con su servicio de telefonía móvil para obtener instrucciones de
configuración.

296 Guía de referencia rápida
Configuración de su conexión a Internet
Para configurar una conexión a Internet con un acceso directo en el escritorio
de su proveedor de servicios de internet:
1
Guarde y cierre todos los archivos que estén abiertos y salga de los
programas activos.
2
Haga doble clic en el icono de su proveedor de servicios de internet (ISP)
en el escritorio de Microsoft
®
Windows
®
.
3
Siga las instrucciones de la pantalla para completar la configuración.
Si no tiene un icono de su proveedor de servicios de internet (ISP) en el
escritorio o desea configurar una conexión a Internet con un ISP diferente,
realice los pasos de la siguiente sección que se correspondan con el sistema
operativo del ordenador que utiliza.
NOTA: Si tiene problemas para conectarse a Internet, consulte el apartado
“Configuración de una red doméstica y de oficina” en la página 293. Si no puede
conectarse a Internet pero consiguió hacerlo anteriormente, puede que el
proveedor de servicios de internet (ISP) tenga una interrupción del servicio.
Póngase en contacto con su proveedor de servicios de internet (ISP) para
comprobar el estado del servicio, o intente conectarse de nuevo más tarde.
Windows XP
1
Guarde y cierre todos los archivos que estén abiertos y salga de los
programas activos.
2
Haga clic en
Inicio
→
Internet Explorer
.
Aparecerá el
Asistente para conexión nueva
.
3
Haga clic en
Conectarse a Internet
.
4
En la siguiente ventana, haga clic en la opción correcta:
• Si no tiene un proveedor de servicios de internet (ISP) y desea
seleccionar uno, haga clic en
Elegir de una lista de proveedores de
servicios Internet (ISP)
.
• Si ha obtenido información de configuración de su ISP pero no ha
recibido un CD de configuración, haga clic en
Establecer mi conexión
manualmente
.
• Si dispone de un CD, haga clic en
Usar el CD que tengo de un
proveedor de servicios Internet (ISP)
.

Guía de referencia rápida 297
5
Haga clic en
Siguiente
.
Si ha seleccionado
Establecer mi conexión manualmente
, continúe con el
paso 6. En caso contrario, siga las instrucciones de la pantalla para
completar la configuración.
NOTA: Si no sabe qué tipo de conexión seleccionar, póngase en contacto con su
ISP.
6
Haga clic en la opción adecuada de
¿Cómo desea conectar a Internet?
y, a
continuación, haga clic en
Siguiente
.
7
Utilice la información de configuración ofrecida por su proveedor de
servicios de internet (ISP) para completar la configuración.
Windows Vista™
NOTA: Tenga la información de su proveedor de servicios de internet (ISP)
preparada. Si no dispone de ISP, el asistente para Conectarse a Internet podrá
ayudarle a obtener uno.
1
Guarde y cierre todos los archivos que estén abiertos y salga de los
programas activos.
2
Haga clic en el botón Inicio de Windows Vista y en
Panel de control
.
3
En
Red e Internet
, haga clic en
Conectarse a Internet
.
Aparece la ventana
Conectarse a Internet
.
4
Haga clic en
Banda ancha (PPPoE)
o
Conexión telefónica
, dependiendo
de cómo desee conectarse:
• Seleccione
Banda ancha
si va a utilizar una conexión ADSL, de
módem por satélite, de módem por TV de cable, o de tecnología
inalámbrica Bluetooth.
• Seleccione
Conexión telefónica
si va a utilizar un módem de acceso
telefónico o ISDN.
NOTA: Si no sabe qué tipo de conexión seleccionar, haga clic en Ayúdeme a elegir
o póngase en contacto con su proveedor de servicios de internet (ISP).
5
Siga las instrucciones de la pantalla y utilice la información de
configuración suministrada por su proveedor de servicios de internet (ISP)
para completar la configuración.

298 Guía de referencia rápida
Transferencia de información a un ordenador
nuevo
Puede utilizar los “asistentes” del sistema operativo para ayudarle a transferir
archivos y otros datos de un ordenador a otro (por ejemplo, de un ordenador
antiguo a uno nuevo. Para obtener instrucciones, consulte en los apartados
siguientes el que corresponda al sistema operativo que ejecuta su ordenador.
Microsoft
®
Windows
®
XP (opcional)
El sistema operativo Microsoft
Windows XP proporciona un Asistente para
transferencia de archivos y configuraciones que sirve para transferir datos del
ordenador de origen a uno nuevo. Puede transferir datos, como los siguientes:
• Mensajes de correo electrónico
• Configuraciones de barras de herramientas
• Tamaños de ventana
• Marcadores de Internet
Puede transferir los datos al ordenador nuevo a través de una conexión de red
o de serie o puede guardarlos en medios extraíbles como, por ejemplo, un CD
grabable, para transferirlos al ordenador nuevo.
NOTA: Puede transferir información de un ordenador viejo a un ordenador nuevo
conectando directamente un cable serie a los puertos de entrada/salida (E/S) de
los dos ordenadores. Para transferir datos a través de una conexión serie, debe
acceder a la utilidad Conexiones de red desde el Panel de control y realizar los
pasos de configuración adicionales, como configurar una conexión avanzada y
designar el ordenador host y el ordenador invitado.
Para obtener instrucciones sobre la configuración de una conexión de cables
directa entre dos ordenadores, consulte en Microsoft Knowledge Base el artículo
número 305621, titulado How to Set Up a Direct Cable Connection Between Two
Computers in Windows XP. Es posible que esta información no esté disponible en
determinados países.
Para transferir información a un ordenador nuevo, debe ejecutar el Asistente
para transferencia de archivos y configuraciones. Para este proceso, puede
utilizar el soporte multimedia opcional Operating System (Sistema operativo)
o bien crear un disco del asistente con el Asistente para transferencia de
archivos y configuraciones.

Guía de referencia rápida 299
Ejecución del Asistente para transferencia de archivos y configuraciones con el
CD Operating System (Sistema operativo)
NOTA: Para este procedimiento es necesario el soporte multimedia Operating
System (Sistema operativo). Este soporte multimedia es opcional, por lo que es
posible que no se envíe con todos los ordenadores.
Para preparar un ordenador nuevo para la transferencia de archivos:
1
Abra el Asistente para transferencia de archivos y configuraciones: haga
clic en
Inicio
→
Todos los programas
→
Accesorios
→
Herramientas del
sistema
→
Asistente para transferencia de archivos y configuraciones
.
2
Cuando aparezca la pantalla de bienvenida
Asistente para transferencia de
archivos y configuraciones
, haga clic en
Siguiente
.
3
En la pantalla
¿Qué ordenador es éste?
, haga clic en
Ordenador nuevo
→
Siguiente
.
4
En la pantalla
¿Tiene un CD de Windows XP?
, haga clic en
Utilizaré el
asistente desde el CD de Windows XP
→
Siguiente
.
5
Cuando aparezca la pantalla
Diríjase al ordenador antiguo
, vaya al
ordenador antiguo o de origen.
No haga
clic en
Siguiente
en esta ocasión.
Para copiar datos del ordenador antiguo:
1
En el ordenador antiguo, inserte el soporte multimedia
Operating System
(Sistema operativo) de Windows XP.
2
En la pantalla
Microsoft Windows XP
, haga clic en
Realizar tareas
adicionales
.
3
En
¿Qué desea hacer?
, haga clic en
Transferir archivos y
configuraciones
→
Siguiente
.
4
En la pantalla
¿Qué ordenador es éste?
, haga clic en
Ordenador antiguo
→
Siguiente
.
5
En la pantalla
Seleccione un método de transferencia
, haga clic en el
método de transferencia que prefiera.
6
En la pantalla
Elija qué desea transferir
, seleccione los elementos que
desea transferir y haga clic en
Siguiente
.
Una vez copiada la información, se muestra la pantalla
Completando la
Fase de recopilación
.
7
Haga clic en
Terminar
.

300 Guía de referencia rápida
Para transferir información al ordenador nuevo:
1
En la pantalla
Diríjase al ordenador antiguo
del ordenador nuevo, haga
clic en
Siguiente
.
2
En la pantalla
Seleccione la ubicación de archivos y configuraciones
,
seleccione el método que ha elegido para transferir los archivos y las
configuraciones y haga clic en
Siguiente
.
El asistente lee las configuraciones y los archivos recopilados y los aplica al
nuevo ordenador.
Una vez se han aplicado todas las configuraciones y los archivos, aparece la
pantalla
Completado
.
3
Haga clic en
Completado
y reinicie el ordenador nuevo.
Ejecución del Asistente para transferencia de archivos y configuraciones sin el
soporte multimedia Operating System (Sistema operativo)
Para ejecutar el Asistente para transferencia de archivos y configuraciones sin
el soporte multimedia Operating System (Sistema operativo), debe crear un
disco del asistente que le permitirá crear un archivo imagen a modo de copia
de seguridad para los medios extraíbles.
Para crear un disco del asistente, utilice el nuevo ordenador con Windows XP
y realice los pasos siguientes:
1
Abra el Asistente para transferencia de archivos y configuraciones: haga
clic en
Inicio
→
Todos los programas
→
Accesorios
→
Herramientas del
sistema
→
Asistente para transferencia de archivos y configuraciones
.
2
Cuando aparezca la pantalla de bienvenida
Asistente para transferencia de
archivos y configuraciones
, haga clic en
Siguiente
.
3
En la pantalla
¿Qué ordenador es éste?
, haga clic en
Ordenador nuevo
→
Siguiente
.
4
En la pantalla
¿Tiene un CD de Windows XP?
, haga clic en
Deseo crear
un disco del asistente en la siguiente unidad:
→
Siguiente.
5
Inserte los medios extraíbles, como un CD grabable, y haga clic en
Aceptar
.
6
Cuando la creación del disco haya finalizado y aparezca el mensaje
Diríjase al ordenador antiguo
,
no
haga clic en
Siguiente
.
7
Diríjase al ordenador antiguo.

Guía de referencia rápida 301
Para copiar datos del ordenador antiguo:
1
En el ordenador antiguo, inserte el disco del asistente.
2
Haga clic en
Inicio
→
Ejecutar
.
3
En el campo
Abrir
de la ventana
Ejecutar
, busque la ruta de acceso de
fastwiz
(en los medios extraíbles adecuados) y haga clic en
Aceptar
.
4
En la pantalla de bienvenida
Asistente para transferencia de archivos y
configuraciones
, haga clic en
Siguiente
.
5
En la pantalla
¿Qué ordenador es éste?
, haga clic en
Ordenador antiguo
→
Siguiente
.
6
En la pantalla
Seleccione un método de transferencia
, haga clic en el
método de transferencia que prefiera.
7
En la pantalla
Elija qué desea transferir
, seleccione los elementos que
desea transferir y haga clic en
Siguiente
.
Una vez copiada la información, se muestra la pantalla
Completando la
Fase de recopilación
.
8
Haga clic en
Terminar
.
Para transferir información al ordenador nuevo:
1
En la pantalla
Diríjase al ordenador antiguo
del ordenador nuevo, haga
clic en
Siguiente
.
2
En la pantalla
Seleccione la ubicación de archivos y configuraciones,
seleccione el método que ha elegido para transferir los archivos y las
configuraciones y haga clic en
Siguiente
. Siga las instrucciones que
aparecen en pantalla.
El asistente lee las configuraciones y los archivos recopilados y los aplica al
nuevo ordenador.
Una vez se han aplicado todas las configuraciones y los archivos, aparece la
pantalla
Completado
.
3
Haga clic en
Completado
y reinicie el ordenador nuevo.
NOTA: Para obtener más información acerca de este procedimiento, busque en el
sitio web support.dell.com el documento n.º 154781 (What Are The Different
Methods To Transfer Files From My Old Computer To My New Dell™ Computer
Using the Microsoft
®
Windows
®
XP Operating System?).
NOTA: Es posible que no pueda acceder al documento Dell™ Knowledge Base en
determinados países.

302 Guía de referencia rápida
Microsoft Windows Vista™ (opcional)
1
Haga clic en el botón Inicio de Windows Vista y, a continuación, haga
clic en
Transferir archivos y configuraciones
→
Iniciar Windows Easy
Transfer
.
2
En el cuadro de diálogo
User Account Control
(Control de cuenta de
usuario), haga clic en
Continue
(Continuar).
3
Haga clic en
Start a new transfer
(Iniciar una transferencia nueva) o
Continue a transfer in progress
(Continuar con una transferencia en
curso).
Siga las instrucciones del asistente Windows Easy Transfer (Transferencia
sencilla de Windows) que aparecen en la pantalla.
Configuración de una impresora
AVISO: Complete la configuración del sistema operativo antes de conectar una
impresora al ordenador.
Consulte la documentación incluida con la impresora para obtener
información sobre la configuración, entre ella, cómo:
• Obtener e instalar unidades actualizadas.
• Conectar la impresora al ordenador.
• Cargar papel e instalar el cartucho de tóner o de tinta.
Si necesita asistencia técnica, consulte el manual del propietario de la
impresora o póngase en contacto con el fabricante de la impresora.
Cable de la impresora
Su impresora se conecta al ordenador con un cable USB o un cable paralelo.
Su impresora puede no incluir un cable de impresora, así que cómprelo por
separado, asegurándose de que sea compatible con la impresora y el
ordenador. Si ha adquirido un cable de impresora al mismo tiempo que
compró el ordenador, puede que el cable venga en la caja de envío del
ordenador.

Guía de referencia rápida 303
Conexión de dos monitores
PRECAUCIÓN: Antes de comenzar cualquiera de los procedimientos de esta
sección, siga las instrucciones de seguridad que se encuentran en la Guía de
información del producto.
Si ha adquirido una tarjeta gráfica que admita monitores duales, siga estas
instrucciones para conectar y activar los monitores. Las instrucciones le dirán
cómo conectar los dos monitores (cada uno de ellos con un conector VGA),
un monitor con un conector VGA y un monitor con un conector DVI, o
una TV.
AVISO: Si conecta dos monitores que tengan conectores VGA, deberá disponer del
adaptador DVI opcional para conectar el cable. Si conecta dos monitores de
panel-plano, al menos uno de ellos deberá tener un conector VGA. Si conecta una TV,
podrá conectar sólo un monitor (VGA o DVI) además de la TV.
Conexión de dos monitores con conectores VGA
1
Apague el sistema.
NOTA: Si el ordenador tiene vídeo integrado, no conecte ningún monitor al
conector de vídeo integrado. Si el conector de vídeo integrado está cubierto por
una funda, no retire la funda para conectar el monitor o el monitor no funcionará.
2
Conecte uno de los monitores al conector VGA (azul) de la parte trasera
del ordenador.
3
Conecte el otro monitor al adaptador DVI opcional y conecte el adaptador
DVI al conector DVI (blanco) de la parte trasera del ordenador.
4
Reinicie el sistema.

304 Guía de referencia rápida
Conexión de un monitor con un conector VGA y un monitor con un conector DVI
1
Apague el sistema.
2
Conecte el conector VGA del monitor al conector VGA (azul) de la parte
trasera del ordenador.
3
Conecte el conector DVI del otro monitor al conector DVI (blanco) de la
parte trasera del ordenador.
4
Reinicie el sistema.
Conexión de una TV
NOTA: Debe adquirir un cable de S-vídeo, disponible en la mayoría de los
establecimientos de electrónica de consumo, para conectar un televisor al
ordenador. No viene incluido con el ordenador.
1
Apague el sistema.
2
Conecte un extremo del cable de S-vídeo al conector de SALIDA de TV
opcional situado en la parte trasera del ordenador.
1 Adaptador DVI opcional 2 Conector DVI (blanco)
3 Conector de SALIDA de TV 4 Conector VGA (azul)
1
23
4

Guía de referencia rápida 305
3
Conecte el otro extremo del cable de S-vídeo al conector de entrada de S-
vídeo del televisor.
4
Conecte el monitor VGA o DVI.
5
Reinicie el sistema.
Cambio de la configuración de pantalla
1
Después de conectar los monitores o el televisor, encienda el ordenador.
El escritorio de Microsoft
®
Windows
®
aparece en el monitor principal.
2
Active el modo de escritorio ampliado en la configuración de pantalla. En
el modo de escritorio ampliado, puede arrastrar objetos de una pantalla a
otra, con lo que se dobla de manera eficaz la cantidad de área de trabajo
visible.
Dispositivos de protección de alimentación
Dispone de varios dispositivos para protegerse contra las fluctuaciones y fallos
de la alimentación:
• Protectores contra sobrevoltajes
• Acondicionadores de línea
• Sistemas de alimentación ininterrumpida (SAI)
Protectores contra sobrevoltajes
Los protectores contra sobrevoltajes y las cajas de enchufes equipadas con
protección contra sobrevoltaje ayudan a evitar daños en el ordenador
causados por los picos de voltaje que se puedan producir durante tormentas
eléctricas o tras interrupciones eléctricas. Algunos fabricantes de protectores
contra sobrevoltajes incluyen cobertura de garantía para determinados tipos
de daños. Lea atentamente la garantía del dispositivo al elegir un protector
contra sobrevoltajes. Un dispositivo con un rango de julios más alto ofrece
mayor protección. Compare los rangos de julios para determinar la eficacia
relativa de los distintos dispositivos.
AVISO: La mayoría de los protectores contra sobrevoltajes no protegen contra las
fluctuaciones de alimentación o los cortes de electricidad causados por descargas
de rayos cercanas. Si se produce una descarga en su zona, desconecte la línea
telefónica de la roseta del teléfono y desconecte el ordenador de la toma de
corriente.

306 Guía de referencia rápida
Muchos protectores contra sobrevoltaje tienen una roseta para protección del
módem. Consulte la documentación del protector contra sobrevoltajes para
obtener instrucciones sobre conexiones de módem.
AVISO: No todos los protectores contra sobrevoltajes ofrecen protección al
adaptador de red. Desconecte el cable de red de la toma de red de pared durante
las tormentas eléctricas.
Acondicionadores de línea
AVISO: Los acondicionadores de línea no protegen contra las interrupciones del
suministro eléctrico.
Los acondicionadores de línea están diseñados para mantener el voltaje de
corriente alterna a un nivel cuasi constante.
Sistemas de alimentación ininterrumpida
AVISO: El corte del suministro eléctrico mientras los datos se estén guardando en
la unidad de disco duro podría causar la pérdida de los datos o daños en los
archivos.
NOTA: Para garantizar un tiempo máximo de funcionamiento de la batería, conecte
sólo un ordenador al SAI. Conecte los demás dispositivos, caso de una impresora, a
una caja de enchufes independiente que ofrezca protección contra sobrevoltajes.
Una SAI protege contra las fluctuaciones e interrupciones de la electricidad.
Los dispositivos SAI contienen una batería que proporciona alimentación
temporal a los dispositivos a ellos conectados cuando la alimentación de CA
se interrumpe. La batería se carga mientras haya alimentación de CA.
Consulte la documentación del fabricante de SAI para obtener información
acerca del tiempo de funcionamiento de la batería y para asegurarse de que el
dispositivo esté aprobado por Underwriters Laboratories (UL).

Guía de referencia rápida 307
Ordenador de sobremesa
Vista anterior
1 Conectores
USB 2.0 (2)
Utilice los conectores USB para los dispositivos que conecte
ocasionalmente, como palancas de mando o cámaras, o para
dispositivos USB de arranque (consulte el apartado
“Opciones de la Configuración del sistema” en la Guía
del usuario en línea para obtener más información sobre
cómo arrancar desde un dispositivo USB). Se recomienda
la utilización de los conectores USB posteriores para los
dispositivos que suelen permanecer siempre conectados
como, por ejemplo, impresoras y teclados.
2 Indicador de
actividad de la
unidad
El indicador de actividad de la unidad se enciende
cuando el ordenador lee o escribe datos en la unidad de
disco duro. El indicador también puede encenderse
cuando un dispositivo como la unidad óptica está en
funcionamiento.
3 Botón de encendido Pulse el botón de encendido para encender el ordenador.
El indicador situado en el centro de este botón señala el
estado encendido.
AVISO: Para evitar la pérdida de datos no utilice el
botón de alimentación para apagar el ordenador. En
su lugar, apague el ordenador mediante el sistema
operativo.
89
3
5
1
4610
2
11 7

308 Guía de referencia rápida
4 Placa de
identificación de
Dell
Esta placa puede girarse de modo que esté orientada
igual que su ordenador. Para girar la placa, coloque los
dedos alrededor de la placa, presione con fuerza y gírela.
También puede girarla utilizando la ranura que hay cerca
de la parte inferior de la placa.
5 Indicador de
alimentación
El indicador de alimentación se ilumina y parpadea o
permanece encendido para indicar estados diferentes:
• Sin luz: el ordenador está apagado.
• Verde sólido: el ordenador se encuentra en un estado de
funcionamiento normal.
• Verde parpadeante: el ordenador se encuentra en un
modo de ahorro de energía.
• Ámbar sólido o parpadeante: consulte “Problemas de
alimentación” en la
Guía del usuario
en línea.
Para salir de un modo de ahorro de energía, pulse el
botón de encendido o utilice el teclado o el ratón si está
configurado como un dispositivo de activación en el
Administrador de dispositivos de Windows. Para obtener
más información acerca de los modos de suspensión y
cómo salir del modo de ahorro de energía, consulte la
Guía del usuario en línea.
Consulte el apartado “Indicadores de diagnóstico” en la
página 336 para ver una descripción de los códigos
luminosos que pueden ayudarle a solucionar problemas
del ordenador.
6 Indicadores de
diagnóstico
Utilice los indicadores para solucionar problemas del
ordenador basados en el código de diagnóstico. Para
obtener más información, consulte el apartado
“Indicadores de diagnóstico” en la página 336.
7 Indicador luminoso
de LAN
Este indicador señala que se ha establecido una conexión
LAN (red de área local).
8 Conectores de
micrófono y
auricular
Utilice el conector del micrófono para conectar un
micrófono para PC. En los ordenadores con tarjeta de
sonido, el conector de micrófono está en la tarjeta.
Utilice el conector de los auriculares para conectar los
auriculares y la mayoría de los altavoces.
9 Unidad de disco
flexible
Puede contener una unidad de disco flexible.
10 Unidad óptica Utilice la unidad óptica para reproducir un CD/DVD.
11 Etiqueta de servicio Utilice la etiqueta de servicio para identificar el ordenador al
acceder al sitio web Dell Support o al llamar a la asistencia.

Guía de referencia rápida 309
Vista posterior
PRECAUCIÓN: Asegúrese de que ninguno de los ventiladores de aire del sistema
estén bloqueados. Su bloqueo podría causar serios problemas termales.
1 Ranuras para
tarjetas
Acceda a los conectores de las tarjetas PCI y PCI Express
instaladas.
2 Conectores del
panel posterior
Conecte el USB, el audio y demás dispositivos en el
conector adecuado (consulte el apartado “Conectores del
panel posterior” en la página 310 para obtener más
información).
3 Conector de
alimentación
Inserte el cable de alimentación.
4 Interruptor
selector de voltaje
Para seleccionar el tipo de voltaje.
5 Anillos del
candado
Los anillos del candado sirven para conectar un dispositivo
contra robo comercialmente disponible. Los anillos del
candado le permiten asegurar la cubierta del ordenador al
chasis con un candado, evitando así el acceso no autorizado
al interior del ordenador. Para utilizar anillos del candado,
inserte un candado disponible comercialmente a través de
los anillos y, a continuación, cierre el candado.
6 Pestillo de
liberación de la
cubierta
Utilice este seguro para abrir la cubierta del ordenador.
5
1
2 3 4 6

310 Guía de referencia rápida
Conectores del panel posterior
1 Conector
paralelo
Conecte un dispositivo paralelo, como una impresora, al
conector paralelo. Si tiene una impresora USB, enchúfela a
un conector USB.
NOTA: El conector paralelo integrado se desactiva
automáticamente si el ordenador detecta una tarjeta instalada
que contiene un conector paralelo configurado en la misma
dirección. Si desea más información, consulte el apartado
“Opciones de configuración del sistema” en la Guía del
usuario en línea.
2 Indicador de
integridad de
vínculo
• Verde: existe una conexión correcta entre una red a
10 Mbps y el ordenador.
• Naranja: existe una conexión correcta entre una red a
100 Mbps y el ordenador.
• Amarillo: existe una conexión correcta entre una red a 1 Gb
(o 1.000 Mbps) y el ordenador.
• Apagado: el ordenador no detecta una conexión física con
la red.
13
98 7
5
6
24

Guía de referencia rápida 311
3 Conector del
adaptador de red
Para conectar el ordenador a una red o a un dispositivo de
banda ancha, conecte un extremo de un cable de red a un
enchufe de red o a su dispositivo de banda ancha. Conecte
el otro extremo del cable de red al conector del adaptador de
red, situado en el panel posterior del equipo. Cuando el
cable de red se haya conectado correctamente, oirá un clic.
NOTA: No enchufe un cable de teléfono al conector de red.
En los ordenadores con una tarjeta adaptadora de red, utilice
el conector de la tarjeta.
Se recomienda que utilice al menos cableado y conectores
de categoría 5 para su red. Si debe utilizar la categoría 3 para
cables, fuerce la velocidad de la red a 10 Mbps para
garantizar un funcionamiento fiable.
4 Indicador de
actividad de red
Este indicador amarillo parpadea cuando el ordenador
transmite o recibe datos de la red. Un gran volumen de
tráfico en la red puede hacer que este indicador luminoso
parezca estar continuamente encendido.
5 Conector de
salida de línea
Utilice el conector verde de salida de línea para conectar
auriculares y la mayoría de altavoces con amplificadores
integrados.
En ordenadores con tarjeta de sonido, use el conector de la
tarjeta.
6 Conector del
micrófono/línea
de entrada
Utilice el conector azul de entrada de línea para conectar un
dispositivo de grabación/reproducción como un reproductor
de casete, de CD o VCR.
Utilice el conector rosa de micrófono para conectar un
micrófono de PC para la entrada de música o de voz a un
programa de sonido o de telefonía.
En ordenadores con tarjeta de sonido, use el conector de la
tarjeta.
7 Conectores
USB 2.0 (6)
Utilice los conectores USB posteriores para los dispositivos
que suelen permanecer siempre conectados como, por
ejemplo, impresoras y teclados.
Se recomienda la utilización de los conectores USB
delanteros para los dispositivos que se conectan
ocasionalmente, como, por ejemplo, palancas de mando o
cámaras.

312 Guía de referencia rápida
Extracción de la cubierta del ordenador
PRECAUCIÓN: Antes de comenzar cualquiera de los procedimientos de esta
sección, siga las instrucciones de seguridad en la Guía de información del
producto.
PRECAUCIÓN: Para protegerse de las descargas eléctricas, desconecte el
ordenador de la toma de corriente eléctrica antes de retirar la cubierta.
1
Siga los procedimientos que se indican en el apartado “Antes de comenzar”
en la página 288.
NOTA: Asegúrese de que existe suficiente espacio para la extracción de la
cubierta.
AVISO: Asegúrese de trabajar en una superficie protegida y nivelada para evitar
arañar el ordenador o la superficie sobre la que descansa.
2
Si ha instalado un candado a través del anillo del candado en el panel
posterior, retire el candado.
3
Deslice el seguro de liberación de la cubierta hacia atrás al mismo tiempo
que levanta la cubierta.
8 Conector de
vídeo VGA
Conecte el cable VGA del monitor al conector VGA del
ordenador.
En ordenadores con tarjeta de vídeo, utilice el conector de la
tarjeta.
9 Conector serie Conecte un dispositivo serie, como un dispositivo portátil, al
puerto serie. El nombre predeterminado para el conector
serie 1 es COM1.
Si desea más información, consulte el apartado “Opciones
de configuración del sistema” en la Guía del usuario en
línea.

Guía de referencia rápida 313
4
Levante la cubierta utilizando las lengüetas de la bisagra a modo de
palanca.
5
Retire la cubierta de las lengüetas de la bisagra y colóquela sobre una
superficie suave y no abrasiva.
1 Ranura para cable de seguridad 2 Pestillo de liberación de la cubierta
3 Anillo del candado
2
1
3

314 Guía de referencia rápida
Vista interior del ordenador
PRECAUCIÓN: Antes de comenzar cualquiera de los procedimientos de esta
sección, siga las instrucciones de seguridad que se encuentran en la Guía de
información del producto.
PRECAUCIÓN: Para evitar las descargas eléctricas, desconecte el ordenador de
la toma de alimentación eléctrica antes de retirar la cubierta.
AVISO: Asegúrese de que al abrir la cubierta del ordenador no haya desconectado
inadvertidamente los cables de la placa base.
1 Compartimento de las unidades
(CD/DVD, disquete y unidad de
disco duro)
2 Fuente de alimentación
3 Tarjeta del sistema 4 Ranuras para tarjetas
5 Ensamblaje de disipador de calor 6 Panel de E/S frontal
1
2
3
4
5
6

Guía de referencia rápida 315
Componentes de la placa base
1 Conector del altavoz interno
(INT_SPKR)
2 Conector del procesador (CPU)
3 Conector de alimentación del
procesador (12VPOWER)
4 Conectores del módulo de memoria
(DIMM_1, DIMM_2)
12
5
13
3
15
17
12
4
7
14
10
11 89
16
6

316 Guía de referencia rápida
Cómo volver a colocar la cubierta del ordenador
PRECAUCIÓN: Antes de comenzar cualquiera de los procedimientos de este
apartado, siga las instrucciones de seguridad que se encuentran en la Guía de
información del producto.
1
Compruebe que todos los cables estén conectados y apártelos de forma
que no molesten.
2
Asegúrese de no dejar herramientas ni piezas adicionales dentro del
ordenador.
3
Para volver a colocar la cubierta:
a
Alinee la parte inferior de la cubierta con las lengüetas de la bisagra
situadas a lo largo del borde inferior del ordenador.
b
Haga palanca con las lengüetas de la bisagra para girar la cubierta
hacia abajo y cerrarla.
c
Coloque la cubierta en su sitio tirando del seguro de liberación de la
cubierta y, cuando la cubierta esté bien colocada, suelte el seguro.
d
Compruebe que la cubierta está colocada correctamente antes de
mover el ordenador.
5 Conectores de unidad SATA
(SATA0, SATA1)
6 Conector del panel anterior
(FRONTPANEL)
7 Conector de alimentación
(POWER)
8 Conectores de unidad SATA
(SATA2, SATA3)
9 Puente de reinicio de RTC
(RTCRST)
10 Puente de contraseña (PSWD)
11 Zócalo de la batería (BATTERY) 12 Conector de tarjeta PCI Express
x16 (SLOT1)
13 Conectores de tarjeta PCI
(SLOT2 y SLOT3)
14 Timbre interno (SPKR)
15 Conector serie/ PS/2 (PS2/SER2) 16 Conector del ventilador
(FAN_CPU)
17 Conector de la unidad de disco
flexible (FLOPPY)

Guía de referencia rápida 317
Ordenador de minitorre
Vista anterior
1 Etiqueta de servicio Utilice la etiqueta de servicio para identificar el
ordenador al acceder al sitio web Dell Support o al llamar
a la asistencia.
2 Unidad óptica Utilice la unidad óptica para reproducir un CD/DVD.
4
8
7
3
2
6
5
1
10
9

318 Guía de referencia rápida
3 Unidad de disco
flexible
Una unidad de disco flexible es opcional.
4 Indicador de
actividad de la
unidad
El indicador de actividad de la unidad se enciende
cuando el ordenador lee o escribe datos en la unidad de
disco duro. El indicador también puede encenderse
cuando un dispositivo como la unidad óptica está en
funcionamiento.
5 Conectores
USB 2.0 (2)
Utilice los conectores USB para los dispositivos que conecte
ocasionalmente, como palancas de mando o cámaras, o para
dispositivos USB de arranque (consulte el apartado
“Opciones de la Configuración del sistema” en la Guía
del usuario en línea para obtener más información sobre
cómo arrancar desde un dispositivo USB). Se recomienda
la utilización de los conectores USB posteriores para los
dispositivos que suelen permanecer siempre conectados
como, por ejemplo, impresoras y teclados.
6 Indicadores de
diagnóstico
Utilice los indicadores para solucionar problemas del
ordenador basados en el código de diagnóstico. Para
obtener más información, consulte el apartado
“Indicadores de diagnóstico” en la página 336.
7 Botón de
alimentación,
Indicador de
alimentación
Pulse el botón de encendido para encender el ordenador.
El indicador situado en el centro de este botón señala el
estado encendido.
AVISO: Para evitar la pérdida de datos no utilice el
botón de alimentación para apagar el ordenador. En
su lugar, apague el ordenador mediante el sistema
operativo.
8 Conector de
auriculares
Utilice el conector de los auriculares para conectar los
auriculares y la mayoría de los altavoces.
9 Conector del
micrófono
Utilice el conector para micrófono para conectar un
micrófono de PC para la entrada de voz o música a un
programa de sonido o de telefonía.
En los ordenadores con tarjeta de sonido, el conector de
micrófono está en la tarjeta.
10 Indicador luminoso
de LAN
Este indicador señala que se ha establecido una conexión
LAN (red de área local).

Guía de referencia rápida 319
Vista posterior
4
3
5
6
2
1

320 Guía de referencia rápida
PRECAUCIÓN: Asegúrese de que ninguno de los ventiladores de aire del sistema
estén bloqueados. Su bloqueo podría causar serios problemas termales.
Conectores del panel posterior
1 Pestillo de
liberación de la
cubierta
Este seguro le permite abrir la cubierta de su ordenador.
2 Anillos del
candado
Los anillos del candado sirven para conectar un dispositivo
contra robo comercialmente disponible. Los anillos del
candado le permiten asegurar la cubierta del ordenador al
chasis con un candado, evitando así el acceso no autorizado
al interior del ordenador. Para utilizar anillos del candado,
inserte un candado disponible comercialmente a través de
los anillos y, a continuación, cierre el candado.
3 Conector de
alimentación
Inserte el cable de alimentación.
4 Interruptor
selector de voltaje
Para seleccionar el tipo de voltaje.
5 Conectores del
panel posterior
Conecte el USB, el audio y demás dispositivos en el conector
adecuado (consulte el apartado “Conectores del panel
posterior” en la página 310 para obtener más información).
6 Ranuras para
tarjetas
Acceda a los conectores de las tarjetas PCI y PCI Express
instaladas.
1
3
98 7
5
6
24

Guía de referencia rápida 321
1 Conector
paralelo
Conecte un dispositivo paralelo, como una impresora, al
conector paralelo. Si tiene una impresora USB, enchúfela a un
conector USB.
NOTA: El conector paralelo integrado se desactiva
automáticamente si el ordenador detecta una tarjeta instalada
que contiene un conector paralelo configurado en la misma
dirección. Para obtener más información, consulte el apartado
“Opciones de configuración del sistema” en la Guía del usuario
en línea.
2 Indicador de
integridad de
vínculo
• Verde: existe una conexión correcta entre una red a 10 Mbps
y el ordenador.
• Naranja: existe una conexión correcta entre una red a
100 Mbps y el ordenador.
• Amarillo: existe una conexión correcta entre una red a 1 Gb
(o 1.000 Mbps) y el ordenador.
• Apagado: el ordenador no detecta una conexión física con la
red.
3 Conector del
adaptador de
red
Para conectar el ordenador a una red o a un dispositivo de
banda ancha, conecte un extremo de un cable de red a un
enchufe de red o a su dispositivo de banda ancha. Conecte el
otro extremo del cable de red al conector del adaptador de red,
situado en el panel posterior del equipo. Cuando el cable de
red se haya conectado correctamente, oirá un clic.
NOTA: No enchufe un cable de teléfono al conector de red.
En los ordenadores con una tarjeta adaptadora de red, utilice
el conector de la tarjeta.
Se recomienda que utilice al menos cableado y conectores de
categoría 5 para su red. Si debe utilizar la categoría 3 para
cables, fuerce la velocidad de la red a 10 Mbps para garantizar
un funcionamiento fiable.
4 Indicador de
actividad de red
Este indicador amarillo parpadea cuando el ordenador
transmite o recibe datos de la red. Un gran volumen de tráfico
en la red puede hacer que este indicador luminoso parezca
estar continuamente encendido.

322 Guía de referencia rápida
Cómo quitar la cubierta del ordenador
PRECAUCIÓN: Antes de comenzar cualquiera de los procedimientos de esta
sección, siga las instrucciones de seguridad en la Guía de información del
producto.
PRECAUCIÓN: Para protegerse de las descargas eléctricas, desconecte el
ordenador de la toma de corriente eléctrica antes de retirar la cubierta.
1
Siga los procedimientos que se indican en el apartado “Antes de comenzar”
en la página 288.
NOTA: Asegúrese de que existe suficiente espacio para la extracción de la
cubierta.
AVISO: Asegúrese de trabajar en una superficie protegida y nivelada para evitar
arañar el ordenador o la superficie sobre la que descansa.
5 Conector de
salida de línea
Utilice el conector verde de salida de línea para conectar
auriculares y la mayoría de altavoces con amplificadores
integrados.
En ordenadores con tarjeta de sonido, use el conector de la
tarjeta.
6 Conector del
micrófono/línea
de entrada
Utilice el conector de entrada de línea azul y rosa para
conectar un dispositivo de grabación/reproducción como un
reproductor de casete, de CD o VCR; o un micrófono para PC.
7 Conectores
USB 2.0 (6)
Utilice los conectores USB posteriores para los dispositivos
que suelen permanecer siempre conectados como, por
ejemplo, impresoras y teclados.
Se recomienda la utilización de los conectores USB delanteros
para los dispositivos que se conectan ocasionalmente, como,
por ejemplo, palancas de mando o cámaras.
8 Conector de
vídeo VGA
Conecte el cable VGA del monitor al conector VGA del
ordenador.
En ordenadores con tarjeta de vídeo, utilice el conector de la
tarjeta.
9 Conector serie Conecte un dispositivo serie, como un dispositivo portátil, al
puerto serie. El nombre predeterminado para el conector serie
1 es COM1.
Si desea más información, consulte el apartado “Opciones de
configuración del sistema” en la Guía del usuario en línea.

Guía de referencia rápida 323
2
Deje el ordenador de lado con la cubierta mirando hacia arriba.
3
Saque la cubierta del ordenador tirando de ella de la parte delantera del
ordenador y levantándola.
4
Deje la cubierta a un lado en un lugar segura.
1 Ranura para cable de seguridad 2 Pestillo de liberación de la cubierta
3 Anillo del candado
2
1
3

324 Guía de referencia rápida
Vista interior del ordenador
1 Unidad de disco flexible 2 Unidad óptica
3 Fuente de alimentación 4 Tarjeta del sistema
5 Ensamblaje de disipador de calor 6 Unidad de disco duro
1
3
4
6
2
5

Guía de referencia rápida 325
Componentes de la placa base
1 Conector del altavoz interno
(INT_SPKR)
2 Conector del procesador (CPU)
3 Conector de alimentación del
procesador (12VPOWER)
4 Conectores del módulo de
memoria (DIMM_1, DIMM_2)
5 Conectores de unidad SATA
(SATA0, SATA1)
6 Conector del panel anterior
(FRONTPANEL)
12
6
5
13
3
15
17
12
4
7
14
1011 89
16

326 Guía de referencia rápida
Cómo volver a colocar la cubierta del ordenador
PRECAUCIÓN: Antes de comenzar cualquiera de los procedimientos de este
apartado, siga las instrucciones de seguridad que se encuentran en la Guía de
información del producto.
1
Compruebe que todos los cables estén conectados y apártelos de forma
que no molesten.
2
Asegúrese de no dejar herramientas ni piezas adicionales dentro del
ordenador.
3
Para volver a colocar la cubierta:
a
Alinee la parte inferior de la cubierta con las lengüetas de la bisagra
situadas a lo largo del borde inferior del ordenador.
b
Haga palanca con las lengüetas de la bisagra para girar la cubierta
hacia abajo y cerrarla.
c
Coloque la cubierta en su sitio tirando del seguro de liberación de la
cubierta y, cuando la cubierta esté bien colocada, suelte el seguro.
d
Compruebe que la cubierta está colocada correctamente antes de
mover el ordenador.
4
Mueva el ordenador poniéndolo en posición vertical.
Solución de problemas
Dell proporciona una serie de herramientas para ayudarle en el caso de que el
ordenador no funcione como es de esperar. Para obtener la información más
actualizada sobre la solución de problemas de su ordenador, consulte el sitio
web Dell Support en support.dell.com.
7 Conector de alimentación
(POWER)
8 Conectores de unidad SATA
(SATA2, SATA3)
9 Puente de reinicio de RTC
(RTCRST)
10 Puente de contraseña (PSWD)
11 Zócalo de la batería (BATTERY) 12 Conector de tarjeta PCI Express
x16 (SLOT1)
13 Conectores de tarjeta PCI
(SLOT2 y SLOT3)
14 Timbre interno (SPKR)
15 Conector serie/ PS/2 (PS2/SER2) 16 Conector del ventilador
(FAN_CPU)
17 Conector de la unidad de disco
flexible (FLOPPY)

Guía de referencia rápida 327
Si se produce algún problema en el ordenador para el que necesite la ayuda de
Dell, escriba una descripción detallada del error, los códigos de sonido o los
patrones de los indicadores de diagnóstico, introduzca el código de servicio
rápido y la etiqueta de servicio que aparece a continuación y póngase en
contacto con Dell desde la misma ubicación que el ordenador.
Para obtener un ejemplo del código de servicio rápido y de la etiqueta de
servicio, consulte el apartado “Localización de información” en la Guía del
usuario del ordenador.
Dell Diagnostics
PRECAUCIÓN: Antes de comenzar cualquiera de los procedimientos de esta
sección, siga las instrucciones de seguridad que se encuentran en la Guía de
información del producto.
Cuándo utilizar los Dell Diagnostics (Diagnósticos Dell)
Si tiene algún problema con el ordenador, realice las comprobaciones que se
indican en la sección Bloqueos y problemas de software (consulte la Guía del
usuario en línea) y ejecute Dell Diagnostics antes de ponerse en contacto con
Dell para obtener asistencia técnica.
Se recomienda imprimir estos procesos antes de empezar.
AVISO: Los Dell Diagnostics (Diagnósticos Dell) sólo funcionan en los ordenadores
Dell™.
NOTA: El soporte multimedia Drivers and Utilities (Controladores y utilidades) es
opcional y es posible que no se entregue con el ordenador.
Consulte la “Configuración del sistema” en la Guía del usuario en línea para
revisar la información de configuración del ordenador y asegúrese de que el
dispositivo que desea probar se muestra en la Configuración del sistema y que
está activo.
Inicie los Dell Diagnostics desde la unidad de disco duro o desde el soporte
multimedia Drivers and Utilities (Controladores y utilidades).
Código de servicio urgente:
Etiqueta de servicio:

328 Guía de referencia rápida
Inicio de los Dell Diagnostics desde la unidad de disco duro
Los Dell Diagnostics se encuentran en una partición oculta de la utilidad de
diagnóstico en la unidad de disco duro.
NOTA: Si el ordenador no muestra ninguna imagen en la pantalla, póngase en
contacto con Dell.
1
Asegúrese de que el ordenador esté conectado a una toma de corriente que
funcione correctamente.
2
Encienda (o reinicie) el ordenador.
3
Cuando aparezca el logotipo de DELL™, pulse <F12> inmediatamente.
Seleccione
Diagnostics
(Diagnósticos) desde el menú de inicio y pulse
<Intro>.
NOTA: Si espera demasiado y aparece el logotipo del sistema operativo, siga
esperando hasta que vea el escritorio de Microsoft
®
Windows
®
y, a
continuación, cierre el ordenador e inténtelo de nuevo.
NOTA: Si recibe un mensaje que indica que no se ha encontrado ninguna
partición para la utilidad de diagnóstico, ejecute los Dell Diagnostics desde el
soporte multimedia Drivers and Utilities.
4
Pulse cualquier tecla para iniciar los Dell Diagnostics desde la partición de
la utilidad de diagnósticos en la unidad de disco duro.
Inicio de los Dell Diagnostics desde el soporte multimedia Drivers and Utilities
1
Introduzca el soporte multimedia
Drivers and Utilities
(Controladores y
utilidades).
2
Apague y reinicie el ordenador
Cuando aparezca el logotipo de DELL, pulse <F12>inmediatamente.
NOTA: Si espera demasiado y aparece el logotipo del sistema operativo, siga
esperando hasta que vea el escritorio de Microsoft
®
Windows
®
y, a
continuación, cierre el ordenador e inténtelo de nuevo.
NOTA: Los siguientes pasos cambian la secuencia de inicio una sola vez. La
próxima vez que inicie el ordenador, éste lo hará según los dispositivos
especificados en el programa Configuración del sistema.
3
Cuando aparezca la lista de dispositivos de inicio, resalte
CD/DVD/
CD-RW
y pulse <Intro>.
4
Seleccione la opción
Boot from CD-ROM
(Iniciar desde CD-ROM) en el
menú que aparece y pulse <Intro>.
5
Escriba
1
para iniciar el menú del CD y presione <Intro> para continuar.

Guía de referencia rápida 329
6
Seleccione
Run the 32 Bit Dell Diagnostics
(Ejecutar los Dell Diagnostics
de 32 bits) de la lista numerada. Si se muestran varias versiones, seleccione
la apropiada para su ordenador.
7
Cuando aparezca el
Main Menu
(Menú principal) de Dell Diagnostics
(Diagnósticos Dell), seleccione la prueba que desea ejecutar.
Menú principal de Dell Diagnostics (Diagnósticos Dell)
1
Una vez se hayan cargado los Dell Diagnostics y aparezca la pantalla
Main
Menu
(Menú principal), haga clic en el botón de la opción que desee.
NOTA: Se recomienda que seleccione Test System (Probar sistema) para ejecutar
una prueba completa en el ordenador.
2
Después de seleccionar la opción
Test System
(Probar sistema) del menú
principal, aparecerá el siguiente menú:
NOTA: Se recomienda que seleccione Extended Test (Prueba exhaustiva) en el
siguiente menú para realizar una comprobación más exhaustiva de los dispositivos
del ordenador.
Opción Función
Test Memory
(Probar memoria)
Ejecutar la prueba de memoria independiente
Test System
(Probar sistema)
Ejecutar los diagnósticos del sistema
Exit (Salir) Salir de los diagnósticos
Opción Función
Express Test
(Prueba rápida)
Realiza una prueba rápida de los dispositivos del sistema.
Suele tardar de 10 a 20 minutos.
Extended Test
(Prueba extendida)
Realiza una comprobación exhaustiva de los dispositivos
del sistema. Suele tardar una hora o más.
Custom Test
(Prueba personalizada)
Se utiliza para probar un dispositivo específico o para
personalizar las pruebas que se van a ejecutar.
Symptom Tree
(Árbol de síntomas)
Esta opción le permite seleccionar pruebas basadas en un
síntoma del problema que tiene. Esta opción enumera los
síntomas más comunes.

330 Guía de referencia rápida
3
Si se produce un problema durante una prueba, aparecerá un mensaje con
un código de error y una descripción del problema. Anote el código de
error y la descripción del problema y póngase en contacto con Dell.
NOTA: La etiqueta de servicio para su ordenador está situada en la parte
superior de cada pantalla de prueba. Si se pone en contacto con Dell, el
servicio de asistencia técnica le pedirá su etiqueta de servicio.
4
Si ejecuta una prueba desde la opción
Custom Test
(Prueba personalizada)
o Symptom Tree (Árbol de síntomas), haga clic en la ficha correspondiente
que se describe en la tabla siguiente para obtener más información.
5
Cuando las pruebas hayan terminado, cierre la pantalla de la prueba para
volver a la pantalla
Main
Menu
(Menú principal). Para salir de Dell
Diagnostics y reiniciar el ordenador, cierre la pantalla
Main Menu
(Menú
principal).
6
Retire el soporte multimedia
Drivers and Utilities
(Controladores y
utilidades) de Dell
(si corresponde).
Ficha Función
Results (Resultados) Muestra el resultado de la prueba y las condiciones de error
encontradas.
Errors (Errores) Muestra las condiciones de error encontradas, los códigos
de error y la descripción del problema.
Help (Ayuda) Describe la prueba y puede indicar los requisitos para
ejecutarla.
Configuration
(Configuración)
Muestra la configuración de hardware del dispositivo
seleccionado.
Dell Diagnostics obtiene la información de configuración
de todos los dispositivos a partir de la configuración del
sistema, la memoria y varias pruebas internas, y la muestra
en la lista de dispositivos del panel izquierdo de la pantalla.
La lista de dispositivos puede que no muestre los nombres
de todos los componentes instalados en el ordenador o de
todos los dispositivos conectados al ordenador.
Parameters
(Parámetros)
Permite personalizar la prueba cambiando su
configuración.

Guía de referencia rápida 331
Indicadores de alimentación
PRECAUCIÓN: Antes de comenzar cualquiera de los procedimientos de esta
sección, siga las instrucciones de seguridad que se encuentran en la Guía de
información del producto.
El indicador del botón de alimentación (LED bicolor) ubicado en la parte
anterior del ordenador se ilumina y parpadea o permanece encendido para
indicar diferentes estados:
• Si el indicador de alimentación está apagado, el ordenador está apagado o
no recibe alimentación.
– Coloque de nuevo el cable de alimentación en el conector de
alimentación de la parte posterior del ordenador y en la toma de
corriente.
– Si el ordenador está enchufado a una caja de enchufes, asegúrese de
que la caja de enchufes esté enchufada a una toma de corriente y que
esté encendida. Además, puentee los dispositivos de protección de la
alimentación, las regletas de enchufes y los alargadores de
alimentación para comprobar que el ordenador se enciende
correctamente.
– Asegúrese de que la toma de alimentación eléctrica funciona; para
ello, pruébela con otro dispositivo, por ejemplo, una lámpara.
• Si el indicador de alimentación se ilumina en verde y el ordenador no
responde:
– Asegúrese de que la pantalla está conectada y encendida.
– Si la pantalla está conectada y encendida, consulte el apartado
“Códigos de sonido” en la página 332.
• Si el indicador de alimentación se ilumina de color verde y parpadea, el
ordenador está en modo de espera. Pulse una tecla del teclado, mueva el
ratón o pulse el botón de alimentación para reanudar la operación normal.
Si la luz de alimentación es verde y el ordenador no responde:
– Asegúrese de que la pantalla está conectada y encendida.
– Si la pantalla está conectada y encendida, consulte el apartado
“Códigos de sonido” en la página 332.

332 Guía de referencia rápida
• Si el indicador de alimentación está en ámbar, el ordenador estará
recibiendo corriente eléctrica pero puede que un dispositivo no funcione
bien o no esté correctamente instalado.
– Retire y vuelva a instalar los módulos de memoria.
– Extraiga las tarjetas y vuelva a instalarlas.
– Extraiga la tarjeta gráfica y vuelva a instalarla, si procede.
• Si el indicador de alimentación parpadea en ámbar, puede que haya algún
problema de alimentación o que falle un dispositivo interno.
– Asegúrese de que todos los cables de alimentación estén firmemente
conectados a la placa base (consulte el apartado “Componentes de la
placa base” en la página 315).
– Asegúrese de que el cable de alimentación principal y el cable del
panel anterior están firmemente conectados a la placa base (consulte
el apartado “Componentes de la placa base” en la página 315).
Códigos de sonido
Su ordenador puede emitir una serie de sonidos durante el inicio si el monitor
no puede mostrar errores o problemas.Esta serie de sonidos, denominada
códigos de sonido, identifica un problema. Por ejemplo, el código de sonido 1-
3-1 (un código de sonido posible) consiste en un sonido, una serie de tres
sonidos y, a continuación, otro sonido. Este código de sonido indica que el
equipo ha detectado un problema de memoria.
El hecho de volver a colocar los módulos de memoria puede corregir los
errores de código de sonido siguientes. Si el problema continua, póngase en
contacto con Dell para obtener asistencia técnica (consulte el apartado
“Cómo ponerse en contacto con Dell”
en la
Guía del usuario
).
Si se le presenta alguno de los siguientes errores de códigos de sonido,
consulte el apartado “Cómo ponerse en contacto con Dell”
en la
Guía del
usuario
para obtener instrucciones sobre cómo obtener asistencia técnica.
Código Causa
1-3-1 a
2-4-4
La memoria no se está utilizando o identificando adecuadamente
4-3-1 Fallo de memoria por encima de la dirección 0FFFFh

Guía de referencia rápida 333
Código Causa
1-1-2 Fallo en un registro del microprocesador
1-1-3 Fallo de lectura/escritura NVRAM
1-1-4 Fallo en la suma de comprobación del BIOS en ROM
1-2-1 Error del temporizador de intervalos programable
1-2-2 Fallo en la inicialización de DMA
1-2-3 Fallo de lectura /escritura en el registro de páginas del sistema de DMA
1-3 Fallo en la prueba de la memoria de vídeo
1-3-1 a
2-4-4
La memoria no se está utilizando o identificando adecuadamente
3-1-1 Fallo en el registro DMA esclavo
3-1-2 Fallo en el registro del DMA maestro
3-1-3 Fallo en el registro maestro de enmascaramiento de interrupciones.
3-1-4 Fallo en el registro esclavo de enmascaramiento de interrupciones
3-2-2 Fallo en la carga del vector de interrupciones
3-2-4 Fallo de la prueba de la controladora del teclado
3-3-1 Pérdida de alimentación para la NVRAM
3-3-2 Configuración de la NVRAM no válida
3-3-4 Fallo en la prueba de la memoria de vídeo
3-4-1 Fallo de inicio de la pantalla
3-4-2 Fallo en el retrazo de la pantalla
3-4-3 Fallo de búsqueda de ROM de vídeo
4-2-1 No hay impulsos del temporizador
4-2-2 Fallo de suspensión del trabajo
4-2-3 Error Gate A20
4-2-4 Interrupción inesperada en modo protegido
4-3-1 Fallo de memoria por encima de la dirección 0FFFFh
4-3-3 Fallo en el contador del chip del temporizador 2
4-3-4 El reloj de hora se ha parado
4-4-1 Fallo en la prueba de un puerto serie o paralelo
4-4-2 Falló la descompresión de los datos hacia la memoria duplicada
4-4-3 Fallo en la prueba del coprocesador matemático
4-4-4 Fallo de la prueba de la memoria caché

334 Guía de referencia rápida
Mensajes del sistema
NOTA: Si el mensaje que ha recibido no aparece en la lista de la tabla, consulte la
documentación para el sistema operativo o programa que se estaba ejecutando
cuando apareció el mensaje.
ALERT! PREVIOUS ATTEMPTS AT BOOTING THIS SYSTEM HAVE FAILED AT
CHECKPOINT [NNNN ] (¡ALERTA! LOS INTENTOS ANTERIORES DE INICIAR ESTE
SISTEMA NO HAN SIDO SATISFACTORIOS EN EL PUNTO DE CONTROL [NNNN]).
P
ARA OBTENER AYUDA ACERCA DE LA RESOLUCIÓN DE ESTE PROBLEMA, ANOTE
ESTE PUNTO DE CONTROL Y PÓNGASE EN CONTACTO CON EL SOPORTE TÉCNICO
DE DELL: The computer failed to complete the boot routine three consecutive
times for the same error (el ordenador no ha podido completar la rutina de inicio
tres veces consecutivas por el mismo error).
CMOS CHECKSUM ERROR (ERROR DE SUMA DE COMPROBACIÓN DE CMOS):
Possible motherboard failure or RTC battery low (Posible fallo de la placa base o
batería baja de RTC). Cambie la batería
CPU FAN FAILURE (FALLO DEL VENTILADOR DE LA UNIDAD CENTRAL DE
PROCESAMIENTO): CPU fan failure (Fallo del ventilador de la Unidad central de
procesamiento). Cambie el ventilador de la UCP.
DISKETTE DRIVE 0 SEEK FAILURE (FALLO DE BÚSQUEDA EN UNIDAD DE DISCO
FLEXIBLE 0): A cable may be loose, or the computer configuration information
may not match the hardware configuration (Un cable puede estar suelto, o la
información de configuración del equipo puede no coincidir con la configuración
del hardware). Compruebe las conexiones de cable.
DISKETTE READ FAILURE (EL DISQUETE NO SE PUEDE LEER): The floppy disk
may be defective or a cable may be loose (El disco flexible puede estar defectuoso o
un cable puede estar suelto). Replace the floppy disk/check for a loose cable
connection (Sustituya el disco flexible/compruebe si hay una conexión de cable
suelta).
HARD-DISK DRIVE FAILURE (FALLO DE LA UNIDAD DE DISCO DURO): Possible
hard disk drive failure during HDD POST (Posible fallo de la unidad de disco duro
durante la autoprueba de encendido de la unidad de disco duro). Compruebe los
cables/cambie los discos duros.

Guía de referencia rápida 335
HARD-DISK DRIVE READ FAILURE (FALLO DE LECTURA DE LA UNIDAD DE DISCO
DURO): Possible HDD failure during HDD boot test (Posible fallo de la unidad de
disco duro durante la prueba de arranque de la unidad de disco duro).
KEYBOARD FAILURE (ERROR DE TECLADO): Keyboard failure or keyboard cable
loose (Fallo del teclado o cable del teclado suelto).
NO BOOT DEVICE AVAILABLE (NO HAY NINGÚN DISPOSITIVO DE INICIO
DISPONIBLE): The system cannot detect a bootable device or partition (El sistema
no puede detectar un dispositivo de inicio o una partición).
• If the floppy drive is your boot device, ensure that the cables are connected and
that a bootable floppy disk is in the drive (Si la unidad de disco flexible es el
dispositivo de inicio, asegúrese de que los cables estén conectados y que el
disquete de inicio esté en la unidad).
• Si la unidad de disco duro es el dispositivo de inicio, asegúrese de que los cables
estén conectados y que la unidad esté instalada correctamente y dividida en
particiones como un dispositivo de inicio.
• Ejecute el programa de configuración del sistema y asegúrese de que la
información de la secuencia de inicio es correcta.
NO TIMER TICK INTERRUPT (NO HAY INTERRUPCIÓN DE TIC DE
TEMPORIZADOR): A chip on the system board might be malfunctioning or
motherboard failure (Un chip de la placa base podría estar fallando o fallo de la
placa base).
NON-SYSTEM DISK OR DISK ERROR (NO ES DISCO DEL SISTEMA O ERROR DE
DISCO): Cambie el disco flexible por uno que contenga un sistema operativo
ejecutable o retire el disco flexible de la unidad A y reinicie el ordenador.
NOT A BOOT DISKETTE (NO ES UN DISQUETE DE INICIALIZACIÓN): Inserte un
disquete de inicio y reinicie el ordenador.
USB OVER CURRENT ERROR (ERROR DE SOBRECORRIENTE EN USB): Disconnect
the USB device (Desconecte el dispositivo USB). Use an external power source for
the USB device (Utilice una fuente de energía externa para el dispositivo USB).

336 Guía de referencia rápida
Indicadores de diagnóstico
PRECAUCIÓN: Antes de comenzar cualquiera de los procedimientos de este
apartado, siga las instrucciones de seguridad que se encuentran en la Guía de
información del producto.
Para ayudarle a solucionar un problema con el ordenador, el ordenador cuenta
con cuatro indicadores denominados 1, 2, 3 y 4 situados en el panel anterior o
posterior. Estos indicadores pueden estar apagados o ser de color verde. Cuando
el equipo se inicia normalmente, los patrones o códigos de los indicadores
cambian a medida que avanza el proceso de arranque. Cuando el equipo se
inicia normalmente, los patrones o códigos de los indicadores cambian a
medida que avanza el proceso de arranque. Si la parte de la POST del arranque
del sistema se completa correctamente, los cuatro indicadores luminosos
emiten una luz verde fija. En el caso de que se produzcan errores durante el
proceso de la POST, el patrón mostrado en los indicadores LED puede ayudarle
a identificar la fase del proceso en la que se ha detenido el equipo.
NOTA: La orientación de las luces de diagnóstico puede variar en función del tipo
de sistema. Los indicadores de diagnóstico pueden estar en posición vertical u
horizontal.
NOTICE - HARD DRIVE SELF MONITORING SYSTEM HAS REPORTED THAT A
PARAMETER HAS EXCEEDED ITS NORMAL OPERATING RANGE (AVISO - UNIDAD
DE DISCO DURO EL SISTEMA DE SUPERVISIÓN AUTOMÁTICO HA
INFORMADO DE QUE UN PARÁMETRO HA SUPERADO SU RANGO OPERATIVO
NORMAL). DELL RECOMMENDS THAT YOU BACK UP YOUR DATA REGULARLY
(D
ELL RECOMIENDA QUE REGULARMENTE HAGA UNA COPIA DE SEGURIDAD DE
LOS DATOS). A PARAMETER OUT OF RANGE MAY OR MAY NOT INDICATE A
POTENTIAL HARD DRIVE PROBLEM (UN PARÁMETRO FUERA DE RANGO PUEDE O
NO INDICAR UN PROBLEMA POTENCIAL EN LA UNIDAD DE DISCO DURO). Error
de S.M.A.R.T, posible fallo de la unidad de disco duro. Esta función puede estar
activada o desactivada en la configuración de BIOS.
Patrón de luz Descripción del problema Resolución sugerida
El ordenador está apagado o se
ha producido un error de pre-
BIOS.
Los indicadores de diagnóstico
no permanecen encendidos
después de que el ordenador se
inicie correctamente en el
sistema operativo.
Enchufe el ordenador a una
toma de alimentación eléctrica
en funcionamiento y pulse el
botón de alimentación.

Guía de referencia rápida 337
Se ha producido un posible
fallo del BIOS; el ordenador se
encuentra en modo de
recuperación.
Ejecute la Utilidad de
recuperación de BIOS, espere a
que acabe la recuperación y
reinicie el ordenador.
Se ha producido un posible
fallo en el procesador.
Vuelva a instalar el procesador y
reinicie el ordenador.
Se han detectado los módulos
de memoria, pero se ha
producido un error de
memoria.
• Si tiene instalado un módulo
de memoria, vuelva a instalarlo
y, a continuación, reinicie el
ordenador. (consulte la
Guía
del usuario
en línea para
obtener instrucciones sobre
cómo quitar e instalar módulos
de memoria).
• Si tiene instalados dos o más
módulos de memoria,
extráigalos, vuelva a instalar
uno y reinicie el ordenador. Si
el equipo se inicia
normalmente, vuelva a instalar
otro módulo. Prosiga de este
modo hasta que identifique el
módulo anómalo o hasta que
haya vuelto a instalar todos los
módulos sin errores.
• Si es posible, instale una
memoria del mismo tipo que
funcione correctamente en el
ordenador.
• Si el problema persiste,
póngase en contacto con Dell
.
Patrón de luz Descripción del problema Resolución sugerida

338 Guía de referencia rápida
Se ha producido un posible
fallo de la tarjeta de gráficos.
• Si el ordenador incluye una
tarjeta gráfica, extráigala,
vuelta a instalarla y, a
continuación, reinicie el
ordenador.
• Si persiste el problema, instale
una tarjeta de gráficos que
sepa que funcione y reinicie el
ordenador.
• Si no se soluciona el problema
o el ordenador tiene gráficos
integrados,
póngase en
contacto con Dell
.
Se ha producido un error de
unidad de disco flexible o de
disco duro.
Vuelva a asentar todos los cables
de alimentación y de datos y
reinicie el ordenador.
Se ha producido un fallo de
USB.
Vuelva a instalar todos los
dispositivos USB, compruebe las
conexiones por cable y reinicie el
ordenador.
Patrón de luz Descripción del problema Resolución sugerida

Guía de referencia rápida 339
No se detectan módulos de
memoria.
• Si tiene instalado un módulo
de memoria, vuelva a instalarlo
y, a continuación, reinicie el
ordenador. Consulte la
Guía
del usuario
en línea para
obtener instrucciones sobre
cómo quitar e instalar módulos
de memoria.
• Si tiene instalados dos o más
módulos de memoria,
extráigalos, vuelva a instalar
uno y reinicie el ordenador. Si
el equipo se inicia
normalmente, vuelva a instalar
otro módulo. Prosiga de este
modo hasta que identifique el
módulo anómalo o hasta que
haya vuelto a instalar todos los
módulos sin errores.
• Si es posible, instale una
memoria del mismo tipo que
funcione correctamente en el
ordenador.
• Si el problema persiste,
póngase en contacto con Dell
.
Se han detectado los módulos
de memoria, pero existe un
error de configuración del
sistema o de compatibilidad.
• Asegúrese de que no existen
requisitos especiales para la
colocación del conector o del
módulo de memoria
.
• Asegúrese de que los
módulos
de memoria
que va a instalar
son compatibles con el
ordenador.
• Si el problema no desaparece,
póngase en contacto con Dell.
Patrón de luz Descripción del problema Resolución sugerida

340 Guía de referencia rápida
Cómo borrar contraseñas olvidadas
PRECAUCIÓN: Antes de comenzar cualquiera de los procedimientos de este
apartado, siga las instrucciones de seguridad que se encuentran en la Guía de
información del producto.
1
Siga los procedimientos que se indican en el apartado “Antes de comenzar”
en la página 288.
2
Quite la cubierta del ordenador (consulte el apartado “Cómo quitar la
cubierta del ordenador” en la página 322).
3
Localice el puente de contraseña de 2 patas (PSWD) situado en la placa
base. De manera predeterminada, la pata 1 y la pata 2 deberían estar
conectadas. Tendrá que retirar el puente e iniciar el sistema como se
explica a continuación.
4
Retire el puente.
Se ha producido un fallo.
Este patrón también se
muestra cuando entra en la
configuración del sistema y
puede que no indique un
problema.
• Compruebe que los cables de
las unidades de disco duro y de
la unidad óptica están
conectados correctamente a la
placa base.
• Compruebe el mensaje del
ordenador que aparece en la
pantalla del monitor.
• Si el problema no desaparece,
póngase en contacto con Dell.
Cuando se ha completado la
POST, los cuatro indicadores
verdes se encienden unos
segundos antes de apagarse
para indicar un
funcionamiento normal.
Ninguna.
Patrón de luz Descripción del problema Resolución sugerida

Guía de referencia rápida 341
5
Vuelva a colocar la cubierta del ordenador (consulte el apartado “Cómo
volver a colocar la cubierta del ordenador” en la página 316).
AVISO: Para conectar un cable de red, conecte primero el cable al dispositivo de
red y, a continuación, enchúfelo al ordenador.
6
Conecte el ordenador y los dispositivos a las tomas de corriente y
enciéndalos.
7
Después de que aparezca el escritorio de Microsoft
®
Windows
®
en el
ordenador, apague el ordenador (consulte el apartado “Cómo apagar el
ordenador” en la página 290).
8
Apague el monitor y desconéctelo de la toma de alimentación eléctrica.
9
Desconecte el cable de alimentación del ordenador de la toma de
alimentación eléctrica y pulse el botón de alimentación para conectar a
tierra la placa base.
10
Abra la cubierta de la PC.
11
Localice el puente de contraseña de 2 patas (PSWD) en la placa base y
conecte el puente para volver a activar la función de contraseña.
12
Vuelva a colocar la cubierta del ordenador (consulte el apartado “Cómo
volver a colocar la cubierta del ordenador” en la página 316).

342 Guía de referencia rápida
AVISO: Para conectar un cable de red, primero conecte el cable a la toma de red
de la pared y, después, al ordenador.
13
Conecte el ordenador y los dispositivos a las tomas de corriente y
enciéndalos.
NOTA: Este procedimiento permite activar la función de contraseña. Cuando
entre
en la configuración del sistema (consulte el apartado “Cómo entrar en la
configuración del sistema” de la Guía del usuario), las opciones de contraseña del
sistema y de contraseña de administrador aparecen con el valor Not Set (No
establecida), lo que significa que la función de contraseña está activada pero no se
ha asignado ninguna contraseña.
14
Asigne una nueva contraseña del sistema y/o de administrador.
Borrado de la configuración de CMOS
PRECAUCIÓN: Antes de comenzar cualquiera de los procedimientos de este
apartado, siga las instrucciones de seguridad que se encuentran en la Guía de
información del producto.
1
Siga los procedimientos que se indican en el apartado “Antes de comenzar”
en la página 288.
NOTA: El ordenador debe estar desconectado de la toma de corriente para
borrar la configuración de CMOS.
2
Quite la cubierta del ordenador (consulte el apartado “Cómo quitar la
cubierta del ordenador” en la página 322).
3
Retire la cubierta del sistema.
4
Restablezca la configuración actual de la memoria CMOS:
a
Localice los puentes de contraseña (PSWD) y CMOS (RTCRST) en
la placa base (consulte el apartado “Cómo borrar contraseñas
olvidadas” en la página 340).
b
Quite el conector del puente de contraseña de sus patillas.
c
Coloque el conector del puente de contraseña en las patas RTCRST y
espere unos cinco segundos.
d
Quite el conector del puente de las patas de RTCRST y colóquelo de
nuevo en las patas de la contraseña.
5
Vuelva a colocar la cubierta del ordenador (consulte el apartado “Cómo
volver a colocar la cubierta del ordenador” en la página 316).

Guía de referencia rápida 343
AVISO: Para conectar un cable de red, conecte primero el cable al dispositivo o
puerto de red y, a continuación, enchúfelo al ordenador.
6
Conecte el ordenador y los dispositivos a las tomas de corriente y
enciéndalos.
Actualización flash del BIOS
Es posible que sea necesario actualizar el BIOS cuando haya una
actualización disponible o cuando se cambie la placa base.
1
Encienda el ordenador.
2
Localice el archivo de actualización del BIOS para el ordenador situado en
el sitio web Dell Support en
support.dell.com
.
3
Haga clic en
Download Now
(Descargar) ahora para descargar el archivo.
4
Si aparece la ventana
Export Compliance Disclaimer
(Renuncia de
cumplimiento para exportación), haga clic en
Yes, I Accept this
Agreement
(Sí, acepto este acuerdo).
Aparece la ventana
File Download
(Descarga de archivos).
5
Haga clic en
Save this program to disk
(Guardar este programa en el disco)
y, a continuación, haga clic en
OK
(Aceptar).
Aparece la ventana
Save In
(Guardar en).
6
Haga clic en la flecha hacia abajo para ver el menú
Save In
(Guardar en),
seleccione
Desktop
(Escritorio) y, a continuación, haga clic en
Save
(Guardar).
El archivo se descarga en el escritorio.
7
Haga clic en Close (Cerrar) cuando aparezca la ventana
Download
Complete
(Descarga completa).
Aparecerá un icono de archivo en el escritorio que se titula igual que el
archivo de actualización BIOS que se ha descargado.
8
Haga doble clic en el icono de archivo situado en el escritorio y siga las
instrucciones que aparecen en la pantalla.

344 Guía de referencia rápida

Índice 345
Índice
A
alimentación
acondicionadores de línea
botón, 318
dispositivos de protección
indicador, 308
protector contra sobrevoltajes
UPS
archivo de ayuda
Centro de ayuda y soporte técnico
de Windows, 287
Asistente para configuración de
red, 294
asistentes
Asistente para configuración de
red, 294
C
CD
sistema operativo, 287
CD Operating System (Sistema
operativo), 287
Centro de ayuda y soporte
técnico, 287
códigos de sonido, 332
conexión a Internet
acerca de, 295
configuración, 296
opciones, 295
configuración de CMOS
borrar, 342
contraseña
borrar, 340
puente, 340
Contrato de licencia del usuario
final, 284
cubierta
quitar, 312, 322
volver a colocar, 316, 326
D
Dell Diagnostics, 327
diagnósticos
códigos de sonido, 332
Dell, 327
documentación
Contrato de licencia del usuario
final, 284
en línea, 286
ergonomía, 284
garantía, 284
Guía de información del
producto, 284
Guía del usuario, 284
Referencia rápida, 284

346 Índice
reglamentaria, 284
seguridad, 284
E
equipo
componentes del interior, 324
vista interior, 324
etiqueta de servicio, 285, 308,
317
etiquetas
etiqueta de servicio, 285, 308,
317
Microsoft Windows, 285
G
Guía de información del
producto, 284
Guía del usuario, 284
H
hardware
códigos de sonido, 332
Dell Diagnostics, 327
I
impresora
cable, 302
conectar, 293
conexión, 302
configurar, 293, 302
indicadores
alimentación, 308
información reglamentaria, 284
información sobre
ergonomía, 284
información sobre la
garantía, 284
Iniciar los Dell Diagnostics
desde el CD Drivers and
Utilities, 328
Iniciar los Dell Diagnostics
desde la unidad de disco
duro, 328
instalación de piezas
antes de comenzar, 289
instalar piezas
apagar el ordenador, 290
herramientas recomendadas, 290
instrucciones de seguridad, 284
M
mensajes de error
códigos de sonido, 332
monitor
conectar dos, 303-304
conectar DVI, 303-304
conectar TV, 303-304
conectar VGA, 303-304

Índice 347
configuración de pantalla, 305
modo de clonación, 305
modo de escritorio ampliado, 305
O
ordenador
códigos de sonido, 332
componentes internos, 314
vista interior, 314
P
placa base, 315, 325
placa base. Consulte placa base
placa base. Véase placa base
problemas
códigos de sonido, 332
Dell Diagnostics, 327
R
red
Asistente para configuración de
red, 294
ResourceCD
Dell Diagnostics, 327
S
S.M.A.R.T, 336
sistema de alimentación
ininterrumpida. Consulte
UPS
sistema operativo
volver a instalar, 287
sitio web de asistencia
técnica, 286
sitio web de asistencia técnica de
Dell, 286
solución de problemas
Centro de ayuda y soporte
técnico, 287
Dell Diagnostics, 327
T
TV
conectar al equipo, 303
conectar al ordenador, 304
U
UPS
W
Windows XP
Asistente para configuración de
red, 294
Centro de ayuda y soporte
técnico, 287
volver a instalar, 287

348 Índice

www.dell.com | support.dell.com
Dell™ OptiPlex™ 330
Hızlı Başvuru Kılavuzu
Modeller DCSM ve DCNE

Notlar, Uyarılar ve Dikkatler
NOT:
NOT, bilgisayarınızı daha iyi kullanmanıza yardımcı olacak önemli bir bilgi
verir:
DİKKAT:
DİKKAT, bir donanım arızası veya veri kaybı olasılığını belirtir ve sorunu
nasıl önleyeceğinizi açıklar.
UYARI:
UYARI olası mal hasarı, kişisel hasar veya ölümü belirtir.
____________________
Bu belgedeki bilgiler önceden haber verilmeden değiştirilebilir.
© 2007 Dell Inc. Tüm hakları saklıdır.
Bu belgenin Dell Inc. şirketinin yazılı izni olmadan herhangi bir şekilde çoğaltılması kesinlikle
yasaktır.
Bu metinde kullanılan ticari markalar: Dell, DELL logosu, Inspiron, Dell Precision, Dimension,
OptiPlex, Latitude, PowerEdge, PowerVault, PowerApp ve Dell OpenManage Dell Inc.'in ticari
markalarıdır; Intel, Pentium ve Celeron Intel Corporation ticari markalarıdır; Microsoft ve Windows
Microsoft Corporation ticari markalarıdır.
Bu belgede, marka ve adların sahiplerine ya da ürünlerine atıfta bulunmak için başka ticari marka ve
ticari adlar kullanılabilir. Dell Inc. kendine ait olanların dışındaki ticari markalar ve ticari isimlerle
ilgili hiçbir mülkiyet hakkı olmadığını beyan eder.
Modeller DCSM ve DCNE
Eylül 2007 P/N DU086 Rev. A00

İçerik
351
İçerik
Bilgi Bulma
. . . . . . . . . . . . . . . . . . . . . . . . . .
353
Başlamadan Önce
. . . . . . . . . . . . . . . . . . . . . .
358
Bilgisayarınızın İçinde Çalışmaya Başlamadan
Önce
. . . . . . . . . . . . . . . . . . . . . . . . . . .
358
Parçaları Takma ve Çıkarma
. . . . . . . . . . . . . . . .
359
Bilgisayarınızı Ayarlama
. . . . . . . . . . . . . . . . . .
360
Bilgisayarı Dolap İçine Kurma
. . . . . . . . . . . . . .
360
Ev ve Ofis Ağı Kurma
. . . . . . . . . . . . . . . . . . . .
362
Ağ Adaptörü Bağlama
. . . . . . . . . . . . . . . . . .
362
Ağ Kurulumu
. . . . . . . . . . . . . . . . . . . . . . .
363
Internet bağlantısı
. . . . . . . . . . . . . . . . . . . . . .
364
Bilgileri Yeni Bilgisayara Taşıma
. . . . . . . . . . . . . .
366
Yazıcı Kurma
. . . . . . . . . . . . . . . . . . . . . . . . .
370
İki Monitörü Bağlama
. . . . . . . . . . . . . . . . . . . .
370
Güç Koruma Aygıtları
. . . . . . . . . . . . . . . . . . . .
372
Masaüstü Bilgisayar
. . . . . . . . . . . . . . . . . . . . .
374
Önden Görünüm
. . . . . . . . . . . . . . . . . . . . .
374
Arkadan Görünüm
. . . . . . . . . . . . . . . . . . . .
376
Arka Panel Konektörleri
. . . . . . . . . . . . . . . . .
377
Bilgisayarın Kapağını Açma
. . . . . . . . . . . . . . . .
379
Bilgisayarınızın İç Görünümü
. . . . . . . . . . . . . . . .
381
Sistem Kartı Bileşenler
. . . . . . . . . . . . . . . . . . .
382
Bilgisayarın Kapağını Takma
. . . . . . . . . . . . . . . .
383

352
İçerik
Mini Tower Bilgisayar
. . . . . . . . . . . . . . . . . . . .
384
Önden Görünüm
. . . . . . . . . . . . . . . . . . . . .
384
Arkadan Görünüm
. . . . . . . . . . . . . . . . . . . .
386
Arka Panel Konektörleri
. . . . . . . . . . . . . . . . . . .
387
Bilgisayarın Kapağını Açma
. . . . . . . . . . . . . . . .
389
Bilgisayarınızın İç Görünümü
. . . . . . . . . . . . . . . .
391
Sistem Kartı Bileşenler
. . . . . . . . . . . . . . . . . . .
392
Bilgisayarın Kapağını Takma
. . . . . . . . . . . . . . . .
393
Sorun Çözme
. . . . . . . . . . . . . . . . . . . . . . . . .
394
Dell Diagnostics
. . . . . . . . . . . . . . . . . . . . . . .
394
Güç Işıkları
. . . . . . . . . . . . . . . . . . . . . . . . . .
398
Sesli Uyarı Kodları
. . . . . . . . . . . . . . . . . . . . . .
399
Sistem İletileri
. . . . . . . . . . . . . . . . . . . . . . . .
400
Tanılama Işıkları
. . . . . . . . . . . . . . . . . . . . . . .
402
Unutulan Parolaları Silme
. . . . . . . . . . . . . . . . . .
405
CMOS Ayarlarını Silme
. . . . . . . . . . . . . . . . . . .
407
BIOS Kodunu Yenileme
. . . . . . . . . . . . . . . . . . .
407
Dizin
. . . . . . . . . . . . . . . . . . . . . . . . . . . . . . .
409

Hızlı Başvuru Kılavuzu
353
Bilgi Bulma
NOT:
Bazı özellik ve ortamlar isteğe bağlı olabilir ve bilgisayarınızla birlikte
gelmeyebilir. Bazı özellik ve ortamlar belirli ülkelerde kullanılmıyor olabilir.
NOT:
Bilgisayarınızla birlikte ek bilgi gelebilir.
Ne Arıyorsunuz? Aradığınızı Burada Bulun
• Bilgisayarım için bir tanılama
programı
• Bilgisayarım için sürücüler
• Desktop System Software (DSS -
Masaüstü Sistem Yazılımı)
Drivers and Utilities CD'si
NOT:
Drivers and Utilities
CD'si isteğe bağlı
olabilir ve bilgisayarınızla birlikte verilmeyebilir.
Sürücüler bilgisayarınıza yüklenmiş
durumdadır. Sürücüleri yeniden yüklemek
(çevrimiçi Kullanım Kılavuzu'na bakın) ve Dell
Diagnostics'i çalıştırmak (bkz. "Dell
Diagnostics" Sayfa: 394) için CD'yi
kullanabilirsiniz.
CD'de bilgisayarınızdaki teknik değişikliklerle
ilgili son güncelleştirmeleri veya teknisyenler
ve deneyimli kullanıcılar için ileri teknik
referans malzemelerini içeren Benioku
dosyaları içerebilir.
NOT:
Sürücü ve belge güncelleştirmeleri
support.dell.com
web sitesinde bulunabilir.

354
Hızlı Başvuru Kılavuzu
• Temel sorun giderme bilgileri
• Dell Diagnostics nasıl çalıştırılır?
• Araçlar ve yardımcı programlar
• Yazıcı nasıl kurulur?
Hızlı Başvuru Kılavuzu
NOT:
Bu belge isteğe bağlı olabilir ve
bilgisayarınızla birlikte verilmeyebilir.
NOT:
Bu belge,
support.dell.com
Web
sitesinde PDF dosyası olarak bulunmaktadır.
• Garanti bilgileri
• Hükümler ve Koşullar (sadece
ABD)
• Güvenlik yönergeleri
• Düzenleyici bilgiler
• Ergonomi bilgileri
• Son Kullanıcı Lisans Sözleşmesi
Dell™ Ürün Bilgileri Kılavuzu
• Parçaları nasıl çıkartabilirim ve
değiştirebilirim?
• Özellikler
• Sistem ayarlarını nasıl
yapılandırabilirim?
• Sorunları nasıl giderebilirim ve
çözebilirim?
Dell OptiPlex™ 330 Kullanım Kılavuzu
Microsoft Windows Yardım ve Destek Merkezi
1
Windows Vista
Başlat düğmesi
→
Yardım ve
Destek
→
Dell User and System Guides
→
System Guides
'ı tıklatın.
2
Bilgisayarınızla ilgili
User's Guide
seçeneğini
tıklatın.
Ne Arıyorsunuz? Aradığınızı Burada Bulun

Hızlı Başvuru Kılavuzu
355
• Servis Etiketi ve Hızlı Servis Kodu
• Microsoft Windows Lisans Etiketi
Servis Etiketi ve Microsoft
®
Windows
®
Lisansı
Bu etiketler bilgisayarınızın üzerindedir.
•
support.dell.com
adresini kullanırken veya
desteğe başvuracağınız zaman bilgisayarınızı
tanıtmak için Servis Etiketini kullanın.
•Desteğe başvurduğunuzda aramanızın
yönlendirilmesi için Hızlı Servis Kodu'nu
girin.
NOT:
Artırılmış bir güvenlik önlemi olarak, yeni
tasarlanan Microsoft Windows lisans etiketinde,
etiketin çıkarılmasını zorlaştırmak için eksik bir
parça veya "delik" bulunur.
Ne Arıyorsunuz? Aradığınızı Burada Bulun

356
Hızlı Başvuru Kılavuzu
• Çözümler — Sorun giderme ipuçları
ve püf noktaları, teknik
uzmanlardan makaleler ve çevrimiçi
kurslar, sık sorulan sorular
• Topluluk — Diğer Dell
müşterileriyle çevrimiçi tartışma
• Yükseltmeler — Bellek, sabit
sürücü ve işletim sistemi gibi
bileşenler için yükseltme bilgileri
•Müşteri Hizmetleri — Iletişim
bilgileri, servis çağrısı ve sipariş
durumu, garanti ve onarım bilgileri
• Servis ve destek — Servis çağrısı
durumu ve destek geçmişi, servis
sözleşmesi, teknik destekle
çevrimiçi tartışmalar
• Dell Teknik Güncelleştirme
Hizmeti — Bilgisayarınızla ilgili
yazılım ve donanım
güncelleştirmeleri için e-postayla
proaktif bildirim
•Başvuru — Bilgisayar belgeleri,
bilgisayar yapılandırma bilgileri,
ürün özellikleri ve teknik belgeler
• Yüklemeler — Onaylı sürücüler,
düzeltme ekleri ve yazılım
güncelleştirmeleri
• Desktop System Software (DSS) —
Bilgisayarınızın işletim sistemini
yeniden yüklüyorsanız, DSS
yardımcı programını da yüklemeniz
gerekir. DSS, işletim sisteminizle
ilgili önemli güncelleştirmeleri ve
işlemciler, optik aygıtlar, USB
aygıtları, vb. için destel sağlar. Dell
bilgisayarınızın doğru çalışması için
DSS gereklidir. Yazılım,
bilgisayarınızı ve işletim sisteminizi
otomatik olarak algılar ve
yapılandırmanıza uygun
güncelleştirmeleri yükler.
Dell Destek Web sitesi — support.dell.com
NOT:
Uygun destek sitesini görüntülemek için,
bulunduğunuz bölgeyi veya iş kolunu seçin.
Masaüstü Sistem Yazılımı'nı yüklemek için:
1
support.dell.com
adresine gidin, bölgenizi
veya iş kolunuzu seçin ve Servis Etiketini
girin.
2
Drivers & Downloads
(Sürücüler ve
Yüklemeler) öğesini seçip
Go
'yu tıklatın.
3
İşletim sisteminizi tıklatın ve
Desktop System
Software
anahtar sözcüğünü aratın.
NOT:
support.dell.com
kullanıcı arabirimi
seçimlerinize göre değişebilir.
Ne Arıyorsunuz? Aradığınızı Burada Bulun

Hızlı Başvuru Kılavuzu
357
• Windows'u nasıl kullanırım?
• Program ve dosyalarla nasıl
çalışırım?
• Masaüstümü nasıl
kişiselleştirebilirim?
Windows Yardım ve Destek Merkezi
1
Windows Yardım ve Destek'e erişmek için:
• Windows XP'de,
Başlat
ve
Yardım ve
Destek
'i tıklatın.
• Windows Vista™ işletim sisteminde,
Windows Vista başlat düğmesi
→
Yardım ve Destek
'i tıklatın.
2
Sorununuzu belirten bir sözcük veya tümcecik
girin ve ok simgesini tıklatın.
3
Sorununuzu açıklayan konuyu tıklatın.
4
Ekrandaki yönergeleri izleyin.
• İşletim sistemimi nasıl yeniden
yüklerim?
Operating System CD'si
NOT:
Operating System
CD'si isteğe bağlı
olabilir ve bilgisayarınızla birlikte verilmeyebilir.
İşletim sistemi bilgisayarınıza zaten
yüklenmiştir. İşletim sisteminizi yeniden
yüklemek için, Operating System CD'sini
kullanın ve çevrimiçi Kullanım Kılavuzu'na
bakın.
İşletim sistemini yeniden yükldikten sonra,
bilgisayarınızla birlikte gelen aygıtları yeniden
yüklemek için Drivers and Utilities CD'sini
kullanın.
İşletim sisteminizin ürün anahtarı etiketi,
bilgisayarınızda bulunur.
NOT:
CD'nin rengi sipariş ettiğiniz işletim
sistemine bağlı olarak değişir.
Ne Arıyorsunuz? Aradığınızı Burada Bulun

358
Hızlı Başvuru Kılavuzu
Başlamadan Önce
Bilgisayarınızın İçinde Çalışmaya Başlamadan Önce
Bilgisayarınızı olası hasarlara karşı korumak ve kişisel güvenliğinizi sağlamak
için aşağıdaki güvenlik yönergelerine uyun.
UYARI:
Bu bölümdeki yordamlara başlamadan önce,
Ürün Bilgileri
Kılavuzu
'ndaki güvenlik yönergelerini uygulayın.
DİKKAT:
Bileşenleri ve kartları itina ile kullanın. Bileşenlere veya kartların
üzerindeki temas noktalarına dokunmayın. Kartları uç kısmından veya metal montaj
kenarından tutun. Bileşenleri, örneğin bir işlemciyi pinlerinden değil kenarlarından
tutun.
DİKKAT:
Yalnızca yetkili bir servis teknisyeni bilgisayarınızda onarım yapmalıdır.
Dell tarafından yetkilendirilmemiş servislerden kaynaklanan zararlar garantinizin
kapsamında değildir.
DİKKAT:
Bir kabloyu çıkarırken, kablonun kendisini değil konektörünü veya fişini
çekin. Bazı kabloların konektörlerinde kilitleme tırnakları bulunur; bu tür bir kabloyu
çıkarıyorsanız, kabloyu çıkarmadan önce kilitleme tırnaklarına basın. Bağlayıcıları
çıkartırken, bağlayıcı pinlerinin eğilmesini önlemek için bağlayıcıları düz tutun.
Ayrıca bir kabloyu bağlamadan önce, her iki bağlayıcının yönlerinin doğru
olduğundan ve doğru hizalandıklarından emin olun.
DİKKAT:
Bilgisayara vermekten kaçınmak için, bilgisayarın içinde çalışmaya
başlamadan önce aşağıdaki adımları uygulayın.
1
Bilgisayarınızı kapatın (bkz. "Bilgisayarınızı Kapatma" Sayfa: 359).
UYARI:
Kapak çıkarılmış durumdayken bilgisayara asla elektrik bağlamayın.
DİKKAT:
Ağ kablosunu çıkarırken, kabloyu önce bilgisayardan, sonra ağ
aygıtından çıkarın.
2
Bilgisayardan tüm telefon ve ağ kablolarını çıkarın.
3
Bilgisayarınızı ve tüm takılı aygıtları elektrik prizlerinden çekin.
4
Sistem kartını topraklamak için güç düğmesine basın.
DİKKAT:
Bilgisayarınızın içindeki herhangi bir şeye dokunmadan önce,
bilgisayarınızın arkasındaki metal kısım gibi boyanmamış bir metal yüzeye
dokunarak kendinizi topraklayın. Çalışırken, statik elektriği boşaltmak için belirli
aralıklarla boyasız metal bir yüzeye dokunun; statik elektrik iç bileşenlere zarar
verebilir.

Hızlı Başvuru Kılavuzu
359
Parçaları Takma ve Çıkarma
Bu bölümde bilgisayarınızın bileşenlerini takma ve çıkarma yordamları yer
almaktadır. Aksi belirtilmediği sürece, her yordam aşağıdaki koşulların geçerli
olduğunu varsayar:
• "Bilgisayarınızı Kapatma" Sayfa: 359 ve "Bilgisayarınızın İçinde Çalışmaya
Başlamadan Önce" Sayfa: 358 konularındaki adımları tamamladınız.
• Dell™
Ürün Bilgileri Kılavuzu
'ndaki güvenlik bilgilerini okudunuz.
• Bileşenler çıkarma yordamını ters sırada uygulayarak bileşeni değiştirebilir
veya —ayrıca satın alındıysa— takılabilir.
Önerilen Araçlar
Bu belgedeki yordamlar için aşağıdaki araçlar gerekebilir:
• Küçük boy düz tornavida
• Küçük Phillips tornavida
• Küçük plastik kalem
Bilgisayarınızı Kapatma
DİKKAT:
Veri kaybını önlemek için, bilgisayarınızı kapatmadan önce tüm açık
dosyaları kaydedip kapatın ve tüm açık programlardan çıkın.
1
Işletim sistemini kapatın:
a
Tüm açık dosyaları kaydedip kapatın ve tüm açık programlardan çıkın.
b
Microsoft
®
Windows
®
XP işletim sisteminde
Başlat
→
Bilgisayarı
Kapat
→
Bilgisayarı kapat
'ı tıklatın.
Microsoft
®
Windows Vista™
işletim sisteminde, Windows Vista Başlat
düğmesini tıklatın, masaüstünün sağ alt köşesinde, Başlat
menüsünün sağ alk köşesindeki oku (aşağıda gösterilmiştir) tıklatın,
sonra da
Kapat
'ı tıklatın.
Bilgisayar işletim sistemi kapatma işlemi tamamlandıktan sonra kapanır.
2
Bilgisayarı ve takılı tüm aygıtları kapatın. İşletim sistemini kapattığınızda
bilgisayarınız ve takılı tüm aygıtlar otomatik olarak kapanmıyorsa, bunları
kapatmak için bilgisayarın güç düğmesini 4 saniye basılı tutun.

360
Hızlı Başvuru Kılavuzu
Bilgisayarınızı Ayarlama
Bilgisayarı Dolap İçine Kurma
Bilgisayarın bir dolap içine kurulması hava akışını kısıtlayabilir ve bilgisayarın
performansını etkileyebilir; bu da bilgisayarın aşırı ısınmasına yol açabilir.
Bilgisayarı dolap içine kurarken aşağıdaki yönergeleri uygulayın:
DİKKAT:
Bu el kitabında belirtilen çalışma sıcaklığı maksimum ortam çalışma
sıcaklığını gösterir. Bilgisayarınızı dolap içine kurarken odanın ortam sıcaklığı
dikkate alınmalıdır. Örneğin, odanın ortam sıcaklığı 25°C (77°F) ise, bilgisayarınızın
özelliklerine bağlı olarak, bilgisayarın maksimum çalışma sıcaklığına ulaşması için
sadece 5° - 10°C (9° - 18°F) ısı marjınız vardır. Bilgisayarınızın özellikleriyle ilgili
detaylar için, çevrimiçi
Kullanım Kılavuzu
'na bakın.
• Düzgün havalandırma için gereken hava akışına olanak sağlamak için,
bilgisayarın havalandırma delikleri bulunan taraflarında minimum 10,2 cm
(4 inç) açıklık bırakın.
• Dolabın kapakları varsa, dolap içinde en az yüzde 30 hava akışına (önden ve
arkadan) olanak sağlayan türde olmalıdır.

Hızlı Başvuru Kılavuzu
361
• Bilgisayarınız bir masanın köşesine veya masanın altına kurulacaksa, düzgün
havalandırma için gereken hava akışına olanak sağlamak için bilgisayarın
arka tarafıyla duvar arasında en az 5,1 cm (2 inç) boşluk bırakın.
DİKKAT:
Bilgisayarı hava akışına olanak vermeyen bir dolaba kurmayın. Hava
akışının engellenmesi bilgisayarın performansını etkiler ve aşırı ısınmasına yol
açabilir.

362
Hızlı Başvuru Kılavuzu
Ev ve Ofis Ağı Kurma
Ağ Adaptörü Bağlama
Ağ kablosu bağlamak için:
NOT:
Ağ kablosunu bilgisayardaki ağ adaptörü konektörüne takın. Ağ kablosunu
bilgisayardaki modem konektörüne takmayın. Ağ kablosunu duvardaki telefon
prizine takmayın.
1
Ağ kablosunu bilgisayarın arkasındaki ağ adaptörü konektörüne bağlayın.
Kabloyu yerine oturana kadar itin, sonra da yavaşça çekip tam olarak yerleşip
yerleşmediğini kontrol edin.
2
Ağ kablosunun diğer ucunu bir ağ aygıtına takın.

Hızlı Başvuru Kılavuzu
363
Ağ Kurulumu
Windows XP
Microsoft
®
Windows
®
XP işletim sistemi ev veya küçük ofisinizdeki
bilgisayarlar arasında dosya, yazıcı veya Internet bağlantısı paylaşımı
işlemlerinde size yol gösterecek bir Ağ Kurulum Sihirbazı sağlar.
1
Başlat
düğmesini tıklatın,
Tüm Programlar
→
Donatılar
→
İletişim
'in
üzerine gelin ve
Ağ Kurulum Sihirbazı
'nı tıklatın.
2
Ağ Kurulum Sihirbazı
hoş geldiniz ekranında
İleri
'yi tıklatın.
3
Ağ oluşturma denetim listesi
'ni tıklatın.
NOT:
Bağlantı yöntemi olarak
Bu bilgisayar Internet'e doğrudan bağlanır
seçeneğinin belirlenmesi Windows XP Service Pack 1 (SP1) veya sonrası ile
sağlanan tümleşik güvenlik duvarını etkinleştirir.
4
Denetim listesini tamamlayın ve gerekli hazırlıkları yapın.
5
Ağ Kurulum Sihirbazı'na dönün ve ekrandaki yönergeleri izleyin.
ağ aygıtı
bilgisayardaki ağ adaptörü konektörü
ağ kablosu
ağ
bağdaştırıcısı
konektörü

364
Hızlı Başvuru Kılavuzu
Windows Vista
Microsoft
®
Windows Vista™ işletim sisteminde ağ ayarlarınızda değişiklik
yapmak için:
1
Windows Vista Başlat düğmesini , sonra da
Ağ
→
Ağ ve Paylaşım
Merkezi
'ni tıklatın.
2
Bağlantı veya ağ kur
'u tıklatın.
3
Kurmak istediğiniz ağ bağlantısı türünü seçin ve ekrandaki yönergeleri
izleyin.
4
İşiniz bittiğinde Ağ ve Paylaşım Merkezi'ni kapatın.
Internet bağlantısı
NOT:
ISS'ler ve ISS teklifleri ülkeye göre değişiklik gösterir.
Internet'e bağlanmak için, modem veya ağ bağlantınız olması ve bir Internet
servis sağlayıcısı (ISS) gerekir. ISS'niz aşağıdaki Internet bağlantısı
seçeneklerinden birini veya birkaçını önerecektir:
• Mevcut telefon hattınızdan veya cep telefonu hizmeti üzerinden yüksek hızlı
Internet erişimi sağlayan DSL bağlantıları. DSL bağlantısıyla aynı hattan
eşzamanlı olarak hem Internet'e erişebilir, hem de telefonunuzu
kullanabilirsiniz.
• Yerel kablolu TV hattından yüksek hızlı Internet erişimi sağlayan kablolu
modem bağlantıları.
• Bir uydu televizyon sistemi üzerinden yüksek hızlı Internet erişimi sağlayan
uydu modem bağlantıları.
• Telefon hattından Internet erişimi sağlayan çevirmeli bağlantılar. Çevirmeli
bağlantılar DSL ve kablolu (ya da uydu üzerinde) modem bağlantılarına göre
önemli ölçüde yavaştır.
• Bluetooth
®
kablosuz teknolojisi kullanarak Internet erişimi sağlayan
kablosuz LAN bağlantıları.
Çevirmeli bağlantı kullanıyorsanız, Internet bağlantısını kurmak için
bilgisayarınızdaki modem konektörüne ve duvardaki telefon prizine bir telefon
hattı bağlamanız gerekir. DSL veya kablolu/uydu modem bağlantısı
kullanıyorsanız, kurulum yönergeleri için ISS'nize veya cep telefonu servisinize
başvurun.

Hızlı Başvuru Kılavuzu
365
Internet Bağlantısı Kurma
Sağlanan ISS masaüstü kısayoluyla Internet bağlantısı kurmak için:
1
Açık dosyalarınızın tümünü kaydedin ve kapatın ve tüm açık programlardan
çıkın.
2
Microsoft
®
Windows
®
masaüstünde ISS
simgesini çift tıklatın.
3
Kurulumu tamamlamak için ekrandaki yönergeleri uygulayın.
Masaüstünde ISS simgesi yoksa veya Internet bağlantısını farklı bir ISS ile
kurmak isterseniz, aşağıdaki adımlardan bilgisayarınızda kullanılan işletim
sistemine karşılık düşen bölümü uygulayın.
NOT:
Internet'e bağlanma sorunları yaşıyorsanız, bkz. "Ev ve Ofis Ağı Kurma"
Sayfa: 362. Internet'e bağlanamadıysanız, ancak geçmişte başarıyla bağlantı
kurduysanız ISS hizmeti yetersiz olabilir. Servis durumunu kontrol etmesi için
ISS'nize başvurun veya daha sonra tekrar bağlanmayı deneyin.
Windows XP
1
Açık dosyalarınızın tümünü kaydedin ve kapatın ve tüm açık programlardan
çıkın.
2
Başlat
→
Internet Explorer
'ı tıklatın.
Yeni Bağlantı Sihirbazı
görünür.
3
Internet'e Bağlan
'ı tıklatın.
4
Sonraki pencerede uygun seçeneği tıklatın:
• ISS'niz yoksa ve bir ISS seçmek istiyorsanız,
Internet servis sağlayıcı
(ISS) listesinden seç
'i tıklatın.
• ISS'nizden kurulum bilgilerini zaten aldıysanız, ancak bir kurulum CD'si
almadıysanız,
Bağlantımı ben ayarlayayım
'ı tıklatın.
• CD'niz varsa,
ISS'den aldığım CD'yi kullan
'ı tıklatın.
5
Devam
'ı tıklatın.
Bağlantımı ben ayarlayayım
'ı seçtiyseniz, Adım 6. adıma geçin.Diğer
durumlarda, kurulumu tamamlamak için ekrandaki yönergeleri uygulayın.
NOT:
Hangi bağlantı türünü seçeceğinizi bilmiyorsanız, ISS'nize başvurun.
6
Internet'e nasıl bağlanmak istiyorsunuz?
altından uygun seçeneği
belirleyin ve
İleri
'yi tıklatın.
7
Kurulumu tamamlamak için ISS'niz tarafından sağlanan kurulum bilgilerini
kullanın.

366
Hızlı Başvuru Kılavuzu
Windows Vista™
NOT:
ISS bilgilerini hazır tutun. ISS'niz yoksa,
Internet Bağlantısı
sihirbazı bir ISS
edinmenize yardımcı olur.
1
Açık dosyalarınızın tümünü kaydedin ve kapatın ve tüm açık programlardan
çıkın.
2
Windows Vista Start düğmesini , sonra da
Denetim Masası
'nı tıklatın.
3
Ağ ve Internet
altında
Internet'e Bağlan
'ı seçin.
Internet'e Bağlan
penceresi görünür.
4
Nasıl bağlanmak istediğinize bağlı olarak
Geniş Bant (PPPoE)
veya
Çevirmeli
'yi seçin:
• DSL, uydu modem veya kablolu TV modemi ya da Bluetooth kablosuz
teknolojisi bağlantısı kullanacaksanız
Geniş Bant
'ı seçin.
• Çevirmeli modem veya ISDN kullanacaksanız
Çevirmeli
'yi seçin.
NOT:
Hangi bağlantı türünü seçmeniz gerektiğini bilmiyorsanız,
Seçmeme yardım
et
'i seçin veya ISS'nize başvurun.
5
Kurulumu tamamlamak için ekrandaki yönergeleri uygulayın ve ISS'nizin
sağladığı kurulum bilgilerini kullanın.
Bilgileri Yeni Bilgisayara Taşıma
Bir bilgisayardan diğerine —örneğin, eski bilgisayardan yeni bilgisayara
dosyalarınızı ve diğer verileri aktarırken işletim sistemi "sihirbazlarını"
kullanabilirsiniz. Yönergeler için, aşağıda, bilgisayarınızda kullanılan işletim
sistemine karşılık düşen bölüme bakın.
Microsoft
®
Windows
®
XP (İsteğe Bağlı)
Microsoft
Windows XP işletim sistemi kaynak bilgisayardan yeni bir bilgisayara
veri taşımak için Dosya ve Ayar Aktarma Sihirbazı'nı sağlar. Aşağıdaki verileri
aktarabilirsiniz:
• E-posta iletileri
• Araç çubuğu ayarları
• Pencere boyutları
• Internet yer işaretleri

Hızlı Başvuru Kılavuzu
367
Yeni bilgisayara verileri bir ağ bağlantısı veya seri bağlantı üzerinden aktarabilir
ya da verileri çıkarılabilir bir ortama, örneğin yazılabilir bir CD'ye kaydedip
yeni bilgisayara bu şekilde taşıyabilirsiniz.
NOT:
Eski bilgisayarın ve yeni bilgisayarın girdi/çıktı (G/Ç) bağlantı noktalarına
doğrudan bir seri kablo bağlayarak eski bilgisayardan yenisine bilgi aktarabilirsiniz.
Seri bağlantı üzerinden veri aktarmak için, Denetim Masası'ndan Ağ Bağlantıları
aracına erişmeniz ve gelişmiş bağlantı ayarlamak, ana bilgisayarı ve konuk
bilgisayarı belirtmek gibi ek yapılandırma adımları gerçekleştirmeniz gerekir.
İki bilgisayar arasında doğrudan kablo bağlantısı kurma yönergeleri için, Microsoft
Knowledge Base'de 305621 no'lu
Windows XP'de
İ
ki Bilgisayar Arasında Do
ğ
rudan
Kablo Ba
ğ
lantısı Kurma
makalesine bakın. Bu bilgiler belirli ülkelerde
kullanılamayabilir.
Bilgileri yeni bilgisayara aktarmak için, Dosya ve Ayar Aktarma Sihirbazı'nı
çalıştırmanız gerekir. Bu işlem için isteğe bağlı Operating System CD'sini
kullanabilir veya Dosya ve Ayar Aktarma Sihirbazı ile bir sihirbaz diski
oluşturabilirsiniz.
Dosya ve Ayar Aktarma Sihirbazı'nı Operating System CD'si
İ
le Çalı
ş
tırma
NOT:
Bu yordam için
Operating System
CD'si gereklidir. Bu CD isteğe bağlıdır ve
bazı bilgisayarlarla verilmemiş olabilir.
Yeni bilgisayarı dosya aktarımı için hazırlama:
1
Dosya ve Ayar Aktarma Sihirbazı'nı açın:
Başlat
→
Tüm Programlar
→
Donatılar
→
Sistem Araçları
→
Dosya ve Ayar Aktarma Sihirbazı
'nı
tıklatın.
2
Dosya ve Ayar Aktarma Sihirbazı
hoş geldiniz ekranı göründüğünde
İleri
'yi tıklatın.
3
Bu hangi bilgisayar?
ekranında
Yeni Bilgisayar
→
İleri
'yi tıklatın.
4
Windows XP CD'niz var mı?
ekranında,
Windows XP CD'sindeki
sihirbazı kullanacağım
→
İleri
'yi tıklatın.
5
Şimdi eski bilgisayarınıza gidin
ekranı göründüğünde eski ve kaynak
bilgisayarınıza gidin. Bu noktada
İleri
'yi
tıklatmayın
.
Eski bilgisayardan veri kopyalama:
1
Eski bilgisayarda Windows XP
Operating System
CD'sini takın.
2
Microsoft Windows XP'ye Hoş Geldiniz
ekranında
Ek görevleri uygula
'yı
tıklatın.

368
Hızlı Başvuru Kılavuzu
3
Ne yapmak istiyorsunuz?
altında,
Dosya ve ayarları aktar
→
İleri
'yi
tıklatın.
4
Bu hangi bilgisayar?
ekranında,
Eski Bilgisayar
→
İleri
'yi tıklatın.
5
Aktarma yöntemi seç
ekranında, tercih ettiğiniz aktarma yöntemini seçin.
6
Ne aktarmak istiyorsunuz?
ekranında, aktarmak istediğiniz öğeleri seçin ve
İleri
'yi tıklatın.
Bilgiler kopyalandıktan sonra,
Toplama Aşaması Tamamlanıyor
ekranı
görünür.
7
Son
'u tıklatın.
Verileri yeni bilgisayara aktarmak için:
1
Yeni bilgisayardaki
Şimdi eski bilgisayarınıza gidin
ekranında
İleri
'yi
tıklatın.
2
Dosyalar ve ayarlar nerede?
ekranında, ayarları ve dosyaları aktarma
yöntemini seçin ve
İleri
'yi tıklatın.
Sihirbaz toplanan dosyaları ve ayarları okur ve bunları yeni bilgisayarınıza
uygular.
Tüm dosyalar ve ayarlar aktarıldıktan sonra,
Bitti
ekranı görünür.
3
Bitti
'yi tıklatın ve yeni bilgisayarı yeniden başlatın.
Dosya ve Ayar Aktarma Sihirbazı'nı Operating System CD'si Olmadan
Çalı
ş
tırma
Dosya ve Ayar Aktarma Sihirbazı'nı Operating System CD'si olmadan
çalıştırmak için, çıkarılabilir ortama yedek görüntü dosyası oluşturmanıza
olanak sağlayan bir sihirbaz diski oluşturmalısınız.
Sihirbaz diski oluşturmak için, Windows XP yüklü yeni bilgisayarınızı
kullanarak aşağıdaki adımları gerçekleştirin:
1
Dosya ve Ayar Aktarma Sihirbazı'nı açın:
Başlat
→
Tüm Programlar
→
Donatılar
→
Sistem Araçları
→
Dosya ve Ayar Aktarma Sihirbazı
'nı
tıklatın.
2
Dosya ve Ayar Aktarma Sihirbazı
hoş geldiniz ekranı göründüğünde
İleri
'yi tıklatın.
3
Bu hangi bilgisayar?
ekranında
Yeni Bilgisayar
→
İleri
'yi tıklatın.
4
Windows XP CD'niz var mı?
ekranında
Aşağıdaki sürücüde Sihirbaz
Diski hazırlamak istiyorum
→
İleri
'yi tıklatın.
5
Yazılabilir CD gibi bir çıkarılabilir ortam yerleştirin ve
Tamam
'ı tıklatın.

Hızlı Başvuru Kılavuzu
369
6
Disk oluşturma işlemi tamamlandığında ve
Now go to your old computer
(Şimdi eski bilgisayarınıza gidin) iletisi göründüğünde
İleri
'yi
tıklatmayın
.
7
Eski bilgisayara gidin.
Eski bilgisayardan veri kopyalama:
1
Eski bilgisayara sihirbaz diskini takın.
2
Başlat
→
Çalıştır
'ı tıklatın.
3
Çalıştır
penceresindeki
Aç
alanında
fastwiz
dizin yolunu bulun (ilgili
çıkarılabilir ortamda) ve
Tamam
'ı tıklatın.
4
Dosya ve Ayar Aktarma Sihirbazı
hoş geldiniz ekranında
İleri
'yi tıklatın.
5
Bu hangi bilgisayar?
ekranında
Eski Bilgisayar
→
İleri
'yi tıklatın.
6
Aktarma yöntemi seç
ekranında, tercih ettiğiniz aktarma yöntemini seçin.
7
Neyi aktarmak istiyorsunuz?
ekranında, aktarmak istediğiniz öğeleri seçin
ve
İleri
'yi tıklatın.
Bilgiler kopyalandıktan sonra,
Toplama Aşaması Tamamlanıyor
ekranı
görünür.
8
Son
'u tıklatın.
Bilgileri yeni bilgisayara aktarma:
1
Yeni bilgisayarın
Şimdi eski bilgisayarınıza gidin
ekranında
İleri
'yi tıklatın.
2
Dosyalar ve ayarlar nerede?
ekranında, ayarları ve dosyaları aktarmak
istediğiniz yöntemi seçin ve
İleri
'yi tıklatın. Ekrandaki yönergeleri izleyin.
Sihirbaz toplanan dosyaları ve ayarları okur ve bunları yeni bilgisayarınıza
uygular.
Tüm dosyalar ve ayarlar aktarıldığında
Bitti
ekranı görünür.
3
Bitti
'yi tıklatın ve bilgisayarı yeniden başlatın.
NOT:
Bu yordam hakkında daha fazla bilgi için,
support.dell.com
sitesinde 154781 no'lu belgeyi (
What Are The Different Methods To Transfer Files
From My Old Computer To My New Dell™ Computer Using the Microsoft
®
Windows
®
XP Operating System?
) arayın.
NOT:
Bazı ülkelerde Dell™ Knowledge Base belgesine erişilemeyebilir.

370
Hızlı Başvuru Kılavuzu
Microsoft Windows Vista™ (İsteğe Bağlı)
1
Windows Vista Start düğmesini tıklatın, sonra da
Dosya ve ayarları
aktar
→
Windows Kolay Aktarım'ı başlat
'ı tıklatın.
2
Kullanıcı Hesap Denetimi
iletişim kutusunda
Devam
'ı tıklatın.
3
Yeni aktarım başlat
veya
Süren aktarımı devam ettir
'i tıklatın.
Windows Kolay Aktarım sihirbazı tarafından sağlanan ekran yönergelerini
uygulayın.
Yazıcı Kurma
DİKKAT:
Bilgisayara bir yazıcı bağlayabilmek için işletim sistemi kurulumunun
tamamlanmış olması gerekir.
Yazıcınızın belgelerinde kurulum bilgilerine ve aşağıdaki "nasıl yapılır"
konularına bakın:
• Güncelleştirilmiş sürücüleri edinme ve yükleme.
• Yazıcıyı bilgisayara bağlama.
•Kağıt yükleme ve toner veya mürekkep kartuşunu takma.
Teknik destek için, yazıcının kullanım kılavuzuna bakın veya yazıcının
üreticisine başvurun.
Yazıcı Kablosu
Yazıcınız bilgisayarınıza bir USB kablosuyla veya paralel kabloyla bağlanır.
Yazıcınızla birlikte kablo verilmemiş olabilir; kabloyu ayrıca satın alacaksanız
yazıcınızla ve bilgisayarınızla uyumlu olduğundan emin olun. Bilgisayarınızı
satın alırken bir yazıcı kablosu da aldıysanız, kablo bilgisayarın kutusuna
konmuş olabilir.
İki Monitörü Bağlama
UYARI:
Bu bölümdeki yordamlara başlamadan önce,
Ürün Bilgileri
Kılavuzu
'ndaki güvenlik yönergelerini uygulayın.
Çift monitörü destekleyen bir grafik kartı satın aldıysanız, monitörlerinizi
bağlamak ve etkinleştirmek için bu yönergeleri uygulayın. Bu yönergelerde iki
monitörü (her ikisi de VGA konektörüne), VGA konektörüne bir monitör ve
DVI konektörüne bir monitörü veya televizyonu nasıl bağlayacağınız anlatılır.

Hızlı Başvuru Kılavuzu
371
DİKKAT:
VGA konektörüne iki monitör bağlıyorsanız, kablo bağlantısı için, ayrıca
satılan bir DVI adaptörü kullanmanız gerekir. İki düz-panel monitör bağlıyorsanız,
bunlardan en az birinin VGA konektörü olmalıdır. Televizyon bağlıyorsanız,
televizyona ek olarak yalnızca bir monitör (VGA veya DVI) bağlayabilirsiniz.
VGA Konektörüyle İki Monitörü Bağlama
1
Sisteminizi kapatın.
NOT:
Bilgisayarınızda entegre video varsa, iki monitörü de entegre video
konektörüne bağlamayın. Enterge video konektörü kapakla örtülmüşse, monitörü
bağlamak için kapağı çıkarmayın; aksi halde monitör çalışmaz.
2
Monitörlerden birini bilgisayarın arkasındaki VGA (mavi) konektörüne
bağlayın.
3
Diğer monitörü isteğe bağlı DVI adaptörüne bağlayın ve DVI adaptörünü de
bilgisayarın arkasındaki DVI (beyaz) konektörüne bağlayın.
4
Sisteminizi yeniden başlatın.
1 isteğe bağlı DVI adaptörü 2 DVI (beyaz) konektörü
3 TV-OUT konektörü 4 VGA (mavi) konektörü
1
23
4

372
Hızlı Başvuru Kılavuzu
VGA Könektörüne Bir Monitör ve DVI Konektörüne Bir Monitör Ba
ğ
lama
1
Sisteminizi kapatın.
2
Monitördeki VGA konektörünü bilgisayarın arkasındaki VGA (mavi)
konektöre bağlayın.
3
Diğer monitördeki DVI konektörünü bilgisayarın arkasındaki DVI (beyaz)
konektörüne bağlayın.
4
Sisteminizi yeniden başlatın.
TV Ba
ğ
lama
NOT:
Bilgisayarınıza TV bağlamak için, elektronik eşya mağazalarının çoğunda
bulabileceğiniz bir S-video kablosu satın almanız gerekir. Bu kablo bilgisayarınızla
birlikte verilmez.
1
Sisteminizi kapatın.
2
S-video kablosunun bir ucunu bilgisayarın arkasındaki isteğe bağlı TV-OUT
konektörüne bağlayın.
3
S-video kablosunun diğer ucunu televizyondaki S-video giriş konektörüne
bağlayın.
4
VGA veya DVI monitörü bağlayın.
5
Sisteminizi yeniden başlatın.
Görüntü Ayarlarını Değiştirme
1
Monitörleri veya televizyonu bağladıktan sonra bilgisayarı açın.
Microsoft
®
Windows
®
masaüstü birincil monitörde görüntülenir.
2
Görüntü ayarlarında genişletilmiş masaüstü modunu etkinleştirin.
Genişletilmiş masaüstü modunda, bir ekrandan diğerine nesne taşıyabilir,
görüntülenen çalışma alanı miktarını gerçek anlamda iki katına
çıkarabilirsiniz.
Güç Koruma Aygıtları
Güç dalgalanmalarına ve arızalarına kesintilerine karşı korunmak için çeşitli
aygıtlar vardır:
• Voltaj koruyucuları
• Akım düzenleyiciler
• Kesintisiz güç kaynakları (UPS)

Hızlı Başvuru Kılavuzu
373
Voltaj Koruyucular
Voltaj koruyucular ve voltaj koruyucu içeren anahtarlı uzatma kabloları elektrik
yüklü fırtınalar sırasında veya elektrik kesintilerinden sonra oluşan ani voltaj
değişikliklerine karşı bilgisayarınızı korumaya yardımcı olur. Bazı voltaj
koruyucu üreticiler garanti kapsamına belirli türdeki hasarları dahil ederler. Bir
voltaj koruyucu seçerken aygıtın garantisini dikkatle okuyun. Jul değeri yüksek
olan aygıtlar daha iyi koruma sağlar. Çeşitli cihazların göreli verimliliğini
belirlemek için jul değerlerini karşılaştırın.
DİKKAT:
Çoğu voltaj koruyucu çevredeki şimşeklerden kaynaklanan voltaj
dalgalanmalarına veya elektrik kesintilerine karşı koruma sağlamaz. Bulunduğunuz
yerde şimşekler oluşursa, telefon hattını duvardaki telefon prizinden çıkarın ve
bilgisayarınızın kablosunu elektrik prizinden çekin.
Çoğu voltaj koruyucuda modem koruması için bir telefon jakı bulunur. Modem
bağlantısı yönergeleri için voltaj koruyucu belgelerine bakın.
DİKKAT:
Voltaj koruyucuların hepsinde ağ adaptörü koruması bulunmaz. Elektrik
fırtınası sırasında ağ kablosunu duvardaki ağ prizinden çıkarın.
Akım Düzenleyiciler
DİKKAT:
Akım düzenleyiciler elektrik kesintilerine karşı koruma sağlamaz.
Akım düzenleyiciler AC voltajını tamamen sabit bir düzeyde tutacak şekilde
tasarlanmışlardır.
Kesintisiz Güç Kaynakları
DİKKAT:
Sabit sürücüye veri kaydedilirken elektriğin kesilmesi veri kaybına veya
dosyanın bozulmasına yol açabilir.
NOT:
Maksimum pil kullanım süresi için, UPS'e sadece bilgisayarınızı bağlayın.
Yazıcı gibi diğer aygıtları voltaj koruması sağlayan ayrı bir anahtarlı uzatma
kablosuna bağlayın.
UPS voltaj değişikliklerine ve elektrik kesintilerine karşı koruma sağlar. UPS
aygıtları, AC gücü kesildiğinde bağlı aygıtlara geçici olarak güç sağlamak için
pil içerirler. AC gücü kullanılırken pil şarj olur. Pil kullanım süresi hakkında
bilgi almak ve aygıtın Underwriters Laboratories (UL) tarafından onaylanıp
onaylanmadığını öğrenmek için UPS üreticisinin belgelerine bakın.

374
Hızlı Başvuru Kılavuzu
Masaüstü Bilgisayar
Önden Görünüm
1 USB 2.0
konektörleri (2)
Oyun çubuğu veya fotoğraf makinesi gibi ara sıra
kullandığınız aygıtlar veya önyüklenebilir USB aygıtları için
öndeki USB konektörünü kullanın (USB cihazına
önyükleme hakkında daha fazla bilgi için çevrimiçi
Kullanım Kılavuzu'nda "Sistem Kurulumu Seçenekleri"
konusuna bakın). Yazıcılar ve klavyeler gibi normalde
bağlı kalan aygıtlar için arka USB konektörlerini
kullanmanız önerilir.
2 sürücü etkinlik ışığı Bilgisayar veri okurken veya sabit sürücüye veri
yazarken sürücü etkinlik ışığı yanar. Işık, optik sürücü
gibi bir aygıt çalışırken de yanabilir.
3 güç düğmesi,
güç ışığı
Bilgisayarı açmak için güç düğmesine basın. Bu
düğmenin ortasındaki ışık güç durumunu belirtir.
DİKKAT:
Veri kaybını önlemek için, bilgisayarı
güç düğmesini kullanarak kapatmayın. Bunun
yerine, işletim sisteminden kapatın.
89
3
5
1
4610
2
11 7

Hızlı Başvuru Kılavuzu
375
4 Dell rozeti Bu rozet bilgisayarınızın yönüyle eşleşecek şekilde
döndürülebilir. Rozeti döndürmek için, rozetin
kenarlarından tutun, sıkıca bastırın ve rozeti döndürün.
Rozetin alt kısmındaki yuvayı kullanarak da rozeti
döndürebilirsiniz.
5 güç ışığı Farklı çalışma durumlarını belirtmek için güç ışığı yanar
ve yanıp söner veya sabit kalır:
•Işık yok — Bilgisayar kapalıdır.
•Sabit yeşil — Bilgisayar normal çalışma durumundadır.
• Yanıp sönen yeşil — Bilgisayar güç tasarrufu
modundadır.
• Yanıp sönen veya sürekli yanan sarı — çevrimiçi
Kullanım Kılavuzu
'nda "Güç Sorunları" konusuna
bakın.
Güç tasarrufu modundan çıkmak için güç düğmesine
basın veya Windows Aygıt Yöneticisi'nde uyandırma
aygıtı olarak yapılandırılmışsa klavyeyi veya fareyi
kullanın. Uyku modları ve enerji tasarrufu modundan
çıkma hakkında daha fazla bilgi için çevrimiçi Kullanım
Kılavuzu'na bakın.
Bilgisayarınızla ilgili sorunları çözmenize yardımcı
olacak ışık kodlarının açıklaması için, bkz. "Tanılama
Işıkları" Sayfa: 402".
6 tanılama ışıkları Bilgisayar sorunlarını tanılama koduna göre gidermenize
yardımcı olması için bu ışıkları kullanın. Daha fazla
bilgi için bkz. "Tanılama Işıkları" Sayfa: 402.
7 LAN gösterge ışığıBu ışık bir LAN (yerel alan ağı) bağlantısının
kurulduğunu gösterir.
8 kulaklık ve mikrofon
konektörleri
Kişisel bilgisayar mikrofonu takmak için mikrofon
konektörünü kullanın. Ses kartı bulunan bilgisayarlarda,
mikrofon konektörü kartın üzerindedir.
Kulaklıkları ve hoparlör türlerinin çoğunu bağlamak için
kulaklık konektörünü kullanın.
9 disket sürücüsü İsteğe bağlı bir disket sürücüsü bulunabilir.
10 optik sürücü CD/DVD çalmak için optik sürücüyü kullanın.
11 Servis Etiketi Dell destek web sitesine eriştiğinizde veya Destek
Merkezini aradığınızda bilgisayarınızı tanıtmak için Servis
Etiketini kullanın.

376
Hızlı Başvuru Kılavuzu
Arkadan Görünüm
UYARI:
Sistemdeki havalandırma deliklerinin kapatılmadığından emin olun.
Havalandırma deliklerinin kapatılması önemli termal sorunlara neden olabilir.
1 kart yuvaları Takılı PCI ve PCI Express kartlarına erişim.
2 arka panel
konektörler
USB, ses ve diğer aygıtları ilgili konektörlere takın (daha
fazla bilgi için, bkz. "Arka Panel Konektörleri" Sayfa: 377).
3 güç konektörü Güç kablosunu yerleştirin.
4 voltaj seçim
anahtarı
Voltaj değerini seçmek için.
5 asma kilit halkaları Ama kilit halkaları, ticari olarak satılan bir hırsızlık önleyici
aygıt takmak içindir. Asma kilit halkaları, bilgisayarın iç
kısmına yetkisiz erişimi önlemek için bilgisayarın kapağını
bir asma kilitle kasaya kilitlemenizi sağlar. Asma kilit
halkalarını kullanmak için, ticari olarak satılan bir kilidi
halkalara takın ve kilitleyin.
6 kapak serbest
bırakma mandalı
Bilgisayar kapağını açmak için bu mandalı kullanın.
5
1
2 3 4 6

Hızlı Başvuru Kılavuzu
377
Arka Panel Konektörleri
1 paralel bağlantı
konektörü
Yazıcı gibi paralel aygıtları paralel bağlantı konektörüne
bağlayın. USB yazıcınız varsa, bunu USB konektörüne takın.
NOT:
Bilgisayar, aynı adrese yapılandırılmış paralel konektör
içeren bir kart takılı olduğunu algıladığında, tümleşik paralel
konektör otomatik olarak devre dışı bırakılır. Daha fazla bilgi
için, çevrimiçi
Kullanım Kılavuzu
'nda "Sistem Kurulumu
Seçenekleri" konusuna bakın.
2 bağlantı
bütünlüğü ışığı
•Yeşil — 10 Mb/sn ağ ve bilgisayar arasında iyi bir bağlantı
var.
• Turuncu — 100 Mb/sn ağ ve bilgisayar arasında iyi bir
bağlantı var.
• Sarı — 1 gb/sn (1000 Mb/sn) ağ ve bilgisayar arasında iyi bir
bağlantı var.
• Kapalı — Bilgisayar ağa fiziksel bir bağlantı algılayamadı.
13
98 7
5
6
24

378
Hızlı Başvuru Kılavuzu
3 ağ bağdaştırıcısı
konektörü
Bilgisayarınızı ağa veya geniş bant aygıtına bağlamak için, ağ
kablosunun bir ucunu ağ prizine veya ağ ya da geniş bant
aygıtınıza bağlayın. Ağ kablosunun diğer ucunu
bilgisayarınızın arka panelindeki ağ bağdaştırıcısı
konektörüne takın. Ağ kablosu tam olarak yerine oturduğunda
bir tık sesi duyarsınız.
NOT:
Ağ konektörüne telefon kablosu takmayın.
Ağ bağdaştırıcısı kartı bulunan bilgisayarlarda, karttaki
konektörü kullanın.
Ağınız için en azından Kategori 5 kablo ve konektör
kullanmanız önerilir. Kategori 3 kablo kullanmanız
gerekiyorsa, güvenilir çalışmasını sağlamak için ağ hızını
10 Mb/sn'ye zorlayın.
4 ağ etkinlik ışığıBu ışık ağ verileri iletir veya alırken sarı renkte yanıp söner.
Yüksek hacimli ağ trafiği, bu ışığın sürekli "açık" durumda
görünmesine yol açabilir.
5 çıkış konektörü Kulaklıkları ve yerleşik yükselticili hoparlör setlerinin çoğunu
bağlamak için yeşil renkli çıkış konektörünü kullanın.
Ses kartı bulunan bilgisayarlarda, karttaki konektörü kullanın.
6 mikrofon/giriş
konektörü
Kaset çalar, CD çalar veya VCR gibi kayıt/kayıttan yürütme
aygıtlarını bağlamak için mavi renkli giriş konektörünü
kullanın.
Bir ses veya telefon programına ses veya müzik girişi için
kişisel bilgisayar mikrofonu takmak için pembe mikrofon
konektörünü kullanın.
Ses kartı bulunan bilgisayarlarda, karttaki konektörü kullanın.
7 USB 2.0
konektörleri (6)
Yazıcı ve klavye gibi genellikle bağlı kalan aygıtlar için arka
USB konektörlerini kullanın.
Oyun çubuğu veya fotoğraf makinesi gibi ara sıra bağladığınız
aygıtlar için ön USB konektörlerini kullanmanız önerilir.
8
VGA video
konektörü
Monitörün VGA kablosunu bilgisayardaki VGA konektörüne
bağlayın.
Ekran kartı olan bilgisayarlarda karttaki konektörü kullanın.
9 seri bağlantı
konektörü
El bilgisayarı gibi seri aygıtları seri bağlantı noktasına
bağlayın. Seri konektör 1 için varsayılan bağlantı noktası
COM1'dir.
Daha fazla bilgi için, çevrimiçi Kullanım Kılavuzu'nda
"Sistem Kurulumu Seçenekleri" konusuna bakın.

Hızlı Başvuru Kılavuzu
379
Bilgisayarın Kapağını Açma
UYARI:
Bu bölümdeki yordamlara başlamadan önce,
Ürün Bilgileri
Kılavuzu
'ndaki güvenlik yönergelerini uygulayın.
UYARI:
Elektrik çarpmalarına karşı korunmak için, kapağı çıkarmadan önce
bilgisayarınızın fişini elektrik prizinden çekin.
1
"Başlamadan Önce" Sayfa: 358 bölümündeki yordamları uygulayın.
NOT:
Çıkarılan kapağın konacağı kadar bir alan açın.
DİKKAT:
Bilgisayarın ve üzerinde durduğu yerin çizilmesini önlemek için düz ve
emniyeti sağlanmış bir yüzeyde çalışın.
2
Arka paneldeki asma kilit halkasına bir asma kilit taktıysanız asma kilidi
çıkarın.
3
Kapağı kaldırırken, kapak serbest bırakma mandalını geriye kaydırın.

380
Hızlı Başvuru Kılavuzu
4
Menteşe tırnaklarını destek olarak kullanarak kapağı yukarı doğru çevirin.
5
Kapağı menteşe tırnaklarından çıkarın ve yumuşak ve pürüzsüz bir yere
koyun.
1 güvenlik kablosu yuvası 2 kapak serbest bırakma mandalı
3 asma kilit halkası
2
1
3

Hızlı Başvuru Kılavuzu
381
Bilgisayarınızın İç Görünümü
UYARI:
Bu bölümdeki yordamlara başlamadan önce,
Ürün Bilgileri
Kılavuzu
'ndaki güvenlik yönergelerini uygulayın.
UYARI:
Elektrik çarpmasını önlemek için, kapağı çıkarmadan önce
bilgisayarınızın fişini elektrik prizinden çekin.
DİKKAT:
Kazayla sistem kartındaki kabloların yerinden çıkmasını önlemek için
bilgisayarın kapağını açarken dikkatli olun.
1 sürücü yuvası
(CD/DVD, disket ve sabit sürücü)
2 güç kaynağı
3 sistem kartı 4 kart yuvaları
5 ısı emicisi birimi 6 ön G/Ç paneli
1
2
3
4
5
6

382
Hızlı Başvuru Kılavuzu
Sistem Kartı Bileşenler
1 iç hoparlör konektörü (INT_SPKR) 2 işlemci konektörü (CPU)
3 işlemci güç konektörü
(12VPOWER)
4 bellek modülü konektörleri
(DIMM_1, DIMM_2)
5 SATA sürücü konektörleri
(SATA0, SATA1)
6 ön panel konektörü
(FRONTPANEL)
12
5
13
3
15
17
12
4
7
14
10
11 89
16
6

Hızlı Başvuru Kılavuzu
383
Bilgisayarın Kapağını Takma
UYARI:
Bu bölümdeki yordamları uygulamaya başlamadan önce
Ürün
Bilgileri Kılavuzu
'ndaki güvenlik yönergelerine bakın.
1
Tüm kabloların bağlı olduğundan emin olun ve düzgün bir şekilde
yerleştirin.
2
Bilgisayarın içinde alet veya fazladan parça kalmadığından emin olun.
3
Kapağı takmak için:
a
Kapağın altını bilgisayarın alt kenarında bulunan menteşe tırnaklarına
hizalayın.
b
Menteşe tırnaklarını kaldıraç olarak kullanarak, kapağı aşağı doğru
çevirip kapatın.
c
Kapak serbest bırakma mandalını geri çekip, kapak tam olarak yerine
oturduğunda mandalı bırakarak kapağı yerine yerleştirin.
d
Bilgisayarı hareket ettirmeden önce kapağın doğru yerleştirildiğinden
emin olun.
7 güç konektörü
(POWER)
8 SATA sürücüsü konektörleri
(SATA2, SATA3)
9 RTC sıfırlama atlatıcısı (RTCRST) 10 parola atlatıcı (PSWD)
11 pil yuvası (BATTERY) 12 PCI Express x16 kartı konektörü
(SLOT1)
13 PCI kartı konektörleri
(SLOT2 ve SLOT3)
14 iç buzzer (SPKR)
15 seri/ PS/2 konektörü (PS2/SER2) 16 fan konektörü (FAN_CPU)
17 disket sürücü konektörü (FLOPPY)

384
Hızlı Başvuru Kılavuzu
Mini Tower Bilgisayar
Önden Görünüm
4
8
7
3
2
6
5
1
10
9

Hızlı Başvuru Kılavuzu
385
1 Servis Etiketi Dell destek web sitesine erişirken veya Destek Merkezine
başvurduğunuzda bilgisayarınızı tanıtmak için Servis
Etiketini kullanın.
2 optik sürücü CD/DVD çalmak için optik sürücüyü kullanın.
3 disket sürücüsü Disket sürücüsü isteğe bağlıdır.
4 sürücü etkinlik ışığı Bilgisayar veri okurken veya sabit sürücüye veri
yazarken sürücü etkinlik ışığı yanar. Işık, optik sürücü
gibi bir aygıt çalışırken de yanabilir.
5 USB 2.0
konektörleri (2)
Oyun çubuğu veya fotoğraf makinesi gibi ara sıra
kullandığınız aygıtlar veya önyüklenebilir USB aygıtları için
öndeki USB konektörünü kullanın (USB cihazına
önyükleme hakkında daha fazla bilgi için çevrimiçi
Kullanım Kılavuzu'nda "Sistem Kurulumu Seçenekleri"
konusuna bakın). Yazıcılar ve klavyeler gibi normalde
bağlı kalan aygıtlar için arka USB konektörlerini
kullanmanız önerilir.
6 tanılama ışıkları Bilgisayar sorunlarını tanılama koduna göre gidermenize
yardımcı olması için bu ışıkları kullanın. Daha fazla
bilgi için, bkz. "Tanılama Işıkları" Sayfa: 402
7 güç düğmesi,
güç ışığı
Bilgisayarı açmak için güç düğmesine basın.
Bu düğmenin ortasındaki ışık güç durumunu belirtir.
DİKKAT:
Veri kaybını önlemek için, bilgisayarı
güç düğmesini kullanarak kapatmayın. Bunun
yerine, işletim sisteminden kapatın.
8 kulaklık konektörü Kulaklıkları ve hoparlör türlerinin çoğunu bağlamak için
kulaklık konektörünü kullanın.
9 mikrofon konektörü Ses veya telefon programına ses ya da müzik girdisi için
kişisel bilgisayar mikrofonu takmak istiyorsanız
mikrofon konektörünü kullanın.
Ses kartı bulunan bilgisayarlarda, mikrofon konektörü
kartın üzerindedir.
10 LAN gösterge ışığıBu ışık bir LAN (yerel alan ağı) bağlantısının
kurulduğunu gösterir.

386
Hızlı Başvuru Kılavuzu
Arkadan Görünüm
4
3
5
6
2
1

Hızlı Başvuru Kılavuzu
387
UYARI:
Sistem havalandırma deliklerinin kapanmamasına dikkat edin.
Havalandırma deliklerinin kapanması önemli termal sorunlara yol açabilir.
Arka Panel Konektörleri
1 kapak serbest
bırakma mandalı
Bu mandal, bilgisayar kapağını açmanızı sağlar.
2 asma kilit halkaları Asma kilit halkaları, ticari olarak satılan bir hırsızlık önleyici
aygıt takmak içindir. Asma kilit halkaları, bilgisayarın iç
kısmına yetkisiz erişimi önlemek için bilgisayarın kapağını
bir asma kilitle kasaya kilitlemenizi sağlar. Asma kilit
halkalarını kullanmak için, ticari olarak satılan bir kilidi
halkalara takın ve kilitleyin.
3 güç konektörü Güç kablosunu yerleştirin.
4 voltaj seçim
anahtarı
Voltaj değerini seçmek için.
5 arka panel
konektörler
USB, ses ve diğer aygıtları uygun konektöre takın (daha fazla
bilgi için, bkz. "Arka Panel Konektörleri" Sayfa: 377.
6 kart yuvaları Takılı PCI ve PCI Express kartlarına erişim.
1
3
98 7
5
6
24

388
Hızlı Başvuru Kılavuzu
1 paralel bağlantı
konektörü
Yazıcı gibi paralel aygıtları paralel bağlantı konektörüne
bağlayın. USB yazıcınız varsa, bunu USB konektörüne takın.
NOT:
Bilgisayar, aynı adrese yapılandırılmış paralel konektör
içeren bir kart takılı olduğunu algıladığında, tümleşik paralel
konektör otomatik olarak devre dışı bırakılır. Bilgi için,
Çevrimiçi
Kullanım Kılavuzu
'nda "Sistem Kurulumu
Seçenekleri" konusuna bakın.
2 bağlantı
bütünlüğü ışığı
•Yeşil — 10 Mb/sn ağ ve bilgisayar arasında iyi bir bağlantı
var.
• Turuncu — 100 Mb/sn ağ ve bilgisayar arasında iyi bir
bağlantı var.
• Sarı — 1000 Mb/sn (1 Gb/sn) ağ ve bilgisayar arasında iyi
bir bağlantı var.
• Kapalı — Bilgisayar ağa fiziksel bir bağlantı algılayamadı.
3 ağ bağdaştırıcısı
konektörü
Bilgisayarınızı ağa veya geniş bant aygıtına bağlamak için, ağ
kablosunun bir ucunu ağ prizine veya ağ ya da geniş bant
aygıtınıza bağlayın. Ağ kablosunun diğer ucunu
bilgisayarınızın arka panelindeki ağ bağdaştırıcısı
konektörüne takın. Ağ kablosu tam olarak yerine oturduğunda
bir tık sesi duyarsınız.
NOT:
Ağ konektörüne telefon kablosu takmayın.
Ağ bağdaştırıcısı kartı bulunan bilgisayarlarda, karttaki
konektörü kullanın.
Ağınız için en azından Kategori 5 kablo ve konektör
kullanmanız önerilir. Kategori 3 kablo kullanmanız
gerekiyorsa, güvenilir çalışmasını sağlamak için ağ hızını
10 Mb/sn'ye zorlayın.
4 ağ etkinlik ışığıBu ışık ağ verileri iletir veya alırken sarı renkte yanıp söner.
Yüksek hacimli ağ trafiği, bu ışığın sürekli "açık" durumda
görünmesine yol açabilir.
5 çıkış konektörü Kulaklıkları ve yerleşik yükselticili hoparlör setlerinin çoğunu
bağlamak için yeşil renkli çıkış konektörünü kullanın.
Ses kartı bulunan bilgisayarlarda, karttaki konektörü kullanın.
6 mikrofon/hat giriş
konektörü
Kaset çalar, CD çalar veya VCR ya da kişisel bilgisayar
mikrofonu takmak için mavi ve pembe hat giriş konektörünü
kullanın.

Hızlı Başvuru Kılavuzu
389
Bilgisayarın Kapağını Açma
UYARI:
Bu bölümdeki yordamlara başlamadan önce,
Ürün Bilgileri
Kılavuzu
'ndaki güvenlik yönergelerini uygulayın.
UYARI:
Elektrik çarpmalarına karşı korunmak için, kapağı çıkarmadan önce
bilgisayarınızın fişini elektrik prizinden çekin.
1
"Başlamadan Önce" Sayfa: 358 bölümündeki yordamları uygulayın.
NOT:
Çıkarılan kapağın konacağı kadar bir alan açın.
DİKKAT:
Bilgisayarın ve üzerinde durduğu yerin çizilmesini önlemek için düz ve
emniyeti sağlanmış bir yüzeyde çalışın.
2
Bilgisayarı kapağı yukarı bakacak şekilde yatırın.
7 USB 2.0
konektörleri (6)
Yazıcı ve klavye gibi genellikle bağlı kalan aygıtlar için arka
USB konektörlerini kullanın.
Oyun çubuğu veya fotoğraf makinesi gibi ara sıra bağladığınız
aygıtlar için ön USB konektörlerini kullanmanız önerilir.
8 VGA video
konektörü
Monitörün VGA kablosunu bilgisayardaki VGA konektörüne
takın.
Ekran kartı olan bilgisayarlarda, karttaki konektörü kullanın.
9 seri bağlantı
konektörü
El bilgisayarı gibi seri aygıtları seri bağlantı noktasına
bağlayın. Seri konektör 1 için varsayılan bağlantı noktası
COM1'dir.
Daha fazla bilgi için, çevrimiçi Kullanım Kılavuzu'nda
"Sistem Kurulumu Seçenekleri" konusuna bakın.

390
Hızlı Başvuru Kılavuzu
3
Bilgisayarın ön kısmından çekip yukarı kaldırarak bilgisayar kapağını
çıkarın.
4
Kapağı emniyetli bir yere koyun.
1 güvenlik kablosu yuvası 2 kapak serbest bırakma mandalı
3 asma kilit halkası
2
1
3

Hızlı Başvuru Kılavuzu
391
Bilgisayarınızın İç Görünümü
1 disket sürücüsü 2 optik sürücü
3 güç kaynağı 4 sistem kartı
5 ısı emicisi birimi 6 sabit sürücü
1
3
4
6
2
5

392
Hızlı Başvuru Kılavuzu
Sistem Kartı Bileşenler
1 iç hoparlör konektörü (INT_SPKR) 2 işlemci konektörü (CPU)
3 işlemci güç konektörü
(12VPOWER)
4 bellek modülü konektörleri
(DIMM_1, DIMM_2)
12
6
5
13
3
15
17
12
4
7
14
1011 89
16

Hızlı Başvuru Kılavuzu
393
Bilgisayarın Kapağını Takma
UYARI:
Bu bölümdeki yordamları uygulamaya başlamadan önce
Ürün
Bilgileri Kılavuzu
'ndaki güvenlik yönergelerini uygulayın.
1
Tüm kabloların bağlı olduğundan emin olun ve düzgün bir şekilde
yerleştirin.
2
Bilgisayarın içinde alet veya fazladan parça kalmadığından emin olun.
3
Kapağı takmak için:
a
Kapağın altını bilgisayarın alt kenarında bulunan menteşe tırnaklarına
hizalayın.
b
Menteşe tırnaklarını kaldıraç olarak kullanarak, kapağı aşağı doğru
çevirip kapatın.
c
Kapak serbest bırakma mandalını geri çekip, kapak tam olarak yerine
oturduğunda mandalı bırakarak kapağı yerine yerleştirin.
d
Bilgisayarı hareket ettirmeden önce kapağın doğru yerleştirildiğinden
emin olun.
4
Bilgisayarı dik duracak şekilde kaldırın.
5 SATA sürücü konektörleri
(SATA0, SATA1)
6 ön panel konektörü
(FRONTPANEL)
7 güç konektörü
(POWER)
8 SATA sürücüsü konektörleri
(SATA2, SATA3)
9 RTC sıfırlama atlatıcısı (RTCRST) 10 parola atlatıcı (PSWD)
11 pil yuvası (BATTERY) 12 PCI Express x16 kart konektörü
(SLOT1)
13 PCI kartı konektörleri
(SLOT2 ve SLOT3)
14 iç buzzer (SPKR)
15 seri/ PS/2 konektörü (PS2/SER2) 16 fan konektörü (FAN_CPU)
17 disket sürücü konektörü (FLOPPY)

394
Hızlı Başvuru Kılavuzu
Sorun Çözme
Dell, bilgisayarınızın beklendiği şekilde çalışmaması halinde yardımcı olacak
çeşitli araçlar sağlamaktadır. Bilgisayarınızla ilgili en güncel sorun giderme
bilgileri için, support.dell.com adresindeki Dell destek web sitesine bakın.
Bilgisayarınızda Dell'den yardım almanızı gerektirecek sorunlar olursa, hatanın
ayrıntılı açıklamasını, sesli uyarı kodlarını veya tanı ışıkları düzenini yazın,
Hızlı Servis Kodu ve Servis Etiketini aşağıya kaydedin ve bilgisayarınızın
bulunduğu bölgedeki Dell birimine başvurun.
Hızlı Servis Kodu ve Servis Etiketi örneği için bilgisayarınızın Kullanım
Kılavuzu'nda "Bilgi Bulma" bölümüne bakın.
Dell Diagnostics
UYARI:
Bu bölümdeki yordamlara başlamadan önce,
Ürün Bilgileri
Kılavuzu
'ndaki güvenlik yönergelerini uygulayın.
Dell Teşhislerini Kullanma Zamanı
Bilgisayarınızda sorunlar varsa, teknik yardım almak için Dell'e başvurmadan
önce Kilitlenmeler ve Yazıcı Sorunları konusundaki denetimleri gerçekleştirin
(ayrıntılar için çevrimiçi Kullanım Kılavuzu'na bakın) ve Dell Diagnostics
programını çalıştırın.
Başlamadan önce bu yordamları yazdırmanızı öneririz.
DİKKAT:
Dell Diagnostics programı yalnızca Dell™ bilgisayarlarda çalışır.
NOT:
Drivers and Utilities
CD'si isteğe bağlıdır ve bilgisayarınızla birlikte verilmemiş
olabilir.
Bilgiyayarınızın yapılandırma bilgilerini gözden geçirmek için çevrimiçi
Kullanım Kılavuzu
'nda "Sistem Kurumumu" konusuna bakın ve test etmek
istediğiniz aygıtun sistem kurulumu programında göründüğünden ve etkin
olduğundan emin olun.
Dell Diagnostics programını sabit sürücünüzden veya Drivers and Utilities
CD'sinden başlatın.
Express Service Code:
Service Tag:

Hızlı Başvuru Kılavuzu
395
Dell Diagnostics Programını Sabit Sürücüden Başlatma
Dell Diagnostics programı sabit diskinizdeki gizli bir tanı yardımcı programı
bölümünde bulunur.
NOT:
Bilgisayarınız ekran görüntüsü gösteremiyorsa, Dell'e başvurun.
1
Bilgisayarın düzgün çalışan bir elekrik prizine bağlandığından emin olun.
2
Bilgisayarınızı açın (veya yeniden başlatın).
3
DELL™ logosu göründüğünde, hemen <F12>'ye basın. Önyükleme
menüsünden
Diagnostics
'i seçin ve <Enter> tuşuna basın.
NOT:
Çok uzun süre beklerseniz ve işletim sistemi logosu görünürse,
Microsoft
®
Windows
®
masaüstü görünene kadar bekleyin; sonra da
bilgisayarınızı kapatıp tekrar deneyin.
NOT:
Tanı yardımıcı programı bölümünün bulunamadığını belirten bir ileti
görürseniz, Dell Diagnostics programını
Drivers and Utilities
CD'sinden
çalıştırın.
4
Sabit diskinizdeki tanılama yardımcı programı disk bölümünden Dell
Diagnostics'i başlatmak için herhangi bir tuşa basın.
Dell Diagnostics Programını Drivers and Utilities CD'sinden Başlatma
1
Drivers and Utilities
CD'sini takın
.
2
Bilgisayarı kapatıp tekrar başlatın.
DELL logosu göründüğünde, hemen <F12> tuşuna basın.
NOT:
Çok uzun süre beklerseniz ve işletim sistemi logosu görünürse,
Microsoft
®
Windows
®
masaüstü görünene kadar bekleyin; sonra da
bilgisayarınızı kapatıp tekrar deneyin.
NOT:
Sonraki adımlar, önyükleme sırasını yalnızca bir kez değiştirir. Bir
sonraki başlatmada, bilgisayar sistem kurulumu programında belirtilen
aygıtlara göre önyükleme yapar.
3
Önyükleme aygıt listesi görüntülendiğinde,
CD/DVD/CD-RW
'ı seçin ve
<Enter> tuşuna basın.
4
Görünen menüden
Boot from CD-ROM
(CD-ROM'dan Önyükle)
seçeneğini belirleyin ve <Enter> tuşuna basın.
5
CD'yi başlatmak için
1
yazın ve devam etmek için <Enter> tuşuna basın.

396
Hızlı Başvuru Kılavuzu
6
Numaralı listeden
Run the 32 Bit Dell Diagnostics
'i (32 Bit Dell
Diagnostics Programını Çalıştır) seçin. Birden çok sürüm listelenmişse,
bilgisayarınıza uygun sürümü seçin.
7
Dell Diagnostics programının
Ana Menüsü
göründüğünde, yürütmek
istediğiniz testi seçin.
Dell Tanıları Ana Menüsü
1
Dell Diagnostics programı yüklendikten ve
Ana
Menü
ekranı göründükten
sonra, istediğiniz seçeneğin düğmesini tıklatın.
NOT:
Bilgisayarınızda tam test çalıştırmak için
Test System
'ı (Sistem Testi)
seçmeniz önerilir.
2
Ana menüde
Test System
seçeneği belirlendiğinde aşağudaki menü
görüntülenir:
NOT:
Bilgisayardaki aygıtların eksiksiz olarak denetlenmesi için aşağıdaki
menüden
Extended Test
(Genişletilmiş Test) seçeneğini belirlemeniz önerilir.
Seçenek Function
Test Memory Tek başına bellek testi çalıştırır
Test System System Diagnostics'i çalıştırır
Exit Diagnostics'ten çıkar
Seçenek Function
Express Test Sistemdeki aygıtlarda hızlı test gerçekleştirir. Genellikle
10 - 20 dakika sürer.
Extended Test Sistemdeki aygıtlarda kapsamlı test gerçekleştirir.
Genellikle en az bir saat sürer.
Custom Test Belirli bir aygıtı test etmek veya çalıştırılacak testleri
özelleştirmek için seçin.
Symptom Tree Bu seçenek yaşamakta olduğunuz sorunun belirtisine göre
testler seçmenize olanak sağlar. Bu seçenekte en yaygın
belirtiler listelenir.

Hızlı Başvuru Kılavuzu
397
3
Test sırasında bir sorunla karşılaşılırsa, sorunun hata kodunu ve açıklamasını
içeren bir ileti görünür. Hata kodunu ve sorunun açıklamasını yazın ve Dell'e
başvurun.
NOT:
Bilgisayarınızın Servis Etiketi numarası, her test ekranının en üstünde
bulunur. Dell'e başvurduğunuzda, teknik destek bölümü Servis Etiketi
numaranızı sorar.
4
Custom Test veya Symptom Tree
seçeneğinden bir test yürütürseniz, daha
fazla bilgi için aşağıdaki tabloda açıklaması verilen ilgili sekmeyi tıklatın.
5
Testler tamamlandığında, test ekranını kapatın ve
Ana
Menü
ekranına
dönün. Dell Diagnostics programından çıkmak ve bilgisayarı yeniden
başlatmak için,
Ana
Menü
ekranını kapatın.
6
Dell
Drivers and Utilities
CD'sini çıkarın
(takılıysa).
Sekme Function
Results Test sonuçlarını ve karşılaşılan hata durumlarını
görüntüler.
Errors Karşılaşılan hata durumlarını, hata kodlarını ve sorun
açıklamasını görüntüler.
Help Testi açıklar ve test çalıştırma gereksinimlerini belirtebilir.
Configuration Seçilen aygıt için donanım yapılandırmanızı görüntüler.
Dell Diagnostics programı, tüm aygıtların yapılandırma
bilgilerini sistem kurulumundan, bellekten ve çeşitli iç
testlerden alır ve bilgileri ekranın sol bölmesindeki aygıt
listesinde görüntüler. Aygıt listesi, bilgisayarınıza takılı
tüm bileşenlerin veya bilgisayarınıza bağlanmış tüm
aygıtların adlarını görüntülemeyebilir.
Parameters Test ayarlarını değiştirerek testi özelleştirmenize olanak
sağlar.

398
Hızlı Başvuru Kılavuzu
Güç Işıkları
UYARI:
Bu bölümdeki yordamlara başlamadan önce,
Ürün Bilgileri
Kılavuzu
'ndaki güvenlik yönergelerini uygulayın.
Bilgisayarın ön tarafında bulunan güç düğmesi ışığı (iki renkli LED) farklı
durumları belirtmek için ışık verir ve yanıp söner veya kesintisiz yanar:
•Güç ışıkları kapalıysa, bilgisayar kapalıdır veya elektrik gitmiyordur.
– Güç kablosunu bilgisayarın arkasındaki güç konektörüne ve bir elektrik
prizine bağlayın.
– Bilgisayar bir anahtarlı uzatma kablosuna bağlıysa, anahtarlı uzatma
kablosunun elektrik prizine takılı olduğundan ve anahtarlı uzatma
kablosunun açık olduğundan emin olun. Ayrıca, bilgisayarın düzgün
açıldığını doğrulamak için güç koruma aygıtlarını, anahtarlı uzatma
kablolarını kapatın ve uzatma kablolarını çıkartın.
–Başka bir aygıtı, örneğin bir lambayı takarak elektrik prizinin çalışıp
çalışmadığını test edin.
•Güç ışığı yeşilse ve bilgisayar yanıt vermiyorsa:
– Ekranın bağ lı ve açık olduğundan emin olun.
–Ekran bağlı ve açık durumdaysa, bkz. "Sesli Uyarı Kodları" Sayfa: 399.
•Güç ışığı yanıp sönen yeşilse, bilgisayar bekleme modundadır. Normal
çalışma moduna geçmek için klavyedeki bir tuşa basın, fareyi oynatın veya
güç düğmesine basın. Güç ışığı yeşilse ve bilgisayar yanıt vermiyorsa:
– Ekranın bağ lı ve açık olduğundan emin olun.
–Ekran bağlı ve açık durumdaysa, bkz. "Sesli Uyarı Kodları" Sayfa: 399.
•Güç ışığı kesintisiz sarı yanıyorsa, bilgisayar elektrik alıyordur, ancak bir
aygıt düzgün çalışmıyor veya yanlış takılmış olabilir.
– Bellek modüllerini çıkarıp yeniden takın.
– Tüm kartları çıkarıp yeniden takın.
– Varsa grafik kartını çıkarıp yeniden takın.
•Güç ışığı yanıp sönen sarıysa, bir elektrik sorunu olabilir veya iç aygıtlardan
biri bozuktur.
– Tüm kartların sistem kartına düzgün şekilde takıldığ
ından emin olun
(bkz. "Sistem Kartı Bileşenler" Sayfa: 382).
– Ana elektrik kablosunun ve yan panel kablosunun sistem kartına düzgün
takıldığından emin olun (bkz. "Sistem Kartı Bileşenler" Sayfa: 382).

Hızlı Başvuru Kılavuzu
399
Sesli Uyarı Kodları
Monitör hataları veya sorunları görüntüleyemezse bilgisayarınız başlatma
sırasında bir dizi sesli uyarı yayınlayabilir. Sesli uyarı kodu adı verilen sesli
uyarı dizileri bir sorunu belirtir. Örneğin, 1-3-1 sesli uyarı kodu (olası sesli uyarı
kodlarından biri) bir uyarı sesi, peşpeşe üç uyarı sesi ve ardından bir uyarı sesi
dizisinden oluşur. Bu sesli uyarı kodu, bilgisayarın bir bellek sorunuyla
karşılaştığını anlatır.
Bellek modüllerinin yeniden takılması aşağıdaki sesli uyarı kodu hatalarını
giderebilir. Sorun devam ederse, teknik yardım alma yönergeleri için Dell'e
başvurun (
Kullanım Kılavuzu
'nda "Dell'e Başvurma" konusuna bakın).
Aşağıdaki sesli uyarı kodu hatalarından herhangi biriyle karşılaşırsanız, teknik
yardım alma yönergeleri için
Kullanım Kılavuzu
'nda "Dell'e Başvurma" konusuna
bakın.
Kod Sebep
1-3-1 -
2-4-4 arası
Bellek düzgün tanımlanmıyor veya kullanılmıyor
4-3-1 Adres 0FFFFh üzerinde bellek hatası
Kod Sebep
1-1-2 Mikroişlemci kayıt hatası
1-1-3 NVRAM okuma/yazma hatası
1-1-4 ROM BIOS sağlama hatası
1-1-2 Programlanabilir aralık süreölçeri hatası
1-2-2 DMA başlatma hatası
1-3-2 DMA sayfa kaydı okuma/yazma hatası
1-3 Görüntü Belleği Testi hatası
1-3-1 -
2-4-4 arası
Bellek düzgün tanımlanmıyor veya kullanılmıyor
3-1-1 Bağımlı DMA kayıt hatası
3-1-2 Ana DMA kayıt hatası
3-1-3 Ana kesinti maskesi kayıt hatası
3-1-4 Bağımlı kesinti maskesi kayıt hatası
3-2-2 Kesinti vektör yükleme hatası

400
Hızlı Başvuru Kılavuzu
Sistem İletileri
NOT:
Aldığınız ileti tabloda yoksa, işletim sisteminin veya ileti görüntülendiğinde
çalışmakta olan programın belgelerine bakın.
3-2-4 Klavye Denetimcisi Testi hatası
3-3-1 NVRAM güç kaybı
3-3-2 Geçersiz NVRAM yapılandırması
3-3-4 Görüntü Belleği Testi hatası
3-1-4 Ekran başlatma hatası
3-4-2 Ekran kaynağını bulma hatası
3-4-3 Video ROM arama hatası
4-2-1 Süreölçer sesi yok
4-2-2 Kapatma hatası
4-2-3 Kapı A20 hatası
4-2-4 Korumalı kipte beklenmedik kesinti
4-3-1 Adres 0FFFFh üzerinde bellek hatası
4-3-3 Saat çipi sayacı 2 başarısız
4-3-4 Gün saati durdu
4-4-1 Seri veya paralel bağlantı noktası testi hatası
4-4-2 Gölgeli belleğe kod açma hatası.
4-4-3 Matematik yardımcı işlemcisi test hatası
4-4-4 Önbellek testi hatası
Alert! Previous attempts at booting this system have failed at
checkpoint [nnnn]. For help in resolving this problem, please
note this checkpoint and contact Dell Technical Support (Dikkat!
Bu sistemin önyüklenmesi sırasındaki önceki bir girişim, denetim
noktasında başarısız oldu. Bu sorunu çözme yardımı almak için,
lütfen denetim noktasını not edin ve Dell Teknik Destek Merkezine
başvurun) —
Bilgisayar önyükleme işleminde aynı hatayla ilgili olarak art arda üç
kez başarısız oldu.
Kod Sebep

Hızlı Başvuru Kılavuzu
401
CMOS checksum error (CMOS denetim noktası hatası) —
Olası ana
kart arızası veya RTC pili azaldı. Pili değiştirin.
CPU fan failure (CPU fanı arızalı) —
CPU fanı arızalandı. CPU fanını
değiştirin.
Diskette drive 0 seek failure (Disket sürücüsü 0 bulma hatası) —
Bir kablo gevşemiş olabilir veya bilgisayar yapılandırma bilgileri donanım
yapılandırma bilgileriyle uyumlu değil. Kablo bağlantılarını kontrol edin.
Diskette read failure (Disket okuma hatası) —
Disket arızalı olabilir
veya bir kablo gevşemiştir. Disketi değiştirin/kablo bağlantılarını kontrol edin.
Hard-disk drive failure (Sabit sürücü arızası) —
HDD POST sırasında
olası sabit disk arızası. Kabloları kontrol edin /sabit sürücüleri değiştirin.
Hard-disk drive read failure (Sabit disk sürücüsü arızası) —
HDD
önyükleme testinde olası HDD arızası.
Keyboard failure (Klavye arızası) —
Klavye arızalı veya klavye kablosı
gevşek.
No boot device available (Önyüklenebilir aygıt yok) —
Sistem
önyüklenebilir bir aygıt veya bölüm algılayamadı.
• Önyükleme aygıtınız disket sürücüsüyse, kabloların bağlı ve önyüklenebilir
disketin sürücüde olduğundan emin olun.
• Önyükleme aygıtınız sabit sürücüyse, kabloların bağlı olduğundan, sürücünün
düzgün bir şekilde takıldığından ve önyükleme aygıtı olarak bölümlendiğinden
emin olun.
• Sistem kurulumuna girin ve önyükleme sırası bilgilerinin doğru olduğundan emin
olun.
No timer tick interrupt (Saat tıklaması kesintisi yok) —
Sistem
kartındaki yongalardan biri düzgün çalışmıyor veya ana kart arızalı.

402
Hızlı Başvuru Kılavuzu
Tanılama Işıkları
UYARI:
Bu bölümdeki yordamları uygulamaya başlamadan önce
Ürün
Bilgileri Kılavuzu
'ndaki güvenlik yönergelerine bakın.
Sorunu çözmenize yardımcı olmak için, bilgisayarınızın ön veya arka panelinde
1, 2, 3, 4 şeklinde etiketlenmiş dört ışık vardır. Işıklar kapalı veya yeşil olabilir.
Bilgisayar normal şekilde başlatıldığında, ışıktaki desenler veya kodlar
önyükleme işlemi tamamlandığında değişir. Bilgisayar normal şekilde
başlatıldığında, ışıktaki desenler veya kodlar önyükleme işlemi
tamamlandığında değişir. Sistem önyüklemenin POST kısmı başarıyla
tamamlandığında, dört ışık da kesintisiz yeşil yanar. POST işlemi sırasında
bilgisayarda hata olursa, LED'lerde görüntülenen desen, işlem sırasında
bilgisayarın takıldığı yeri saptamaya yardım edebilir.
NOT:
Tanılama ışıklarının yönü, sistem türüne göre değişebilir. Tanılama ışıkları,
dikey veya yatay olarak görünebilir.
Non-system disk or disk error (Sistem diski değil veya disk
hatası) —
Önyüklenebilir işletim sistemi içeren bir disket takın veya A
sürücüsünden disketi çıkarın ve bilgisayarı yeniden başlatın.
Not a boot diskette (Önyükleme disketi değil) —
Önyüklenebilir bir
disket takın ve bilgisayarınızı yeniden başlatın.
USB over current error (USB fazla akım hatası) —
USB aygıtını
çıkarın. USB aygıtı için harici güç kaynağı kullanın.
NOTICE - Hard Drive SELF MONITORING SYSTEM has reported
that a parameter has exceeded its normal operating range. Dell
recommends that you back up your data regularly. A parameter
out of range may or may not indicate a potential hard drive
problem (DİKKAT - Sabit Sürücü OTOMATİK İZLEME SİSTEMİ
parametrenin normal çalışma aralığını aştığını bildirdi. Dell
verilerinizi düzenli olarak yedeklemenizi önerir. Bir parametre
aralık dışında veya olası bir sabit sürücü sorunu belirtmiyor) —
S.M.A.R.T hatası, olası HDD arızası. Bu özellik BIOS kurulumunda etkinleştirilebilir
veya devre dışı bırakılabilir.

Hızlı Başvuru Kılavuzu
403
Işık Deseni Problem Tanımı Önerilen Çözüm
Bilgisayar normal "kapalı"
durumda veya BIOS öncesi bir
arıza olmuş olabilir.
Bilgisayar işletim sistemini
başarıyla önyükledikten sonra
tanılama ışıkları yanmıyor.
Bilgisayarı çalışan bir elektrik
prizine takın ve güç düğmesine
basın.
BIOS arızası oluşmuş olabilir;
bilgisayar kurtarma modunda
çalışıyor.
BIOS Kurtarma yardımcı
programını çalıştırın,
kurtarmanın tamamlanmasını
bekleyin ve ardından bilgisayarı
yeniden başlatın.
Bir işlemci arızası oluşmuş
olabilir.
İşlemciyi tekrar takın ve
bilgisayarı yeniden başlatın.
Bellek modülleri saptandı, ancak
bir bellek hatası oluştu.
• Yalnızca bir bellek modülü
takılıysa, bunu çıkarıp takın
ve bilgisayarı yeniden
başlatın. (bellek modüllerini
çıkarma ve takma yönergeleri
için çevrimiçi
Kullanım
Kılavuzu
'na bakın.)
• İki ya da daha fazla bellek
modülü takılıysa, modülleri
çıkarın, tek bir modülü takın
ve bilgisayarı yeniden
başlatın. Bilgisayar normal
şekilde başlarsa, diğer bir
modülü takın. Arızalı bir
modül bulana kadar veya tüm
modülleri hatasız şekilde
takana kadar devam edin.
• Mümkünse, bilgisayarınıza
aynı türde, düzgün çalışan bir
bellek takın.
• Sorun devam ederse,
Dell'e
başvurun
.

404
Hızlı Başvuru Kılavuzu
Bir grafik kartı hatası oluşmuş
olabilir.
• Bilgisayarda bir grafik kartı
varsa, kartı çıkarıp takın ve
ardından bilgisayarı yeniden
başlatın.
• Sorun devam ederse,
çalıştığını bildiğiniz bir grafik
kartı takın ve bilgisayarı
yeniden başlatın.
• Sorun devam ederse veya
bilgisayarda tümleşik grafik
kartı varsa,
Dell'e başvurun
.
Bir disket veya sabit sürücü
arızası oluşmuş olabilir.
Tüm güç ve veri kablolarını
yeniden yerleştirin ve
bilgisayarı yeniden başlatın.
Bir USB hatası oluşmuş olabilir. Tüm USB aygıtlarını yeniden
takın, kablo bağlantılarını
kontrol edin ve ardından
bilgisayarı yeniden başlatın.
Bellek modülü algılanamadı.
• Yalnızca bir bellek modülü
takılıysa, bunu çıkarıp takın
ve bilgisayarı yeniden
başlatın. Bellek modüllerini
çıkarma ve takma yönergeleri
için çevrimiçi
Kullanım
Kılavuzu
'na bakın.
• İki ya da daha fazla bellek
modülü takılıysa, modülleri
çıkarın, tek bir modülü takın
ve bilgisayarı yeniden
başlatın. Bilgisayar normal
şekilde başlarsa, diğer bir
modülü takın. Arızalı bir
modül bulana kadar veya tüm
modülleri hatasız şekilde
takana kadar devam edin.
• Mümkünse, bilgisayarınıza
aynı türde, düzgün çalışan bir
bellek takın.
• Sorun devam ederse,
Dell'e
başvurun
.
Işık Deseni Problem Tanımı Önerilen Çözüm

Hızlı Başvuru Kılavuzu
405
Unutulan Parolaları Silme
UYARI:
Bu bölümdeki yordamları uygulamaya başlamadan önce
Ürün
Bilgileri Kılavuzu
'ndaki güvenlik yönergelerine bakın.
1
"Başlamadan Önce" Sayfa: 358 bölümündeki yordamları uygulayın.
2
Bilgisayarın kapağını açın (bkz. "Bilgisayarın Kapağını Açma" Sayfa: 389).
3
Sistem kartında 2 pinli atlatıcıyı (PSWD) bulun. Varsayılan olarak, Pin1 ve
Pin2 bağlı olmalıdır. Atlatıcıyı çıkarmanız ve sistemi önyüklemeniz gerekir.
4
Atlatıcıyı çıkarın.
Bellek modülleri saptandı, ancak
bir bellek yapılandırma veya
uyum hatası var.
•
Özel bellek modülü/bellek
konektörü yerleştirme
gereksinimi
bulunmadığından emin olun.
•Taktığınız
bellek
modüllerinin
bilgisayarınızla
uyumlu olduğunu doğrulayın.
• Sorun devam ederse, Dell'e
başvurun.
Bir hata oluştu.
Bu desen, sistem ayarlarına
girdiğinizde de ortaya çıkabilir
ve bir sorun olduğu anlamına
gelmeyebilir.
• Sabit sürücü ve optik sürücü
kablolarının sistem kartına
düzgün bir şekilde
takıldığından emin olun.
• Monitörünüzün ekranında
görünen bilgisayar iletisini
kontrol edin.
• Sorun devam ederse, Dell'e
başvurun.
POST tamamlandıktan sonra,
dört tanılama ışığının tümü
normal çalışma durumunu
belirtmek için kapanmadan önce
kısa bir süre yeşile döner.
Yok .
Işık Deseni Problem Tanımı Önerilen Çözüm

406
Hızlı Başvuru Kılavuzu
5
Bilgisayarın kapağını takın (bkz. "Bilgisayarın Kapağını Takma"
Sayfa: 383).
DİKKAT:
Ağ kablosunu bağlamak için, kabloyu önce ağ aygıtına, sonra bilgisayara
bağlayın.
6
Bilgisayarınızı ve aygıtlarınızı elektrik prizine bağlayın ve onları açın.
7
Bilgisayarınızda Microsoft
®
Windows
®
masaüstü görüntülendiğinde,
bilgisayarınızı kapatın (bkz. "Bilgisayarınızı Kapatma" Sayfa: 359).
8
Monitörü kapatın ve elektrik prizinden fişini çekin.
9
Bilgisayarın güç kablosunu elektrik prizinden çıkarın ve sistem kartını
topraklamak için güç düğmesine basın.
10
Bilgisayarın kapağını açın.
11
Sistem kartında 2 pinli atlatıcıyı (PSWD) bulun ve parola özelliğini yeniden
etkinleştirmek için atlatıcıyı takın.
12
Bilgisayarın kapağını takın (bkz. "Bilgisayarın Kapağını Takma"
Sayfa: 383).
DİKKAT:
Ağ kablosunu bağlarken, kabloyu önce ağ duvar prizine, sonra
bilgisayara takın.

Hızlı Başvuru Kılavuzu
407
13
Bilgisayarınızı ve aygıtlarınızı elektrik prizine bağlayın ve onları açın.
NOT:
Bu yordam parola özelliğini etkinleştirir. Sistem kurulumuna
girdiğinizde
(
Kullanım Kılavuzu
'nda "Sistem Kurulumuna Girme" konusuna bakın), sistem ve
yönetici parolası seçenekleri
Not Set
olarak görünür; bu, parola özelliğinin
etkinleştirildiği ancak parolanın atanmadığı anlamına gelir.
14
Yeni sistem ve/veya yönetici parolasını atayın.
CMOS Ayarlarını Silme
UYARI:
Bu bölümdeki yordamları uygulamaya başlamadan önce
Ürün
Bilgileri Kılavuzu
'ndaki güvenlik yönergelerine bakın.
1
"Başlamadan Önce" Sayfa: 358 bölümündeki yordamları uygulayın.
NOT:
CMOS ayarını silmek için bilgisayarın kablosunun elektrik prizinden
çekilmesi gerekir.
2
Bilgisayarın kapağını açın (bkz. "Bilgisayarın Kapağını Açma" Sayfa: 389).
3
Bilgisayarın kapağını çıkarın.
4
Geçerli CMOS ayarlarını silin:
a
Sistem kartında parolayı (PSWD) ve CMOS (RTCRST) atlatıcılarını
bulun (bkz. "Unutulan Parolaları Silme" Sayfa: 405).
b
Parola atlatıcısını pininden çıkarın.
c
RTCRST pinlerine parola atlatıcı fişini takın ve yaklaşık 5 saniye
bekleyin.
d
RTCRST pinlerinden atlatıcı fişini tıkarın ve tekrar parola pinlerine
takın.
5
Bilgisayarın kapağını takın (bkz. "Bilgisayarın Kapağını Takma"
Sayfa: 383).
DİKKAT:
Ağ kablosunu bağlarken, kabloyu önce ağ bağlantı noktasına, sonra
bilgisayara takın.
6
Bilgisayarınızı ve aygıtlarınızı elektrik prizine bağlayın ve onları açın.
BIOS Kodunu Yenileme
Bir güncelleştirme bulunduğunda veya sistem kartı değiştirilirken BIOS
kodunun yenilenmesi gerekebilir.
1
Bilgisayarı açın.

408
Hızlı Başvuru Kılavuzu
2
support.dell.com
adresindeki Dell destek web sitesinde bilgisayarınızla
ilgili BIOS güncelleştirme dosyasını bulun.
3
Download Now
(Şimdi Yükle) seçeneğini tıklatarak dosyayı yükleyin.
4
Export Compliance Disclaimer
(Dışa Aktarma Uygunluk Reddi) penceresi
görünürse,
Yes, I Accept this Agreement
'ı (Evet, Bu Sözleşmeyi Kabul
Ediyorum) tıklatın.
File Download
(Dosya İndirme) penceresi görünür.
5
Save this program to disk
'i (Bu programı diske kaydet), sonra da
OK
'i
(Tamam) tıklatın.
Save In
(Kayıt Yeri) penceresi görünür.
6
Save In
menüsünü görüntülemek için aşağı oku tıklatın,
Desktop
'ı
(Masaüstü) seçin ve
Save
(Kaydet) seçeneğini tıklatın.
Dosya masaüstüne kaydedilir.
7
Download Complete
(İndirme Tamamlandı) penceresi göründüğünde
Close'u (Kapat) tıklatın.
Masaüstünde dosya simgesi görünür ve indirilen BIOS güncelleştirme
dosyası ile aynı adı taşır.
8
Masaüstündeki dosya simgesini çift tıklatın ve ekrandaki yönergeleri
uygulayın.

Dizin
409
Dizin
Ğ
ışıklar
güç, 375
Å
ağ
Ağ Kurulum Sihirbazı, 363
Ağ Kurulum Sihirbazı, 363
Æ
ana kart. Bkz. sistem kartı
B
belge
ergonomi, 354
garanti, 354
güvenlik, 354
mevzuat, 354
Son Kullanıcı Lisans
Anlaşması, 354
Ürün Bilgileri Kılavuzu, 354
belgeler
çevrimiçi, 356
Hızlı Başvuru, 354
Kullanım Kılavuzu, 354
bilgisayar
iç bileşenler, 381, 391
iç görünüm, 391
iç görünümü, 381
sesli uyarı kodları, 399
Ç
CD'ler
işletim sistemi, 357
CMOS ayarları
silme, 407
D
Dell destek sitesi, 356
Dell Diagnostics, 394
Dell Diagnostics Programını
Drivers and Utilities
CD'sinden Başlatma, 395
Dell Diagnostics Programını
Sabit Sürücüden
Başlatma, 395
destek web sitesi, 356
donanım
Dell Diagnostics, 394
sesli uyarı kodları, 399

410
Dizin
Ë
ergonomi bilgileri, 354
etiketler
Microsoft Windows, 355
Servis Etiketi, 355, 375, 385
G
garanti bilgileri, 354
güç
ışık, 375
akım düzenleyiciler
düğme, 374, 385
koruma aygıtları
voltaj koruyucular
güvenlik talimatları, 354
H
hata iletileri
sesli uyarı kodları, 399
Ï
işletim sistemi
yeniden yükleme, 357
Internet bağlantısı
hakkında, 364
kurma, 365
seçenekler, 364
K
kapak
açma, 389
çıkarma, 379
takma, 383, 393
kesintisiz güç kaynağı. Bkz. UPS
Kullanım Kılavuzu, 354
M
mevzuat bilgileri, 354
monitçr
DVI bağlama, 370
monitör
DVI bağlama, 372
genişletilmiş masaüstü modu, 372
görüntü ayarları, 372
iki tane bağlama, 370-372
klonlama modu, 372
TV bağlama, 370, 372
VGA bağlama, 370-372
Ø
Operating System CD'si, 357
P
parçaları takma
başlamadan önce, 359
bilgisayarınızı kapatma, 359
önerilen araçlar, 359

Dizin
411
parola
atlatıcı, 405
silme, 405
power
UPS
R
ResourceCD
Dell Diagnostics, 394
S
S.M.A.R.T, 402
Servis Etiketi, 355, 375, 385
sesli uyarı kodları, 399
sihirbazlar
Ağ Kurulum Sihirbazı, 363
sistem kartı, 382, 392
Son Kullanıcı Lisans
Anlaşması, 354
sorun giderme
Dell Diagnostics, 394
Yardım ve Destek Merkezi, 357
sorunlar
Dell Diagnostics, 394
sesli uyarı kodları, 399
T
tanı
Dell, 394
sesli uyarı kodları, 399
TV
bilgisayara bağlı, 370
bilgisayara bağlama, 372
Ù
UPS
Ürün Bilgileri Kılavuzu, 354
W
Windows XP
Ağ Kurulum Sihirbazı, 363
Yardım ve Destek Merkezi, 357
yeniden yükleme, 357
Y
yardım dosyası
Windows Yardım ve Destek
Merkezi, 357
Yardım ve Destek Merkezi, 357
yazıcı
ayarlama, 362
bağlama, 362, 370
kablo, 370
kurma, 370

412
Dizin
-
 1
1
-
 2
2
-
 3
3
-
 4
4
-
 5
5
-
 6
6
-
 7
7
-
 8
8
-
 9
9
-
 10
10
-
 11
11
-
 12
12
-
 13
13
-
 14
14
-
 15
15
-
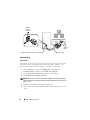 16
16
-
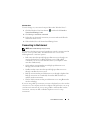 17
17
-
 18
18
-
 19
19
-
 20
20
-
 21
21
-
 22
22
-
 23
23
-
 24
24
-
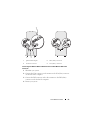 25
25
-
 26
26
-
 27
27
-
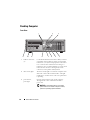 28
28
-
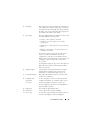 29
29
-
 30
30
-
 31
31
-
 32
32
-
 33
33
-
 34
34
-
 35
35
-
 36
36
-
 37
37
-
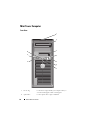 38
38
-
 39
39
-
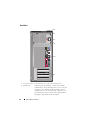 40
40
-
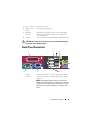 41
41
-
 42
42
-
 43
43
-
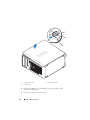 44
44
-
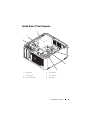 45
45
-
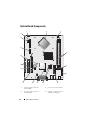 46
46
-
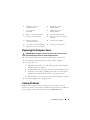 47
47
-
 48
48
-
 49
49
-
 50
50
-
 51
51
-
 52
52
-
 53
53
-
 54
54
-
 55
55
-
 56
56
-
 57
57
-
 58
58
-
 59
59
-
 60
60
-
 61
61
-
 62
62
-
 63
63
-
 64
64
-
 65
65
-
 66
66
-
 67
67
-
 68
68
-
 69
69
-
 70
70
-
 71
71
-
 72
72
-
 73
73
-
 74
74
-
 75
75
-
 76
76
-
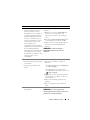 77
77
-
 78
78
-
 79
79
-
 80
80
-
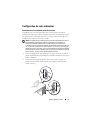 81
81
-
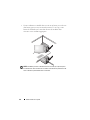 82
82
-
 83
83
-
 84
84
-
 85
85
-
 86
86
-
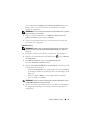 87
87
-
 88
88
-
 89
89
-
 90
90
-
 91
91
-
 92
92
-
 93
93
-
 94
94
-
 95
95
-
 96
96
-
 97
97
-
 98
98
-
 99
99
-
 100
100
-
 101
101
-
 102
102
-
 103
103
-
 104
104
-
 105
105
-
 106
106
-
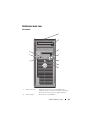 107
107
-
 108
108
-
 109
109
-
 110
110
-
 111
111
-
 112
112
-
 113
113
-
 114
114
-
 115
115
-
 116
116
-
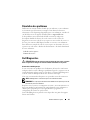 117
117
-
 118
118
-
 119
119
-
 120
120
-
 121
121
-
 122
122
-
 123
123
-
 124
124
-
 125
125
-
 126
126
-
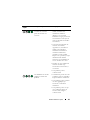 127
127
-
 128
128
-
 129
129
-
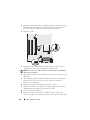 130
130
-
 131
131
-
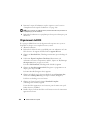 132
132
-
 133
133
-
 134
134
-
 135
135
-
 136
136
-
 137
137
-
 138
138
-
 139
139
-
 140
140
-
 141
141
-
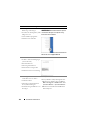 142
142
-
 143
143
-
 144
144
-
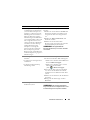 145
145
-
 146
146
-
 147
147
-
 148
148
-
 149
149
-
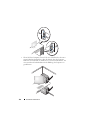 150
150
-
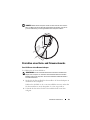 151
151
-
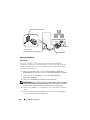 152
152
-
 153
153
-
 154
154
-
 155
155
-
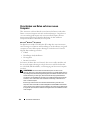 156
156
-
 157
157
-
 158
158
-
 159
159
-
 160
160
-
 161
161
-
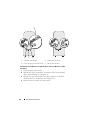 162
162
-
 163
163
-
 164
164
-
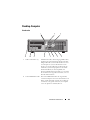 165
165
-
 166
166
-
 167
167
-
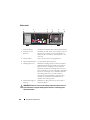 168
168
-
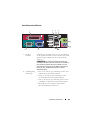 169
169
-
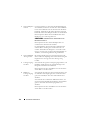 170
170
-
 171
171
-
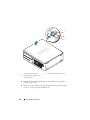 172
172
-
 173
173
-
 174
174
-
 175
175
-
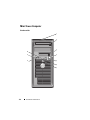 176
176
-
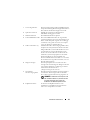 177
177
-
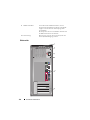 178
178
-
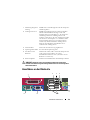 179
179
-
 180
180
-
 181
181
-
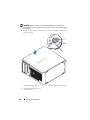 182
182
-
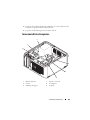 183
183
-
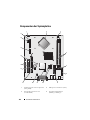 184
184
-
 185
185
-
 186
186
-
 187
187
-
 188
188
-
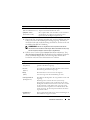 189
189
-
 190
190
-
 191
191
-
 192
192
-
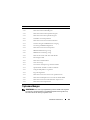 193
193
-
 194
194
-
 195
195
-
 196
196
-
 197
197
-
 198
198
-
 199
199
-
 200
200
-
 201
201
-
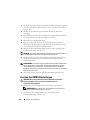 202
202
-
 203
203
-
 204
204
-
 205
205
-
 206
206
-
 207
207
-
 208
208
-
 209
209
-
 210
210
-
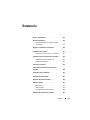 211
211
-
 212
212
-
 213
213
-
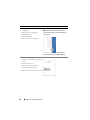 214
214
-
 215
215
-
 216
216
-
 217
217
-
 218
218
-
 219
219
-
 220
220
-
 221
221
-
 222
222
-
 223
223
-
 224
224
-
 225
225
-
 226
226
-
 227
227
-
 228
228
-
 229
229
-
 230
230
-
 231
231
-
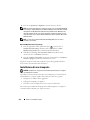 232
232
-
 233
233
-
 234
234
-
 235
235
-
 236
236
-
 237
237
-
 238
238
-
 239
239
-
 240
240
-
 241
241
-
 242
242
-
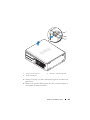 243
243
-
 244
244
-
 245
245
-
 246
246
-
 247
247
-
 248
248
-
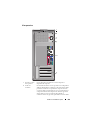 249
249
-
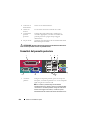 250
250
-
 251
251
-
 252
252
-
 253
253
-
 254
254
-
 255
255
-
 256
256
-
 257
257
-
 258
258
-
 259
259
-
 260
260
-
 261
261
-
 262
262
-
 263
263
-
 264
264
-
 265
265
-
 266
266
-
 267
267
-
 268
268
-
 269
269
-
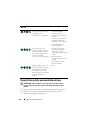 270
270
-
 271
271
-
 272
272
-
 273
273
-
 274
274
-
 275
275
-
 276
276
-
 277
277
-
 278
278
-
 279
279
-
 280
280
-
 281
281
-
 282
282
-
 283
283
-
 284
284
-
 285
285
-
 286
286
-
 287
287
-
 288
288
-
 289
289
-
 290
290
-
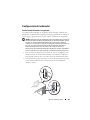 291
291
-
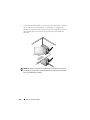 292
292
-
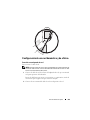 293
293
-
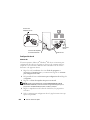 294
294
-
 295
295
-
 296
296
-
 297
297
-
 298
298
-
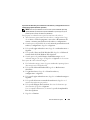 299
299
-
 300
300
-
 301
301
-
 302
302
-
 303
303
-
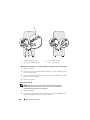 304
304
-
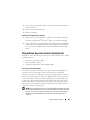 305
305
-
 306
306
-
 307
307
-
 308
308
-
 309
309
-
 310
310
-
 311
311
-
 312
312
-
 313
313
-
 314
314
-
 315
315
-
 316
316
-
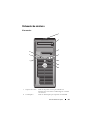 317
317
-
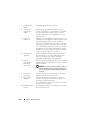 318
318
-
 319
319
-
 320
320
-
 321
321
-
 322
322
-
 323
323
-
 324
324
-
 325
325
-
 326
326
-
 327
327
-
 328
328
-
 329
329
-
 330
330
-
 331
331
-
 332
332
-
 333
333
-
 334
334
-
 335
335
-
 336
336
-
 337
337
-
 338
338
-
 339
339
-
 340
340
-
 341
341
-
 342
342
-
 343
343
-
 344
344
-
 345
345
-
 346
346
-
 347
347
-
 348
348
-
 349
349
-
 350
350
-
 351
351
-
 352
352
-
 353
353
-
 354
354
-
 355
355
-
 356
356
-
 357
357
-
 358
358
-
 359
359
-
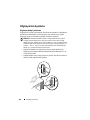 360
360
-
 361
361
-
 362
362
-
 363
363
-
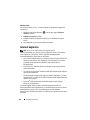 364
364
-
 365
365
-
 366
366
-
 367
367
-
 368
368
-
 369
369
-
 370
370
-
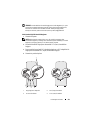 371
371
-
 372
372
-
 373
373
-
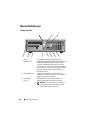 374
374
-
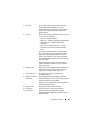 375
375
-
 376
376
-
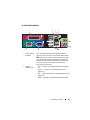 377
377
-
 378
378
-
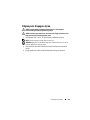 379
379
-
 380
380
-
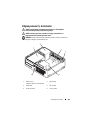 381
381
-
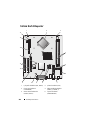 382
382
-
 383
383
-
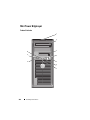 384
384
-
 385
385
-
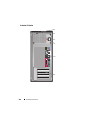 386
386
-
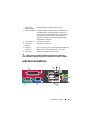 387
387
-
 388
388
-
 389
389
-
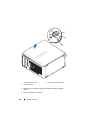 390
390
-
 391
391
-
 392
392
-
 393
393
-
 394
394
-
 395
395
-
 396
396
-
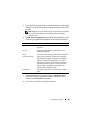 397
397
-
 398
398
-
 399
399
-
 400
400
-
 401
401
-
 402
402
-
 403
403
-
 404
404
-
 405
405
-
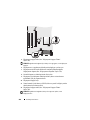 406
406
-
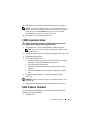 407
407
-
 408
408
-
 409
409
-
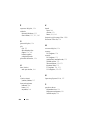 410
410
-
 411
411
-
 412
412


en otros idiomas
- français: Dell OptiPlex 330
- italiano: Dell OptiPlex 330
- Deutsch: Dell OptiPlex 330
- português: Dell OptiPlex 330
- Türkçe: Dell OptiPlex 330
