Silvercrest 293244 El manual del propietario
- Categoría
- Afeitadoras de hombre
- Tipo
- El manual del propietario

MINI SHAVER
MINI RASURADORA SBT 1.5 B1
IAN 293244
MINI SHAVER
Operating instructions MINI RASURADORA
Instrucciones de uso

US - EN Operating instructions Page 1
US - ES Instrucciones de uso Página 25
Before reading, unfold the page containing the illustrations and familiarise
yourself with all functions of the device.
Antes de empezar a leer abra la página que contiene las imágenes y, en
seguida, familiarícese con todas las funciones del dispositivo.


SBT 1.5 B1 US-EN │ 1 ■
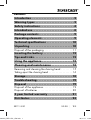
Contents
Introduction ..........................2
Warning types ........................2
Safety instructions .....................4
Intended use ..........................8
Package contents ......................9
Operating elements ....................9
Technical specifications ................10
Unpacking ..........................10
Disposal of the packaging. . . . . . . . . . . . . . . . . . . . . 11
Inserting the battery ..................12
Tips and tricks ........................12
Using the appliance ...................13
Cleaning and maintenance .............14
Removing and cleaning the shaving head ........15
Taking apart the shaving head .................16
Storage .............................18
Troubleshooting ......................19
Disposal ............................19
Disposal of the appliance .....................19
Disposal of batteries .........................20
3 year limited warranty ...............21
Distributor ...........................23
IB_293244_SBT1.5B1_LB9.indb 1 18.12.17 11:33

SBT 1.5 B1
■ 2 │ US-EN
Introduction
Congratulations on the purchase of your new appliance.
You have selected a high-quality product. The operating
instructions are part of this product. They contain impor-
tant information on safety, usage, and disposal.
Before using the product, familiarize yourself with all
handling and safety guidelines. Use the product only as
described and for the specified range of applications.
Please also pass these operating instructions on to any
future owner(s).
Warning types
The following warnings types are used in these operating
instructions:
This is the safety alert symbol. It is used to alert
you to potential injury hazards. Obey all safety
messages that follow this symbol to avoid possi-
ble injury and death.
The following warnings types are used in these operating
instructions:
DANGER indicates a hazardous situation that, if not
avoided, will result in death or serious injury.
IB_293244_SBT1.5B1_LB9.indb 2 18.12.17 11:33

SBT 1.5 B1 US-EN │ 3 ■
WARNING indicates a hazardous situation that, if not
avoided, could result in death or serious injury.
CAUTION indicates a hazardous situation that, if not
avoided, could result in minor or moderate injury.
NOTICE indicates information that is considered important,
but not hazardous (e.g. messages related to property
damage).
IB_293244_SBT1.5B1_LB9.indb 3 18.12.17 11:33

SBT 1.5 B1
■ 4 │ US-EN
Safety instructions
This section contains important safety instructions for
using the appliance. This appliance complies with
statutory safety regulations. Improper use may result
in personal injury and property damage.
IMPORTANT SAFETY INSTRUCTIONS
When using electrical appliances, basic safety
precautions should always be followed, in-
cluding the following:
READ ALL INSTRUCTIONS BEFORE USE!
To reduce the risk
of burns, fire, electric shock, or injury to persons:
1. Do not use outdoors or operate where aero-
sol (spray) products are being used or where
oxygen is being administered.
2. Close supervision is required when this appli-
ance is used by, on, or near children, or per-
sons with limited physical, sensory, or mental
capabilities or invalids.
IB_293244_SBT1.5B1_LB9.indb 4 18.12.17 11:33

SBT 1.5 B1 US-EN │ 5 ■
3. This appliance is not intended for use by persons
(including children) with limited physical, sensory
or mental capabilities or lack of experience and/
or knowledge unless they are supervised by a
person who is responsible for their safety, or re-
ceive instructions from this person on how to use
the appliance. Children should be supervised to
ensure that they do not play with the appliance.
4. Use this appliance only for its intended pur-
pose as described in this manual. Do not use
attachments that were not specified by the
manufacturer.
5. Never operate this appliance if it is not working
properly, or if it has been dropped, damaged,
or dropped into water. Return the appliance to
a service center for examination and repair.
6. Never drop or insert any object into any
opening.
7. Do not use this appliance with a damaged or
broken comb, as it has the potential to result
in injury.
SAVE THESE INSTRUCTIONS
FOR HOUSEHOLD USE ONLY.
IB_293244_SBT1.5B1_LB9.indb 5 18.12.17 11:33

SBT 1.5 B1
■ 6 │ US-EN
Suitable for cleaning under a running
water tap.
ADDITIONAL SAFETY INSTRUCTIONS
► Do not place or store appliance where it is able
to fall or be pulled into a tub or sink. Do not
place in or drop into water or other liquid.
► Check the appliance for visible external dam-
age before use. Do not operate an appliance
that has been damaged or dropped.
► Do not expose the appliance to direct sunlight
or high temperatures. Otherwise it may over-
heat and become irreparably damaged.
► Turn off the appliance immediately if you smell
unusual odors/burning or notice smoke. Have
the appliance tested by a qualified specialist
before using it again.
Mishandling the batteries can cause fires,
explosions, leakages, or other hazards!
► Do not throw the batteries into a fire and do
not subject them to high temperatures.
IB_293244_SBT1.5B1_LB9.indb 6 18.12.17 11:33

SBT 1.5 B1 US-EN │ 7 ■
► Never dispose of batteries in fire, except under
conditions of controlled incineration. (Failure to
observe this precaution may result in an explo-
sion.)
► Do not open, deform, or short-circuit batteries,
since this can lead to chemical leakage.
► Do not attempt to recharge the batteries. Do
not recharge batteries unless they are explicitly
labeled as "rechargeable". There is a risk of
explosion!
► Check the condition of the batteries regularly.
Leaking chemicals can cause permanent dam-
age to the appliance.
Take particular care when handling damaged
or leaking batteries. Danger of chemical burn!
Wear protective gloves.
► Never heat batteries in order to revive them.
► Leaking chemicals from a battery can cause skin
irritation. If the chemicals come in contact with
your skin, rinse the area with plenty of water. If
the chemicals come into contact with your eyes,
rinse them thoroughly with water and do not
rub them. Consult a physician immediately.
► Do not mix different types of batteries.
► Always insert the batteries the right way (ob-
IB_293244_SBT1.5B1_LB9.indb 7 18.12.17 11:33

SBT 1.5 B1
■ 8 │ US-EN
serve correct polarity); otherwise there is a risk
that they could explode.
► Always replace the whole set of batteries at the
same time. Never mix old and new ones.
► Remove discharged batteries from equipment
promptly to avoid possible damage from leak-
age.
► If you do not intend to use the appliance for
a long time, remove the batteries.
► Keep batteries out of the reach of children.
Children might put batteries into their mouth and
swallow them. If a battery has been swallowed,
seek medical assistance immediately.
Also, contact your local poison control center.
Intended use
This appliance is intended exclusively for use in domestic
households and for shaving the bikini zone. It is not suit-
able for commercial use! The appliance is not intended
for any other purpose, nor for use beyond the scope
described.
Claims of any kind for damage resulting from misuse,
incompetent repairs, unauthorized modification, or the
use of unauthorized spare parts will not be accepted.
The risk shall be borne solely by the user.
IB_293244_SBT1.5B1_LB9.indb 8 18.12.17 11:33

SBT 1.5 B1 US-EN │ 9 ■
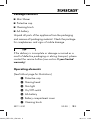
Package contents
■ Mini Shaver
■ Protective cap
■ Cleaning brush
■ AA battery
Unpack all parts of the appliance from the packaging
and remove all packaging material. Check the package
for completeness and signs of visible damage.
If the delivery is incomplete or damage occurred as a
result of defective packaging or during transport, please
contact the service hotline (see section 3 year limited
warranty).
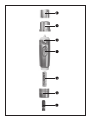
Operating elements
(See fold-out page for illustrations)
1 Protective cap
2 Shaving head
3 Skin light
4 On/Off switch
5 AA battery
6 Battery compartment cover
7 Cleaning brush
IB_293244_SBT1.5B1_LB9.indb 9 18.12.17 11:33

SBT 1.5 B1
■ 10 │ US-EN
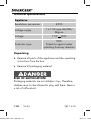
Technical specifications
Appliance
Revolutions per minute 4500
Voltage supply 1 x 1.5V, type AA/LR6/
Mignon
Voltage 1.5V (DC)
Protection type
IPX5
Protection against water
splashing from any direction
Unpacking
♦ Remove all parts of the appliance and the operating
instructions from the box.
♦ Remove all packaging material.
RISK OF SUFFOCATION!
Packaging materials are not children’s toys. Therefore,
children must not be allowed to play with them. There is
a risk of suffocation!
IB_293244_SBT1.5B1_LB9.indb 10 18.12.17 11:33

SBT 1.5 B1 US-EN │ 11 ■
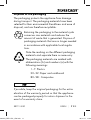
Disposal of the packaging
The packaging protects the appliance from damage
during transport. The packaging materials have been
selected for their environmental friendliness and ease of
disposal, and are therefore recyclable.
Returning the packaging to the material cycle
conserves raw materials and reduces the
amount of waste that is generated. Dispose of
packaging materials that are no longer needed
in accordance with applicable local regula-
tions.
Note the marking on the different packaging
materials and separate them as necessary.
The packaging materials are marked with
abbreviations (b) and numbers (a) with the
following meanings:
1–7: Plastics
20–22: Paper and cardboard
80–98: Composites
If possible, keep the original packaging for the entire
duration of the warranty period so that the appliance
can be packaged properly for return shipment in the
event of a warranty claim.
IB_293244_SBT1.5B1_LB9.indb 11 18.12.17 11:33

SBT 1.5 B1
■ 12 │ US-EN
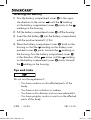
Inserting the battery
1) Turn the battery compartment cover 6 in the oppo-
site direction to the arrow until the marking
on the battery compartment cover 6 points to the
marking on the housing.
2) Pull the battery compartment cover 6 off the housing.
3) Insert the AA battery 5 into the battery compartment
with the positive terminal (+) first.
4) Place the battery compartment cover 6 back on the
housing so that the marking on the battery com-
partment cover 6 points towards the marking on
the housing. Turn the battery compartment cover 6
in the direction of the arrow until the marking
on the battery compartment cover 6 points towards
the marking on the housing.
Tips and tricks
Do not use the appliance if...
–You have sunburn on the affected parts of the
body.
–You have a skin irritation or redness.
–You have a skin disease such as neurodermatitis.
–You have pimples, moles or warts on the affected
parts of the body.
IB_293244_SBT1.5B1_LB9.indb 12 18.12.17 11:33

SBT 1.5 B1 US-EN │ 13 ■
–You have wounds or raised scars on the affected
parts of the body.
Test the appliance on a small, unobtrusive spot first in
order to establish skin compatibility.
■ The skin light 3 is used to illuminate the area being
shaved and thus ensure an optimal result.
■ To make optimal use of the appliance, we recom-
mend using it to shave hairs that are between 0.04
inch and 0.2 inch (1 mm and 5 mm).
■ Treat the skin with a peeling treatment or a massage
glove before shaving. This helps remove dead skin
cells, prevents ingrown hairs and makes fine hair stand
up. The appliance can cut the hair better this way.
■ After shaving, treat the skin with a moisturizing lotion
or cream. Ideally, use a cream containing aloe vera
or chamomile extracts to soothe and nourish the skin.
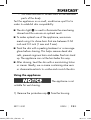
Using the appliance
The appliance is not
suitable for wet shaving.
1) Remove the protective cap 1 from the housing.
IB_293244_SBT1.5B1_LB9.indb 13 18.12.17 11:33

SBT 1.5 B1
■ 14 │ US-EN
2) Push the On/Off switch 4 towards the I marking.
The skin light 3 lights up.
3) Pull the skin tight with one hand.
4) Place the appliance perpendicular on the skin and
move it over the skin in circular movements without
exerting any pressure.
5) When you have finished the treatment, push the
On/Off switch 4 in the direction of the 0 marking
to turn off the appliance. The skin light 3 turns off.
6) Replace the protective cap 1 on the housing.
Cleaning and maintenance
Never immerse the
appliance in water or other liquids!
■ After each use, clean the shaving head 2 using the
supplied cleaning brush 7 to remove loose hairs.
■ Disinfect the shaving head 2 regularly by spraying
and cleaning it with disinfectant spray.
■ Wipe the casing with a damp cloth. If required, use
some mild detergent on the cloth. Ensure that the
appliance is completely dry before the next use.
IB_293244_SBT1.5B1_LB9.indb 14 18.12.17 11:33

SBT 1.5 B1 US-EN │ 15 ■
If...
– the shaving result deteriorates noticeably,
– the shave takes much longer than usual,
– there is any visible damage on the shaving head 2,
... the shaving head 2 needs to be replaced.
You can order replacement shaving heads 2 from
our service department (see section "3 year limited
warranty").
Removing and cleaning the shaving head
To clean the shaving head 2 thoroughly, you need
to remove the shaving head 2 from the housing:
1) Remove the protective cap 1 (if fitted) from the
housing.
2) Turn the shaving head 2 in the opposite direction
to the arrow until the marking on the shaving
head 2 points to the O marking on the housing.
3) Pull the shaving head 2 off the housing.
Clean the shaving head 2 using the supplied
cleaning brush 7 and/or rinse the shaving
head 2 under running water.
4) Dry off the shaving head 2 thoroughly if necessary.
5) Also remove any remaining hairs using the cleaning
brush 7.
IB_293244_SBT1.5B1_LB9.indb 15 18.12.17 11:33

SBT 1.5 B1
■ 16 │ US-EN
6) Replace the shaving head 2 on the housing and
turn the shaving head 2 in the direction of the ar-
row until the marking on the shaving head 2
points to the marking on the housing.
7) Replace the protective cap 1 on the housing.
Taking apart the shaving head
You can also remove the shaving head 2 if you want
to clean it particularly thoroughly:
1) Remove the shaving head 2 as described in the
section "Removing and cleaning the shaving head".
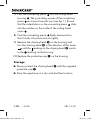
2) Press the parts of the cutting head out towards the
open side of the shaving head housing .
3) Clean the individual parts carefully under running
water.
4) Leave the parts to dry thoroughly.
5) To re-assemble, insert the cutting head cover into
the shaving head housing so that the indentations
on the cutting head cover slide into the catches on
the inside of the cutting head cover (see fig. 1).
IB_293244_SBT1.5B1_LB9.indb 16 18.12.17 11:33

SBT 1.5 B1 US-EN │ 17 ■
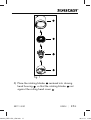
Fig. 1
6) Place the rotating blades centered into shaving
head housing , so that the rotating blades rest
against the cutting head cover .
IB_293244_SBT1.5B1_LB9.indb 17 18.12.17 11:33

SBT 1.5 B1
■ 18 │ US-EN
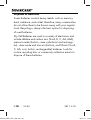
7) Push the connecting piece into the cutting head
housing . The protruding spacer of the connecting
piece must point towards you (see fig. 1). Ensure
that the indentations on the connecting piece slide
into the catches on the inside of the cutting head
cover .
8) Push the connecting piece firmly downward so
that it clicks into place and sits tightly.
9) Replace the shaving head 2 on the housing and
turn the shaving head 2 in the direction of the arrow
until the marking on the shaving head 2 points
to the marking on the housing.
10) Replace the protective cap 1 on the housing.
Storage
■ Always protect the shaving head 2 with the supplied
protective cap 1.
■ Store the appliance in a dry and dust-free location.
IB_293244_SBT1.5B1_LB9.indb 18 18.12.17 11:33

SBT 1.5 B1 US-EN │ 19 ■
Troubleshooting
The appliance is not working:
■ Replace the battery.
■ The appliance is defective. Contact the customer
service department.
Not all hairs are trimmed:
■ You are working too fast. Move the appliance over
your skin slowly.
Disposal
Disposal of the appliance
Electrical appliances may not be thrown away as part
of normal household trash. If you can no longer use
your electrical appliance, dispose of it in accordance
with the legal provisions applicable in your state. This
will ensure that old electrical appliances are recycled
and environmental pollution is kept to a minimum.
Further information about disposal is available on the
Internet at www.epa.gov.
IB_293244_SBT1.5B1_LB9.indb 19 18.12.17 11:33

SBT 1.5 B1
■ 20 │ US-EN
Disposal of batteries
Some batteries contain heavy metals such as mercury,
lead, cadmium, and nickel; therefore, many communities
do not allow them to be thrown away with your regular
trash. Recycling is always the best option for disposing
of used batteries.
Dry-Cell Batteries are used in a variety of electronics and
include alkaline and carbon zinc (9-volt, D, C, AA, AAA),
mercuric-oxide (button, some cylindrical and rectangu-
lar), silver-oxide and zinc-air (button), and lithium (9-volt,
C, AA, coin, button, rechargeable) batteries. Look for
in-store recycling bins or community collection events to
dispose of these batteries.
IB_293244_SBT1.5B1_LB9.indb 20 18.12.17 11:33

SBT 1.5 B1 US-EN │ 21 ■
3 year limited warranty
What does this warranty cover?
The warranty covers:
●Damage, breakage or inoperability due to defect.
●Damage not caused by normal wear and tear or fail-
ure to follow the safety and maintenance instructions
provided in the user manual.
What is not covered by the warranty?
The warranty does not cover damage caused by:
●Normal wear and tear of the product, including frag-
ile parts (such as switches, glass, etc.);
●Improper use or transport;
●Disregarding safety and maintenance instructions;
●Accidents or acts of nature (e.g. lightning, fire, water,
etc.);
●Tampering with the product (such as removing cover,
unscrewing screws etc.)
Consequential and incidental damages are also not
covered under this warranty. However, some states do
not allow the exclusion or limitation of incidental or con-
sequential damages, so this limitation or exclusion may
not apply to you.
IB_293244_SBT1.5B1_LB9.indb 21 18.12.17 11:33

SBT 1.5 B1
■ 22 │ US-EN
What is the period of coverage and warranty
resolution?
The warranty is for 3 years from the date of purchase.
At our discretion, product will either be refunded or re-
placed.
What will we not do?
We will not:
●Start a new warranty period upon product exchange;
●Repair product.
How to process the warranty?
To initiate, please:
●Call customer service at 1 (844) 543-5872
●Visit the Website Customer Service Platform at
www.lidl.com/contact-us
or
●Visit a LIDL store for further assistance
To ensure the quickest warranty return process, please
have the following available:
●The original sales receipt that includes the date
purchased;
●The product and manual in the original package;
●A statement of the problem.
IB_293244_SBT1.5B1_LB9.indb 22 18.12.17 11:33

SBT 1.5 B1 US-EN │ 23 ■
What must you do to keep the warranty in
effect?
●Retain the original receipt;
●Follow all product instructions;
●Do not repair or modify the product.
How does state law relate to this warranty?
This warranty gives you specific legal rights, and you
may also have other rights which vary from state to
state. All implied warranties are limited by the duration
and terms of this warranty. Some states do not allow
limitations on how long an implied warranty lasts, so the
above limitation may not apply to you.
Distributor
LIDL US LLC.
ARLINGTON
VA 22202
IB_293244_SBT1.5B1_LB9.indb 23 18.12.17 11:33

SBT 1.5 B1
■ 24 │ US-EN
IB_293244_SBT1.5B1_LB9.indb 24 18.12.17 11:33

SBT 1.5 B1 US-ES │ 25 ■
Contenido
Introducción .........................26
Tipos de advertencias .................26
Instrucciones de seguridad .............27
Uso previsto .........................33
Contenido del paquete ................33
Elementos operativos .................34
Especificaciones técnicas ...............34
Desempaque ........................35
Eliminación del empaque .....................35
Inserción de la batería .................36
Sugerencias y trucos ..................37
Uso del dispositivo ....................38
Limpieza y mantenimiento .............39
Remoción y limpieza de la cabeza de rasurar .....40
Separación de la cabeza de rasurar ............41
Almacenamiento .....................43
Solución de problemas ................44
Eliminación ..........................44
Eliminación del dispositivo .....................44
Eliminación de baterías .......................45
Garantía limitada de 3 años ............46
Importador ..........................48
IB_293244_SBT1.5B1_LB9.indb 25 18.12.17 11:33

SBT 1.5 B1
■ 26 │ US-ES
Introducción
Felicidades por la compra de su nuevo dispositivo.
Ha seleccionado un producto de alta calidad. El instruc-
tivo de operación es parte de este producto. Contiene
información importante sobre seguridad, uso y elimina-
ción. Antes de usar el producto, familiarícese con todas
las instrucciones de manejo y seguridad. Use el producto
solamente como se describe y para la variedad de apli-
caciones especificada. También entregue este instructivo
de operación a cualquier propietario futuro.
Tipos de advertencias
Los siguientes tipos de advertencias se usan en este
instructivo de operación:
Este es el símbolo de alerta de seguridad. Se
usa para alertarle sobre peligros de lesiones
potenciales. Obedezca todos los mensajes de
seguridad a continuación de este símbolo para
prevenir posibles lesiones y la muerte.
Los siguientes tipos de advertencias se usan en este
instructivo de operación:
PELIGRO indica una situación peligrosa que, si no se
evita, provocará la muerte o lesiones graves.
IB_293244_SBT1.5B1_LB9.indb 26 18.12.17 11:33

SBT 1.5 B1 US-ES │ 27 ■
ADVERTENCIA indica una situación peligrosa que, si no
se evita, podría provocar la muerte o lesiones graves.
PRECAUCIÓN indica una situación peligrosa que, si no
se evita, podría provocar lesiones leves o moderadas.
AVISO indica información que se considera importante,
pero no está relacionada con peligro (por ejemplo,
mensajes relacionados con daños materiales).
Instrucciones de seguridad
Esta sección contiene instrucciones de seguridad im-
portantes para el uso del dispositivo. Este dispositivo
cumple con las normas de seguridad legales. El uso
inadecuado puede provocar lesiones personales y
daños materiales.
IB_293244_SBT1.5B1_LB9.indb 27 18.12.17 11:33

SBT 1.5 B1
■ 28 │ US-ES
INSTRUCCIONES DE SEGURIDAD
IMPORTANTES
Al usar dispositivos eléctricos, siempre deben
observarse precauciones básicas de seguridad
como las siguientes:
¡LEA TODAS LAS INSTRUCCIONES ANTES
DEL USO!
Para reducir
el riesgo de quemaduras, fuego, descarga
eléctrica o lesiones a personas:
1. No lo use en exteriores ni en lugares donde se
estén usando productos en aerosol, ni donde
se esté administrando oxígeno.
2. Es necesaria una supervisión estrecha cuando
este dispositivo sea utilizado por niños, en ellos
o cerca de ellos, o por personas con capacida-
des físicas, sensoriales o mentales limitadas o
que estén discapacitadas.
IB_293244_SBT1.5B1_LB9.indb 28 18.12.17 11:33

SBT 1.5 B1 US-ES │ 29 ■
3. Este dispositivo no ha sido fabricado para uso
por parte de personas (incluyendo niños) con
capacidades físicas, sensoriales o mentales
limitadas, o falta de experiencia y conocimiento,
a menos que sean supervisadas o que hayan
recibido instrucción con respecto al uso del
dispositivo de parte de una persona respon-
sable de su seguridad. Los niños deben ser
supervisados para asegurar que no jueguen
con el dispositivo.
4. Use este dispositivo solamente para el uso pre-
visto como se describe en este manual. No use
accesorios que el fabricante no especifique.
5. Nunca opere este dispositivo si no funciona
correctamente, si se ha dejado caer, si está
dañado o si se ha caído en el agua. Envíe el
dispositivo a un centro de servicio para inspec-
ción y reparación.
6. Nunca lo deje caer ni introduzca ningún objeto
en ninguna de las aberturas.
7. No use este dispositivo con un peine dañado
o roto, ya que puede provocar daño.
CONSERVE ESTE INSTRUCTIVO
EXCLUSIVO PARA USO DOMÉSTICO.
IB_293244_SBT1.5B1_LB9.indb 29 18.12.17 11:33

SBT 1.5 B1
■ 30 │ US-ES
Puede limpiarse bajo el chorro del agua.
INSTRUCCIONES DE SEGURIDAD ADICIONALES
► No coloque ni guarde el dispositivo donde
pueda caerse o jalarse hacia una tina o lava-
bo. No lo coloque ni lo sumerja en agua u otro
líquido.
► Verifique si el dispositivo muestra algún daño
externo visible antes de usarlo. No opere un
dispositivo que haya sido dañado o se haya
caído.
► No exponga el dispositivo a la luz del sol directa
o a altas temperaturas. De lo contrario, puede
sobrecalentarse y sufrir daños irreparables.
► Apague el dispositivo inmediatamente si huele
algo inusual, si huele a quemado o si ve humo.
Solicite a un especialista calificado que revise
el dispositivo antes de volver a usarlo.
¡El manejo inadecuado de las baterías puede
provocar incendios, explosiones, derrames u
otros riesgos!
IB_293244_SBT1.5B1_LB9.indb 30 18.12.17 11:33

SBT 1.5 B1 US-ES │ 31 ■
► No arroje las baterías al fuego ni las someta
a altas temperaturas.
► Nunca tire las baterías al fuego, excepto en
condiciones de incineración controlada. (Si no
obedece esta precaución, puede causar una
explosión.)
► No abra, deforme ni cortocircuite las baterías;
esto puede ocasionar derrames químicos.
► No intente recargar las baterías. No recargue
las baterías a menos que estén etiquetadas
explícitamente como "recargables". ¡Existe el
riesgo de explosión!
► Revise regularmente la condición de las baterías.
Las baterías con fugas pueden causar daño
permanente al dispositivo.
Tenga especial cuidado cuando maneje baterías
dañadas o con fugas. ¡Peligro de quemaduras
químicas! Use guantes de protección.
► Nunca caliente las baterías para revivirlas.
► La fuga del ácido de la batería puede causar
irritación en la piel. Si los químicos entran en
contacto con la piel, enjuague el área con agua
abundante. Si los químicos entran en contacto
con los ojos, enjuáguelos con agua abundante
y no se frote los ojos. Consulte a un médico de
inmediato.
IB_293244_SBT1.5B1_LB9.indb 31 18.12.17 11:33

SBT 1.5 B1
■ 32 │ US-ES
► No mezcle diferentes tipos de baterías.
► Inserte siempre las baterías correctamente
(observe la polaridad correcta); de no ser así,
existe el riesgo de que exploten.
► Reemplace siempre todas las baterías al mismo
tiempo. Nunca mezcle baterías usadas con
nuevas.
► Retire las baterías descargadas del equipo de
inmediato, para evitar posible daño por fugas
de líquidos.
► Retire las baterías si no va a usar el dispositivo
durante un tiempo prolongado.
► Mantenga las baterías fuera del alcance de los
niños. Los niños podrían llevarse las baterías a
la boca e ingerirlas. Si se ha ingerido una bate-
ría, solicite asistencia médica inmediatamente.
También póngase en contacto con su centro
local de control de envenenamiento.
IB_293244_SBT1.5B1_LB9.indb 32 18.12.17 11:33

SBT 1.5 B1 US-ES │ 33 ■
Uso previsto
Este dispositivo está diseñado exclusivamente para
uso doméstico y para rasurar el área del bikini. ¡No es
adecuado para uso comercial! Este dispositivo no está
diseñado para ningún otro propósito ni para usarse
fuera del uso descrito.
No se aceptará ningún tipo de reclamación por daños
que resulten del mal uso, reparaciones incompetentes,
modificaciones no autorizadas o el uso de refacciones
no autorizadas.
El usuario será la única persona que asuma el riesgo.
Contenido del paquete
■ Mini rasuradora
■ Tapa protectora
■ Cepillo para limpiar
■ Batería AA
Extraiga todas las partes del dispositivo del paquete y
saque todos los materiales de empaque. Verifique que
el paquete esté completo y no muestre signos visibles
de daño.
Si la entrega está incompleta o si ha ocurrido daño
debido al empaquetado defectuoso o durante el trans-
porte, póngase en contacto con la línea directa de servi-
cio (vea la sección garantía limitada de 3 años).
IB_293244_SBT1.5B1_LB9.indb 33 18.12.17 11:33

SBT 1.5 B1
■ 34 │ US-ES
Elementos operativos
(Vea las imágenes en la página desplegable)
1 Tapa protectora
2 Cabeza de rasurar
3 Luz para la piel
4 Interruptor de encendido/apagado
5 Batería AA
6 Tapa del compartimiento de batería
7 Cepillo para limpiar
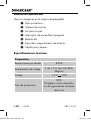
Especificaciones técnicas
Dispositivo
Revoluciones por minuto 4500
Alimentación de voltaje 1 de 1.5 V, tipo AA/LR6/
Mignon
Voltaje 1.5 V (CD)
Tipo de protección
IPX5
Protegido contra salpicadu-
ras de agua desde cualquier
dirección
IB_293244_SBT1.5B1_LB9.indb 34 18.12.17 11:33

SBT 1.5 B1 US-ES │ 35 ■
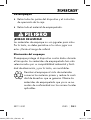
Desempaque
♦ Retire todas las partes del dispositivo y el instructivo
de operación de la caja.
♦ Retire todo el material de empaquetado.
¡RIESGO DE ASFIXIA!
Los materiales de empaque no son juguetes para niños.
Por lo tanto, no debe permitirse a los niños jugar con
estos. ¡Existe el riesgo de asfixia!
Eliminación del empaque
El empaque protege al dispositivo contra daños durante
el transporte. Los materiales de empaquetado han sido
seleccionados por su compatibilidad ambiental y facili-
dad de eliminación, y por lo tanto, son reciclables.
Devolver el empaque al ciclo de materiales
conserva las materias primas y reduce la canti-
dad de desechos que se generan. Elimine los
materiales de empaquetado que ya no se ne-
cesitan de conformidad con las normas locales
aplicables.
IB_293244_SBT1.5B1_LB9.indb 35 18.12.17 11:33

SBT 1.5 B1
■ 36 │ US-ES
Observe las marcas en los diferentes mate-
riales de empaque y sepárelos según sea
necesario. Los materiales de empaquetado
están marcados con abreviaturas (a) y
números (b) con los siguientes significados:
1–7: Plásticos
20–22: Papel y cartón
80–98: Materiales compuestos
Si es posible, conserve el material de empaquetado
original durante todo el periodo de garantía para
poder empaquetar el dispositivo adecuadamente para
su devolución en caso de una reclamación de garantía.
Inserción de la batería
1) Gire la tapa del compartimiento de la batería 6 en
dirección opuesta a la flecha hasta que la
marca en la tapa del compartimiento de la batería 6
apunte hacia la marca en la carcasa.
2) Retire la tapa del compartimiento de la batería 6
de la carcasa.
3) Inserte la batería AA 5 en el compartimiento de la
batería con el polo positivo (+) primero.
IB_293244_SBT1.5B1_LB9.indb 36 18.12.17 11:33

SBT 1.5 B1 US-ES │ 37 ■
4) Coloque la tapa del compartimiento de la bate-
ría6 nuevamente en la carcasa, de manera que
la marca en la tapa del compartimiento de la
batería 6 apunte hacia la marca en la carcasa.
Gire la tapa del compartimiento de la batería 6 en
dirección de la flecha hasta que la marca en
la tapa del compartimiento de la batería 6 apunte
hacia la marca en la carcasa.
Sugerencias y trucos
No use el dispositivo en los siguientes casos:
–Tiene una quemadura de sol en las áreas del
cuerpo afectadas.
–Tiene irritación o enrojecimiento de la piel.
–Tiene una enfermedad de la piel como la
neurodermatitis.
–Tiene granos, lunares o verrugas en las áreas
del cuerpo correspondientes.
–Tiene heridas o costras levantadas en las áreas
del cuerpo afectadas.
Pruebe el dispositivo primero en un área pequeña discreta
para determinar la compatibilidad con la piel.
■ La luz para piel 3 se usa para iluminar el área que
va a rasurarse a fin de obtener el mejor resultado.
IB_293244_SBT1.5B1_LB9.indb 37 18.12.17 11:33

SBT 1.5 B1
■ 38 │ US-ES
■ Para usar el dispositivo de forma óptima, recomenda-
mos usarlo para rasurar vello que mida entre 1 y
5 mm (0.04 y 0.2 pulgadas).
■ Aplique a la piel un tratamiento exfoliante o un guante
de masaje antes de rasurar. Esto ayuda a remover
las células muertas de la piel y a evitar vellos encar-
nados, y levanta los vellos finos. El dispositivo puede
cortar el vello mejor de esta manera.
■ Después de rasurar, trate la piel con una loción o
crema humectante. Idealmente, use una crema que
contenga áloe vera o extractos de manzanilla para
suavizar y nutrir la piel.
Uso del dispositivo
¡Este dispositivo no es adecuado
para rasurado húmedo!
1) Retire la tapa protectora 1 de la carcasa.
2) Presione el interruptor de encendido/apagado 4
hacia la marca "I". La luz para piel 3 se enciende.
3) Presione la piel con firmeza con una mano.
4) Coloque el dispositivo perpendicular sobre la piel y
haga movimientos circulares sin ejercer demasiada
presión.
IB_293244_SBT1.5B1_LB9.indb 38 18.12.17 11:33

SBT 1.5 B1 US-ES │ 39 ■
5) Cuando haya terminado el tratamiento, presione el
interruptor de encendido/apagado 4 en dirección
de la marca "0" para apagar el dispositivo. La luz
para piel 3 se apaga.
6) Vuelva a colocar la tapa protectora 1 en la carcasa.
Limpieza y mantenimiento
¡Nunca sumerja el dispositivo en
agua u otros líquidos!
■ Después de cada uso, limpie la cabeza de rasurar 2
con el cepillo para limpiar 7 incluido para retirar
vello suelto.
■ Desinfecte la cabeza de rasurar 2 regularmente ro-
ciándola y limpiándola con desinfectante en aerosol.
■ Limpie la carcasa con una tela humedecida. Si es
necesario, use un detergente suave sobre la tela.
Asegúrese de que el dispositivo esté completamente
seco antes del siguiente uso.
Si...
– el resultado de rasurarse es notablemente deficiente,
– el rasurado dura mucho más tiempo que el normal,
IB_293244_SBT1.5B1_LB9.indb 39 18.12.17 11:33

SBT 1.5 B1
■ 40 │ US-ES
– hay daño visible en la cabeza de rasurar 2,
... es necesario cambiar la cabeza de rasurar 2.
Puede ordenar cabezas de rasurar 2 de repuesto
a nuestro departamento de servicio (vea la sección
"garantía limitada de 3 años").
Remoción y limpieza de la cabeza de rasurar
Para limpiar completamente la cabeza de rasurar 2,
necesita retirar la cabeza de rasurar 2 de la carcasa:
1) Retire la tapa protectora 1 (si está colocada) de la
carcasa.
2) Gire la cabeza de rasurar 2 en dirección opuesta a
la flecha hasta que la marca en la cabeza de
rasurar 2 apunte hacia la marca "O" en la carcasa.
3) Retire la cabeza de rasurar 2 de la carcasa.
Limpie la cabeza de rasurar 2 con el cepillo
para limpiar incluido 7 o enjuague la cabeza
de rasurar 2 bajo el chorro del agua.
4) Seque completamente la cabeza de rasurar 2 si
es necesario.
5) También remueva cualquier vello que quede con el
cepillo para limpiar 7.
IB_293244_SBT1.5B1_LB9.indb 40 18.12.17 11:33

SBT 1.5 B1 US-ES │ 41 ■
6) Vuelva a colocar la cabeza de rasurar 2 en la car-
casa y gire la cabeza de rasurar 2 en dirección de
la flecha hasta que la marca en la cabeza de
rasurar 2 apunte hacia la marca en la carcasa.
7) Vuelva a colocar la tapa protectora 1 en la carcasa.
Separación de la cabeza de rasurar
También puede retirar la cabeza de rasurar 2 si desea
limpiarla especialmente en forma exhaustiva:
1) Retire la cabeza de rasurar 2 como se describe en
la sección "Remoción y limpieza de la cabeza de
rasurar".
2) Presione las partes de la cabeza de corte hacia
el lado abierto de la carcasa de la cabeza de
rasurar .
3) Limpie las partes individuales con cuidado bajo el
chorro del agua.
4) Deje que las partes se sequen completamente.
IB_293244_SBT1.5B1_LB9.indb 41 18.12.17 11:33

SBT 1.5 B1
■ 42 │ US-ES
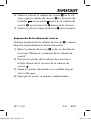
5) Para volver a armar, inserte la tapa de la cabeza de
corte en la carcasa de la cabeza de rasurar
de manera que las muescas de la tapa de la cabeza
de corte se deslicen dentro de las depresiones en
el interior de la carcasa de la cabeza de rasurar
(vea la Fig. 1).
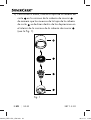
Fig.1
IB_293244_SBT1.5B1_LB9.indb 42 18.12.17 11:33

SBT 1.5 B1 US-ES │ 43 ■
6) Coloque las cuchillas giratorias centradas en la
tapa de la cabeza de rasurar , de manera que las
cuchillas giratorias se apoyen sobre la tapa de la
cabeza de corte .
7) Empuje la pieza de conexión hacia la carcasa de
la cabeza de corte . El espaciador saliente de la
pieza de conexión debe apuntar hacia usted (vea
la Fig. 1). Asegúrese de que las muescas de la tapa
de la pieza de conexión se deslicen dentro de las
depresiones en el lado interno de la carcasa de la
cabeza de rasurar .
8) Empuje la pieza de conexión con firmeza de
manera que haga clic en su lugar y se asiente bien.
9) Vuelva a colocar la cabeza de rasurar 2 en la car-
casa y gire la cabeza de rasurar 2 en dirección de
la flecha hasta que la marca en la cabeza de
rasurar 2 apunte hacia la marca en la carcasa.
10) Vuelva a colocar la tapa protectora 1 en la carcasa.
Almacenamiento
■ Proteja siempre la cabeza de rasurar 2 con la tapa
protectora 1 incluida.
■ Guarde el dispositivo en un lugar seco y libre de
polvo.
IB_293244_SBT1.5B1_LB9.indb 43 18.12.17 11:33

SBT 1.5 B1
■ 44 │ US-ES
Solución de problemas
El dispositivo no funciona:
■ Reemplace la batería.
■ El dispositivo está defectuoso. Póngase en contacto
con el departamento de servicio al cliente.
No se recortan todos los vellos:
■ Está usando el dispositivo demasiado rápido. Mueva
el dispositivo más lentamente sobre su piel.
Eliminación
Eliminación del dispositivo
Los dispositivos eléctricos no deben ser desechados
como parte de la basura doméstica normal. Si ya no
puede usar su dispositivo eléctrico, elimínelo de con-
formidad con las disposiciones legales aplicables en
su estado. Esto asegura que los dispositivos eléctricos
usados sean reciclados y la contaminación ambiental
se mantenga a un nivel mínimo. Puede encontrar más in-
formación sobre la eliminación de desechos en Internet
en www.epa.gov.
IB_293244_SBT1.5B1_LB9.indb 44 18.12.17 11:33

SBT 1.5 B1 US-ES │ 45 ■
Eliminación de baterías
Algunas baterías contienen metales pesados como
mercurio, plomo, cadmio y níquel; por ello, muchas co-
munidades no permiten que se desechen con la basura
normal. El reciclaje es siempre la mejor opción para
eliminar las baterías usadas.
Las baterías de celda seca se usan en una gran varie-
dad de aparatos electrónicos, e incluyen baterías alcali-
nas y de carbono-zinc (de 9 voltios, D, C, AA, AAA), de
óxido de mercurio (de botón, algunas cilíndricas y rec-
tangulares), de óxido de plata y de zinc aire (de botón)
y de litio (de 9 volts, C, AA, de tipo moneda, de botón,
recargables). Busque los depósitos de reciclaje en las
tiendas, o los eventos de recopilación de la comunidad
para desechar estas baterías.
IB_293244_SBT1.5B1_LB9.indb 45 18.12.17 11:33

SBT 1.5 B1
■ 46 │ US-ES
Garantía limitada de 3 años
Lo que cubre la presente garantía
La gafrantía incluye:
●Daños, quebraduras o incapacidad para funcionar
debido a defectos.
●Daños que no hayan sido causados por el desgaste
propio del uso o por no seguir las instrucciones de
seguridad y mantención incluidas en el manual para
el usuario.
Lo que no cubre esta garantía
La garantía no cubre daños causados por:
●El desgaste propio del uso del producto, incluidas las
partes frágiles (como interruptores, piezas de vidrio,
etc.).
●Uso o transporte no indicado del producto.
●Desatención a las instrucciones de seguridad y
mantención.
●Accidentes o causas de fuerza mayor (e.g. relámpa-
gos, incendio, inundación, etc.).
●Manipulación mal intencionada del producto (retirar
la cubierta, tornillos, etc.).
La presente garantía tampoco cubre daños indirectos o
emergentes. Sin embargo algunos estados no permiten
la exclusión o limitación de daños indirectos o emergen-
tes, por lo que dicha exclusión o limitación pudiera no
aplicarse en su caso.
IB_293244_SBT1.5B1_LB9.indb 46 18.12.17 11:33

SBT 1.5 B1 US-ES │ 47 ■
Período de cobertura y resolución de la
garantía
La garantía es válida por 3 años a partir de la fecha de
compra. La empresa, según lo estime conveniente, devol-
verá el dinero o repondrá el producto.
La empresa no:
●Dará inicio a un nuevo período de garantía al hacer-
se el cambio del producto.
●Reparará el producto.
¿Cómo se tramita la garantía?
Recomendamos que primero usted:
●Llame al Servicio de atención al cliente al 1 (844)
543-5872.
●Visite el Portal de atención al cliente en
www.lidl.com/contact-us
●Visite una de nuestras tiendas LIDL en caso de cual-
quier inquietud.
A fin de acelerar el trámite de la garantía, tenga a bien
contar con lo siguiente:
●Recibo de venta original que incluya la fecha de
compra.
●Producto y manual en su empaque original.
●Descripción del problema.
IB_293244_SBT1.5B1_LB9.indb 47 18.12.17 11:33

SBT 1.5 B1
■ 48 │ US-ES
¿Qué debe hacer usted para mantener la
garantía vigente?
●Guardar el recibo original.
●Seguir todas las instrucciones para el uso del produc-
to.
●No realizar ninguna reparación ni alteración al
producto.
¿De qué manera influyen las leyes estatales
con esta garantía?
La presente garantía le otorga derechos legales
específicos, y pudiera usted contar con otros derechos
los cuales varían de un estado a otro. Todas las garan-
tías implícitas se encuentran limitadas a la duración y
términos de la presente garantía. Algunos estados no
permiten limitaciones al período de tiempo y términos
de la garantía implícita, por lo que dichas limitaciones
pudieran no aplicarse en su caso.
Importador
LIDL US LLC.
ARLINGTON
VA 22202
IB_293244_SBT1.5B1_LB9.indb 48 18.12.17 11:33

IAN 293244
LIDL US LLC.
ARLINGTON
VA 22202
Last Information Update · Estado de las informaciones:
11 / 2017 · Ident.-No.: SBT1.5B1-102017-2
9
-
 1
1
-
 2
2
-
 3
3
-
 4
4
-
 5
5
-
 6
6
-
 7
7
-
 8
8
-
 9
9
-
 10
10
-
 11
11
-
 12
12
-
 13
13
-
 14
14
-
 15
15
-
 16
16
-
 17
17
-
 18
18
-
 19
19
-
 20
20
-
 21
21
-
 22
22
-
 23
23
-
 24
24
-
 25
25
-
 26
26
-
 27
27
-
 28
28
-
 29
29
-
 30
30
-
 31
31
-
 32
32
-
 33
33
-
 34
34
-
 35
35
-
 36
36
-
 37
37
-
 38
38
-
 39
39
-
 40
40
-
 41
41
-
 42
42
-
 43
43
-
 44
44
-
 45
45
-
 46
46
-
 47
47
-
 48
48
-
 49
49
-
 50
50
-
 51
51
-
 52
52


Silvercrest 293244 El manual del propietario
- Categoría
- Afeitadoras de hombre
- Tipo
- El manual del propietario
en otros idiomas
- English: Silvercrest 293244 Owner's manual