LG MG230d El manual del propietario
- Categoría
- Teléfonos móviles
- Tipo
- El manual del propietario

LG-MG230d User Guide
LG-MG230d
User Guide
MMBB0239147 (1.0)
W
LG-MG230d Guía del usuario
Alguno de los contenidos de este manual puede tener variaciones con el
teléfono dependiendo del software o del proveedor del servicio.

LIMITED WARRANTY STATEMENT
1. WHAT THIS WARRANTY COVERS:
LG offers you a limited warranty that the enclosed subscriber unit and its enclosed accessories
will be free from defects in material and workmanship, according to the following terms and
conditions:
1. The limited warranty for the product extends for ONE (1) year beginning on the date of
purchase of the product by the original end user.
2. The limited warranty extends only to the original end user of the product and is not
assignable or transferable to any subsequent purchaser/end user.
3. This warranty is good only to the original end user of the product during the warranty
period as long as it is in Canada.
4. Upon request from LG, the consumer must provide information to reasonably prove the
date of purchase.
5. During the applicable warranty period, LG will repair or replace at LG’s sole option,
without charge to the original end user, any defective component part of the phone or
accessory.
6. LG may use rebuilt, reconditioned or new parts or components when repairing any
product or replace a product with a rebuilt, reconditioned or new product.
2. WHAT THIS WARRANTY DOES NOT COVER:
1. Defects or damages resulting from use of the product in other than its normal and
customary manner.
2. Defects or damages from abnormal use, abnormal conditions, improper storage, exposure
to moisture or dampness, unauthorized modifications, unauthorized connections,
unauthorized repair, misuse, neglect, abuse, accident, alteration, improper installation or
other acts which are not the fault of LG, including damage caused by spills of food or
liquids.
3. Breakage or damage to antennas unless caused directly by defects in material or
workmanship.

4. The fact that the Customer Service Department at LG was not notified by the original
end user of the alleged defect or malfunction of the product, during the warranty period.
5. Products which have had their serial numbers removed or made illegible.
6. Damage resulting from use of non-LG approved accessories.
7. All plastic surfaces and all other externally exposed parts that are scratched or damaged
due to normal customer use.
8. Products serviced by non-authorized persons or companies.
Notes:
1. This limited warranty supersedes all other warranties, expressed or implied either in fact or
by operations of law, statutory or otherwise, including, but not limited to any implied
warranty of merchantability or fitness for a particular purpose.
2. Shipping damage is the sole responsibility of the shipping company.
3. EXCLUSION OF LIABILITY:
No other express warranty is applicable to this product.
THE DURATION OF ANY IMPLIED WARRANTIES, INCLUDING THE IMPLIED WARRANTY OF
MARKETABILITY, IS LIMITED TO THE DURATION OF THE EXPRESS WARRANTY HEREIN.
LG ELECTRONICS CANADA, INC. SHALL NOT BE LIABLE FOR THE LOSS OF THE USE OF
THE PRODUCT, INCONVENIENCE, LOSS OR ANY OTHER DAMAGES, DIRECT OR
CONSEQUENTIAL, ARISING OUT OF THE USE OF, OR INABILITY TO USE, THIS PRODUCT
OR FOR ANY BREACH OF ANY EXPRESS OR IMPLIED WARRANTY, INCLUDING THE
IMPLIED WARRANTY OF MARKETABILITY APPLICABLE TO THIS PRODUCT.
4. HOW TO GET WARRANTY SERVICE:
Puerto Rico 001 800 510 9564, Rep. Dominicana 00 800 751 5454, Nicaragua 001 800
507 0007, El Salvador 00 800 6309, Costa Rica 1 800 507 5454, Panama 507 800
5454, Guatemala 1 801 422 5454, Ecuador 593 1 800 545454, Venezuela 58 800
5424477

MG230d USER GUIDE
- ENGLISH

Table of Contents
Table of Contents
2
Introduction 7
Guidelines for safe and
efficient use 8
Exposure to radio frequency energy
Product care and maintenance 9
Efficient phone operation 11
Electronic devices
Road safety 12
Avoid damage to your hearing 13
Blasting area
Potentially explosive atmospheres
In aircraft 14
Children
Emergency calls
Battery information and care
MG230d Features 16
Getting started 17
Installing the SIM card and
battery 17
Charging the Battery 19
Disconnecting the charger 21
Access codes
PIN code (4 to 8 digits) 22
PIN2 code (4 to 8 digits)
PUK code (4 to 8 digits)
PUK2 code (4 to 8 digits) 23
Security code (4 to 8 digits)
General functions 24
Making and answering calls
Making a voice call
Making a voice call from Contacts
or close the handset
Making international calls
Adjusting the volume 25
Answering a call

Table of Contents
3
Signal strength 26
Entering text
Changing the text input mode 27
Using the T9 Mode 28
Using the ABC Mode 29
Using the 123 (Number) mode 31
Using the symbol mode
Menu tree 32
Browser 35
Browser
Home
Bookmarks
Go to URL 36
History
Settings
Information 39
Call register 40
All calls
Missed calls
Dialed calls 41
Received calls
Call duration 42
Call costs
Last call 43
All calls
Cost settings
GPRS information 44
Fun & Tools 45
Favorites
Alarm clock
Calendar
Calculator 47
Memo 48
To-do

Table of Contents
4
Stopwatch 48
Unit converter 49
World time
Multimedia 50
Camera
Voice recorder 51
Messages 52
New message
Inbox 54
Drafts 56
Outbox 57
Sent 58
Listen voice mail 59
Info service 60
Read
Topics
Templates 61
Text templates 61
Multimedia templates 62
Settings
Text message
Multimedia message 63
Voicemail number 64
Info service 65
Push messages 66
My stuff 67
Images
Sounds
Others
Games & Apps
SIM Service
68
Contacts 69
Search
Table of Contents

Table of Contents
5
Add new 70
Speed dial
Caller groups 71
Copy all 72
Delete all
Settings 73
View options
Information
Settings 75
Date & Time
Set date
Date format
Set time
Time format
Date & Time 76
Languages
Profiles
Display 77
Wallpaper 78
Backlight time
Brightness
Home screen shortcut
Theme
Menu style 79
Network name
Dial font color
Network
Network selection 80
Change frequency band 81
GPRS attach
Access Point 82
Calls 84
Call divert
Answer mode 85
Send my number 86
Call waiting
Minute minder

Table of Contents
6
Auto redial 87
Send DTMF tones
Security
PIN code request
Phone lock 88
Call barring
Fixed dial number
Change codes 89
Flight mode
Power save 90
Reset
Memory status
Accessories 91
Table of Contents

Introduction
Introduction
7
Congratulations on your purchase of the advanced and compact MG230d
mobile phone, designed to operate with the latest digital mobile
communication technology.
This user’s guide contains important
information on the use and operation of this
phone. Please read all the information carefully
for optimal performance and to prevent any
damage to or misuse of the phone. Any changes
or modifications not expressly approved in this
user’s guide could void your warranty for this
equipment.

Guidelines for safe and
efficient use
Guidelines for safe and efficient use
8
Please read these simple guidelines. Not following these guidelines may be
dangerous or illegal. Further detailed information is given in this manual.
Exposure to radio frequency energy
RADIO WAVE EXPOSURE AND SPECIFIC ABSORPTION RATE (SAR)
INFORMATION
This mobile phone model MG230d has been designed to comply with
applicable safety requirements for exposure to radio waves. This requirement is
based on scientific guidelines that include safety margins designed to assure
the safety of all persons, regardless of age and health.
] The radio wave exposure guidelines employ a unit of measurement known as
the Specific Absorption Rate, or SAR. Tests for SAR are conducted using
standardised methods with the phone transmitting at its highest certified
power level in all used frequency bands.
] While there may be differences between the SAR levels of various LG phone
models, they are all designed to meet the relevant guidelines for exposure to
radio waves.
] The SAR limit recommended by the International Commission on Non-
Ionizing Radiation Protection (ICNIRP) is 2W/kg averaged over ten (10)
gram of tissue.

Guidelines for safe and efficient use
9
] The highest SAR value for this model phone tested by DASY4 for use at the
ear is 1.36 W/kg (10g).
] SAR data information for residents in countries/regions that have adopted
the SAR limit recommended by the Institute of Electrical and Electronics
Engineers (IEEE) is 1.6 W/kg averaged over one (1) gram of tissue (for
example USA, Canada, Australia and Taiwan).
Product care and maintenance
] Do not disassemble this unit. Take it to a qualified service technician when
repair work is required.
] Keep away from electrical appliances such as a TV's, radios or personal
computers.
] The unit should be kept away from heat sources such as radiators or
cookers.
] Never place your phone in a microwave oven as it will cause the battery to
explode.
WARNING! Only use batteries, chargers and accessories approved for use with this
particular phone model. The use of any other types may invalidate any approval or warranty
applying to the phone, and may be dangerous.

Guidelines for safe and efficient use
10
] Do not drop.
] Do not subject this unit to mechanical vibration or shock.
] The coating of the phone may be damaged if covered with wrap or vinyl
wrapper.
] Do not use harsh chemicals (such as alcohol, benzene, thinners, etc.) or
detergents to clean your phone. There is a risk of this causing a fire.
] Do not subject this unit to excessive smoke or dust.
] Do not keep the phone next to credit cards or transport tickets; it can affect
the information on the magnetic strips.
] Do not tap the screen with a sharp object as it may damage the phone.
] Do not expose the phone to liquid or moisture.
] Use accessories, such as earphones and headsets, with caution. Ensure that
cables are tucked away safely and do not touch the antenna unnecessarily.
] Please remove the data cable before powering on the handset.
Guidelines for safe and efficient use

Guidelines for safe and efficient use
11
Efficient phone operation
To enjoy optimum performance with minimum power consumption
please:
] Do not hold the antenna when the phone is in use. If you hold it, it can affect
call quality, it may also cause the phone to operate at a higher power level
than needed and shorten talk and standby times.
Electronic devices
All mobile phones may get interference, which could affect performance.
] Do not use your mobile phone near medical equipment without requesting
permission. Avoid placing the phone over pacemakers (i.e. in your breast
pocket.)
] Some hearing aids might be disturbed by mobile phones.
] Minor interference may affect TVs, radios, PCs, etc.

Guidelines for safe and efficient use
12
Road safety
Check the laws and regulations on the use of mobile phones in the areas
when you drive.
] Do not use a hand-held phone while driving.
] Give full attention to driving.
] Use a hands-free kit, if available.
] Pull off the road and park before making or answering a call if driving
conditions so require.
] RF energy may affect some electronic systems in your motor vehicle such as
a car stereo or safety equipment.
] If your vehicle is equipped with an air bag, do not obstruct it with installed or
portable wireless equipment. It can cause serious injury due to improper
performance.
If you are listening to music whilst out and about, please ensure that the
volume is at a reasonable level so that you are aware of your
surroundings. This is particularly imperative when attempting to cross the
street.
Guidelines for safe and efficient use

Guidelines for safe and efficient use
13
Avoid damage to your hearing
Damage to your hearing can occur if you are exposed to loud sound for long
periods of time. We therefore recommend that you do not turn on or off the
handset close to your ear. We also recommend that music and call volumes
are set to a reasonable level.
Blasting area
Do not use the phone where blasting is in progress. Observe restrictions, and
follow any regulations or rules.
Potentially explosive atmospheres
] Do not use the phone at a refueIling point. Don't use near fuel or chemicals.
] Do not transport or store flammable gas, liquid, or explosives in the
compartment of your vehicle, which contains your mobile phone and
accessories.

Guidelines for safe and efficient use
14
In aircraft
Wireless devices can cause interference in aircraft.
] Turn off your mobile phone before boarding any aircraft.
] Do not use it on the ground without crew permission.
Children
Keep the phone in a safe place out of small children's reach. It includes small
parts which if detached may cause a choking hazard.
Emergency calls
Emergency calls may not be available under all mobile networks. Therefore, you
should never depend solely on your mobile phone for emergency calls. Check
with your local service provider. Dial 0-0-0 local emergency number in the
case of fire, traffic accident or medical emergencies. Remember, it is a free call
on your wireless phone! Dial 1-1-2 internationally for emergency services.
Battery information and care
CAUTION Risk of explosion if battery is replaced by an incorrect type. Dispose of used
batteries according to the instructions.
Guidelines for safe and efficient use

Guidelines for safe and efficient use
15
For use only with battery LG-MG230d.
] You do not need to completely discharge the battery before recharging.
Unlike other battery systems, there is no memory effect that could
compromise the battery's performance.
] Use only LG batteries and chargers. LG chargers are designed to maximize
the battery life.
] Do not disassemble or short-circuit the battery pack.
] Keep the metal contacts of the battery pack clean.
] Replace the battery when it no longer provides acceptable performance. The
battery pack may be recharged hundreds of times until it needs replacing.
] Recharge the battery if it has not been used for a long time to maximize
usability.
] Do not expose the battery charger to direct sunlight or use it in high
humidity, such as the bathroom.
] Do not leave the battery in hot or cold places, this may deteriorate the
battery performance.

MG230d Features
MG230d Features
16
Open view
Parts of the phone
OK
08/01 Lun
12:48
Earpiece
Main screen
Left soft key/
Right soft key
Confirm key
Camera key
Clear key
End/Power Key
Navigation keys
]
In standby mode:
Messages
Contacts
Profile
Favorites
]
In menu: Navigates menus.
Send key
]
Dials a phone number and
answers a call.
]
In standby mode: Shows a
history of calls made, received
and missed.
Calender key
Alpha numeric keys
]
In standby mode: Input numbers
to dial. Hold down:
for international calls.
to dial voice mail centre.
to for speed dials.
]
In editing mode: Enter numbers &
characters.

Getting started
17
Installing the SIM card and battery
1. Installing the SIM card.
Your SIM card contains your phone number, service details and contacts and
must be inserted into your handset.
If your SIM card is removed then your handset becomes unusable (except for
emergency calls) until a valid one is inserted. Always disconnect the charger
and other accessories from your handset before inserting and removing your
SIM card. Slide the SIM card into the SIM card holder.
Make sure that the SIM card is properly inserted and the gold Color of contact
area on the card is facing downwards. To remove the SIM card, press down
lightly and pull it in the reverse direction.
Getting started
SIM
SIM
To insert the SIM card To remove the SIM card

Getting started
18
2. Installing the battery.
Insert the battery aligning the gold contacts on the battery with the battery
terminals (gold contacts) in the battery compartment. Then push down the
top of the battery until it snaps into place.
3. To remove the battery.
Turn the power off. (If the power is left on, there is a chance you could lose
the stored telephone numbers and messages.) Press the battery release
latches ➊ and open the battery ➋. Then remove the battery.
Note
]
The metal contact of the SIM card can easily be damaged by
scratches. Pay special attention to the SIM card while handling.
Follow the instructions supplied with the SIM card.
Getting started

Getting started
19
Charging the Battery
Before connecting the travel adapter to the phone you must first install the
battery.
1. With the arrow facing you as shown in the diagram push the plug on the
battery adapter into the socket on the down part of the phone until it
clicks into place.

3. The moving bars on the battery icon will stop after charging is complete.
4. Ensure the battery is fully charged before using the phone for the first
time.
WARNING!
• Unplug the power cord and charger during lightning storms to avoid electric shock or
fire.
• Make sure that no sharp-edged items such as animal teeth or nails, come into contact
with the battery. This may cause a fire.
CAUTION!
• Do not force the connector as this may damage the phone and/or the travel adapter.
• If you use the battery pack charger when abroad, use an attachment plug adaptor for
the proper configuration.
• Do not remove your battery or the SIM card while charging.
Note
]
Only use the charger included in the box.
Getting started
Getting started
20

Getting started
21
Disconnecting the charger
Disconnect the travel adapter from the phone as shown in the diagram
below.
Access codes
You can use the access codes described in this section to avoid
unauthorised use of your phone. The access codes (except the PUK and
PUK2 codes) can be changed by using the
Change codes
feature [Menu
9.7.5].

Getting started
Getting started
22
PIN code (4 to 8 digits)
The PIN (Personal Identification Number) code protects your SIM card
against unauthorised use. The PIN code is usually supplied with the SIM
card. When the
PIN Code Request
is set to
On
, your phone will request
the PIN code every time it is switched on. When the
PIN Code Request
is
set to
Off
, your phone connects to the network directly without the PIN
code.
PIN2 code (4 to 8 digits)
The PIN2 code, supplied with some SIM cards, is required to access
functions such as
Fixed Dial Number
. These functions are only available if
supported by your SIM card.
PUK code (4 to 8 digits)
The PUK (PIN Unblocking Key) code is required to unlock a PIN blocked
SIM card. The PUK code may be supplied with the SIM card. If not, contact
your network operator for the code. If you lose the code, also contact your
network operator.

Getting started
23
PUK2 code (4 to 8 digits)
The PUK2 code, supplied with some SIM cards, is required to unlock a
blocked PIN2 code. If you lose the code, please contact your network
operator.
Security code (4 to 8 digits)
The security code prevents unauthorised use of your phone. The default
security code is set to ‘0000’ and the security code is required to delete all
phone entries and to restore the handset to the factory settings.

General functions
24
General functions
Making and answering calls
Making a voice call
1. Enter the number including the full area code, or select the phone
number from call logs by pressing .
] To delete a digit press . To delete all digits press and hold .
2. Press to make the call.
3. Press or close the handset to finish the call.
Making a voice call from Contacts or close the handset
It is easy to call anyone whose number you have stored in your Contacts.
1. Press to access the contacts list.
2. Scroll to the contact to make a call.
3. Press to make a voice call.
4. Press to finish the call.
Making international calls
1. Press and hold for the international prefix. The ‘+’ character prefixes
the international access code.

General functions
25
2. Enter the country code, area code, and the phone number.
3. Press .
Adjusting the volume
During a call, if you want to adjust the earpiece volume, use on the left
side of the handset. In idle mode with the phone open, you can adjust the
keypad volume using .
Answering a call
When you receive a call, the phone rings and the flashing phone icon
appears on the screen. If the caller can be identified, the caller’s phone
number (or name if stored in your Contacts) is displayed.
1. Open the phone and press to answer an incoming call. If the answer
mode is set to
Press any key
, any key will answer a call except for .
Note
]
To reject an incoming call, press or the right soft key twice.
]
If you set Answer mode as Flip open (Menu 9.6.2), you can answer the call simply by
opening the phone.
2. End the call by closing the handset or pressing .

General functions
General functions
26
Note
]
You can answer a call while using Contacts or other menu features.
]
When the compatible headset is connected, you can also answer a call using the headset
key, as well as using the phone. To reject an incoming call, press .
]
You can mute the ringtone by pressing the right soft key or lower the volume through
the volume key
.
Signal strength
You can check the strength of your signal by the signal indicator ( ) on
the LCD screen of your phone. Signal strength can vary, particularly inside
buildings. Moving close to a window may improve reception.
Entering text
You can enter alphanumeric characters using the keypad. For example,
storing names in Contacts, writing a message, creating a personal greeting
or scheduling events in the calendar all require entering text. The following
text input methods are available with the handset.

General functions
27
Changing the text input mode
1. When you are in a field that allows characters to be entered, you will
notice the text input mode indicator in the upper right corner of the LCD
screen.
T9 mode
This mode lets you enter words with only one keystroke per letter. Each
key on the keypad has more than one letter. The T9 mode automatically
compares your keystrokes with an internal dictionary to determine the
correct word, thus requiring far fewer keystrokes than the traditional ABC
mode. This is sometimes known as predictive text.
ABC mode
This mode lets you enter letters by pressing the key labelled with the
required letter once, twice, three or four times until the letter is displayed.
123 mode (Number mode)
Type numbers using one keystroke per number. To change to 123 mode
in a text entry field, press until 123 mode is displayed.

General functions
General functions
28
2. Press to switch between T9Abc, T9abc, Abc, abc and 123.
Using the T9 Mode
In order to use T9 mode you must first enable it.
The T9 predictive text input mode allows you to enter words easily with a
minimum number of key presses. As you press each key, the handset begins
to display the characters that it thinks you are typing based on a built-in
dictionary. As new letters are added, the word changes to reflect the most
likely candidate from the dictionary.
1. When you are in the T9 predictive text input mode, start entering a word
by pressing keys to . Press one key per letter.
] The word changes as letters are typed. Ignore what’s on the screen
until the word is typed completely.
] If the word is still incorrect after typing completely, press once or
more to scroll through the other word options.
Example
Press to type Good.
Press to get Home.

General functions
29
] If the desired word is missing from the word choices list, add it by using
the ABC mode.
2. Enter the whole word before editing or deleting any keystrokes.
3. Complete each word with a space by pressing
.
To delete letters, press . Press and hold down to continue erasing
automatically
Using the ABC Mode
Use to to enter your text.
1. Press the key labelled with the required letter:
]
Once for the first letter.
]
Twice for the second letter.
]
And so on.
2. To insert a space, press once. To delete letters, press .
Press and hold down to clear the display.
Refer to the following table for more information on the characters available
using the alphanumeric keys.

General functions
General functions
30
Key
Characters in the order display
Upper Case Lower Case
. , / ? ! - ' " @ 1 . , / ? ! - ' " @ 1
A B C 2 À Â Æ Ç a b c 2 à â æ ç
D E F 3 É È Ê Ë d e f 3 é è ê ë
G H I 4 Î Ï g h i 4 î ï
J K L 5 j k l 5
M N O 6 Ñ Ô Ö Œ m n o 6 ñ ô ö œ
P Q R S 7 p q r s 7
T U V 8 Û t u v 8 û
W X Z Y 9 W Y w x y z 9 w y
Space 0 Space 0

General functions
31
Note
]
The characters assigned to the keys and their order of appearance depends on the
language selected using the option Input method. The table above provides the
characters set for English language.
Using the 123 (Number) mode
The 123 mode enables you to enter numbers in a text message (a
telephone number, for example). Press the keys corresponding to the
required digits before manually switching back to the appropriate text entry
mode.
Using the symbol mode
The symbol mode enables you to enter various symbols or special
characters. To enter a symbol,
Options > Insert > Symbol
. Use the
navigation and numeric keys to select the desired symbol and press .

Menu tree
32
Menu tree
3.1 Favorites
3.2 Alarm clock
3.3 Calendar
3.4 Calculator
3.5 Memo
3.6 To-do
3.7 Stopwatch
3.8 Unit converter
3.9 World time
1.1 Browser
2.1 All calls
2.2 Missed calls
2.3 Dialed calls
2.4 Received calls
2.5 Call duration
2.6 Call costs
2.7 GPRS information
1. Browser
2. Call register
3. Fun&Tools

Menu tree
33
6.1 Images
6.2 Sounds
6.3 Others
6.4 Games & Apps
4.1 Camera
4.2 Voice recorder
5.1 New message
5.2 Inbox
5.3 Drafts
5.4 Outbox
5.5 Sent
5.6 Listen voice mail
5.7 Info service
5.8 Templates
5.9 Settings
4. Multimedia
5. Messages
6. My stuff
7. SIM Service

Menu tree
34
Menu tree
8.1 Search
8.2 Add new
8.3 Speed dial
8.4 Caller groups
8.5 Copy all
8.6 Delete all
8.7 Settings
8.8 Information
8. Contacts
9.1 Date & Time
9.2 Languages
9.3 Profiles
9.4 Display
9.5 Network
9.6 Calls
9.7 Security
9.8 Flight mode
9.9 Power save
9.0 Reset
9.* Memory status
9. Settings

Browser
35
Browser Menu 1.1
You can access various WAP (Wireless Application Protocol) services such
as banking, news, weather reports and flight information. These services are
specially designed for mobile phones and they are maintained by WAP
service providers.
Home (Menu 1.1.1)
The homepage is defined in the activated profile.
Bookmarks (Menu 1.1.2)
This menu allows you to store the URL of favorite web pages for easy access
at a later time. Your phone has several pre-installed bookmarks. These pre-
installed bookmarks cannot be deleted.
To create a bookmark
1. Press the left soft key [Options].
2. Select New bookmark and press the OK key.
3. After entering the desired URL and title, press the OK key.
Tip
]
Use the key and key to enter symbols. To enter “.”, press .
Browser

Browser
36
Go to URL (Menu 1.1.3)
You can connect directly to the site you want. After entering a specific URL,
press the OK key.
History (Menu 1.1.4)
The phone can save the page on display as an offline file. Up to 20 pages
can be saved.
Settings (Menu 1.1.5)
Network Profiles
A profile is the network information used to connect to the Internet.
Note
]
In case the SIM card support SAT(i.e. SIM Application Toolkit) services,
this menu will be the operator specific service name stored on the SIM
card. In case the SIM card does not support SAT services, this menu will be
Profiles.
Browser

Browser
37
Each profile has submenus as follows:
]
Activate:
Activates the selected profile.
]
View:
You can view the profile settings.
]
Edit:
Use this to edit and change WAP settings for the selected profile.
- Name:
You can specify the name of the WAP profile.
- Homepage:
This setting allows you to enter the address (URL) of a site you
want to use as homepage. You do not need to type http:// at the front of each
URL for the WAP Browser will automatically add it.
- Proxy:
You can make proxy On/ Off by using left and right navigation keys.
- IP address:
Input the IP address of the WAP gateway you access.
- Port number:
Input the Proxy Port.
- Access point:
Input the APN of the GPRS,to see the details refer (Menu
9.4.4)
]
New profile:
You can add a new profile.
]
Delete:
You can delete a profile.
]
Reset all:
You can reset all the profiles you edited.

Browser
38
Cache
Allow cache
Set a value whether a connection attempt is made through cache or not.
Clear cache
Removes all content saved in cache.
Cookies
Allow Cookies
Check whether a cookie is used or not.
Clear Cookies
Removes all content saved in cookie.
Security Certificates
A list of the available certification is shown.
]
Authority:
You can see the list of authority certificates that have been stored
in your phone.
]
Personal:
You can see the list of personal certificates that have been stored
in your phone.
Browser

Browser
39
]
Show Image:
You can set this option to On / Off based on whether or not
you want to view images while browsing.
Information (Menu 1.1.6)
Browser version is mentioned here.

You can check the record of missed, received, and dialed calls only if the
network supports the Calling Line Identification (CLI) within the service
area.
The number and name (if available) are displayed together with the date
and time at which the call was made. You can also view call times.
All calls Menu 2.1
Allows you to view the missed, received, and dialed call records. You can
make a call or send a message to the number you have selected from the
records. You can also save the number as a Contact.
Missed calls
Menu 2.2
This option lets you view the last 50 unanswered calls. You can also:
]
View the number if available and call it, or save it in the phonebook.
]
Enter a new name for the number and save both in the phonebook.
]
Send a message to this number.
]
Delete the call from the list.
Call register
40
Call register

Call register
41
Dialed calls Menu 2.3
This option lets you view the last 50 outgoing calls (called or attempted).
You can also:
]
View the number if available and call it, or save it in the phonebook.
]
Enter a new name for the number and save both in the phonebook.
]
Send a message to this number.
]
Delete the call from the list.
Received calls Menu 2.4
This option lets you view the last 50 incoming calls. You can also:
]
View the number if available and call it, or save it in the phonebook.
]
Enter a new name for the number and save both in the phonebook.
]
Send a message to this number.
]
Delete the call from the list.

Call duration Menu 2.5
Use this to view the duration of your incoming and outgoing calls. You can
check each call duration at the bottom of screen while scrolling using the
up/down navigation keys. You can reset the call timer by selecting
All calls
> Reset
.
]
Last call:
Length of the last call.
]
All calls:
Total length of all calls made and received since the timer was
last reset.
]
Dialed calls:
Length of the outgoing calls.
]
Received calls:
Length of the incoming calls.
Call costs Menu 2.6
This network service allows you to check the cost of your last call, all calls,
remaining and reset the call cost. To reset the call cost, you will be
requested to enter the PIN2 code.
Note
]
The actual cost invoiced for calls by your service provider may vary,
depending on network features, rounding-off for billing, taxes, etc.
Call register
42
Call register

Call register
43
Last call (Menu 2.6.1)
Call cost of the last call.
All calls (Menu 2.6.2)
Total cost of all calls.
Cost settings (SIM Dependant) (Menu 2.6.3)
]
Set tariff
: You can set the currency type and the unit price. Contact
your service providers to obtain charging unit prices. To select the
currency or unit in this menu, you need the PIN2 code.
]
Set credit:
This network service allows you to limit the cost of your calls
by selected charging units. If you select
Read
, the number of remaining
units are shown. If you select
Change
, you can change your charge limit.
]
Auto display:
This network service allows you to automatically see the
cost of your last calls. If set to
On
, you can see the cost of the last call
when the call is released.

Call register
44
GPRS information Menu 2.7
You can check the amount of data transferred over the network through the
GPRS information option. In addition, you can also view how much time you
are online.
Call register

Fun & Tools
45
Fun & Tools
Favorites Menu 3.1
Alarm clock Menu 3.2
You can set up to 5 alarm clocks to go off at a specified time.
1. Select On and enter the alarm time you want.
2. Select the repeat period :
Once
,
Mon
~
Fri
,
Mon
~
Sat
,
Sat
~
Sun,
Everyday
.
3. Select the alarm tone you want and press .
4. Edit the alarm name and press .
Calendar Menu 3.3
When you enter this menu, a calendar appears. A square cursor is located on
the current date. You can move the cursor to another date using the
navigation keys. On the calendar, you can use the following keys.

You can enter a schedule or memo in the scheduler by pressing the left soft
key [Options].
]
View daily schedules:
Shows the schedule note or memo for the
Chosen day. Press the left soft key [Options] to edit or delete the note
you selected.
]
Add new:
Select this to enter a new schedule or memo. After a schedule
note is entered, the date is shown in a different color and icon appears
on the top middle of the screen. This function reminds you of your
schedule and the phone will sound an alarm tone if set to do so.
]
Set alarm tone:
you can select the tone.
]
All schedules:
Shows all the notes entered in the phone. Use up/ down
navigation keys to browse through the list.
]
Go to date:
You can go to a particular date and create a new schedule.
Fun & Tools
Fun & Tools
46
skips back a year.
skips forward a year.
skips back a month.
skips forward a month.
Pressing

Fun & Tools
47
]
Delete old:
Select this to delete the expired schedule notes that you
have already been notified of.
]
Delete all:
Select this to delete all the schedule notes and memos.
Calculator Menu 3.4
The calculator provides the basic arithmetic functions:
addition,
subtraction, multiplication ,division along with functions such as sin
cos tan log ln exp sqrt
1. Enter the first number using the numeric keys.
2. Press the corresponding navigation key to select a mathematical function.
3. To calculate the result, press the OK key.
4. After calculation, press the right soft key [Clear] to return to the initial
state.
Note
]
To erase any mistake or clear the display, use the key.
]
To include a decimal point, press the key.
]
To include a minus sign, press the key.

Memo Menu 3.5
Using the memo management function, you can view and manage saved
memo contents and add new memo. Enter the contents of the memo. You
can save the memo to the list by pressing the OK key.
Edit and delete memo
Highlight the desired memo and press to view its contents. You can edit
or delete the contents of a memo using the left soft key [Options]. You can
select Multiple or All memos using the Mark/Unmark option and then delete
a memo.
To-do Menu 3.6
You can create a To do list here.
Stopwatch Menu 3.7
1. Press [Start] to star running the watch and record the lap time by
pressing [Lap].
2. Press [Stop] to ascertain the record of lap time.
3. Press [Reset] to restart the stopwatch.
Fun & Tools
48
Fun & Tools

Fun & Tools
49
Unit converter Menu 3.8
This converts any measurement into the unit you want. There are 7 types
that can be converted into units:
Currency, Area, Length, Weight,
Temperature, Volume, Velocity.
World time Menu 3.9
You can check the time of the major cities of the world.
1. Select the city corresponding to your time zone by pressing options.
The local date and time are displayed.

Multimedia
50
Multimedia
Your multimedia phone comes with an easy-to-use built-in camera, which
allows you to instantly take, view and share pictures with your friends and
family.
Camera Menu 4.1
Press Menu > Multimedia > Camera > Take a picture by pressing OK key or by
pressing the Camera key on standby mode, the camera module opens and you'll
see the image to be captured.
Note
]
If the battery is too low, you may not be able to use the Camera feature.
preview option
menu bar
Options Album

Multimedia
51
Voice recorder Menu 4.2
In this feature you can record up to 10 voice memos, up to a maximum of 60
seconds each.

This menu includes functions related to SMS (Short Message Service), MMS
(Multimedia Message Service), voice mail, as well as the network’s service
messages. Sending of SMS and MMS leads to costs. For details please
contact your network operator.
New message
Menu 5.1
You can write and edit text messages up to 10 pages.
1. Enter the Messages menu by selecting it and pressing [OK].
2. If you want to write a new message, select Text.
3. To input text easier, use T9. For details, refer to pages 21 through 24
(Entering text).
4. Press [Insert] to attach the followings;
Insert
]
Symbol:
You can add special characters.
]
Image:
You can insert the Default graphics or graphics in My pictures
that are available for short messages. Pictures taken by the phone camera
can also be sent via MMS.
]
Sound:
You can insert sounds that are available for short messages.
]
Text templates:
You can use text templates already set in the phone.
Messages
52
Messages

Messages
53
]
Contacts:
You can add phone numbers or e-mail addresses in the
address book.
]
My Business card:
You can add your business card to the message.
5. After you have completed the message, to select the required option,
press the left soft key [Options].
Options
]
Send to:
Sends the text message.
1. Enter the number of the recipient.
2. Press key to add more recipients.
3. You can add phone numbers from the address book.
4. Once the numbers have been entered, press the left soft key to send the
message.
All sent messages will automatically be saved on [Sent] folder and also the
messages which are automatically stored on Outbox folder even after a
sending failure.
]
Save:
Stores messages in the Drafts folder.
]
Add T9 dictionary:
You can add your own words. This menu will only
be shown when the edit mode has been set to T9ABC/T9Abc/T9abc.

Messages
54
Messages
]
T9 languages:
Select the desired language for T9 input mode. You can
also deactivate the T9 input mode by selecting ‘T9 off’.
]
Exit:
If you press Exit whilst writing a message, you will be taken back to
the message menu. Also the written message will not have been saved.
Inbox Menu 5.2
You will be alerted when you have received messages. They will be stored in
the Inbox.
In the Inbox, you can identify each message by their icons. For detail, see
the icon directive.
Note
]
This phone supports EMS release 5, so is available to send Color pictures,
sounds, text styles, etc.. If the other parties handsets do not support such
options, the pictures, sounds or texts sent may not be displayed correctly
on their phones.

Messages
55
]
Icon directive
When you are notified that you have received a multimedia message, you
have to wait for the message to be downloaded before you can view it. For
notification setting, see (Menu 5.2) for detail.
To read a message, select one of the messages by pressing Options] >
[View].
]
View:
You can view the selected message.
]
Reply:
You can reply to the sender.
]
Delete:
You can delete the current message.
]
Forward:
You can forward the selected message to another party.
Note
]
SIM message: SIM message means the message is exceptionally stored in
the SIM card.
Multimedia message
Short message
Read Short message
Read Multimedia message
Icon
Description

Messages
56
Messages
]
Return call:
You can call the sender back. Number: You can save the
number as new contact or add it to an existing contact.
]
Information: You can view information about received messages;
Sender's address, subject (only for Multimedia message), Message date
& time, Message type, Message size.
]
Multi delete: You can delete multiple messages at a time.
]
Delete all read: You can delete all the read messages.
]
Delete all: You can delete all the messages.
Drafts Menu 5.3
You can view the messages saved as a draft. The draft messages are listed with
the date and time when they were saved. Scroll through the list using up/down
navigation keys.
Each draft has the following options. Press [Options].
]
View:
You can view the selected message.
]
Edit:
You can edit the selected message.
]
Delete:
Deletes the selected message from the drafts folder.
]
Information:
You can view the information of selected message: subject

Messages
57
(only for multimedia message), the date and time when saved, message type
and size, the priority (only for multimedia message).
]
Multi delete:
You can delete the multiple messages at a time.
]
Delete all:
Deletes all the messages from drafts folder.
Outbox Menu 5.4
You can view the list and contents of sent messages in this menu and can
also verify if the transmission was successful.
In each message, the following options are available by pressing the left soft
key [Options].
The messages of which transmission was completed has the
following options.
]
View:
You can view the selected message.
]
Forward:
You can forward the selected message to other recipients.
]
Delete:
Deletes the selected message from outbox.
]
View information:
You can view the information of selected message:
subject (only for multimedia message), the date and time when you sent
it, message type and size, the priority (only for multimedia message), and
recipients.

Messages
58
Messages
]
Delete all:
Deletes all the messages in the outbox folder.
The messages of which transmission is in progress has the
following options.
]
View:
You can view the selected message.
]
Delete:
Cancels transmitting the message and deletes the message.
]
Resend: Select this to send it again.
]
Edit: You can edit the message.
]
Information:
You can view the information of selected message: subject
(only for multimedia message), the date and time when you sent it,
message type and size, the priority (only for multimedia message), and
recipients.
]
Multi delete:
You can delete the multiple messages at a time.
]
Delete all:
Cancels all the message transmission and deletes all of them.
Sent Menu 5.5
Shows the messages you sent (Message).

Messages
59
[Options]
]
View:
Opens the selected message.
]
Delete:
Deletes the current message.
]
Forward:
Forwards the selected message.
]
Information:
You can view the information of selected message: subject
(only for multimedia message), the date and time when sent, message
type and size, the priority (only for multimedia message).
]
Multi delete:
You can delete the multiple messages at a time.
]
Delete all:
Deletes all the messages from sent item folder.
Listen voice mail Menu 5.6
This menu provides you with a quick way of accessing your voice mailbox (if
provided by your network). Before using this feature, you must enter the
voice mail number obtained from your network operator (Menu 5.9.3).
When a new voice message is received, the symbol will be displayed on
the screen. A long press of the key will take you directly into your
voicemail. Please check with your service operator for details of their service
in order to configure the handset correctly.

Info service (Dependant to network and subscription) Menu 5.7
Info service messages are text messages delivered by the network to your
handset. They provide general information such as weather reports, traffic
news, taxis, pharmacies, and stock prices. When you receive an info service
message, a popup message will indicate a new message receipt or the info
service message will be displayed directly. In standby mode, the following
options are available when viewing info service messages.
Read (Menu 5.7.1)
When you have received an info service message and select OK to view the
message, it will be displayed on the screen. You can read another message
by scrolling , .
Topics (Menu 5.7.2)
]
Add new:
You can add Info service message numbers in the Phone
memory with its nickname.
Messages
Messages
60

Messages
61
]
View list:
You can see Info service message numbers which you have
added. If you press [Options], you can edit and delete info message
categories which you have added.
]
Active list:
You can select Info service message numbers in the active
list. If you activate an info service number, you can receive messages sent
from the number.
Templates Menu 5.8
There are pre-defined messages in this menu. You can view, edit or create
new template messages. Two types of templates are available: Text and
Multimedia.
Text templates (Menu 5.8.1)
The followings are pre-defined text templates.
• Please call me back.
• I'm late. I will be there at
• Where are you now?
• I am on the way.

• Top urgent. Please contact.
• I love you.
Multimedia templates (Menu 5.8.2)
You can create a multimedia template after pressing the left soft key [New]
or save as a template when creating a multimedia message. (Menu 5.1.2).
Settings Menu 5.9
Text message (Menu 5.9.1)
]
Message types:
Text, Voice, Fax, Paging, X.400, Email, ERMES
Usually, the type of message is set to Text. You can convert your text into
alternative formats. Contact your service provider for the availability of
this function.
]
Validity period:
This network service allows you to set how long your
text messages will be stored at the message centre.
]
Delivery report:
If you set to Yes, you can check whether your message
is sent successfully.
Messages
62
Messages

Messages
63
]
Reply via same service center:
When a message is sent, it allows the
recipients to reply and charge the cost of the reply to your telephone
bill.
]
SMS Center:
Saves or changes the number of your SMS centre when
sending text messages. You must obtain this number from your service
provider.
Multimedia message (Menu 5.9.2)
]
Subject:
You can enter multimedia messages subject when this menu is
On.
]
Slide Duration:
You can set the duration of slides by the second.
]
Priority:
You can send the message after setting the level of priority:
Low, Normal and High.
]
Validity period:
This network service allows you to set how long your
text messages will be stored at the message centre.
]
Delivery report:
If it is set to Yes in this menu, you can check whether
your message is sent successfully.
]
Read report:
You can check if your message is read by the recipient.
This feature is dependent on the network.

]
Auto download
On :
The messages are downloaded automatically on receipt.
Off :
Requires you to confirm you want to download the message.
Home network:
If you select this, messages are downloaded
automatically on receipt in your home network area. Outside your home
service area, it requires you to confirm the download of the message.
]
Network Profile:
Select the multimedia message server. Here you can
set the URL for the multimedia message server.
]
Permitted message types
- Personal: Personal message.
- Advertisements: Commercial message.
- Information: Necessary information.
Voicemail number (Menu 5.9.3)
You can receive voicemail if this feature is supported by your network
service provider. When a new voicemail has arrived, the symbol will be
displayed on the screen. Please check with your network service provider for
details of their service in order to configure the phone accordingly.
Messages
64
Messages

Messages
65
1. Hold down key in standby mode.
2. You can check the following submenus.
]
Home:
You can listen to voice mails by selecting Home.
]
Roaming:
Even when you are abroad, you can listen to voice mails if a
roaming service is supported.
Info service (Dependent to network and subscription)
(Menu 5.9.4)
]
Receive
- Yes: If you select this menu, your phone will receive Info service
messages.
- No: If you select this menu, your phone will not receive Info service
messages any more.
]
Alert
- Yes: Your phone will beep when you have received Info service message
numbers.
- No: Your phone will not beep even though you have received info service
messages.

]
Languages
You can select the language you want by pressing [OK], then the info
service message will be shown in the language that you have selected.
Push messages (Menu 5.9.5)
You can set the option whether you will receive the message or not, also set
the auto download on or off.
Messages
66
Messages

My stuff
67
My stuff
Images Menu 6.1
Pictures taken using the camera are stored in the Picture folder and you can
create new folders to manage them.
Sounds Menu 6.2
Here you can create new folders, play or set sounds as ringtones.
Others Menu 6.3
Some of the unsupported contents (if downloaded / transferred to phone)
will be stored here.
Games & Apps Menu 6.4
You can easily play games and other applications in this menu. It has two
folders with Games and Applications as default.

SIM Service
SIM Service
68
This menu depends on SIM and the network services.

Contacts
Contacts
69
Search Menu 8.1
1. Select Search. You are asked to enter a name.
2. Enter the first letter of the name that you wish to find and press the [OK]
key.
]
You can also access the Contacts directly in standby mode by pressing
down navigation key .
3. After finding the desired contact, you can make call to the number by
pressing the key. Or press the left soft key [Option] to use the
following options.
]
View:
You can view the number.
]
Text message:
You can write a text message to a contact.
]
Multimedia message: You can write a multimedia message to the contact.
]
Send Via: you can send contact via Text message or Multimedia.
]
Delete: Deletes the contact.
]
New contact: You can add a new contact.
]
Multi delete: You can multi delete the contacts.

Contacts
Contacts
70
]
Copy to handset or Copy to SIM:
You can copy an entry from SIM to
phone or from Phone to SIM depending on what memory the contact was
saved.
Add new Menu 8.2
You can add a contact entry using this function. There are 2 memories:
Phone memory and SIM memory. To select the memory, go to New contact
and you will find the storage window, scroll to this window with left and
right navigation key and select the Phone or SIM memory in which you need
to store the contact. The phone memory capacity is 500 entries. You can
enter up to 40 characters in each name in the phone memory. The SIM card
memory capacity depends on the SIM card.
Speed dial Menu 8.3
Assign contacts to any of the keys to . You can then call that contact
by pressing the corresponding number key.
1.Scroll to
Speed dial
, then press [OK].
2. To add a number to
Speed dial
, select (Empty). Then, you can search
the name through Contacts.

Contacts
71
3. You can change or delete a speed dial number, make a call or send a
message by pressing the left soft key [Option].
Caller groups Menu 8.4
You can add members to any group, with up to a maximum of 7 groups in
total.
1. Select
Caller groups
. All group lists will be displayed:
Family, Friends,
Colleagues, VIP, Group 1, Group 2, and Group 3.
2. Select the group name that you want to manage by pressing the left soft
key [Option].
The following submenus will be displayed.
]
View members:
Displays the member list in the group.
]
Group ring tone:
Use this to select the ring tone to be used when you
receive a phone call from a person of a group.
]
Group icon:
Use this to select the graphic icon to be displayed when you
receive a call from a person in the group.
]
Add member:
Add a member to the group. You can add up to 20
members per group.
]
Remove member:
You can select and remove member one by one.

Contacts
Contacts
72
]
Remove all members:
Removes all the members from the group.
]
Reset all:
Removes all the member from all the group member list .
]
Rename:
Assigns a new name for the goup.
Copy all Menu 8.5
You can copy/move entries from the SIM card memory to the phone
memory and vice versa.
]
SIM to Phone:
Use this to copy the contacts from SIM Card to the
Phone memory.
]
Phone to SIM: Use this to copy the contacts from the Phone memory to
the SIM Card.
The following options are available.
• Keep original: When copying, the original dial numbers are kept.
• Delete original: When copying, the original dial numbers will be erased.
Delete all Menu 8.6
You can delete all entries in the SIM or Phone. This function requires the
security code. Press to return to standby mode.

Contacts
73
Settings Menu 8.7
View options (Menu 8.7.1)
You can set the Contact display option.
]
Names only:
When you search Contacts, the list displays the names only.
]
Name & number:
When you search Contacts, the list displays the names
and numbers.
]
With pictures:
When you search Contacts, the list displays names and
corresponding pictures.
Information Menu 8.8
]
Service dial number (SIM dependent):
Use this to view the list of
Service dial numbers (SDN) assigned by your network operator (if
supported by the SIM card). Such numbers includes the emergency
number, directory enquiries and voice mail numbers.
1. Select the Service dial number option.
2. The names of the available services will be shown.
3. Use the up/down navigation keys to select a service. Press .

Contacts
Contacts
74
]
Own number (SIM dependent):
Use this to display your phone
number in the SIM card.
]
Business card:
You can store personal information such as your Name,
Mobile, Home, Office, Fax number and Email.

Settings
Settings
75
You can set the following menus for your convenience and preferences.
Date & Time Menu 9.1
You can set functions relating to the date and time.
Set date (Menu 9.1.1)
You can enter the current date.
Date format (Menu 9.1.2)
You can set the Date format such as
DD/MM/YYYY, MM/DD/YYYY,
YYYY/MM/DD
.
(D: Day / M: Month / Y: Year)
Set time (Menu 9.1.3)
You can enter the current time.
Time format (Menu 9.1.4)
You can set the time format to either 24-hour or 12-hour count.

Settings
Settings
76
Date & Time (Menu 9.1.5)
Auto update
Languages Menu 9.2
You can select any of the displayed languages. When the language option is
set to Automatic, the language is automatically selected according to the
language of the SIM card used. English will be set if the language on the SIM
card is not supported by the phone.
Profiles Menu 9.3
In Profiles, you can adjust and costumize the phone tones for different
envents, environments and preference. There are five preset profiles:
General, Silent, Vibrate only, Outdoor and Headset
. Each profile can
be personalised(Except Vibrate only, Silent menu).
Press the left soft key [Menu] > [Settings] > [Profiles].

Settings
77
Changing the profile Menu 9.X.1
1. A list of profiles is displayed.
2. In the
Profiles
list, scroll to the profile you want to activate and press
the left soft key [OK] or OK key.
3. Then, select
Activate
.
Customising profiles – Personalise Menu 9.X.2
You can customise profiles except Vibrate only and Silent menu. Scroll to
the desired profile in the Profile list. After pressing the left soft key or the
OK key, select Personalise.
Display Menu 9.4
Many features of your phone can be customised to suit your preferences.
All of these features are accessed via the Phone settings menu.
Note
]
When a headset is connected to the phone the Headset profile is
automatically activated.

Settings
Settings
78
Wallpaper (Menu 9.4.1)
Use this to set up the display on the LCD screen in standby mode.
Backlight time (Menu 9.4.2)
Use this to select whether or not the phone uses the backlight. A small
increase in standby/talk time can be achieved by turning the backlight off.
Brightness (Menu 9.4.3)
You can set the brightness of LCD.
Home screen shortcut (Menu 9.4.4)
If you select On, a shortcut menu will be displayed when on standby mode.
Theme (Menu 9.4.5)
Your phone provides you with 3 menu Color themes. Set the menu color by
scrolling and pressing the left soft key [Select].

Settings
79
Menu style (Menu 9.4.6)
There are two menu styles available, Grid view and List view.
Network name (Menu 9.4.7)
If you select on, you can see the network service provider name which is
displayed in standby mode.
Dial font color (Menu 9.4.8)
Sets the font color.
Network Menu 9.5
The
Network settings
feature enables you to indicate whether the
network used when roaming(outside your home area) is selected
automatically, manually or preferably.
Note
]
You can select a network other than your home network only if it has a
valid roaming agreement with your home network.

Settings
Settings
80
Network selection (Menu 9.5.1)
Automatic (Menu 9.5.1.1)
Use this to set the phone to automatically search for and select one of the
networks available in your area.
Manual (Menu 9.5.1.2)
If you want to select the desired network manually from a list of networks,
you can activate this function. If the connection to the manually selected
network is lost, the phone will give off a error tone and ask you to select a
network again. The selected network must have a roaming agreement with
your home network. The phone will let you select another network if the
phone fails to access the initial selected network. The phone will default
back to Automatic if it is switched off.
Preferred (Menu 9.5.1.3)
You can set a list of preferred networks and the phone attempts to register
with first, before attempting to register to any other networks. This list is
set from the phone’s predefined list of known networks.

Settings
81
Change frequency band (Menu 9.5.2)
GSM850/PCS (Menu 9.5.2.1)
According to depending on Network situation, you can select PCS only.
DCS only (Menu 9.5.2.2)
According to depending on Network situation, you can select EGSM/DCS.
GPRS attach (Menu 9.5.3)
You can set the GPRS service depending on various situations.
Power on (Menu 9.5.3.1)
If you select
Power on
and you are in a network that supports GPRS, the phone
registers to the GPRS network and sending short messages will be done via
GPRS. Also, starting an active packet data connection, for example, to send and
receive a multimedia message is quicker.
When needed (Menu 9.5.3.2)
If you select
When needed
, the phone will use a GPRS connection only if you
start an application or action that needs it. The GPRS connection is closed after
it is no longer required by any application.

Settings
Settings
82
Access Point (Menu 9.5.4)
Allows user to add an Acess point .To Create a new access point, go to
options and select New Access point and press OK.
]
Enter the name of the APN in the name window
]
Bearer:
You can set the bearer data service as DATA/GPRS by right and
left navigation keys in the selection box.
Data
]
Data settings:
Appears only if you select Data Settings as a Bearer
/service.
]
Dial number:
Enter the telephone number to dial to access your WAP
gateway.
]
User ID:
The users identity for your dialup server (and NOT the WAP
gateway).
]
Password:
The password required by your dial-up server (and NOT the
WAP gateway) to identify you.
]
Call type:
Select the type of data call : Analogue of Digital (ISDN)
]
Linger time:
You need to enter timeout period. After entering that, the
WAP navigation service will be unavailable if any data is not input or
transferred.

Settings
83
]
Primary server:
Input the IP address of the primary DNS server you
access.
]
Secondary server:
Input the IP address of the secondary DNS server you
access.
GPRS
]
GPRS:
The service settings are only available when GPRS is chosen as a
bearer service.
]
APN:
Input the APN of the GPRS.
]
User ID:
The users identify for your APN server.
]
Password:
The password required by your APN server.
]
Primary server:
Input the IP address of the primary DNS server you
access.
]
Secondary server:
Input the IP address of the secondary DNS server you
access.

Settings
Settings
84
Calls Menu 9.6
You can access the menus by pressing [OK] in the Setting menu.
Call divert (Menu 9.6.1)
The Call divert service allows you to divert all voice calls, If busy, If no reply,
If out of reach, all data calls and all fax calls to another number. For details,
contact your service provider.
]
All voice calls:
Diverts voice calls unconditionally.
]
If busy: Diverts if busy unconditionally.
]
If no reply: Diverts when there is no reply unconditionally.
]
If out of reach: Diverts if out of reach unconditionally.
]
All data calls:
Diverts to a number with a PC connection unconditionally.
]
All fax calls:
Diverts to a number with a fax connection unconditionally.
]
Cancel all:
Cancels all call divert service.
The submenus
Call divert menus have the submenus shown below.
]
Activate:
Activates the corresponding service.

Settings
85
- To voice mail centre:
Forwards to message centre. This function is not
shown at All data calls and All fax calls menus.
- To other number:
Inputs the number for diverting.
- To favorite number:
You can check back to last five diverted numbers.
]
Cancel:
Deactivates the corresponding service.
]
View status:
View the status of the corresponding service.
Answer mode (Menu 9.6.2)
]
Flip open
If you select this menu, you can answer an incoming call only by opening
the flip.
]
Press any key
If you select this menu, you can receive a call by pressing any key except
[End] key and Left soft key.
]
SEND key only
If you select this menu, you can receive a call by only pressing
[Send]
key.

Settings
Settings
86
Send my number (network and subscription dependent) (Menu 9.6.3)
]
Set by network
If you select this, you can send your phone number depending on
carrier provider.
]
On
You can send your phone number to another party. Your phone
number will be shown on the receiver’s phone.
]
Off
Your phone number will not be shown.
Call waiting (network dependent) (Menu 9.6.4)
The network will notify you of a new incoming call while you have a call in
progress. Select On to request the network to activate call waiting, Off to
request the network to deactivate call waiting, or Status, to check if the
function is active or not.
Minute minder (Menu 9.6.5)
When set to
On
, the phone will beep every minute during an incoming or call
to keep you informed of the length of the call.

Settings
87
Auto redial (Menu 9.6.6)
Select
On
, and your phone will make a maximum of five attempts to connect
the call after an unsuccessful call attempt.
Send DTMF tones (Menu 9.6.7)
You can set DTMF ON and OFF.
Security Menu 9.7
PIN code request (Menu 9.7.1)
In this menu, you can set the phone to ask for the PIN code of your SIM card
when the phone is switched on. If this function is activated, you’ll be
requested to enter the PIN code.
1. Select PIN code request in the security settings menu, and then press
[OK].
2. Set
Enable/Disable
.
3. If you want to change the setting, you need to enter PIN code.
4. If you enter the wrong PIN code more than 3 times, the phone will lock
out. If the PIN is blocked, you will need to key in the PUK code.

Settings
Settings
88
5. You can enter your PUK code up to 10 times. If you enter the wrong
PUK code more than 10 times, you can not unlock your phone. You will
need to contact your service provider.
Phone lock (Menu 9.7.2)
You can use a security code to avoid unauthorised use of the phone.
Whenever you switch on the phone, the phone will request a security code if
you set the handset lock to When power on. If you set the handset lock to
When SIM changed, your phone will request a security code only when you
change your SIM card. If you set the handset lock to Immediately, the phone
will request a security code as soon as the option is selected.
Call barring (Menu 9.7.3)
The Call barring service prevents your phone from making or receiving certain
category of calls. This function requires the call barring password.
Fixed dial number (SIM dependent) (Menu 9.7.4)
You can restrict your outgoing calls to selected phone numbers. The
numbers are protected by your PIN2 code.
]
On
You can restrict your outgoing calls to selected phone numbers.

Settings
89
]
Off
You can cancel fixed dialling function.
]
Number list
You can view the number list saved as Fixed dial number.
Change codes (Menu 9.7.5)
PIN is an abbreviation of Personal Identification Number to prevent use by an
unauthorised person.
You can change the access codes:
Security code, PIN code, PIN2 code
.
1. If you want to change the Security code/PIN2/PIN code input your
original code, and then press [OK].
2. Input new Security code/PIN2/PIN code and verify them.
Flight mode Menu 9.8
This allows you to use only the phone’s features that do not require the use
of the wireless network when you are in an airplane or in places where the
wireless network is prevented. If you set the flight mode on, the icon will be
displayed on the screen instead of the network signal icon.

Settings
Settings
90
Power save Menu 9.9
Decide whether to activate the power save mode or not.
Reset Menu 9.0
You can initialise all factory defaults. You will need the Security code to
activate this function.
Memory status Menu 9.*
You can check the status of memory in use.

Accessories
Accessories
91
There are various accessories for your mobile phone. You can select these
options according to your personal communication requirements.
Standard Battery
Travel Adapter
This charger allows you to charge the battery
whilst away from home or your office.

Accessories
Accessories
92
Note
]
Always use genuine LG accessories.
]
Failure to do this may invalidate your warranty.
]
Accessories may be different in different regions; please check with our
regional service company or agent for further inquires.

NOTES

NOTES

CERTIFICADO DE GARANTÍA LIMITADA
LG ELECTRONICS PANAMA, S.A. (LGEPS) garantiza este producto (incluyendo su batería y accesorios
originales) en contra de defectos de fabricación y mano de obra como sigue:
1. MANO DE OBRA: Por un período de un (1) año contado desde la fecha de compra por el consumidor
que adquiera el producto nuevo, si este producto es encontrado defectuoso, LGEPS correrá con los
gastos de reparación en los Centros de Servicio Autorizado que para estos efectos designe en cada país.
Una vez expirado el período de garantía, LGEPS no será responsable por gastos en mano de obra.
2. PARTES: Por un período de un (1) año contado desde la fecha de compra por el consumidor que
adquiera el producto nuevo, si este producto es encontrado defectuoso, LGEPS correrá con el costo de
las piezas nuevas en los Centros de Servicio Autorizado que para estos efectos designe en cada país.
Una vez expirado el período de garantía, LGEPS no será responsable por gastos en partes.
3. BATERÍAS Y ACCESORIOS: Por un período de seis (6) meses contados desde la fecha de compra por el
consumidor que adquiera el producto nuevo, si este producto es encontrado defectuoso, LGEPS correrá
con el costo de las piezas nuevas en los Centros de Servicio Autorizado que para estos efectos designe
en cada país. Una vez expirado el período de garantía, LGEPS no será responsable por gastos en baterías
y accesorios.
Exclusiones de la garantía. La presente garantía no cubre las siguientes situaciones:
a. Aquellos daños causados por negligencia, impericia, inobservancia del manual de uso del teléfono no
serán cubiertos por la garantía.
b. Daños causados por el contacto de líquidos, comida o corrosión de las partes metálicas.
c. Daños causados por la invasión de cuerpos extraños al producto tales como arena e insectos.
d. La instalación indebida del equipo.
e. Daños sufridos por teléfonos dedicados a uso comercial ( equipos para alquiler).
f. El uso de accesorios no originales invalida la garantía.
g. Daños sufridos por teléfonos sometidos a servicios de reparación, upgrade, apertura del teléfono e
instalación de accesorios por personal ajeno a los centros de servicio autorizado de LGEPS.
h. Modificaciones de conversión de tensión o frecuencia al equipo.
i. Daños causados por conexiones a voltajes inapropiados.
j. Daños sufridos por la Tarjeta SIM. Tampoco cubre cualesquiera daños incidentales como lucro cesante
y/o pérdida de oportunidad producto de la pérdida de información contenida en la Tarjeta SIM del
usuario.

k. El deterioro de las superficies externas del equipo debido al transcurso normal del tiempo.
l. Daños cosméticos, daños causados por eventos de fuerza mayor y/o caso fortuito.
m. En los casos en que el número de serie colocado por la fábrica ha sido alterado o removido del
producto.
n. Cuando la batería presente sellos rotos, húmedos o humidificados.
o. Cuando la batería ha sido cargada con cargador no fabricado por LG Electronics Inc. o sus subsidiarias.
p. Cuando la batería ha sido utilizada en un equipo distinto a aquel para el cual fue diseñado.
q. Cuando la etiqueta del equipo no sea legible, esté ausente o presente alteración en la imprenta.
Productos de reemplazo: Aquellos productos entregados en reemplazo de un producto defectuoso
contarán con garantía de un (1) año contados a partir de la fecha de adquisición del primer producto,
excepto en aquellos países y estados que la ley no lo permita.
LA REPARACIÓN O REEMPLAZO DEL PRODUCTO TAL Y COMO ESTA EXPUESTO EN EL PRESENTE
CERTIFICADO ES LA ÚNICA COMPENSACIÓN A RECIBIR POR EL CONSUMIDOR. LGEPS NO SERÁ
RESPONSABLE POR DAÑOS INCIDENTALES O CONSECUENTES POR EL INCUMPLIMIENTO DE LA
PRESENTE GARANTÍA.
EXCEPTO EN LOS CASOS EN QUE SEA EXPRESAMENTE PROHIBIDO POR LA LEY DEL PAÍS DE
COMPRA DEL PRODUCTO, CUALQUIER GARANTÍA IMPLÍCITA DE MERCANTIBILIDAD O ADECUACIÓN
PARA UN PROPÓSITO PARTICULAR DE ESTE PRODUCTO ESTÁ LIMITADA EN SU DURACIÓN A LA
DURACIÓN DE ESTA GARANTÍA.
Esta garantía será válida en el país de compra del producto y Ud. podrá tener otros derechos que
dependerán del país de compra. Esta garantía no es internacional por lo que no podrá exigirse en país
distinto al país de compra del producto. Algunos países y estados no permiten la exclusión o la limitación
a los daños incidentales o consecuentes o permiten alguna limitación en cuánto a la duración de la
garantía implícita por lo que las limitaciones y exclusiones arriba indicadas pueden no aplicarle.
Para hacer válida la garantía debe mostrarse factura de compra o recibo de pago y el presente certificado
de garantía.
Para mayor información contáctenos en http://pa.lge.com o a los siguientes números telefónicos:
PANAMA: 800-5454, ECUADOR: 800-545454, VENEZUELA: 800-5424477,
GUATEMALA: 1801-422LGLG(5454), COSTA RICA: 256-6878, 256-3396

MG230d Guía del usuario
- ESPAÑOL

CONTENIDOS
CONTENIDOS
2
Introducción 7
Por su seguridad 8
Información importante
Instrucciones de seguridad
Información de seguridad 9
Información sobre la exposición a
radiofrecuencias de la FCC 12
Precaución
Funcionamiento en el cuerpo 13
Antena externa montada sobre el
vehículo
Cumplimiento de clase B según el
artículo 15 de la FCC 14
Precauciones con la batería
Eliminación de las baterías
Precauciones con el adaptador 15
Evite daños en su oído.
Características del
MG230d 16
Partes del teléfono
Información en la pantalla 19
Para empezar 21
Instalación de la tarjeta SIM
Cargar la batería 23
Para encender y apagar el
teléfono 24
Funciones generales 25
Hacer una llamada
Hacer llamadas internacionales
Contestar una llamada
Introducir texto
Modo T9 26
Modo ABC
Modo 123 (modo de números)
Modo símbolos

CONTENIDOS
3
Selección de funciones y
opciones 27
Menú en llamada 28
Durante una llamada
Árbol de menús 30
Navegador 33
Navegador
Inicio
Favoritos 34
Ir a URL
Historial
Configuraciones
Información
Registro de llamadas 35
Todas
Llamadas perdidas
Llamadas realizadas 35
Llamadas recibidas
Duración de llamadas 36
Costo de llamada
Última llamada
Todas
Configuraciones
Informaciones GPRS 37
Herramientas 38
Favoritos
Alarma
Calendario
Calculadora 39
Nota
Tareas 40
Cronómetro
Conver. unidad
Reloj mundial

CONTENIDOS
4
Multimedia 41
Cámara
Grabador de voz 42
Mensajes 43
Nuevo mensaje
Texto
Multimedia
Buzón de entrada 44
Borradores
Buzón de salida
Enviados 45
Escuchar buzón de voz
Servicio de información 46
Plantillas
Texto
Multimedia
Config. mensajes 47
Mensaje de texto
Mensaje multimedia 48
Buzón de voz 49
Servicio de información
Mensajes push 50
Mis cosas 51
Imágenes
Sonidos
Otros
Juegos y aplicativos
Servicios en la tarjeta
SIM 52
Contactos 53
Buscar
Agregar nuevo
Marcación rápida 54
Grupos
Copiar/Borrar todos
CONTENIDOS

CONTENIDOS
5
Configuraciones 55
Visualización
Información
Números de servicio
Número propio
Tarjeta de visita 56
Configuraciones 57
Fecha y hora
Idiomas 58
Perfiles
Pantalla 59
Fondo de pantalla
Tiempo de iluminación
Brillo
Ver teclas cursor 60
Temas
Estilo del menú
Nombre de red
Color en fuente marcado
Red 61
Selección de red
Selección de banda
Conexión GPRS
Punto de acceso
Llamadas 62
Desvío de llamadas
Modo de respuesta
Enviar mi número
Llamada en espera 63
Aviso minuto
Remarcar autom.
Enviar DTMF tonos 64
Seguridad
Solicitar código PIN
Bloquear teléfono
Restricción de llamada 65
Marcación fija
Cambiar códigos

CONTENIDOS
6
Modo avión 66
Ahorro energía
Restaurar
Estado de memoria
Accesorios 67
CONTENIDOS

Introducción
Introducción
7
Felicidades por comprar el avanzado y compacto teléfono celular MG230d,
diseñado para operar con la más nueva tecnología de comunicación digital
móvil.
Esta guía del usuario contiene información
importante acerca del uso y
funcionamiento de este teléfono. Lea toda
la información con cuidado para obtener
un desempeño óptimo y para evitar
cualquier daño o mal uso del teléfono.
Cualquier cambio o modificación que no
esté explícitamente aprobado en esta guía
del usuario podría invalidar la garantía que
tiene para este equipo.
El uso de fundas con cerraduras
magnéticas para teléfonos de tapa
deslizable ha causado problemas como
pérdida de señal o apagado indeseado de
los teléfonos.

Por su seguridad
Por su seguridad
8
Información importante
Esta guía del usuario contiene información importante acerca del uso y
funcionamiento de este teléfono. Lea toda la información con cuidado para
obtener un desempeño óptimo y para evitar cualquier daño o mal uso del
teléfono. Cualquier cambio o modificación que no esté explícitamente
aprobado en esta guía del usuario podría invalidar la garantía que tiene para
este equipo.
Antes de comenzar
Instrucciones de seguridad
Mantenga siempre el teléfono lejos del calor. Nunca almacene el teléfono en
ambientes que puedan exponerlo a temperaturas menores a los 0 °C o
superiores a los 40 °C , como por ejemplo al aire libre durante una tormenta
de nieve o dentro del automóvil en un día caluroso. La exposición al frío o
calor excesivos causará desperfectos, daños y posiblemente una falla
catastrófica.
¡ADVERTENCIA!
Para reducir la posibilidad de sufrir descargas
eléctricas, no exponga el teléfono a áreas de mucha humedad, como serían el
baño, una piscina, etc.

Por su seguridad
9
Sea cuidadoso al usar su teléfono cerca de otros dispositivos electrónicos.
Las emisiones de radiofrecuencia del teléfono celular pueden afectar a
equipos electrónicos cercanos que no estén adecuadamente blindados.
Debe consultar con los fabricantes de cualquier dispositivo médico personal,
como sería el caso de marcapasos o audífonos para determinar si son
susceptibles de recibir interferencia del teléfono celular. Apague el teléfono
cuando esté en una instalación médica o en una gasolinera. Nunca coloque el
teléfono en un horno de microondas ya que esto haría que estallara la batería.
Información de seguridad
Lea estas sencillas instrucciones. Romper las reglas puede ser peligroso o
ilegal. Se ofrece más información detallada en esta guía del usuario.
• No use nunca una batería no aprobada, ya que esto podría dañar el teléfono
o la batería, y podría ocasionar que estalle la batería.
• Nunca coloque su teléfono en un horno de microondas ya que esto podría
ocasionar que la batería estallara.
• No se deshaga de la batería mediante el fuego o con materiales peligrosos o
inflamables.
• Asegúrese de que no entren en contacto con la batería objetos con bordes
cortantes, como dientes de animales o uñas. Hay riesgo de causar un
incendio.
• Almacene la batería en un sitio fuera del alcance de los niños.

Por su seguridad
10
• Cuide que los niños no se traguen partes del teléfono, como los tapones de
hule (del auricular, partes que se conectan al teléfono, etc.). Esto podría
causar asfixia o ahogo.
• Desconecte el enchufe de la toma de corriente y el cargador cuando en el
teléfono se indique que la batería esta cargada, porque puede provocar un
choque eléctrico o peligro de incendio.
• Al ir en automóvil, no deje el teléfono ni instale el kit de manos libres cerca
de la bolsa de aire. Si el equipo inalámbrico está instalado incorrectamente y
se activa la bolsa de aire, usted puede resultar gravemente lesionado.
• No use un teléfono de mano cuando esté conduciendo.
• No use el teléfono en zonas donde esté prohibido hacerlo. (Por ejemplo, en
los aviones).
• No exponga el cargador de baterías o el adaptador a la luz directa del sol, ni
lo utilice en sitios con elevada humedad, como por ejemplo el baño.
• Nunca almacene el teléfono a temperaturas menores de -20 °C ni mayores
de 50 °C .
• No use sustancias químicas corrosivas (como alcohol, bencina, solventes,
etc.) ni detergentes para limpiar el teléfono. Existe riesgo de causar un
incendio.
• No deje caer el teléfono, ni lo golpee o agite fuertemente. Tales acciones
pueden dañar las tarjetas de circuitos internas del teléfono.
• No use el teléfono en áreas altamente explosivas, ya que puede generar
chispas.
Por su seguridad

Por su seguridad
11
• No dañe el cable de corriente doblándolo, retorciéndolo, tirando de él o
calentándolo. No use la clavija si está suelta, ya que esto puede ocasionar
incendios o descargas eléctricas.
• No coloque objetos pesados sobre el cable de corriente. No permita que el
cable de corriente se doble, ya que esto puede ocasionar incendios o
descargas eléctricas.
• No manipule el teléfono con las manos húmedas cuando se esté cargando.
Puede causar un choque eléctrico o dañar gravemente el teléfono.
•No desarme el teléfono.
• No haga ni conteste llamadas mientras esté cargando el teléfono, ya que
puede causar un corto circuito en éste o provocar descargas eléctricas o
incendios.
• Sólo use baterías, antenas y cargadores proporcionados por LG. La garantía
no se aplicará a productos proporcionados por otros proveedores.
• Sólo personal autorizado debe darle servicio al teléfono y a sus accesorios.
La instalación o servicio incorrectos pueden dar como resultado accidentes
y por tanto invalidar la garantía.
• No sostenga la antena ni permita que entre en contacto con su cuerpo
durante las llamadas.
• Las llamadas de emergencia sólo pueden hacerse dentro de un área de
servicio. Para hacer una llamada de emergencia, asegúrese de estar dentro
de un área de servicio y que el teléfono esté encendido.

Por su seguridad
12
• Utilice accesorios como auriculares o manos libres con precaución,
garantizando que los cables sean insertados correctamente y no tengan
contacto innecesario con la antena.
Información sobre la exposición a radiofrecuencias de
la FCC
En agosto de 1 996, la Comisión federal de comunicaciones (FCC) de los
Estados Unidos, con su acción en el informe y orden FCC 96-326, adoptó
una norma de seguridad actualizada para la exposición humana a la energía
electromagnética de radiofrecuencias (RF) que emiten los transmisores
regulados por la FCC. Esos lineamientos corresponden con la norma de
seguridad establecida previamente por organismos de estándares tanto de los
EE.UU. como internacionales.
El diseño de este teléfono cumple con los lineamientos de la FCC y esas
normas internacionales.
Precaución
Utilice solamente la antena incluida y aprobada. El uso de antenas no
autorizadas o el hacerles modificaciones podría deteriorar la calidad de la
llamada, dañar el teléfono, invalidar la garantía o dar como resultado una
¡ADVERTENCIA!
Lea esta información antes de hacer funcionar el
teléfono.
Por su seguridad

Por su seguridad
13
violación de los reglamentos de la FCC. No utilice el teléfono con una antena
dañada. Si una antena dañada entra en contacto con la piel, puede producirse
una pequeña quemadura. Comuníquese con su distribuidor local para obtener
un reemplazo de la antena.
Funcionamiento en el cuerpo
Este dispositivo se ha probado para un funcionamiento típico en el cuerpo,
manteniendo una distancia de 1,5 cm (0,6 de pulgada) entre el cuerpo del
usuario y la parte posterior del telefono. Para cumplir los requisitos de
exposición a RF de la FCC, debe mantenerse una distancia de separación
mínima de 1,5 cm (0,6 de pulgada) entre el cuerpo del usuario y la parte
posterior del teléfono. No deben utilizarse clips para cinturón, fundas y
accesorios similares de otros fabricantes que tengan componentes metálicos.
Es posible que los accesorios usados sobre el cuerpo que no puedan
mantener una distancia de separación de 1,5 cm (0,6 de pulgada) entre el
cuerpo del usuario y la parte posterior del teléfono, y que no hayan sido
probados para el funcionamiento típico en el cuerpo no cumplan con los
límites de exposición a RF de la FCC y deberán evitarse.
A
ntena externa montada sobre el vehículo (opcional,
en caso de estar disponible)
Debe mantenerse una distancia de separación mínima de 20 cm (8 pulgadas)
entre el usuario o transeúnte y la antena externa montada en el vehículo para
satisfacer los requisitos de exposición a RF de la FCC.

Por su seguridad
14
Para obtener más información sobre la exposición a RF, visite el sitio Web de
la FCC en www.fcc.gov
Cumplimiento de clase B según el artículo 15 de la FCC
Este dispositivo y sus accesorios cumplen con el artículo 15 de las reglas de
la FCC. La operación está sujeta a las dos condiciones siguientes:
(1) Este dispositivo y sus accesorios no podrán causar interferencias dañinas
y (2) este dispositivo y sus accesorios deben aceptar cualquier interferencia
que reciban, incluida la que pudiera causar un funcionamiento indeseable.
Precauciones con la batería
• No la desarme.
• No le provoque un corto circuito.
• No la exponga a altas temperaturas. Mayores de 60 °C (140°F)
• No la incinere.
Eliminación de las baterías
• Por favor deshágase de la batería en forma correcta o llévela a su proveedor
de servicios inalámbricos para que sea reciclada.
• No se deshaga de ella en el fuego ni utilizando materiales peligrosos o
inflamables.
Por su seguridad

Por su seguridad
15
Precauciones con el adaptador (cargador)
• El uso de un cargador de baterías incorrecto puede dañar su teléfono e
invalidar su garantía.
• El adaptador o cargador de baterías está diseñado solamente para su uso en
interiores.
No exponga el adaptador o cargador de baterías a la luz directa del sol, ni lo
utilice en sitios con elevada humedad, como por ejemplo el baño.
Evite daños en su oído.
• Los daños en su oído pueden ocurrir debido a la constante exposición a
sonidos demasiado fuertes. Por lo tanto recomendamos que usted no
encienda o apague el teléfono cerca de su oído. Así mismo se recomienda
que la música y el nivel de volumen sean razonables.
•Si usted escucha música por favor asegure que el nivel de volumen es el
adecuado, de modo que usted se encuentre alerta de lo que acontece a su
alrededor. Esto es particularmente importante cuando intenta cruzar una
calle.

Características del MG230d
Características del MG230d
16
Partes del teléfono
Vista Frontal
OK
08/01 Lun
12:48
Auricular
Teclas de navegación
• En modo de espera
Nuevo SMS
Contactos
Favoritos
Perfiles
• En menú: Desplazar
arriba, abajo,
izquierda y derecha
Micrófono
Se puede silenciar durante
una llamada para tener
privacidad.
Pantalla
• Arriba: Iconos que muestran
fuerza de la señal, nivel de la
batería y otras funciones
variadas.
• Abajo: Funciones de las
teclas de función.
Teclas alfanuméricas
• En modo de espera: Teclear
números para marcar.
Dejando presionado:
- Llamadas
internacionales
- Buzón de voz
a- Marcación
rápida
• En modo de edición:
Ingresar números y
caracteres

Características del MG230d
17
OK
Tecla de función izquierda/
Tecla de función derecha
Estas teclas realizan la función indicada en la
parte inferior de la pantalla.
Tecla de confirmación.
Selecciona opciones del menú y confirma
acciones.
Tecla End/ Encendido/Apagado
Le permite apagar el teléfono, terminar
llamadas o volver al modo de Espera.
Tecla de borrado
Borra un caracter cada vez que se presiona.
Borra todo lo que se ha ingresado dejándola apretada. Use
esta tecla para regresar a una pantalla previa.
Tecla SEND
• Llamar un número telefónico y responder una llamada.
• En modo de espera: Muestra el registro de llamadas
realizadas, recibidas y perdidas.

Características del MG230d
18
Vista lateral izquierda
Características del MG230d
Nota
]
Para proteger el oído mientras la tapa
está abierta, el nivel de volumen
máximo es 3.
Teclas laterales
]
En modo de espera
Volumen del teclado
•
Durante llamada: Volumen del altavoz
Entrada de Auriculares

Características del MG230d
19
Información en la pantalla
Área de iconos
Área de texto y gráficos
Indicaciones de teclas de función
Área Descripción
Área de iconos Muestra varios iconos.
Área de texto Muestran mensajes, instrucciones y
y gráficos cualquier información que usted introduzca,
como el número que debe marcarse.
Teclas de función Muestra las funciones asignadas actualmente a las
dos teclas de función.

Iconos en la pantalla
La tabla que aparece abajo describe varios indicadores o iconos
visuales que aparecen en la pantalla del teléfono.
Icono Descripción
Indica la fuerza de la señal de la red.
Indica que se está realizando una llamada.
Indica que se ha ajustado la alarma y está activa.
Indica el estado de la carga de la batería.
Indica la recepción de un mensaje.
Indica la recepción de un mensaje de voz.
Perfil Sólo vibración activado.
Perfil General activado.
Perfil Silencioso activado.
Perfil Auriculares activado.
Perfil Fuerte activado.
Indica la función del Calendario.
Indica que el teléfono está accediendo a WAP.
Indica que está usando GPRS.
Indica que el Modo avión está encendido.
Características del MG230d
20
Características del MG230d

Para empezar
21
Instalación de la tarjeta SIM
Al suscribirse a una red celular, se le proporciona una tarjeta SIM que se
conecta al teléfono y que está cargada con los detalles de su suscripción,
como su PIN, servicios opcionales que tiene disponibles y muchos otros.
¡Importante!
La tarjeta SIM que se conecta al teléfono puede dañarse fácilmente si
se raya o dobla, así que tenga cuidado al manipularla, introducirla o
extraerla. Mantenga todas las tarjetas SIM fuera del alcance de los
niños pequeños.
Para empezar

Para empezar
22
Nota
Cuando necesite extraer la tarjeta SIM, deslícela como se muestra y
sáquela del soporte.
Para empezar
S
I
M
S
I
M

Para empezar
23
Cargar la batería
El uso de accesorios no autorizados puede dañar su teléfono e invalidar su
garantía.
Aviso
Si el teléfono está encendido mientras esté cargando la batería, verá las
barras del ciclo de iconos indicadores de la batería. Cuando la batería esté
totalmente cargada, las barras del icono indicador de la batería destellarán
encendiéndose y apagándose.

Para empezar
24
Para encender y apagar el teléfono
1. Mantenga presionada la tecla hasta que se encienda el teléfono.
2. Si el teléfono pide un PIN, introdúzcalo y presione la tecla de función
izquierda [Aceptar]. Para más información acerca del PIN predeterminado
de su tarjeta SIM consulte a su proveedor de servicios.
El teléfono busca su red y, al encontrarla, la pantalla de inactividad, que se
ilustra abajo, aparece en la pantalla. Ahora puede hacer o recibir llamadas.
3. Cuando desee apagar el teléfono, mantenga oprimida la tecla [End]
hasta que aparezca la imágen de desactivación.
Nota
El idioma de presentación está predeterminado como español. Para cambiar
el idioma, use la opción de menú Idiomas (Menú 9.2)
Para empezar

Funciones generales
25
Funciones generales
Hacer una llamada
1. Introduzca el número que desea llamar y el código de área
(si es necesario).
2. Oprima la tecla para llamar al número.
3. Cuando haya terminado, oprima la tecla .
Hacer llamadas internacionales
1. Mantenga oprimida la tecla del prefijo internacional. El caracter ‘+’
puede sustituirse con el código de acceso internacional.
2. Introduzca el código del país, el código de área y el número telefónico.
3. Oprima la tecla .
Contestar una llamada
Cuando alguien le llama, el teléfono suena y parpadea el icono de teléfono en
el centro de la pantalla.
1. Oprima la tecla o la tecla de función izquierda para contestar la
llamada entrante.
2. Termine la llamada oprimiendo la tecla .
Introducir texto
Puede introducir caracteres alfanuméricos con el teclado del teléfono. El
MG230d tiene los siguientes modos de entrada de texto.

Funciones generales
26
Funciones generales
Modo T9
Este modo le permite introducir palabras con sólo oprimir una vez la tecla por
cada letra. Cada tecla del teclado tiene más de una letra. El modo T9 compara
automáticamente sus tecleos con un diccionario lingüístico interno para
determinar la palabra correcta, lo que demanda mucho menos teclazos que el
modo ABC tradicional.
Modo ABC
Este modo le permite introducir letras oprimiendo la tecla marcada con la
letra correspondiente una, dos, tres o cuatro veces hasta que aparezca la
letra.
Modo 123 (modo de números)
Escriba números con un tecleo por número. Para cambiar al modo 123 en un
campo de entrada de texto, oprima la tecla hasta que aparezca el
modo 123.
Modo símbolos
Este modo le permite introducir caracteres especiales.
Aviso
Puede seleccionar un idioma T9 distinto en la opción de menú. La
configuración predeterminada del teléfono es con el modo T9 desactivado.

Selección de funciones y opciones
27
Su teléfono ofrece una serie de funciones que permiten personalizar el
aparato. Estas funciones están disponibles en los menús y sub-menús, y el
usuario puede acceder a ellas utilizando las dos teclas de función y .
Cada elemento del menú y sub-menú le permite observar y modificar
la configuración de una función determinada.
Las funciones de las teclas de función varían dependiendo del contexto actual;
la etiqueta, que está sobre la línea inferior de la pantalla justo arriba de cada
tecla, indica su función actual.
Selección de funciones y opciones
08/01 Lun
12:48
Oprima la tecla
de función
izquierda para
acceder al
Menú principal.
Oprima la tecla
de función
derecha para
acceder a
Contactos.

Menú en llamada
28
El teléfono le proporciona varias funciones de control que puede emplear
durante una llamada. Para acceder a estas funciones durante una llamada,
oprima la tecla suave izquierda [Opciones].
Durante una llamada
El menú que aparece en la pantalla del teléfono durante una llamada es
distinto del menú principal predeterminado al que se llega desde la pantalla
de inactividad, y aquí se describen las opciones.
Hacer una segunda llamada
Puede recuperar de Contactos un número que desee marcar para hacer una
segunda llamada. Oprima la tecla de función izquierda [Opciones], seleccione
Contactos y pulse la tecla OK.
Alternar entre dos llamadas
Para alternar entre dos llamadas, presione la tecla o la tecla de función
izquierda [Responder].
Menú en llamada

Menú en llamada
29
Contestar una llamada entrante
Para contestar una llamada entrante cuando esté sonando el teléfono, sólo
debe oprimir la tecla .
El teléfono también puede advertirle que hay una llamada entrante cuando ya
tenga una llamada en curso.
Suena un tono en el auricular y la pantalla mostrará que hay una segunda
llamada esperando. Esta función, que se conoce como Llamada en espera,
sólo estará disponible si la admite su red telefónica. Para obtener detalles
sobre cómo activarlo y desactivarlo, vea Llamada en espera (Menú 9.6.4).
Si está activada la Llamada en espera, puede poner en espera la primera
llamada y contestar la segunda oprimiendo .
Rechazar una llamada entrante
Cuando no tenga una llamada en curso, puede rechazar una llamada entrante
sin contestarla sencillamente oprimiendo la tecla .

Árbol de menús
30
La ilustración siguiente muestra la estructura de los menús
disponibles.
]
El número asignado a cada opción.
Árbol de menús
2.1 Todas
2.2 Llamadas perdidas
2.3 Llamadas realizadas
2.4 Llamadas recibidas
2.5 Duración de llamadas
2.6 Costo de llamada
2.7 Informaciones GPRS
1.1 Navegador
1. Navegador 2. Registro de llamadas

Árbol de menús
31
5.1 Nuevo mensaje
5.2 Buzón de entrada
5.3 Borradores
5.4 Buzón de salida
5.5 Enviados
5.6 Escuchar buzón de voz
5.7 Servicio de información
5.8 Plantillas
5.9 Config. mensajes
6.1 Imágenes
6.2 Sonidos
6.3 Otros
6.4 Juegos y aplicativos
3.1 Favoritos
3.2 Alarma
3.3 Calendario
3.4 Calculadora
3.5 Nota
3.6 Tareas
3.7 Cronómetro
3.8 Conver. unidad
3.9 Reloj mundial
4.1 Cámara
4.2 Grabador de voz
3. Herramientas
4. Multimedia
5. Mensajes
6. Mis cosas

Árbol de menús
32
Árbol de menús
8.1 Buscar
8.2 Agregar nuevo
8.3 Marcación rápida
8.4 Grupos
8.5 Copiar todos
8.6 Borrar todos
8.7 Configuraciones
8.8 Información
7.
Servicios en la tarjeta SIM
8. Contactos
9.1 Fecha y hora
9.2 Idiomas
9.3 Perfiles
9.4 Pantalla
9.5 Red
9.6 Llamadas
9.7 Seguridad
9.8 Modo avión
9.9 Ahorro energía
9.10 Restaurar
9.11 Estado de memoria
9. Configuraciones

Navegador
33
En el menú de Servicios de red puede acceder a varios servicios WAP
(Wireless Application Protocol, Protocolo de aplicación inalámbrico)como
bancos, noticias, información metereológica y vuelos. Estos servicios están
especialmente diseñados para teléfonos móviles y los mantienen los
proveedores de servicios WAP.
Consulte la disponibilidad, los precios y las tarifas de los servicios WAP al
operador de la red o al proveedor de servicios que desea utilizar. Los
proveedores de servicios también le darán instrucciones sobre cómo utilizar
los servicios que ofrecen.
Una vez conectado, se muestra la página de Inicio. El contenido depende del
proveedor de servicios. Puede acceder a cualquier sitio Web que cuente con
servicio WAP. Sólo tiene que introducir la dirección URL del mismo. Para salir
del explorador en cualquier momento, pulse la tecla ( ). El teléfono
aparecerá en modo de espera.
Navegador
Menú 1.1
Inicio
(Menú 1.1.1)
Le permite conectarse a la página de Inicio. La página de Inicio puede ser el
sitio definido en el perfil activado. Esta página está definida por el proveedor
del servicio si no se crea un perfil activo.
Navegador

Navegador
34
Favoritos
(Menú 1.1.2)
Este menú le permite guardar la URL de sus páginas Web preferidas para
acceder fácilmente en cualquier momento.
Ir a URL
(Menú 1.1.3)
Puede conectarse directamente al sitio que desee introduciendo una
dirección URL específica, pulse la tecla OK.
Historial
(Menú 1.1.4)
Este menú mostrará las páginas recientemente visitadas.
Configuraciones
(Menú 1.1.5)
Puede establecer los Perfiles WAP, el Caché y la seguridad relacionada con el
servicio de Internet entre otros.
Información
(Menú 1.1.6)
Muestra la versión del navegador WAP.
Navegador

Registro de llamadas
35
Permite ver un registro de las últimas llamadas perdidas, recibidas y realizadas
sólo si la red admite la Identificación de línea de llamada (ILL) dentro del área
de servicio.
El número y nombre (si están disponibles) se muestran junto con la fecha y
hora en que se hizo la llamada. También puede ver las duraciones.
Todas
Menú 2.1
Permite ver todas las listas de llamadas perdidas, recibidas o realizadas.
Llamadas perdidas
Menú 2.2
Esta opción le permite ver las 50 últimas llamadas no contestadas.
Llamadas realizadas
Menú 2.3
Esta opción le permite ver las últimas 50 llamadas salientes (realizadas o
intentadas).
Llamadas recibidas
Menú 2.4
Esta opción le permite ver las 50 últimas llamadas entrantes.
Registro de llamadas

Registro de llamadas
36
Duración de llamadas
Menú 2.5
Le permite ver la duración de las llamadas recibidas y realizadas. También
puede restaurar de una sola vez la duración de todas las llamadas de voz.
Costo de llamada
Menú 2.6
Última llamada
(Menú 2.6.1)
Le permite ver la duración de sus llamadas realizadas y recibidas, así como
restaurar los tiempos de llamadas.
Todas
(Menú 2.6.2)
Esta función le permite comprobar el costo de la última llamada, de todas las
llamadas y el costo restante. Para restablecer el costo se le pedirá que
introduzca el código PIN2.
Configuraciones
(Menú 2.6.3)
]
Definir crédito: Este servicio de red le permite establecer un límite para el
costo de las llamadas por unidades de gasto seleccionadas.
Si selecciona Leer, se muestra el número de unidades restantes. Si
selecciona Cambiar, puede cambiar el límite del gasto.
Registro de llamadas

Registro de llamadas
37
]
Establecer tarifa: Puede establecer el tipo de moneda y el precio por
unidad. Póngase en contacto con los proveedores de servicios para obtener
los precios por unidad. Para seleccionar la moneda o unidad en este menú,
debe introducir el código PIN2.
]
Mostrar costo: Este servicio de red le permite ver automáticamente el
costo de las últimas llamadas. Si está establecido en Encendido, puede ver
el costo de la última llamada al finalizar la llamada.
Informaciones GPRS
Menú 2.7
Puede comprobar la cantidad de datos transferidos por la red, mediante la
opción de información GPRS. Además, puede ver cuánto tiempo permanece
en línea.

Favoritos
Menú 3.1
Esta opción le permite agregar sus propios favoritos a la lista ya
proporcionada. Una vez que cree su propio menú, podrá acceder a la función
deseada rápidamente.
Alarma
Menú 3.2
Puede fijar hasta 5 relojes de alarma para que suenen en momentos
determinados.
Calendario
Menú 3.3
Al entrar en este menú, aparecerá un calendario. En la parte superior de la
pantalla, hay secciones para las fechas. Cada vez que cambie la fecha, el
calendario se actualizará según la fecha seleccionada.
El cursor cuadrado se utilizará para ubicar una fecha determinada. Si el
calendario presenta una marca en alguna fecha, significa que ese día contiene
un evento o una cita. Esta función le ayuda a recordar los eventos o citas. El
teléfono hará sonar un tono de alarma si usted fija esta opción para la nota.
Herramientas
38
Herramientas

Herramientas
39
Calculadora
Menú 3.4
Este menú contiene las funciones estándar, por ejemplo, +, –, x, /: suma,
resta, multiplicación y división. Más aun, es posible usar las diversas
funciones de la calculadora como +/-, sen, cos, tan, log, In, exp, raíz, pulsando
la tecla Función.
Nota
Menú 3.5
1. Si la entrada está en blanco, oprima la tecla de función izquierda
[Nuevo].
2. Escriba la nota y oprima la tecla de función izquierda [Opciones] y
seleccione Guardar.
3. Seleccione el memo oprimiendo la tecla de función izquierda
[Opciones] y seleccione Ver.
Nota
]
Si desea cambiar el modo de entrada de texto, oprima la tecla .

Ta r e a s
Menú 3.6
Esta función le permite guardar y administrar sus tareas.
Cronómetro
Menú 3.7
El dispositivo cuenta con una función de cronómetro.
Conver. unidad
Menú 3.8
Esta función convierte cualquier medida a una unidad que usted seleccione.
Existen cuatro tipos de categorías que puede convertir a otras unidades:
Moneda, Superficie, Longitud, Peso, Temperatura, Volumen y Velocidad.
Reloj mundial
Menú 3.9
Puede ver relojes con la hora de las principales ciudades del mundo.
Herramientas
40
Herramientas

Multimedia
41
Puede disfrutar sus funciones multimedia, Cámara y Grabador de voz para su
diversión y conveniencia.
Cámara
Menú 4.1
1. Seleccione Cámara y luego oprima la tecla de función izquierda
[Aceptar]. Si desea llegar directamente a este menú, oprima durante
varios segundos.
2. Enfoque el objeto para capturar la imágen y oprima la tecla [OK].
3. Después de tomar una foto, la imágen se guardará automáticamente sin
que aparezca la barra de menús para guardarla.
4.
Para volver a la pantalla de captura de image pulse la tecla OK la tecla
de función izquierda [Opciones] seleccionando la opción Nueva foto.
Tomar una foto
Con el módulo de cámara integrado en su teléfono, puede tomar fotografías
de personas o acontecimientos cuando esté en movimiento.
OK
Nota
]
Cuando el estado indica un bajo nivel de batería, quizá no pueda utilizar las
funciones multimedia o de cámara.
]
Si está utilizando la función Multimedia, el estado de la batería es variable.
Multimedia

Multimedia
42
Además, puede enviarles fotografías a otras personas en un mensaje
multimedia.
1. En modo de espera, oprima la tecla de cámara o u oprima la opción Menú
(4.1).
2. Oprima izquierda o derecha en la tecla de navegación para ajustar el brillo y
arriba y abajo para el zoom.
3. Oprima la tecla para tomar la imágen.
4. Para volver a la pantalla de captura de image pulse la tecla OK la tecla de
función izquierda [Opciones] seleccionando la opción Nueva foto.
A cualquier momento podrá salir de este menú pulsando la tecla End.
En la pantalla de captura de image usted podrá hacer configuraciones antes
tomar la foto pulsando la tecla de función izquierda [Opciones], aparecerán
las opciones seguintes: Resolución, Calidad, Cronometrador, Modo de
visualización, Disparo múltiple, Efecto de color, Balance blancos, Sonido
obturador y Restablecer configuraciones.
Grabador de voz
Menú 4.2
Puede grabar una Nota de voz con ésta aplicación. La función de Grabador de
voz le permite grabar Notas de voz de hasta 1 minuto hasta ocupar todo el
espacio de almacenamiento disponible en su teléfono.
OK
Multimedia

Mensajes
43
Mensajes
Nuevo mensaje
Menú 5.1
Este menú incluye funciones relacionadas con el SMS (Servicio de Mensajes
Cortos) y el MMS (Servicio de Mensajes Multimedia).
Texto
(Menú 5.1.1)
Puede escribir y editar mensajes de texto, además de comprobar la cantidad
de páginas del mensaje.
Multimedia
(Menú 5.1.2)
Puede escribir y editar mensajes multimedia, además de comprobar el tamaño
del mensaje.
1. Abra el menú Nuevo mensaje oprimiendo la tecla de función izquierda
[Aceptar].
2. Puede crear un mensaje nuevo.

Buzón de entrada
Menú 5.2
Se le dará una alerta cuando reciba mensajes. Se almacenarán en el Buzón de
entrada. En el Buzón de entrada, puede identificar cada mensaje mediante
iconos. Si el teléfono muestra la leyenda ‘Memoria excedida’, deberá borrar
algunos mensajes del Buzón de entrada.
* Mensaje SIM
El término mensaje SIM hace referencia a un mensaje que se ha almacenado
en la tarjeta SIM, como excepción.
En caso de mensajes multimedia que hayan sido notificados, deberá esperar
hasta que se complete la descarga y procesamiento del mensaje.
Borradores
Menú 5.3
Por medio de este menú, puede almacenar mesajes de texto y multimedia para
ser editados y enviados posteriormente.
Buzón de salida
Menú 5.4
Este menú permite ver el mensaje a punto de enviarse o que se tuvo un error
en el envío. Una vez enviado satisfactoriamente, el mensaje se moverá a la
carpeta de elementos enviados.
Mensajes
Mensajes
44

Mensajes
45
Enviados
Menú 5.5
Este menú le permite ver los mensajes ya enviados. Puede comprobar la hora
y el contenido de los mensajes, así como reenviar los mensajes al mismo
contacto o a un usuario diferente. También puede eliminar los mensajes de
este menú.
Escuchar buzón de voz
Menú 5.6
Una vez seleccionado este menú, sólo oprima la tecla de función izquierda
[Aceptar] para escuchar el buzón de voz. También puede mantener
oprimida la tecla en modo de espera para escuchar el correo de voz.
Nota
]
Al recibir un mensaje de voz, el teléfono muestra el icono correspondiente
y emite una alerta auditiva. Compruebe con su proveedor de red para
obtener detalles sobre su servicio con objeto de configurar la terminal
correctamente.

Servicio de información
Menú 5.7
(Según la red y los servicios suscritos)
Los mensajes de servicios de información son mensajes de texto enviados al
dispositivo GSM a través de la red. Brindan información general, como
informes meteorológicos, noticias sobre el tráfico vehicular, taxis, farmacias y
cotización de acciones. Cada tipo tiene un número; por lo tanto, puede
comunicarse con el proveedor del servicio, siempre que haya introducido el
número específico para recibir esa información. Cuando reciba un mensaje de
un servicio de información, podrá ver un mensaje emergente que le indicará
que ha recibido un mensaje o mostrará directamente el mensaje del servicio
de información.
Plantillas
Menú 5.8
Texto
(Menú 5.8.1)
Hay 6 mensajes predefinidos en la lista. Puede ver y editar la plantilla de
mensajes o crear mensajes.
Multimedia
(Menú 5.8.2)
Una vez guardada una nueva plantilla, puede utilizar esa plantilla con cada
mensaje multimedia que usted envié o puede crear diferentes para cada ocasión.
Mensajes
46
Mensajes

Mensajes
47
Config. mensajes
Menú 5.9
Mensaje de texto
(Menú 5.9.1)
]
Tipos de mensajes:
Texto, Voz, Fax, Localizador, X.400, E-mail, ERMES.
El tipo de mensaje suele estar establecido en Texto.
Puede convertir el texto a formatos alternativos. Comuníquese con su
proveedor de servicio para averiguar sobre la disponibilidad de esta función.
]
Período de validez: Este servicio de red le permite establecer durante
cuánto tiempo se almacenarán los mensajes de texto en el centro de
mensajes.
]
Informe de entrega: Si lo establece en Encendido, puede comprobar si el
mensaje se envió satisfactoriamente.
]
Responder mediante el mismo centro de servicios: Al enviarse un
mensaje, esta función permite que el costo de la respuesta de los
destinatarios se agregue a su factura de teléfono.
]
Centro SMS: Contiene el número del centro SMS.

Mensaje multimedia
(Menú 5.9.2)
]
Asunto: Puede introducir el asunto del mensaje multimedia cuando este
menú esté activado.
]
Duración de diapositiva: Muestra la duración de cada página al escribir el
mensaje.
]
Prioridad: Puede establecer la prioridad del mensaje seleccionado.
]
Período de validez: Este servicio de red le permite establecer durante
cuánto tiempo se almacenarán los mensajes de texto en el centro de
mensajes.
]
Informe de entrega: Si lo establece en Encendido en este menú, puede
comprobar si el mensaje se envió satisfactoriamente.
]
Informe de lectura: Este menú permite solicitar al destinatario del mensaje
un mensaje de confirmación de lectura.
]
Descarga automática: Si selecciona Encendido, puede recibir mensajes
multimedia automáticamente. Si selecciona Solo red de origen, puede recibir
mensajes multimedia según la red local.
]
Perfiles de red: Si selecciona servidor de mensaje multimedia, puede
establecer la URL de ese servidor de mensajes multimedia.
]
Tipo de mensaje permitido: Usted puede seleccionar que tipos de
mensajes recibir de la red.
Mensajes
48
Mensajes

Mensajes
49
Personal: mensaje personal.
Anuncio: mensaje comercial.
Información: información necesaria.
Buzón de voz
(Menú 5.9.3)
Puede recibir mensajes de voz si el proveedor de servicios de red admite esta
función. Cuando llega un nuevo mensaje de voz, el símbolo correspondiente
aparece en la pantalla. Solicite a su proveedor de servicio de red los detalles
sobre su servicio con el objeto de configurar el teléfono según corresponda.
Servicio de información
(Menú 5.9.4)
]
Recibir
Si: Si selecciona este menú, el teléfono recibirá mensajes de servicios de
información.
No: Si selecciona este menú, el teléfono ya no recibirá mensajes de
servicios de información.
]
Alerta
Sí: El teléfono emitirá un sonido cuando haya recibido mensajes de servicios
de información.

No: El teléfono no emitirá un sonido aunque haya recibido mensajes de
servicios de información.
]
Idiomas
Puede seleccionar el idioma que desea oprimiendo la tecla de confirmación.
Entonces, se mostrará el mensaje de servicio de información en el idioma
que seleccionó.
Mensajes push
(Menú 5.9.5)
Puede establecer la opción de si recibirá el mensaje o no.
Mensajes
50
Mensajes

Mis cosas
51
Mis cosas
Imágenes
Menú 6.1
Muestra la lista de archivos JPG de Mis cosas\Imágenes en la memoria
Multimedia.
Sonidos
Menú 6.2
Muestra la lista de carpetas con contenidos MIDI, AMR, IMY, en Mis
cosas\Sonidos.
Otros
Menú 6.3
Muestra la lista de archivos de Mis cosas/Otros en la memoria Multimedia.
Juegos y aplicativos
Menú 6.4
En este menú puede administrar los aplicativos Java instaladas en su teléfono.
Puede reproducir o borrar los aplicativos descargados, o configurar la opción
conectar.
Nota
]
No cambie el nombre de la carpeta predeterminada o no funcionará
adecuadamente.

Servicios en la tarjeta SIM
52
Servicios en la tarjeta SIM
Las opciones que se muestran en este menú son leídas directamente de la
tarjeta SIM y su funcionamiento dependerá de los servicios habilitados en la
red.

Contactos
53
Contactos
Buscar
Menú 8.1
1. Seleccione buscar oprimiendo la tecla de función izquierda [Aceptar].
2. Introduzca el nombre que desea buscar.
3. Si desea Ver, Editar, enviar Mensaje, enviar contacto vía mensaje, Borrar o
Copiar una entrada, seleccione la tecla de función izquierda
[Opciones].
Agregar nuevo
Menú 8.2
Puede agregar una entrada de libreta telefónica con esta función. La
capacidad de la memoria del teléfono es de 500 entradas. La capacidad de
memoria de la tarjeta SIM depende del proveedor de servicio celular. El
número de caracteres es una característica que depende de la SIM.
Nota
]
Está disponible la búsqueda instantánea introduciéndole la letra inicial del
nombre que desea buscar.

Contactos
54
Contactos
Marcación rápida
Menú 8.3
Puede asignar una entrada de la lista de Contactos a cualquiera de las teclas
a . Puede llamar directamente oprimiendo esa tecla asignada
por un tiempo prolongado.
Grupos
Menú 8.4
Puede mostrar la lista de los miembros de cada grupo. Hay 7 grupos de los
cuales puede hacer listas.
Copiar/Borrar todos
Menú 8.5/8.6
Puede copiar, mover o eliminar entradas de la memoria de la tarjeta SIM a la
memoria del teléfono y viceversa.
Nota
]
La longitud máxima del nombre y número almacenados depende del tipo de
tarjeta SIM.

Contactos
55
Configuraciones
Menú 8.7
1. Ingrese a Menú 8
2. Desplácese a Configuraciones y oprima la tecla de función izquierda
[Aceptar].
Visualización
(Menú 8.7.1)
Desplácese para resaltar las opciones de visualización de los contactos y
oprima la tecla de función izquierda [Aceptar].
Información
Menú 8.8
Números de servicio
(Menú 8.8.1)
Permite acceder a la lista de servicios proporcionada por el operador de la red
(si los admite la tarjeta SIM).
Número propio
(Dependiente de la tarjeta SIM)
(Menú 8.8.2)
Puede guardar y comprobar su propio número en la tarjeta SIM.

Contactos
56
Contactos
Tarjeta de visita
(Menú 8.8.3)
Esta opción le permite crear su propia Tarjeta de Presentación con su
nombre, un número de teléfono móvil y demás. Para crear una nueva tarjeta
de visita, oprima la tecla de función izquierda [Nuevo] e introduzca la
información en los campos.

Configuraciones
57
Configuraciones
Fecha y hora
Menú 9.1
Puede establecer funciones relacionadas con la fecha y hora.
]
Fijar fecha
Puede introducir la fecha actual.
]
Formato fecha
Puede establecer el formato de Fecha como DD/MM/AAAA,
MM/DD/AAAA, AAAA/MM/DD. (D: Día / M: Mes / A: Año).
]
Fijar hora
Puede introducir la hora actual.
]
Formato hora
Puede establecer el formado horario en 24 horas y 12 horas.
]
Actualización automática
Seleccione Encendido y el teléfono actualizará automáticamente la hora y la
fecha.
Nota
]
Puede usar esta función cuando su operador de servicios de red admita
esta función.

Idiomas
Menú 9.2
Puede cambiar el idioma de los textos de pantalla en su teléfono.
Este cambio también afectará el Modo de entrada de texto.
Perfiles
Menú 9.3
En el menú Perfiles puede ajustar y personalizar los tonos del teléfono en
función de distintas situaciones, entornos o grupos de usuarios.
Hay seis perfiles predeterminados: General, Silencioso, Sólo vibración,
Fuerte y Auriculares. Los perfiles General, Fuerte y Auriculares pueden
personalizarse.
Pulse la tecla de función izquierda [Menú] y seleccione Configuraciones y a
continuación Perfiles con las teclas de navegación.
Activar
1. Aparece un listado de perfiles.
2. En la lista Perfiles, desplácese hasta el perfil que desea activar y pulse la
tecla de confirmación [OK].
3. A continuación, seleccione Activar .
OK
Configuraciones
Configuraciones
58

Configuraciones
59
Personalizar
Desplácese hasta el perfil deseado en la lista Perfiles. Después pulse la tecla
de confirmación [OK] y seleccione Personalizar.
Pantalla
Menú 9.4
Fondo de pantalla
(Menú 9.4.1)
Puede seleccionar la imagen de fondo en modo de espera.
Tiempo de iluminación
(Menú 9.4.2)
]
Pantalla
- Puede cambiar la duración de iluminación de la pantalla interior.
(Apagado / 5 segundos / 10 segundos / 20 segundos/ 30 segundos/
60 segundos / 180 segundos).
]
Teclado (Apagado / 5 segundos / 10 segundos / 30 segundos).
Brillo
(Menú 9.4.3)
Puede ajustar el brillo de la pantalla LCD en 100%, 80%, 60%, 40%.
OK

Ver teclas cursor
(Menú 9.4.4)
Si selecciona Encendido la imagen de las funciones de las teclas de navegación
que aparecerán como guía cuando el teléfono está en modo de espera.
Temas
(Menú 9.4.5)
El teléfono proporciona 3 opciones de color de menú. Establezca el color del
menú desplazándose y pulsando la tecla de función izquierda [Seleccion...].
Estilo del menú
(Menú 9.4.6)
Su teléfono le proporciona temas de menú de Vista en cuadrícula y Ver
lista. Ajuste el estilo del menú desplazándose y oprimiendo la tecla de
función izquierda [Aceptar].
Nombre de red
(Menú 9.4.7)
Si ésta función está activada, el nombre de la red se mostrará en la pantalla
LCD principal.
Color en fuente marcado
(Menú 9.4.8)
Usted puede optar por cambiar el color de los números que aparecen en la
pantalla al momento de realizar una llamada.
Configuraciones
60
Configuraciones

Configuraciones
61
Red
Menú 9.5
Selección de red
(Menú 9.5.1)
Puede seleccionar una red que se registrará ya sea automática o
manualmente. De modo predefinido, la selección de la red se ajusta en
Automático.
Selección de banda
(Menú 9.5.2)
Cuando está seleccionada la opción GSM850/PCS(América(850/1 900)), el
dispositivo puede usarse en los EE.UU, y cuando está seleccionada la opción
Sólo DCS(Europa(1 800)), el dispositivo puede usarse en los países
europeos.
Conexión GPRS
(Menú 9.5.3)
Puede ajustar el servicio GPRS en función de diversas situaciones.
Punto de acceso
(Menú 9.5.4)
Un punto de acceso es la información de la red utilizada para conectarse a
Internet. Hay puntos de acceso predeterminados para algunos operadores,
almacenados en la memoria del teléfono. No es posible borrar los puntos de
acceso predeterminados.

Llamadas
Menú 9.6
Le permite configurar las opciones de llamada.
Desvío de llamadas
(Menú 9.6.1)
El servicio de desvío de llamadas le permite desviar las llamadas de voz, de fax
y de datos entrantes a otro número.
Para obtener detalles, comuníquese con su proveedor de servicio.
Modo de respuesta
(Menú 9.6.2)
]
Abrir tapa: Si selecciona este menú, puede recibir una llamada entrante si
abre la tapa del teléfono.
]
Presione cualquier tecla: Si selecciona este menú, puede recibir una
llamada oprimiendo cualquier tecla excepto la tecla [END].
]
Sólo tecla 'Enviar': Si selecciona este menú, puede recibir una llamada sólo
oprimiendo la tecla [SEND].
Enviar mi número
(Menú 9.6.3)
(dependiente de la red y de la suscripción)
]
Definido por red: Si selecciona esto, dependerá de la red si su propio
número se envía o no.
Configuraciones
62
Configuraciones

Configuraciones
63
]
Encendido: Puede enviar su número de teléfono a otra persona. Su número
de teléfono se mostrará en el teléfono del destinatario.
]
Apagado: Su número de teléfono no se mostrará.
Llamada en espera
(dependiente de la red)
(Menú 9.6.4)
]
Encendido: Si selecciona activado, puede aceptar una llamada en espera
(de recepción).
]
Apagado: Si selecciona cancelar, no podrá reconocer las llamadas en espera
(de recepción).
]
Estado: Muestra el estado de la Llamada en espera
Aviso minuto
(Menú 9.6.5)
Si selecciona Encendido, puede comprobar la duración de la llamada
mediante un sonido que se da cada minuto durante una llamada.
Remarcar autom.
(Menú 9.6.6)
]
Encendido: Cuando está activada esta función, el teléfono intentará volver
a marcar automáticamente en caso de un error al tratar de conectar una
llamada.

]
Apagado: Su teléfono no hará ningún intento de volver a marcar cuando la
llamada original no se haya conectado.
Enviar DTMF tonos
(Menú 9.6.7)
Puede enviar tonos del teclado durante una llamada activa para controlar su
buzón de voz u otros servicios telefónicos automatizados.
Información
DTMF tonos: Frecuencia múltiple de tonos dobles.
Seguridad
Menú 9.7
Solicitar código PIN
(Menú 9.7.1)
En este menú puede ajustar el teléfono para que le pida el código PIN de su
tarjeta SIM cuando se enciende el teléfono.
Bloquear teléfono
(Menú 9.7.2)
Puede usar un código de seguridad para evitar el uso no autorizado del
teléfono. Siempre que encienda el teléfono, éste le solicitará el código de
seguridad si configuró el bloqueo del teléfono en Al encender.
Si configura el bloqueo de teléfono al cambiar Tarjeta SIM, su teléfono le
solicitará el código de seguridad sólo cuando cambie la tarjeta SIM.
Configuraciones
64
Configuraciones

Configuraciones
65
Seleccionando la opción Inmediatamente, su teléfono solicitará el código de
seguridad y se bloqueará al mismo instante.
Restricción de llamada
(Dependiente de la tarjeta SIM)
(Menú 9.7.3)
El servicio de exclusión de llamadas impide que su teléfono haga o reciba
determinada categoría de llamadas. Esta función requiere la contraseña de
restricción de llamadas.
Marcación fija
(Dependiente de la tarjeta SIM)
(Menú 9.7.4)
Puede restringir sus llamadas salientes a números de teléfono seleccionados.
Los números están protegidos por su código PIN2.
Cambiar códigos
(Menú 9.7.5)
PIN es una abreviatura de Número de Identificación Personal (por sus siglas
en Inglés) para evitar el uso por parte de personas no autorizadas. Puede
cambiar los códigos de acceso: Código PIN, Código PIN2, Código
seguridad.
Nota
]
El Código de Seguridad predeterminado del teléfono es "0000".

Configuraciones
Configuraciones
66
Modo avión
Menú 9.8
De esta forma, podrá utilizar sólo las funciones del teléfono que no requieren
la utilización de la red inalámbrica cuando esté en un avión o en lugares en los
que no hay red inalámbrica. Si activa el modo avión, se mostrará el icono en la
pantalla en lugar del icono de señal de red.
Ahorro energía
Menú 9.9
Si selecciona Encendido, puede ahorrar energía de la batería del teléfono
cuando no lo esté utilizando.
Restaurar
Menú 9.10
Puede Restaurar configuraciones o Reiniciar todo, como todos valores
predeterminados de fábrica. Necesita el código de seguridad para utilizar esta
función.
Estado de memoria
Menú 9.11
Puede comprobar el espacio libre y el uso de memoria en cada depósito,
Común / Reservado / Tarjeta SIM.

Accesorios
Accesorios
67
Hay diversos accesorios disponibles para su teléfono celular. Puede
seleccionar estas opciones en función de sus requisitos personales de
comunicación. Consulte a su distribuidor local para conocer cuáles están a
su disposición.
Adaptador para viajes
ESPECIFICACIONES
Adaptador ca / cc
Entrada: 100-240 V
~
50/60 Hz 150 - 100 mA
Salida: 5,2 Vcc 800 mA
TELEFONO
3,7 Vcc 500 mA
Este adaptador, le permite cargar la batería. Tarda 5
horas cargar una batería completamente descargada.
Batería
Especificaciones: 3,7 Vcc 830mAh

NOTA

NOTA
-
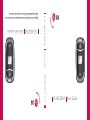 1
1
-
 2
2
-
 3
3
-
 4
4
-
 5
5
-
 6
6
-
 7
7
-
 8
8
-
 9
9
-
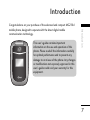 10
10
-
 11
11
-
 12
12
-
 13
13
-
 14
14
-
 15
15
-
 16
16
-
 17
17
-
 18
18
-
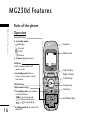 19
19
-
 20
20
-
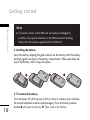 21
21
-
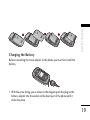 22
22
-
 23
23
-
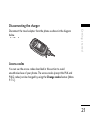 24
24
-
 25
25
-
 26
26
-
 27
27
-
 28
28
-
 29
29
-
 30
30
-
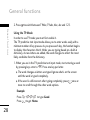 31
31
-
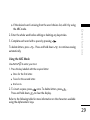 32
32
-
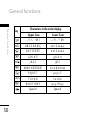 33
33
-
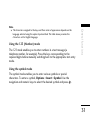 34
34
-
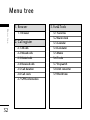 35
35
-
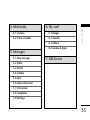 36
36
-
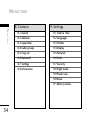 37
37
-
 38
38
-
 39
39
-
 40
40
-
 41
41
-
 42
42
-
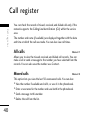 43
43
-
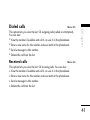 44
44
-
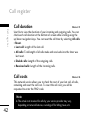 45
45
-
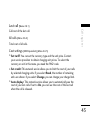 46
46
-
 47
47
-
 48
48
-
 49
49
-
 50
50
-
 51
51
-
 52
52
-
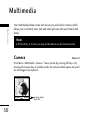 53
53
-
 54
54
-
 55
55
-
 56
56
-
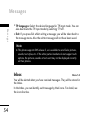 57
57
-
 58
58
-
 59
59
-
 60
60
-
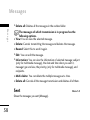 61
61
-
 62
62
-
 63
63
-
 64
64
-
 65
65
-
 66
66
-
 67
67
-
 68
68
-
 69
69
-
 70
70
-
 71
71
-
 72
72
-
 73
73
-
 74
74
-
 75
75
-
 76
76
-
 77
77
-
 78
78
-
 79
79
-
 80
80
-
 81
81
-
 82
82
-
 83
83
-
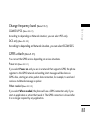 84
84
-
 85
85
-
 86
86
-
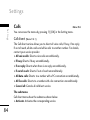 87
87
-
 88
88
-
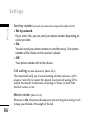 89
89
-
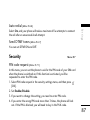 90
90
-
 91
91
-
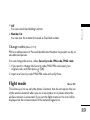 92
92
-
 93
93
-
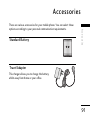 94
94
-
 95
95
-
 96
96
-
 97
97
-
 98
98
-
 99
99
-
 100
100
-
 101
101
-
 102
102
-
 103
103
-
 104
104
-
 105
105
-
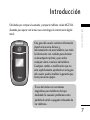 106
106
-
 107
107
-
 108
108
-
 109
109
-
 110
110
-
 111
111
-
 112
112
-
 113
113
-
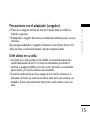 114
114
-
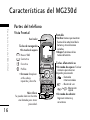 115
115
-
 116
116
-
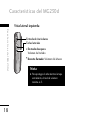 117
117
-
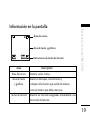 118
118
-
 119
119
-
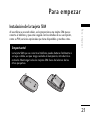 120
120
-
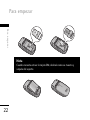 121
121
-
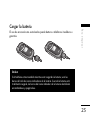 122
122
-
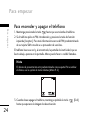 123
123
-
 124
124
-
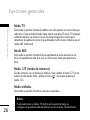 125
125
-
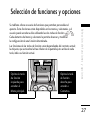 126
126
-
 127
127
-
 128
128
-
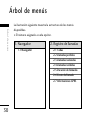 129
129
-
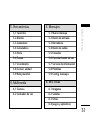 130
130
-
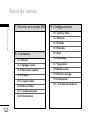 131
131
-
 132
132
-
 133
133
-
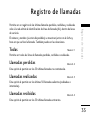 134
134
-
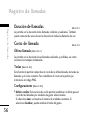 135
135
-
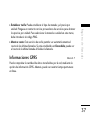 136
136
-
 137
137
-
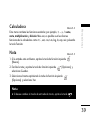 138
138
-
 139
139
-
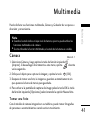 140
140
-
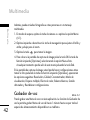 141
141
-
 142
142
-
 143
143
-
 144
144
-
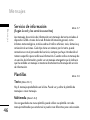 145
145
-
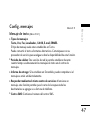 146
146
-
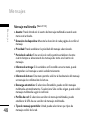 147
147
-
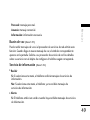 148
148
-
 149
149
-
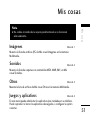 150
150
-
 151
151
-
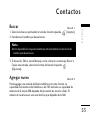 152
152
-
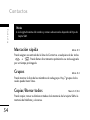 153
153
-
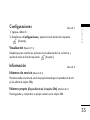 154
154
-
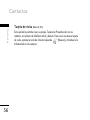 155
155
-
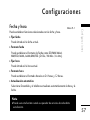 156
156
-
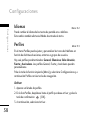 157
157
-
 158
158
-
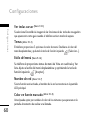 159
159
-
 160
160
-
 161
161
-
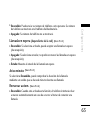 162
162
-
 163
163
-
 164
164
-
 165
165
-
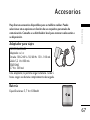 166
166
-
 167
167
-
 168
168


LG MG230d El manual del propietario
- Categoría
- Teléfonos móviles
- Tipo
- El manual del propietario
en otros idiomas
- English: LG MG230d Owner's manual
Artículos relacionados
-
LG ME970c El manual del propietario
-
LG KG220 Manual de usuario
-
LG F2410.ARUSBK Manual de usuario
-
LG S5100.AESPRK Manual de usuario
-
-
LG KG225.ATFTWA Manual de usuario
-
LG Série F2400.ADEUBK Manual de usuario
-
-
LG Série S5200.ANLDRK Manual de usuario
-