Cafe CSB912M2NS5 El manual del propietario
- Categoría
- Microondas
- Tipo
- El manual del propietario

Owner’s Manual

49-2000417 Rev. 0 02-19 GEA
Write the model and serial numbers here:
Model # _______________________________
Serial # _______________________________
Find these numbers on the label inside the oven.
Advantium
®
Oven
Model: CSB912, CSB913
Contents
SAFETY INFORMATION .........................3
ADVANTIUM
Getting to Know Advantium? .......................8
Features ......................................9
Controls ......................................10
PRECISION COOKING
Power Level ...................................11
Cookware ....................................12
Custom ......................................12
Menu Guide ...................................12
Things That Are Normal .........................13
CONVECTION BAKING .........................14
BROILING AND TOASTING .....................14
WARMING AND PROOFING .....................15
MICROWAVING ...............................16
Cookware ....................................16
Pre-Set Selections ..............................16
Power Levels ..................................16
Cooking Tips ..................................16
Defrost .......................................17
Sensor Cooking ................................18
Things That Are Normal .........................19
SETTINGS ....................................20
OTHER FEATURES ............................21
CARE AND CLEANING
Cooking Trays and Wire Oven Rack ................23
Halogen Lamp Cover and Mica Sheet ..............23
Outside of Oven and Accessory Storage Drawer (with
some models) .................................23
TROUBLESHOOTING ..........................24
LIMITED WARRANTY ..........................27
CONSUMER SUPPORT .........................28
Español
Para consultar una version en español de este manual de instrucciones,
visite nuestro sitio de internet cafeappliances.com.
Owner's Manual
TM
MFL38211661_00

2 49-2000417 Rev.0
THANK YOU FOR MAKING CAFÉ A PART OF YOUR HOME.
We take pride in the craftsmanship, innovation and design that goes into every Café product, and
we think you will too. Among other things, registration of your appliance ensures that we can deliver
important product information and warranty details when you need them.
Register your Café appliance now online. Helpful websites are available in the Consumer Support
section of this Owner’s Manual. You may also mail in the pre-printed registration card included in the
packing material.

49-2000417 Rev.0 3
READ AND SAVE THESE INSTRUCTIONS
IMPORTANT SAFETY INFORMATION
READ ALL INSTRUCTIONS BEFORE USING THE APPLIANCE
SAFETY INFORMATION
WARNING
To reduce the risk of burns, electric shock, fire, injury to persons, or exposure to
excessive microwave energy:
When using electrical appliances, basic safety precautions should be followed, including the following:
Ŷ 5HDGDOOLQVWUXFWLRQVEHIRUHXVLQJWKLVDSSOLDQFH
Ŷ 5HDGDQGIROORZWKHVSHFLILFSUHFDXWLRQVLQWKH
PRECAUTIONS TO AVOID POSSIBLE EXPOSURE
TO EXCESSIVE MICROWAVE ENERGY section on
page 7.
Ŷ 8VHWKLVDSSOLDQFHRQO\IRULWVLQWHQGHGXVHDV
described in this manual. Do not use corrosive
chemicals or vapors in this appliance. This oven is
specifically designed to heat, dry or cook food, and is
not intended for laboratory or industrial use.
Ŷ 7KLVDSSOLDQFHPXVWRQO\EHVHUYLFHGE\TXDOLILHG
service personnel. Contact nearest authorized service
facility for examination, repair or adjustment.
INSTALLATION
Ŷ ,QVWDOORUORFDWHWKLVDSSOLDQFHRQO\LQDFFRUGDQFHZLWK
the provided installation instructions.
Ŷ This appliance must be grounded. Connect only
to properly grounded outlet. See “GROUNDING
INSTRUCTIONS” found on page 7.
Ŷ 7KLVPLFURZDYHLV8/OLVWHGIRUVWDQGDUGZDOO
installation. See installation instructions for approved
appliances to mount over and under the microwave.
Ŷ 'RQRWRSHUDWHWKLVDSSOLDQFHLILWKDVDGDPDJHG
power cord or plug, if it is not working properly, or if it
has been damaged or dropped.
Ŷ .HHSFRUGDZD\IURPKHDWHGVXUIDFHV
Ŷ 'RQRWOHWFRUGKDQJRYHUWKHHGJHRIWKHWDEOHRU
counter
Ŷ 'RQRWLPPHUVHFRUGRUSOXJLQZDWHU
Ŷ 'RQRWFRYHURUEORFNDQ\RSHQLQJVRQWKHDSSOLDQFH
Ŷ 'RQRWVWRUHWKLVDSSOLDQFHRXWGRRUV'RQRWXVHWKLV
product near water—for example, in a wet basement,
near a swimming pool, near a sink or in similar
locations.
Ŷ 'RQRWPRXQWWKLVDSSOLDQFHRYHUDVLQN
TO REDUCE THE RISK OF FIRE IN THE CAVITY:
Ŷ 'RQRWRYHUFRRNIRRG&DUHIXOO\DWWHQGDSSOLDQFH
when paper, plastic or other combustible materials
are placed inside the oven to facilitate cooking.
Ŷ 5HPRYHZLUHWZLVWWLHVDQGPHWDOKDQGOHVIURPSDSHU
or plastic containers before placing them in the oven.
Ŷ ,IPDWHULDOVLQVLGHWKHRYHQLJQLWHNHHSWKHRYHQGRRU
closed, turn the oven off and disconnect the power
cord or shut off power at the fuse or circuit breaker
panel.
Ŷ 'RQRWVWRUHDQ\PDWHULDOVLQWKLVRYHQZKHQQRWLQ
use. Do not leave paper products, cooking utensils or
food in the cavity when not in use. All racks should be
removed from oven when not in use.
Ŷ 'RQRWRSHUDWHWKHPLFURZDYHIHDWXUHZLWKRXWIRRGLQ
the oven.
Ŷ 'RQRWXVHWKH6HQVRU)HDWXUHVWZLFHLQVXFFHVVLRQ
on the same food portion. If food is undercooked
after the first countdown, use COOK BY TIME for
additional cooking time.
Ŷ 7KHZLUHRYHQUDFNVKRXOGQRWEHXVHGIRU3UHFLVLRQ
Cook or microwave cooking to prevent arcing.
TO REDUCE THE RISK OF BURNS:
Ŷ %HFDUHIXOZKHQRSHQLQJFRQWDLQHUVRIKRWIRRG8VH
pot holders and direct steam away from face and
hands.
Ŷ 9HQWSLHUFHRUVOLWFRQWDLQHUVSRXFKHVRUSODVWLF
bags to prevent build-up of pressure.
Ŷ %HFDUHIXOZKHQWRXFKLQJWKHWXUQWDEOHGRRUUDFNV
or walls of the oven which may become hot during
use.
Ŷ /LTXLGVDQGFHUWDLQIRRGVKHDWHGLQWKHPLFURZDYH
oven can present a risk of burn when removing
them from the microwave. The potential for a burn is
greater in young children, who should not be allowed
to remove hot items from the microwave.

4 49-2000417 Rev.0
SAFETY INFORMATION
READ AND SAVE THESE INSTRUCTIONS
WARNING
Continued
OPERATING
Ŷ $VZLWKDQ\DSSOLDQFHFORVHVXSHUYLVLRQLV
necessary when used by children.
Ŷ 'RQRWRSHUDWHWKHRYHQZLWKRXWWKHWXUQWDEOHLQ
place. The turntable must be unrestricted so it can
turn.
Ŷ 'RQRWVWRUHDQ\WKLQJGLUHFWO\RQWRSRIWKH
microwave oven surface when the microwave oven
is in operation.
Ŷ 2YHUVL]HGIRRGVRURYHUVL]HGPHWDOXWHQVLOVVKRXOG
not be inserted in a microwave/convection oven as
they may create a fire or risk of electric shock.
Ŷ Do not use paper products in oven when
appliance is operating in any cooking mode except
microwave.
Ŷ 6RPHSURGXFWVVXFKDVZKROHHJJVDQGVHDOHG
containers—for example, closed jars—are able to
explode and should not be heated in this oven.
Ŷ 'RQRWRYHUFRRNSRWDWRHV7KH\FRXOGGHK\GUDWH
and catch fire, causing damage to your oven.
Ŷ 'RQRWFRYHUUDFNVRUDQ\RWKHUSDUWRIWKHRYHQ
with meal foi. This will cause overheating of the
oven.
Ŷ &RRNPHDWDQGSRXOWU\WKRURXJKO\²
meat to at least an INTERNAL temperature
of 160°F, and poultry to at least an
INTERNAL temperature of 180°F. Cooking to these
temperatures usually protects against foodborne
illness.
Ŷ 7KLVRYHQLVQRWDSSURYHGRUWHVWHGIRUPDULQHXVH
CLEANING
Ŷ .HHSWKHRYHQIUHHIURPJUHDVHEXLOGXS
Ŷ 'RQRWFOHDQZLWKPHWDOVFRXULQJSDGV3LHFHVFDQ
burn off the pad and touch electrical parts involving
a risk of electric shock.
Ŷ :KHQFOHDQLQJVXUIDFHVRIGRRUDQGRYHQWKDW
comes together on closing the door, use only mild,
nonabrasive soaps, or detergents applied with a
clean sponge or soft cloth. Rinse well.
SUPER HEATED WATER
Ŷ /LTXLGVVXFKDVZDWHUFRIIHHRUWHDDUHDEOHWR
be overheated beyond the boiling point without
appearing to be boiling. Visible bubbling or boiling
when the container is removed from the microwave
oven is not always present. THIS COULD RESULT
IN VERY HOT LIQUIDS SUDDENLY BOILING
OVER WHEN THE CONTAINER IS DISTURBED
OR A SPOON OR OTHER UTENSIL IS INSERTED
INTO THE LIQUID.
Ŷ 7RUHGXFHWKHULVNRILQMXU\WRSHUVRQV
'RQRWRYHUKHDWWKHOLTXLG
6WLUWKHOLTXLGERWKEHIRUHDQGKDOIZD\WKURXJK
heating it.
- Do not use straight-sided containers with narrow
necks.
- After heating, allow the container to stand in the
microwave oven for a short time before removing
the container.
- Use extreme care when inserting a spoon or other
utensil into the container.
WARNING
Arcing can occur during both Precision Cooking and microwave cooking. If you see
arcing, press the CANCEL pad and correct the problem.
Arcing is the microwave term for sparks in the oven.
Arcing is caused by:
Ŷ 0HWDORUIRLOWRXFKLQJWKHVLGHRIWKHRYHQ
Ŷ )RLOQRWPROGHGWRIRRGXSWXUQHGHGJHVDFWOLNH
antennas).
Ŷ 8VHIRLORQO\DVUHFRPPHQGHGLQWKLVPDQXDO
Ŷ 0HWDOFRRNZDUHXVHGGXULQJHLWKHU3UHFLVLRQ&RRN
or microwave cooking (except for the pans provided
with the oven).
Ŷ 0HWDOVXFKDVWZLVWWLHVSRXOWU\SLQVRU
gold-rimmed dishes, in the oven.
Ŷ 5HF\FOHGSDSHUWRZHOVFRQWDLQLQJVPDOOPHWDO
pieces being used in the oven.
IMPORTANT SAFETY INFORMATION
READ ALL INSTRUCTIONS BEFORE USING THE APPLIANCE

49-2000417 Rev.0 5
READ AND SAVE THESE INSTRUCTIONS
WARNING
PRECISION COOK OVEN-SAFE COOKWARE
Ŷ 7KHRYHQDQGGRRUZLOOJHWYHU\KRWZKHQ3UHFLVLRQ
Cooking.
Ŷ &RRNZDUHZLOOEHFRPHKRW2YHQPLWWVZLOOEH
needed to handle the cookware.
Ŷ 'RQRWXVHFRYHULQJVFRQWDLQHUVRUFRRNLQJ
roasting bags made of foil, plastic, wax or paper
when Precision Cooking.
Ŷ 'RQRWFRYHUWKHWXUQWDEOHPHWDOWUD\VRUDQ\SDUW
of the oven with metal foil. This will cause arcing in
the oven.
Ŷ 8VHWKHPHWDOWUD\LQWKHVDPHZD\
you would use a shallow baking pan or baking tray.
Ŷ 'RQRWXVHWKHZLUHRYHQUDFNIRU3UHFLVLRQ&RRN
Ŷ 3ODFHIRRGGLUHFWO\RQWKHPHWDOWUD\VZKHQFRRNLQJ
unless prompted by the oven to do otherwise.
Ŷ $Q\QRQPHWDORYHQVDIHGLVKFDQEHXVHGLQ\RXU
oven. Recipes in the Advantium Cookbook were
tested in Pyrex
®
glass cookware and Corningware
®
ceramic casseroles. Cook times and results may
vary when using other types of oven-safe dishes.
Place them directly on the trays.
Ŷ 8VHRIWKHFOHDUJODVVWUD\ZKHQ3UHFLVLRQ&RRNLQJ
will result in inferior cooking performance and
possible cracking of the glass tray.
Ŷ 8VHRQO\WKHPHWDOWUD\VVSHFLILHGIRUXVHZLWKWKLV
oven. Other metal trays are not designed for use
with this oven and will result in inferior cooking
performance.
WARNING
OVEN-SAFE COOKWARE FOR BAKING, BROILING, WARMING,
PROOFING & TOASTING
Ŷ 7KHRYHQDQGGRRUZLOOJHWYHU\KRWZKHQ
convection baking, broiling, warming or toasting.
Ŷ &RRNZDUHZLOOEHFRPHKRW2YHQPLWWVZLOOEH
needed to handle the cookware.
Ŷ 'RQRWFRYHUGLVKHVRUXVHSODVWLFFRQWDLQHUV
plastic cooking/roasting bags, plastic wrap, wax
paper or paper when broiling or toasting.
Ŷ 8VHWKHPHWDOWUD\LQWKHVDPHZD\\RXZRXOGXVH
a shallow baking pan or baking tray.
Ŷ 8VHWKHZLUHRYHQUDFNZKHQFRQYHFWLRQEDNLQJRU
warming on two levels.
Ŷ 3ODFHIRRGGLUHFWO\RQWKHPHWDOWUD\VZKHQFRRNLQJ
XQOHVVWKHUHFLSHUHTXLUHVDGLVK
Ŷ $Q\RYHQVDIHGLVKFDQEHXVHGLQ\RXURYHQ
Recipes in the Advantium Cookbook were tested in
Pyrex
®
glass cookware and Corningware
®
ceramic
casseroles. Cook times and results may vary when
using other types of oven-safe dishes. Place them
directly on the trays.
Ŷ 8VHRIWKHFOHDUJODVVWUD\ZKHQFRQYHFWLRQEDNLQJ
broiling, warming or toasting will result in inferior
cooking performance.
IMPORTANT SAFETY INFORMATION
READ ALL INSTRUCTIONS BEFORE USING THE APPLIANCE
SAFETY INFORMATION
The turntable must always
be in place when using the
oven.
The turntable must always
be in place when using the
oven.
Put food directly on the metal
tray to convection bake, warm
or toast.
Put food directly on the metal
tray to convection bake, warm
or toast.
Put food directly on the aluminum baking sheet on the
wire oven rack, and place them on the non-stick metal
tray, when baking on two levels, broiling or toasting foods.

6 49-2000417 Rev.0
READ AND SAVE THESE INSTRUCTIONS
SAFETY INFORMATION
WARNING
MICROWAVE-SAFE COOKWARE
Make sure to use suitable cookware during microwave
cooking. Most glass casseroles, cooking dishes,
measuring cups, custard cups, pottery or china
dinnerware which does not have metallic trim or glaze
with a metallic sheen can be used. Some cookware is
labeled “suitable for microwaving.”
Ŷ 3ODFHIRRGRUPLFURZDYDEOHFRQWDLQHUGLUHFWO\RQWKH
clear glass tray to cook your food.
Ŷ 8VHRIDPHWDOWUD\GXULQJPLFURZDYHFRRNLQJZLOO
result in inferior cooking performance.
Ŷ &RRNZDUHPD\EHFRPHKRWEHFDXVHRIKHDW
transferred from the heated food. Oven mitts may be
needed to handle the cookware.
Ŷ 'RQRWXVHUHF\FOHGSDSHUSURGXFWV5HF\FOHG
paper towels, napkins and waxed paper can contain
metal flecks which may cause arcing or ignite.Paper
products containing nylon or nylon filaments should
be avoided, as they may also ignite.
Ŷ 8VHIRLORQO\DVGLUHFWHGLQWKLVPDQXDO:KHQXVLQJ
foil in the oven, keep the foil at least 1” away from
the sides of the oven.
Ŷ ,I\RXXVHDPHDWWKHUPRPHWHUZKLOHFRRNLQJPDNH
sure it is safe for use in microwave ovens.
Ŷ 6RPHIRDPWUD\VOLNHWKRVHWKDWPHDWLVSDFNDJHG
on) have a thin strip of metal embedded in the
bottom. When microwaved, the metal can burn the
floor of the oven or ignite a paper towel.
Ŷ 3DSHUWRZHOVZD[HGSDSHUDQGSODVWLFZUDSFDQEH
used to cover dishes in order to retain moisture and
prevent spattering. Be sure to vent plastic wrap so
steam can escape.
Ŷ 1RWDOOSODVWLFZUDSLVVXLWDEOHIRUXVHLQPLFURZDYH
ovens. Check the package for proper use.
Ŷ ³%RLODEOH´FRRNLQJSRXFKHVDQGWLJKWO\FORVHGSODVWLF
bags should be slit, pierced or vented as directed by
package instructions. If they are not, plastic could
burst during or immediately after cooking, possibly
resulting in injury. Also, plastic storage containers
should be at least partially uncovered because they
form a tight seal. When cooking with containers
tightly covered with plastic wrap, remove covering
carefully and direct steam away from hands and
face.
Ŷ 3ODVWLFFRRNZDUH²3ODVWLFFRRNZDUHGHVLJQHGIRU
microwave cooking is very useful, but should be
used carefully. Even microwave-safe plastic may not
be as tolerant of overcooking conditions as are glass
or ceramic materials. Plastic may soften or char if
subjected to short periods of overcooking. In longer
exposures to overcooking, the food and cookware
could ignite.
Ŷ 'RQRWXVHWKHZLUHRYHQUDFNIRUPLFURZDYLQJ
Follow these guidelines:
1. Use microwave-safe plastics only, and use them in
strict compliance with the cookware manufacturer’s
recommendations.
2. Do not microwave empty containers.
3. Do not permit children to use plastic cookware
without adult supervision.
IMPORTANT SAFETY INFORMATION
READ ALL INSTRUCTIONS BEFORE USING THE APPLIANCE
The turntable must
always be in place when
using the oven.
The clear glass tray
should always be in place
when microwaving.

49-2000417 Rev.0 7
READ AND SAVE THESE INSTRUCTIONS
IMPORTANT SAFETY INFORMATION
READ ALL INSTRUCTIONS BEFORE USING THE APPLIANCE
SAFETY INFORMATION
PRECAUTIONS TO AVOID POSSIBLE EXPOSURE
TO EXCESSIVE MICROWAVE ENERGY
(a) Do Not Attempt to operate this oven with the
door open since open-door operation can result
in harmful exposure to microwave energy. It is
important not to defeat or tamper with the safety
interlocks.
(b) Do Not Place any object between the oven front
face and the door or allow soil or cleaner residue to
accumulate on sealing surfaces.
(c) Do Not Operate the oven if it is damaged.
It is particularly important that the oven door close
properly and that there is no damage to the:
(1) door (bent),
(2) hinges and latches (broken or loosened),
(3) door seals and sealing surfaces.
(d) The Oven Should Not be adjusted or repaired by
DQ\RQHH[FHSWSURSHUO\TXDOLILHGVHUYLFHSHUVRQQHO
PACEMAKERS
Most pacemakers are shielded from interference from electronic products, including microwaves. However,
patients with pacemakers may wish to consult their physicians if they have concerns.
GROUNDING INSTRUCTIONS
WARNING
Improper use of the grounding plug can result in a risk of electric shock.
This appliance must be
grounded. In the event of an
electrical short circuit, grounding
reduces the risk of electric shock
by providing an escape wire for
the electric current.
7KLVDSSOLDQFHLVHTXLSSHGZLWKDSRZHUFRUGKDYLQJD
grounding wire with a grounding plug. The plug must
be plugged into an outlet that is properly installed and
grounded.
&RQVXOWDTXDOLILHGHOHFWULFLDQRUVHUYLFHWHFKQLFLDQLI
the GROUNDING INSTRUCTIONS are not completely
understood, or if doubt exists as to whether the
appliance is properly grounded.
If the outlet is a standarf 2-prong wall outlet, it is
your personal responsibility and obligation to have it
replaced with a properly grounded 3-prong wall outlet.
Do not under any circumstacnes cut or remove the
third (ground) prong from the power cord.
Do not use an extension cord. If the power cord is too
VKRUWKDYHDTXDOLILHGHOHFWULFLDQRUVHUYLFHWHFKQLFLDQ
install an outlet near the appliance.
For best operation, plug this appliance into its own
electrical outlet to prevent flickering of lights, blowing
of fuse or tripping of circuit breaker.
Ensure Proper ground
exists before use.

8 49-2000417 Rev.0
Getting to Know Advantium
Advantium Quick Start
Microwaving with Express
• Select Express 30s to initiate a microwave cook
mode. The oven will start immediately. Time can be
added by pressing the +30s or +1m.
• The initial cook time can be modified to a preferred
time up to 6 minutes. This can be changed in the
SETTINGS.
What is Advantium?
The new Advantium oven uses breakthrough Precision
Cooking technology to harness the power of light.
The Advantium oven cooks the outside of foods much
like conventional radiant heat, while also penetrating
the surface so the inside cooks simultaneously.
While halogen light is the primary source of power, a
“microwave boost” is added with certain foods. Foods
cook evenly and fast, retaining their natural moisture.
The Advantium oven is capable of Precision Cooking,
convection baking, broiling, toasting, warming, proofing
and microwaving. The Precision Cook feature is the
biggest benefit of the Advantium oven.
1RSUHKHDWLQJLVUHTXLUHGWR3UHFLVLRQ&RRN3ODFHWKH
food in the oven and start cooking immediately. You see
timesaving because there is no preheat and because
Precision Cook cooks faster.
The turntable must
always be in place when
using the oven.
The clear glass tray
should always be in place
when microwaving.
ADVANTIUM: Getting to Know Advantium
Set Clock
Press the icon to access settings.
This feature allows you to set the clock and specifies
how the time of day will be displayed. Options are for a
standard 12-hour clock with AM and PM selections or
24-hour military time display.
Slide up and down to access all the settings
SETTINGS
LOCK CONTROL
SOUND
SET CLOCK
Wi-Fi & REMOTE ENABLE
12:30 PM

49-2000417 Rev.0 9
ADVANTIUM: Features
Features
Throughout this manual, features and appearance may vary from your model.
1
5
6 8
9
11
10
7
2
3
4
1. Turntable
The turntable must always be in place, on the oven
floor, for all cooking. Be sure the turntable is seated
securely over the spindle in the center of the oven.
2. Metal Tray or Metal Grill Tray
Put food directly on the metal tray or metal grill tray
and place on the turntable when using the Precision
Cook, broil, toast, warm and convection bake features.
3. Wire Oven Rack
Put food directly on the metal tray or in an oven-safe
dish on the wire oven rack only when convection
baking on two levels.
4. Clear Glass Tray
Place on the turntable when using the microwave
features. Place food or microwave-safe cookware
directly on the tray.
5. Upper Halogen Lamp / Ceramic Heater
Halogen lamp and ceramic heater cook food from
above in Precision Cook, broil and toast.
6. Window
Allows cooking to be viewed while keeping microwaves
confined in the oven.
7. Door Handle
Pull to open the door.
8. Door Latches
The door must be securely latched for the oven to
operate.
9. Lower Ceramic Heater
One ceramic heater cooks food from the bottom in
Precision Cook, broil and toast.
10. Control Panel
Touch LCD is used to operate the oven. The LCD is
located on the control panel.
11. Rear Convection System
One heating element cooks food with a convection fan
circulating the hot air throughout the cavity in Precision
Cook, broil, convection bake, toast and warm.

10 49-2000417 Rev.0
Controls
With your Advantium oven, you can cook with high-intensity halogen lights, ceramic heaters and
convection heating element, and/or conventional microwave energy.
ADVANTIUM: Controls
Express
Select to initiate a microwave cook mode. The oven will
start immediately. Time can be added by pressing the
+30s or +1m. The initial cook time can be modified to a
preferred time up to 6 minutes. This can be changed in
the Settings.
Microwave
Select to access microwave only cook modes. These
features include Beverage, Cook by Food Type, Cook by
Time, Defrost, Popcorn, Reheat, Slow Cook, Soften/Melt,
and Steam Cook.
Oven
Select to access Broil, Convection Bake, Proof, Toast,
and Warm features.
Precision Cooking
Precision Cooking is a suite of customized cooking
cycles that have been designed for specific foods. The
display will guide you through setting the oven and food
appropriately for the cycle selected. An option to set
custom cook times and power levels is also available.
Recipes
This option allows you to access pre-loaded recipes for
certain foods. New recipes can be loaded and followed
through the Café App once your phone is connected.
See the Wi-Fi Connect section for instructions on
connecting your phone.
Steam Clean
This feature will create heat and steam to loosen dirt in
the oven. Once the cycle is terminated, wipe oven cavity
with paper towel or cloth.
Oven Light
To turn on or off the oven cavity lights, press the .
Settings
Press the to access the Settings. See the Settings
section for more information.
Favorite
This option allows the user to save their favorite cycles
for easy access in the future. After selecting a cooking
mode and setting the temperature and any timers, press
the to save it as a favorite for future use. After saving
a cycle, press the RQWKHPDLQPHQXWRTXLFNO\DFFHVV
the saved mode.The last cooked cycle is available in the
favorites section.
Kitchen Timer
This feature works as a countdown timer. Press the
, select the amount of time for the timer to operate, and
press Start. The oven will continue to operate once the
timer countdown is complete. To turn off the timer, select
the and press CANCEL TIMER.
Cook Time
This function counts down cooking time and turns off the
oven when the cooking time is complete. Press the
during a cycle, select the amount of cooking time, and
press Start.
Delay Time
This feature delays the start time for an oven cycle. Use
this feature to set a time when you want the oven to
start. Select a cycle, then press the . Select the time of
day for the oven to turn on and press Start. A cook time
can also be programmed if desired.
Precision
Cooking
Express
30s
Microwave Oven
Steam
Clean
Recipes
12:30 PM

49-2000417 Rev.0 11
PRECISION COOKING
Precision Cooking
WARNING
When using Precision Cook programs, remember that the oven, door and dishes
will be very hot!
PRECISION COOKING
Precision Cook Power Level
The Advantium uses power from high intensity halogen
lamps, a ceramic heater, a convection system and
microwaves to cook food from the top, bottom and
interior simultaneously to seal in moisture and flavor.
When using the pre-set menu foods, the power levels
are already selected for you. However, power levels can
be adjusted when using pre-set menu foods and Custom
Precision Cook.
Each power level gives you halogen lamp or ceramic
heater power and microwave energy for a certain
percentage of the time or provides heating from the
convection system.
For example:
U–07 Upper Halogen lamp and Ceramic heater on 70%
of the time.
L–07 Lower ceramic heater on 70% of the time.
M–05 Microwave on 50% of the time.
NOTE: Be careful when adjusting power levels so that
you do not over- or undercook food.
Follow these general guidelines when selecting
the best U=, L=, and M= settings for your favorite
recipe:
8 6HOHFWDKLJKHUVHWWLQJIRUWKLQIRRGVUHTXLULQJ
a golden brown top (example: fish fillets, toast,
boneless chicken breasts). Select
a lower setting for thicker foods and foods with
high sugar or fat content (example: muffins, roasts,
FDVVHUROHVRUWKDWUHTXLUHDORQJHUFRRNWLPH
L = Select a higher setting for thick or dense foods that
PD\QRWFRRNTXLFNO\LQWKHFHQWHUH[DPSOHVWHDNV
casseroles). Select a lower setting for thin foods
(example: cookies).
M = Select a higher setting to shorten cooking time for
dense or heavy foods (example: casseroles, whole
chicken). Select a lower setting for delicate foods
H[DPSOHEUHDGVRUIRRGVUHTXLULQJORQJHUFRRN
times for tender results (example: stew, pot roast).
Custom
PRECISION COOKING
Crisp
Reheat
FrozenFresh
12:30 PM
Using Precision Cook Features
Ŷ
If the door is opened during cooking, the oven will
stop. Close the door and press the RESUME pad to
resume cooking.
Ŷ$WDQ\WLPHGXULQJFRRNLQJ\RXFDQFKDQJHWKH
cooking time. You can change power levels by pressing
POWER.
Ŷ3UHFLVLRQ&RRNLQJPHDWVLQWKHRYHQPD\SURGXFHVPRNH
Ŷ7RFRRNIRUDGGLWLRQDOWLPHDIWHUDFRRNLQJF\FOHKDV
been completed, use the CONTINUE feature as
instructed on the display.
The turntable must always be in
place when using the oven.
Put food directly on the metal tray
to Precision Cook.
Cooking Tips
To ensure consistent and even browning when cooking
foods directly on the non-stick metal tray, arrange food
as shown below.
Foods can touch but should not overlap.
Fresh meat, chicken, fish or seafood that has been frozen
should be thawed before cooking (the microwave defrost
feature can be used). For other frozen prepackaged
foods, follow package directions.
Circular pattern
(Example: biscuits, cookies)
Spoke pattern
(Example: crescent
rolls, breadsticks)
Single layer
(Example: appetizers)
Side by side pattern
(Example: meats and poultry)

12 49-2000417 Rev.0
Precision Cooking
PRECISION COOKING
Precision Cook Cookware
Ŷ )ROORZFRRNZDUHVXJJHVWLRQVRQWKHRYHQGLVSOD\
Ŷ &RRNZDUHZLOOEHFRPHKRW2YHQPLWWVZLOOEHQHHGHG
to handle the cookware.
Ŷ 3ODFHIRRGGLUHFWO\RQWKHPHWDOWUD\RUPHWDOJULOOWUD\
when cooking, unless prompted by the oven to do
otherwise.
Ŷ 8VHWKHPHWDOWUD\LQWKHVDPHZD\\RXZRXOGXVHD
shallow baking pan or baking tray.
Ŷ ,QDGGLWLRQWRWKHFRRNZDUHSURYLGHG\RXFDQXVH
non-metal casserole dishes, pie plates and other
heat-safe cookware. Place them directly on the turntable.
Ŷ %HVXUHWRVHOHFWDVL]HWKDWZLOOURWDWHHDVLO\
Ŷ 3ODFHWKHPHWDOWUD\RQWKHWXUQWDEOH3ODFHJODVVRU
ceramic cookware on the tray.
Ŷ 'RQRWXVHFRRNZDUHRUFRYHULQJVPDGHRISDSHUSODVWLF
or foil when cooking during a Precision Cook cycle.
Pre-set Precision Cook Menu
Ŷ $GYDQWLXPLVDOUHDG\SUHVHWWRFRRNRYHU
popular dishes. The pre-set menu has been divided
into Fresh and Frozen categories to simplify
navigation to desired food items.
Ŷ 7XUQWKHIRRGRYHUZKHQWKHRYHQVLJQDOV7851
FOOD OVER (for certain foods).
Ŷ :KHQWKHRYHQVLJQDOV&+(&.)25'21(1(66
check to see if your food is done to your liking (for
certain foods).
Custom Precision Cook
Advantium gives you the flexibility to cook your
favorite dishes.
If you want to cook a food item that is not among the
pre-set selections, use Custom Precision Cook.
For power level and cooking time suggestions, use your
cooking guide and the pre-set Precision Cook menu
selections.
Crisp Reheat Precision Cook
Ŷ 7KLVIHDWXUHLVGHVLJQHGWRUHKHDWOHIWRYHUIRRGLWHPV
that tend to lose their crispiness when reheated in a
microwave.
Ŷ 7XUQWKHIRRGRYHUZKHQWKHRYHQVLJQDOV7851
FOOD OVER (for certain foods).
Ŷ :KHQWKHRYHQVLJQDOV&+(&.)25'21(1(66
check to see if your food is done to your liking (for
certain foods).
Baked
Goods
FRESH
Meats Potatoes Seafoods
Vegetables
Cuisines
12:30 PM
Baked
Goods
Chicken Cuisines
FROZEN
Breakfast
12:30 PM

49-2000417 Rev.0 13
PRECISION COOKING
Precision Cooking
Things that are Normal
Cooking Times
Ŷ :KHQ3UHFLVLRQ&RRNLQJSUHSURJUDPPHGIRRGV
you may see Adjusting Cook Time in the display
several seconds after you press START. The oven
automatically senses the electrical voltage level in
your home and adjusts the cooking time up or down
for proper cooking.
Cooling Fans
Ŷ 7KHIDQZLOOEHRQGXULQJFRRNLQJ$WWKHHQGRI
cooking, the automatic fan may continue to run for a
short time, and the display will read Oven is Cooling.
The fan will automatically shut off when the internal
parts of the oven have cooled.
Ŷ 7KHRYHQYHQWZLOOHPLWZDUPDLUZKLOHWKHRYHQLVRQ
Lights
Ŷ :KHQWKHRYHQLVRQOLJKWPD\EHYLVLEOHDURXQGWKH
door or outer case.
Ŷ 7KHKDORJHQOLJKWVZLOOGLPDQGF\FOHRQDQGRII
during a Precision Cook cycle, sometimes even at full
power levels. This is normal. The oven senses the
heat level and adjusts automatically.
Oven Heat
Ŷ 1RSUHKHDWLQJWLPHLVUHTXLUHGGXULQJ3UHFLVLRQ&RRN
cycles. The oven begins cooking immediately.
Ŷ 7KHGRRUDQGLQVLGHRIWKHRYHQZLOOEHYHU\KRW8VH
caution when opening the door and removing food.
Be cautious of steam or vapor that may escape from
around the door.
Ŷ 'RQRWXVHFRRNZDUHRUFRYHULQJVPDGHRISDSHUSODVWLF
or foil when cooking during a Precision Cook cycle.
Ŷ :KHQFRRNLQJIRUDQH[WHQGHGSHULRGRIWLPHWKH
oven may automatically reduce the power levels to
maintain the appropriate level of oven heat.
Sounds
Ŷ &OLFNVDQGDIDQEORZLQJDUHQRUPDOVRXQGVGXULQJ
cooking. The relay board is turning components on and off.
Interference
Ŷ79UDGLRLQWHUIHUHQFHPLJKWEHQRWLFHGZKLOHXVLQJ
the microwave, similar to the interference caused by
other small appliances. It does not indicate a problem
with the microwave. Move the radio or TV as far away
from the microwave as possible, or check the position
of the TV/radio antenna.

14 49-2000417 Rev.0
Cooking Tips for Convection Baking
ŶCook time maximum is 3 hours.
Ŷ:KHQFRRNLQJLWHPVWKDWJRGLUHFWO\RQWRWKHPHWDO
tray, do not place the tray into the oven during preheat.
Place the food directly onto the tray, and place the
metal tray with food onto the turntable after the oven is
finished preheating.
Ŷ:KHQFRRNLQJLWHPVLQDGLVKWREHSODFHGRQWKH
metal tray, place the metal tray in the oven during
preheat for optimum
cooking performance.
Convection Baking
Convection baking allows you to cook foods the same
way as a conventional oven, using a heating element
to raise the temperature of the air inside the oven. Any
oven temperature from 250°F to 450°F may be set.
A fan gently circulates heated air throughout the oven,
over and around the food. Because the heated air is kept
constantly moving, not permitting a layer of cooler air to
develop around the food, some foods cook slightly faster
than in regular oven cooking.
Before you begin, make sure the turntable is in place.
Use the metal tray at all times when single or two-level
baking.
WARNING
When baking, remember that the oven, door and dishes will be very hot!
Broiling and Toasting
WARNING
When broiling or toasting, remember that the oven, door and dishes will
be very hot!
CONVECTION BAKING / BROILING AND TOASTING
Broil and toast use the upper lamps, lower heater and
convection system to broil or toast food similar to a
conventional oven.
Before you begin, make sure the turntable is in place.
Use the metal tray when toasting and broiling.
For two-level baking, place food in a metal baking dish or
directly on the non-stick metal tray. Place the aluminum
baking sheet or your baking dish with food on top of the
wire rack. Stand the rack with food on the metal tray.
Cooking Tips for Broiling
Ŷ%URLOLQJWLPHVPD\EHVKRUWHULQWKH$GYDQWLXPRYHQ
because of the use of halogen lamps. Make sure to
monitor food closely to get the desired results.
Ŷ)RUEHVWUHVXOWVZKHQEURLOLQJSODFHIRRGGLUHFWO\RQ
the metal tray.
Ŷ,ISUHKHDWLQJWKHRYHQWREURLOPHDWSUHKHDWZLWKWKH
metal tray in the oven and place food on the hot metal
tray for best searing of meat.
Ŷ%URLOLQJPHDWVLQWKHRYHQPD\SURGXFHVPRNH
Ŷ0RVWIRRGVVKRXOGEHWXUQHGKDOIZD\WKURXJKEURLOLQJ
time. Dense foods such as meaty, bone-in chicken
pieces should be turned about 3/4 of the way through
broiling time.
Ŷ5HPRYHWKLQQHUSLHFHVDVQHHGHGWRSUHYHQW
overcooking and drying.
Cooking Tips for Toasting
Ŷ)RUEHVWUHVXOWVZKHQWRDVWLQJXVHWKHPHWDOWUD\
Ŷ0RVWIRRGVVKRXOGEHWXUQHGRYHURIWKHZD\
through toasting.
Ŷ7RFULVSH[WHULRUEXWPDLQWDLQPRLVWQHVVLQVLGHIRRGV
preheat the oven.
Ŷ7RFULVSH[WHULRUDQGFULVSWKHLQVLGHWRRGRQRW
preheat the oven.
Ŷ7RDVWWKLFNHUSLHFHVDORQJHUWLPHWKLQQHUSLHFHVD
shorter time.
The turntable must
always be in place when
using the oven.
Put food directly on
the metal tray to broil or toast
The turntable must always
be in place when using the
oven.
Put food directly on the metal
tray to Convection Bake.
For two-level baking, place food in a metal baking dish or directly
on the non-stick metal tray. Place the aluminum baking sheet or
your baking dish with food on top of the wire rack. Stand the rack
with food on the metal tray.

49-2000417 Rev.0 15
WARMING AND PROOFING
Warming and Proofing
Warming
The WARM feature will keep hot, cooked foods at
serving temperature. Always start with hot food. Use
cookware and utensils that can withstand temperatures
XSWRÛ)
Ŷ 6HOHFWWKHRYHQWHPSHUDWXUH6HHWKHFKDUWDQGWLSV
LOW 140–160°F
MEDIUM 160–195°F
HIGH 195–230°F
To Crisp Stale Items:
Ŷ 3ODFHIRRGRUGLVKHVGLUHFWO\RQWKHEODFNPHWDOWUD\
Ŷ 3UHKHDWRQ/2:VHWWLQJDQGVHOHFW&5,63
Ŷ &KHFNFULVSQHVVDIWHUPLQXWHV$GGWLPHDV
needed.
Tips for Crisp Foods.
Ŷ /HDYHIRRGXQFRYHUHG
Ŷ 'RQRWXVHSODVWLFFRQWDLQHUVRUSODVWLFZUDS
Ŷ 3UHKHDWLQJLVQRWQHFHVVDU\H[FHSWIRUFULVSLQJVWDOH
items. (See To Crisp Stale Items.)
Tips for Moist Foods:
Ŷ &RYHUIRRGZLWKOLGRUDOXPLQXPIRLO
Ŷ 'RQRWXVHSODVWLFFRQWDLQHUVRUSODVWLFZUDS
Ŷ 3UHKHDWLQJLVQRWQHFHVVDU\
Proofing
The proofing feature automatically provides the optimum
temperature for the proofing process, and therefore does
not have a temperature adjustment.
NOTES:
Ŷ 'RQRWXVHWKHSURRILQJPRGHIRUZDUPLQJIRRGRU
keeping food hot. The proofing oven temperature is
not hot enough to hold foods at safe temperatures.
Use the WARM feature to keep food warm.
Ŷ 3URRILQJZLOOQRWRSHUDWHLIWKHRYHQLVWRRKRW$OORZ
the oven to cool before proofing.
The turntable must always be in
place when using the oven.
The turntable must always be in
place when using the oven.
Put food directly on the
metal tray to warm.
Put bread dough in a bowl/bread
pan and place on the metal tray
to proof.
Food Type Control
Setting
Moisture
Setting
Bread, hard rolls MEDIUM CRISP
Bread, soft rolls MEDIUM MOIST
Casseroles MEDIUM MOIST
Fried foods HIGH CRISP
Meats* and fish MEDIUM CRISP
Pancakes, waffles HIGH CRISP
Pizza HIGH CRISP
Potatoes, baked HIGH CRISP
Potatoes, mashed MEDIUM MOIST
Poultry HIGH MOIST
Tortilla Chips LOW CRISP
Vegetables MEDIUM MOIST
* USDA/FSIS recommends an internal temperature of 145°F
as the minimum doneness for beef.
Use a portable meat thermometer to check internal
temperatures.
Temperature and Moisture Selection Chart

16 49-2000417 Rev.0
Microwaving
MICROWAVING
Make sure the turntable is in place with the side marked
“TOP” facing up. Use the clear glass tray.
Place food or microwavable container directly on the
clear glass tray to cook your food.
The turntable must always
be in place when using the oven.
The clear glass tray should always
be in place when microwaving.
Microwave Pre-Set Selections
Microwave Auto Cook Selections
Ŷ Beverage
– Water (8-12 oz)
– Coffee (8-12 oz)
– Tea (8-12 oz)
– Milk (8-12 oz)
– Hot Cocoa
(8-12 oz)
Ŷ Cook by Food Time
ŶCook by time
ŶDefrost
– 1.0 lb Quick
– By Time
– By Weight
– By Food Type
ŶPopcorn
ŶReheat
– Casserole
– Chicken
– Pasta
– Pizza
– Plate of Food
– Rice
– Soup
– Steaks/Chops
– Vegetables
ŶSoften/Melt
– Butter
– Caramel
– Cheese
– Chocolate Chips
– Cream Cheese
– Frosting (16 oz)
– Ice Cream
– Marshmallow
ŶSteam Cook
Cookware
Ŷ0DNHVXUHWKDWFRRNZDUHLVVXLWDEOHIRUPLFURZDYLQJ Ŷ3ODFHIRRGRUPLFURZDYDEOHFRQWDLQHUGLUHFWO\RQWKH
clear glass tray to cook your food.
Express
Ŷ6HOHFW([SUHVVVWRLQLWLDWHDPLFURZDYHFRRNPRGH
The oven will start immediately. Time can be added by
pressing the +30s or +1m.
Ŷ7KHLQLWLDOFRRNWLPHFDQEHPRGLILHGWRDSUHIHUUHG
time up to 6 minutes. This can be changed in the
SETTINGS.
Cooking Tips
Ŷ:KHQFRRNLQJEDFRQOD\HUVWULSVRQDSODWH&RYHU
each layer with a paper towel.
Ŷ:KHQFRRNLQJYHJHWDEOHVXVHDPLFURZDYHVDIH
casserole or bowl. Cover with a microwave-safe lid or
vented plastic wrap.
Ŷ )RUIUR]HQYHJHWDEOHVIROORZWKHSDFNDJHLQVWUXFWLRQV
for adding water.
Ŷ )RUIUHVKYHJHWDEOHVDGGWDEOHVSRRQVRIZDWHUIRU
each serving.
Microwave Power Level(s)
You can change the power level before or during a
cooking program.
Here are some examples of uses for various power
levels:
High 10: )LVKEDFRQYHJHWDEOHVERLOLQJOLTXLGV
Med-High 7: Gentle cooking of meat and poultry;
baking casseroles and reheating.
Medium 5: Slow cooking and tenderizing for stews and
less tender cuts of meat.
Low 2 or 3: Defrosting; simmering; delicate sauces.
Warm 1: Keeping food warm; softening butter.
Beverage
MICROWAVE
Cook By
Time
Defrost Popcorn Reheat
Cook By
Food Type
12:30 PM
Slow Cook
MICROWAVE
Steam
Cook
Soften/Melt
12:30 PM

49-2000417 Rev.0 17
MICROWAVING
Microwaving
Defrost
DEFROST BY FOOD TYPE: Automatically sets the
defrosting times and power levels based on menu tree
selection to give even defrosting results for food types,
poultry and fish weighing up to 6 pounds.
DEFROST BY TIME: Allows user to set defrosting time.
The power level defaults to 3.
DEFROST BY WEIGHT: Automatically sets the
defrosting times and power levels based on the entered
weight up to 6 pounds.
Ŷ 7XUQWKHIRRGRYHUZKHQWKHRYHQVLJQDOV7851
FOOD OVER.
Ŷ 5HPRYHGHIURVWHGPHDWRUVKLHOGZDUPDUHDVZLWK
small pieces of foil for even defrosting.
Ŷ $IWHUGHIURVWLQJPRVWPHDWVQHHGWRVWDQGPLQXWHV
to complete defrosting. Large roasts should stand for
about 30 minutes.
Conversion Guide
If the weight of food is stated in pounds and ounces, the
ounces must be converted to tenths (.1) of a pound.
Weight of Food
in Ounces
Enter Food Weight
(tenths of a pound)
1-2 .1
3.2
4-5 .3
6-7 .4
8.5
9-10 .6
11 .7
12-13 .8
14-15 .9
Defrosting Tips
Use DEFROST BY FOOD TYPE for meat, poultry and
fish. Use DEFROST BY TIME for most other frozen
foods.
Ŷ)RRGVIUR]HQLQSDSHURUSODVWLFFDQEHGHIURVWHGLQ
the package when using DEFROST BY TIME. Foods
should be taken out of the package when using
DEFROST BY FOOD TYPE. Closed packages should
be slit, pierced or vented after food has partially
defrosted. Plastic storage containers should be
partially uncovered.
Ŷ)DPLO\VL]HSUHSDFNDJHGIUR]HQGLQQHUVFDQEH
defrosted and microwaved. If the food is in a foil
container, transfer it to a microwave-safe dish.
Ŷ)RRGVWKDWVSRLOHDVLO\VKRXOGQRWEHDOORZHGWRVLW
out for more than one hour after defrosting. Room
temperature promotes the growth of harmful bacteria.
Ŷ)RUPRUHHYHQGHIURVWLQJRIODUJHUIRRGVVXFKDV
roasts, use DEFROST BY TIME. Be sure large meats
are completely defrosted before cooking.
Ŷ:KHQGHIURVWHGIRRGVKRXOGEHFRROEXWVRIWHQHGLQ
all areas. If still slightly icy, return to the microwave
very briefly, or let it stand a few minutes.
Ŷ:KHQGHIURVWLQJRUPRUHSRXQGVRIJURXQGRUFXEHG
meat, remove defrosted portions at the turn signals.

18 49-2000417 Rev.0
Microwaving
Sensor Cooking Cookware
The proper containers and covers are essential for best
sensor cooking.
Ŷ$OZD\VXVHPLFURZDYHVDIHFRQWDLQHUVDQGFRYHUWKHP
with lids or vented plastic wrap. Never use tight sealing
plastic containers—they can prevent steam from
escaping and cause food to overcook.
Ŷ%HVXUHWKHRXWVLGHRIWKHFRRNLQJFRQWDLQHUVDQG
the inside of the oven are dry before placing food in
the oven. Beads of moisture turning into steam can
mislead the sensor.
Ŷ%HYHUDJHVDUHEHVWKHDWHGXQFRYHUHG
Sensor Cooking
The Advantium’s microwave mode features sensor
cooking. The oven automatically senses when food
is done and shuts itself off—eliminating the need to
program cook times and power levels.
Do not open the oven door until time is counting down
in the display. If the door is opened, close it and press
RESUME immediately. If the food is not done enough,
use COOK BY TIME in the microwave selector to cook
for more time.
NOTE: Do not use the sensor features twice in
succession on the same food portion—it may result in
severely overcooked or burnt food. If the food is not
done enough at the end of the sensor cook time, use
Cook BY Time in the microwave selector to cook for
more time.
Ŷ ,I\RXKDYHEHHQFRRNLQJDQGWKHRYHQLVKRWLWPD\
indicate that it is too hot for sensor cooking. In that
case, the oven will automatically change to time
cooking and may prompt for weights or amounts of
food.
Ŷ 7RVKRUWHQRUOHQJWKHQWKHFRRNWLPHZDLWXQWLOWKH
time countdown shows in the display. Use the screen
pad to add or subtract time.
Ŷ ,I\RXRSHQWKHGRRUZKLOHVHQVRUFRRNLQJIROORZ
instructions that appear on the screen.
Notes About the Reheat Program:
Reheated foods may have wide variations in
temperature. Some areas may be extremely hot.
It is best to use COOK BY TIME and not REHEAT for
these foods:
Ŷ %UHDGSURGXFWV
Ŷ )RRGWKDWPXVWEHUHKHDWHGXQFRYHUHG
Ŷ )RRGVWKDWQHHGWREHVWLUUHGRUWXUQHG
Ŷ )RRGVFDOOLQJIRUDGU\ORRNRUFULVSVXUIDFHDIWHU
reheating.
Covered
Vented
Dry off dishes so they
don’t mislead the sensor.
MICROWAVE SENSOR PROGRAMS:
Ŷ*URXQG0HDW
Ŷ3RSFRUQ±3UHSDFNDJHGPLFURZDYHSRSFRUQ
3.0 oz. to 3.5 oz.
Ŷ6RXS
Ŷ5LFH
Ŷ9HJHWDEOHV&DQQHG)UHVK)UR]HQ
Ŷ&KLFNHQ5HKHDW
Ŷ3DVWD5HKHDW
Ŷ3ODWHRI)RRG5HKHDW
Ŷ6RXS5HKHDW
Ŷ9HJHWDEOH5HKHDW
MICROWAVING

49-2000417 Rev.0 19
MICROWAVING
Microwaving
Things that are Normal
Interference
Ŷ79UDGLRLQWHUIHUHQFHPLJKWEHQRWLFHGZKLOHXVLQJ
the microwave. Similar to the interference caused by
other small appliances, it does not indicate a problem
with the microwave. Move the radio or TV as far away
from the microwave as possible, or check the position
of the TV/radio antenna.
Oven Heat
Ŷ&RRNZDUHPD\EHFRPHKRWEHFDXVHRIKHDW
transferred from the heated food. Oven mitts may be
needed to handle the cookware.
Ŷ6WHDPRUYDSRUPD\HVFDSHIURPDURXQGWKHGRRU
Steam Cook Feature
For best results use steam or simmer bowl. Add 2
Tablespoons of water when steaming vegetables.
MENU SELECTION FOR SENSOR STEAM
For best results use 1-4 cups.
• Asparagus
• Brussels Sprouts
• Carrots
• Cauliflower
• Potatoes
• Rice
6TXDVK
• Zucchini
MENU SELECTION FOR TIMED STEAM
MENU SELECTION FOR TIMED STEAM
(continued)
Asparagus 1 Cup
2 Cups
4 Cups
Broccoli 1 Cup
2 Cups
4 Cups
Brussels Sprouts 1 Cup
2 Cups
4 Cups
Carrots 1 Cup
2 Cups
4 Cups
Cauliflower 1 Cup
2 Cups
4 Cups
Chicken Breast 1 Piece 6-8 Ounces
8-10 Ounces
2 Pieces 6-8 Ounces
8-10 Ounces
Fish 1 Piece Thin Filet - 1/2”
Medium Filet - 1”
Thick Filet - 1 1/2”
2 Pieces Thin Filet - 1/2”
Medium Filet - 1”
Thick Filet - 1 1/2”
Green Beans 1 Cup
2 Cups
4 Cups
Potatoes 1 Cup
2 Cups
4 Cups
Quinoa 1 Cup
Rice 1 Cup
Scallops Bay Scallops 6-10 Ounces
10-16 Ounces
Sea Scallops 6-10 Ounces
10-16 Ounces
Shrimp 1/2 Pound
1 Pound
6TXDVK 1 Cup
2 Cups
4 Cups
Zucchini 1 Cup
2 Cups
4 Cups

20 49-2000417 Rev.0
Settings
SETTINGS
&RPSDWLEOH $SSOH RU $QGURLG GHYLFHV DQG KRPH :L)L QHWZRUN UHTXLUHG
Slide up and down to access all the settings
SETTINGS
LOCK CONTROL
SOUND
SET CLOCK
Wi-Fi & REMOTE ENABLE
12:30 PM
COOKING
SYSTEM
SETTINGS
SOUND
DISPLAY
12:30 PM
There are numerous settings that are accessed by pressing in the top right corner of the main screen.
Set Clock
This feature allows you to set the clock and specifies how
the time of day will be displayed. Options are for a standard
12-hour clock with AM and PM selections or 24-hour military
time display.
Lock Control
Select this option in order to lock the LCD from any undesired
screen selections. To unlock the screen, press
and press
Unlock on the next screen.
Sound
This setting screen allows you to change the volume, the end
of cycle tone, and turn on or off the touch sound.
Display
This screen shows the options for brightness, clock off, energy
saver, and screen time out. Clock off will remove the clock from
the display when the screen is inactive, but it will be shown
after pressing the screen. The screen can be set to never time
out or it can be set to shut off after 1, 5, or 10 minutes.
Cooking
Ŷ The oven is set to Fahrenheit, however, in this setting the
cooking unit can be changed to Celsius.
Ŷ Auto Recipe Conversion can be turned on in order to
automatically reduce the programmed cooking temperature
for Convection Bake or Convection Bake Multi. Note that
this will only reduce the cooking temperature, not the baking
time.
System
This screen allows you to clear your saved user data and
shows the current software version.
Wi-Fi & Remote Enable
This appliance is configurable to allow remote operation at any
time. Do not store any flammable materials or temperature
sensitive items inside or on top of this appliance. By using the
Wi-Fi Connect feature, you will be able to control essential
oven operations such as temperature settings, timers and
cooking modes using your smartphone or tablet.*
Select the
then Wi-Fi & Remote Enable - follow the
instructions on your oven display and phone app. It is
necessary to turn on Wi-Fi before using Remote Enable on
your oven.
Connecting your Wi-Fi Connect Enabled oven
1. Have your smart phone or tablet ready with the ability to
access the internet and download apps.
2. You will need to know the password of your home Wi-Fi
router. Have this password ready while you are setting up
your Café Appliances oven.
3. On your smart phone or tablet, visit
cafeappliances.com/connect to learn more about
connected appliance features and to download the app to
connect to your oven.
4. Follow the onscreen instructions in the app to connect your
Café Appliances oven. When connected, your oven should
show that it is connected to your home Wi-Fi network.
5. If there are issues connecting wirelessly to your oven,
please call 800.220.6899 and ask for assistance regarding
oven wireless connectivity.
To connect additional smart devices, repeat steps 3 and 4.
Remote Starting Your Advantium
Remote Enable ON/OFF is a selection under the menu
selection WiFi & Remote Enable.
When Remote Enable is ON the
icon will be active on the
home screen and you can start an Advantium cook cycle from
a remote source such as the Café Appliance app or Voice
Commands from Amazon Alexa or Google Assistant. When
starting a Precision cook or microwave cooking cycle, you will
need to have opened the microwave door within the last 5
minutes. The 5 minute restriction is to help ensure food is in the
microwave before starting the cooking cycle. There is not a 5
minute limitation with Oven/Convection cycles.
When Remote Enabled is OFF you can still view the cooking
status from your app, you can turn off cooking modes, or you
can use the timer and setting features from your smart device.
With Remote enabled OFF you just will not be able to start a
cooking cycle on a smart device.
To disable all WiFi features and remove the Advantium from the
WiFi network, select Disconnect AND Forget WiFi option under
the WiFi & Remote Enabled menu.

49-2000417 Rev.0 21
Other Features
OTHER FEATURES
Cooling Fans
7ZRFRROLQJIDQVDXWRPDWLFDOO\WXUQRQDVUHTXLUHGWR
keep the internal oven components and control from
overheating.
The fans will automatically turn off when the internal
parts are cool. One or both may stay on for 30 minutes
or more after the oven control is turned off.
Accessory Storage Drawer (with some models)
The accessory storage drawer is designed to hold the
cooking trays and wire oven rack provided with the oven.
The accessory storage drawer is not intended for storing
cloth, wood, paper or other combustible products.
Contents in the drawer can become hot to the touch
while the oven is in use and while the oven is cooling.
Use caution when removing items at these times.
Cook Time Completed
To remind you that you have food in the oven, the oven will display COMPLETED and beep once a minute until you
either open the oven door or press DONE.

22 49-2000417 Rev.0
Care and Cleaning
Inside of Oven and Accessory Storage Drawer (with some models)
Be certain the oven control is turned off and the oven is
warm or cool to the touch before cleaning any part of this
oven.
Clean the inside of the oven often for proper heating
performance.
Some spatters can be removed with a paper towel,
RWKHUVPD\UHTXLUHDZDUPVRDS\FORWK5HPRYHJUHDV\
spatters with a sudsy cloth, then rinse with a damp cloth.
If you notice yellowing on the metal inside the oven
that cannot be removed with a warm sudsy cloth, use a
stainless steel cleaner that removes heat discoloration
and/or tarnishing. You can then clean the inside of the
oven as you normally do.
Do not use abrasive cleaners or sharp utensils on oven
walls or the accessory storage drawer.
Never use a commercial oven cleaner on any part of
your oven or the accessory storage drawer.
Do not clean the inside of the oven or the accessory
storage drawer with metal scouring pads. Pieces can
break off the pad inside the oven, causing electrical
shock as well as damaging the inside surface finish of
the oven or the accessory storage drawer..
Removable Turntable
The area underneath the turntable should be cleaned
IUHTXHQWO\WRDYRLGRGRUVDQGVPRNLQJGXULQJDFRRNLQJ
cycle.
The turntable can be broken if dropped. Wash carefully
in warm, sudsy water. Dry completely and replace.
To replace the turntable, place its center over the
spindle in the center of the oven and turn it until it seats
into place. (Make sure the smooth side of the turntable
is facing up and that its center seats securely on the
spindle.)
Do not use the oven without the
turntable in place.
Turntable
Steam Clean
Ŷ This feature will create heat and steam to loosen dirt
in the oven. To create enough steam pour a half cup
of water into a microwave safe bowl.
Ŷ Remember to use the glass tray. Once the cycle
is terminated, wipe oven cavity with paper towel or
cloth.
CARE AND CLEANING

49-2000417 Rev.0 23
CARE AND CLEANING
Outside of Oven and Accessory Storage Drawer (with some models)
We recommend against using cleaners with ammonia
or alcohol, as they can damage the appearance of the
oven or the accessory storage drawer. If you choose to
use a common household cleaner, first apply the cleaner
directly to a clean cloth, then wipe the soiled area.
Glass Control Panel, Door and Drawer
Wipe with a clean damp sponge. Dry thoroughly. Do
not use cleaning sprays, large amounts of soap and
water, abrasives or sharp objects on the panel—they can
damage it.
Door Seal
It’s important to keep the area clean where the door
seals against the oven. Use only mild, non-abrasive
detergents applied with a clean sponge or soft cloth.
Rinse well.
Stainless Steel (on some models)
To clean the stainless steel surface, use warm sudsy
water or a stainless steel cleaner or polish. Always
wipe the surface in the direction of the grain. Follow
the cleaner instructions for cleaning the stainless steel
surface.
7RLQTXLUHDERXWSXUFKDVLQJVWDLQOHVVVWHHODSSOLDQFH
cleaner or polish, or to find the location of a dealer
nearest you, please visit cafeappliances.com.
Cooking Trays and Wire Oven Rack
To prevent breakage, allow the trays to cool completely
before cleaning. Wash carefully in hot, sudsy water or in
the dishwasher.
Do not use abrasives to clean the glass tray or wire oven
rack, as they may damage the finish.
A soap-filled scouring pad may be used to clean the
metal trays.
Mica Sheet
To clean the mica sheet: Allow the oven to cool
completely. Wipe clean with a warm soapy cloth.
Care and Cleaning
Metal tray
Wire oven rack
Clear glass tray
Mica sheet

24 49-2000417 Rev.0
Troubleshooting Tips
FEDERAL COMMUNICATIONS COMMISSION RADIO FREQUENCY
INTERFERENCE STATEMENT (U.S.A. ONLY)
7KLVHTXLSPHQWJHQHUDWHVDQGXVHV,60IUHTXHQF\
energy and if not installed and used properly, that is in
strict accordance with the manufacturer’s instructions,
may cause interference to radio and television
reception. It has been type tested and found to comply
ZLWKOLPLWVIRU,60(TXLSPHQWSXUVXDQWWRSDUWRI
FCC Rules, which are designed to part 18 of FCC
Rules, which are designed to provide residential
installation.
However, there is no guarantee that interference will not
RFFXULQDSDUWLFXODULQVWDOODWLRQ,IWKLVHTXLSPHQWGRHV
cause interference to radio or television reception, which
FDQEHGHWHUPLQHGE\WXUQLQJWKHHTXLSPHQWRIIDQGRQ
the user is encouraged to try to correct the interference
by one or more of the following:
Ŷ5HRULHQWWKHUHFHLYLQJDQWHQQDRIWKHUDGLRRU
television.
Ŷ5HORFDWHWKH0LFURZDYH2YHQZLWKUHVSHFWWRWKH
receiver.
Ŷ0RYHWKHPLFURZDYHRYHQDZD\IURPWKHUHFHLYHU
Ŷ3OXJWKHPLFURZDYHRYHQLQWRDGLIIHUHQWRXWOHWVRWKDW
the microwave oven and the receiver are on different
branch codes.
The manufacturer is not responsible for any radio of TV
interference caused by unauthorized modification to this
microwave oven. It is the responsibility of the user to
correct such interference.
Supplier’s Declaration of Conformity
47 CFR § 2.1077 Compliance Information
8QLTXH,GHQWLILHU0LFURZDYH&6%DQG&6%
Modular Component: Wireless LAN Module
Modular Component FCC ID: COF-WMBNBM26A
Responsible Party: GE Appliances
Appliance Park,
Louisville, KY 40225
cafeappliances.com
FCC Compliance Statement: This device complies with
part 18 of the FCC Rules.
FCC Compliance Statement:
This device complies with
part 15 of the FCC Rules. Operation is subject to the
following two conditions: (1) This device may not cause
harmful interference, and (2) this device must accept any
interference received, including interference that may
cause undesired operation.
NOTE: 7KLVHTXLSPHQWKDVEHHQWHVWHGDQGIRXQG
to comply with the limits for a Class B digital device,
pursuant to part 15 of the FCC Rules. These limits
are designed to provide reasonable protection against
harmful interference in a residential installation. This
HTXLSPHQWJHQHUDWHVXVHVDQGFDQUDGLDWHUDGLR
IUHTXHQF\HQHUJ\DQGLIQRWLQVWDOOHGDQGXVHGLQ
accordance with the instructions, may cause harmful
interference to radio communications. However, there
is no guarantee that interference will not occur in a
SDUWLFXODULQVWDOODWLRQ,IWKLVHTXLSPHQWGRHVFDXVH
harmful interference to radio or television reception,
ZKLFKFDQEHGHWHUPLQHGE\WXUQLQJWKHHTXLSPHQW
off and on, the user is encouraged to try to correct the
interference by one or more of the following measures:
Ŷ5HRULHQWRUUHORFDWHWKHUHFHLYLQJDQWHQQD
Ŷ,QFUHDVHWKHVHSDUDWLRQEHWZHHQWKHHTXLSPHQWDQG
receiver.
Ŷ&RQQHFWWKHHTXLSPHQWLQWRDQRXWOHWRQDFLUFXLW
different from that to which the receiver is connected.
Ŷ&RQVXOWWKHGHDOHURUDQH[SHULHQFHGUDGLR79
technician for help.
7RVDWLVI\)&&5)H[SRVXUHUHTXLUHPHQWVDVHSDUDWLRQ
distance of 20 cm or more should be maintained
between the antenna of this device and persons during
device operation.
To ensure compliance, operations at closer than this
distance is not recommended.
WARNING
Any changes or modifications to this
unit not expressly approved by the
party responsible for compliance could void the user’s
DXWKRULW\WRRSHUDWHWKHHTXLSPHQW
TROUBLESHOOTING TIPS

49-2000417 Rev.0 25
TROUBLESHOOTING TIPS
Troubleshooting Tips... Before you call for service
Save time and money! Review the charts on the following pages first and you may not need to call for service.
Problem Possible Cause What To Do
LIGHTS
Light during a Precision Cooking
cycle dims and cycles on and
off, even at full power levels
This is normal. Power level has been
automatically reduced because the
oven is hot.
This is normal. The oven senses the heat
level and adjusts automatically.
Light visible around the door
and outer case while Precision
Cooking
This is normal. When the oven is on, light may be visible
around the door and outer case.
COOLING FANS
Fan continues to run after
cooking stops
The oven is cooling. The fans will automatically shut off when the
internal parts of the oven have cooled.
Oven vent emits warm air while
oven is on
This is normal.
Fan comes on automatically
when using the microwave
This is normal.
COOKING
The oven makes unusual sounds
while cooking
Clicks are normal. The control is
turning components on and off.
These sounds are normal.
Fan noise is normal. Fans
are required to keep the oven
components and controls cool.
These sounds are normal.
Smoke comes out of the oven
when I open the door
Food is high in fat content. Aerosol
spray used on the pans.
Smoke is normal when cooking high-fat
foods.
Food is not fully cooked or
browned at the end of a cooking
program
Programmed times may not match
the size or amount of food you are
cooking.
Adjust time for doneness or adjust the upper
or lower lamps for browning and doneness.
DISPLAY
³)±DQGDQXPEHURUOHWWHU´DUH
displayed on LCD screen.
You have a function error code. Press Dismiss on the LCD screen. Allow the
oven to cool for one hour. Put the oven back
into operation.
If the function code repeats. Disconnect all power to the oven for at least
30 seconds and then reconnect power. If the
function error code repeats, call for service.
LCD is not functioning properly A fuse in your home may be blown or
the circuit breaker tripped.
Replace the fuse or reset the circuit breaker.
Oven controls improperly set. See the Cooking Modes or Settings section
to ensure proper use. Ensure unit is updated
to the most recent software update.
LCD screen is locked.
Unlock the screen by pressing the Unlock
icon. If this does not correct the issue, cycle
power at the circuit breaker and ensure unit is
updated to the most recent software update.
LCD is faulty. Cycle power at the circuit breaker and
ensure unit is updated to the most recent
software update. If issue persists, call
service to assess the issue.
OTHER PROBLEMS
The door and inside of the oven
feels hot
The heat lamps produce intense heat
when ready.
This is normal. Use oven mitts to remove
food when in a small space.
Oven will not start A fuse in your home may be blown or
the circuit breaker tripped.
Replace fuse or reset circuit breaker.

26 49-2000417 Rev.0
Notes
NOTES

49-2000417 Rev.0 27
Staple your receipt here. Proof of the original purchase
date is needed to obtain service under the warranty.
LIMITED WARRANTY
Advantium Oven Limited Warranty
Cafeappliances.com
All warranty service is provided by our Factory Service Centers, or an authorized Customer Care
®
technician. To schedule
service online, visit us at cafeappliances.com/service.
What Café will not cover:
Ŷ6HUYLFHWULSVWR\RXUKRPHWRWHDFK\RXKRZWRXVHWKH
product.
Ŷ,PSURSHULQVWDOODWLRQGHOLYHU\RUPDLQWHQDQFH
Ŷ3URGXFWQRWDFFHVVLEOHWRSURYLGHUHTXLUHGVHUYLFH
Ŷ)DLOXUHRIWKHSURGXFWRUGDPDJHWRWKHSURGXFWLILWLV
abused, misused (for example, cavity arcing from wire
rack or metal/foil), or used for other than the intended
purpose or used commercially.
Ŷ5HSODFHPHQWRIKRXVHIXVHVRUUHVHWWLQJ
of circuit breakers.
Ŷ5HSODFHPHQWRIWKHFRRNWRSOLJKWEXOEV
Ŷ'DPDJHWRWKHSURGXFWFDXVHGE\DFFLGHQWILUHIORRGV
or acts of God.
Ŷ,QFLGHQWDORUFRQVHTXHQWLDOGDPDJHFDXVHGE\
possible defects with this appliance.
Ŷ'DPDJHFDXVHGDIWHUGHOLYHU\
EXCLUSION OF IMPLIED WARRANTIES
Your sole and exclusive remedy is product repair as provided in this Limited Warranty. Any implied warranties,
including the implied warranties of merchantability or fitness for a particular purpose, are limited to one year or
the shortest period allowed by law.
This limited warranty is extended to the original purchaser and any succeeding owner for products purchased for home
use within the USA. If the product is located in an area where service by a Café Appliances Authorized Servicer is not
DYDLODEOH\RXPD\EHUHVSRQVLEOHIRUDWULSFKDUJHRU\RXPD\EHUHTXLUHGWREULQJWKHSURGXFWWRDQ$XWKRUL]HG&DIp
Appliances Service location for service. In Alaska, the limited warranty excludes the cost of shipping or service calls to
your home.
6RPHVWDWHVGRQRWDOORZWKHH[FOXVLRQRUOLPLWDWLRQRILQFLGHQWDORUFRQVHTXHQWLDOGDPDJHV7KLVOLPLWHGZDUUDQW\
gives you specific legal rights, and you may also have other rights which vary from state to state. To know what your
legal rights are, consult your local or state consumer affairs office or your state’s Attorney General.
Warrantor: GE Appliances, a Haier company
Louisville KY,40225
For the period of Café Appliances will replace
One year
From the date
of the original
purchase
Any part of the oven which fails due to a defect in materials or workmanship. During this
limited one-year warranty, Café Appliances will also provide, free of charge, all labor and
related service costs to replace the defective part.
Five years
From the date
of the original
purchase
The magnetron tube, if the magnetron tube fails due to a defect in materials or workmanship.
During this five-year limited warranty, you will be responsible for any labor or in-home
service costs.

28 49-2000417 Rev.0
Printed in China
Consumer Support
CONSUMER SUPPORT
Café Website
+DYHDTXHVWLRQRUQHHGDVVLVWDQFHZLWK\RXUDSSOLDQFH"7U\WKHCafé Appliances Website 24 hours a day, any
day of the year! You can also shop for more great Café Appliances products and take advantage of all our on-line
support services designed for your convenience. cafeappliances.com
Register Your Appliance
Register your new appliance on-line at your convenience! Timely product registration will allow for enhanced
communication and prompt service under the terms of your warranty, should the need arise. You may also mail in
the pre-printed registration card included in the packing material. cafeappliances.com/register
Schedule Service
Expert Café repair service is only one step away from your door. Get on-line and schedule your service at your
convenience any day of the year. cafeappliances.com/service
Extended Warranties
Purchase a Café extended warranty and learn about special discounts that are available while your warranty is still in
effect. You can purchase it on-line anytime. Café Appliances Services will still be there after your warranty expires.
cafeappliances.com/extended-warranty
Remote Connectivity
For assistance with wireless network connectivity (for models with remote enable), visit our website at
cafeappliances.com/connect
Parts and Accessories
,QGLYLGXDOVTXDOLILHGWRVHUYLFHWKHLURZQDSSOLDQFHVFDQKDYHSDUWVRUDFFHVVRULHVVHQWGLUHFWO\WRWKHLUKRPHV
(VISA, MasterCard and Discover cards are accepted). Order on-line today 24 hours every day.
cafeappliances.com/parts
Instructions contained in this manual cover procedures to be performed by any user. Other servicing
generally should be referred to qualified service personnel. Caution must be exercised, since improper
servicing may cause unsafe operation.
Contact Us
If you are not satisfied with the service you receive from Café Appliances, contact us on our Website with all the
details including your phone number, or write to: General Manager,

49-2000417 Rev. 0 02-19 GEA
Escriba el modelo y los números de serie a
continuación:
Modelo No: ____________________________
Serial No: ______________________________
Encuentra estos números en la etiqueta dentro
del horno
Manual del Propietario
TM
Horno Advantium
®
Modelo: SB912, CSB913
Contenido
INFORMACIÓN DE SEGURIDAD ..........3
ADVANTIUM
Familiarícese con Advantium .............. 8
Funciones ............................. 9
Controles ............................. 10
COCCIÓN DE PRECISIÓN
Nivel de potencia ....................... 11
Cocción de Precisión. . . . . . . . . . . . . . . . . . . . 12
Menú de Cocción de Precisión ............ 12
Lo que es normal ...................... 13
HORNEAR CON CONVECCIÓN ..........14
ASAR Y TOSTAR ......................14
CALENTAR Y FERMENTAR
..............15
COCCIÓN POR MICROONDAS
Recipientes de cocina ................... 16
Selecciones de Microondas Preprogramadas
. . 16
Nivel(es) de potencia del horno
microondas ...........................16
Consejos de cocina .....................16
Descongelación ........................ 17
Cocción por sensor ..................... 18
Cocción de microondas por sensor. . . . . . . . . 18
Función de Cocción al Vapor ............. 19
CONFIGURACIONES ...................20
OTRAS FUNCIONES ...................21
CUIDADO Y LIMPIEZA
Limpieza al Vapor ......................22
Dentro del Horno y del Cajón de
Almacenamiento de Accesorios ...........22
Plato giratorio removible .................22
Bandejas de Cocimiento y Parrilla
de Alambre del Horno ...................23
Lámpara Halógena y Lámina de Mica ...... 23
Fuera del Horno y del Cajón de
Almacenamiento de Accesorios ........... 23
CONSEJOS PARA LA SOLUCIÓN
DE PROBLEMAS ...................... 24
GARANTÍA LIMITADA ..................27
SOPORTE PARA EL CONSUMIDOR
........28
MFL38211661_00

2 49-2000417 Rev. 0
GRACIAS POR HACER QUE CAFÉ SEA PARTE DE SU HOGAR.
Sentimos orgullo por el nivel de arte, innovación y diseño de cada uno de los electrodomésticos de
CAFÉ, y creemos que usted también. Entre otras cosas, el registro de su electrodoméstico asegura que
podamos entregarle información importante del producto y detalles de la garantía cuando los necesite.
Registre su electrodoméstico CAFÉ ahora a través de Internet. Sitios Web útiles están disponibles
en la sección de Soporte para el Consumidor de este Manual del Propietario. También puede enviar
una carta en la tarjeta de inscripción preimpresa que se incluye con el material embalado.

49-2000417 Rev. 0 3
INFORMACIÓN DE SEGURIDAD
LEA Y GUARDE ESTAS INSTRUCCIONES
INFORMACIÓN IMPORTANTE DE SEGURIDAD
LEA TODAS LAS INSTRUCCIONES ANTES DE USAR
ADVERTENCIA
Para reducir el riesgo de quemaduras, descargas eléctricas, incendio, lesiones o
exposición a energía de microondas excesiva:
Cuando utilice aparatos eléctricos, se deben seguir las precauciones de seguridad básicas, entre las que se incluyen las
siguientes:
Ŷ /HDWRGDVODVLQVWUXFFLRQHVDQWHVGHXWLOL]DUHVWHDSDUDWR
Ŷ /HD\VLJDODVSUHFDXFLRQHVHVSHFtILFDVGHVFULWDVHQOD
sección PRECAUCIONES PARA EVITAR LA POSIBLE
EXPOSICIÓN A ENERGÍA DE MICROONDAS EXCESIVA
de la página 7.
Ŷ 8WLOLFHHVWHDSDUDWRVRODPHQWHSDUDHOILQSUHYLVWR
como se describe en este manual. No utilice químicos
ni vapores corrosivos en este aparato. Este horno está
específicamente diseñado para calentar, secar o cocinar
alimentos y bebidas y no está diseñado para usarse en n
laboratorio ni para uso industrial.
Ŷ 6yORSHUVRQDOFXDOLILFDGRGHEHUHSDUDUHVWHDSDUDWR
Póngase en contacto con el centro de mantenimiento
autorizado más cercano en caso de necesitar revisión,
reparación o ajuste.
INSTALLATION
Ŷ ,QVWDOHRXELTXHHVWHDSDUDWR~QLFDPHQWHGHDFXHUGRDODV
instrucciones de instalación suministradas.
Ŷ (VWHDSDUDWRGHEHFRQWDUFRQXQDFRQH[LyQDWLHUUD
&RQHFWHVyORDXQWRPDFRUULHQWHFRQDGHFXDGDFRQH[LyQD
WLHUUD9HUODVHFFLyQ,QVWUXFFLRQHVGHFRQH[LyQDWLHUUDGH
la página 7.
Ŷ (VWHKRUQRHVWiOLVWDGRSRU8/SDUDDLQVWDODFLyQGHSDUHG
estándar. Consulte las instrucciones de instalación para
que electrodomésticos aprobados se puedan montar sobre
y debajo del microondas.
Ŷ 1RXWLOLFHHVWHDSDUDWRVLWLHQHHOFDEOHHOpFWULFRRHO
enchufe dañados, si no funciona bien o si ha sufrido una
avería o una caída.
Ŷ 0DQWHQJDHOFDEOHDOHMDGRGHVXSHUILFLHVFDOLHQWHV
Ŷ 1RSHUPLWDTXHHOFDEOHHOpFWULFRFXHOJXHVREUHHOERUGH
de la mesa o del mostrador de encimera.
Ŷ 1RVXPHUMDHOFDEOHHOpFWULFRRHOHQFKXIHHQDJXD
Ŷ 1RFXEUDQLEORTXHHQLQJXQDDSHUWXUDGHHVWHDSDUDWR
Ŷ 1RDOPDFHQHHVWHDSDUDWRDODLUHOLEUH1RXWLOLFHHVWH
producto cerca del agua; por ejemplo, en un sótano
húmedo, cerca de una piscina, cerca de un lavabo o
lugares similares.
Ŷ 1RPRQWHHVWHDSDUDWRVREUHHOIUHJDGHUR
PARA REDUCIR EL RIESGO DE INCENDIO DENTRO DEL
HORNO:
Ŷ 1RFRFLQHH[FHVLYDPHQWHORVDOLPHQWRV9LJLOH
cuidadosamente el aparato cuandose coloque papel,
plástico u otros materiales combustibles dentro del
microondas para facilitar la cocción.
Ŷ 4XLWHODVWLULWDVGHVHJXULGDGWZLVWWLHV\DVDVPHWiOLFDV
de los recipientes de papel o plástico antes de colocarlos
dentro del microondas.
Ŷ 6LORVPDWHULDOHVTXHVHHQFXHQWUDQGHQWURGHOKRUQR
prenden fuego, mantenga cerrada la puerta del horno,
apáguelo y desconecte el cable eléctrico, o corte la
energía desde el panel de fusibles o del interruptor de
circuitos.
Ŷ 1RXWLOLFHHOKRUQRSDUDDOPDFHQDUHOHPHQWRV1RGHMH
productos de papel, utensilios de cocina o alimentos en
el horno cuando no lo esté usando. Todos los estantes
deberán ser retirados del horno cuando no se encuentren
en uso.
Ŷ 1RRSHUHHOKRUQRVLQDOLPHQWRVDGHQWUR
Ŷ 1RXWLOLFHODVIXQFLRQHVGHOVHQVRUGRVYHFHV
sucesivamente en la misma porción de alimento. Si el
alimento no se cocina completamente después del primer
conteo regresivo, utilice la función COOK BY TIME
(COCINAR POR TIEMPO) para permitir tiempo de cocción
adicional.
Ŷ Para evitar chispas no se debe utilizar la parrilla de
alambre del horno para el cocimiento rápido o cocimiento
con microonda.
A FIN DE REDUCIR RIESGOS DE QUEMADURAS:
Ŷ 7HQJDFXLGDGRDODEULUHQYDVHVFRQFRPLGDFDOLHQWH8VH
manijas y aleje el vapor del rostro y las manos.
Ŷ 9HQWLOHSHUIRUHRFRUWHHQYDVHVEROVDVREROVDV
plásticas para evitar la acumulación de presión.
Ŷ 7HQJDFXLGDGRDOWRFDUHOSODWRJLUDWRULRODSXHUWD
estantes o paredes del horno, los cuales se podrán
calentar durante el uso.
Ŷ /RVOtTXLGRV\FLHUWDVFRPLGDVFDOHQWDGDVHQHOKRUQR
microondas pueden presentar riesgos de quemaduras,
al ser retirados del horno microondas. La posibilidad de
quemaduras es mayor en niños pequeños, a los cuales
no se les deberá permitir retirar ítems calientes del horno
microondas.

4 49-2000417 Rev. 0
LEA Y GUARDE ESTAS INSTRUCCIONES
INFORMACIÓN DE SEGURIDAD
INFORMACIÓN IMPORTANTE DE SEGURIDAD
LEA TODAS LAS INSTRUCCIONES ANTES DE USAR
ADVERTENCIA
El arqueo voltaico puede ocurrir tanto durante la cocción rápida (speedcooking) y de
microondas. Si nota que ocurre arqueo voltaico, apriete el botón táctil CANCEL (BORRAR)
y corrija el problema.
El arqueo voltaico es el término técnico que define las
chispas en el horno. El arqueo voltaico es causado por:
Ŷ 0HWDOROiPLQDGHPHWDOHQFRQWDFWRFRQHOFRVWDGRGHO
horno.
Ŷ /iPLQDGHPHWDOPROGHDGDDODOLPHQWRORVERUGHV
doblados hacia arriba actúan como antenas).
Ŷ 8WLOLFHODOiPLQDGHPHWDOVHJ~QODVUHFRPHQGDFLRQHVGH
este manual.
Ŷ 8WHQVLOLRVGHFRFLQDGHPHWDOXWLOL]DGRVGXUDQWHODFRFFLyQ
UiSLGDRGHPLFURRQGDVH[FHSWRROODVVXPLQLVWUDGDVFRQ
el horno).
Ŷ 0HWDOWDOFRPRWLULWDVPHWiOLFDVGHVHJXULGDGVXMHWDGRUHV
para carne de ave o platos con borde de oro en el horno.
Ŷ 7RDOODVGHSDSHOUHFLFODGRTXHFRQWHQJDQSHGD]RVGH
metal pequeños que se utilizan en el horno.
ADVERTENCIA
Continuado
USO
Ŷ &RPRFRQFXDOTXLHUDSDUDWRFXDQGRVHDXWLOL]DGRSRU
niños es necesaria una estrecha vigilancia.
Ŷ 1RKDJDIXQFLRQDUHOKRUQRVLQWHQHUFRORFDGDHQVXOXJDU
la base giratoria. La base giratoria debe estar libre de
bloqueos para poder girar.
Ŷ 1RDOPDFHQHQLQJ~QHOHPHQWRGLUHFWDPHQWHVREUHOD
superficie del horno de microondas cuando éste se
encuentre en funcionamiento.
Ŷ /DVFRPLGDVRXWHQVLOLRVPHWiOLFRVGHWDPDxRH[FHVLYR
no deberán ser insertados en un horno microondas/
convección, ya que podrán generar un incendio o riesgos
de descargas eléctricas.
Ŷ 1RXWLOLFHSURGXFWRVGHSDSHOFXDQGRHODSDUDWRVHXWLOL]D
en modos diferentes al microondas.
Ŷ $OJXQRVSURGXFWRVWDOHVFRPRKXHYRVHQWHURV\
contenedores sellados (por ejemplo, frascos sellados) son
SURSHQVRVDH[SORWDU\QRGHEHQFDOHQWDUVHHQHVWHKRUQR
Tal uso del horno puede resultar en lesiones personales.
Ŷ 1RFRFLQHODVSDSDVH[FHVLYDPHQWH3XHGHQ
deshidratarse y provocar fuego, causando daños al horno
Ŷ 1RFXEUDODVSDUULOODVXRWUDSDUWHGHOKRUQRFRQSDSHO
metálico. Esto puede sobrecalentar el horno.
Ŷ &RFLQHDIRQGRODFDUQHGHUHVRDYHODFDUQHGHUHVDSRU
los menos una temperatura INTERNA de 160° F y carne
de ave a por lo menos una temperatura INTERNA de 180°
F. Cocinar a estas temperaturas generalmente protege
contra enfermedades causadas por los alimentos.
Ŷ (VWHKRUQRQRKDVLGRDSUREDGRQLSUREDGRSDUDXWLOL]DFLyQ
marina.
LIMPIEZA
Ŷ 0DQWHQJDHOKRUQROLEUHGHDFXPXODFLyQGHJUDVD
Ŷ 1ROLPSLHFRQHVSRQMLOODVGHPHWDO3XHGHQGHVSUHQGHUVH
pedazos de la esponjilla y tocar partes eléctricas,
provocando un riesgo de descarga eléctrica.
Ŷ $OOLPSLDUVXSHUILFLHVGHSXHUWDV\KRUQRTXHVHXQHQDO
cerrar la puerta, sólo use detergentes suaves no abrasivos
aplicados con una esponja limpia o un paño suave.
Enjuague bien.
AGUA SOBRECALENTADA
Ŷ /tTXLGRVWDOHVFRPRDJXDFDIpRWpVRQFDSDFHV
de sobrecalentarse más allá del punto de ebullición
sin parecer que estén hirviendo. No siempre hay
burbujeo o hervor visible cuando se saca el recipiente
del horno microondas. ESTO PUEDE RESULTAR EN
/$(%8//,&,Ï15(3(17,1$'(/Ë48,'2608<
CALIENTES CUANDO SE MUEVE EL RECIPIENTE O SE
INSERTA UNA CUCHARA U OTRO UTENSILIO DENTRO
'(//Ë48,'2
Ŷ 3DUDUHGXFLUHOULHVJRGHOHVLyQItVLFD
1RVREUHFDOLHQWHHOOtTXLGR
5HYXHOYDHOOtTXLGRDQWHV\DODPLWDGGHOWLHPSRGH
calentamiento.
1RXWLOLFHUHFLSLHQWHVFRQFRVWDGRVUHFWRV\FXHOORV
angostos.
'HVSXpVGHFDOHQWDUHOUHFLSLHQWHGpMHORHQHOKRUQR
microondas por un período corto de tiempo antes de
sacarlo.
7HQJDH[WUHPDSUHFDXFLyQFXDQGRLQWURGX]FDXQD
cuchara u otro utensilio en el recipiente.

49-2000417 Rev. 0 5
INFORMACIÓN IMPORTANTE DE SEGURIDAD
LEA TODAS LAS INSTRUCCIONES ANTES DE USAR
INFORMACIÓN DE SEGURIDAD
LEA Y GUARDE ESTAS INSTRUCCIONES
ADVERTENCIA
RECIPIENTES DE COCINA SEGUROS DISEÑADOS PARA HORNEAR, ASAR,
CALENTAR, ACTIVAR Y TOSTAR
Ŷ El horno y la compuerta se tornarán muy calientes
cuando se hornea, asa, calienta, activa o tuesta algo.
Ŷ Los recipientes de cocina se tornarán muy calientes.
Se requerirán guantes de cocina protectores para
manipular los recipientes de cocina.
Ŷ 1RXWLOLFHWDSDVUHFLSLHQWHVQLEROVDVGHFRFFLyQDVDGR
fabricadas de láminas de metal, plástico, cera o papel
cuando cocine con la función de cocción rápida.
Ŷ 8WLOLFHODEDQGHMDPHWiOLFDDQWLDGKHUHQWHGHODPLVPD
forma que utilizaría una bandeja o charola para hornear
plana.
Ŷ 8VHODEDQGHMDFRQUHMLOODGHOKRUQRSDUDKRUQHDUSRU
convección o calentar en dos niveles.
Ŷ &RORTXHORVDOLPHQWRVGLUHFWDPHQWHHQODVEDQGHMDV
cuando cocine, a menos que el horno le indique hacer
otra cosa.
Ŷ 3XHGHXWLOL]DUHQHOKRUQRFXDOTXLHUSODWRGLVHxDGRSDUD
microondas. Las recetas del Libro de cocina Advantium
VHSUREDURQHQUHFLSLHQWHVGHFRFLQDGHYLGULR3\UH[
®
\FDFHURODVGHFHUiPLFD&RUQLQJZDUH
®
. Los tiempos y
resultados de cocción pueden variar cuando se utilizan
otros tipos de recipientes diseñados para hornos
microondas. Colóquelos directamente en las bandejas.
Ŷ 8WLOL]DUODEDQGHMDGHYLGULRWUDQVSDUHQWHFXDQGRKRUQHD
asa, calienta, activa o tuesta puede producir resultados
insatisfactorios.
ADVERTENCIA
UTENSILIOS PARA COCCIÓN RÁPIDA SEGUROS PARA MICROONDAS
Ŷ El horno y la compuerta se tornarán muy calientes
cuando se utiliza la función de cocción rápida.
Ŷ Los utensilios de cocina se tornarán muy calientes
debido a la transferencia de calor proveniente de los
alimentos calentados. Se requerirán guantes de cocina
protectores para manipular los recipientes de cocina.
Ŷ 1RXWLOLFHWDSDVUHFLSLHQWHVREROVDVGHFRFFLyQDVDGR
fabricadas de láminas de metal, plástico, cera o papel
cuando cocine con la función de cocción rápida.
Ŷ 1RFXEUDODEDVHJLUDWRULDSDUULOODGHDODPEUHEDQGHMDV
ni ninguna pieza del horno con lámina de metal. Esto
provocará arqueo voltaico en el horno.
Ŷ 8WLOLFHODEDQGHMDGHPHWDODQWLDGKHUHQWHHODPLVPD
forma que utilizaría una bandeja o charola para hornear
plana.
Ŷ 1RXVHODUHMLOODGHDFHURGHOKRUQRSDUDODFRFFLyQUiSLGD
Ŷ &RORTXHORVDOLPHQWRVGLUHFWDPHQWHHQODVEDQGHMDV
cuando cocine, a menos que el horno le indique otra
cosa.
Ŷ 3XHGHXWLOL]DUHQHOKRUQRFXDOTXLHUSODWRGLVHxDGRSDUD
microondas. Las recetas del Libro de cocina Advantium
VHSUREDURQHQUHFLSLHQWHVGHFRFLQDGHYLGULR3\UH[
®
\FDFHURODVGHFHUiPLFD&RUQLQJZDUH
®
. Los tiempos y
resultados de cocción pueden variar cuando se utilizan
otros tipos de recipientes diseñados para hornos
microondas. Colóquelos directamente en las bandejas.
Ŷ (OXVRGHODEDQGHMDGHYLGULRFODURDOFRFLQDUHQ
velocidad resultará en un rendimiento inferior de la
cocción y posibles fisuras sobre la bandeja de vidrio.
Ŷ 8VHVROREDQGHMDVPHWiOLFDVHVSHFLILFDGDVSDUDXVR
con este horno. Otras bandejas metálicas no fueron
diseñadas para uso con este horno y resultarán en un
rendimiento inferior de la cocción.
El plato giratorio siempre
deberá estar en la
ubicación correcta al usar
el horno.
Coloque la comida
directamente sobre la bandeja
metálica para hornear, calentar
o dorar por convección.
El plato giratorio siempre
deberá estar en la
ubicación correcta al usar
el horno.
Coloque la comida
directamente sobre la bandeja
metálica para hornear, calentar
o dorar por convección.
Coloque la comida directamente en la bandeja para
hornear de aluminio sobre el estante rejilla del horno, y
coloque ambos sobre la bandeja metálica no adherente, al
hornear en dos niveles, asar o dorar comidas.

6 49-2000417 Rev. 0
LEA Y GUARDE ESTAS INSTRUCCIONES
INFORMACIÓN DE SEGURIDAD
INFORMACIÓN IMPORTANTE DE SEGURIDAD
LEA TODAS LAS INSTRUCCIONES ANTES DE USAR
ADVERTENCIA
RECIPIENTES DE COCINA SEGUROS DISEÑADOS PARA
MICROONDAS
Asegúrese de utilizar recipientes de cocina adecuados durante
la cocción a microondas. Se pueden utilizar la mayoría de
las cacerolas, platos para cocinar, tazas de medir, tazas
normales, cerámica o loza que no tengan bordes metálicos o
vidriados con un recubrimiento metálico. Algunos recipientes
de cocina se encuentran marcados como adecuados para
microondas.
Ŷ &RORTXHORVDOLPHQWRVRUHFLSLHQWHSDUDPLFURRQGDV
directamente en la bandeja de vidrio transparente para
cocinar sus alimentos.
Ŷ /DXWLOL]DFLyQGHODEDQGHMDPHWiOLFDDQWLDGKHUHQWH
durante la cocción en microondas puede producir
resultados insatisfactorios.
Ŷ /RVXWHQVLOLRVGHFRFLQDSXHGHQWRUQDUVHPX\FDOLHQWHV
debido a la transferencia de calor proveniente de los
alimentos calentados. Podrían requerirse guantes de
cocina para manipular los recipientes de cocina.
Ŷ 1RXWLOLFHSURGXFWRVGHSDSHOUHFLFODGR/DVWRDOODV
servilletas y papel encerado fabricados de material
reciclado pueden contener partículas metálicas que
pueden causar arqueo voltaico o prender fuego. Se deben
evitar los productos de papel que contienen nylon o
filamentos de nylon, ya que también pueden incendiarse.
Ŷ 8WLOLFHODVOiPLQDVPHWiOLFDV~QLFDPHQWHFRPRVHLQGLFD
en este manual. Cuando utilice la lámina de metal en el
KRUQRPDQWHQJDODOiPLQDSRUORPHQRVƎDOHMDGDGHORV
costados del horno.
Ŷ 6LXWLOL]DXQWHUPyPHWURGHFDUQHPLHQWUDVFRFLQD
asegúrese que sea seguro para utilizarse en hornos
microondas.
Ŷ $OJXQDVEDQGHMDVGHHVSXPDFRPRDTXHOODVHQODVTXH
se empaca la carne) tienen una tirita de metal delgada
empotrada en la parte inferior. Cuando se cocinan con
microondas, el metal puede quemar el fondo del horno o
hacer que arda una toalla de papel.
Ŷ 6HSXHGHXWLOL]DUWRDOODVGHSDSHOSDSHOHQFHUDGR\ODV
envolturas plásticas para cubrir los platos con el propósito
de mantener la humedad y prevenir los salpicones.
Asegúrese de ventilar cortando la envoltura plástica para
que pueda escapar el vapor.
Ŷ 1RWRGDVODVFXELHUWDVSOiVWLFDVVRQDGHFXDGDVSDUD
hornos microondas. Lea en la caja las instrucciones
correspondientes.
Ŷ 6HGHEHQFRUWDUSHUIRUDURYHQWLODUFRPRVHLQGLFDHQOD
caja las bolsas de cocina “hervibles” y bolsas plásticas
cerradas herméticamente. De lo contrario, el plástico
puede reventarse durante o inmediatamente después de
la cocción, resultando en una posible lesión. También,
los recipientes de almacenamiento plásticos deben al
menos estar parcialmente descubiertos debido a que
forman un sello muy ajustado. Al cocinar con recipientes
cubiertos con envoltura plástica de manera muy ajustada,
quite cuidadosamente la cubierta y dirija el vapor fuera y
alejado de manos y rostro.
Ŷ 5HFLSLHQWHVGHFRFLQDSOiVWLFRV²/RVUHFLSLHQWHVGH
cocina diseñados para microondas son muy útiles, pero
deben utilizarse con cuidado. Incluso el plástico diseñado
para microondas podría no tolerar condiciones de sobre
cocción, así como los materiales de vidrio o cerámica
\SRGUtDQVXDYL]DUVHRFDUERQL]DUVHVLVHH[SRQHQD
SHUtRGRVFRUWRVGHVREUHFRFFLyQ(QH[SRVLFLRQHV
más prolongadas a la sobrecocción, los alimentos y los
recipientes de cocina podrían coger fuego.
Ŷ 1RXWLOLFHODSDUULOODGHDODPEUHGHOKRUQRSDUDFRFLQDUFRQ
microonda.
Siga las siguientes pautas:
1. Utilice plásticos seguros para microondas únicamente y
utilícelos estrictamente según las especificaciones del
fabricante.
2. No cocine en el microondas recipientes vacíos.
3. No permita que los niños utilicen recipientes de plástico
sin vigilarlos bien.
La base giratoria siempre
debe estar colocada en su
lugar cuando se utiliza el
horno.
La bandeja de cristal
transparente siempre
deberá estar en su lugar
cuando se cocina con
microondas.

49-2000417 Rev. 0 7
PRECAUCIONES PARA EVITAR LA POSIBLE
EXPOSICIÓN A ENERGÍA DE MICROONDAS EXCESIVA
(a) No intente hacer funcionar el horno con
la compuerta abierta ya que ésto puede provocar
H[SRVLFLyQSHOLJURVDDODHQHUJtDGHPLFURRQGDV(V
importante no forzar ni dañar los seguros.
(b) No coloque ningún objeto entre la parte frontal del horno
y la compuerta, ni permita que se acumulen residuos de
producto limpiador o detergente, suciedad o polvo en las
superficies de sellado.
(c) No haga funcionar el horno si se encuentra dañado. Es
particularmente importante cerrar bien la compuerta
(1) la compuerta (doblada o curvada),
(2) las bisagras y pestillos (rotos o flojos),
(3) sellos de la compuerta y superficies de sellado.
(d) El horno no debe ser ajustado o reparado por ninguna
SHUVRQDH[FHSWRSRUSHUVRQDOGHPDQWHQLPLHQWR
calificado.
AVISO: MARCAPASOS
La mayoría de los marcapasos se encuentran protegidos contra la interferencia de productos electrónicos, incluyendo los
microondas. Sin embargo, los pacientes que tengan marcapasos deberían consultar a sus médicos si tienen alguna duda.
INFORMACIÓN IMPORTANTE DE SEGURIDAD
LEA TODAS LAS INSTRUCCIONES ANTES DE USAR
INFORMACIÓN DE SEGURIDAD
INSTRUCCIONES DE CONEXIÓN A TIERRA
ADVERTENCIA
El uso inadecuado del enchufe de conexión a tierra puede provocar riesgos de
descargas eléctricas.
Este electrodoméstico deberá
estar conectado a tierra. En caso
de que se produzca un
FRUWRFLUFXLWRODFRQH[LyQDWLHUUD
reduce el riesgo de descarga
eléctrica, brindando un cable de
salida de la corriente eléctrica.
Este electrodoméstico está equipado con un cable de
FRUULHQWHTXHSRVHHXQFDEOHGHFRQH[LyQDWLHUUDFRQ
un enchufe a tierra. El enchufe se deberá conectar
en un tomacorriente instalado y conectado a tierra de
forma adecuada.
Consulte a un electricista calificado o al personal del
servicio técnico en caso de que las INSTRUCCIONES
DE CONEXIÓN A TIERRA no se entiendan
completamente o si tiene dudas sobre si el
electrodoméstico está conectado a tierra de forma
apropiada.
En caso de contar con un tomacorriente de pared
estándar de 2 cables, es su responsabilidad y
obligación reemplazarlo por un tomacorriente de pared
de 3 cables correctamente conectado a tierra.
Bajo ninguna circunstancia corte o elimine el tercer
cable (tierra) del cable de corriente.
No use un prolongador. Si el cable de corriente
es demasiado corto, solicítele a un electricista o a
personal del servicio técnico calificado la instalación
de un tomacorriente cerca del electrodoméstico.
Para un mejor funcionamiento, conecte este
electrodoméstico en su tomacorriente eléctrico a fin de
HYLWDUSDUSDGHRVGHODVOXFHVH[SORVLyQGHOIXVLEOHR
desactivación del disyuntor.
Asegúrese de contar
FRQXQDFRQH[LyQD
tierra adecuada antes
de usar.

8 49-2000417 Rev. 0
Familiarícese con Advantium
¿Qué es Advantium?
El horno Advantium utiliza tecnologíaavanzada de Cocimiento
rápido paraaprovechar la energía de la luz. Elhorno Advantium
FRFLQDHOH[WHULRUGHORVDOLPHQWRVPX\SDUHFLGRDOFDORU
radiante convencional, al mismo tiempoen que penetra la
superficie para cocinar el interior simultáneamente. La luz
halógena es la fuente primariade energía, un sistema de
conveccióny un calentador de cerámica ayudan alcocimiento,
con un “refuerzo de microonda” agregado en algunos
algoritmosde cocimiento. Los alimentos se cocinan parejos y
rápido, al mismo tiempoen que retienen su humedad natural.
El horno Advantium es capaz de cocinar rápido, hornear con
convección, asar, tostar, calentar, fermentar y cocinar con
microonda. La función de cocimiento rápido es el mayor
beneficio del horno Advantium.
Para cocinar rápido no se requiere precalentar. Coloque los
alimentos en elhorno y comience a cocinar inmediatamente.
Se ahorra tiempo ya que noprecalienta y debido a que éste
cocinamás rápido.
ADVANTIUM: Familiarícese con Advantium
Inicio Rápido de Advantium
Cocción en el Microondas con el modo Express
6HOHFFLRQH([SUHVVV([SUHVVVHJXQGRVSDUD
iniciar un modo de cocción de microondas. El horno
se iniciará de inmediato. Se podrá agregar tiempo
presionando +30s o +1m.
• El tiempo de cocción inicial podrá ser modificado por
un tiempo de su preferencia de hasta 6 minutos. Esto
puede ser modificado en SETTINGS (Configuraciones).
El plato giratorio deberá
estar siempre en su
ubicación al usar el horno.
La bandeja de vidrio
transparente deberá estar
siempre en su ubicación al
cocinar en el microondas.
Configuración del Reloj
Presione el ícono para acceder a las configuraciones.
Esta función le permite configurar el reloj y especifica
cómo se mostrará la hora del día. Las opciones son un
reloj estándar de 12 horas con selecciones AM y PM o
de estilo militar de 24 horas.
Deslice las opciones hacia arriba y abajo para acceder a
todas las configuraciones
SETTINGS
LOCK CONTROL
SOUND
SET CLOCK
Wi-Fi & REMOTE ENABLE
12:30 PM

49-2000417 Rev. 0 9
Funciones del horno
ADVANTIUM: Funciones del Horno
1. Plato Giratorio
Para todos los tipos de cocimiento el plato giratorio siempre
debe estar en su lugar, en el piso del horno. Asegúresede
que esté colocado seguro sobre eleje en el centro del horno
con el lado que posee la marca mirando hacia arriba.
2. Bandeja de Metal o Bandeja de Metal para Asar
Al cocinar rápido, asar y tostar coloque los alimentos
directamente en la bandeja de metal o bandeja de metal
para asar y coloque el plato giratorio.
3. Parrilla de Alambre del Horno
Al hornear con convección o en dos niveles coloque los
alimentos directamente en la bandeja de metal o plato
seguro para elhorno sobre la parilla de alambre del horno.
4. Bandeja de Vidrio Claro
Coloque el plato giratorio cuando utilice las funciones de
microonda. Coloque los alimentos o el recipiente seguro
paramicroondas directamente en la bandeja.
5. Lámpara halógena superior / Calentador de cerámica
Al cocinar rápido, asar y tostar, lámpara halógena y
calentador cerámico de 1200” cocinan losalimentos.
6. Ventana
Permite ver el cocmiento, al mismo tiempo en que mantiene
confinadas las microondas adentro del horno.
7. Manilleta de la Puerta
Hale para abrir la puerta.
8. Aldabas de la Puerta
Para que el horno funcione la puerta debe estar cerrada con
la aldaba.
9. Calentador de Cerámica Inferior
Un calentador de cerámica de 500W cocina los alimentos
por la parte deabajo, al cocinar rápido, asar otostar.
10. Panel de Control
Las teclas utilizadas para operar elhorno están ubicadas
en el panel decontrol.
11. Sistema de Convección Trasera
Un elemento de cocción cocina la comida con un
ventilador de convección que hace circular el aire caliente
a través de la cavidad en Precision Cook (Cocción de
Precisión), asar, hornear por convección, dorar y calentar.
A través de este manual, las características y apariencia pueden variar de las de su modelo.
1
5
6 8
9
11
10
7
2
3
4

10 49-2000417 Rev. 0
Controles
ADVANTIUM: Controles
Con su horno advantium usted podrá cocinar con luces halógenas de altaintensidad, calentadores de cerámica,
elemento de calentamiento de convección y/o con energía de microonda convencional.
Express
Seleccione esta función para iniciar un modo de cocción de
microondas. El horno se iniciará de inmediato. Se podrá agregar
tiempo presionando +30s o +1m. El tiempo de cocción inicial podrá ser
modificado por un tiempo de su preferencia de hasta 6 minutos. Esto
podrá ser modificado en Settings (Configuraciones).
Microondas
Realice la selección para acceder a los modos de cocción sólo de
microondas. Estas funciones incluyen Beverage (Bebida), Cook by
Food Type (Cocción por Tipo de Comida), Cook by Time (Cocción por
Tiempo), Defrost (Descongelar), Popcorn (Palomitas de Maíz), Reheat
5HFDOHQWDU6ORZ&RRN&RFFLyQ/HQWD6RIWHQ0HOW$EODQGDU
Derretir), y Steam Cook (Cocción al Vapor).
Horno
Seleccione esta función para acceder a Broil (Asar), Convection Bake
(Hornear por Convección), Proof (Leudar), Toast (Dorar), y Warm
(Calentar).
Cocción de Precisión
Precision Cooking (Cocción de Precisión) consta de una serie de
ciclos de cocción que fueron diseñados para comidas específicas.
La pantalla lo guiará a través de la configuración del horno y de la
comida de forma apropiada para el ciclo seleccionado. También
está disponible una opción para configurar los tiempos de cocción
personalizados y los niveles de potencia.
Recetas
Esta opción le permite acceder a recetas configuradas previamente
para ciertas comidas. Las recetas nuevas podrán ser ingresadas y
seguidas a través de la Aplicación Café, una vez que su teléfono esté
conectado. Para acceder a instrucciones sobre cómo conectar su
WHOpIRQRFRQVXOWHODVHFFLyQ:L)L&RQQHFW
Limpieza al Vapor
Esta función creará calor y vapor para aflojar la suciedad en el horno.
Una vez finalizado el ciclo, limpie la cavidad del horno con una toalla
de papel o de tela.
Luz del Horno
Para encender o apagar las luces de la cavidad del horno presione .
Configuraciones
Presione para acceder a Settings (Configuraciones).
Para más información, consulte la sección de Configuraciones.
Favoritos
Esta opción le permite al usuario guardar sus ciclos favoritos para un
fácil acceso en el futuro. Luego de seleccionar un modo de cocción
y de configurar la temperatura y un temporizador, presione
para
guardar dicha configuración como favorita para uso futuro. Luego
de guardar un ciclo, presione en el menú principal para acceder
rápidamente al modo guardado. El último ciclo de cocción está
disponible en la sección de favoritos.
Temporizador de la Cocina
Esta función actúa como un temporizador con cuenta regresiva.
Presione
, seleccione la cantidad de tiempo que desee que el
temporizador funcione, y presione Start (Iniciar). El horno continuará
funcionando cuando la cuenta regresiva del temporizador se haya
completado. Para apagar el temporizador, seleccione
y presione
CANCEL TIMER (temporizador de cancelación).
Tiempo de Cocción
Esta función realiza una cuenta regresiva del tiempo de cocción y
apaga el horno cuando el tiempo de cocción es completado. Presione
durante un ciclo, seleccione la cantidad de tiempo de cocción, y
presione Start (Iniciar).
Tiempo de Retraso
Esta función retrasa el tiempo de inicio de un ciclo del horno. Use esta
función para configurar el momento en que desea que el horno se
inicie. Seleccione un ciclo, y luego presione
. Seleccione la hora del
día en que desea que el horno se encienda y presione Start (Iniciar).
Si lo desea, también puede ser programado un tiempo de cocción.
Precision
Cooking
Express
30s
Microwave Oven
Steam
Clean
Recipes
12:30 PM

49-2000417 Rev. 0 11
Cocción de Precisión
COCCIÓN DE PRECISIÓN
ADVERTENCIA
Cuando utilice los programas de cocción rápida, recuerde que el horno,
compuerta y los platos se ¡encontrarán muy calientes!
Nivel de Potencia de la Cocción de Precisión
El Advantium utiliza energía de las lámparas halógenas de alta
intensidad, delcalentador de cerámica, del sistema deconvección y
de microondas para cocinar simultáneamente los alimentos porarriba,
abajo y en el interior, y sellar lahumedad y el sabor.
Cuando utilice el menú predeterminado dealimentos, los niveles de
potencia yaestán seleccionados para usted. Sin embargo, estos se
pueden ajustar al utilizar el menú predeterminado de alimentosy
COCCIÓN COMÚN CON SPEEDCOOK.
Cada nivel de potencia le ofrece energíade la lámpara halógena o del
calentadorde cerámica y de microonda durante cierto porcentaje de
tiempo o le ofrece calentamiento para el sistema de convección.
Por ejemplo:
U–07 l ámpara halógena superior y calentador de cerámica
encendida el 70% del tiempo.
L–07 Calentador de cerámica inferiorencendido el 70% del tiempo.
M–05 Microonda encendido el 50% del tiempo.
NOTA: Tenga cuidado al ajustar los niveles de potencia de manera
que no cocinelos alimentos demasiado o muy poco.
Siga estas guías generales cuando seleccione los mejores ajustes de
U=, L=, y M= para sus Recetas Favorita.
U = Seleccione un ajuste más alto paraalimentos delgados que
requierenun café dorado en la parte de arriba(por ejemplo:
filetes de pescado, tostadas, pechugas de pollo deshuesadas).
Seleccione un ajuste más bajopara alimentos gruesos o con
muchocontenido de azúcar o grasa (porejemplo: muffins,
rostizados, cacerolas) o que requieran un tiempo decocimiento
más largo.
L = Seleccione un ajuste más alto paraalimentos gruesos o densos
que norequieren un cocimiento rápido en elcentro (por ejemplo:
steaks, cacerolas). Seleccione un ajuste más bajopara alimentos
delgados (por ejemplo:galletas).
M = Seleccione un ajuste más alto paraacortar el tiempo de cocimiento
para alimentos densos o pesados (porejemplo: cacerolas, pollos
enteros). Seleccione un ajuste más bajo para alimentos delicados
(por ejemplo:panes) o alimentos que requierenun período de
cocimiento más largopara obtener resultados suaves (por ejemplo:
steaks, carne
Custom
PRECISION COOKING
Crisp
Reheat
FrozenFresh
12:30 PM
Consejos de cocción
Para asegurar un dorado uniforme y constante cuando cocine los
alimentos directamente en la bandeja de metal, coloque los alimentos
como se indica a continuación.
Los alimentos pueden tocarse pero no deben estar
montados unos sobre otros.
La carne, pollo, pescado o mariscos frescos que están
congelados deben descongelarse antesde cocinarlos. (Puede
utilizar la función de descongelación del microonda). Siga las
instruccionesdel paquete para otros alimentos congelados empacados.
Uso de las Funciones de Cocción de Precisión
Ŷ(OKRUQRVHGHWHQGUiVLDEUHODSXHUWDGXUDQWHHOFRFLPLHQWR\
aparecerá PAUSE enla pantalla. Para reanudar el cocimiento cierre
la puerte y presione START/PAUSE.
Ŷ6HOHFFLRQH(',7SDUDFDPELDUHOWLHPSRRORVQLYHOHVGH
potencia en cualquier momento durante el cocimiento.
Ŷ6HSURGXFHKXPRDOFRFLQDUUiSLGRFDUQHVHQHOKRUQR
Ŷ3DUDFRFLQDUXQWLHPSRDGLFLRQDOGHVSXpVGHTXHWHUPLQyHOFLFORGH
cocimiento, utilice lafunción para Reanudar, como se le indica enla
pantalla.
Patrón circular
(Ejemplo: biscochos, galletas)
Patrón radial
(Ejemplo: rollitos de
media luna [crescent])
Capa sencilla
(Ejemplo: aperitivos)
Patrón de lado a lado
(Ejemplo: carnes y aves)
El plato giratorio debe estar colocadoen
su lugar siempre que utiliza el horno.
Para cocinar ràpido coloque los alimentos
directamente en la bandeja de metal para asar.

12 49-2000417 Rev. 0
Cocción de Precisión
Utensilios para la Cocción de Precisión
Ŷ 6LJDODVVXJHUHQFLDVSDUDXWHQVLOLRVGHFRFLQDHQOD
pantalla del horno o en el Libro de Cocción o la Guía de
Cocción.
Ŷ /RVUHFLSLHQWVVHFDOHQWDUiQ1HFHVLWDUiJXDQWHVSDUD
manipular los recipientes.
Ŷ &XDQGRFRFLQHFRORTXHORVDOLPHQWRVGLUHFWDPHQWHHQOD
bandeja de metal o en la bandeja de metal para asar, a
menos de que el horno le indique lo contrario.
Ŷ 8WLOLFHODEDQGHMDGHPHWDOGHODPLVPDPDQHUDHQTXH
utilizaría una pan para hornear baja o una bandeja para
hornear.
Ŷ $GHPDVGHORVXWHQVLOLRVVXPLQLVWUDGRVXVWHGSXHGHXWLOL]DU
platos de cacerolasque no sean de metal, platos para
tartasy otros recipientes seguros para el calor.Colóquelos
directamente en la bandejade metal.
Ŷ $VHJ~UHVHGHVHOHFFLRQDUXQWDPDxRTXHURWHIiFLOPHQWH
Ŷ &RORTXHODEDQGHMDGHPHWDORODEDQGHMDGHPHWDOSDUD
asar en el plato giratorio. Coloque el recipiente de vidrio o
cerámicaen la bandeja.
Ŷ &XDQGRFRFLQHUiSLGRQRXWLOLFHUHFLSLHQWHVQLFXELHUWDV
hechas de papel, plástico o aluminio.
COCCIÓN DE PRECISIÓN
Preconfigure el Menú de Cocción de Precisión
Ŷ(O$GYDQWLXP\DVHHQFXHQWUDSUHFRQILJXUDGRSDUDFRFLQDU
más de 175 platos populares. El menú preconfigurado ha
sido dividido en las categorías Fresh (Frescos) y Frozen
(Congelados), a fin de simplificar la navegación por las
comidas deseadas.
Ŷ'pYXHOWDODFRPLGDVLHOKRUQRGDODVHxDO7851)22'
OVER (Dé Vuelta la Comida) (con ciertas comidas).
Ŷ&XDQGRHOKRUQRGpODVHxDO&+(&.)25'21(1(66
(Controle que la Comida Esté Preparada), controle si ya está
preparada a su gusto (para ciertas comidas).
Cocción en Velocidad Personalizada
(O$GYDQWLXPOHGDODIOH[LELOLGDGSDUDFRFLQDUVXVSODWRV
preferidos.
Si desea cocinar una comida que no se encuentra entre las
preseleccionadas, use la función Custom Precision Cook
(Cocción de Precisión Personalizada).
Para acceder a sugerencias sobre el nivel de potencia y el
tiempo de cocción, use su guía de cocción y las selecciones
del menú de preconfiguraciones de Precision Cook (Cocción
de Precisión).
Cocción de Precisión para el Recalentamiento Crocante
Ŷ(VWDIXQFLyQIXHGLVHxDGDSDUDUHFDOHQWDUUHVWRVGHFRPLGDV
que tienden a dejar de ser crocantes cuando se recalientan
en el microondas.
Ŷ'pYXHOWDODFRPLGDVLHOKRUQRGDODVHxDO7851)22'
OVER (Dé Vuelta la Comida) (con ciertas comidas).
Ŷ&XDQGRHOKRUQRGpODVHxDO&+(&.)25'21(1(66
(Controle que la Comida Esté Preparada), controle si ya está
preparada a su gusto (para ciertas comidas).
Baked
Goods
FRESH
Meats Potatoes Seafoods
Vegetables
Cuisines
12:30 PM
Baked
Goods
Chicken Cuisines
FROZEN
Breakfast
12:30 PM

49-2000417 Rev. 0 13
Lo que es normal
Tiempos de cocimiento
Ŷ $OFRFLQDUUiSLGRFRQHOPHQ~SUHGHWHUPLQDGRGHDOLPHQWRV
podrá ver en la pantalla OPTIMIZING COOK TIME
(optimizando el tiempo de cocimiento) varios segundos
después de presionar START/PAUSE. El horno detecta
automáticamente el nivel del voltaje eléctrico de su casa y
ajusta el tiempo de cocimiento hacia arriba o hacia abajo
para un cocimiento adecuado.
Ventiladores de Enfriamiento
Ŷ /RVYHQWLODGRUHVVHHQFHQGHUiQGXUDQWHHOFRFLPLHQWR$O
final, éstos continuarán durante un tiempo corto para enfriar
los componentes internos. Los ventiladores se apagarán
automáticamente cuando las piezas internas del horno
estén frías. Lapantalla mostrará.
Ŷ 0LHQWUDVHOKRUQRHVWpHQFHQGLGRHOUHVSLUDGRUHPLWLUiXQ
aire caliente.
Luces
Ŷ &XDQGRHOKRUQRHVWiHQFHQGLGRODOX]HVWDUiYLVLEOH
DOUHGHGRUGHODSXHUWDRGHODFDMDH[WHULRU
Ŷ /DVOXFHVKDOyJHQDVVHRSDFDUiQ\VHHQFHQGHUiQ\
apagarán durante el ciclo de cocimiento rápido, algunas
veces a niveles de potencia completa. Esto es normal. El
hornodetecta el nivel de calor y se ajusta automáticamente.
Calor del Horno
Ŷ /RVFLFORVGHFRFLPLHQWRUiSLGRQRUHTXLHUHQXQWLHPSR
de precalentamiento. El horno comienzaa cocinar
inmediatamente.
Ŷ /DSXHUWD\HOLQWHULRUGHOKRUQRHVWDUiQPX\FDOLHQWHV
Tenga cuidado al abrir la puerta y retirarlos alimentos.
Tenga cuidado del vapor quese puede salir alrededor de la
puerta.
Ŷ &XDQGRFRFLQHUiSLGRQRXWLOLFHUHFLSLHQWHVQLFXELHUWDV
hechas de papel, plástico o aluminio.
Ŷ &XDQGRFRFLQHSRUXQSHUtGRODUJRGHWLHPSRHOKRUQR
puede reducir automáticamente los niveles de potencia
para mantener el nivelapropiado de calor en el horno.
Sonidos
Ŷ (VQRUPDOHVFXFKDUGXUDQWHHOFRFLPLHQWRFKDVTXLGRV\HO
soplador del ventilador. El controlelectrónico enciende y
apaga los componentes.
Interferencia
Ŷ6HSXHGHREVHUYDULQWHUIHUHQFLDGH79UDGLRFXDQGRXWLOL]D
el microonda, similar a la interferencia causada por otros
aparatos pequeños.Esto no indica un problema con el
microonda.Mueva el radio o la TV lo más lejos posible
delmicroonda o revise la posición de la antena dela TV/radio.
Cocción de Precisión
COCCIÓN DE PRECISIÓN

14 49-2000417 Rev. 0
Hornear con Convección
HORNEAR CON CONVECCIÓN
Hornear con convección le permite cocinar los alimentos de la misma
manera que un horno convencional, utiliza un elemento para calentar
el aire adentro del horno. Se puede programar cualquier temperatura
entre 250ºF a 450ºF.
El ventilador circula suavemente el aire caliente a través del horno,
sobre y alrededor de los alimentos. Debido a que el aire caliente se
mantiene en constante movimiento, algunos alimentos se cocinan un
poco más rápido, a diferencia de los hornos de cocimiento regular.
Antes de comenzar, asegúrese que la parrilla de metal esté en
su lugar. Se pueden utilizar ambas parrillas en los dos niveles de
cocimiento.
Consejos de Cocimiento para Hornear con Convección
Ŷ(OWLHPSRPi[LPRGHFRFFLyQHVGHKRUDV
Ŷ$OFRFLQDUSURGXFWRVTXHHQWUDQGLUHFWDPHQWHVREUHXQDEDQGHMD
metálica, no coloque la bandeja en el horno mientras éste se está
precalentando. Coloque la comida directamente sobre la bandeja, y
coloque la bandeja metálica con comida en el plato giratorio una vez que
el horno se haya precalentado.
Ŷ$OFRFLQDUSURGXFWRVVREUHXQSODWR
que será apoyado en la bandeja
metálica, coloque esta última en el
horno durante el precalentamiento
para un rendimiento óptimo de la
cocción.
ADVERTENCIA
¡ Cuando hornee, recuerde que el horno, la puerta y losplatos están
muy calientes.
El plato giratorio siempre
deberá estar en su
ubicación al usar el horno.
Coloque la comida directamente
sobre la bandeja metálica para
hornear, calentar o dorar por
convección.
Para hornear en dos niveles, coloque la comida en un plato metálico para
hornear o directamente sobre la bandeja de metal no adherente. Coloque la
bandeja de aluminio para hornear o su plato para hornear con comida sobre
el estante de rejilla. Coloque el estante con comida sobre la bandeja metálica.
Asar y Tostar
Asar y tostar utilizan las lámparas superiores, el calentador inferior y
el sistema de convección, para asar o tostar los alimentos similar al
horno convencional.
Antes de comenzar asegúrese que el plato giratorio esté en su lugar.
Al tostar utilice la bandeja de metal y al asar utilice la bandeja de
metal o la bandejade metal para asar.
ADVERTENCIA
¡ Al asar o tostar, recuerde que el horno, la puerta y los platos estarán
muy calientes.
Cuando utilice el horno el
plato giratorio debeestar
siempre ensu lugar.
Coloque la comida directamente
sobre la bandeja metálica para
hornear, calentar o dorar por asar y
tostar.
Para hornear en dos niveles, coloque la comida en un plato
metálico para hornear o directamente sobre la bandeja de metal
no adherente. Coloque la bandeja de aluminio para hornear o su
plato para hornear con comida sobre el estante de rejilla. Coloque el
estante con comida sobre la bandeja metálica.
Consejos de cocimiento para asar
Ŷ/RVWLHPSRVGHDVDUSXHGHQVHUPiVFRUWRVHQHOKRUQR$GYDQWLXP
ya queutiliza lámparas halógenas. Asegúrese de monitorear de
cerca los alimentos para obtener los resultados deseados.
Ŷ3DUDPHMRUHVUHVXOWDGRVDODVDUFRORTXHORVDOLPHQWRVGLUHFWDPHQWH
en la bandeja de metal para asar.
Ŷ6HSURGXFHKXPRDODVDUFDUQHHQHOKRUQR
Ŷ6LSUHFDOLHQWDHOKRUQRSDUDDVDUFDUQHSUHFDOLHQWHFRQODEDQGHMD
de metal para asar en el horno y para una mejor brasa en la carne
colóquela sobre la bandeja caliente.
Ŷ/DPD\RUtDGHODVFRPLGDVVHGHEHUtDQGDUYXHOWDHQODPLWDGGHO
tiempo al asar las mismas. Las comidas densas con mucha carne o
trozos de pollo con huesos se deberían dar vuelta a los ¾ de tiempo
durante el tiempo de asado.
Ŷ5HWLUHODVSLH]DVPiVILQDVSDUDHYLWDUTXHVHFRFLQHQGHPDVLDGR\
que se sequen.
Consejos de cocimiento para tostar
Ŷ8WLOLFHODEDQGHMDGHPHWDOSDUDPHMRUHVUHVXOWDGRVDOWRVWDU
Ŷ/DPD\RUtDGHODVFRPLGDVVHGHEHUtDQGDUYXHOWDDORVGHO
tiempo de cocción al asar cuando no se esté precalentando.
Ŷ$OXVDUODRSFLyQGHSUHFDOHQWDPLHQWRGpYXHOWDODFRPLGDDODPLWDG
del tiempo de cocción.
Ŷ3DUDTXHHOH[WHULRUTXHGHFURFDQWH\TXHVHPDQWHQJDODKXPHGDG
interior de las comidas, precaliente el horno.
Ŷ7RFULVSH[WHULRUDQGFULVSWKHLQVLGHWRRGRQRWSUHKHDWWKHRYHQ
Ŷ7XHVWHODVSLH]DVPiVJUXHVDVSRUPiVWLHPSRODVSLH]DVGHOJDGDV
menos tiempo.

49-2000417 Rev. 0 15
Calentar y Fermentar
CALENTAR Y FERMENTAR
Calentar
La función WARM mantendrá calientelas comidas cocinadas
a temperaturas de servicio. Siempre comience con la comida
caliente. Utilice recipientes y utensilios que puedan soportar
temperaturas hasta 230ºF.
Ŷ 6HOHFFLRQHODWHPSHUDWXUDGHOKRUQR&RQVXOWHHOFXDGUR\ORV
consejos.
BAJO 140–160°F
MEDIO 160–195°F
ALTO 195–230°F
Para que los Ítems Duros Queden Crocantes:
Ŷ&RORTXHODFRPLGDRORVSODWRVGLUHFWDPHQWHVREUHODEDQGHMD
metálica negra.
Ŷ3UHFDOLHQWHHQODFRQILJXUDFLyQ/2:%DMR\VHOHFFLRQH&5,63
(Crocante).
Ŷ&RQWUROHVLHVWiFURFDQWHOXHJRGHPLQXWRV$JUHJXHWLHPSR
según sea necesario.
Consejos para alimentos crujientes:
Ŷ 1RFXEUDORVDOLPHQWRV
Ŷ 1RXWLOLFHUHFLSLHQWHVSOiVWLFRVQLHQYROWRULRVSOiVWLFRV
Ŷ 1RHVQHFHVDULRSUHFDOHQWDUDPHQRVTXHGHVHHKDFHU
crujiente alimentos viejos. (Vea Hacer crujiente los
alimentos viejos))
Consejos para alimentos húmedos:
Ŷ &XEUDORVDOLPHQWRVFRQXQDWDSDRFRQSDSHOGHDOXPLQLR
Ŷ 1RXWLOLFHUHFLSLHQWHVSOiVWLFRVQLHQYROWRULRVSOiVWLFRV
Ŷ 1RHVQHFHVDULRSUHFDOHQWDU
Fermentar
La función para fermentar suministra automáticamente la
temperatura apropiada para el proceso de fermentación,por lo
tanto, no necesita ajustar la temperatura.
NOTAS:
Ŷ 1RXWLOLFHHOPRGRGHIHUPHQWDFLyQSDUDFDOHQWDUDOLPHQWRV
o para mantener caliente la comida. La temperatura
de fermentación no es lo suficientemente caliente para
mantener la comida a temperaturas seguras. Utilice la
función WARM para mantener la comida caliente.
Ŷ /DIXQFLyQGHIHUPHQWDFLyQQRRSHUDUiVLHOKRUQRHVWi
demasiado caliente. Permita que el horno se enfríe antes
de fermentar.
Cuando utilice el horno el plato
giratorio debe estar siempre en
su lugar.
Cuando utilice el horno el plato
giratorio debe estar siempre en
su lugar.
Coloque la comida directamente
en la bandeja metálica para
calentar.
Para fermentar coloque la masa
en un tazón/pana para pan y
colóquela en la bandeja de metal.
Tipo de Comida Configuración
del Control
Ajuste de
Humedad
Pan, panes
crocantes
MEDIA Crujiente
Pan, panes blandos
MEDIA Húmedo
Cacerolas
MEDIA Húmedo
Comidas fritas
ALTA Crujiente
Carnes* y pescado
MEDIA Crujiente
Panqueques,
ZDIIOHV
ALTA Crujiente
Pizza
ALTA Crujiente
Papas, horneadas
ALTA Crujiente
Papas, pisadas
MEDIA Húmedo
Ave
ALTA Húmedo
Tortilla de Papas
BAJA Crujiente
Verduras
MEDIA Húmedo
* USDA/FSIS recomienda una temperatura interior de 145º F (62º C)
como mínimo para un bife. Use un termómetro portátil para carne a
fin de controlar las temperaturas interiores.
Cuadro de Selección de Temperatura y Humedad

16 49-2000417 Rev. 0
Cocción por microondas
Asegúrese de que el plato giratorio esté en su lugar con el lado que
posee la marca “TOP” (Parte Superior) hacia arriba.
Utilice la bandeja de vidrio claro.Coloque los alimentos o el recipiente
para microondas directamente en la bandeja devidrio claro, para
cocinar los alimentos.
Cuando utilice el horno el plato
giratorio debe estar siempre en
su lugar.
Cuando cocine en el microondas
la bandejade vidrio claro siempre
debe estaren su lugar.
SELECCIONES PREDETERMINADAS PARA EL MICROONDAS
Recipientes de cocimiento
Ŷ$VHJ~UHVHTXHWRGRVORVUHFLSLHQWHVVHDQDGHFXDGRVSDUDFRFLQDU
en microondas.
Ŷ&RORTXHODFRPLGDRHOHQYDVHSDUDFRFFLyQFRQHOPLFURRQGDV
directamente en la bandeja de vidrio transparente para cocinar su comida.
COCCIÓN POR MICROONDAS
Beverage
MICROWAVE
Cook By
Time
Defrost Popcorn Reheat
Cook By
Food Type
12:30 PM
Slow Cook
MICROWAVE
Steam
Cook
Soften/Melt
12:30 PM
Selecciones de Cocción Automática con
Ŷ%HELGD
– Agua (8 a 12 onzas)
– Café (8 a 12 onzas)
– Té (8 a 12 onzas)
– Leche (8 a 12 onzas)
– Cacao Caliente (8 a 12
onzas)
Ŷ&RFFLyQSRU7LSRGH
Comida
Ŷ&RFFLyQSRUWLHPSR
Ŷ'HVFRQJHODU
– 1.0 libra Rápido
– Por Tiempo
– Por Peso
– Por Tipo de Comida
Ŷ3DORPLWDVGH0Dt]
Ŷ5HFDOHQWDU
– Cazuela
– Pollo
– Pasta
– Pizza
– Plato de Comida
– Arroz
– Sopa
– Bifes/ Chuletas
– Verduras
Ŷ$EODQGDU'HUUHWLU
– Manteca
– Caramelo
±4XHVR
– Trozos de Chocolate
±4XHVR&UHPD
– Congelación (16
onzas)
– Helado
– Malvavisco
Ŷ&RFFLyQDO9DSRU
Express
Ŷ6HOHFFLRQH([SUHVVV([SUHVVVHJXQGRVSDUDLQLFLDU
un modo de cocción de microondas. El horno se iniciará de
inmediato. Se podrá agregar tiempo presionando +30s o
+1m.
Ŷ(OWLHPSRGHFRFFLyQLQLFLDOSRGUiVHUPRGLILFDGRSRUXQ
tiempo de su preferencia de hasta 6 minutos. Esto puede ser
modificado en SETTINGS (Configuraciones).
Consejos de Cocción
Ŷ$OFRFLQDUWRFLQRFXEUDODVWLUDVHQXQSODWR&XEUDFDGDFDSDFRQ
una toalla de papel.
Ŷ$OFRFLQDUYHUGXUDVXWLOLFHXQDFD]XHODRUHFLSLHQWHGHXVRVHJXUR
en el microondas. Cubra con una tapa o envoltorio de plástico
ventilado de uso seguro en el microondas.
Ŷ3DUDODVYHUGXUDVFRQJHODGDVVLJDODVLQVWUXFFLRQHVGHOSDTXHWH
para agregar agua.
Ŷ3DUDODVYHUGXUDVIUHVFDVDJUHJXHFXFKDUDGDVGHDJXDSRU
porción.
Nivel(es) de Potencia del Microondas
Usted puede modificar el nivel de potencia antes o durante un
programa de cocción.
Estos son algunos ejemplos de usos de diferentes niveles de potencia:
Alto 10: Pescado, tocino, verduras, líquidos en hervor.
0HGLR$OWR&RFFLyQVXDYHGHFDUQH\DYHFD]XHODVSDUDKRUQHDU\
recalentar.
Medio 5: Cocción lenta y ablandamiento para guisados y cortes de
carne menos tiernos.
Bajo 2 o 3: Descongelar; hervir a fuego lento; platos delicados.
Caliente 1: Mantener la comida caliente; ablandar la manteca.

49-2000417 Rev. 0 17
COCCIÓN POR MICROONDAS
Cocción por microondas
Descongelar por Tipo de Comida
La descongelación por tipo de comida configura
automáticamente los tiempos de descongelación
y niveles de potencia en base a la selección del
árbol de menús para producir resultados parejos de
descongelación con diferentes tipos de comidas, aves y
pescados que pesen hasta 6 libras.
DEFROST BY TIME (Descongelar por tiempo) le permite
al usuario configurar el tiempo de descongelación. El
nivel de potencia por omisión es 3.
DEFROST BY WEIGHT (Descongelación por
Peso) configura automáticamente los tiempos de
descongelación y los niveles de potencia en base al
peso ingresado y hasta 6 libras.
Ŷ'pYXHOWDODFRPLGDFXDQGRHOKRUQRGpODVHxDO
TURN FOOD OVER (Dé Vuelta la Comida).
Ŷ5HWLUHODFDUQHGHVFRQJHODGDRFXEUDODVSDUWHV
calientes con trozos pequeños de papel de aluminio
para una descongelación pareja.
Ŷ/XHJRGHGHVFRQJHODUODPD\RUtDGHODVFDUQHV
necesitan reposar durante 5 minutos para completar
la descongelación. Al asar trozos grandes, estos se
deberán dejar reposar por unos 30 minutos.
Guía de Conversión
6LHOSHVRGHODFRPLGDVHH[SUHVDHQOLEUDV\RQ]DVODV
onzas se deberán convertir a décimas (.1) de una libra
Weight of Food
in Ounces
Enter Food Weight
(tenths of a pound)
.1
3.2
.3
.4
8.5
.6
11 .7
.8
.9
Consejos para la Descongelación
Use DEFROST BY FOOD TYPE (Descongelar por
Tipo de Comida) para carnes, aves y pescado. Use
DEFROST BY TIME (Descongelación por Tiempo) para
la mayoría de las demás comidas congeladas.
Ŷ/DVFRPLGDVFRQJHODGDVHQSDSHORSOiVWLFRVH
podrán descongelar en el paquete al usar DEFROST
BY TIME (Descongelar por Tiempo). Las comidas se
deberán retirar el paquete al usar DEFROST BY FOOD
TYPE (Descongelar por Tipo de Comida). Los paquetes
cerrados se deberán cortar, perforar o ventilar luego
de que la comida se haya descongelado parcialmente.
Los envases de plástico se deberán destapar de forma
parcial.
Ŷ/DVFRPLGDVGHWDPDxRIDPLOLDUSUHHPSDTXHWDGDV\
congeladas se podrán descongelar y cocinar en el horno
microondas. Si la comida se encuentra en un envase de
papel de aluminio, traslade la misma a un plato para uso
seguro en el horno microondas.
Ŷ/DVFRPLGDVTXHVHHFKDQDSHUGHUFRQIDFLOLGDGQR
se deberán dejar reposar por más de una hora luego de
la descongelación. La temperatura ambiente estimula el
desarrollo de bacterias nocivas.
Ŷ3DUDXQDGHVFRQJHODFLyQPiVSDUHMDGHFRPLGDVPiV
grandes, tales como comidas asadas, use DEFROST
BY TIME (Descongelar por Tiempo). Asegúrese de que
las carnes grandes estén totalmente descongeladas
antes de realizar la cocción.
Ŷ8QDYH]GHVFRQJHODGDODFRPLGDGHEHUiHVWDUIUtD
pero ablandada en todas las áreas. Si aún está un poco
congelada, vuelva a colocarla en el horno microondas
muy brevemente, o deje reposar la misma por unos
pocos minutos.
Ŷ$OGHVFRQJHODURPiVOLEUDVGHFDUQHSLFDGDRHQ
cubos, retire las partes descongeladas al escuchar las
señales intermitentes.

18 49-2000417 Rev. 0
Cocción por microondas
COCCIÓN POR MICROONDAS
Cocción de microondas por sensor
Los recipientes y tapas o cubiertas apropiadas son esenciales
para obtener los mejores resultados con la cocción por sensor.
Ŷ8WLOLFHVLHPSUHUHFLSLHQWHVDGHFXDGRVSDUDPLFURRQGDV\
cúbralos con tapas o envoltura plástica ventilada. Nunca
utilice recipientes de plástico con sellado ajustado ya que
pueden prevenir que el vapor escape ocasionando que se
sobrecocinen los alimentos.
Ŷ$VHJ~UHVHGHTXHHOH[WHULRUGHORVUHFLSLHQWHVGHFRFLQD\
el interior del horno se encuentren secos antes de colocar
los alimentos en el horno. Las gotas de humedad que se
convierten en vapor pueden dar lecturas incorrectas al
sensor.
Ŷ/DVEHELGDVVHFDOLHQWDQPHMRUGHVFXELHUWDV
Cocción por sensor
La modalidad de microondas Avantium tiene la función
de cocción por sensor. El horno detecta automáticamente
cuándo están cocinados los alimentos y se apaga solo,
eliminando la necesidad de programar tiempos de cocción
y niveles de potencia. El horno ajusta el tiempo de cocción
automáticamente a los diferentes tipos y cantidades de
comida.
No abra la compuerta del horno hasta que el tiempo se
encuentre en conteo regresivo en la pantalla. Si la compuerta
se encuentra abierta, ciérrela y apriete START/PAUSE
(INICIAR/PAUSAR) inmediatamente. Si los alimentos aún no
se encuentran lo suficientemente cocinados, utilice la función
Cook BY Time (COCCIÓN POR TIEMPO) en el selector de
microondas para cocinar por más tiempo.
NOTA: No utilice las funciones de sensor dos veces en
sucesión en la misma porción de comida ya que puede
dar como resultado comida severamente sobrecocinada o
quemada. Si el alimento no se cocina completamente después
del primer conteo regresivo, utilice la función de COOK BY
TIME (COCINAR POR TIEMPO) para permitir tiempo de
cocción adicional.
Ŷ 6LKDHVWDGRXWLOL]DQGRODIXQFLyQGHFRFFLyQUiSLGD\HO
horno se encuentra caliente, esto puede ser una indicación
de que está demasiado caliente como para cocinar por
sensor. Por supuesto, siempre puede proceder a cocinar
con la función COOK BY TIME (COCCIÓN POR TIEMPO)
o Cocción rápida.
NOTA: Si el horno se encuentra demasiado caliente, cambiará
automáticamente a cocción por tiempo.
Ŷ 3DUDGLVPLQXLURDXPHQWDUHOWLHPSRGHFRFFLyQHVSHUH
hasta que se muestre el conteo de tiempo regresivo en la
pantalla. Luego gire el dial para añadir o restar tiempo.
Ŷ 6LDEUHODFRPSXHUWDPLHQWUDVVHHQFXHQWUDXWLOL]DQGR
la función SENSOR Cooking (Cocción por SENSOR),
aparecerá el mensaje SENSOR ERROR (ERROR DE
SENSOR). Cierre la compuerta y apriete el botón START/
PAUSE (INICIAR/PAUSAR) para comenzar nuevamente.
Notas sobre el programa de Recalentamiento:
Los alimentos recalentados podrían tener amplias variaciones
de temperatura. Algunas áreas se pueden encontrar
H[WUHPDGDPHQWHFDOLHQWHV
Es mejor utilizar la función Cook BY Time (Cocción por tiempo)
y no Recalentar estos alimentos:
Ŷ 3URGXFWRVGHSDQ
Ŷ /RVDOLPHQWRVTXHGHEHQUHFDOHQWDUVHFXELHUWRV
Ŷ /RVDOLPHQWRVTXHQHFHVLWDQUHYROYHUVHRYROWHDUVH
Ŷ /RVDOLPHQWRVTXHQHFHVLWDQWHQHUXQDVSHFWRVHFRR
superficie crujiente después del recalentamiento.
PROGRAMAS DE SENSOR PARA COCCIÓN POR
MICROONDAS:
Ŷ&DUQHPROLGD
Ŷ3DORPLWDVGHPDt]±3DORPLWDVGHPDt]SDUD
microondas preempacadas, de 3,0 onzas. a
3,5 onzas.
Ŷ6RSD
Ŷ$UUR]
Ŷ9HUGXUDVHQODWDGDVIUHVFDVFRQJHODGDV
Ŷ5HFDOHQWDPLHQWRGHSROOR
Ŷ5HFDOHQWDPLHQWRGHSDVWD
Ŷ3ODWRGHUHFDOHQWDPLHQWRGHFRPLGD
Ŷ5HFDOHQWDPLHQWRGHVRSD
Ŷ5HFDOHQWDPLHQWRGHYHUGXUDV
Cubiertas
Ventiladas
Seque los platos de modo
que no den lecturas
incorrectas al sensor.

49-2000417 Rev. 0 19
COCCIÓN POR MICROONDAS
Cocción por microondas
Cosas que son Normales
Interferencia
Ŷ6HSRGUiQREVHUYDULQWHUIHUHQFLDVGH79UDGLR
mientras usa el horno microondas. De forma similar a
la interferencia causada por otros electrodomésticos
SHTXHxRVHVWRQRLQGLFDTXHH[LVWDXQSUREOHPDFRQ
el horno microondas. Mueva la radio o TV tan lejos
del horno microondas como sea posible, o controle la
posición de la antena de TV/radio.
Calor del Horno
Ŷ/RVXWHQVLOLRVGHFRFLQDVHSRGUiQFDOHQWDUGHELGR
al calor transferido por la comida que se calentó.
Será necesario usar guantes para horno al tomar el
utensilio de cocina.
Ŷ9DSRUTXHVDOHDOUHGHGRUGHODSXHUWD
Función de Cocción al Vapor
VAPOR POR TIEMPO o CON SENSOR
Para obtener mejores resultados, use un bol para vapor
o para fuego lento. Agregue 2 cucharas grandes de
agua al cocinar verduras al vapor.
SELECCIÓN DEL MENÚ PARA COCINAR AL
VAPOR CON SENSOR
Para obtener mejores resultados, use entre 1 y 4 tazas.
• Espárragos
• Repollitos de Bruselas
• Zanahorias
• Coliflor
• Papas
• Arroz
• Zapallo
• Zucchini
SELECCIÓN DEL MENÚ PARA COCINAR AL
VAPOR POR TIEMPO
SELECCIÓN DEL MENÚ PARA COCINAR AL
VAPOR POR TIEMPO (continúa)
Espárragos 1 Taza
2 Tazas
4 Tazas
Brócoli 1 Taza
2 Tazas
4 Tazas
Repollitos de Bruselas 1 Taza
2 Tazas
4 Tazas
Zanahorias 1 Taza
2 Tazas
4 Tazas
Coliflor 1 Taza
2 Tazas
4 Tazas
Pechuga de Pollo 1 Trozo 2Q]DV
2Q]DV
2 Trozos 2Q]DV
2Q]DV
Pescado 1 Trozo )LOHWH)LQR´
)LOHWH0HGLDQR´
)LOHWH$QFKR´
2 Trozos )LOHWH)LQR´
)LOHWH0HGLDQR´
)LOHWH$QFKR´
Frijoles Verdes 1 Taza
2 Tazas
4 Tazas
Papas 1 Taza
2 Tazas
4 Tazas
4XtQRD 1 Taza
Arroz 1 Taza
Vieiras Vieiras de la Bahía 2Q]DV
2Q]DV
Vieiras de Mar 2Q]DV
2Q]DV
Camarones 1/2 Libra
1 Libra
Calabacín 1 Taza
2 Tazas
4 Tazas
Zucchini 1 Taza
2 Tazas
4 Tazas

20 49-2000417 Rev. 0
Configuraciones
CONFIGURACIONES
6HUHTXLHUHHOXVRGHGLVSRVLWLYRV\GHXQDUHG:L)LKRJDUHxDTXHVHDQFRPSDWLEOHVFRQ$SSOHR$QGURLG
Deslice las opciones hacia arriba y abajo para acceder a todas las configuraciones
SETTINGS
LOCK CONTROL
SOUND
SET CLOCK
Wi-Fi & REMOTE ENABLE
12:30 PM
COOKING
SYSTEM
SETTINGS
SOUND
DISPLAY
12:30 PM
([LVWHQQXPHURVDVFRQILJXUDFLRQHVDODVFXDOHVVHDFFHGHSUHVLRQDQGR en la esquina superior derecha de la pantalla principal.
Configuración del Reloj
Esta función le permite configurar el reloj y especifica cómo la
KRUDGHOGtDVHUiH[KLELGD/DVRSFLRQHVVRQXQUHORMHVWiQGDU
de 12 horas con selecciones AM y PM o de estilo militar de 24
horas.
Control de Bloqueo
Seleccione esta opción a fin de bloquear el LCD desde
cualquier selección de pantalla no deseada. Para desbloquear
la pantalla, presione – y presione Unlock (Desbloquear) en la
siguiente pantalla.
Sonido
Esta pantalla de configuración le permite cambiar el volumen,
el tono de fin de ciclo, y encender o apagar el sonido táctil.
Pantalla
Esta pantalla muestra las opciones de brillo, reloj apagado,
ahorro de energía, y tiempo de inactividad de la pantalla. La
función de reloj apagado eliminará el reloj de la pantalla cuando
la misma se encuentre inactiva, pero será mostrado luego de
presionar sobre la pantalla. La pantalla puede ser configurada
para que nunca quede inactiva o puede ser configurada para
que se apague luego de 1, 5 o 10 minutos.
Cocción
Ŷ(OKRUQRHVWiFRQILJXUDGRHQJUDGRV)DKUHQKHLWVLQ
embargo, en esta configuración la unidad de cocción se
podrá cambiar a Celsius.
Ŷ/DIXQFLyQ$XWR5HFLSH&RQYHUVLRQ&RQYHUVLyQGH
Receta Automática) podrá ser activada a fin de reducir
automáticamente la temperatura de cocción programada para
Convection Bake (Hornear por Convección) o Convection
Bake Multi (Hornear por Convección Múltiple). Observe que
esto no reducirá la temperatura de cocción, ni el tiempo de
horneado.
Sistema
Esta pantalla le permite borrar sus datos de usuario guardados
\PRVWUDUODYHUVLyQDFWXDOGHVXVRIWZDUH
Wi-Fi y Acceso Remoto
Este electrodoméstico permite su configuración para un
funcionamiento remoto en cualquier momento. No guarde
materiales inflamables ni ítems sensibles a la temperatura
dentro o sobre este electrodoméstico. Al usar la función
:L)L&RQQHFWXVWHGSRGUiFRQWURODUIXQFLRQHVHVHQFLDOHV
de su horno tales como las configuraciones de temperatura,
temporizadores y modos de cocción, utilizando su teléfono
inteligente o tableta.*
6HOHFFLRQHHOOXHJR:L)L5HPRWH(QDEOH:L)L\$FFHVR
Remoto) – y siga las instrucciones de la pantalla del horno y de
ODDSOLFDFLyQGHVXWHOpIRQR(VQHFHVDULRDFWLYDUODIXQFLyQ:L
Fi antes de usar Remote Enable (Acceso Remoto) en su horno.
&RQH[LyQGHVXKRUQRFRQ$FFHVR$XWRUL]DGRDOD&RQH[LyQ
:L)L
1. Tenga preparado su teléfono inteligente o tableta con
la posibilidad de acceso a Internet y a la descarga de
aplicaciones.
8VWHGGHEHUiFRQRFHUODFRQWUDVHxDGHOHQUXWDGRU:L)LGH
su hogar. Tenga esta contraseña a mano mientras configura
su horno Café Appliances.
3. En su teléfono inteligente o tableta, visite cafeappliances.
com/connect para conocer más sobre las funciones del
electrodoméstico conectado y para descargar la aplicación
para conectarse a su horno.
4. Siga las instrucciones en pantalla de la aplicación para
conectarse a su horno Café Appliances. Una vez conectado,
su horno deberá mostrar que se encuentra conectado a la
UHGGH:L)LGHVXKRJDU
5. Si se producen inconvenientes para conectarse de
forma inalámbrica a su horno, por favor comuníquese
al 800.220.6899 y solicite asistencia en relación a la
conectividad inalámbrica de su horno.
Para conectar dispositivos inteligentes adicionales, repita los
pasos 3 y 4.
Inicio Remoto de su Advantium
Remote Enable ON/OFF (Encendido/ Apagado del Acceso
5HPRWRHVXQDVHOHFFLyQEDMRODVHOHFFLyQGHOPHQ~:L)L
Remote Enable (WiFi y Acceso Remoto)
Cuando Remote Enable (Acceso Remoto) esté en ON
(Encendido), el ícono – estará activado en la pantalla del hogar
y usted podrá iniciar un ciclo de cocción de Advantium desde
una fuente remota tal como una aplicación de Café Appliance
R9RLFH&RPPDQGVGH$PD]RQ$OH[DR*RRJOH$VVLVWDQW
Al iniciar un ciclo de cocción de precisión o de cocción en
el horno microondas, usted deberá haber abierto la puerta
del microondas dentro de los últimos 5 minutos. La finalidad
de la restricción de 5 minutos es asegurar que la comida se
encuentre en el microondas antes de iniciar el ciclo de cocción.
No hay una limitación de 5 minutos con los ciclos Oven/
Convection (Horno/ Convección).
Cuando la función Remote Enabled (Acceso Remoto) esté
en OFF (Apagada), usted aún podrá visualizar el estado de
la cocción desde su aplicación, podrá apagar los modos de
cocción, o podrá usar el temporizador y las funciones de
configuración desde su dispositivo inteligente. Con el acceso
remoto apagado, usted no podrá iniciar un ciclo de cocción en
un dispositivo inteligente.
Para desactivar todas las funciones de WiFi y retirar el
Advantium de la red de WiFi, seleccione la opción Disconnect
AND Forget WiFi (Desconectar Y Olvidar WiFi) bajo el menú
:L)L5HPRWH(QDEOHG:L)L\$FFHVR5HPRWR

49-2000417 Rev. 0 21
Otras funciones
OTRAS FUNCIONES
Ventiladores para Enfriar
Dos ventiladores para enfriar se encienden de forma
automática, de acuerdo con lo requerido para evitar el
sobrecalentamiento del control y los componentes internos del
horno.
Los ventiladores se apagarán de forma automática una vez
que las partes internas estén apagadas. Uno o ambos podrán
permanecer encendidos durante 30 minutos o más, una vez
apagado el control del horno
Cajón de Almacenamiento de Accesorios (en algunos modelos)
El cajón de almacenamiento de accesorios está diseñado
para sostener las bandejas de cocción y el estante rejilla para
horno provisto con el horno. El cajón de almacenamiento de
accesorios no deberá ser usado para guardar ropa, madera,
papel u otros productos combustibles.
Los contenidos del cajón se podrán calentar con el tacto
mientras el horno esté en uso y mientras el mismo se esté
enfriando. Tenga cuidado al retirar objetos en estos momentos.
Tiempo de Cocción Completado
Para recordarle que colocó comida en el horno, este último mostrará COMPLETED (Completado) y emitirá un pitido
una vez por minuto hasta que abra la puerta del horno o presione DONE (Finalizado).

22 49-2000417 Rev. 0
Cuidado y Limpieza
CUIDADO Y LIMPIEZA
Dentro del Horno y del Cajón de Almacenamiento de Accesorios (en algunos modelos)
Antes de limpiar cualquier parte delhorno asegúrese que el
control del horno esté apagado y que esté frío o tibio al tacto.
Limpie el interior del horno frecuentemente para que pueda
calentar adecuadamente.
Algunas salpicaduras pueden ser removidas con papel
toalla, otras requieren un paño tibio jabonoso.Remueva las
salpicaduras de grasacon un paño jabonoso, luego enjuague
con un paño húmedo.
Si observa un amarillentamiento enel metal adentro del horno
que no puede ser removido con un pañotibio jabonoso, utilice
XQOLPSLDGRUSDUDDFHURLQR[LGDEOHTXHUHPXHYHODGHFRORUDFLyQ
por calor y/o manchas.Puede limpiar el interior del horno como
lo haría normalmente.
No utilice limpiadores abrasivos niutensilios filosos en las
paredes delhorno o el cajón de almacenamiento de accesorios.
Nunca utilice limpiadores comerciales para hornos en
ninguna parte de su horno o el cajón de almacenamiento de
accesorios.
No limpie el interior del horno o el cajón de almacenamiento
de accesorios con estropajos de metal. Se pueden quebrar
pedazos del estropajo adentro del horno,causando un toque
eléctrico, así comodaño al acabado de la superficie interiordel
horno o el cajón de almacenamiento de accesorios.
Plato giratorio removible
El área debajo del plato giratorio debe limpiarse
frecuentemente para evitar oloros y humo durante el
ciclo de cocimiento.
El plato giratorio se puede quebrar si lodeja caer.
Lávelo con cuidado en aguatibia y jabonosa. Séquelo
bien y colóquelo en su lugar.
Para colocar el plato giratorio, coloque elcentro sobre
el eje en el centro del hornoy gírelo hasta que esté
colocado en sulugar. (Asegúrese de que el lado plano
del plato giratorio con la marca “TOP” (Parte Superior)
esté mirando hacia arriba y que su centro se apoye
sobre el perno.)
No utilice el horno sin el platogiratorio
en su lugar.
Plato giratorio
Limpieza al Vapor
Ŷ(VWDIXQFLyQFUHDUiFDORU\YDSRUSDUDDIORMDUODVXFLHGDGHQ
el horno. Para crear suficiente cantidad de calor, vierta media
taza de agua en un recipiente de uso seguro en el microondas.
Ŷ5HFXHUGHXVDUODEDQGHMDGHYLGULR8QDYH]ILQDOL]DGRHO
ciclo, limpie la cavidad del horno con una toalla de papel o de
tela.

49-2000417 Rev. 0 23
Fuera del Horno y del Cajón de Almacenamiento de Accesorios (en algunos modelos)
No recomendamos el uso de limpiadores con amoníaco o
alcohol, ya que pueden dañar la apariencia del horno or el
cajón de almacenamiento de accesorios. Si escoge utilizar
un limpiador casero común, aplique primero el limpiador
directamente en el pañode limpieza, luego limpie el área sucia.
Panel de Control, Puerta y Cajón de Vidrio
Limpie con una esponja limpia y húmeda. Seque totalmente.
No use espráis limpiadores, grandes cantidades de agua y
jabón, objetos abrasivos o puntiagudos sobre el panel, ya que
lo pueden dañar.
Sello de la Puerta
Es importante mantener limpia el área donde sella la puerta
con el horno. Utilice detergentes suaves, noabrasivos
aplicados con un paño o esponja. Enjuague bien.
Acero Inoxidable (en algunos modelos)
3DUDOLPSLDUODVXSHUILFLHGHDFHURLQR[LGDEOHXVHDJXDWLELD
FRQMDEyQRXQOLPSLDGRURSXOLGRUSDUDDFHURLQR[LGDEOH
Siempre limpie la superficie en la dirección del veteado. Siga
las instrucciones del limpiador para limpiar la superficie de
DFHURLQR[LGDEOH
Para consultar sobre la compra de limpiadores o pulidores para
HODUWHIDFWRGHDFHURLQR[LGDEOHRSDUDEXVFDUODXELFDFLyQGHO
vendedor minorista más cercano a su hogar, comuníquese al
número gratuito: 800.626.2005 o visite GEAppliances.com.
Bandejas de cocimiento y parrilla de alambre del horno
Para evitar que se quiebren, permitaque las bandejas se
enfríen completamente antes de limpiarlas. Lave concuidado
en agua caliente jabonosa oen la lavadora de platos.
No utilice abrasivos para limpiar la bandeja de vidrio ni la
parrilla de alambre delhorno, ya que se puede dañar el
acabado.
Se debe utilizar un estropajo plástico paralimpiar las bandejas
de metal.
Lámina de mica
Para limpiar la lámina de mica: Permitaque el horno se
enfríe completamente.Limpie con un paño tibio jabonoso.
Lámina de Mica
Cuidado y Limpieza
CUIDADO Y LIMPIEZA
Metal tray
Wire oven rack
Clear glass tray

24 49-2000417 Rev. 0
Consejos para la Solución de Problemas... Antes de solicitar el servicio
técnico
CONSEJOS PARA LA SOLUCIÓN DE PROBLEMAS
DECLARACIÓN DE INTERFERENCIA POR RADIOFRECUENCIA DE LA FEDERAL
COMMUNICATIONS COMMISSION (COMISIÓN FEDERAL DE COMUNICACIONES)
(EE.UU. ÚNICAMENTE)
Este equipo genera y utiliza energía de frecuencia ISM y si no
es instalado y usado de forma adecuada, estando en estricto
cumplimiento con las instrucciones del fabricante, podrá
generar interferencia en la recepción de radio y televisión. Fue
evaluado de forma específica y se comprobó que cumple con
los límites de Equipamientos ISM, de acuerdo con la parte
18 de las Normativas de la FCC, que fueron diseñadas para
brindar una instalación residencial.
Sin embargo, no se garantiza que no se presenten
interferencias en una instalación en particular. Si este
equipamiento genera interferencias en la recepción de
radio o televisión, lo que se puede comprobar encendiendo
y apagando el equipo, se aconseja al usuario que intente
corregir la interferencia a través de una de las siguientes
medidas:
Ŷ5HRULHQWHODDQWHQDUHFHSWRUDGHODUDGLRRHOWHOHYLVRU
Ŷ5HXELTXHHO+RUQR0LFURRQGDVHQUHODFLyQDOUHFHSWRU
Ŷ$OHMHHOKRUQRPLFURRQGDVGHOUHFHSWRU
Ŷ(QFKXIHHOKRUQRPLFURRQGDVHQXQWRPDFRUULHQWHGLIHUHQWH
de modo que el horno microondas y el receptor estén en
diferentes recepciones de códigos.
El fabricante no es responsable por ninguna interferencia
de radio o TV generada por modificaciones no autorizadas
sobre este horno microondas. Es responsabilidad del usuario
corregir tales interferencias.
Declaración de Conformidad del Proveedor
Información de Cumplimiento 47 CFR § 2.1077
Identificador Único: Microondas, CSB912 and CSB913
Componente Modular: Módulo de LAN inalámbrica
&RPSRQHQWH0RGXODU)&&,'&2):0%1%0$
Parte Responsable: GE Appliances
Appliance Park,
Louisville, KY 40225
cafeappliances.com
Declaración de Cumplimiento de la FCC: Este dispositivo
cumple con la parte 18 de las Normativas de la FFC.
Declaración de Cumplimiento de la FCC
: Este dispositivo
cumple con la Parte 15 de las Normativas de la FCC. Su
funcionamiento está sujeto a las dos condiciones siguientes:
(1) Este dispositivo no deberá causar interferencias nocivas
y (2) este dispositivo deberá aceptar cualquier interferencia
recibida, incluyendo interferencias que puedan generar un
funcionamiento no deseado.
NOTA: Este equipo ha sido probado y cumple con los
límites establecidos para un dispositivo digital de Clase B,
de acuerdo con la parte 15 de las Normativas de la FCC.
Estos límites han sido diseñados para ofrecer una protección
razonable contra interferencias perjudiciales en la instalación
residencial. Este equipo genera, usa y puede emitir energía
de radiofrecuencia y, si no se instala y utiliza de acuerdo
con las instrucciones, podrá ocasionar interferencias
perjudiciales para las comunicaciones de radio. Sin embargo,
no se garantiza que no se presenten interferencias en una
instalación en particular. Si el equipo provoca interferencias
perjudiciales para la recepción de radio o televisión, lo que
puede comprobar encendiendo y apagando el equipo, se
aconseja al usuario intentar corregir la interferencia a través
de una de las siguientes medidas:
Ŷ5HRULHQWHRUHXELTXHODDQWHQDUHFHSWRUD
Ŷ$XPHQWHODVHSDUDFLyQHQWUHHOHTXLSR\HOUHFHSWRU
Ŷ&RQHFWHHOHTXLSRDXQWRPDFRUULHQWHGHXQFLUFXLWR
diferente al que se encuentra conectado el receptor.
Ŷ3DUDVROLFLWDUD\XGDFRQVXOWHDOSURYHHGRUPLQRULVWDRDXQ
WpFQLFRH[SHULPHQWDGRGHUDGLR79
$ILQGHVDWLVIDFHUORVUHTXLVLWRVGHH[SRVLFLyQD5)GHOD
FCC, se deberá mantener una distancia de separación de 20
cm o más entre la antena de este dispositivo y las personas
durante el funcionamiento del mismo.
Para asegurar el cumplimiento, no se recomienda el
funcionamiento en una cercanía mayor.
ADVERTENCIA
Las modificaciones sobre esta
XQLGDGQRDSUREDGDVH[SUHVDPHQWHSRUODSDUWHUHVSRQVDEOH
del cumplimiento adecuado podrán anular la autoridad del
usuario a utilizar el equipo.

49-2000417 Rev. 0 25
Problema Causas posibles Qué hacer/Explicación
LUCES
Se opaca la luz durante un circlo de
cocimiento rapido y se enciende y
apaga, aún en niveles de potencio
completa.
Esto es normal. El nivel de potencia ha
sido reducido automáticamente ya que el
horno está caliente.
Esto es normal. El horno detecta el nivel de calor y
se ajusta automáticamente.
Luz visible alrededor de la puerta y
de la caja exterior al cocinar ráppido.
Esto es normal. Cuando el horno está encendido, hay una luz visible
DOUHGHGRUGHODSXHUWD\GHODFDMDH[WHULRU
VENTILADORES PARA ENFRIAR
El ventilador continúa funcionando
despué de terminar de cocinar.
El horno se está enfriando. El ventilador se apagará automáticamente cuando
las piezas internos del horno se hayan enfriado.
El respirador del horno emite un
aire caliente mientras el horno está
encendido.
Esto es normal.
El ventilador del respirador se
enciende automáticamente cuando
el horno no está en uso.
Esto es normal.
COCIMIENTO
El horno emite sonidos atípicos
mientras se está cocinando
Los sonidos de clic son normales. El
control está encendiendo y apagando los
componentes.
Estos sonidos son normales.
El sonido del ventilador es normal. La
función de los ventiladores es mantener
fríos los componentes y controles del
horno.
Estos sonidos son normales.
Sale humo del horno cuando se abre
la puerta.
La comida tiene alto contenido de grasa.
Se utilizó espray en las panas.
El humo es normal al cocinar comidas con mucha
grasa. Utilice aceite vegetal o de oliva en la carne,
en lugar de cubrir toda la pana.
Al final del programa de cocimento
la comida no está completamente
cocida ni dorada.
Los tiempos programados no cocnierdan
con el tamaño ni la cantidad de comida que
va a cocinar.
Ajuste el tiempo de finalización o ajuste las
lámparas superior e inferior para dorar y finalizar la
cocción.
Aparece SENSOR ERROR (Error
del Sensor) junto con una señal del
horno
La cantidad o el tipo de comida colocado
en el horno no coinciden con el programa
que fue configurado.
Presione la tecla CANCEL/ OFF (Borrar/ Apagar).
Configure el programa del horno para igualar la
comida y el líquido que se cocinarán o calentarán.
El sensor del horno no detectó el vapor
debido a que el envoltorio plástico no
estaba ventilado, una tapa del plato estaba
demasiado ajustada o un líquido estaba
cubierto.
Ventile los envoltorios plásticos, use una tapa floja o
destape los líquidos al cocinar o calentar.
PANTALLA
La pantalla está en blanco.
Esto es normal. La pantalla está programada para
apagarse durante el modo de espera.
(Ver la sección
del reloj)
Aparece en la pantalla El control está bloqueado. Presione y sostenga CANCEL/OFF “Control durante
3 segundos para desbloquear Funciones.
La pantalla de control está iluminada
pero el horno no se inicia
El reloj no está programado.
Siga las instrucciones para programar el reloj.
La puerta no está cerrada.
Abra la puerta y ciérrela segura.
No se presionó la tecla START/PAUSE
después de seleccionar el cocimiento.
Presione START/ PAUSE (Inicio/ Pausa).
Otra selección ya fue ingresada en el horno
y no se presionó la tecla CANCEL/ OFF
(Borrar/ Apagar) para cancelar la misma.
Presione CANCEL/ OFF (Borrar/ Apagar).
El tamaño, la cantidad o el tiempo de
cocción no fueron ingresados luego de la
selección final.
Asegúrese de haber ingresado el tiempo de cocción
luego de realizar la selección.
Se presionó accidentalmente CANCEL/OFF Reajuste el programa de cocimiento y presione
START/PAUSE.
OTROS PROBLEMAS
La puerta y el interior del horno se
sienten caliente.
Las lámparas de calentamiento producen
un calor intenso en un espacio pequeño.
Esto es normal.
Cuando la comida esté lista, utilice guantes para
retirarla.
El horno no arranca Se pudo haber quemado un fusible o
disparado el interruptor automático de su
casa.
Cambie el fusible o reajuste el interruptor automático.
Consejos para la Solución de Problemas... Antes de solicitar el servicio
técnico
CONSEJOS PARA LA SOLUCIÓN DE PROBLEMAS
¡Ahorre tiempo y dinero! Primero revise los cuadros que aparecen en las siguientes páginas y es posible que no necesite solicitar reparaciones.

26 49-2000417 Rev. 0
Notas
NOTAS

49-2000417 Rev. 0 27
Abroche su recibo aquí. Para acceder al servicio técnico de acuerdo con
la garantía deberá contar con la prueba de la fecha original de compra.
GARANTÍA LIMITADA
Garantía limitada de la estufa eléctrica Café
cafeappliances.com
Todo el servicio de garantía es provisto por nuestros Centros de Servicio de Fabricación, o un técnico de servicio autorizado. Para
programar una visita del servicio técnico a través de Internet, visítenos en cafeappliances.com/service. Tenga listo el número de
serie y número de modelo cuando programe el servicio.
Qué no cubrirá Café:
Ŷ
Viajes de reparación a su hogar para enseñarle cómo
usar el producto.
Ŷ
Instalación o entrega inapropiada, o mantenimiento
impropio.Si tiene un problema con la instalación,
comuníquese con su vendedor o instalador. Usted es
responsable de brindar instalaciones adecuadas de
conexión eléctrica, escape u otras instalaciones de
conexión.
Ŷ
Fallos del producto si hay abuso, mal uso (por
ejemplo, chispas dentro de horno microondas del
estante metálico/papel de aluminio), o uso para otros
propósitos que los propuestos, o si se usa con fines
comerciales.
Ŷ
Reemplazo de fusibles de su hogar o reajuste de los
diferenciales.
Ŷ
Daño al producto causado por accidente, fuego,
inundaciones o actos de Dios.
Ŷ
Daños sobre el acabado, tales como óxido sobre
la superficie, deslustres o manchas pequeñas no
informadas dentro de las 48 horas luego de la entrega.
Ŷ
Daño incidental o consecuencial a su propiedad
causado por posibles defectos con el aparato.
Ŷ
Causar daños después de la entrega.
Ŷ
Producto no accesible para brindar el servicio
requerido.
Ŷ
Servicio técnico para reparar o reemplazar las
lámparas, excepto las lámparas LE
D.
EXCLUSIÓN DE GARANTÍAS IMPLÍCITAS
6X~QLFD\H[FOXVLYDDOWHUQDWLYDHVODUHSDUDFLyQGHOSURGXFWRFRPRVHLQGLFDHQOD*DUDQWtD/LPLWDGD/DV
garantías implícitas, incluyendo garantías implícitas de comerciabilidad o conveniencia sobre un propósito
particular, se limitan a un año o al período más corto permitido por la ley.
(VWDJDUDQWtDOLPLWDGDVHH[WLHQGHDOFRPSUDGRURULJLQDO\DFXDOTXLHUSURSLHWDULRSRVWHULRUGHORVSURGXFWRV
comprados para uso doméstico dentro de EE. UU. Si el producto está en un área donde no se encuentra disponible
un Proveedor Autorizado del Servicio Técnico de Café, usted será responsable por el costo de un viaje o se podrá
requerir que traiga el producto a una ubicación del Servicio Técnico de Café autorizado para recibir el servicio.
(Q$ODVNDODJDUDQWtDOLPLWDGDH[FOX\HHOFRVWRGHHQYtRRYLVLWDVGHVHUYLFLRDVXGRPLFLOLR$OJXQRVHVWDGRVQR
SHUPLWHQODH[FOXVLyQROLPLWDFLyQGHGDxRVIRUWXLWRVRFRQVHFXHQWHV(VWDJDUDQWtDOLPLWDGDOHRWRUJDGHUHFKRV
legales específicos, y usted también podría tener otros derechos que varían de estado a estado. Para conocer cuáles
son sus derechos legales, consulte a la oficina de asuntos del consumidor local o estatal o al Fiscal de su estado.
Garante: GE Appliances, a Haier company
Louisville, KY 40225
Garantías Extendidas:$GTXLHUDXQDJDUDQWtDH[WHQGLGDGH&DIp\FRQR]FDORVGHVFXHQWRVHVSHFLDOHVTXHHVWiQ
disponibles mientras su garantía aún está vigente. Puede acceder a la misma a través de Internet en cualquier
momento en
cafeappliances.com/extended-warranty
Los Servicios para los Café aún estarán disponibles cuando su garantía caduque.
Por el Período de Café reemplazará
Un Año
Desde la fecha de la
compra original
Café elegirá reemplazar o realizar el servicio técnico sobre la unidad defectuosa. Si es necesario
el servicio técnico, GE Appliances brindará cualquier parte del horno microondas que falle debido a un
defecto en los materiales o la fabricación. Durante esta garantía limitada de un año, GE Appliances
también proveerá, sin costo, todo el trabajo y los costos del servicio relacionado con el reemplazo de la
parte que presente defectos en la unidad.
Cinco Años
Desde la fecha de
compra original
Café
elegirá reemplazar la unidad o reemplazar el tubo magnetrón, si éste falla debido a un
defecto en los materiales o la fabricación. Durante esta garantía limitada de cinco años, usted será
responsable por el costo de cualquier trabajo o reparación en el hogar.

28 49-2000417 Rev. 0
Soporte para el Consumidor
SOPORTE PARA EL CONSUMIDOR
Sitio Web de Café
¿Desea realizar una consulta o necesita ayuda con su electrodoméstico? ¡Intente a través del Sitio Web de Café las 24 horas
del día, cualquier día del año! Usted también puede comprar más electrodomésticos maravillosos de Café y aprovechar todos
nuestros servicios de soporte a través de Internet, diseñados para su conveniencia.
En EE.UU.: cafeappliances.com.
Registre su Electrodoméstico
¡Registre su electrodoméstico nuevo a través de Internet, según su conveniencia! Un registro puntual de su producto permitirá
una mejor comunicación y un servicio más puntual de acuerdo con los términos de su garantía, en caso de surgir la necesidad.
También puede enviar una carta en la tarjeta de inscripción preimpresa que se incluye con el material embalado.
En EE.UU.: cafeappliances.com/register.
Servicio Programado
(OVHUYLFLRGHUHSDUDFLyQGHH[SHUWRVGH&DIpHVWiDVyORXQSDVRGHVXSXHUWD&RQpFWHVHDWUDYpVGH,QWHUQHW\SURJUDPHVX
servicio a su conveniencia cualquier día del año. En EE.UU.: cafeappliances.com/service.
Garantías Extendidas
$GTXLHUDXQDJDUDQWtDH[WHQGLGDGH&DIp\FRQR]FDORVGHVFXHQWRVHVSHFLDOHVTXHHVWiQGLVSRQLEOHVPLHQWUDVVXJDUDQWtDD~Q
está vigente. La puede adquirir en cualquier momento a través de Internet. Los servicios de Café aún estarán allí cuando su
garantía caduque. En EE.UU.: cafeappliances.com/extended-warranty.
Conectividad Remota
3DUDVROLFLWDUDVLVWHQFLDSDUDODFRQHFWLYLGDGGHUHGLQDOiPEULFDSDUDPRGHORVFRQDFFHVRUHPRWRYLVLWHQXHVWURVLWLRZHEHQ
cafeappliances.com/connect.
Piezas y Accesorios
Aquellos individuos calificados para realizar el servicio técnico de sus propios electrodomésticos podrán solicitar el envío de
piezas o accesorios directamente a sus hogares (se aceptan las tarjetas VISA, MasterCard y Discover). Ordene hoy a través de
Internet durante las 24 horas, todos los días. En EE.UU.: cafeappliances.com/parts
Las instrucciones que figuran en este manual cubren los procedimientos que serán realizados por cualquier usuario.
Otros servicios técnicos generalmente deben ser derivados a personal calificado del servicio. Se deberá tener cuidado,
ya que una reparación indebida podrá hacer que el funcionamiento no sea seguro.
Contáctenos
6LQRVHHQFXHQWUDVDWLVIHFKRFRQHOVHUYLFLRTXHUHFLELyGH&DIpFRPXQtTXHVHFRQQRVRWURVDWUDYpVGHQXHVWURVLWLRZHEFRQ
todos los detalles, incluyendo su número telefónico, o escriba a:
En EE.UU.: General Manager, Customer Relations | Café Appliances, Appliance Park | Louisville, KY 40225
cafeappliances.com/contact
-
 1
1
-
 2
2
-
 3
3
-
 4
4
-
 5
5
-
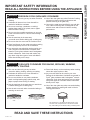 6
6
-
 7
7
-
 8
8
-
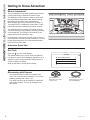 9
9
-
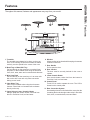 10
10
-
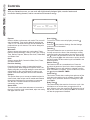 11
11
-
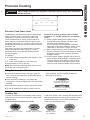 12
12
-
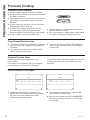 13
13
-
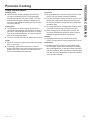 14
14
-
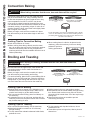 15
15
-
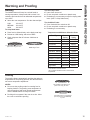 16
16
-
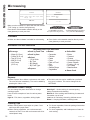 17
17
-
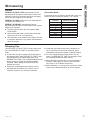 18
18
-
 19
19
-
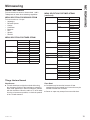 20
20
-
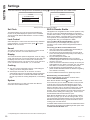 21
21
-
 22
22
-
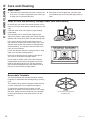 23
23
-
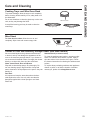 24
24
-
 25
25
-
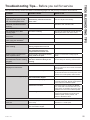 26
26
-
 27
27
-
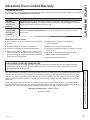 28
28
-
 29
29
-
 30
30
-
 31
31
-
 32
32
-
 33
33
-
 34
34
-
 35
35
-
 36
36
-
 37
37
-
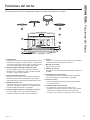 38
38
-
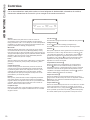 39
39
-
 40
40
-
 41
41
-
 42
42
-
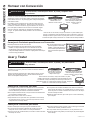 43
43
-
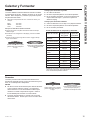 44
44
-
 45
45
-
 46
46
-
 47
47
-
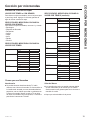 48
48
-
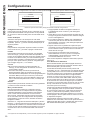 49
49
-
 50
50
-
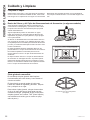 51
51
-
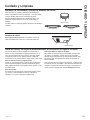 52
52
-
 53
53
-
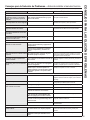 54
54
-
 55
55
-
 56
56
-
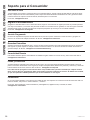 57
57


Cafe CSB912M2NS5 El manual del propietario
- Categoría
- Microondas
- Tipo
- El manual del propietario
en otros idiomas
- English: Cafe CSB912M2NS5 Owner's manual
Artículos relacionados

Otros documentos
-
GE ZSA1202PSS Manual de usuario
-
GE ZSB9121NSS El manual del propietario
-
Monogram Advantium Built-In Wall Oven 240V El manual del propietario
-
GE ZSB9231NSS El manual del propietario
-
GE Profile PSB9240EF3ES El manual del propietario
-
GE Cafe Series CSA1201RSS El manual del propietario
-
GEAppliances PSA9240 El manual del propietario
-
Sharp YC-GC52FE Manual de usuario
-
 GE Monogram ZWL1126SJSS El manual del propietario
-
Monogram ZWL1126SJ El manual del propietario
