FUENTE DE ALIMENTACIÓN
1 Desate el cable del Adaptador de CA
2 Conecte el adaptador de CA a un enchufe de pared adecuado.
3 Conecte el extremo pequeño del adaptador a la clavija de la parte trasera de la unidad.
DESEMPAQUETADO DEL PLATO
1. Retire el embalaje de la unidad.
Nota: Guarde todos los elementos de embalaje.
2. Retire la bolsa de plástico que cubre la radio.
3. Retire la cubierta plástica de protección del conector A/C.
4. Quite el nudo del cable A/C y desate el cable de antena de la parte trasera de la radio
5. Abra la tapa y retire del plato el material de poliestireno de protección.
6. Retire la brida negra de debajo del brazo del tocadiscos.
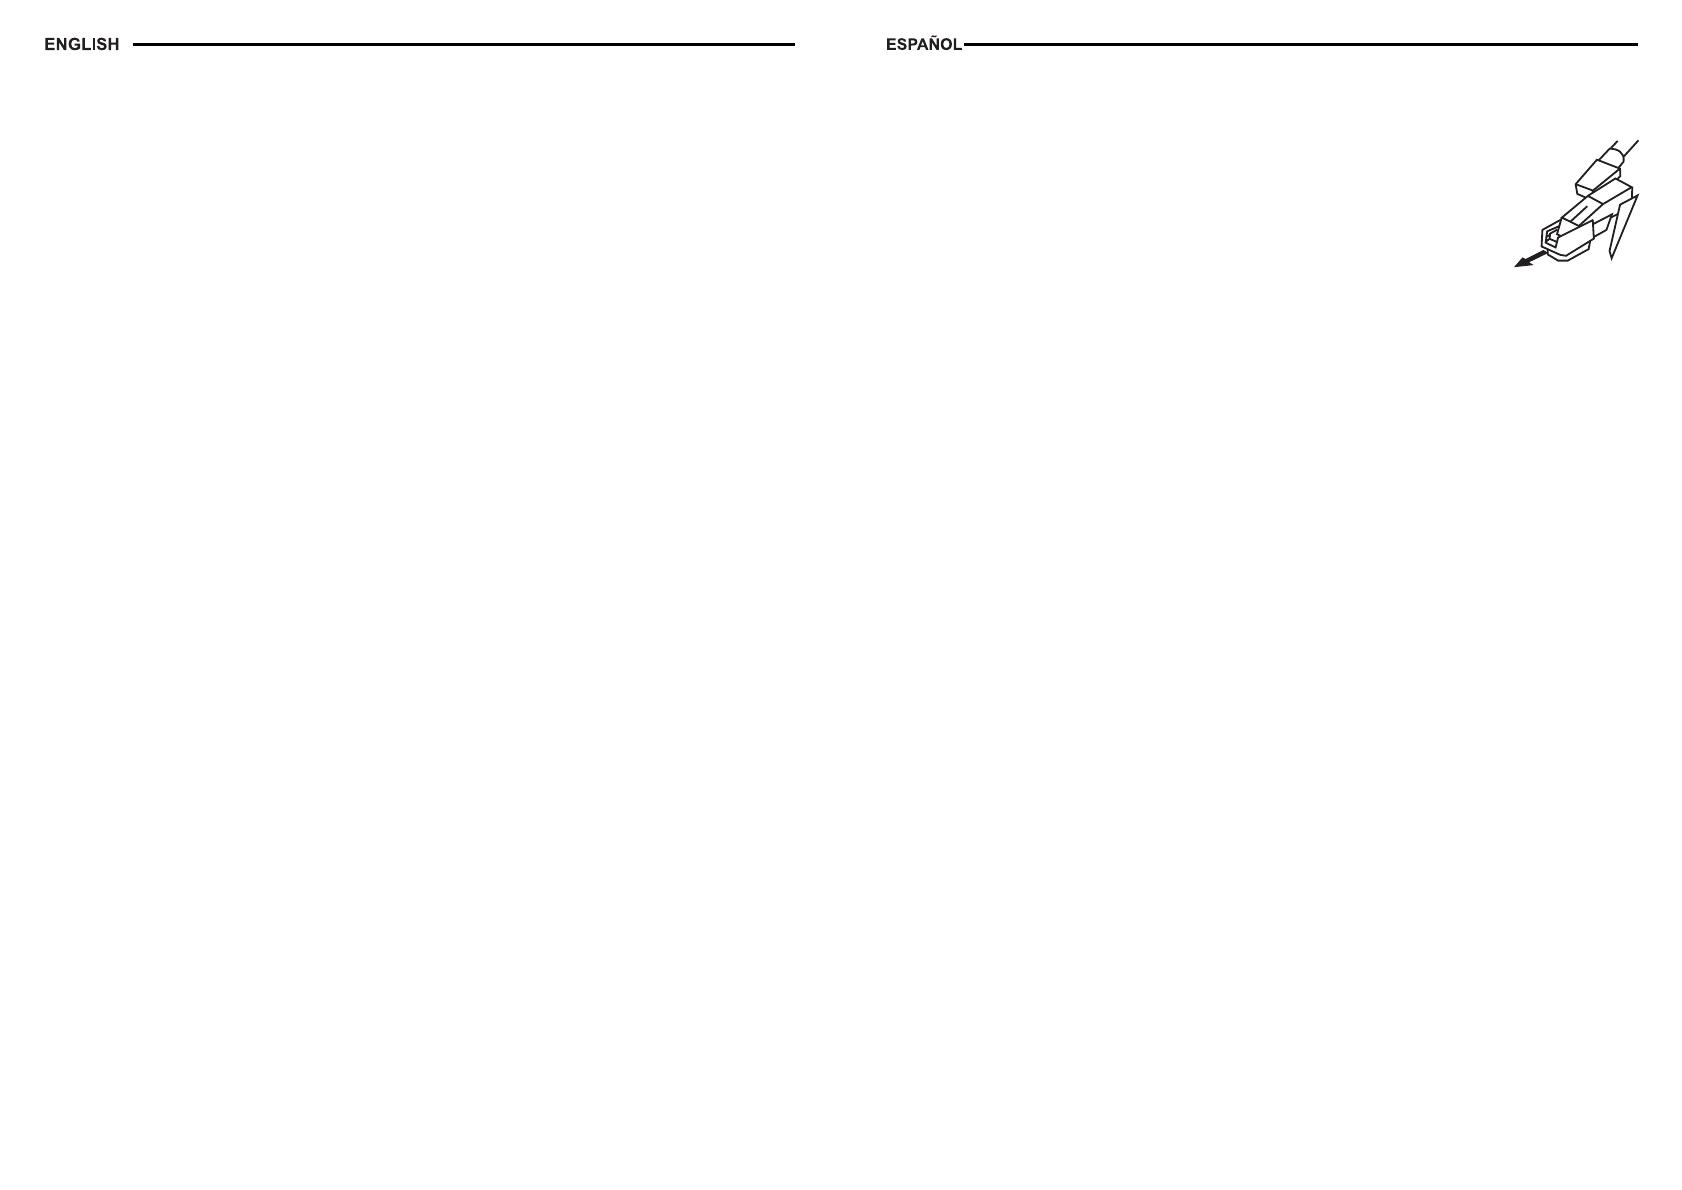
7. Retire la cubierta protectora de la aguja, de color blanco, tirando con delicadeza hacia la parte delantera
de la unidad.
8. Desate la antena FM y déjela colgando en línea recta para una recepción FM óptima. Si tiene problemas
para sintonizar una estación FM, mueva la antena FM externa para una mejor recepción. No conecte
la antena FM a antenas exteriores.
FUNCIONAMIENTO DEL PLATO
Encienda la unidad rotando a la posición ENCENDIDO el BOTÓN GIRATORIO DE VOLUMEN-
ENCENDIDO/APAGADO situado en el panel frontal.
1. Gire el selector de función (FUNCTION SWITCH) para seleccionar modo PHONO.
2. Ajuste el SELECTOR DE CONTROL DE VELOCIDAD a la velocidad deseada (33 1/3,45 o 78 rpm).
Coloque el disco en el plato.
3. Utilice la PALANCA ELEVADORA para levantar el BRAZO DEL TOCADISCOS de su posición de reposo.
Tire del BRAZO DEL TOCADISCOS ligeramente hacia la derecha hasta oír un “clic” para activar el plato.
4. Mueva el BRAZO DEL TOCADISCOS sobre el disco con la mano y bájelo lentamente. Ajuste el BOTÓN
GIRATORIO DE VOLUMEN-ENCENDIDO/APAGADO al nivel de escucha deseado.
5. Al finalizar el disco, el BRAZO DEL TOCADISCOS se parará automáticamente. Debe retornar el BRAZO
DEL TOCADISCOS a su soporte manualmente.
Accesorio: ADAPTADOR PARA 45 RPM
1 Ponga el adaptador de 45 rpm en el eje.
2 Coloque el disco de 45 rpm en el plato delicadamente.
3 Siga los pasos de funcionamiento del plato para reproducir el disco.
ANTENA
Para la recepción FM, la unidad dispone de una ANTENA FM DE CABLE, mueva el cable hasta que la
recepción sea nítida y sin interferencias. Para la recepción AM, la unidad tiene incorporada una antena
direccional de ferrita. Gire el conjunto para encontrar la mejor posición de recepción. No conecte la ANTENA
FM EXTERNA a ninguna antena exterior.
FUNCIONAMIENTO DE LA RADIO
1. Gire el SELECTOR DE FUNCIÓN para seleccionar modo RADIO.
2. Ajuste el SELECTOR DE BANDA AM/FM a la banda de radio deseada (AM o FM).
3. Seleccione la estación de radio deseada rotando el BOTÓN GIRATORIO DE SINTONIZAR.
4. Ajuste el BOTÓN GIRATORIO DE VOLUMEN-ENCENDIDO/APAGADO al nivel de escucha deseado.
USB & FUNCIONAMIENTO DE LA TARJETA SD
Funcionamiento de la tarjeta SD:
1. Introduzca la tarjeta SD en la ranura para tarjetas SD.
2. Encienda girando el BOTÓN GIRATORIO DE VOLUMEN-ENCENDIDO/APAGADO desde la posición Apagado.
3. Ajuste el BOTÓN GIRATORIO DE VOLUMEN-ENCENDIDO/APAGADO al volumen deseado.
4. Gire el SELECTOR DE FUNCIÓN a modo SD/USB.
5. Pulse el BOTÓN DE REPRODUCCIÓN/PAUSA (USB/SD) para reproducir las pistas de música
almacenadas en la tarjeta SD.
6. El LED ACC verde destellará durante la reproducción de música.
7. Para pausar la música, pulse el BOTÓN DE REPRODUCCIÓN/PAUSA (USB/SD) otra vez.
8. Pulse el BOTÓN SALTO+ (USB/SD) / SALTO- (USB/SD) para ir al siguiente archivo durante el modo
Reproducción.
9. Para dejar de reproducir los archivos de música almacenados en la tarjeta SD, pulse el BOTÓN DE
REPRODUCCIÓN/PAUSA (USB/SD).
Nota: Apague la unidad antes de desconectar la tarjeta SD. Giro del CONTROL DE VOLUMEN a la
posición Apagado.
TROUBLE SHOOTING GUIDE
TURNTABLE
There is no Power
1. The AC Adaptor is not well connected.
2. Check to see that the ON/OFF volume knob is in the on position.
There is no Sound
1. Check the volume level by turning the volume knob.
Turntable will not work
1. Make sure the function switch is set to phono.
2. Try moving the tone arm to the right until you hear a click.
3. Make sure the protective needle cover is removed.
CD does not play
1. Check to make sure CD is inserted correctly (label side facing up).
2. Check that the surface of the CD is clean
3. Make sure function switch is set to CD.
USB - There is no music playing when PLAY/PAUSE (USB) is pressed.
1. Make sure the MP3 device/Flash Drive has stored music files.
2. The unit will only play Flash Drives up to 4GB max.
3. Reset USB/SD by powering Off or rotate the FUNCTION SWITCH (2) to select another mode.
Then select SD/USB mode again.
4. Check if the file(s) is a/are WMA file(s). The unit does not play WMA format, only MP3 Format.
USB Specification
Interface
* USB2.0 Full speed, HOST (USB HUB is not supported)
Corresponding Flash memory
* USB1.1 Flash memory
* USB2.0 High speed Flash memory
* Maximum memory size : 4GByte
* Minimum memory size : 512MByte (Only FAT16 corresponds.)
MP3 Decoder
* Compatible with MPEG Audio 1, 2, 2.5
* Compatible with Layer 1, 2, 3
* Compatible with Bit rate : 8k ~ 320kbps
* Subfolder nest : 8
* Compatible with Sampling rate : 8k, 16k, 32k, 11.025k, 22.05k, 44.1k, 12k, 24k,48kHz
* Number of maximum files for playback : 999
* File format for playback : *.mp3. *.mp2, *.mp1 It is not possible to select it.
6
35


