GE TFT20JABAA El manual del propietario
- Categoría
- Neveras
- Tipo
- El manual del propietario

Safety Information
Adapter Plugs . . . . . . . . . . . . . . . . . . .4
Connect Electricity . . . . . . . . . . . . . . .4
Extension Cords . . . . . . . . . . . . . . . . .3
Proper Disposal . . . . . . . . . . . . . . . . .3
Safety Precautions . . . . . . . . . . . . . . .2
Operating Instructions
Automatic Icemaker . . . . . . . . . . . .10
Controls . . . . . . . . . . . . . . . . . . . . . . .5
Ice and Water Dispenser . . . . . . . . .11
Shelves, Bins and Racks . . . . . . . .5–8
Storage Drawers . . . . . . . . . . . . . . .8, 9
Water Filter Cartridge . . . . . . . . . . . .6
Care and Cleaning . . . . . . . .12, 13
Replacing the Light Bulbs . . . . . . .13
Installation Instructions
Preparing to Install
the Refrigerator . . . . . . . . . . . . . . . .14
Water Line Installation . . . . . . .15–19
Troubleshooting Tips
Before You Call For Service . . .21–23
Normal Operating Sounds . . . . . . .20
Consumer Support
Cartridge Performance
Data Sheet . . . . . . . . . . . . . . . . . . . . .24
EXPORT 197D3353P001 49-60101 12-00 JR
Write your model and serial numbers here:
Model # _____________________
Serial # _____________________
Find these numbers on a label inside
the refrigerator compartment at the top
on the right side behind the controls.
Models 20, 22 and 25
Owner’s Manual and
Installation Instructions
Refrigerators
Side by Side

2
IMPORTANT SAFETY INFORMATION.
READ ALL INSTRUCTIONS BEFORE USING.
WARNING!
Use this appliance only for its intended purpose as described in this Owner’s Manual.
SAFETY PRECAUTIONS
When using electrical appliances, basic safety precautions should be followed, including the following:
■
■This refrigerator must be properly installed
and located in accordance with the Installation
Instructions before it is used. Also see the
How to
Connect Electricity
section.
■
■Do not attempt to stand on top of the refrigerator.
Doing so may result in bodily injury or damage to
the refrigerator.
■
■Do not allow children to play with the refrigerator
or tamper with the controls.
■
■Do not allow children to climb, stand or hang on
the shelves in the refrigerator. They could damage
the refrigerator and seriously injure themselves.
■
■Do not touch the cold surfaces in the freezer
compartment when hands are damp or wet.
Skin may stick to these extremely cold surfaces.
■
■Do not store or use gasoline or other flammable
vapors and liquids in the vicinity of this or any
other appliance.
■
■In refrigerators with automatic icemakers, avoid
contact with the moving parts of the ejector
mechanism, or with the heating element that
releases the cubes. Do not place fingers or hands
on the automatic icemaking mechanism while
the refrigerator is plugged in.
■
■Keep fingers out of the “pinch point” areas;
clearances between the doors and between the
doors and cabinet are necessarily small. Be careful
closing doors when children are in the area.
■
■Unplug the refrigerator before cleaning and
making repairs.
NOTE: We strongly recommend that any servicing be
performed by a qualified individual.
■
■
Before replacing a burned-out light bulb, the
refrigerator should be unplugged
in order to avoid
contact with a live wire filament. (A burned-out
light bulb may break when being replaced.)
NOTE: Turning the freezer control to the 0 position does not
remove power to the light circuit.
■
■Do not refreeze frozen foods which have thawed
completely.

PROPER DISPOSAL OF THE REFRIGERATOR
Child entrapment and suffocation are not problems
of the past. Junked or abandoned refrigerators are
still dangerous…even if they will sit for “just a few
days.” If you are getting rid of your old refrigerator,
please follow the instructions below to help prevent
accidents.
Before You Throw Away Your Old Refrigerator
or Freezer:
■Take off the doors and discard separately.
■Leave the shelves in place so that children may not
easily climb inside.
■If the refrigerator has a lock, make it unusable.
CFC Disposal
Your old refrigerator may have a cooling system
that used CFCs (chlorofluorocarbons). CFCs are
believed to harm stratospheric ozone.
If you are throwing away your old refrigerator,
make sure the CFC refrigerant is removed for
proper disposal by a qualified servicer. If you
intentionally release this CFC refrigerant you
can be subject to fines and imprisonment under
provisions of environmental legislation.
USE OF EXTENSION CORDS
Because of potential safety hazards under certain conditions, we strongly recommend against the use of an
extension cord.
However, if you must use an extension cord, it is absolutely necessary that it be a UL-listed (in the United States) or
a CSA-listed (in Canada), 3-wire grounding type appliance extension cord having a grounding type plug and outlet
and that the electrical rating of the cord be 15 amperes (minimum) and 120 volts.
DANGER! RISK OF CHILD ENTRAPMENT
3

4
IMPORTANT SAFETY INFORMATION.
READ ALL INSTRUCTIONS BEFORE USING.
WARNING!
HOW TO CONNECT ELECTRICITY
Do not, under any circumstances, cut or remove the third (ground) prong from the power cord. For personal
safety, this appliance must be properly grounded.
The power cord of this appliance is equipped with
a 3-prong (grounding) plug which mates with a
standard 3-prong (grounding) wall outlet to
minimize the possibility of electric shock hazard
from this appliance.
Have the wall outlet and circuit checked by a
qualified electrician to make sure the outlet is
properly grounded.
Where an ungrounded wall outlet is encountered,
it is your personal responsibility and obligation to
have it replaced with a properly grounded 3-prong
wall outlet.
The refrigerator should
always be plugged into
its own individual electrical
outlet. This provides the
best performance and also
prevents overloading house
wiring circuits which could
cause a fire hazard from overheated wires. Please
refer to the rating plate on the refrigerator for the
correct voltage, wattage and frequency. If the
product plug does not fit your outlet, the product
should be fitted with a new plug.
IMPORTANT: The refitting of electric plugs and cables should
be done by a qualified technician or service agent. In some
countries the refitting of electric plugs and cables is only
permitted when the work is completed by a qualified technician.
If the power supply cord becomes damaged, it must
be replaced by a qualified service agent in order to
avoid a safety hazard.
Never unplug your refrigerator by pulling on the
power cord. Always grip plug firmly and pull straight
out from the outlet.
Repair or replace immediately all power cords that
have become frayed or otherwise damaged. Do not
use a cord that shows cracks or abrasion damage
along its length or at either end.
When moving the refrigerator away from the wall,
be careful not to roll over or damage the power cord.
Mains lead replacement
If the mains lead on your refrigerator needs
replacing at any time, it must be replaced by a
special lead which is obtainable from your local
dealer. A charge will be made for the replacement
of the mains lead if you have damaged the lead.
USE OF ADAPTER PLUGS
Because of potential safety hazards under certain conditions, we strongly recommend against the use of
an adapter plug.
However, if you must use an adapter, where local
codes permit, a
temporary connection
may be made
to a properly grounded 2-prong wall outlet by use
of a UL-listed adapter available at most local
hardware stores.
The larger slot in the adapter must be aligned with
the larger slot in the wall outlet to provide proper
polarity in the connection of the power cord.
When disconnecting the power cord from the
adapter, always hold the adapter in place with one
hand while pulling the power cord plug with the
other hand. If this is not done, the adapter ground
terminal is very likely to break with repeated use.
If the adapter ground terminal breaks,
DO NOT USE
the refrigerator until a proper ground has been
established.
Attaching the adapter ground terminal to a wall outlet cover
screw does not ground the appliance unless the cover screw
is metal, and not insulated, and the wall outlet is grounded
through the house wiring. You should have the circuit checked
by a qualified electrician to make sure the outlet is properly
grounded.
READ AND FOLLOW THIS SAFETY INFORMATION CAREFULLY.
SAVE THESE INSTRUCTIONS
Insure proper grounding
exists before using.

5
9 IS COLDEST
0 IS OFF
FREEZER FRESH FOOD
5
8
9
4
3
2
1
0
6
7
5
8
9
4
3
2
1
6
7
Initially, set the fresh food control at 5 and the freezer control at 5 and allow
12 hours for the temperature to stabilize.
Several adjustments may be required. Adjust the controls one increment at a
time, and allow 12 hours after each adjustment for the refrigerator to reach
the temperature you have set.
Setting the freezer control to 0 stops cooling in both the fresh food and freezer
compartments but does not shut off electrical power to the refrigerator.
Control settings will vary based on personal preferences, usage, and
operating conditions and may require more than one adjustment.
9 IS COLDEST
0 IS OFF
FREEZER FRESH FOOD
5
8
9
4
3
2
1
0
6
7
5
8
9
4
3
2
1
6
7
About the controls on the refrigerator.

6
About the water filter cartridge.
About the refrigerator shelves and bins.
Bins on the Fresh Food Compartment Door
Adjustable bins can easily be carried from
refrigerator to work area.
To remove:
Lift the front of the bin up, then
pull out.
To replace or relocate:
Engage the bin in the
molded supports of the door, and push in.
Bin will lock in place.
The snugger
helps prevent tipping, spilling or
sliding of small items stored on the door shelf.
Place a finger on either side of the divider
near the rear and move it back and forth to
fit your needs.
Water Filter Cartridge
The water filter cartridge is located in the
back upper right corner of the refrigerator
compartment.
When to Replace the Filter on Models
With a Replacement Indicator Light
There is a replacement indicator light for
the water filter cartridge on the dispenser.
This light will turn orange to tell you that
you need to replace the filter soon.
The filter cartridge should be replaced
when the replacement indicator light turns
red or if the flow of water to the dispenser
or icemaker decreases.
When to Replace the Filter on Models
Without a Replacement Indicator Light
The filter cartridge should be replaced every
six months
or earlier if the flow of water to the
water dispenser or icemaker decreases.
Installing the Filter Cartridge
If you are replacing the cartridge, first
remove the old one by slowly turning it
to the left.
Do not
pull down on the
cartridge. A small amount of water
may drip down.
On models without a replacement
indicator light, apply the month and
year sticker to the new cartridge to
remind you to replace the filter in
six months.
Fill the replacement cartridge with
water from the tap to allow for better
flow from the dispenser immediately
after installation.
Lining up the arrow on the cartridge
and the cartridge holder, place the top
of the new cartridge up inside the holder.
Do not
push it up into the holder.
Slowly turn it to the right until the filter
cartridge stops.
DO NOT OVERTIGHTEN.
As you turn the cartridge, it will
automatically raise itself into position.
Cartridge will rotate about 1/2 turn.
Run water from the dispenser for
3 minutes (about one and a half gallons)
to clear the system and prevent sputtering.
Press and hold the
RESET WATER FILTER
pad (on some models) on the dispenser
for 3 seconds.
NOTE: A newly-installed water filter cartridge may
cause water to spurt from the dispenser.
Filter Bypass Plug
You must use the filter bypass plug when a
replacement filter cartridge is not available.
The dispenser and the icemaker will not
operate without the filter or filter bypass plug.
Replacement Filters:
To order additional filter cartridges, contact
your local distributor.
GWF
Place the top of the cartridge up
inside the cartridge holder and
slowly turn it to the right.
Filter Bypass Plug
Cartridge Holder
On some models
Not all features are on all models.
Snugger
(on some models)

Rearranging the Shelves
To Remove
To Replace
Deep Door Shelves
Detachable shelf extenders deepen and
enclose fixed door shelves, providing more
storage room and greater storage flexibility.
To remove:
Lift the shelf extender straight up
then pull out.
To replace:
Engage the shelf extender in the
molded supports on the door and push in.
It will lock in place.
Quick Space Shelf
(on some models)
This shelf splits in half and slides under itself for
storage of tall items on the shelf below.
Refrigerator Shelves:
Lift up and out
Tilt up
Insert
top hook
Lower to
lock in place
To Remove
Freezer Shelves:
Slide-Out Spillproof Shelf
(on some models)
The slide-out spillproof shelf allows you to
reach items stored behind others. The special
edges are designed to help prevent spills from
dripping to lower shelves.
Make sure you push the shelves all the way back in
before you close the door.
Spillproof Shelves
(on some models)
Spillproof shelves have special edges to help
prevent spills from dripping to lower shelves.
To Remove
Freezer Baskets:
Remove the basket by pulling it forward,
lifting up the front, and sliding it past the
stop
location.
WARNING: Poor performance may occur if
freezer baskets are not used. Storage of items in
the freezer without using baskets may result in
poor temperature performance due to restrictions
of air flow within the freezer compartment.
7

8
About the storage drawers.
Not all features are on all models.
About the additional features.
Not all features are on all models.
Storage Drawers
Excess water that may accumulate in the
bottom of the drawers should be wiped dry.
Adjustable Humidity Drawers
Slide the control all the way to the
High
or
setting to provide high humidity
recommended for most vegetables.
Slide the control all the way to the
Low
or
setting to provide lower humidity levels
recommended for most fruits.
ShelfSaver
™
Rack
Use this rack to store beverage cans for
easy access.
It can also hold a 9″ x 13″ baking dish.
Loading the Freezer Compartment
Load so that at least 15 mm of space remains
clear between stacks of packages and 15 mm
to 25 mm of space between the top of any
stack and any shelf or basket above it.
Packages may hang over the front of shelves
but must remain 15 mm from doors.
■Food to be frozen must not be placed
in direct contact with food in storage.
If food is to be frozen every day, it may
be necessary to reduce the quantity to
be frozen.
■If a quantity of food needs to be frozen,
set the freezer control to its coldest setting.
After the food is frozen, reset the freezer
control to its initial position.
■Food is most quickly frozen on the middle
three shelves of the freezer compartment
and most slowly in the freezer door shelves.
■Do not store commercially quick-frozen
food longer than the time recommended
by the food manufacturers.
■If the power to the appliance is shut off for
an extended time or if the refrigerating
system fails, do not open the doors unless
absolutely necessary. When it is necessary,
close them as quickly as possible so the
frozen food will stay frozen as long as
possible.
■The freezer door storage shelves marked
with a two-star label are only appropriate
for the storage of previously frozen food.
Carbonated drinks should not be stored in the
freezer compartment.

About storage drawer removal.
Not all features are on all models.
Drawer Removal
Drawers can easily be removed by tilting up
slightly and pulling past
stop
location.
If the door prevents you from taking out
the drawers, the refrigerator will need to
be rolled forward until the door opens
enough to slide the drawers out. In some
cases, when you roll the refrigerator out,
you will need to move the refrigerator to
the left as you roll it out.
When replacing the drawers, make
sure you slide them through the
drawer guides.
Drawer
Guides
9
Convertible Meat Drawer
The convertible meat drawer has its own
cold air duct to allow a stream of cold air
from the freezer compartment to flow
around the drawer.
The variable temperature control
regulates
the air flow from the freezer compartment.
Set control lever
up
to convert the drawer
to normal refrigerator temperature and
provide extra vegetable storage space. Cold
air duct is turned off. Variable settings
between these extremes can be selected.
Set control lever
down
to the coldest setting
to store fresh meats. If lever is left in meat
position for a long period of time, some frost
may form on the inside of the drawer.
Normal
Coldest
Divider
Trivet
Trivet and Divider
(on some models)
The trivet is designed to keep your fruits and vegetables off
the floor of the drawer and away from any moisture that
might form. The divider will keep the larger fruits and
vegetables from falling or rolling onto the more delicate
ones. By lifting straight up on the divider, you can detach it
from the trivet and adjust it from side to side, then push
down and into position.

10
Automatic Icemaker
(on some models)
The icemaker will produce seven cubes
per cycle—approximately 100–130 cubes
in a 24-hour period, depending on freezer
compartment temperature, room
temperature, number of door openings
and other use conditions.
If the refrigerator is operated before the
water connection is made to the icemaker,
set the power switch in the
OFF
position.
When the refrigerator has been connected
to the water supply, set the power switch to
the
ON
position.
The icemaker will fill with water when it cools
to freezing. A newly-installed refrigerator
may take 12 to 24 hours to begin making
ice cubes.
Throw away the first few batches of ice to
allow the water line to clear.
Be sure nothing interferes with the sweep of
the feeler arm.
It is normal for several cubes to be joined
together.
If ice is not used frequently, old ice cubes will
become cloudy, taste stale, and shrink. If the
ice cubes become stuck in the icemaker, turn
off the icemaker, remove cubes and turn
icemaker back on.
There is an upper freezer shelf
above the icemaker that can be
used for storage.
Ice Storage Drawer
Icemaker Accessory Kit
To access ice,
pull the drawer out.
To remove the drawer,
pull it straight out and
lift it past the
stop
location.
If your refrigerator did not come already
equipped with an automatic icemaker,
an icemaker accessory kit is available at
extra cost.
Check the back of the refrigerator for the
specific icemaker kit needed for your model.
Icemaker
Feeler Arm
Power
Switch
Green
Power Light
About the automatic icemaker.
A newly-installed refrigerator may take 12–24 hours to begin making ice.

11
About the ice and water dispenser.
On some models
Ice Storage Drawer on Dispenser
Models
To remove:
Set the icemaker power switch to the
OFF
position. Pull the drawer straight out and
then lift past the
stop
position.
To replace:
When replacing the drawer, make sure to
push it firmly into place. If it does not go all
the way back, remove it and rotate the drive
mechanism 1/4 turn. Then push the drawer
back again.
Rotate
Drive
Mechanism
Important Facts About Your Dispenser
■Do not add ice from trays or bags to
the storage bin. It may not crush or
dispense well.
■Avoid overfilling glass with ice and use
of narrow glasses. Backed-up ice can jam
the chute or cause the door in the chute
to freeze shut. If ice is blocking the chute,
poke it through with a wooden spoon.
■Beverages and foods should not be quick-
chilled in the ice storage bin. Cans, bottles
or food packages in the storage bin may
cause the icemaker or auger to jam.
■Some crushed ice may be dispensed even
though you selected
CUBED ICE.
This
happens occasionally when a few cubes
have been left in the crusher.
■After crushed ice is dispensed, some water
may drip from the chute.
■Sometimes a small mound of snow will
form on the door in the ice chute. This
condition is normal and usually occurs
when you have dispensed crushed ice
repeatedly. The snow will eventually
evaporate.
CAUTION: Some products such as water ices should
not be consumed too cold.
To Use the Dispenser
Select
CUBED ICE , CRUSHED ICE
or
WATER .
Press the glass gently against the top of the
dispenser cradle.
The spill shelf is not self-draining. To reduce
water spotting, the shelf and its grille should
be cleaned regularly.
If no water is dispensed when the refrigerator is first
installed, there may be air in the water line system.
Press the dispenser arm for at least two minutes to
remove trapped air from the water line and to fill the
water system. To flush out impurities in the water
line, throw away the first six glassfuls of water.
CAUTION: Never put fingers or any other
objects into the ice crusher discharge opening.
Locking the Dispenser
(on some models)
Press the
LOCK CONTROL
pad for 3 seconds to lock
the dispenser and control
panel. To unlock, press
and hold the pad again
for 3 seconds.
Dispenser Light
This pad turns the
night
light
in the dispenser on
and off. The light also
comes on when the
dispenser cradle is pressed.
If this light burns out, it
should be replaced with
a 6 watt maximum, 12 volt
DC bulb.
Spill Shelf

12
Condenser
There is no need for routine condenser
cleaning in normal home operating
environments. However, in environments
that may be particularly dusty or greasy, the
condenser should be cleaned periodically
for efficient refrigerator operation.
Cleaning the condenser:
The condenser is located inside the back
of the refrigerator. To access it, first unplug
the refrigerator. Then remove the access
cover. The condenser is on the right side.
Care and cleaning of the refrigerator.
Cleaning the Outside
The dispenser drip area,
(on some models)
beneath the grille, should be wiped dry. Water
left in this area may leave deposits. Remove
the deposits by adding undiluted vinegar to
the well. Soak until the deposits disappear or
become loose enough to rinse away.
The dispenser cradle
(on some models).
Before cleaning, lock the dispenser by
pressing and holding the
LOCK CONTROL
pad
for 3 seconds. Clean with warm water and
baking soda solution—about a tablespoon
(15 ml) of baking soda to a quart (1 l) of
water. Rinse thoroughly and wipe dry.
The door handles and trim.
Clean with a
cloth dampened with soapy water. Dry
with a soft cloth.
Keep the outside clean.
Wipe with a clean
cloth lightly dampened with kitchen
appliance wax or mild liquid dish detergent.
Dry and polish with a clean, soft cloth.
Do not wipe the refrigerator with a soiled dish cloth
or wet towel. These may leave a residue that can
erode the paint. Do not use scouring pads, powdered
cleaners, bleach or cleaners containing bleach
because these products can scratch and weaken
the paint finish.
Cleaning the Inside
To help prevent odors,
leave an open box of
baking soda in the fresh food and freezer
compartments.
Unplug the refrigerator before cleaning.
If this
is not practical, wring excess moisture out
of sponge or cloth when cleaning around
switches, lights or controls.
Use warm water and baking soda solution—
about a tablespoon (15 ml) of baking soda
to a quart (1 l) of water. This both cleans
and neutralizes odors. Rinse and wipe dry.
After cleaning the door gaskets, apply a thin
layer of petroleum jelly to the door gaskets at
the hinge side. This helps keep the gaskets
from sticking and bending out of shape.
Drain opening in freezer compartment.
During
yearly cleaning, remove bottom freezer
basket and flush a solution of baking soda—
1 teaspoon (5 ml) and 2 cups (500 ml) of
hot (not boiling) water— through the drain
line with the help of a meat baster. This
will help eliminate odor and reduce the
likelihood of a clogged drain line. If drain
becomes clogged, use a meat baster and
baking soda solution to force the clog
through the drain line.
Avoid cleaning cold glass shelves with hot water
because the extreme temperature difference may
cause them to break. Handle glass shelves carefully.
Bumping tempered glass can cause it to shatter.
Do not wash any plastic refrigerator parts in
the dishwasher.
Dispenser drip area.
Be careful when moving the refrigerator away
from the wall. All types of floor coverings
can be damaged, particularly cushioned
coverings and those with embossed surfaces.
Pull the refrigerator straight out and return
it to position by pushing it straight in.
Moving the refrigerator in a side direction
may result in damage to the floor covering
or refrigerator.
When pushing the refrigerator back, make sure you
don’t roll over the power cord or icemaker supply line
(on some models).
Behind the Refrigerator

For long vacations or absences, remove food
and unplug the refrigerator. Move the freezer
control to the
0
(off) position, and clean the
interior with a baking soda solution of one
tablespoon (15 ml) of baking soda to one
quart (1 l) of water. Leave the doors open.
Set the icemaker power switch to the
OFF
position and shut off the water supply to
the refrigerator.
If the temperature can drop below freezing,
have a qualified servicer drain the water
supply system (on some models) to prevent
serious property damage due to flooding.
Replacing the light bulbs.
Turning the control to the 0 (off) position does not remove power to the light circuit.
Fresh Food Compartment—Upper Light
Unplug the refrigerator.
The bulb is located behind the controls.
Replace with an appliance bulb of the
same or lower wattage.
Plug the refrigerator back in.
Fresh Food Compartment—Lower Light
(on some models)
This light is located above the top drawer.
Unplug the refrigerator.
Grasp the lip at the bottom of the light
shield and pull it up and forward.
After replacing with an appliance bulb
of the same or lower wattage, replace
the shield.
Plug the refrigerator back in.
Freezer Compartment
Unplug the refrigerator.
Remove the shelf just below light shield.
(The shelf will be easier to remove if it is
emptied first.)
Lift up on the light shield to remove.
After replacing with an appliance bulb of
the same or lower wattage, reinstall the
shield by hanging it from the three tabs.
Reinstall the shelf and plug the
refrigerator back in.
13
Preparing for Vacation
Preparing to Move
Secure all loose items such as grille, shelves
and drawers by taping them securely in place
to prevent damage.
Be sure the refrigerator stays in an upright position
during moving.
Dispenser
Unplug the refrigerator.
The bulb is located on the dispenser
under the control panel. Remove the
light bulb by turning it counterclockwise.
Replace the bulb with a bulb of the same
size and wattage.
Plug the refrigerator back in.

14
BEFORE YOU BEGIN
Read these instructions completely and carefully.
•
IMPORTANT
–
Save these
instructions for local inspector’s use.
•
IMPORTANT
–
Observe all
governing codes and ordinances.
• Note to Installer
–
Be sure to leave these
instructions with the Consumer.
• Note to Consumer
–
Keep these instructions
for future reference.
• Skill level – Installation of this appliance requires
basic mechanical skills.
• Completion time – Refrigerator Installation
15 minutes
• Proper installation is the responsibility of the
installer.
• Product failure due to improper installation is not
covered under the Warranty.
• Do not install the refrigerator where the temperature
will go below 60°F (16°C) because it will not run often
enough to maintain proper temperatures.
• Install it on a floor strong enough to support it fully
loaded.
REFRIGERATOR LOCATION
Installation
Refrigerator
Instructions
Models 20, 22, 25
Allow the following clearances for ease of installation,
proper air circulation and plumbing and electrical
connections.
• Sides 4 mm
• Top 25 mm
• Back 25 mm
A door clearance of 19 mm is needed for a 90° door
opening which provides better access to the food
storage area.
CLEARANCES
If the refrigerator has an icemaker, it will have to be
connected to a cold drinking water line. An approved
water supply kit (containing tubing, shutoff valve,
fittings and instructions) is available at extra cost
from your local distributor.
Installation of the icemaker must be done by a
qualified service technician.
WATER SUPPLY TO THE ICEMAKER
(on some models)
*Height does not include hinge.
**Depth includes handle.
DIMENSIONS
20 22 25
A* 66
1
⁄2″ 66
1
⁄2″ 68
3
⁄4″
(1689 mm) (1689 mm) (1746 mm)
B 31
1
⁄2″ 33
1
⁄2″ 35
3
⁄4″
(800 mm) (851 mm) (908 mm)
C** 33″ 33″ 33″
(838 mm) (838 mm) (838 mm)
D 46
5
⁄9″ 48
4
⁄5″ 48
4
⁄5″
(1182 mm) (1240 mm) (1240 mm)
A
B
C
D

15
To remove the base
grille, open the doors
and then pull the
grille straight out.
5/16″Socket
Wrench
Raise
The rollers have 3 purposes:
Rollers adjust so the door closes easily when opened
about halfway.
Rollers adjust so the refrigerator is firmly positioned
on the floor and does not wobble.
Rollers allow you to move the refrigerator away from
the wall for cleaning.
To adjust the rollers, remove the base grille by pulling it
out at the bottom.
Turn the roller adjusting screws clockwise to raise the
refrigerator, counterclockwise to lower it. Use an
adjustable wrench (3/8″hex head bolt) or pliers.
To replace base grille, line up the clips on back of grille
between the bar and the bottom of the cabinet. Push
forward until grille snaps into place.
ROLLERS DOOR ALIGNMENT
After leveling, make sure that doors are even at the top.
To make the doors even, adjust the fresh food door. Using
a 5/16″socket wrench, turn the door adjusting screw to
the right to raise the door, to the left to lower it. (A nylon
plug, embedded in the threads of the pin, prevents the pin
from turning unless a wrench is used.) After one or two
turns of the wrench, open and close the fresh food door
and check the alignment at the top of the doors.
INSTALLING THE WATER LINE
If the water supply to the refrigerator is from a Reverse
Osmosis Water Filtration System AND the refrigerator also
has a water filter, use the refrigerator’s filter bypass plug.
Using the refrigerator’s water filtration cartridge in
conjunction with the RO filter can result in hollow ice
cubes and slower water flow from the water dispenser.
This water line installation is not warranted by the
refrigerator or icemaker manufacturer. Follow these
instructions carefully to minimize the risk of expensive
water damage.
Water hammer (water banging in the pipes) in house
plumbing can cause damage to refrigerator parts and
lead to water leakage or flooding. Call a qualified
plumber to correct water hammer before installing
the water supply line to the refrigerator.
To prevent burns and product damage, do not hook
up the water line to the hot water line.
BEFORE YOU BEGIN
If you use your refrigerator before connecting the
water line, make sure the icemaker power switch is
in the OFF position.
Do not install the icemaker tubing in areas where
temperatures fall below freezing.
When using any electrical device (such as a power drill)
during installation, be sure the device is insulated or
wired in a manner to prevent the hazard of electric
shock.
All installations must be in accordance with local
plumbing code requirements.
WARNING
–
Connect to potable
water supply only.
Installation of the icemaker must be done by a
qualified service technician.
BEFORE YOU BEGIN (CONT.)
Installation Instructions

16
•Copper tubing or plastic tubing from an approved
water supply kit, 1/4″ outer diameter to connect the
refrigerator to the water supply. Be sure both ends
of the tubing are cut square.
Do not use plastic tubing or plastic fittings, unless
they are part of an approved water supply kit, because
the water supply line is under pressure at all times.
Certain types of plastic tubing may become brittle
with age and crack, resulting in water leakage.
•Two 1/4″ outer diameter compression nuts and
2 ferrules (sleeves)—to connect the tubing to the
shutoff valve and the refrigerator water valve.
•If your existing water line has a flared fitting at the
end, you will need an adapter (available at plumbing
supply stores) to connect the water line to the
refrigerator OR you can cut off the flared fitting
with a tube cutter and then use a compression fitting.
•Shutoff valve to connect to the cold water line.
The shutoff valve should have a water inlet with a
minimum inside diameter of 5/32″ at the point of
connection to the COLD WATER LINE. Saddle-type
shutoff valves are included in many water supply kits.
Before purchasing, make sure a saddle-type valve
complies with your local plumbing codes. Self-piercing
shutoff valves are not recommended.
WHAT YOU WILL NEED
To determine how much tubing you need:
Measure the distance from the water valve on the back
of the refrigerator to the water supply pipe. Then add
244 cm. Be sure there is sufficient extra tubing (244 cm
coiled into 3 turns of about 25 cm) to allow the
refrigerator to move out from the wall after installation.
•An approved water supply kit (containing tubing,
shutoff valve and fittings listed below) is available at
extra cost from your local distributor.
•A cold water supply. The water pressure must be
between 1.4–8.1 bar on models without a water filter
and between 2.8-8.2 bar on models with a water filter.
•Power drill.
WHAT YOU WILL NEED (CONT.)
Installation Instructions

17
Fasten the shutoff valve to the cold water pipe with
the pipe clamp.
Installation Instructions
SHUT OFF THE MAIN WATER
SUPPLY
Turn on the nearest faucet long enough to clear the
line of water.
Install the shutoff valve on the nearest frequently used
drinking water line.
1
Choose a location for the valve that is easily
accessible. It is best to connect into the side of a
vertical water pipe. When it is necessary to connect
into a horizontal water pipe, make the connection
to the top or side, rather than at the bottom,
to avoid drawing off any sediment from the
water pipe.
CHOOSE THE VALVE LOCATION
2
Drill a 1/4″ hole in the water pipe, using a sharp bit.
Remove any burrs resulting from drilling the hole in
the pipe.
DRILL THE HOLE FOR THE VALVE
3
FASTEN THE SHUTOFF VALVE
4
Tighten the clamp screws until the sealing washer
begins to swell.
NOTE: Do not overtighten or you may crush the
tubing.
TIGHTEN THE PIPE CLAMP
5
Pipe Clamp
Vertical Cold Water Pipe
Saddle-Type
Shutoff Valve
Washer
Inlet End
Pipe Clamp
Clamp
Screw
Route the tubing between the cold water line and
the refrigerator.
Route the tubing through a hole drilled in the wall
or floor (behind the refrigerator or adjacent base
cabinet) as close to the wall as possible.
NOTE: Be sure there is sufficient extra tubing
(244 cm coiled into 3 turns of about 25 cm) to
allow the refrigerator to move out from the wall
after installation
.
ROUTE THE TUBING
6

18
Place the compression nut and ferrule (sleeve)
onto the end of the tubing as shown.
Insert the end of the tubing into the water valve
connection as far as possible. While holding the
tubing, tighten the fitting.
Fasten the tubing into the clamp provided to hold
it in a vertical position. You may need to pry open
the clamp.
Remove the plastic flexible cap from the water valve
(refrigerator connection).
Place the compression nut and ferrule (sleeve)
onto the end of the tubing and connect it to the
shutoff valve.
Make sure the tubing is fully inserted into the valve.
Tighten the compression nut securely.
CONNECT THE TUBING TO THE
VALVE
7
Saddle-Type Shutoff Valve
Compression Nut
Packing Nut
Outlet Valve
Ferrule (sleeve)
Turn the main water supply on and flush out the
tubing until the water is clear.
Shut the water off at the water valve after about
one quart (1 liter) of water has been flushed
through the tubing.
FLUSH OUT THE TUBING
8
NOTES:
• Before making the connection to the refrigerator,
be sure the refrigerator power cord is not plugged
into the wall outlet.
• If your refrigerator does not have a water filter,
we recommend installing a water filter if your
water supply has sand or particles that could clog
the screen of the refrigerator’s water valve. Install
it in the water line near the refrigerator.
CONNECT THE TUBING TO THE
REFRIGERATOR
9
CONNECT THE TUBING TO THE
REFRIGERATOR
(CONT.)
9
INSTALLING THE WATER LINE (CONT.)
Remove the access cover.
1/4″
Compression
Nut
Tubing
Clamp
1/4″Tubing
Ferrule
(sleeve)
Refrigerator
Connection
Installation Instructions
Reattach the access cover.

19
INSTALLING THE WATER LINE (CONT.)
Tighten any connections that leak.
TURN THE WATER ON AT THE
SHUTOFF VALVE
10
Arrange the coil of tubing so that it does not vibrate
against the back of the refrigerator or against the
wall. Push the refrigerator back to the wall.
PLUG IN THE REFRIGERATOR
11
START THE ICEMAKER
Set the icemaker power switch to the ON position.
The icemaker will not begin to operate until it
reaches its operating temperature of 15°F
(-9°C) or below. It will then begin operation
automatically if the icemaker power switch is in
the ON position.
NOTE: In lower water pressure conditions, the
water valve may turn on up to 3 times to deliver
enough water to the icemaker.
Installation Instructions
12

The new high efficiency compressor runs faster and will have a higher pitch hum or
pulsating sound while operating.
The fan circulating air inside the freezer which keeps the temperatures throughout.
Water dropping on the defrost heater causing a sizzling, hissing or popping sound
during the defrost cycle.
The flow of refrigerant through the freezer cooling coils sounds like boiling water
or a gurgling noise.
Cracking or popping of cooling coils caused by expansion and contraction during
defrost and refrigeration following defrost.
Water dripping as it melts from the evaporator and flows to the drain pan during
the defrost cycle.
Icemaker
(on some models)
The icemaker water valve will buzz when the icemaker fills with water. If the power
switch is in the
ON
position it will buzz even if it has not yet been hooked up to water.
Keeping the power switch in the
ON
position before it is hooked up to water can
damage the icemaker. To prevent this, set the power switch to the
OFF
position.
This will stop the buzzing.
The sound of cubes dropping into the bin and water running in pipes as
icemaker refills.
These sounds are normal
and are due mostly to highly
efficient operation.
20
Normal operating sounds.

21
Problem Possible Causes What To Do
Refrigerator does not
Refrigerator in defrost cycle. • Wait about 30 minutes for defrost cycle to end.
operate
Freezer control • Move the freezer control to a temperature setting.
in
0
(off) position.
Refrigerator is unplugged. • Push the plug completely into the outlet.
The fuse is blown/circuit •Replace fuse or reset the breaker.
breaker is tripped.
Vibration or rattling
Front rollers need adjusting. •See
Rollers.
(slight vibration
is normal)
Motor operates for
Normal when refrigerator • Wait 24 hours for the refrigerator to completely
long periods or cycles
is first plugged in. cool down.
on and off frequently.
Often occurs when large • This is normal.
(Modern refrigerators
amounts of food are
with more storage
placed in refrigerator.
space and a larger
Door left open. • Check to see if package is holding door open.
freezer require more
Hot weather or frequent • This is normal.
operating time. They
door openings.
start and stop often
Temperature controls • See
About the controls.
to maintain even
set at the coldest
temperatures.)
setting.
Fresh food or freezer
Temperature control not set • See
About the controls.
compartment too warm
cold enough.
Warm weather or frequent • Set the temperature control one step colder.
door openings. See
About the controls.
Door left open. •Check to see if package is holding door open.
Frost or ice crystals
Door left open. • Check to see if package is holding door open.
on frozen food
Too frequent or too long
(frost within package
door openings.
is normal)
Divider between fresh
Automatic energy saver •This helps prevent condensation on the outside.
food and freezer
system circulates warm
compartments
liquid around front edge
feels warm
of freezer compartment.
Automatic icemaker
Icemaker power switch • Set the power switch to the
ON
position.
does not work
is in the
OFF
position.
(on some models)
Water supply turned off or • See
Installing the water line.
not connected.
Freezer compartment • Wait 24 hours for the refrigerator to completely cool down.
too warm.
Piled up cubes in the storage •Level cubes by hand.
bin cause the icemaker
to shut off.
Ice cubes stuck in icemaker. • Turn off the icemaker, remove cubes, and turn the
(Green power light on icemaker back on.
icemaker blinking).
Troubleshooting Tips
Save time and money! Review the charts on the following pages first
and you may not need to call for service.
Before you call for service…

22
Problem Possible Causes What To Do
Ice cubes have
Ice storage bin needs cleaning. • Empty and wash bin. Discard old cubes.
odor/taste
Food transmitting odor/taste • Wrap foods well.
to ice cubes.
Interior of refrigerator •See
Care and cleaning.
needs cleaning.
Small or hollow cubes
Water filter clogged. •Replace filter cartridge with new cartridge or with plug.
Slow ice cube freezing
Door left open. • Check to see if package is holding door open.
Temperature control not set •See
About the controls.
cold enough.
Door not closing
Door gasket on hinge side •Apply petroleum jelly on face of gasket.
properly
sticking or folding over.
Orange glow in
Defrost heater is on. • This is normal.
the freezer
Cube dispenser does not
Icemaker turned off or • Turn on icemaker or water supply.
work (on some models)
water supply turned off.
Ice cubes are frozen to • Remove cubes and move the feeler arm to the
ON
(down)
icemaker feeler arm. position.
Irregular ice clumps in • Break up with fingertip pressure and discard remaining clumps.
storage container.
• Freezer may be too warm. Adjust the freezer control to a colder
setting, one position at a time, until clumps do not form.
Dispenser is
LOCKED
. •Press and hold the
LOCK CONTROL
pad for 3 seconds.
Water has poor taste/odor
Water dispenser has not been •Dispense water until all water in system is replenished.
(on some models)
used for a long time.
Water in first glass is
Normal when refrigerator • Wait 24 hours for the refrigerator to completely cool down.
warm (on some models)
is first installed.
Water dispenser has not been • Dispense water until all water in system is replenished.
used for a long time.
Water system has been drained. •Allow several hours for replenished supply to chill.
Water dispenser does
Water supply line turned • See
Installing the water line.
not work (on some models)
off or not connected.
Water filter clogged. • Replace filter cartridge or remove filter and install plug.
Air may be trapped in the •Press the dispenser arm for at least two minutes.
water system.
Dispenser is
LOCKED
. •Press and hold the
LOCK CONTROL
pad for 3 seconds.
Water spurting from
Newly-installed filter cartridge. •Run water from the dispenser for 3 minutes (about one and
dispenser
a half gallons).
Water is not dispensed
Water in reservoir is •Call for service.
but icemaker is working
frozen.
Troubleshooting Tips
Before you call for service…

23
Problem Possible Causes What To Do
No water or ice cube
Supply line or shutoff • Call a plumber.
production
valve is clogged.
Water filter clogged. •Replace filter cartridge or remove filter and install plug.
Dispenser is
LOCKED
. •Press and hold the
LOCK CONTROL
pad for 3 seconds.
Refrigerator has odor
Foods transmitting • Foods with strong odors should be tightly wrapped.
odor to refrigerator.
• Keep an open box of baking soda in the refrigerator; replace
every three months.
Interior needs cleaning. • See
Care and cleaning.
Defrost water drainage •See
Care and cleaning.
system needs cleaning.
Moisture forms on
Not unusual during •Wipe surface dry.
outside of refrigerator
periods of high humidity.
Moisture collects inside
Too frequent or too
(in humid weather, air
long door openings.
carries moisture into
refrigerator when doors
are opened)
Interior light does
No power at outlet. • Replace fuse or reset the breaker.
not work
Light bulb burned out. •See
Replacing the light bulbs.
Water on kitchen floor or
Drain in the bottom of • See
Care and cleaning.
on bottom of freezer
the freezer clogged.
Cubes jammed in chute. •Poke ice through with a wooden spoon.
Hot air from bottom
Normal air flow cooling
of refrigerator
motor. In the refrigeration
process, it is normal that
heat be expelled in the
area under the refrigerator.
Some floor coverings are
sensitive and will discolor at
these normal and safe temperatures.
CUBED ICE was selected
Last setting was
CRUSHED ICE
. • A few cubes were left in the crusher from the previous setting.
but CRUSHED ICE
This is normal.
was dispensed
(
on some models)

Performance Data Sheet
GE SmartWater Filtration System
GWF Cartridge
Health Claim Performance Certified by NSF/ANSI*
(100% safety factors built in for unmetered usage)
Standard No. 42: Aesthetic Effects
Parameter USEPA Influent Effluent % Reduction
MCL Challenge Average Maximum Average Minimum
Chlorine – 1.9 ppm 0.02 ppm 0.05 ppm 98.90% 97.37%
T & O – – – – –
Particulate** – 200,000 3,978 7,800 98.00% 96.10%
Standard No. 53: Health Effects
Parameter USEPA Influent Effluent % Reduction
MCL Challenge Average Maximum Average Minimum
Turbidity 1 NTU*** 24.3 NTU 0.07 NTU 0.1 NTU 99.71% 99.59%
Cysts 99.95% Reduction 105,750 26 55 99.97% 99.95%
Lead at pH 6.5 15 ppb 160 ppb 1 ppb 1 ppb 99.37% 99.37%
Lead at pH 8.5 15 ppb 150 ppb 1.8 ppb 4.3 ppb 98.80% 97.13%
Lindane 0.0002 ppm 0.00062 ppm 0.00005 ppm 0.00005 ppm 91.93% 91.93%
Atrazine 0.003 ppm 0.0084 ppm 0.002 ppm 0.003 ppm 76.19% 64.28%
2,4-D 0.100 ppm 0.272 ppm 0.0264 ppm 0.080 ppm 90.29% 70.58%
Asbestos 99% 690 MFL/ml 0.32 MFL/ml 1.2 MFL/ml 99.95% 99.82%
* Tested using a flow rate of 0.5 gpm; pressure of 120 psig; pH of 7.5±0.5; temp. of 20±2.5 C
** Measurement in particles/ml
*** NTU = Nephelometric Units
Operating Specifications
■Capacity: certified for up to 300 gallons (1135 l) for models without a replacement filter indicator light; certified for up to
500 gallons (1895 l) for models with a replacement filter indicator light
■Pressure requirement: 40-120 psi (2.8-8.2 bar), non-shock
■Temperature: 33-100 F (0.6-38 C)
■Flow rate: 0.5 gpm (1.9 lpm)
General Installation/Operation/Maintenance Requirements
■Flush new cartridge at full flow for 3 minutes to purge out trapped air.
■Replace cartridge when flow becomes too slow; at least every six months.
Special Notices
■
Installation instructions; parts and service availability; and standard warranty are included with the product when shipped.
■This drinking water system must be maintained according to manufacturer’s instructions, including replacement of
filter cartridges.
■Do not use with water that is microbiologically unsafe or of unknown quality without adequate disinfection before or after
the system. Systems certified for cyst reduction may be used on disinfected water that may contain filterable cysts.
■
The contaminants or other substances removed or reduced by this water treatment system are not necessarily in your water.
■Check for compliance with the state and local laws and regulations.
Manufactured for: General Electric Company, Louisville, KY 40225
NSF
®
System Tested and Certified by NSF International against ANSI/NSF
Standard 42 & 53 for the reduction of:
Standard No. 42: Aesthetic Effects
Chemical Unit
Taste and Odor Reduction
Chlorine Reduction, Class I
Mechanical Filtration Unit
Particulate Reduction, Class I
Standard No. 53: Health Effects
Chemical Reduction Unit
Lead and Atrazine Reduction
Lindane and 2,4-D Reduction
Mechanical Filtration Unit
Turbidity Reduction
Cyst and Asbestos Reduction
24

25
Notes.

This appliance conforms to the following EEC Directives:
Cet appareil ménager est conforme aux directives CEE suivantes :
Este electrodoméstico se conforma con las siguientes instrucciones de la CEE:
Low Voltage Equipment
Appareils ménagers à bas voltage
Electrodomésticos de bajo voltaje
73/23/EEC
93/68/EEC
Electromagnetic Compatibility
Compatabilité électromagnétique
Compatibilidad electromagnética
89/336/EEC
92/31/EEC
93/68/EEC
Printed in the United States
Imprimé aux États-Unis
Impreso en los Estados Unidos

Información de seguridad
Adaptadores de corriente . . . . . . . . .4
Cables de extensión . . . . . . . . . . . . . .3
Conectar la electricidad . . . . . . . . . .4
Deshacerse debidamente de su
refrigerador. . . . . . . . . . . . . . . . . . . . .3
Precauciones de seguridad . . . . . . . .2
Instrucciones de funcionamiento
Cartucho del filtro de agua . . . . . . .6
Controles . . . . . . . . . . . . . . . . . . . . . .5
Dispensador de hielo y de agua . . .11
Dispositivo automático para
hacer hielo . . . . . . . . . . . . . . . . . . . .10
Entrepaños, recipientes
y estantes . . . . . . . . . . . . . . . . . . . . .6–8
Gavetas para guardar . . . . . . . . . . .8, 9
Cuidado y limpieza . . . . . . .12, 13
Cambio de bombillas . . . . . . . . . . .13
Instrucciones de instalación
Instalación de
la línea de agua . . . . . . . . . . . . .15–19
Preparación de instalación
del refrigerador . . . . . . . . . . . . . . . .14
Solucionar problemas
Antes de llamar al servicio . . . .21–23
Sonidos normales de
la operación . . . . . . . . . . . . . . . . . . .20
Ayuda al cliente
Hoja de datos de
funcionamiento . . . . . . . . . . . . . . . .24
EXPORT 197D3353P001 49-60101 12-00 JR
Anote aquí sus números de modelo y de serie:
Modelo número ________________________
Número de serie ________________________
Podrá encontrar estos números en la etiqueta
dentro del compartimiento del refrigerador
en la parte superior derecha bajo los controles.
Modelos 20, 22 y 25
Manual del Propietario
e Instrucciones
de Instalación
Refrigeradores
Lado a Lado

2
INFORMACIÓN IMPORTANTE DE SEGURIDAD.
LEA PRIMERO TODA LAS INSTRUCCIONES.
¡ADVERTENCIA!
Use este aparato sólo para los fines que se describen en este Manual del propietario.
PRECAUCIONES DE SEGURIDAD
Cuando use electrodomésticos, siga las precauciones básicas de seguridad, incluyendo las siguientes:
■
■Antes de usarse, este refrigerador deberá estar
instalado y ubicado de acuerdo con las
instrucciones de instalación. Ver también la
sección
Cómo Conectar la Electricidad
.
■
■No intente ponerse de pie sobre el refrigerador.
Eso podría resultar en daños personales o dañar
al refrigerador.
■
■No permita que los niños jueguen con el
refrigerador o que manipulen indebidamente los
controles.
■
■No permita que los niños se suban, se pongan
de pie en los entrepaños del refrigerador o se
cuelguen de los mismos. Podría dañarse el
refrigerador y causarles serias lesiones.
■
■No toque las superficies frías del congelador
cuando tenga las manos húmedas o mojadas.
La piel se podría adherir a las superficies
extremadamente frías.
■
■No almacene ni use gasolina ni otros vapores o
líquidos inflamables cerca de éste o de cualquier
otro aparato.
■
■Si su refrigerador tiene un dispositivo automático
para hacer hielo, evite el contacto con las partes
móviles del mecanismo de expulsión, o con el
elemento calefactor que desprende los cubos. No
ponga los dedos ni las manos en el mecanismo
automático para hacer hielo mientras el
refrigerador esté conectado.
■
■No toque las áreas donde se puede pinchar los
dedos; los espacios entre las puertas y entre las
puertas y los gabinetes son estrechos por
necesidad. Cierre las puertas con cuidado cuando
hayan niños cerca.
■
■Desconecte el refrigerador antes de limpiarlo o
efectuar reparaciones.
NOTA: Recomendamos enfáticamente encargar cualquier
servicio a un personal calificado.
■
■
Antes de reemplazar una bombilla fundida, el
refrigerador deberá ser desconectado
para evitar
el contacto con un cable con corriente. (Una
bombilla fundida podría romperse al
reemplazarla.)
NOTA: El colocar el control del congelador en posición 0 no
quita la corriente del circuito de la luz.
■
■No vuelva a congelar los alimentos congelados
una vez que se hayan descongelado.

DESHACERSE DEBIDAMENTE DE SU REFRIGERADOR
El que los niños queden atrapados y se asfixien no es
un problema del pasado. Los refrigeradores
abandonados o tirados …aunque sea por sólo “pocos
días siguen siendo un peligro.” Si se deshace de su
viejo refrigerador, por favor siga las instrucciones
que le damos a continuación para ayudar a prevenir
accidentes.
Antes de deshacerse de su viejo refrigerador
o congelador:
■Quite todas las puertas y tírelas por separado.
■Deje los entrepaños en su sitio para que los niños
no se suban encima.
■Si el refrigerador tiene un candado, inutilícelo.
Eliminación de CFC
Su antiguo refrigerador pudiera tener un sistema de
refrigeración que usara CFC (clorofluorocarbonos).
Se cree que los CFC son nocivos para el ozono de la
estratósfera.
Si se deshace del antiguo refrigerador, asegúrese de
que se extraiga el refrigerante con CFC para que un
técnico calificado lo tire en el lugar apropiado. Si
libera a propósito el refrigerante con CFC usted
podrá sufrir multas y encarcelamiento bajo las
estipulaciones de la legislación ambiental.
USO DE CABLES DE EXTENSION
Debido a los accidentes potenciales que pudieran ocurrir bajo determinadas condiciones, se recomienda
estrictamente no usar cables de extension.
Sin embargo, si decidiera usarlos, es absolutamente necesario que sea del tipo UL trifilar para aparatos
y cuente con una clavija con conexión a tierra y que el cable eléctrico sea de 15 amperios (mínimo) y
120 voltios.
PELIGRO! RIESGO DE QUE
UN NIÑO PUEDA QUEDAR ATRAPADO
3

4
INFORMACIÓN IMPORTANTE DE SEGURIDAD.
LEA PRIMERO TODA LAS INSTRUCCIONES.
¡ADVERTENCIA!
COMO CONECTAR LA ELECTRICIDAD
Bajo ninguna circunstancia debe cortar o quitar la tercera clavija (tierra) del cable de corriente. Por su
seguridad personal, este aparato deberá conectarse debidamente a tierra.
El cable eléctrico de este aparato está equipado
con un enchufe de tres clavijas (tierra) que encaja
en una toma de corriente estándar de pared de tres
entradas (tierra) para reducir al mínimo la posibilidad
de daños por descarga eléctrica con este aparato.
Haga que un electricista calificado revise la toma de
corriente de la pared y el circuito para asegurarse
que la salida esté conectada debidamente a tierra.
Cuando sólo se disponga de una salida de corriente
sin toma de tierra, es su responsabilidad y obligación
personal el reemplazarla por una salida adecuado
para tres clavijas con toma de tierra.
El refrigerador debería estar
siempre enchufado a una
toma de electricidad propia.
Esto le proporcionará el
mejor rendimiento y además
evita la sobrecarga que los
circuitos eléctricos de la casa,
lo cual podría ser causa de
incendio si los cables se
sobrecalentaran. En la placa indicadora de potencia
del refrigerador encontrará el voltaje, potencia y
frecuencia adecuados. Si el enchufe del producto no
encaja en su salida de corriente, debería cambiarse
el enchufe del aparato por uno nuevo.
IMPORTANTE: Los cambios de enchufes eléctricos y cables
debería realizarse por un técnico cualificado o un agente de
servicio. En algunos países, sólo les está permitido el cambiar
enchufes eléctricos y cables a técnicos cualificados.
Si el cable de corriente viene dañado de fábrica,
debe reemplazarse con un agente de servicio
cualificado para evitar un peligro de seguridad.
Nunca desconecte el refrigerador estirando del
cable. Tome siempre firmemente del enchufe y
sáquelo del contacto directamente hacia fuera.
Repare o reemplace inmediatamente todos los
cables eléctricos de servicio que se hayan desgastado
o dañado en alguna otra forma. No utilice cables
que muestren roturas o daños por abrasión a lo
largo de éste ni en alguno de sus extremos.
Al alejar su refrigerador de la pared, cuide que no
pase sobre el cable o lo dañe.
Cómo cambiar el cable de corriente
Si el cable de corriente de su refrigerador necesita
cambiarse en algún momento, deberá cambiarse
por un cable especial que podrá comprar en su
tienda local. Se le cobrará por el recambio del cable
de corriente principal si ha dañado el cable.
USO DE ADAPTADORES DE CORRIENTE
Debido a los accidentes potenciales relacionados con la seguridad bajo determinadas circunstancias,
recomendamos estrictamente no utilizar adaptadores de enchufe.
Sin embargo, en caso de que deba usar un
adaptador, y siempre que los códigos locales lo
permitan, es posible realizar una
conexión temporal
a una toma de corriente de pared de dos clavijas
debidamente conectada a tierra utilizando un
adaptador UL que puede adquirirse en la mayoría
de las ferreterías locales.
La punta más ancha del adaptador se deberá alinear
con la entrada más ancha de la toma de corriente
con el fin de proveer la polaridad correcta para la
conexión del cable de corriente.
Al desconectar el cable del adaptador, mantenga
siempre con una mano el adaptador en su lugar
mientras estira del cable de corriente con la otra
mano. De no hacerlo puede causar que el adaptador
se rompa después de mucho uso.
Si se rompiera la terminal a tierra del adaptador,
NO USE
el aparato hasta que se haya restablecido
la conexión a tierra de manera adecuada.
La conexión de la terminal de tierra del adaptador a la toma de
corriente no conecta el aparato a tierra, a no ser que el tornillo
de la tapa sea de metal y no esté aislado y que la toma de
corriente esté conectada a tierra a través del cableado de la
casa. Un electricista calificado deberá revisar el circuito para
asegurarse de que la toma esté debidamente conectado a tierra.
FAVOR DE LEER Y SEGUIR CUIDADOSAMENTE
LAS PRECAUCIONES DE SEGURIDAD.
GUARDE ESTAS INSTRUCCIONES
Antes de usarlo asegúrese
que hay una buena
conexión a tierra.

5
9 IS COLDEST
0 IS OFF
FREEZER FRESH FOOD
5
8
9
4
3
2
1
0
6
7
5
8
9
4
3
2
1
6
7
Para empezar, ponga el control para alimentos frescos en 5 y el control del
congelador en 5 y deje pasar 12 horas para que la temperatura se estabilice.
Puede ser necesario realizar varios ajustes. Ajuste los controles de
incremento en incremento, y deje pasar 12 horas tras realizar cada ajuste
para que el refrigerador alcance la temperatura que ha seleccionado.
Cuando ajusta el control del congelador a 0 dejan de enfriar el compartimiento
de alimentos frescos y el congelador pero el refrigerador no se apaga.
La calibración de los controles es un asunto de gustos personales, uso y
condiciones de operación y puede requerir más de un ajuste.
9 IS COLDEST
0 IS OFF
FREEZER FRESH FOOD
5
8
9
4
3
2
1
0
6
7
5
8
9
4
3
2
1
6
7
Los controles en el refrigerador.

6
El cartucho del filtro del agua.
Los entrepaños y recipientes del refrigerador.
Los recipientes en la puerta del compartimiento de alimentos frescos
Los recipientes ajustables se pueden llevar
fácilmente del refrigerador al área de trabajo.
Para sacarlos:
Levante la parte frontal del
recipiente hacia arriba, luego sáquelo.
Para reemplazarlos o reubicarlos:
Ajuste el
recipiente en los soportes moldeados de la
puerta y empuje hacia dentro La gaveta se
ajustará en su lugar.
La tapa deslizante
ayuda a prevenir que un
golpecito haga derramarse algo o que las cosas
pequeñas guardadas en el interior del
entrepaño de la puerta se caigan o resbalen.
Ponga un dedo en cada lado del divisor hacia la
parte trasera y muévalo hacia delante y hacia
atrás para que se ajuste a sus necesidades.
Cartucho del filtro de agua
El cartucho del filtro de agua está ubicado en
la esquina superior derecha trasera del
compartimiento del refrigerador.
Cuando cambiar el filtro en modelos
con luz indicadora de necesidad de
recambio
En el dispensador hay una luz de indicación
de recambio del cartucho del filtro del agua.
Esta luz se volverá anaranjada para advertirle
que necesita reemplazar el filtro pronto.
El cartucho del filtro debería reemplazarse
cuando la luz indicadora de recambio se
vuelva roja o si la salida de agua al
dispensador o al dispositivo para hacer
hielo disminuyera.
Cuándo cambiar el filtro en modelos
sin luz indicadora de necesidad de
recambio
El cartucho del filtro se deberá cambiar cada
seis meses
o antes si el flujo del agua desde el
dispensador de agua o desde el dispositivo
para hacer hielo disminuye.
Instalación del cartucho del filtro
Si está cambiando el cartucho, remueva
primero el viejo girándolo lentamente
hacia la izquierda.
No estire
del
cartucho hacia abajo. Un poco de agua
puede gotear.
En modelos sin luz indicadora de
recambio, pegue la etiqueta de mes
y año en el cartucho para recordarle de
reemplazar el filtro en
seis meses
.
Llene el cartucho de recambio con
agua de grifo para que fluya mejor desde
el dispensador inmediatamente después
de la instalación.
Alinee la flecha en el cartucho y el
soporte del cartucho, sitúelo encima del
nuevo cartucho hacia arriba dentro del
soporte.
No empuje
el cartucho arriba
hacia la parte interna del soporte.
Gírelo hacia la derecha lentamente hasta
que el cartucho del filtro pare.
NO LO
APRIETE DEMASIADO.
A medida que gira
el cartucho, él mismo se subirá hasta su
posición adecuada. El cartucho rotará
una media vuelta.
Deje correr el agua desde el dispensador
por 3 minutos (aprox. un galón y medio)
para aclarar el sistema y para prevenir
salpicaduras.
Presione la tecla
RESET WATER FILTER
en
el dispensador y manténgala presionada
durante tres segundos.
NOTA: Un cartucho de filtro de agua recién instalado
podría hacer que chorreara agua del dispensador.
Tapón de derivación del filtro
Se debe usar el tapón de derivación del filtro
cuando un cartucho de filtro de recambio no
se puede encontrar. El dispensador y el
dispositivo para hacer hielo no pueden
funcionar sin el filtro o sin el tapón de
derivación del filtro.
Filtros de recambio:
Para pedir cartuchos extra, contacte con su
distribuidor local.
GWF
Ponga la parte superior del cartucho hacia
arriba dentro del soporte del cartucho y
gírelo lentamente hacia la derecha.
Tapón de
derivación
del filtro
Soporte del
cartucho
En algunos modelos
No todos los modelos tienen todas las características.
Tapa deslizante
(en algunos modelos)

Reorganización de los entrepaños
Para extraerlas
Para cambiarlas
Entrepaños profundos de la puerta
Los extensores de entrepaños desmontables
hacen más profundos y encierran las
entrepaños fijos de las puertas, ofreciendo
mayor espacio y flexibilidad de
almacenamiento.
Para sacarlos:
Levante el extensor directamente
hacia arriba y luego hacia fuera.
Para cambiarlos:
Coloque el extensor del
entrepaño en los soportes moldeados en la
puerta y empuje hacia dentro. Se ajustará en
su lugar.
Entrepaño ajustable
(en algunos modelos)
Este entrepaño se divide en dos y la mitad se
desliza debajo de sí mismo para guardar
artículos muy altos ubicados en el entrepaño
que se encuentra más abajo.
Entrepaños del refrigerador:
Introduzca
el gancho
superior
Bájelo
para que se
ajuste en
su lugar
Para extraerlos
Entrepaños de congelador:
Entrepaño a prueba de derrames
(en algunos modelos)
El entrepaño deslizable a prueba de derrames
permite alcanzar artículos guardados atrás de
otros. Los bordes especiales están diseñados
para ayudar a prevenir derramamientos o
goteos a los entrepaños que se encuentran
más abajo.
Asegúrese de haber empujado los entrepaños hasta
el fondo antes de cerrar la puerta.
Entrepaños a prueba de derrames
(en algunos modelos)
Los bordes especiales están diseñados para
ayudar a prevenir derramamientos o goteos a
los entrepaños que se encuentran más abajo.
Para extraerlas
Cestas de congelador:
Extraiga la cesta estirando de la misma hacia
delante, levantando la parte delantera, y
levántela hasta sobrepasar el punto donde
se para.
ADVERTENCIA: Si no se usan las cestas del
congelador es posible que el rendimiento sea
pobre. Si se almacenan alimentos en el
congelador sin usar las cestas, el rendimiento de
la temperatura podría ser pobre por las
restricciones de la circulación del aire en el
compartimiento del congelador.
7
Estire hacia arriba
y hacia fuera
Levántelo

8
Características adicionales.
No todos los modelos tienen todas las características.
Estante ShelfSaver
™
Use este estante para guardar latas de bebidas,
que pueda alcanzar con facilidad.
También puede sostener un plato de cocinar
de 9″x 13″.
Cómo Llenar el Compartimiento del Congelador
Llene el refrigerador de forma que quede un
espacio libre de, al menos, 15 mm entre los
paquetes y 25 mm de espacio entre la parte
superior de cualquier paquete y el entrepaño
o la cesta por encima del mismo. Los
paquetes pueden colgar por fuera de la parte
frontal de los entrepaños, pero deberán
mantener una distancia de unos 15 mm con
las puertas.
■La comida a congelar no debe situarse
en contacto directo con la comida
almacenada. Si necesita congelar comida
cada día, puede que sea necesario reducir
la cantidad a congelar.
■Si necesita congelarse una cantidad
elevada de comida, ajuste el control del
congelador a su posición más fría. Una vez
que la comida haya sido congelada, vuelva
a ajustar el control del congelador a su
posición inicial.
■La comida se congela más rápidamente
en los tres entrepaños del centro del
compartimiento del congelador y más
lentamente en los entrepaños de la puerta
del congelador.
■No almacene comida rápida congelada
comercial por más tiempo del recomendado
por los fabricantes de la comida.
■Si el electrodoméstico sufriera una pérdida
de corriente por un período extenso de
tiempo o si fallase el sistema frigorífico, no
abra las puertas a menos que sea
absolutamente necesario. En caso de ser
necesario, ciérrelas tan pronto como sea
posible para que la comida congelada
permanezca en dicho estado por el mayor
tiempo posible.
■Los entrepaños de las puertas del
congelador marcadas con una etiqueta
de dos estrellas sólo deben almacenar
alimentos previamente congelados.
Bebidas carbonatadas no deben ser almacenadas
en el compartimiento del congelador.
Las gavetas de almacenamiento.
No todos los modelos tienen todas las características.
Gavetas de almacenamiento
El exceso de agua que pueda acumularse en
el fondo de las gavetas debe secarse.
Gavetas con humedad regulable
Deslice el control hasta llegar a la posición
High
(alto) o para proporcionar el alto
nivel de humedad recomendado para la
mayoría de los vegetales.
Deslice el control hasta llegar a la posición
Low
(bajo) o para proporcionar el nivel
de baja humedad recomendado para la
mayoría de las frutas.

Cómo sacar la gaveta de almacenamiento.
No todos los modelos tienen todas las características.
Cómo sacar las gavetas
Pueden extraerse fácilmente levantándolas
ligeramente y tirando de ellas hasta pasar el
punto de tope.
Si la puerta no le permite sacar las gavetas,
necesitará empujar el refrigerador hacia
delante hasta que la puerta se abra lo
suficiente para poder sacarlas. En algunos
casos, cuando se hace rodar el refrigerador
fuera, se necesitará moverlo hacia la
izquierda mientras lo empuja.
Al cambiar las gavetas, asegúrese de
deslizarlas por sus guías.
Guías de
la gaveta
9
Gaveta convertible para carnes
Esta gaveta convertible para carnes tiene su
propio conducto de refrigeración, el cual
permite la circulación en dicha gaveta de aire
frío proveniente del congelador.
El control de temperatura variable
regula
el flujo de aire desde el compartimiento
del congelador.
Disponga la palanca de control hacia
arriba
para pasar la gaveta a la temperatura normal
del refrigerador y proporcionar espacio extra
para almacenar verduras. El conducto de
refrigeración queda apagado. Se pueden
seleccionar posiciones variables entre estos
extremos.
Coloque la palanca del control hacia
abajo
en
la posición más fría para conservar carne fresca.
Si la palanca se deja mucho tiempo en esta
posición, se podrá formar escarcha en el
interior de la gaveta.
Normal
Lo más frío
Divisor
Soporte
Soporte y Divisor
(en algunos modelos)
El soporte está diseñado para que sus frutas y verduras no
toquen el suelo de la gaveta y no entren en contacto con la
escarcha que pudiera formarse. El divisor evitará que las
frutas y verduras de mayor tamaño caigan o rueden encima
de las más delicadas. Al levantar el divisor puede
desengancharlo del soporte y ajustarlo de un lado a otro,
luego vuelva a apretarlo hacia abajo y hasta que entre en
su posición.

10
Dispositivo automático para hacer hielo
(en algunos modelos)
El dispositivo para hacer hielo producirá
siete cubitos por ciclo—aproximadamente
100-130 cubitos en un período de 24 horas,
dependiendo de la temperatura del
congelador, de la temperatura ambiente,
del número de veces que se abra la puerta
y de otras condiciones de uso.
Si el refrigerador se pone en marcha antes
de que se instale la conexión de agua en el
dispositivo para hacer hielo, ponga el
interruptor de funcionamiento del mismo
en la posición
OFF
.
Cuando el refrigerador se haya conectado
al suministro de agua, ponga el interruptor
en la posición
ON
(ACTIVADO).
El dispositivo para hacer hielo se llenará de
agua cuando la temperatura alcance el
punto de congelación. Un refrigerador
recién instalado puede tardar entre 12 y 24
horas para empezar a hacer hielo.
Tire las primeras cargas de cubitos de hielo
para permitir que la línea de agua se limpie.
Asegúrese que nada impida el movimiento
del brazo detector.
Es normal que algunos cubitos salgan
pegados.
Si no se usa hielo con frecuencia, los cubitos
de hielo viejos se opacan, se hacen más
pequeños y adquieren un sabor rancio. Si los
cubitos de hielo se pegasen al dispositivo,
apague el dispositivo, saque los cubitos y
vuelva a ponerlo en marcha.
Hay un entrepaño en la parte superior
del congelador por encima del
dispositivo para hacer hielo que puede
usarse para almacenamiento.
Gaveta de almacenamiento de hielo
Juego de accesorios de dispositivo automático para hacer hielo
Para acceder al hielo,
tire de la gaveta hacia
fuera.
Para sacar la gaveta,
estire de la misma hacia
fuera y levántela hasta sobrepasar el punto
donde se para.
Si su refrigerador no venía ya equipado con
un dispositivo automático para hacer hielo,
puede obtener un juego de accesorios para
el dispositivo para hacer hielo, por un
precio adicional.
Véase la parte de atrás de su refrigerador
para el juego de dispositivo para hacer hielo
específico que su modelo necesita.
Dispositivo
para hacer hielo
Brazo Detector
Interruptor de
corriente
Luz verde de
corriente
El dispositivo automático para hacer hielo.
Un refrigerador recién instalado puede tardar de 12 a 24 horas antes de empezar a hacer hielo.

11
El dispensador de agua y hielo.
En algunos modelos
Datos importantes sobre su dispensador
■No agregue hielo de bandejas o de bolsas
en el recipiente de almacenamiento.
Podría provocar que no salga bien o que
no se triture adecuadamente.
■No llene demasiado los vasos de hielo ni
use vasos estrechos. El hielo amontonado
podría obstruir el orificio o hacer que se
congele la puerta del orifico de manera
que no se pueda abrir. Si hubiera hielo
bloqueándolo, empújelo con una cuchara
de madera.
■No debería usarse el recipiente de hielo
para enfriar rápidamente bebidas ni
alimentos. Las latas, botellas o paquetes
de comida dentro del recipiente podrían
causar que el dispositivo de hielo se
agujereara o obturase.
■Puede que salga algo de hielo triturado
aunque haya seleccionado la opción
CUBED ICE
(Hielo en Cubitos). Esto sucede
en ocasiones cuando algunos cubos se
cuelan por el triturador.
■Después de salir hielo triturado, puede
gotear un poco de agua de la salida.
■A veces, se formará un pequeño montón
de nieve en la salida del hielo de la puerta.
Esto es normal y, por regla general, sucede
cuando ha dispensado hielo picado
repetidamente. La nieve se evaporará por
sí misma.
PRECAUCION: Algunos productos como el agua
helada no deberían consumirse demasiado frios.
Para usar el dispensador
Seleccione
CUBED ICE
(Hielo en cubitos) ,
CRUSHED ICE
(Picado) o
WATER
(Agua) .
Presione el vaso suavemente contra el brazo
del dispensador.
El entrepaño recogedor no se vacía solo.
Para evitar las manchas de agua, el
recogedor y la parrilla se deberán limpiar
regularmente.
Si no hay distribución de agua cuando se acaba de
instalar el refrigerador, puede que haya aire en el
circuito de la línea de agua. Oprima el brazo del
dispensador durante al menos dos minutos para
eliminar el aire atrapado de la línea de agua y llenar
el circuito. Para eliminar las impurezas de la línea de
agua, deseche los primeros seis vasos de agua.
PRECAUCIÓN: Nunca introduzca los dedos ni
cualquier otro objeto en la apertura de salida del
triturador de hielo.
Para bloquear el dispensador
(en algunos modelos)
Presione la tecla
LOCK
CONTROL
(control de
bloqueo) durante tres
segundos para cerrar el
dispensador y el panel de
control. Para desbloquearlo,
presione la misma tecla
durante tres segundos nuevamente.
Luz del dispensador
Esta tecla enciende y apaga
la luz nocturna del
dispensador. La luz también
se enciende al presionar el
brazo del dispensador. Si
esta luz se funde debería
reemplazarse con una bombilla de un máximo
de 6 vatios y 12 voltios DC.
Entrepaño Recogedor
Gaveta de almacenamiento de hielo en
modelos con dispensador
Para sacarla:
Ponga el interruptor de marcha del
dispositivo de hielo en la posición
OFF
. Estire
de la gaveta directamente hacia fuera y luego
levántela hasta pasar el punto de detención.
Para cambiarla:
Al cambiar la gaveta asegúrese de
presionarla firmemente en su sitio. Si no
llega hasta el final, vuelva a sacarla y gire el
mecanismo de manejo 1/4 de vuelta. Luego
empuje de nuevo el entrepaño.
Girar
Mecanismo
de manejo

12
Condensador
En ambientes de uso casero normal la
limpieza rutinaria del condensador no es
necesaria. Sin embargo, en ambientes que
puedan ser particularmente grasientos o con
mucho polvo, el condensador deberá
limpiarse de forma periódica para el buen
funcionamiento del refrigerador.
Limpieza del Condensador:
El condensador está situado en la parte
trasera del refrigerador. Para acceder al
mismo, primero desenchufe el refrigerador.
Luego quite la cubierta de acceso. El
condensador está al lado derecho.
Cuidado y limpieza del refrigerador.
Limpieza del exterior
El receptor del dispensador
(en algunos
modelos), por debajo de la parrilla, debe
mantenerse limpio y seco. El agua que se
queda en esta área puede dejar depósitos.
Quite los depósitos agregando vinagre sin
diluir al pozo. Remoje hasta que
desaparezcan los depósitos o hasta que se
desprendan lo suficiente para quitarlos.
El botón del dispensador
(en algunos
modelos). Antes de limpiarlo, cierre el
dispensador presionando y manteniendo
apretada la tecla
LOCK CONTROL
durante
3 segundos. Use agua caliente y una solución
de bicarbonato—de sodio aproximadamente
una cucharada (15 ml) de bicarbonato de
sodio por cada cuarto (1 litro) de agua.
Enjuague completamente con agua y seque.
Las manijas de la puerta y los ornamentos.
Se limpian con un paño humedecido con
una solución de detergente suave y agua.
Seque con un paño suave.
Mantenga limpio el exterior.
Límpielo con un
paño limpio ligeramente humedecido con
cera para aparatos de cocina o con un
detergente suave y agua. Seque y pula con
un paño limpio y suave.
No limpie el refrigerador con un paño sucio de limpiar
cacharros ni con un paño húmedo. Estos podrían dejar
residuos que afecten a la pintura. No use estropajos,
limpiadores en polvo, lejía ni limpiadores que
contengan lejía, ya que estos productos podrían
rayar y desprender el acabado de pintura.
Limpieza del Interior
Para evitar olores,
deje una caja abierta de
bicarbonato de sodio en los compartimientos
de alimentos frescos y del congelador.
Desconecte el refrigerador antes de limpiarlo.
Si no fuera posible, exprima el exceso de
humedad de la esponja o del paño cuando se
limpie alrededor de botones, bombillas o
controles.
Use agua caliente y una solución de
bicarbonato—de sodio aproximadamente
una cucharada (15 ml) de bicarbonato de
sodio por cada cuarto (1 litro) de agua.
Esta solución limpia y neutraliza olores.
Enjuague y séquelo.
Después de limpiar las juntas de las puertas,
aplique una capa delgada de vaselina del
lado de la bisagra. Esto ayuda a evitar que las
juntas se doblen o se peguen.
Vacíe la apertura del compartimiento del
congelador.
En la limpieza anual, retire la
canasta inferior del congelador e introduzca,
con ayuda de una jeringa para carne, una
solución de bicarbonato de sodio—una
cucharadita (5 ml) y 2 tazas (500 ml) de agua
caliente (no hirviendo)—en la tubería de
desagüe. Esto ayudará a eliminar los olores y
a reducir la probabilidad de que se tape. Si
la salida del desagüe se obturara, use una
jeringa de carne y una solución de
bicarbonato de sodio para forzar que la
materia pase a través de la línea de desagüe.
Evite limpiar los entrepaños de cristal con agua
caliente dado que el cambio extremo de temperatura
podría hacer que se rompan. Maneje los entrepaños
de vidrio con cuidado. El golpear un vidrio templado
puede hacer que se rompa en pedazos.
No lave ninguna parte de plástico del refrigerador
en el lavaplatos.
Área de goteo del dispensador
Se deberá tener cuidado al retirar el
refrigerador de la pared. Todos los tipos de
recubrimiento de pisos se pueden dañar,
sobre todo los recubrimientos acojinados y
los que tienen superficies repujadas.
Tire del refrigerador en forma recta y
empuje nuevamente para devolverlo a su
posición. Mover el refrigerador en dirección
lateral puede causar daños al recubrimiento
del piso o al refrigerador.
Cuando empuje el refrigerador hacia atrás, debe
asegurarse de que no esté pasando por encima del
cable de corriente o de la línea de agua del
dispositivo automático de hielo (en algunos modelos).
Detrás del refrigerador

En el caso de vacaciones o ausencias
prolongadas, retire los alimentos y
desenchufe el refrigerador. Mueva el control
del congelador a la posición
0
(off)(apagado)
y limpie el interior con una solución de
bicarbonato de una cucharada (15 ml) de
bicarbonato por un cuarto (1 litro) de agua.
Deje las puertas abiertas.
Ponga el interruptor de corriente del
dispositivo de hielo en la posición
OFF
y
cierre el paso del agua al refrigerador.
Si la temperatura ambiente pudiera llegar a
estar por debajo del punto de congelación,
haga que una persona calificada desagüe el
circuito del suministro de agua (en algunos
modelos) para evitar daños a la propiedad
causados por inundación.
Cómo cambiar las bombillas.
El colocar el control en posición 0 (off) no quita la corriente del circuito de la luz.
Compartimiento de alimentos frescos—Luz superior
Desenchufe el refrigerador.
La bombilla está situada detrás de los
controles. Reemplace la bombilla con
una bombilla de electrodomésticos del
mismo voltaje o inferior.
Vuelva a enchufar el refrigerador.
Compartimiento de alimentos frescos—Luz inferior
(en algunos modelos)
Esta luz está situada por encima de la gaveta
superior.
Desenchufe el refrigerador.
Tome la lengüeta en la parte inferior de
la cubierta de la luz y tire de esta hacia
delante.
Después de reemplazar la bombilla con
una bombilla de electrodomésticos
del mismo voltaje o inferior, vuelva a
colocar la cubierta.
Vuelva a enchufar el refrigerador a
la corriente.
Compartimiento del congelador
Desenchufe el refrigerador.
Saque el entrepaño justo debajo de la
cubierta de la luz. (El entrepaño será
más fácil de quitar si se vacía primero).
Levante la cubierta de la luz para
extraer.
Después de colocar una bombilla nueva
de igual o menos vatios, vuelva a instalar
la cubierta colgándola de las tres pestañas.
Vuelva a instalar el entrepaño y enchufe
el refrigerador de nuevo.
13
Preparación para Vacaciones
Preparación para Mudanzas
Asegure todos los elementos sueltos como
parrillas, entrepaños y gavetas pegándolos
con cinta adhesiva en su lugar para evitar
daños.
Asegúrese que el refrigerador se coloque en posición
vertical durante la mudanza.
Dispensador
Desenchufe el refrigerador.
La bombilla está situada en el
dispensador bajo el panel de control.
Quite la bombilla girándola en el
sentido contrario a las agujas del reloj.
Cambie la bombilla por otra del mismo
tamaño y voltaje.
Vuelva a enchufar el refrigerador a la
corriente.

14
ANTES DE QUE EMPIECE
Lea todo este manual cuidadosamente.
• IMPORTANTE
–
Guarde este
manual para que lo pueda usar el inspector local.
• IMPORTANTE
–
Obedezca todos
los códigos y leyes relacionados.
• Nota para el Instalador
–
Asegúrese de dejar
el manual de instrucciones al Consumidor.
• Nota al Consumidor
–
Guarde este manual
para revisarlo en el futuro.
• Nivel de Conocimientos – La instalación de este
electrodoméstico requiere conocimientos
mecánicos básicos.
• Tiempo de montaje – Instalación del Refrigerador
15 minutos
• El instalador es el responsable de que la instalación
se efectúe de forma adecuada.
• Los fallos del producto fruto de una instalación
incorrecta no están cubiertos por la garantía.
•No instale el refrigerador en un lugar donde la
temperatura ambiente bajará de los 60°F (16°C) ya
que no se pondrá en marcha lo suficiente para
mantener una temperatura apropiada.
•Instálelo sobre un piso suficientemente fuerte para
aguantar su peso cuando esté lleno.
UBICACIÓN DEL REFRIGERADOR
Instrucciones de
Refrigerador
Instalación
Modelos 20, 22, 25
Deje suficiente espacio para facilitar la instalación,
la circulación adecuada de aire y las conexiones de
fontanería y eléctricas.
•Por los lados 4 mm
•Por arriba 25 mm
•Por detrás 25 mm
Se necesita un espacio para la puerta de 19 mm para su
apertura en 90° . Esto facilita el acceso al espacio de
almacenamiento de alimentos.
ESPACIOS DE SEGURIDAD
Si el refrigerador tiene un dispositivo de hielo, deberá
estar conectado a la tubería de agua potable fría.
Puede adquirirse, con un costo adicional un juego de
suministro de agua (contiene tuberías, llave de paso,
adaptadores e instrucciones) en su distribuidor local.
La instalación del dispositivo automático de hielo debe
realizarse únicamente por un técnico calificado.
SUMINISTRO DE AGUA AL
DISPOSITIVO DE HIELO
(en algunos modelos)
*La altura no incluye la bisagra.
**La profundidad incluye la manija.
DIMENSIONES
20 22 25
A* 66
1
⁄2″ 66
1
⁄2″ 68
3
⁄4″
(1689 mm) (1689 mm) (1746 mm)
B 31
1
⁄2″ 33
1
⁄2″ 35
3
⁄4″
(800 mm) (851 mm) (908 mm)
C** 33″ 33″ 33″
(838 mm) (838 mm) (838 mm)
D 46
5
⁄9″ 48
4
⁄5″ 48
4
⁄5″
(1182 mm) (1240 mm) (1240 mm)
A
B
C
D

15
Los rodillos tienen 3 propósitos:
Los rodillos se ajustan de forma que la puerta se
cierre fácilmente cuando esté medio abierta.
Los rodillos se ajustan para que el refrigerador esté
firmemente posicionado en el piso y no se tambalee.
Los rodillos permiten mover el refrigerador para
retirarlo de la pared para su limpieza.
Para ajustar los rodillos, quite la parrilla de la base,
tirando hacia fuera por debajo.
Gire los tornillos que ajustan el rodillo en el sentido de las
agujas del reloj para elevar el refrigerador y en el sentido
contrario de la agujas para bajarlo. Use una llave ajustable
(de 3/8″hexagonal ) o tenazas.
Para volver a colocar la parrilla de la base, alinee los
ganchos de la parte trasera de la parrilla entre la barra y la
parte inferior del armario. Presiónela hacia delante hasta
que los ganchos queden fijos en su lugar.
RODILLOS
INSTALACIÓN DE LA LÍNEA DE AGUA
Si la alimentación de agua a su refrigerador proviene de
un Sistema de Filtración de Agua de Ósmosis Inversa Y el
refrigerador también cuenta con un filtro de agua, use el
tapón de derivación del filtro del refrigerador. El uso
conjunto del cartucho de filtración de agua del
refrigerador con el filtro de OI (ósmosis inversa) pudiera
resultar en la producción de cubos de hielo huecos y en un
caudal de agua más lento del dispensador de agua.
Esta instalación de la línea de agua no está garantizada
ni por el fabricante del refrigerador ni por el del
dispositivo para hacer hielo. Siga estas instrucciones
con cuidado para minimizar el riesgo de producir
costosos daños causados por el agua.
El agua que da golpes en la tubería de la casa con un
ruido de martillo, puede causar daños en partes del
refrigerador y también fugas o inundación. Llame a un
fontanero calificado para arreglar el ruido de martillo
en la tubería antes de instalar la línea del suministro de
agua al refrigerador.
Para prevenir quemaduras y daños al producto, no
instale la línea de agua a la tubería de agua caliente.
ANTES DE EMPEZAR
Si el refrigerador se pone en marcha antes de que se
instale la conexión de agua en el dispositivo para hacer
hielo, ponga el interruptor de funcionamiento del
mismo en la posición OFF(apagado).
No instale el tubo del dispositivo para hacer hielo en
sitios en donde la temperatura pudiera descender por
debajo del punto de congelación.
Cuando utilice un aparato eléctrico (como, por
ejemplo, un taladro mecánico) durante la instalación,
asegúrese de que dicho aparato esté eléctricamente
aislado o conectado de tal manera que no exista
peligro de que se produzcan descargas eléctricas.
Todas las instalaciones deben apegarse a las normas
vigentes en materia de obras de fontanería.
PRECAUCIÓN
–
Conéctelo solo
a tomas de agua potable.
La instalación del dispositivo automático de hielo
debe realizarse únicamente por un técnico calificado.
ANTES DE EMPEZAR (CONT.)
Instrucciones de instalación
Para extraer la
parrilla de la base,
abra las puertas
y tire de la parrilla
hacia fuera.
5/16″Llave
hexagonal
Para
levantarla
ALINEADO DE LAS PUERTAS
Una vez nivelado, asegúrese que las puertas estén parejas
en la parte superior.
Para nivelar las puertas, ajuste la puerta del compartimiento
de alimentos frescos. Use una llave Allen de 5/16″para
girar el tornillo de ajuste de la puerta hacia la derecha
para levantar la puerta y hacia la izquierda para bajarla.
(Un tapón de nylon intercalado en la fibra de la clavija
evita el que se gire la misma a menos que se use una
llave.) Después de una o dos vueltas de llave, abra y cierre
la puerta de los alimentos frescos y revise el correcto
alineado de la parte superior de las puertas.

16
• Tubo de cobre o plástico de un juego de suministros de
agua aprobado de, 1/4″de diamétro exterior para
conectar el refrigerador al suministro de agua.
Asegúrese que ambos extremos del tubo estén cortados
a precisión.
No use adaptadores ni tubos de plástico a no ser que
provengan de un juego de suministros de agua
aprobado ya que la cañería de suministro sufre la
presión del agua en todo momento. Además, ciertos
tipos de tubos de plástico podrían debilitarse con el
tiempo y agrietarse, ocasionando fugas de agua.
• Dos tuercas de compresión con diámetro exterior de
1/4″y 2 férulas (mangas)—para conectar el tubo de
cobre a la llave de paso y la válvula del agua del
refrigerador.
• Si la tubería del agua existente tiene en el extremo un
empalme apestañado, para conectar la tubería del agua
al refrigerador se necesitará un adaptador (que se
compra en las tiendas de artículos de fontanería) O
puede cortar el empalme apestañado con un cortatubos
y luego usar un empalme de compresión.
• Llave de paso para conectar a la tubería del agua fría.
La entrada de agua de dicha llave habrá de tener un
diámetro interior mínimo de 5/32″en el punto de
conexión a la TUBERIA DE AGUA FRIA. En muchos
de los juegos de accesorios para el abastecimiento de
agua se incluyen llaves de paso tipo campana. Antes de
comprarla, asegúrese que la llave de paso de tipo
campana se ajuste a las normas locales vigentes en
materia de fontanería. No se recomienda el uso de
válvulas de cierre autoperforadoras.
QUÉ NECESITARÁ
Para determinar la cantidad de tubo que necesita:
Mida la distancia desde la llave de paso del agua detrás del
refrigerador hasta el tubo de suministro de agua. Luego
agregue 244 cm. Asegúrese de que haya suficiente tubo
adicional 244 cm doblado en forma de espiral en 3 vueltas
de 25 cm de diámetro) para permitir separar el refrigerador
de la pared después de la instalación.
• Puede adquirirse, a un costo adicional, un juego de
suministro de agua(contiene tuberías, llave de paso,
adaptadores e instrucciones) en su distribuidor local.
•Suministro de agua fría. La presión del agua debe oscilar
entre 1,4 y -8,1 bares en modelos sin filtro de agua y entre
2,8 y -8,2 bares en modelos con un filtro de agua.
•Taladro eléctrico.
QUÉ NECESITARÁ (CONT.)
Instrucciones de instalación

17
Una la llave de paso al tubo de agua fría con la
abrazadera de tubo.
Instrucciones de instalación
CIERRE EL PASO GENERAL DE
AGUA A LA CASA
Abra el grifo más cercano durante el tiempo suficiente
para despejar la tubería del agua.
Instale la llave de paso en la tubería de agua potable
de uso frecuente más cercana.
1
Coloque la llave en un lugar que tenga fácil acceso.
Lo mejor es colocarla en el lateral de un tubo
vertical. Si fuera necesario colocarla en un tubo
horizontal, haga la conexión en la parte superior
o lateral, en vez de en la inferior, para evitar la
extracción de sedimentos presentes en el tubo.
ELIJA LA UBICACIÓN DE LA
LLAVE DE PASO
2
HAGA EL AGUJERO PARA
LA LLAVE
3
SUJETE LA LLAVE DE PASO
4
Apriete los tornillos de la abrazadera hasta que la
arandela de sellado empiece a dilatarse.
NOTA: No apriete demasiado pues podría quebrar
el tubo.
APRIETE LA ABRAZADERA DEL
TUBO
5
Abrazadera del tubo
Tubo de agua fría vertical
Llave de paso
tipo campana
Arandela
Extremo de entrada
Abrazadera del tubo
Tornillo de la
Abrazadera
Haga pasar el tubo de cobre entre la tubería de
agua fría y el refrigerador.
Haga pasar el tubo por un agujero hecho en el suelo
(detrás del refrigerador o en la base del armario
adyacente) lo más próximo posible a la pared.
NOTA: Asegúrese que haya suficiente tubo
adicional 8 pies (244 cm) doblado en forma de
espiral en 3 vueltas de 10″ (25 cm) de diámetro para
permitir separar el refrigerador de la pared después
de la instalación.
COLOQUE LA TUBERÍA
6
Haga un agujero de 1/4″ en el tubo con un taladro,
usando una broca bien afilada. Elimine las
asperezas que pudieran haberse producido al hacer
el agujero con el taladro.

18
Coloque la tuerca de compresión y la férula
(manga) al extremo del tubo, tal como se indica en
la ilustración.
Introduzca el extremo del tubo en la válvula del
agua del refrigerador (lo más posible). Al mismo
tiempo que sujeta el tubo, apriete el adaptador.
Sujete el tubo con la abrazadera que se
proporciona, de modo que quede en posición
vertical. Es posible que necesite abrir la abrazadera.
Retire el tapón de plástico flexible de la válvula de agua
(conexión al refrigerador).
Coloque la tuerca de compresión y la férula
(manga) en el extremo del tubo y conéctelo a la
llave de paso.
Asegúrese que el tubo esté totalmente metido en la
llave. Apriete bien la tuerca de compresión.
CONECTE EL TUBO A LA LLAVE
DE PASO
7
Llave de paso tipo
campana
Tuerca de compresión
Tuerca de presión
Válvula de salida
Férula (manga)
Abra el abastecimiento principal del agua y deje
que ésta corra por el interior del tubo hasta que
salga completamente transparente.
Cierre el agua después de que haya pasado por el
tubo un litro, aproximadamente.
LIMPIEZA DE LA TUBERÍA
8
NOTAS:
• Antes de efectuar la conexión al refrigerador,
asegúrese de que el cable eléctrico del
refrigerador no esté enchufado a la toma de
corriente de la pared.
• Si su refrigerador no tiene un filtro de agua,
recomendamos la instalación de uno si el agua
que recibe tiene arenilla o partículas que pudieran
obturar el filtro de la válvula de agua el refrigerador.
Instálelo en el tubo de agua cerca al refrigerador.
CONECTE EL TUBO AL
REFRIGERADOR
9
CONECTE EL TUBO AL
REFRIGERADOR
(CONT.)
9
INSTALACIÓN DE LA LÍNEA DE AGUA (CONT.)
Retire la cubierta de acceso.
Instrucciones de instalación
Vuelva a colocar la cubierta de acceso.
1/4″
Tuerca de
compresión
Abrazadera
del tubo
1/4″Tubos
Férula
(manga)
Conexión al
refrigerador

19
INSTALACIÓN DE LA LÍNEA DE AGUA (CONT.)
Apriete todas las conexiones que tengan fugas
de agua.
ABRA EL PASO DE AGUA EN LA
VÁLVULA DE CIERRE
10
Coloque el tubo en espiral para evitar la vibración
contra la parte trasera del refrigerador o contra la
pared. Empuje el refrigerador de nuevo hacia la pared.
ENCHUFE EL REFRIGERADOR
11
PONGA EN MARCHA EL
DISPOSITIVO PARA HACER HIELO
Ponga el interruptor de marcha del dispositivo de
hielo en la posición ON. El dispositivo para hacer
hielo no entrará en funcionamiento hasta que haya
alcanzado su temperatura de operación de 15 °F
(-9 °C), o menos. En dicho momento entrará en
funcionamiento, si el interruptor de corriente del
dispositivo está en la posición ON (Activado).
NOTA: En casos en que la presión del agua sea baja,
la llave de paso del agua podría tardar hasta tres
veces más en proveer agua suficiente para el
dispositivo de hielo.
Instrucciones de instalación
12

El nuevo compresor altamente efectivo funciona más rápido y tendrá un zumbido o
ruido pulsante más alto durante el funcionamiento.
El ventilador haciendo circular aire dentro del congelador manteniendo una
temperatura uniforme.
El goteo de agua que cae en el calentador de descongelación causa un ruido
silbante durante el ciclo de descongelación.
El flujo de refrigerante a través de la espiral de refrigeración del congelador causa
sonidos similares al agua hirviendo o un gorgoteo.
Las espirales de refrigeración crujen o truenan a causa de la expansión y
contracción durante la descongelación y la refrigeración después del deshiele.
El goteo de agua al derretirse desde el vaporizador y fluir a la bandeja de desagüe
en el ciclo de descongelación.
Dispositivo automático para hacer hielo
(en algunos modelos)
La válvula de agua del dispositivo para hacer hielo zumba cuando se llena de agua.
Si el interruptor está en posición
ON
(ACTIVADA hacia abajo) zumbará aun sin
estar conectada al agua. El tener el interruptor en la posición
ON
(ACTIVADA
hacia abajo) antes de que esté conectado al agua puede dañar el dispositivo. Para
evitar esto, ponga el interruptor de marcha en la posición
OFF
. Esto parará el ruido.
El sonido de los cubitos de hielo al caer al recipiente y el flujo del agua en las
tuberías cuando el dispositivo se está rellenando.
Estos sonidos son normales
y se deben a su elevada
eficacia operativa.
20
Sonidos normales de operación.

21
Solución de problemas
¡Ahorre tiempo y dinero! Revise las tablas en las páginas siguientes y
tal vez no necesite llamar al servicio de reparación.
Antes de llamar al servicio…
Problema Posibles Causas Qué hacer
El refrigerador no
El refrigerador en ciclo de • Espere 30 minutos para que termine el ciclo de descongelación.
funciona
descongelación.
El controles del congelador está • Mueva los controles de temperatura hasta un ajuste
en posición
0 (off)
. de temperatura.
El refrigerador esté • Empuje la clavija completamente en el enchufe.
desconectado.
Fusible fundido/ • Reemplace el fusible o reajuste el interruptor.
interruptor de circuito roto.
Vibraciones o sacudidas
Los rodillos frontales •Ver
Rodillos.
(Es normal que
necesitan ajustarse.
vibre ligeramente)
El motor está en marcha
Es normal cuando •Espere 24 horas para que el refrigerador se enfríe
por mucho tiempo o se
se enchufa al principio por completo.
enciende y apaga con
frecuencia. (Los
Sucede a menudo cuando •Es normal.
refrigeradores modernos
se guardan cantidades
con más espacio y mayores
grandes de comida.
congeladores necesitan
Puerta quedó abierta. •Revise que no haya un paquete atrancando la puerta.
más tiempo de
Hace calor o la puerta •Es normal.
funcionamiento. Se ponen
se abre frecuentemente.
en march y se apagan para
Seleccionado el nivel más •Ver
Controles.
apagan para mantener su
temperatura.)
bajo del control de
temperatura.
Nevera o congelador
Control de temperatura en •Ver
Controles.
demasiado templado
posición poco fría.
Hace calor o la puerta •Ajuste el control de temperatura a un nivel más bajo
se abre frecuentemente. Ver
Controles.
Puerta quedó abierta. •Revise que no haya un paquete atrancando la puerta.
Se ha acumulado hielo
Puerta quedó abierta. •Revise que no haya un paquete atrancando la puerta.
en los alimentos congelados
La puerta se abre con
(es normal que haya hielo
demasiada frecuencia.
dentro del paquete)
El divisor entre el
El sistema de ahorra •Eso ayuda que no se forme condensación en el exterior.
congelador y la nevera
energético hace circular
parece caliente
líquido templado por el borde
del congelador.

Problema Posibles Causas Qué hacer
Los cubitos tienen
Hay que limpiar el recipiente. • Vacíe y limpie el recipiente. Tire los cubitos viejos.
olor/sabor
La comida está pasando •Envuelva bien los alimentos.
olor/sabor a los cubitos.
El interior del refrigerador •Ver
Cuidado y Limpieza
.
necesita limpiarse.
Cubitos pequeños o huecos
Filtro de agua obturado. •Cambie el cartucho del filtro por uno nuevo o el tapón.
Congelación de cubitos lenta
Puerta quedó abierta. •Revise que no haya un paquete atrancando la puerta.
Control de temperatura ajustado •Ver
Controles
.
demasiado alto.
Puerta no se cierra
La junta selladora de la puerta en •Ponga vaselina en la parte delantera de la junta.
bien
lado de bisagras se pega o se dobla.
Luz naranja en
Calentador de descongelación •Es normal.
el congelador
en marcha.
El dispositivo de cubitos
Dispositivo apagado o • Encienda dispositivo o abra paso de agua.
no funciona (en algunos
paso de agua cerrado.
modelos)
Hay cubitos pegados al • Quite los cubitos y mueva el brazo a la posición ON (abajo)
brazo detector del dispositivo. position.
Bloques de hielo irregulares en •Rómpalos con la presión de sus dedos (no más) y tire los restantes.
el recipiente de almacenamiento.
•Congelador puede estar demasiado caliente. Vaya ajustando el
control del congelador a una posición más fría, de una posición
a la otra, hasta que no se formen bloques.
El dispensador está LOCKED •Presione la tecla, manteniéndola apretada
(bloqueado)
LOCK CONTROL
por 3 segundos.
El agua tiene mal olor/sabor
No se ha usado el dispensador •Saque agua del dispensador hasta que se renueve toda el agua
(en algunos modelos)
en mucho tiempo. del circuito.
El agua del primer vaso
Es normal cuando el refrigerador • Espere 24 horas a que el refrigerador se enfríe por completo.
está templada
está recién instalado.
(en algunos modelos)
No se ha usado el dispensador • Saque agua del dispensador hasta que se renueve toda el agua
en mucho tiempo. del circuito.
El circuito del agua se ha vaciado. •Deje pasar varias horas hasta que el nuevo depósito se enfríe.
El dispensador de agua
Suministro de agua apagado •Ver
Instalación de la línea de agua
.
no funciona (en algunos
o no conectado.
modelos)
Filtro de agua obturado. • Cambie el cartucho del filtro o quite el filtro e instale el tapón.
Puede haber aire atrapado en el •Presione el brazo del dispensador por un mínimo de dos
circuito del agua. minutos.
El dispensador está LOCKED •Presione la tecla
LOCK CONTROL
manteniéndola apretada
(bloqueado). por 3 segundos.
Sale agua del dispensador
Cartucho de filtro recién instalado. •Haga corer el agua del dispensador durante 3 minutos (un galón
y medio más o menos).
No sale agua pero el
El agua en el depósito está •Llame al servicio de reparaciones.
dispositivo de hielo
congelada.
funciona
Solución de problemas
Antes de llamar al servicio…
22

Problema Posibles Causas Qué hacer
No sale agua ni
La línea de agua o la • Llame a un fontanero.
cubitos de hielo
válvula están obturadas.
Filtro de agua obturado. •Cambie el cartucho del filtro o quite el filtro e instale el tapón.
El dispensador está LOCKED •Presione la tecla
LOCK CONTROL
manteniéndola apretada
(bloqueado). por 3 segundos.
El refrigerador huele mal
Alguna comida está •Las comidas que desprendan fuertes olores deben envolverse
pasando olores al refrigerador. muy bien.
•Deje una caja de bicarbonato sódico abierta en el refrigerador,
cámbiela cada tres meses.
El interior del refrigerador •Ver
Cuidado y Limpieza
.
necesita limpiarse
Descongele el desagüe •Ver
Cuidado y Limpieza
.
el sistema necesita limpiarse.
Se forma humedad
No es inusual en •Seque la superficie.
fuera del refrigerador
períodos de mucha humedad.
Se acumula humedad en
Las puertas se abren demasiadas
el interior (cuando hace
veces o por mucho rato.
humedad, el aire trae
humedad dentro del
refrigerador cuando las
puertas se abren)
No funciona la luz
No hay corriente en la toma. •Cambie el fusible o reconecte el diferencial.
interior
La bombilla se ha fundido. •Ver
Cómo cambiar las bombillas
.
Hay agua en el suelo de
El desagüe del fondo •Ver
Cuidado y limpieza
.
la cocina o en el fondo
del congelador está obturado.
del congelador
Cubitos obturados en la salida. • Empuje el hielo hacia fuera con una cuchara de madera.
Aire caliente de parte
Circulación de aire normal que
inferior del refrigerador
enfría el motor. En el proceso de
refrigeración, es normal que
salga calor en el área bajo el
refrigerador. Algunos suelos son
sensibles y pueden perder color
a estas temperaturas normales y seguras.
Se seleccionó CUBED ICE
La última selección fue •Habían quedado unos cuantos cubitos en la trituradora de la
(hielo picado)
CRUSHED ICE. selección anterior. Esto es normal.
(
en algunos modelos)
Dispositivo automático
El interruptor de alimentación •Coloque el interruptor de alimentación
para hacer hielo no
eléctrica del dispositivo eléctrica en la posición
ON
(Encendido).
funciona (en algunos
automático para hacer
modelos)
hielo está en la posición
OFF
(Apagado).
El agua está cerrada o no está • Vea
Instalación de la línea de agua.
conectada.
El compartimiento del •Espere 24 horas para que se enfríe el refrigerador.
congelador es muy cálido.
Cubos apilados en el recipiente •Nivele los cubos con la mano.
apaga el dispositivo para hacer
hielo.
Cubos de hielo atorados en •Apague el dispositivo de hielo, retire los cubos y vuelva a
dispositivo para hacer hielo. poner el dispositivo en marcha.
(La luz verde de corriente en
dispositivo de hielo está destellando).
23

Hoja de Datos de Funcionamiento
Sistema de Filtración GE SmartWater
Cartucho GWF
Comprobación de afirmación de salud Certificada por NSF/ANSI*
(Factores de 100% incorporados para la utilización no medida)
Estándar No. 42: Efectos estéticos
Parámetro USEPA Influent Effluent % de reducción
MCL Challenge Promedio Máximo Promedio Mínimo
Cloro – 1,9 ppm 0,02 ppm 0,05 ppm 98.90% 97.37%
T & O – – – – –
Partículas** – 200,000 3,978 7,800 98.00% 96.10%
Estándar No. 53: Efectos Relativos a la Salud
Parámetro USEPA Influent Effluent % de reducción
MCL Challenge Promedio Máximo Promedio Mínimo
Turbiedad 1 NTU*** 24,3 NTU 0,07 NTU 0,1 NTU 99,71% 99,59%
Quistes 99,95% de reducción 105,750 26 55 99,97% 99,95%
Plomo a pH 6,5 15 ppb 160 ppb 1 ppb 1 ppb 99,37% 99,37%
Plomo a pH 8,5 15 ppb 150 ppb 1,8 ppb 4,3 ppb 98,80% 97,13%
Lindane 0,0002 ppm 0,00062 ppm 0,00005 ppm 0,00005 ppm 91,93% 91,93%
Atrazine 0,003 ppm 0,0084 ppm 0,002 ppm 0,003 ppm 76,19% 64,28%
2,4-D 0,100 ppm 0,272 ppm 0,0264 ppm 0,080 ppm 90,29% 70,58%
Asbestos 99% 690 MFL/ml 0,32 MFL/ml 1,2 MFL/ml 99,95% 99,82%
* Probado utilizando una tasa de flujo de 0,5 gpm (1,8927 l/min.); presión de 60 psig (4,218 Kg/cm2); pH de 7,5 ± 0,5; temp. de 20° ± 2,5°C
** Medición en partículas/ml
*** Unidades de turbidez Nefelométrica NTU
Especificaciones de Funcionamiento
■Capacidad: certificada hasta 1135 litros (300 galones) para modelos sin luz indicadora de necesidad de cambiar,
certificada hasta 1895 litros (500 galones) para modelos con luz indicadora de necesidad de cambiar
■Requerimiento de presión: 40–120 psi (2,8–8,2 bar), sin choque
■Temperatura: 33-100 F (0,6°–38°C)
■Tasa de flujo: 0,5 gpm (1,9 lpm)
Requerimientos Generales de Instalación/Operación/Mantenimiento
■Lave el nuevo cartucho a la tasa máxima por 3 minutos para sacar el aire atrapado.
■Reemplace el cartucho cuando el flujo se haga muy lento; por lo menos cada seis meses.
Avisos Especiales
■
Las instrucciones de instalación, las piezas, la información sobre la disponibilidad de servicio y la garantía estándar se
incluyen con el producto al enviarlo.
■Este sistema de agua potable debe mantenerse conforme a las instrucciones del fabricante, incluyendo el reemplazo de
los cartuchos.
■No se utiliza en los sitios donde el agua es de calidad microbiológicamente dudosa, ni con aguas de calidad desconocida,
sin una desinfección adecuada antes o después del sistema. Los sistemas certificados para reducción de quistes pueden
usarse con aguas desinfectadas que puedan contener quistes filtrables.
■
Los contaminantes u otras substancias que este sistema de tratamiento de agua puede remover o reducir, no están
presentes, necesariamente, en su agua.
■ Verifique el acatamiento de las leyes y
reglamentos estatales y locales.
Hecho por: General Electric, Appliance Park, Louisville, KY 40225
NSF
®
Probado y Certificado según las normas ANSI/NSF para la reducción de:
Estándar No. 42: Efectos estéticos
Unidad química
Reducción de Olor y Sabor
Reducción de Cloro, Clase I
Unidad de Filtrado Mecánica
Reducción de Partículas, Clase I
Estándar No. 53: Efectos Relativos a la
Salud
Unidad de reducción química
Reducción del plomo y Atrazine
Reducción del Lindane y 2,4-D
Unidad de filtrado mecánico
Reducción de turbiedad
Reducción de quistes y Asbestos
24

25
Notas.

This appliance conforms to the following EEC Directives:
Cet appareil ménager est conforme aux directives CEE suivantes :
Este electrodoméstico se conforma con las siguientes instrucciones de la CEE:
Low Voltage Equipment
Appareils ménagers à bas voltage
Electrodomésticos de bajo voltaje
73/23/EEC
93/68/EEC
Electromagnetic Compatibility
Compatabilité électromagnétique
Compatibilidad electromagnética
89/336/EEC
92/31/EEC
93/68/EEC
Printed in the United States
Imprimé aux États-Unis
Impreso en los Estados Unidos
-
 1
1
-
 2
2
-
 3
3
-
 4
4
-
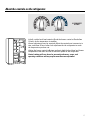 5
5
-
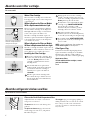 6
6
-
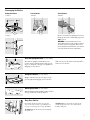 7
7
-
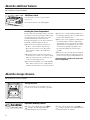 8
8
-
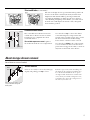 9
9
-
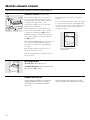 10
10
-
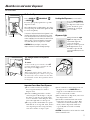 11
11
-
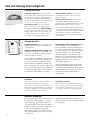 12
12
-
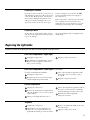 13
13
-
 14
14
-
 15
15
-
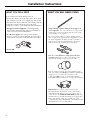 16
16
-
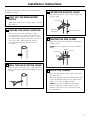 17
17
-
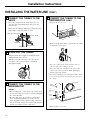 18
18
-
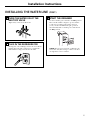 19
19
-
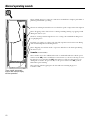 20
20
-
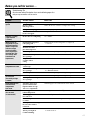 21
21
-
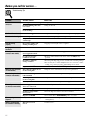 22
22
-
 23
23
-
 24
24
-
 25
25
-
 26
26
-
 27
27
-
 28
28
-
 29
29
-
 30
30
-
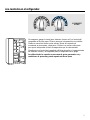 31
31
-
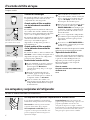 32
32
-
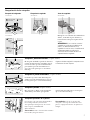 33
33
-
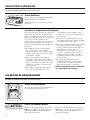 34
34
-
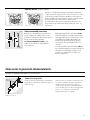 35
35
-
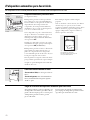 36
36
-
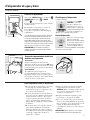 37
37
-
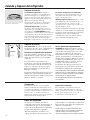 38
38
-
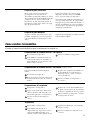 39
39
-
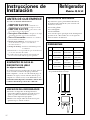 40
40
-
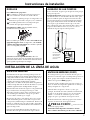 41
41
-
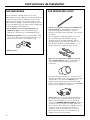 42
42
-
 43
43
-
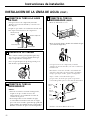 44
44
-
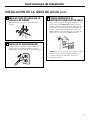 45
45
-
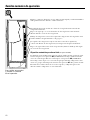 46
46
-
 47
47
-
 48
48
-
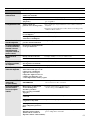 49
49
-
 50
50
-
 51
51
-
 52
52


GE TFT20JABAA El manual del propietario
- Categoría
- Neveras
- Tipo
- El manual del propietario
en otros idiomas
- English: GE TFT20JABAA Owner's manual
Artículos relacionados
-
GE 28, 30 Manual de usuario
-
-
GE Profile TPG21PRDBB El manual del propietario
-
-
GE TFX27PPBWW Manual de usuario
-
-
GE GSS22QGMCC El manual del propietario
-
-
GE TBX19PABBB El manual del propietario
-