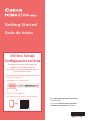
Canon PIXMA G5020 Guía de inicio rápido
- Categoría
- Impresión
- Tipo
- Guía de inicio rápido
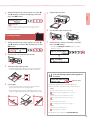
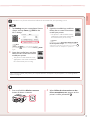
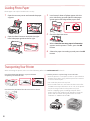
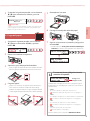
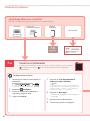
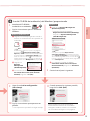
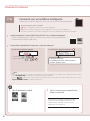
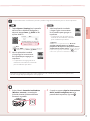
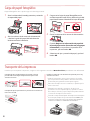
La Canon PIXMA G5020 es una impresora multifuncional con conectividad inalámbrica que te permite imprimir, escanear, copiar y enviar faxes desde cualquier lugar de tu casa u oficina. Esta impresora es ideal para quienes necesitan una impresora fiable y asequible para tareas diarias. Con su sistema de tanques de tinta rellenables, la PIXMA G5020 te ofrece un costo de impresión ultra bajo, permitiéndote ahorrar dinero en tinta. Además, su diseño elegante y compacto la hace perfecta para cualquier espacio de trabajo.
La Canon PIXMA G5020 es una impresora multifuncional con conectividad inalámbrica que te permite imprimir, escanear, copiar y enviar faxes desde cualquier lugar de tu casa u oficina. Esta impresora es ideal para quienes necesitan una impresora fiable y asequible para tareas diarias. Con su sistema de tanques de tinta rellenables, la PIXMA G5020 te ofrece un costo de impresión ultra bajo, permitiéndote ahorrar dinero en tinta. Además, su diseño elegante y compacto la hace perfecta para cualquier espacio de trabajo.


-
 1
1
-
 2
2
-
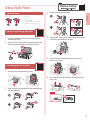 3
3
-
 4
4
-
 5
5
-
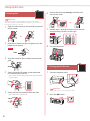
 6
6
-
 7
7
-
 8
8
-
 9
9
-
 10
10
-
 11
11
-
 12
12
-
 13
13
-
 14
14
-
 15
15
-
 16
16
-
 17
17
-
 18
18
-
 19
19
-
 20
20


Canon PIXMA G5020 Guía de inicio rápido
- Categoría
- Impresión
- Tipo
- Guía de inicio rápido
La Canon PIXMA G5020 es una impresora multifuncional con conectividad inalámbrica que te permite imprimir, escanear, copiar y enviar faxes desde cualquier lugar de tu casa u oficina. Esta impresora es ideal para quienes necesitan una impresora fiable y asequible para tareas diarias. Con su sistema de tanques de tinta rellenables, la PIXMA G5020 te ofrece un costo de impresión ultra bajo, permitiéndote ahorrar dinero en tinta. Además, su diseño elegante y compacto la hace perfecta para cualquier espacio de trabajo.
En otros idiomas
- English: Canon PIXMA G5020 Quick start guide
Documentos relacionados
-
Canon PIXMA TS6120 El manual del propietario
-
Canon PIXMA G4210 El manual del propietario
-
Canon PIXMA TS702 El manual del propietario
-
Canon PIXMA G6020 Guía de inicio rápido
-
Canon GX4020 Instrucciones de operación
-
Canon PIXMA TR7520 El manual del propietario
-
Canon PIXMA G7020 Guía de inicio rápido
-
Canon PIXMA TR8520 El manual del propietario
-
Canon PIXMA TS8120 El manual del propietario
-
Canon PIXMA TS9120 El manual del propietario