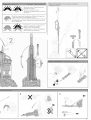
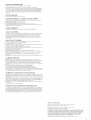
CC)MO ARMAR LA ASPIRADORA
• Coloque la asplradora en poslci6n vertical y deslice la i'nanguera pot las gufas en la parte
posterior de la asplradora basra que haga ctic en su sltlo
• File la varilla a Ja parle superior de la rnanguera hasfa que haga dic
• Haga dic en la manila de la varilla en Ja parle superior de la aspiradora
• AsegOrese de que Ja manguera este derecha. DesJice la varilla derecho hada abajo en
direcci6n a la manguera
• AcopJe las herramlenfas a la asplradora, enroIle eJ cable en senfido confrario a las
manecillas del reloj sobre los ganchos y asegOreJo en el broche.
CC)MO UTILIZAR SU ASPIRADORA DYSON
DesenroIle el cable e _nserte el enchufe con una foma de corr_ente adecuada
Detenga el cabezaJ limpiador hada abaio con el pie y tire de la manila hada abaio
Para encender ("ON") o apagar ("OFF") presione eJ bot6n de encendldo/apagado
sifuado al frenfe de la manlja
!k ADVERTENCIA:
• No use o guarde esfa rn6qulna en un lugar con ternperatura por debajo de 32°F (0°C)
Antes de operar Ia m6quina asegOrese de que est6 a temperatura amblente.
• No permita que la aspiradora sea usada pot algulen que no est@ capadtado para
operarla de manera segura.
• No es recornendable utillzar una exfensi6n de cable
• Siempre apague y desconecfe la aspiradora antes de reallzar cuaJquier fipo de
mantenlrnlenfo
• Cuando coJoque la aspiradora nuevamente en posici6n vertical, compruebe que el
conjunto deJ fubo y eJ comparfimlenfo cubo fransparenfe T_esf& fambi_n en posici6n
vertical
• AsegOrese de que el extractor de polvo este bien conectado a Ja aspiradora. No preslone
el bof6n para solfar el extractor ni sacuda la aspiradora rnlenfras la fransporfa porque
podr_a caerse y dai_arse.
• Guarde la asplradora bajo techo Luego de utillzarla, guarde la asplradora con el cable
debldamente enroIlado para evltar poslbles tropezones
• No utillce el aparato aJ aire libre ni sobre superficies hOrnedas o para asplrar agua u ofros
llquldos, ya que podrla recibir un choque el_cfrlco
• No lubrlque nlnguna parte deJ aparato ni intente repararlo o realizar cuaJquier ofro fipo
de mantenlrnlento que no se encuentre en este manual o que no haya sldo indicado pot la
llnea de ayuda de Dyson
RECUERDE:
• Esta asplradora es para uso dom_stico sdamente
• $61o deben aspirarse canfidades pequer_as de polvo flno como por ejemplo reslduos de
yeso o harlna
• No utillce la aspiradora para recoger objefos duros cortantes, juguefes pequeBos,
alfileres, sujefapapeles, efc, ya que podrlan daBar la asplradora
• Si se ufiIiza en un garaje, tenga sumo cuidado de llrnplar la placa base y las ruedas
con un paBo seco despu_s de aspirar, para qultarles la arena, suciedad o pledrltas que
podr_an dai_ar los plsos ddicados.
• Consuhe Jas instrucciones recornendadas por eJfabricante de su plso antes de asplrar
y culdar sus pisos, y affombras. AJgunas alfombras formar6n pelusa si ufillza el cepillo
rotaforlo mlentras asplra. Si esto sucede, recomendarnos asplrar en eJmodo de pisos
expuestos y consultar con el fabrlcanfe de su piso.
• AI aspirar, algunas alfombras pueden ggnerar pequerlas descargas de esf6fica en
el compartlmlento cubo fransparente T'. Estas son tofalmenfe inofenslvas y no est@n
asocladas al suminlstro de corrlente el_ctrica Para minlrnlzar sus efecfos, no coloque
su mano nl introduzca nlngOn objeto en eJcomparfimiento cubo transparenf_ _'a menos
que primero Io haya vadado y lavado con agua frla (consulfe la secci6n 'C6rno limpiar eJ
cornparfirniento cubo transparentem").
PISOS CON ALFOMBRAS Y PISOS DESCUBIERTOS
Cuando la aspiradora estci encendida y reclinada siempre estara por defecto en la
posicion "Pelo Medio" Para cambiar las configuraciones de acuerdo con el tipo de
piso, presione el boton que mejor describa el tipo de piso que estci aspirando mientras
la aspiradora esta prendida.
Para aspirar con la barra del cepillo apagada (por ejemplo Para pisos descubiertos
o alfombras/carpetas delicadas), aseg0rese que el modo 'Piso Descubierto _estci
activado antes de reclinar la mciquina.
Una luz blanca constante indica que el modo que ha escogido ha sido activado.
PARA LOGRAR EL MEJOR RENDIMIENTO DE LIMPIEZA,
DYSON RECOMIENDA CONFIGURAR LA ASPIRADORA
DE LA SIGUIENTE MANERA:
Configuraci6n Tipo de aJfombra o piso
Nivd profundo Afelpado, esfiJos varlados_ y de fibras largas y gruesas
Nivd interrnedio Lazos nivelados, afelpado ligero
NiveJ corto Alfombras de grado cornercial y estlios Wilton
Piso duro Alfombras o tapetes delicados, duelas, Iosetas, lamlnados, vin4o, etc.
Siempre siga sus instrucciones recomendadas del fabricante de alfombras para el
suelo EIcepillodeestaaspiradorapuededa_arciertostiposdealfombra Siesta
inseguro, apague el cepillo para asegurar la operaci6n apropiada
TUBO TELESCC)PICO AJUSTABLE A LA LONGITUD
REQUERIDA
,,'k ADVERTENCtA:
• Apague Ia aspiradora antes de carnblar las herramientas
• Si el aparafo aspira a rn6xima potencla, la rnanguera puede retraerse Tenga rnucho
cuidado
• Tenga rnucho cuidado cuando utillce la asplradora sobre una escalera y no la coloque
encima de usted No suba la asplradora a sillas, mesas, eft
• AsegOrese de que la aspiradora est_ en posici6n vertical antes de usar las herramientas.
RECUERDE:
• Para soltar el fubo, abra la tapa y tire deJ tubo rojo hasta que el tubo de asplraci6n quede
liberado de la asplradora Las herramlentas pueden colocarse tanto en eJ tubo corno en
la manguera.
• El cepillo no rotar6 cuando Ja aspiradora est6 en posici6n vertical
• AsegOrese de que la tapa deJ tubo est6 cerrada cuando no se use.
CC)MO VACIAR EL COMPARTIMIENTO CUBO
TRANSPARENTE TM
,'k ADVERTENCIA:
• Apague la asplradora y descon_ctela ("OFF") antes de vadar el comparfimienfo cubo
fra nspa renfe T"
RECUERDE:
• Vade el cornparfirnlento cuando Ia basura Ilegue al nlveJ rn6ximo Evlte sobrecargarlo
• Para desmontar el cornparfimlento cubo transparente T,', preslone el bot6n rojo que est6
debajo dei bot6n rojo de encendldo Preslone con fuerza eJ rnismo bot6n nuevamente
para vadar eJcomparfimiento
• No utilice la aspiradora si et comparfimlento cubo transparente T" no est6 colocado
• Se recomienda a quienes sufren de alerglas que vaclen el contenido en una bolsa.
CC)MO LIMPIAR EL COMPARTIMIENTO CUBO
TRANSPARENTE TM
• Para desmontar el cornparfimlento cubo transparenteT_ preslone el bof6n roio que esta
debaio deJ bot6n rojo de encendldo. Preslone con fuerza eJ misrno bof6n nuevamente
para vadar et compartimiento
• El mecanlsmo gris de sujeci6n se ver6 en el lado posterior del comparfirnlento dear bin m_"
Preslone el bot6n grls sin solfarJo mientras sujeta la manila Extralga el extractor de polvo
glr6ndolo para refirarlo
• Para voIver a colocar la unldad del extractor de polvo en eJcomparfimiento cubo
transparente T",aJinear el bof6n gris de manera inversa y empujar para unlr Verlfique que
eJ borde deJ frente del comparfirnlento cubo transparente T_'encaje en lu lugar hadendo
un cllc
!k ADVERTENCIA:
• No sumerja totalmente el extractor de pdvo en agua ni ponga agua dentro de @ste
• AsegOrese de que el cornparfimiento cubo transparente m"est_ totalmente seco antes de
colocarlo
RECUERDE:
• No ufilice detergenfe, Iiquldo para encerar nl desodorante de ambientes para llrnplar eJ
comparfimienfo cubo transparenfe'
• No Iimpie el comparfimiento cubo transparente "_'en un lavavajillas
• Limpie la cublerta con un paBo o cepillo seco para remover eJ polvo y la peJusa
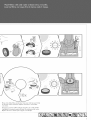
CC)MO LAVAR LOS FILTROS
HAGA ESTO CADA 3 MESES
,/k ADVERTENCIA:
• Apague la asplradora' y desconectela antes de quitar los filtros.
• AsegOrese de que los filfros esf&n fotalmente secos antes de volver a colocarlos en la
asplradora
RECUERDE:
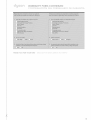
• Esfa aspiradora tiene dos fiIfros, ublcados como se muestra en las ilustraciones
Es importante revlsar Ios filtros con regularldad y Iavarlos al rnenos cada tres meses de
acuerdo con las insfrucciones, para mantener eJfunclonarnlenfo del aparafo
• Despu@s de lavarlos, d@jelos secar por completo durante 24 horas
• Es normal que los filtros se vudvan de color grls Si se aspira polvo flno, ser6 necesarlo
lavar los filfros con mayor frecuencia
• No use detergentes para llrnpiar los filtros
• No coloque los filfros en el lavavaiillas, el lavadora, la secadora, el homo, el microondas
o cerca del fuego
DIAGNOSTICOS
Controles de
presion tcictil Accion requerida
SoIamente el bof6n
rojo de apagado/ Indica una obstrucci6n La barra del cepillo se apagar6 autorn6ti
camente sl se encuentra obsfrulda Pot favor consulfe la secd6n '
prendldo est6
destellando Limpiando las obstrucciones de la barra del cepillo'
Vuelva a inidar el rnodo de atfornbra seleccionando un bof6n
Solamente el para un flpo de piso dlferenfe luego vuelva a seleccionar el bot6n
bof6n blanco esf6 para el tipo de plso deseado Si esto no funciona, revise sl hay
destellando obsfrucciones y consulte la secci6n "Lirnplando las obstrucdones
de la barra del cepillo'
Un bof6n blanco
destellando con Indica una obstrucci6n Por favor consulfe la secci6n 'Lirnplando
el bot6n rojo de las obstrucciones de la barra del cepillo'
apagado/prendldo
Cuatro botones Vuelva a inidar la asplradora apag6ndola por al rnenos
blancos desfellando 30 segundos luego pr_ndala nuevamente.
Cuatro botones
bJancos desfeHando
con el bof6n rojo de Vuelva a inidar la asplradora apag6ndola por aJ rnenos
apagado/prendldo 30 segundos luego pr@ndala nuevamente.
destellando
POR FAVOR ESTEATENTO: Si usfed confinOa experlmentando problernas, pot favor
confacfe la Linea de Ayuda de Dyson para mayor asisfencla
CC)MO BUSCAR OBSTRUCCIONES
/k ADVERTENCIA:
• Apague la asplradora y descon_ctela antes de buscar obsfrucclones. Si no Io hace, podHa
sufrlr lesiones.
• Por favor asegOrese de que la aspiradora esf& en poslci6n vertical y apagada antes de
quitar el tubo o las partes de inspecci6n de la venfilaci6n.
• Tenga culdado al ufillzar obietos filosos para sacar las obstrucciones.
• Coloque todas las partes de la asplradora correctarnente antes de ufilizarla.
RECUERDE:
• Su garanfia Ih*nltada no cubre la eJiminad6n de obstrucclones.
• Esfa aspiradora posee un slsterna de desconexi6n t@rmlca. Si aJguna parte de la
asplradora se obsfruye, esta puede sobrecaJenfarse y apagarse autom@ficamenfe. Apague
y desenchufe la aspiradora y d@iela enfrlar aJ rnenos por 60 minutos antes de revlsar los
fihros o si hay obstrucclones
10


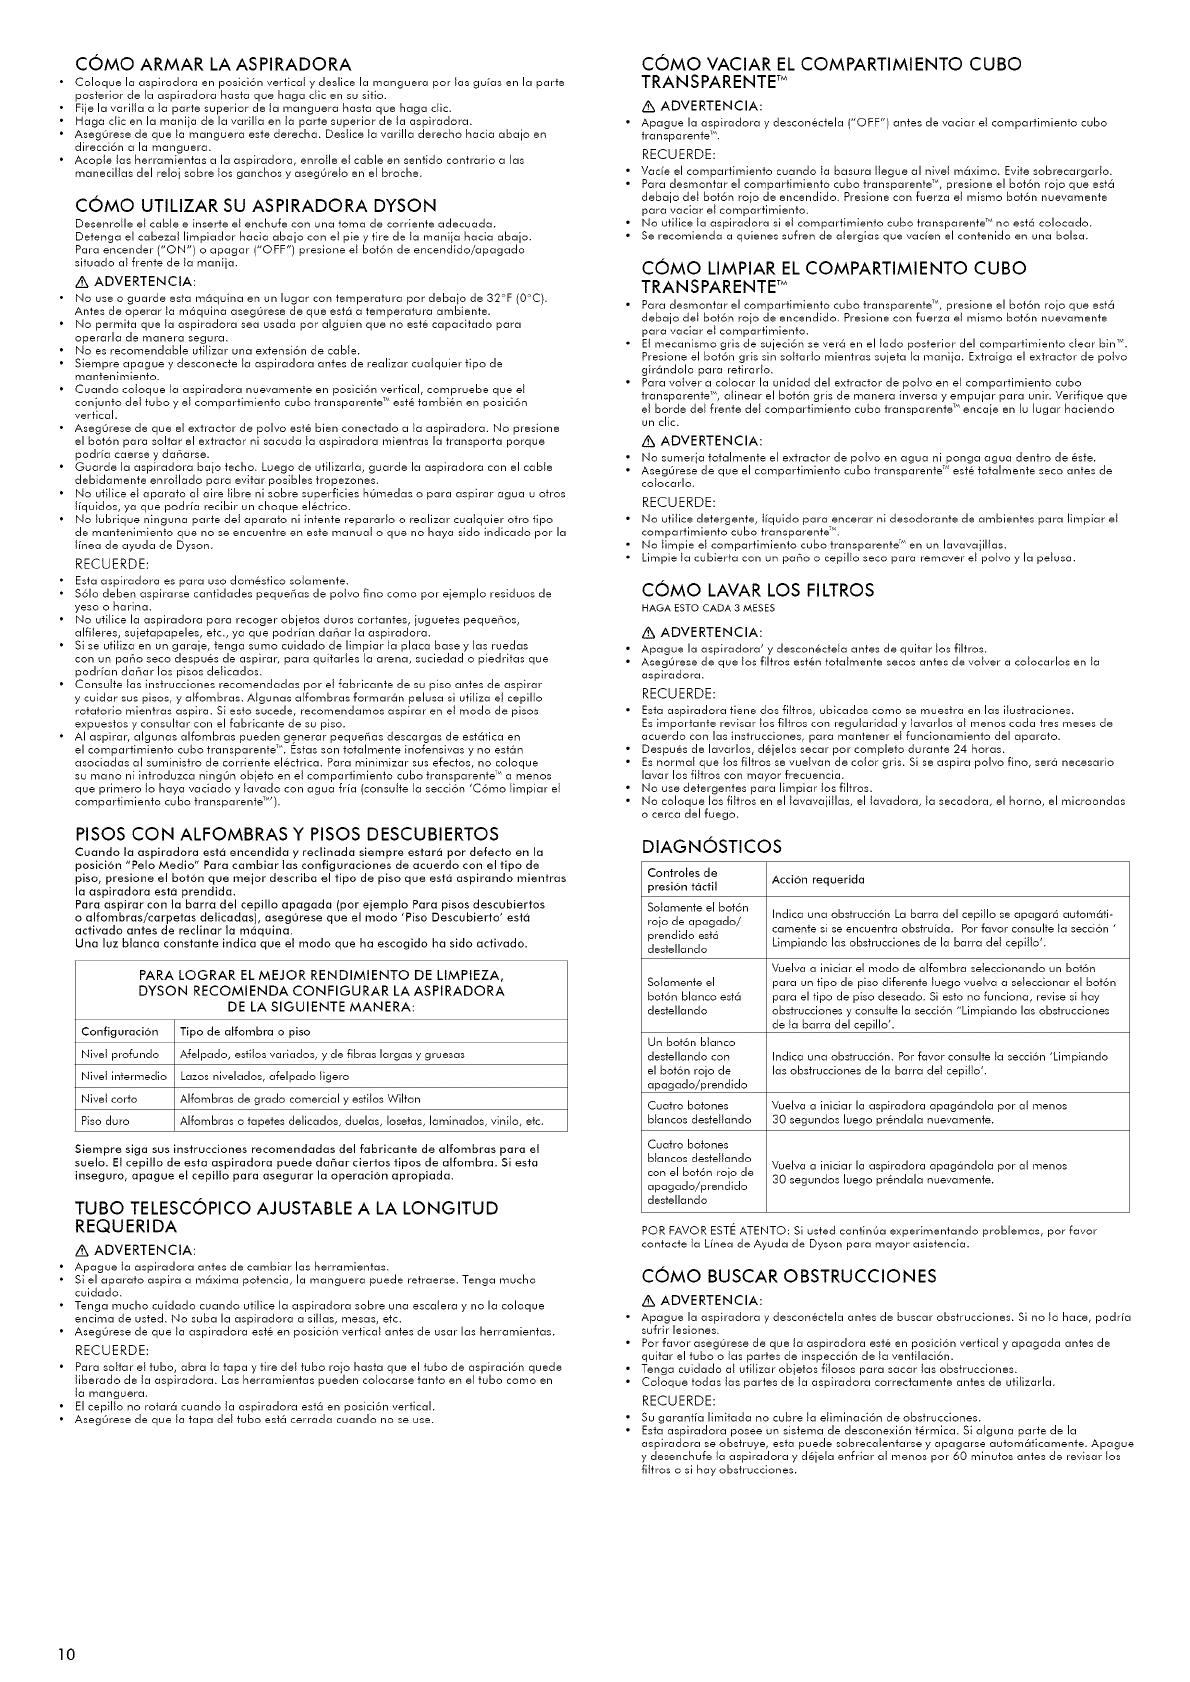
 1
1
 2
2
 3
3
 4
4
 5
5
 6
6
 7
7
 8
8
 9
9
 10
10
 11
11
 12
12
 13
13
 14
14
 15
15
 16
16


Dyson DC33 El manual del propietario