Superior IDP-100 Manual de usuario
- Categoría
- Relojes inteligentes
- Tipo
- Manual de usuario

The IDP-100 digital photo frame is capable of receiving photos via compatible Bluetooth™
devices, USB drive or memory card. The unique user interface makes it a great tool for
browsing photos. You can tag, rotate or copy photos all while viewing them.
To setup the frame
1. Attach the backside support to stand the IDP-100 on any flat surface (Figure 2A).
Optionally the IDP-100 can be mounted on a wall using the wall mount hanger (Figure 2B).
2. Connect the AC adapter to the power connector on the backside of the IDP-100 and plug
into an electrical outlet.
3. Press the on/off key.
4. During the first startup, select a language, set current date and time, and select a time
zone.
Navigating the menus
Depending on the menu choices that are available some keys may not appear.
Navigation keys
Press to select an item.
Press to navigate to the left.
Press to navigate to the right.
Press to go back to the previous screen.
Press to view available options.
Note: Both the and keys are sensitive to a single press or a sliding motion in either
direction (Figure 2C).
To upload photos via Bluetooth
1. Activate Bluetooth in the device you wish to interact with the IDP-100.
2. Open a photo in your device and send it to the IDP-100 via Bluetooth.
3. Select the IDP-100 as the receiving device. A four digit code appears on the IDP-100.
4. Enter the code into your device and the transfer will begin.
Note: You only need to enter a four digit code during the first interaction with a device and
every time you add a new device. You can send pictures from most Bluetooth devices that
have an OPP profile.
To connect external storage devices
To connect a USB flash drive or memory card
1. Insert the USB flash drive or memory card into the designated slot.
2. The IDP-100 will begin a slideshow of all the photos on the drive or card.
To view photos
Photos can be loaded to the IDP-100 from external devices such as a USB flash drive, mem-
ory card, or compatible Bluetooth device. To optimize space the IDP-100 compresses all
photos that are loaded to internal memory.
To view the latest photo
1. From the main menu select Latest photo.
2. Press the Select key to view the photos in a slideshow, sorted by the date they were
loaded into the IDP-100.
To view photo albums
1. From the main menu select Photo albums.
2. To view all of the photos in a chosen month, navigate using the arrow keys and press
Select to chose a month. Photos are sorted by the date they were taken.
To view tagged photos
1. From the main menu select Tagged photos.
2. Use the arrow keys to navigate to the desired tag icon and press the Select key.
A slideshow will begin of photos tagged with chosen tag icon.
To manage photos
To copy photos
1. To copy single photos from a storage device, while viewing photos in full screen or
thumbnail view, press the Options key > Copy photo to. To copy all photos from a storage
device, press the Options key > Copy all photos to.
2. Select a location to store the photos and press the Select key.
To rotate photos
1. While viewing photos, press the Options key > Rotate.
2. Use the left arrow key to rotate the photo counter clockwise or the right arrow key to rotate
clockwise.
3. Press the Select key to save and return to the previous mode.
To tag photos
1. While viewing photos, press the Options key > Tag.
2. Use the arrow keys to navigate to the desired tag icon and press the Select key.
To delete photos
1. To delete single photos, press the Options key > Delete photo > Yes. To delete all photos
press the Options key > Delete all photos > Yes.
2. Press the Select key.
To manage the clock
To view the clock
1. From the main menu select Clock.
2. Press the left or right arrow keys to change from digital to analogue.
To add a time zone
1. From the main menu select Clock > Options key > Add time zone.
2. Time zones are noted by the major city that resides there. Navigate to the city located in
the time zone to be added and press the Select key.
To remove a time zone
1. From the main menu select Clock > Options key > Remove time zone.
2. Navigate to the time zone that is to be removed and press the Select key.
To change a time zone
1. From the main menu select Clock > Options key > Change time zone > Select.
2. Navigate to the time zone to be changed and press the Select key.
3. A list of time zones appears. Select the desired time zone from the menu. Press the Select
key to make the change.
Settings
The IDP-100 allows you to customize language, photo intervals, transition effects, power
schedule, view mode and more. Changes can be made in the Settings menu. From the main
menu select Settings.
• Language — Change to your preference.
• Transition effect — Set photos to appear on the screen by fading, page flipping, sliding,
wave washing, or pan and zoom.
• Photo interval — Adjust the time that a photo is displayed during a slideshow with the
photo interval setting.
• View mode — Set the view to Fill Screen or Original size.
• Light sensor — Control whether the backlight of the display is automatically adjusted by
the surrounding light or is on at full strength.
• Power schedule — Control when the IDP-100 is turned on and off by setting the power
schedule.
•
Time — Select a time zone and set the time and date
El marco de fotos digital IDP-100 puede recibir fotos a través de dispositivos Bluetooth™
compatibles, una unidad USB o una tarjeta de memoria. La interfaz de usuario única
constituye una herramienta idónea para compartir fotos. Le permite etiquetarlas, girarlas
o copiarlas mientras las está mirando.
Para montar el marco
1. Sujete el soporte trasero para colocar el marco IDP-100 en una superficie plana (Figura
2A). Si lo prefiere, puede colgar el marco IDP-100 de la pared usando el gancho para
montaje mural (Figura 2B).
2. Conecte el adaptador de CA al conector de alimentación situado en la parte posterior del
marco IDP-100 y enchúfelo a la toma de corriente.
3. Pulse la tecla de activación/desactivación.
4. Al utilizar el marco por primera vez, seleccione un idioma, establezca la fecha y la hora,
y seleccione una zona horaria.
Desplazamiento por los menús
Algunas teclas estarán o no disponibles en función de las opciones de menú elegidas.
Teclas de dirección
Pulsar para seleccionar un elemento.
Pulsar para ir hacia la izquierda.
Pulsar para ir hacia la derecha.
Pulsar para volver a la pantalla anterior.
Pulsar para ver las opciones disponibles.
Nota: Las teclas y se pueden manejar pulsándolas levemente o deslizando el dedo
sobre ellas en cualquier dirección (Figura 2C).
Para cargar fotos con Bluetooth
1. Active Bluetooth en el dispositivo que desea que interactúe con el marco IDP-100.
2. Abra una foto en dicho dispositivo y envíela al marco IDP-100 mediante Bluetooth.
3. Seleccione el marco IDP-100 como dispositivo de destino. En el marco IDP-100 aparece
un código de cuatro dígitos.
4. Introdúzcalo en el dispositivo y se iniciará la transferencia.
Nota: Sólo tendrá que introducir el código de cuatro dígitos la primera vez que el marco
interactúe con un dispositivo y cada vez que se añada uno nuevo. Puede enviar fotos desde
casi todos los dispositivos Bluetooth que tengan un perfil OPP.
Para conectar dispositivos de almacenamiento externos
Para conectar una unidad flash USB o una tarjeta de memoria
1. Introduzca la unidad flash USB o la tarjeta de memoria en la ranura correspondiente.
2. El marco IDP-100 iniciará una presentación de imágenes con todas las fotos contenidas
en la unidad o la tarjeta.
Para ver fotos
Las fotos se pueden cargar en el marco IDP-100 desde dispositivos externos como una
unidad flash USB, una tarjeta de memoria y un dispositivo Bluetooth compatible. Para
optimizar
el espacio, el marco IDP-100 comprime todas las fotos que se cargan en su memoria interna.
Para ver las fotos más recientes
1. En el menú principal, seleccione Última foto.
2. Pulse la tecla Seleccionar para ver las fotos en forma de presentación de imágenes,
ordenadas según la fecha en la que se cargaron en el marco IDP-100.
Para ver álbumes de fotos
1. En el menú principal, seleccione Álbumes de fotos.
2. Para ver todas las fotos de un mes determinado, desplácese utilizando las teclas de flecha
y pulse Seleccionar para elegir el mes. Las fotos se ordenan según la fecha en la que
fueron hechas.
Para ver fotos etiquetadas
1. En el menú principal, seleccione Fotos etiquetadas.
2. Use las teclas de flecha para desplazarse hasta el icono de la etiqueta deseada y pulse
la tecla Seleccionar. Se iniciará una presentación de imágenes de las fotos etiquetadas
con el icono elegido.
Para gestionar fotos
Para copiar fotos
1. Para copiar fotos de una en una desde un dispositivo de almacenamiento, pulse la tecla
Opciones > Copiar la foto en mientras ve las fotos en pantalla completa o en forma de
miniaturas. Para copiar todas las fotos desde un dispositivo de almacenamiento, pulse la
tecla Opciones > Copiar todas fotos en.
2. Seleccione una ubicación para guardar las fotos y pulse la tecla Seleccionar.
Para girar las fotos
1. Mientras está viendo las fotos, pulse la tecla Opciones > Rotar.
2. Use la tecla de flecha derecha para girarlas en el sentido de las agujas del reloj y la
izquierda para girarlas en dirección contraria.
3. Pulse la tecla Seleccionar para guardar y volver al modo anterior.
Para etiquetar fotos
1. Mientras está viendo las fotos, pulse la tecla Opciones > Etiqueta.
2. Use las teclas de flecha para desplazarse hasta el icono de la etiqueta deseada y pulse la
tecla Seleccionar.
Para eliminar fotos
1. Para eliminar fotos de una en una, pulse la tecla Opciones > Eliminar la foto > Sí.
Para eliminar todas las fotos, pulse la tecla Opciones > Eliminar todas las fotos > Sí.
2. Pulse la tecla Seleccionar.
Para gestionar el reloj
Para ver el reloj
1. En el menú principal, seleccione Reloj.
2. Pulse la tecla de flecha izquierda o derecha para cambiar entre los modos digital
y analógico.
Para añadir una zona horaria
1. En el menú principal, seleccione Reloj > tecla Opciones > Añadir zona horaria.
2. Cada zona horaria se identifica con el nombre de la ciudad más grande ubicada en ella.
Desplácese hasta la ciudad que identifica la zona horaria que desea añadir y pulse la tecla
Seleccionar.
Para eliminar una zona horaria
1. En el menú principal, seleccione Reloj > tecla Opciones > Eliminar zona horaria.
2. Desplácese hasta la zona horaria que desea eliminar y pulse la tecla Seleccionar.
Para cambiar la zona horaria
1. En el menú principal, seleccione Reloj > tecla Opciones > Cambiar zona horaria
> Seleccionar.
2. Desplácese hasta la zona horaria que desea cambiar y pulse la tecla Seleccionar.
3. Aparece una lista de zonas. Seleccione en el menú la zona horaria deseada. Pulse la tecla
Seleccionar para guardar el cambio.
Ajustes
El marco IDP-100 permite cambiar el idioma, el intervalo entre fotos, los efectos de transición,
la programación de conexión, el modo de vista, etc. Los cambios se hacen en el menú
Ajustes. En el menú principal, seleccione Ajustes
.
• Idioma: elija el idioma que usted prefiera.
• Efecto de transición: establezca si las fotos deben sucederse en la pantalla en forma
de fundido, de página que pasa, de topetazo, de ola o de zoom que se acerca y se aleja.
• Intervalo entre fotos: use el intervalo entre fotos para ajustar el tiempo durante el que se
muestra una foto en una presentación de imágenes.
• Modo Vista: establezca la vista como Pantalla completa o tamaño Original.
• Sensor de luz: controle si la retoiluminación de la pantalla debe ajustarse
automáticamente en función de la luz del entorno o si debe tener siempre la intensidad
máxima.
• Programar conexión: use la programación de conexión para controlar cuándo debe
apagarse y encenderse el marco IDP-100.
• Hora: seleccione una zona horaria y establezca la fecha y la hora.
User guide
English
Español
简体中文
繁體中文
IDP-100
Desk stand
Soporte de mesa
Security slot
Ranura de
seguridad
USB connector
Conector USB
Power connector
Conector de
alimentación
MS DUO/SD slot
Ranura MS DUO/SD
M2/microSD slot
Ranura M2/microSD
On/off key
Tecla de activación/
desactivación
Figure 1
A
C
B
Figure 2
Sony Ericsson Mobile Communications AB
SE-221 88 Lund, Sweden
1210-3034.1
Printed in XXXXX
Declaration of conformity for IDP-100
We, Sony Ericsson Mobile Communications AB of
Nya Vattentornet
SE-221 88 Lund, Sweden
declare under our sole responsibility that our product
Sony Ericsson type DGA-0002006
and in combination with our accessories, to which this declaration relates, is in conformity
with the appropriate standards EN 300 328:V1.7.1, EN 301 489-7:V1.3.1, EN 301 489-
17:V1.2.1 and EN 60950-1:2006 following the provisions of Radio Equipment and
Telecommunication Equipment directive 1999/5/EC.
Lund, March 2008
Jacob Sten, Head of Product Business Unit Accessories
We fulfil the R&TTE Directive.
Cumplimos con la directiva R&TTE.
我们符合 R&TTE 指令 (99/5/EC) 的要求。
我們符合 R&TTE Directive 規範的要求。
English
For additional product support go to www.sonyericsson.com/support
Español
Para solicitar asistea adicional para el producto, visite www.sonyericsson.com/support
This is the Internet version of the User's guide. © Print only for private use.
La página se está cargando...
Transcripción de documentos
Español English The IDP-100 digital photo frame is capable of receiving photos via compatible Bluetooth™ devices, USB drive or memory card. The unique user interface makes it a great tool for browsing photos. You can tag, rotate or copy photos all while viewing them. To setup the frame 1. Attach the backside support to stand the IDP-100 on any flat surface (Figure 2A). Optionally the IDP-100 can be mounted on a wall using the wall mount hanger (Figure 2B). 2. Connect the AC adapter to the power connector on the backside of the IDP-100 and plug into an electrical outlet. 3. Press the on/off key. 4. During the first startup, select a language, set current date and time, and select a time zone. User guide Navigating the menus Depending on the menu choices that are available some keys may not appear. Navigation keys English Español 简体中文 繁體中文 Pulsar para ir hacia la izquierda. Press to navigate to the right. Pulsar para ir hacia la derecha. Pulsar para volver a la pantalla anterior. Press to view available options. keys are sensitive to a single press or a sliding motion in either Activate Bluetooth in the device you wish to interact with the IDP-100. Open a photo in your device and send it to the IDP-100 via Bluetooth. Select the IDP-100 as the receiving device. A four digit code appears on the IDP-100. Enter the code into your device and the transfer will begin. Note: You only need to enter a four digit code during the first interaction with a device and every time you add a new device. You can send pictures from most Bluetooth devices that have an OPP profile. To connect external storage devices MS DUO/SD slot Ranura MS DUO/SD USB connector Conector USB M2/microSD slot Ranura M2/microSD On/off key Tecla de activación/ desactivación Desk stand Soporte de mesa Security slot Ranura de seguridad To connect a USB flash drive or memory card 1. Introduzca la unidad flash USB o la tarjeta de memoria en la ranura correspondiente. 2. El marco IDP-100 iniciará una presentación de imágenes con todas las fotos contenidas en la unidad o la tarjeta. Photos can be loaded to the IDP-100 from external devices such as a USB flash drive, memory card, or compatible Bluetooth device. To optimize space the IDP-100 compresses all photos that are loaded to internal memory. To view the latest photo 1. From the main menu select Photo albums. 2. To view all of the photos in a chosen month, navigate using the arrow keys and press Select to chose a month. Photos are sorted by the date they were taken. Para ver fotos Las fotos se pueden cargar en el marco IDP-100 desde dispositivos externos como una unidad flash USB, una tarjeta de memoria y un dispositivo Bluetooth compatible. Para optimizar el espacio, el marco IDP-100 comprime todas las fotos que se cargan en su memoria interna. Para ver las fotos más recientes 1. En el menú principal, seleccione Última foto. 2. Pulse la tecla Seleccionar para ver las fotos en forma de presentación de imágenes, ordenadas según la fecha en la que se cargaron en el marco IDP-100. 1. En el menú principal, seleccione Álbumes de fotos. 2. Para ver todas las fotos de un mes determinado, desplácese utilizando las teclas de flecha y pulse Seleccionar para elegir el mes. Las fotos se ordenan según la fecha en la que fueron hechas. To manage photos Para ver fotos etiquetadas To copy photos 1. En el menú principal, seleccione Fotos etiquetadas. 2. Use las teclas de flecha para desplazarse hasta el icono de la etiqueta deseada y pulse la tecla Seleccionar. Se iniciará una presentación de imágenes de las fotos etiquetadas con el icono elegido. 1. To copy single photos from a storage device, while viewing photos in full screen or thumbnail view, press the Options key > Copy photo to. To copy all photos from a storage device, press the Options key > Copy all photos to. 2. Select a location to store the photos and press the Select key. Para gestionar fotos To rotate photos Para copiar fotos 1. While viewing photos, press the Options key > Rotate. 2. Use the left arrow key to rotate the photo counter clockwise or the right arrow key to rotate clockwise. 3. Press the Select key to save and return to the previous mode. 1. Para copiar fotos de una en una desde un dispositivo de almacenamiento, pulse la tecla Opciones > Copiar la foto en mientras ve las fotos en pantalla completa o en forma de miniaturas. Para copiar todas las fotos desde un dispositivo de almacenamiento, pulse la tecla Opciones > Copiar todas fotos en. To tag photos 1. While viewing photos, press the Options key > Tag. 2. Use the arrow keys to navigate to the desired tag icon and press the Select key. To delete photos 1. To delete single photos, press the Options key > Delete photo > Yes. To delete all photos press the Options key > Delete all photos > Yes. 2. Press the Select key. C Para conectar una unidad flash USB o una tarjeta de memoria Para ver álbumes de fotos 1. From the main menu select Tagged photos. 2. Use the arrow keys to navigate to the desired tag icon and press the Select key. A slideshow will begin of photos tagged with chosen tag icon. B Nota: Sólo tendrá que introducir el código de cuatro dígitos la primera vez que el marco interactúe con un dispositivo y cada vez que se añada uno nuevo. Puede enviar fotos desde casi todos los dispositivos Bluetooth que tengan un perfil OPP. To view photos To view tagged photos A 1. Active Bluetooth en el dispositivo que desea que interactúe con el marco IDP-100. 2. Abra una foto en dicho dispositivo y envíela al marco IDP-100 mediante Bluetooth. 3. Seleccione el marco IDP-100 como dispositivo de destino. En el marco IDP-100 aparece un código de cuatro dígitos. 4. Introdúzcalo en el dispositivo y se iniciará la transferencia. Para conectar dispositivos de almacenamiento externos To view photo albums Figure 2 Para cargar fotos con Bluetooth 1. Insert the USB flash drive or memory card into the designated slot. 2. The IDP-100 will begin a slideshow of all the photos on the drive or card. 1. From the main menu select Latest photo. 2. Press the Select key to view the photos in a slideshow, sorted by the date they were loaded into the IDP-100. Power connector Conector de alimentación Pulsar para ver las opciones disponibles. Nota: Las teclas y se pueden manejar pulsándolas levemente o deslizando el dedo sobre ellas en cualquier dirección (Figura 2C). To upload photos via Bluetooth 1. 2. 3. 4. Desplazamiento por los menús Pulsar para seleccionar un elemento. Press to go back to the previous screen. Figure 1 1. Sujete el soporte trasero para colocar el marco IDP-100 en una superficie plana (Figura 2A). Si lo prefiere, puede colgar el marco IDP-100 de la pared usando el gancho para montaje mural (Figura 2B). 2. Conecte el adaptador de CA al conector de alimentación situado en la parte posterior del marco IDP-100 y enchúfelo a la toma de corriente. 3. Pulse la tecla de activación/desactivación. 4. Al utilizar el marco por primera vez, seleccione un idioma, establezca la fecha y la hora, y seleccione una zona horaria. Teclas de dirección Press to navigate to the left. Note: Both the and direction (Figure 2C). Para montar el marco Algunas teclas estarán o no disponibles en función de las opciones de menú elegidas. Press to select an item. IDP-100 El marco de fotos digital IDP-100 puede recibir fotos a través de dispositivos Bluetooth™ compatibles, una unidad USB o una tarjeta de memoria. La interfaz de usuario única constituye una herramienta idónea para compartir fotos. Le permite etiquetarlas, girarlas o copiarlas mientras las está mirando. To manage the clock 2. Seleccione una ubicación para guardar las fotos y pulse la tecla Seleccionar. Para girar las fotos 1. Mientras está viendo las fotos, pulse la tecla Opciones > Rotar. 2. Use la tecla de flecha derecha para girarlas en el sentido de las agujas del reloj y la izquierda para girarlas en dirección contraria. 3. Pulse la tecla Seleccionar para guardar y volver al modo anterior. Para etiquetar fotos 1. Mientras está viendo las fotos, pulse la tecla Opciones > Etiqueta. 2. Use las teclas de flecha para desplazarse hasta el icono de la etiqueta deseada y pulse la tecla Seleccionar. Para eliminar fotos To view the clock 1. From the main menu select Clock. 2. Press the left or right arrow keys to change from digital to analogue. 1. Para eliminar fotos de una en una, pulse la tecla Opciones > Eliminar la foto > Sí. Para eliminar todas las fotos, pulse la tecla Opciones > Eliminar todas las fotos > Sí. 2. Pulse la tecla Seleccionar. To add a time zone 1. From the main menu select Clock > Options key > Add time zone. 2. Time zones are noted by the major city that resides there. Navigate to the city located in the time zone to be added and press the Select key. To remove a time zone 1. From the main menu select Clock > Options key > Remove time zone. 2. Navigate to the time zone that is to be removed and press the Select key. To change a time zone 1. From the main menu select Clock > Options key > Change time zone > Select. 2. Navigate to the time zone to be changed and press the Select key. 3. A list of time zones appears. Select the desired time zone from the menu. Press the Select key to make the change. Declaration of conformity for IDP-100 We, Sony Ericsson Mobile Communications AB of Nya Vattentornet SE-221 88 Lund, Sweden declare under our sole responsibility that our product Sony Ericsson type DGA-0002006 and in combination with our accessories, to which this declaration relates, is in conformity with the appropriate standards EN 300 328:V1.7.1, EN 301 489-7:V1.3.1, EN 301 48917:V1.2.1 and EN 60950-1:2006 following the provisions of Radio Equipment and Telecommunication Equipment directive 1999/5/EC. Lund, March 2008 Jacob Sten, Head of Product Business Unit Accessories We fulfil the R&TTE Directive. Cumplimos con la directiva R&TTE. 我们符合 R&TTE 指令 (99/5/EC) 的要求。 我們符合 R&TTE Directive 規範的要求。 Settings The IDP-100 allows you to customize language, photo intervals, transition effects, power schedule, view mode and more. Changes can be made in the Settings menu. From the main menu select Settings. • Language — Change to your preference. • Transition effect — Set photos to appear on the screen by fading, page flipping, sliding, wave washing, or pan and zoom. • Photo interval — Adjust the time that a photo is displayed during a slideshow with the photo interval setting. • View mode — Set the view to Fill Screen or Original size. • Light sensor — Control whether the backlight of the display is automatically adjusted by the surrounding light or is on at full strength. • Power schedule — Control when the IDP-100 is turned on and off by setting the power schedule. • Time — Select a time zone and set the time and date For additional product support go to www.sonyericsson.com/support Para gestionar el reloj Para ver el reloj 1. En el menú principal, seleccione Reloj. 2. Pulse la tecla de flecha izquierda o derecha para cambiar entre los modos digital y analógico. Para añadir una zona horaria 1. En el menú principal, seleccione Reloj > tecla Opciones > Añadir zona horaria. 2. Cada zona horaria se identifica con el nombre de la ciudad más grande ubicada en ella. Desplácese hasta la ciudad que identifica la zona horaria que desea añadir y pulse la tecla Seleccionar. Para eliminar una zona horaria 1. En el menú principal, seleccione Reloj > tecla Opciones > Eliminar zona horaria. 2. Desplácese hasta la zona horaria que desea eliminar y pulse la tecla Seleccionar. Para cambiar la zona horaria 1. En el menú principal, seleccione Reloj > tecla Opciones > Cambiar zona horaria > Seleccionar. 2. Desplácese hasta la zona horaria que desea cambiar y pulse la tecla Seleccionar. 3. Aparece una lista de zonas. Seleccione en el menú la zona horaria deseada. Pulse la tecla Seleccionar para guardar el cambio. Ajustes El marco IDP-100 permite cambiar el idioma, el intervalo entre fotos, los efectos de transición, la programación de conexión, el modo de vista, etc. Los cambios se hacen en el menú Ajustes. En el menú principal, seleccione Ajustes. • Idioma: elija el idioma que usted prefiera. • Efecto de transición: establezca si las fotos deben sucederse en la pantalla en forma de fundido, de página que pasa, de topetazo, de ola o de zoom que se acerca y se aleja. • Intervalo entre fotos: use el intervalo entre fotos para ajustar el tiempo durante el que se muestra una foto en una presentación de imágenes. • Modo Vista: establezca la vista como Pantalla completa o tamaño Original. • Sensor de luz: controle si la retoiluminación de la pantalla debe ajustarse automáticamente en función de la luz del entorno o si debe tener siempre la intensidad máxima. • Programar conexión: use la programación de conexión para controlar cuándo debe apagarse y encenderse el marco IDP-100. • Hora: seleccione una zona horaria y establezca la fecha y la hora. Para solicitar asistea adicional para el producto, visite www.sonyericsson.com/support Sony Ericsson Mobile Communications AB SE-221 88 Lund, Sweden 1210-3034.1 Printed in XXXXX This is the Internet version of the User's guide. © Print only for private use.-
 1
1
-
 2
2


Superior IDP-100 Manual de usuario
- Categoría
- Relojes inteligentes
- Tipo
- Manual de usuario
en otros idiomas
- English: Superior IDP-100 User manual
Otros documentos
-
Dell N02G Guía del usuario
-
 ZyXEL Communications ZYWALL 70 UTM El manual del propietario
-
 ZyXEL Communications Network Card 5 Manual de usuario
-
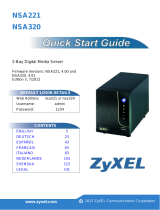 ZyXEL Communications NSA221 Guía de inicio rápido
-
 ZyXEL Communications VANTAGE REPORT 2.3 - El manual del propietario
-
ZyXEL Communications 1-Bay Manual de usuario
-
ZyXEL Communications NSA310 El manual del propietario
-
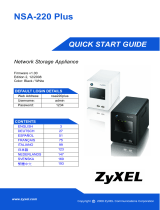
 ZyXEL Communications NSA-220 Plus Guía de inicio rápido
-
 ZyXEL Communications NSA-220 Plus Manual de usuario
-
ZyXEL VRPT Guía de inicio rápido


