LG 26LD310 Manual de usuario
- Categoría
- Televisores LCD
- Tipo
- Manual de usuario
Este manual también es adecuado para

P/NO : MFL41469219 (1008-REV03)
www.lg.com
OWNER’S MANUAL
LCD TV
Please read this manual carefully before operating
your set and retain it for future reference.
22LD310
26LD310
32LD310

2
WARNING / CAUTION
The lightning flash with arrowhead
symbol, within an equilateral triangle, is
intended to alert the user to the presence
of uninsulated “dangerous voltage” within the
product’s enclosure that may be of sufficient
magnitude to constitute a risk of electric shock to
persons.
The exclamation point within an equilateral
triangle is intended to alert the user to
the presence of important operating and
maintenance (servicing) instructions in the litera-
ture accompanying the appliance.
TO REDUCE THE RISK OF ELECTRIC SHOCK
DO NOT REMOVE COVER (OR BACK). NO
USER SERVICEABLE PARTS INSIDE. REFER TO
QUALIFIED SERVICE PERSONNEL.
WARNING/CAUTION
TO REDUCE THE RISK OF FIRE AND ELECTRIC
SHOCK, DO NOT EXPOSE THIS PRODUCT TO
RAIN OR MOISTURE.
MFL41469218-en 7/12/10 4:58 PM Page 2

3
IMPORTANT SAFETY INSTRUCTIONS
SAFETY INSTRUCTIONS
Read these instructions.
Keep these instructions.
Heed all warnings.
Follow all instructions.
Do not use this apparatus near water.
Clean only with dry cloth.
Do not block any ventilation openings. Install in
accordance with the manufacturer’s instructions.
Do not install near any heat sources such as
radiators, heat registers, stoves, or other
apparatus (including amplifiers) that produce
heat.
Protect the power cord from being walked on
or pinched particularly at plugs, convenience
receptacles, and the point where they exit from
the apparatus.
Only use attachments/accessories specified by
the manufacturer.
Use only with the cart, stand, tripod, bracket,
or table specified by the manufacturer, or sold
with the apparatus. When a cart is used, use
caution when moving the cart/apparatus com-
bination to avoid injury from tip-over.
Unplug this apparatus during lighting storms
or when unused for long periods of time.
Refer all servicing to qualified service personnel.
Servicing is required when the apparatus has
been damaged in any way, such as power-
supply cord or plug is damaged, liquid has
been spilled or objects have fallen into the
apparatus, the apparatus has been exposed to
rain or moisture, does not operate normally, or
has been dropped.
1
2
3
4
6
7
5
8
9
MFL41469218-en 7/12/10 4:58 PM Page 3

4
SAFETY INSTRUCTIONS
Never touch this apparatus or antenna during
a thunder or lighting storm.
When mounting a TV on the wall, make sure
not to install the TV by the hanging power and
signal cables on the back of the TV.
Do not allow an impact shock or any objects to
fall into the product, and do not drop onto the
screen with something.
CAUTION concerning the Power Cord:
It is recommend that appliances be placed
upon a dedicated circuit; that is, a single
outlet circuit which powers only that appliance
and has no additional outlets or branch
circuits. Check the specification page of this
owner's manual to be certain.
Do not connect too many appliances to the
same AC power outlet as this could result in
fire or electric shock.
Do not overload wall outlets. Overloaded wall
outlets, loose or damaged wall outlets, extension
cords, frayed power cords, or damaged or
cracked wire insulation are dangerous. Any of
these conditions could result in electric shock
or fire. Periodically examine the cord of your
appliance, and if its appearance indicates damage
or deterioration, unplug it, discontinue use of
the appliance, and have the cord replaced with
an exact replacement part by an authorized
servicer. Protect the power cord from physical
or mechanical abuse, such as being twisted,
kinked, pinched, closed in a door, or walked
upon. Pay particular attention to plugs, wall
outlets, and the point where the cord exits the
appliance.
Do not make the TV with the power cord
plugged in. Do not use a damaged or loose
power cord. Be sure do grasp the plug when
unplugging the power cord. Do not pull on the
power cord to unplug the TV.
WARNING - To reduce the risk of fire or electrical
shock, do not expose this product to rain,
moisture or other liquids. Do not touch the TV
with wet hands. Do not install this product
near flammable objects such as gasoline or
candles or expose the TV to direct air
conditioning.
Do not expose to dripping or splashing and do
not place objects filled with liquids, such as
vases, cups, etc. on or over the apparatus (e.g.
on shelves above the unit).
GGRROOUUNNDDIINNGG
Ensure that you connect the earth ground wire
to prevent possible electric shock (i.e. a TV
with a three-prong grounded AC plug must be
connected to a three-prong grounded AC out-
let). If grounding methods are not possible,
have a qualified electrician install a separate
circuit breaker.
Do not try to ground the unit by connecting it
to telephone wires, lightening rods, or gas
pipes.
DDIISSCCOONNNNEECCTTIINNGG DDEEVVIICCEE FFRROOMM MMAAIINNSS
Mains plug is the disconnecting device. The
plug must remain readily operable.
As long as this unit is connected to the AC wall
outlet, it is not disconnected from the AC
power source even if you turn off this unit by
SWITCH.
11
10
13
12
15
16
17
18
Power
Supply
Short-circuit
Breaker
14
MFL41469218-en 7/12/10 4:58 PM Page 4

5
CClleeaanniinngg
When cleaning, unplug the power cord and rub
gently with a soft cloth to prevent scratching.
Do not spray water or other liquids directly on
the TV as electric shock may occur. Do not
clean with chemicals such as alcohol, thinners
or benzene.
MMoovviinngg
Make sure the product is turned off,
unplugged and all cables have been removed. It
may take 2 or more people to carry larger TVs.
Do not press against or put stress on the front
panel of the TV.
VVeennttiillaattiioonn
Install your TV where there is proper ventila-
tion. Do not install in a confined space such as
a bookcase. Do not cover the product with
cloth or other materials (e.g.) plastic while
plugged in. Do not install in excessively dusty
places.
Take care not to touch the ventilation open-
ings. When watching the TV for a long period,
the ventilation openings may become hot.
If you smell smoke or other odors coming from
the TV, unplug the power cord and contact an
authorized service center.
No presione en exceso el panel con sus manos u
objetos afilados, como tornillos, lápices o bolí-
grafos, y evite rayarlo.
Keep the product away from direct sunlight.
DDoott DDeeffeecctt
The Plasma or LCD panel is a high technology
product with resolution of two million to six
million pixels. In a very few cases, you could see
fine dots on the screen while you’reviewing the
TV. Those dots are deactivated pixels and do
not affect the performance and reliability of
the TV.
GGeenneerraatteedd SSoouunndd
“Cracking” noise: A cracking noise that occurs
when watching or turning off the TV is gener-
ated by plastic thermal contraction due to
temperature and humidity. This noise is com-
mon for products where thermal deformation
is required.
Electrical circuit humming/panel buzzing: A low
level noise is generated from a high-speed
switching circuit, which supplies a large
amount of current to operate a product. It
varies depending on the product.This generat-
ed sound does not affect the performance and
reliability of the product.
FFoorr LLCCDD TTVV
If the TV feels cold to the touch, there may be
a small “flicker” when it is turned on. This is
normal, there is nothing wrong with TV.
Some minute dot defects may be visible on the
screen, appearing as tiny red, green, or blue
spots. However, they have no adverse effect on
the monitor's performance.
Avoid touching the LCD screen or holding your
finger(s) against it for long periods of time.
Doing so may produce some temporary dis-
tortion effects on the screen.
19
26
20
21
22
23
24
25
ON DISPOSAL
(Only Hg lamp used LCD TV)
The fluorescent lamp used in this product contains
a small amount of mercury. Do not dispose of
this product with general household waste.
Disposal of this product must be carried out in
accordance to the regulations of your local authority.
27
28
MFL41469218-en 7/12/10 4:58 PM Page 5

6
CONTENTS
WARNING / CAUTION
. . . . . . . . . . . . . . . . . . . . . . . . . . . . 2
SAFETY INSTRUCTIONS
. . . . . . . . . . . . . . . . . . . . . . . . . . 3
FEATURE OF THIS TV
. . . . . . . . . . . . . . . . . . . . . . . . . . . . . . . 8
PREPARATION
Accessories . . . . . . . . . . . . . . . . . . . . . . . . . . . . . . . . . . . . . . . . . . . . . . . . . . . . . . 9
Front Panel Information
. . . . . . . . . . . . . . . . . . . . . . . . . . . . . . . . . . . 10
Back Panel Information . . . . . . . . . . . . . . . . . . . . . . . . . . . . . . . . . . . . . 11
Stand Instructions
. . . . . . . . . . . . . . . . . . . . . . . . . . . . . . . . . . . . . . . . . . . 12
VESA Wall Mounting . . . . . . . . . . . . . . . . . . . . . . . . . . . . . . . . . . . . . . . . 14
Cable Management . . . . . . . . . . . . . . . . . . . . . . . . . . . . . . . . . . . . . . . . .
15
Desktop Pedestal Installation
. . . . . . . . . . . . . . . . . . . . . . . . . . . . 16
Swivel Stand
. . . . . . . . . . . . . . . . . . . . . . . . . . . . . . . . . . . . . . . . . . . . . . . . . . . . 16
Positioning your Display
. . . . . . . . . . . . . . . . . . . . . . . . . . . . . . . . . . . 16
Attaching the TV to a Desk . . . . . . . . . . . . . . . . . . . . . . . . . . . . . . 17
Kensington Security System
. . . . . . . . . . . . . . . . . . . . . . . . . . . . . 17
Securing the TV to the wall to prevent falling when
the TV is used on a stand
. . . . . . . . . . . . . . . . . . . . . . . . . . . . . . . . 18
Antenna or Cable Connection . . . . . . . . . . . . . . . . . . . . . . . . . . 19
EXTERNAL EQUIPMENT SETUP
HD Receiver Setup . . . . . . . . . . . . . . . . . . . . . . . . . . . . . . . . . . . . . . . . . 20
DVD Setup
. . . . . . . . . . . . . . . . . . . . . . . . . . . . . . . . . . . . . . . . . . . . . . . . . . . . . 22
VCR Setup . . . . . . . . . . . . . . . . . . . . . . . . . . . . . . . . . . . . . . . . . . . . . . . . . . . . . 24
Other A/V Source Setup
. . . . . . . . . . . . . . . . . . . . . . . . . . . . . . . . . 25
External Stereo Setup . . . . . . . . . . . . . . . . . . . . . . . . . . . . . . . . . . . . . . 25
WATCHING TV / CHANNEL CONTROL
Remote Control Functions . . . . . . . . . . . . . . . . . . . . . . . . . . . . . . . 26
Turning On the TV
. . . . . . . . . . . . . . . . . . . . . . . . . . . . . . . . . . . . . . . . . .
28
Channel Selection
. . . . . . . . . . . . . . . . . . . . . . . . . . . . . . . . . . . . . . . . . . .
28
Volume Adjustment . . . . . . . . . . . . . . . . . . . . . . . . . . . . . . . . . . . . . . . . . 28
On-Screen Menus Selection
. . . . . . . . . . . . . . . . . . . . . . . . . . . . 29
Channel Search
- Auto Tuning . . . . . . . . . . . . . . . . . . . . . . . . . . . . . . . . . . . . . . . . . . . . . . 30
- Manual Tuning
. . . . . . . . . . . . . . . . . . . . . . . . . . . . . . . . . . . . . . . . . . 31
Fine Tuning Adjustment
. . . . . . . . . . . . . . . . . . . . . . . . . . . . . . . . . . . 32
Favorite Channels Setup
. . . . . . . . . . . . . . . . . . . . . . . . . . . . . . . . . . 33
Key Lock . . . . . . . . . . . . . . . . . . . . . . . . . . . . . . . . . . . . . . . . . . . . . . . . . . . . . . . . . 34
Factory Reset
. . . . . . . . . . . . . . . . . . . . . . . . . . . . . . . . . . . . . . . . . . . . . . . . . . 34
PICTURE CONTROL
Picture Size (Aspect Ratio) Control . . . . . . . . . . . . . . . . . . 35
Preset Picture Settings (Picture Mode Preset)
. . . 36
Manual Picture Adjustment
. . . . . . . . . . . . . . . . . . . . . . . . . . . . . . 37
Picture Improvement Technology
. . . . . . . . . . . . . . . . . . . . . 38
Picture Reset
. . . . . . . . . . . . . . . . . . . . . . . . . . . . . . . . . . . . . . . . . . . . . . . . . 40
Screen Setup
. . . . . . . . . . . . . . . . . . . . . . . . . . . . . . . . . . . . . . . . . . . . . . . . . . 41
SOUND & LANGUAGE CONTROL
Preset Sound Settings - Sound Mode . . . . . . . . . . . . . . . 43
Sound Setting Adjustment - User Mode
. . . . . . . . . . . 44
Audio Reset
. . . . . . . . . . . . . . . . . . . . . . . . . . . . . . . . . . . . . . . . . . . . . . . . . . . 45
Auto Volume Leveler (Auto Volume)
. . . . . . . . . . . . . . . . . 46
Balance
. . . . . . . . . . . . . . . . . . . . . . . . . . . . . . . . . . . . . . . . . . . . . . . . . . . . . . . . . . 47
Stereo/SAP Broadcasts Setup
. . . . . . . . . . . . . . . . . . . . . . . . . . 48
On-Screen Menus Language Selection
. . . . . . . . . . . . .
49
Power Indicator
. . . . . . . . . . . . . . . . . . . . . . . . . . . . . . . . . . . . . . . . . . . . . . . 50
Closed Captions
. . . . . . . . . . . . . . . . . . . . . . . . . . . . . . . . . . . . . . . . . . . . . 51
MFL41469218-en 7/12/10 4:58 PM Page 6

7
TIME SETTING
Clock Setup . . . . . . . . . . . . . . . . . . . . . . . . . . . . . . . . . . . . . . . . . . . . . . . . . . . . 52
Auto On/Off Time Setting
. . . . . . . . . . . . . . . . . . . . . . . . . . . . . . 53
Sleep Timer Setting
. . . . . . . . . . . . . . . . . . . . . . . . . . . . . . . . . . . . . . . . . 54
APPENDIX
Troubleshooting . . . . . . . . . . . . . . . . . . . . . . . . . . . . . . . . . . . . . . . . . . . . . . 55
Maintenance
. . . . . . . . . . . . . . . . . . . . . . . . . . . . . . . . . . . . . . . . . . . . . . . . . . . 57
Product Specifications . . . . . . . . . . . . . . . . . . . . . . . . . . . . . . . . . . . . . 58
IR Codes
. . . . . . . . . . . . . . . . . . . . . . . . . . . . . . . . . . . . . . . . . . . . . . . . . . . . . . . . 59
MFL41469218-en 7/12/10 4:58 PM Page 7

8
FEATURE OF THIS TV
HDMI, the HDMI logo and High-Definition
Multimedia Interface are trademarks or registered
trademarks of HDMI Licensing LLC."
LG TV include a unique invisible speaker system,
tuned by renowned audio expert, Mr. Mark Levinson.
Speakers are embedded in strategic spots behind the
front cabinet and use minute vibrations to turn the
entire front bezel into the speaker system. The result
is a clean, polished look, and enhanced audio by
increasing the “sweet spot”, giving a wider and richer
sound field.
■
When a fixed image (e.g. logos, screen menus, video game, and computer display) is displayed on the TV
for an extended period, it can become permanently imprinted on the screen. This phenomenon is known
as “image burn” or “burn-in.” Image burn is not covered under the manufacturer’s warranty.
■
In order to prevent image burn, avoid displaying a fixed image on your TV screen for a prolonged period
(2 or more hours for LCD, 1 or more hours for Plasma).
■
Image burn can also occur on the letterboxed
areas of your TV if you use the 4:3 aspect ratio
setting for an extended period.
IMPORTANT INFORMATION TO PREVENT “IMAGE BURN
/ BURN-IN” ON YOUR TV SCREEN
MFL41469218-en 7/12/10 4:58 PM Page 8

PREPARATION
9
ACCESSORIES
PREPARATION
Ensure that the following accessories are included with your TV. If an accessory is missing, please contact the
dealer where you purchased the TV.
The accessories included may differ from the images below.
1.5V 1.5V
Owner’s Manual
Power Cord
Remote Control
123
456
78
0
9
V
O
L
V
O
L
CH
CH
ENTER
MENU Q.VIEW SLEEP
SOUND RATIO
FAV
MUTE
O
G
MEMORY/ERASE
CAPTION
INPUT
123
456
78
0
9
V
O
L
V
O
L
CH
CH
ENTER
POWER
MENU Q.VIEW SLEEP
RATIO
MTS
FAV
MUTE
A
.P
R
O
G
CAPTION
TV INPUT
MEMORY/ERASE
SOUNDPICTURE
* Wipe spots on the exterior only with
the polishing cloth.
* Do not wipe roughly when removing
stains. Excessive pressure may cause
scratches or discoloration.
Polishing Cloth
Not included with all models
FFoorr 2222LLDD331100
Cable Management Clip
Protection Cover
OOnnllyy 2266//3322LLDD331100
(M4x24)
Bolts for stand assembly
Screw for stand fixing Protection Cover
x 4
Batteries
(Some models)
RF Adapter
(Some models)
You must connect it to the antenna
wire after fixing in Antenna Input.
This adapter is For supplied in
AArrggeennttiinnaa
.
MFL41469218-en 7/12/10 4:58 PM Page 9

PREPARATION
10
FRONT PANEL INFORMATION
PREPARATION
■
Image shown may differ from your TV.
32LD310
INPUT MENU
VOL
CH
ENTER
CHANNEL
(
EE
,
DD
) Buttons
VOLUME
(-, +) Buttons
ENTER
Button
22/26LD310
MENU Button
POWER Button
INPUT Button
INPUT
MENU
ENTER
CH
VOL
CHANNEL (
DD
,
EE
)
Buttons
VOLUME (+, -)
Buttons
ENTER Button
MENU Button
INPUT Button
POWER Button
SPEAKER
Remote Control Sensor,
Power/Standby Indicator
Illuminates red in standby mode.
Illuminates blue when the TV is switched on.
(Can be adjusted
PPoowweerr IInnddiiccaattoorr
in the
OPTION menu.
GG
pp..5500
)
MFL41469218-en 7/12/10 4:58 PM Page 10

PREPARATION
11
BACK PANEL INFORMATION
IN
SERVICE ONLY
AUDIOVIDEO
ANTENNA
IN
COMPONENT IN
AUDIO OUT
VIDEO
AUDIOAUDIO
L(MONO)
R
AV IN
Power Cord Socket
This TV operates on an AC power. The voltage is
indicated on the Specifications page. Never
attempt to operate the TV on DC power.
HDMI Input
Connect a HDMI signal to HDMI IN.
This TV does not support DVI(VIDEO) signal
using DVI to HDMI cable.
Audio Output
Connect an external amplifier, or add a subwoofer
to your surround sound system.
Audio/Video Input (AV IN)
Connect audio/video output from an external
device to these jacks.
SERVICE ONLY PORT
Component Input
Connect a component video/audio device to
these jacks.
Antenna Input
Connect RF antenna to this jack.
1
2
3
4
5
7
1
2
3
5
6
7
4
6
■
Image shown may differ from your TV.
MFL41469218-en 7/12/10 4:58 PM Page 11

PREPARATION
12
STAND INSTRUCTIONS (For 22LD310)
PREPARATION
■
Image shown may differ from your TV.
Carefully place the TV screen side down on a
cushioned surface to protect the screen from
damage.
Assemble the TV as shown until you hear it click.
1
2
INSTALLATION
PROTECTION COVER
Insert the
PPRROOTTEECCTTIIOONN CCOOVVEERR
into the TV.
4
PPRROOTTEECCTTIIOONN CCOOVVEERR
Fix the 4 bolts securely using the holes in the
back of the TV.
5
DETACHMENT
Carefully place the TV screen side down on a
cushioned surface to protect the screen from
damage.
1
Loose the bolts from TV.
2
Detach the stand from TV.
3
MFL41469218-en 7/12/10 4:58 PM Page 12

PREPARATION
13
STAND INSTRUCTIONS (For 26/32LD310)
INSTALLATION
DETACHMENT
Carefully place the TV screen side down on a
cushioned surface to protect the screen from
damage.
Assemble the TV as shown.
Fix the 4 bolts securely using the holes in the
back of the TV.
1
2
3
GG
When assembling the desk type stand, make sure
the bolt is fully tightened (If not tightened fully,
the TV can tilt forward after the product installa-
tion). Do not over tighten.
NOTE
!
Carefully place the TV screen side down on a
cushioned surface to protect the screen from
damage.
1
Loose the bolts from TV.
2
Detach the stand from TV.
3
After removing the stand, install the included
pprrootteeccttiioonn ccoovveerr
over the hole for the stand.
Press the
PPRROOTTEECCTTIIOONN CCOOVVEERR
into the TV
until you hear it click.
PROTECTION COVER
MFL41469218-en 7/12/10 4:58 PM Page 13

PREPARATION
14
VESA WALL MOUNTING
PREPARATION
Install your wall mount on a solid wall perpendicular to the floor. When attaching to other building materials, please
contact your nearest installer.
If installed on a ceiling or slanted wall, it may fall and result in severe personal injury.
We recommend that you use an LG brand wall mount when mounting the TV to a wall.
LG recommends that wall mounting be performed by a qualified professional installer.
GG
Do not install your wall mount kit while your TV is turned on. It may result in personal
injury due to electric shock.
CAUTION
GG
Screw length needed depends on the wall mount
used. For further information, refer to the instruc-
tions included with the mount.
GG
Standard dimensions for wall mount kits are shown
in the table.
GG
When purchasing our wall mount kit, a detailed
installation manual and all parts necessary for
assembly are provided.
GG
Do not use screws longer then the standard dimen-
sion, as they may cause damage to the inside to
the TV.
GG
For wall mounts that do not comply with the VESA
standard screw specifications, the length of the
screws may differ depending on their specifica-
tions.
GG
Do not use screws that do not comply with the
VESA standard screw specifications.
Do not use fasten the screws too strongly, this may
damage the TV or cause the TV to a fall, leading to
personal injury. LG is not liable for these kinds of
accidents.
GG
LG is not liable for TV damage or personal injury
when a non-VESA or non specified wall mount is
used or the consumer fails to follow the TV installa-
tion instructions.
NOTE
!
Model
VESA (A
*
B)
Standard Screw Quantity
Wall Mounting Bracket
(sold separately)
22LD310
26LD310
32LD310
10 0
*
10 0 M 4 4
200
*
10 0 M 4 4
AA
BB
RW230 AW-47LG30M
RW120
RW230
MFL41469218-en 7/12/10 4:58 PM Page 14

PREPARATION
15
CABLE MANAGEMENT
■
Image shown may differ from your TV.
Connect the cables as necessary.
To connect additional equipment, see the
EXTERNAL EQUIPMENT SETUP section.
Fit the CABLE MANAGEMENT CLIP as
shown.
For 22LD310
1
Install the CABLE MANAGEMENT CLIP as
shown.
2
3
How to remove the CABLE
MANAGEMENT CLIP
GG
Hold the CABLE MAN-
AGEMENT CLIP with
both hands and pull it
backward.
GG
Do not hold the CABLE MANAGEMENT
CLIP when moving the TV.
- If the TV is dropped, you may be injured or
the product may be broken.
NOTE
!
CABLE MANAGEMENT CLIP
For 26/32LD310
Connect the cables as necessary.
To connect additional equipment, see the
EXTERNAL EQUIPMENT SETUP section.
Install the CABLE MANAGEMENT CLIP as
shown.
1
2
Put the cables inside the CABLE MANAGE-
MENT CLIP and snap it closed.
3
CABLE MANAGEMENT CLIP
MFL41469218-en 7/12/10 4:58 PM Page 15

PREPARATION
16
DESKTOP PEDESTAL INSTALLATION
PREPARATION
For proper ventilation, allow a clearance of 4 inches on all four sides from the wall.
■
Image shown may differ from your TV.
4 inches
GG
Ensure adequate ventilation by following the clearance recommendations.
GG
Do not mount near or above any type of heat source.
CAUTION
4 inches
4 inches
4 inches
SWIVEL STAND (Except 22LD310)
After installing the TV, you can adjust the TV set manually to the left or right direction by 20 degrees to suit
your viewing position.
POSITIONING YOUR DISPLAY (For 22LD310)
■
Here shown may be somewhat different from your TV.
■
Adjust the position of the panel in various ways for maximum comfort.
• Tilt range
12
0
3
0
MFL41469218-en 7/12/10 4:58 PM Page 16

PREPARATION
17
ATTACHING THE TV TO A DESK (Except 22LD310)
The TV must be attached to a desk so it cannot be pulled in a forward/backward direction, potentially causing
injury or damaging the product.
GG
To prevent TV from falling over, the TV should be securely attached to the floor/wall per installation
instructions. Tipping, shaking, or rocking the machine may cause injury.
WARNING
1-Screw
(provided as parts of the product)
Desk
Stand
KENSINGTON SECURITY SYSTEM
■
This feature is not available for all models.
- The TV is equipped with a Kensington Security System connector on
the back panel. Connect the Kensington Security System cable as
shown below.
- For the detailed installation and use of the Kensington Security
System, refer to the user’s guide provided with the Kensington
Security System.
For further information, contact
hhttttpp::////wwwwww..kkeennssiinnggttoonn..ccoomm
,
the internet homepage of the Kensington company. Kensington sells
security systems for expensive electronic equipment such as note-
book PCs and LCD projectors.
NOTE: The Kensington Security System is an optional accessory.
MFL41469218-en 7/12/10 4:58 PM Page 17

PREPARATION
18
SECURING THE TV TO THE WALL TO PREVENT FALLING
WHEN THE TV IS USED ON A STAND
PREPARATION
We recommend that you set up the TV close to a wall so it cannot fall over if pushed backwards.
Additionally, we recommend that the TV be attached to a wall so it cannot be pulled in a forward direction,
potentially causing injury or damaging the product.
Caution: Please make sure that children don’t climb on or hang from the TV.
■
Insert the eye-bolts (or TV brackets and bolts) to tighten the product to the wall as shown in the picture.
*If your product has the bolts in the eye-bolts position before inserting the eye-bolts, loosen the bolts.
* Insert the eye-bolts or TV brackets/bolts and tighten them securely in the upper holes.
Secure the wall brackets with the bolts (sold separately) to the wall. Match the height of the bracket that is
mounted on the wall to the holes in the product.
Ensure the eye-bolts or brackets are tightened securely.
■
Use a sturdy rope (sold separately) to tie the product. It is safer to tie
the rope so it becomes horizontal between the wall and the product.
■
You should purchase necessary components to prevent the TV from tipping over (when not using a wall mount).
■
Image shown may differ from your TV.
GG
Use a platform or cabinet strong enough and large enough to support the size and weight of the TV.
GG
To use the TV safely make sure that the height of the bracket on the wall and the one on the TV are the same.
NOTE
!
MFL41469218-en 7/12/10 4:58 PM Page 18

IN
ANTENNA
IN
COMPONENT IN
AUDIO OUT
AUDIO
AV IN
IN
ANTENNA
IN
COMPONENT IN
AUDIO OUT
AUDIO
AV IN
PREPARATION
19
ANTENNA OR CABLE CONNECTION
1. Antenna (Analog)
Wall Antenna Socket or Outdoor Antenna without a Cable Box
Connections.
For optimum picture quality, adjust antenna direction if needed.
2. Cable
Wall
Antenna
Socket
Outdoor
Antenna
(VHF, UHF)
Cable TV
Wall Jack
Multi-family Dwellings/Apartments
(Connect to wall antenna socket)
RF Coaxial Wire (75 ohm)
RF Coaxial Wire (75 ohm)
Single-family Dwellings /Houses
(Connect to wall jack for outdoor antenna)
Be careful not to bend the copper wire
when connecting the antenna.
Copper Wire
■
To improve the picture quality in a poor signal area, please purchase a signal amplifier and install properly.
■
If the antenna needs to be split for two TV’s, install a 2-Way Signal Splitter.
■
If the antenna is not installed properly, contact your dealer for assistance.
■
To prevent damage do not connect to the power outlet until all connections are made between the devices.
■
Image shown may differ from your TV.
MFL41469218-en 7/12/10 4:58 PM Page 19

EXTERNAL EQUIPMENT SETUP
20
EXTERNAL EQUIPMENT SETUP
HD RECEIVER SETUP
Component Connection
1. How to connect
Connect the video outputs
(
Y, PB, PR
)
of the digital set-
top box to the
CCOOMMPPOONNEENNTT IINN VVIIDDEEOO
jacks on
the TV. Match the jack colors (Y = green, P
B = blue, and
P
R = red).
Connect the audio output of the digital set-top box to
the
CCOOMMPPOONNEENNTT IINN AAUUDDIIOO
jacks on the TV.
2
1
2. How to use
■
Turn on the digital set-top box.
(
Refer to the owner’s manual for the digital set-top box operation.
)
■
Select the
CCoommppoonneenntt
input source on the TV using the
IINNPPUUTT
button on the remote control.
■
To prevent the equipment damage, never plug in any power cords until you have finished connecting all equipment.
Supported Resolutions
Signal
480i
480p
720p
1080 i
108 0 p
Component
Yes
Yes
Yes
No
No
HDMI
No
Yes
Yes
No
No
L/MONO
R
AUDIO
VIDEO
VARIABLE AUDIO OUT
HDMI IN HDMI DVI IN
HDMI/DVI IN
1
IN
SERVICE ONLY
ANTENNA
IN
AUDIO OUT
VIDEO
AUDIO
L( MONO)
R
AV IN
AUDIO
VIDEO
COMPONENT IN
1
2
Y, C
B/PB
, CR/P
R
Horizontal Vertical
Frequency
(
KHz
)
Frequency
(
Hz
)
15 . 73 59 . 9 4
15.75 60.00
15.625 50.00
31. 47 59. 9 4
31.50 60.00
31.25 50.00
44.96 59.94
45.00 60.00
37.50 50.00
Resolution
720x480i
720x480p
1280x720p
720x576p
720x576i
MFL41469218-en 7/12/10 4:58 PM Page 20

EXTERNAL EQUIPMENT SETUP
21
HDMI Connection
Connect the digital set-top box to the
HHDDMMII IINN
jack on the TV.
No separate audio connection is necessary.
HDMI supports both audio and video.
1. How to connect
2. How to use
■
Turn on the digital set-top box.
(
Refer to the owner’s manual for the digital set-top box.
)
■
Select the
HHDDMMII
input source on the TV using the
IINNPPUUTT
button on the remote control.
2
1
HDMI-DTV
GG
If the DVD player supports Auto HDMI function, the output resolution of the source device will be auto-
matically TV to 1280*720p.
GG
If the DVD player does not support Auto HDMI, you must TV the output resolution appropriately.
To get the best picture quality, adjust the output resolution of the source device to 1280*720p.
GG
We recommend less than 10m for HDMI cable.
GG
HDMI Audio Supported Format: PCM
GG
If the Auto setting is set to Dolby/DTS/Bitstream in some DVDP/STB, make sure to change the setting to
PCM.
GG
If the resolution of external equipment is over 1280*720p, there will be no picture on the TV.
NOTE
!
L/MONO
R
AUDIO
VIDEO
VARIABLE AUDIO OUT
HDMI IN HDMI DVI IN
HDMI/DVI IN
1
COMPONENT IN
IN
SERVICE ONLY
AUDIO OUT
VIDEO
AUDIO
L( MONO)
R
AV IN
AUDIO
VIDEO
COMPONENT IN
1
31. 47 59. 9 4
31.5 60.00
31.25 50.00
44.96 59.94
45 60.00
37.5 50.00
Resolution
1280x720p
Horizontal Vertical
Frequency(kHz) Frequency(Hz)
720x480p
720x576p
MFL41469218-en 7/12/10 4:58 PM Page 21

EXTERNAL EQUIPMENT SETUP
22
DVD SETUP
EXTERNAL EQUIPMENT SETUP
Component Connection
Component Input ports
To get better picture quality, connect a DVD player to the
component input ports as shown below.
Component ports on the TV
YPB PR
Video output ports
on DVD player
Y
Y
Y
Y
PB
B-Y
Cb
Pb
P
R
R-Y
Cr
Pr
Connect the video outputs
(
Y, PB, PR
)
of the DVD to
the
CCOOMMPPOONNEENNTT IINN VVIIDDEEOO
jacks on the TV. Match
the jack colors
(
Y = green, P
B = blue, and PR = red
)
.
Connect the audio outputs of the DVD to the
CCOOMMPPOONNEENNTT IINN AAUUDDIIOO
jacks on the TV.
1. How to connect
2. How to use
■
Turn on the DVD player, insert a DVD.
■
Select the
CCoommppoonneenntt
input source on the TV using the
IINNPPUUTT
button on the remote control.
■
Refer to the DVD player's manual for operating instructions.
2
1
L/MONO
R
AUDIO
VIDEO
VARIABLE AUDIO OUT
HDMI IN HDMI DVI IN
HDMI/DVI IN
1
IN
SERVICE ONLY
ANTENNA
IN
AUDIO OUT
VIDEO
AUDIO
L( MONO)
R
AV IN
AUDIO
VIDEO
COMPONENT IN
1 2
MFL41469218-en 7/12/10 4:58 PM Page 22

EXTERNAL EQUIPMENT SETUP
23
HDMI Connection
Connect the HDMI output of the DVD to the
HHDDMMII
II NN
jack on the TV.
No separated audio connection is necessary.
HDMI supports both audio and video.
1. How to connect
2. How to use
■
Select the
HHDDMMII
input source on the TV using the
IINNPPUUTT
button on the remote control.
■
Refer to the DVD player's manual for operating instructions.
2
1
L/MONO
R
AUDIO
VIDEO
VARIABLE AUDIO OUT
HDMI IN HDMI DVI IN
HDMI/DVI IN
1
COMPONENT IN
IN
SERVICE ONLY
AUDIO OUT
VIDEO
AUDIO
L( MONO)
R
AV IN
AUDIO
VIDEO
COMPONENT IN
1
GG
If the DVD player supports Auto HDMI function, the output resolution of the source device will be auto-
matically TV to 1280*720p.
GG
If the DVD player does not support Auto HDMI, you must TV the output resolution appropriately.
To get the best picture quality, adjust the output resolution of the source device to 1280*720p.
GG
We recommend less than 10m for HDMI cable.
GG
HDMI Audio Supported Format: PCM
GG
If the Auto setting is set to Dolby/DTS/Bitstream in some DVDP/STB, make sure to change the setting to
PCM.
GG
If the resolution of external equipment is over 1280*720p, there will be no picture on the TV.
NOTE
!
MFL41469218-en 7/12/10 4:58 PM Page 23

EXTERNAL EQUIPMENT SETUP
24
VCR SETUP
EXTERNAL EQUIPMENT SETUP
Antenna Connection
Connect the RF antenna out socket of the
VCR to the
AANNTTEENNNNAA IINN
socket on the
TV.
Connect the antenna cable to the RF
antenna in socket of the VCR.
1. How to connect
■
Set VCR output switch to 3 or 4 and then tune
TV to the same channel number.
■
Insert a video tape into the VCR and press PLAY
on the VCR.
(
Refer to the VCR owner’s manual.
)
2. How to use
2
1
Composite (RCA) Connection
GG
If you have a mono VCR, connect the audio cable from
the VCR to the
AAUUDDIIOO LL//MMOONNOO
jack of the TV.
NOTE
!
1
Connect the
AAUUDDIIOO
/
VVIIDDEEOO
jacks between TV and
VCR. Match the jack colors (Video = yellow, Audio Left
= white, and Audio Right = red).
1. How to connect
2. How to use
■
Insert a video tape into the VCR and press PLAY on the
VCR.
(
Refer to the VCR owner’s manual.
)
■
Select the
AAVV
input source on the TV using the
IINNPPUUTT
button on the remote control.
1
AV IN 2
IN
CE ONLY
ANTENNA
IN
AUDIO OUT
AUDIO
VIDEO
COMPONENT IN
AV IN
L
R
S-VIDEO
VIDEO
OUTPUT
SWITCH
ANT IN
ANT OUT
VIDEO
AUDIO
L(MONO)
R
ANTENNA
IN
DIO
R
IO
COMPONENT IN
OUTPUT
SWITCH
ANT IN
R
S-VIDEO VIDEO
ANT OUT
L
AV IN 2
Wall Jack
Antenna
1
2
■
To avoid picture noise (interference), allow adequate distance between the VCR and TV.
MFL41469218-en 7/12/10 4:58 PM Page 24

EXTERNAL EQUIPMENT SETUP
25
OTHER A/V SOURCE SETUP
Connect the
AAUUDDIIOO
/
VVIIDDEEOO
jacks
between TV and external equipment.
Match the jack colors
.
(
Video = yellow, Audio Left = white, and
Audio Right = red
)
1. How to connect
2. How to use
■
Select the
AAVV
input source on the TV using the
IINNPPUUTT
button on the remote control.
■
Operate the corresponding external equipment.
1
IN
SERVICE ONLY
ANTENNA
IN
AUDIO OUT
AUDIO
VIDEO
COMPONENT IN
AV IN
L R
VIDEO
VIDEO
AUDIO
L( MONO)
R
Camcorder
Video Game Set
1
EXTERNAL STEREO SETUP
Use to connected either an external amplifier, or add a sub-
woofer to your surround sound system.
Connect the input jack of the stereo amplifier to the
AAUUDDIIOO OOUUTT
jacks on the TV.
Set up your speakers through your analog stereo
amplifier, according to the instructions provided with
the amplifier.
2
1
L/MONO
R
AUDIO
VIDEO
VARIABLE
AUDIO OUT
IN
SERVICE ONLY
AUDIO
VIDEO
COMPONENT IN
VIDEO
AUDIO
L(MONO)
R
AUDIO OUT
AV IN
11
GG
This function works in following mode : TV, AV, Component, HDMI
NOTE
!
MFL41469218-en 7/12/10 4:58 PM Page 25

WATCHING TV / CHANNEL CONTROL
26
REMOTE CONTROL FUNCTIONS
WATCHING TV / CHANNEL CONTROL
When using the remote control, aim it at the remote control sensor on the TV.
123
456
78
0
9
VOL VOL
CH
CH
ENTER
POWER
MENU Q.VIEW SLEEP
PICTURE SOUND RATIO
MTS
FAVMUTE
A.PROG
MEMORY/ERASE
CAPTION
TV INPUT
MTS
A.PROG
(AUTO PROGRAM)
MEMORY/ERASE
CAPTION
CHANNEL
UP/DOWN
VOLUME UP
/DOWN
THUMBSTICK
(Up/Down/Left
Right/ENTER)
MENU
Q.VIEW
SLEEP
PICTURE
SOUND
RATIO
Selects the MTS sound: Mono, Stereo, or SAP.
GG
pp..4488
Searches for available channels.
GG
pp..3300
Memorizes or erases selected channel.
GG
pp..3311
Selects CAPTION mode.
GG
pp..5511
Select available channels.
Increase/decrease the sound level.
Navigate the on-screen menus and adjust the system set-
tings to your preference.
Displays the main menu.
Tune to the last channel viewed.
Select the amount of time before your TV turns off auto-
matically.
GG
pp..5544
Selects the factory preset picture depend on the viewing
environment.
GG
pp..3366
Selects the factory preset sound for type of program.
GG
pp..4433
Change the aspect ratio.
GG
pp..3355
MFL41469218-en 7/12/10 4:58 PM Page 26

WATCHING TV / CHANNEL CONTROL
27
■
Open the battery compartment cover on the back
side and install the batteries matching correct
polarity
(
+ with +, - with -
)
.
■
Install two 1.5V AAA batteries. Don’t mix old or
used batteries with new ones.
■
Close cover.
Installing Batteries
NUMBER button
Turns your TV.
In AV, Component and HDMI input sources, screen returns to the last TV channel.
Select the desired input source.
Switch the sound on or off.
Scroll through the programmed Favorite channels.
GG
pp..3333
POWER
TV
INPUT
MUTE
FAV
MFL41469218-en 7/12/10 4:58 PM Page 27

WATCHING TV / CHANNEL CONTROL
28
TURNING ON THE TV
WATCHING TV / CHANNEL CONTROL
NOTE
!
GG
If you intend to be away on vacation, disconnect the power plug from the wall power outlet.
GG
If you do not complete the
IInniittiiaall sseettttiinngg
, it will appear whenever the TV is switched on until the
IInniittiiaall
sseettttiinngg
procedure is completed.
First, connect power cord correctly.
At this moment, the TV switches to standby mode.
■
In standby mode to turn TV on, press the button on the TV or press the
PPOOWWEERR
button on the
remote control.
Select the viewing source by using the
IINNPPUUTT
button on the remote control.
■
This TV is programmed to remember which power state it was last set to, even if the power cord is out.
When finished using the TV, press the
PPOOWWEERR
button on the remote control. The TV reverts to standby
mode.
1
2
3
Press the
CCHH ((
DD
or
EE
))
or
NNUUMMBBEERR
buttons to select a channel number.
1
VOLUME ADJUSTMENT
CHANNEL SELECTION
Press the
VVOOLL ((
FF
or
GG
))
button to adjust the volume.
If you want to switch the sound off, press the
MMUUTTEE
button.
You can cancel the Mute function by pressing the
MMUUTTEE
or
VVOOLL ((
FF
or
GG
))
button.
Adjust the volume to suit your personal preference.
1
2
3
IInniittiiaalliizziinngg sseettuupp
Note:
It will automatically disappear after approx. 40 seconds unless a button is pressed.
If the OSD (On Screen Display) is displayed on the screen after turning on the TV, you can adjust the
LLaanngguuaaggee
,
AAuuttoo TTuunniinngg
.
MFL41469218-en 7/12/10 4:58 PM Page 28

WATCHING TV / CHANNEL CONTROL
29
ON-SCREEN MENUS SELECTION
Press the
MMEENNUU
button and then use
DD
or
EE
button to select the each menu.
Press the
GG
button and then use
DD EE FF GG
button to display the available menus.
1
2
DEF G MENU
Setup MENU
Picture MENU
Audio MENU
Time MENU
Option MENU
Clock
Off Time
On Time
Sleep Timer
Time
Auto Tuning
Manual Tuning
Favorite Channel
Setup
Sound Mode
• Treble 50
• Bass 50
• Reset
Auto Volume
Balance 0
Audio
Language
Key Lock
Caption/Text
Power Indicator
Factory Reset
Option
Aspect Ratio
Picture Mode
• Backlight 100
• Contrast 100
• Brightness 50
• Sharpness 70
• Color 70
• Tint 0
Picture
DEF G MENU
DEF G MENU
DEF G MENU
DEF G MENU
E
MFL41469218-en 7/12/10 4:58 PM Page 29

WATCHING TV / CHANNEL CONTROL
30
CHANNEL SEARCH
WATCHING TV / CHANNEL CONTROL
Setup
Auto Tuning
Manual Tuning
Favorite Channel
To Start
Auto Tuning G
DE F G
MENU
Auto Tuning
49%
MENU Stop
CATV
34
Auto Tuning: Program Search
Auto Tuning should be used to memorize all the active channels in
your area before you are able to use the TV.
There are two ways of storing channels in the TV's memory. You
can use either.
One is called AUTO TUNING and the other is called MANUAL
TUNING.
In AUTO TUNING mode, the TV will memorize the channels in
ascending numerical order. If there are additional channels you
want to add or delete, you can manually add or delete those
channels with Manual Tuning.
- Redo Auto Tuning if the TV is ever moved to another location.
- Auto Tuning will search for channels only through the Antenna
jack.
- If channels numbers for broadcast over-the air TV and cable TV
are duplicated where different channels have the same number,
press the same number buttons again to toggle between:
(For example, press 17 to go to the channel, press 17 again to go
to the duplicated channel.)
Broadcast TV Channels
Cable TV Channels
Press the
AA..PPRROOGG
button.
AAUUTTOO TTUUNNIINNGG
starts the chan-
nel search. If you want to stop auto tuning, press the
MMEENNUU
button. Only the channels found up to at that time are memo-
rized.
■
You can also use the
SSeettuupp
menu to adjust
AAuuttoo TTuunniinngg
.
1
Auto Tuning
Manual Tuning
Favorite Channel
Setup
DE F G
MENU
MFL41469218-en 7/12/10 4:58 PM Page 30

WATCHING TV / CHANNEL CONTROL
31
1
Setup
Auto Tuning
Manual Tuning
Favorite Channel
TV 39
Memory
Fine 0
Manual Tuning G
DE F G
MENU
Auto Tuning
Manual Tuning
Favorite Channel
Setup
DE F G
MENU
You can add or delete channels from the channel scan manually.
Manual Tuning: Adding/Deleting Channels
Use the
CCHH
DD EE
or NUMBER buttons to select the channel number
you want to add or delete.
Press the
MMEEMMOORRYY//EERRAASSEE
button to select
MMeemmoorryy
or
EErraassee
.
Press the
EENNTTEERR
button to return to TV viewing.
1
2
3
■
You can also use the
SSeettuupp
menu to adjust
MMaannuuaall TTuunniinngg
.
MFL41469218-en 7/12/10 4:58 PM Page 31

WATCHING TV / CHANNEL CONTROL
32
FINE TUNING ADJUSTMENT
WATCHING TV / CHANNEL CONTROL
Normally fine tuning is only necessary if reception is poor.
Press the
MMEENNUU
button and then use
DD
or
EE
button to
select the
SSeettuupp
menu.
Press the
GG
button and then
DD
or
EE
button to select
MMaannuuaall TTuunniinngg
.
Press the
GG
button and then
DD
or
EE
button to select
FFiinnee
.
Press the
FF
or
GG
button to adjust the picture to your
preference.
Press the
EENNTTEERR
button to save.
2
1
4
5
3
1
2
Setup
Auto Tuning
Manual Tuning
Favorite Channel
TV 39
Memory
Fine 0
Manual Tuning G
DE F G
MENU
Auto Tuning
Manual Tuning
Favorite Channel
Setup
DE F G
MENU
Setup
Auto Tuning
Manual Tuning
Favorite Channel
TV 39
Memory
Fine 0
Manual Tuning
DE F G
MENU
Fine 0
43
MFL41469218-en 7/12/10 4:58 PM Page 32

WATCHING TV / CHANNEL CONTROL
33
FAVORITE CHANNELS SETUP
This function lets you select your favorite channels directly.
Repeatedly press the FAV button to select stored favorite channels.
Press the
MMEENNUU
button and then use
DD
or
EE
button
to select the
SSeettuupp
menu.
Press the
GG
button and then
DD
or
EE
button to select
FFaavvoorriittee CChhaannnneell
.
Press the
GG
button and then
DD
or
EE
button to select
the first favorite channel position.
Use the
FF
or
GG
button to set the desired channel
number for first favorite channel.
Repeat steps 3 to 5 to memorize other favorite chan-
nels. You can store up to 8 channels.
Press the
MMEENNUU
button to move to the previous menu.
2
3
4
5
6
1
2 3 4
1
Setup
Auto Tuning
Manual Tuning
Favorite Channel
Favorite Channel G
DE F G
MENU
Auto Tuning
Manual Tuning
Favorite Channel
Setup
---- ---
---- ---
---- ---
---- ---
---- ---
---- ---
---- ---
---- ---
DE F G
MENU
MFL41469218-en 7/12/10 4:58 PM Page 33

WATCHING TV / CHANNEL CONTROL
34
KEY LOCK
WATCHING TV / CHANNEL CONTROL
The TV can be set so that the remote control is needed to
control it.
This feature can be used to prevent unauthorized viewing.
This TV is programmed to remember which option it was
last set to even if you turn the TV off.
Press the
MMEENNUU
button and then use
DD
or
EE
button
to select the
OOppttiioonn
menu.
Press the
GG
button and then use
DD
or
EE
button to
select
KKeeyy LLoocckk
.
Press the
GG
button and then use
DD
or
EE
button to
select
OOnn
or
OOffff
.
Press the
MMEENNUU
button to move to the previous menu.
2
3
4
1
1
32
Option
Language
Key Lock
Caption/Text
Power Indicator
Factory Reset
Key Lock G
DE F G
MENU
Off
On
Language
Key Lock
Caption/Text
Power Indicator
Factory Reset
Option
DE F G
MENU
NOTE
!
GG
In
KKeeyy LLoocckk
‘
OO nn
’, if the TV is turned off, press the /
I button on the TV or
PPOOWWEERR
buttons on
the remote control.
GG
With the
KKeeyy LLoocckk OOnn
, the display ‘
KKeeyy LLoocckk OOnn
’ appears on the screen if any button on the front
panel is pressed while viewing the TV.
Use to quickly reset all the menu options to their original factory
preset values.
Press the
MMEENNUU
button and then
DD
or
EE
button to
select the
OOppttiioonn
menu.
Press the
GG
button and then
DD
or
EE
button to select
FFaaccttoorryy RReesseett
.
Press the
GG
button and then
FF
or
GG
button to select
YYEESS
or
NN OO
.
1
2
3
3
2
Option
Language
Key Lock
Caption/Text
Power Indicator
Factory Reset
Factory Reset G
1
To set
Factory Reset
Yes
No
Language
Key Lock
Caption/Text
Power Indicator
Factory Reset
Option
DEF G MENU
DEF G MENU
F G MENU
FACTORY RESET
MFL41469218-en 7/12/10 4:58 PM Page 34

PICTURE CONTROL
35
PICTURE SIZE (ASPECT RATIO) CONTROL
This feature allows an analog picture with a 4:3 aspect ratio is displayed on your TV. When you receive an analog
picture with a 4:3 aspect ratio on your 16:9 TV, you need to specify how the picture is to be displayed.
16:9
Following selection will lead you to adjust the picture
horizontally, in a linear proportion, to fill the entire
screen (useful for viewing 4:3 formatted DVDs).
4:3
Following selection will lead you to view a picture
with an original 4:3 aspect ratio, with gray bars
appearing at both the left and right sides.
Just Scan
Following selection will lead to you view the pic-
ture of best quality without loss of original pic-
ture in high resolution image.
Notes: If there are noise in original picture, you
can see the noise at the edge.
JJuusstt SSccaann
operates only in
Component (720p), HDMI(720p) input
source.
Zoom 1
Following selection will lead you to view the pic-
ture without any alternation, while filling the
entire screen. However, the top and bottom por-
tions of the picture will be cropped.
You can adjust the enlarge proportion of Zoom1
using
DD
or
EE
button.
Zoom 2
Choose Zoom2 when you want the picture to be
altered, both horizontally extended and vertical-
ly cropped. The picture taking a halfway trade off
between alteration and screen coverage.
You can adjust the enlarge proportion of Zoom2
using
DD
or
EE
button.
4:3
16:9
NOTE
!
GG
If a fixed image is displayed on the screen for a long time, the image could become imprinted on the screen
and remain visible.
This phenomenon is common to all manufacturers and is not covered by warranty. Although, after watching
video that did not fill the screen, any after-image from the black bars will normally dissipate after a few minutes.
Press the
RRAATTIIOO
button repeatedly to select the desired picture format.
■
You can also adjust
AAssppeecctt RRaattiioo
in the
PPiiccttuurree
menu.
1
Zoom 1
Zoom 2
DD EE
Just Scan
DD EE
PICTURE CONTROL
MFL41469218-en 7/12/10 4:58 PM Page 35

PICTURE CONTROL
36
PICTURE CONTROL
PRESET PICTURE SETTINGS
(Picture Mode - Preset)
1
32
Picture Mode adjusts the TV for the best picture appear-
ance. Select the preset value in the
PPiiccttuurree MMooddee
menu
based on the program category.
Vivid, Standard, and Cinema are programmed for optimum
picture reproduction at the factory and cannot be changed.
Press the
PPIICCTTUURREE
button repeatedly to select the picture
appearance setup option as below :
VViivviidd,, SSttaannddaarrdd,,
or
CCiinneemmaa
.
Press the
EENNTTEERR
button to return to TV viewing.
■
You can also use the
PPiiccttuurree
menu to adjust
PPiiccttuurree MMooddee
.
2
1
Aspect Ratio
Picture Mode
• Backlight 100
• Contrast 100
• Brightness 50
• Sharpness 70
• Color 70
• Tint 0
Picture
DEF G MENU
E
Picture
Aspect Ratio
Picture Mode
• Backlight 100
• Contrast 100
• Brightness 50
• Sharpness 70
• Color 70
• Tint 0
Picture Mode G
Vivid (User)
Standard
Cinema
DEF G MENU
E
MFL41469218-en 7/12/10 4:58 PM Page 36

PICTURE CONTROL
37
MANUAL PICTURE ADJUSTMENT
Press the
MMEENNUU
button and then
DD
or
EE
button to select
the
PPiiccttuurree
menu.
Press the
GG
button and then
DD
or
EE
button to select
PPiiccttuurree MMooddee
.
Press the
GG
button and then
DD
or
EE
button to select
VViivviidd,, SSttaannddaarrdd
or
CCiinneemmaa
.
Press the
FF
button and then
DD
or
EE
button to select the
desired picture option (
BBaacckklliigghhtt
,
CCoonnttrraasstt
,
BBrriigghhttnneessss
,
SShhaarrppnneessss,, CCoolloorr
and
TTiinntt
).
Press the
FF
or
GG
button to make appropriate adjustments.
Press the
MMEENNUU
button to move to the previous menu.
Picture Mode-User Mode
BBaacckklliigghhtt
To control the brightness of the screen, adjust the bright-
ness of LCD panel.
CCoonnttrraasstt
Adjusts the difference between light and dark.
BBrriigghhttnneessss
Increases or decreases the amount of white in the picture.
SShhaarrppnneessss
Adjusts the level of crispness in the edges between the light
and dark areas of the picture. The lower the level, the softer
the image.
CCoolloorr
Adjusts intensity of all colors.
TTiinntt
Adjusts the balance between red and green levels.
1
2
3
4
5
6
54
•
Backlight 100 F
G
E
E
1
32
Aspect Ratio
Picture Mode
• Backlight 100
• Contrast 100
• Brightness 50
• Sharpness 70
• Colour 70
• Tint 0
Picture
DEF G MENU
Picture
Aspect Ratio
Picture Mode
• Backlight 100
• Contrast 100
• Brightness 50
• Sharpness 70
• Color 70
• Tint 0
Picture Mode G
Vivid (User)
Standard
Cinema
DEF G MENU
Picture
Aspect Ratio
Picture Mode
• Backlight 100
• Contrast 100
• Brightness 50
• Sharpness 70
• Color 70
• Tint 0
• Backlight 100
G
DEF G MENU
Vivid (User)
E
E
E
MFL41469218-en 7/12/10 4:58 PM Page 37

PICTURE CONTROL
38
PICTURE CONTROL
PICTURE IMPROVEMENT TECHNOLOGY
Press the
MMEENNUU
button and then
DD
or
EE
button to select
the
PPiiccttuurree
menu.
Press the
GG
button and then
DD
or
EE
button to select
AAddvvaanncceedd
.
Press the
GG
button and then
DD
or
EE
button to select
DDyynnaammiicc CCoonnttrraasstt
,
DDyynnaammiicc CCoolloorr
,
NNooiissee
RReedduuccttiioonn
,
BBllaacckk LLeevveell
,
FFiillmm MMooddee
or
CCoolloorr
TTeemmppeerraattuurree
.
Press the
MMEENNUU
button to move to the previous menu.
You can calibrate the screen for each Picture Mode or set the video value according to the special video
screen.
You can set the video value differently for each input.
To reset to the factory default screen after making adjustments to each video mode, execute the “Picture
Reset” function for each Picture Mode.
1
2
3
4
1
3
2
Picture Mode
• Backlight 100
• Contrast 100
• Brightness 50
• Sharpness 70
• Color 70
• Tint 0
• Advanced
Picture
DEF G MENU
E
Advanced
Dynamic Contrast
G
Dynamic Color
Noise Reduction
Black Level
Film Mode
Color Temperature
• Red 0
• Green 0
Dynamic Contrast G
Off
Low
High
Picture
Picture Mode
• Backlight 100
• Contrast 100
• Brightness 50
• Sharpness 70
• Color 70
• Tint 0
• Advanced
• Advanced
G
Cinema
To Set
E
E
E
E
DEF G MENU
DEF G MENU
MFL41469218-en 7/12/10 4:58 PM Page 38

PICTURE CONTROL
39
■
Adjusts the contrast to keep it at the best level according to the brightness of the
screen. The picture is improved by making bright parts brighter and dark parts darker.
■
Adjusts screen colors so that they look livelier, richer and clearer. This feature
enhances hue, saturation and luminance so that red, blue, green and white look
more vivid.
■
Reduces screen noise without compromising video quality.
Low: The reflection of the screen gets darker.
High: The reflection of the screen gets brighter.
■
Set black level of the screen to proper level.
■
Makes video clips recorded in film look more natural by eliminating judder effect.
■
Set to warm to enhance hotter colors such as red, or set to cool to make picture
bluish.
Dynamic Color
(Off/Low/High)
Noise Reduction
(Off/Low/High)
Black Level
(Low/High)
Film Mode
(On/Off)
Color Temperature
(Cool/Medium/Warm)
Dynamic Contrast
(Off/Low/High)
MFL41469218-en 7/12/10 4:58 PM Page 39

PICTURE CONTROL
40
PICTURE CONTROL
PICTURE RESET
Press the
MMEENNUU
button and then
DD
or
EE
button to select
the
PPiiccttuurree
menu.
Press the
GG
button and then
DD
or
EE
button to select
PPiiccttuurree RReesseett
.
Press the
GG
button to initialize the adjusted value.
Press the
MMEENNUU
button to move to the previous menu.
Returns to the default factory setting for Picture Mode,
Advanced.
1
2
3
4
32
Picture
• Backlight 100
• Contrast 100
• Brightness 50
• Sharpness 70
• Color 70
• Tint 0
• Advanced
• Picture Reset
• Picture Reset
G
OK
1
DEF G MENU
• Backlight 100
• Contrast 100
• Brightness 50
• Sharpness 70
• Color 70
• Tint 0
• Advanced
• Picture Reset
Picture
DEF G MENU
E
E
MFL41469218-en 7/12/10 4:58 PM Page 40

PICTURE CONTROL
41
PICTURE CONTROL
SCREEN SETUP
Manual Configure - Adjustment for screen Position
Press the
MMEENNUU
button and then use
DD
or
EE
button
to select the
PPiiccttuurree
menu.
Press the
GG
button and then use
DD
or
EE
button to
select
SSccrreeeenn
.
Press the
GG
button and then use
DD
or
EE
button to
select
MMaannuuaall CCoonnffiigg..
.
Press the
GG
button and then use
DD
or
EE
button to
select
HH--PPoossiittiioonn
or
VV--PPoossiittiioonn
.
Press the
FF
or
GG
button to make appropriate adjust-
ments.
Press the
MMEENNUU
button to move to the previous menu.
2
1
4
5
3
6
This function works in the following mode when the signal exist :
HDMI, Component
3 4 5
1
Aspect Ratio
Picture Mode
• Backlight 100
• Contrast 100
• Brightness 50
• Sharpness 70
• Color 70
• Tint 0
Picture
2
Picture
• Contrast 100
• Brightness 50
• Sharpness 70
• Color 70
• Tint 0
•
Advanced
•
Picture Reset
Screen
To Set
Screen G
Screen
Manual Config.
Reset
H-Position 50
V-Position 50
Manual Config. G
DEF G MENU
DEF G MENU
DEF G MENU
E
MFL41469218-en 7/12/10 4:58 PM Page 41

PICTURE CONTROL
42
Screen Reset (Reset to original factory settings)
Press the
MMEENNUU
button and then use
DD
or
EE
button
to select the
PPiiccttuurree
menu.
Press the
GG
button and then use
DD
or
EE
button to
select
SSccrreeeenn
.
Press the
GG
button and then use
DD
or
EE
button to
select
RReesseett
.
Press the
GG
button.
Press the
MMEENNUU
button to move to the previous menu.
2
1
4
5
3
This function operates in current mode.
To initialize the adjusted value.
This function works in the following mode when the signal
exist : HDMI, Component
3 4
1
Aspect Ratio
Picture Mode
• Backlight 100
• Contrast 100
• Brightness 50
• Sharpness 70
• Color 70
• Tint 0
Picture
2
Screen
Manual Config.
Reset
To Set
Reset G
DEF G MENU
DEF G MENU
Picture
• Contrast 100
• Brightness 50
• Sharpness 70
• Color 70
• Tint 0
•
Advanced
•
Picture Reset
Screen
To Set
Screen G
DEF G MENU
E
MFL41469218-en 7/12/10 4:58 PM Page 42

SOUND & LANGUAGE CONTROL
43
PRESET SOUND SETTINGS - SOUND MODE
SOUND & LANGUAGE CONTROL
Sound Mode lets you enjoy the best sound without any Special adjustment as the TV
sets the appropriate sound options based on the channel content.
SSttaannddaarrdd
,
MMuussiicc
, and
CCiinneemmaa
are preset for optimum sound quality at the fac-
tory and are not adjustable.
Press the
SSOOUUNNDD
button repeatedly to select the appropri-
ate sound setup as below :
SSttaannddaarrdd
,
MMuussiicc
,
or
CCiinneemmaa
.
Press the
EENNTTEERR
button to return to TV viewing.
■
You can also adjust
SSOOUUNNDD MMOODDEE
in the
AAuuddiioo
menu.
2
1
1
Sound Mode
• Treble 50
• Bass 50
• Reset
Auto Volume
Balance 0
Audio
DEF G MENU
32
Audio
Sound Mode
• Treble 50
• Bass 50
• Reset
Auto Volume
Balance 0
Sound Mode G
Standard
Music
Cinema
DEF G MENU
MFL41469218-en 7/12/10 4:58 PM Page 43

SOUND & LANGUAGE CONTROL
44
SOUND SETTING ADJUSTMENT -USER MODE
SOUND & LANGUAGE CONTROL
Press the
MMEENNUU
button and then
DD
or
EE
button to select
the
AAuuddiioo
menu.
Press the
GG
button and then
DD
or
EE
button to select
SSoouunndd MMooddee
.
Press the
GG
button and then
DD
or
EE
button to select
SSttaannddaarrdd
,
MMuussiicc
or
CCiinneemmaa
.
Press the
EENNTTEERR
button and then
DD
or
EE
button to select
TTrreebbllee
or
BBaassss
.
Press the
FF
or
GG
button to make appropriate adjustments.
Press the
MMEENNUU
button to move to the previous menu.
1
2
3
4
5
6
1
32
Audio
Sound Mode
• Treble 50
• Bass 50
• Reset
Auto Volume
Balance 0
• Treble 50
G
Standard
To Set
Sound Mode
• Treble 50
• Bass 50
• Reset
Auto Volume
Balance 0
Audio
DEF G MENU
DEF G MENU
4 5
MFL41469218-en 7/12/10 4:58 PM Page 44

SOUND & LANGUAGE CONTROL
45
AUDIO RESET
Press the
MMEENNUU
button and then
DD
or
EE
button to select
the
AAuuddiioo
menu.
Press the
GG
button and then
DD
or
EE
button to select
RReesseett
.
Press the
GG
button.
Press the
MMEENNUU
button to move to the previous menu.
Settings of selected Sound Mode return to the default factory
settings.
1
2
3
4
1
32
Audio
Sound Mode
• Treble 50
• Bass 50
• Reset
Auto Volume
Balance 0
• Reset
G
Sound Mode
• Treble 50
• Bass 50
• Reset
Auto Volume
Balance 0
Audio
DEF G MENU
DEF G MENU
Standard
To Set
MFL41469218-en 7/12/10 4:58 PM Page 45

SOUND & LANGUAGE CONTROL
46
AUTO VOLUME LEVELER (AUTO VOLUME)
SOUND & LANGUAGE CONTROL
Press the
MMEENNUU
button and then
DD
or
EE
button to select
the
AAuuddiioo
menu.
Press the
GG
button and then
DD
or
EE
button to select
AAuuttoo VVoolluummee
.
Press the
GG
button and then
DD
or
EE
button to select
OO nn
or
OOffff
.
Press the
MMEENNUU
button to move to the previous menu.
Auto Volume automatically remains on the same level of volume
if you change programs.
1
2
3
4
1
32
Audio
Sound Mode
• Treble 50
• Bass 50
• Reset
Auto Volume
Balance 0
Auto Volume G
Off
On
Sound Mode
• Treble 50
• Bass 50
• Reset
Auto Volume
Balance 0
Audio
DEF G MENU
DEF G MENU
MFL41469218-en 7/12/10 4:58 PM Page 46

SOUND & LANGUAGE CONTROL
47
BALANCE
You can adjust the sound balance of the speakers to the preferred levels.
Press the
MMEENNUU
button and then
DD
or
EE
button to select
the
AAuuddiioo
menu.
Press the
GG
button and then
DD
or
EE
button to select
BBaallaannccee
.
Press the
GG
button and then
FF
or
GG
button to make
desired adjustment.
Press the
MMEENNUU
button to move to the previous menu.
1
2
3
4
1
32
Audio
Sound Mode
• Treble 50
• Bass 50
• Reset
Auto Volume
Balance 0
Balance 0 G
Sound Mode
• Treble 50
• Bass 50
• Reset
Auto Volume
Balance 0
Audio
DEF G MENU
DEF G MENU
MFL41469218-en 7/12/10 4:58 PM Page 47

SOUND & LANGUAGE CONTROL
48
STEREO/SAP BROADCASTS SETUP
SOUND & LANGUAGE CONTROL
The TV can receive MTS stereo programs and any SAP
(Secondary Audio Program) that accompanies the stereo program;
if the broadcaster transmits one additional sound signal in
addition to the original one.
Mono: The primary language is heard from left and right speakers.
Signal mode is mono.
Stereo: The primary language is heard from left and right speakers.
Signal mode is stereo.
SAP: The secondary language is heard from left and right speakers
in mono sound.
Use the
MMTTSS
button to select your desired MTS mode in
analog signal. Each time you press the
MMTTSS
button,
MMoonnoo
,
SStteerreeoo
, or
SSAAPP
appear in turn.
Press the
EENNTTEERR
button to return to TV viewing.
NOTE
!
GG
Select mono sound mode if the signal is not clear or in poor signal reception areas.
GG
SStteerreeoo
,
SSAAPP
modes are available only if included on the broadcast signal.
1
2
MFL41469218-en 7/12/10 4:58 PM Page 48

SOUND & LANGUAGE CONTROL
49
ON-SCREEN MENUS LANGUAGE SELECTION
The menus can be shown on the screen in the selected language. First select your language.
Press the
MMEENNUU
button and then use
DD
or
EE
button to select the
OOppttiioonn
menu.
Press the
GG
button and then use
DD
or
EE
button to select
LLaanngguuaaggee
.
Press the
GG
button and then use
FF
or
GG
button to select your desired
language.
Press the
EEnntteerr
button to move to the previous menu.
1
2
3
4
MFL41469218-en 7/12/10 4:58 PM Page 49

SOUND & LANGUAGE CONTROL
50
SOUND & LANGUAGE CONTROL
It is function to control of IR LED(turn on/ off).
Press the
MMEENNUU
button and then
DD
or
EE
button to select
the
OOppttiioonn
menu.
Press the
GG
button and then
DD
or
EE
button to select
PPoowweerr IInnddiiccaattoorr
.
Press the
GG
button to select
SSttaannddbbyy LLiigghhtt
or
PPoowweerr
LLiigghhtt
.
Press the
GG
button and then
DD
or
EE
button to select
OOnn
or
OOffff
.
Press the
MMEENNUU
button to move to the previous menu.
1
2
3
4
5
1
32
Option
Language
Key Lock
Caption/Text
Power Indicator
Factory Reset
Power Indicator G
To set
Language
Key Lock
Caption/Text
Power Indicator
Factory Reset
Option
DEF G MENU
DEF G MENU
4
Standby Light
Power Light
Standby Light G
Power Indicator
Off
On
DEF G MENU
POWER INDICATOR
MFL41469218-en 7/12/10 4:58 PM Page 50

SOUND & LANGUAGE CONTROL
51
CLOSED CAPTIONS
2. An old, bad, or illegally recorded tape is being played.
3. Strong, random signals from a car or airplane interfere
with the TV signal.
4. The signal from the antenna is weak.
5. The program wasn’t captioned when it was produced,
transmitted, or taped.
Closed captioning is a process which converts the audio
portion of a television program into written words which
then appear as subtitles on the television screen. Closed
captions allow viewers to read the dialogue and narration
of television programs.
UUssiinngg CClloosseedd CCaappttiioonnss
Captions are the subtitles of the dialogue and narration
of television programs. For prerecorded programs,
program dialogue can be arranged into captions in
advance. Its possible to caption a live program by using
a process called real-time captioning, which creates
captions instantly. Real-time captioning is normally done
by professional reporters using a machine shorthand
system and computer for
translation into English.
Captioning is an effective
system for the hearing-
impaired, and it can also
aid in teaching language
skills.
• The picture at left shows a typical caption.
CCaappttiioonn TTiippss
• Not all TV broadcasts include closed caption signals.
• Sometimes TV stations broadcast four different caption
signals on the same channel. By selecting Mode1 to
Mode2, you can choose which signal you view. Mode1
is usually the signal with the captions, while another
mode might show demonstration or programming
information.
• Your TV might not receive caption signals normally in
the following situations.
•
IIGGNNIITTIIOONN::
Picture may flutter, drift, suffer from
black spots, or horizontal streaking.
Usually caused by interference from
automobile ignition systems, neon
lamps, electrical drills, and other
electrical appliances.
•
GGHHOOSSTTSS::
Ghosts are caused when the TV sig-
nal splits and follows two paths.
One is the direct path and the other
is reflected off tall buildings, hills or
other objects. Changing the direction
or position of the antenna may
improve reception.
•
SSNNOOWW::
If your receiver is located at the
weak, fringe area of a TV signal, your
picture may be marred by small
dots. It may be necessary to install a
special antenna to improve the picture.
FOLLOW ME
■
You can also adjust
CCaappttiioonn//TTeexxtt
in the
OOppttiioonn
menu.
Use the
CCAAPPTTIIOONN
button repeatedly to select your caption
Mode 1, Mode 2, Text1, Text2, or Off.
Press the
EENNTTEERR
button to return to TV viewing.
1
2
1. Poor reception conditions are encountered:
MFL41469218-en 7/12/10 4:58 PM Page 51

TIME SETTING
52
TIME SETTING
CLOCK SETUP
Press the
MMEENNUU
button and then
DD
or
EE
button to select
the
TTiimmee
menu.
Press the
GG
button and then
DD
or
EE
button to select
CClloocckk
.
Press the
GG
button and then
DD
or
EE
button to set the
hour.
Press the
GG
button and then
DD
or
EE
button to set the
minute.
Press the
MMEENNUU
button to move to the previous menu.
You must set the time correctly before using on/off timer function.
If current time setting is erased by a power failure or the TV is unplugged, reset
the clock.
1
2
3
4
5
1
3 42
Time
Clock
Off Time
On Time
Sleep Timer
Clock G
- - : - -
Clock
Off Time
On Time
Sleep Timer
Time
DEF G MENU
DEF G MENU
MFL41469218-en 7/12/10 4:58 PM Page 52

TIME SETTING
53
AUTO ON/OFF TIME SETTING
Press the
MMEENNUU
button and then
DD
or
EE
button to select
the
TTiimmee
menu.
Press the
GG
button and then
DD
or
EE
button to select
OO nn
/
OOffff TTiimmee
.
Press the
GG
button and then
DD
or
EE
button to set the
hour.
Press the
GG
button and then
DD
or
EE
button to set the
minutes.
FFoorr OOnn TTiimmee ffuunnccttiioonn oonnllyy
•
CChhaannnneell
: Press the
GG
button and then
DD
or
EE
button to
select the channel.
•
VVoolluummee
: Press the
GG
button and then
DD
or
EE
button to
adjust volume level at switch-on.
Press the
MMEENNUU
button to move to the previous menu.
The Off time function automatically switches the TV to standby at a preset
time.
Two hours after the TV is switched on by the on time function it will auto-
matically switch back to standby mode unless a button has been pressed.
Once the on time/off time is set, these functions operate daily at the preset
time.
The Off time function overrides the On time function if both are set to the
same time.
The TV must be in standby mode for the On time to work.
1
2
3
4
5
6
• To cancel
OO nn
/
OOffff TTiimmee
function, select
OOffff
.
1
54
4
32
32
Clock
Off Time
On Time
Sleep Timer
Time
Time
Clock
Off Time
On Time
Sleep Timer
Off Time G
- - : - -
Off
Time
Clock
Off Time
On Time
Sleep Timer
On Time G
- - : - -
CH 1
Vol. 30
On
DEF G MENU
DEF G MENU
DEF G MENU
MFL41469218-en 7/12/10 4:58 PM Page 53

TIME SETTING
54
TIME SETTING
SLEEP TIMER SETTING
Press the
SSLLEEEEPP
button repeatedly to select the number of
minutes. First the ‘ off ’ option appears on the screen, fol-
lowed by the following sleep timer options : 10, 20, 30, 60,
90, 120, 180, and 240 minutes.
When the number of minutes you want is displayed on the
screen, press the
EENNTTEERR
button. The timer begins to count
down from the number of minutes selected.
To check the remaining minutes before the TV turns off, press
the
SSLLEEEEPP
button once.
To cancel the Sleep Timer, press the
SSLLEEEEPP
button repeat-
edly to select ‘ off ’.
The Sleep Timer turns the TV off at the preset time.
Note that this setting is cleared when the TV is turned off.
2
3
4
1
MFL41469218-en 7/12/10 4:58 PM Page 54

APPENDIX
55
APPENDIX
TROUBLESHOOTING
TThhee ooppeerraattiioonn ddooeess nnoott wwoorrkk nnoorrmmaallllyy..
TThhee vviiddeeoo ddooeess nnoott wwoorrkk..
No picture &No sound
No or poor color
or poor picture
Poor reception on
some channels
Lines or streaks
in pictures
No picture
when connecting HDMI
Horizontal/vertical bars
or picture shaking
Picture appears slowly
after switching on
The remote control
doesn’t work
Power is suddenly
turned off
■
Check to see if there is any object between the product and the remote control
causing obstruction. Ensure you are pointing the remote control directly at the TV.
■
Ensure that the batteries are installed with correct polarity (+ to +, - to -).
■
Ensure that the correct remote operating mode is set: TV, VCR etc.
■
Install new batteries.
■
Is the sleep timer set?
■
Check the power control settings. Power interrupted.
■
TV will be automatically turned off, in case of no signal for 15 minutes.
■
Check whether the product is turned on.
■
Try another channel. The problem may be with the broadcast.
■
Is the power cord inserted into wall power outlet?
■
Check your antenna direction and/or location.
■
Test the wall power outlet, plug another product’s power cord into the outlet
where the product’s power cord was plugged in.
■
This is normal, the image is muted during the product startup process. Please
contact your service center, if the picture has not appeared after five minutes.
■
Adjust Color in menu option.
■
Keep a sufficient distance between the product and the VCR.
■
Try another channel. The problem may be with the broadcast.
■
Are the video cables installed properly?
■
Activate any function to restore the brightness of the picture.
■
Check for local interference such as an electrical appliance or power tool.
■
Station or cable product experiencing problems, tune to another station.
■
Station signal is weak, reorient antenna to receive weaker station.
■
Check for sources of possible interference.
■
Check antenna (Change the direction of the antenna).
■
Check HDMI cable over version 1.3.
The HDMI cables don’t support HDMI version 1.3, it cause flickers or no screen
display. In this case use the latest cables that support HDMI version 1.3.
*This feature is not available for all models.
MFL41469218-en 7/12/10 4:58 PM Page 55

APPENDIX
56
APPENDIX
Picture OK & No sound
Unusual sound from
inside the product
No sound
when connecting HDMI
or USB
No output from one
of the speakers
TThhee aauuddiioo ddooeess nnoott wwoorrkk..
■
Press the VOL or VOLUME button.
■
Sound muted? Press MUTE button.
■
Try another channel. The problem may be with the broadcast.
■
Are the audio cables installed properly?
■
Adjust Balance in menu option.
■
A change in ambient humidity or temperature may result in an unusual noise
when the product is turned on or off and does not indicate a fault with the
product.
■
Check HDMI cable over version 1.3.
■
Check USB cable over version 2.0.
■
Use normal MP3 file.
*This feature is not available for all models.
MFL41469218-en 7/12/10 4:58 PM Page 56

APPENDIX
57
MAINTENANCE
Early malfunctions can be prevented. Careful and regular cleaning can extend the amount of time you can
enjoy your new TV.
Caution: Be sure to turn the power off and unplug the power cord before you begin any cleaning.
Cleaning the Screen
Here’s a great way to keep the dust off your screen for a while. Wet a soft cloth in a mixture of lukewarm
water and a little fabric softener or dish washing detergent. Wring the cloth until it’s almost dry, and then
use it to wipe the screen.
Make sure the excess water is off the screen, and then let it air-dry before you turn on your TV.
Cleaning the Cabinet
■
To remove dirt or dust, wipe the cabinet with a soft, dry, lint-free cloth.
■
Please be sure not to use a wet cloth.
Extended Absence
GG
If you expect to leave your TV dormant for a long time (such as a vacation), it’s a good idea to unplug
the power cord to protect against possible damage from lightning or power surges.
CAUTION
2
1
MFL41469218-en 7/12/10 4:58 PM Page 57

APPENDIX
58
APPENDIX
PRODUCT SPECIFICATIONS
■
The specifications shown above may be changed without prior notice for quality improvement.
MODELS
AC100-240V ~ 50/60Hz
NTSC, PAL M-N
VHF 2-13, UHF 14-69, CATV 1-125
75 ohm
32 ~ 104°F (0 ~ 40°C)
Less than 80%
-4 ~ 140°F (-20 ~ 60°C)
Less than 85%
Dimensions
(Width x Height
x Depth)
Weight
Power requirement
Television System
Program Coverage
External Antenna Impedance
Environment
condition
With stand
Without stand
With stand
Without stand
Operating Temperature
Operating Humidity
Storage Temperature
Storage Humidity
22LD310
(22LD310-MA)
533.4 mm x 397.0 mm x 171.0 mm
(21.0 inch x 15.6 inch x 6.7 inch)
533.4 mm x 351.7 mm x 65.0 mm
(21.0 inch x 13.8 inch x 2.6 inch)
4.8 kg / 10.6 lbs
4.6 kg / 10.1 lbs
Dimensions
(Width x Height
x Depth)
Weight
With stand
Without stand
With stand
Without stand
667.0 mm x 504.0 mm x 224.0 mm
(26.3 inch x 19.8 inch x 8.8 inch)
667.0 mm x 446.2 mm x 80.0 mm
(26.3 inch x 17.6 inch x 3.1 inch)
8.9 kg / 19.6 lbs
7.8 kg / 17.2 lbs
805.0 mm x 583.0 mm x 224.0 mm
(31.7 inch x 23.0 inch x 8.8 inch)
805.0 mm x 528.0 mm x 79.9mm
(31.7 inch x 20.8 inch x 3.1 inch)
11.5 kg / 25.4 lbs
10.4 kg / 23.0 lbs
MODELS
26LD310
(26LD310-MA)
32LD310
(32LD310-MA)
Current Value 0.9 A
Current Value 1.1 A 1.5 A
MFL41469218-en 7/12/10 4:58 PM Page 58

APPENDIX
59
IR CODES
Code
(Hexa)
Remote control
Code
(Hexa)
Remote control
0F TV
0B INPUT
08 POWER
79 RATIO
10-19 Number Key 0-9
09 MUTE
02 VOL
GG
03 VOL
FF
00 CH
DD
01 CH
EE
43 MENU
44 ENTER
1A Q.VIEW
52 SOUND
4D PICTURE
39 CAPTION
0E SLEEP
54 A.PROG
55 MEMORY/ERASE
1E FAV
0A MTS
MFL41469218-en 7/12/10 4:58 PM Page 59

The model and serial number of the TV is located
on the back and one side of the TV.
Record it below should you ever need service.
MODEL
SERIAL

www.lg.com
MANUAL DE USUARIO
TELEVISOR LCD
Lea atentamente este manual antes de poner en
marcha su equipo y guárdelo para futuras consultas.
22LD310
26LD310
32LD310

2
ADVERTENCIA
ADVERTENCIA PRECAUCION
RIESGO DE CHOQUE ELECTRICO
NO ABRIR
El símbolo de descarga dentro del tri-
angulo equilátero, señala al usuario la
presencia de voltaje peligroso sin ais-
lamiento en el interior del aparato de tal intensi-
dad que podría presentar riesgo de descarga
eléctrica.
El símbolo de admiración dentro del trian-
gulo equilátero, indica al usuario que el man-
ual que acompaña a este aparato contiene instruc-
ciones referentes a su funcionamiento y mantenimien-
to.
PARA REDUCIR EL RIESGO DE DESCARGA
ELECTRICA NO RETIRE LA CUBIERTA NI LA
PARTE POSTERIOR DE ESTE APARATO.
ADVERTENCIA/PRECAUCION
PARA REDUCIR EL RIESGO DE INCENDIO O
DESCARGA ELECTRICA, NO EXPONGA EL TELE-
VISOR A LA LLUVIA O HUMEDAD.
MFL41469218-SP 7/12/10 5:01 PM Page 2

3
INSTRUCCIONES IMPORTANTES DE LA SEGURIDAD
INSTRUCCIONES IMPORTANTES DE LA SEGURIDAD
Lea estas instrucciones.
Guarde estas instrucciones.
Tenga en cuenta todas las advertencias.
Siga todas las instrucciones.
No utilice este producto cerca del agua.
Límpielo sólo con un paño seco.
No bloquee las aberturas de ventilación. Instale
siguiendo las instrucciones del fabricante.
No lo coloque cerca de fuentes de calor, como
radiadores, rejillas de aire caliente, estufas u
otros aparatos (incluidos los amplificadores)
que emitan calor.
Proteja el cable de alimentación para que no lo
pisen ni aplasten, especialmente en las clavijas,
las tomas y el punto de salida del aparato.
Utilice únicamente acoplamientos y accesorios
especificados por el fabricante.
Utilícelo sólo con el estante fijo o con ruedas,
trípode, soporte o mesa especificados por el
fabricante o con el accesorio suministrado con
el aparato. Si utiliza un carrito, tenga cuidado al
moverlo junto con el aparato para evitar
lesiones en caso de que éste se caiga.
Desenchufe este producto en caso de no
utilizarlo durante un largo periodo de tiempo.
Desenchufe este equipo durante tormentas
con aparato eléctrico o si no piensa usarlo
durante largos períodos de tiempo.
Sólo el personal calificado puede encargarse
del servicio técnico. La asistencia técnica es
necesaria si el aparato presenta algún daño,
como por ejemplo, si el cable o la clavija de
alimentación están dañados, si se derrama
líquido o se introducen objetos dentro del
aparato, si el aparato ha estado expuesto a la
lluvia o humedad, si no opera correctamente o
si se ha caído.
1
2
3
4
6
7
5
8
9
MFL41469218-SP 7/12/10 5:01 PM Page 3

4
INSTRUCCIONES IMPORTANTES DE LA SEGURIDAD
No toque el aparato o la antena durante una
tormenta eléctrica.
Cuando monte el televisor en la pared,
asegúrese de no colgar el televisor en cables
eléctricos y de señal de la parte trasera..
Cuando monte el televisor en la pared,
asegúrese de no colgar el televisor en cables
eléctricos y de señal de la parte trasera.
PRECAUCIÓN en cuanto al cable de alimentación:
Se recomienda colocar la mayoría de los aparatos
en un circuito dedicado. Es decir, un circuito de
salida única que alimenta sólo a ese aparato y que
no tiene tomas o circuitos adicionales.
Compruebe la página de especificaciones de este
manual del propietario para estar seguro.
No conecte demasiados electrodomésticos a
la misma toma de pared de CA ya que hacerlo
podría suponer riesgo de incendio o choque
eléctrico.
No sobrecargue las tomas de pared. Las tomas
de pared sobrecargadas, sueltas o dañadas,
los alargadores, los cables de alimentación
deshilachados o el aislante agrietado de los
cables podrían resultar peligrosos. Cualquiera
de estas condiciones podría provocar un
incendio o una descarga eléctrica. Examine
periódicamente el cable de su aparato y si
parece dañado o deteriorado, desenchúfelo,
deje de usarlo y solicite al centro de servicio
técnico autorizado que lo sustituyan por un
nuevo equivalente. Proteja el cable de ali-
mentación de daños físicos o mecánicos y
evite doblarlo, aplastarlo, pellizcarlo o pisarlo
con una puerta o caminar sobre él. Ponga
especial atención en los enchufes, tomas de
pared y el punto por donde el cable sale del
aparato.
No manipule la TV con el cable de ali-
mentación enchufado. No utilice cables de ali-
mentación dañados o mal conectados.
Asegúrese de desenchufar el cable de ali-
mentación sujetando el enchufe. No tire del
cable de alimentación para desenchufar la TV.
ADVERTENCIA - A fin de reducir el riesgo de
incendio o choque eléctrico, no exponga este
aparato a la lluvia, humedad u otros líquidos. No
toque la TV con las manos mojadas. No instale
este producto cerca de objetos inflamables como
gasolina o velas, ni exponga la TV al flujo directo
de aparatos de aire acondicionado.
No exponga este aparato a goteos o salpica-
duras, ni coloque sobre él objetos que con-
tengan líquidos, como floreros, tazas, etc. (por
ejemplo en estantes sobre la unidad).
TTOOMMAA AA TTIIEERRRRAA
Asegúrese de conectar el cable de toma a tierra
para evitar posibles descargas eléctricas. (es
decir, que una TV con un enchufe de tres polos,
debe conectarse a una toma de pared con tres
polos). Si no es posible la puesta a tierra, con-
tacte con un electricista calificado para que
instale un interruptor automático independiente.
No intente conectar la unidad a tierra medi-
ante cables telefónicos, pararrayos o tuberías
de gas.
DDEESSCCOONNEEXXIIÓÓNN DDEE LLAA AALLIIMMEENNTTAACCIIÓÓNN
Link-Loader recibe alimentación si el cable de
alimentación está conectado. Desenchufe el
cable de alimentación del tomacorriente de
CA para eliminar la alimentación.
Mientras esta unidad esté conectada a un
tomacorriente de CA se desconectará de dicha
fuente aunque apague la unidad mediante el
INTERRUPTOR DE PRENDIDO.
11
10
13
12
15
16
17
18
14
Proveedor de
potencia
Interruptor de
corto de circuito
MFL41469218-SP 7/12/10 5:01 PM Page 4

5
LLiimmppiieezzaa
Antes de iniciar labores de limpieza, desenchufe
el cable de alimentación y limpie cuidadosa-
mente la unidad con un paño suave para evitar
arañazos superficiales. No rocíe directamente
agua vaporizada u otros líquidos sobre la TV
para evitar posibles choques eléctricos. No
limpie la unidad con productos químicos como
alcoholes, disolventes o benceno.
TTrraannssppoorrttee
Asegúrese de que el producto esté apagado,
desenchufado y que todos los cables hayan
sido desconectados. Harán falta dos o más
personas para transportar TVs de gran tamaño.
No someta el panel frontal de la TV a presiones
o esfuerzos excesivos.
VVeennttiillaacciióónn
Instale su TV en un lugar que disponga de ven-
tilación apropiada. No la instale en espacios
cerrados como, por ejemplo, una estantería. No
cubra el producto con paños u otros materiales,
como plásticos, mientras esté enchufada. No
instale la unidad en lugares con exceso de polvo.
Take care not to touch the ventilation open-
ings. When watching the TV for a long period,
the ventilation openings may become hot.
Si percibe olor a quemado o de cualquier otro
tipo, o detecta sonidos extraños procedentes
de su TV, desenchufe el cable de alimentación
y contacte con el servicio técnico autorizado.
Do not press strongly upon the panel with a hand or
sharp object such as nail, pencil or pen, or make a
scratch on it.
Mantenga el producto lejos de la luz directa
del sol.
DDeeffeeccttoo ddee ppuunnttooss
El plasma o panel LCD es un producto de alta
tecnología con resolución de dos a seis mil-
lones de píxeles. En muy pocos casos, podría
ver puntos minúsculos en la pantalla mientras
mira la TV. Esos puntos son píxeles desactiva-
dos y no afectan el rendimiento ni la confiabil-
idad de la TV.
SSoonniiddoo ggeenneerraaddoo
Ruido de "chasquidos": se genera un ruido de
chasquidos que ocurre al mirar o apagar la TV
por la deformación térmica plástica, debido a
la temperatura o la humedad. Este ruido es
común en productos donde se requiere la
deformación térmica.
Zumbido en el circuito eléctrico o en el panel:
se genera un ruido microscópico en el circuito
de conmutación a alta velocidad que suminis-
tra una gran cantidad de corriente para hacer
funcionar un producto. Varía según el producto.
Este sonido que se genera no afecta el
rendimiento ni la confiabilidad del producto.
PPaarraa LLCCDD TTVV
Si siente la TV fría al tocar, puede que haya un
pequeño “flicker” cuando se ha encendido.
Esto es normal, no hay nada malo con la TV.
Unos pocos defectos de puntos pueden ser
visibles en la pantalla, apareciendo en un color
rojo, verde o azul. Pero ellos no tienen ningún
efecto equivocado para la función del monitor.
Evitese tocar la pantalla LCD o agarrarla con
su(s) dedo(s) por un periodo largo de tiempo.
Si lo hace, eso puede provocar una distorción
temporal en la pantalla.
19
26
20
21
22
23
24
25
DDiissppoossiicciióónn
(Sólo lámpara de Hg utilizada en TV LCD)
Lámpara fluorescente usada en este producto-
contiene una cantidad mínima de mercurio. No
disponga este producto con basura normal de la
casa. La disposición de este producto debe ser
manejado de acuerdo a la autoridad local de su
provincia.
27
28
MFL41469218-SP 7/12/10 5:01 PM Page 5

6
CONTENIDO
ADVERTENCIA
. . . . . . . . . . . . . . . . . . . . . . . . . . . . . . . . . . . . . . . . . . . . 2
INSTRUCCIÓNES DE LA SEGURIDAD
. . . . . 3
FUNCIONES DE ESTE TV
. . . . . . . . . . . . . . . . . . . . . . . . . 8
PREPARACIÓN
Accessorios . . . . . . . . . . . . . . . . . . . . . . . . . . . . . . . . . . . . . . . . . . . . . . . . . . . . . . 9
Información del panel frontal
. . . . . . . . . . . . . . . . . . . . . . . . . . 10
Información del panel posterior
. . . . . . . . . . . . . . . . . . . . . . . 11
Instalación de la base
. . . . . . . . . . . . . . . . . . . . . . . . . . . . . . . . . . . . . . 12
Montaje para la pared VESA . . . . . . . . . . . . . . . . . . . . . . . . . . . . . 14
Organizador de cables . . . . . . . . . . . . . . . . . . . . . . . . . . . . . . . . . . . . . 15
Instalación de un Pedestal de Escritorio
. . . . . . . . . . . . 16
Soporte del eslabon giratorio . . . . . . . . . . . . . . . . . . . . . . . . . . . 16
Posición de la pantalla
. . . . . . . . . . . . . . . . . . . . . . . . . . . . . . . . . . . . . 16
Unión Del Televisor a un Escritorio
. . . . . . . . . . . . . . . . . . . 17
Sistema de seguridad Kensington
. . . . . . . . . . . . . . . . . . . . .
17
Fijación de la TV a la pared para evitar que se
caiga cuando esté instalada sobre un soporte
tipo pedestal
. . . . . . . . . . . . . . . . . . . . . . . . . . . . . . . . . . . . . . . . . . 18
Conexión de la Antena o cable
. . . . . . . . . . . . . . . . . . . . . . . . . 19
CONEXIONES DE EQUIPO EXTERNO
Instalación del HDSTB
. . . . . . . . . . . . . . . . . . . . . . . . . . . . . . . . . . . . . 20
Instalación del DVD
. . . . . . . . . . . . . . . . . . . . . . . . . . . . . . . . . . . . . . . . . 22
Instalación del VCR
. . . . . . . . . . . . . . . . . . . . . . . . . . . . . . . . . . . . . . . . 24
Configuración de otra fuente de A/V
. . . . . . . . . . . . . . . . 25
Ajuste estéreo externo
. . . . . . . . . . . . . . . . . . . . . . . . . . . . . . . . . . . . . 25
VER LA TV / CONTROL DE CANAL
Funciones de los botones del control remoto
. . . . 26
Encendiendo la TV
. . . . . . . . . . . . . . . . . . . . . . . . . . . . . . . . . . . . . . . . . 28
Ajuste del Canal
. . . . . . . . . . . . . . . . . . . . . . . . . . . . . . . . . . . . . . . . . . . . . 28
Ajuste del volumen
. . . . . . . . . . . . . . . . . . . . . . . . . . . . . . . . . . . . . . . . . 28
Selección y ajuste del menú pantalla
. . . . . . . . . . . . . . . . 29
Búsqueda de canales
- Sinto. Auto
. . . . . . . . . . . . . . . . . . . . . . . . . . . . . . . . . . . . . . . . . . . . . . . . 30
- Sintonización Manual . . . . . . . . . . . . . . . . . . . . . . . . . . . . . . . . 31
Ajuste fino de sintonización.............................................................. 32
Ajuste de canales favoritos
.................................................................. 33
Bloqueo de controles.................................................................................... 34
Resstablecer ajustes de fabrica . . . . . . . . . . . . . . . . . . . . . . . . . 34
CONTROL DE IMAGEN
Tamaño de la Imagen(Control de Relacion de Aspecto) . . 35
Ajustes de la Imagen Prestablecida(
Modo imagen
) . . 36
Control Manual de Imagen
. . . . . . . . . . . . . . . . . . . . . . . . . . . . . . . . . 37
Tecnología de Mejora de la Imagen
. . . . . . . . . . . . . . . . . 38
Restablecimiento de la Imagen
. . . . . . . . . . . . . . . . . . . . . . . . 40
Configuración de depantalla
. . . . . . . . . . . . . . . . . . . . . . . . . . . 41
CONTROL DE SONIDO Y IDIOMA
Ajustes de sonido preestablecidos (Modo de audio) . . 43
Ajuste de sonido - modo usuario
. . . . . . . . . . . . . . . . . . . . . 44
Reajuste de audio
. . . . . . . . . . . . . . . . . . . . . . . . . . . . . . . . . . . . . . . . . . . 45
Nivelador Automático de Volumen
. . . . . . . . . . . . . . . . . . . 46
Ajuste de Balance . . . . . . . . . . . . . . . . . . . . . . . . . . . . . . . . . . . . . . . . . . . . 47
Disfrute de la transmisión Estéreo/SAP
. . . . . . . . . . . 48
Selección del lenguaje en la pantalla
. . . . . . . . . . . . . . . . . 49
Indicador de encendido
. . . . . . . . . . . . . . . . . . . . . . . . . . . . . . . . . . . 50
Subtitulaje
. . . . . . . . . . . . . . . . . . . . . . . . . . . . . . . . . . . . . . . . . . . . . . . . . . . . . . 51
MFL41469218-SP 7/12/10 5:01 PM Page 6

7
CONFIGURACIÓN HORARIA
Ajuste del reloj
. . . . . . . . . . . . . . . . . . . . . . . . . . . . . . . . . . . . . . . . . . . . . . . 52
Ajustes de Conexión/Desconexión Automática
Mediante Temporizador
. . . . . . . . . . . . . . . . . . . . . . . . . . . . . . . . . . . 53
Configuración Del Temporizador De Apagado
Automático
. . . . . . . . . . . . . . . . . . . . . . . . . . . . . . . . . . . . . . . . . . . . . . . . . . . . 54
APÉNDICE
Lista de verificación de problemas . . . . . . . . . . . . . . . . . . . 55
Mantenimiento
. . . . . . . . . . . . . . . . . . . . . . . . . . . . . . . . . . . . . . . . . . . . . . . 57
Especificaciones del producto . . . . . . . . . . . . . . . . . . . . . . . . . 58
Aviso sobre software de código abierto
. . . . . . . . . . . . 59
MFL41469218-SP 7/12/10 5:01 PM Page 7

8
FUNCIONES DE ESTE TV
HDMI, tel logotipo HDMI y el inter-faz multimedia de
alta definición son marcas comerciales o registra-das
de HDMI Licensing LLC.
El televisor LG incluye un sistema de altoparlantes
exclusivo, ajustado por el renombrado experto en
audio, Mark Levinson. Los altopar-lantes están inte-
grados en lugares estratégicos tras la cubierta frontal,
y emplean minúsculas vibraciones para girar la totali-
dad del bisel fron-tal hacia el sistema del altoparlante.
Esto genera un aspecto limpio y elegante, a la vez que
mejora el audio incrementando los “puntos óptimos”,
proporcionando un campo de sonido más rico y
amplio.
■
Al visualizar una imagen fija (Ej.: logotipos, menús de pantalla, videojuegos e imágenes proce-dentes de computado-
ras) en el televisor durante un período de tiempo prolongado, dicha imagen puede quedar impresa permanente-
mente sobre la pantalla. Este fenómeno se conoce como “degradación de la imagen por sobreexposición” o “que-
mado”. Problema que no está cubierto por la garantía del fabricante.
■
A fin de evitar la degradación de la imagen por sobreexposición, no permita la visualización de imágenes fijas en su
pantalla durante un período de tiempo prolongado (2 horas o más para una pantalla LCD, 1 hora o más para pan-
tallas de plasma).
■
El efecto de degradación de imagen por sobreexposi-
ción también puede producirse en las zonas de ban-
das del formato letter-box (apaisado) de su televisor
si usa el ajuste de formato de pantalla en 4:3 duran-
te un período de tiempo prolongado..
INFORMACIÓN IMPORTANTE PARA EVITAR EL EFECTO
“DEGRADACIÓN DE LA IMAGEN POR SOBRE EXPOSI-
CION / QUEMADO” EN LA PANTALLA DE SU TELEVISOR
MFL41469218-SP 7/12/10 5:01 PM Page 8

PREPARACIÓN
9
ACCESORIOS
PREPARACIÓN
1,5V 1,5V
123
456
78
0
9
V
O
L
V
O
L
CH
CH
ENTER
MENU Q.VIEW SLEEP
SOUND RATIO
FAV
MUTE
O
G
MEMORY/ERASE
CAPTION
INPUT
123
456
78
0
9
V
O
L
V
O
L
CH
CH
ENTER
POWER
MENU Q.VIEW SLEEP
RATIO
MTS
FAV
MUTE
A
.P
R
O
G
CAPTION
TV INPUT
MEMORY/ERASE
SOUNDPICTURE
Para
2222LLDD331100
Para
2266//3322LLDD331100
x 4
Asegurese de que los siguientes accesorios estén incluidos con su TV. Si algún accesorio no está incluido, favor
de contactar al distribuidor del producto en el lugar donde realizó la compra.
Los accesorios que se incluyen pueden ser diferentes a los de las imágenes a continuación.
Manual de Usuario
Cable de
Alimentación
Control Remoto
* Si la superficie exterior de la unidad tiene manchas o marcas de huellas, limpie
suavemente utilizando únicamente paños de limpieza diseñados para tal fin.
* No limpie con demasiada fuerza para intentar quitar las manchas. Tenga cuida-
do, ya que si limpia con demasiada fuerza podría rayar o decolorar la superficie.
Paño de limpieza
No incluido en todos los modelos
Baterías
(
Algunos modelos
)
Adaptador RF
(
Algunos modelos
)
Debe conectarlo al cable de antena tras
la fijación en la entrada de antena. Este
adaptador es suministrado únicamente
en Argentina.
Clip sujetador de cables
Cubierta de pro-
tección
(M4x24)
para la base ensamblada
Tornillos para fijación
vertical
Cubierta de protección
MFL41469218-SP 7/12/10 5:01 PM Page 9

PREPARACIÓN
10
INFORMACIÓN DEL PANEL FRONTAL
PREPARACIÓN
■
La imagen puede ser diferente a la de su televisor.
32LD310
INPUT MENU
VOL
CH
ENTER
22/26LD310
INPUT
MENU
ENTER
CH
VOL
ALTOPARLANTE
Sensor de Control Remoto
Indicador de Encendido/Standby
Se ilumina en rojo en el modo de espera.
Se ilumina de color azul cuando el aparato está
encendido.
(El
IInnddiiccaaddoorr ddee EEssttaaddoo
puede ajustarse en
el menú
OOPPCCIIÓÓNN
.
GG
pp..5500
)
Botones de
CHANNEL (
EE
,
DD
)
Botones de
VOLUME
(-, +)
Botón
ENTER
Botón MENU
Botón POWER
Botón INPUT
Botones de
CHANNEL (
EE
,
DD
)
Botones de
VOL-
UME
(-, +)
Botón ENTER
Botón MENU
Botón INPUT
Botón POWER
MFL41469218-SP 7/12/10 5:01 PM Page 10

PREPARACIÓN
11
INFORMACIÓN DEL PANEL POSTERIOR
IN
SERVICE ONLY
AUDIOVIDEO
ANTENNA
IN
COMPONENT IN
AUDIO OUT
VIDEO
AUDIOAUDIO
L(MONO)
R
AV IN
Socket del Cordón de Alimentación
Esta TV funciona con alimentación de corriente
alterna (ca)
Cuidado: Nunca aplique voltaje de corriente con-
tinua (cc) a esta TV.
HDMI IN
Conexión digital.
Compatible con video HD y audio digital. No es
compatible con 480 entrelazado/576 entrelazado.
Acepta video DVI con un adaptador o un cable de
HDMI a DVI (no incluido).
Audio Output
Conecte un Amplificador externo o añada un sub-
woofer a su sistema surround sound (sonido
envolvente).
Audio/Video Input (AV IN)
Conexión de audio / salida de vídeo desde un
dispositivo externo a estas tomas
SERVICE
Component In
Conecte un componente de vídeo / dispositivo
de audio a estas tomas
ANTENNA IN
Conecte los cables de señal a este conector.
1
2
3
4
5
7
1
2
3
5
6
7
4
6
■
La imagen puede ser diferente a la de su televisor.
MFL41469218-SP 7/12/10 5:01 PM Page 11

PREPARACIÓN
12
PREPARACIÓN (
Para
22LD310)
PREPARACIÓN
■
La imagen puede ser diferente a la de su televisor.
Coloque con cuidado pantalla de la TV sobre
una superficie acolchada que la proteja de
posibles daños.
Monte la TV como se ilustra asta que oiga click.
1
2
INSTALACIÓN
CUBIERTA DE PROTECCIÓN
Inserte la
CCUUBBIIEERRTTAA DDEE PPRROOTTEECCCCIIÓÓNN
en
el televisor.
4
CCUUBBIIEERRTTAA DDEE PPRROOTTEECCCCIIÓÓNN
Ajuste firmemente los 4 pernos en los huecos de
la parte posterior de la TV.
5
SEPARACIÓN
Coloque con cuidado pantalla de la TV sobre
una superficie acolchada que la proteja de
posibles daños.
1
Afloje los tornillos del televisor.
2
Separar el soporte del televisor.
3
MFL41469218-SP 7/12/10 5:01 PM Page 12

PREPARACIÓN
13
INSTRUCCIONES (
Para
26/32LD310)
INSTALACIÓN
SEPARACIÓN
Coloque con cuidado la pantalla de la TV sobre
una superficie acolchada que la proteja de posi-
bles daños.
Monte la TV como se ilustra.
Ajuste firmemente los 4 pernos en los huecos de
la parte posterior de la TV.
1
2
3
GG
Al realizar un montaje de sobremesa, compruebe
que los tornillos estén apretados correctamente.
(De no ser así, el producto podría inclinarse hacia
delante tras su instalación). Si, por el contrario,
apretara los tornillos en exceso, podría defor-
marse por abrasión en el área de apriete del
mismo. No sobreapriete los tornillos.
NOTA
!
Coloque con cuidado la pantalla de la TV sobre
una superficie acolchada que la proteja de posi-
bles daños.
1
Afloje los tornillos del televisor.
2
Separar el soporte del televisor.
3
Tras extraer el soporte, instale la
CCUUBBIIEERRTTAA
DDEE PPRROOTTEECCCCIIÓÓNN
incluida sobre el hueco
dejado por este. Inserte la
CCUUBBIIEERRTTAA DDEE
PPRROOTTEECCCCIIÓÓNN
en el televisor hasta que
escuche un sonido de chasquido.
CUBIERTA DE PROTECCIÓN
MFL41469218-SP 7/12/10 5:01 PM Page 13

PREPARACIÓN
14
MONTAJE PARA LA PARED VESA
PREPARACIÓN
Realice la instalación mural sobre una pared sólida, perpendicular al suelo. Al montar sobre otros materiales de con-
strucción, por favor, póngase en contacto con su instalador más cercano.
En instalaciones del techo o sobre paredes inclinadas, la unidad puede caer y provocar graves daños personales.
Le recomendamos que utilice un soporte de montaje de pared de la marca LG, cuando ud. ponga la TV en la
pared.LG recomienda que el montaje de pared lo realice un instalador profesional calificado.
GG
No instale su equipo de montaje mural mientras la TV está encendida. Eso podría
provocar lesiones personales por choques eléctricos.
PRECAUCIÓN
GG
La longitud de los tornillos necesarios varía en fun-
ción de la pared en la que se realice el montaje.
Para obtener más información, consulte las instruc-
ciones incluidas con el equipo de mon-taje.
GG
Las dimensiones estándar para el equipo de mon-
taje mural se muestran en la tabla.
GG
Al adquirir nuestro equipo de montaje mural, le
será suministrado un manual de instrucciones
detallado y todas las piezas necesarias para la
instalación.
GG
No utilice tornillos más largos que los de dimensión
estándar mostrados, ya que podría dañar el interior
de la TV.
GG
Para montajes murales que no cumplan con las
especificaciones para tornillos del estándar VESA,
la longitud de estos puede diferir dependiendo de
sus especificaciones.
GG
No utilice tornillos que no cumplan con las especi-
ficaciones relativas a los mismos del estándar
VESA. No apriete los tornillos en exceso, ya que
podría dañar la TV o provocar que cayera pro-
vocando daños personales. LG no se hace respon-
sable de este tipo de accidentes.
GG
LG no se hace responsable por los daños ocasiona-
dos en la TV o las lesiones personales producidas
cuando no se utilice un equipo de montaje que
cumpla con el estándar VESA o se monte sobre un
muro que no haya sido especificado o si el cliente no
sigue las instrucciones de instalación de la TV.
NOTA
!
Modelos
VESA (A
*
B)
Tornillo
estándar
estándar
Soporte para instalación en pared
(de venta por separado)
22LD310
26LD310
32LD310
10 0
*
10 0 M 4 4
200
*
10 0 M 4 4
AA
BB
RW230 AW-47LG30M
RW120
RW230
MFL41469218-SP 7/12/10 5:01 PM Page 14

PREPARACIÓN
15
ORGANIZADOR DE CABLES
■
Es probable que la imagen sea un poco diferente que su unidad de TV.
Conecte los cables necesarios.
Para conectar un equipo adicional, vea la sec-
ción de CONEXIONES DE EQUIPO EXTER-
NO.
Ajuste el CLIP SUJETADOR DE CABLES
como se muestra en la imagen.
Para 22LD310
1
Instale el CLIP SUJETADOR DE CABLES
como la imagen.
2
3
Cómo quitar el CLIP SUJETA-
DOR DE CABLES
GG
Agarre el CLIP SUJETA-
DOR DE CABLES con
las dos manos jalelo
hacia atrás.
GG
No agarre el CLIP SUJETADOR DE CABLES
cuando mueve el producto.
- Si el producto se cae, ud. se puede herir o
el producto se puede romper.
NOTA
!
CLIP SUJETADOR DE CABLES
Para 26/32LD310
Conecte los cables necesarios.
Para conectar un equipo adicional, vea la sec-
ción de CONEXIONES DE EQUIPO EXTER-
NO.
Instale el CLIP SUJETADOR DE CABLES
como la imagen.
1
2
Introduzca los cables en el interior del
CLIP
SUJETADOR DE CABLES
y ciérrelo a presión.
3
CLIP SUJETADOR DE CABLES
MFL41469218-SP 7/12/10 5:01 PM Page 15

PREPARACIÓN
16
INSTALACIÓN DE UN PEDESTAL DE ESCRITORIO
PREPARACIÓN
Para conseguir una ventilación adecuada, deje un espacio de 10,1 cm de separación entre la pared y los costados
del televisor.
■
La imagen puede ser diferente a la de su televisor.
10,1 cm
GG
Asegure la ventilación adecuada dejando el espacio recomendado.
GG
No instale la unidad próxima o sobre ninguna fuente de calor.
CUIDADO
10,1 cm
10,1 cm
10,1 cm
12
0
3
0
SOPORTE DEL ESLABON GIRATORIO (
Excepto
22LD310)
Despues de instalar la TV, puede ajustar el TV manualmente 20 grados a la izquierda y derecha para satisfacer
su angulo de vision.
POSICIÓN DE LA PANTALLA
(para
22LD310)
■
La imagen puede ser diferente a la de su televisor.
■
Ajuste la posición del panel en diversas formas para obtener una máxima comodidad.
• Rango de inclinación
MFL41469218-SP 7/12/10 5:01 PM Page 16

PREPARACIÓN
17
UNIÓN DEL TELEVISOR A UN ESCRITORIO (
Excepto
22LD310)
Recomendamos que el televisor se una a un escritorio, de modo que no se mueva hacia adelante o hacia atrás,
causando posibles lesiones o daños en el producto.
GG
Para evitar que se caiga el televisor, debe estar sujetado seguramente al piso o pared según las
instrucciones de la instalación. Si inclina, sacude o balancea la máquina, podría causar lesiones.
ADVERTENCIA
1-Tornillo
(suministradas como piezas del pro-
ducto)
Escritorio
Soporte
SISTEMA DE SEGURIDAD KENSINGTON
■
Esta característica no está disponible en todos los modelos.
- El televisor tiene instalado un conector de Sistema de seguridad
Kensington en el panel posterior. Conecte el cable de Sistema de
seguridad Kensington como se indica a continuación.
- Para obtener información detallada sobre la instalación y uso del
Sistema de seguridad Kensington, consulte la guía del usuario que se
incluye con este sistema.
Para obtener información adicional, visite
hhttttpp::////wwwwww..kkeennssiinngg--
ttoonn..ccoomm
, la página Web de Kensington. Esta empresa vende sistemas
de seguridad para equipos electrónicos de alto costo, como PC
portátiles y proyectores LCD.
NOTA: El Sistema de seguridad Kensington es un accesorio opcional.
MFL41469218-SP 7/12/10 5:01 PM Page 17

PREPARACIÓN
18
FIJACIÓN DE LA TV A LA PARED PARA EVITAR QUE SE CAIGA
CUANDO ESTÉ INSTALADA SOBRE UN SOPORTE TIPO PEDESTAL
PREPARACIÓN
Instalelo cerca de la pared así el producto no se cae cuando esté presionado hacia atrás. Las instrucciones
mostradas a continuación son más seguras para instalar el producto en la pared así no se caerá cuando el pro-
ducto esté presionado hacia enfrente. Esto protegerá el producto y la gente de la caida hacia enfrente. También
prevendrá el producto del daño causado por la caida. Cuidado:Favor de estar seguro de que los niños no se
suban ni se cuelguen del producto.
■
Use los soportes y los tornillos para fijar el producto en la pared como se muestra.
* Si el producto tiene los tornillos en el lugar de los tornillosde ojo antes de insertar estos últimos, afloje los
tornillos.
* Asegúrese de los soportes con los tornillos (De venta por separado) en la pared que estén ajustados firme
mente.
Para usar el producto seguramente asegúrese de que la altura de los soportes montados en la pared sea la
misma que la del producto. Asegúrese de que los tornillos de ojo o soportes
estén apretados en forma segura.
■
Use un cordón fuerte (De venta por separado) para ajustar el produc-
to. Es más seguro usar un cordón, así se quedará horizontalmente entre
la pared y el producto.
■
Debe adquirir los componentes necesarios para prevenir que el televisor vuelque (cuando no se use el montaje de pared).
■
La imagen puede ser diferente a la de su televisor.
GG
Utilice una plataforma o armario suficientemente fuerte y grande para soportar el tamaño y el peso de
la TV.
GG
Para utilizar la TV con seguridad, asegúrese que la altura los soportes están a la misma altura en la pared y en
el aparato de televisión..
NOTA
!
MFL41469218-SP 7/12/10 5:01 PM Page 18

IN
ANTENNA
IN
COMPONENT IN
AUDIO OUT
AUDIO
AV IN
IN
ANTENNA
IN
COMPONENT IN
AUDIO OUT
AUDIO
AV IN
PREPARACIÓN
19
CONEXIÓN DE LA ANTENA O CABLE
■
Para prevenir daños, no conecte a la corriente hasta que estén instaladas todas las conexiones entre los dispositivos.
■
La imagen puede ser diferente a la de su televisor.
1. Antena (analógica)
Toma de entrada de pared o antena exterior sin conexiones a caja
de cables.
Para lograr la mejor calidad de imagen, ajuste la posición de la
antena si fuera necesario.
2. Cable
Enchufe de
antena de
la pared
Antena de
exterior
Puerto de
TV
de Cable en
la pared
Viviendas/Apartamentos
(Conectar al enchufe de antena en la pared)
Cable Coaxial RF (75 ohm)
Cable Coaxial RF (75 ohm)
Casa privada
(Conectar a un enchufe de pared de la
antena exterior)
Asegúrese de no doblar el cable de cobre
cuando conecte la antena.
Alambre de
bronce
■
En áreas de señal deficiente,puede obtener una mejor calidad en la imagen si instala un amplificador de
señal como se muestra en la derecha.
■
Si está siendo utilizando una antena para dos unidades, use un divisor de señal para conectarse.
■
El cable y el convertidor de antena no son proporcionados con el producto.
MFL41469218-SP 7/12/10 5:01 PM Page 19

CONEXIONES DE EQUIPO EXTERNO
20
CONEXIONES DE EQUIPO EXTERNO
INSTALACIÓN DEL HDSTB
Conexión de componentes
1. Cómo conectar
Conecte las salidas de video (Y, PB, PR) del DVD a los
puertos de
CCOOMMPPOONNEENNTT IINN VVIIDDEEOO
en la unidad.
Haga coincidir los colores de los conectores (Y =
Verde, P
B = Azul, PR = Rojo).
Conecte la salida de audio del decodificador digital a
los puertos de
CCOOMMPPOONNEENNTT IINN AAUUDDIIOO
en la unidad.
2
1
2. Cómo usar
■
Encienda el decodificador digital.
(Refiérase al manual de usuario del
decodificador
digital.)
■
Seleccione la entrada de la fuente
CCoommppoonneennttee
usando el
botón
IINNPPUUTT
del control remoto.
■
Para evitar daños en el equipo, no enchufe ningún cable de alimentación hasta haber finalizado la conexión
completa de todo el equipo.
Resoluciones soportadas
Señal
480entrelazado
480 progresivo
720 progresivo
1080entrelazado
1080 progresivo
Componente
Sí
Sí
Sí
No
No
HDMI
No
Sí
Sí
No
No
L/MONO
R
AUDIO
VIDEO
VARIABLE AUDIO OUT
HDMI IN HDMI DVI IN
HDMI/DVI IN
1
IN
SERVICE ONLY
ANTENNA
IN
AUDIO OUT
VIDEO
AUDIO
L( MONO)
R
AV IN
AUDIO
VIDEO
COMPONENT IN
1
2
Y, C
B/PB
, CR/P
R
Frecuencia Frecuencia
Horizontal
(
kHz
)
Vertical
(
Hz
)
15 , 73 59 , 9 4
15,75 60,00
15,625 50,00
31, 47 59, 9 4
31,50 60,00
31,25 50,00
44,96 59,94
45,00 60,00
37,50 50,00
Resolución
720x480
entrelazado
720x480
progresivo
1 280x720
progresivo
720x576
progresivo
720x576
entrelazado
MFL41469218-SP 7/12/10 5:01 PM Page 20

CONEXIONES DE EQUIPO EXTERNO
21
Conexión HDMI
Conecte la salida HDMI del decodificador de señales
digitales al conector
HHDDMMII IINN
en el televisor.
No se necesita conexión de audio por separado.
HDMI admite audio y video.
1. Cómo conectar
2. Cómo usar
■
Encienda el decodificador digital.
(Refiérase al manual de usuario del decodificador digital.)
■
Seleccione la entrada de la fuente
HHDDMMII
usando el botón
IINNPPUUTT
del control remoto.
2
1
HDMI-DTV
GG
si el reproductor de DVD soporta la función Auto HDMI, las resoluciones de salida del dispositivo fuente
automáticamente para TV 1280x720 progresivo.
GG
si el reproductor de DVD no es compatible con HDMI auto, debe la resolución de salida debe ser adecuada
para TV. Para obtener la mejor calidad de imagen, ajuste la resolución de salida del dispositivo fuente a
1280x720 progresivo.
GG
Recomendamos menos de 10 metros de cable HDMI.
GG
Formatos de audio HDMI: PCM.
GG
Si la configuración automática en Dolby / DTS / indirecto en algunos STB / DVDP, asegúrese de cambiar la
configuración a PCM.
GG
Si la resolución del equipo exterior el 1280x720 progresivo, no habrá imagen en el televisor.
NOTA
!
L/MONO
R
AUDIO
VIDEO
VARIABLE AUDIO OUT
HDMI IN HDMI DVI IN
HDMI/DVI IN
1
COMPONENT IN
IN
SERVICE ONLY
AUDIO OUT
VIDEO
AUDIO
L( MONO)
R
AV IN
AUDIO
VIDEO
COMPONENT IN
1
31, 47 59, 9 4
31,5 60,00
31,25 50,00
44,96 59,94
45 60,00
37,5 50,00
Resolución
1 280x720
progresivo
Frecuencia Frecuencia
Horizontal
(
kHz
)
Vertical
(
Hz
)
720x480
progresivo
720x576
progresivo
MFL41469218-SP 7/12/10 5:01 PM Page 21

CONEXIONES DE EQUIPO EXTERNO
22
INSTALACIÓN DEL DVD
CONEXIONES DE EQUIPO EXTERNO
Conexión de componente
Puertos de la Entrada de Componente
Puede obtener una mejor calidad de imagen si conecta el reproduc-
tor de DVD a los puertos de la entrada del componente como la
imagen mostrada.
Puertos de Componente en la TV
YPB PR
Puertos de la salida del repro-
ductor de DVD
Y
Y
Y
Y
P
B
B-Y
Cb
Pb
P
R
R-Y
Cr
Pr
Conecte las salidas de video
(
Y, PB, PR
)
del DVD a
los puertos de
CCOOMMPPOONNEENNTT IINN VVIIDDEEOO
en la
unidad. Haga coincidir los colores de los conectores
(
Y = Verde, P
B = Azul, PR = Rojo
)
.
Conecte las salidas de audio del DVD a los puertos de
CCOOMMPPOONNEENNTT IINN AAUUDDIIOO
en la unidad.
1. Cómo conectar
2. Cómo usar
■
Encienda el reproductor de DVD, inserte un DVD.
■
Seleccione la entrada de la fuente
CCoommppoonneennttee
usando
el botón
IINNPPUUTT
del control remoto.
■
Refiérase al manual de usuario del reproductor de DVD
para seguir las instrucciones.
2
1
L/MONO
R
AUDIO
VIDEO
VARIABLE AUDIO OUT
HDMI IN HDMI DVI IN
HDMI/DVI IN
1
IN
SERVICE ONLY
ANTENNA
IN
AUDIO OUT
VIDEO
AUDIO
L( MONO)
R
AV IN
AUDIO
VIDEO
COMPONENT IN
1 2
MFL41469218-SP 7/12/10 5:01 PM Page 22

CONEXIONES DE EQUIPO EXTERNO
23
Conexión HDMI
Conecte la salida de HDMI del DVD al puerto de
HHDDMMII IINN
en la unidad.
No se necesita conexión de audio por separado.
HDMI admite audio y video.
1. Cómo conectar
2. Cómo usar
■
Seleccione la entrada de la fuente
HHDDMMII
usando el botón
IINNPPUUTT
del control remoto.
■
Refiérase al manual de usuario del reproductor de DVD para
seguir las instrucciones.
2
1
L/MONO
R
AUDIO
VIDEO
VARIABLE AUDIO OUT
HDMI IN HDMI DVI IN
HDMI/DVI IN
1
COMPONENT IN
IN
SERVICE ONLY
AUDIO OUT
VIDEO
AUDIO
L( MONO)
R
AV IN
AUDIO
VIDEO
COMPONENT IN
1
GG
si el reproductor de DVD soporta la función Auto HDMI, las resoluciones de salida del dispositivo fuente
automáticamente para TV 1280x720 progresivo.
GG
si el reproductor de DVD no es compatible con HDMI auto, debe la resolución de salida debe ser adecuada
para TV. Para obtener la mejor calidad de imagen, ajuste la resolución de salida del dispositivo fuente a
1280x720 progresivo.
GG
Recomendamos menos de 10 metros de cable HDMI.
GG
Formatos de audio HDMI: PCM.
GG
Si la configuración automática en Dolby / DTS / indirecto en algunos STB / DVDP, asegúrese de cambiar la
configuración a PCM.
GG
Si la resolución del equipo exterior el 1280x720 progresivo, no habrá imagen en el televisor.
NOTA
!
MFL41469218-SP 7/12/10 5:01 PM Page 23

CONEXIONES DE EQUIPO EXTERNO
24
INSTALACIÓN DEL VCR
CONEXIONES DE EQUIPO EXTERNO
Conexión de la antena
Conecte el conector de la antena exterior de
RF del VCR al conector de la
AANNTTEENNNNAA IINN
del televisor.
Conecte el cable de antena al puerto de la
antena RF del VCR.
1. Cómo conectar
■
Ponga el interruptor de salida del VCR en 3 ó 4
y luego sintonice el televisor en el mismo número
de canal.
■
Inserte una cinta de video en el VCR y presione
el botón AUDIO PLAY del VCR.
(Vea el manual de usuario del VCR).
2. Cómo usar
2
1
Cuando lo conecta con el cable RCA
GG
Si ud.tiene un VCR monofónico,conecte el cable de
audio de VCR al puerto
AAUUDDIIOO LL//MMOONNOO
de la
unidad.
NOTA
!
1
Conecte las salidas de
AAUUDDIIOO
/
VVIIDDEEOO
entre la TV y
el VCR.Coincida los colores de salidas (Video = amar-
illo, Audio izquierdo = blanco, Audio derecho = rojo)
1. Cómo conectar
2. Cómo usar
■
Inserte una cinta de video en el VCR y presione el botón
PLAY del VCR.(Vea el manual de usuario del VCR).
■
Seleccione la entrada de la fuente
AAVV
usando el botón
IINNPPUUTT
del control remoto.
1
AV IN 2
IN
CE ONLY
ANTENNA
IN
AUDIO OUT
AUDIO
VIDEO
COMPONENT IN
AV IN
L
R
S-VIDEO
VIDEO
OUTPUT
SWITCH
ANT IN
ANT OUT
VIDEO
AUDIO
L(MONO)
R
ANTENNA
IN
DIO
R
IO
COMPONENT IN
OUTPUT
SWITCH
ANT IN
R
S-VIDEO VIDEO
ANT OUT
L
AV IN 2
Conector de pared
Antena
1
2
■
Para evitar ruido en la imagen (interferencia), deje una distancia adecuada entre el VCR y la TV.
MFL41469218-SP 7/12/10 5:01 PM Page 24

CONEXIONES DE EQUIPO EXTERNO
25
CONFIGURACIÓN DE OTRA FUENTE DE A/V
Conecte las salidas de
AAUUDDIIOO
/
VVIIDDEEOO
entre la TV y el
VCR.Coincida los colores de salidas
(Video = amarillo, Audio izquierdo =
blanco, Audio derecho = rojo)
1. Cómo conectar
2. Cómo usar
■
Seleccione la entrada de la fuente
AAVV
usando
el botón
IINNPPUUTT
del control remoto.
■
Opere el equipo externo correspondiente.
Refiérase a la guía de la operación de equipo
externo..
1
IN
SERVICE ONLY
ANTENNA
IN
AUDIO OUT
AUDIO
VIDEO
COMPONENT IN
AV IN
L R
VIDEO
VIDEO
AUDIO
L( MONO)
R
1
AJUSTE ESTÉREO EXTERNO
Utilice esta función para conectar un amplificador externo o
añadir un subwoofer a su sistema de sonido envolvente.
Conecte la toma de entrada del amplificador estéreo a
la toma
AAUUDDIIOO OOUUTT
de la TV.
Configure sus altavoces a través de su amplificador
analógico estéreo,
según las instrucciones incluidas con el amplificador.
2
1
L/MONO
R
AUDIO
VIDEO
VARIABLE
AUDIO OUT
IN
SERVICE ONLY
AUDIO
VIDEO
COMPONENT IN
VIDEO
AUDIO
L(MONO)
R
AUDIO OUT
AV IN
11
GG
Esta función funciona en el siguiente modo: TV, AV, Componente,
HDMI
NOTA
!
Grabadora de video
Unidad de video juego
MFL41469218-SP 7/12/10 5:01 PM Page 25

VER LA TV / CONTROL DE CANAL
26
VER LA TV / CONTROL DE CANAL
123
456
78
0
9
VOL VOL
CH
CH
ENTER
POWER
MENU Q.VIEW SLEEP
PICTURE SOUND RATIO
MTS
FAVMUTE
A.PROG
MEMORY/ERASE
CAPTION
TV INPUT
FUNCIONES DE LOS BOTONES DEL CONTROL REMOTO
Cuando use el control remoto dirija el sensor del control remoto hacia panel frontal de la TV.
MTS
A.PROG
(AUTO PROGRAM)
MEMORY/ERASE
CAPTION
CANAL
ARRIBA/ABAJO
VOLUMEN
SUBIR/BAJAR
THUMBSTICK
(Arriba/Abajo/Iz
quierda/Derecha/
ENTER)
MENU
Q.VIEW
SLEEP
PICTURE
SOUND
RATIO
Selecciona el sonido MTS: Mono, Estereo o SAP.
GG
pp..4488
Búsquedas para los canales disponible.
GG
pp..3300
Memoriza o borra el canal seleccionado.
GG
pp..3311
Selecciona el modo de subtítulos.
GG
pp..5511
Selecciona los canales disponibles encontrados durante
la escaneada manual.
Aumenta/disminuye el nivel de sonido.
Le permite navegar a través de los menús en la pantalla y
ajustar el sistema de acuerdo a sus preferencias.
Selecciona un menú.
Regresa al último canal visto.
Programa el temporizador para dormir.
GG
pp..5544
Ajusta la imagen establecida por la fábrica dependiendo
de el ambiente de visualización.
GG
pp..3366
Para seleccionar el sonido apropiado de acuerdo al programa.
GG
pp..4433
Selecciona su formato de imagen deseado.
GG
pp..3355
MFL41469218-SP 7/12/10 5:01 PM Page 26

VER LA TV / CONTROL DE CANAL
27
■
Abra la tapa del compartimiento de las baterías en
la parte posterior e instale las baterías con la
polaridad correcta. (+con +, -con -)
■
Instale dos baterías de 1,5 Vcc tipo AAA. No
mezcle las baterías nuevas con las usadas.
■
Cierre la tapa.
Colocando las Baterías
Botones Numerados
Enciende su TV o deja cualquier otro equipo programado encendido o apagado dependiendo
del modo.
En las fuentes de entrada AV, Component y HDMI, la pantalla vuelve al último canal de TV.
Los modos de entrada externa se dan rotación en secuencia regular.
Enciende y apaga el sonido.
Se desplaza a través de los canales programados favoritos.
GG
pp..3333
POWER
TV
INPUT
MUTE
FAV
MFL41469218-SP 7/12/10 5:01 PM Page 27

VER LA TV / CONTROL DE CANAL
28
ENCENDIENDO LA TV
VER LA TV / CONTROL DE CANAL
NOTA
!
GG
Si usted va a estar ausente en vacaciones, desconecte el TV del tomacorriente.
GG
Si no completa los ajustes iniciales, estos aparecerán cada vez que prenda el televisor hasta que complete
dicho proceso.
Primero conecte el cordón de alimentación correctamente.
En este momento, la TV se cambia al modo de espera.
■
En el modo de espera para encender la TV, presione los botones del control remoto.
Select the viewing source by using the
IINNPPUUTT
button on the remote control.
■
This TV is programmed to remember which power state it was last set to, even if the power cord is out.
When finished using the TV, press the
PPOOWWEERR
button on the remote control. The TV reverts to standby
mode.
1
2
3
GGuuííaa ppaarraa llaa iinnssttaallaacciióónn
Nota:
Se desaparecerá automáticamente aproximadamonte en 40 segundos si no se presiona ningun botón.
Si se aparece la OSD (On Screen Display) en la pantalla después de la sintonización de TV, ud.puede ajus-
tar el
IIddiioommaa((LLaanngguuaaggee))
,
UUbbiiccaacciióónn
y
SSiinnttoo.. AAuuttoo
.
Presione el botón
CCHH ((
DD
o
EE
))
o de N
ÚMERO para seleccionar un
número del canal.
1
AJUSTE DEL VOLUMEN
AJUSTE DEL CANAL
Presione el botón
VVOOLL ((
FF
o
GG
))
para ajustar el volumen.
Si ud. quiere apagar el sonido, presione el botón
MMUUTTEE
.
Ud. puede cancelar esta función presionando el botón the
MMUUTTEE
o
VVOOLL ((
FF
o
GG
))
.
Ajuste el volumen según su preferencia personal.
1
2
3
MFL41469218-SP 7/12/10 5:01 PM Page 28

VER LA TV / CONTROL DE CANAL
29
SELECCIÓN Y AJUSTE DEL MENÚ PANTALLA
Presione el botón
MMEENNUU
y enseguida presione los botones
DD
o
EE
para desplegar cada menú.
Presione el botón
GG
y enseguida presione los botones
DD EE FF GG
para seleccionar un ítem del menú.
1
2
DEF G MENU
Configuración
Imagen
Audio
Hora
Opción
Reloj
Hora de Apagado
Hora de Encendido
Hora del Apagador
Hora
Sinto. Auto
Sintonización Manual
Favorito
Configuración
Modo de Audio
• Agudos 50
• Graves 50
• Restablecer
Volumen Automático
Balance 0
Audio
Idioma (Language)
Bloqueo de Teclas
Subtít/Texto
Indicador de Estado
Modo de Fábrica
Opción
Relacion de Aspecto
Modo de imagen
• Luz de Fondo 100
• Contraste 100
• Brillo 50
• Nitidez 70
• Color 70
• Tinte 0
Imagen
DEF G MENU
DEF G MENU
DEF G MENU
DEF G MENU
E
MFL41469218-SP 7/12/10 5:01 PM Page 29

VER LA TV / CONTROL DE CANAL
30
BÚSQUEDA DE CANALES
VER LA TV / CONTROL DE CANAL
Configuración
Sinto. Auto
G
Sintonización Manual
Favorito
Empezar
Sinto. Auto G
DE F G
MENU
Sinto. Auto
49%
MENU Detener
TV
34
Cable TV Canals
Sinto. Auto
Sintonización Manual
Favorito
Configuración
DE F G
MENU
Sinto. Auto: Búsqueda de canales
El Sinto. Auto debe memorizar todos los canales activos en su
área antes de poder usar la TV.
Hay dos maneras de almacenar canales en la memoria de la TV. Y
ud. también puede usar.
Una se llama
SSiinnttoo.. AAuuttoo
y la otra se llama
SSiinnttoonniizzaacciióónn
MMaannuuaall
.
En el modo
SSiinnttoo.. AAuuttoo
, la TV memorizará los canales en el
orden numérico. Si hay canales que ud. quiere agregar o eliminar
adicionalmente, ud. puede agregar o eliminar manualmente estos
canales con
SSiinnttoonniizzaacciióónn MMaannuuaall
.
- Repita Sinto. Auto si la TV está movida a otra localidad.
- Sinto. Auto buscará los canales sólo por el puerto de la antena.
- Si los números de los canales para la emisión de TV o para el
cable de TV están duplicados es decir, los canales diferentes
tienen mismo número, presione otra vez los botones de mismo
número para mover entre:
(Por ejemplo, presione 17 para ir al canal, y presione 17 otra vez
para ir al canal duplicado.)
Canales de la Emisión de TV
Presione el botón
AA..PPRROOGG
. Asi
SSiinnttoo.. AAuuttoo
empezará a
buscar los canales. Si ud.quiere parar la sintonización
automática, presione el botón
MMEENNUU
. Sólo los canales
encontrados en este momento están memorizados.
■
También ud. puede hacer el
SSiinnttoo.. AAuuttoo
. con el menú
CCoonnffiigguurraacciióónn
.
1
MFL41469218-SP 7/12/10 5:01 PM Page 30

VER LA TV / CONTROL DE CANAL
31
1
Configuración
Sinto. Auto
Sintonización Manual
G
Favorito
TV 39
Memoria
Fina 0
Sintonización Manual G
DE F G
MENU
Sinto. Auto
Sintonización Manual
Favorito
Configuración
DE F G
MENU
Ud.puede agregar o eliminar los canales de la escaneada manual de
los canales.
Sintonización
Manual: Agregar/Eliminar los Canales
Use el botón
CCHH
DD EE
o de NÚMERO para seleccionar el número
de canal que ud. quiere agregar o eliminar.
Presione el botón
MMEEMMOORRYY//EERRAASSEE
para seleccionar
MMeemmoorriiaa
o
BBoorrrraarr
.
Presione el botón
EENNTTEERR
para regresar a la TV donde estaba vien-
do.
1
2
3
■
También ud. puede hacer el
SSiinnttoonniizzaacciióónn MMaannuuaall
con el menú
CCoonnffiigguurraacciióónn
.
MFL41469218-SP 7/12/10 5:01 PM Page 31

VER LA TV / CONTROL DE CANAL
32
VER LA TV / CONTROL DE CANAL
1
2
Configuración
Sinto. Auto
Sintonización Manual
Favorito
TV 39
Memoria
Fina 0
Sintonización Manual G
DE F G
MENU
Sinto. Auto
Sintonización Manual
Favorito
Configuración
DE F G
MENU
Configuración
Sinto. Auto
Sintonización Manual
Favorito
TV 39
Memoria
Fina 0
Manual Tuning
DE F G
MENU
Fina 0
43
AJUSTE FINO DE SINTONIZACIÓN
Normalmente la sintonización fina sólo es necesaria en caso de una mala recepción.
Presione el botón
MMEENNUU
y luego presione el botón
DD
o
EE
para seleccionar el menú
CCoonnffiigguurraacciióónn
.
Presione el botón
GG
y luego presione el botón
DD
o
EE
para seleccionar
SSiinnttoonniizzaacciióónn MMaannuuaall
.
Presione el botón
GG
y luego presione el botón
DD
o
EE
para seleccionar
FFiinnaa
.
Presione el botón
FF
o
GG
para ajustar la imagen a su
gusto.
Presione el botón
EENNTTEERR
para almacenarlo.
2
1
4
5
3
MFL41469218-SP 7/12/10 5:01 PM Page 32

VER LA TV / CONTROL DE CANAL
33
2 3 4
1
Configuración
Sinto. Auto
Sintonización Manual
Favorito
Favorito G
DE F G
MENU
Sinto. Auto
Sintonización Manual
Favorito
Configuración
---- ---
---- ---
---- ---
---- ---
---- ---
---- ---
---- ---
---- ---
DE F G
MENU
AJUSTE DE CANALES FAVORITOS
Esta función le permitirá seleccionar directamente sus programas
favoritos.
Presione repetidamente el botón FAV para seleccionar programas
favoritos guardados.
Presione el botón
MMEENNUU
y luego presione el botón
DD
o
EE
para seleccionar el menú
CCoonnffiigguurraacciióónn
.
Presione el botón
GG
y luego presione el botón
DD
o
EE
para seleccionar
FFaavvoorriittoo
.
Presione el botón
GG
y luego presione el botón
DD
o
EE
para seleccionar la primera posición para el canal
favorito.
Presione el botón
FF
o
GG
para ajustar el número de
canal deseado para el primer canal favorito.
Repita los pasos del 3 al 5 para memorizar canales
favoritos.
Presione el botón
MMEENNUU
para regresar al menú previo.
2
3
4
5
6
1
MFL41469218-SP 7/12/10 5:01 PM Page 33

VER LA TV / CONTROL DE CANAL
34
BLOQUEO DE CONTROLES
VER LA TV / CONTROL DE CANAL
La TV puede ajustarse de tal forma que le sea necesario el
mando a distancia para controlarla.
Esta función puede utilizarse para evitar el uso sin autorización.
Esta TV está programada para recordar qué opción fue estable-
cida por última vez, incluso si se apaga la unidad.
Presione el botón
MMEENNUU
y luego presione el botón
DD
o
EE
para seleccionar el menú
OOppcciióónn
.
Presione el botón
GG
y luego presione el botón
DD
o
EE
para seleccionar
BBllooqquueeoo ddee TTeeccllaass
.
Presione el botón
GG
y luego presione el botón
DD
o
EE
para seleccionar
EEnncc..
o
AAppaagg
.
Presione el botón
MMEENNUU
para regresar al menú previo.
2
3
4
1
1
32
Opción
Idioma (Language)
Bloqueo de Teclas
Subtít/Texto
Indicador de Estado
Modo de Fábr
Bloqueo de Teclas G
DE F G
MENU
Apag
Enc.
Idioma (Language)
Bloqueo de Teclas
Subtít/Texto
Indicador de Estado
Modo de Fábr
Opción
DE F G
MENU
NOTA
!
GG
En
BBllooqquueeoo ddee TTeeccllaass
‘
EEnncc..
’, si la unidad está apagada, presione el botón / I de la unidad o los
botones de
PPOOWWEERR
control remoto.
GG
Con
BBllooqquueeoo ddee TTeeccllaass EEnncc..
, se aparecerá ‘Bloqueo de Teclas Enc.’ en la pantalla si cualquier botón del
panel frontal ha presionado cuando mira la unidad.
Utilizar para restablecer rápidamente todas las opciones del menú
a sus valores de fábrica originales.
Pulse el botón
MMEENNUU
y después use el botón
DD
o
EE
para
seleccionar el menú
OOppcciióónn
.
Pulse el botón
GG
y después use el botón
DD
o
EE
para selec-
cionar
MMooddoo ddee FFáábbrriiccaa
.
Pulse el botón
GG
y después use el botón
FF
o
GG
para selec-
cionar
SS ÍÍ
o
NN OO
.
1
2
3
3
2
Opción
Idioma (Language)
Bloqueo de Teclas
Subtít/Texto
Indicador de Estado
Modo de Fábr
Modo de Fábr G
1
Para ajustar
Modo de Fábrica
Sí
No
Idioma (Language)
Bloqueo de Teclas
Subtít/Texto
Indicador de Estado
Modo de Fábr
Opción
DEF G MENU
DEF G MENU
F G MENU
RESTABLECER AJUSTES DE F
ÁBRICA
MFL41469218-SP 7/12/10 5:01 PM Page 34

CONTROL DE IMAGEN
35
TAMAÑO DE LA IMAGEN
(CONTROL DE RELACION DE ASPECTO)
Esta característica le permite elegir la forma en la que aparece una imagen análoga con una relación de aspecto de
4:3 en el televisor. Cuando recibe una imagen análoga con una relación de aspecto de 4:3 en el televisor de 16:9, es
necesario especificar cómo se mostrará la imagen.
•
1166::99
La siguiente selección le permitirá ajustar la
imagen horizontalmente, en proporción linear,
para llenar la pantalla completa (útil para la.
visualización de DVDs en formato 4:3).
•
44::33
La siguiente selección le permitirá visualizar
una imagen con formato original 4:3, y con
barras grises a ambos lados, derecho e
izquierdo.
•
Just Scan
La siguiente selección le permitirá disfrutar de
la mejor calidad de imagen sin perder su alta
resolución original.
Notas: Si existe ruido en la imagen original,
podrá ver este ruido en el borde.
Just Scan La funciona sólo para fuentes de
entrada por
Componente(720p), HDMI(720p).
•
ZZoooomm11
La siguiente selección le permitirá disfrutar
una imagen sin alteración, ocupando la pan-
talla por completo. Sin embargo, la parte
superior e inferior de la imagen será cortada.
Puede ajustar la proporción de aumento uti-
lizando los botones
DD
o
EE
.
•
ZZoooomm22
Seleccione la función Zoom 2 cuando desee
alterar la imagen, la ampliación hacia izquierda
y derecha se cortará. La imagen adopta un
compromiso entre la alteración y la cobertura
de la pantalla.
Puede ajustar la proporción de aumento uti-
lizando los botones
DD
o
EE
.
4:3
16:9
NOTA
!
GG
Si aparece una imagen fija en la pantalla durante un período de tiempo prolongado, es posible que la
imagen se imprima en la pantalla y permanezca visible.
Este fenómeno es común para todos los fabricantes y no lo cubre la garantía. No obstante, luego de mirar
un video que no ocupaba toda la pantalla, cualquier imagen posterior se disipará normalmente luego de
unos minutos.
Presione el botón RATIO para seleccionar el formato de imagen deseado.
■
Ud. también puede ajustar
RReellaacciióónn ddee AAssppeeccttoo
en el menú
IImmaaggeenn
.
1
Zoom 1
Zoom 2
DD EE
Just Scan
DD EE
CONTROL DE IMAGEN
MFL41469218-SP 7/12/10 5:01 PM Page 35

CONTROL DE IMAGEN
36
AJUSTES DE LA IMAGEN PRESTABLECIDA
Modo imagen - Presintonizada
1
32
La Modo imagen ajusta la TV para obtener el mejor aspecto
de la imagen. Seleccione el valor preestablecido en el menú
de Modo imagen basado en la categoría del programa.
Los ajustes
IInntteennssoo
,
EEssttáánnddaarr
o
CCiinnee
son preestableci-
dos en fábrica para lograr la mejor calidad de imagen, y no
son ajustables.
Relacion de Aspecto
Modo de imagen
• Luz de Fondo 100
• Contraste 100
• Brillo 50
• Nitidez 70
• Color 70
• Tinte 0
Imagen
DEF G MENU
E
Imagen
Relacion de Aspecto
Modo de imagen
• Luz de Fondo 100
• Contraste 100
• Brillo 50
• Nitidez 70
• Color 70
• Tinte 0
Modo de imagen G
Vivo (Usuario)
Estandar (Usuario)
Cine
DEF G MENU
E
Presione el botón
PPIICCTTUURREE
repetidamente para seleccionar
la opción de configuración de la apariencia de imagen como
está mostrada en la siguiente:
IInntteennssoo
,
EEssttáánnddaarr
o
CCiinnee
.
Presione el botón
EENNTTEERR
para regresar a la TV donde esta-
ba viendo.
■
Usted también puede ajustar
MMooddoo IImmaaggeenn
desde el menú
IImmaaggeenn
.
2
1
CONTROL DE IMAGEN
MFL41469218-SP 7/12/10 5:01 PM Page 36

CONTROL DE IMAGEN
37
54
• Luz de Fondo
100 F
G
E
E
1
32
Relacion de Aspecto
Modo de imagen
• Luz de Fondo 100
• Contraste 100
• Brillo 50
• Nitidez 70
• Color 70
• Tinte 0
Imagen
DEF G MENU
Imagen
Relacion de Aspecto
Modo de imagen
• Luz de Fondo 100
• Contraste 100
• Brillo 50
• Nitidez 70
• Color 70
• Tinte 0
Modo de imagen G
Vivo (Usuario)
Estandar (Usuario)
Cine
DEF G MENU
Imagen
Relacion de Aspecto
Modo de imagen
• Luz de Fondo 100
• Contraste 100
• Brillo 50
• Nitidez 70
• Color 70
• Tinte 0
• Luz de Fondo 100
G
DEF G MENU
Vivo (Usuario)
E
E
E
Pulse el botón
MMEENNUU
y después use el botón
DD
o
EE
para
seleccionar el menú
IImmaaggeenn
.
Pulse el botón
GG
y después use el botón
DD
o
EE
para selec-
cionar
MMooddoo IImmaaggeenn
.
Pulse el botón
GG
y después use el botón
DD
o
EE
para selec-
cionar
IInntteennssoo
,
EEssttáánnddaarr
o
CCiinnee
.
Pulse el botón
FF
y después use el botón
DD
o
EE
para selec-
cionar la opción de imagen deseada (
LLuuzz ddee FFoonnddoo
,
CCoonnttrraassttee
,
BBrriilllloo
,
NNiittiiddeezz,,
CCoolloorr
y
TTiinnttee
).
Presione los botones
FF
o
GG
para realizar los ajustes adecuados.
Presione el botón
MMEENNUU
para regresar al menú previo.
Modo Imagen – Modo usuario
LLuuzz ddee ffoonnddoo
Para controlar el brillo de la pantalla, ajuste el brillo del
panel LCD.
CCoonnttrraassttee
Ajusta la diferencia entre los niveles de luz y oscuridad de la
imagen.
BBrriilllloo
Incrementa o reduce la cantidad de blanco en la imagen.
NNiittiiddeezz
Ajusta el nivel de la nitidez de los bordes entre zonas de
imagen iluminadas y oscuras. Cuanto más bajo sea el nivel,
más suave la imagen.
CCoolloorr
Ajusta la intensidad de todos los colores.
TTiinnttee
Ajusta el balance entre niveles de rojo y verde.
1
2
3
4
5
6
CONTROL MANUAL DE IMAGEN
MFL41469218-SP 7/12/10 5:01 PM Page 37

CONTROL DE IMAGEN
38
CONTROL DE IMAGEN
TECNOLOGÍA DE MEJORA DE LA IMAGEN
1
3
2
Modo de imagen
• Luz de Fondo 100
• Contraste 100
• Brillo 50
• Nitidez 70
• Color 70
• Tinte 0
Imagen
DEF G MENU
E
Avanzado
Contraste Dinámico
G
Color Dinámico
Reducción de ruido
Nivel de Negro
Modo película
Temp color
• Rojo 0
• Verde 0
Contraste Dinámico G
Apag
Bajo
Alto
Imagen
Modo de imagen
• Luz de Fondo 100
• Contraste 100
• Brillo 50
• Nitidez 70
• Color 70
• Tinte 0
• Avanzado
G
Cine
Para ajustar
E
E
E
E
DEF G MENU
DEF G MENU
Pulse el botón
MMEENNUU
y después use el botón
DD
o
EE
para
seleccionar el menú
IImmaaggeenn
.
Pulse el botón
GG
y después use el botón
DD
o
EE
para selec-
cionar
AAvvaannzzaaddoo
.
Pulse el botón
GG
y después use el botón
DD
o
EE
para selec-
cionar
CCoonnttrraassttee DDiinnáámmiiccoo,, CCoolloorr DDiinnáámmiiccoo
,
RReedduucccciióónn ddee rruuiiddoo
,
NNiivveell ddee NNeeggrroo,, MMooddoo ppeellííccuu--
llaa
or
TTeemmpp ccoolloorr..
Presione el botón
MMEENNUU
para regresar al menú previo.
El control avanzado le permite realizar ajustes en las funciones avanzadas de la pantalla LG.Para reiniciar a los
ajustes preestablecidos de fábrica tras realizar ajustes para cada fuente de entra-da, ejecute el Restablecer
imagen para cada Modo imagen.
1
2
3
4
MFL41469218-SP 7/12/10 5:01 PM Page 38

CONTROL DE IMAGEN
39
■
Ajusta el contraste para mantenerlo en el nivel óptimo dependiendo del brillo de la
pantalla. La resolución de la graduación mejora haciendo más brillantes las partes bril-
lantes y más oscuras, las oscuras.
■
Ajusta los colores en pantalla para que aparezcan vivos y limpios. Esta función mejo-
ra el tono, saturación e iluminación de forma que rojos, azules, y verdes parezcan
más vivos.
■
Reduce el ruido en pantalla sin afectar la calidad de video.
Bajo: La reflexión de pantalla se pone más obscura.
Alto: La reflexión de pantalla se pone más clara.
■
el nivel de negro conjunto de la pantalla a un nivel apropiado
■
Hace que los videoclips grabados en la película parezcan más naturales mediante la
eliminación de efecto “judder”.
■
Ajuste en cálido para mejorar los colores de gama más cálida como el rojo o en frío
para dar a la imagen un tono más azulado.
Color Dinámico
(Apagado/Bajo/Alto)
Reducción de ruid
(Apagado/Bajo/Alto)
Nivel Negro
(Bajo/Alto)
Modo película
(Encendido/Apagado)
Temp color
(Fresco/Medio/Calida)
Contraste Dinámico
(Apagado/Bajo/Alto)
MFL41469218-SP 7/12/10 5:01 PM Page 39

CONTROL DE IMAGEN
40
CONTROL DE IMAGEN
RESTABLECIMIENTO DE LA IMAGEN
Pulse el botón
MMEENNUU
y después use el botón
DD
o
EE
para
seleccionar el menú
IImmaaggeenn
.
Pulse el botón
GG
y después use el botón
DD
o
EE
para sele-
cionar
RReessttaabblleecceerr IImmaaggeenn
.
Presione el botón
GG
para inicializar el valor ajustado.
Presione el botón
MMEENNUU
para regresar al menú previo.
Restablece la configuración de fábrica a los ajustes modo ima-
gen, Avanzado.
1
2
3
4
32
Imagen
• Luz de Fondo 100
• Contraste 100
• Brillo 50
• Nitidez 70
• Color 70
• Tinte 0
• Avanzado
• Restablecer imagen
• Restablecer imagen
G
OK
1
DEF G MENU
• Luz de Fondo 100
• Contraste 100
• Brillo 50
• Nitidez 70
• Color 70
• Tinte 0
• Avanzado
• Restablecer imagen
Imagen
DEF G MENU
E
E
MFL41469218-SP 7/12/10 5:01 PM Page 40

CONTROL DE IMAGEN
41
CONFIGURACIÓN DE PANTALLA
Config. Manual - Ajuste de las funciones de pantalla Posicion
Pulse el botón
MMEENNUU
y después use el botón
DD
o
EE
para seleccionar Imagen
Pulse el botón
GG
y después use el botón
DD
o
EE
para
seleccionar
PPaannttaallllaa
.
Pulse el botón
GG
y después use el botón
DD
o
EE
para
seleccionar
MMaannuuaall CCoonnffiigg..
.
Pulse el botón
GG
y después use el botón
DD
o
EE
para
seleccionar
PPoossiicciióónn HH
or
PPoossiicciióónn VV
Presione el botón
FF
o
GG
para realizar los ajustes ade-
cuados.
Presione el botón
MMEENNUU
para regresar al menú previo.
2
1
4
5
3
6
Si la imagen no fuese clara tras el ajuste automático, especialmente si
los caracteres fluctuaran, ajuste la imagen en fase manual.
3 4 5
1
Relacion de Aspecto
Modo de imagen
• Luz de Fondo 100
• Contraste 100
• Brillo 50
• Nitidez 70
• Color 70
• Tinte 0
Imagen
2
Imagen
• Contraste 100
• Brillo 50
• Nitidez 70
• Color 70
• Tinte 0
•
Avanzado
•
Restablecer imagen
Pantalla
Para ajustar
Pantalla G
Pantalla
Manual Config.
Restablecer
Posición H 50
Posición V 50
Manual Config. G
DEF G MENU
DEF G MENU
DEF G MENU
E
MFL41469218-SP 7/12/10 5:01 PM Page 41

CONTROL DE IMAGEN
42
Reajustar la pantalla
(Restablecer el valor original de fábrica)
Pulse el botón
MMEENNUU
y después use el botón
DD
o
EE
para seleccionar Imagen
Pulse el botón
GG
y después use el botón
DD
o
EE
para
seleccionar
PPaannttaallllaa
.
Pulse el botón
GG
y después use el botón
DD
o
EE
para
seleccionar
RReessttaabblleecceerr..
Presione el botón
GG
.
Presione el botón
MMEENNUU
para regresar al menú previo.
2
1
4
5
3
Esta función opera en el modo actual.
Para iniciar el valor ajustado.
Esta función funciona en el modo siguiente, cuando la
señal de: HDMI, Componente
3 4
1
Relacion de Aspecto
Modo de imagen
• Luz de Fondo 100
• Contraste 100
• Brillo 50
• Nitidez 70
• Color 70
• Tinte 0
Imagen
2
Pantalla
Manual Config.
Restablecer
Para ajustar
Restablecer G
DEF G MENU
DEF G MENU
Imagen
• Contraste 100
• Brillo 50
• Nitidez 70
• Color 70
• Tinte 0
•
Avanzado
•
Restablecer imagen
Pantalla
Para ajustar
Pantalla G
DEF G MENU
E
MFL41469218-SP 7/12/10 5:01 PM Page 42

CONTROL DE SONIDO Y DE IDIOMA
43
AJUSTES DE SONIDO PREESTABLECIDOS (MODO DE AUDIO)
CONTROL DE SONIDO Y DE IDIOMA
El modo de sonido le permite disfrutar del mejor sonido sin necesidad de realizar
ajustes especiales, porque la TV establece las opciones de sonido más adecuadas
basándose en el contenido del programa.
EEssttáánnddaarr
,
MMúússiiccaa
o
CCiinnee
están preestablecidos como valores de fábrica para
obtener una calidad de sonido óptima y no pueden ajustarse.
Presione el botón
SSOOUUNNDD
repetidamente, para seleccionar
entre las siguientes opciones de sonido:
EEssttáánnddaarr
,
MMúússiiccaa
o
CCiinnee
Presione el botón
EENNTTEERR
para regresar a la TV donde esta-
ba viendo.
■
Usted también puede ajustar
MMooddoo ddee AAuuddiioo
desde el menú
AAuuddiioo
.
2
1
1
Modo de Audio
• Agudos 50
• Graves 50
• Restablecer
Volumen Automático
Balance 0
Audio
DEF G MENU
32
Audio
Modo de Audio
• Agudos 50
• Graves 50
• Restablecer
Volumen Automático
Balance 0
Modo de Audio G
Estandar
Música
Cine
DEF G MENU
MFL41469218-SP 7/12/10 5:01 PM Page 43

CONTROL DE SONIDO Y DE IDIOMA
44
AJUSTE DE SONIDO - MODO USUARIO
CONTROL DE SONIDO Y DE IDIOMA
Pulse el botón
MMEENNUU
y después use el botón
DD
o
EE
para
seleccionar el menú
AAuuddiioo
.
Pulse el botón
GG
y después use el botón
DD
o
EE
para selec-
cionar
MMooddoo ddee AAuuddiioo
.
Pulse el botón
GG
y después use el botón
DD
o
EE
para selec-
cionar
SSttaannddaarrdd
,
MMuussiicc
or
CCiinneemmaa
.
Pulse el botón
MMEENNUU
y después use el botón
DD
o
EE
para
seleccionar
AAgguuddooss
o
GGrraavveess
Presione el botón
FF
o
GG
para realizar los ajustes adecuados.
Presione el botón
MMEENNUU
para regresar al menú previo.
1
2
3
4
5
6
1
32
Audio
Modo de Audio
• Agudos 50
• Graves 50
• Restablecer
Volumen Automático
Balance 0
• Agudos 50
G
Estandar
Para ajustar
Modo de Audio
• Agudos 50
• Graves 50
• Restablecer
Volumen Automático
Balance 0
Audio
DEF G MENU
DEF G MENU
4 5
MFL41469218-SP 7/12/10 5:01 PM Page 44

CONTROL DE SONIDO Y DE IDIOMA
45
REAJUSTE DE AUDIO
Pulse el botón
MMEENNUU
y después use el botón
DD
o
EE
para
seleccionar el menú
AAuuddiioo
.
Pulse el botón
GG
y después use el botón
DD
o
EE
para selec-
cionar
RReessttaabblleecceerr..
Presione el botón
GG
.
Presione el botón
MMEENNUU
para regresar al menú previo.
Las configuraciones de los modos de sonido seleccionados vuel-
ven a las configuraciones predeterminadas de fábrica.
1
2
3
4
1
32
Audio
Modo de Audio
• Agudos 50
• Graves 50
• Restablecer
Volumen Automático
Balance 0
• Restablecer
G
Modo de Audio
• Agudos 50
• Graves 50
• Restablecer
Volumen Automático
Balance 0
Audio
DEF G MENU
DEF G MENU
Estandar
Para ajustar
MFL41469218-SP 7/12/10 5:01 PM Page 45

CONTROL DE SONIDO Y DE IDIOMA
46
NIVELADOR AUTOMÁTICO DE VOLUMEN
(AUTOMÁTICO DE VOLUMEN)
CONTROL DE SONIDO Y DE IDIOMA
Pulse el botón
MMEENNUU
y después use el botón
DD
o
EE
para
seleccionar el menú
AAuuddiioo
.
Pulse el botón
GG
y después use el botón
DD
o
EE
para
seleccionar
VVoolluummeenn AAuuttoommááttiiccoo
.
Pulse el botón
GG
y después use el botón
DD
o
EE
para selec-
cionar
EEnncc..
o
AAppaagg
.
Presione el botón
MMEENNUU
para regresar al menú previo.
El volumen automático mantiene al mismo nivel el volumen al
cambiar de programa.
1
2
3
4
1
32
Audio
Modo de Audio
• Agudos 50
• Graves 50
• Restablecer
Volumen Automático
Balance 0
Volumen Automático G
Apag
Enc.
Modo de Audio
• Agudos 50
• Graves 50
• Restablecer
Volumen Automático
Balance 0
Audio
DEF G MENU
DEF G MENU
MFL41469218-SP 7/12/10 5:01 PM Page 46

CONTROL DE SONIDO Y DE IDIOMA
47
AJUSTE DE BALANCE
Puede ajustar el balance de sonido de las bocinas a los niveles que desea ud.
Pulse el botón
MMEENNUU
y después use el botón
DD
o
EE
para
seleccionar el menú
AAuuddiioo
.
Pulse el botón
GG
y después use el botón
DD
o
EE
para selec-
cionar
BBaallaannccee
.
Pulse el botón
GG
a continuación, los botones
FF
o
GG
para
realizar los ajustes deseados.
Presione el botón
MMEENNUU
para regresar al menú previo.
1
2
3
4
1
32
Audio
Modo de Audio
• Agudos 50
• Graves 50
• Restablecer
Volumen Automático
Balance 0
Balance 0 G
Modo de Audio
• Agudos 50
• Graves 50
• Restablecer
Volumen Automático
Balance 0
Audio
DEF G MENU
DEF G MENU
MFL41469218-SP 7/12/10 5:01 PM Page 47

CONTROL DE SONIDO Y DE IDIOMA
48
DISFRUTE DE LA TRANSMISIÓN ESTÉREO/SAP
CONTROL DE SONIDO Y DE IDIOMA
La TV puede recibir programas MTS estéreo y SAP que acompañen
la programación ya que se transmite una señal de audio adicional
de igual calidad que la señal original y cuando selecciona Stereo
(Estéreo) o SAP en el control remoto.
El sonido Mono se recibe automáticamente si el programa emite
en Mono aunque se haya seleccionado Stereo o SAP.
Seleccione Mono si desea escuchar el sonido mono en zonas
limítrofes remotas durante una emisión estéreo o SAP.
Es posible recibir emisiones estéreo o SAP en un canal analógico.
Utilice el botón
MMTTSS
para seleccionar el modo MTS deseado
en una señal analógica. Cuando presione el botón
MMTTSS
, verá
aparecer uno a uno
MMoonnoo
,
EEssttéérreeoo
o
SSAAPP
.
Presione el botón
EENNTTEERR
para regresar a la TV donde estaba
viendo.
NOTA
!
GG
Seleccione el modo de sonido monofónico si la señal no está clara o está pobre en el area de recepción.
GG
Los modos de
EEssttéérreeoo,, SSAAPP
están disponibles sólo cuando están incluidos en la señal de transmisión.
1
2
MFL41469218-SP 7/12/10 5:01 PM Page 48

CONTROL DE SONIDO Y DE IDIOMA
49
SELECCIÓN DEL LENGUAJE EN LA PANTALLA
Los menus pueden ser mostrados en la pantalla en el idioma inicial seleccionado.
Primero seleccione su idioma.
Pulse el botón
MMEENNUU
y después use el botón
DD
o
EE
para seleccionar el
menú
OOppcciióónn
.
Pulse el botón
GG
y después use el botón
DD
o
EE
para seleccionar
IIddiioommaa((LLaanngguuaaggee))
.
Pulse el botón
GG
a continuación, utilice el botón
FF
o
GG
para seleccionar
el idioma que desee.
Presione el botón
MMEENNUU
para regresar al menú previo.
1
2
3
4
MFL41469218-SP 7/12/10 5:01 PM Page 49

CONTROL DE SONIDO Y DE IDIOMA
50
CONTROL DE SONIDO Y DE IDIOMA
Función de control de IR LED (encender / apagado).
Pulse el botón
MMEENNUU
y después use el botón
DD
o
EE
para
seleccionar el menú
OOppcciióónn
.
Pulse el botón
GG
y después use el botón
DD
o
EE
para selec-
cionar
IInnddiiccaaddoorr ddee EEssttaaddoo
.
Pulse el botón
GG
para seleccionar
EEnn eessppeerraa
o
EEnncceennddiiddoo
.
Pulse el botón
GG
y después use el botón
DD
o
EE
para selec-
cionar
EEnncc..
o
AAppaagg
.
Presione el botón
MMEENNUU
para regresar al menú previo.
1
2
3
4
5
1
32
Opción
Idioma (Language)
Bloqueo de Teclas
Subtít/Texto
Indicador de Estado
Modo de Fábrica
Indicador de Estado G
Para ajustar
Idioma (Language)
Bloqueo de Teclas
Subtít/Texto
Indicador de Estado
Modo de Fábrica
Opción
DEF G MENU
DEF G MENU
4
Standby Light
Encendido
En espera G
Indicador de Estado
Apag
Enc.
DEF G MENU
INDICADOR DE ENCENDIDO
MFL41469218-SP 7/12/10 5:01 PM Page 50

CONTROL DE SONIDO Y DE IDIOMA
51
SUBTITULAJE
2. Se reproduce una cinta de grabación vieja,en mal esta
do o copia pirata.
3. Las señales fuertes,aleatorias desde un carro o avión
interfieren con la señal de TV.
4. La señal de la antena es débil.
5. El programa no se subtituló cuando fue producido,trans-
mitido o grabado.
El subtitulaje es un proceso que convierte la porción de
audio de un programa de televisión en palabras escritas, las
cuales aparecen en la pantalla del televisor en una forma
similar a los subtítulos. El subtitulaje permite al televidente
leer el diálogo y narración de los programas de televisión.
UUssaannddoo eell ssuubbttiittuullaajjee
Las leyendas son los subtítulos del diálogo y narración de los
programas de televisión. Para programas pregrabados, el diálogo
del programa puede prepararse anticipadamente con subtítulos.
Es posible subtitular un programa en vivo usando un proceso
llamado "subtitulaje de tiempo real", el cual crea subtitulajes
instantaneamente. El subtitulaje de tiempo real es normalmente
efectuado por reporteros profesionales que usan un sistema de
taquigrafía a máquina y una
computadora para traducir al
inglés. El subtitulaje es un sis-
tema efectivo para personas
con incapacidad auditiva, y
también puede ayudar en la
enseñanza de idiomas.
• La imagen de arriba muestra un subtitulaje típico.
CCoonnsseejjooss ppaarraa eell SSuubbttiittuullaajjee
• No todas las transmisiones de TV incluyen señales de
subtitulaje.
• Algunas veces las estaciones de Televisión transmiten cua-
tro señales de subtitulaje diferentes en el mismo canal.
Seleccionando Modo 1 o el Modo 2, usted puede escoger
cuál señal visualizar. Modo 1 es la señal usual con subtítu-
los, mientras que otro modo puede desplegar demostra-
ciones o información sobre la programación actual.
• El televisor puede no recibir señales de subtitulaje en
las siguientes situaciones.
•
IIGGNNIICCIIÓÓNN::
La imagen puede vibrar, desviarse,llenarse
de manchas negras o rayas horizontales.
Usualmente causadas por interferencia
de sistemas de ignición de automóviles,
lámparas de neón, taladros eléctricos y
otros aparatos eléctricos.
•
FFAANNTTAASSMMAASS::
Los fantasmas son causados cuando la
señal del Televisor se separa y sigue
dos trayectorias. Una es la trayectoria
directa y la otra es reflejada desde edi-
ficios altos, montañas u otros objetos.
Puede mejorar la recepción cambiando
la dirección o posición de la antena.
•
NNIIEEVVEE::
Si su receptor se localiza en una zona
marginal en donde la señal es débil, su
imagen puede ser estropeada por la
aparición de puntos pequeños. Será
necesario instalar una antena especial
para mejorar la imagen.
FOLLOW ME
■
Ud. también puede ajustar
SSuubbttíítt//TTeexxttoo
en el menú
OOppcciióónn
.
Use el botón
CCAAPPTTIIOONN
repetidamente para seleccionar su
subtitulaje Modo1, Modo2, Texto1, Texto2 o Apag.
Presione el botón
EENNTTEERR
para regresar a la TV donde estaba
viendo.
1
2
1. Poor reception conditions are encountered:
MFL41469218-SP 7/12/10 5:01 PM Page 51

CONFIGURACI
ÓN HORARIA
52
CONFIGURACIÓN HORARIA
AJUSTE DEL RELOJ
Pulse el botón
MMEENNUU
y después use el botón
DD
o
EE
para
seleccionar el menú
HHoorraa
.
Pulse el botón
GG
y después use el botón
DD
o
EE
para selec-
cionar
RReelloojj
.
Pulse el botón
GG
y, a continuación, los botones
DD
o
EE
para
ajustar la hora.
Pulse el botón
GG
y, a continuación, los botones
DD
o
EE
para
ajustar los minutos.
Presione el botón
MMEENNUU
para regresar al menú previo.
Deberá realizar correctamente la configuración horaria antes de utilizar la fun-
ción de encendido/apagado por temporizador.
Si la hora se borrase debido a un corte eléctrico o por desenchufar la TV, vuel-
va a ajuste el reloj.
1
2
3
4
5
1
3 42
Hora
Reloj
Hora de Apagado
Hora de Encendido
Hora del Apagador
Reloj G
- - : - -
Reloj
Hora de Apagado
Hora de Encendido
Hora del Apagador
Hora
DEF G MENU
DEF G MENU
MFL41469218-SP 7/12/10 5:01 PM Page 52

Pulse el botón
MMEENNUU
y después use el botón
DD
o
EE
para
seleccionar el menú
HHoorraa
.
Pulse el botón
GG
y después use el botón
DD
o
EE
para selec-
cionar
HHoorraa ddee AAppaaggaaddoo
/
HHoorraa ddee EEnncceennddiiddoo
.
Pulse el botón
GG
y, a continuación, los botones
DD
o
EE
para
ajustar la hora.
Pulse el botón
GG
y, a continuación, los botones
DD
o
EE
para
ajustar los minutos.
SSóólloo ppaarraa llaa ffuunncciióónn HHoorraa ddee EEnncceennddiiddoo
•
CCaannaall ((CChhaannnneell))::
Presione el botón
GG
y, a contin-
uación, los botones
DD
o
EE
para seleccionar el programa.
•
VVoolluummeenn::
Presione el botón
GG
y, a continuación, los
botones
DD
o
EE
para ajustar el nivel de volumen en
switch-on.
Presione el botón
MMEENNUU
para regresar al menú previo.
CONFIGURACIÓN HORARIA
53
AJUSTES DE CONEXIÓN/DESCONEXIÓN AUTOMÁTICA
MEDIANTE TEMPORIZADOR
La función de desconexión automática pone la TV en espera tras un periodo
programado.
Dos horas después de encender la TV mediante el temporizador de conexión,
la unidad volverá automáticamente al modo de espera, a menos que presione
cualquier botón.
Una vez configurado el temporizador de conexión o desconexión, estas fun-
ciones se activarán diariamente a la hora establecida.
La función de desconexión automática sobrescribe la función de conexión
automática si ambos se programan para el mismo periodo.
La TV debe estar en modo standby, para que la función de conexión automáti-
ca funcione.
1
2
3
4
5
6
• Para cancelar la función
HHoorraa ddee AAppaaggaaddoo
/
HHoorraa ddee EEnncceennddiiddoo
, seleccione
AAppaagg
.
1
54
4
32
32
Reloj
Hora de Apagado
Hora de Encendido
Hora del Apagador
Hora
Hora
Reloj
Hora de Apagado
Hora de Encendido
Hora del Apagador
Hora de Apagado G
- - : - -
Apag
Hora
Reloj
Hora de Apagado
Hora de Encendido
Hora del Apagador
Hora de Encendido G
- - : - -
CH 1
Vol. 30
Enc.
DEF G MENU
DEF G MENU
DEF G MENU
MFL41469218-SP 7/12/10 5:01 PM Page 53

CONFIGURACI
ÓN HORARIA
54
CONFIGURACIÓN HORARIA
CONFIGURACIÓN DEL TEMPORIZADOR
DE APAGADO AUTOMÁTICO
Presione el botón
SSLLEEEEPP
para fijar el tiempo para dormir.
‘ Apagado ’ aparecerá en la pantalla, seguido de 10, 20,
30, 60, 90, 120, 180 y 240.
Cuando el tiempo de dormir deseado aparece en la pantalla,
Presione el botón
EENNTTEERR
. El temporizador comienza la
cuenta atrás desde el número de minutos seleccionado.
Para verificar el tiempo de dormir que queda, presione el
botón
SSLLEEEEPP
solamente una vez.
Para cancelar dormir, presione repetidamente el botón
SSLLEEEEPP
hasta seleccionar ‘ Apagado ’.
El Temporizador para Dormir apaga el TV después de un tiempo
prefijado.
Nota: Si apaga el TV después de haber programado el tempo-
rizador para dormir, el ajuste se borrará.
2
3
4
1
MFL41469218-SP 7/12/10 5:01 PM Page 54

■
Verifique para ver si hay algún objeto entre el producto y el control remoto cau-
sando la obstrucción. Asegúrese de apuntar el control remoto directamente al televisor.
■
Están puestas las baterías con la polaridad correcta (+con +, -con -)?
■
Está correcta la configuración del modo remoto de la operación: TV, VCR etc.?
■
Ponga nuevas baterías.
■
Está configurado el tiempo para dormir?
■
Verifique las configuraciones de control de la potencia. La potencia interrumpida.
■
El Televisor se apagará automáticamente en 15 minutos en caso de que no haya señal.
La TV se apaga
repentinamente
APÉNDICE
55
APÉNDICE
LISTA DE VERIFICACIÓN DE PROBLEMAS
TThhee vviiddeeoo ddooeess nnoott wwoorrkk..
■
Verifique si el producto está encendido.
■
Intente otro canal. El problema puede ser con la transmisión.
■
Está metido el cordón de alimentación dentro del tomacorriente de la pared?
■
Verifique la dirección y/o la ubicación de su antena.
■
Pruebe el tomacorriente, enchufe un cordón de alimentación de otro producto en el
tomacorriente donde estaba enchufado el cordón de alimentación del producto.
■
Es normal, la imagen es muda durante el proceso de inicio del producto. Favor de
contactar a su centro de servicio, si la imagen no aparece cinco minutos después.
■
Ajuste Color en la opción del menú.
■
Mantenga una distancia suficiente entre el producto y el VCR.
■
Intente otro canal. El problema puede ser con la transmisión.
■
Están instalados apropiadamente los cables de video?
■
Active cualquier función para restablecer el brillo de la imagen.
■
Verifique la inteferencia local como aparatos eléctricos o herramientas de potencia.
■
Estación o cable con problemas experimentales, sintonice a otra estación.
■
Si la señal de estación es débil, reubique la antena para recibir estación más debil.
■
Verifique las fuentes de la interferencia posible.
■
Verifique la antena (Cambie la dirección de la antena).
■
Chequee que el cable HDMI admita la versión 1,3.
Los cables HDMI que no admiten la versión 1,3 de HDMI, provocan parpadeos o
no muestran la imagen en pantalla. Si este es el caso, utilice cables recientes que
soporten la versión 1,3 de HDMI.
* Esta característica no se encuentra disponible para todos los modelos.
NNoo ssee ttrraabbaajjaa nnoorrmmaallmmeennttee..
El control remoto no
funciona
No imagen
No sonido
Color o imagen deficiente,
o No color
Recepción pobre en
algunos canales
Lineas o rayas en las
imagenes
No hay recepción de
imagen al conectar la
toma HDMI
Bar horizontal/vertical o
imagen temblante
La imagen aparece lenta-
mente después de enceder
la TV
MFL41469218-SP 7/12/10 5:01 PM Page 55

APÉNDICE
56
APÉNDICE
NNoo ssiirrvvee llaa ffuunncciióónn ddee aauuddiioo..
Imagen OK pero
No sonido
Sonido raro desde interior
del producto
No hay sonido al conectar
tomas HDMI o USB
No salida de una de las
bocinas
■
Presione el botón VOL o Volume.
■
Sonido mudo? Presione el botón MUTE.
■
Intente otro canal. El problema puede ser con la transmisión.
■
Están instalados apropiadamente los cables de audio?
■
Ajuste el Balance en la opción del menú.
■
Un cambio en la ambiente de humedad o temperatura puede causar un sonido
raro cuando enciende o apaga el producto y esto no significa la falla del pro-
ducto.
■
Chequee que el cable HDMI admite la versión 1,3.
■
Chequee que el cable USB admite la versión 2,0.
■
Lea archivos MP3 normales.
* Esta característica no se encuentra disponible para todos los modelos.
MFL41469218-SP 7/12/10 5:01 PM Page 56

APÉNDICE
57
MANTENIMIENTO
Las malfunciones anticipadas pueden ser prevenidas. La limpieza regular y cuidadosa puede extender la suma
de tiempo que ud.va a tener su nueva TV. Asegurese apagar la TV y desenchufar el cordón de alimentación
antes de empezar cualquier tipo de limpieza.
Limpiando la pantalla
Aqui hay una buena manera para mantener su pantalla limpia por un tiempo. Moje una tela suave en una
mezcla de agua tibia con un poco de suavizante de ropa, o detergente de platos. Escurra la tela hasta que
esté casi seca, luego limpie la pantalla con ella.
Asegurese que no haya exceso de agua en la pantalla, luego dejela secar por el aire antes de encender su TV.
Limpiando el gabinete
■
Para remover la suciedad o polvo, limpie el gabinete con una tela suave, seca y sin pelusa.
■
Favor de asegurarse no usar una tela mojada.
Ausencia Extendida
GG
Si ud. espera dejar su TV por un tiempo largo (como las vacaciones), será buena idea desenchufar el cordón
de alimentación para proteger la TV contra el posible daño por tormentas o fallas de linea de alimentacion.
AVISO
1
2
MFL41469218-SP 7/12/10 5:01 PM Page 57

APÉNDICE
58
APÉNDICE
ESPECIFICACIONES DEL PRODUCTO
■
Las especificaciones mostradas arriba se pueden cambiar sin previo aviso para la mejora de calidad.
MODELO
AC100-240V ~ 50/60Hz
NTSC, PAL M-N
VHF 2-13, UHF 14-69, CATV 1-125
75 ohm
32 - 104°F (0 - 40°C)
Menos de 80%
-4 - 140°F (-20 - 60°C)
Menos de 85%
Dimensiones
(Ancho x Altura
x Profundidad)
Peso
Corriente de consmo
Alimentación Eléctrica
Potencia requerida
Sistema de la TV
Cobertura de programas
Impedancia de Antena Externa
Condición
de ambiente
incluyendo la base
excluyendo la base
incluyendo la base
excluyendo la base
Temp.de operación
Humedad de operación
Temp.para almacenar
Humedad para almacenar
22LD310
(22LD310-MA)
533,4 mm x 397,0 mm x 171,0 mm
(21,0 pulgadas x 15,6 pulgadas x 6,7 pulgadas)
533,4 mm x 351,7 mm x 65,0 mm
(21,0 pulgadas x 13,8 pulgadas x 2,6 pulgadas)
4,8 kg / 10,6
libras
4,6 kg / 10,1 libras
0,9 A
Dimensiones
(Ancho x Altura
x Profundidad)
Peso
Corriente de consmo
With stand
Without stand
With stand
Without stand
667,0 mm x 504,0 mm x 224,0 mm
(26,3 pulgadas x 19,8 pulgadas x 8,8 pulgadas)
667,0 mm x 446,2 mm x 80,0 mm
(26,3 pulgadas x 17,6 pulgadas x 3,1 pulgadas)
8,9 kg / 19,6 libras
7,8 kg / 17,2 libras
1,1 A
805,0 mm x 583,0 mm x 224,0 mm
(31,7 pulgadas x 23,0 pulgadas x 8,8 pulgadas)
805,0 mm x 528,0 mm x 79,9mm
(31,7 pulgadasx 20,8 pulgadasx 3,1 pulgadas)
11,5 kg / 25,4 libras
10,4 kg / 23,0 libras
1,5 A
MODELO
26LD310
(26LD310-MA)
32LD310
(32LD310-MA)
MFL41469218-SP 7/12/10 5:01 PM Page 58

APÉNDICE
59
CÓDIGOS DE IR
Código
(Hexa)
Control Remoto Código
(Hexa)
Control Remoto
0F TV
0B INPUT
08 POWER
79 RATIO
10 - 19
Teclas de números
0-9
09 MUTE
02 VOL
GG
03 VOL
FF
00 CH
DD
01 CH
EE
43 MENU
44 ENTER
1A Q.VIEW
52 SOUND
4D PICTURE
39 CAPTION
0E SLEEP
54 A.PROG
55 MEMORY/ERASE
1E FAV
0A MTS
MFL41469218-SP 7/12/10 5:01 PM Page 59

NOTE
ENG
Some video codecs listed in the manual may not be
supported, depending on the region (country).
POR
Alguns codecs de vídeo listados no manual podem não
ser suportados, dependendo da região (país).
POL
Niektóre kodeki wideo wymienione w instrukcji mogą
nie być obsługiwane, w zależności od regionu (kraju).
SPA
Algunos códecs de vídeo que figuran en el manual
pueden no ser compatibles, dependiendo de la región
(país).
THA

El número de modelo y serie del televisor se
encuentra en la parte posterior y en un lateral del
televisor respectivamente.
Anótelo a continuación para tenerlo disponible en
caso de necesitar asistencia.
MODELO
SERIE
-
 1
1
-
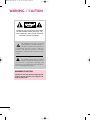 2
2
-
 3
3
-
 4
4
-
 5
5
-
 6
6
-
 7
7
-
 8
8
-
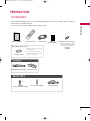 9
9
-
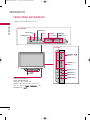 10
10
-
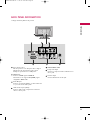 11
11
-
 12
12
-
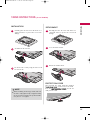 13
13
-
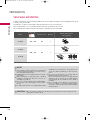 14
14
-
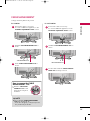 15
15
-
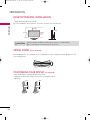 16
16
-
 17
17
-
 18
18
-
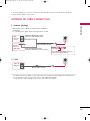 19
19
-
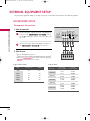 20
20
-
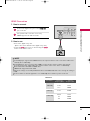 21
21
-
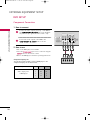 22
22
-
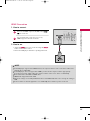 23
23
-
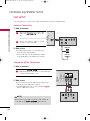 24
24
-
 25
25
-
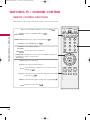 26
26
-
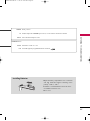 27
27
-
 28
28
-
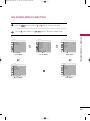 29
29
-
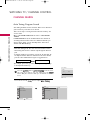 30
30
-
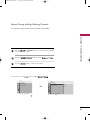 31
31
-
 32
32
-
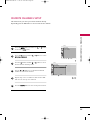 33
33
-
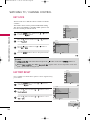 34
34
-
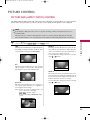 35
35
-
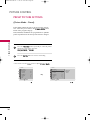 36
36
-
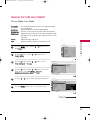 37
37
-
 38
38
-
 39
39
-
 40
40
-
 41
41
-
 42
42
-
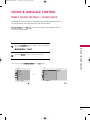 43
43
-
 44
44
-
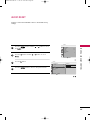 45
45
-
 46
46
-
 47
47
-
 48
48
-
 49
49
-
 50
50
-
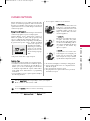 51
51
-
 52
52
-
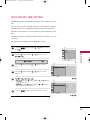 53
53
-
 54
54
-
 55
55
-
 56
56
-
 57
57
-
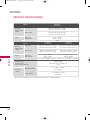 58
58
-
 59
59
-
 60
60
-
 61
61
-
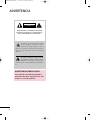 62
62
-
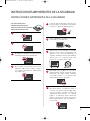 63
63
-
 64
64
-
 65
65
-
 66
66
-
 67
67
-
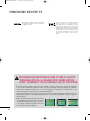 68
68
-
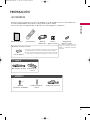 69
69
-
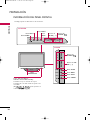 70
70
-
 71
71
-
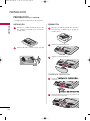 72
72
-
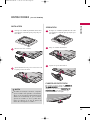 73
73
-
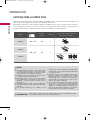 74
74
-
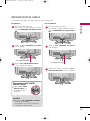 75
75
-
 76
76
-
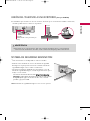 77
77
-
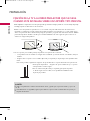 78
78
-
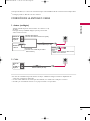 79
79
-
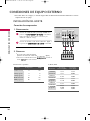 80
80
-
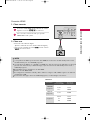 81
81
-
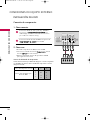 82
82
-
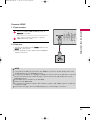 83
83
-
 84
84
-
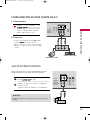 85
85
-
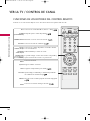 86
86
-
 87
87
-
 88
88
-
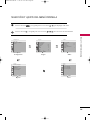 89
89
-
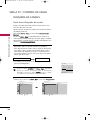 90
90
-
 91
91
-
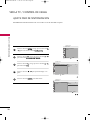 92
92
-
 93
93
-
 94
94
-
 95
95
-
 96
96
-
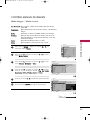 97
97
-
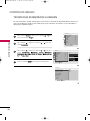 98
98
-
 99
99
-
 100
100
-
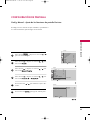 101
101
-
 102
102
-
 103
103
-
 104
104
-
 105
105
-
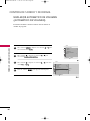 106
106
-
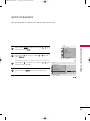 107
107
-
 108
108
-
 109
109
-
 110
110
-
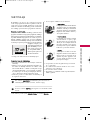 111
111
-
 112
112
-
 113
113
-
 114
114
-
 115
115
-
 116
116
-
 117
117
-
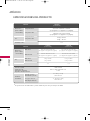 118
118
-
 119
119
-
 120
120
-
 121
121


LG 26LD310 Manual de usuario
- Categoría
- Televisores LCD
- Tipo
- Manual de usuario
- Este manual también es adecuado para
en otros idiomas
- English: LG 26LD310 User manual
- português: LG 26LD310 Manual do usuário
Artículos relacionados
-
LG 22LD310 Manual de usuario
-
LG 26LD310 El manual del propietario
-
-
-
LG 42LH30FR-MA Manual de usuario
-
LG 42LH90QR Manual de usuario
-
LG 42LD420 El manual del propietario
-
LG 47SL90QR Manual de usuario
-
LG 50PJ350 Manual de usuario
-
LG 37LD460 Manual de usuario