FR | 49
Étape 3 : connectez votre réfrigérateur
à l’appli Home Connect
Échec de la connexion :
(Wi-Fi). Le cas échéant, répétez les opérations de l’étape 3. Si „Er“
compartiment congélation, réinitialisez les réglages Home Connect. (Attention : tous les réglages Home Connect sont alors
réinitialisés.) Vous trouverez dans la notice d’utilisation plus d’informations et autres conseils concernant la réinitialisation.
Assurez-vous que l’appli est activée sur votre terminal mobile !
super
°
C
To uch Technology
super
super
°
C
To uch Technology
super
super
°
C
To uch Technology
super
super
super
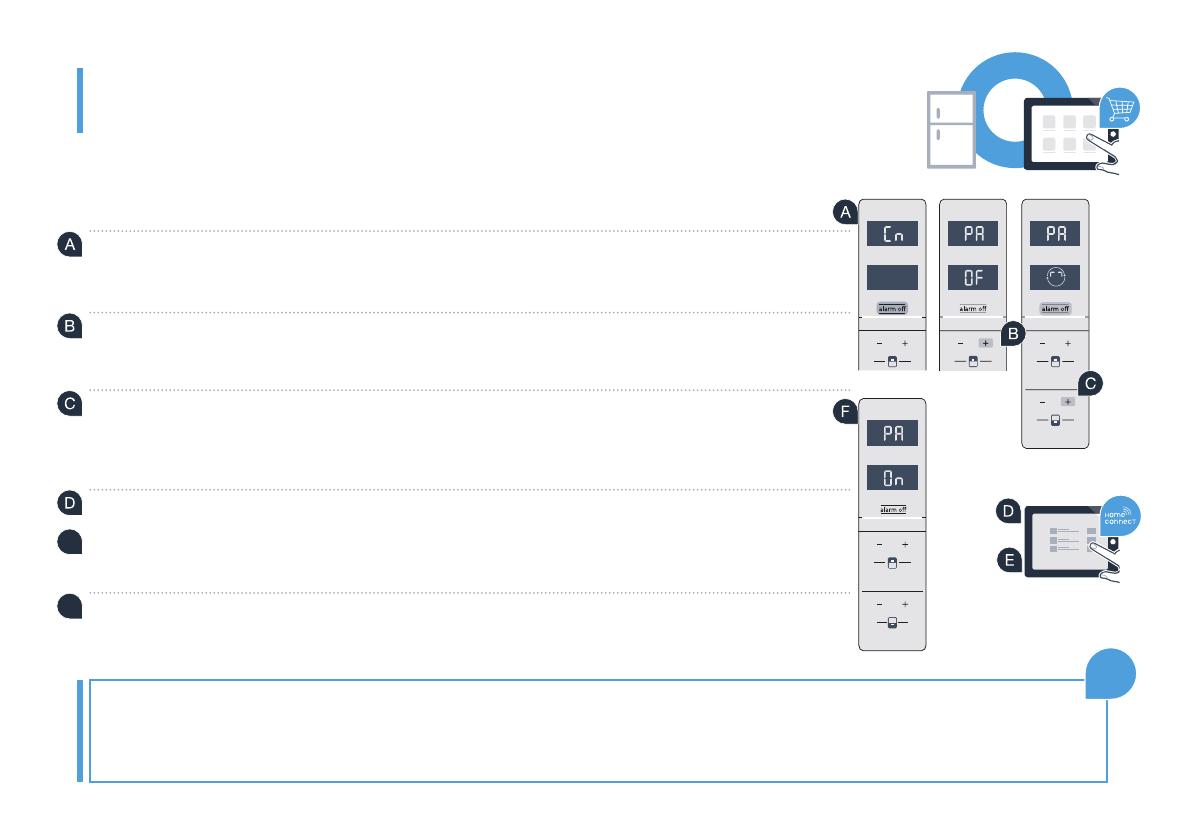
Appuyez sur la touche „alarm of“.
„Cn“
du compartiment réfrigérateur
Appuyez sur la touche „+“ du bandeau de commande du compartiment réfrigérateur jusqu’à ce
que „PA“
et „OF“.
Appuyez sur la touche „+“ du bandeau de commande du compartiment congélation pour
connecter l’appareil à l’appli.
°
C
To uch Technology
super
super
super
super
Prenez votre appareil mobile en main. Suivez les instructions de l’appli pour achever la procédure.
„Rechercher
l’appareil“, puis sur „Connecter à l’appareil“.
Si la connexion est établie avec succès, „PA“
température du compartiment réfrigérateur et „On“
du compartiment congélation. Votre réfrigérateur a été connecté à l’appli avec succès.


