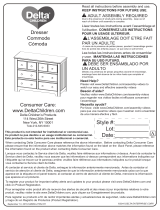
Delta Children Haven 6 Drawer Dresser Assembly Instructions
- Tipo
- Assembly Instructions

To Make Assembly Even
Easier Watch Video Here!
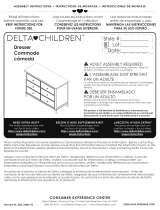
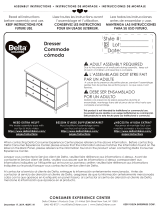
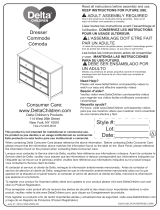
ADULT ASSEMBLY REQUIRED
Due to the presence of small parts during assembly,
keep out of reach of children until assembly is complete.
EN
December 07, 2020, 41876, R0
Dresser
This product is not intended for institutional or commercial use.
Read all instructions
before assembly and use.
KEEP INSTRUCTIONS FOR
FUTURE USE.
For Questions or
to Contact Us:
DeltaChildren.com/Help
If unable to access website, please email
Expect longer response times via email.
©2020 Delta Children’s Products Corp.
ASSEMBLY INSTRUCTIONS • INSTRUCCIONES DE MONTAJE
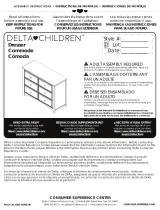
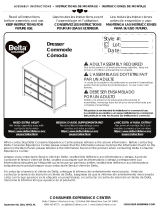
Style #:
Lot:
Date:
___________
___________
___________
G
REV
Before contacting Delta Consumer
Experience Center please ensure this
information matches the information
found on the label on the Back Panel.

2
Debido a la presencia de piezas pequeñas durante el
ensamblaje, mantenga fuera del alcance de los niños
hasta que complete el ensamblaje.
DEBE SER ENSAMBLADO
POR UN ADULTO
ES
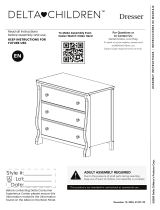
Cómoda
Este producto no esta hecho para uso institucional o comercial.
Para facilitar más aun el
ensamblaje ver el video aquí
Antes de contactar el Centro de Experiencia
del Consumidor de Delta por favor
asegúrese de que la información de la
primera página coincida con la información
que se encuentra en la etiqueta ubicada en
el panel trasero.
Lea todas las instrucciones
antes de ensamblar y usar.
MANTENGA LAS
INSTRUCCIONES PARA SU
USO FUTURO.
Para preguntar o para
contactarnos :
DeltaChildren.com/Help
Si no puede acceder el sitio web, por
favor envíenos un email a
El tiempo de espera para respuestas
será más largo por email.

3
3
ASSEMBLY INSTRUCTIONS • INSTRUCCIONES DE MONTAJE

4
BABY SAFE SLEEP TIPS
AAP RECOMMENDS:
Always lay your baby on its back to sleep.
Consult your doctor.
Visit Deltachildren.Com/Pages/Crib-Safety-Tips for more information
DO NOT place any
items in the crib.
Your baby should sleep
on a firm mattress.
Pillows and blankets have
caused infants to suffocate,
NEVER use in a crib.
Adult beds are not safe
for babies:
NEVER co-sleep.
NEVER place the crib near
a window or any wall
hangings.
The safest place for your
baby to sleep is in a
JPMA Certified crib.
Missing or broken parts, any
questions?
www.DeltaChildren.com/
Help
Read all warnings and
follow all instructions.

5
Missing or broken parts, any
questions?
www.DeltaChildren.com/
Help
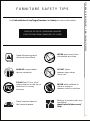
DO NOT set TV’s or other
heavy objects on the top of
bedroom or nursery
furniture.
ALWAYS use provided
tipover restraints.
NEVER allow children to
climb or hang on
drawers, doors,or shelves.
Place heaviest items in
the lowest drawers.
NEVER open more than
one drawer at a time.
DO NOT leave
drawers open when
not in use.
Read all warnings and
follow all instructions.
FURNITURE SAFETY TIPS
Visit Deltachildren.Com/Pages/Leaders-In-Safety for more information
SERIOUS OR FATAL CRUSHING INJURIES
CAN OCCUR FROM FURNITURE TIP-OVER.
ASSEMBLY INSTRUCTIONS • INSTRUCCIONES DE MONTAJE

6
CONSEJOS PARA UN SUEÑO
SEGURO PARA LOS BEBÉS
APP RECOMIENDA:
Haga que su bebé duerma siempre boca arriba.
Consulte a su médico.
Visite Deltachildren.Com/Pages/Crib-Safety-Tips para obtener más información
NO coloque artículos
en la cuna.
Su bebé debe dormir
sobre un colchón firme.
Las almohadas y frazadas
han provocado asfixia en
menores; por lo tanto,
JAMÁS se deben utilizar en
una cuna.
Las camas para adultos
no son seguras para los
bebés: JAMÁS duerma
con ellos.
JAMÁS coloque la cuna
cerca de una ventana o
elementos colgados en
las paredes.
El lugar más seguro para
que su bebé duerma es
una cuna con
certificación JPMA.
¿Le faltan piezas o vienen
rotas?
www.DeltaChildren.com/
Help
Lea todas las
advertencias y siga
todas las instrucciones.

7
Visite Deltachildren.Com/Pages/Leaders-In-Safety para obtener más información
¿Le faltan piezas o vienen
rotas?
www.DeltaChildren.com/
Help
PUEDEN PRODUCIRSE LESIONES GRAVES O MORTALES
POR APLASTAMIENTO AL VOLCARSE MUEBLES.
NO posicione televisores u
otros objetos pesados
sobre la cama o muebles
para infantes.
Utilice SIEMPRE las
retenciones contra
volcamiento incluidas
NUNCA permita que los
niños trepen sobre
cajones, puertas o baldas
de estantería ni que se
cuelguen de ellos.
Coloque los artículos de
mayor peso en los cajones
inferiores.
NUNCA abra más de
un cajón al mismo
tiempo.
NO DEJE cajones
abiertos si no los está
utilizando.
Lea todas las
advertencias y siga todas
las instrucciones.
CONSEJOS DE SEGURIDAD
SOBRE MUEBLES
ASSEMBLY INSTRUCTIONS • INSTRUCCIONES DE MONTAJE

8
Your Next Purchase From
DeltaChildren.com
Welcome to the
Here's a Gift From Us To You
DELTA FAMILY
*Subject to Change
*Exclusions Apply
DELTA10
USE CODE:
Visit Deltachildren.com To Start Shopping
REVIEW TO WIN $2500
R ULES TO EN TER
My husband was impressed with the directions and organization of the hardware package.
He easily assembled this crib in an hour without any help. It's very sturdy and we like that it
has adjustable levels for the mattress height. To top it all off, it's so incredibly darling!!!
“We LOVE, LOVE, LOVE this crib”
WRITE A REVIEW for this product on the store’s website from where it was purchased
1
TAKE A SCREENSHOT of your review and upload it to www.DeltaChildren.com/Review
2
IT’S THAT EASY! Upon submission, you’ll be instantly ENTERED TO WIN $2,500
3
DELTA CHILDREN
SAVE BIG WITH
@deltachildren
FOLLOW US FOR MORE CHANCES TO WIN
SCAN HERE
For more
information &
to see all of
our products

9
DELTA CHILDREN
AHORRE MUCHO CON
Visita
*Subject to Change
*Exclusions Apply
Aquí Está Nuestro Regalo
Para Usted
FAMILIA DELTA
Bienvenido a la
Su Próxima Compra En
DeltaChildren.com
DELTA10
UTILICE EL CÓDIGO:
CALIFIQUE EL PRODUCTO en la página web de la tienda donde haya sido comprado
1
HAGA UNA CAPTURA DE PANTALLA de su calificación y cárguela a la pagina www.DeltaChildren.com/Review
2
ES ASÍ DE FÁCIL! En cuanto lo envíe ya estará instantáneamente PARTICIPANDO PARA GANAR $2.500
3
REGLAS PARA PARTICIPAR
CALIFIQUE EL PRODUCTO PARA GANAR $2500
@deltachildren
SÍGANOS PARA TENER MAS CHANCES DE GANAR
ESCANEE AQUÍ
Para más
información
y para ver todos
nuestros productos
ASSEMBLY INSTRUCTIONS • INSTRUCCIONES DE MONTAJE
Deltachildren.com Para Comenzar A Comprar

10
WARNING
Children have died from furniture tipover. To reduce the risk of
furniture tipover:
.
ALWAYS install tipover restraint provided.
.
NEVER put a TV on this product.
.
NEVER allow children to stand, climb or hang on drawers, doors, or
shelves.
.
NEVER open more than one drawer at a time.
.
Place heaviest items in the lowest drawers.
NOTES ON ASSEMBLY:
-During the assembly process whenever using screws or bolts, check each by placing the screw/bolt
on the diagram of the item which is drawn actual size and design. Be sure to use the proper size and
shape specified in the instructions.
-To assemble this unit you may be required to place the unit on it’s side and face. It is strongly
recommended that assembly is done on a soft, non-abrasive surface to avoid damaging the finish.
NOTES ON CARE AND MAINTENANCE:
- Do not scratch or chip the finish.
- Inspect the product periodically, contact Delta Children's Products for replacement parts or
questions.
- Do not store the product or any parts in extreme temperatures and conditions such as a hot attic
or a damp, cold basement. These extremes can cause a loss of structural integrity.
-To preserve the luster of the high quality finish on your product, it is recommended to place a doily
or felt pad under any items you place on the finish.
-Clean with a damp cloth, then a dry cloth to preserve the original luster and beauty of this fine
finish.
-Do not use abrasive chemicals.
-Do not spray cleaners directly onto furniture.
-Lift slightly when moving on carpeting to prevent leg breakage.
-Use of a vaporizer near furniture will cause wood to swell and finish to peel.
NOTES ON USE:
Keep children and others safe by following these simple rules:
- Do not allow any child to play on furniture
- Do not allow climbing on any piece of furniture.
- Do not allow hanging from any piece of furniture.
- Always monitor your child’s activity when in the nursery.

11
ADVERTENCIA
Han muerto niños debido a volcaduras de muebles. Para
prevenir volcaduras:
.
Instalar SIEMPRE el dispositivo anti-volcaduras incluido.
.
No colocar NUNCA un televisor en este producto.
.
Nunca permita que los niños trepen sobre cajones, puertas o
baldas de
estantería ni que se cuelguen de ellos.
.
Nunca abra más de un cajón al mismo tiempo.
.
Coloque los artículos de mayor peso en los cajones inferiores.
INFORMACIÓN SOBRE EL MONTAJE:
-Durante el proceso de montaje, ya utilice pernos o tornillos, compruebe cada uno de ellos colocan-
do el perno/tornillo en el diagrama del artículo donde está dibujado el tamaño y el diseño real.
Asegúrese de que utiliza el tamaño y la forma adecuada que especifican las instrucciones.
-Para montar esta unidad, puede que se le solicite que coloque la unidad de lado y de cara. Se
recomienda encarecidamente que realice el montaje sobre una superficie no abrasiva (Como la
envoltura de embalaje de espuma) para evitar dañar el acabado.
INFORMACIÓN SOBRE EL USO:
Mantenga a los niños y otras personas a salvo siguiendo estas sencillas reglas:
- No permita que ningún niño juegue sobre muebles.
- No permita que nadie trepe sobre un mueble.
- No permita que nadie se cuelgue de un mueble.
- Vigile siempre la actividad de su hijo cuando se encuentre en su cuarto.
NOTAS SOBRE SU CUIDADO Y MANTENIMIENTO:
- No arañe ni desconche el acabado.
- Inspeccione el producto con regularidad, póngase en contacto con Delta Children’s Products para
el recambio de partes o para formular preguntas.
- No guarde el producto ni ninguna de sus partes a temperaturas ni en condiciones extremas como
un ático caluroso o un sótano húmedo y frío. Estos extremos pueden provocar una pérdida de
integridad estructural.
-Para preservar el brillo del acabado de alta calidad que recubre su producto, se recomienda que
coloque un paño o una almohadilla de fieltro debajo de cualquier objeto que coloque sobre el
acabado.
-Límpielo con un trapo húmedo y luego con uno seco para preservar el brillo y la belleza originales
de este fino acabado.
-No utilice productos químicos abrasivos.
-No pulverice limpiadores directamente sobre el mueble.
-Elévelo ligeramente cuando lo mueva sobre alfombras o moqueta para evitar que se rompan las
patas.
-El uso de vaporizadores cerca de muebles puede provocar que la madera se hinche y acabe
desconchándose.
ASSEMBLY INSTRUCTIONS • INSTRUCCIONES DE MONTAJE

12
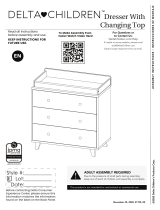
PARTS: MAKE SURE THAT ALL PRE-ASSEMBLED PARTS ARE TIGHT
PIEZAS: ASEGÚRESE DE QUE TODAS LAS PIEZAS PRE-ENSAMBLADAS ESTÁN BIEN APRETADAS.
Back Weight x2
Peso trasero
# 41873
Top Front Rail x1
Barra frontal superior
#41440
Drawer Rail x4
Barra de la gaveta
#41444
Bottom Front Rail x1
Barra frontal inferior
# 41442
Top Back Rail x1
Barra trasero superior
# 41441
Bottom Back Rail x1
Barra trasero inferior
# 41443
Drawer Left Side x6
Lado Izquierdo de la Gaveta
# 24862
Drawer Right Side x6
Lado Derecho de la Gaveta
# 24863
Drawer Support x6
Soporte de la Gaveta
# 29824
Drawer Front x6
Parte frontal de la gaveta
# 41448
Drawer Back x6
Trasera de la gaveta
#24864
Drawer Bottom x6
Fondo de la gaveta
# 24865
Center Panel x1
panel central
# 41872
Left Side x1
Lado izquierdo
# 41870
Right Side x1
Lado derecho
# 41871
Top Panel x1
Panel superior
# 41875
Back Panel x1
Panel Trasero
# 41874
T
A
B
C
D
EF G
H
J
K
L
M
N
P
R
S

13
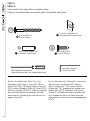
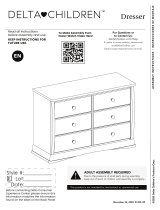
Back Panel Screw x25
Tornillo de Panel Trasero
Φ8x30mm Dowel x34
Pasador Φ8x30mm
Crescent Washer x8
Arandela de media luna
Plastic Barrel Nut x30
Tuercacilíndricaplástica
20mm Screw x24
Tornillo 20mm
40mm Screw x30
Tornillo 40mm
25mm Bolt x4
Perno 25mm
30mm Bolt x7
Perno 30mm
50mm Bolt x9
Perno 50mm
60mm Bolt x8
Perno 60mm
ASSEMBLY INSTRUCTIONS • INSTRUCCIONES DE MONTAJE
AA
BB
CC
DD
FF
GG
HH
JJ
KK
LL
PARTS: HARDWARE KITS PART#41449
PIEZAS: EL KIT DE HERRAMIENTAS - PIEZA #41449
Knob / Perilla x6
#41436
Knob
Perilla
Knob Screw
Tornillo para Perilla
MM
MM2
MM1
TT
XX
YY
ZZ
Short Screw x1
Tornillo corto
Long Screw x1
Tornillo Largo
Washer x2
Arandela
Wall Strap x1
Abrazadera
Phillips Screwdriver – Not included
Destornillidor Phillips – no incluido
No drills necessary.
Do not use power screwdriver.
No hace falta taladrar.
No utilice destornilladores eléctricos
M4 Ballend Screwdriver
destornillador M4 con cabeza de bola
M4 Allen Wrench
Llave Allen M4

14
AA
GG
60mm Bolt
Perno 60mm
1. Insert the Dowels in the Rail into the holes
in the Post.
1. Inserte los pasadores del Riel en los
agujeros del Poste.
2. Insert the Bolt into the slot. Turn clockwise
with fingers or the Ball End Screwdriver
provided. DO NOT fully tighten, leave 1/2”
(12mm) exposed.
2. Inserte el perno en la ranura. Gírelo en el
sentido de las agujas del reloj con los
dedos o con el destornillador con cabeza
de bola. NO lo apriete del todo, deje 1/2"
(12 mm) fuera.
3. Slide the Crescent Washer over the
exposed bolt, behind the head of the
bolt.
3. Abrace la parte del Perno que quedó
fuera, debajo de la cabeza del mismo,
con la Arandela de media luna.
Hardware System - Review Before Assembly
Revise Antes De Armar- Elementos De Fijacion Y Ensamble
Crescent Washer
Arandela de Media Luna

15
Install (1) bolt and (1) crescent washer at a time. Tighten until it looks like the picture.
Instale (1) perno y (1) Arandela de media luna al mismo tiempo. Apriételos hasta que
quede como en la ilustración.
Ensure all bolts are tight with Allen wrench.
Apriételo con la llave Allen.
Tighten the bolt with the ball end
screwdriver.
Apriételo con el Destornillador hcon cabeza
de bola.
ASSEMBLY INSTRUCTIONS • INSTRUCCIONES DE MONTAJE

16
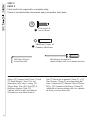
STEP 1
PASO 1
Parts and tools required to complete step
Piezas y herramientas necesarias para completar este paso
Φ8x30mm Dowel x8
Pasador Φ8x30mm
Crescent Washer x4
Arandela de media luna
60mm Bolt x4
Perno 60mm
AA
FF
GG
M4 Ballend Screwdriver
destornillador M4 con cabeza de bola
M4 Allen Wrench
Llave Allen M4
Attach Bottom Front Rail (Part E),
Bottom Back Rail (Part G), Top Front
Rail (Part D) and Top Back Rail (Part F)
to Left Side (Part A) using (4) 60mm
bolts (Part AA), (4) Crescent Washer
(Part GG) and (8) Φ8x30mm Dowels
(Part FF). Tighten the Bolts with the M4
Ballend Screwdriver and M4 Allen
wrench, following the instructions on
pages 14 and 15.
Fije la Barra frontal inferior (Pieza E), Barra
trasero inferior (Pieza G), Barra Frontal
Superior
(Pieza D) y Barra Posterior Superior (Pieza
F) al Lado izquierdo (Pieza A) utilizando
(4) Pernos 60mm (Pieza AA), (4) Arandela
de media luna (Pieza GG) y (8) Pasadors
Φ8x30mm (Pieza FF) utilizando el destornil-
lador M4 con cabeza de bola y la llave
Allen M4 siguiendo las instrucciones de
laspáginas 14 y 15.

17
ASSEMBLY INSTRUCTIONS • INSTRUCCIONES DE MONTAJE
AA
GG
x4
FF
A
D
F
E
G

18
STEP 2
PASO 2
Parts and tools required to complete step
Piezas y herramientas necesarias para completar este paso
Φ8x30mm Dowel x2
Pasador Φ8x30mm
FF
DD
M4 Ballend Screwdriver
destornillador M4 con cabeza de bola
M4 Allen Wrench
Llave Allen M4
Attach (2) Drawer Rails (Part C) and
(1) Back Weight ( Part L) to the
assembly from Step 1 using (2)
25mm Bolts (Part DD) and (2) Φ
8x30mm Dowels (Part FF).
Tighten all Bolts with the Ballend
Screwdriver and Allen Wrench.
Fije (2) Barra de la gaveta (Pieza C) y (1)
Peso trasero (Pieza L) al ensamblaje del
Paso 1 utilizando (2) Pernos 25mm (Pieza
DD) y (2) Pasadors Φ8x30mm (Pieza FF)
utilizando el destornillador M4 con cabeza
de bola y la llave Allen M4.
25mm Bolt x2
Perno 25mm

19
L
C
FF
DD
ASSEMBLY INSTRUCTIONS • INSTRUCCIONES DE MONTAJE

20
STEP 3
PASO 3
Parts and tools required to complete step
Piezas y herramientas necesarias para completar este paso
M4 Ballend Screwdriver
destornillador M4 con cabeza de bola
M4 Allen Wrench
Llave Allen M4
Attach the Center Panel (Part H) to the
assembly from Step 2 using (6) Φ
8x30mm Dowels (Part FF), (3) 30mm
bolts (Part BB) and (1) 50mm bolt (Part
CC). Tighten the Bolts with the M4 Bal-
lend Screwdriver and M4 Allen wrench.
Fije el panel central (Pieza H) al ensam-
blaje del Paso 2 utilizando (6) Pasadors
Φ8x30mm (Pieza FF), (3) Pernos 30mm
(Pieza BB) y (1) Perno 50mm (Pieza CC)
utilizando el destornillador M4 con
cabeza de bola y la llave Allen M4.
Φ8x30mm Dowel x6
Pasador Φ8x30mm
30mm Bolt x3
Perno 30mm
50mm Bolt x1
Perno 50mm
BB
CC
FF

21
H
FF
FF
FF
BB
BB
BB
CC
ASSEMBLY INSTRUCTIONS • INSTRUCCIONES DE MONTAJE

22
STEP 4
PASO 4
Parts and tools required to complete step
Piezas y herramientas necesarias para completar este paso
Φ8x30mm Dowel x6
Pasador Φ8x30mm
Attach (2) Drawer Rails (Part C) and
(1) Back Weight ( Part L) to the assem-
bly from Step 3 using (6) Φ8x30mm
Dowels (Part FF).
Fije (2) Barra de la gaveta (Pieza C) y (1)
Peso trasero (Pieza L) al ensamblaje del
Paso 3 utilizando (6) Pasadors Φ8x30mm
(Pieza FF) .
FF

23
FF
FF
L
FF
C
ASSEMBLY INSTRUCTIONS • INSTRUCCIONES DE MONTAJE

24
STEP 5
PASO 5
Parts and tools required to complete step
Piezas y herramientas necesarias para completar este paso
Φ8x30mm Dowel x10
Pasador Φ8x30mm
Crescent Washer x4
Arandela de media luna
60mm Bolt x4
Perno 60mm
Attach the Right Side (Part B) to the
assembly from Step 4 using (2) 25mm
bolts (Part DD), (4) 60mm bolts (Part AA),
(4) Crescent Washer (Part GG) and (10) Φ
8x30mm Dowels (Part FF). Tighten the Bolts
with the M4 Ballend Screwdriver and M4
Allen wrench, following the instructions on
pages 14 and 15.
Fije el Lado derecho (Pieza B) al ensamb-
laje del Paso 4 utilizando (2) Pernos
25mm (Pieza DD), (4) Pernos 60mm
(Pieza AA), (4) Arandela de media luna
(Pieza GG) y (10) Pasadors Φ8x30mm
(Pieza FF) utilizando el destornillador M4
con cabeza de bola y la llave Allen M4
siguiendo las instrucciones de laspáginas
14 y 15.
DD
25mm Bolt x2
Perno 25mm
AA
FF
GG
M4 Ballend Screwdriver
destornillador M4 con cabeza de bola
M4 Allen Wrench
Llave Allen M4

25
B
FF
GG
AA
DD
DD
FF
FF
ASSEMBLY INSTRUCTIONS • INSTRUCCIONES DE MONTAJE

26
STEP 6
PASO 6
Parts and tools required to complete step
Piezas y herramientas necesarias para completar este paso
M4 Ballend Screwdriver
destornillador M4 con cabeza de bola
M4 Allen Wrench
Llave Allen M4
Attach the Top Panel (Part J) to the
assembly from Step 5 using (2)Φ
8x30mm Dowels (Part FF) and (8)
50mm Bolts (Part CC). Tighten the Bolts
with the M4 Ballend Screwdriver and M4
Allen wrench.
Fije el Panel Superior(Pieza J) al ensamb-
laje del Paso 5 utilizando (2) Pasadores Φ
8x30mm (Pieza FF) y (8) Pernos 50 mm
(Pieza CC) utilizando el destornillador M4
con cabeza de bola y la llave Allen M4.
Φ8x30mm Dowel x2
Pasador Φ8x30mm
50mm Bolt x8
Perno 50mm
CC
FF

27
J
CC
CC
CC
CC
FF
FF
ASSEMBLY INSTRUCTIONS • INSTRUCCIONES DE MONTAJE

28
STEP 7
PASO 7
Parts and tools required to complete step
Piezas y herramientas necesarias para completar este paso
M4 Ballend Screwdriver
destornillador M4 con cabeza de bola
M4 Allen Wrench
Llave Allen M4
Attach the Top Panel (Part J) using (4)
30mm Bolts (Part BB). Tighten the Bolts
with the M4 Ballend Screwdriver and M4
Allen wrench.
Fije el Panel Superior(Pieza J) utilizando
(4) Pernos 30 mm (Pieza BB) utilizando el
destornillador M4 con cabeza de bola y la
llave Allen M4.
30mm Bolt x4
Perno 30mm
BB

29
BB
BB
ASSEMBLY INSTRUCTIONS • INSTRUCCIONES DE MONTAJE

30
STEP 8
PASO 8
Parts and tools required to complete step
Piezas y herramientas necesarias para completar este paso
Attach Back Panel (Part K) using (25)
Screws (Part JJ), tighten with a Phillips
screwdriver.
Una el panel posterior (Pieza K) utilizando
(25) tornillos (Pieza JJ), apriete utilizando
un destornillador Philips.
JJ
Back Panel Screw x25
Tornillo de Panel Trasero
No drills necessary.
Do not use power screwdriver.
No hace falta taladrar.
No utilice destornilladores eléctricos
Phillips Screwdriver – Not included
Destornillidor Phillips – no incluido

31
JJx25
K
ASSEMBLY INSTRUCTIONS • INSTRUCCIONES DE MONTAJE

32
STEP 9
PASO 9
1) Choose BOTTOM or TOP attachment.
2) Locate the through holes in the back of the dresser.
3) Align the hole to be used with the wood wall stud (For Open Bottom Installation, use wood wall
stud closest to center)
1) Seleccione el aditamento SUPERIOR o INFERIOR.
2) Ubique los orificios pasantes en la parte posterior del mueble.
3) Alinee el orificio que utilizará con el pilar de la pared (para una instalación con fondo abierto,
utilice el pilar de madera más cercano al centro)
6) Attach the Tip-over restraint strap (ZZ) to
the wall using (1) Long Screw (XX) and (1)
washer (TT) as shown. The Screw MUST be
installed into a wood wall stud (See
WARNINGS for additional information).
6) Fije la correa de retención contra
volcamiento (ZZ) a la pared utilizando (1)
tornillo largo (XX) y (1) arandela (TT), como
se indica. El tornillo DEBE instalarse en un
pilar de madera (para obtener más
información consulte las ADVERTENCIAS).
ADVERTENCIA
El uso de herramientas de contención de
vuelcos tan solo puede reducir, pero no
eliminar, el riesgo de vuelco.
No intente atornillar a paredes hechas
únicamente de paneles. Debe atornillar en
un pilar u otra estructura de madera
similar, como un zócalo fijado de manera
segura.
Si su pared no tiene vigas de Madera, visite
su ferretería o tienda del ramo más cercana para
conseguir un sistema de anclaje que soporte una
fuerza de tiraje de hasta 50 LBS (22,7 Kgs) para su
tipo de muro. Si no está seguro sobre cómo
encontrar la viga de madera o tiene dudas sobre el
tipo de muro, contacte a un contratista profesional.
5) Drill Ø1/8” hole at Pencil
Mark, in wood wall stud
5) Perfore un orificio de
Ø1/8” en la marca del lápiz,
sobre el pilar de madera
Wood Wall Stud
Pilar de madera
Pencil Mark
Marca de lápiz
XX
TT
ZZ
Tipover Restraint
Protección contra volcamiento
WARNING
Use of tip-over restraints may only
reduce, but not eliminate, the risk of
tip-over.
Do not attempt to Screw into the
wallboard only. You must Screw into
a wood wall stud or other wood
structure such as securely attached
baseboard.
If your wall is not wood stud
construction, see your local hardware store or
home center for a wall anchor system that will
hold a pull force of 50 LBS in your wall type. If
you are unsure of how to locate the wood
stud, or of what type of wall you have, contact
a professional contractor.
4) Make a pencil mark on the wall using the
wood rail as a guide, pencil mark must be
over wood wall stud. Then move the case
away from the wall.
4) Utilizando un lápiz, haga una marca en la
pared utilizando el barra de madera como
guía; la marca debe estar sobre el pilar de
madera. Luego, aleje la carcasa de la pared.

33
ASSEMBLY INSTRUCTIONS • INSTRUCCIONES DE MONTAJE
9)Pull case AWAY from wall until Restraint is SNUG.
9) Jale la carcasa ALEJÁNDOLA de la pared hasta
que la retención esté TENSA.
YY
10) Ensure restraint is not loose.
10) Asegúrese de que la retención no
esté suelta.
Bottom Back Rail
BarraTraseroInferior
NOTE: Be sure to attach any accessory items to case before completing this
step.
7)Feed the Tipover Restarint through the hole as you place the dresser in it’s
final position.
NOTA: Asegúrese de fijar todos los accesorios a la carcasa antes de
completar este paso.
7) Pase el elemento de retención a través del orificio, a medida que
posiciona el mueble en su posición final.
8) Pull the Tip-over restraint through the hole and fasten it securely to the
case using (1) 15mm Screw (YY) and (1) washer (TT).
8) Pase el elemento de retención a través del orificio y fíjelo con seguridad
a la carcasa utilizando (1) tornillo de 15 mm (YY) y (1) arandela (TT).
Attach to Bottom
Fijar al fondo
Attach to Top
Fijar a la parte superior
YY
TT
Top Back Rail
Barra Trasero Superior

34
STEP 10
PASO 10
Parts and tools required to complete step
Piezas y herramientas necesarias para completar este paso
Assemble 1 Right Drawer and 1 Left
Drawer as shown.
Slide Drawer Bottom (Part N) into the
grooves. Attach the Right and Left
Drawer Sides (Part T and P) to a Drawer
Front (Part M) with (4) 20mm Screws
(Part KK), ensure the grooves align.
Tighten the screws with a Phillips Screw-
driver. Repeat until you have (3) right
and (3) left drawers. On the Left Drawer
the wide side is on the left, on the Right
Drawer, the wide side is on the right.
Ensamble una Gaveta Derecha y una
Gaveta Izquierda.
Deslice la Fondo de la gaveta (Pieza N)
hacia las ranuras. Fije los Lados Izqueirdo
y Derecho dela Gaveta (Pieza T y P) a la
parte frontal de la gaveta superior (Pieza
M) utilizando (4) tornillos 20mm (Pieza
KK). Las ranuras deben alinearse.
Apriete utilizando un destornillador Phil-
lips. Repita este paso hasta haber com-
pletado las 3 gavetas. En la gaveta
Izquierda el lado grande está a la izquier-
da, en la gaveta derecha el lado grande
está a la derecha.
No drills necessary.
Do not use power screwdriver.
No hace falta taladrar.
No utilice destornilladores eléctricos
Phillips Screwdriver – Not included
Destornillidor Phillips – no incluido
KK
20mm Screw x24
Tornillo 20mm

35
ASSEMBLY INSTRUCTIONS • INSTRUCCIONES DE MONTAJE
Right Drawer
Gaveta Derecha
Left Drawer
Gaveta Izquierda
x3
x3
Wide Side
lado grande
Wide Side
lado grande
groove
ranura
groove
ranura
KK
KK
P
T
M
N
P
T
M
N
KK
KK

36
STEP 11
PASO 11
Parts and tools required to complete step
Piezas y herramientas necesarias para completar este paso
Install the Drawer Support (Part S)
and Drawer Back (Part R), using (5)
40mm Screws (Part LL) and (5) Plas-
tic Barrel Nuts (Part HH). Note:
Grooves In Bottom Must Align. Repeat
this step until 6 drawers are complete.
Instale el soporte de gaveta (Pieza S) y Tras-
era de la gaveta (Pieza R) utilizando (5)
tornillos de 40 mm (Pieza LL) y (5) tuercas
cilíndricas plásticas (Pieza HH). Nota: Las
ranuras al inferior deben alinearse. Apriete
utilizando un destornillador Phillips. Repita
este paso hasta haber completado las 6
gavetas.
Right Drawer
Gaveta Derecha
x3
x3
Left Drawer
Gaveta Izquierda
No drills necessary.
Do not use power screwdriver.
No hace falta taladrar.
No utilice destornilladores eléctricos
Phillips Screwdriver – Not included
Destornillidor Phillips – no incluido
40mm Screw x30
Tornillo 40mm
Plastic Barrel Nut x30
Tuercacilíndricaplástica
HH
LL

37
ASSEMBLY INSTRUCTIONS • INSTRUCCIONES DE MONTAJE
x6
S
T
HH
HH
HH
LL
LL
R
LL

38
STEP 12
PASO 12
Parts and tools required to complete step
Piezas y herramientas necesarias para completar este paso
Attach (1) Knob (Part PP1) to Drawer
Assembly using (1) Knob Screw (Part
PP2). Repeat this step until 3 drawers are
complete.
Fije la(1) perilla (Pieza PP1) al ensamblaje
de la gaveta utilizando (1) tornillo para
Perilla (Pieza PP2). Repita este paso hasta
haber completado las 3 gavetas.
Phillips Screwdriver – Not included
Destornillidor Phillips – no incluido
No drills necessary.
Do not use power screwdriver.
No hace falta taladrar.
No utilice destornilladores eléctricos
Knob x6
Perilla
Knob Screw x6
Tornillo para Perilla
MM2
MM1

39
ASSEMBLY INSTRUCTIONS • INSTRUCCIONES DE MONTAJE
x6
MM1
MM2

40
STEP 13
PASO 13
Parts and tools required to complete step
Piezas y herramientas necesarias para completar este paso
Install the drawers in the case body.
Changing the locations may improve
fit or performance.
Instale las gavetas en el cuerpo del mueble.
Cambiar las ubicaciones podría mejorar el
funcionamiento.

41
ASSEMBLY INSTRUCTIONS • INSTRUCCIONES DE MONTAJE

42
Garantía Limitada:
Este Producto Delta está garantizado de estar libre de defectos por un período de 90
dias a partir de su adquisición, bajo uso normal. Si un producto tiene defectos durante
este período, Nosotros tomaremos la opción de reparar o reemplazar la pieza
defectuosa del producto. Esta garantía limitada se otorga únicamente al comprador
original y es válida solamente cuando se proporciona una prueba de compra, o si el
producto fue recibido como un regalo, debe haber sido registrado con Delta. Esta
garantía limitada del fabricante no cubre lo siguiente:
• Productos comprados como exhibiciones de la tienda o muestras.
• Artículos comprados como “tal como está”, productos de segunda mano o reventa
de los productos.
• Artículos comprados como “venta final”, “ventas de tiendas que están quebrando”
o ventas por liquidación.
Esta garantía limitada le otorga derechos legales específicos y también puede tener
otros derechos que varían de un estado a otro.
Para registrar su producto
para alertas importantes de seguridad y estar al tanto sobre novedades de su
producto por favor visite
www.DeltaChildren.com
Fecha de Compra: _____________ (debe además mantener su recibo)
Para reportarcualquier problema
por favor entre a www.DeltaChildren.com/help
Limited Warranty:
This Delta Product is warranted to be free from defects for a period of 90 days from
the date of purchase under normal use. If a product is defective during this period, we
will at our option repair or replace the defective part or product. This limited warranty
extends only to the original retail purchaser and is valid only when supplied with proof
of purchase, or if received as a gift, when the registration is on file with Delta. This
limited warranty does not cover the following:
• Products purchased as floor models or samples.
• Items purchased on an “as-is” basis, as a second hand product, or as a resale
product.
• Items purchased at a Final sale, a “Going out of Business” sale or a Liquidation sale.
This limited warranty gives you specific legal rights and you may also have other rights
which vary from state to state.
To register your product
for important safety alerts and updates to your product please visit
www.deltachildren.com
Date of Purchase: _____________ (you should also keep your receipt)
To report a problem
please log on to www.deltachildren.com/help

43
ASSEMBLY INSTRUCTIONS • INSTRUCCIONES DE MONTAJE
SAFETY LEADERS
Safe products start with safe materials.
We test all of our products to create the
safest and healthiest environment for
your baby.
We have 8 cutting edge safety labs around
the world where we test our products above
and beyond the industry standards. All of our
dressers are engineered to meet or exceed
ASTM Furniture Safety Standards.
To protect your children, Delta Children
dressers are tested to meet the
requirements of the industry tip over test
set forth by ASTM. For additional security,
we strongly recommend that all dressers
in you home be anchored; all Delta
Children dressers include a wall anchor.
SAFE MATERIALS PRODUCTS YOU CAN TRUST
WE GO ABOVE
& BEYOND
Visit Deltachildren.Com/Pages/Leaders-In-Safety for more information

44
LÍDERES EN
LA SEGURIDAD
Los productos seguros se hacen con
materiales seguros. Ponemos a prueba
todos nuestros productos para crear el
ambiente más seguro y saludable para
su bebé.
Tenemos 8 laboratorios de seguridad de alta
tecnología donde probamos nuestros
productos mas allá de los estándares de la
industria. Todos nuestros tocadores están
diseñados para cumplir o exceder los
estándares de seguridad ASTM de muebles.
Para proteger a sus niños, los tocadores de Delta
Children son sometidos a pruebas para que
cumplan los requisitos ASTM establecidos de la
industria en cuanto a volcamientos se refiere.
Para seguridad adicional, recomendamos
enfáticamente que todos los tocadores de su
casa estén fijos: todos los tocadores de Delta
Children incluyen un anclaje de pared.
MATERIALES SEGUROS PRODUCTOS CONFIABLES
ESTAMOS POR ENCIMA
Y MÁS ALLÁ
Visite Deltachildren.Com/Pages/Leaders-In-Safety para más información

45
*Subject to Change
*Exclusions Apply
PRODUCTOS PARA CADA EDAD Y ETAPA
CUNAS
TOCADORES
SILLA MOISÉS
COSAS PARA BEBÉ
CARRIOLAS CAMA SENCILLA
CONTENEDORES
COLCHÓN
CUARTO DE JUGARCAMA PARA NIÑO
MÁS DE 50 AÑOS DE SEGURIDAD, ESTILO E INNOVACIÓN
NUESTRA FAMILIA DE LAS MEJORES MARCAS
Aquí Está Nuestro Regalo
Para Usted
FAMILIA DELTA
Bienvenido a la
Su Próxima Compra En
DeltaChildren.com
DELTA10
UTILICE EL CÓDIGO:
DELTA CHILDREN?
POR QUÉ ELEGIR A
Visita Deltachildren.Com/Pages/Our-Story para más información
DELTA DONA
10% de nuestros
ingresos está
destinado a mejorar
la vida de los niños
A DELTA
LE IMPORTA
Hacemos pruebas
por encima de los
estándares de
seguridad de la industria
DELTA LIDERA
1 de cada 2
niños en los
EE.UU duerme en
nuestros productos
DELTA CRECE
CON USTEDES
Tenemos productos
para cada edad
y etapa
DELTA ESTÁ
DEDICADA
Nuestra empresa
familiar ha estado
siempre presente para
su familia desde 1968
Más De 50
Años De
Seguridad,
Estilo E
Innovación
ASSEMBLY INSTRUCTIONS • INSTRUCCIONES DE MONTAJE

46
Your Next Purchase From
DeltaChildren.com
Welcome to the
Here's a Gift From Us To You
DELTA FAMILY
*Subject to Change
*Exclusions Apply
DELTA10
USE CODE:
DELTA CHILDREN?
Visit Deltachildren.Com/Pages/Our-Story for more information
PRODUCTS FOR EVERY AGE AND STAGE
CRIBS
LITS POUR BÉBÉ
CUNAS
DRESSERS
COMMODES
TOCADORES
GLIDERS
CHAISE
SILLA
BASSINETS
COUFFINS
MOISÉS
STROLLERS
ÉQUIPEMENT POUR BÉBÉ
COSAS PARA BEBÉ
BABY GEAR
POUSSETTES
CARRIOLAS
TWIN BEDS
LITS UNE PLACE
CAMA SENCILLA
BINS &
ORGANIZERS
PANIERS
CONTENEDORES
MATTRESES
MATELAS
COLCHÓN
PLAYROOM
FURNITURE
SALLE DE JEUX
CUARTO DE JUGAR
TODDLER BEDS
LITS POUR ENFANT
CAMA PARA NIÑO
WHY CHOOSE
DELTA
GIVES
10% Of Our Profits
Go Toward Improving
The Lives Of Children
DELTA
CARES
We Test Above &
Beyond Industry
Safety Standards
DELTA
LEADS
1 Out Of 2 Children
In The U.S. Sleep In
Our Products
DELTA GROWS
WITH YOU
We Have Products
For Every Age
And Stage
DELTA IS
DEDICATED
Our Family-Run
Company Has Been
There For Your
Family Since 1968
Over
50 Years Of
Safety, Style
& Innovation
OVER 5O YEARS OF SAFETY, STYLE, AND INNOVATION
OUR FAMILY OF TOP BRANDS
-
 1
1
-
 2
2
-
 3
3
-
 4
4
-
 5
5
-
 6
6
-
 7
7
-
 8
8
-
 9
9
-
 10
10
-
 11
11
-
 12
12
-
 13
13
-
 14
14
-
 15
15
-
 16
16
-
 17
17
-
 18
18
-
 19
19
-
 20
20
-
 21
21
-
 22
22
-
 23
23
-
 24
24
-
 25
25
-
 26
26
-
 27
27
-
 28
28
-
 29
29
-
 30
30
-
 31
31
-
 32
32
-
 33
33
-
 34
34
-
 35
35
-
 36
36
-
 37
37
-
 38
38
-
 39
39
-
 40
40
-
 41
41
-
 42
42
-
 43
43
-
 44
44
-
 45
45
-
 46
46


Delta Children Haven 6 Drawer Dresser Assembly Instructions
- Tipo
- Assembly Instructions
En otros idiomas
Documentos relacionados
-
 Delta Children Haven 6 Drawer Dresser Assembly Instructions
-
 Delta Children Haven 6 Drawer Dresser Assembly Instructions
-
 Delta Children Summit 6 Drawer Dresser Assembly Instructions
-
 Delta Children Summit 6 Drawer Dresser Assembly Instructions
-
 Delta Children Summit 6 Drawer Dresser Assembly Instructions
-
 Delta Children Providence 6 Drawer Dresser Assembly Instructions
-
 Delta Children Universal 3 Drawer Dresser Assembly Instructions
-
 Delta Children Universal 3 Drawer Dresser Assembly Instructions
-
 Delta Children Ava 3 Drawer Dresser Assembly Instructions
-
 Delta Children Bentley 6 Drawer Dresser Assembly Instructions


