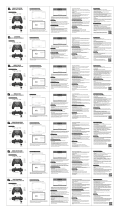
XRocker B741 Manual de usuario

Categoría
Accesorios de la consola de juegos
Tipo
Manual de usuario
ELITE CONTROLLER
FOR USE WITH
NINTENDO SWITCH™
ENG
Switch™ Mode
First time to Pair & Connect(Y+Home)
(Power on your console, then follow these steps to pair and connect
your controller.)
Step 1. Select the Controllers option on the home screen.
Step 2. Select change Grip/Order.
Step 3. Press Y+Home button at the same time, the LED Indicator
will blink, wait a few seconds for the connection to complete.
Reconnect (Home)
Reconnect: Press Home Button
If your controller was once paired and connected to your console,
press the Home button to reconnect.
NOTE: Please ensure that the console is turned on to complete
reconnection of the wireless Pro controller.
You may need to reconnect your controller as per the initial setup
instructions to reconnect after a firmware update.
Analogue Stick Calibration:
A. Press Home button to enter the main menu of the console and
select System Settings.
B. In the Controllers and Sensors menu, select
Calibrate Control Sticks.
C. Follow the on screen instructions to complete calibration.
D. Then press 3D (L3/R3) step into below interface.
E. And then press X button step in to calibrate interface, and do
actions based on the remind.
Console Mode ENG
Adjust Turbo Speed
You can set the following buttons to Turbo Mode: A/B/X/Y/L/ZL/R/
ZR button
To Enable/Disable the manual and auto turbo speed function:
1. Turn on Turbo function
Pressing (at the same time) button plus the button you wish to
set to enable Turbo for that button.
2. To make the Turbo-enabled button automatic
Press (at the same time) button plus the button you previously
enabled.
3. Turn off Turbo function
Pressing (at the same time) button+ the button you previously
enabled as auto turbo to clear.
To Disable all buttons turbo speed function: Press the minus (-)
button and the down button of the direction pad at the same time.
How to increase the turbo speed:
When a button is Turbo enabled, hold for 5 seconds and press
up on the right analogue stick. This will increase on level of turbo
speed.
How to decrease the turbo speed:
When a button is Turbo enabled, hold for 5 seconds and press
down on the right analogue stick. This will increase on level of
turbo speed.
Adjust vibration Intensity
There are 4 levels of vibration intensity: 100%-70%-30%-0%
(No vibration). By default the controller is at 50% intensity.
How to increase the vibration intensity: Press the Plus (+) button
and the up button of direction pad at the same time for 3s, this will
increase one level of
vibration intensity.
How to decrease the vibration intensity: Press the Minus (-) button
Press button and the up button of direction pad at the same time
for 3s, this will decrease one level of vibration intensity.
ENG
Programming and Macro function:
The M1, M2, M3, M4, rear buttons default to ABXY buttons when the
Switch console is turned on.
- To set a macro button, press Turbo and Mx button to step into
Macro setting mode, the mode LED light and LED2, LED3 light
indicate that the controller is in Macro Mode.
- Release Turbo and the Macro button then press the buttons
which you need set, when finished, press the Macro button to
save and exit. The Indication LED’s will turn off, indicating that the
macro is saved.
Charge Indicator:
1. When the controller is in charging mode while the console is
turned off, the LED’s on the controller will flash to indicate power is
connected. Once fully charged, the LED will turn off.
2. When the controller is charged with the console turned on. The
LED Will flash and then remain constantly on when fully charged.
3. When the battery is low, the controller LED will flash in bursts of
three flashes until connected to charge.
4. When the battery reaches almost empty, the
controller will change to sleep mode and will require USB
connection to continue use.
ENG
Product Features:
1. Product Size: 154mm x 111mm x 59mm
2. Product Weight: 248g
3. Material: ABS plastic
4. Buttons: Home Button/Capture Button/-Button/+Button/
A Button/B Button/X Button/Y Button//ZL Button/L Button /
ZR Button/R Button/D-pad control / L3 Button /R3 Button
5. Connection Method: Wireless
6. Vibration: Dual motor
7. Motion Control: 6 Axis sensors
8. Turbo, Auto Turbo and clear Turbo function
IF YOU LIKE YOUR PRODUCT LET US KNOW ON
FACEBOOK AND INSTAGRAM! #Xrockergaming
Health and Safety
• Avoid direct contact with liquids. To clean, wipe with a damp
cloth. If a spillage occurs, switch off the controller and wait for the
product to dry before reusing.
• Do not use any type of abrasive pad or abrasive cleaning solutions
as these may damage the surface material.
• Never place any type of candle or naked flame on or near the
controller at any time. While X Rocker products are compliant
with UK and European safety regulations, prolonged exposure to
naked flames will result in damage to the product and other safety
hazards.
ENG
FR
Switch™ Mode
Première fois pour appairer et se connecter (Y + Home)
(Allumez votre console, puis suivez ces étapes pour appairer et
connectez votre contrôleur.)
Étape 1. Sélectionnez l'option Contrôleurs sur l'écran d'accueil.
1ɈƊȯƵׂخ²ƶǶƵƧɈǞȌȁȁƵɹwȌƮǞ˛ƵȲǶƊȯȌǞǐȁƶƵشǶزȌȲƮȲƵخ
Étape 3. Appuyez sur le bouton Y + Home en même temps,
ǶزǞȁƮǞƧƊɈƵɐȲm0(ƧǶǞǐȁȌɈƵةƊɈɈƵȁƮƵɹȱɐƵǶȱɐƵȺȺƵƧȌȁƮƵȺȱɐƵ
la connexion se termine
Reconnecter (maison)
Reconnecter: appuyez sur le bouton d'accueil
Si votre manette a déjà été appairée et connectée à votre console,
appuyez sur le bouton Accueil pour vous reconnecter.
ª0wª©Ç0بɨƵɐǞǶǶƵɹɨȌɐȺƊȺȺɐȲƵȲȱɐƵǶƊƧȌȁȺȌǶƵƵȺɈƊǶǶɐǿƶƵ
ȯȌɐȲɈƵȲǿǞȁƵȲǶƊȲƵƧȌȁȁƵɮǞȌȁƮƵǶƊǿƊȁƵɈɈƵȺƊȁȺ˛Ƕ§ȲȌخ
ßȌɐȺƮƵɨȲƵɹȯƵɐɈٌƺɈȲƵȲƵƧȌȁȁƵƧɈƵȲɨȌɈȲƵƧȌȁɈȲȏǶƵɐȲȺƵǶȌȁǶƊƧȌȁ˛ǐɐȲƊɈǞȌȁ
ǞȁǞɈǞƊǶƵǞȁȺɈȲɐƧɈǞȌȁȺȯȌɐȲȺƵȲƵƧȌȁȁƵƧɈƵȲƊȯȲDŽȺɐȁƵǿǞȺƵƜǯȌɐȲƮɐǿǞƧȲȌǶȌǐǞƧǞƵǶخ
Calibrage analogique du bâton:
A. Appuyez sur le bouton Accueil pour accéder au menu principal
de la console et sélectionnez Paramètres système.
B. Dans le menu Contrôleurs et capteurs, sélectionnez Calibrer
Sticks de contrôle.
!خ²ɐǞɨƵɹǶƵȺǞȁȺɈȲɐƧɈǞȌȁȺƜǶزƶƧȲƊȁȯȌɐȲɈƵȲǿǞȁƵȲǶزƶɈƊǶȌȁȁƊǐƵخ
(خȯȯɐɯƵɹƵȁȺɐǞɈƵȺɐȲǶزƶɈƊȯƵ׃(ـm׃شª׃فƮƊȁȺǶزǞȁɈƵȲǏƊƧƵƧǞٌƮƵȺȺȌɐȺخ
E. Et puis appuyez sur le bouton X pour calibrer l'interface, et faites
actions basées sur le rappel.
Console Mode FR
Ajuster la vitesse du turbo
Vous pouvez régler les boutons suivants sur le mode Turbo: A / B / X / Y / L
/ ZL / R /Bouton ZR
Pour activer / désactiver la fonction de vitesse turbo manuelle et automatique:
1. Activer la fonction Turbo
Appuyer (en même temps) sur le bouton plus le bouton que
vous souhaitez réglé pour activer Turbo pour ce bouton.
2. Pour rendre automatique le bouton Turbo
Appuyez (en même temps) sur le bouton plus sur le bouton que
vous activée.
3. Désactiver la fonction Turbo
En appuyant (en même temps) sur le bouton + le bouton que vous
activé comme turbo automatique pour effacer.
Pour désactiver la fonction de vitesse turbo de tous les boutons: Appuyez
sur le moins (-) et le bouton bas du pavé directionnel en même temps.
Comment augmenter la vitesse turbo:
Lorsqu'un bouton est activé Turbo, maintenez pendant 5 secondes
et appuyez sur sur le stick analogique droit. Cela augmentera au
niveau du turbo la vitesse.
Comment diminuer la vitesse turbo:
Lorsqu'un bouton est activé Turbo, maintenez pendant 5 secondes
et appuyez sur sur le stick analogique droit. Cela augmentera
au niveau de vitesse turbo.
Ajuster l'intensité des vibrations
Il existe 4 niveaux d'intensité de vibration: 100% -70% -30% -0%
(Pas de vibration). Par défaut, le contrôleur est à 50% d'intensité.
Comment augmenter l'intensité des vibrations: appuyez sur le
bouton Plus (+) et le bouton haut du pavé directionnel en même
temps pendant 3s, cela augmenter d'un niveau d'intensité de
vibration.
Comment diminuer l'intensité des vibrations: appuyez sur le
bouton Moins (-) Appuyez sur le bouton et le bouton haut du pavé
directionnel en même temps pendant 3 s, cela diminuera d'un
niveau d'intensité de vibration.
FR
Programmation et fonction macro:
Les boutons arrière M1, M2, M3, M4, par défaut sur les boutons
ABXY lorsque le la console est allumée.
- §ȌɐȲƮƶ˛ȁǞȲɐȁƦȌɐɈȌȁǿƊƧȲȌةƊȯȯɐɯƵɹȺɐȲǶƵȺƦȌɐɈȌȁȺÀɐȲƦȌƵɈwɮȯȌɐȲ
entrer Mode de réglage macro, la lumière LED de mode et la lumière LED2,
LED3 indiquent que le contrôleur est en mode macro.
ٌªƵǶƓƧǘƵɹÀɐȲƦȌƵɈǶƵƦȌɐɈȌȁwƊƧȲȌȯɐǞȺƊȯȯɐɯƵɹȺɐȲǶƵȺƦȌɐɈȌȁȺ
ȱɐƵɨȌɐȺƮƵɨƵɹȲƶǐǶƵȲةɐȁƵǏȌǞȺɈƵȲǿǞȁƶةƊȯȯɐɯƵɹȺɐȲǶƵƦȌɐɈȌȁ
Macro pour sauvegarder et quitter. Les LED d’indication s’éteignent,
indiquant que le la macro est enregistrée.
Témoin de charge:
1. Lorsque le contrôleur est en mode de charge alors que la
ƧȌȁȺȌǶƵƵȺɈƶɈƵǞȁɈةǶƵɨȌɯƊȁɈƮɐƧȌȁɈȲȏǶƵɐȲƧǶǞǐȁȌɈƵȲƊȯȌɐȲǞȁƮǞȱɐƵȲ
ȱɐƵǶزƊǶǞǿƵȁɈƊɈǞȌȁƵȺɈǶǞƶخÇȁƵǏȌǞȺƧȌǿȯǶDŽɈƵǿƵȁɈƧǘƊȲǐƶةǶƵɨȌɯƊȁɈ
s'éteint.
2. Lorsque le contrôleur est chargé avec le. La LED Will
˜ƊȺǘƵɈȲƵȺɈƵƊǶǶɐǿƶƵȁȯƵȲǿƊȁƵȁƧƵɐȁƵǏȌǞȺƧȌǿȯǶDŽɈƵǿƵȁɈƧǘƊȲǐƶخ
׃خmȌȲȺȱɐƵǶƊƦƊɈɈƵȲǞƵƵȺɈǏƊǞƦǶƵةǶƵɨȌɯƊȁɈƮɐƧȌȁɈȲȏǶƵɐȲƧǶǞǐȁȌɈƵ
par rafales de trois clignotements jusqu'à ce qu'il soit connecté
pour charger.
4. Lorsque la batterie est presque vide, le contrôleur
ȯƊȺȺƵȲƵȁǿȌƮƵɨƵǞǶǶƵƵɈȁƶƧƵȺȺǞɈƵȲƊɐȁƵƧȌȁȁƵɮǞȌȁDz ȯȌɐȲ
continuer à utiliser.
FR
Caractéristiques du produit:
1. Taille du produit: 154 mm x 111 mm x 59 mm
2. Poids du produit: 248g
3. Matériel: plastique ABS
4. Boutons: Bouton d'accueil / Bouton de capture / -Bouton /
Bouton + / Bouton A / Bouton B / Bouton X / Bouton Y // Bouton ZL
/ Bouton L / Bouton ZR / Bouton R / Commande D-pad / Bouton L3 /
Bouton R3
5. wƶɈǘȌƮƵƮƵƧȌȁȁƵɮǞȌȁبȺƊȁȺ˛Ƕ
6. Vibration: double moteur
7. Contrôle de mouvement: capteurs à 6 axes
8. Fonction Turbo, Auto Turbo et Clear Turbo
SI VOUS AIMEZ VOTRE PRODUIT, FAITES-NOUS SAVOIR
FACEBOOK ET INSTAGRAM! #Xrockergaming
Santé et sécurité
اÉvitez tout contact direct avec des liquides. Pour nettoyer, essuyez
avec un tissu. En cas de déversement, éteignez le contrôleur et attendez
produit à sécher avant de le réutiliser.
اyزɐɈǞǶǞȺƵɹƊɐƧɐȁɈɯȯƵƮƵɈƊǿȯȌȁƊƦȲƊȺǞǏȌɐƮƵȺȌǶɐɈǞȌȁƮƵ
nettoyage abrasivecar ceux-ci peuvent endommager le matériau
ƮƵȺɐȲǏƊƧƵخ
اyƵȯǶƊƧƵɹǯƊǿƊǞȺƊɐƧɐȁɈɯȯƵƮƵƦȌɐǐǞƵȌɐƮƵ˜ƊǿǿƵȁɐƵȺɐȲ
ou à proximité du contrôleur à tout moment. Alors que les produits
åªȌƧDzƵȲȺȌȁɈƧȌȁǏȌȲǿƵȺƧȌȁǏȌȲǿƵƊɐɮȲƶǐǶƵǿƵȁɈƊɈǞȌȁȺƮƵȺƶƧɐȲǞɈƶ
ƦȲǞɈƊȁȁǞȱɐƵȺƵɈƵɐȲȌȯƶƵȁȁƵȺةǶƵȺ˜ƊǿǿƵȺȁɐƵȺƵȁƮȌǿǿƊǐƵȲȌȁɈǶƵ
produit et d'autres mesures de sécurité dangers.
FR
DE
Switch™ Modus
Zum ersten Mal Pair & Connect (Y + Home)
(Schalten Sie Ihre Konsole ein und führen Sie die folgenden Schritte
aus, um eine Verbindung herzustellen und eine Verbindung
herzustellen Ihr Controller.)
Schritt 1. Wählen Sie auf dem Startbildschirm die Option Controller.
Schritt 2. Wählen Sie Änderung Griff / Bestellung.
Schritt 3. Drücken Sie gleichzeitig die Taste Y + Home, die
LED-Anzeige blinkt, warten Sie einige Sekunden, bis die Verbindung
hergestellt ist.
Erneut verbinden (Home)
Erneut verbinden: Drücken Sie die Home-Taste
Wenn Ihr Controller einmal gekoppelt und mit Ihrer Konsole
verbunden war, Drücken Sie die Home-Taste, um die Verbindung
wiederherzustellen.
HINWEIS: Bitte stellen Sie sicher, dass die Konsole zum Abschluss
eingeschaltet ist Wiederverbindung des drahtlosen Pro-Controllers.
Möglicherweise müssen Sie Ihren Controller gemäß der Ersteinrichtung
erneut anschließen Anweisungen zum erneuten Verbinden nach einem
Firmware-Update.
Analoge Stick-Kalibrierung:
A. Drücken Sie die Home-Taste, um das Hauptmenü der Konsole
aufzurufen Wählen Sie Systemeinstellungen.
B. Wählen Sie im Menü Controller und Sensoren die Option
Control Sticks kalibrieren.
C. Befolgen Sie die Anweisungen auf dem Bildschirm, um die
Kalibrierung abzuschließen.
D. (ȲɖƧDzƵȁ²ǞƵƮƊȁȁƮƵȁ²ƧǘȲǞɈɈ׃(ـm׃شª׃فǞȁƮǞƵǏȌǶǐƵȁƮƵƦƵȲ˜ƚƧǘƵخ
E. Drücken Sie dann die X-Taste, um die Schnittstelle zu kalibrieren,
und tun Sie dies Aktionen basierend auf der Erinnerung.
Konsolenmodus DE
Passen Sie die Turbogeschwindigkeit an
Sie können die folgenden Tasten auf Turbo-Modus einstellen: A / B / X / Y / L /
ZL / R / ZR-Taste
So aktivieren / deaktivieren Sie die manuelle und automatische
Turbogeschwindigkeitsfunktion:
1. Schalten Sie die Turbo-Funktion ein
Drücken Sie die Taste (gleichzeitig) und die gewünschte Taste
ƵǞȁǐƵȺɈƵǶǶɈةɐǿÀɐȲƦȌǏɖȲƮǞƵȺƵ²ƧǘƊǶɈ˜ƚƧǘƵɹɐƊDzɈǞɨǞƵȲƵȁخ
2. So machen Sie die Turbo-fähige Taste automatisch
Drücken Sie (gleichzeitig) die Taste und die zuvor angegebene
Taste aktiviert.
3. Schalten Sie die Turbo-Funktion aus
Drücken Sie (gleichzeitig) die Taste + die Taste, die Sie zuvor
gedrückt haben aktiviert als Auto Turbo zu löschen.
So deaktivieren Sie die Turbogeschwindigkeitsfunktion aller Tasten: Drücken
²ǞƵƮƊȺwǞȁɐȺɹƵǞƧǘƵȁـٌفÀƊȺɈƵɐȁƮƮǞƵƦɩƚȲɈȺٌÀƊȺɈƵƮƵȺ²ɈƵɐƵȲDzȲƵɐɹƵȺ
gleichzeitig.
So erhöhen Sie die Turbogeschwindigkeit:
Wenn eine Taste Turbo aktiviert ist, halten Sie sie 5 Sekunden lang
gedrückt und drücken Sie oben auf dem rechten Analogstick.
Dies erhöht sich auf dem Niveau des Turbos Geschwindigkeit.
So verringern Sie die Turbogeschwindigkeit:
When a button is Turbo enabled, hold for 5 seconds and press
unten auf dem rechten Analogstick. Dies wird sich auf dem Niveau
von erhöhen Turbogeschwindigkeit.
Passen Sie die Vibrationsintensität an
0ȺǐǞƦɈׄ²ƧǘɩǞȁǐɐȁǐȺǞȁɈƵȁȺǞɈƚɈȺȺɈɐǏƵȁبׁ׀׀ڭׇٌ׀ڭٌ׃׀ڭٌ׀ڭـjƵǞȁƵ
ßǞƦȲƊɈǞȌȁفخ²ɈƊȁƮƊȲƮǿƚɆǞǐǘƊɈƮƵȲ!ȌȁɈȲȌǶǶƵȲƵǞȁƵXȁɈƵȁȺǞɈƚɈɨȌȁׅ׀ڭخ
How to increase the vibration intensity: Press the Plus (+) button
and the up button of direction pad at the same time for 3s, this will
increase one level of vibration intensity.
²ȌɨƵȲȲǞȁǐƵȲȁ²ǞƵƮǞƵßǞƦȲƊɈǞȌȁȺǞȁɈƵȁȺǞɈƚɈب(ȲɖƧDzƵȁ²ǞƵƮǞƵ
Minus-Taste (-) Drücken Sie gleichzeitig die Taste und die
ɐǏɩƚȲɈȺٌÀƊȺɈƵƮƵȺ²ɈƵɐƵȲDzȲƵɐɹƵȺIɖȲ׃ȺɩǞȲƮƮƊƮɐȲƧǘƮǞƵ
ßǞƦȲƊɈǞȌȁȺǞȁɈƵȁȺǞɈƚɈɐǿƵǞȁƵ²ɈɐǏƵɨƵȲȲǞȁǐƵȲɈخ
DE
Programmier- und Makrofunktion:
Die Tasten M1, M2, M3, M4 und hinten sind standardmäßig
ABXY-Tasten, wenn die Konsole eingeschaltet ist.
- Um eine Makrotaste einzustellen, drücken Sie die Turbo- und
Mx-Taste, um in den Makroeinstellungsmodus zu wechseln. Die
Modus-LED leuchtet und LED 2. Die LED 3 leuchtet, um anzuzeigen,
ƮƊȺȺȺǞƧǘƮƵȲ!ȌȁɈȲȌǶǶƵȲǞǿwƊDzȲȌǿȌƮɐȺƦƵ˛ȁƮƵɈخ
- Lassen Sie Turbo und die Makrotaste los und drücken Sie dann die
Tasten, die Sie einstellen müssen. Wenn Sie fertig sind, drücken Sie
die Makrotaste, um zu speichern und zu beenden. Die Anzeige-LEDs
erlöschen und zeigen an, dass das Makro gespeichert ist.
ׁخàƵȁȁȺǞƧǘƮƵȲ!ȌȁɈȲȌǶǶƵȲǞǿ!ǘƊȲƵٌwȌƮɐȺƦƵ˛ȁƮƵɈةɩƚǘȲƵȁƮƮǞƵ
Konsole ausgeschaltet ist, blinken die LEDs am Controller, um
anzuzeigen, dass die Stromversorgung angeschlossen ist. Sobald der
Akku vollständig aufgeladen ist, erlischt er.
2. Wenn der Controller bei eingeschalteter Konsole aufgeladen wird.
Die LED blinkt und leuchtet dann konstant, wenn sie vollständig
aufgeladen ist.
3. Wenn die Batterie schwach ist, blinkt die Controller-LED in drei
Blitzen, bis sie zum Laden angeschlossen wird.
4. Wenn der Akku fast leer ist, wechselt der Controller in den
Ruhemodus und benötigt eine USB-Verbindung, um weiter
verwendet zu werden.
Ladeanzeige:
DE
Produktmerkmale:
1. Produktgröße: 154 mm x 111 mm x 59 mm
2. Produktgewicht: 248g
3. Material: ABS-Kunststoff
4. Tasten: Home-Taste / Capture-Taste / -Taste / + Taste /
A-Taste / B-Taste / X-Taste / Y-Taste // ZL-Taste / L-Taste /
ZR-Taste / R-Taste / D-Pad-Steuerung / L3-Taste / R3-Taste
5. Verbindungsmethode: Drahtlos
6. Vibration: Doppelmotor
7. Bewegungssteuerung: 6-Achsen-Sensoren
8. Turbo, Auto Turbo und Clear Turbo Funktion
WENN SIE IHR PRODUKT MÖGEN, LASSEN SIE UNS WISSEN
FACEBOOK UND INSTAGRAM! #Xrockergaming
Gesundheit und Sicherheit
اVermeiden Sie direkten Kontakt mit Flüssigkeiten. Zum Reinigen
feucht abwischen Stoff. Wenn etwas verschüttet wird, schalten Sie
die Steuerung aus und warten Sie auf die Produkt vor der
Wiederverwendung trocknen lassen.
اßƵȲɩƵȁƮƵȁ²ǞƵDzƵǞȁƵ²ƧǘǶƵǞǏDzǞȺȺƵȁȌƮƵȲ²ƧǘƵɐƵȲǿǞɈɈƵǶ
ƮƊƮǞƵȺƵƮƊȺƦƵȲ˜ƚƧǘƵȁǿƊɈƵȲǞƊǶƦƵȺƧǘƚƮǞǐƵȁDzȖȁȁƵȁخ
ا²ɈƵǶǶƵȁ²ǞƵȁǞƵǿƊǶȺjƵȲɹƵȁȌƮƵȲȁƊƧDzɈƵIǶƊǿǿƵȁƊɐǏȌƮƵȲǞȁƮƵȲ
yƚǘƵɨȌȁ!ȌȁɈȲȌǶǶƵȲǯƵƮƵȲɹƵǞɈخàƚǘȲƵȁƮåªȌƧDzƵȲٌ§ȲȌƮɐDzɈƵDzȌȁǏȌȲǿ
ȺǞȁƮǿǞɈƦȲǞɈǞȺƧǘƵȁɐȁƮƵɐȲȌȯƚǞȺƧǘƵȁ²ǞƧǘƵȲǘƵǞɈȺƦƵȺɈǞǿǿɐȁǐƵȁة
ǶƚȁǐƵȲƵ0ɮȯȌȺǞɈǞȌȁǐƵǐƵȁɖƦƵȲȁƊƧDzɈƵIǶƊǿǿƵȁǏɖǘȲƵȁɹɐ²ƧǘƚƮƵȁح
am Produkt und anderen Sicherheitsvorkehrungen Gefahren.
DE
ESP
Switch™ Modo
Primera vez para emparejar y conectar (Y + Home)
(Encienda su consola, luego siga estos pasos para emparejar y
conectar su controlador.)
Paso 1. Seleccione la opción Controladores en la pantalla de inicio.
Paso 2. Seleccione cambiar agarre / orden.
Paso 3. Presione el botón Y + Inicio al mismo tiempo, el indicador
LEDnparpadeará, espere unos segundos hasta que se complete
la conexión.
Reconectar (Casa)
Reconectar: presione el botón de inicio
Si su controlador una vez estuvo emparejado y conectado a su consola,
presione el botón Inicio para volver a conectarse.
NOTA: asegúrese de que la consola esté encendida para completar
reconexión del controlador Pro inalámbrico.
0ȺȯȌȺǞƦǶƵȱɐƵƮƵƦƊɨȌǶɨƵȲƊƧȌȁƵƧɈƊȲȺɐƧȌȁɈȲȌǶƊƮȌȲȺƵǐɑȁǶƊƧȌȁ˛ǐɐȲƊƧǞȍȁ
inicial instrucciones para volver a conectarse después de una actualización
ƮƵ˛ȲǿɩƊȲƵخ
Calibración de varilla analógica:
A. Presione el botón Inicio para ingresar al menú principal de la
ƧȌȁȺȌǶƊɯȺƵǶƵƧƧǞȌȁƵ!Ȍȁ˛ǐɐȲƊƧǞȍȁƮƵǶȺǞȺɈƵǿƊخ
B. En el menú Controladores y sensores, seleccione Calibrar
palancas de control.
C. Siga las instrucciones en pantalla para completar la calibración.
D. Luego presione el paso 3D (L3 / R3) en la interfaz de abajo.
E. Y luego presione el botón X para calibrar la interfaz, y haga
acciones basadas en el recordatorio.
Modo consola ESP
Ajustar la velocidad turbo
§ɐƵƮƵƧȌȁ˛ǐɐȲƊȲǶȌȺȺǞǐɐǞƵȁɈƵȺƦȌɈȌȁƵȺƵȁwȌƮȌÀɐȲƦȌبش شåشæشmشðmشªش
ȌɈȍȁðª
§ƊȲƊǘƊƦǞǶǞɈƊȲشƮƵȺǘƊƦǞǶǞɈƊȲǶƊǏɐȁƧǞȍȁƮƵɨƵǶȌƧǞƮƊƮɈɐȲƦȌǿƊȁɐƊǶɯƊɐɈȌǿƋɈǞƧƊب
1. Encienda la función Turbo
§ȲƵȺǞȌȁƊȁƮȌـƊǶǿǞȺǿȌɈǞƵǿȯȌفƵǶƦȌɈȍȁǿƋȺƵǶƦȌɈȍȁȱɐƵƮƵȺƵƊ
ƧȌȁ˛ǐɐȲƊƮȌȯƊȲƊǘƊƦǞǶǞɈƊȲÀɐȲƦȌȯƊȲƊƵȺƵƦȌɈȍȁخ
2. Para que el botón Turbo habilitado sea automático
§ȲƵȺǞȌȁƵـƊǶǿǞȺǿȌɈǞƵǿȯȌفƵǶƦȌɈȍȁǿƋȺƵǶƦȌɈȍȁȱɐƵȯȲƵɨǞƊǿƵȁɈƵ
ǘƊƦǞǶǞɈƊƮȌخ
3. Apague la función Turbo
§ɐǶȺƊȁƮȌـƊǶǿǞȺǿȌɈǞƵǿȯȌفƵǶƦȌɈȍȁڕƵǶƦȌɈȍȁȱɐƵȯȲƵɨǞƊǿƵȁɈƵ
ǘƊƦǞǶǞɈƊƮȌƧȌǿȌɈɐȲƦȌƊɐɈȌǿƋɈǞƧȌȯƊȲƊƦȌȲȲƊȲخ
§ƊȲƊƮƵȺǘƊƦǞǶǞɈƊȲǶƊǏɐȁƧǞȍȁƮƵɨƵǶȌƧǞƮƊƮɈɐȲƦȌƮƵɈȌƮȌȺǶȌȺƦȌɈȌȁƵȺب
§ȲƵȺǞȌȁƵƵǶȺǞǐȁȌǿƵȁȌȺـٌفƦȌɈȍȁɯƵǶƦȌɈȍȁƊƦƊǯȌƮƵǶȯƊƮƮƵƮǞȲƵƧƧǞȍȁ
ƊǶǿǞȺǿȌɈǞƵǿȯȌخ
Cómo aumentar la velocidad turbo:
!ɐƊȁƮȌɐȁƦȌɈȍȁƵȺɈƋǘƊƦǞǶǞɈƊƮȌȯƊȲƊÀɐȲƦȌةǿƊȁɈƶȁǐƊǶȌȯȲƵȺǞȌȁƊƮȌ
ƮɐȲƊȁɈƵׅȺƵǐɐȁƮȌȺɯȯȲƵȺǞȌȁƵƵȁƵǶǯȌɯȺɈǞƧDzƊȁƊǶȍǐǞƧȌƮƵȲƵƧǘȌخ
0ȺɈȌƊɐǿƵȁɈƊȲƋƵȁƵǶȁǞɨƵǶƮƵɈɐȲƦȌخɨƵǶȌƧǞƮƊƮ
Cómo disminuir la velocidad del turbo:
!ɐƊȁƮȌɐȁƦȌɈȍȁƵȺɈƋǘƊƦǞǶǞɈƊƮȌȯƊȲƊÀɐȲƦȌةǿƊȁɈƶȁǐƊǶȌ
ȯȲƵȺǞȌȁƊƮȌƮɐȲƊȁɈƵׅȺƵǐɐȁƮȌȺɯȯȲƵȺǞȌȁƵƊƦƊǯȌƵȁƵǶǯȌɯȺɈǞƧDz
ƊȁƊǶȍǐǞƧȌƮƵȲƵƧǘȌخ0ȺɈȌƊɐǿƵȁɈƊȲƋƵȁƵǶȁǞɨƵǶƮƵɨƵǶȌƧǞƮƊƮɈɐȲƦȌخ
Ajustar la intensidad de la vibración
RƊɯׄȁǞɨƵǶƵȺƮƵǞȁɈƵȁȺǞƮƊƮƮƵɨǞƦȲƊƧǞȍȁبׁ׀׀ڭׇٌ׀ڭٌ׃׀ڭٌ׀ڭ
ـ²ǞȁɨǞƦȲƊƧǞȌȁƵȺفخ§ȌȲƮƵǏƵƧɈȌةƵǶƧȌȁɈȲȌǶƊƮȌȲƵȺɈƋƊǶׅ׀ڭƮƵǞȁɈƵȁȺǞƮƊƮخ
!ȍǿȌƊɐǿƵȁɈƊȲǶƊǞȁɈƵȁȺǞƮƊƮƮƵǶƊɨǞƦȲƊƧǞȍȁبȯȲƵȺǞȌȁƵƵǶƦȌɈȍȁ
ǿƋȺـڕفɯƵǶƦȌɈȍȁƊȲȲǞƦƊƮƵǶȯƊƮƮƵƮǞȲƵƧƧǞȍȁƊǶǿǞȺǿȌɈǞƵǿȯȌ
ƮɐȲƊȁɈƵ׃ȺةƵȺɈȌƊɐǿƵȁɈƊȲɐȁȁǞɨƵǶƮƵǞȁɈƵȁȺǞƮƊƮƮƵɨǞƦȲƊƧǞȍȁخ
!ȍǿȌƮǞȺǿǞȁɐǞȲǶƊǞȁɈƵȁȺǞƮƊƮƮƵǶƊɨǞƦȲƊƧǞȍȁبȯȲƵȺǞȌȁƵƵǶƦȌɈȍȁ
wƵȁȌȺـٌف§ȲƵȺǞȌȁƵƵǶƦȌɈȍȁɯƵǶƦȌɈȍȁƊȲȲǞƦƊƮƵǶȯƊƮƮƵƮǞȲƵƧƧǞȍȁ
ƊǶǿǞȺǿȌɈǞƵǿȯȌƮɐȲƊȁɈƵ׃ȺةƵȺɈȌƮǞȺǿǞȁɐǞȲƋɐȁȁǞɨƵǶƮƵǞȁɈƵȁȺǞƮƊƮ
ƮƵɨǞƦȲƊƧǞȍȁخ
ESP
Función de programación y macro:
Los botones traseros M1, M2, M3, M4, por defecto son
los botones ABXY cuando la consola está encendida.
ٌ§ƊȲƊƧȌȁ˛ǐɐȲƊȲɐȁƦȌɈȍȁǿƊƧȲȌةȯȲƵȺǞȌȁƵƵǶƦȌɈȍȁÀɐȲƦȌɯwɮ
ȯƊȲƊȯƊȺƊȲƊǶǿȌƮȌƮƵƧȌȁ˛ǐɐȲƊƧǞȍȁwƊƧȲȌةǶƊǶɐɹm0(ƮƵǿȌƮȌɯ
ǶƊǶɐɹm0(ׂةm0(׃ǞȁƮǞƧƊȁȱɐƵƵǶƧȌȁɈȲȌǶƊƮȌȲƵȺɈƋƵȁǿȌƮȌwƊƧȲȌخ
ٌ²ɐƵǶɈƵÀɐȲƦȌɯƵǶƦȌɈȍȁwƊƧȲȌةǶɐƵǐȌȯȲƵȺǞȌȁƵǶȌȺƦȌɈȌȁƵȺȱɐƵ
ȁƵƧƵȺǞɈƊƧȌȁ˛ǐɐȲƊȲةƧɐƊȁƮȌɈƵȲǿǞȁƵةȯȲƵȺǞȌȁƵƵǶƦȌɈȍȁwƊƧȲȌȯƊȲƊ
ǐɐƊȲƮƊȲɯȺƊǶǞȲخmȌȺm0(ƮƵǞȁƮǞƧƊƧǞȍȁȺƵƊȯƊǐƊȲƋȁةǞȁƮǞƧƊȁƮȌȱɐƵǶƊ
ǿƊƧȲȌƵȺɈƋǐɐƊȲƮƊƮƊخ
Indicador de carga:
ׁخ!ɐƊȁƮȌƵǶƧȌȁɈȲȌǶƊƮȌȲƵȺɈƋƵȁǿȌƮȌƮƵƧƊȲǐƊǿǞƵȁɈȲƊȺǶƊ
ƧȌȁȺȌǶƊƵȺɈƋƊȯƊǐƊƮƊةǶȌȺm0(ƮƵǶƧȌȁɈȲȌǶƊƮȌȲȯƊȲȯƊƮƵƊȲƋȁȯƊȲƊ
ǞȁƮǞƧƊȲȱɐƵǶƊƊǶǞǿƵȁɈƊƧǞȍȁƵȺɈƋƧȌȁƵƧɈƊƮƊخÇȁƊɨƵɹȱɐƵƵȺɈƶ
ƧȌǿȯǶƵɈƊǿƵȁɈƵƧƊȲǐƊƮȌةƵǶm0(ȺƵƊȯƊǐƊȲƋخ
ׂخ!ɐƊȁƮȌƵǶƧȌȁɈȲȌǶƊƮȌȲȺƵƧƊȲǐƊƧȌȁǶƊƧȌȁȺȌǶƊƵȁƧƵȁƮǞƮƊخ0Ƕ
m0(ȯƊȲȯƊƮƵƊȲƋɯǶɐƵǐȌȯƵȲǿƊȁƵƧƵȲƋƵȁƧƵȁƮǞƮȌƧɐƊȁƮȌƵȺɈƶ
ƧȌǿȯǶƵɈƊǿƵȁɈƵƧƊȲǐƊƮȌخ
׃خ!ɐƊȁƮȌǶƊƦƊɈƵȲǠƊƵȺɈƋƦƊǯƊةƵǶm0(ƮƵǶƧȌȁɈȲȌǶƊƮȌȲȯƊȲȯƊƮƵƊȲƋ
ƵȁȲƋǏƊǐƊȺƮƵɈȲƵȺȯƊȲȯƊƮƵȌȺǘƊȺɈƊȱɐƵȺƵƧȌȁƵƧɈƵȯƊȲƊƧƊȲǐƊȲخ
ׄخ!ɐƊȁƮȌǶƊƦƊɈƵȲǠƊƵȺɈƶƧƊȺǞɨƊƧǠƊةƵǶƧȌȁɈȲȌǶƊƮȌȲƧƊǿƦǞƊȲƋƊǶ
ǿȌƮȌƮƵȺɐȺȯƵȁȺǞȍȁɯȲƵȱɐƵȲǞȲƋɐȁƊƧȌȁƵɮǞȍȁDz ȯƊȲƊ
continuar usándolo.
ESP
Características del producto:
1. Tamaño del producto: 154 mm x 111 mm x 59 mm
2. Peso del producto: 248g
3. Material: plástico ABS
4. Botones: Botón de inicio / Botón de captura / -Botón / Botón + /
Botón A / Botón B / Botón X / Botón Y // Botón ZL / Botón L /
Botón ZR / Botón R / Control D-pad / Botón L3 / Botón R3
5. Método de conexión: inalámbrico
6. Vibración: motor dual
7. Control de movimiento: sensores de 6 ejes
8. Función Turbo, Auto Turbo y Clear Turbo
SI TE GUSTA TU PRODUCTO Háganos saber
FACEBOOK E INSTAGRAM! #Xrockergaming
Salud y seguridad
اEvite el contacto directo con líquidos. Para limpiar, pase un paño húmedo.
paño. Si se produce un derrame, apague el controlador y espere a que
producto para secar antes de reutilizar.
اyȌɐɈǞǶǞƧƵȁǞȁǐɑȁɈǞȯȌƮƵƵȺɈȲȌȯƊǯȌȌȺȌǶɐƧǞȌȁƵȺƮƵǶǞǿȯǞƵɹƊƊƦȲƊȺǞɨƊȺخ
ɯƊȱɐƵȯɐƵƮƵȁƮƊȋƊȲƵǶǿƊɈƵȲǞƊǶƮƵǶƊȺɐȯƵȲ˛ƧǞƵخ
اyɐȁƧƊƧȌǶȌȱɐƵȁǞȁǐɑȁɈǞȯȌƮƵɨƵǶƊȌǶǶƊǿƊƮƵȺȁɐƮƊȺȌƦȲƵȌ
cerca del controlador en cualquier momento. Si bien los productos
X Rocker cumplen con las regulaciones de seguridad del Reino Unido
y Europa, exposición prolongada a Las llamas desnudas resultarán
en daños al producto y otras medidas de seguridad. peligros.
ESP
NL
Switch™ Modus
Eerste keer koppelen en verbinden (Y + Home)
(Schakel uw console in en volg deze stappen om te koppelen en
verbinding te maken uw controller.)
Stap 1. Selecteer de optie Controllers op het startscherm.
Stap 2. Selecteer wijzigen Grip / Order.
Stap 3. Druk tegelijkertijd op Y + Home-knop, de LED-indicator
knippert, wacht een paar seconden totdat de verbinding is voltooid.
Opnieuw verbinden (Home)
Opnieuw verbinden: Druk op de Home-knop
Als je controller ooit was gekoppeld en verbonden met je console,
druk op de Home-knop om opnieuw verbinding te maken.
OPMERKING: Zorg ervoor dat de console is ingeschakeld om te
voltooien opnieuw verbinden van de draadloze Pro-controller.
Mogelijk moet u uw controller opnieuw aansluiten volgens de eerste installatie
ǞȁȺɈȲɐƧɈǞƵȺȌǿȌȯȁǞƵɐɩɨƵȲƦǞȁƮǞȁǐɈƵǿƊDzƵȁȁƊƵƵȁ˛ȲǿɩƊȲƵٌɐȯƮƊɈƵخ
Kalibratie analoge stick:
A. Druk op de Home-knop om het hoofdmenu van de console te
openen en selecteer Systeeminstellingen.
B. Selecteer in het menu Controllers en sensoren Control Sticks
kalibreren.
C. Volg de instructies op het scherm om de kalibratie te voltooien.
D. Druk vervolgens op 3D (L3 / R3) stap naar de onderstaande interface.
E. En druk vervolgens op de X-knop om de interface te kalibreren
en doe het acties op basis van de herinnering.
Console-modus NL
Pas de turbosnelheid aan
U kunt de volgende knoppen instellen op Turbomodus: A / B / X / Y / L / ZL / R /
ZR-knop
De handmatige en automatische turbosnelheidsfunctie in- / uitschakelen:
1. Schakel de turbofunctie in
Door (tegelijkertijd) op de knop plus de gewenste knop te drukken
ingesteld om Turbo voor die knop in te schakelen.
2. Om de turboknop automatisch te maken
Druk (tegelijkertijd) op de knop plus de knop die u eerder had
ingeschakeld.
3. Schakel de turbofunctie uit
Door (tegelijkertijd) op de knop + de knop te drukken die u eerder
had ingeschakeld als automatische turbo om te wissen.
Om de turbosnelheidsfunctie van alle knoppen uit te schakelen: Druk op
de min (-) -knop en de omlaag-knop van het richtingpad tegelijkertijd.
Hoe de turbosnelheid te verhogen:
Als een knop Turbo is ingeschakeld, houdt u deze 5 seconden
ingedrukt en drukt u op op de rechter analoge stick. Dit zal
toenemen op het niveau van turbo snelheid.
Hoe de turbosnelheid te verlagen:
Als een knop Turbo is ingeschakeld, houdt u deze 5 seconden
ingedrukt en drukt u op op de rechter analoge joystick. Dit zal
toenemen op niveau van turbo snelheid.
Pas de trillingsintensiteit aan
Er zijn 4 niveaus van trillingsintensiteit: 100% -70% -30% -0%
(Geen trilling). Standaard staat de controller op 50% intensiteit.
De intensiteit van de vibratie verhogen: Druk op de plusknop (+)
en de knop omhoog van richtingstootkussen tegelijkertijd
gedurende 3 seconden, dit zal één niveau van trillingsintensiteit
verhogen.
Hoe de trillingsintensiteit verminderen: Druk op de min (-) knop
Druk tegelijkertijd op de knop en de omhoog-knop van het
richtingspad gedurende 3 seconden zal dit één niveau van
trillingsintensiteit verminderen.
NL
Programmering en macro-functie:
De M1, M2, M3, M4, knoppen aan de achterkant zijn standaard op
ABXY-knoppen wanneer de console is ingeschakeld.
- Om een macro-knop in te stellen, drukt u op de Turbo- en
Mx-knop om naar de macro-instelmodus te gaan, het LED-lampje
van de modus en het LED2-, LED3-lampje geven aan dat de
controller zich in de macromodus bevindt.
- Laat Turbo en de Macro-knop los en druk vervolgens op de
knoppen die u nodig hebt. Als u klaar bent, drukt u op de
Macro-knop om op te slaan en af te sluiten. De indicatie-LED's gaan
uit, wat aangeeft dat de macro is opgeslagen.
Oplaadindicator:
1. Als de controller in de oplaadmodus is terwijl de console is
uitgeschakeld, knipperen de LED's op de controller om aan te geven
dat de stroom is aangesloten. Eenmaal volledig opgeladen, gaat de
LED uit.
2. Als de controller is opgeladen terwijl de console is ingeschakeld.
De LED knippert en blijft dan constant branden wanneer deze
volledig is opgeladen.
3. Als de batterij bijna leeg is, knippert de led van de controller in
uitbarstingen van drie keer knipperen totdat deze is aangesloten
om op te laden.
4. Als de batterij bijna leeg is, schakelt de controller over naar de
slaapstand en is een USB-verbinding vereist om het gebruik te
kunnen voortzetten.
NL
Producteigenschappen:
1. Productafmetingen: 154 mm x 111 mm x 59 mm
2. Gewicht van het product: 248 g
3. Materiaal: ABS-kunststof
4. Knoppen: Home-knop / Capture-knop / -knop / + knop /
A-knop / B-knop / X-knop / Y-knop // ZL-knop / L-knop /
ZR-knop / R-knop / D-pad-bediening / L3-knop / R3-knop
5. Verbindingsmethode: draadloos
6. Vibration: Dual motor
7. Motion Control: 6 assige sensoren
8. Turbo, Auto Turbo en duidelijke turbofunctie
ALS U VAN UW PRODUCT HOUDT, LAAT HET ONS WETEN
FACEBOOK EN INSTAGRAM! #Xrockergaming
Gezondheid en veiligheid
اVermijd direct contact met vloeistoffen. Om schoon te maken, veeg
met een vochtig kleding. Als er iets wordt gemorst, schakel dan de
controller uit en wacht op het product drogen alvorens opnieuw te
gebruiken.
اJƵƦȲɐǞDzǐƵƵȁȺƧǘɐɐȲȺȯȌȁȺǯƵȌǏȺƧǘɐɐȲǿǞƮƮƵǶƵȁ
aangezien deze het oppervlaktemateriaal kunnen beschadigen.
ا§ǶƊƊɈȺȁȌȌǞɈƵƵȁDzƊƊȲȺȌǏȌȯƵȁɨɐɐȲȌȯȌǏȁƊƊȺɈƮƵƧȌȁɈȲȌǶǶƵȲȌȯ
elk moment. Hoewel X Rocker-producten compatibel zijn met Britse
en Europese veiligheidsvoorschriften, langdurige blootstelling aan
open vuur zal leiden tot schade aan het product en andere veiligheid
gevaren.
NL
IT
Switch™ Modalità
Prima volta che si esegue l’accoppiamento e la connessione (Y +
Home)
(Accendi la console, quindi segui questi passaggi per accoppiare e
connettere il controller.)
Passaggio 1. Selezionare l’opzione Controller nella schermata
iniziale.
Passaggio 2. Selezionare Modifica grip / ordine.
Passaggio 3. Premere contemporaneamente il pulsante Y + Home,
l’indicatore LED lampeggerà, attendere alcuni secondi per il com-
pletamento della connessione.
Riconnetti (Home)
Riconnetti: premi il pulsante Home
Se una volta il controller è stato associato e connesso alla console,
premere il pulsante Home per riconnettersi.
NOTA: assicurarsi che la console sia accesa per completare la
riconnessione del controller wireless Pro.
Potrebbe essere necessario ricollegare il controller secondo le istru-
zioni di configurazione iniziale per riconnettersi dopo un aggiorna-
mento del firmware.
Calibrazione analogica dello stick:
A. Premere il pulsante Home per accedere al menu principale della
console e selezionare Impostazioni di sistema.
B. Nel menu Controller e sensori, selezionare
Calibrare gli stick di controllo.
C. Seguire le istruzioni sullo schermo per completare la cali-
brazione.
D. Quindi premere 3D (L3 / R3) per passare all’interfaccia sotto-
stante.
E. Quindi premere il pulsante X per calibrare l’interfaccia e eseguire
azioni in base al promemoria.
Modalità console IT
Regola la velocità turbo
È possibile impostare i seguenti pulsanti sulla modalità Turbo: Pul-
sante A / B / X / Y / L / ZL / R / ZR
Per abilitare / disabilitare la funzione di velocità turbo manuale e
automatica:
1. Attivare la funzione Turbo
Premendo (contemporaneamente) il pulsante più il pulsante che
si desidera impostare per abilitare Turbo per quel pulsante.
2. Per rendere automatico il pulsante abilitato per Turbo
Premere (contemporaneamente) il pulsante più il pulsante prec-
edentemente abilitato.
3. Disattivare la funzione Turbo
Premendo (contemporaneamente) il pulsante + il pulsante prec-
edentemente abilitato come auto turbo per cancellare.
Per disabilitare la funzione di velocità turbo di tutti i pulsanti:
premere il segno meno (-)
contemporaneamente il pulsante e il pulsante giù del tastierino
direzionale.
Come aumentare la velocità del turbo:
Quando un pulsante è abilitato Turbo, tieni premuto per 5 sec-
ondi e premi la levetta analogica destra verso l’alto. Ciò aumenterà a
livello di velocità del turbo.
Come diminuire la velocità del turbo:
Quando un pulsante è abilitato Turbo, tieni premuto per 5 sec-
ondi e premi la levetta analogica destra. Ciò aumenterà a livello di
velocità del turbo.
Regola l’intensità della vibrazione
Sono disponibili 4 livelli di intensità di vibrazione: 100% -70% -30%
-0% (Nessuna vibrazione). Per impostazione predefinita, il controller
è al 50% di intensità.
Come aumentare l’intensità della vibrazione: premere il pulsante P
(+) e il pulsante su del pad direzionale contemporaneamente per 3
secondi, questo aumenterà di un livello
intensità di vibrazione.
Come diminuire l’intensità della vibrazione: premere il pulsante
Meno (-) Premere contemporaneamente il pulsante e il pulsante
su del pad direzionale per 3 secondi, questo diminuirà di un livello
l’intensità della vibrazione.
IT
Programmazione e funzione Macro:
I pulsanti posteriori M1, M2, M3, M4 e posteriori sono predefiniti
come pulsanti ABXY quando la console Switch è accesa.
- Per impostare un pulsante macro, premere i pulsanti Turbo e
Mx per passare alla modalità di impostazione Macro, la luce LED
della modalità e la luce LED2, LED3 indicano che il controller è in
modalità Macro.
-Rilascia Turbo e il pulsante Macro, quindi premi i pulsanti che devi
impostare, al termine, premi il pulsante Macro per salvare e uscire.
I LED di indicazione si spegneranno, indicando che la macro è stata
salvata.
Indicatore di carica:
1. Quando il controller è in modalità di ricarica mentre la console
è spenta, i LED sul controller lampeggiano per indicare che l’ali-
mentazione è collegata. Una volta completata la carica, il LED si
spegnerà.
2. Quando il controller viene caricato con la console accesa. Il LED
lampeggerà e quindi rimarrà costantemente acceso quando è
completamente carico.
3. Quando la batteria è scarica, il LED del controller lampeggia a
raffiche di tre lampeggi fino a quando non viene collegato per la
carica.
4. Quando la batteria è quasi scarica, il
il controller passerà alla modalità sleep e richiederà USB
connessione per continuare a utilizzare.
IT
Caratteristiche del prodotto:
1. Dimensioni del prodotto: 154 mm x 111 mm x 59 mm
2. Peso del prodotto: 248 g
3. Materiale: plastica ABS
4. Pulsanti: Pulsante Home / Pulsante Cattura / Pulsante-Pulsante
/ Pulsante + /
Pulsante A / Pulsante B / Pulsante X / Pulsante Y // Pulsante ZL /
Pulsante L / Pulsante ZR / Pulsante R / Controllo D-pad / Pulsante
L3 / Pulsante R3
5. Metodo di connessione: wireless
6. Vibrazione: doppio motore
7. Motion Control: 6 sensori assi
8. Turbo, Auto Turbo e chiara funzione Turbo
SE TI PIACE IL TUO PRODOTTO FACELO SAPERE
FACEBOOK E INSTAGRAM! #Xrockergaming
Salute e sicurezza
• Evitare il contatto diretto con i liquidi. Per pulire, strofinare con un
panno umido. In caso di fuoriuscita, spegnere il controller e atten-
dere che il prodotto si asciughi prima di riutilizzarlo.
• Non utilizzare alcun tipo di spugnetta abrasiva o soluzioni deter-
genti abrasive poiché potrebbero danneggiare il materiale della
superficie.
• Non posizionare mai alcun tipo di candela o fiamma viva sopra
o vicino al controller in qualsiasi momento. Sebbene i prodotti X
Rocker siano conformi alle normative di sicurezza britanniche ed
europee, l’esposizione prolungata a fiamme libere provocherà
danni al prodotto e altri rischi per la sicurezza.
IT
This product is not officially licensed or endorsed by Nintendo®, Nintendo®
Europe or Nintendo® America, who is the owner of the Nintendo Switch™
platform. All rights reserved.
This controller may require future firmware updates, available from
xrockeruk.com
Ce produit n'est pas officiellement autorisé ou approuvé par Nintendo®,
Nintendo® Europe ou Nintendo® America, qui est le propriétaire de la
plate-forme Nintendo Switch ™. Tous les droits sont réservés.
Ce contrôleur peut nécessiter de futures mises à jour du micrologiciel,
disponibles sur xrockeruk.com
Dieses Produkt ist nicht offiziell lizenziert oder empfohlen von Nintendo®,
Nintendo® Europe oder Nintendo® America, dem Eigentümer der Nintendo
Switch ™ -Plattform. Alle Rechte vorbehalten.
Für diesen Controller sind möglicherweise zukünftige Firmware-Updates
erforderlich, die auf xrockeruk.com erhältlich sind
Este producto no tiene licencia oficial ni está respaldado por Nintendo®,
Nintendo® Europe o Nintendo® America, que es el propietario de la
plataforma Nintendo Switch ™. Todos los derechos reservados.
Este controlador puede requerir futuras actualizaciones de firmware,
disponibles en xrockeruk.com
Dit product is niet officieel gelicentieerd of goedgekeurd door Nintendo®,
Nintendo® Europe of Nintendo® America, die de eigenaar is van het
Nintendo Switch ™ -platform. Alle rechten voorbehouden.
Deze controller vereist mogelijk toekomstige firmware-updates, verkrijg-
baar bij xrockeruk.com
Questo prodotto non è ufficialmente concesso in licenza o approvato da
Nintendo®, Nintendo® Europe o Nintendo® America, che è il proprietario
della piattaforma Nintendo Switch ™. Tutti i diritti riservati.
Questo controller potrebbe richiedere futuri aggiornamenti del firmware,
disponibili su xrockeruk.com
FCC Caution
This device complies with part 15 of the FCC Rules. Operation is subject to the
following two conditions: (1) This device may not cause harmful interference, and (2)
this device must accept any interference received, including interference that may
cause undesired operation.
Any Changes or modifications not expressly approved by the party responsible for
compliance could void the user's authority to operate the equipment.
Note: This equipment has been tested and found to comply with the limits for a Class
B digital device, pursuant to part 15 of the FCC Rules. These limits are designed to
provide reasonable protection against harmful interference in a residential installation.
This equipment generates uses and can radiate radio frequency energy and, if not
installed and used in accordance with the instructions, may cause harmful interference
to radio communications. However, there is no guarantee that interference will not
occur in a particular installation. If this equipment does cause harmful interference to
radio or television reception, which can be determined by turning the equipment off
and on, the user is encouraged to try to correct the interference by one or more of the
following measures:
-Reorient or relocate the receiving antenna.
-Increase the separation between the equipment and receiver.
-Connect the equipment into an outlet on a circuit different from that to which the
receiver is connected.
-Consult the dealer or an experienced radio/TV technician for help.
The device has been evaluated to meet general RF exposure requirement. The device
can be used in portable exposure condition without restriction.
  • Page 1 1
  • Page 2 2
  • Page 3 3
  • Page 4 4
  • Page 5 5
  • Page 6 6
  • Page 7 7
  • Page 8 8
  • Page 9 9
  • Page 10 10
  • Page 11 11
  • Page 12 12
  • Page 13 13
  • Page 14 14
  • Page 15 15
  • Page 16 16
  • Page 17 17
  • Page 18 18
  • Page 19 19
  • Page 20 20
  • Page 21 21
  • Page 22 22
  • Page 23 23
  • Page 24 24
  • Page 25 25
  • Page 26 26
  • Page 27 27
  • Page 28 28
  • Page 29 29
  • Page 30 30
  • Page 31 31
  • Page 32 32
  • Page 33 33

XRocker B741 Manual de usuario

Categoría
Accesorios de la consola de juegos
Tipo
Manual de usuario