Thrustmaster 2960534 2969052 2970016 Manual de usuario
- Categoría
- Controles de juego
- Tipo
- Manual de usuario
Este manual también es adecuado para

Für PCs (Windows 98 oder höher) mit
USB Anschluß.
For PCs (Windows 98 or higher)
equipped with USB ports.
Para os PC (Windows 98 ou superior)
equipados com portas USB.
Para PCs (Windows 98 o superior)
equipados con puertos USB.
QUICK INSTALL 1
THRUSTMASTER
®
TECHNICAL
FEATURES
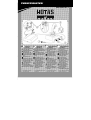
z F-16 block 50 controller (Stick
and Throttle) replica
z Full metal casing incl. base,
handle and buttons
c HD15 connector to TQS
d DB15 connector to optional
standard gameport rudder
(RCS)
e USB connector to PC
f 28 buttons incl. multiple hat
switches, and an 8-way POV
hat, all programmable, offering
thousands of functions
g 7-10 programmable axes
z Easy-to-use Foxy
programming software
z Flash upgradable hardware to
ensure long-term compatibility
U
S
TECHNISCHE
MERKMALE
z F-16 Block 50 Controller
(Stick+Schubregler) Nachbau
z Metallgehäuse incl. Basis, Griff
und Tasten
c HD15-Verbindung zu TQS
d DB15-Verbindung für optionale
Standard-Gameport Ruder
(RCS)
e USB-Verbindung zum PC
f 28 Tasten inkl. Mehrfach-Hat
Switches und 8-Wege-POV,
alle programmierbar,
Tausende von Funktionen
g 7-10 programmierbare Achsen
z Einfach bedienbare Foxy-
Programmiersoftware
z Updatebare Firmware, um
ständige Kompatibilität zu
gewährleisten
D
CARACTERÍSTICAS
TÉCNICAS
z Réplica del mando del F-16
block 50 (Mando y Palanca
de gases)
z Carcasa de metal incluyendo
base, joystick y botones
c Conector HD15 a TQS
d Conector DB15 a puerto
opcional standard de timón
(RCS)
e Conector USP a PC
f 28 botones incluídos, botones
hat, y hat de 8 direcciones
POV, todos programables,
ofreciendo miles de funciones
g De 7 a 10 ejes programables
z Programa de configuración
Foxy de fácil uso
z Hardware actualizable para
asegurar la compatibilidad a
largo plazo
E
CARACTERÍSTICAS
TÉCNICAS
z Réplica da manche e manete
do F-16 Block 50
z Guarnição em metal, incl.
base, manípulo e botões
c Conector HD15 ao TQS
d Conector DB15 para leme de
direcção facult. padrão da
porta de jogos (RCS)
e Conector USB ao PC
f 28 botões, incl. múltiplos
botões-chapéus, e um botão
PdV de 8 dir., todos
programáveis, oferecendo
milhares de funções
g 7-10 eixos programáveis
z Software de programação
Foxy de fácil utilização
z Hardware expansível por
Flash para garantir
compatibilidade a longo prazo
P

PC SETUP
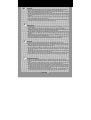
1. Make sure that your HOTAS Cougar is NOT connected to your computer before installing the software package!
2.
Insert the HOTAS Cougar Installation CD into your CD-ROM drive, a user interface should appear.
Note: if you have disabled the Windows Autorun feature, or if the user interface does not appear, simply star
t
Windows Explorer and double-click on the Setup.exe file on the CD.
3.
If you do not have DirectX 8.0a installed on your computer (or if you are not sure), click on the DirectX button, and
DirectX 8.0a will be installed onto your computer. You may be requested to reboot your PC once the installation
completes.
Note: a reboot is only required if you have previously plugged in your HOTAS Cougar - remember to eject the
HOTAS Cougar Installation CD before Windows reboots!
4.
From the user interface, click on the HOTAS Cougar Software button. The wizard will then automatically guide
you through the successive installation steps; click on Finish once you are done.
U
S
INSTALLATION
1. Vergewissern Sie sich, dass der HOTAS Cougar NICHT an den Rechner angeschlossen ist, wenn Sie die
Software installieren.
2.
Legen Sie die HOTAS Cougar Installations-CD ins CD-ROM-Laufwerk ein. Es erscheint ein Dialogfenster.
Hinweis: wenn Sie Autorun unter Windows deaktiviert haben oder das Dialogfenster nicht erscheint, dann starten
Sie Setup über die Datei Setup.exe auf der CD manuell über den Windows Explorer.
3.
Wenn Sie DirectX 8.0a nicht auf Ihrem PC installiert haben oder sich nicht sicher sind, dann klicken Sie auf die
Schaltfläche DirectX und DirectX 8.0a wird auf dem Rechner installiert. Sie müssen den PC dann eventuell
neustarten.
Hinweis: ein Neustart ist nur dann notwendig, wenn Sie den HOTAS Cougar eingesteckt haben – bitte entfernen
Sie die HOTAS Cougar Installations-CD vor dem Neustart!
4.
Klicken Sie im Dialogfenster auf die Schaltfläche HOTAS Cougar Software. Der Installationsassistent wird Sie
durch die weiteren Schritte der Installation führen. Klicken Sie auf Beenden wenn Sie fertig sind.
D
PC SETUP
1. Asegúrate de que tu HOTAS Cougar NO esté conectado al ordenador antes de instalar el software.
2.
Al introducir el CD de instalación de HOTAS Cougar en tu CD-ROM debería aparecer un interface de usuario.
Nota: si has desactivado el la autoejecución de Windows, o si el interface de usuario no aparece, simplemente
inicia Windows Explorer y haz doble click en el archivo Setup.exe del CD.
3.
Si no tienes DirectX 8.0a instalado en tu ordenador (o si no estas seguro), haz click en el botón DirectX,
y
DirectX 8.0a se instalará en tu ordenador. Puede que se te pida que reinicies el PC una vez que la instalación
esté completa.
Nota: el reinicio del PC sólo se requiere si has conectado previamente tu HOTAS Cougar - ¡recuerda extraer el
CD de instalación del HOTAS Cougar antes de reiniciar Windows!
4.
Desde el interface de usuario, haz click en el botón de HOTAS Cougar Software. El ayudante te guiará
automáticamente a través de los sucesivos pasos de instalación; haz click en Finalizar cuando lo hayas hecho.
E
CONFIGURAÇÃO DO PC
1. Verifique se o seu HOTAS Cougar NÃO está ligado ao computador antes de instalar o pacote de software!
2.
Insira o CD de instalação do HOTAS Cougar na sua unidade de CD-ROM; deverá aparecer uma interface do
utilizador.
Nota: se desactivou a função AutoPlay do Windows, ou se a interface do utilizador não surgir, inicie
simplesmente o Explorador do Windows e faça duplo clique no ficheiro Setup.exe presente no CD.
3.
Caso não tenha o DirectX 8.0a instalado no seu computador (ou se não tiver a certeza), clique no botão DirectX,
e o DirectX 8.0a será instalado. Poderá ser-lhe pedido que reinicie o PC depois de concluída a instalação.
Nota: só é necessário reiniciar se conectou previamente o seu HOTAS Cougar – não se esqueça de ejectar o
CD de instalação do HOTAS Cougar antes do Windows reiniciar!
4.
A partir da interface do utilizador, clique no botão HOTAS Cougar Software. O assistente guiá-lo-á então
automaticamente através dos sucessivos passos da instalação; clique em Concluir quando tiver terminado.
P
For use with P
C

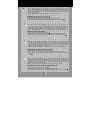
5. Once the two previous steps are performed, click on the Foxy button. The Windows Installer will proceed, and
guide you through the appropriate steps for installation. You may be requested to reboot your computer during
this sequence. When Windows restarts, it will display the Foxy HOTAS Cougar Edition installer; follow the
instructions provided to install Foxy - you may choose to use the default directory (recommended), or install Fox
y
elsewhere on your computer.
6.
Once the installation is finished, click the Close button to exit, and reboot your computer.
PREPARING THE HOTAS COUGAR FOR ACTION
1. Connect the TQS to the base of the stick using connector c.
Note: connecting the TQS to the Stick is not compulsory – the stick also works on its own!
2. If necessary, connect your optional gameport rudder (RCS) to the base of the stick using connector d.
U
S
5. Wenn diese beiden Schritte durchgeführt wurden, klicken Sie auf die Schaltfläche Foxy.
Der Installationsassistent führt Sie weiter durch die Installation. Möglicherweise müssen Sie den PC neustarten.
Wenn Windows neustartet, dann wird der Installationsassistent Foxy HOTAS Cougar Edition angezeigt. Bitte
folgen Sie den Anweisungen und installieren Sie die Software (ins Standardverzeichnis oder ein anderes).
6. Wenn die Installation abgeschlossen ist, klicken Sie auf die Schaltfläche Schließen und starten Sie den PC neu.
VORBEREITEN DES HOTAS COUGAR
1. Verbinden Sie den TQS mit der Basis über den Anschluss c.
Hinweis: der TQS muss nicht mit dem Stick verbunden werden, er kann auch einzeln verwendet werden!
2. Wenn notwendig, verbinden Sie das optionale Gameport-Ruder (RCS) mit der Basis über den Anschluss d.
D
5. Cuando los dos pasos anteriores estén realizados, haz click en el botón Foxy. El instalador de Windows
comenzará, y te guiará a través de los diferentes pasos de la intalación. Puede que se te pida que reinicies tu
PC durante esta secuencia. Cuando Windows reinicia, aparecerá el instalador de Foxy HOTAS Cougar Edition;
sigue las instrucciones para instalar Foxy – puedes elegir utilizar el directorio por defecto (recomendado), o
instalar Foxy en cualquier otro directorio en tu ordenador.
6.
Una vez que la instalación esté terminada, haz click en el botón Cerrar para salir, y reinicia el ordenador.
PREPARANDO EL HOTAS COUGAR PARA LA ACCIÓN
1. Conecta el TQS a la base del joystick utilizando el conector c.
Nota: la conexión del TQS al joystick no es imprescindible – el joystick también funciona por separado.
2. Si fuera necesario, conecta tu puerto opcional para el timón (RCS) a la base del joystick utiliazando el
conector d.
E
5. Depois de realizar os dois passos anteriores, clique no botão Foxy. O Windows Installer continuará, guiando-o
através dos passos apropriados para a instalação. Poderá ser-lhe pedido que reinicie o seu computador durante
esta sequência. Assim que o Windows for reiniciado, exibirá o Foxy HOTAS Cougar Edition installer; siga as
instruções fornecidas para instalar o software Foxy – pode optar entre o directório padrão (recomendado), ou
instalar Foxy noutro directório do seu computador.
6. Quando a instalação estiver concluída, clique no botão Fechar para sair, e reinicie o computador.
PREPARAÇÃO DO HOTAS COUGAR PARA ENTRAR EM ACÇÃO
1. Conecte o TQS à base da manche usando o conector c.
Nota: não é obrigatório conectar o TQS à manche – esta também funciona sozinha!
2. Se for preciso, ligue o leme de direcção opcional da porta de jogos (RCS) à base da manche com o conector d.
P
Für P
C
La página se está cargando...

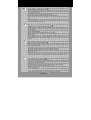
5. Klicken Sie auf Eigenschaften, um den Joystick zu testen.
6. Sie können sowohl das Thrustmaster HOTAS Cougar Control-Panel und die Applikationen des Ladeprogramms
sowie die Foxy-Software über Start erreichen. Bitte lesen Sie in den Handbüchern auf CD-ROM nach, wie diese
Anwendungen zu bedienen sind.
7. Programmierte Voreinstellungen befinden sich auf der Installations-CD (Verzeichnis Foxy/Files) und können auch
unter de.thrustmaster.com heruntergeladen werden.
© Guillemot Corporation 2001. Thrustmaster® und HOT
A
S™ sind Warenzeichen und/oder eingetragene Warenzeichen der Guillemo
t
Corporation S.A. Microsoft®, Windows® 98, 2000, Me, Windows XP™ und DirectX® sind Warenzeichen und/oder eingetragene
Warenzeichen der Microsoft Corporation in den USA und/oder anderen Ländern.
A
lle Markennamen sind Warenzeichen und/ode
r
eingetragene Warenzeichen ihrer jeweiligen Besitzer. Fotos und Abbildungen sind beispielhaft. Inhalte, Design und Spezifikationen
können ohne Ankündigung geändert werden und sind länderspezifisch.
D
5. Haz click en Propiedades para probar tu
j
oystick.
6. Puedes acceder tanto al Panel de Control del Thrustmaster HOTAS Cougar y cargador de aplicaciones como al
software Foxy a través del menú de Inicio. Por favor consulta los manuales online para una completa descripción
de cómo funcionan éstas aplicaciones.
7. Programaciones especiales de juegos están disponibles en el CD de instalación, en el directorio Files bajo Foxy,
y también en la web Thrustmaster (es.thrustmaster.com
).
© Guillemot Corporation 2001. Thrustmaster® y HOTAS™ son marcas comerciales y/o marcas comerciales registradas de Guillemo
t
Corporation S.A. Microsoft®, Windows® 98, 2000, Me, Windows XP™ und DirectX® son marcas comerciales y/o marcas comerciales
registradas de Microsoft Corporation en los Estados Unidos y/o otros países. Cualquier otra marca nacional o internacionalmente
reconocida y los nombres comerciales están reconocidos por la presente. Fotos no compremetedoras. Los contenidos, diseños
y
especificaciones pueden cambiar sin previo aviso y de un país a otro.
E
5. Clique em Propriedades para testar o seu joystick.
6. Pode aceder a ambas as aplicações Control Panel e Loader do Thrustmaster HOTAS Cougar, bem como ao
software Foxy, via menu Iniciar. Consulte os manuais online para obter uma descrição detalhada do modo de
funcionamento destas aplicações.
7. No CD de instalação há pré-definições de jogos disponíveis, assim como no directório Files de Foxy, e também
no site da Thrustmaster (europe.thrustmaster.com
).
© Guillemot Corporation 2001. Thrustmaster® e HOTAS™ são marcas comerciais e/ou marcas registadas da Guillemot Corporation S.A.
Microsoft®, Windows® 98, 2000, Me, Windows XP™ e DirectX® são marcas comerciais e/ou marcas registadas da Microsoft Corporation
nos Estados Unidos e/ou noutros países. Todas as outras marcas comerciais e nomes de marcas reconhecidas nacional e
internacionalmente são por este meio aceites. As fotografias não são vinculativas. Os conteúdos, desenhos e especificações estão
sujeitos a alteração sem aviso prévio, e poderão variar dum país para outro.
P
5. Click on Properties to test your joystick.
6. You can access both the Thrustmaster HOTAS Cougar Control Panel and Loader applications and the Fox
y
software via the Start menu. Please refer to the online manuals for a thorough description of how these
applications work.
7. Specialized game presets are available on the installation CD, in the Files directory under Foxy, and also on the
Thrustmaster website (www.thrustmaster.com
).
© Guillemot Corporation 2001. Thrustmaster® and HOTAS™ are trademarks and/or registered trademarks of Guillemot Corporation S.A.
Microsoft®, Windows® 98, 2000, Me, Windows XP™ and DirectX® are trademarks and/or registered trademarks of Microsoft Corporation
in the United States and/or other countries. All other nationally and internationally recognized trademarks and brand names are hereb
y
acknowledged. Photos not binding. Contents, designs and specifications are subject to change without notice and may vary from one
country to another.
U
S
Para a P
C
Transcripción de documentos
THRUSTMASTER ® QUICK INSTALL 1 US TECHNICAL FEATURES D TECHNISCHE MERKMALE F-16 block 50 controller (Stick z F-16 Block 50 Controller and Throttle) replica (Stick+Schubregler) Nachbau z Full metal casing incl. base, z Metallgehäuse incl. Basis, Griff handle and buttons und Tasten c HD15 connector to TQS c HD15-Verbindung zu TQS d DB15 connector to optional d DB15-Verbindung für optionale standard gameport rudder Standard-Gameport Ruder (RCS) (RCS) e USB connector to PC e USB-Verbindung zum PC f 28 buttons incl. multiple hat f 28 Tasten inkl. Mehrfach-Hat switches, and an 8-way POV Switches und 8-Wege-POV, hat, all programmable, offering alle programmierbar, thousands of functions Tausende von Funktionen g 7-10 programmable axes g 7-10 programmierbare Achsen z Easy-to-use Foxy z Einfach bedienbare Foxyprogramming software Programmiersoftware z Flash upgradable hardware to z Updatebare Firmware, um ensure long-term compatibility ständige Kompatibilität zu gewährleisten z For PCs (Windows 98 or higher) equipped with USB ports. Für PCs (Windows 98 oder höher) mit USB Anschluß. E CARACTERÍSTICAS TÉCNICAS Réplica del mando del F-16 block 50 (Mando y Palanca de gases) z Carcasa de metal incluyendo base, joystick y botones c Conector HD15 a TQS d Conector DB15 a puerto opcional standard de timón (RCS) e Conector USP a PC f 28 botones incluídos, botones hat, y hat de 8 direcciones POV, todos programables, ofreciendo miles de funciones g De 7 a 10 ejes programables z Programa de configuración Foxy de fácil uso z Hardware actualizable para asegurar la compatibilidad a largo plazo z Para PCs (Windows 98 o superior) equipados con puertos USB. P CARACTERÍSTICAS TÉCNICAS Réplica da manche e manete do F-16 Block 50 z Guarnição em metal, incl. base, manípulo e botões c Conector HD15 ao TQS d Conector DB15 para leme de direcção facult. padrão da porta de jogos (RCS) e Conector USB ao PC f 28 botões, incl. múltiplos botões-chapéus, e um botão PdV de 8 dir., todos programáveis, oferecendo milhares de funções g 7-10 eixos programáveis z Software de programação Foxy de fácil utilização z Hardware expansível por Flash para garantir compatibilidade a longo prazo z Para os PC (Windows 98 ou superior) equipados com portas USB. US PC SETUP 1. Make sure that your HOTAS Cougar is NOT connected to your computer before installing the software package! 2. Insert the HOTAS Cougar Installation CD into your CD-ROM drive, a user interface should appear. Note: if you have disabled the Windows Autorun feature, or if the user interface does not appear, simply start Windows Explorer and double-click on the Setup.exe file on the CD. 3. If you do not have DirectX 8.0a installed on your computer (or if you are not sure), click on the DirectX button, and DirectX 8.0a will be installed onto your computer. You may be requested to reboot your PC once the installation completes. Note: a reboot is only required if you have previously plugged in your HOTAS Cougar - remember to eject the HOTAS Cougar Installation CD before Windows reboots! 4. From the user interface, click on the HOTAS Cougar Software button. The wizard will then automatically guide you through the successive installation steps; click on Finish once you are done. D INSTALLATION 1. Vergewissern Sie sich, dass der HOTAS Cougar NICHT an den Rechner angeschlossen ist, wenn Sie die Software installieren. 2. Legen Sie die HOTAS Cougar Installations-CD ins CD-ROM-Laufwerk ein. Es erscheint ein Dialogfenster. Hinweis: wenn Sie Autorun unter Windows deaktiviert haben oder das Dialogfenster nicht erscheint, dann starten Sie Setup über die Datei Setup.exe auf der CD manuell über den Windows Explorer. 3. Wenn Sie DirectX 8.0a nicht auf Ihrem PC installiert haben oder sich nicht sicher sind, dann klicken Sie auf die Schaltfläche DirectX und DirectX 8.0a wird auf dem Rechner installiert. Sie müssen den PC dann eventuell neustarten. Hinweis: ein Neustart ist nur dann notwendig, wenn Sie den HOTAS Cougar eingesteckt haben – bitte entfernen Sie die HOTAS Cougar Installations-CD vor dem Neustart! 4. Klicken Sie im Dialogfenster auf die Schaltfläche HOTAS Cougar Software. Der Installationsassistent wird Sie durch die weiteren Schritte der Installation führen. Klicken Sie auf Beenden wenn Sie fertig sind. E PC SETUP 1. Asegúrate de que tu HOTAS Cougar NO esté conectado al ordenador antes de instalar el software. 2. Al introducir el CD de instalación de HOTAS Cougar en tu CD-ROM debería aparecer un interface de usuario. Nota: si has desactivado el la autoejecución de Windows, o si el interface de usuario no aparece, simplemente inicia Windows Explorer y haz doble click en el archivo Setup.exe del CD. 3. Si no tienes DirectX 8.0a instalado en tu ordenador (o si no estas seguro), haz click en el botón DirectX, y DirectX 8.0a se instalará en tu ordenador. Puede que se te pida que reinicies el PC una vez que la instalación esté completa. Nota: el reinicio del PC sólo se requiere si has conectado previamente tu HOTAS Cougar - ¡recuerda extraer el CD de instalación del HOTAS Cougar antes de reiniciar Windows! 4. Desde el interface de usuario, haz click en el botón de HOTAS Cougar Software. El ayudante te guiará automáticamente a través de los sucesivos pasos de instalación; haz click en Finalizar cuando lo hayas hecho. P CONFIGURAÇÃO DO PC 1. Verifique se o seu HOTAS Cougar NÃO está ligado ao computador antes de instalar o pacote de software! 2. Insira o CD de instalação do HOTAS Cougar na sua unidade de CD-ROM; deverá aparecer uma interface do utilizador. Nota: se desactivou a função AutoPlay do Windows, ou se a interface do utilizador não surgir, inicie simplesmente o Explorador do Windows e faça duplo clique no ficheiro Setup.exe presente no CD. 3. Caso não tenha o DirectX 8.0a instalado no seu computador (ou se não tiver a certeza), clique no botão DirectX, e o DirectX 8.0a será instalado. Poderá ser-lhe pedido que reinicie o PC depois de concluída a instalação. Nota: só é necessário reiniciar se conectou previamente o seu HOTAS Cougar – não se esqueça de ejectar o CD de instalação do HOTAS Cougar antes do Windows reiniciar! 4. A partir da interface do utilizador, clique no botão HOTAS Cougar Software. O assistente guiá-lo-á então automaticamente através dos sucessivos passos da instalação; clique em Concluir quando tiver terminado. For use with PC US 5. Once the two previous steps are performed, click on the Foxy button. The Windows Installer will proceed, and guide you through the appropriate steps for installation. You may be requested to reboot your computer during this sequence. When Windows restarts, it will display the Foxy HOTAS Cougar Edition installer; follow the instructions provided to install Foxy - you may choose to use the default directory (recommended), or install Foxy elsewhere on your computer. 6. Once the installation is finished, click the Close button to exit, and reboot your computer. PREPARING THE HOTAS COUGAR FOR ACTION 1. Connect the TQS to the base of the stick using connector c. Note: connecting the TQS to the Stick is not compulsory – the stick also works on its own! 2. If necessary, connect your optional gameport rudder (RCS) to the base of the stick using connector d. D 5. Wenn diese beiden Schritte durchgeführt wurden, klicken Sie auf die Schaltfläche Foxy. Der Installationsassistent führt Sie weiter durch die Installation. Möglicherweise müssen Sie den PC neustarten. Wenn Windows neustartet, dann wird der Installationsassistent Foxy HOTAS Cougar Edition angezeigt. Bitte folgen Sie den Anweisungen und installieren Sie die Software (ins Standardverzeichnis oder ein anderes). 6. Wenn die Installation abgeschlossen ist, klicken Sie auf die Schaltfläche Schließen und starten Sie den PC neu. VORBEREITEN DES HOTAS COUGAR 1. Verbinden Sie den TQS mit der Basis über den Anschluss c. Hinweis: der TQS muss nicht mit dem Stick verbunden werden, er kann auch einzeln verwendet werden! 2. Wenn notwendig, verbinden Sie das optionale Gameport-Ruder (RCS) mit der Basis über den Anschluss d. E 5. Cuando los dos pasos anteriores estén realizados, haz click en el botón Foxy. El instalador de Windows comenzará, y te guiará a través de los diferentes pasos de la intalación. Puede que se te pida que reinicies tu PC durante esta secuencia. Cuando Windows reinicia, aparecerá el instalador de Foxy HOTAS Cougar Edition; sigue las instrucciones para instalar Foxy – puedes elegir utilizar el directorio por defecto (recomendado), o instalar Foxy en cualquier otro directorio en tu ordenador. 6. Una vez que la instalación esté terminada, haz click en el botón Cerrar para salir, y reinicia el ordenador. PREPARANDO EL HOTAS COUGAR PARA LA ACCIÓN 1. Conecta el TQS a la base del joystick utilizando el conector c. Nota: la conexión del TQS al joystick no es imprescindible – el joystick también funciona por separado. 2. Si fuera necesario, conecta tu puerto opcional para el timón (RCS) a la base del joystick utiliazando el conector d. P 5. Depois de realizar os dois passos anteriores, clique no botão Foxy. O Windows Installer continuará, guiando-o através dos passos apropriados para a instalação. Poderá ser-lhe pedido que reinicie o seu computador durante esta sequência. Assim que o Windows for reiniciado, exibirá o Foxy HOTAS Cougar Edition installer; siga as instruções fornecidas para instalar o software Foxy – pode optar entre o directório padrão (recomendado), ou instalar Foxy noutro directório do seu computador. 6. Quando a instalação estiver concluída, clique no botão Fechar para sair, e reinicie o computador. PREPARAÇÃO DO HOTAS COUGAR PARA ENTRAR EM ACÇÃO 1. Conecte o TQS à base da manche usando o conector c. Nota: não é obrigatório conectar o TQS à manche – esta também funciona sozinha! 2. Se for preciso, ligue o leme de direcção opcional da porta de jogos (RCS) à base da manche com o conector d. Für PC US 5. Click on Properties to test your joystick. 6. You can access both the Thrustmaster HOTAS Cougar Control Panel and Loader applications and the Foxy software via the Start menu. Please refer to the online manuals for a thorough description of how these applications work. 7. Specialized game presets are available on the installation CD, in the Files directory under Foxy, and also on the Thrustmaster website (www.thrustmaster.com). © Guillemot Corporation 2001. Thrustmaster® and HOTAS™ are trademarks and/or registered trademarks of Guillemot Corporation S.A. Microsoft®, Windows® 98, 2000, Me, Windows XP™ and DirectX® are trademarks and/or registered trademarks of Microsoft Corporation in the United States and/or other countries. All other nationally and internationally recognized trademarks and brand names are hereby acknowledged. Photos not binding. Contents, designs and specifications are subject to change without notice and may vary from one country to another. D 5. Klicken Sie auf Eigenschaften, um den Joystick zu testen. 6. Sie können sowohl das Thrustmaster HOTAS Cougar Control-Panel und die Applikationen des Ladeprogramms sowie die Foxy-Software über Start erreichen. Bitte lesen Sie in den Handbüchern auf CD-ROM nach, wie diese Anwendungen zu bedienen sind. 7. Programmierte Voreinstellungen befinden sich auf der Installations-CD (Verzeichnis Foxy/Files) und können auch unter de.thrustmaster.com heruntergeladen werden. © Guillemot Corporation 2001. Thrustmaster® und HOTAS™ sind Warenzeichen und/oder eingetragene Warenzeichen der Guillemot Corporation S.A. Microsoft®, Windows® 98, 2000, Me, Windows XP™ und DirectX® sind Warenzeichen und/oder eingetragene Warenzeichen der Microsoft Corporation in den USA und/oder anderen Ländern. Alle Markennamen sind Warenzeichen und/oder eingetragene Warenzeichen ihrer jeweiligen Besitzer. Fotos und Abbildungen sind beispielhaft. Inhalte, Design und Spezifikationen können ohne Ankündigung geändert werden und sind länderspezifisch. E 5. Haz click en Propiedades para probar tu joystick. 6. Puedes acceder tanto al Panel de Control del Thrustmaster HOTAS Cougar y cargador de aplicaciones como al software Foxy a través del menú de Inicio. Por favor consulta los manuales online para una completa descripción de cómo funcionan éstas aplicaciones. 7. Programaciones especiales de juegos están disponibles en el CD de instalación, en el directorio Files bajo Foxy, y también en la web Thrustmaster (es.thrustmaster.com). © Guillemot Corporation 2001. Thrustmaster® y HOTAS™ son marcas comerciales y/o marcas comerciales registradas de Guillemot Corporation S.A. Microsoft®, Windows® 98, 2000, Me, Windows XP™ und DirectX® son marcas comerciales y/o marcas comerciales registradas de Microsoft Corporation en los Estados Unidos y/o otros países. Cualquier otra marca nacional o internacionalmente reconocida y los nombres comerciales están reconocidos por la presente. Fotos no compremetedoras. Los contenidos, diseños y especificaciones pueden cambiar sin previo aviso y de un país a otro. P 5. Clique em Propriedades para testar o seu joystick. 6. Pode aceder a ambas as aplicações Control Panel e Loader do Thrustmaster HOTAS Cougar, bem como ao software Foxy, via menu Iniciar. Consulte os manuais online para obter uma descrição detalhada do modo de funcionamento destas aplicações. 7. No CD de instalação há pré-definições de jogos disponíveis, assim como no directório Files de Foxy, e também no site da Thrustmaster (europe.thrustmaster.com). © Guillemot Corporation 2001. Thrustmaster® e HOTAS™ são marcas comerciais e/ou marcas registadas da Guillemot Corporation S.A. Microsoft®, Windows® 98, 2000, Me, Windows XP™ e DirectX® são marcas comerciais e/ou marcas registadas da Microsoft Corporation nos Estados Unidos e/ou noutros países. Todas as outras marcas comerciais e nomes de marcas reconhecidas nacional e internacionalmente são por este meio aceites. As fotografias não são vinculativas. Os conteúdos, desenhos e especificações estão sujeitos a alteração sem aviso prévio, e poderão variar dum país para outro. Para a PC-
 1
1
-
 2
2
-
 3
3
-
 4
4
-
 5
5


Thrustmaster 2960534 2969052 2970016 Manual de usuario
- Categoría
- Controles de juego
- Tipo
- Manual de usuario
- Este manual también es adecuado para
en otros idiomas
Artículos relacionados
-
TRUSTMASTER USB JOYSTICK El manual del propietario
-
Thrustmaster 2960782 2961068 Manual de usuario
-
Thrustmaster MFD COUGAR PACK El manual del propietario
-
-
Thrustmaster 2961067 2960778 Manual de usuario
-
Thrustmaster 2960738 Manual de usuario
-
-
-
Thrustmaster 4460168 4460153 Manual de usuario
-