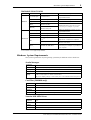
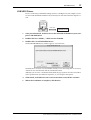
Yamaha Studio Manager Guía de instalación
- Categoría
- Software
- Tipo
- Guía de instalación
Este manual también es adecuado para

E
Studio Manager
for//
/
Installation Guide
Keep This Manual For Future Reference.

2
Studio Manager for DM2000/DM1000/02R96/01V96—Installation Guide
Important Information
Special Notices
•The software and this owner’s manual are the exclusive copyrights of Yamaha Corporation.
•Use of the software and this manual is governed by the Software Licensing Agreement which
the purchaser fully agrees to upon breaking the seal of the software packaging. (Careful-
lyread the agreement at the end of this manual before installing the software.)
•Copying of the software or reproduction of this manual in whole or in part by any means is
expressly forbidden without the written consent of the manufacturer.
•Yamaha makes no representations or warranties with regard to the use of the software and
documentation and cannot be held responsible for the results of the use of this manual and
the software.
•This disc is a CD-ROM. Do not attempt to play the disc on an audio CD player. Doing so
may result in irreparable damage to your audio CD player.
•Copying of the commercially available music sequence data and/or digital audio files is
strictly prohibited except for your personal use.
•The screen displays as illustrated in this owner’s manual are for instructional purposes, and
may appear somewhat different from the screens which appear on your computer.
•Future upgrades of application and system software and any changes in specifications and
functions will be announced separately.
Trademarks
Adobe, Acrobat, and Reader are registered trademarks of Adobe Systems Incorporated.
Apple, AppleTalk, and Macintosh are registered trademarks of Apple Computer, Inc.
Microsoft and Windows are registered trademarks of Microsoft Corporation. OMS is a reg-
istered trademark of Opcode Systems, Inc. Pentium and Celeron are registered trademarks
of Intel Corporation. PowerPC is a registered trademark of International Business
Machines Corporation. SmartMedia is a trademark of Toshiba America, Inc. All other
trademarks are the property of their respective holders and are hereby acknowledged.
Copyright
No part of the Studio Manager software or its documentation may be reproduced or dis-
tributed in any form or by any means without the prior written authorization of Yamaha
Corporation.
© 2003 Yamaha Corporation. All rights reserved.
Yamaha Web Site
Information about Studio Manager, related products, and other Yamaha professional audio
equipment is available on the Yamaha Professional Audio Web site at:
http://www.yamahaproaudio.com/
* Specifications and descriptions in this owner’s manual are for information purposes only.
Yamaha Corp. reserves the right to change or modify products or specifications at any
time without prior notice. Since specifications, equipment or options may not be the
same in every locale, please check with your Yamaha dealer.

3
Studio Manager for DM2000/DM1000/02R96/01V96—Installation Guide
Contents
1 Getting Started . . . . . . . . . . . . . . . . . . . . . . . . . . . . 4
Introduction . . . . . . . . . . . . . . . . . . . . . . . . . . . . . . . . . . . . . . . . . . . . . . . . . . . . . . . . . 4
CD-ROM Contents . . . . . . . . . . . . . . . . . . . . . . . . . . . . . . . . . . . . . . . . . . . . . . . . . . . 4
Windows System Requirements . . . . . . . . . . . . . . . . . . . . . . . . . . . . . . . . . . . . . . . . 5
Macintosh System Requirements . . . . . . . . . . . . . . . . . . . . . . . . . . . . . . . . . . . . . . . . 6
System Hookup . . . . . . . . . . . . . . . . . . . . . . . . . . . . . . . . . . . . . . . . . . . . . . . . . . . . . . 7
Configuring Your Yamaha Mixing Console . . . . . . . . . . . . . . . . . . . . . . . . . . . . . . . 7
2 Windows Installation . . . . . . . . . . . . . . . . . . . . . . . . 8
Acrobat Reader . . . . . . . . . . . . . . . . . . . . . . . . . . . . . . . . . . . . . . . . . . . . . . . . . . . . . . 8
USB MIDI Driver . . . . . . . . . . . . . . . . . . . . . . . . . . . . . . . . . . . . . . . . . . . . . . . . . . . . 8
Yamaha CBX Driver (DM2000/02R96 only) . . . . . . . . . . . . . . . . . . . . . . . . . . . . . 15
Studio Manager . . . . . . . . . . . . . . . . . . . . . . . . . . . . . . . . . . . . . . . . . . . . . . . . . . . . . 15
Card Filer (DM2000 only) . . . . . . . . . . . . . . . . . . . . . . . . . . . . . . . . . . . . . . . . . . . . 15
3 Macintosh Installation . . . . . . . . . . . . . . . . . . . . . . 16
Acrobat Reader . . . . . . . . . . . . . . . . . . . . . . . . . . . . . . . . . . . . . . . . . . . . . . . . . . . . . 16
OMS (Open Music System) . . . . . . . . . . . . . . . . . . . . . . . . . . . . . . . . . . . . . . . . . . . 16
USB MIDI Driver . . . . . . . . . . . . . . . . . . . . . . . . . . . . . . . . . . . . . . . . . . . . . . . . . . . 17
Studio Manager . . . . . . . . . . . . . . . . . . . . . . . . . . . . . . . . . . . . . . . . . . . . . . . . . . . . . 18
Card Filer (DM2000 only) . . . . . . . . . . . . . . . . . . . . . . . . . . . . . . . . . . . . . . . . . . . . 18
Setting Up OMS . . . . . . . . . . . . . . . . . . . . . . . . . . . . . . . . . . . . . . . . . . . . . . . . . . . . . 19
4 Getting Started . . . . . . . . . . . . . . . . . . . . . . . . . . . 20
Starting Studio Manager . . . . . . . . . . . . . . . . . . . . . . . . . . . . . . . . . . . . . . . . . . . . . . 20
Quitting Studio Manager . . . . . . . . . . . . . . . . . . . . . . . . . . . . . . . . . . . . . . . . . . . . . 20
Specifying the MIDI Port (DM1000/01V96 & Windows only) . . . . . . . . . . . . . . 20
Configuring Studio Manager . . . . . . . . . . . . . . . . . . . . . . . . . . . . . . . . . . . . . . . . . . 21
Synchronizing Studio Manager . . . . . . . . . . . . . . . . . . . . . . . . . . . . . . . . . . . . . . . . 22
Working with Sessions . . . . . . . . . . . . . . . . . . . . . . . . . . . . . . . . . . . . . . . . . . . . . . . 23
5 Troubleshooting . . . . . . . . . . . . . . . . . . . . . . . . . . 24

4
Chapter 1—Getting Started
Studio Manager for DM2000/DM1000/02R96/01V96—Installation Guide
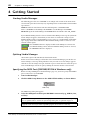
1 Getting Started
Introduction
With Yamaha Studio Manager you can control your Yamaha digital mixing console from
your Windows or Macintosh computer. There are four versions of Studio Manager:
•Studio Manager for DM2000
•Studio Manager for 02R96
•Studio Manager for DM1000
•Studio Manager for 01V96
The CD-ROM supplied with the DM2000 or 02R96 contains
Studio Manager for DM2000
and
Studio Manager for 02R96
. The CD-ROM supplied with the DM1000 or 01V96 con-
tains
Studio Manager for DM1000
and
Studio Manager for 01V96
.
This
Installation Guide
explains how to install Studio Manager and the necessary driver soft-
ware for Windows and Macintosh computers. The owner’s manual for Studio Manager can
be found on the included CD-ROM (Acrobat PDF format).
CD-ROM Contents
DM2000/02R96 CD-ROM
Folder Software Description
Windows
Acroread\English
Acrobat Reader
1,
2
1. For information on using this software, refer to the PDF manual after installation.
2. This software is not supported by Yamaha.
Adobe Acrobat Reader software for view-
ing the PDF manuals.
SM_\DM2000
Studio Manager for DM2000
1
Yamaha Studio Manager for DM2000
SM_\02R96
Studio Manager for 02R96
1
Yamaha Studio Manager for 02R96
Mididrv_ Yamaha CBX Driver
Yamaha serial driver. Necessary if you are
connecting to a serial port on your PC.
USBdrv_
Yamaha USB MIDI Driver
(Windows 98, Me)
Yamaha USB driver. Necessary if you are
connecting to a USB port on your PC.
USBdrv2k_
Yamaha USB MIDI Driver
(Windows 2000, XP)
Card_
Card Filer
1
Yamaha utility for transferring and man-
aging data stored on the DM2000’s
SmartMedia card.
Macintosh
Acroread\English
Acrobat Reader
,1, 2
Adobe Acrobat Reader software for view-
ing the PDF manuals.
SM_\DM2000
Studio Manager for DM2000
1
Yamaha Studio Manager for DM2000
SM_\02R96
Studio Manager for 02R96
1
Yamaha Studio Manager for 02R96
OMS_
Open Music System (OMS)
2.3.8
1, 2
Opcode driver software for use with MIDI
applications on Macintosh computers.
OMS Setup for YAMAHA
OMS studio setup files for use with the
DM2000 and 02R96.
USBdrv_ YAMAHA USB MIDI Driver
Yamaha USB driver. Necessary if you are
connecting to a USB port on your Macin-
tosh computer.
Card_
Card Filer
1
Yamaha utility for transferring and man-
aging data stored on the DM2000’s
SmartMedia card.

Windows System Requirements
5
Studio Manager for DM2000/DM1000/02R96/01V96—Installation Guide
DM1000/01V96 CD-ROM
Windows System Requirements
The system requirements of your operating system may be different to those listed here.
Studio Manager
Card Filer (DM2000 only)
Yamaha USB MIDI Driver
Folder Software Description
Windows
Acroread\English
Acrobat Reader
1,
2
1. For information on using this software, refer to the PDF manual after installation.
2. This software is not supported by Yamaha.
Adobe Acrobat Reader software for view-
ing the PDF manuals.
SM_\DM1000
Studio Manager for DM1000
1
Yamaha Studio Manager for DM1000
SM_\01V96
Studio Manager for 01V96
1
Yamaha Studio Manager for 01V96
USBdrv_
Yamaha USB MIDI Driver
(Windows 98, Me)
Yamaha USB driver. Necessary if you are
connecting to a USB port on your PC.
USBdrv2k_
Yamaha USB MIDI Driver
(Windows 2000, XP)
Macintosh
Acroread\English
Acrobat Reader
,1, 2
Adobe Acrobat Reader software for view-
ing the PDF manuals.
SM_\DM1000
Studio Manager for DM1000
1
Yamaha Studio Manager for DM1000
SM_\01V96
Studio Manager for 01V96
1
Yamaha Studio Manager for 01V96
OMS_
Open Music System (OMS)
2.3.8
1, 2
Opcode driver software for use with MIDI
applications on Macintosh computers.
OMS Setup for YAMAHA
OMS studio setup files for use with the
DM1000 and 01V96.
USBdrv_ YAMAHA USB MIDI Driver
Yamaha USB driver. Necessary if you are
connecting to a USB port on your Macin-
tosh computer.
Computer
A PC with a 433 MHz or faster Intel Pentium or Celeron family processor
OS
Windows 98SE, Me, 2000, XP Home Edition, XP Professional
Memory
128 MB or more
Hard Disk
20 MB or more of free space
Display
1024 x 768 pixels, 256 colors or higher
1280 x 1024, High Color 16-bit recommended
(If you use display settings of 1024 x 768, turn on the Task Bar’s Auto-hide option.)
Computer
A PC with a 100 MHz or faster Intel Pentium or Celeron family processor
OS
Windows 95, 98, 98SE, Me, NT4.0, 2000, XP Home Edition, XP Professional
Memory
8 MB or more
Hard Disk
2 MB or more of free space
Display
800 x 600 pixels, 256 colors or higher
Computer
A PC with a 166 MHz or faster Intel Pentium or Celeron family processor and a USB
port
OS
Windows 98, 98SE, Me, 2000, XP Home Edition, XP Professional
Memory
32 MB or more
Hard Disk
2 MB or more of free space

6
Chapter 1—Getting Started
Studio Manager for DM2000/DM1000/02R96/01V96—Installation Guide
Yamaha CBX Driver (DM2000/02R96 only)
System requirements for software not listed here can be found on the CD-ROM.
Macintosh System Requirements
The system requirements of your operating system may be different to those listed here.
Studio Manager
Card Filer (DM2000 only)
Yamaha USB MIDI Driver
System requirements for software not listed here can be found on the CD-ROM.
OS
Windows 95, 98, 98SE, Me, NT4.0, 2000, XP Home Edition, XP Professional
Computer
A Macintosh G3/233 MHz or better and a USB port
OS
Mac OS 8.6 to 9.2.2 (Mac OS X not supported)
Memory
120 MB or more of free memory (Virtual memory must be turned off)
Hard Disk
7 MB or more
Display
1024 x 768 pixels, 256 colors or higher
1280 x 1024, 32,000 colors recommended
Other
OMS 2.3.3 or later
Note: If you are using a PowerBook on battery power, open the Energy Save control panel,
and in Advanced Settings, Additional Power Savings, turn off Allow processor cycling.
Computer
A Macintosh computer with a PowerPC processor or better
OS
Mac OS 7.5 to 9.2.2 (Mac OS X not supported)
Memory
8 MB or more of free memory
Hard Disk
6 MB or more
Display
800 x 600 pixels, 256 colors or higher
Computer
A Macintosh computer with a PowerPC processor or better and a USB port
OS
Mac OS 8.6 to 9.2.2 (Mac OS X not supported)
Memory
64 MB or more (recommended: 128 MB or more)
Hard Disk
2 MB or more

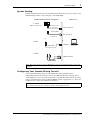
System Hookup
7
Studio Manager for DM2000/DM1000/02R96/01V96—Installation Guide
System Hookup
The following illustration shows the available hookup methods you can use to connect your
Yamaha mixing console to your computer: serial, USB, MIDI.
Configuring Your Yamaha Mixing Console
On your Yamaha mixing console, use the DISPLAY ACCESS [SETUP] button
([DIO/SETUP button on the 01V96) to locate the MIDI/TO HOST Setup page. Under
“Studio Manager,” select a port and assign an ID to your Yamaha mixing console. If you are
using a serial connection, set the TO HOST SERIAL options as appropriate (i.e., “PC-2” for
a Windows PC, or “Mac” for a Macintosh computer).
Note: Before you connect to serial or MIDI ports, turn off your Yamaha mixing console and
computer.
Warning: Do not set the TO HOST SERIAL option to “Mac” while your Yamaha mixing con-
sole is connected to your PC’s serial port. Doing so may damage your PC.
USB cable
(Yamaha CCJ-Mac
or equivalent)
(Yamaha CCJ-PC2
or equivalent)
USB port
Serial cable
Mac serial port
PC serial port
Yamaha mixing console rear panel Mac or PC
MIDI interface
MIDI cables
3. MIDI
2. USB
1. Serial
(DM2000/02R96 only)
TO HOST
USB
INOUT

8
Chapter 2—Windows Installation
Studio Manager for DM2000/DM1000/02R96/01V96—Installation Guide
2 Windows Installation
Acrobat Reader
To view the PDF manuals included on the CD-ROM, you need to install the Adobe Acrobat
Reader software. If you already have this software installed, skip this section.
1
Start your computer and Windows, and then insert the included CD-ROM
into your computer’s CD-ROM drive.
2
Double-click the “Acroread_” folder on the CD-ROM.
This folder contains Acrobat software in several languages.
3
Double-click the folder of the language you want to install.
4
Double-click “ar***enu.exe.”
(“***” indicates the software version.)
5
Follow the on-screen instructions to install the software.
For instructions on using Acrobat Reader, choose Reader Help from Acrobat Reader’s Help
menu.
USB MIDI Driver
If you are connecting your Yamaha mixing console to a USB port on your computer, you’ll
need to install the Yamaha USB driver. If you already have this driver installed, skip this sec-
tion.
The procedure you use for installing the Yamaha USB driver depends on which version of
Windows you’re using:
•Windows 98 & 98SE—page 9
•Windows Me—page 12
•Windows 2000—page 13
•Windows XP—page 14
Studio
Manager
DM2000/02R96
DM1000/01V96
Computer
USB cable
Driver

USB MIDI Driver
9
Studio Manager for DM2000/DM1000/02R96/01V96—Installation Guide
Windows 98 & 98SE
1
Start your computer and Windows, and then insert the included CD-ROM
into your computer’s CD-ROM drive.
2
Turn off your Yamaha mixing console, and then use a USB cable to connect
its USB TO HOST port to a USB port on your computer.
3
Turn on your Yamaha mixing console.
The Add New Hardware Wizard appears. If it doesn’t appear, try disconnecting and recon-
necting the USB cable. Alternatively, open the Add New Hardware control panel.
4
Click Next.
The following window appears.
5 Select “Search for the best driver for your device (Recommended),” and then
click Next.

10 Chapter 2—Windows Installation
Studio Manager for DM2000/DM1000/02R96/01V96—Installation Guide
The following window appears.
6 Select “Specify a location,” and specify “D:\USBdrv_” (replacing “D” with
the drive letter of your CD-ROM drive), and then click Next.
When the driver is located, “YAMAHA USB MIDI Driver” is displayed, as shown below.
7 Click Next.
Note: You may be prompted to insert your Windows CD-ROM. Do not insert it! Click OK,
and in the “Copy files from” section of the subsequent dialog box, enter “D:\USBdrv_” (replac-
ing “D” with the drive letter of your CD-ROM drive), and then click OK.

USB MIDI Driver 11
Studio Manager for DM2000/DM1000/02R96/01V96—Installation Guide
The driver is installed, and the following window appears when the installation is complete.
8 Click Finish, and then restart your computer.

12 Chapter 2—Windows Installation
Studio Manager for DM2000/DM1000/02R96/01V96—Installation Guide
Windows Me
1 Start your computer and Windows, and then insert the included CD-ROM
into your computer’s CD-ROM drive.
2 Turn off your Yamaha mixing console, and then use a USB cable to connect
its USB TO HOST port to a USB port on your computer.
3 Turn on your Yamaha mixing console.
The Add New Hardware Wizard appears. If it doesn’t appear, try disconnecting and recon-
necting the USB cable. Alternatively, open the Add New Hardware control panel.
4 Select “Automatic search for a better driver (Recommended),” and then click
Next.
Windows Me should be able to locate the driver automatically, in which case you can pro-
ceed to Step 5. If the driver cannot be located, select “Specify the location of the driver
(Advanced),” click Next, specify your CD-ROM drive (e.g., D:\USBdrv_), and then con-
tinue as prompted.
The following window appears when the installation is complete.
5 Click Finish, and then restart your computer.

USB MIDI Driver 13
Studio Manager for DM2000/DM1000/02R96/01V96—Installation Guide
Windows 2000
1 Start your computer and Windows, log on as the Administrator, and then
insert the included CD-ROM into your computer’s CD-ROM drive.
2 Go to My Computer–>Control Panel–>System–>Hardware–>Driver Sign-
ing–>File Signature Verification, select “Ignore—Install all files, regardless of
file signature,” and then click OK.
3 Turn off your Yamaha mixing console, and then use a USB cable to connect
its USB TO HOST port to a USB port on your computer.
4 Turn on your Yamaha mixing console.
The Found New Hardware Wizard appears.
5 Click Next.
6 Select “Search for a suitable driver for my device (Recommended),” and then
click Next.
7 In the subsequent window, select “CD-ROM drives” only, and then click Next.
The driver is installed, and the message “Completing the Found New Hardware Wizard”
appears.
8 Click Finish, and then restart your computer.
Note: You may be prompted to insert your Windows CD-ROM. Do not insert it! Click OK,
and in the “Copy files from” section of the subsequent dialog box, enter “D:\USBdrv2k_”
(replacing “D” with the drive letter of your CD-ROM drive), and then click OK.

14 Chapter 2—Windows Installation
Studio Manager for DM2000/DM1000/02R96/01V96—Installation Guide
Windows XP
1 Start your computer and Windows, and then insert the included CD-ROM
into your computer’s CD-ROM drive.
2 Click the Start button, and then click Control Panel.
If the Control Panel window appears as shown below, click “Switch to Classic View” on the
left side of the window in order to see all of the control panels.
3 Go to System Hardware–>Driver signatures–>Driver signature options,
select “Ignore—Install software without asking for confirmation,” and then
click OK.
4 Click OK to close the System Properties window, and then click the Close but-
ton to close the Control Panel window.
5 Turn off your Yamaha mixing console, and then use a USB cable to connect
its USB TO HOST port to a USB port on your computer.
6 Turn on your Yamaha mixing console.
The Found New Hardware Wizard appears.
7 Select “Install software automatically (recommended) (I),” and then click
Next.
The driver is installed, and the message “Completing the Found New Hardware Wizard”
appears.
8 Click Finish, and then restart your computer.

Yamaha CBX Driver (DM2000/02R96 only) 15
Studio Manager for DM2000/DM1000/02R96/01V96—Installation Guide
Yamaha CBX Driver (DM2000/02R96 only)
If you’re connecting your Yamaha mixing console to a serial port on your computer, you’ll
need to install the Yamaha CBX driver. If you already have this driver installed, skip this sec-
tion.
1 Double-click the “Mididrv_” folder on the CD-ROM.
2 Double-click “Setup.exe.”
3 Follow the on-screen instructions to install the software.
Studio Manager
1 Double-click the “SM_” folder on the CD-ROM.
2 Double-click the “DM2000,” “02R96,” “DM1000,” or “01V96” folder as
appropriate.
3 Double-click “Setup.exe.”
4 Follow the on-screen instructions to install the software.
Card Filer (DM2000 only)
1 Double-click the “Card_” folder on the CD-ROM.
2 Double-click “Setup.exe.”
3 Follow the on-screen instructions to install the software.
For information on using Card Filer, see the “CardFilerManual.pdf.” This file is installed in
the same folder as Card Filer.

16 Chapter 3—Macintosh Installation
Studio Manager for DM2000/DM1000/02R96/01V96—Installation Guide
3 Macintosh Installation
Acrobat Reader
To view the PDF manuals included on the CD-ROM, you need to install the Adobe Acrobat
Reader software. If you already have this software installed, skip this section.
1 Start your Macintosh, and then insert the included CD-ROM into your com-
puter’s CD-ROM drive.
2 Double-click the “Acroread_” folder on the CD-ROM.
This folder contains Acrobat software in several languages.
3 Double-click the folder of the language you want to install.
4 Double-click “Reader Installer.”
(The actual name of the installer depends on the language you select.)
5 Follow the on-screen instructions to install the software.
For instructions on using Acrobat Reader, choose Reader Guide from Acrobat Reader’s Help
menu.
OMS (Open Music System)
Studio Manager requires OMS 2.3.3 or later in order to work on Macintosh computers.
OMS 2.3.8 is included on the CD-ROM. If you already have OMS 2.3.3 or later installed,
skip this section.
1 Start your Macintosh, and then insert the included CD-ROM into your com-
puter’s CD-ROM drive.
2 Double-click the “OMS_” folder on the CD-ROM.
3 Double-click “Install OMS 2.3.8.”
4 Follow the on-screen instructions to install the software.
5 When the installation is complete, click Restart.
6 Copy the “OMS_2.3_Mac.pdf” from the “OMS_” folder on the CD-ROM to
the “Opcode:OMS Applications” folder on your hard disk.
This file contains information on using and configuring OMS.
Note: Once the installation is complete, you may receive an error message warning that the
installer did not quit. In this case, choose Quit from the File menu to quit the installer, then
restart your computer.

USB MIDI Driver 17
Studio Manager for DM2000/DM1000/02R96/01V96—Installation Guide
USB MIDI Driver
If you’re connecting your Yamaha mixing console to a USB port on your computer, you’ll
need to install the Yamaha USB driver. If you already have this driver installed, skip this sec-
tion.
1 Start your Macintosh, and then insert the included CD-ROM into your com-
puter’s CD-ROM drive.
2 Double-click the “USBdrv_” folder on the CD-ROM.
3 Double-click “Install USB MIDI Driver.”
The Install USB MIDI Driver window appears, as shown below.
Normally there’s no need to set the Install Location, because the startup disk is selected by
default. To select another disk, click the Switch Disk button.
Although you can select a destination folder from the pop-up menu, the files are installed
in the specified disk’s System Folder regardless, so you can ignore that option.
4 Click Install, and follow the on-screen instructions to install the software.
5 When the installation is complete, click Restart.
OMS
Computer
USB cable
Driver
Studio
Manager
DM2000/02R96
DM1000/01V96

18 Chapter 3—Macintosh Installation
Studio Manager for DM2000/DM1000/02R96/01V96—Installation Guide
Studio Manager
1 Start your Macintosh, and then insert the included CD-ROM into your com-
puter’s CD-ROM drive.
2 Double-click the “SM_” folder on the CD-ROM.
3 Double-click the “DM2000,” “02R96,” “DM1000,” or “01V96” folder as
appropriate.
4 Double-click “Install Studio Manager.”
5 Follow the on-screen instructions to install the software.
Card Filer (DM2000 only)
1 Start your Macintosh, and then insert the included CD-ROM into your com-
puter’s CD-ROM drive.
2 Double-click the “Card_” folder on the CD-ROM.
3 Double-click “Install Card Filer.”
4 Follow the on-screen instructions to install the software.
For information on using Card Filer, see the “CardFilerManual.pdf.” This file is installed in
the same folder as Card Filer.

Setting Up OMS 19
Studio Manager for DM2000/DM1000/02R96/01V96—Installation Guide
Setting Up OMS
The “OMS Setup for YAMAHA” folder on the included CD-ROM contains OMS studio
setup files preconfigured for use with your Yamaha mixing console.
1 Turn off your Yamaha mixing console, and then use a USB cable to connect
its USB TO HOST port to a USB port on your computer.
If you are connecting to the SERIAL TO HOST port, use a serial cable to connect to the
Printer or Modem port on your computer.
2 Turn on your Yamaha mixing console.
3 Start your Macintosh, and then insert the included CD-ROM into your com-
puter’s CD-ROM drive.
4 Open the “OMS_” folder on the CD-ROM, and then open the “OMS Setup
for YAMAHA” folder.
The “DM2000/02R96” folder contains the following OMS studio setup files:
• DM2000-USB
• DM2000-Modem
• DM2000-Printer
• 02R96-USB
• 02R96-Modem
• 02R96-Printer
The “DM1000/01V96” folder contains the following OMS studio setup files:
• DM1000-USB
• 01V96-USB
5 Copy the appropriate file to your computer’s hard disk, and then double-click
it.
OMS Setup starts and the Studio Setup file window appears.
6 Choose Make Current from the File menu, and then save the setup.
After completing the above setup, your Yamaha mixing console will be the only MIDI
device in the current OMS studio setup. In order to use other MIDI devices, or to add an
additional Yamaha mixing console, you must create a new studio setup. See the
“OMS_2.3_Mac.pdf” for more information.
Note: If the AppleTalk dialog box appears, click the Turn It Off button, and then click OK on
the subsequent dialog box.
Note: If you are using Studio Manager for DM2000/02R96 and the Modem or Printer port,
go to OMS Setup Preferences and turn off “Use Apple SerialDMA driver when available.”

20 Chapter 4—Getting Started
Studio Manager for DM2000/DM1000/02R96/01V96—Installation Guide
4 Getting Started
Starting Studio Manager
The following procedure uses “DM1000” as an example. The content of the menu items
selected in the procedure below may vary depending on the version number of Studio Man-
ager software.
Windows: Click the Start button and then click Programs–>(YAMAHA OPT
To ols–>)YAMAHA Studio Manager for DM1000–>Studio Manager for DM1000.
Macintosh: Open the Studio Manager for DM1000 folder and double-click “SM_DM1K.”
If your Yamaha mixing console is detected while Studio Manager starts up, the Synchroni-
zation dialog box appears, from which you can choose to transfer the settings of your
Yamaha mixing console to Studio Manager or vice versa. See “Synchronizing Studio Man-
ager” on page 22 for more information. If no Yamaha mixing console is detected, a new
Console window opens.
The ONLINE indicator is displayed while Studio Manager is connected to
your Yamaha mixing console. When no Yamaha mixing console is detected,
the OFFLINE indicator is displayed.
Quitting Studio Manager
Choose Exit (Quit on the Macintosh) from the File menu.
If there are no unsaved changes, all windows close and Studio Manager quits. If there are
unsaved changes, a message asking whether or not you want to save the changes appears.
Click Yes to save the changes and quit, click No to quit, or click Cancel to cancel the opera-
tion. Studio Manager can also be quit by clicking the Console window’s Close button.
Specifying the MIDI Port (DM1000/01V96 & Windows only)
Before selecting a MIDI port in Studio Manager (page 21), you must specify which MIDI
port is connected to your DM1000.
1 Start Studio Manager.
2 Click the MIDI Setup button on the MIDI SETUP toolbar, as shown below.
The MIDI Setup dialog box appears.
3 Select the MIDI port to which your DM1000 is connected (e.g., MIDI In, Out,
or Thru).
Note: To use a MIDI port with Studio Manager, you must select it on the MIDI Setup dialog
box (as explained above) and on the System Setup dialog box, as explained on page 21.
Warning: Studio Manager does not yet support OPT (Open Plug-in Technology), so even if
it appears in the menu of an OPT compatible program, do not start it in this way.
MIDI Setup

Configuring Studio Manager 21
Studio Manager for DM2000/DM1000/02R96/01V96—Installation Guide
Configuring Studio Manager
Selecting Ports
In order to use Studio Manager, you must specify the input and output ports that Studio
Manager should use to communicate with your Yamaha mixing console.
Windows: Choose System Setup from the File menu, and specify the input and output ports
on the Setup dialog box, as shown below.
Macintosh: Choose Select OMS Ports from the File menu, and specify the input and output
ports (device names set in OMS Studio Setup) on the Setup dialog box, as shown below.
OMS Studio Setup can be opened directly from Studio Manager by selecting OMS Studio
Setup from the File menu.
System Setup
To open the Setup window, choose System Setup from the File menu.
This is the Windows Setup window.
Note: If you’re using Windows, you must specify a MIDI port (see page 20) before making the
following settings.
Note: Choose OMS MIDI Setup from the File menu, and make sure that the “Run MIDI in
Background” option is on.

22 Chapter 4—Getting Started
Studio Manager for DM2000/DM1000/02R96/01V96—Installation Guide
This is the Macintosh Setup window
Input Port/Output Port: (Windows only) These pop-up menus are used to select the
ports with which Studio Manager communicates with your Yamaha mixing console.
Console Device ID: Studio Manager can control any one of up to eight Yamaha mixing
consoles, each with its own exclusive ID. Select the ID of Yamaha mixing console that you
want to control.
Channel Select: These options determine whether or not channel selection is linked.
When the PC–>Console option is on, selecting a channel on Studio Manager selects the
same channel on your Yamaha mixing console. When the Console–>PC option is on,
selecting a channel on your Yamaha mixing console selects the same channel on Studio
Manager.
Confirmation: These options determine whether or not a confirmation dialog box
appears when storing, recalling, or patching.
Layer Select: These options determine whether or not Layer selection is linked. When the
PC–>Console option is on, selecting a Layer on Studio Manager selects the same Layer on
your Yamaha mixing console. When the Console–>PC option is on, selecting a Layer on
your Yamaha mixing console selects the same Layer on Studio Manager.
Synchronizing Studio Manager
If your Yamaha mixing console is detected while Studio Manager starts up, or while Studio
Manager is up and running, the Synchronization dialog box shown below appears.
All Lib: This option determines whether or not Scene and Library data is synchronized.
Console–>PC: Click this button to transfer the settings of your Yamaha mixing console to
the current Studio Manager Session.
PC–>Console: Click this button to transfer the settings of current Studio Manager Ses-
sion to your Yamaha mixing console.
Cancel: Click this button to leave your Yamaha mixing console and current Studio Man-
ager Session unsynchronized.
You can resynchronize the system at any time by choosing Re-synchronize from the Syn-
chronization menu.
Note: Do not operate your Yamaha mixing console while synchronization is in progress.

Working with Sessions 23
Studio Manager for DM2000/DM1000/02R96/01V96—Installation Guide
Working with Sessions
A Studio Manager Session consists of all your Yamaha mixing console’s mix settings, includ-
ing Scene and library data.
•To create a new Session, choose New Session from the File menu.
•To open a previously saved Session, choose Open Session from the File menu.
•To save the current Session, choose Save Session from the File menu.
•To save the current Session with a new name, choose Save Session as from the File menu.
Only one Session can be open at a time, so when you create a new Session, or open a previ-
ously saved Session, the message “This operation will purge current session” appears. If
there are no unsaved changes, or you do not want to save, click OK. If Studio Manager is
offline, the Session is loaded. If Studio Manager is online, the Session is loaded and the syn-
chronization dialog box appears.
Note: In order to save the current Automix, or the settings of an optional Y56K card, in a Ses-
sion, you must resynchronize Studio Manager beforehand (Console–>PC).
Note: In order to protect the communication port used by Studio Manager, your Yamaha mix-
ing console communication settings (e.g., MIDI, Remote Layer, Machine Control) are not
affected by PC–>Console synchronization operations.

24 Chapter 5—Troubleshooting
Studio Manager for DM2000/DM1000/02R96/01V96—Installation Guide
5 Troubleshooting
Cannot control your Yamaha mixing console via USB?
•Have you installed the Yamaha USB MIDI driver (Windows page 8, Mac page 17)?
•Is the USB cable connected correctly (page 7)?
•Is your Yamaha mixing console configured correctly (page 7)?
•Is Studio Manager set to the correct ID? (see the Studio Manager documentation)
• Macintosh: Is OMS configured correctly (page 19)? On some systems, the included OMS
studio setup files may not work correctly. In this case, you must create a new studio setup.
See the “OMS_2.3_Mac.pdf” for more information.
Cannot install the Yamaha USB MIDI Driver?
•Is the USB cable connected correctly (page 7)?
•Try disconnecting the USB cable, and then reconnecting it.
• Windows: Is USB enabled? When your Yamaha mixing console is connected to your com-
puter for the first time, if the Add New Hardware Wizard doesn’t appear, it may be because
your computer’s USB controller is disabled. To check this, open the System control panel,
click the Device Manager tab, and check for any crosses (x) or exclamation points (!) next
to the “Universal Serial Bus controllers” and “USB Root Hub” items. If these items do have
these marks next to them, your USB controller is disabled. For information on enabling
your USB controller, refer to your computer’s documentation.
• Windows: If for some reason installation of the Yamaha USB Driver fails, your Yamaha mix-
ing console may be registered as an unknown device and you may not be able to reinstall
the driver until the unknown device is deleted. In this case, open the System control panel,
click the Device Manager tab, and select the “View devices by connection” option. If an item
called “Other devices” appears in the list, click it. If there’s an item called “Unknown device,”
select it and then click the Remove button. Disconnect the USB cable, reconnect it, and then
try reinstalling the driver again.
OMS stops working after installing the Yamaha USB MIDI Driver?
• Macintosh: The Yamaha USB MIDI Driver supports Mac OS 8.6 through 9.2.2. If you
install it on a computer that is running an earlier version of the Mac OS, OMS will not work
correctly. In this case you should remove the Yamaha USB MIDI Driver as explained below.
How to remove & reinstall the Yamaha USB MIDI Driver
• Windows 98/Me: Presuming that the Yamaha USB MIDI Driver was installed successfully,
and that your Yamaha mixing console has been recognized correctly, the driver can be
removed from your computer as follows. Open the System control panel, click the Device
Manager tab, select the “YAMAHA USB MIDI Driver,” and then click the Remove button.
After deleting the following files, disconnect the USB cable, reconnect it, and then reinstall
the driver again.
Windows\Inf\Other\YAMAHADM2000.INF (or YAMAHA02R96.INF or
YAMAHADM1000.INF or YAMAHA01V96.INF)
Windows\System\Xgusb.drv
Windows\System\Ymidusb.sys

Troubleshooting 25
Studio Manager for DM2000/DM1000/02R96/01V96—Installation Guide
• Macintosh: The driver can be removed from your computer by deleting the following files,
after which you should restart your computer, reinstall the driver, and then set up OMS.
System Folder:Control Panels:YAMAHA USB MIDI Patch
System Folder:Extensions:USB YAMAHA MIDI Diver
System Folder:OMS Folder:YAMAHA USB MIDI OMS Driver
Improving performance
•If your computer seems unresponsive, make sure it satisfies the system requirements (Win-
dows page 5, Mac page 6).
• Quit any other applications that you are not using.
• Macintosh: Try turning off virtual memory and AppleTalk.
Cannot suspend or resume your computer?
• Windows: Suspend will not work if there are any MIDI applications open.
• Windows 2000: Depending on your system’s USB controller, suspend and resume may not
work properly. If your Yamaha mixing console does stop responding, try disconnecting and
reconnecting the USB cable.

26
Studio Manager for DM2000/DM1000/02R96/01V96—Installation Guide
Software Licensing Agreement
The following is a legal agreement between you, the end user, and Yamaha Corporation
(“Yamaha”). The enclosed Yamaha software program is licensed by Yamaha to the original
purchaser for use only on the terms set forth herein. Please read this licensing agreement
with care. Opening this package indicates that you accept all terms outlined herein. If you
do not agree to the terms, return this package unopened to Yamaha for a full refund.
GRANT OF LICENSE AND COPYRIGHT: Yamaha grants you, the original purchaser,
the right to use one copy of the enclosed software program and data (“SOFTWARE”) on a
single-user computer system. You may not use it on more than one computer or computer
terminal. The SOFTWARE is owned by Yamaha and is protected by Japanese copyright laws
and all applicable international treaty provisions. You are entitled to claim ownership of the
media in which the SOFTWARE is included. Therefore, you must treat the SOFTWARE like
any other copyrighted materials.
RESTRICTIONS: The SOFTWARE program is copyrighted. You may not engage in
reverse engineering or reproduction of the SOFTWARE by other conceivable methods. You
may not reproduce, modify, change, rent, lease, resell, or distribute the SOFTWARE in
whole or in part, or create derivative works from the SOFTWARE. You may not transmit or
network the SOFTWARE with other computers. You may transfer ownership of the SOFT-
WARE and the accompanying written materials on a permanent basis provided that you
retain no copies and the recipient agrees to the terms of the licensing agreement.
TERMINATION: The licensing condition of the software program becomes effective on
the day that you receive the SOFTWARE. If any one of the copyright laws or clauses of the
licensing conditions is violated, the licensing agreement shall be terminated automatically
without notice from Yamaha. In this case, you must destroy the licensed SOFTWARE and
its copies immediately.
PRODUCT WARRANTY: Yamaha warrants to the original purchaser that if the SOFT-
WARE, when used in normal conditions, will not perform the functions described in the
manual provided by Yamaha, the sole remedy will be that Yamaha will replace any media
which proves defective in materials or workmanship on an exchange basis without charge.
Except as expressly set forth above, the SOFTWARE is provided “as is,” and no other war-
ranties, either expressed or implied, are made with respect to this software, including, with-
out limitation the implied warranties of merchantability and fitness for a particular
purpose.
LIMITED LIABILITY: Your sole remedies and Yamaha’s entire liability are as set forth
above. In no event will Yamaha be liable to you or any other person for any damages, includ-
ing without limitation any incidental or consequential damages, expenses, lost profits, lost
savings or other damages arising out of the use or inability to use such SOFTWARE even if
Yamaha or an authorized dealer has been advised of the possibility of such damages, or for
any claim by any other party.
GENERAL: This license agreement shall be interpreted according to and governed by Jap-
anese laws.

For details of products, please contact your nearest Yamaha
representative or the authorized distributor listed below.
Pour plus de détails sur les produits, veuillez-vous adresser à Yamaha ou
au distributeur le plus proche de vous figurant dans la liste suivante.
Die Einzelheiten zu Produkten sind bei Ihrer unten aufgeführten
Niederlassung und bei Yamaha Vertragshändlern in den jeweiligen
Bestimmungsländern erhältlich.
Para detalles sobre productos, contacte su tienda Yamaha más cercana
o el distribuidor autorizado que se lista debajo.
CANADA
Yamaha Canada Music Ltd.
135 Milner Avenue, Scarborough, Ontario,
M1S 3R1, Canada
Tel: 416-298-1311
U.S.A.
Yamaha Corporation of America
6600 Orangethorpe Ave., Buena Park, Calif. 90620,
U.S.A.
Tel: 714-522-9011
MEXICO
Yamaha de Mexico S.A. De C.V.,
Departamento de ventas
Javier Rojo Gomez No.1149, Col. Gpe Del
Moral, Deleg. Iztapalapa, 09300 Mexico, D.F.
Tel: 686-00-33
BRAZIL
Yamaha Musical do Brasil LTDA.
Av. Rebouças 2636, São Paulo, Brasil
Tel: 011-853-1377
ARGENTINA
Yamaha Music Latin America, S.A.
Sucursal de Argentina
Viamonte 1145 Piso2-B 1053,
Buenos Aires, Argentina
Tel: 1-4371-7021
PANAMA AND OTHER LATIN
AMERICAN COUNTRIES/
CARIBBEAN COUNTRIES
Yamaha Music Latin America, S.A.
Torre Banco General, Piso 7, Urbanización Marbella,
Calle 47 y Aquilino de la Guardia,
Ciudad de Panamá, Panamá
Tel: +507-269-5311
THE UNITED KINGDOM
Yamaha-Kemble Music (U.K.) Ltd.
Sherbourne Drive, Tilbrook, Milton Keynes,
MK7 8BL, England
Tel: 01908-366700
GERMANY
Yamaha Music Central Europe GmbH
Siemensstraße 22-34, 25462 Rellingen, Germany
Tel: 04101-3030
SWITZERLAND/LIECHTENSTEIN
Yamaha Music Central Europe GmbH,
Branch Switzerland
Seefeldstrasse 94, 8008 Zürich, Switzerland
Tel: 01-383 3990
AUSTRIA
Yamaha Music Central Europe GmbH,
Branch Austria
Schleiergasse 20, A-1100 Wien, Austria
Tel: 01-60203900
THE NETHERLANDS
Yamaha Music Central Europe,
Branch Nederland
Clarissenhof 5-b, 4133 AB Vianen, The Netherlands
Tel: 0347-358 040
BELGIUM/LUXEMBOURG
Yamaha Music Central Europe GmbH,
Branch Belgium
Rue de Geneve (Genevastraat) 10, 1140 - Brussels,
Belgium
Tel: 02-726 6032
FRANCE
Yamaha Musique France, S.A.
Division Professionnelle
BP 70-77312 Marne-la-Vallée Cedex 2, France
Tel: 01-64-61-4000
ITALY
Yamaha Musica Italia S.P.A.
Combo Division
Viale Italia 88, 20020 Lainate (Milano), Italy
Tel: 02-935-771
SPAIN/PORTUGAL
Yamaha-Hazen Música, S.A.
Ctra. de la Coruna km. 17, 200, 28230
Las Rozas (Madrid), Spain
Tel: 91-639-8888
SWEDEN
Yamaha Scandinavia AB
J. A. Wettergrens Gata 1
Box 30053
S-400 43 Göteborg, Sweden
Tel: 031 89 34 00
DENMARK
YS Copenhagen Liaison Office
Generatorvej 8B
DK-2730 Herlev, Denmark
Tel: 44 92 49 00
NORWAY
Norsk filial av Yamaha Scandinavia AB
Grini Næringspark 1
N-1345 Østerås, Norway
Tel: 67 16 77 70
OTHER EUROPEAN COUNTRIES
Yamaha Music Central Europe GmbH
Siemensstraße 22-34, 25462 Rellingen, Germany
Tel: +49-4101-3030
Yamaha Corporation,
Asia-Pacific Music Marketing Group
Nakazawa-cho 10-1, Hamamatsu, Japan 430-8650
Tel: +81-53-460-2313
TURKEY/CYPRUS
Yamaha Music Central Europe GmbH
Siemensstraße 22-34, 25462 Rellingen, Germany
Tel: 04101-3030
OTHER COUNTRIES
Yamaha Music Gulf FZE
LB21-128 Jebel Ali Freezone
P.O.Box 17328, Dubai, U.A.E.
Tel: +971-4-881-5868
INDONESIA
PT. Yamaha Music Indonesia (Distributor)
PT. Nusantik
Gedung Yamaha Music Center, Jalan Jend. Gatot
Subroto Kav. 4, Jakarta 12930, Indonesia
Tel: 21-520-2577
KOREA
Yamaha Music Korea Ltd.
Tong-Yang Securities Bldg. 16F 23-8 Yoido-dong,
Youngdungpo-ku, Seoul, Korea
Tel: 02-3770-0661
MALAYSIA
Yamaha Music Malaysia, Sdn., Bhd.
Lot 8, Jalan Perbandaran, 47301 Kelana Jaya,
Petaling Jaya, Selangor, Malaysia
Tel: 3-703-0900
SINGAPORE
Yamaha Music Asia Pte., Ltd.
11 Ubi Road #06-00, Meiban Industrial Building,
Singapore
Tel: 65-747-4374
TAIWAN
Yamaha KHS Music Co., Ltd.
3F, #6, Sec.2, Nan Jing E. Rd. Taipei.
Taiwan 104, R.O.C.
Tel: 02-2511-8688
THAILAND
Siam Music Yamaha Co., Ltd.
121/60-61 RS Tower 17th Floor,
Ratchadaphisek RD., Dindaeng,
Bangkok 10320, Thailand
Tel: 02-641-2951
THE PEOPLE’S REPUBLIC OF CHINA
Yamaha Music & Electronics (China) Co., Ltd.
Shanghai Branch
United Plaza 25F 1468 Nan Jing Road West
Jingan Shanghai 200040, China
Tel: 21-6247-2211
OTHER ASIAN COUNTRIES
Yamaha Corporation,
Asia-Pacific Music Marketing Group
Nakazawa-cho 10-1, Hamamatsu, Japan 430-8650
Tel: +81-53-460-2313
AUSTRALIA
Yamaha Music Australia Pty. Ltd.
Level 1, 99 Queensbridge Street, Southbank,
Victoria 3006, Australia
Tel: 3-9693-5111
COUNTRIES AND TRUST
TERRITORIES IN PACIFIC OCEAN
Yamaha Corporation,
Asia-Pacific Music Marketing Group
Nakazawa-cho 10-1, Hamamatsu, Japan 430-8650
Tel: +81-53-460-2313
NORTH AMERICA
CENTRAL & SOUTH AMERICA
EUROPE
AFRICA
MIDDLE EAST
ASIA
OCEANIA
HEAD OFFICE
Yamaha Corporation, Pro Audio & Digital Musical Instrument Division
Nakazawa-cho 10-1, Hamamatsu, Japan 430-8650
Tel: +81-53-460-2441
PA05

M.D.G., Pro Audio & Digital Musical Instrument Division, Yamaha Corporation
© 2003 Yamaha Corporation
WA88390 306IPAP24.2-02B0
Printed in Japan
Yamaha Manual Library
http://www2.yamaha.co.jp/manual/english/
This document is printed on recycled
chlorine free (ECF) paper with soy ink.
-
 1
1
-
 2
2
-
 3
3
-
 4
4
-
 5
5
-
 6
6
-
 7
7
-
 8
8
-
 9
9
-
 10
10
-
 11
11
-
 12
12
-
 13
13
-
 14
14
-
 15
15
-
 16
16
-
 17
17
-
 18
18
-
 19
19
-
 20
20
-
 21
21
-
 22
22
-
 23
23
-
 24
24
-
 25
25
-
 26
26
-
 27
27
-
 28
28


Yamaha Studio Manager Guía de instalación
- Categoría
- Software
- Tipo
- Guía de instalación
- Este manual también es adecuado para
En otros idiomas
- français: Yamaha Studio Manager Guide d'installation
- italiano: Yamaha Studio Manager Guida d'installazione
- English: Yamaha Studio Manager Installation guide
- Deutsch: Yamaha Studio Manager Installationsanleitung
- русский: Yamaha Studio Manager Инструкция по установке
- Nederlands: Yamaha Studio Manager Installatie gids
- português: Yamaha Studio Manager Guia de instalação
- dansk: Yamaha Studio Manager Installationsvejledning
- polski: Yamaha Studio Manager Instrukcja instalacji
- čeština: Yamaha Studio Manager instalační příručka
- svenska: Yamaha Studio Manager Installationsguide
- Türkçe: Yamaha Studio Manager Yükleme Rehberi
- suomi: Yamaha Studio Manager Asennusohje
- română: Yamaha Studio Manager Ghid de instalare
Documentos relacionados
-
Yamaha DM2000 El manual del propietario
-
-
Yamaha R96 Guía de instalación
-
-
-
-
-
-
-
Yamaha MY16 El manual del propietario